|
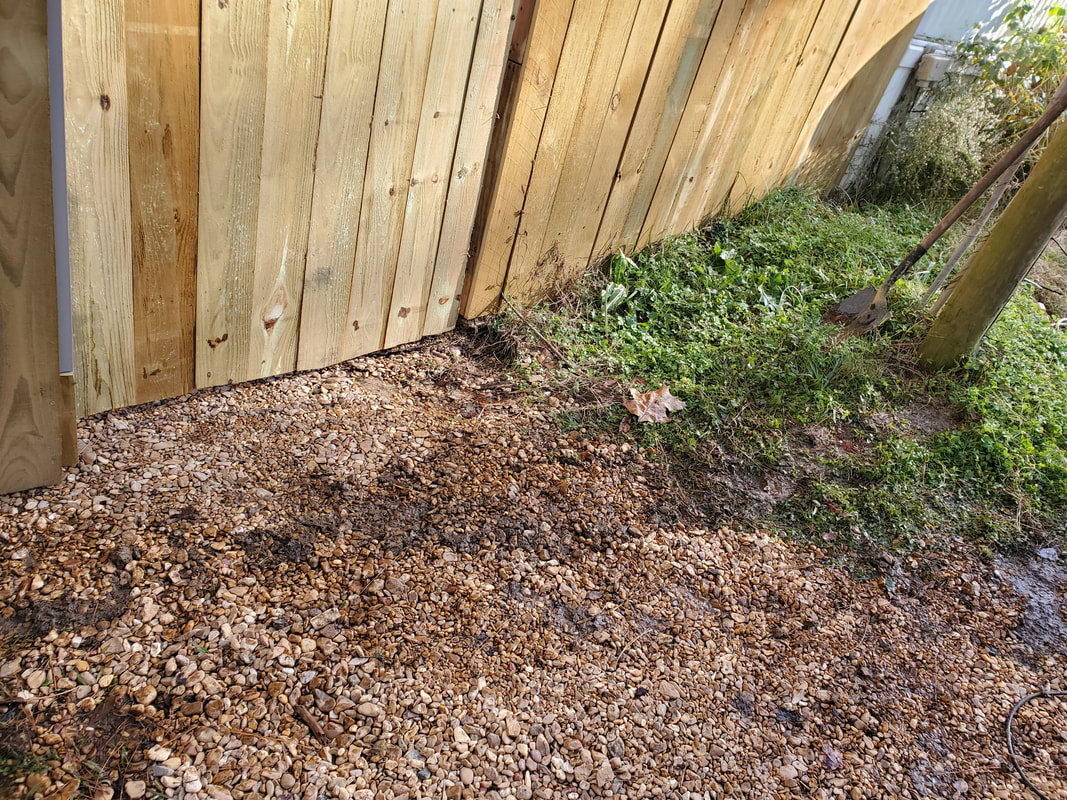
As usual I try to get a load of gravel every week, sometimes two times a week. I'm still trying to finish covering the chicken yard in its entirety before moving on to another spot on the premises. I continued to cover the ground along the fence line to the back, covering the area where the old duck coop/chicken tractor was at. I covered the ground all the way to the north fence where the other chicken coops are staged. After running out of gravel and getting a fair amount of area covered, it was time to move on to another small addition for the animals.
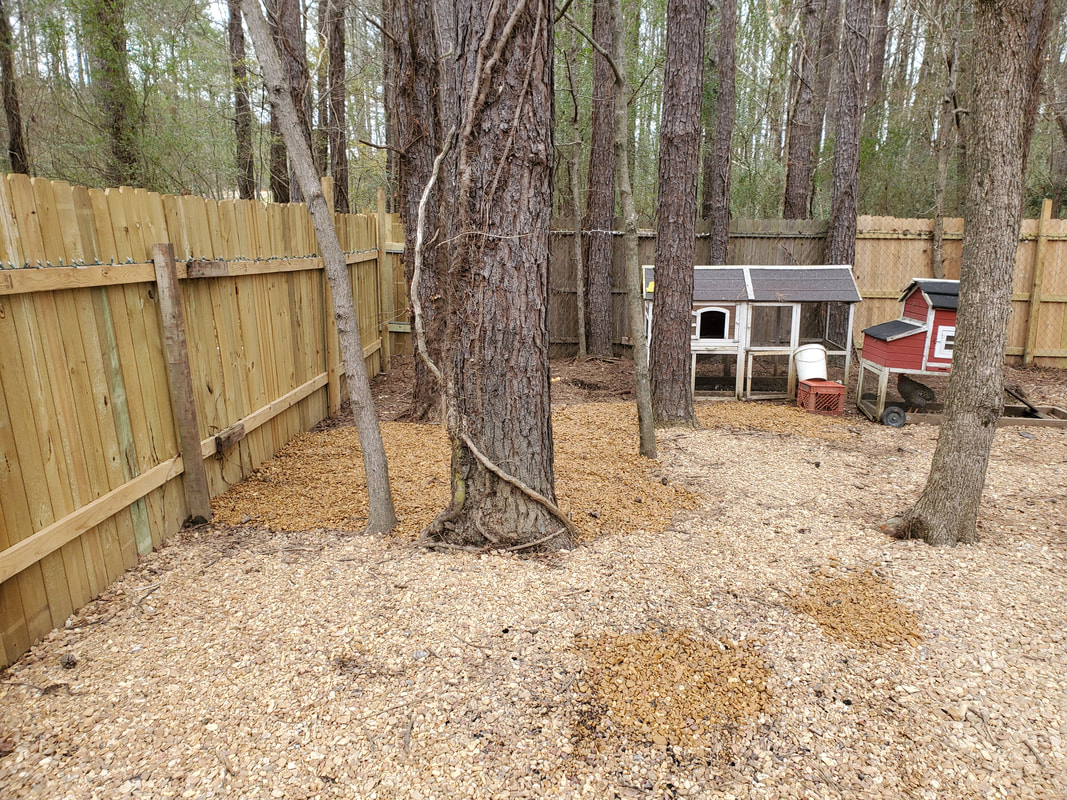
Gravel spread where old duck coop sat. Darker areas are the newly spread wet gravel.
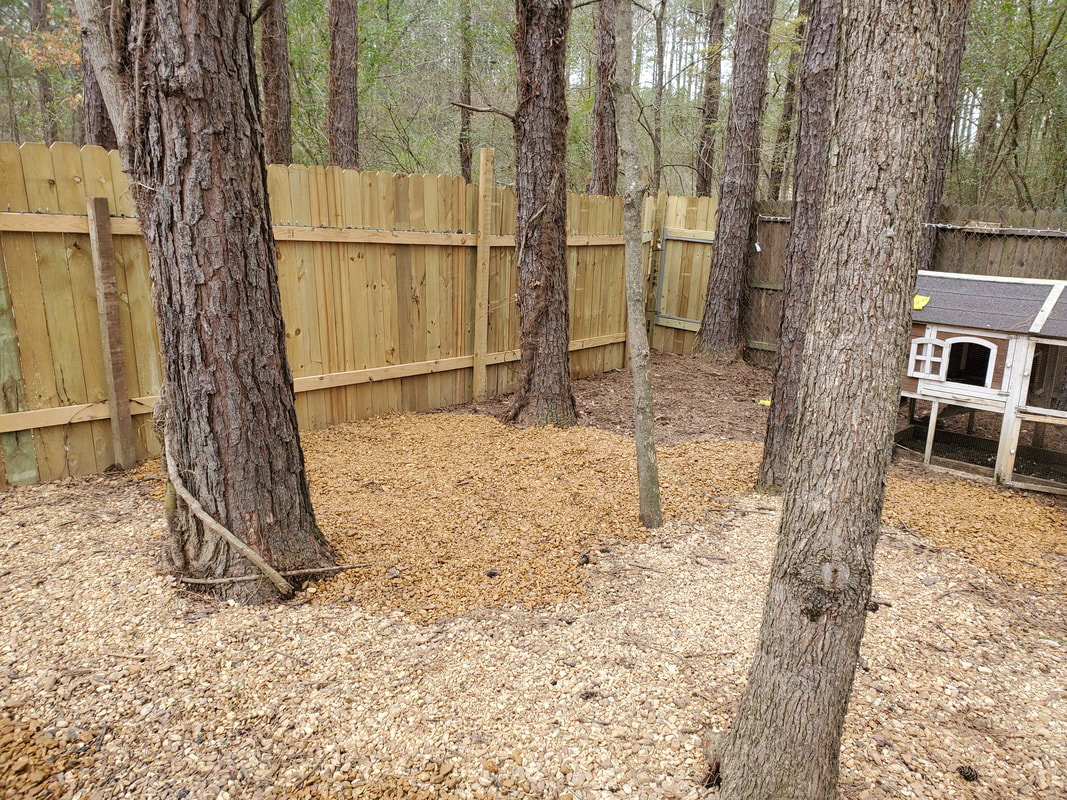
Fresh spread gravel from another angle showing area that was covered.
Another thing that I needed to do was add heaters to a couple of structures. One of the structures was the Toyota Chicken Truck. I had a heater in there already but despite it having thermostat control the unit would time out after 12 hours. This was no good, I can't always keep going back out there to reset the damned thing. At the same time I had made plans to further automate the chicken yard by putting a dusk/dawn module on the power line feeding the chicken yard so everything would come on at dusk, lights in the coops, fence lights and heaters. Because of this, I would be able to get away with the simple personal heaters that one would use at their office desk or similar places. These heaters are 250w rated and are plenty able to heat up the cab of any of the coops to the point where the birds will probably come out of those bastards if the temps aren't too low. I got two heaters because besides the Toyota I still had to put a heater in the dog house on the porch. I had a thermostatically controlled heater in it too but it would fault out after so long so I said screw it I'll put one of these simple heaters in there as well. I started off with the Toyota first. I had to make a shelf for the heater in much the same way I did for the S10 Ranger Chicken Coop. Instead of welding the shelf in place I cut a large enough piece of sheet metal that I was able to fold up a shelf with tabs on the top and bottom in order to secure the shelf in place on the back of the cab with self tapping screws. 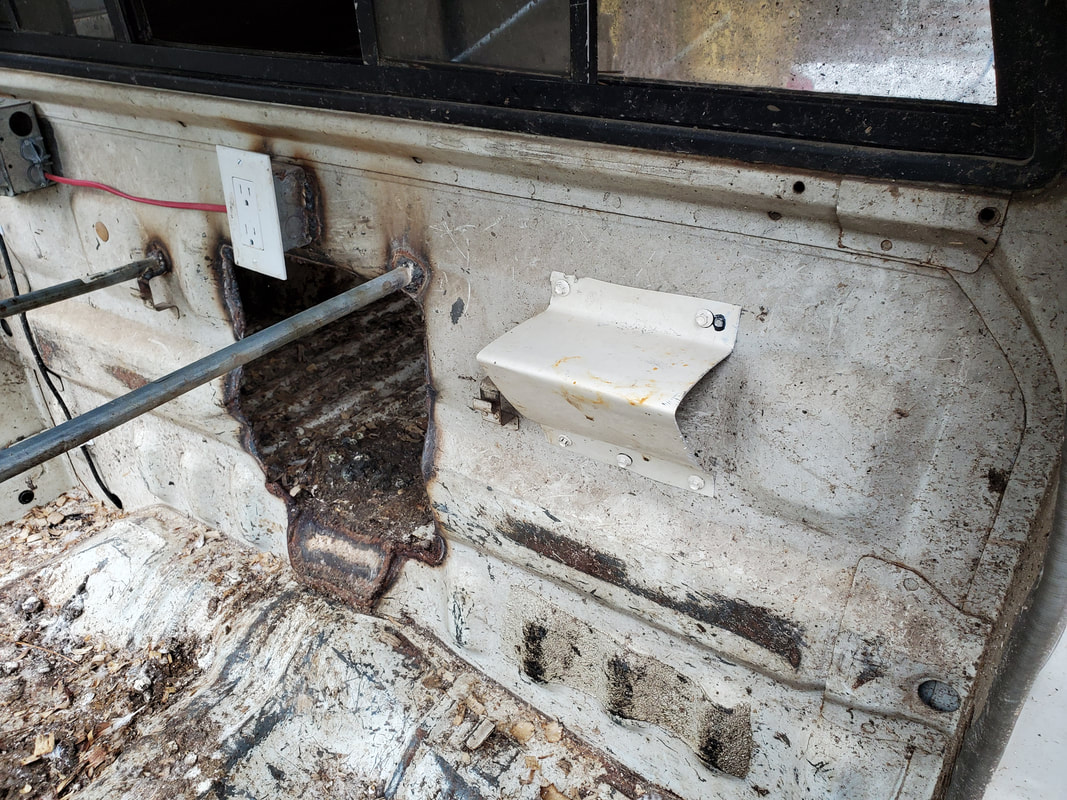
Sheet metal shelf secured to back of cab with self tapping screws.
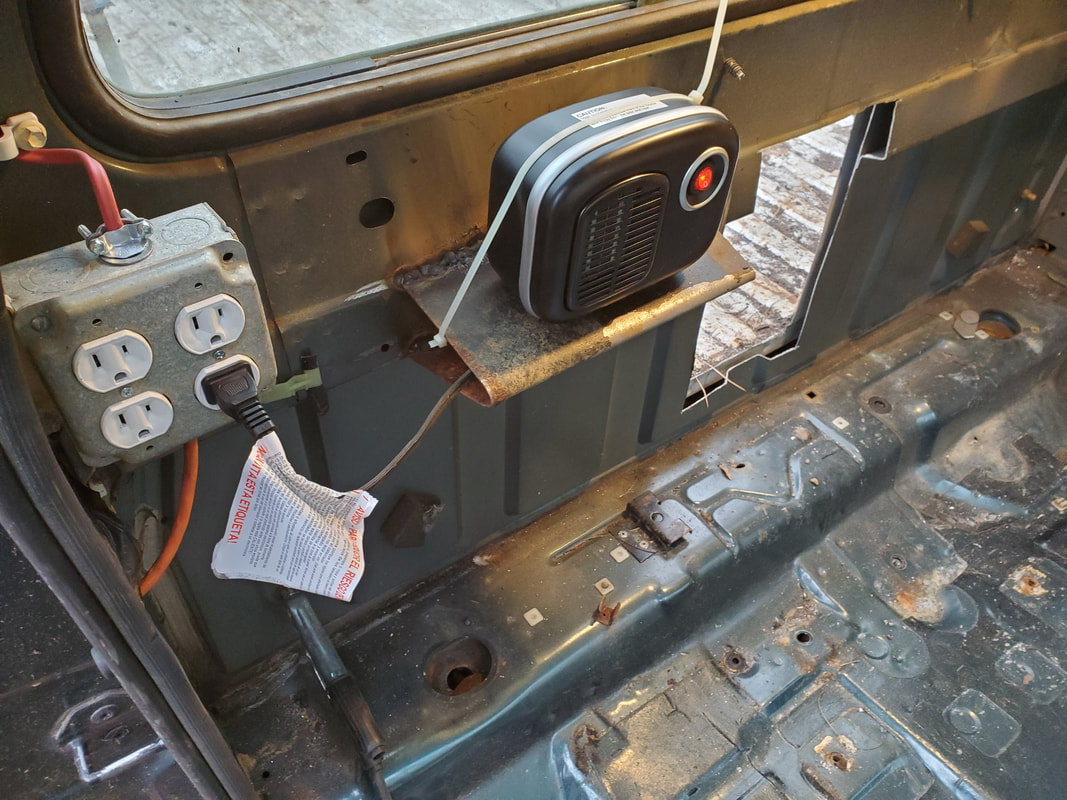
Just like with the S10 Chicken Coop when I mounted the heater to the shelf I used zip ties to hold the unit to the top of the shelf so it can't be knocked down by an overzealous chicken. I also routed the cable around the top of the roosting post, keeping the cable tied together with enough cable plug to reach the outlet. 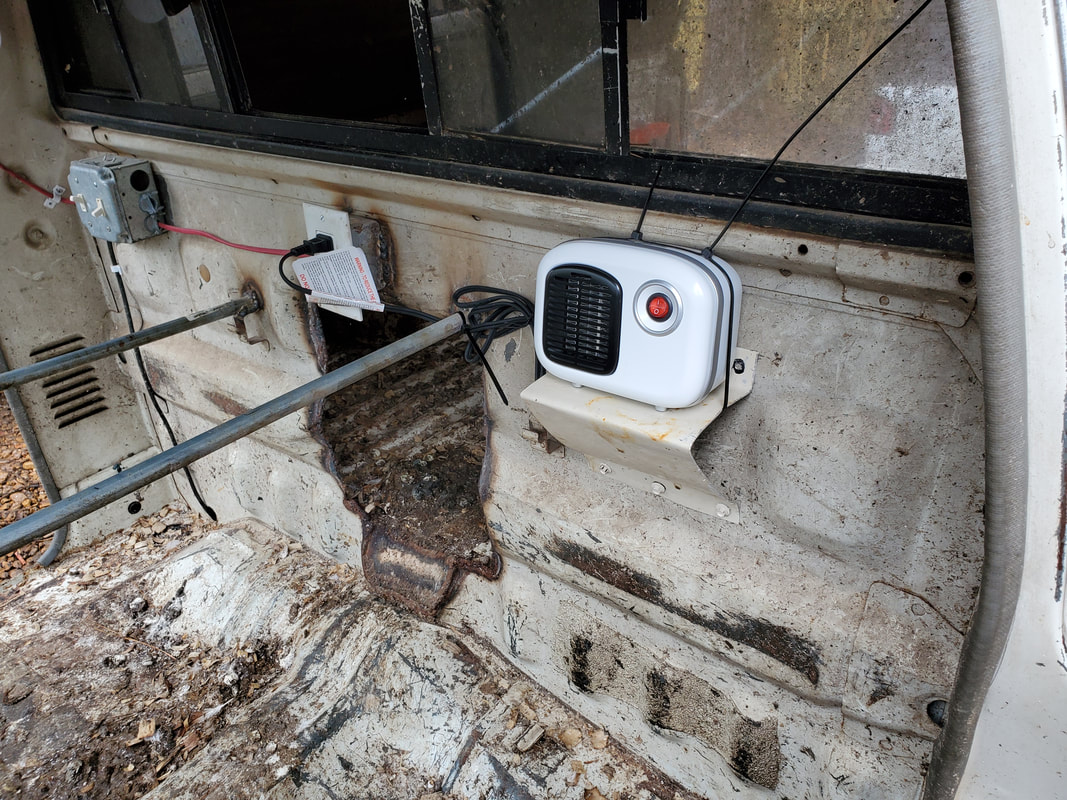
Heater mounted in place on the shelf and plugged to outlet. Note wire ties around heater.
With the heater fully installed in the Toyota Chicken Truck I moved on to the dog house. I had to remove most of the shit that was stuffed in there for cushioning for the dog when the temps dropped. I stuck with a couple of pillows, leaving the other shit out so after washing, the blankets and dog bed would serve as spare bedding when the other shit gets too dirty. Another reason I went with these heaters was because the dog house doesn't have any kind of door or covering to trap the heat. The old thermostatically controlled heater would shut off pretty fast when there was a door covering in place but would stay on without it. Since that heater stayed on it wouldn't matter that I'm using these simple 250w heaters. I went ahead and made a shelf the same way as I did with the chicken coops. Since the dog house was plastic I was able to get away with regular screws to hold the shelf in place. I did drill starter holes before putting the screws in place. With the screws in place and the shelf secured, I was ready for the heater. 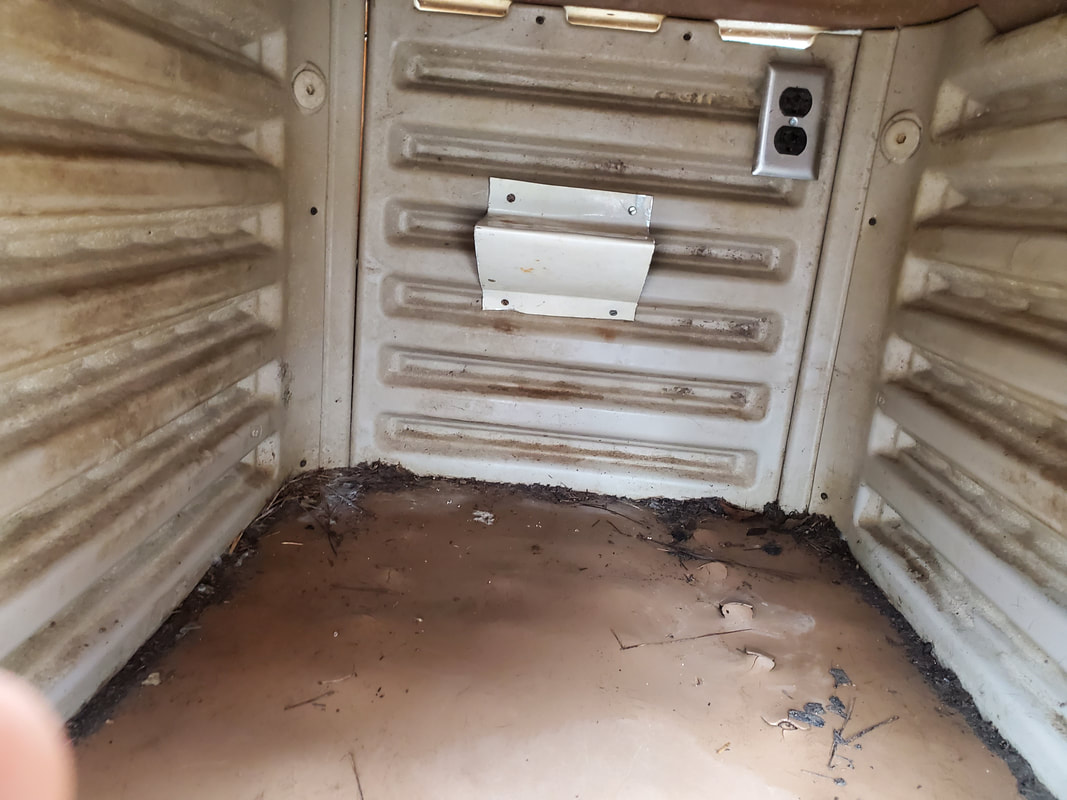
Sheet metal shelf secured to back of dog house next to outlet.
Just like with the chicken coops I used zip ties to secure the heater in place on the shelf. This time I took the power cable and routed the bundled cable inside the shelf, leaving enough cable to reach the outlet. With that, the dog house has its heater set up. 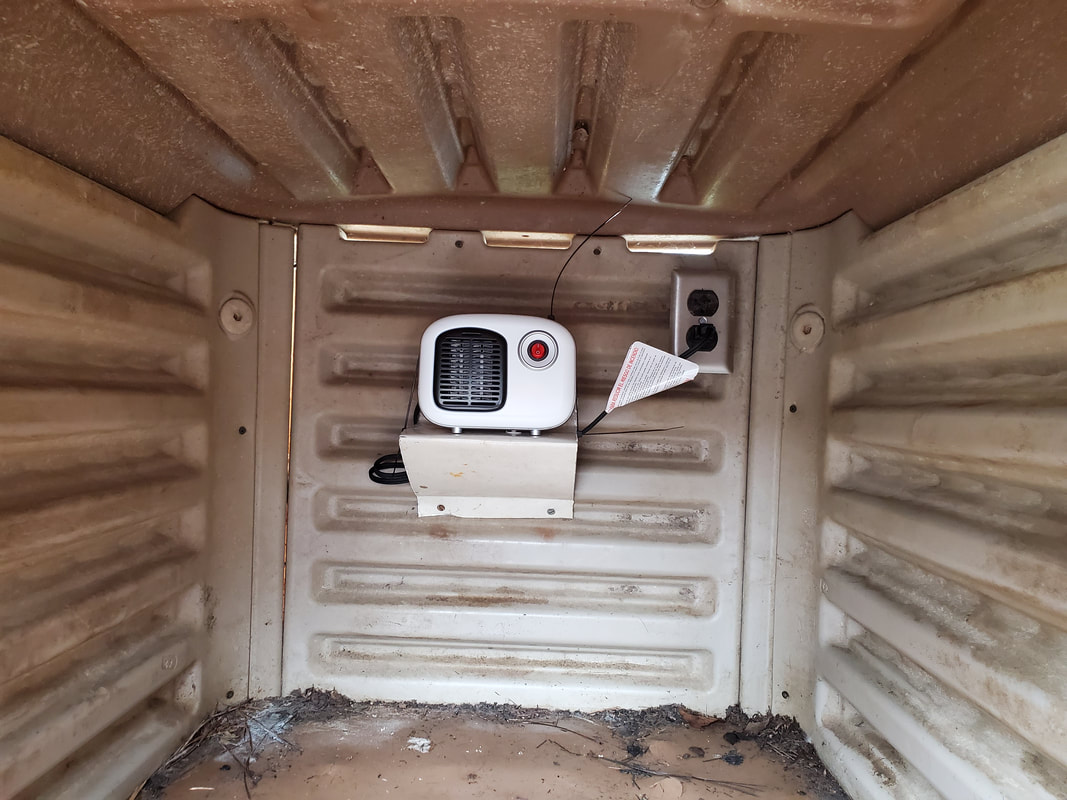
Heater secured to shelf in dog house, note cable routed inside the shelf over to the outlet.
Even though the dog house has a heater, I still will have to get power to the dog house. It still has the length of power cable secured from when the dog house was in the back of the yard and plugged up to the outside outlet. My plan is to find the closest outlet, most likely in the kitchen, and remove it in order to drill a hole through the outside siding then add a short length of cable from the outlet through the hole to the outside. From here I'll install an outside outlet box to take the cable and from here I can be able to plug up the dog house in order for it to get power. I might even add a dusk/dawn module in order to turn the unit on at night like with the chicken yard so the heater isn't just always on, only when its needed, which obviously would be at night.
0 Comments
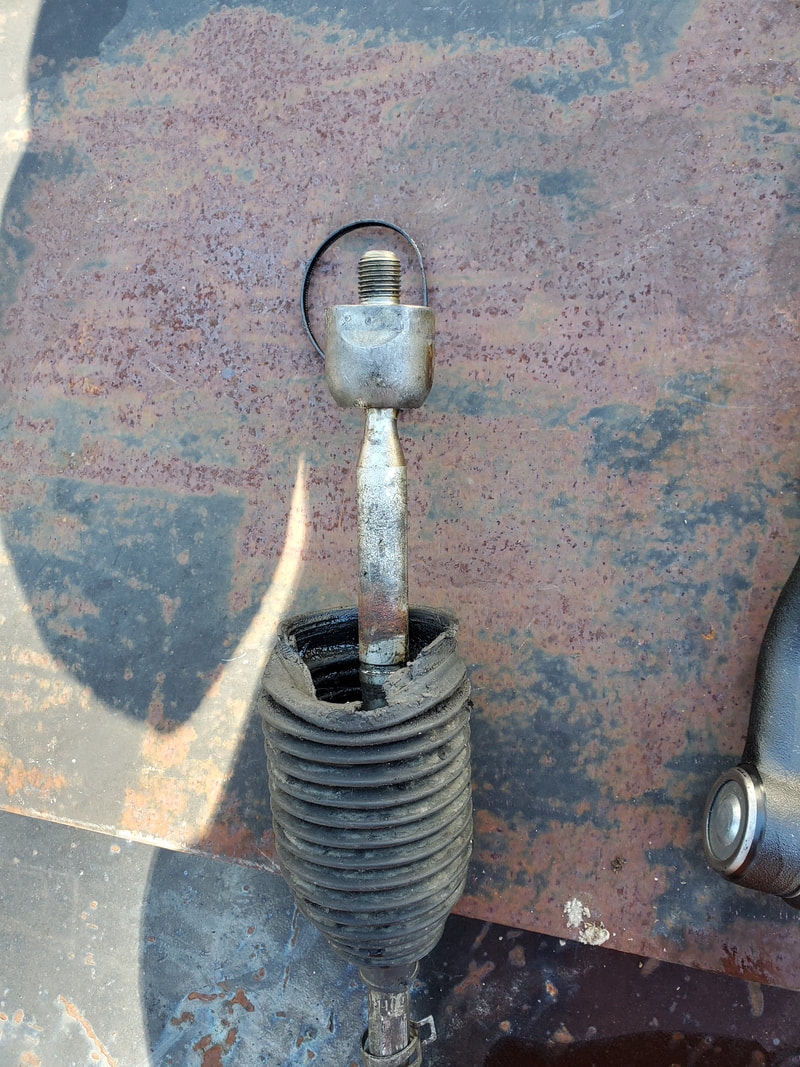
Old inner tie rod end with bad boot.
With the boot secured to the new inner tie rod end I installed the outer tie rod end and lined them up with the old inner/outer tie rod end assembly in order to get the measurements correct so things can go back on as straight as possible. 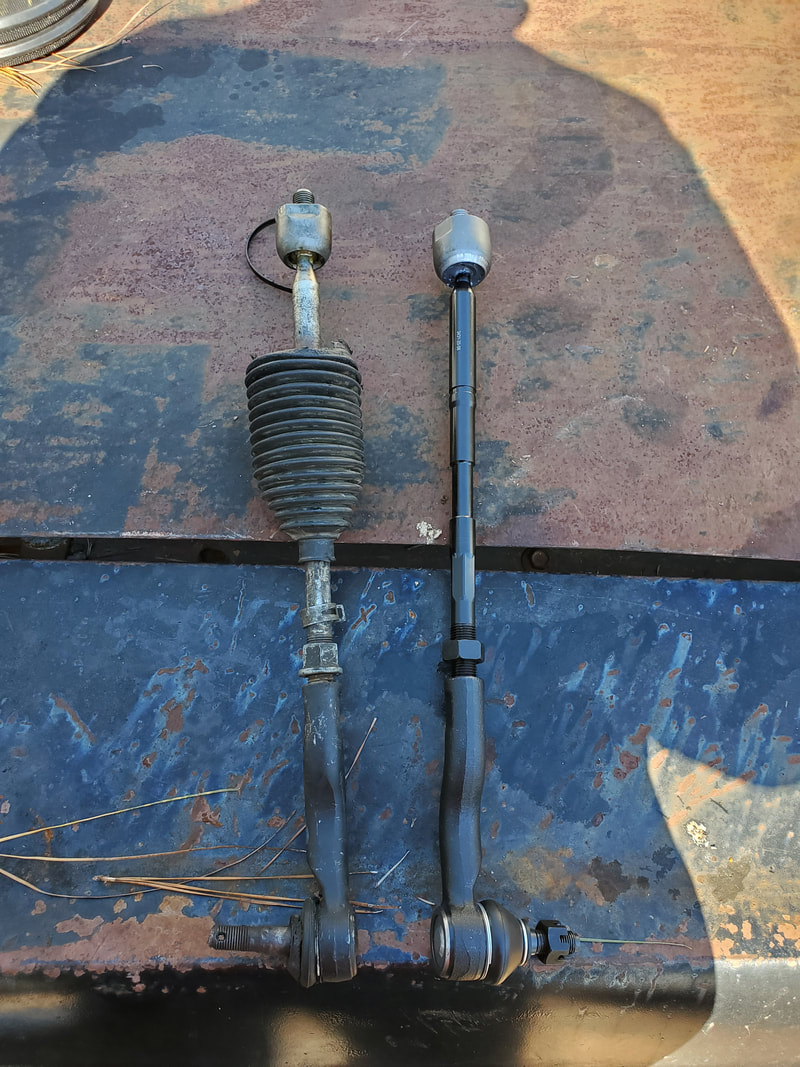
Doing a preliminary line up of the two tie rod end assemblies, old and new, in order to get the nut set in place so it can be separated again to install the boot.
With the new tie rod assembly ready I went ahead and screwed the inner tie rod end into the rack and pinion assembly, securing it using the inner tie rod removal too in reverse. Afterwards I went ahead and worked the inner end of the boot over the R&P body, making sure to get more than enough rubber over the lip portion where the zip tie would wrap around the rubber to hold the boot to the R&P body. With the boot in place I secured a zip tie making sure to have it nice and tight so the boot can't slip off easily. Afterwards I installed the outer tie rod back into the spindle and capped it with the nut and retaining pin to finish that part of the project. 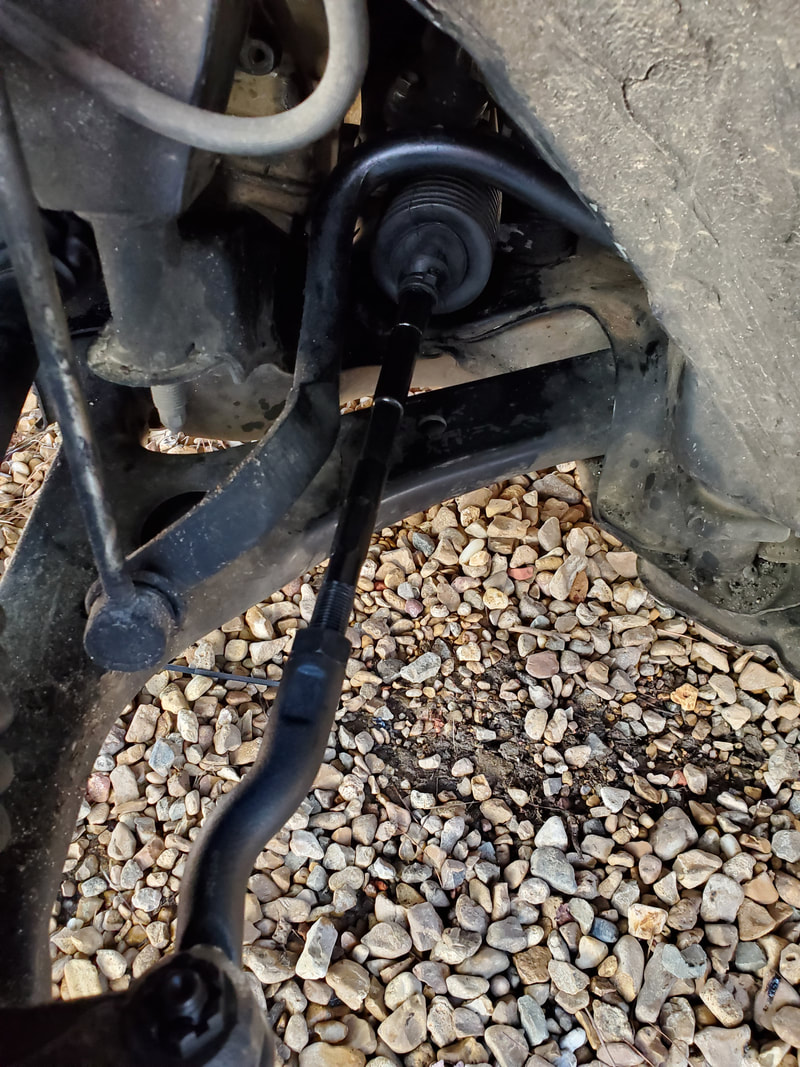
New tie rod/boot assembly installed in place.

Closeup of tie rod boot over inner tie rod end.
With the left side done and reassembled I moved on to the right side. At least the boot was intact enough not to have to change anything. As with the left side I lined up the two assemblies after putting the boot on. I was able to get this side done pretty fast as I was able to reach things on the passenger side that I couldn't reach on the driver's side. With that done I was able to get things back together quickly. The right side was not as bad as the left side. 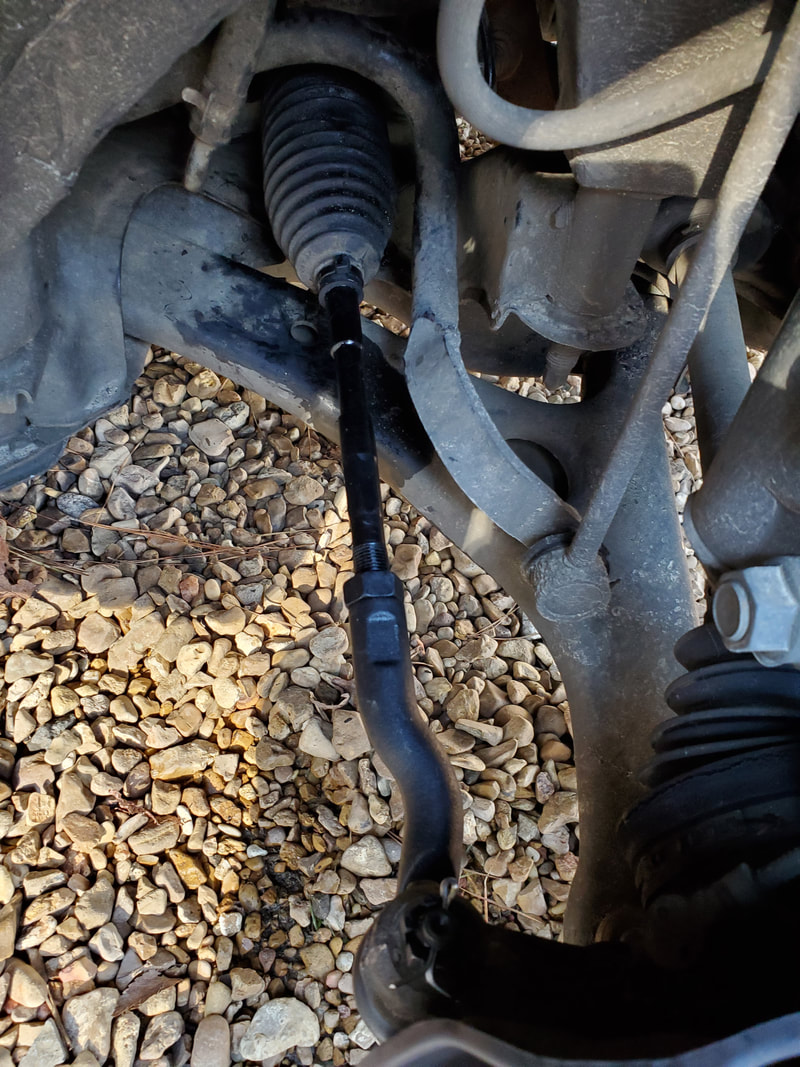
Right side tie rod assembly installed in place.
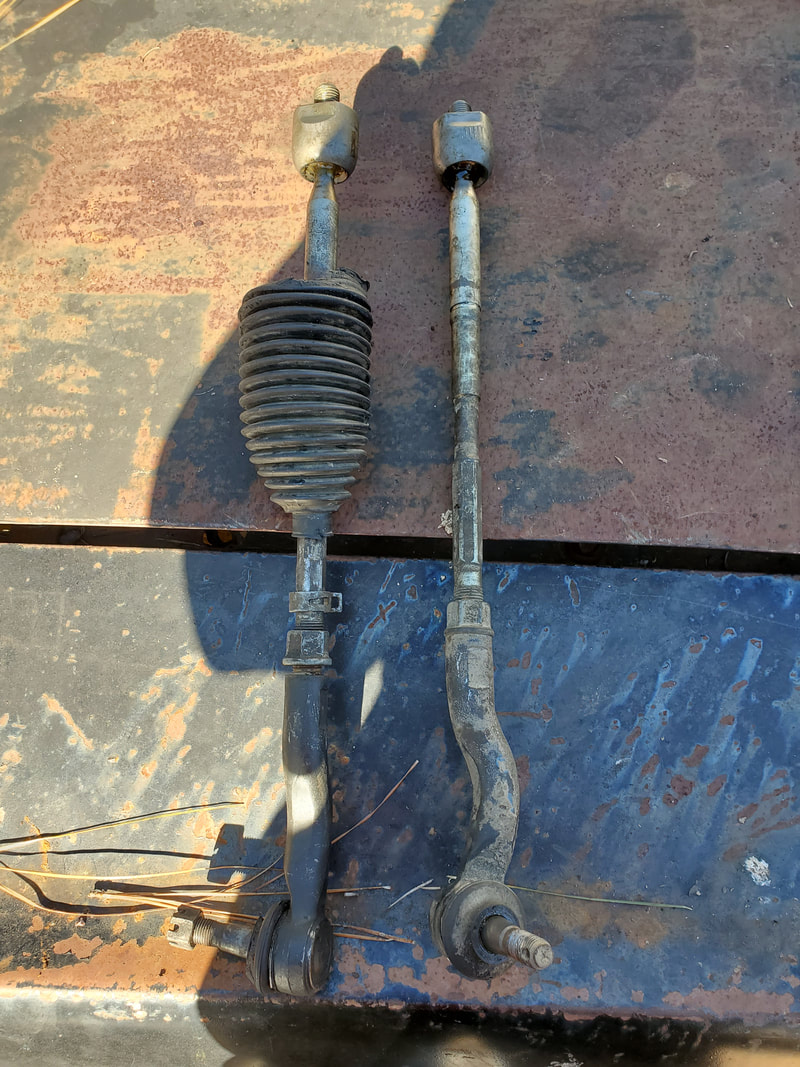
Both old tie rod assemblies.
With everything straight on the right side I reassembled things and got the car back down on its tires. With the measurements that were taken between the old and new tie rod assemblies, I got everything right enough that the steering was pretty much the same as it was before I pulled things apart. I will still need to do an alignment for good measure and to get the steering wheel straight again as it was knocked out of alignment prior to pulling things apart. Of course the alignment won't be done until the new tires are installed on the front as well. We will get it all done and at least we can say that more of the front suspension on the Scion is done. I will have to look at the rear as this car apparently has an independent rear suspension where it uses tie rod ends on the rear wheels too. Don't ask me why engineers would bother making the rear wheel assembly able to be aligned like the front. In case things look off on the rear, I will be having to get more tie rod ends to take care of the rear as well.
Finishing Up The Wiring Of The Fence Lights In The Chicken Yard And Cleaning Up Some Mess12/26/2020
With the S10 Ranger chicken coop completed the next thing I wanted to turn my attention to was finishing up the wiring of the white LED Christmas lights. I put two runs of lights in place. One run spans the western length of fence from the gate over to where the rear entry gate is. Another run spans the whole of the Northern/perimeter fence and back around the Eastern end of the chicken yard fence back to the house, ending where the fence ends.
What I needed to do was make an extension cord that goes from the end of the first set of lights, down to the ground and past the rear entry gate and back up to link up with the 2nd set of lights. I then had to run a short cable from the beginning of the first string of lights over to the post where the outlet box has a plug going to the cable feeding the chicken yard. The one thing I planned on doing for the entire chicken yard was to add a dusk/dawn module that just plugs up to the outlet box and has an outlet of its own that will connect to whatever load is to be switched on and off. In this case, the module will go to the outlet box where the cable is plugged up to and said cable will go into the module. This way at dusk the power will be switched on to the whole chicken yard's power supply feeding all three coops. This will turn on the interior lights of said coops as well as the electric heaters and heating lamp that are in the coops for keeping the cabs and brooder area warm. What will also be switched on is the LED fence lights. I started off by taking an old extension cord and plugging it up to the beginning end of the 1st string of Xmas lights and routed the cable down to the ground and along the bottom of the gate over to the power post where the outlet box is anchored. From here I carved a shallow trench with which to lightly bury the extension cord. I got the cord in the trench and covered up with the dirt and gravel that I removed to form the trench. Once the cord was over by the power pole I was able to start working on the rest of the project. 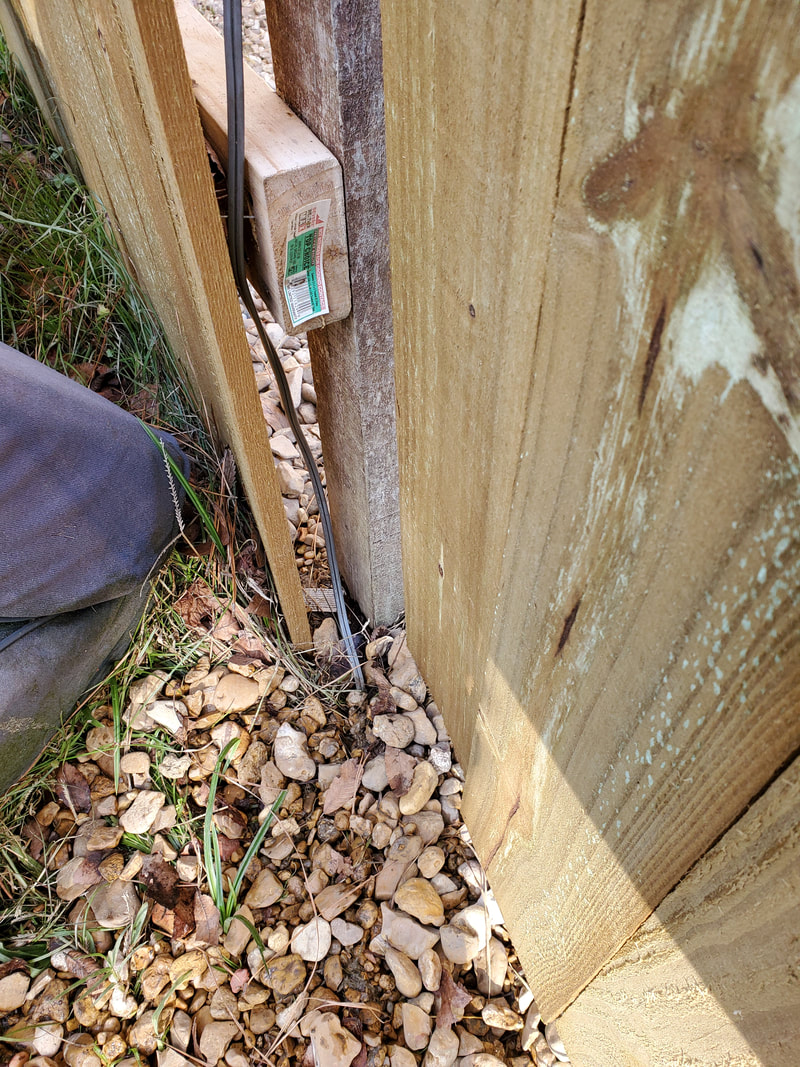
Gray extension cord plugged up to Xmas lights and routed down to ground where it goes into the trench dug for it.
Trench covered up, note muddy track running along center of picture going over to power pole.
The next order of business was hooking up the dusk/dawn module. I put a screw into the power pole with which to anchor the module to. Afterward I ran the other end of the extension cord up the power pole and plugged it up to the module. There was some excess cable left so I had to bundle it up and secure it with a wire tie and put it up where it'll be out of the way so the cable won't be damaged if grass around the pole needs to be trimmed. Of course I plan on having gravel around all of this area so grass shouldn't be a problem and if any errant blades of grass do pop up they can be eliminated with weed killer. The extension cord was wire tied to the other cords going down to the ground. I had to use a three way plug since the dusk/dawn module only has one outlet on it. With that I was able to plug both cables up to the module so things are able to be switched on at dusk. Next is to get the rest of the fence lights hooked up. 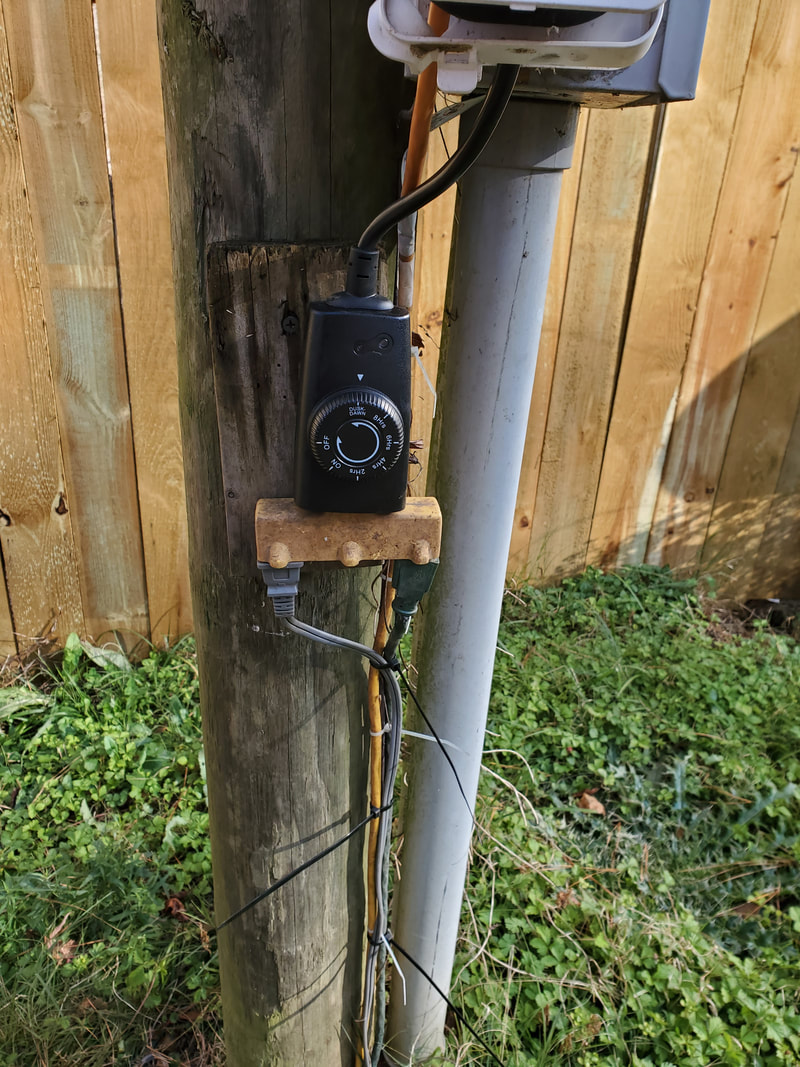
Dusk/dawn module hooked up to outlet box with plugs in place secured via wire ties. Note 3 way outlet plug.
To do the link up between the fence lights I essentially did the same thing, using an old extension cord. The plugs on the cord were shitty so I had to replace them with replacement plugs I had in my stash of electrical components. Just like by the power pole I put the plug on one end of the cable and plugged it up to the end of the string of lights then routed the cable down to the ground. 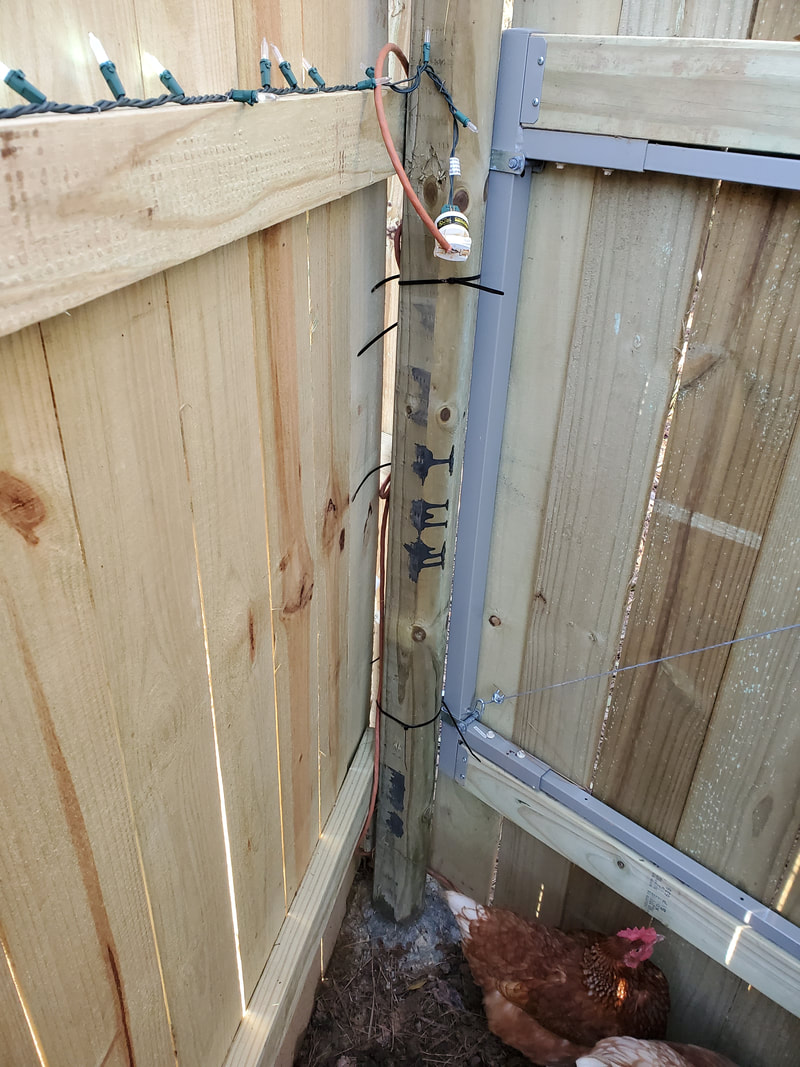
Extension cord and plug hooked up to 1st string of Xmas lights with cable routed down to ground via fence post.
Just like on the first cable I dug a shallow trench along the bottom of the gate to bury the cable. On the opposite side of the gate I routed the cable up the tree that served as a fence post for the perimeter fence. The cord was routed behind the chain link that I left in place which helped further secure the cable. From here I trimmed the excess cable at the beginning of the 2nd string of lights and installed the opposite plug for the cable. Plugging it up to the 2nd string of Xmas lights had the link up completed for the fence lights in the chicken yard. 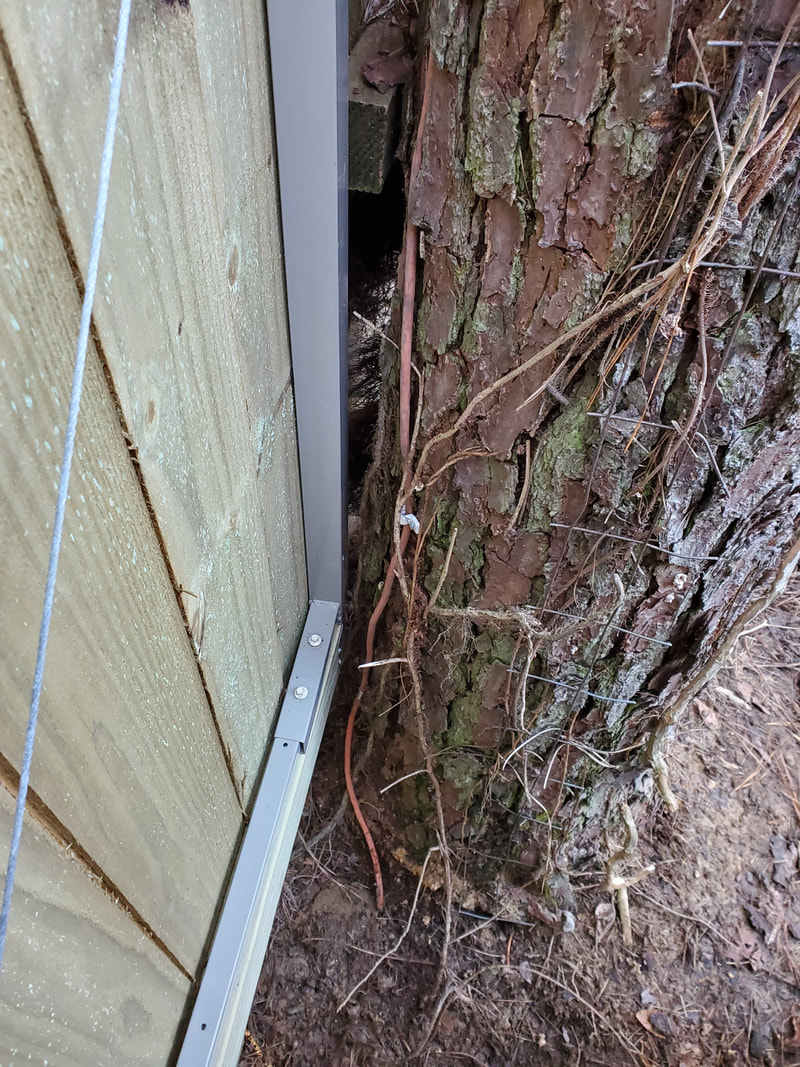
Extension cord cable coming up out of ground and routed up and between tree and fence towards 2nd string of lights.
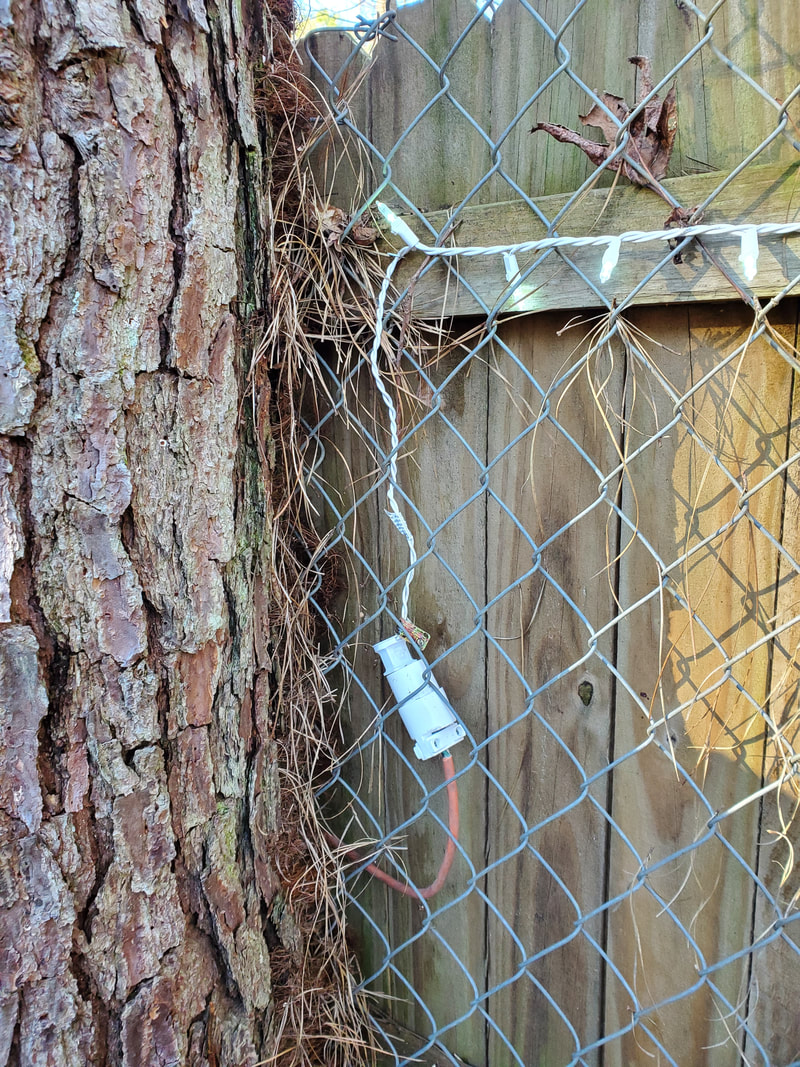
Plug hooked up to cable and plugged up to 2nd string of Xmas lights.
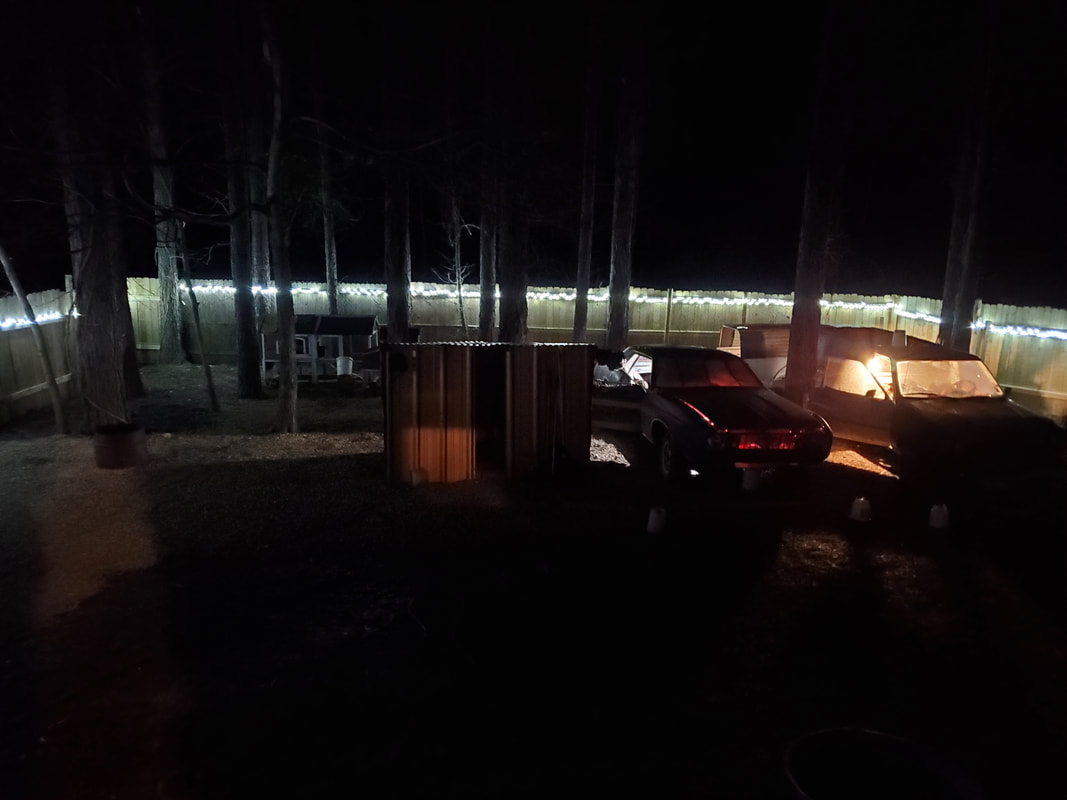
Chicken yard at night after module does its job of turning the fence lights and the coops on. Note the level of illumination in the otherwise pitch dark yard.
With the chicken yard's electrical system completed in its entirety, it was time to do a little clean up work. The old chicken tractor I made several years ago and had to retrofit due to decay was being used as the coop for the couple of ducks we had. One of the ducks went missing so we're currently left with one duck. Once we released all the chickens the duck never went back into the coop. The other chickens would periodically go in there more or less to be nosy but otherwise none of the birds used the coop. The floor inside was already rotting away as well. It was time for this thing to go once and for all . I started cutting the coop up little at a time, removing screws here and there and cutting pieces of wood from the longer boards, making firewood along the way. 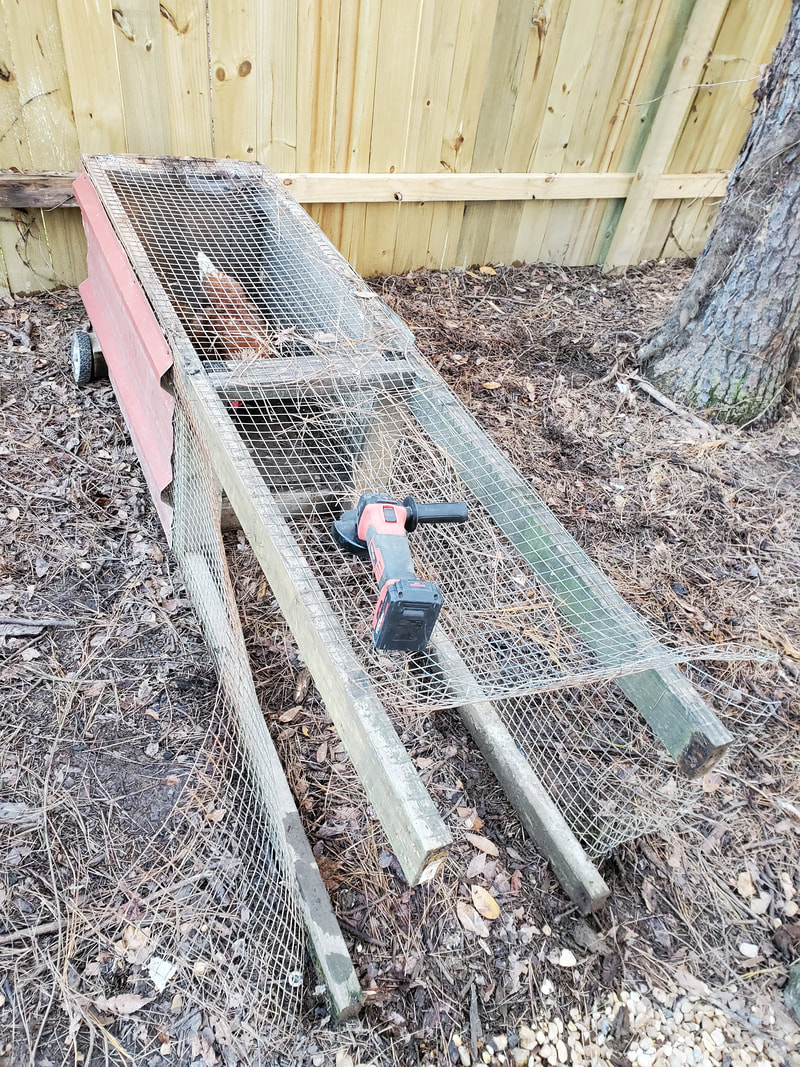
Slowly cutting up old duck coop, removing material as I work my way through the structure.
As I continued working my way through the coop I removed chicken wire and eventually sheet metal. As I got to the rear I removed the rotted floor boards and the wheels in order to get the remainder of the sheet metal from the structure. Eventually I got the whole structure disassembled and was left with a few pieces of sheet metal, several short rolls of chicken wire and two crates full of firewood for outside, along with a bunch of screws and other miscellaneous hardware. 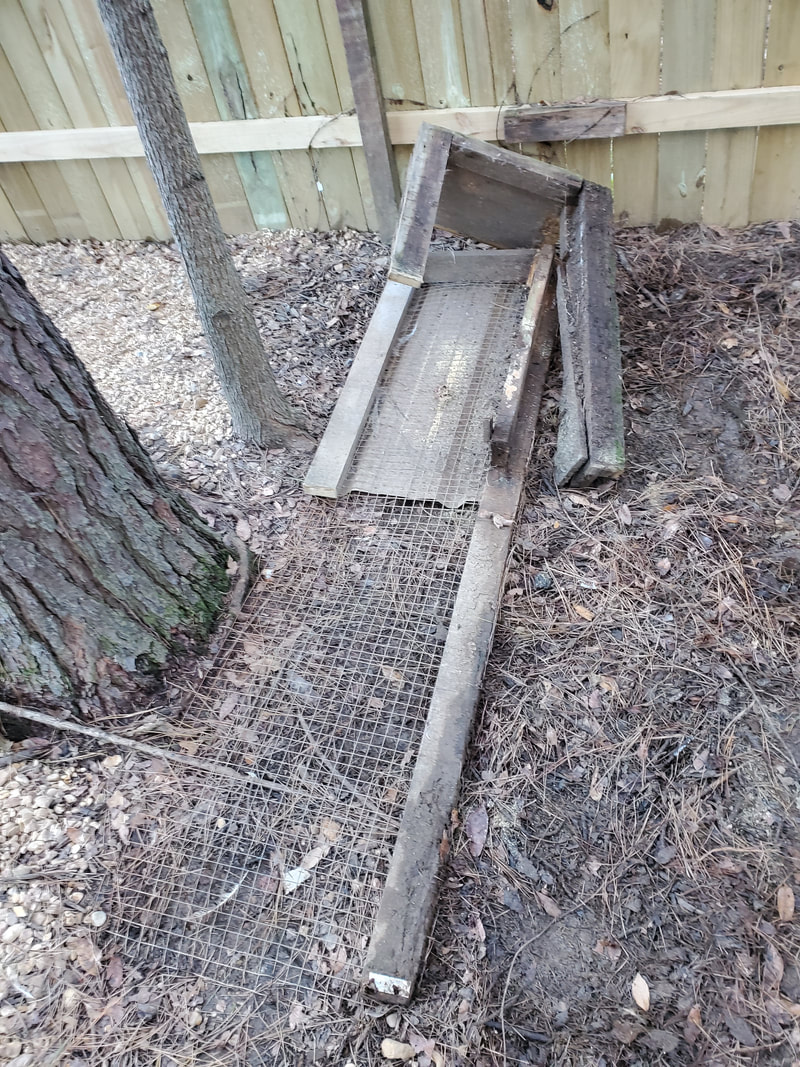
With the old duck coop gone the opened up area can now be graveled over to help cover the muddy ground within the chicken yard. The other two coops that remain in the yard are still in use by the chickens despite being in a state of disrepair and in the case of one of the coops is actually broken in half where the chicken run came free and has long since been disposed of. The chickens are still using the coop portion so I left that portion alone. At some point I do plan on building another vehicle coop in the yard but at the spot where I plan on setting up the unit there are two small trees in the way. I'll have to work on slowly removing these two trees before I can plan on setting up another car coop. Once that is done I will then fully remove those two old coops once and for all. For all intents and purposes, by the time I do get around to removing the trees and finding and building another car coop the two old coops will probably have degraded to a point where they will need to be retired once and for all.
With the bed cover done we're in the home stretch on this project. All that's left is making a hatch for the rear of the bed and patching up the HVAC box opening in the front of the cab. Now, I could've forgone the hatch since the chicken yard is closed up but I decided to make one since there may be a need to close the coop up for any given reason so yeah it needed a hatch. Since there is no tailgate on the S10 bed and the bed cover is homemade so there is no hatch window. This is fine since a camper shell hatch would open to the top and would make entry into the bed to service the water apparatus problematic. Having to crouch down excessively is something that is for the birds. My plan is to make a hatch that is all one piece but hinges at the bottom so it lays down like a drawbridge. This has the added benefit of serving as a ramp for the birds to gain easy entry to the bed of the coop. I started off by making a frame for the hatch using conduit pipe. I made the setup in a two part manner. I first welded up a rectangle out of the pipe that would mimic a tailgate. Afterward I welded up two pipes on the side angling inwards and a single pipe at the top forming a trapezoid. This top half of the hatch roughly matched the contours of the bed cover. 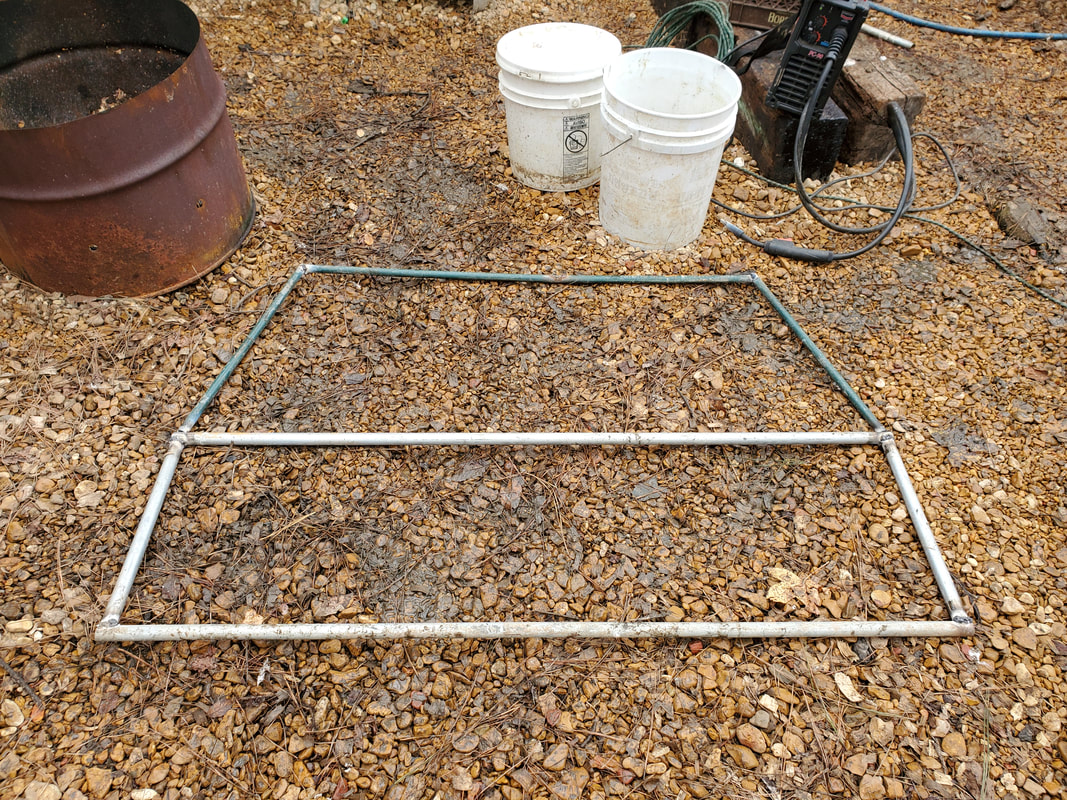 Hatch frame welded up from conduit 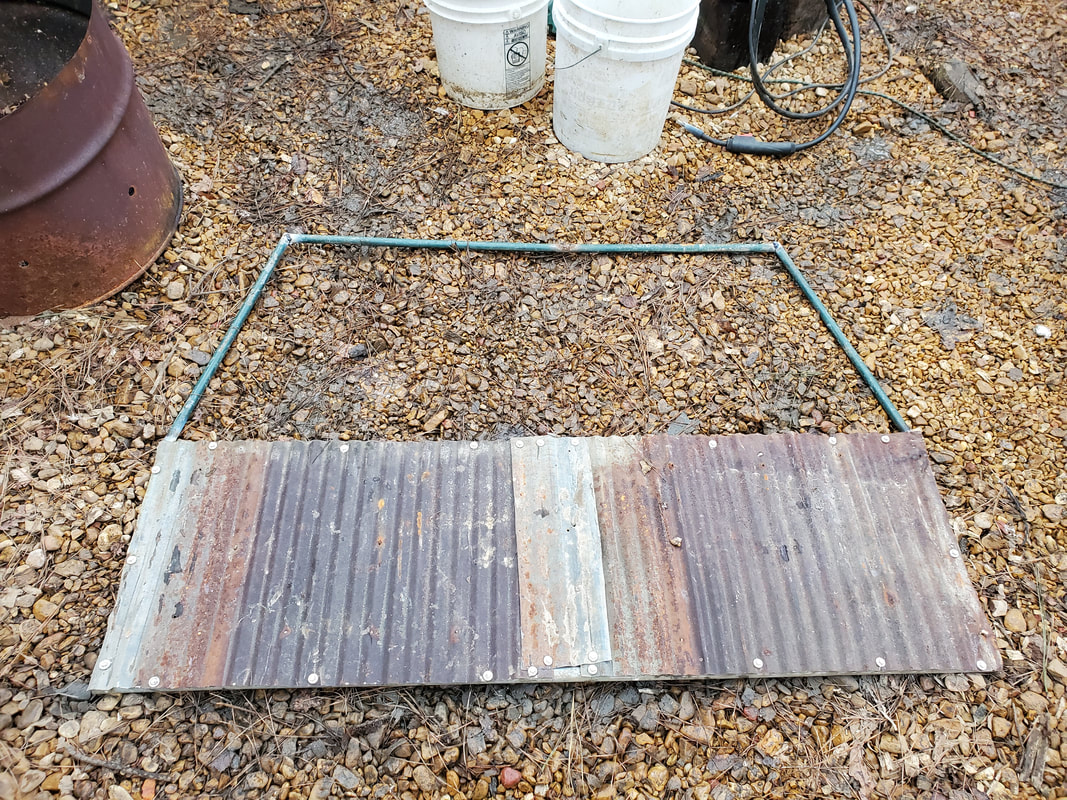 Sheet metal covering on lower half of hatch, note middle patch of sheet metal secured in place. I used some surplus chicken wire from some old fencing to cover the upper half of the hatch. I cut a rough piece to go over the trapezoid and started securing the top side with wire ties. I then trimmed the chicken wire on the sides and continued to secure it with wire ties all the way around the trapezoid. With the chicken wire portion done, I moved on to the hinges. I welded two hinges to the bottom of the hatch frame next. I then secured the other side of each hinge to the bottom of the bed with self tapping screws. The hinges sit on the top of the bed floor to allow for proper movement of the hinges and hence the hatch. I did the hinges this way so I can be able to remove the hatch if need be. Welding everything together would obviously prevent this. With the hatch secured to the bed, there was just a matter of a latch. 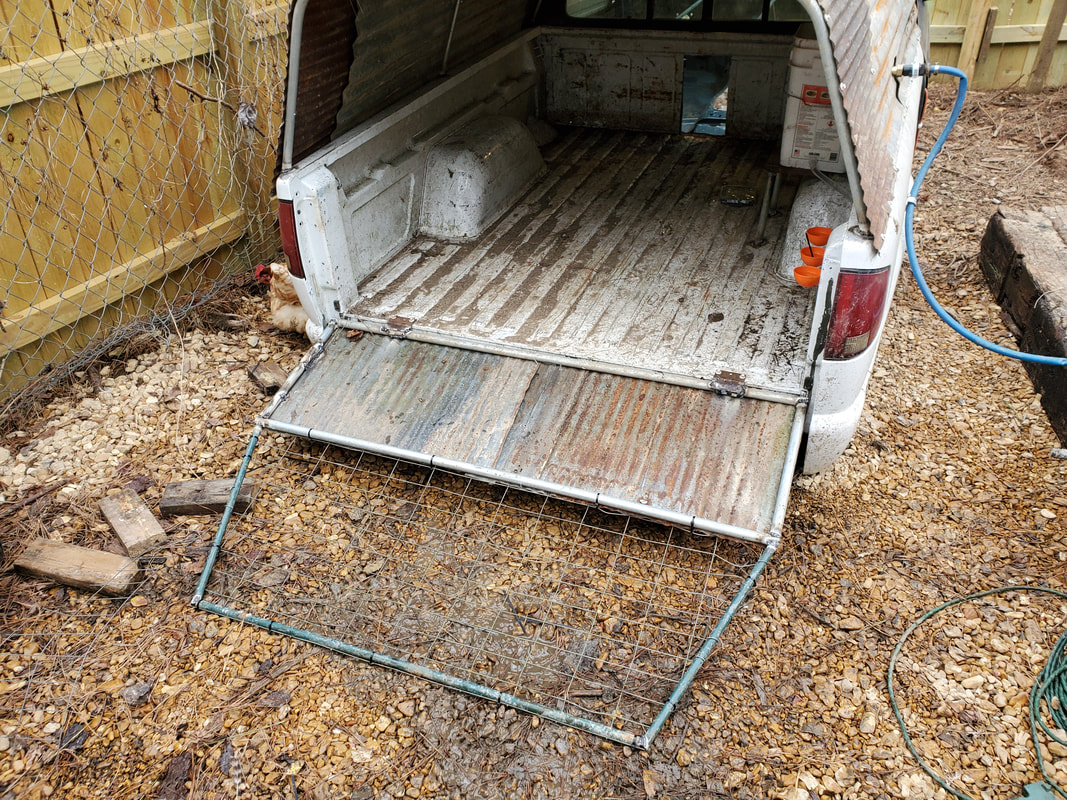 Hatch secured to bottom of bed with hinges, in down position. 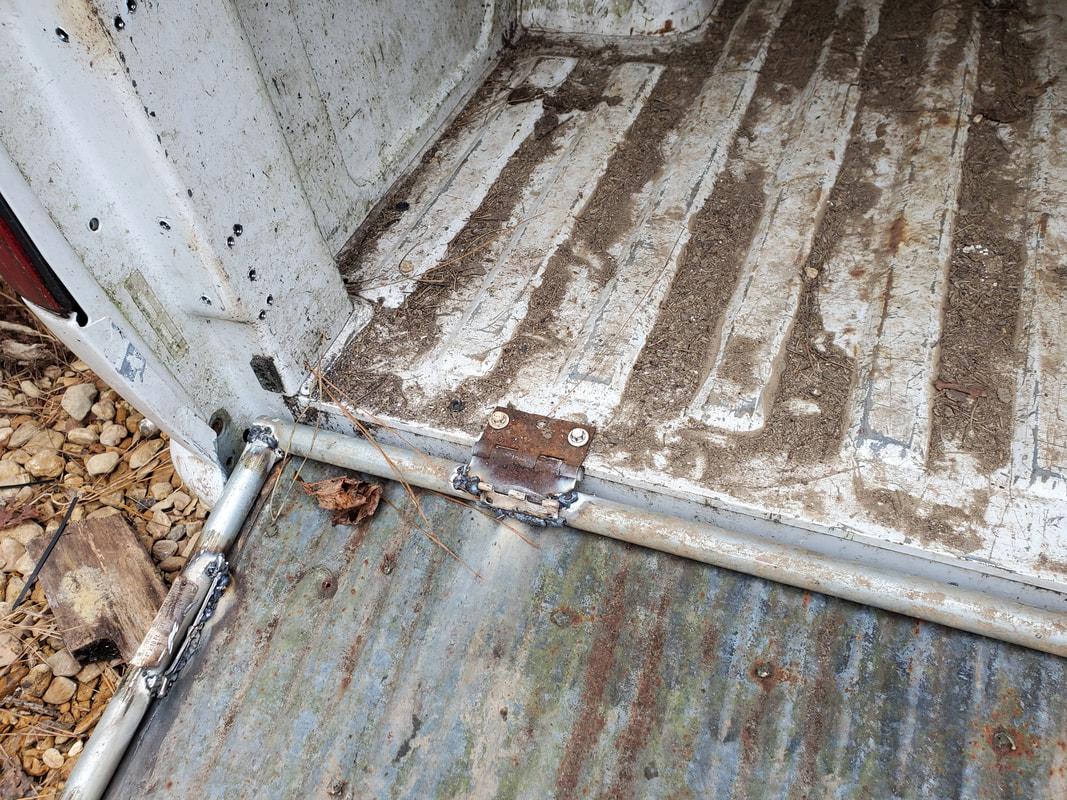 Shot of hinge welded to bottom of hatch and screwed down to bed floor. To keep things simple on this setup I used what I had available to make a latch for the hatch. This consisted of a conduit strap. The strap is a single mount strap. To secure the thing I removed one of the screws holding the top sheet metal to the top of the bed cover. I inserted the mounting end of the strap under the sheet metal, lining it up with the holes and reinstalled the screw, leaving it sightly loose. I then bent the strap down enough to allow for it having to be stressed to get it around the conduit of the hatch. This light forcing allows for the strap to securely hold the hatch closed. To make sure the sheet metal stayed secured at the top of the bed cover I installed more screws around the latch. 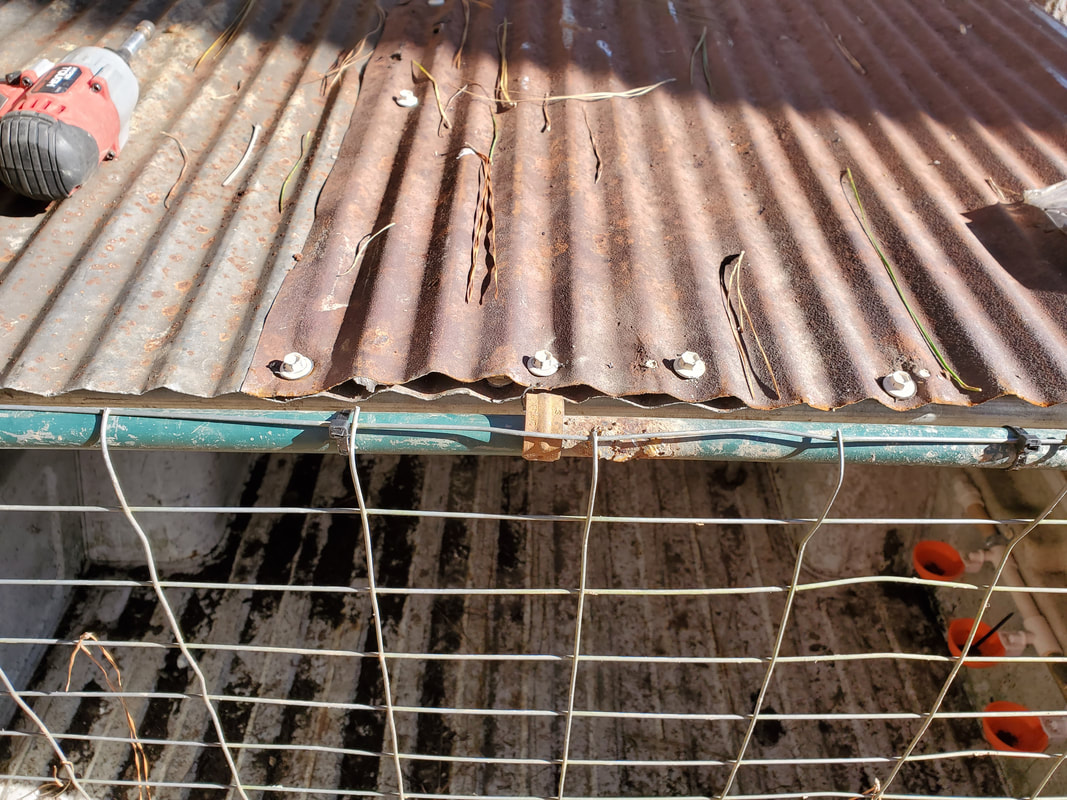 Conduit strap holding hatch in place, note how it lines up with screw in center of pic. Also note extra screws to hold sheet metal down. 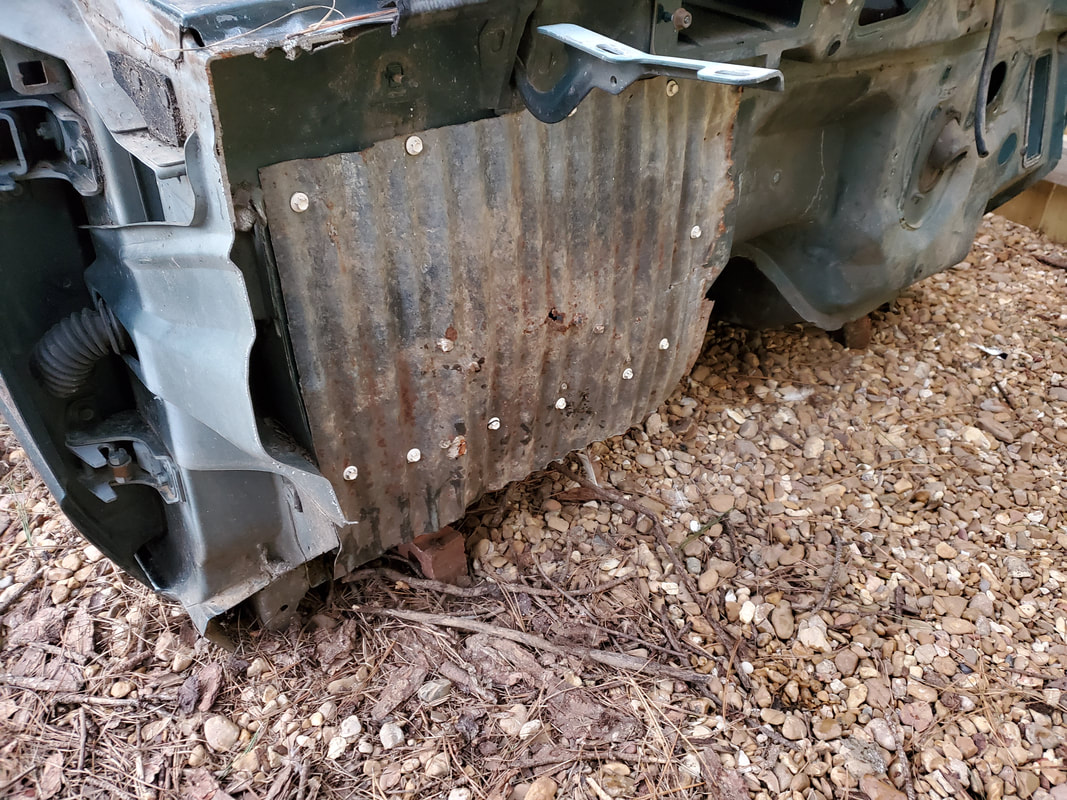 Corrugated sheet metal patch over HVAC box opening. 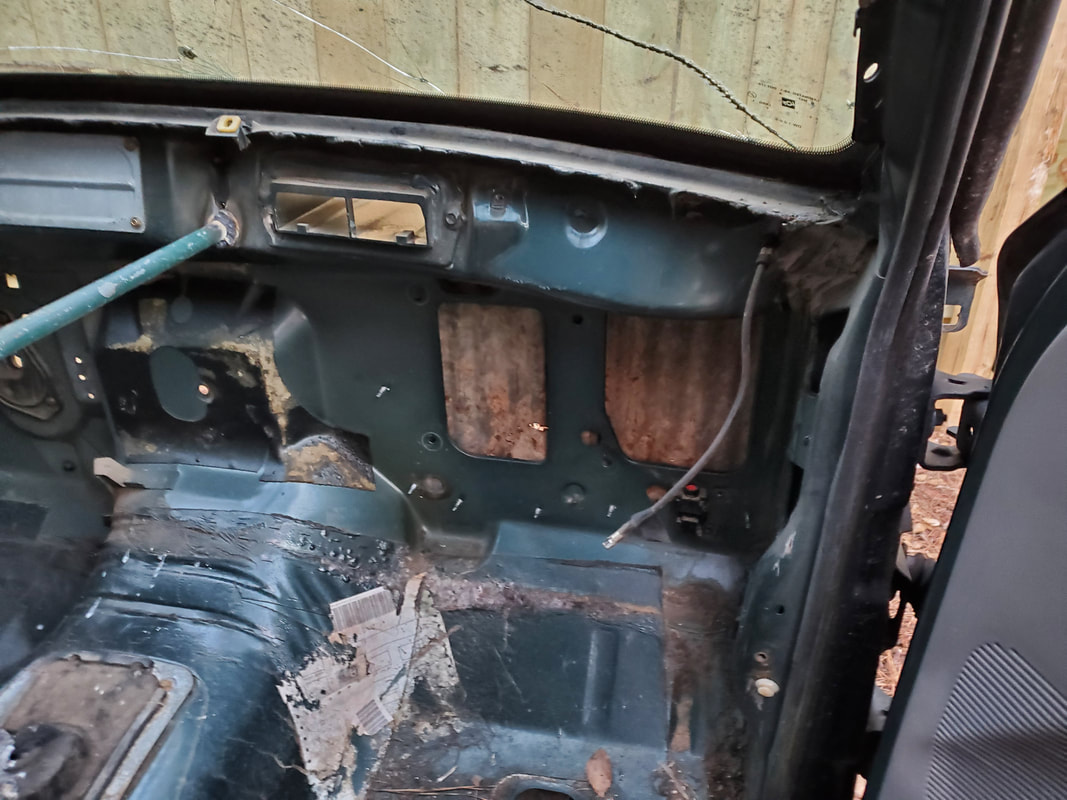 Shot of patch from inside cab. Now that the utilities are taken care of on the S10 Ranger Chicken Coop, the next order of business, albeit a small order, is putting roosting posts in the cab. Just like in the Toyota Chicken Truck, I took a couple of conduit pipes and welded them up longitudinal, front to back, since one of the doors on the truck are being used, I wouldn't have been able to go laterally. As before, I put two pipes in place, welding them up at the back of the cab just below the rear window and against the mounting metal for the dash (which is gone). 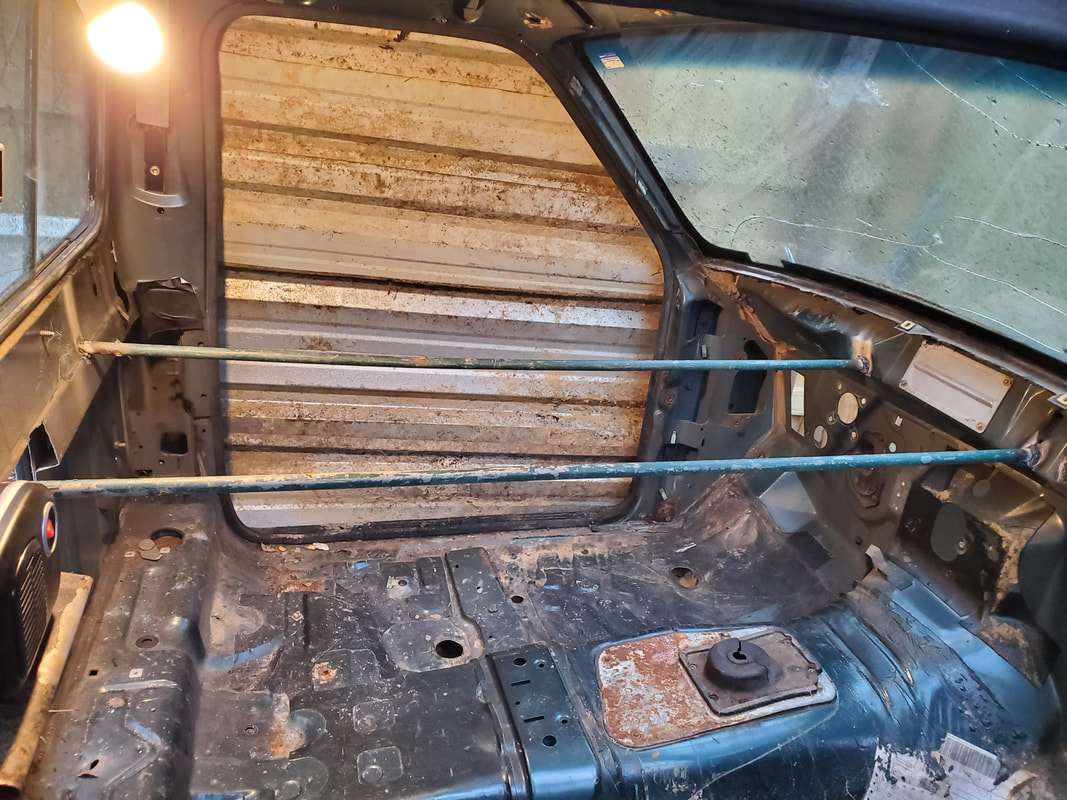 Roosting posts welded up in cab. With that small order of business out of the way I moved on to building the bed cover. Again, just like on the Toyota Chicken Truck, I used conduit to make a frame first. I used the pipe bender to bend the pipes to get the contours matched up to the contours of the cab sides and roof. This way when the sheet metal is laid down it will match up to the back of the cab. I was able to get the three ribs (front, middle and back) bent up pretty good where I didn't have to cut the section in half and trim it down then re-weld it back. I welded the three ribs to the top of the bed. 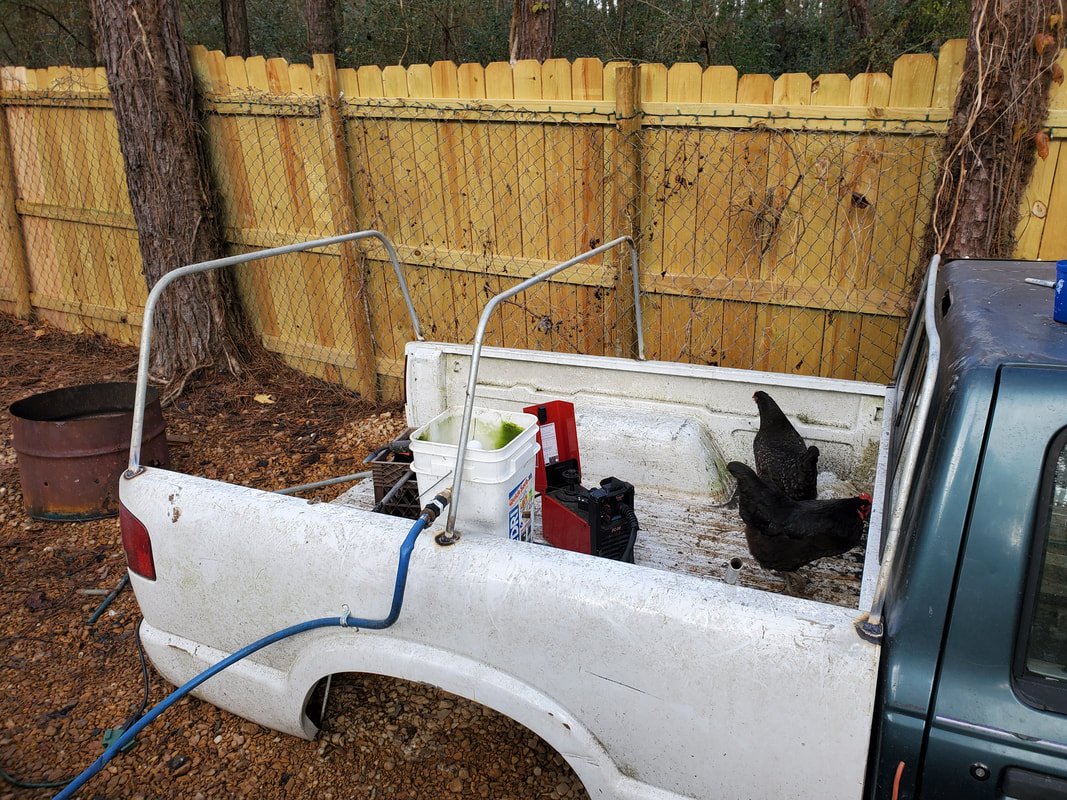 Conduit ribs welded to bed, note bends in ribs to match cab. The next thing to go up were the pipes to link the ribs together. These were welded near where the bends start on each side of each rib. It's these pipes that will support the overall structure of the bed cover and provide an attachment point for the self tapping screws that will hold the corrugated sheet metal to the structure. With the overall frame done, it was time for the sheet metal. 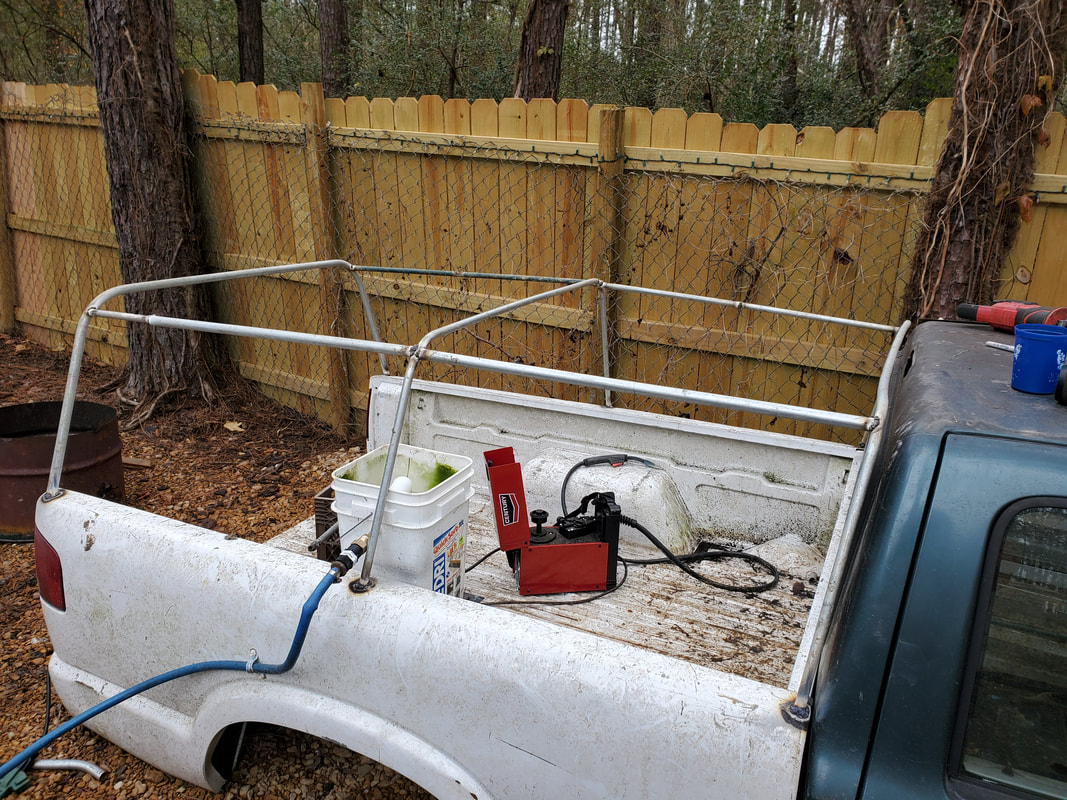 Support pipes welded between the ribs to help form the overall structure. Out of all the pieces of corrugated sheet metal I still had on hand I only had a couple sheets that were long enough to reach from front to back of the bed. The rest of them were able to reach 3/4 of the way to the back. Because of this, I saved the long pieces for the top. For the sides I attached the 3/4 length pieces from the front to back then cut some shorter pieces that I had to fill the gap from the end of the first piece to the last rib in the back of the bed. While I was able to screw the back of the shorter pieces to the rib, I had to use the self tapping screws to go between the overlapping ends of the sheet metal just holding them together by themselves, no pipe base to hold the screws. Because of this I did put extra screws through to the pipe where applicable.  Shorter pieces of sheet metal screwed to the sides of the bed cover frame, note overlapping pieces and the shorter piece at back of bed. 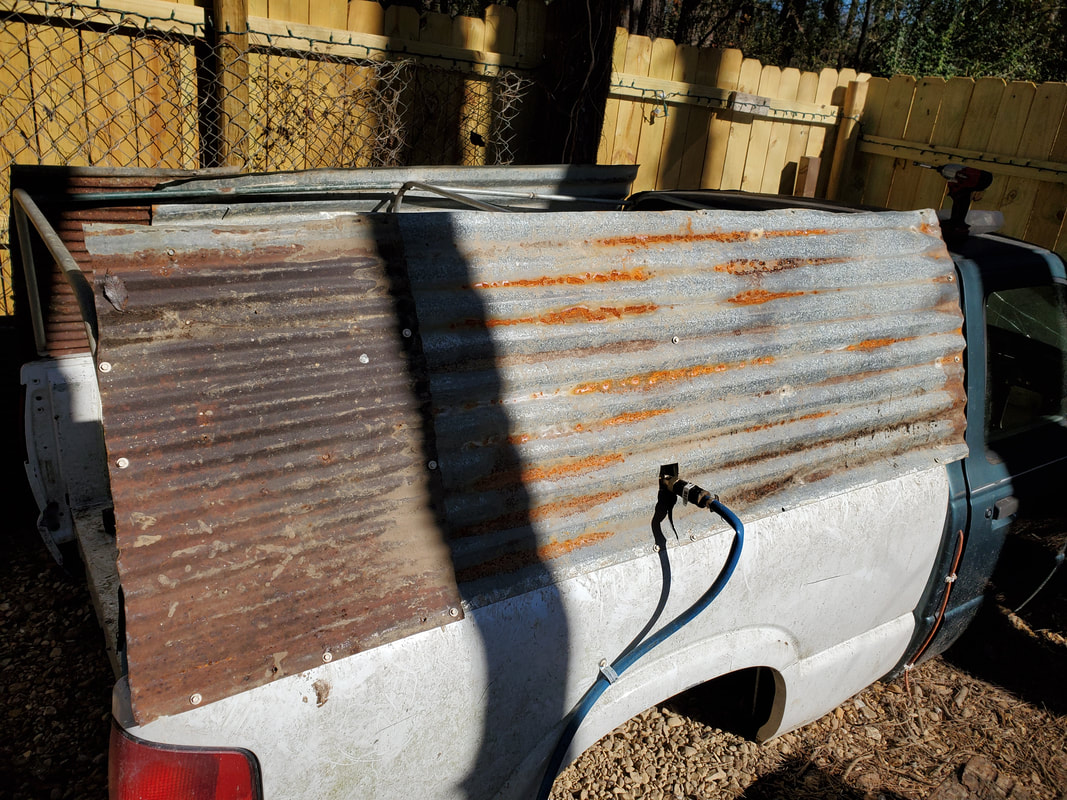 Right side of bed cover with shorter pieces of sheet metal secured. Note cut in longer piece to accommodate plumbing going into bucket reservoir inside bed. For the right side I had to cut a slit from the bottom of the piece of sheet metal then cut a small square about 1/4 of the way up to accommodate the pipe fittings coming out of the bucket reservoir. With the two sides taken care of with the shorter pieces of sheet metal I put the longer pieces on top, securing them in place with the self tapping screws. 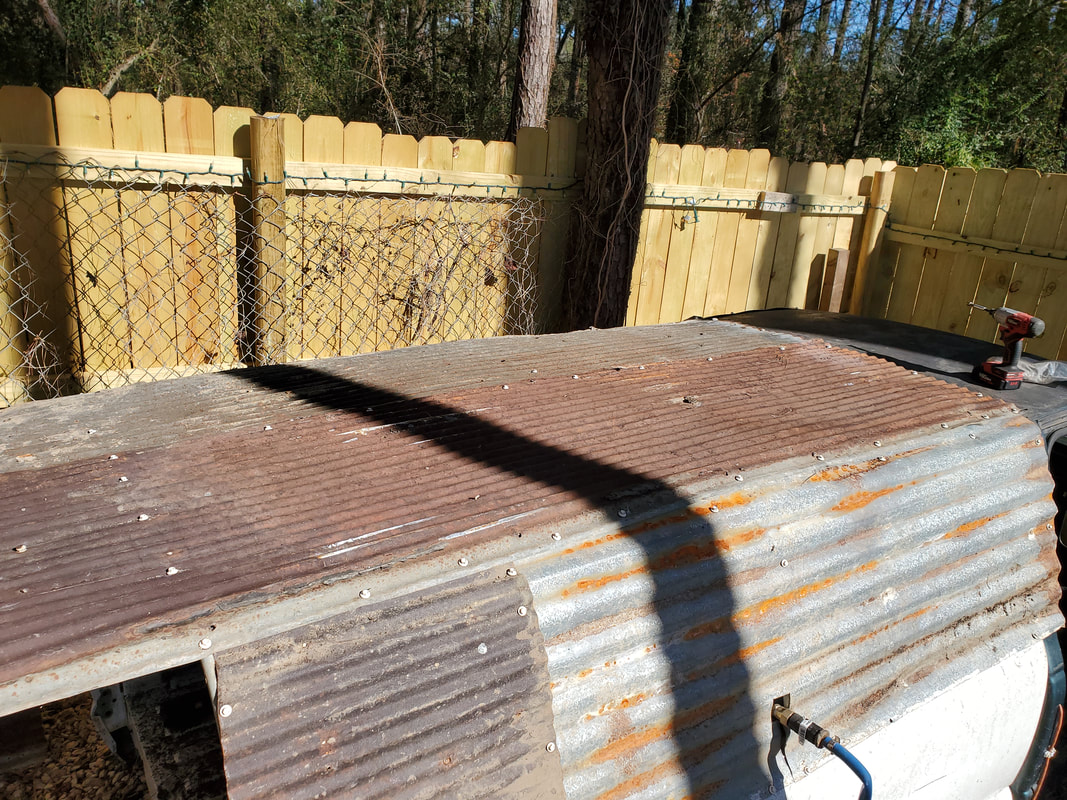 Longer pieces of sheet metal attached to roof of bed cover, note overhanging due to excess length.  Screws attaching sheet metal to top of cab at front of bed cover. 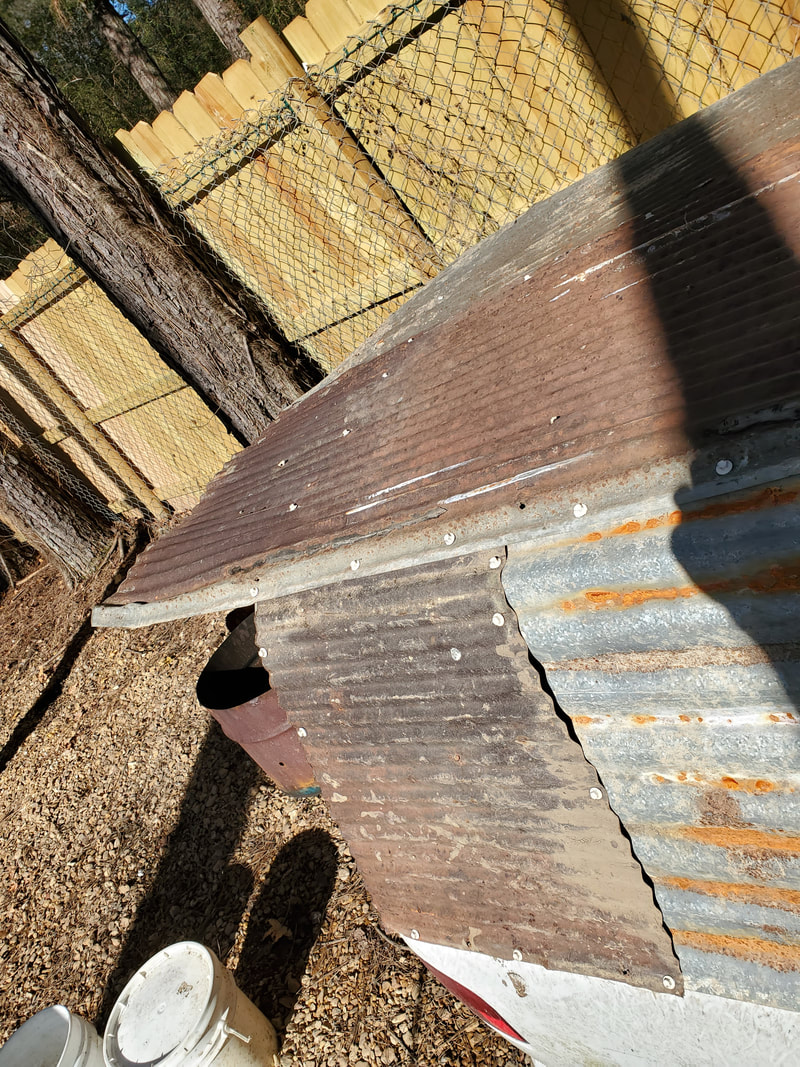 Shot of overhanging sheet metal at back of bed cover, note all the extra screws holding shorter pieces of sheet metal together. After securing the sheet metal to the roof I trimmed down the excess, getting everything flush at the back. With that, the bed cover as a whole was completed, all sheet metal was laid down, screwed securely. The only thing left is to make a hatch for the rear of the bed. Since I didn't have a tailgate for the bed the hatch would pretty much be a full size hatch from top to bottom.  Bed cover with sheet metal trimmed down, everything is nice and neat. 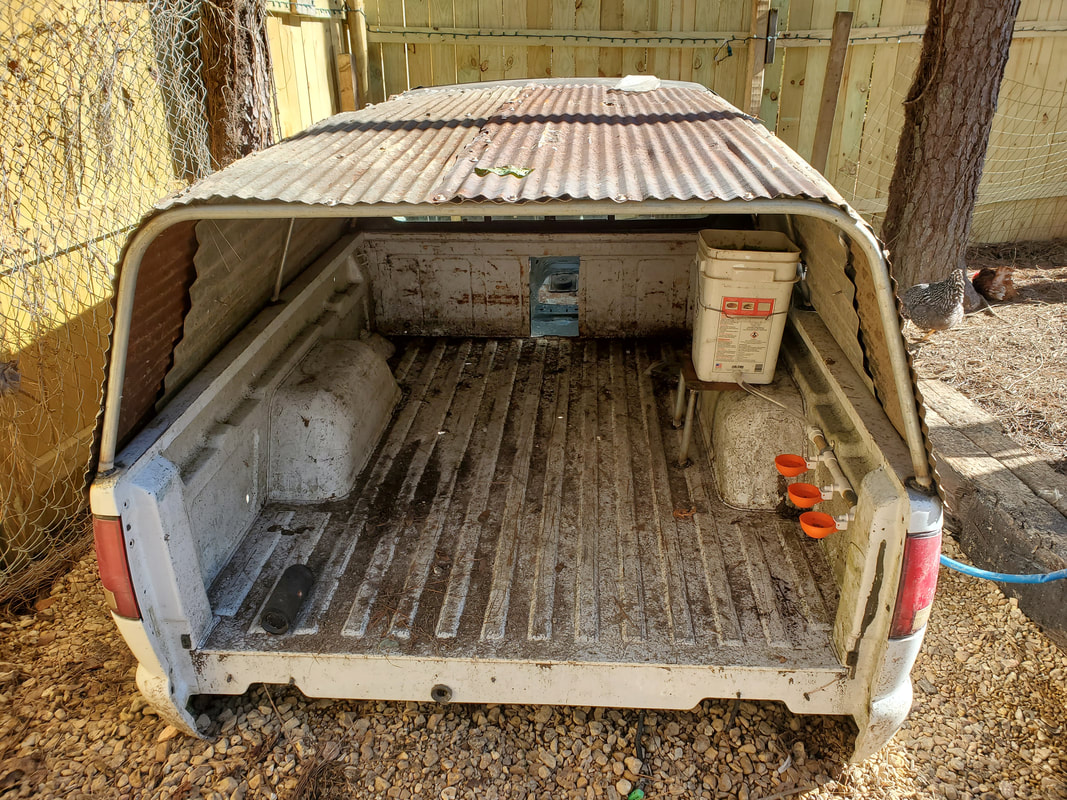 Shot of bed and cover from the back. Note trimmed flush rear and how metal overlaps on the inside. I plan on making the hatch hinge at the bottom since the whole structure is on the ground. If I make the hatch hinge at the top, I would have to have something to either hold the hatch upright or hinge it in a way where I could fold the whole hatch over the top of the bed cover. By hinging it at the bottom, the hatch will lay on the ground, serving as a ramp for the birds to be able to walk up into the bed of the structure. To help make this better I planned on installing a sheet metal skin on the portion of the hatch that would be where the tailgate would be. The portion that angles up to a narrower top would have chicken wire installed. The idea is to have a hatch that mimics a tailgate and window setup like on a normal truck with a camper shell except its all one piece. Once this is done the S10 Chicken Truck will be complete.
After getting the electrical system taken care of on the S10 Ranger Chicken Coop, the next order of business was the setting up of the simple water system on the coop. This would consist of the same components like that which was used on the Toyota Chicken Truck.
A bucket with a float valve would make up the heart of the water system. An input line that consists of a pressure regulator threaded for garden hose on either end since it was intended to be used with garden hoses on a micro irrigation system. From the bucket a nipple would feed into a hose going into the PVC manifold that consists of tees that are 1/2"x1/2"/1/8". These tees would take 1/2" PVC pipe in the manifold and allow for the screwing in of 1/8" tapped drinker cups. Now the first part of the system I installed was the PVC manifold with the drinker cups. Since I was able to assemble the manifold off the truck, I was able to secure the manifold using conduit straps and self tapping screws. 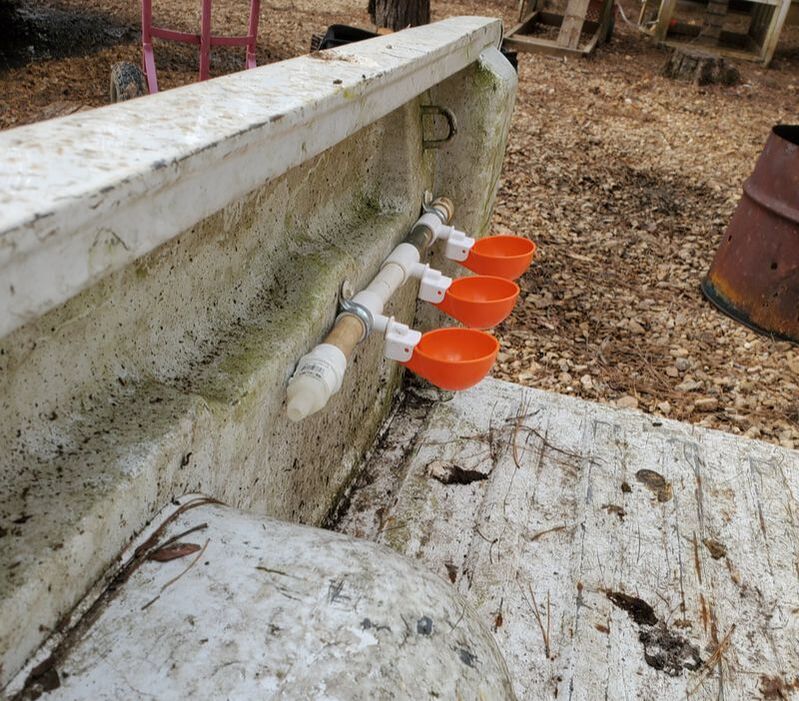
PVC manifold with drinker cups installed and nipple for hose that will go to bucket reservoir.
Before I could install the bucket, I had to make a platform, same as on the Toyota. This consisted of a piece of stiff sheet metal cut from some of my scrap supply, and a couple of pieces of thin wall conduit pipe that would serve as legs for the sheet metal table. The other end of the sheet metal table would be welded to the top of the fender well on the inside of the bed. With that all welded up I was able to assemble the bucket reservoir. 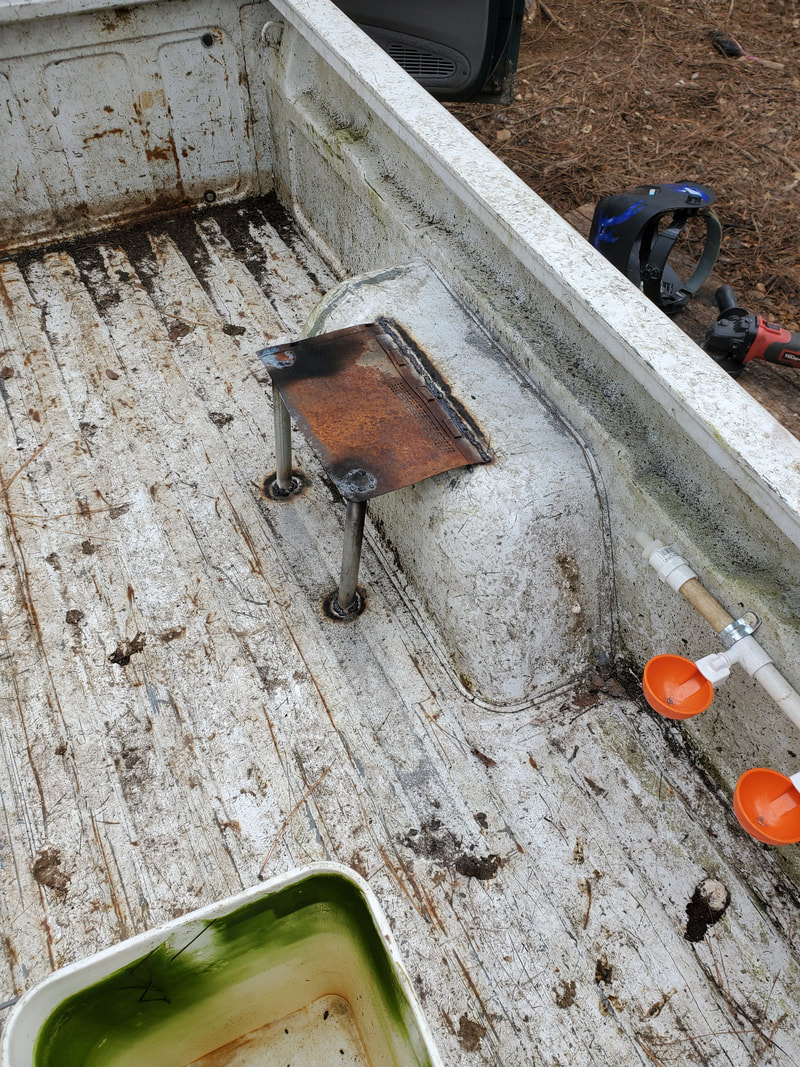
Sheet metal and conduit platform welded up against fender well inside bed to accommodate bucket reservoir.
Just like with the PVC manifold, I assembled the bucket reservoir off the truck. I drilled the necessary holes in the bucket for the nipple at the bottom and the float valve at the top. After installing these two components I then assembled the pressure regulator, the 1/2" garden hose to 1/8" NPT adapter and 1/8" nipple, screwing this assembly into the back of the float valve. Lastly I hooked up the short length of clear hose to link up the two nipples of the bucket reservoir and the PVC manifold. 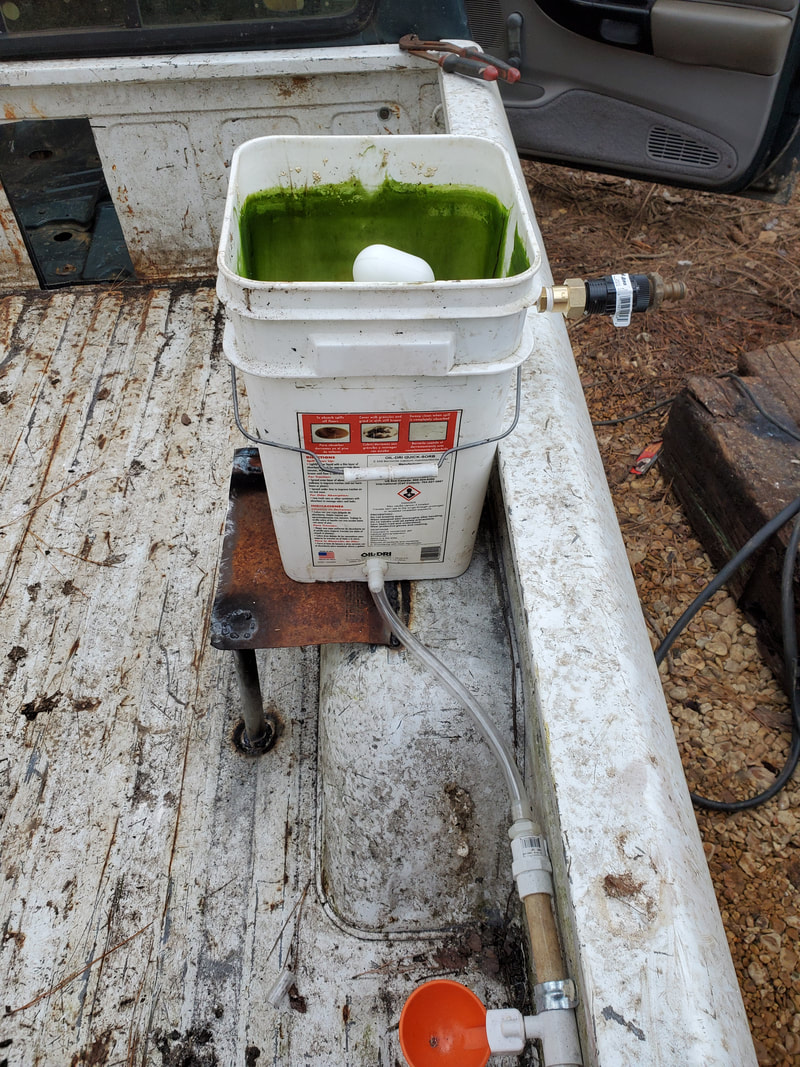
Bucket reservoir set up with float valve and pressure regulator assembly and nipple with hose hookup.
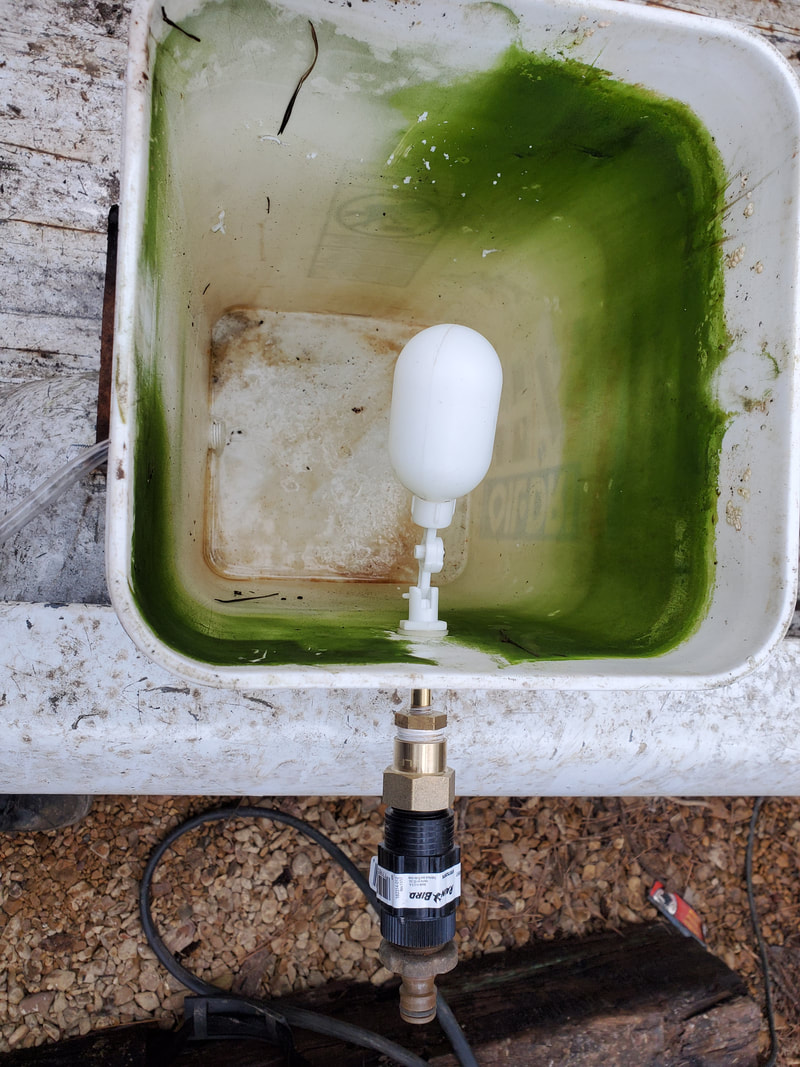
Float valve installed in bucket with fittings and pressure regulator installed.
With everything hooked up the last order of business was the garden hose water line that will feed this set up. Now since all of this is customized, I planned on making a custom length run of garden hose that will link up to the water feed by the Mustang Chicken Coupe. Currently there is a 2 way splitter on the water line but I will put a 3 way splitter on there to accommodate the hose going to the S10 Ranger Chicken Coop. I took a roll of old garden hose I had already cut from and used a couple of repair fittings to cap off the ends of the length of hose. These ends use worm clamps to secure the hose to the fittings. 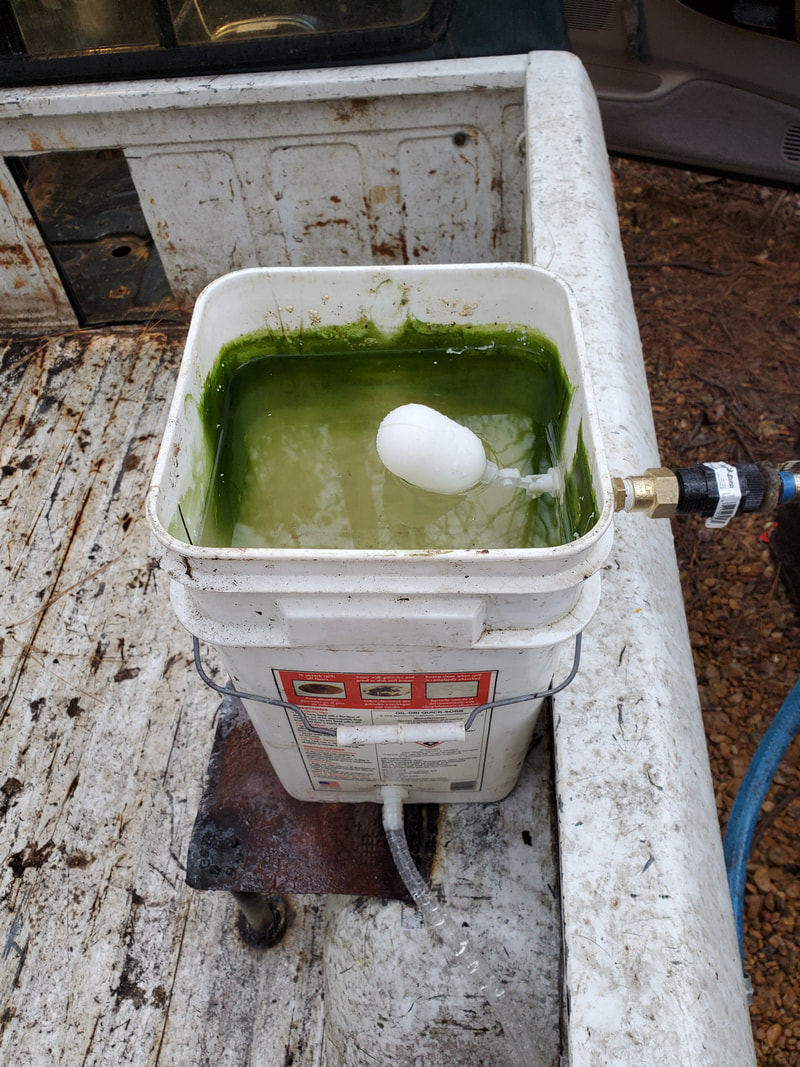
Bucket reservoir with garden hose hooked up to regulator and filled with water.
With the hose made and hooked up to the bucket reservoir I did a temporary hookup of the hose to the yard's garden hose for testing purposes. With the low pressure water going into the bucket, it was able to fill up as intended via the float valve. The water flowed into the drinker cups as intended, showing the system worked as designed. I do plan on digging a shallow trench the same way I did with the power cord going to the coop, in order to bury the hose. I will make the trench shallow as I don't want to put too much weight or pressure from too much dirt on top of the hose as it will prevent the hose from expanding properly. The trench will most likely just be a groove in the gravel, not really in the dirt. This way the hose will more or less rest in a depression more so than a trench. This will be for aesthetics as well as safety since the last thing we need is to have a trip hazard stretching across the yard. Needless to say, the water system is completed.
With the truck bodies put together and the opening cut between the two the first order of real business was wiring things up. I had a new plan for the chicken yard's electrical system, which was to install a dusk/dawn module on the cord going to the chicken coops so the lights and the soon to be newly installed "always on" heaters will come on through the dark hours then go off during the day when they're not needed by the birds. Because of this I would be omitting the switch box in this coop for the light, the only junction box needed is an outlet box for the heater and the venting fan that I would also install.
As for the outlet box I planned on installing a double outlet box with a total of four outlets to accommodate the heater and power adapter for a vent fan with two extra outlets for any extra shit I might install in the coop at a later date. I started off with one of the surplus square boxes I had laying around. The box had tabs on it for attaching to a stud in a wall but here I just used self tapping screws to attach the box to the side panel. I drilled a hole in the side behind the door frame for the power cable to go through. I took an old extension cord and cut the bad plug from it. I routed the cable end through the hole and up to the outlet box. Using the proper clamp fitting I secured the cable in the box. After stripping the end of the cable I went ahead and wired up one of the outlets then cut a short piece of 2 conductor cable to use as a jumper to the other outlet. From there I ran a length of 2 conductor cable through another clamp fitting from the top of the box up along the top of the cab to where the 3rd brake light used to be since that's where the light fixture would be hung. 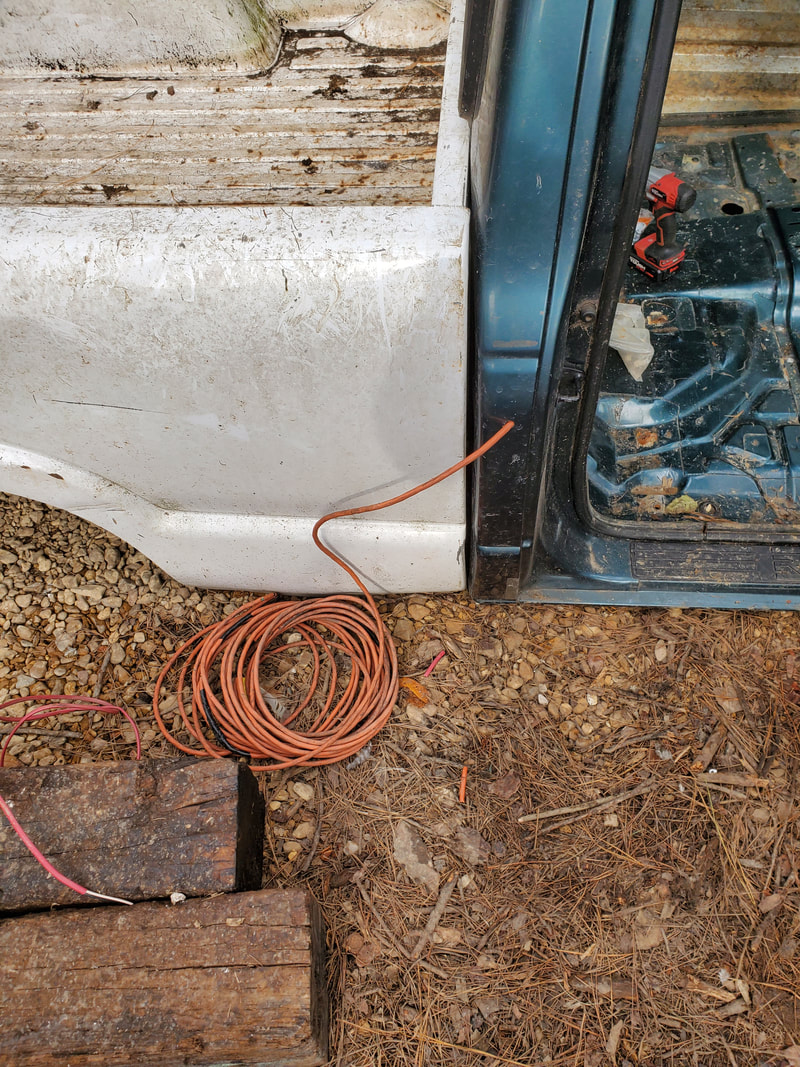
Extension cord used as power cable feeding outlet box.

Four outlet square junction box secured to interior mounting point with cables secured in place with outlets hooked up.
The next thing was to attach the light fixture to a point on the ceiling of the cab. I had to attach the two conductor cable to the fixture prior to securing it in place. Using some surplus cable I go the fixture ready for hanging. Using self tapping screws I attached the fixture to the internal framework where the 3rd brake light was at. I then used some plastic straps to secure the cable along the top of the cab and around to the outlet box. 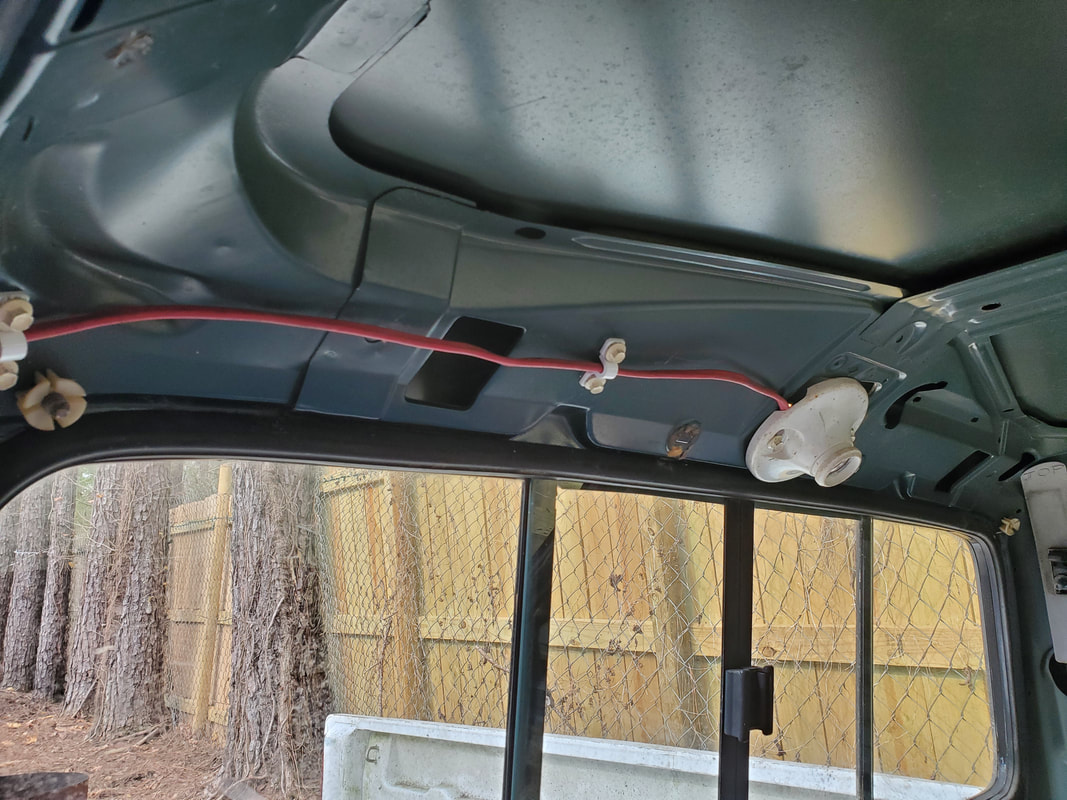
Light fixture and cable suspended on ceiling of cab.
With the light fixture wired up and hung and the cables inside suspended I finished mounting the outlets and covering up the box. After doing that I had to get the extension cord routed over to the outdoor outlet box between the Mustang Chicken Coupe and the Toyota Chicken Truck. 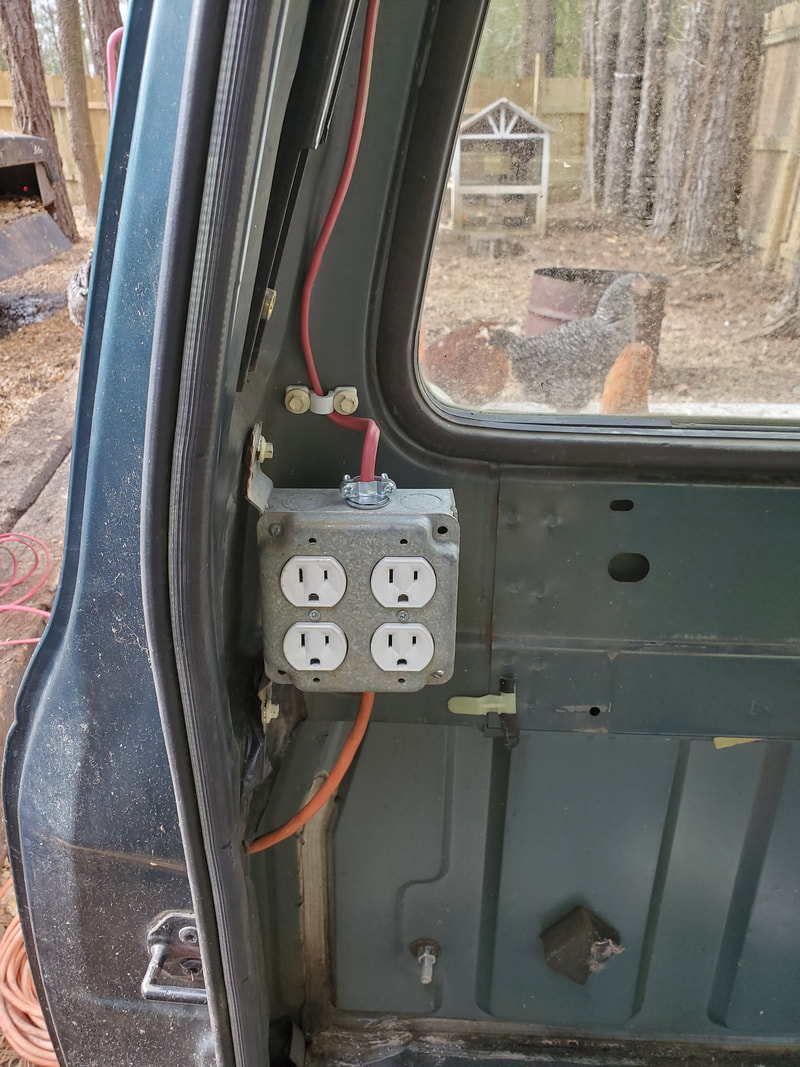
Outlets mounted in box, note straps holding cables to inside of cab.
I ended up using my foot to etch a trench in the gravel and top of dirt to create a shallow trench for the extension cord to be buried in. I put the cord in the trench and covered it with the dirt and gravel. I will be covering this area with more gravel in the future after getting the whole area covered so I can ensure that the cord is buried pretty good. I had to disassemble the outlet box and remove the clamp fitting so I can route the extension cord cable into the box. I cut the excess from the cord, leaving the other plug end intact so I can finish this part of the job. I hooked the cord cable to the outlet's extra terminals and used wire ties to secure the cable to the other cables. With that I was able to put power on the line to feed the new coop. 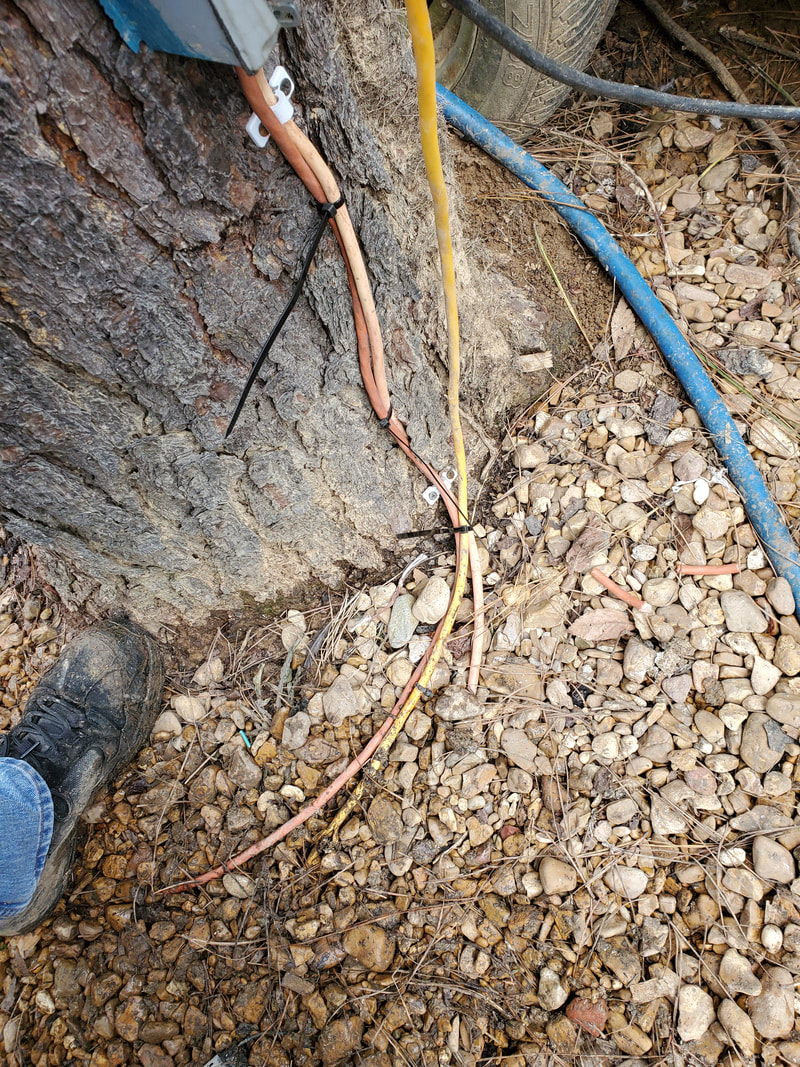
Extension cord cable routed over to outside outlet box between other car coops. Dark orange cable is the cable going to the new coop. Note wire ties attached to cables.
I installed an LED bulb in the light socket and plugged the heater up to verify that the outlets were working. With everything working, I then had to fabricate a platform for the heater. This ended up being made with a piece of sheet metal. I folded the piece of sheet metal to provide the platform for the heater and a brace to keep the platform steady. I welded this platform in place next to the outlet box. From there I put the heater on the platform and used wire ties around the body of the heater and under the platform to help hold the unit in place so it can't be knocked free by an errant chicken. I also routed the excess cord through the platform to hide it while plugging the unit up to the outlet. 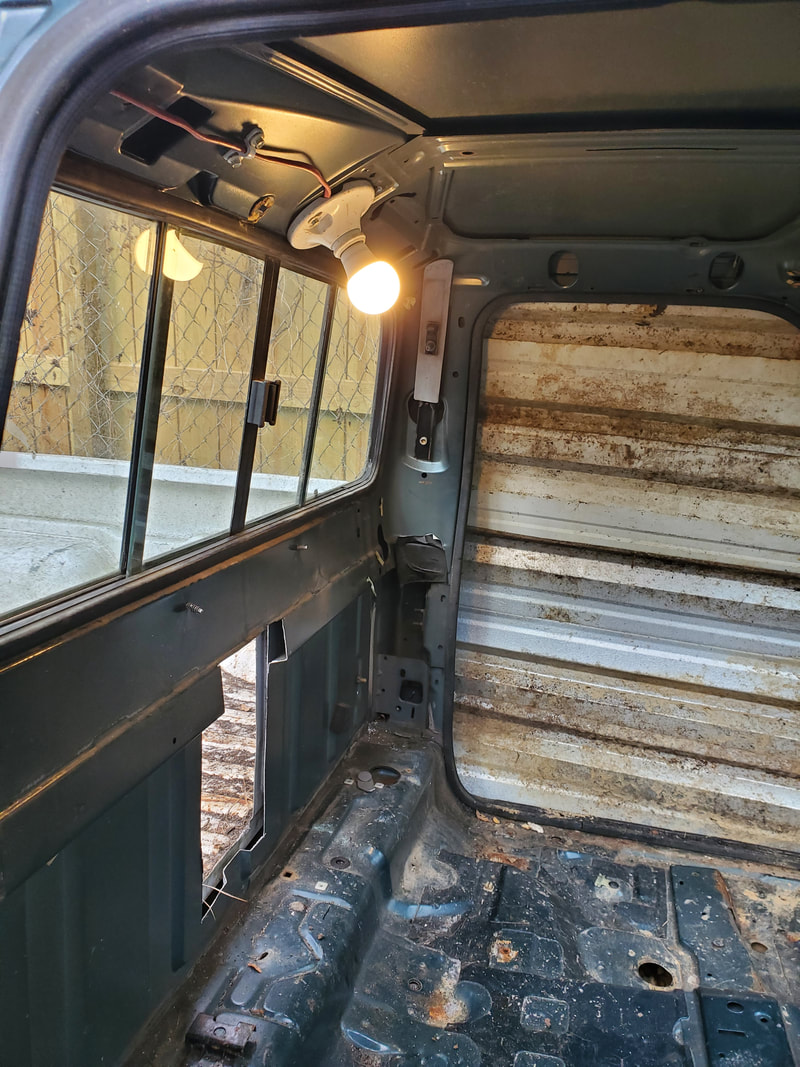
LED lamp installed in light fixture with power applied and illuminated.
Heater mounted on platform next to outlet box. Note wire ties around heater and cable routed through platform.
The last bit of work to be done regarding the electrical system on the coop was securing the power cable on the outside of the cab. This was done using a couple of the same plastic straps that I used on the inside for the cable along the cab's ceiling. With that the electrical system on the S10 Ranger Chicken Coop is done and ready to rock and roll. 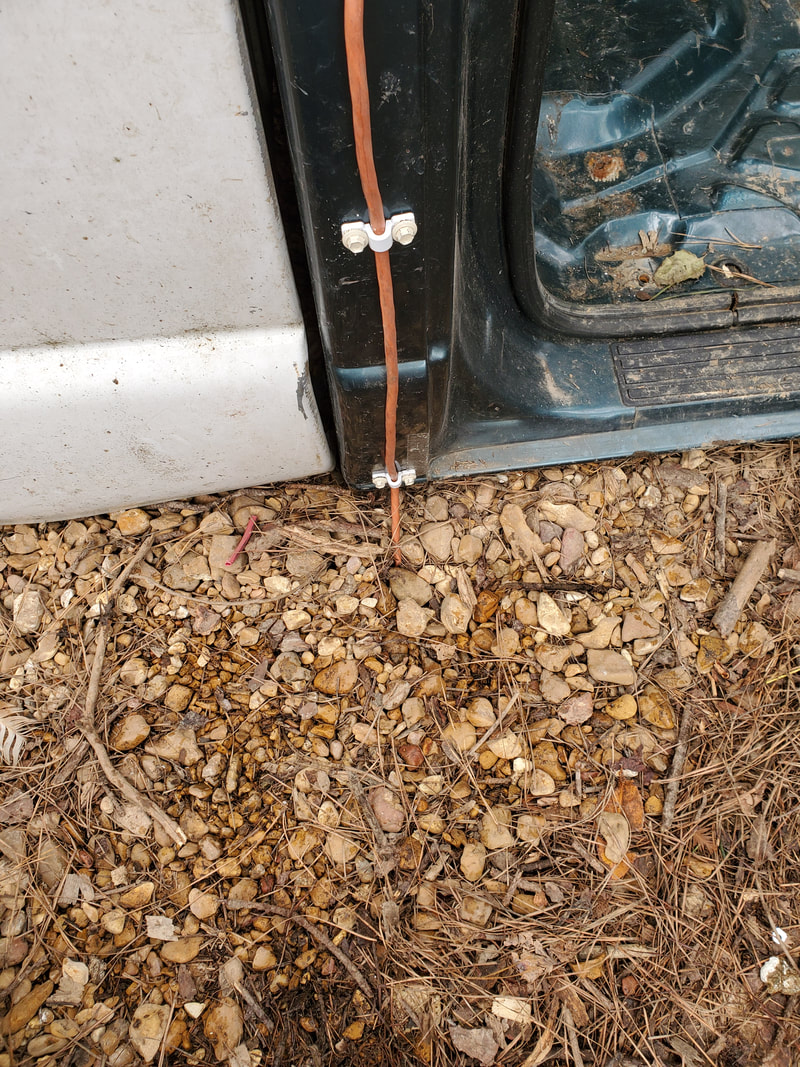
Power cable secured to side of cab with plastic straps. Note cable disappearing into the dirt/gravel.
The next move in the S10 Ranger Chicken Coop Project was to hang the passenger door on the cab and cut the access hole through the front of the bed and through the back of the cab. I had to enlist the help of the ole lady to help me in holding the door up as I put the bolts in the hinges. With the door hung I moved on to cutting the hole between the two bodies. 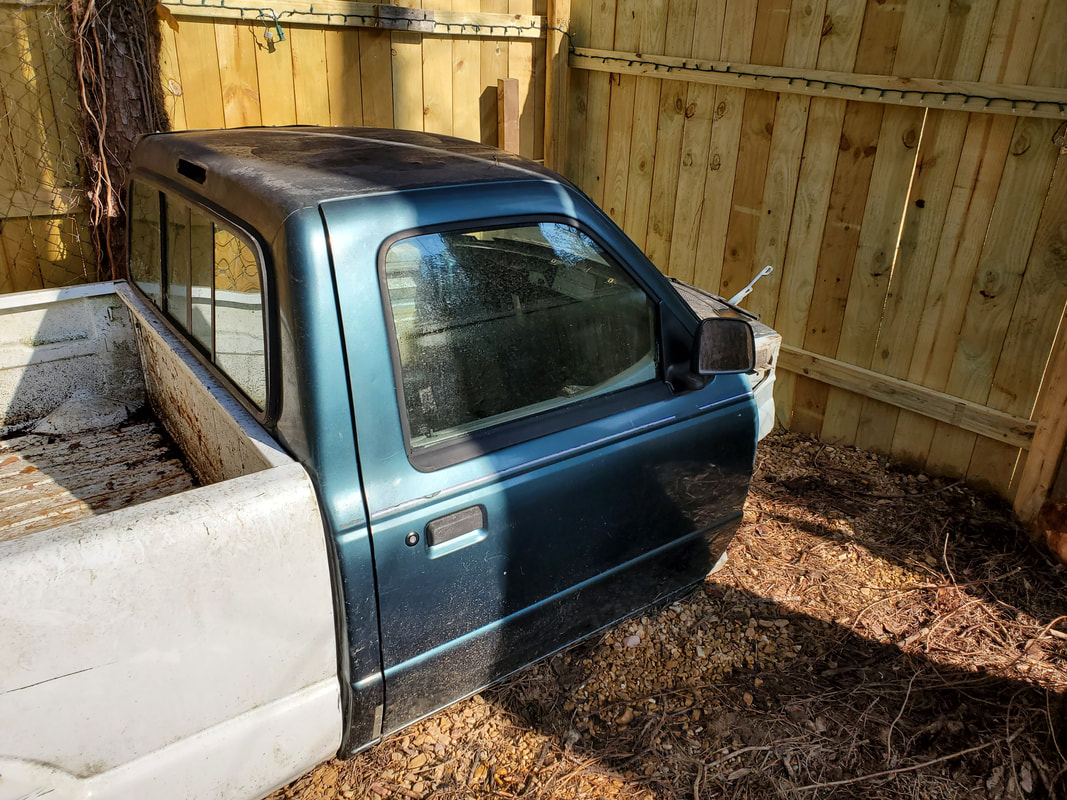 Door hung on Ranger cab. 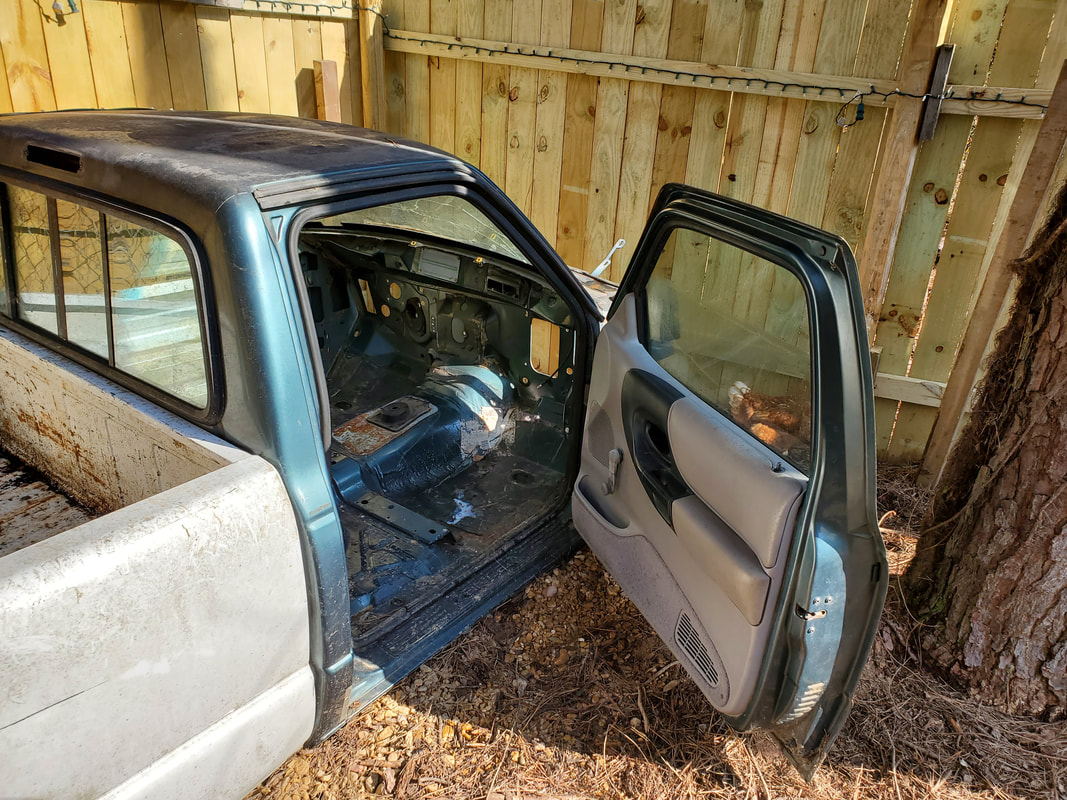 Door still has panel inside and window crank for opening window if need be. I left the door panel on the door but may remove it later on and put the window crank back in place since the panel really isn't needed. The last thing I need is to have to clean extra areas of chicken shit. Besides, I can sell that panel and get an extra few bucks in the process. To cut the opening in the front of the bed I had to start things off using the die grinder to cut slots around the four edges of the opening so I can be able to insert the saw blade and cut through all the way along each side. I had to whittle away a little more metal on the cab side of the opening as I made my way through so the saw blade can fit all the way through both bodies. It didn't take long to get the metal cut out from both bodies. 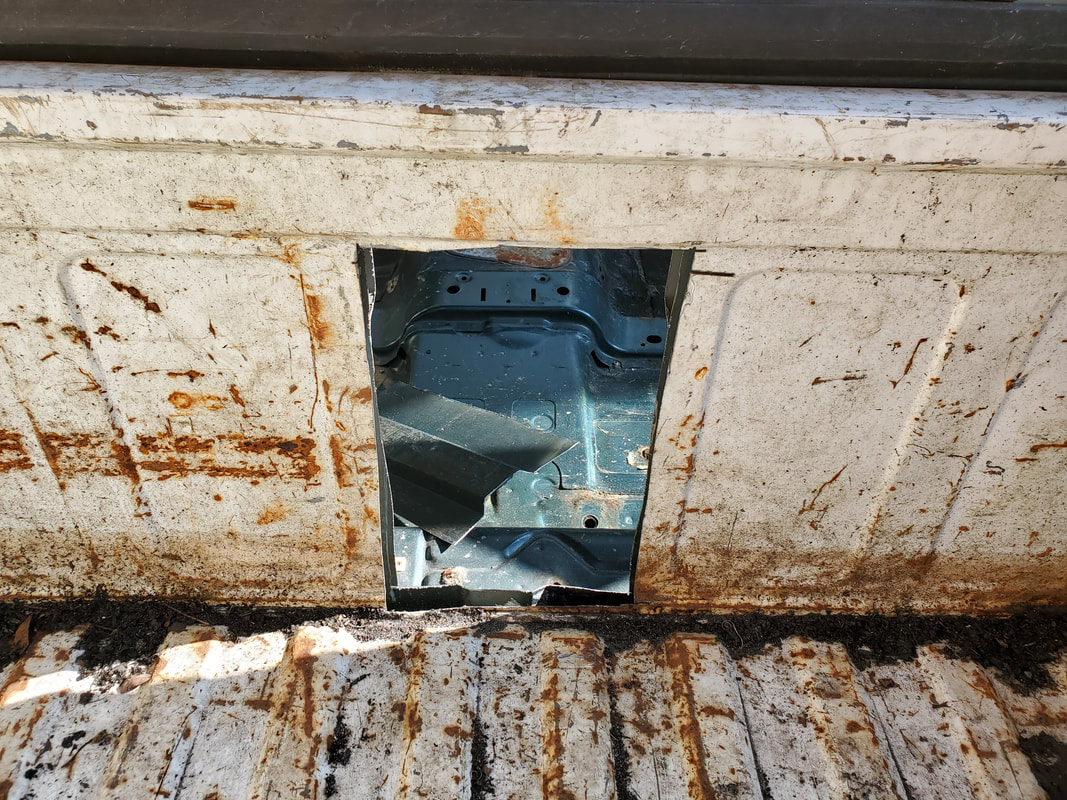 Opening cut through front of bed and through back of cab. 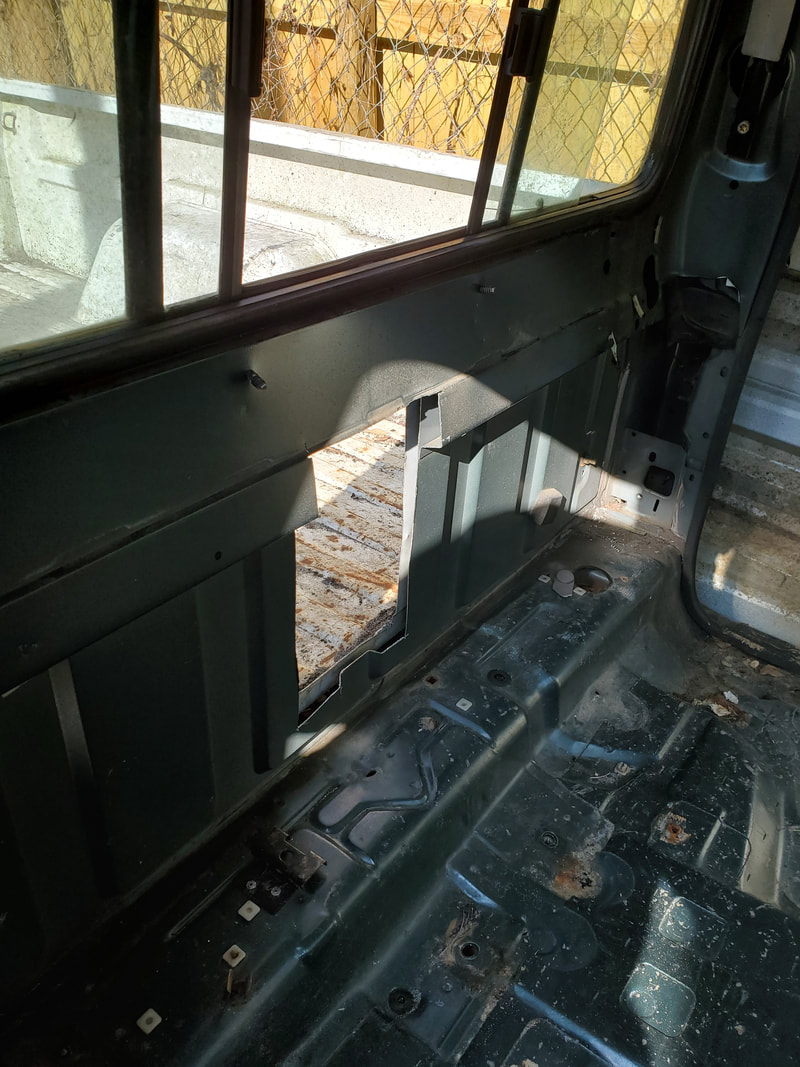 Shot of opening from inside of cab. I got another load of gravel to help cover more of the sloppy area of the chicken yard. With my help, we managed to get the gravel removed from the truck pretty fast. We covered the area in front of the storage shed in the yard and connected to the path that I was laying from the gate over to the tree line. We even managed to get some gravel laid on the outside of the gate where it was very sloppy. I would've normally waited to cover this area as it wasn't in the chicken yard but since we walk through this area all the time I gave in and laid some gravel over this area up to the gate. 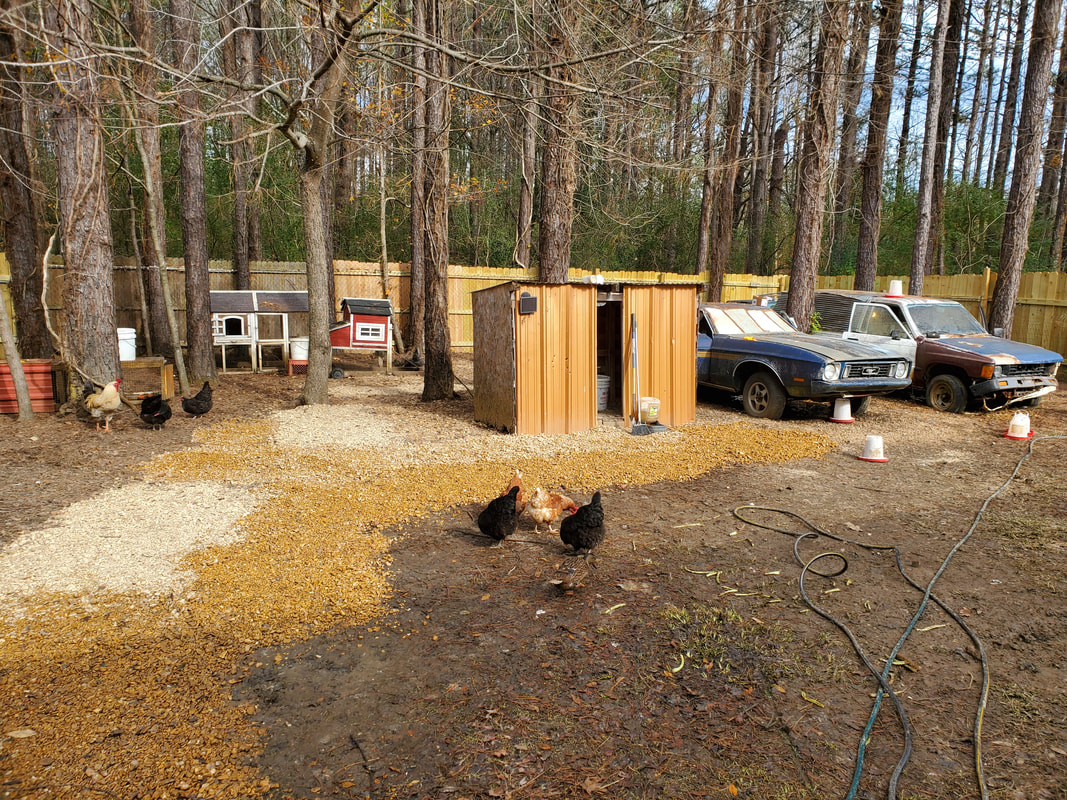 Gravel laid in front of feed shed and along pathway to tree line. 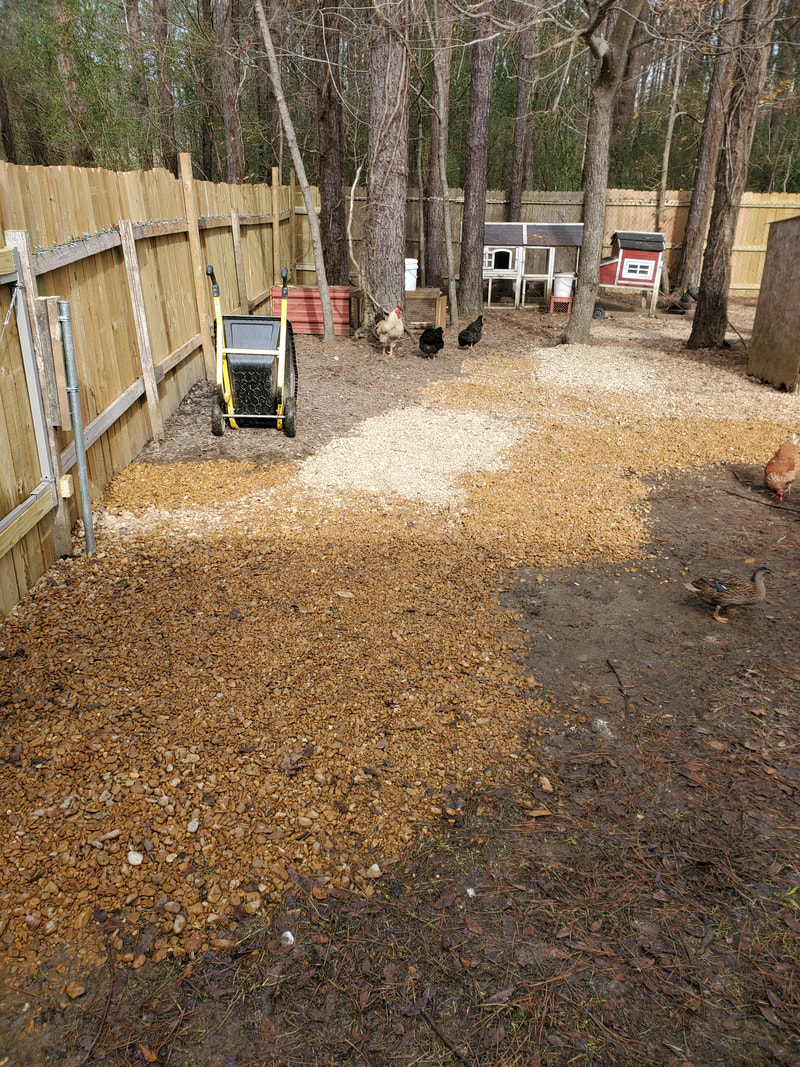 Gravel laid near fence line and gate, widening path laid from gate to tree line. With the gravel laid we can now traverse the chicken yard without getting sloppy wet feet. The next load of gravel will help cover the ground along the rest of the western fence line from the gate to the back near the rear entry gate. I will probably need a couple more gravel loads to fully cover the area I planned on covering in the chicken yard. In the meantime I will be getting ready to kickstart the S10 Ranger Chicken Coop build as I will be gathering the materials to get water and power established in the coop. I plan on getting this coop build done pretty fast as there isn't a whole lot to do and my experience in building the Toyota Chicken Truck will help me plan a fast approach to completing this project so I can get it into play and continue to tidy up the chicken yard by dismantling the old chicken coops. Stay tuned. With the the cab and bed situated where I planned on putting them the project was able to commence in full force. The first thing I had to do was attach the two bodies together. Since the two bodies are on the ground attaching was done by using four sets of nuts and bolts. The To put the bolts in I drilled four holes through the front of the bed and into the back of the cab. The holes were drilled close to the four corners in the front of the cab. Using 3/8" bolts I managed to get the two bodies attached good.  Bolts on right side of front of bed at top and bottom of panel. 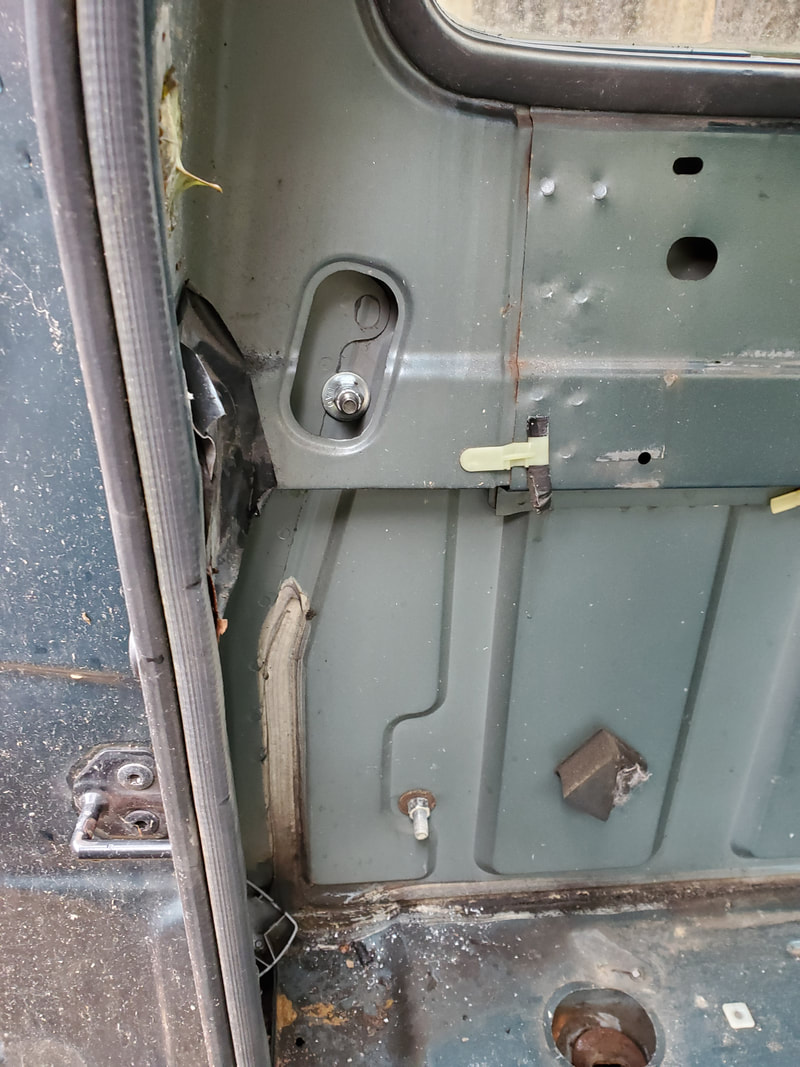 The next order of business was to cover the driver's side door opening on the truck. When we got the truck the door was already removed as part of the initial deal made on the truck. I figured it was no big deal since this side of the truck was going to be against the fence line so there was no concern about having to open the door. My solution was to just cover the opening with corrugated sheet metal. I had plenty of scrap corrugated metal to use but what I found out of that supply was several pieces of cut metal that was around a foot in width and 3-4 ft long, cut from larger pieces from a past project. I figured these would work just fine, since I would start at the bottom of the door opening, securing the metal with self tapping screws, two on either side, and overlap the next panel up, doing the same with the use of the screws, and so forth until I made my way to the top of the opening. 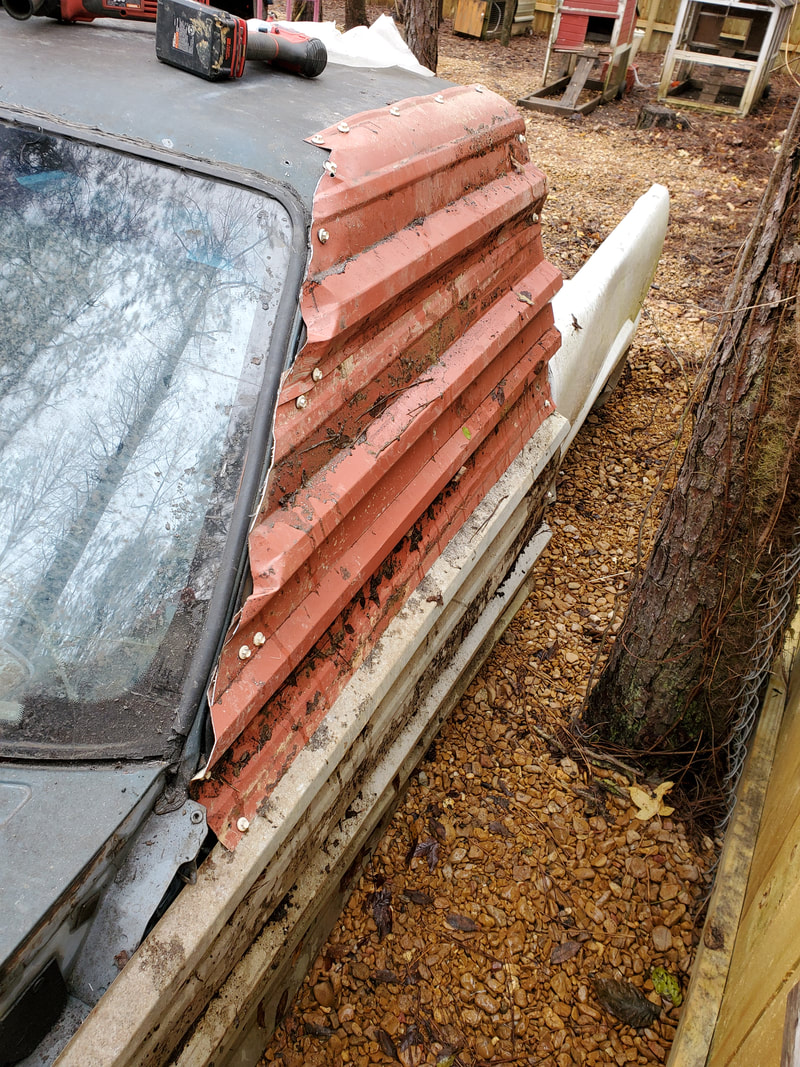 Corrugated sheet metal panels attached to driver's side door opening on cab, note how panels overlap each other as they advance up. Because the panels were longer than the opening, as I attached them to the cab I had to trim the excess from one end of each panel. Since the rear of the cab was perfectly vertical I figured that would be the end where the panels meet perfectly on a vertical plane while I trim the excess at the front. Now since the body of the cab where the fender would've been is pretty uneven, the mounting points for the self tapping screws at the front of each panel were staggered, with screws going wherever a solid spot was found behind the panel. As I trimmed the panels the cuts were relatively uneven but cut where it allowed for the covering of the opening of the door way. As an added bonus I took a hammer to pound in the raised up portion of each panel to help close in the gaps created by the corrugated metal. I even made some cuts at the top of the cab at the corner, in addition to hammering. With these moves I was able to get a good coverage of the opening at the front and along the cab's A-pillar. 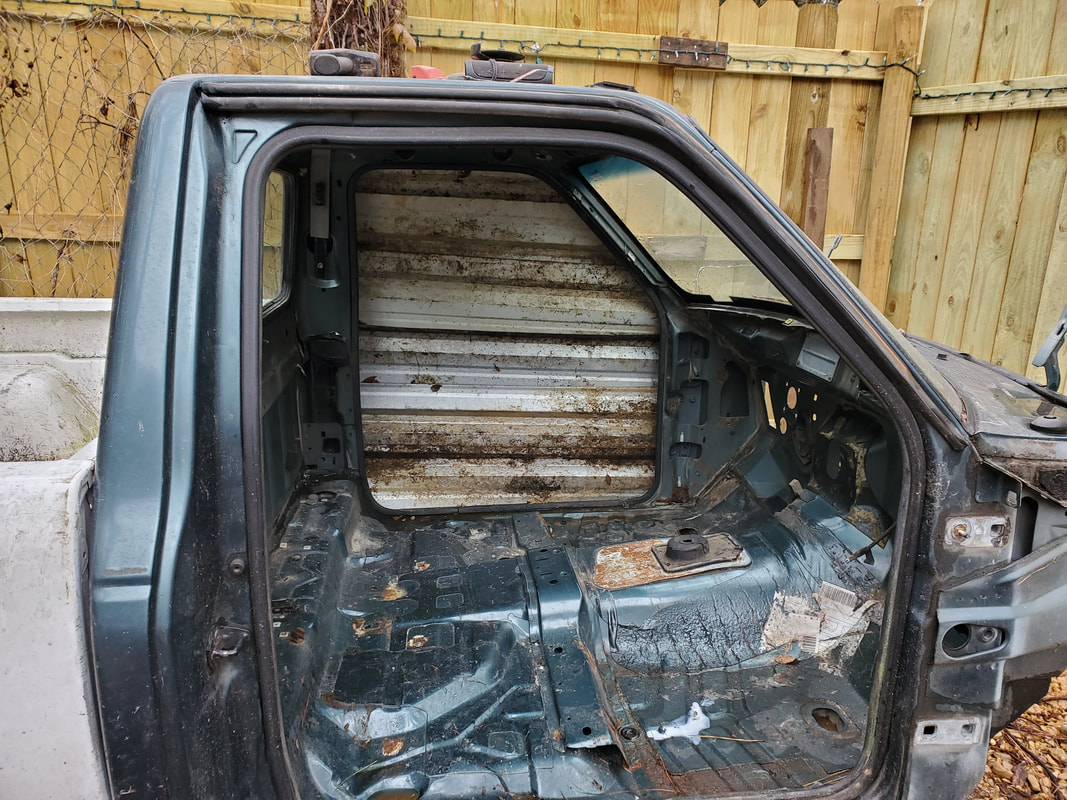 Shot of corrugated sheet metal panel from inside cab. With the sheet metal panel covering the driver's side door opening I can get the passenger side door hung, fully enclosing the cab of the coop. The next thing I'll do is cut the opening at the front of the bed through the back of the cab, just like the Toyota Chicken Truck. I'll weld up the seams between the two bodies to keep things closed up and eliminate the sharp edges. From there I'll weld on the roosting posts which will be made from some of the scrap conduit I have laying around. At the same time I'll also gather the electrical and plumbing components I need to get the light, outlet for heater and drinker cup assembly put together. I did have a new idea I wanted to implement for the chicken yard and the coops in particular. I plan on installing a dusk/dawn module at the outlet feeding the power cord running into the chicken yard and to the car coops. This will make the lights and outlets get energized only at dusk and go off at dawn. I plan on using these plain off/on 250w electric heaters. Even though they have no thermostats, having them come on at dusk and run through the night with such a low power rating will allow the heaters to slowly heat up the coops and keep the temperature maintained. The old thermostatically controlled heaters timed out after 12hrs, which does me no good in these coops as the whole point was to automate things so we don't have to periodically check on them like that. Other than observing things to make sure the birds are fed and doing the periodic cleaning when needed, we should not have to reset an electric heater every day. Another thing i also decided to do was hook up the perimeter LED Christmas lights to the same module so they too will come on at dusk, illuminating the whole chicken yard. Since the chickens come out of their coops at dawn anyway, it makes sense to wire things up to just come on at dusk and go off at dawn. This will save power as none of these items will be in use during the day anyway. Things are coming together nicely. With the Ranger cab and the S10 bed in position in the chicken yard, I had to get more gravel in the yard, especially over the area where I plan to set up the new coop assembly. Of course the F250 served its purpose yet again as I brought back another load of gravel. With the wheelbarrow I quickly got the rest of area in the NE corner of the chicken yard covered with gravel. The remaining area was relatively small as I managed to get the NE corner covered up going back into the chicken yard to meet up with the other graveled areas. 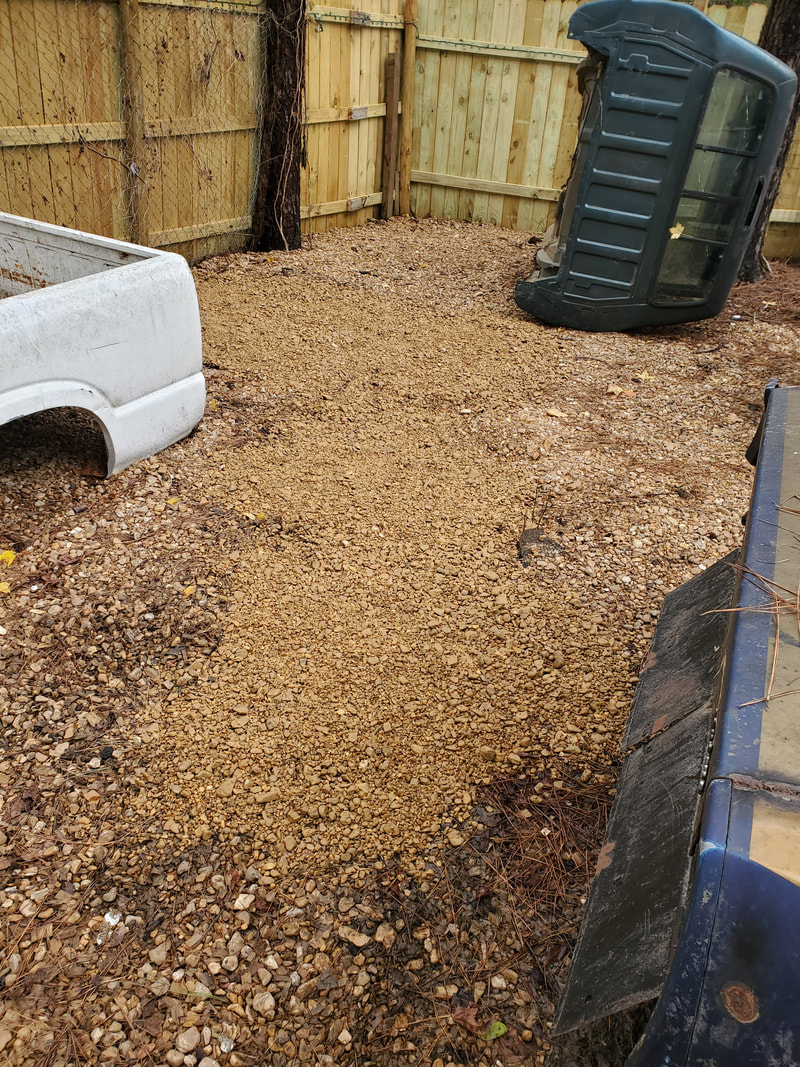 NE corner of chicken yard fully covered with gravel as intended. I still had a bunch of gravel remaining so I started covering some more of the back area of the chicken yard around where the old chicken coops are currently situated at, in the Northwest quadrant. I then spread some gravel over an area around the entry gate as it was soupy after some rains that passed through. With more of this area covered I started laying a path from the gate over to the NW quadrant of the yard. I ran out of gravel before I could fully lay a path to the tree line. 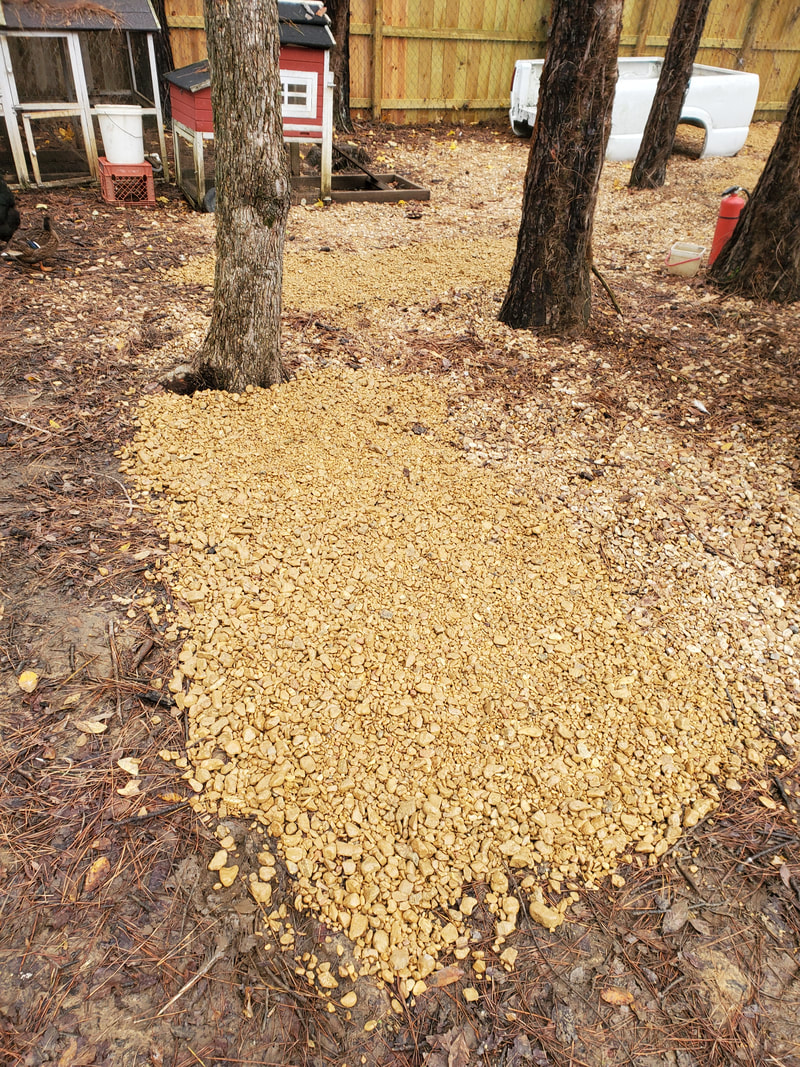 Gravel laid out in NW quadrant of chicken yard around old chicken coops. 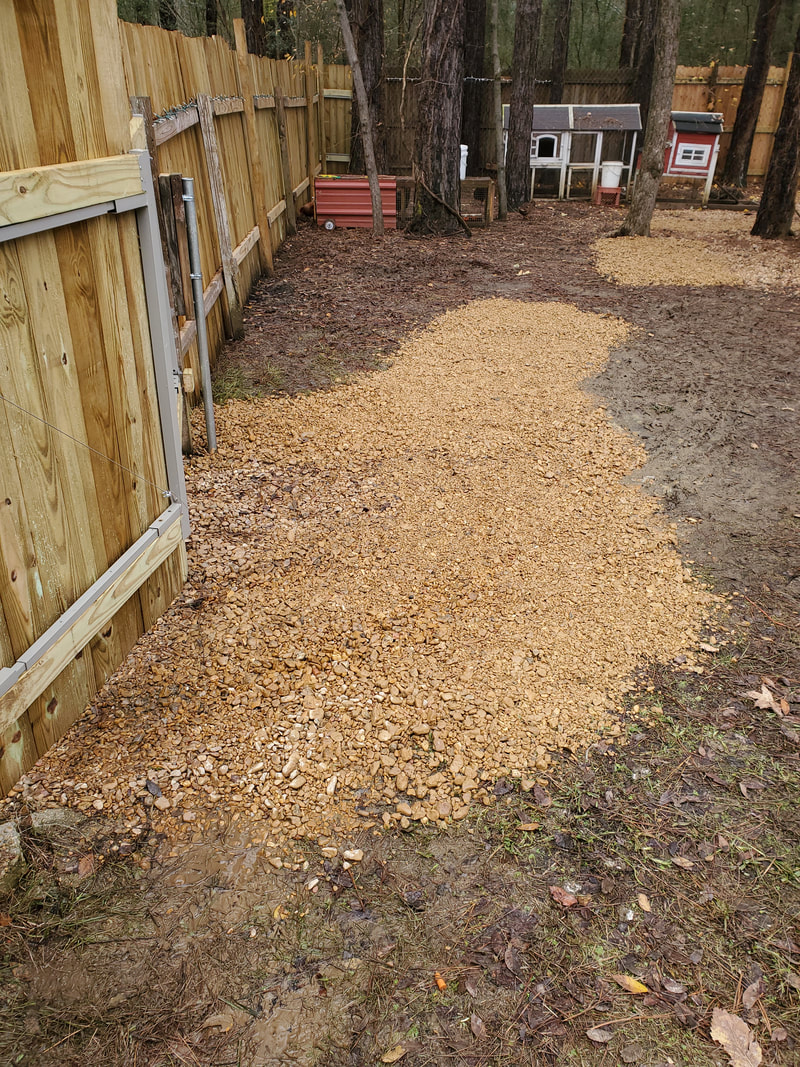 Gravel path laid from gate over to NW quadrant of yard. With the gravel laid later on I picked up the pair of railroad ties I wanted to use for laying the cab and bed on. Getting these things home was slow going as the weight of these fuckers had the poor trailer cockeyed all the way back home. Getting them off the trailer was a literal exercise as the two of us trying to move these damned things was slow going, getting them off the trailer and onto the 2 wheel dolly then moving the tie from the driveway via the dolly into the chicken yard and to the site where I wanted them to be set up. After the work we put in moving these things into place we then moved the cab into position. 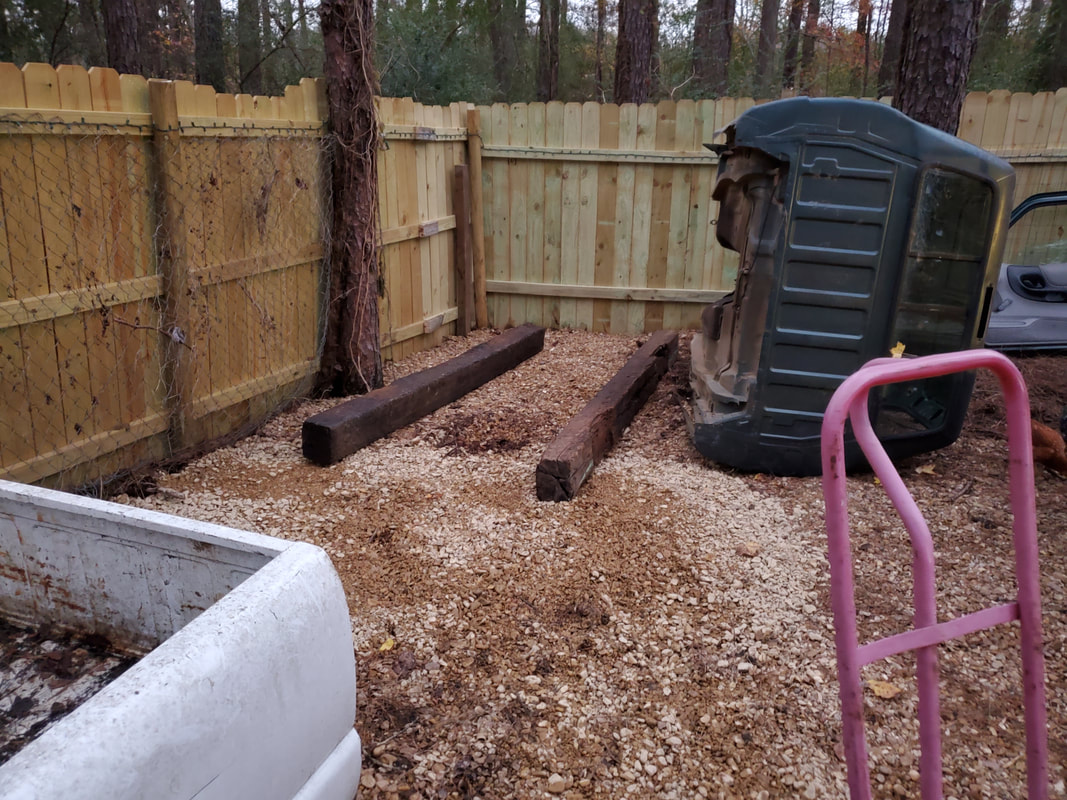 Railroad ties in position We worked the cab onto the ties, having to move the ties some to get everything in the optimum position so the cab doesn't rock on uneven mounts. With the cab in position we then went to move the bed into position. 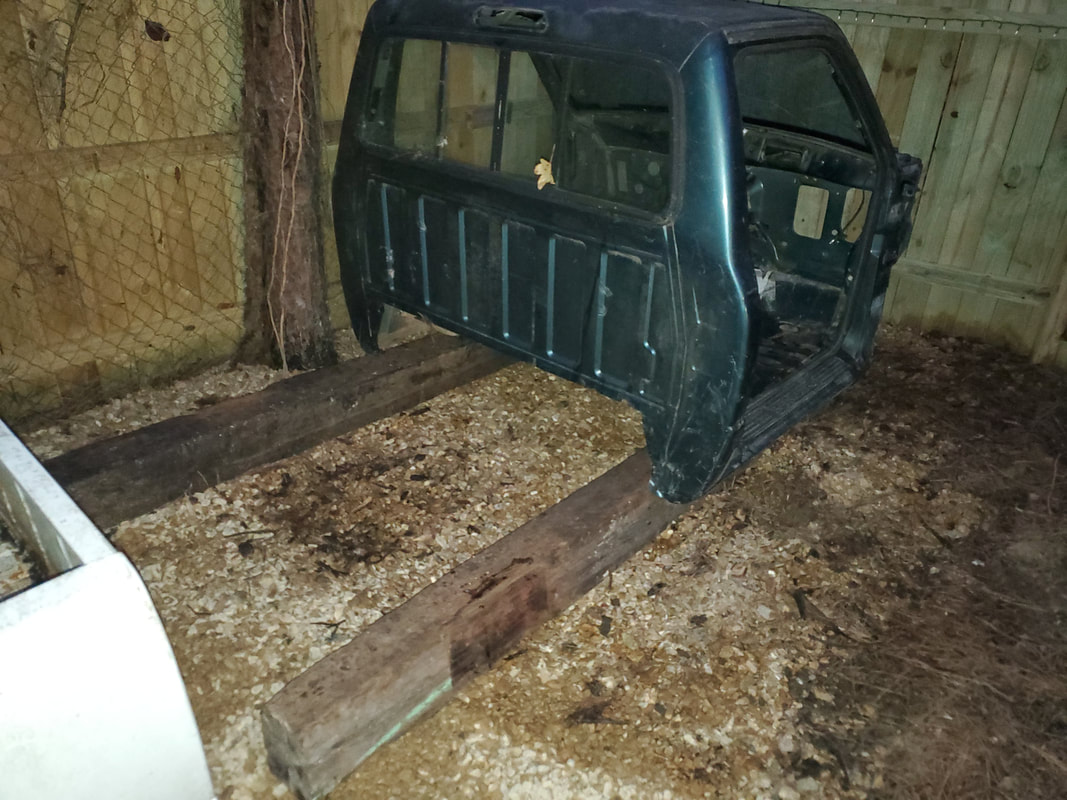 Ranger cab in position over ties with bed staged to the right. When we moved the bed into position over the ties, one thing we did notice was the way the fenders of the bed extended down below the bottom of the bed and its corresponding mounts. Because of the way this bed was made it never even made contact with the ties even when positioned directly over it. After butting the bed against the raised up cab we found out that things really didn't line up the way I hoped for. With that I immediately made the decision to pull the ties and just lay the cab right on the ground with the bed. Of course to do this involved us lifting the bed up vertically and off of the ties, then tipping the cab back on its side off of the ties, then muscling the ties out and off to the side out of the way. After that workout we tipped the cab back on its bottom then moved the bed back in position behind the cab. As I figured, the cab lined up pretty good with the cab, right on the ground. 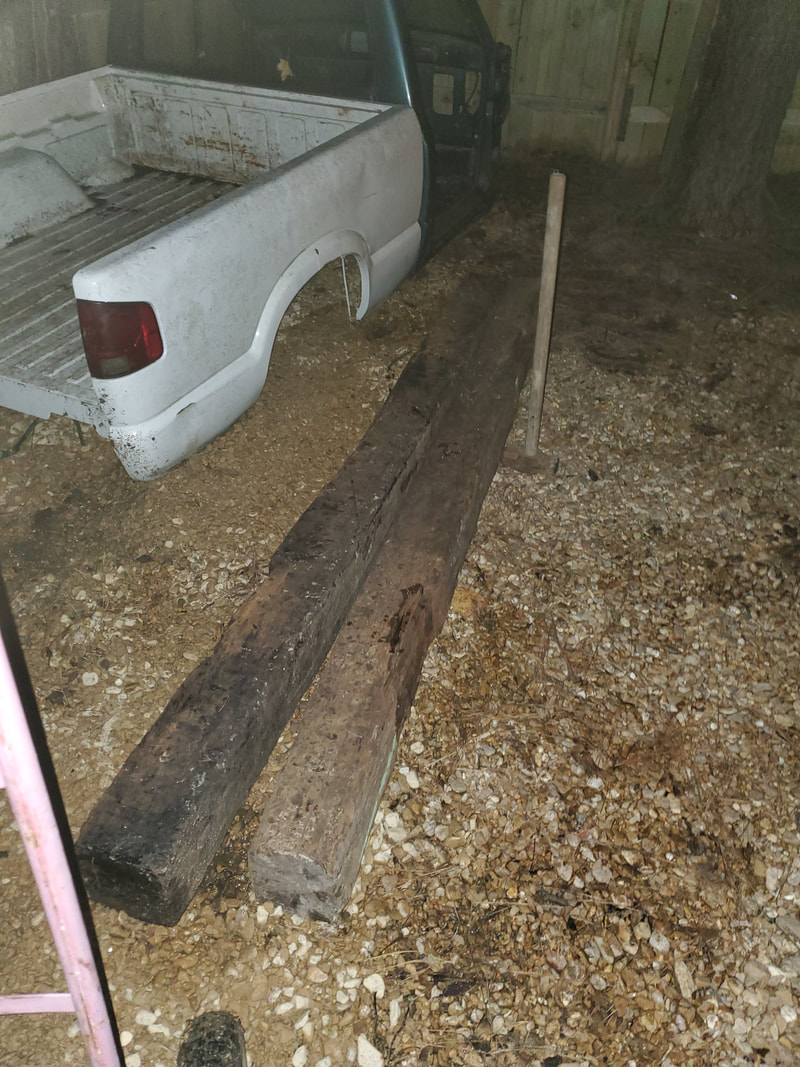 Railroad ties laid out next to site where cab and bed are situated. 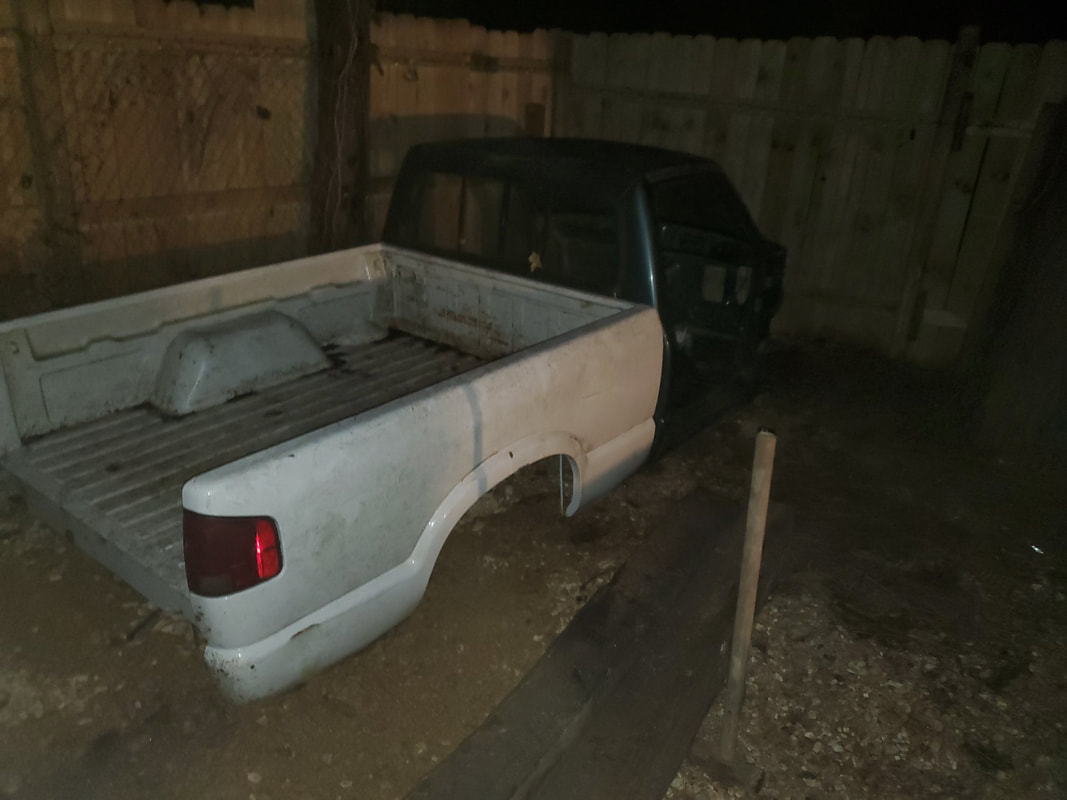 Better shot of cab and bed in new position on ground. As can be seen in the pics most of this was done at night. After getting the two parts in position I did make note of the idea if I raise the front of the cab up some the back would meet up better with the bed. I went ahead and grabbed a couple of bricks and propped them under the mounting points on the front of the cab to keep the body raised up and against the front of the bed. 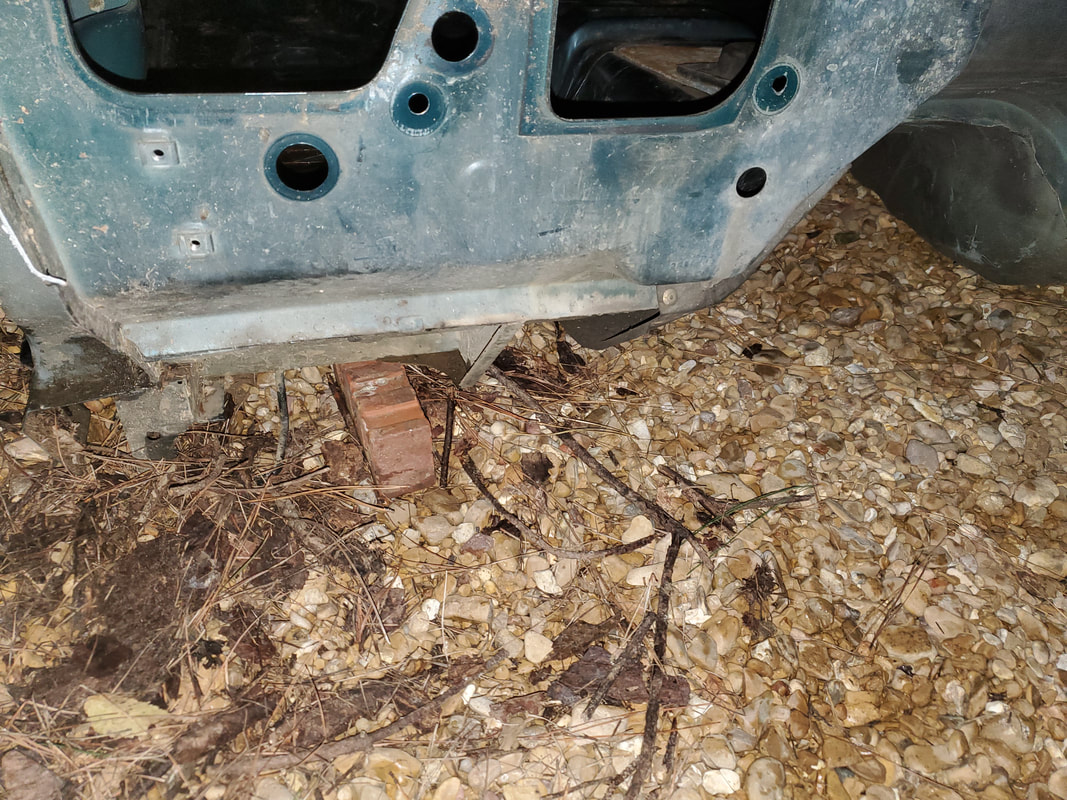 Brick propped under mounting point at front of cab. 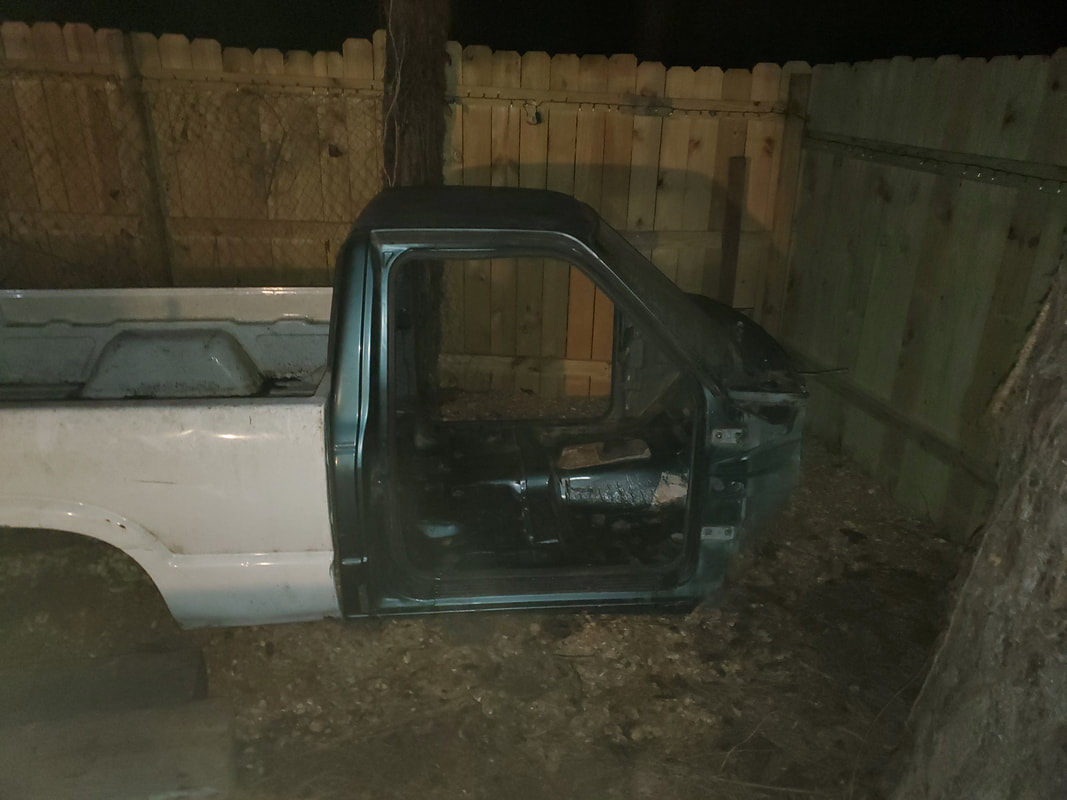 With the new configuration for the cab/bed combo, I no longer have to worry about trying to secure the two bodies to the railroad ties, I'll be drilling some holes through the front of the bed and through the back of the cab to attach long nuts/bolts to hold the two together. I'm not going to bother trying to weld anything on the outside as the nuts/bolts should be sufficient to hold the two bodies together. 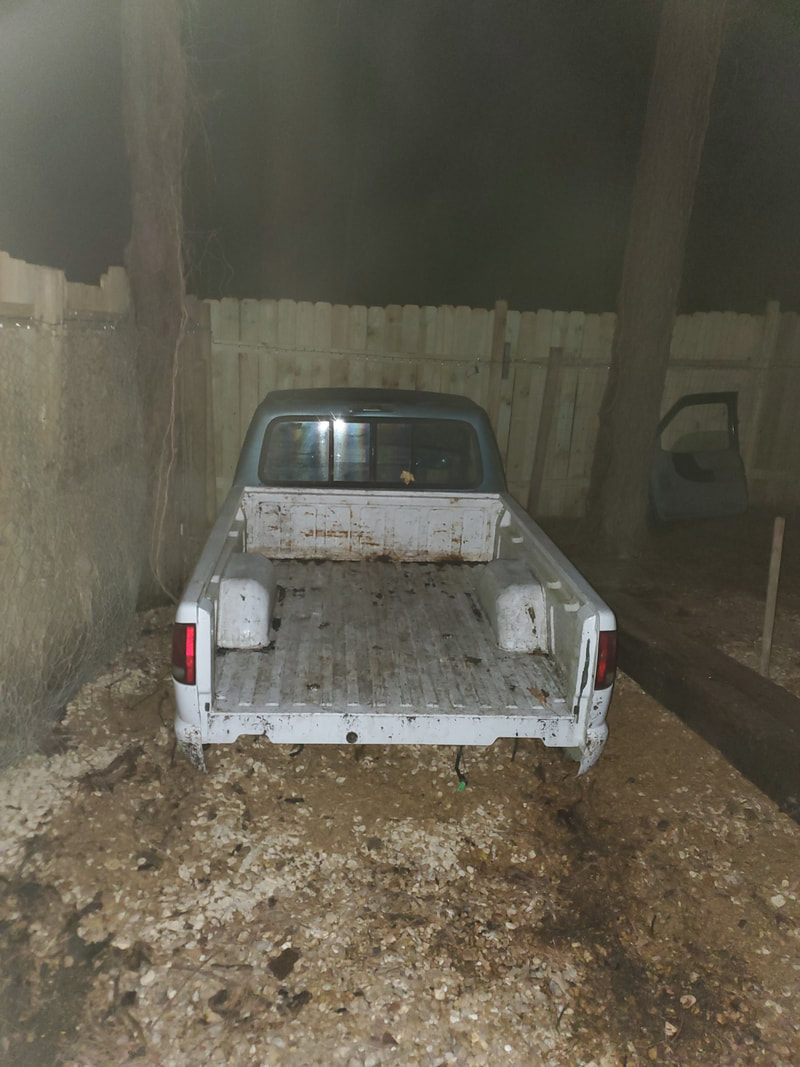 Shot from the back showing perfect line up of cab and bed. After getting the two bodies attached my first order of business will be to take some corrugated sheet metal and use self tapping screws to make a panel/cover for the dirver's side door opening. From there I'll re-attach the passenger side door. Next will be cutting a hole through the front of the bed and into the back of the cab. This project will come together pretty fast like the Toyota Chicken Truck did. I have some other ideas for improving the overall design and function of this coop as well as improving the other car coops as well. Stay tuned for more. |
