|
When I was working on the 51 Chevy trying to break the wheels free so they can free spin in order for me to move the truck, I ran across an old hubcap. There were a couple of aftermarket rims on the back of the truck, a regular steel rim on the left front and a stock rim on the right front that had clips to hold the hubcaps that would've come on this truck from the factory. This one wheel had one of those hubcaps but it was pretty rusty and pitted with a fair dent across it. It was still solid however and still had the Chevrolet inscription on the metal. I couldn't possibly scrap this and had figured I could do something with this on the artistic side of things. My first plan was to turn it into some form of wall art, or something that could be hung in a "Man cave" type garage, who knows. But first I would have to prep this thing. 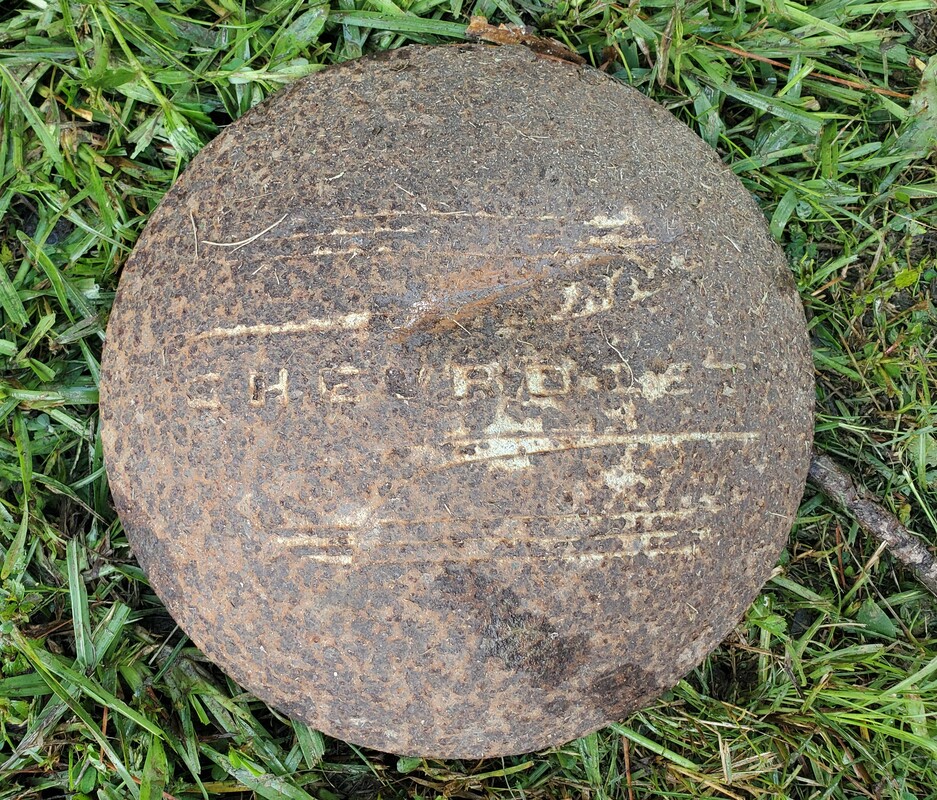 Old hubcap after pulling from rim. The first thing I did was utilize a wire wheel on a drill to scrape as much surface rust from the hubcap as I could. Since there was no way to reverse the pitting of the metal, the best I could hope for was to at least get the metal cleaned up enough that it would hold paint since I had decided to spray the hubcap with some leftover gold paint I had laying around. After a good scraping I got the cap down as good as it was going to get. Out came the spray paint. 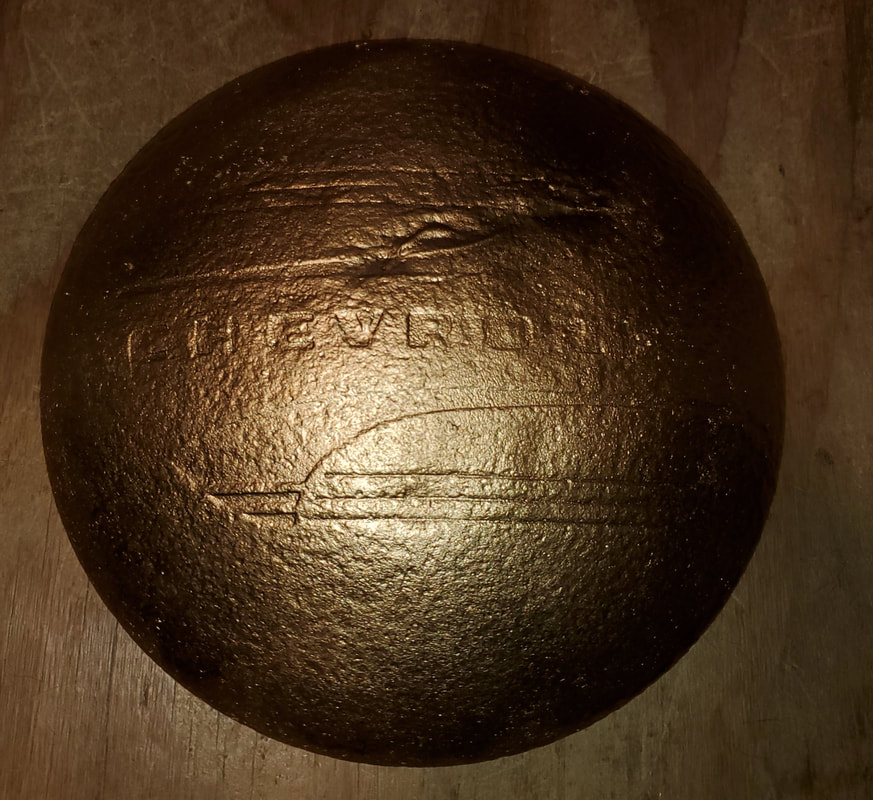 Hubcap after spraying with the gold paint. After getting the hubcap sprayed pretty good and letting it sit overnight to ensure that the paint was well set, I showed the thing to a friend and he made the suggestion to paint the Chevrolet lettering with some black paint. After agreeing to that idea I also thought about the other design patterns around the wording and came up with an add on to the whole design. I decided to incorporate the good ole' American colors of red white and blue in the rest of the design around the Chevrolet word to make an overall complete design with the multiple colors. I took my time with some modeling paint brushes and carefully worked modeling paint into the letters then into the grooves of the design on the cap. Taking time to do double coats to ensure good coverage over the gold painted pitted metal, I was able to get the surface all painted up nicely like I wanted. 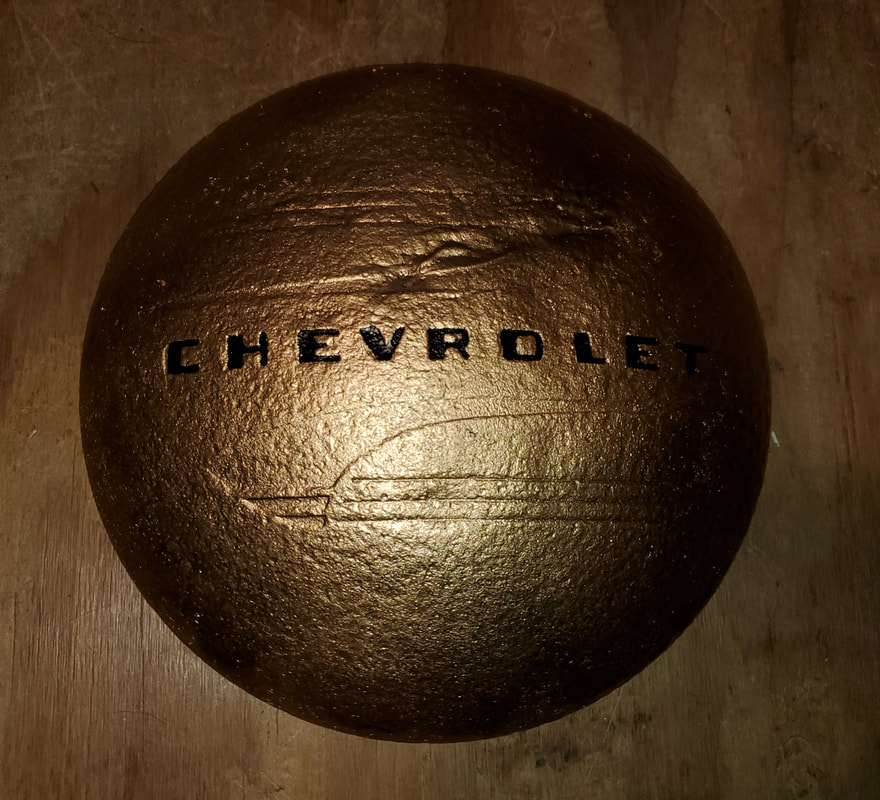 Surface of hubcap after painting the lettering with black modeling paint. The style of the lettering puts you in the mind of that futuristic 80's styling of lettering like what you'd see on some computer designed print. 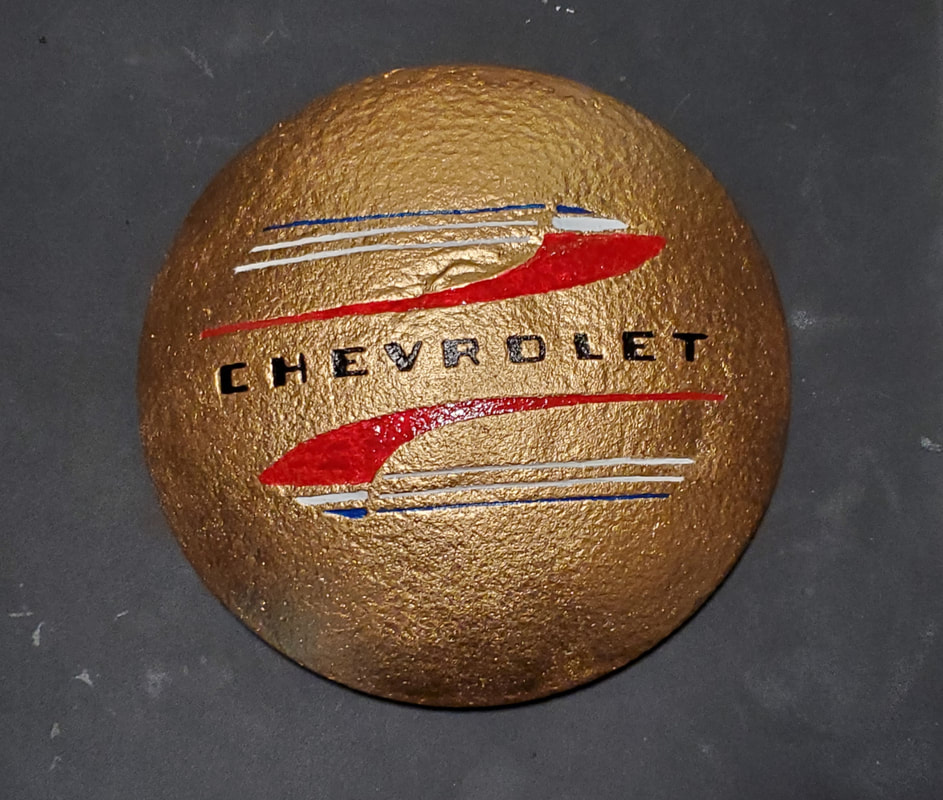 The finished product with the red white and blue in the groves of the design of the hubcap. Overall the art project turned out pretty good. Now again I'm still caught up between making this some type of wall piece or maybe even incorporating this painted hubcap in the interior of the 51 Chevy when I start putting things together on it since that would kind of add to the "rat rod" aspect of the truck, especially if I can manage to keep most of the patina of the body even after repairing the body in the places it needs it. Just being able to put things like this on the inside will make the vehicle more entertaining to drive when you can look at pieces inside knowing that you actually made these pieces custom for the vehicle. Not to mention it would add to the show quality or uniqueness of the vehicle when people can see something that is indeed one of a kind since there won't be another vehicle with the same appearance inside, much less the outside. After this, I may want to take a stab at trying some other automotive art, like welding up sculptures with old car parts....
0 Comments
A good while ago we had attempted to play with this Coleman go kart that we picked up from a friend. We were able to ride around for a short while, going through the grass and over the gravel, despite its apparent slow speed, all things considered. After a while, we started smelling rubber burning and before we knew it, the drive belt shredded and fell apart. That ended the fun for that day, and for the next year almost.
I finally decided to start getting the parts needed to get this machine back online so we can be able to use it for both recreation and utility, since having a motor vehicle can be useful for going up and down between the house and the garage or even down to the main road if need be. I started off with the drive belt. 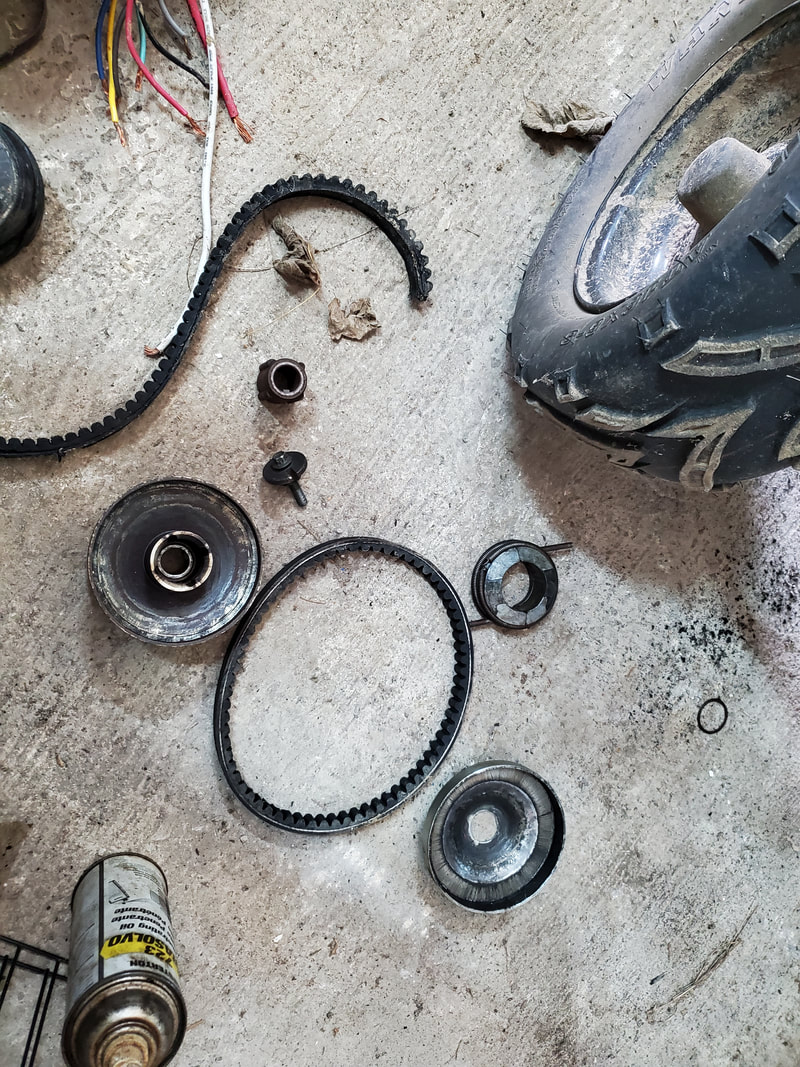
Broken belt, new belt and broken clutch from go kart.
After trying to put the belt on and run the machine we ended up finding out that part of the torque converter assembly, which consists of two separate clutches, was failing. The portion on the motor, which changes RPM obviously, has a variable width pulley that closes in on the belt as the RPM's ramp up, putting pressure on the belt, giving it the grip to drive the go kart forward. This clutch was not moving in and out like it was supposed to, it needed replacing. So back to the drawing board. I ordered the two clutches, so just in case the other one turns out to be faulty, at least I can say I have both parts to the torque converter system so we won't have any delays again. 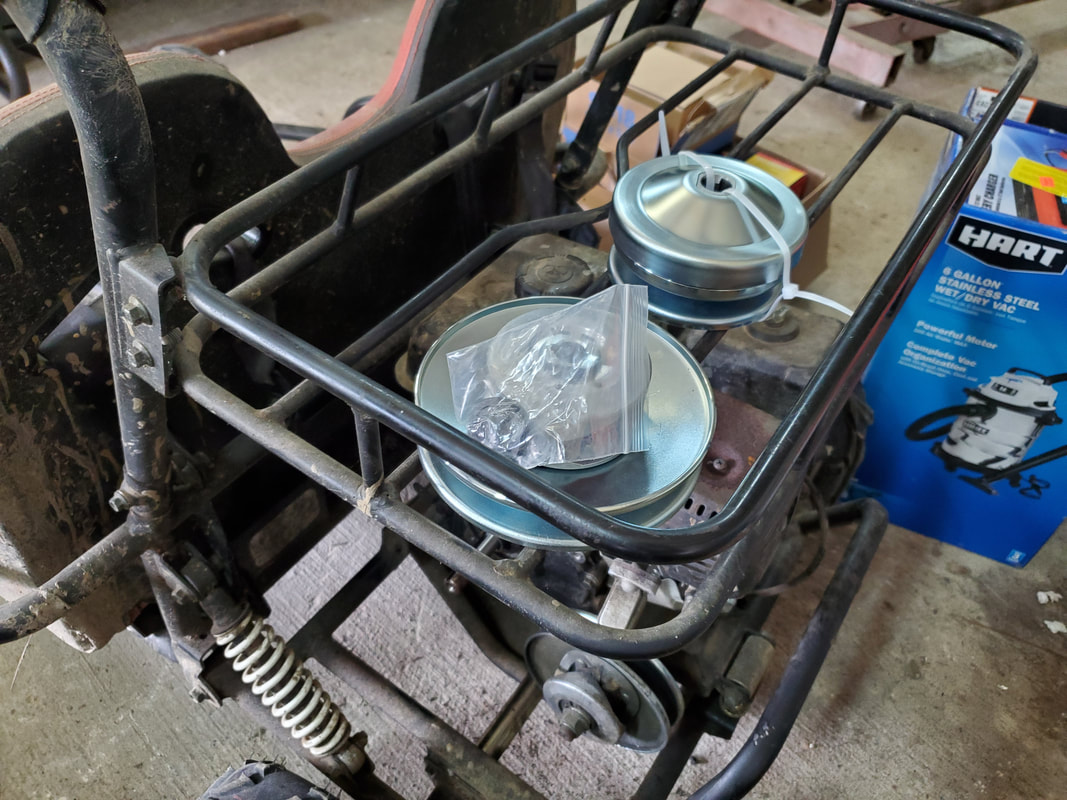
Replacement clutches on back of go kart.
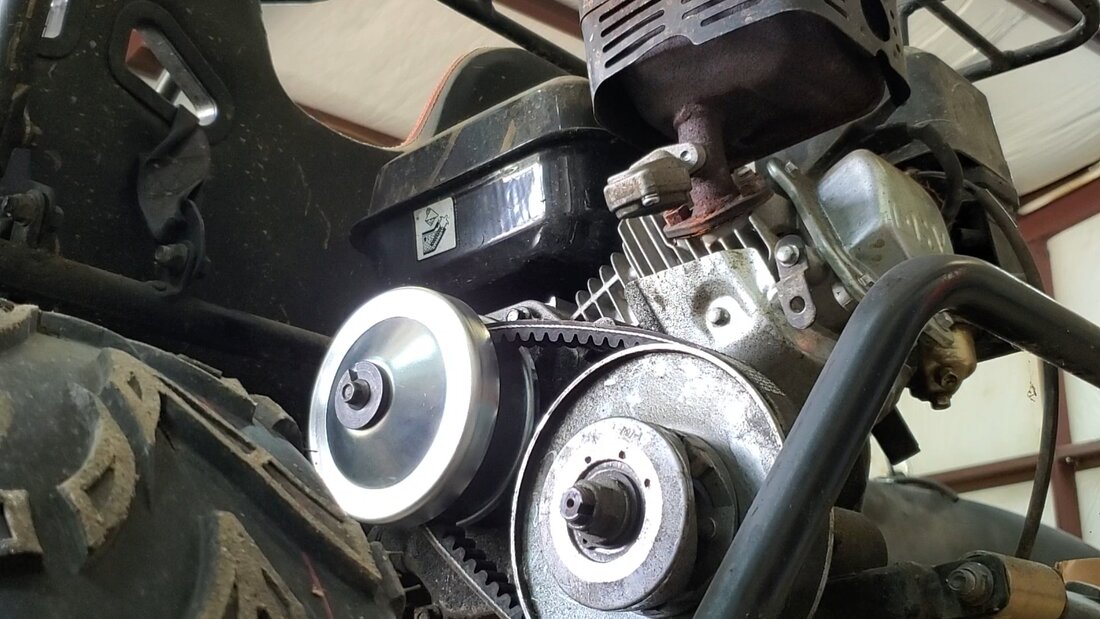
Installation of the clutch was pretty straightforward. The clutch comes apart into several pieces but the main pieces that I needed to focus on were the two halves that squeeze against the belt on either side. The inner half of the clutch looks like a simple half of a pulley with a standard hub with integrated key. This was slid on the engine shaft first. From there I placed the belt on the gearbox clutch and over the engine shaft, onto the stubby shaft of the inner portion of the clutch. From there I put the whole outer half, which consists of the spring/weights inside a drum that push out to move the other half of the pulley against the outside of the belt to engage it. Lastly there was a thick retaining washer piece with a key end to engage the keyway on the engine shaft and go into the hub of the clutch, mating to the end of the engine shaft. A simple bolt held the washer against the end of the engine shaft. 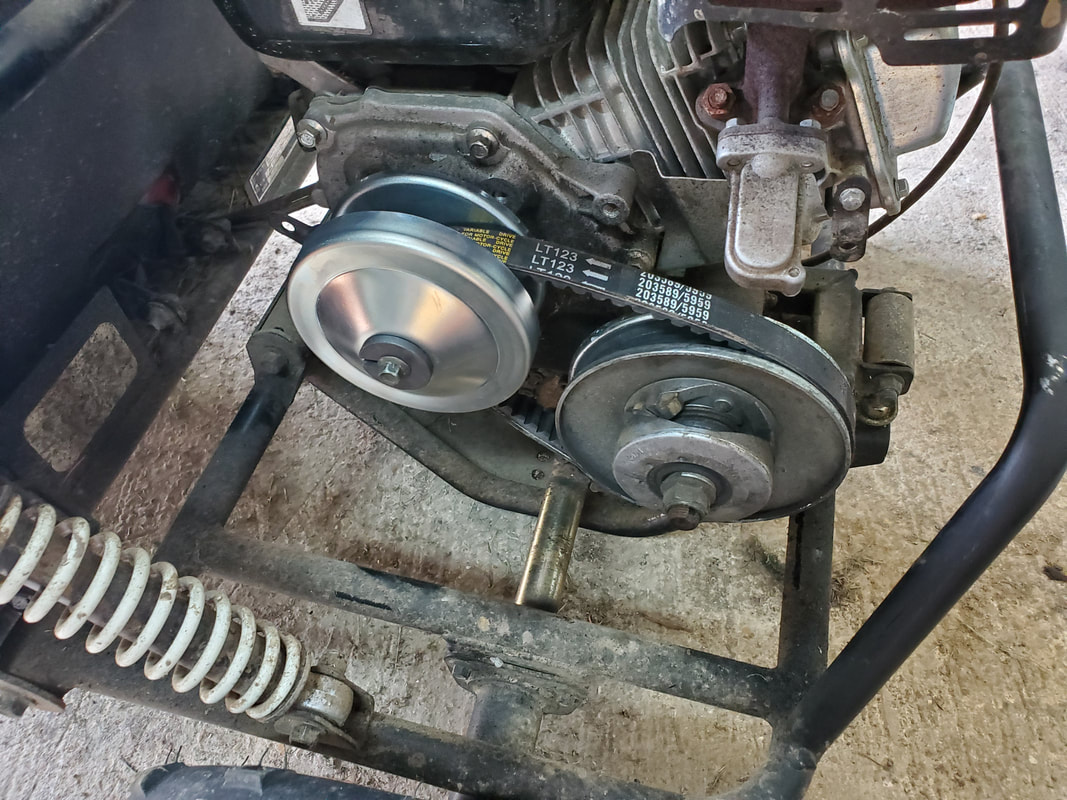
Engine clutch assembled with new belt, ready to test.
Another angle of the torque converter assembly, showing how the belt is slack in the standby position. Note retaining washer bolted in place to hold clutch to engine shaft.
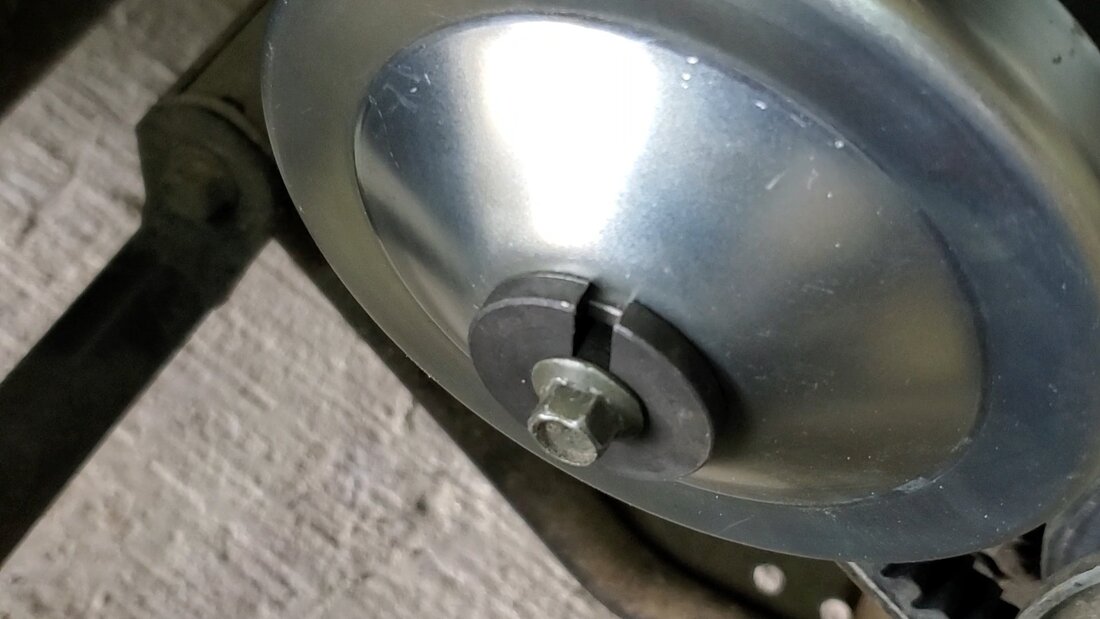
Closeup of retaining washer holding clutch to engine shaft.
With the whole torque converter assembly put back together on the go kart it was time to fire the engine up. After setting the choke and turning the ignition switch on, I fired the engine up. After letting the engine warm up a bit, I worked the throttle real quick to see how the clutch worked and it quickly grabbed the belt, wanting to launch the go kart forward. With that apparent success I moved some stuff out of the way and staged the go kart at the driveway to do a test ride. 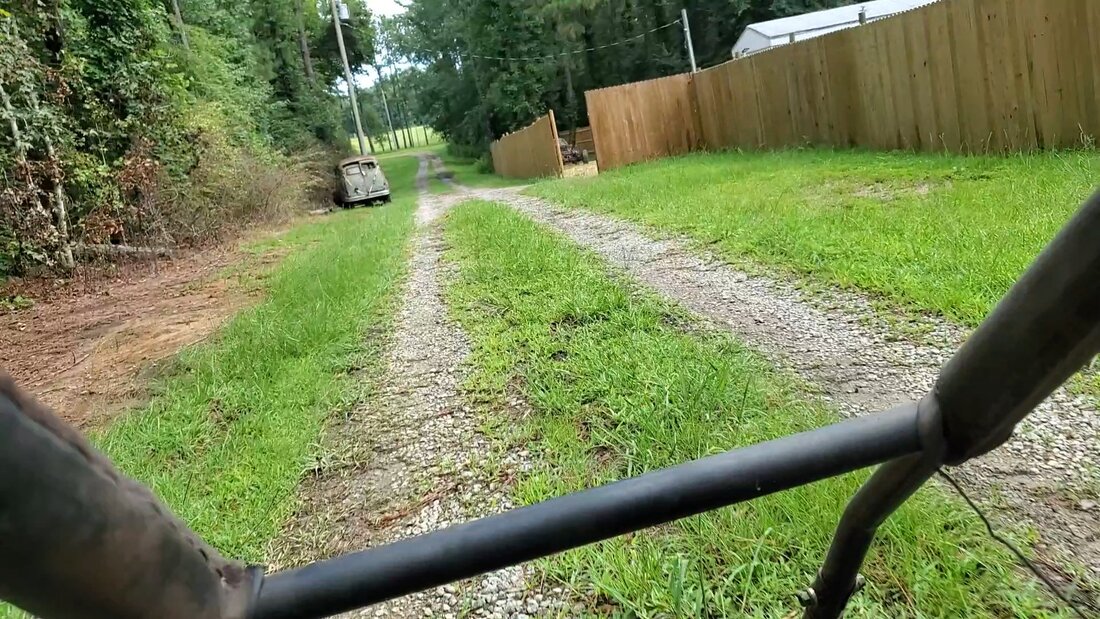
Riding down the driveway in the go kart.
I hopped in and hit the throttle and the torque converter did its job, engaging the belt tightly and dragging the go kart forward. The speed wasn't really the best in my opinion, I felt it had more to it but I remember the friend who had it said he did something to the throttle to govern it to a slower speed for his kids to use, this was never addressed but either way, I just continued driving along the driveway at a cruising speed, letting the go kart pull along. After passing the ole lady who was just coming back from doing a tire run for me, and the dog who was eager to see her, I continued on down to the beginning of the main driveway. It was around this point the engine started surging then sputtering before it completely petered out. I got out and tried to restart to no avail. I worked the choke and the throttle and could not get the damn thing to stay running. I ended up putting the thing on 3/4 choke to get it to where it would start up and stay running and by that time the ole lady came down saying I was too heavy for the go kart because it appeared to have been dragging ass the whole way down. Well whatever, I still feel there's an issue with the carburetor on this engine that is main problem. Either way she forced herself into the go kart's driver seat and took off, if you can call it that, going back up to the garage. 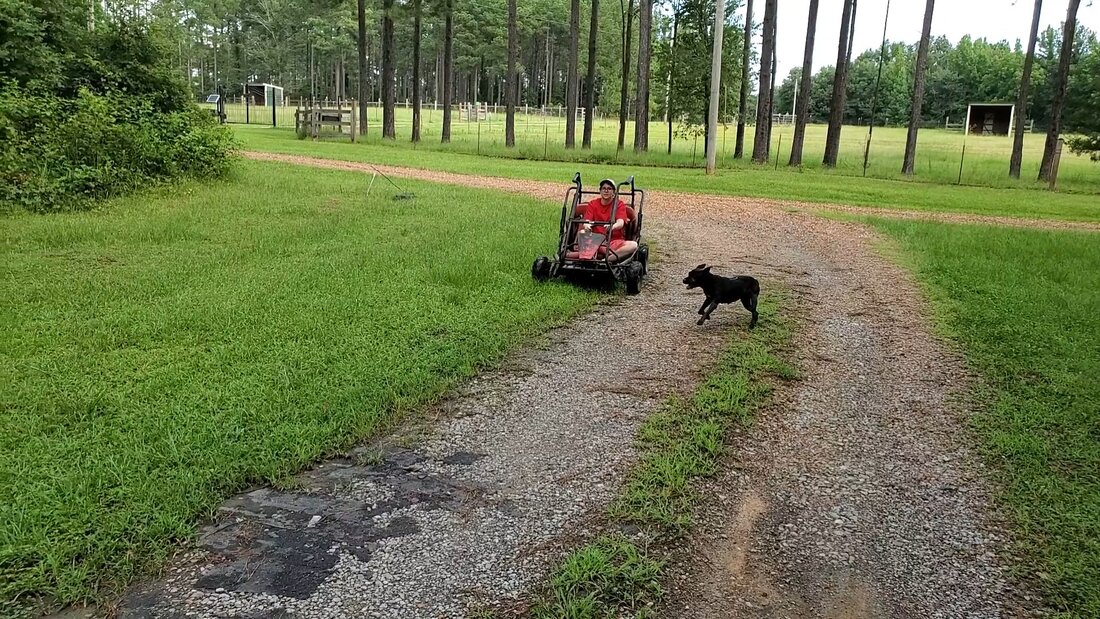
I've just been kart jacked!
As stated the carburetor was acting goofy in that it sputtered out, whether from not getting proper fuel flow or because there's bad gas in the unit or even water in the unit. I had problems with this carb before when we tried to use the machine but after it sat this long I'm sure its even more compromised, despite the go kart sitting in the garage for a long time. 
Making the drive of shame back up to the garage after ole lady returned kart so I can help push it back into its parking place.
The biggest thing I have to look at is the fact that the torque converter did indeed work. It grabbed and it drove the go kart, even with my big ass, down the driveway and took the ole lady back up the driveway. The only thing is the carburetor. Just like the generators that we recently repaired, the carburetors aren't too ridiculously expensive so I will be able to get one more sooner than later and at this time I can also address whatever it was our friend did with the throttle and/or carb to slow down the maximum engine RPM in order to tap into this engine's full potential and be able to really ride this thing when we get it back on the road. In the meantime the go kart is parked right back where we had it, still needing just a little more work.
With only one side remaining open on the shelves of the greenhouse, I had to figure out what I would want to fill them up with. I could've repeated the same thing with more bucket beds or even more hydroponic assemblies but I figured it would be better to use the third form of raised bed I've been using around the garden and that is the drum bed. As you've seen in past posts, the drum beds consist of a plastic drum cut in half the long way and the two halves being used as raised beds, suspended by a wooden table. In the case of our shelf in the greenhouse, the space is large enough to accommodate the two halves of a 55 gallon plastic drum I happen to have laying around. I would have to add some wood around the drum halves to better secure the drum beds and fill in any gaps that may remain in the base shelf, which is fine, I was just happy that the drum halves actually fit in the opening. So the first thing was chopping the drum in half. 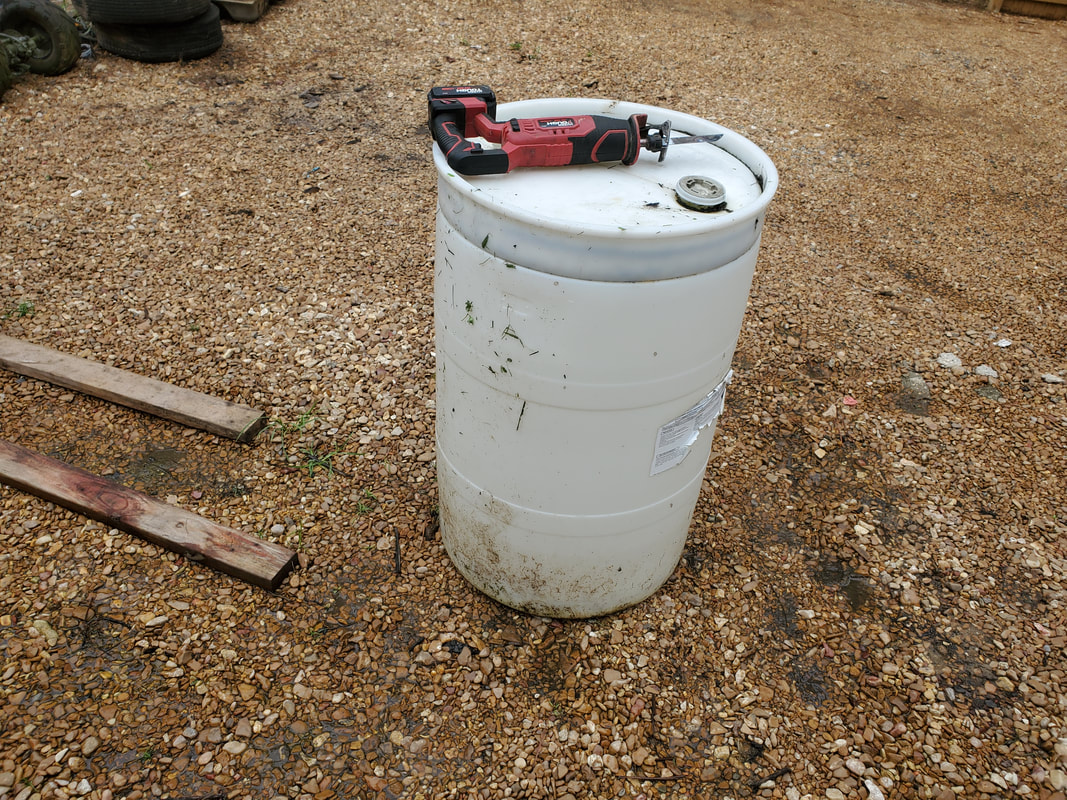 55 gallon drum to be sacrificed for two more drum beds. 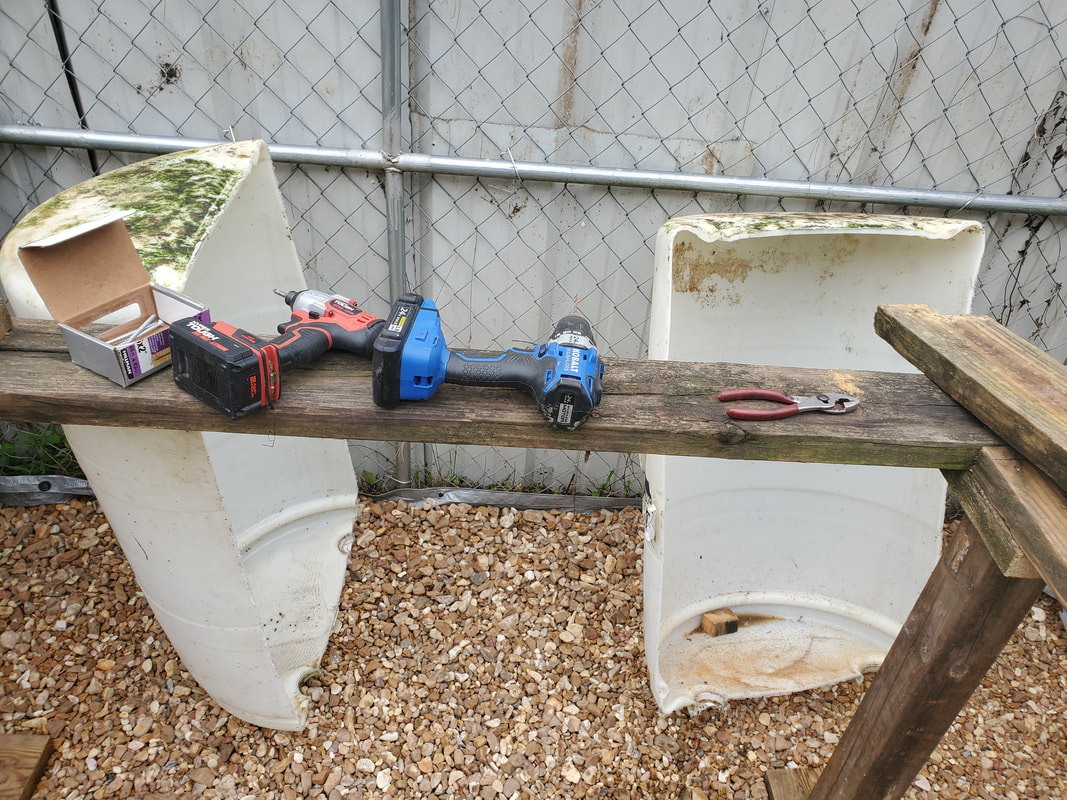 Drum halves staged in opening of shelf to greenhouse. With the drum halves staged in the opening in the greenhouse, the first thing I did was cut and put together a support board to go on the end, in the corner where the short shelf meets the open shelf. This board was made up from another piece of 2x6. Because of how the wall sections mated together, it created a joint that would not allow the end of the board to meet completely flush. I had to cut a notch out of part of the end of the board so the end would "wrap" around the joint where the two wall panels join together. Also, because the side of the board would have to sit on the horizontal tube of one of the wall frames, I couldn't use a full 2x6 board for a tie board underneath. I had to cut a piece of 2x4 and attach it to the opposite side of the 2x6 so when I set the board on the horizontal tubes of the wall frames, it would fit in place and still allow the smaller tie board to go underneath the shelf boards. After doing these preparations with the board, everything fit together rather well. I secured everything with screws then moved on to hang one of the drum halves. 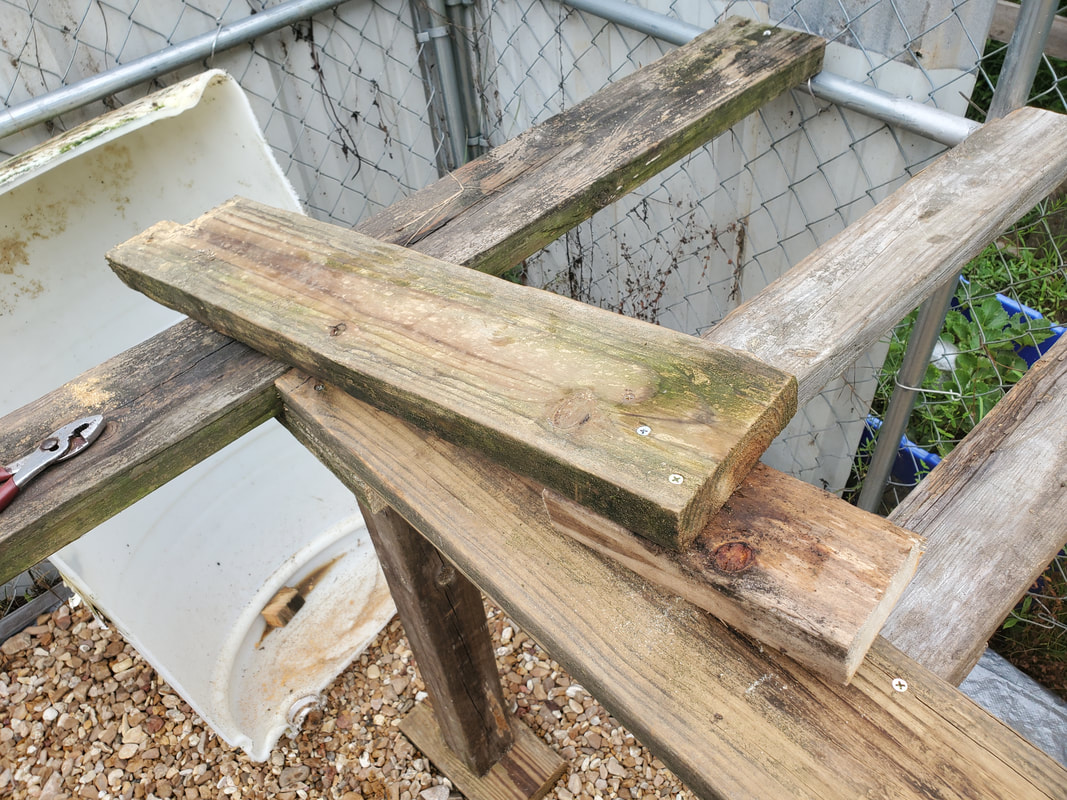 2x6 support board with smaller tie board attached and notch on end of board, ready for install. To help make this a little easier I prepared several screws with washers and partially drove them into the top lip of the drum half so once I got the drum half where I wanted it I can just put the impact driver in place and finish driving the screws all the way in. With some finesse, I got the drum half in place where I wanted and drove several screws in to hold the drum half at the end mating to the previous board I put in as well as the main shelf board. This was more than enough to hold the drum half in place while I get some more wood in place. 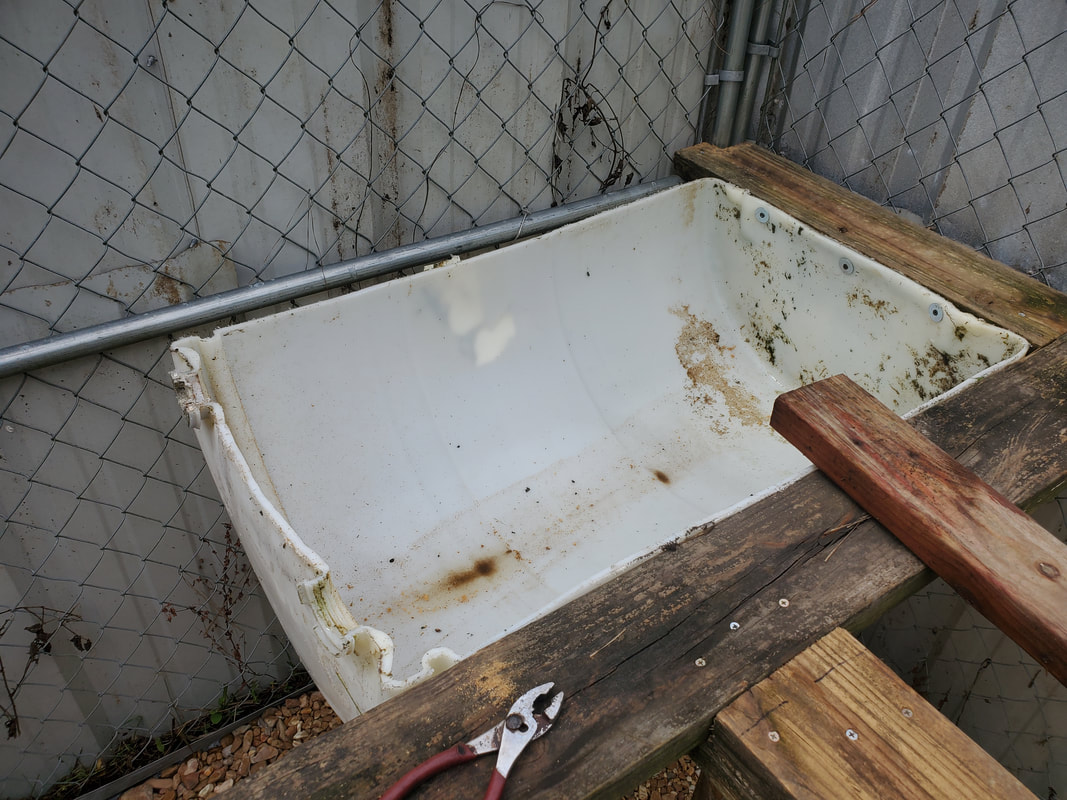 Drum half secured in place on two sides. 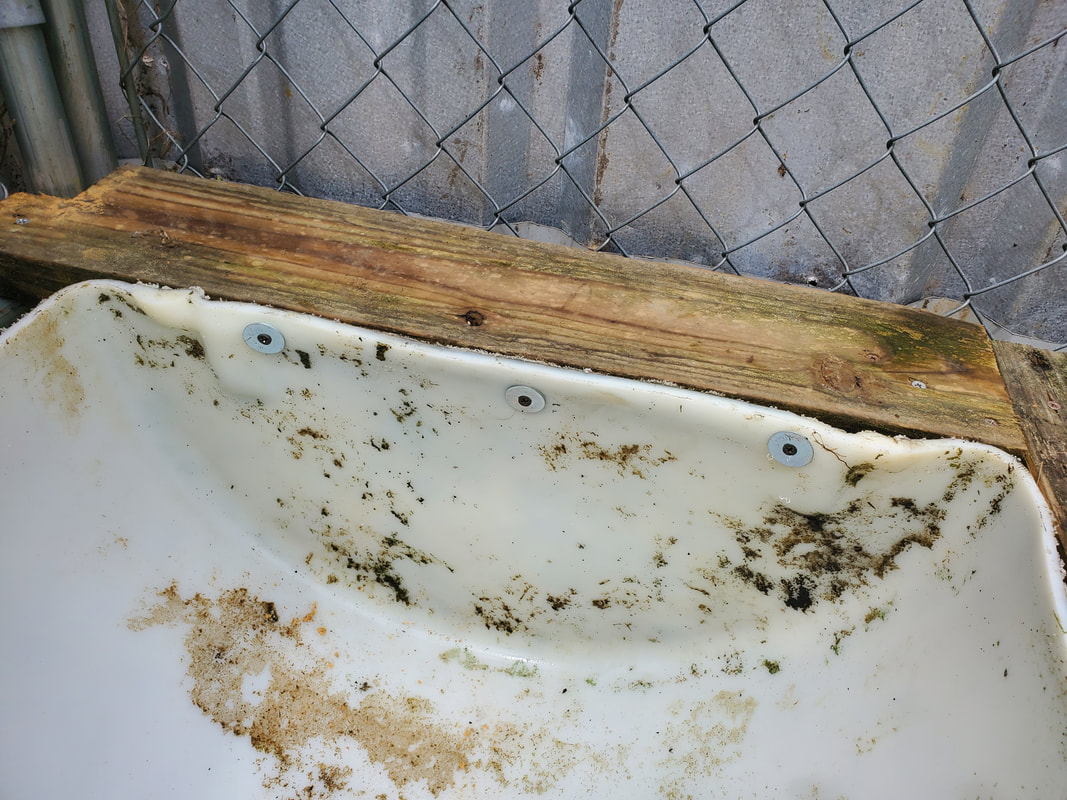 Closeup of wood screws with washers used to secure drum half to boards. For the board that would amount to a divider/support board, going between the two drum halves, I decided to use a salvaged piece of 2x10 board from the scrap pile. This piece even happened to be just long enough that after I cut the excess from the board, I had enough for a tie board on the end of the large board. After assembling this support board I put it in place, securing it to the main shelf board, drilling a hole through the other end and into the wall frame tube to secure the board there, and securing the drum half against this newly installed board. With that, I had the drum half secured on three sides, I still had to put a board on the wall side of the drum half, which would also involve securing the board to the newly added wood as well as securing the drum half to that piece of wood. 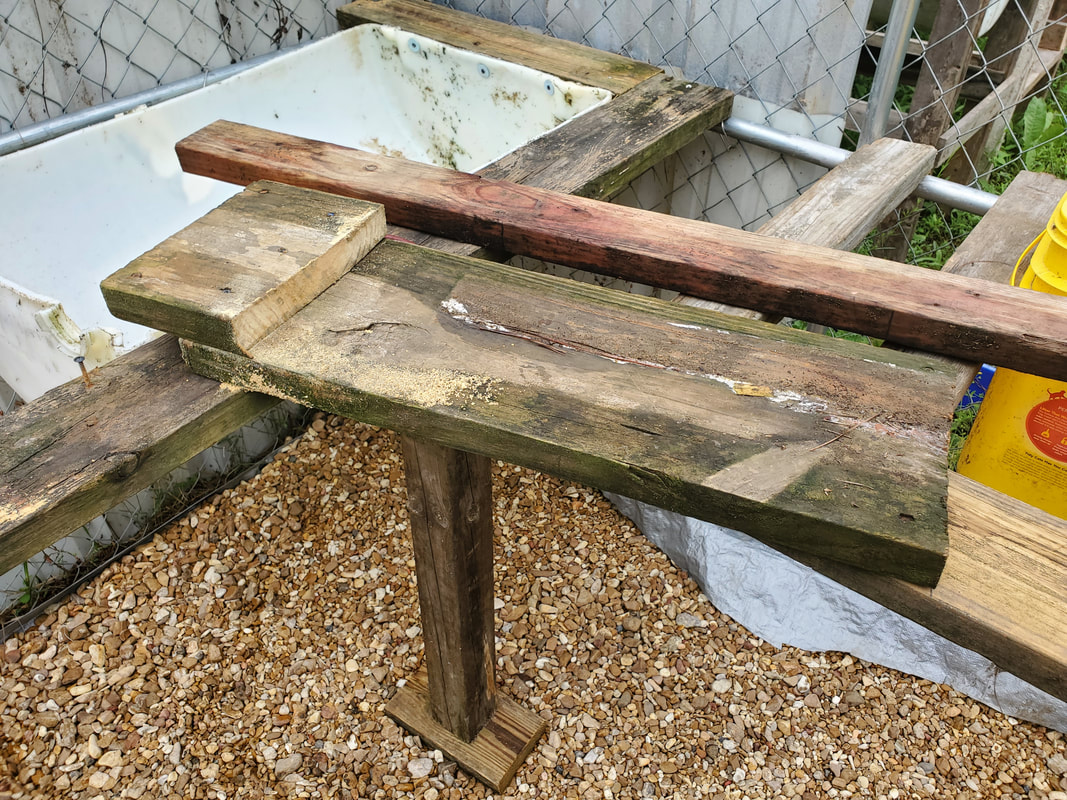 2x10 divider board with tie board put together to go on end of first drum half and provide an anchor point for second drum half. I ended up keeping things simple for this board. After cutting a piece of 2x4 (which conveniently fit like a glove in this cavity), I took some straight braces and attached them to both ends of the 2x4 then after putting the board in place, secured the whole works with screws to the braces to hold the board to the divider board and the end board on the other side of the drum half. With that board in place I finished up the drum half with more wood screws with washers. From there I moved on and got the second drum half hung the same way I started off the first drum half, by securing the piece on two sides with screw/washers partially screwed in prior to putting the drum half up to the shelf. 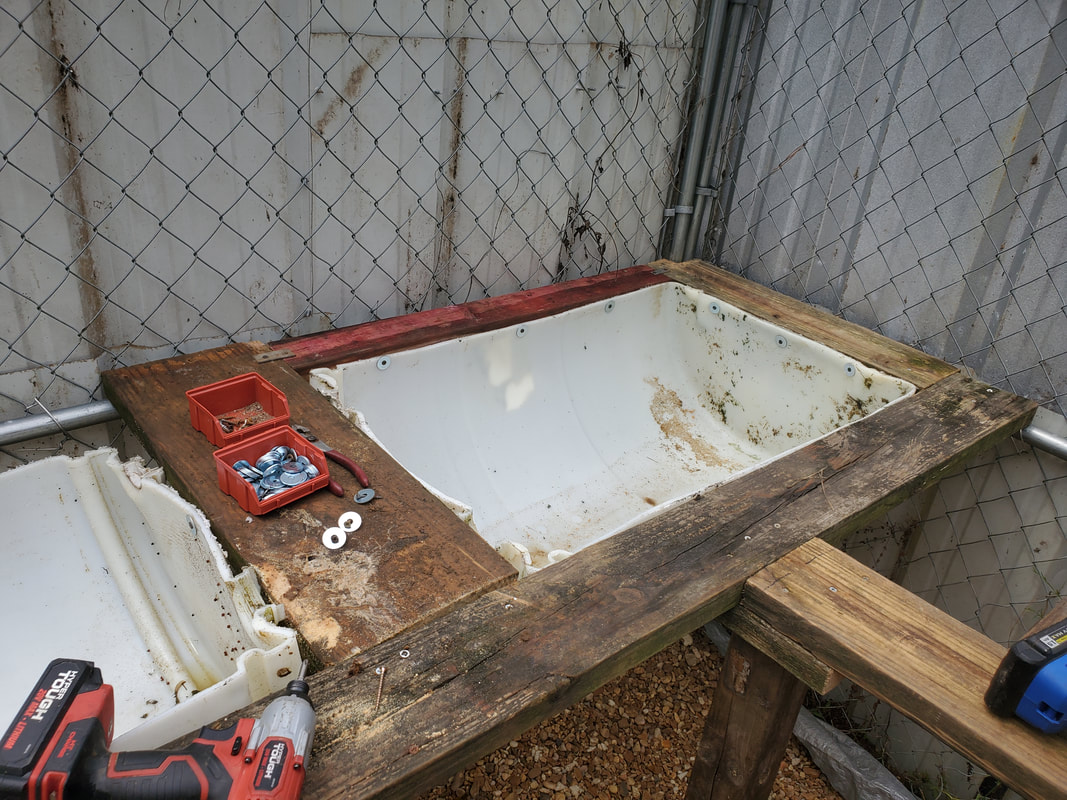 Divider board in place with second drum half attached as was the case with the first. Now this is where using what I have available comes into play. For the boards that I would use on the other end of the drum half and the wall side of the drum half, I couldn't do the typical tie board setup like I had been doing previously. Other tie boards from the boards of the shelving setup more or less were in the way, so I would have to use some braces like I did on the last board for the first drum half, only problem is I didn't have any more straight braces. So the next best thing I found to use were some funny brackets that are used when building wood frame structures like sheds or porches. These brackets fasten to one board by themselves, then you place the other board inside the bracket, which has tabs with more holes to allow you to secure the added board to the bracket, making a flush mount where the two boards meet one another. I had several such brackets that were salvaged from the old porch I tore down a while back so I pressed some of these brackets into service to hold the end support board on the second drum half as well as the wall side support board for the same drum half. 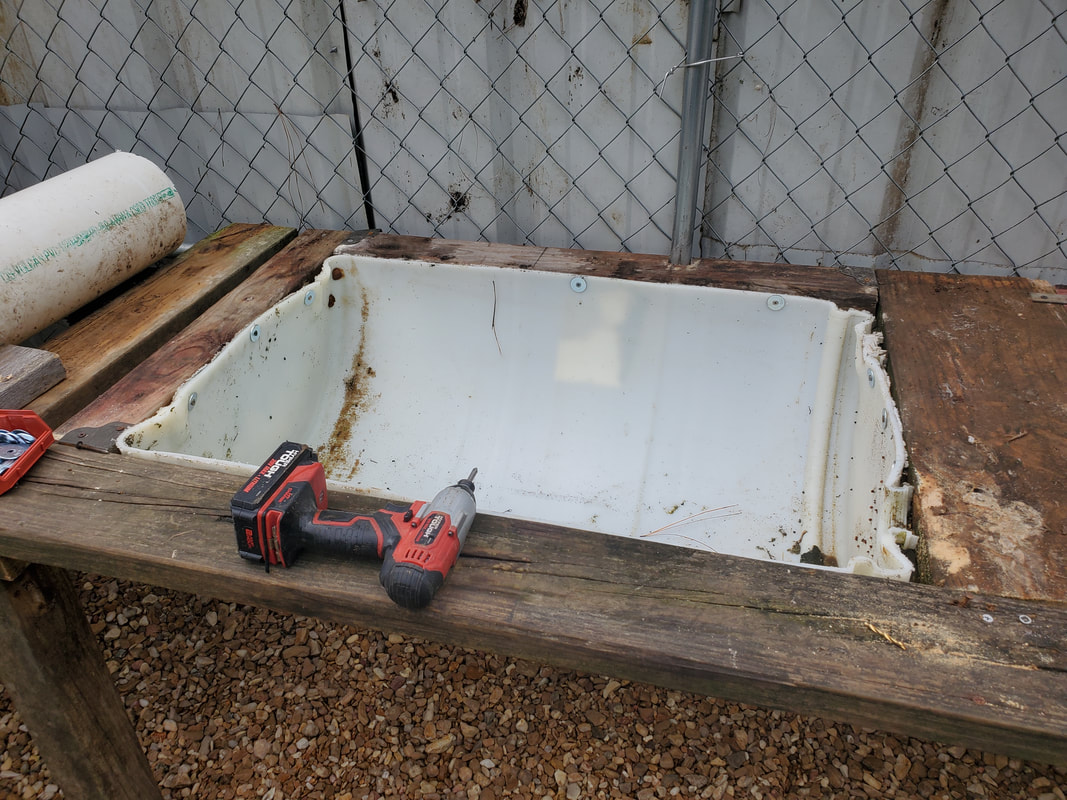 End support board in place with drum half fully secured within its cradle, note the brown brackets used on the end board. I used a couple more braces for the wall side board to hold it in place just as well. Since this board did meet up against the central vertical portion of tubing in the wall frame, I had to cut a notch in the board to allow the board to fit around that section of tubing. After securing the board to the brackets I drilled and applied one wood screw to hold the board to the horizontal tube on the wall frame. From there I finished things up with more wood screws and washers for the remaining two sides of the drum half to fully secure the piece within the shelf, along side its sister drum half. 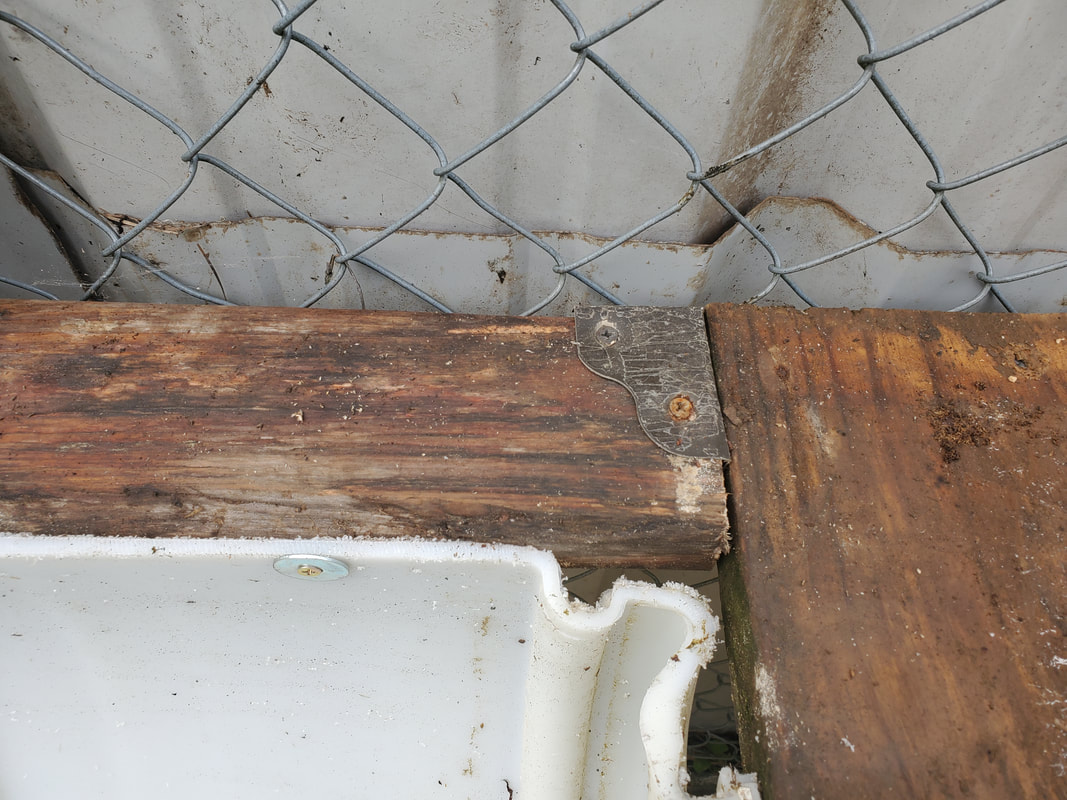 Closeup of bracket used to mate end of support board to divider board. 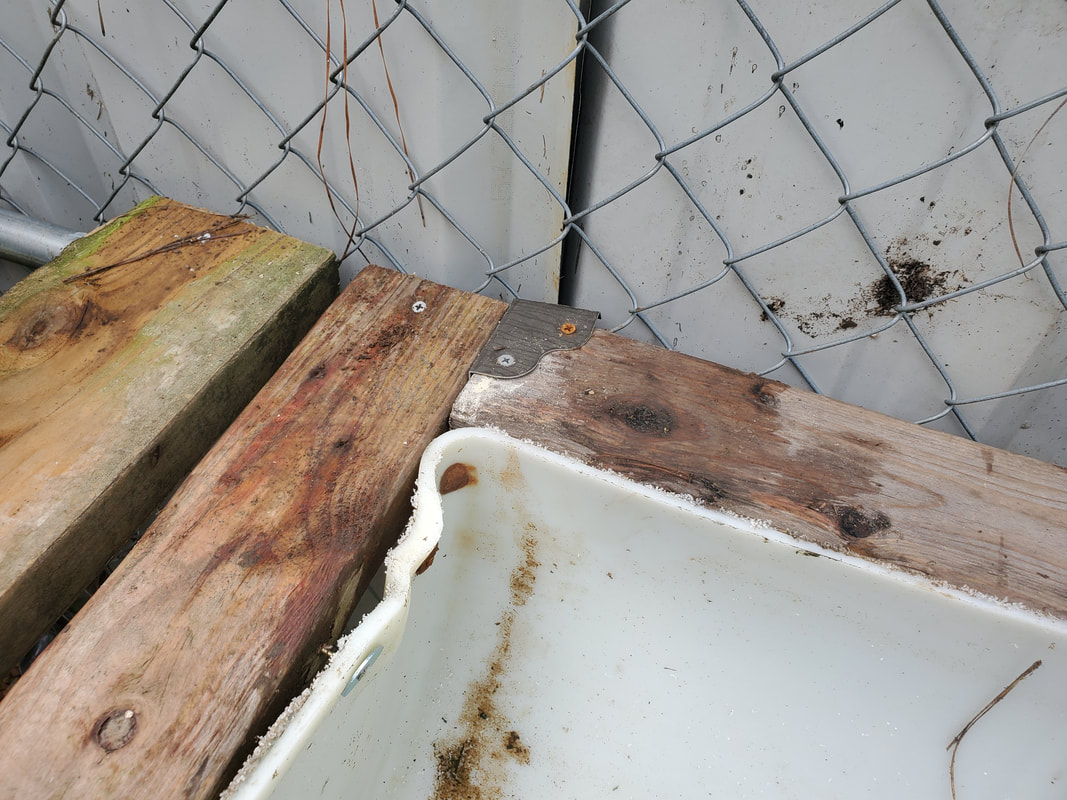 Other end/corner bracket in place to hold wall mount support board in place, note single deck screw holding end of end board to wall frame tube. With all the shelves accommodated with some form of raised bed garden assembly, now I can move on to some more intricate work. I still have to do more finish work on the 6" pipe hydroponic garden setup. Large holes have to be cut along the pipes for the cups and holes need to be drilled and tapped for pipe fittings so I can get the drain pipe manifold set up between all the hydroponic gardens as well as a pipe line that would be feeding plant water to all four gardens. This will be the next order of business. One of the things that is keeping me from getting started with anything on the 51 Chevy is the simple fact that the wheels were frozen up all the way around. Obviously, being a vehicle over 70 years old, its expected, even though I'm sure this truck has been running more recently than 1951. Anyway, the tires on all four wheels are flat and despite one of the rims being off of the Chevy LUV. The ones that were on the 51 Chevy were pretty much destroyed so there was no possibility of saving them. Despite the wheels and rims they still need to be broken free. Since the truck is four wheel drum brake equipped, I'll have the sheer pleasure of beating the shit out of drums trying to free them up. Of course this will also involve liberal use of WD40 as well. 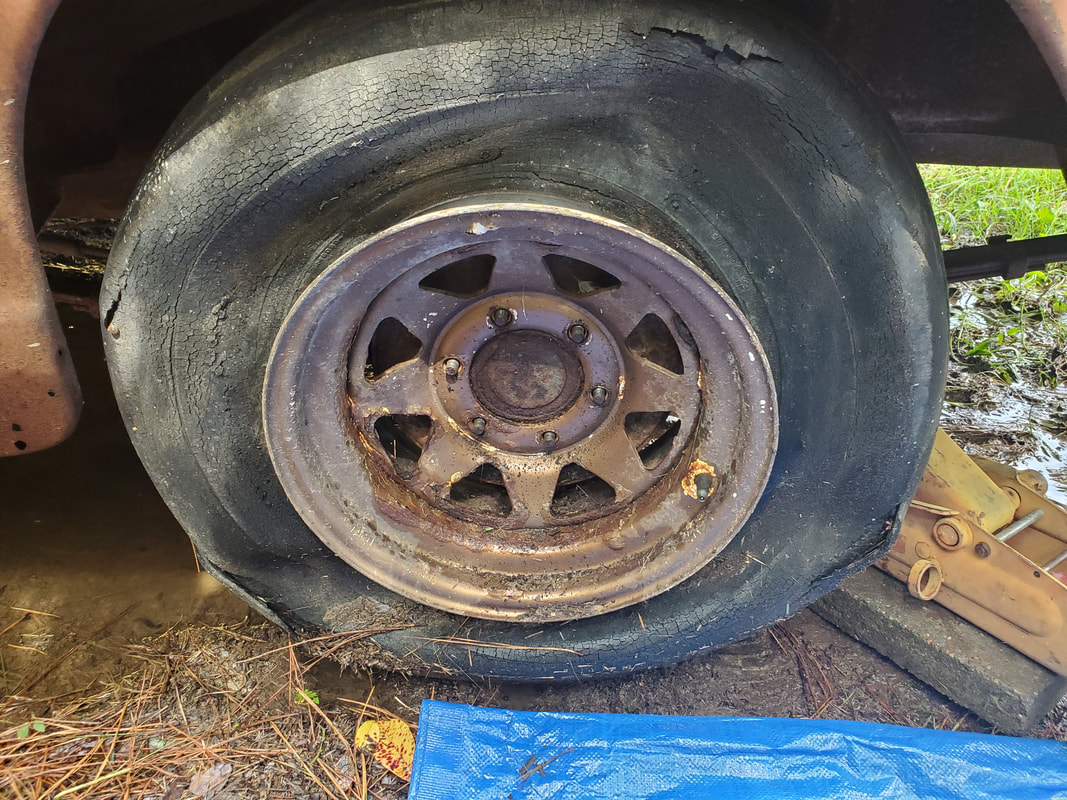 Old rim on left rear of truck, note degradation of tire and even the rim. Luckily the lug nuts on these wheels didn't give me any issue. The exception was the left rear rim, a couple of the lugs were rusted away enough that they were no longer 3/4" but one lug was able to have an 18mm socket hammered on and the other took a 16 mm. After hammering the sockets to the lugs, the impact wrench was able to quickly back the lugs off. 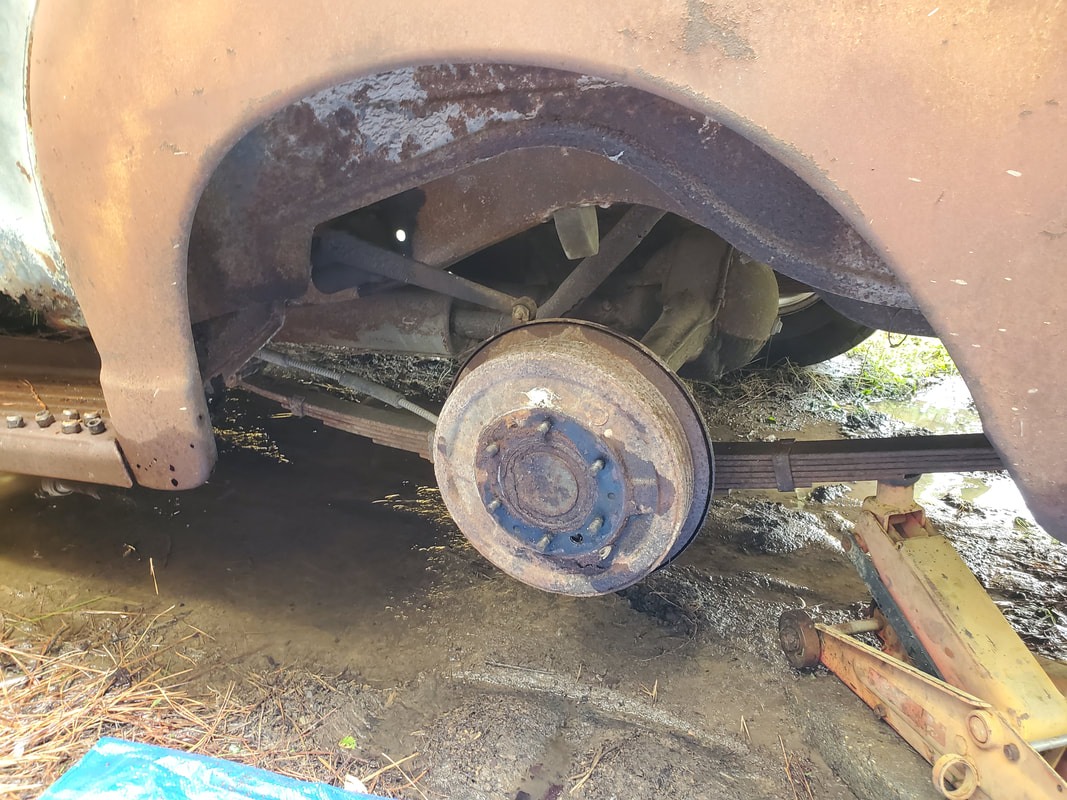 Brake drum wet with WD40 after pulling rim free. With the rim off, the fun began. I started working my way around the drum with the baby sledgehammer as well as a large flathead screwdriver, which was used to pry on the drum to help back it off the axle. After a while I had the drum backed off enough that I was able to get the crowbar in to put more leverage on the drum. After more beating I finally got the drum off. Now the thing I determined was that I would have to remove the old brake shoe and associated hardware so when I put the tire on without the drum in the case of the rear brakes, there will be nothing to possibly freeze up again in the future. In the case of this wheel, the spring to the shoes was broken so the top portion came loose, there was just a matter of removing the retaining clip holding the peg that held the bottom of the shoes in place. 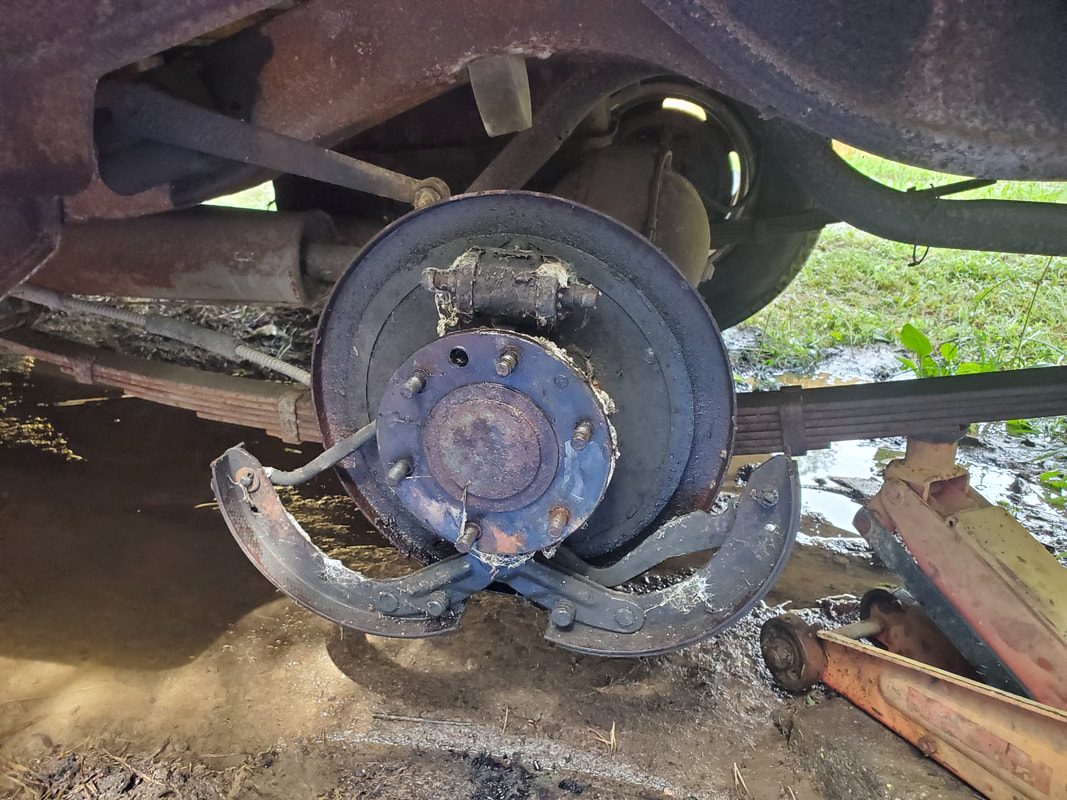 Brake shoes held in place by peg at bottom of assembly. 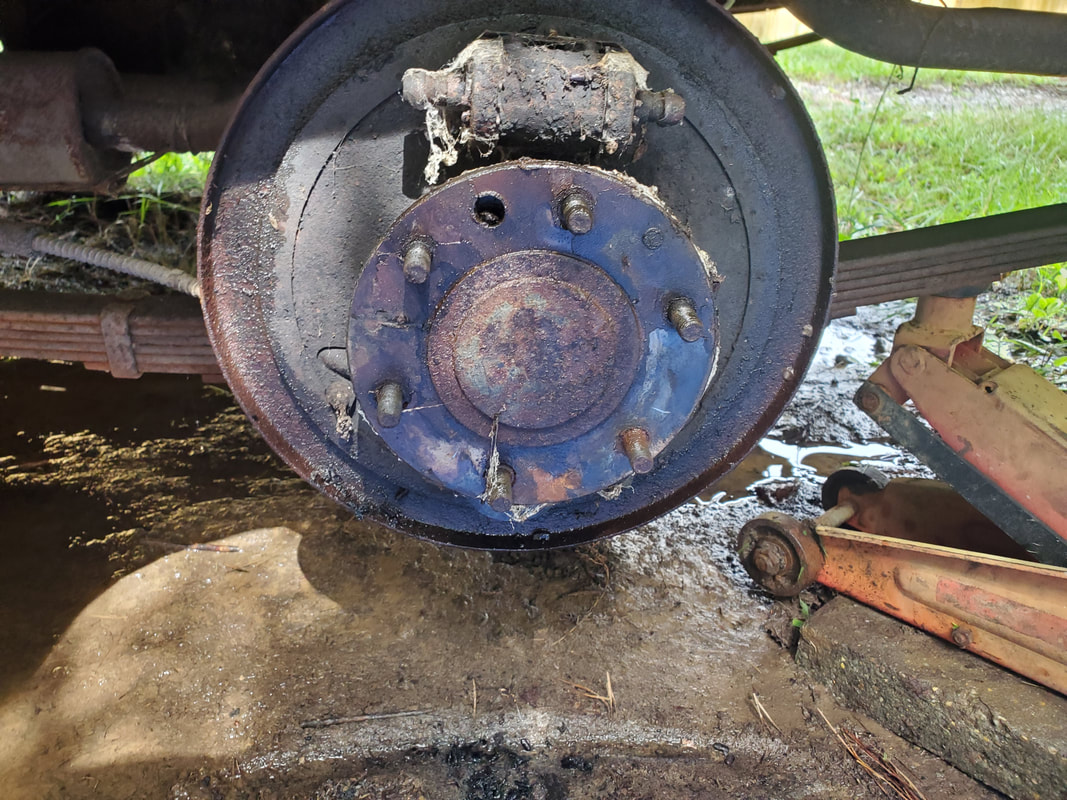 Axle assembly after removing brake hardware. 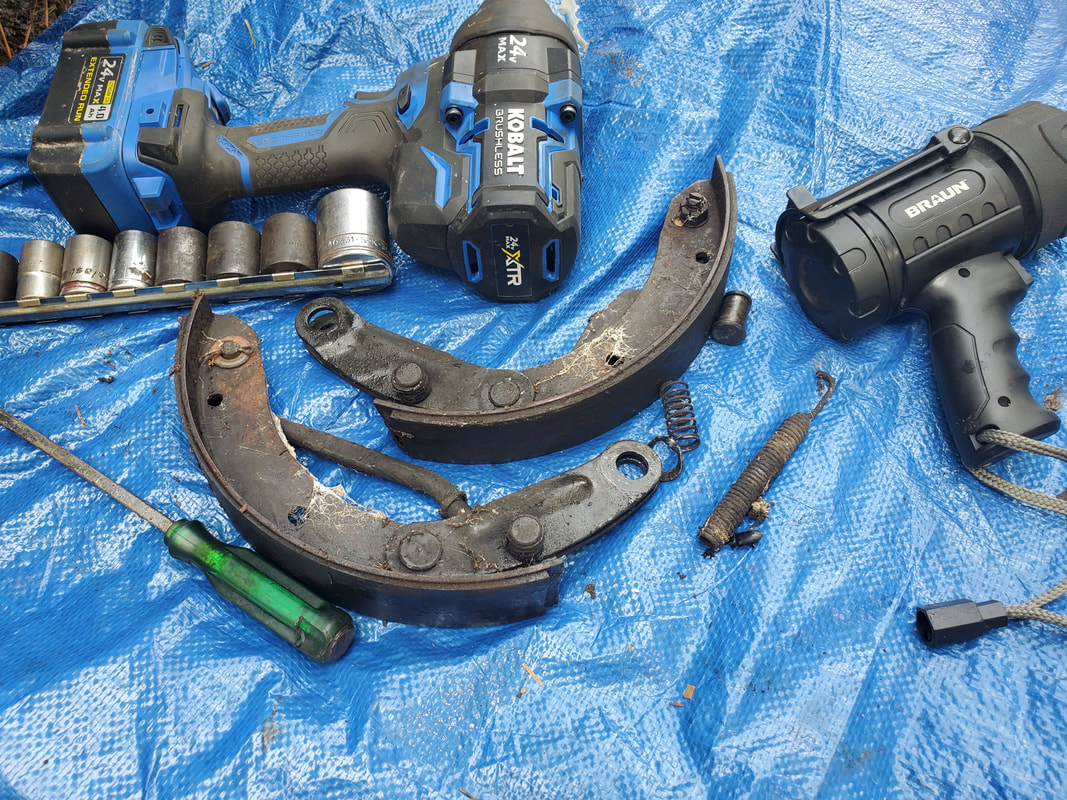 Brake hardware removed from axle assembly. With the hardware removed I was able to put the replacement rim/tire on the hub. We managed to get a trio of 16" Toyota truck rims with tires on them from a friend of ours who didn't need them. The 6 lug rims are the same bolt pattern for the Toyota truck as they are for the Chevy truck. I put the wheel on and moved on to the right side, repeating the same fun on that side before being able to get the wheel on. 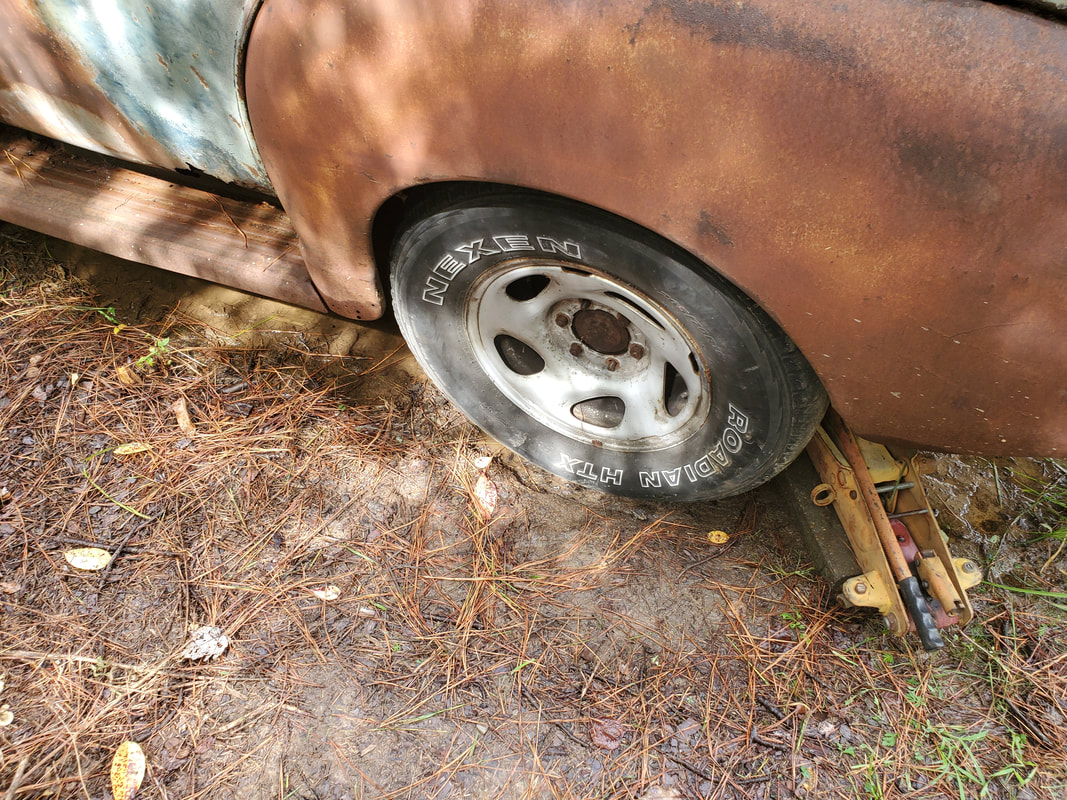 Toyota rim/tire installed on Chevy. 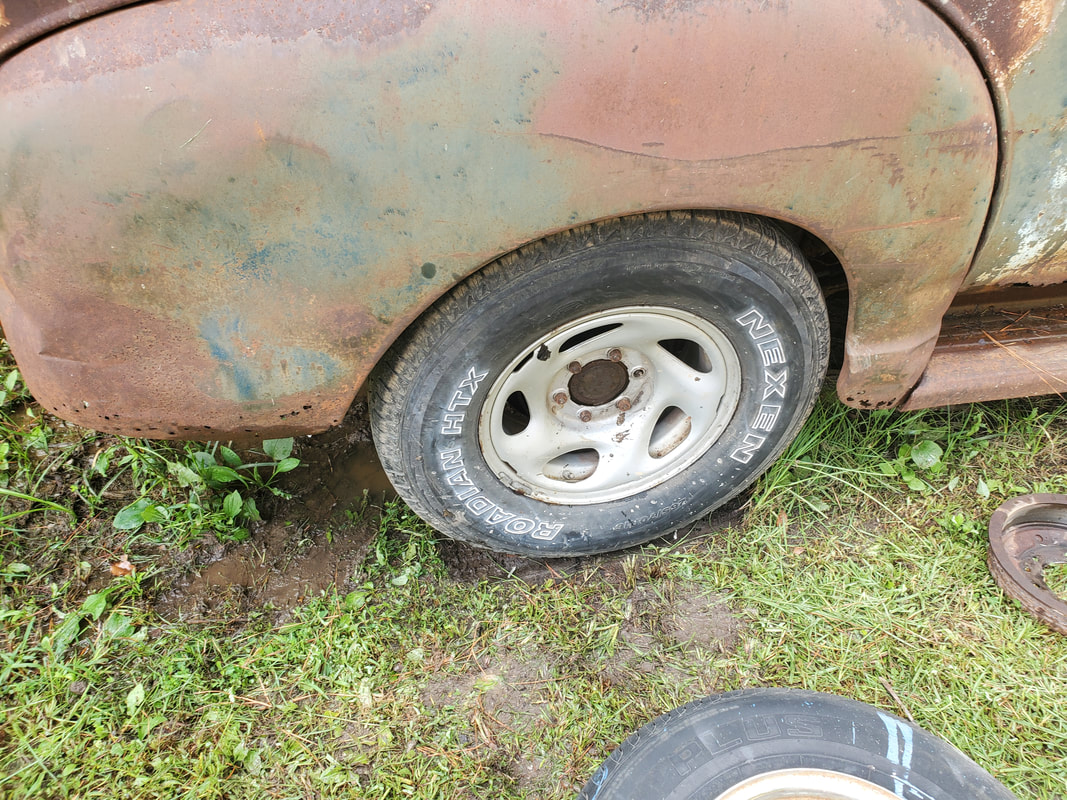 Moving on to the front, I had to place my jacks since I had to drag out another one, in certain spots to facilitate jacking up the vehicle high enough to allow me to be able to get the wheels on when I go the brake hardware off. The steering mechanisms along with the sway bar would all interfere, along with the soft ground, made soft by the rains that passed through. I had to jack the truck in two different spots then put a ramp under the frame behind the steering mechanism to add some extra support. As with the other rims, the lugs didn't give me much grief to come off. Unlike the rear brake drums, the left front wheel was rather stubborn. I had to beat the shit out of the rotor, even after removing the wheel bearings I still had to beat on the thing to finally work the thing free from the spindle. 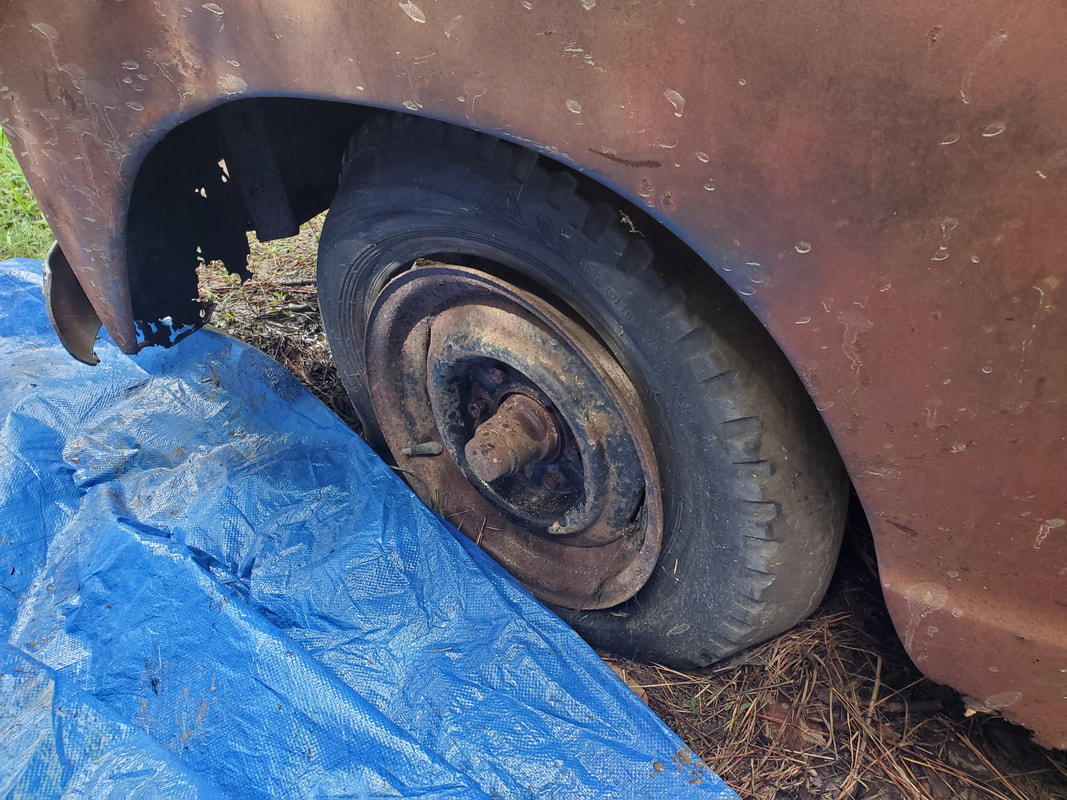 Old rim with destroyed tire on truck. 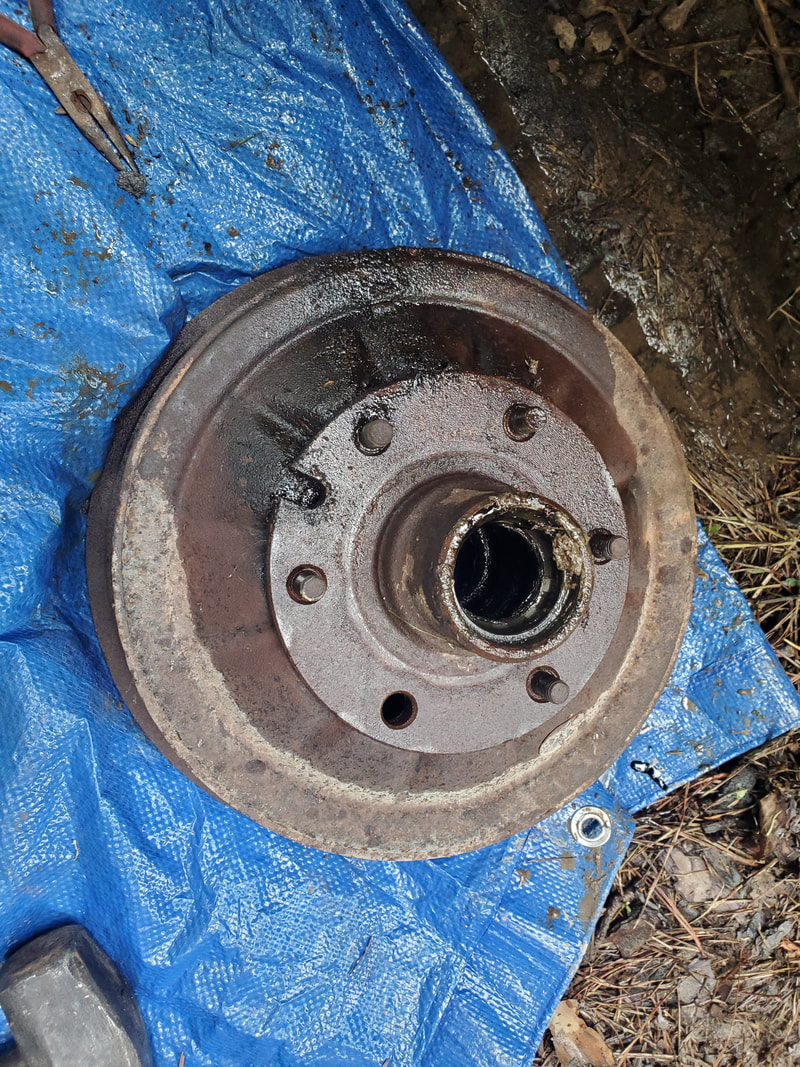 Old brake drum pulled free from assembly, note large amount of wetness from WD40. As before, I wanted to remove the brake hardware so in the case of the front drums, when I put the drum back on, there won't be anything to resist or possibly bind up again in the future. I had to pry on the tops of the brake shoes to get them free from the wheel cylinder and get the spring off then remove the clip that held the peg in place at the bottom of the shoes. Once that was done the two brake shoes came off. I was able to re-install the drums, but then I ran into another serious problem. 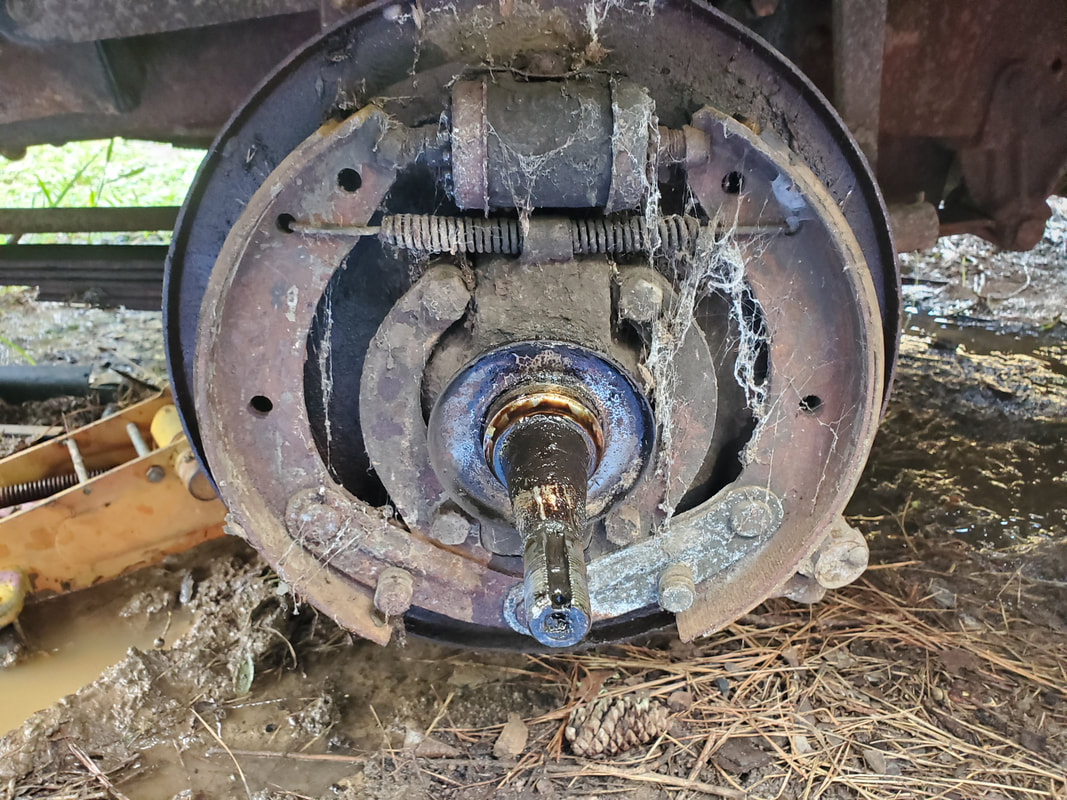 Front brake assembly on truck. Shoes had to come free from top and peg at bottom middle had to come out to pull shoes free.  Spindle with brake hardware removed, leaving the wheel cylinder. 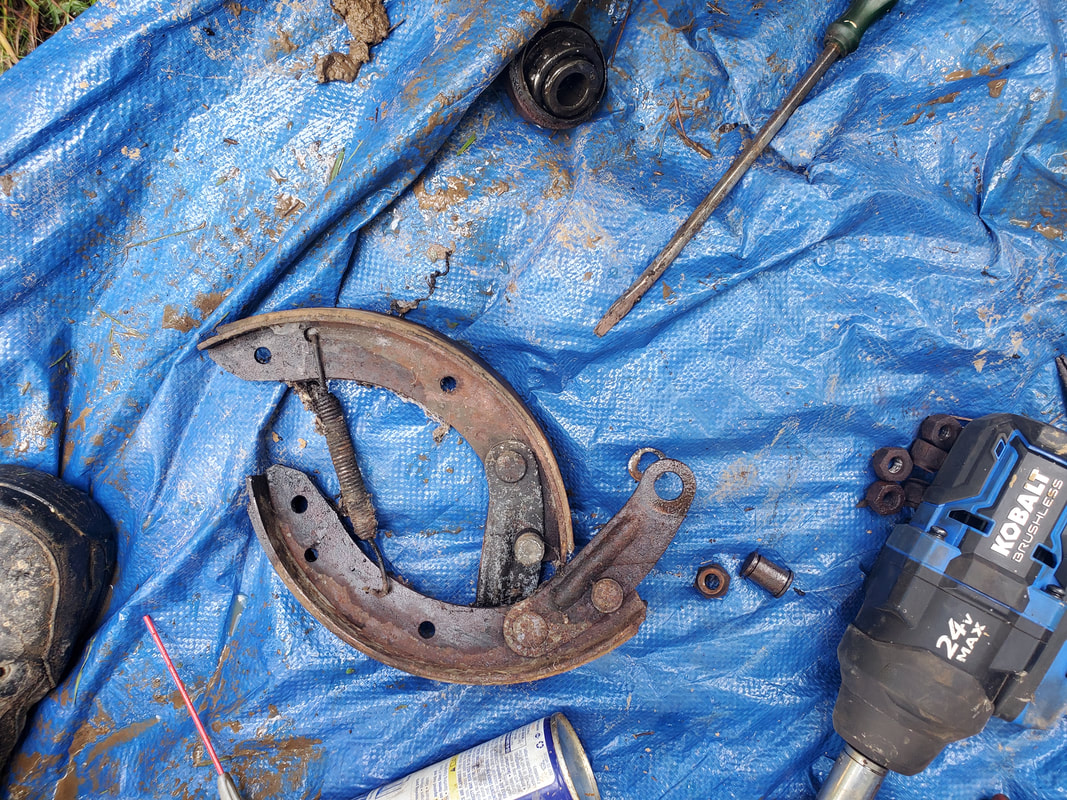 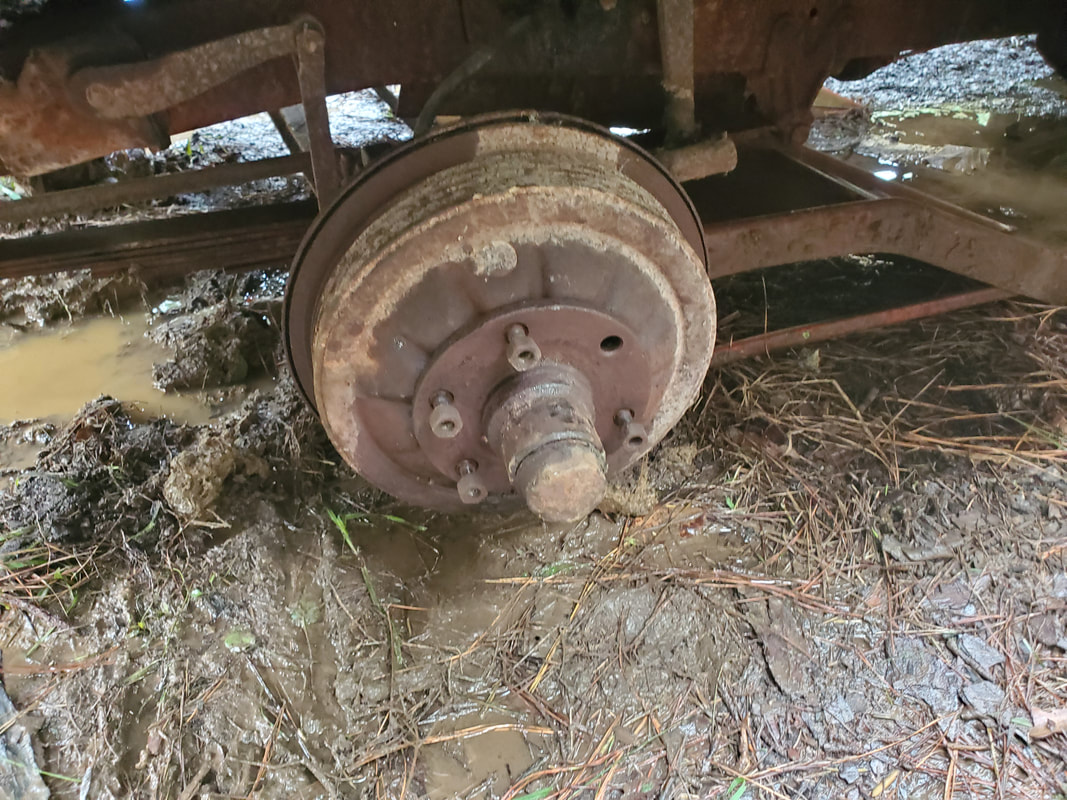 Installing drum back on spindle assembly after removing brake hardware, note the missing stud that somehow walked away in the process of removing everything... The problem that I had was when I tried to put the third Toyota rim on the front. The hub offset was different on the Toyota rim compared to the stock old Chevy rim. The distance from the back of the rim mount surface to the bead of the rim on the stock rims was 3.75", the Toyota was 5" or so. This large distance caused the inner bead of the rim to extend too far in and make contact with the steering tie rod end and knuckle on the spindle, not allowing the rim to sit flush on the brake drum. Because of this, the Toyota rim couldn't be used, I'd have to try and get a tire on the old rim after removing the shitty tire and reuse that old rim. Of course the same will apply to the right side as well. At least with the car ramp under the frame I could recover my jacks until I can put the new tires on. Now it was time to get the right side taken care of. 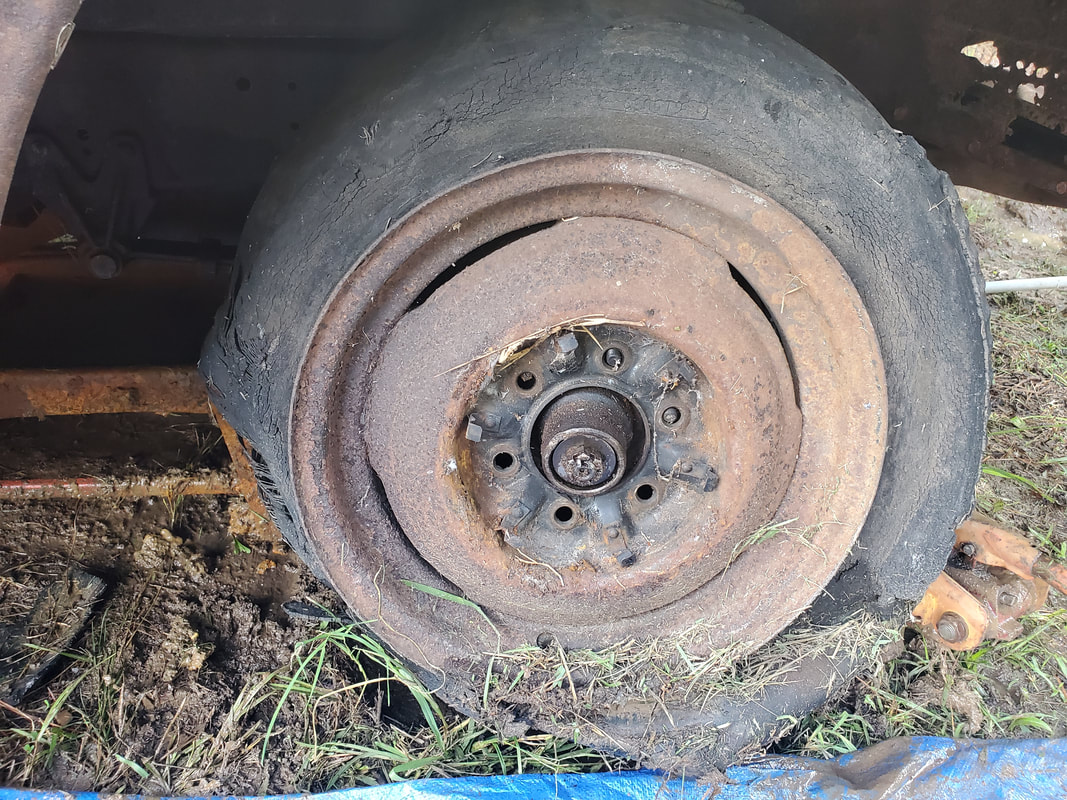 Right front tire after removing hubcap. Note the condition of this tire. Old Chevy hubcap pulled from rim, I might finish this thing and turn it into a wall piece for decoration. I guess circumstances finally worked in my favor after all the headache I went through with the other three wheels and the fact that I couldn't put the one rim/tire on the front because it did not take long at all nor did it take any effort to remove this drum. I did spray things down but this wheel seemed to have already been pretty free in that after removing the outer wheel bearing and doing a couple light taps the drum slid right off like it was a recently used assembly that was still loose. With that I went ahead and removed the internal hardware and put the drum and its wheel bearings back on. I put the other metal car ramp I had on this side to hold the truck up as well since I can't put any fresh wheels on the front on either side. 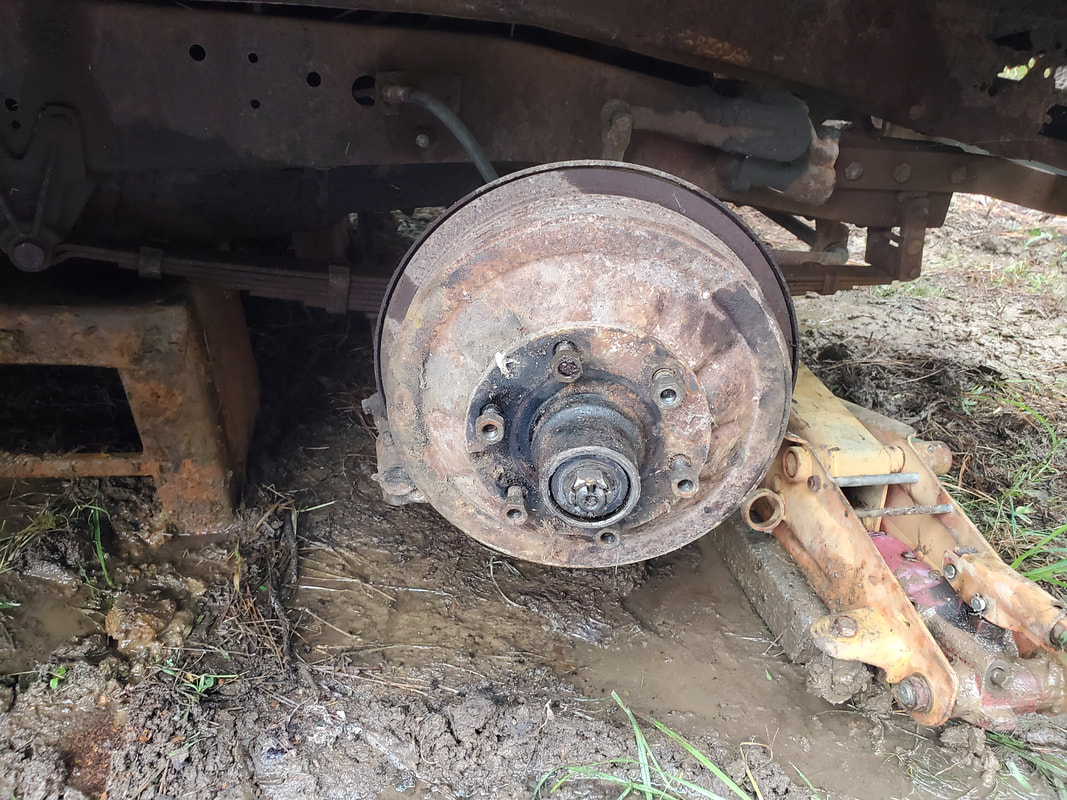 With that all four wheels are freed up and able to rotate. Once I get a pair of rims/tires on the front, I'll be able to move the old Chevy into the compound and park it in a suitable spot so I can begin work on it in the future. Just like with any other project around here, I am getting tired of seeing the truck just sitting there and not taking even a brief spell to do a little something on the thing. This little job is a little something towards getting the project done, allowing myself to be able to move the vehicle where I need it to be so I can more easily work on it, even if that involves just tearing it down like I did the 65 Mustang. There will be more to come.
As usual, every week I try to get a load of gravel to spread out in a specific area. In this case I've been focusing on the garden. Between making a walkway to get to the Dog Kennel Greenhouse to surrounding the drum planters and drum raised beds, I've been focusing on getting the garden graveled up since this area is the next build up area I'm focusing on. Between the greenhouse, the raised beds, planters, and the irrigation system, the graveling is what will hold all of this together as it will make traversing the garden more convenient.
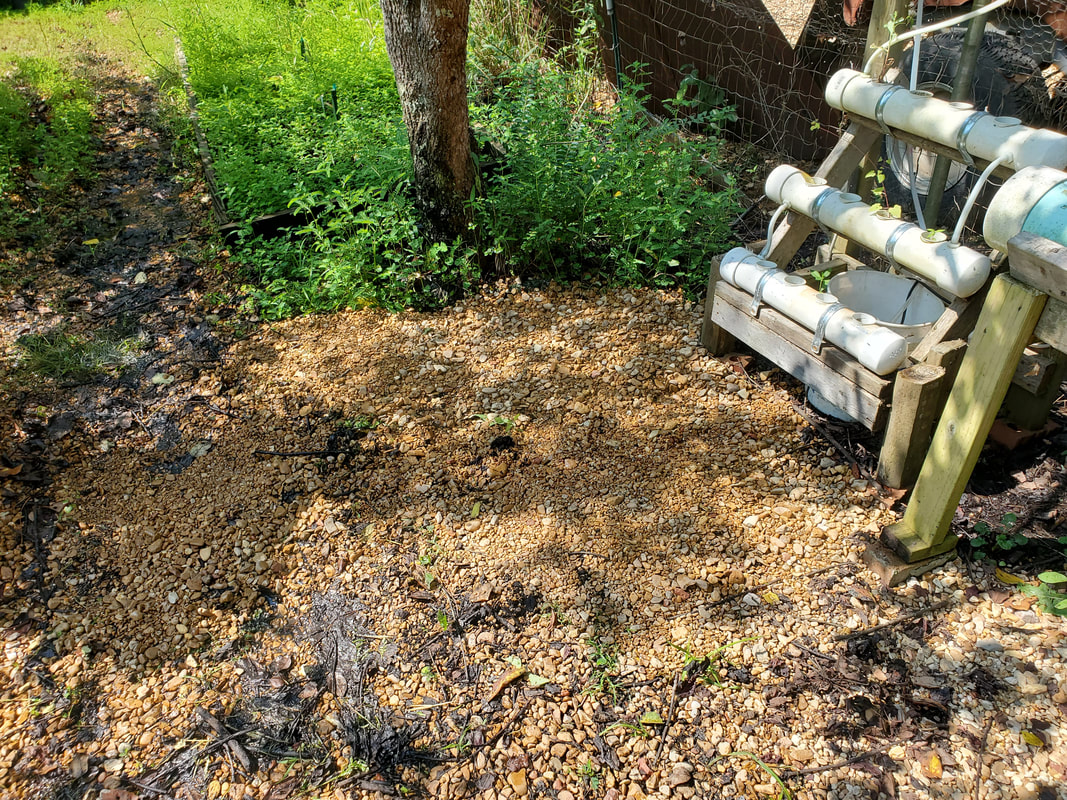
Gravel spread in front of a once bare area in front of one of the older hydroponic gardens.
Of course one of the biggest problems I'm having with regard to laying the gravel down is the idea that the ground, especially in the middle, is mushy and will end up taking a lot of gravel to fully cover the area as it will mush into the mud and require successive layers of gravel to get to the point where the ground will be somewhat solid enough to walk on without allowing one's foot to sink into the mush. 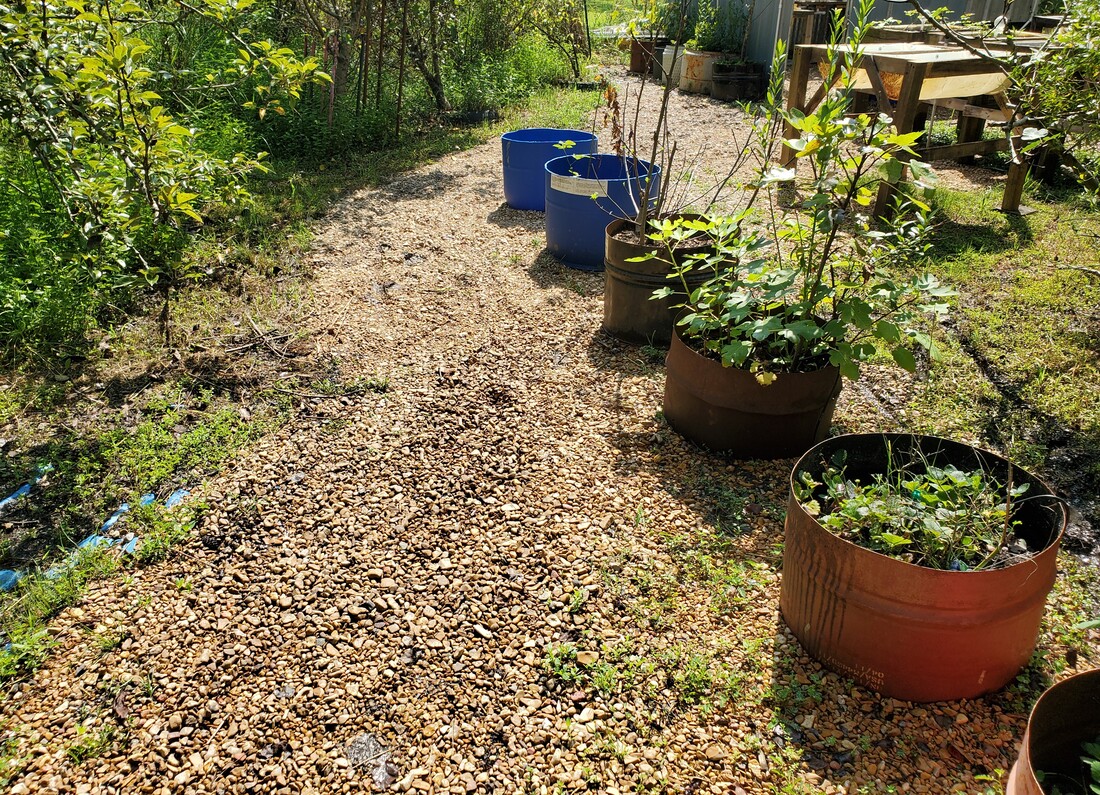
The expanded central walkway along the row of drum planters, covering up more mushy ground leading up to the Dog Kennel Greenhouse.
Another issue regarding the ground getting mushy is from the use of the new expanded micro irrigation system. With the sprinklers spraying and dripping in the different raised beds and draining onto the ground, more and more ground is getting saturated and soupy in areas where it didn't in the past. Because of this, more gravel will need to be added and topped off to ensure that more areas will be solid, whether walkways or surfaces to set the raised bed frames on. 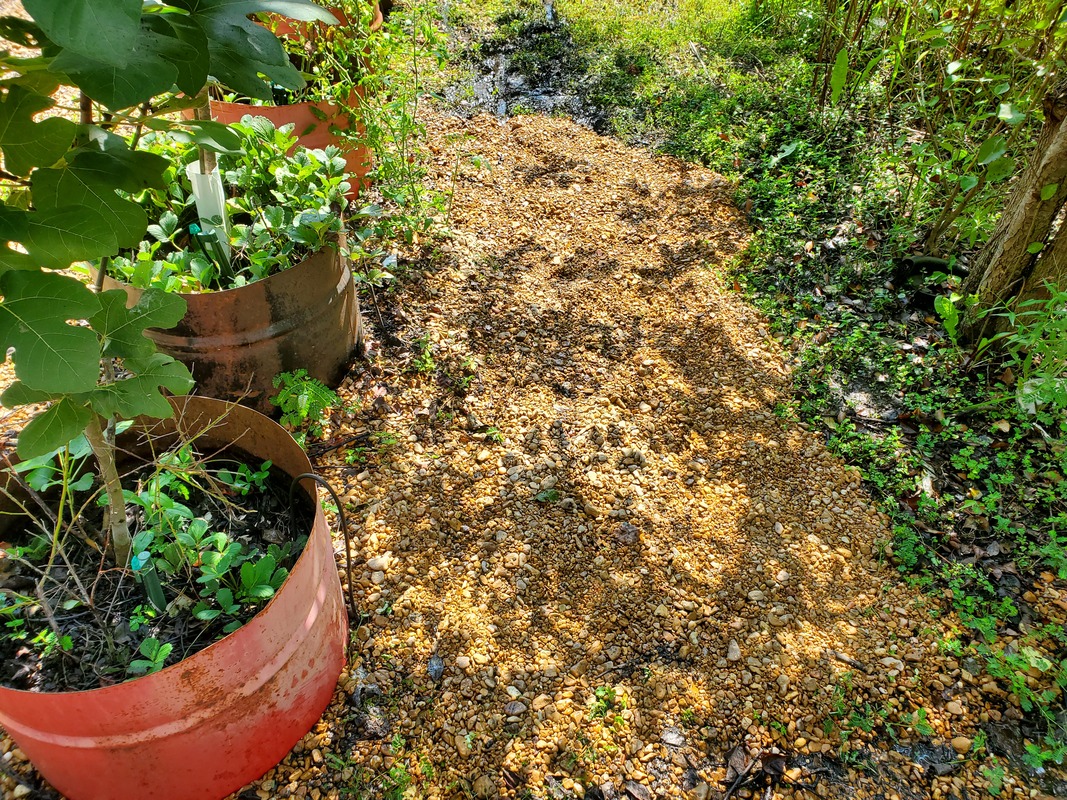
Area behind drum planters, opposite the central walkway, also mushy and now getting gravel laid down.
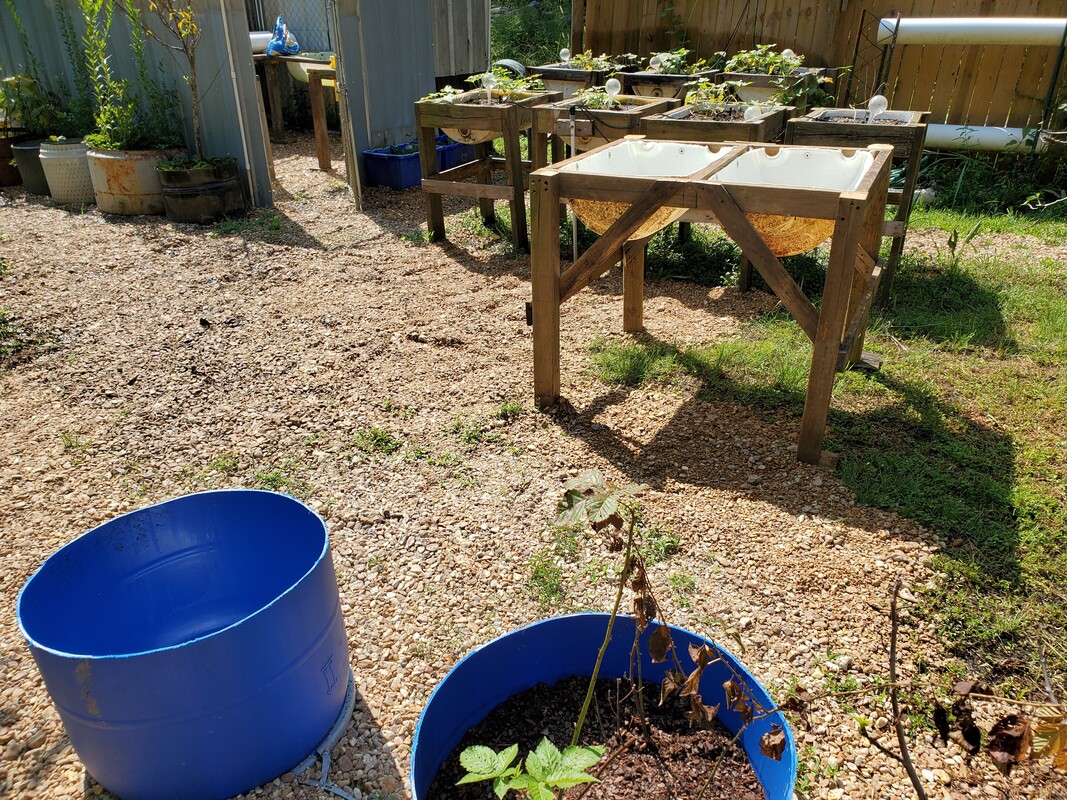
Area between drum planters and raised beds near greenhouse being covered in gravel to cover up mushy ground.
With these areas being covered, more ground will be ready for placement of future raised beds as I move old planters out and move trees around along with the setting up of new planters and beds. Some areas where old planters and/or trees will more than likely not have anything on them other than gravel as I'll be trying to keep planters and beds situated in a grid pattern versus just randomly placed. Areas where larger trees are well rooted will get railroad ties set up around them to create the food forest concept where the central tree will have smaller berry bushes next to them and smaller plants like strawberries or something like asparagus planted on the outskirts of the bed. There may be some trees/plants that'll be cut down as they're no longer producing and are actually dying. Only time will tell as I continue to make my way through the garden, reclaiming the overgrown grounds. On a side note, regarding the recovery of overgrown grounds, we did pick up a new toy. After having to drag the generator and extension cord over to the east end of the clearing to utilize our plug up hedge trimmer to cut through the blackberry briars, I decided that I need to be upgrading this tool just like I did with the other power tools. We picked up a battery hedge trimmer that uses the same batteries as our power tools. This unit uses a single 20v battery and is 22" long, allowing for a good reach, which is useful when cutting into thick blackberry briars. This tool will allow us to gain further independence from the cord since this will allow us to attack brush farther and farther away from any source of mains power. Hell, this tool will allow us to clean up areas such as paths to fishing spots or other areas well off the beaten path. Better than gas, more convenient than plug in power, this tool will see plenty of use in the days, weeks, and hopefully years to come. 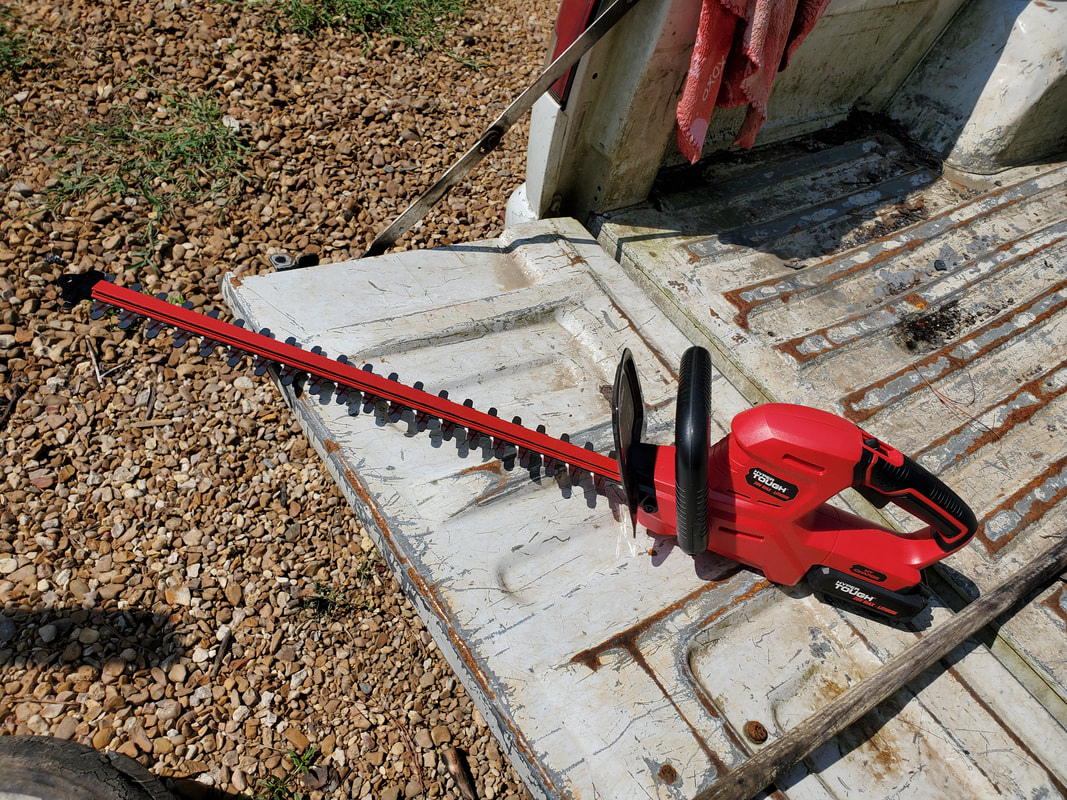
As time progresses, I envision a point in time where we will no longer need to plug in for the use of any power tool, everything will be battery powered. Even when it comes to supplying mains power, our soon to arrive whole house generator will grant us the power needed without having to crank up a portable genny and run extension cords to specific loads. Even on the gas side of things, we look to eventually buying one of the new battery electric zero turn mowers that will allow us to do the grass cutting we typically do on a single charge, freeing us of having to deal with the quirks of running a small gas engine mower. Ain't technology awesome?
After having done the supports for several bucket beds in two sections of shelving in the greenhouse, I turned my attention to the section of shelving that will handle the hydroponic gardens. The two main units are a couple of old units I made probably near 20 years ago out of PVC pipe and were made to handle 2 liter soda bottles. Each unit is capable of handling 11 individual planters. These two setups will be modified to use larger PVC pipes with reducer pipes to go from the 1" pipe up to something larger. Anyway, in order to support these two assemblies, I made more support boards with 2x6's like I did in the other areas. Using the smaller boards to "tie" the ends of the boards to the sides of the shelf boards, I got a pair of boards screwed down for each HPG. I had to space the boards apart so the two rows in the garden assembly would be centered over each board, allowing me to secure the pipe assembly with conduit/pipe straps/brackets. With two pairs of these support boards in place I was able to set up the old HPG assemblies. 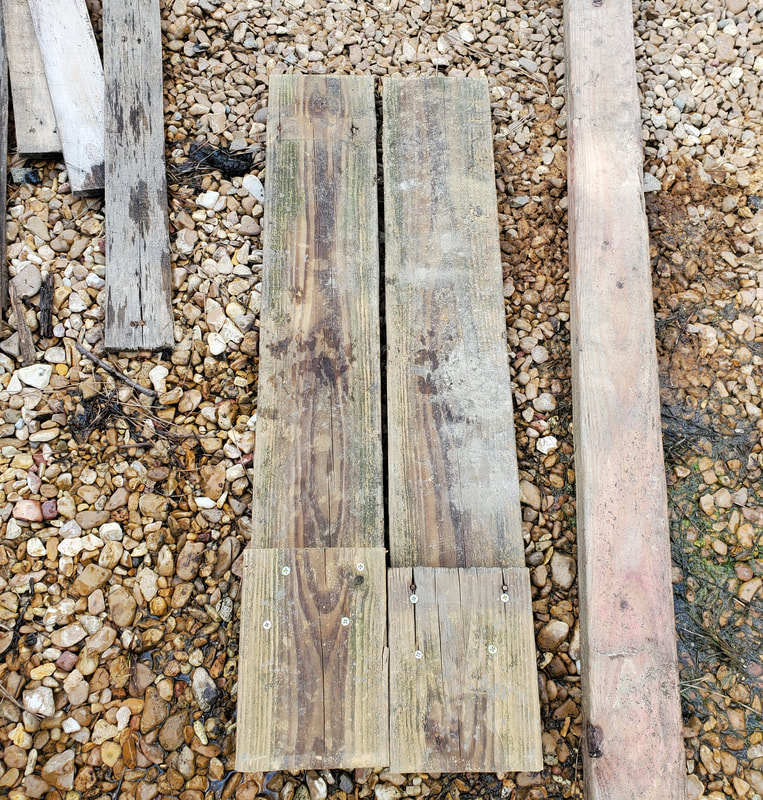 More 2x6 support boards put together for the hydroponic garden assemblies. 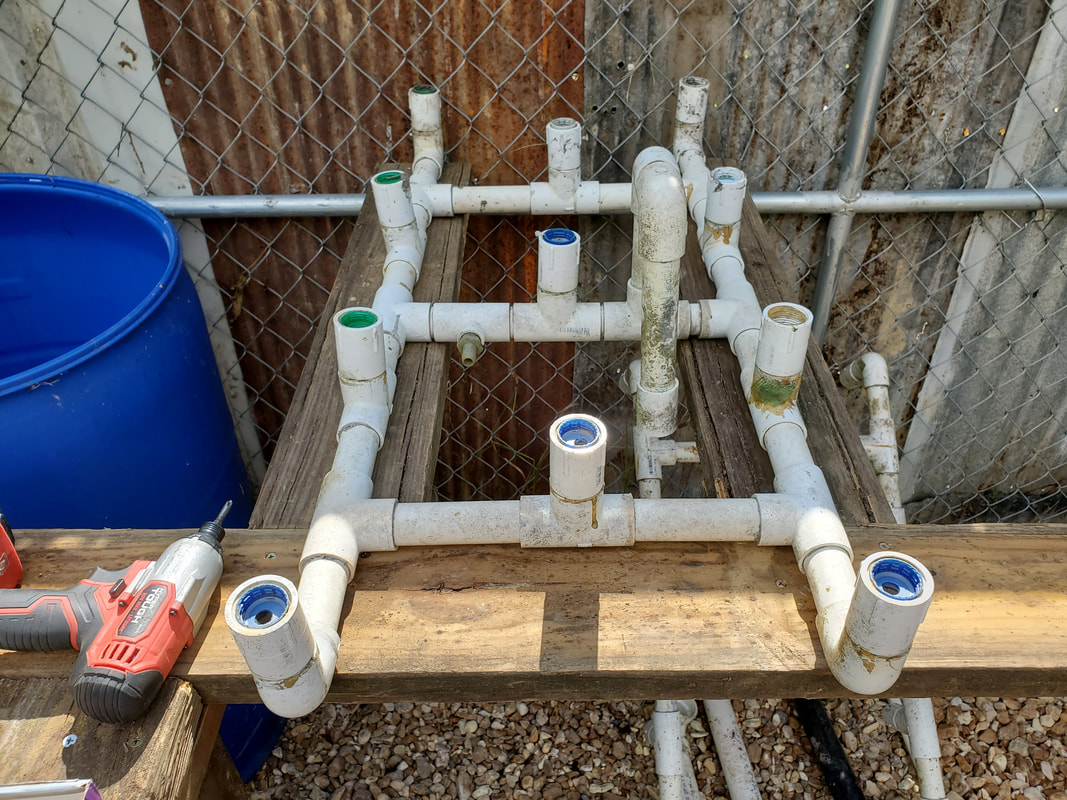 Setting hydroponic garden assembly on top of 2x6 support boards. As stated before, to secure the HPG assemblies to the 2x6 boards I used conduit straps to hold the units down. Some of the straps I had on hand were double sided where I can use a screw on either side to hold the piece down while some were just one sided. I managed to get three straps over each assembly to ensure a decent securing of the units to the boards so they won't shift around. 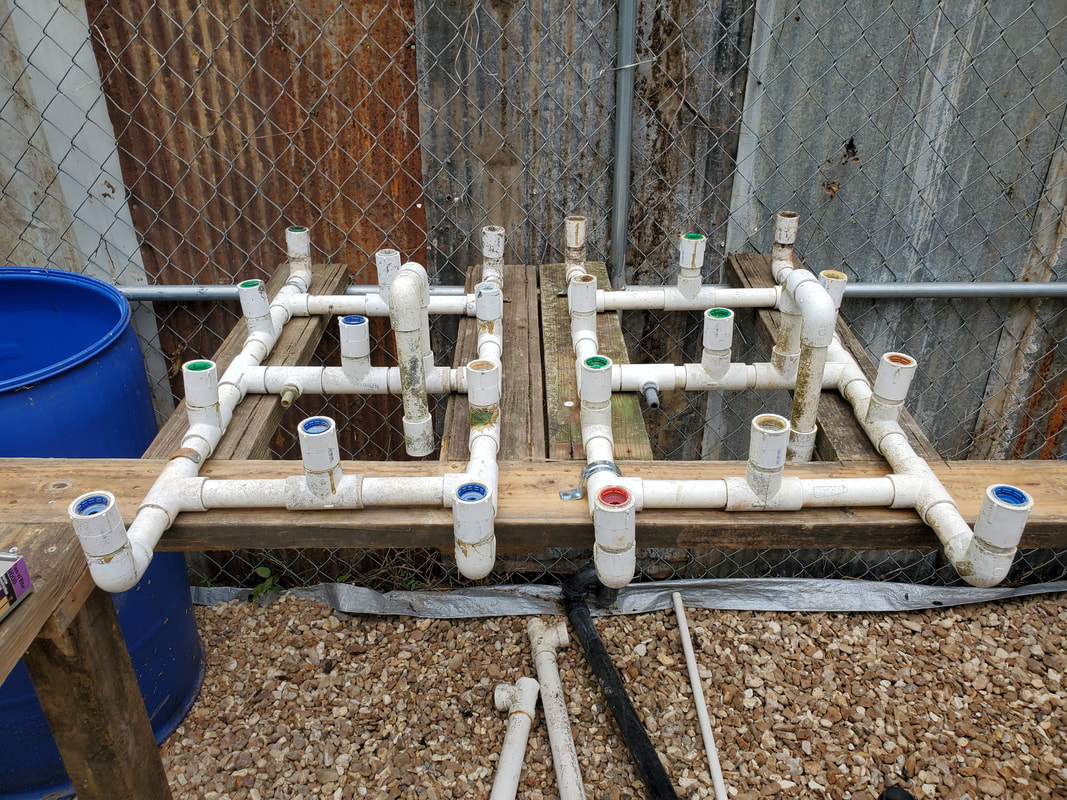 Both hydroponic garden assemblies setting on top of 2x6 support boards with conduit straps in place. 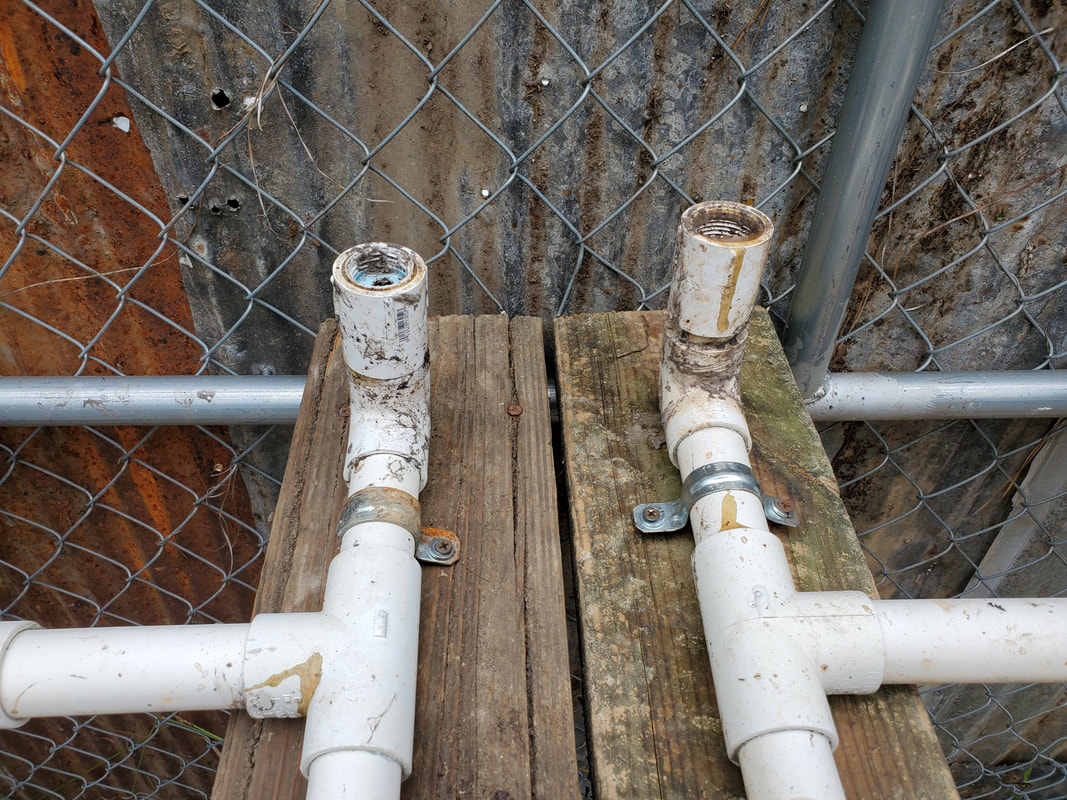 Closeup of conduit straps holding down hydroponic gardens to 2x6 boards. The next thing is getting a small set up started for the other form of hydroponic garden, and that is the one that uses 6" PVC pipe, much like the latest version of hydroponic garden. If you don't remember, that setup involves a couple of lengths of 6" pipe with large holes cut along the pipe and spaced apart by several inches. Each hole holds a 12oz plastic cup that serves as a planter. Pipe fittings threaded into holes in the pipe allow for plant solution to be pumped into one pipe, fill up to a fixed level where the outlet line allows overflow to flow into the 2nd pipe, which then does the same, flowing the excess from its outlet out and back down to the reservoir. Anyway, I happened to have a length of 6" pipe sitting on the shelves where I keep the larger PVC pipe and scrap wood. I dragged this section of pipe over to the greenhouse and marked the center point on the pipe and cut the pipe in half. Surprisingly, the two halves were actually of a length that allowed them to fit rather well in the area I wanted to put the pipe HPG's in place. There's plenty of room around the ends of the pipes without pushing anything out of the way or butting up against something else. 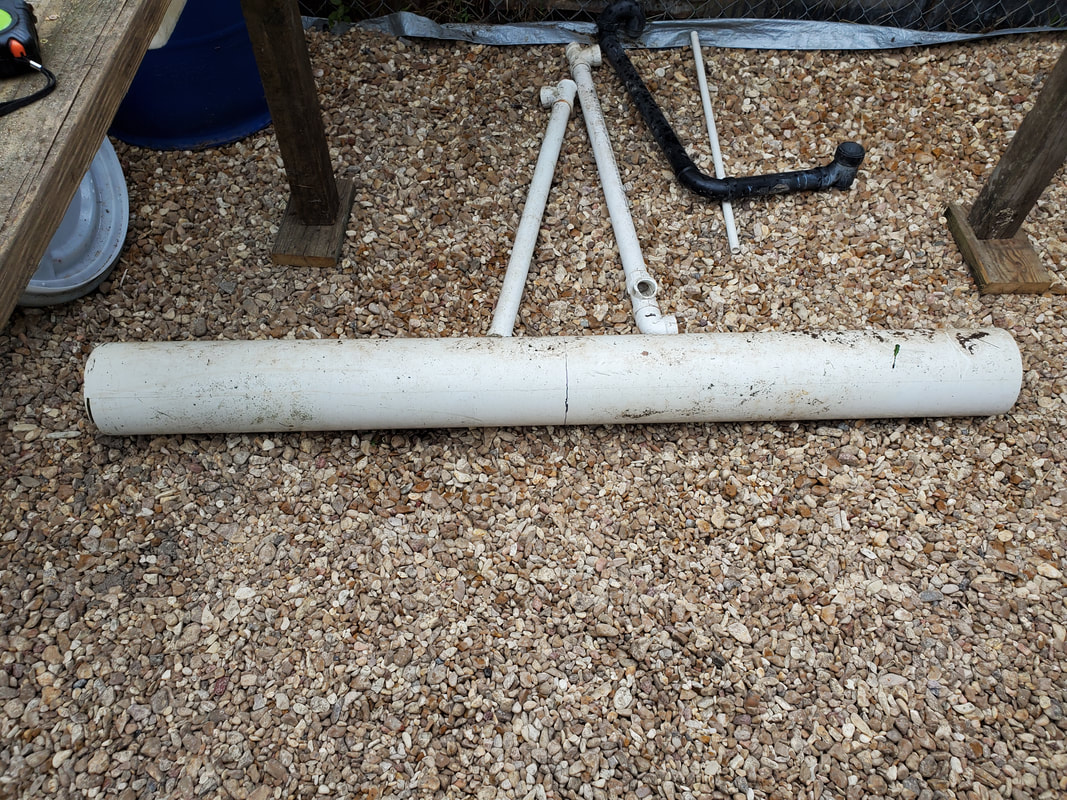 Again I assembled two more 2x6 support board assemblies to go in the opening to the right of the first set of HPG gardens and support boards. I lined the boards up with the pipe in place to get the spacing right enough that there would be even spacing from the ends of the pipes to the boards. Marking these points I secured the support boards in place and set the pipes on top just to fully see how the pipes would sit. Satisfied I just beat the serious rain that had started just as I was wrapping things up. 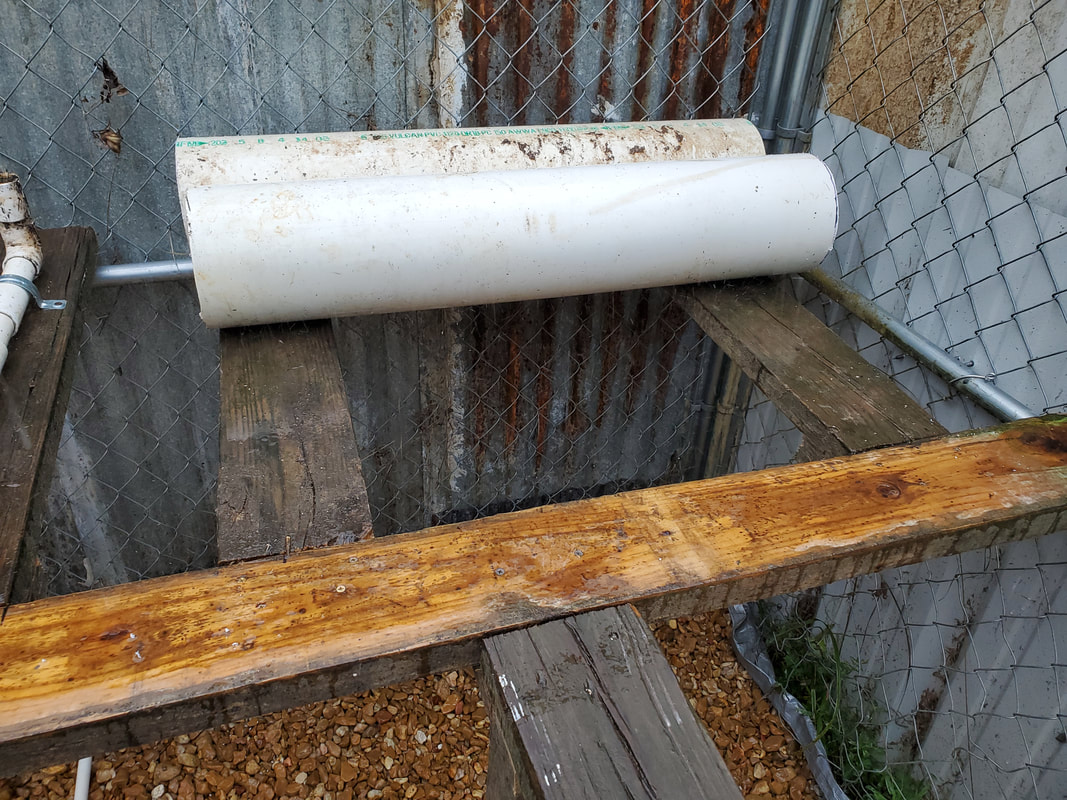 I was able to get the boards done and start cleaning up just before the really hard rain picked up but at least now its just a matter of adding some small pieces of 2x4 to help hold the 6" pipes stationary at the right spacing from one another so I could further finish the whole garden assembly knowing that everything is more or less permanently situated where I want it. The last section of shelving in the greenhouse I really want to be able to set up some half drum beds but the obvious obstacle is finding a drum I can chop in half to use in this setup. I'll have to see before I can really move forward with wrapping up the assembly of all the planters in the greenhouse but if not, I can move on to other aspects of the greenhouse like running some light electrical and plumbing within as well as the overhead tubing I wanted to install for the sake of holding up trellises among other things. More to come.... After having assembled the base shelving around the insides of the dog kennel greenhouse, I still had to secure the ends of the 2x6 boards to the horizontal tubes of the wall frames to ensure that everything would remain perfectly stationary. To do this I drilled a single hole in the middle of the board at the end, going through the tube of the wall frame. This was done on the ends of every board that met the metal tubes of the wall frames around the greenhouse. From here I drove a 3 3/4" wood screw through the end of the board and through the holes in the metal tubes, ensuring that the boards were secured to the wall frames. The next and main order of business for this session of the project was to create the dividers that would split the shelving up into sections to cradle the cat litter buckets that would serve as the bucket beds for the individual plants that would be contained inside the greenhouse. Just like the raised bed assemblies that are currently outdoors, the shelving will contain these buckets in a neat and concise manner within the greenhouse. I started with the section of shelving that was straight in front of the gate. After doing some measuring, I determined that to get the most proper spacing from one end to the other, I would have to use more 2x6 boards to serve as dividers. I took measurements and cut three boards that would span from the inner edge of the shelf board over to the horizontal tube of the wall frame. These boards would be the actual dividers. To allow for these boards to mate up flush with the inner edge of the shelving boards, I cut shorter 2x6 boards to serve as tie boards to go underneath the two boards, secured with wood screws from the top.  Divider boards cut with tie boards already secured to ends of boards, ready for installation. To ensure proper spacing I had to use a couple of buckets as guides and mark where the boards needed to go, taking time to secure each one then moving the buckets over to get the spacing marked for the next board and so forth. I did run across a slight problem with the middle divider board, as it mated up dead center with the vertical tube of the wall frame. This was bypassed by cutting a large notch in the middle of the end of the board to allow the board to "wrap" around the tube and still rest nicely on the horizontal tubes of the wall frame. The only other issue I had was after getting the last divider secured in place, there was still some spacing between the bucket and the end board on the shelf. Conveniently, the spacing was just right to accept a 2x4 turned on its smaller side. The gap was 1.75" wide to the edge of the bucket. After cutting a length of 2x4 and trimming a piece from the end that would be sitting on top of the horizontal metal tube of the wall frame, I secured the board in place with more wood screws. After that the buckets fitted nicely in the last section of the shelf. With that I have room on this shelf for eight buckets. 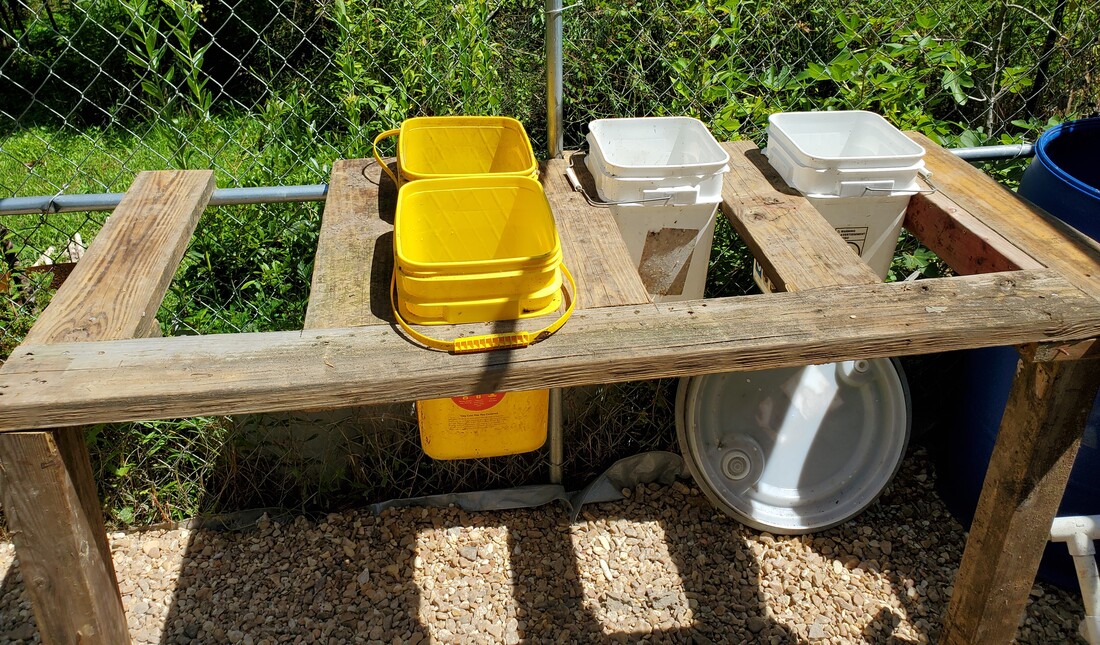 The dividers in place with the buckets in place for fitting purposes. Note 2x4 on end by bucket to serve as extra spacer. 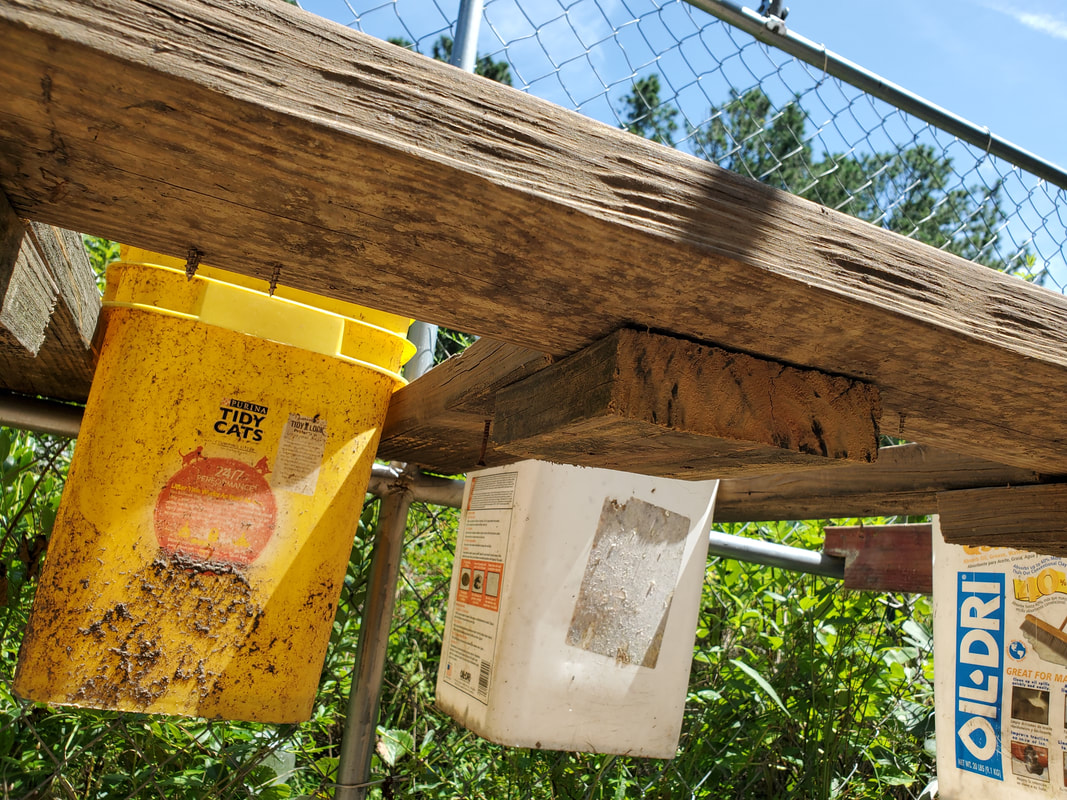 Tie board underneath to hold divider board flush against shelf board. From here I jumped over to the smallest shelf section, the one right next to the gate. This is small enough that it would only be able to accommodate four buckets, but it was wide enough that there would be some excess spacing. I don't have any other containers that are odd shaped that would fit within this cavity to serve as a tub style bed so I just went ahead and made a couple of 2x4 dividers in the same style as the 2x6 boards used previously. I could've used more 2x6's but I had some 2x4's and chose to use these so as to save the larger wood for future applications that call for this size wood. I ended up making two divider boards and situating them next to each other in the middle so the extra spacing would be centered, more for aesthetics than anything, versus having the boards next to each other with the spacing on either end of the shelf, it would just look too goofy. Besides, the center spacing can be applied in some way for something like a trellis or vertical posts for supporting lights or who knows what. Sometimes just looking at the layout of the something spawns ideas of how to add things to the system to make it even better. 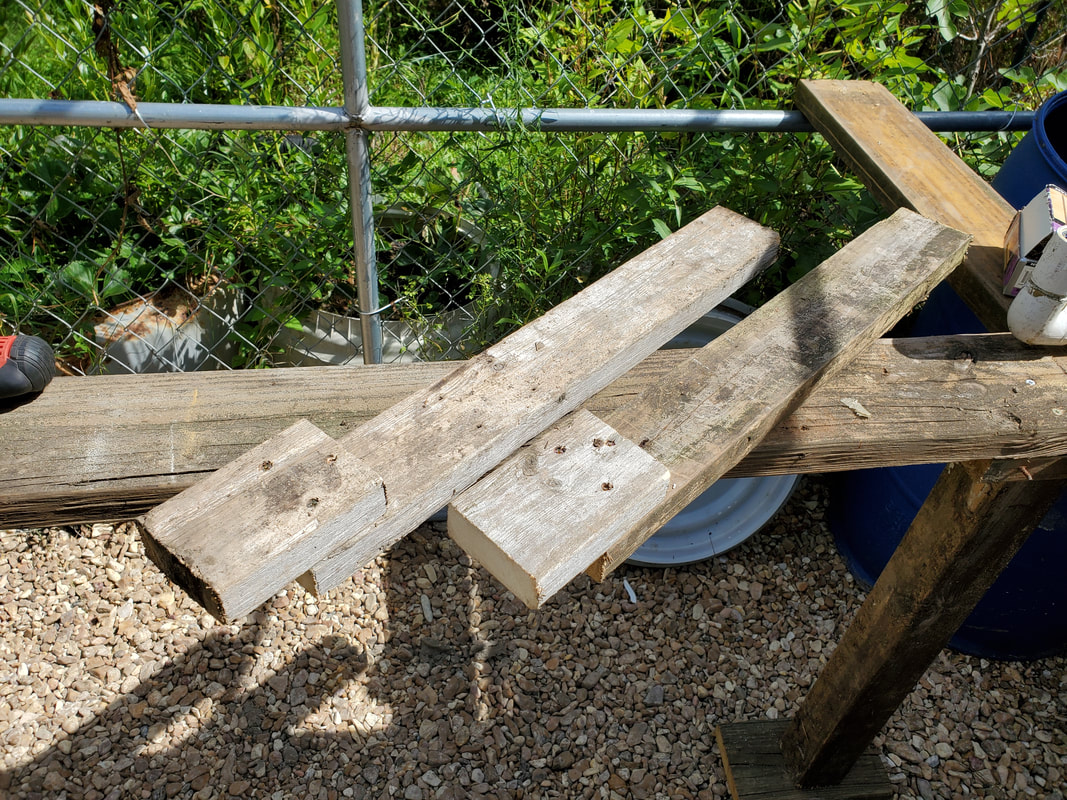 Dividers made from 2x4's with the tie boards attached. 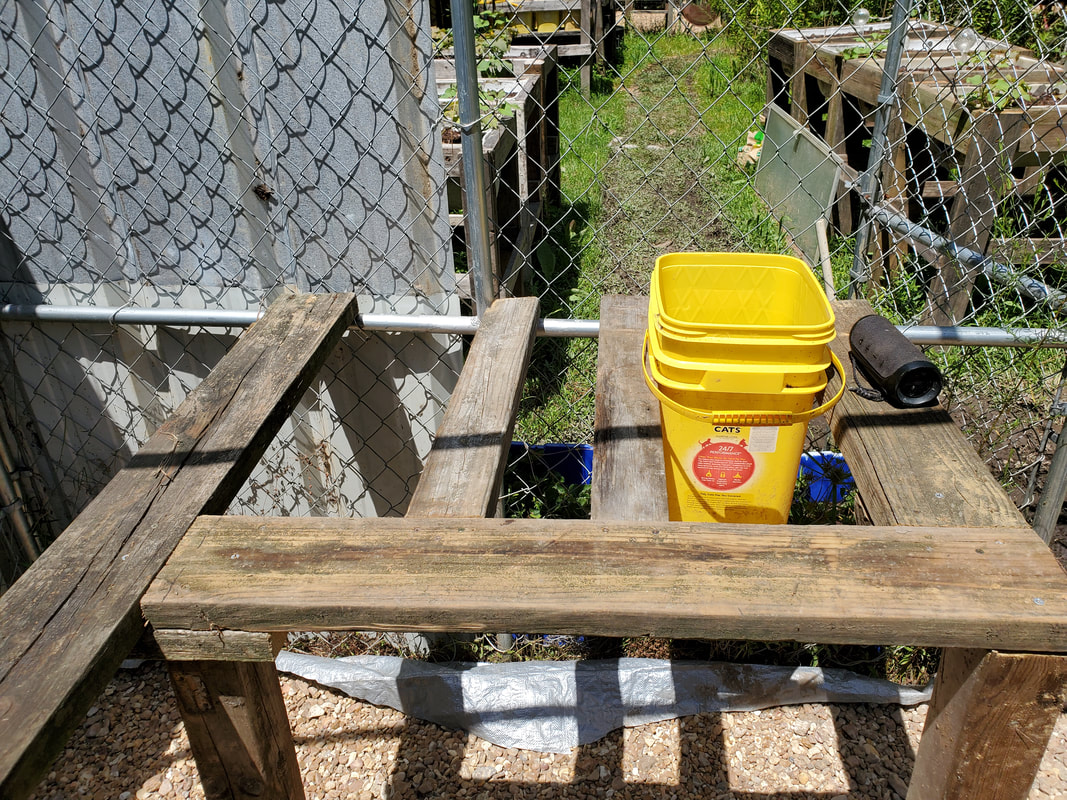 Smaller section of shelving with dividers set up with bucket in place for fitting. With these two setups established I now have the capacity to handle 12 bucket beds, and I still have a whole full length shelf to use plus the shelf for the hydroponic gardens. With all of these in operation plus a couple of spots for some hanging planters, the greenhouse should be more than capable of holding its own when it comes to producing a sizeable amount of produce to add to the overall produce of the garden. More add-ons will follow in the form of framework for supporting chicken wire trellises for vine veggies along with supports for grow lights. Everything will be done in a way to make the whole setup nice and neat and not appear to be so much a hodge-podge of parts. I at least want this little creation to have some physical appeal to it that when you walk inside you'll be happy to be inside of it because of how it was laid out. There will be plenty more to come.
When we last left off we managed to get two complete walls done on the greenhouse plus the roof framework on the structure. I had planned on laying the floor since it was time for gravel again and I figured I'd end up using a load of gravel for just this floor alone since I would want a good thick layer down to ensure that there's no "breaks" in the floor where mud can come up or weeds/grass can sprout through.
Of course to help this along I planned on laying a section of plastic sheeting over the bare ground to serve as a foundation for the floor. This way even as the gravel shifts and settles in the soft ground, it'll push the plastic down more so than just fully disappearing into the mud more and more under the weight of continuous foot traffic. What I ended up doing was salvaging a large tarp that I had originally used as a makeshift shelter for the scrap auto parts shelves I had set up against the southern fence line a while back. This tarp had already gotten blown around and damaged slightly from falling branches and was pretty much destined to fade away into the sun if I left it sitting where it was. I pulled the large tarp down from the area and spread it out. This tarp is pretty much large enough to cover up a whole car for all intents. To do my floor I brought the tarp into the kennel greenhouse and spread it out over the ground within as best as I could, keeping two of the corners mated properly with the slight overlapping up the inside walls. I then started cutting the tarp along one of the sides, allowing for excess tarp to overlap up the walls. The same was done on the final side until I had a cut out square of tarp from the large section. From there I trimmed the tarp at the excess ends to keep things somewhat even and neat looking. Of course I had to walk over the tarp in order to help settle the plastic into the ground, especially since it had rained previously and the ground was exceptionally soft. Next came the gravel. 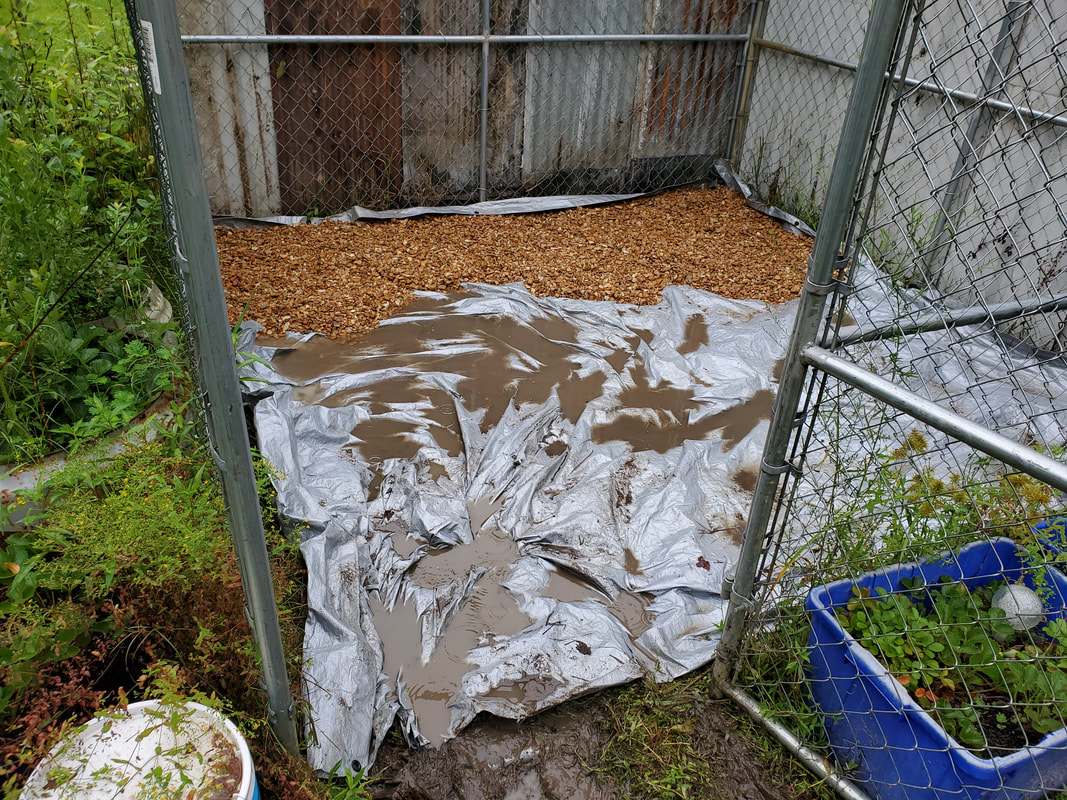
Tarp cut and laid out inside kennel greenhouse with partial spreading of gravel over two corners on one end, note rainwater on tarp.
Since the location of the kennel greenhouse was on the opposite end of the garden from the midway driveway I had to use the wheelbarrow to move small amounts of gravel at a time to the floor. This meant traversing a series of soft spots and light gravel spots, so the wheelbarrow couldn't be fully loaded or I would've passed out trying to move that kind of weight that distance. When I started laying the gravel I started off in one corner, spreading the gravel out to go against the edges of the walls so the overlapping plastic would be held up against the inside wall. From there I did the opposite corner to get the plastic secure on that corner as well. From there I kept spreading gravel between the two corners until both were linked up with a layer of gravel along that one wall. From there I started spreading rock in the corner connecting the wall that holds the gate. I also started spreading gravel from the 2nd corner I started with and covered that wall to within a couple of feet from the gate. From there I laid more gravel to cover the middle of the floor as well as the gate wall until I eventually had 3/4 of the floor covered. 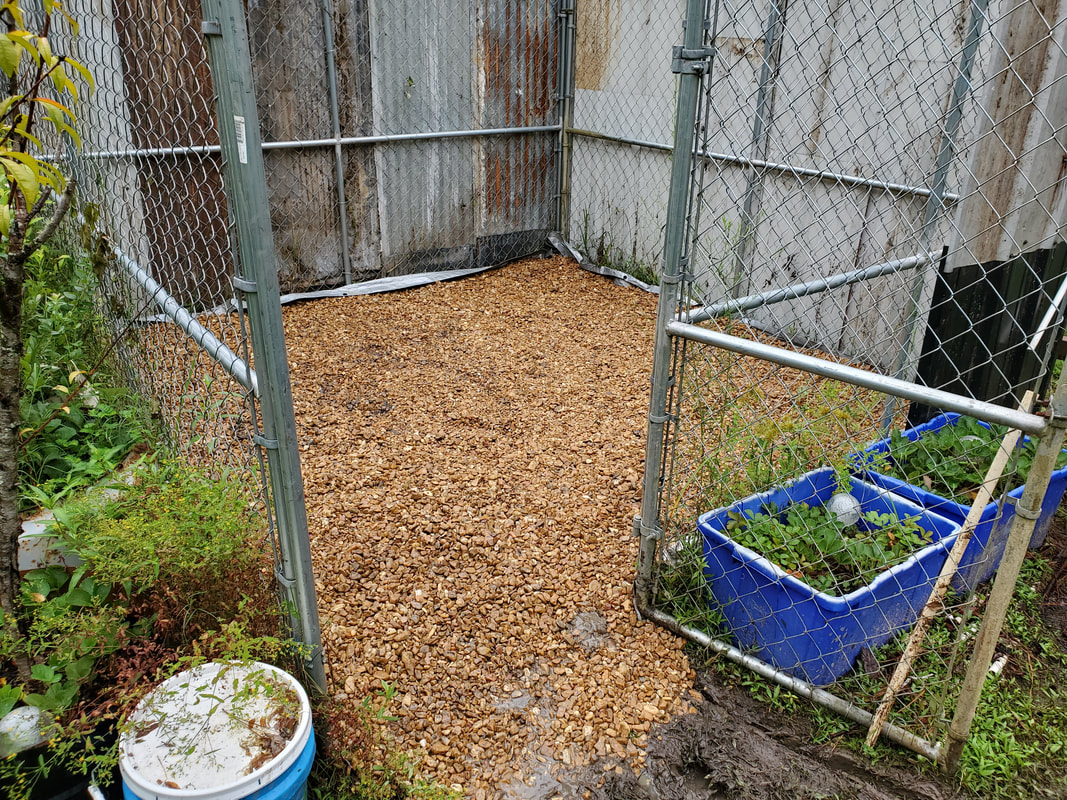
Tarp floor fully covered with gravel all the way around greenhouse leading outside past gate, note muddy path leading up to gate.
In the process of laying the gravel I had to walk over the rock to settle it in more as it was causing air bubbles under the tarp and was shifting quite a bit until I got things fully settled underneath. I eventually made my way to the gate, getting rock over all of the plastic and even over the threshold of the gate going outside the kennel greenhouse. Again I kept walking over the ground to get the rock to settle more until it seemed somewhat settled enough that I didn't haven to move about anymore on the rock. Besides, when I start the work of building the beds and other infrastructure in the greenhouse, the rock will have plenty of opportunity to be settled in under the weight of my feet. The next thing is the beds that will be growing stuff within the greenhouse. I started off by moving a plastic drum inside the greenhouse. This drum was placed in the corner straight ahead from the gate. This drum has an open top but is a 55 gallon drum so it can hold a lot of water. The plan for this drum is to use it as a long term bulk hopper or the hydroponic gardens I plan to set up within the greenhouse. I will tap holes in the side of the drum for inlet and outlet PVC lines that will feed the hydroponic systems. A higher powered fountain pump will be anchored in the bottom of the drum and connected to the lowest fitting in the side of the drum, pumping plant solution into the manifold to supply the individual gardens. The gardens will have return lines that will feed a 1" PVC pipe manifold that will go back to a return line that will dump the water back into the drum. The whole system will be an interconnected permanent system that should be able to operate a long time with such a large capacity of plant solution stored. Now as for the raised beds and hydroponic gardens, I decided that the best way to handle the whole setup is to build integrated shelves going around the inside walls of the greenhouse. Instead of building individual raised beds and hydroponic gardens like the ones that are set up outside, the shelves will consist of boards that are mounted to the wall frames inside the greenhouse, using posts to hold the whole works up. This will use less material and still be just as strong as the individual tables. To do this I gathered up a small batch of scrap wood from my scrap pile, which consisted of some old porch/fence posts, some 2x6 boards, also from the old porch, and some miscellaneous 2x4's and pallet pickets. I may need more wood depending on how I set things up but all in all I think I gathered a good batch of wood to do the base shelving for the greenhouse. 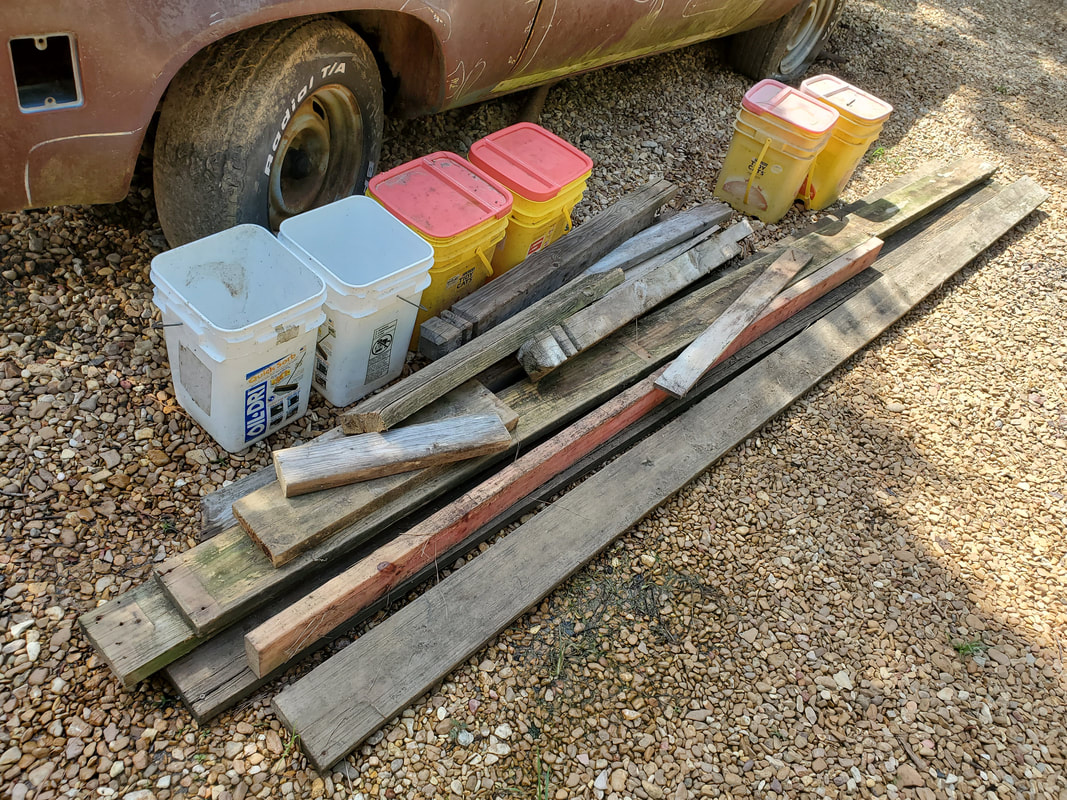
Batch of scrap wood gathered from scrap pile for build.
I started off by taking a 2x6 and measuring out and cutting a 10ft long board for the first span of shelving. This board will stretch across the greenhouse frame, going in front of the plastic drum sitting in the back corner of the structure. I laid this board on the middle portion of the wall frame then went ahead and measured about 2ft in from the edge of the long board then from that point measured across to the opposite side of the frame so I could cut another 2x6 board that would mate up to the first board. Now to attach this board I had to set up a leg for this. Since the posts are made of 4x4 posts that were cut to be decorative porch fence posts, I had to cut the decorative tops from them plus cut the half portion from the bottom of the posts so I can be left with a raw 4x4 post. From there I cut an eight inch long piece of 2x6 and secured the board to one end of the post. From there the post with the 2x6 was secured at that 2ft mark on the 10ft board, sticking about halfway out, where the post would be almost centered, with the edge of the 10ft long 2x6 laying dead center over the post, if that makes sense. I cut another piece of 2x6 to serve as a foot to go on the bottom end of the post where it will stand on the gravel. 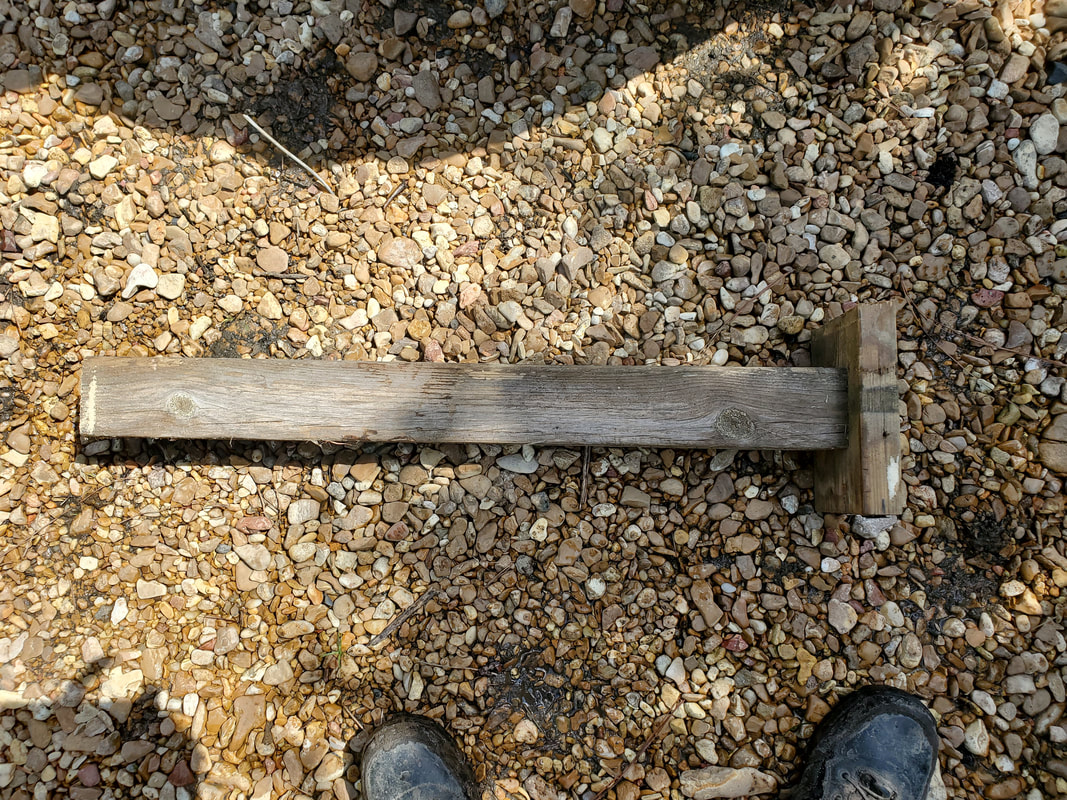
The post cut from the fence/porch post and topped with a piece of 2x6.
With the post set up at that 2ft mark on the first board (10ft) I then cut another 2x6 that would span the distance from the first board to the wall frame opposite this point. I laid the 2nd 2x6 board on top of the exposed portion of the short 2x6 on top of the post and the middle section of wall frame. I secured the post end of the 2x6 with wood screws. With that I have two whole shelves in place. 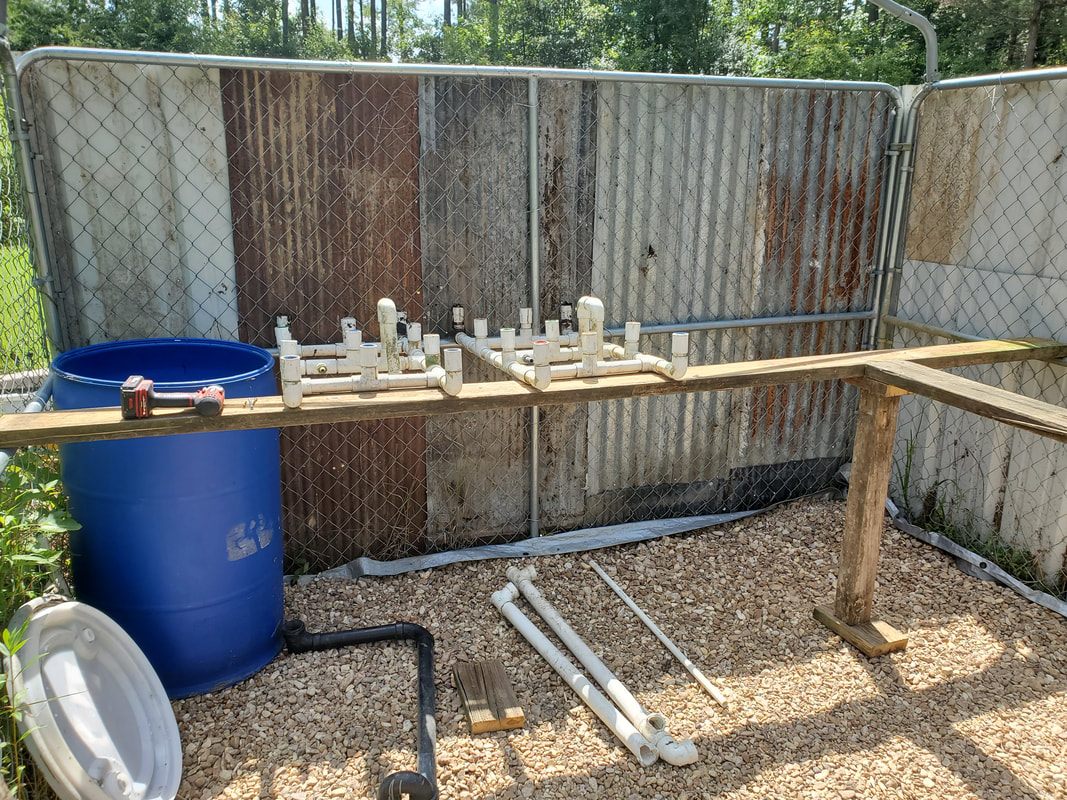
First section of shelving with post setup in place, note other 2x6 board to right that is secured to post.
Second section of shelving secured in place to post on first section.

Closeup of post and 2x6 assembly used for coupling 2x6 shelving boards together and supporting the whole works.
For the next section of shelving, the one that will be right in front of the gate to the greenhouse, I made another post setup like I did with the first, using a porch post and short piece of 2x6 for the top and bottom of the post. The top board was secured with wood screws. From there I measured to a point a little more than 2ft from the gate and cut another 2x6. Next I cut another couple of short pieces of 2x6 for another foot and top then cut another post. After securing one piece of 2x6 to the end of the post that will be the top, I then attached the post assembly to one side of the end of the long 2x6, allowing for that half way overhang underneath. Reason being is I had to cut another length of 2x6 that would attach to this point and extend out to the wall frame to complete the third section of shelving. 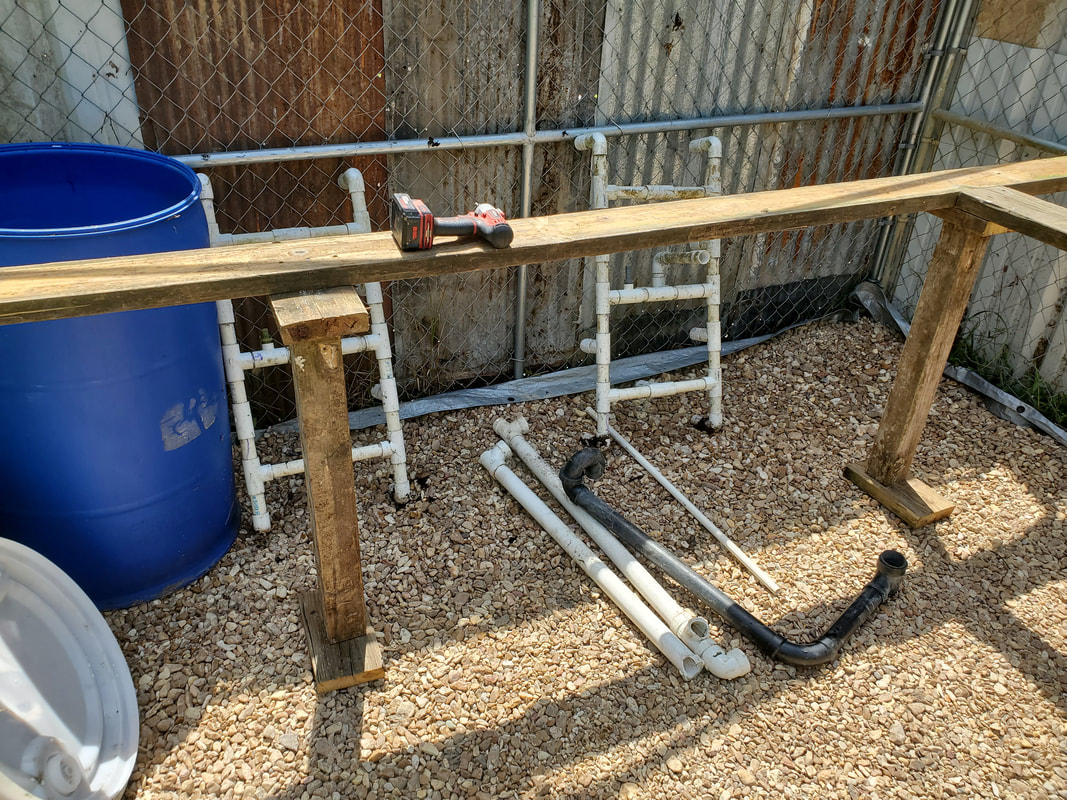
Another post set up next to plastic drum to accommodate the next section of shelving.
Third section of shelving set up just in front of the gate using the same method as the previous sections of shelving.
Lastly I had to do this same procedure for the fourth section of shelving that went along the wall panel holding the gate. Making two more post assemblies and attaching them in the same way as before, I cut the necessary 2x6's to make the final section of shelving, which falls short of the gate by a couple of feet, so as to keep the area open when entering the gate. You would have to walk diagonally to the right to clear the shelf right in front of the gate as well as the end of the shelf just to the right of the gate. 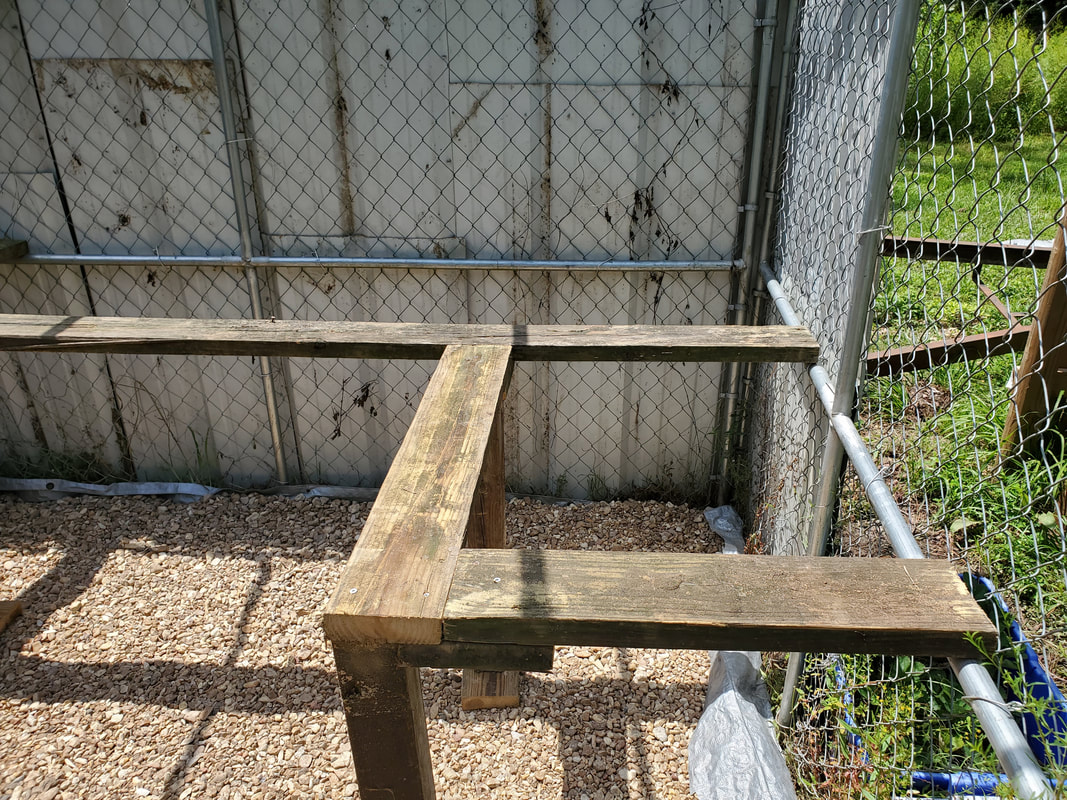
Fourth section, the shortest, set up against the wall along side the gate.
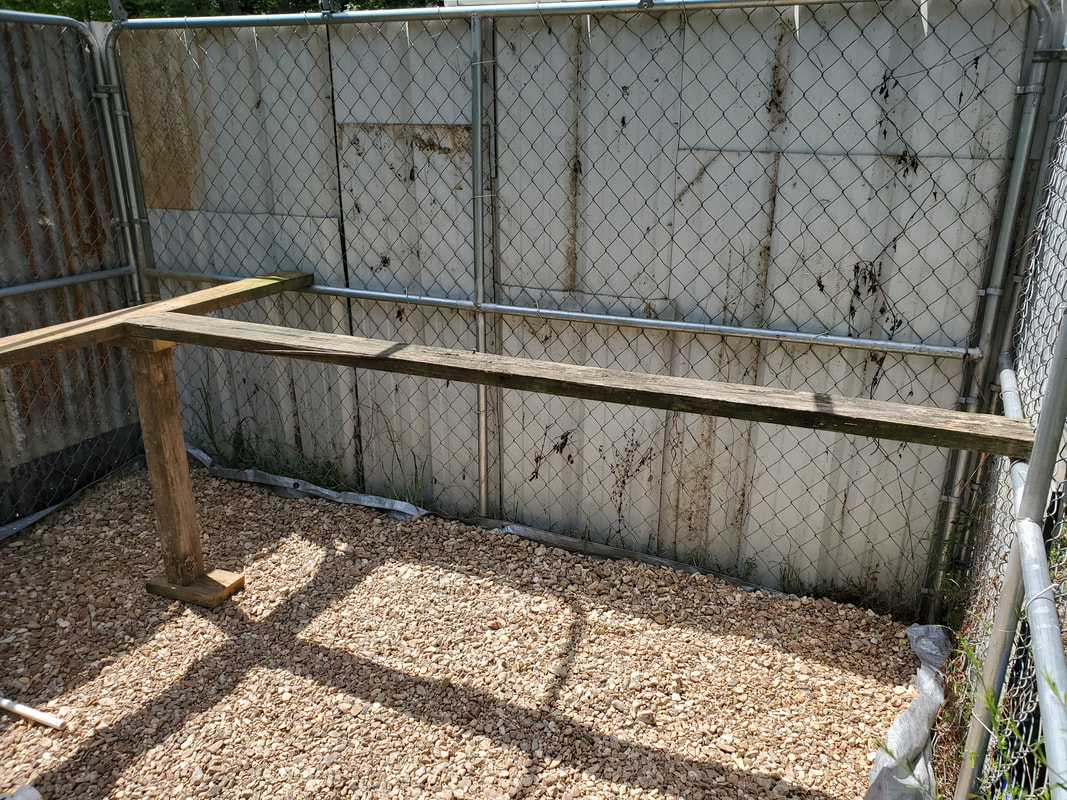
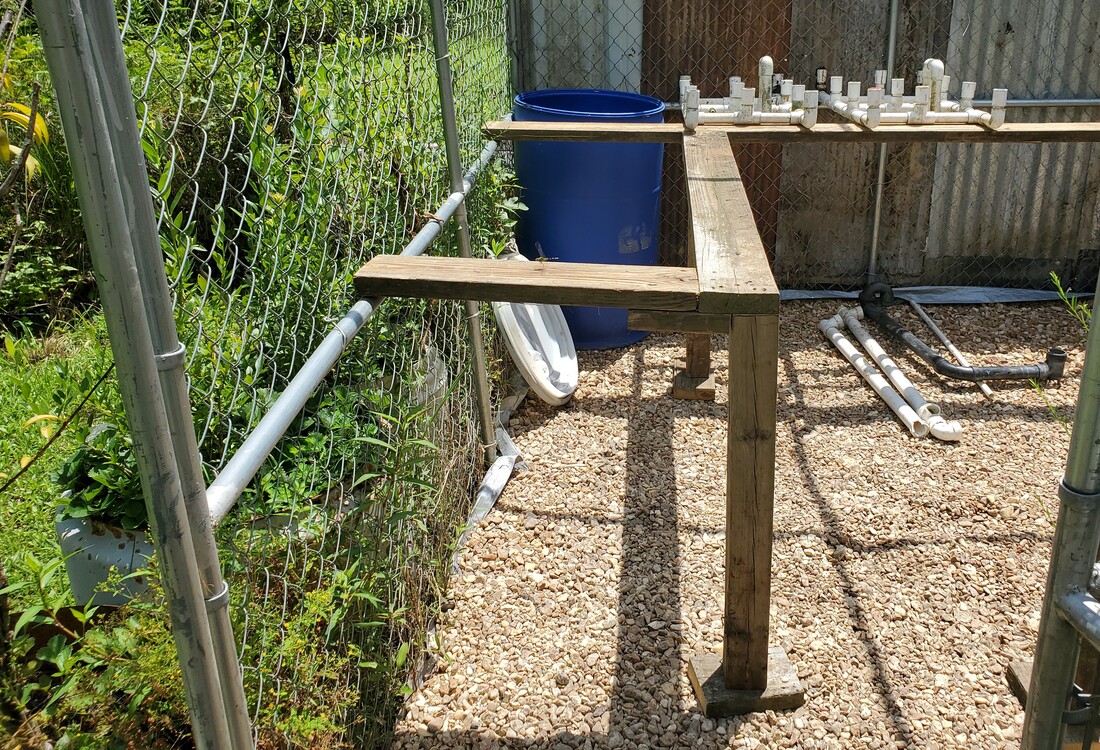
With that all four walls of the greenhouse have shelving set up, allowing for a decent amount of open space in the middle for working on the plants, especially when they grow in the way some plants do. Plants like tomatoes and cucumbers will need some space to spread, even with trellises or posts, the size of the plants will facilitate having plenty of space in the middle to move around when working the gardens. The only thing I'll have to do is drill some holes in the ends of the boards going through the metal tubing of the wall frames so I can secure the ends of the boards with more screws to completely secure the whole assembly to the greenhouse frame. With that I can start adding the extra wood that will be needed to hold the buckets for the raised beds as well as the hydroponic assemblies.
With me exhausting the corrugated sheet metal panel stash I had among my scrap, I turned my attention to the roof. As mentioned before, I had the metal tube frames from two portable garages whose plastic skins had long since rotted away. It is these pieces of metal that I planned on using to make the roof for the kennel greenhouse since the pieces have the angles and junctions that allow for a slanted roof that can be pieced together to make a complete frame. Also the fittings that were used to hold the individual tubes together would also help in mating the frame to the chain link fence panels that make up the dog kennel. 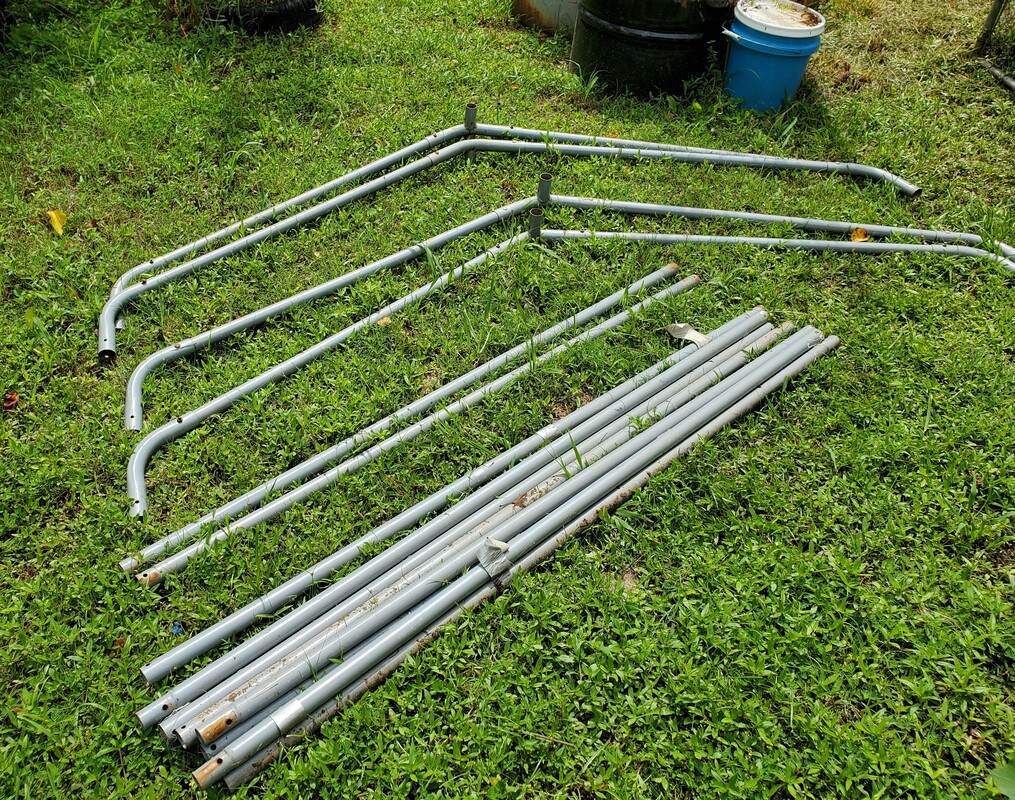 Roof frame sections and misc tubing from old portable garage staged near dog kennel. Now there was a small problem that I ran into when using the complete roof frame sections that span from one side of the old portable garage to the other. The garage was quoted as being a 10' x 20' structure but one thing that needed to be taken into account was the fact that the sides of the garage frame actually taper inward as the frame goes up, so at the top where the roof frame pieces are, its not truly 10' wide, its more like 8' - 9' wide. Because of this, I had to remove the tubes that reach out and go to the 100 degree bend pieces that are attached at the ends and replace them with longer tubes that came from different sections of the old garage. Of course these pieces are much longer than they needed to be so I would have to take the pieces for one of the roof sections and do some measuring to get the lengths for the new tubes. I installed the longer tubes in the roof peak junction and put the fittings on the top of the kennel wall frame. From there I installed the 100 degree bend pieces into the fittings on either side of the kennel then brought the longer roof frame up, lining the roof peak with the center of the kennel wall panel, which is 5 ft, then eyeballing the positions of the ends of the tubes, I marked where I would have to cut the tubes to get them shortened enough that they would fit into the 100 degree bends on either side of the kennel and have the peak be centered. 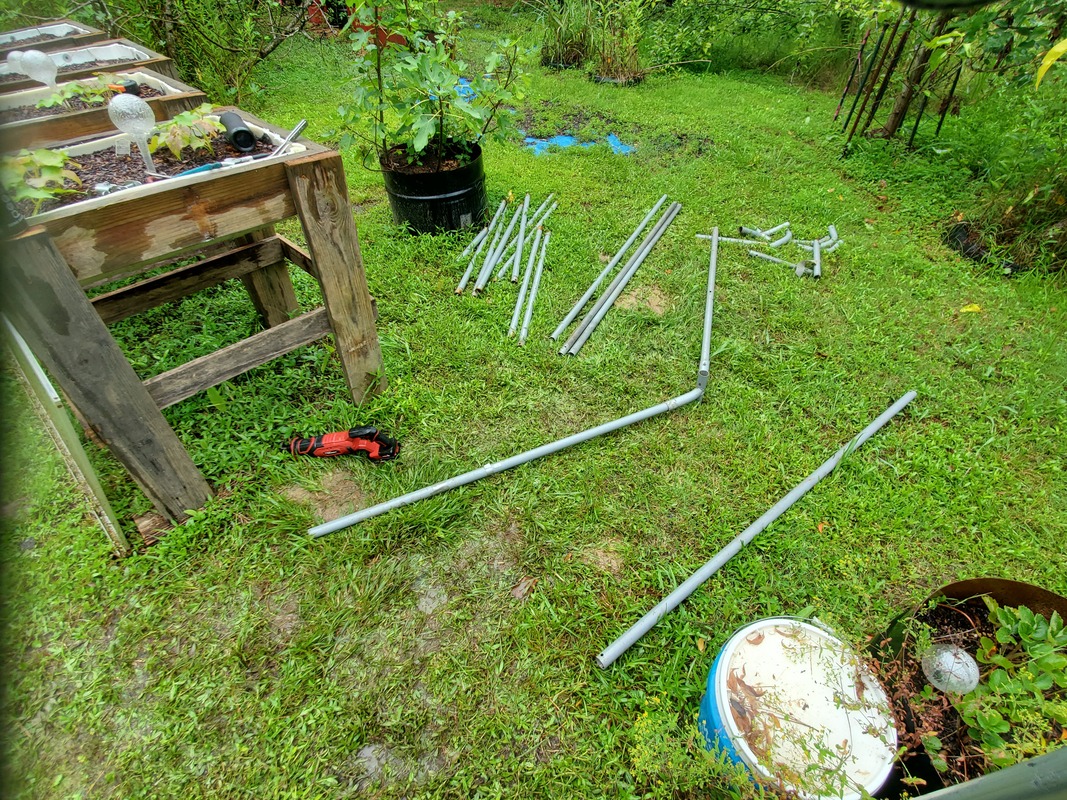 Adding longer tubes to roof peak junction. With the first section setting the bar for how long the new tubes had to be, I removed the roof section then assembled the other roof peak junctions with the longer tubes, lining them up with the first modified section and marking the rest of the longer tubes for cutting. With all of the roof sections modified and ready to install, I was ready to install the other fittings to the top of the kennel walls so I can get the rest of the 100 degree bends installed. Of course to do this I had to drill plenty of holes in the fame panels of the dog kennel so I could install the carriage bolts that were used on the same fittings with the portable garage. After having already done the first pair of fittings during the modification of the roof sections, I did the same on the opposite side of the kennel since I wanted to install the two end sections. The end sections have roof peak junctions that accommodate only three tubes, since the center tube or the tube that makes up the peak or top most part of the roof only reaches out from one side of the end junctions. In some cases I did have to drill new holes since the cut tubes did not have factory drilled holes that corresponded with the design of the garage. Either way, as I made new holes, bolts went in and the structure went together. 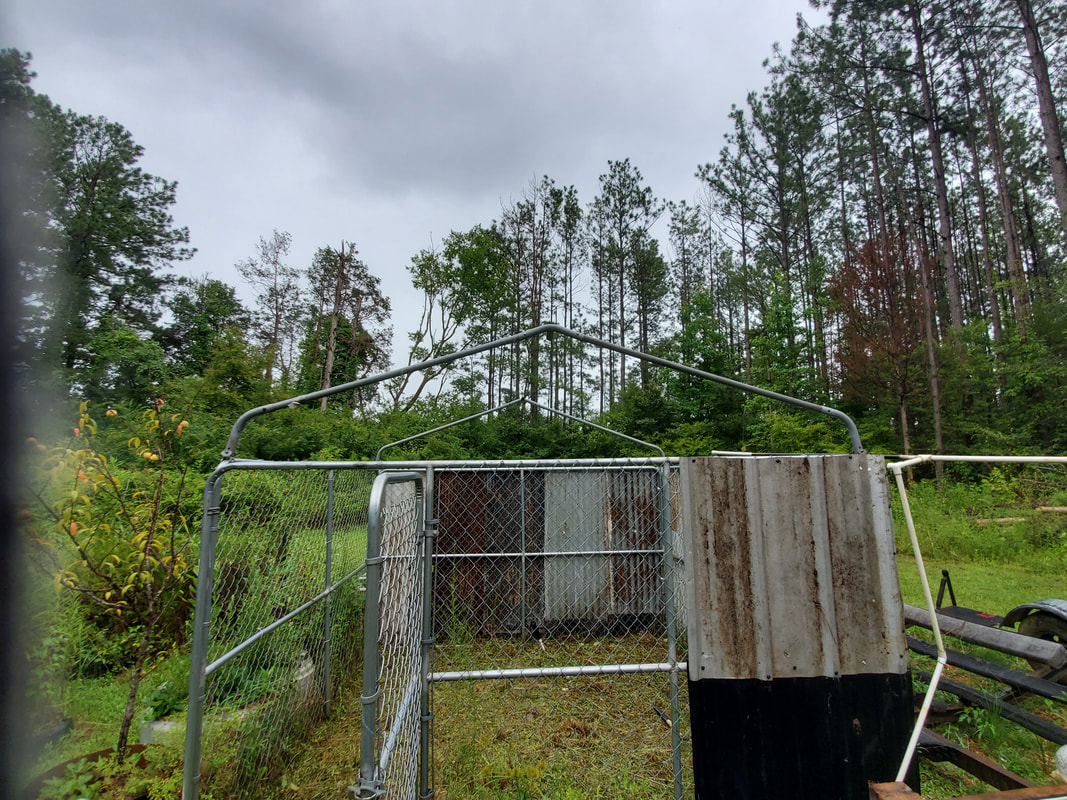 Two end sections of roof frames assembled on top of kennel greenhouse frame. With the two end sections hung I had to mark points on either side that would allow for almost even spacing between the end frame sections and the two middle sections that were to be installed. Since the dimensions of the kennel are 10' x 10', to have evenly spaced sections I would have to mark points that are a little better than a third of that number, or about 40 inches, a few inches more than 3 ft. After marking these points on the top of both sides, I hung the fittings at those points then put the 100 degree bend pieces in place and finished hanging the roof frame sections at those two spots. With that, the last thing is the center tube run that will connect the four frame sections. 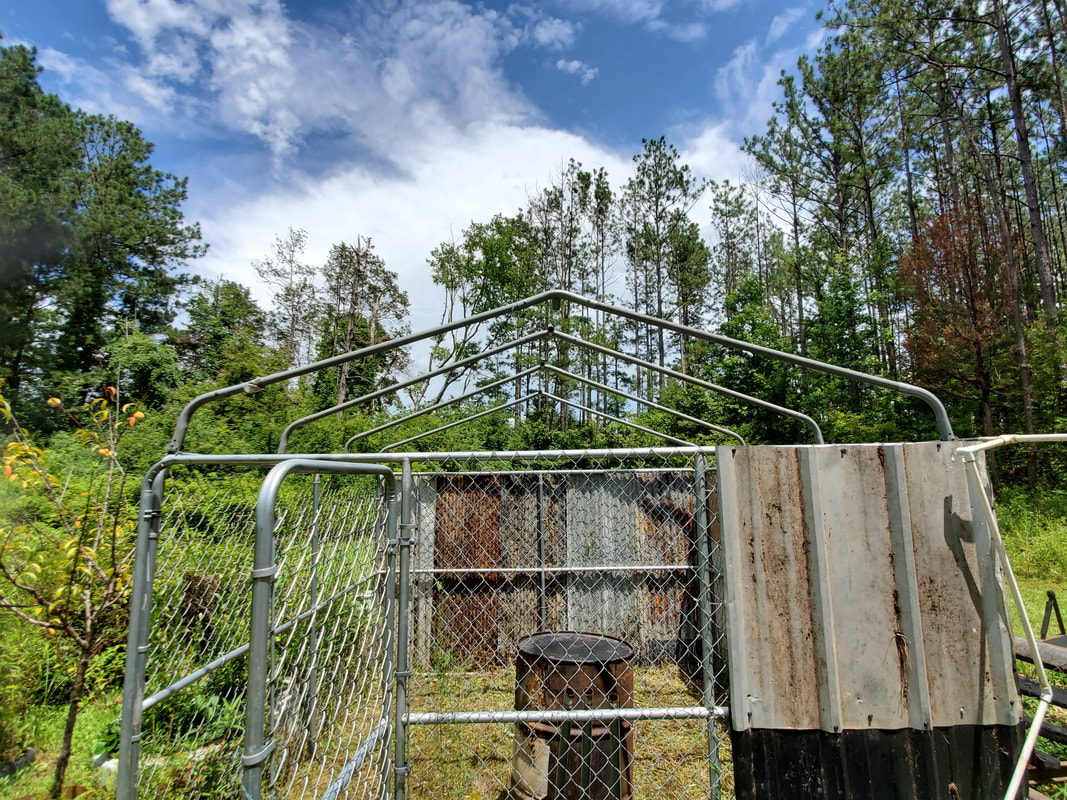 Roof frame sections installed, pending installation of center/peak tubes to couple all the sections together. To perform this fun part I had to utilize an old drum to stand on so I could reach the peak of the roof since it was well above 6ft high. In order to install the tubes between the frame sections I had to take a tube, install it on one side then bring it up below the next section and mark about where it would reach into the junction of the next section. From there I removed the tube, jumped down to the ground, cut the tube then climbed back up and installed the tube between the two frame sections. From there I drilled holes on both sides of the tube to put the carriage bolts in place to finish the coupling of the two sections. I repeated this procedure with other two tubes that would finish coupling the remaining frame sections. 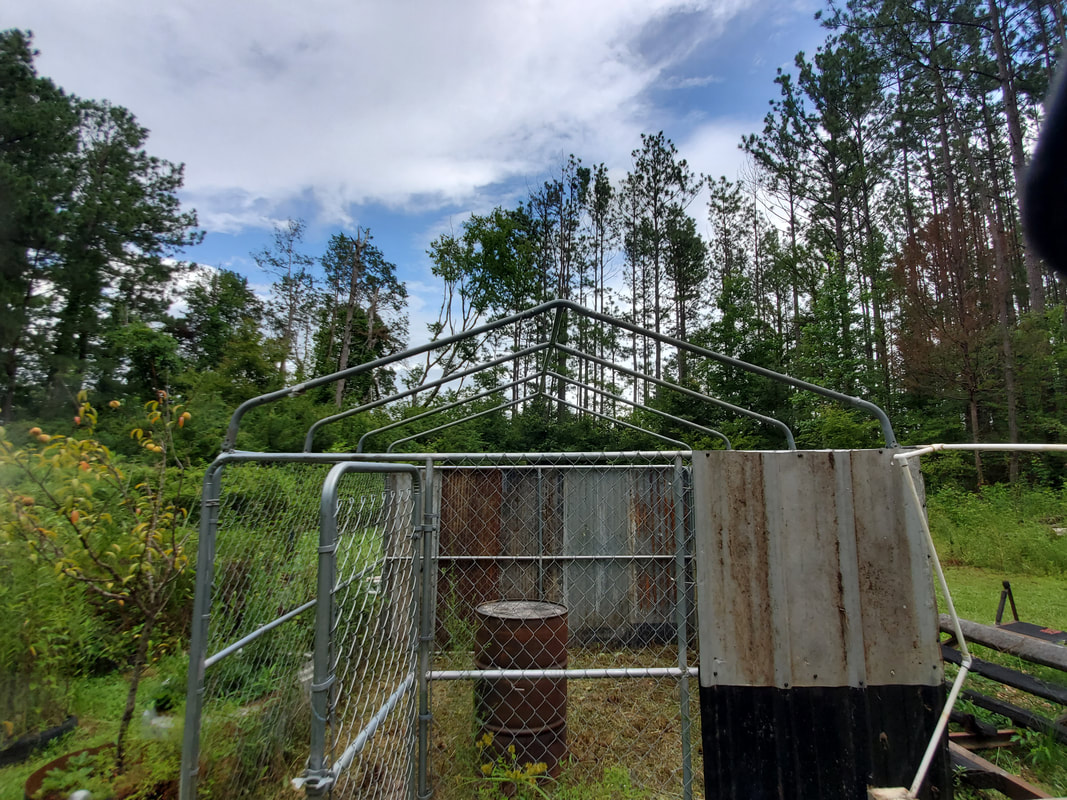 With that the frames of the roof section are all coupled together and the roof frame is complete. Now as stated before, the plan is to get some thick UV resistant plastic that will be used to cover the roof in the winter time to allow the greenhouse to perform its job as a trap of heat so the plants within can grow. The plastic cover will then be removed when the temps start going up since that will cause the temps to rise to dangerous levels during the warmer weather. If the plastic is thick enough I may even be able to make a fitted skin by gluing sections together and adding grommets to allow for securing the roof skin to the kennel frame. Such a thing would make for quick installation since there won't be any fitting of a loose sheet of plastic, it would just have to be lined up right and secured via the grommets.
As I had mentioned before, I decided to start work on the dog kennel greenhouse, with the main reason being that it will actually use up a lot of scrap material I had laying around the backyard area in the form of corrugated sheet metal and the parts to the frames of the old portable garages I disassembled a while ago. I figured that I should have enough corrugated metal to cover at least two walls. I would have to overlap some of the panels as they weren't long enough to cover the span from top to bottom but with an overlap that puts the top piece over the bottom piece, it will shed water better and not allow water to get to the inside of the greenhouse.
The first thing I had to do was some landscaping though. I had to cut the grass on the inside of the kennel since it needs to be gone prior to me making the floor and I had to cut the grass around the east side fence line where the kennel sits. All of the area around the kennel would have to be cleared so I can get the panels up without getting weeds and high grass caught up in between the kennel and the sheet metal panels. I spent a fair amount of time with the weed eater cutting all of this grass from inside and around the outside of the kennel. 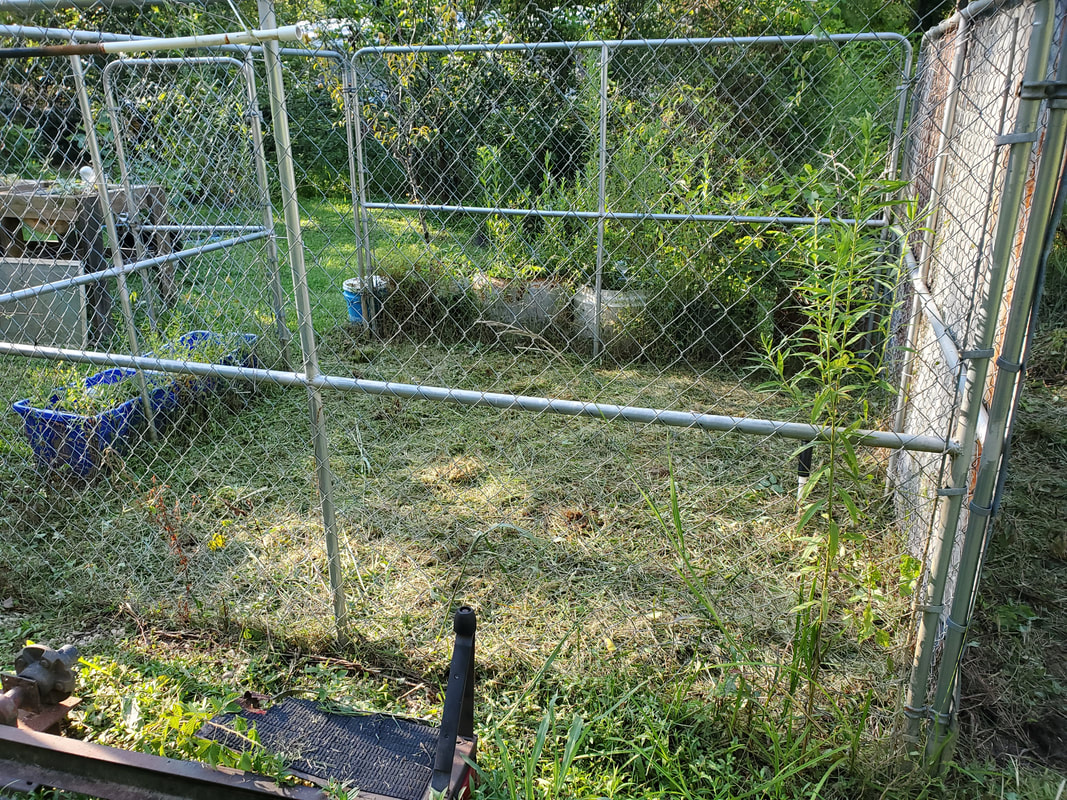
Grass and weeds cleared from around the dog kennel greenhouse.
I started off with the east fence line/east side of the dog kennel. I had to pull the old garden fence away to expose the dog kennel walls first. Since the bottom of the chicken wire was kind of sunk in the dirt and pretty well anchored, I just pulled the Tracker around and using a tow chain wrapped around a small portion of the old fence and hooked to the Tracker's hitch I snatched the old fencing from the ground along with one of the old fence posts, more than enough to fully expose the east wall of the dog kennel and even open up a small path that would allow me to move around the entirety of the dog kennel greenhouse.
From there I started hanging panels. I would attach the two panels together for the ones that would need to be overlapped, then put the pair against the side of the dog kennel to mark where the top of the kennel wall was so I can trim down the corrugated sheet metal and have the newly made wall panel set for bolting down. Once the panel was trimmed down I used some of the batch of self tapping screws with the impact driver to hand the panel up, anchoring to the dog kennel's tubing that's used to hold the chain link fencing up on it. 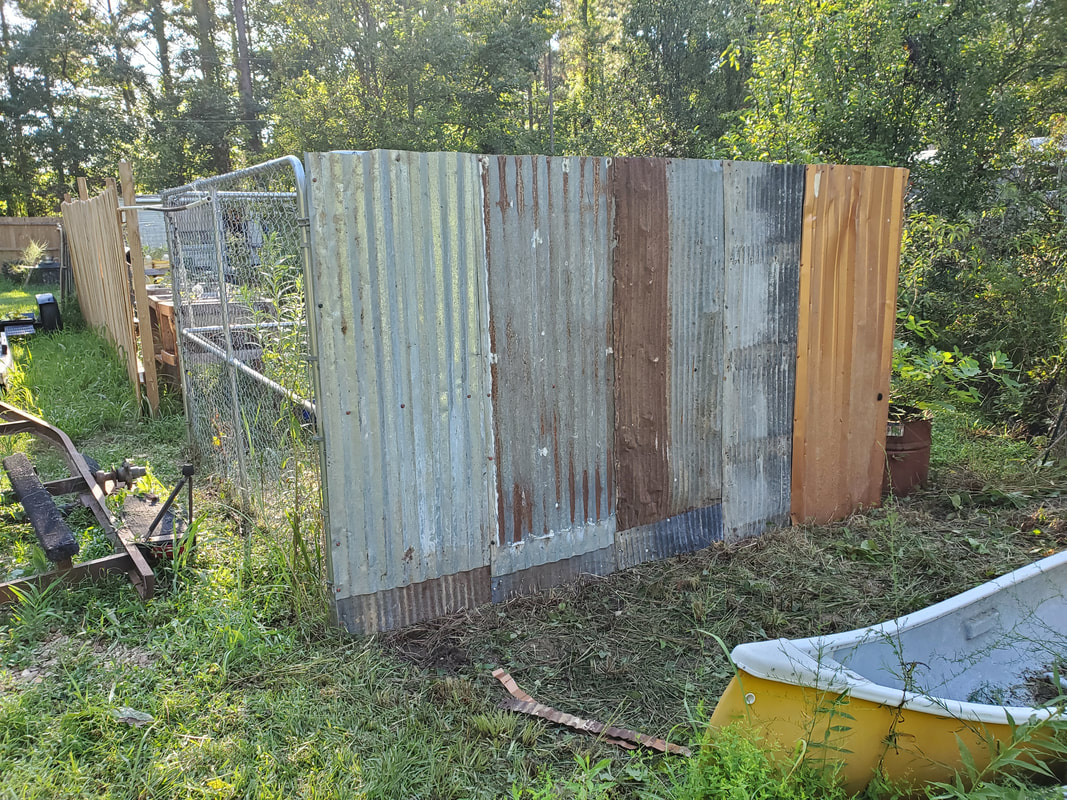
Eastern side of dog kennel greenhouse with corrugated metal panels hung on walls.
After doing this a few times I finally got to some panels of sheet metal that were long enough to cover the side of the dog kennel without overlapping with another panel. A couple of panels even needed to be trimmed down a little bit because they were too long. I hung the panels up first then trimmed them down with the die grinder to finish them off. From there I did the same thing on the southern wall of the dog kennel. Now the biggest reason for me doing these two walls was because when I do start hanging fence panels over this area, the eastern fence will fully cover up the eastern wall of the dog kennel greenhouse while the wood fencing for the garden on the southern fence line will do the same for that wall of the greenhouse. The unsightly overlapping and multicolored panels will be fully covered by wood fencing so no one will really know just how gaudy the thing looks at this point. At least then I can get complete panels for the exposed sides of the greenhouse so when I hang those at least the structure will look a little decent. 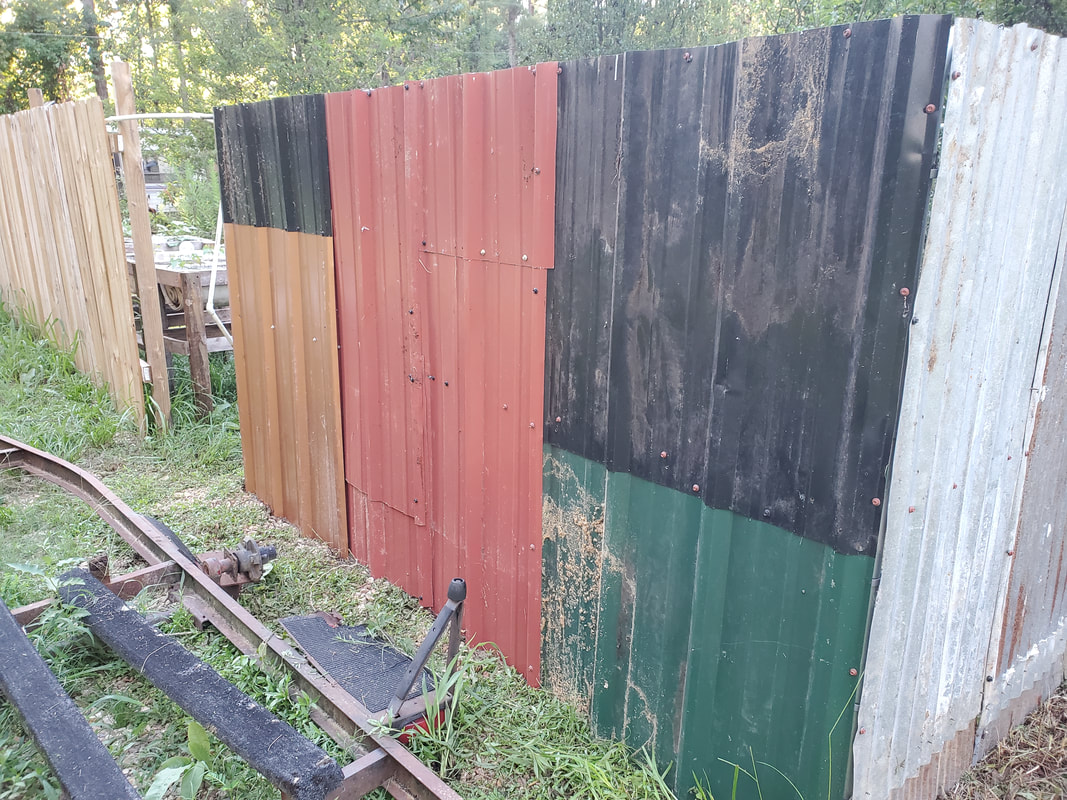
Southern wall of dog kennel greenhouse completely covered in corrugated sheet metal.
After getting the southern wall completed I still had just enough metal paneling to get one small section of the western wall covered. Of course this was an overlapping section of panels but what will end up happening here is the idea that I'll probably spray paint over this metal to make it all one color, along with the new metal when I do get some and hang it just as well. Just as I figured, I'd have enough metal to cover two walls completely and in this case had enough to get started on the third wall. 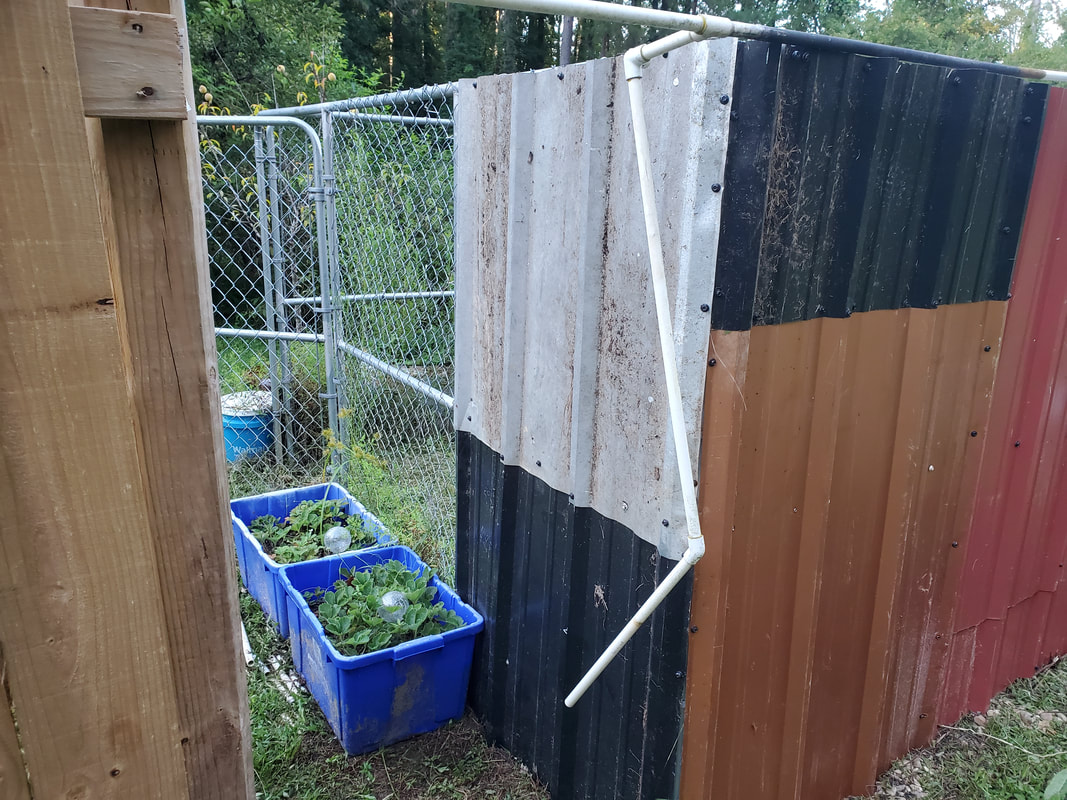
West wall panel hung up with two remaining pieces of sheet metal in the pile
Since I ran out of usable corrugated metal and don't have any prospects of getting any more any time soon, I will be moving on to the roof frame so I can use up those materials just as well and get a good idea of what I can do next within the greenhouse. I can see where I would need to hang mounts for holding things like grow lights or water lines for irrigation and conduits for electrical outlets for the grow lights and even heaters for the winter. Even after I get the roof done I will most likely start going through my other scrap materials to start making some more raised bed gardens and even hydroponic gardens to line the walls of the kennel greenhouse since the whole purpose of this structure is to be able to grow things through the winter months. There will be more to come as progress is made on this project.
|
