|
A good while back I set up an area light over the main driveway that was 12v powered, using an array of 12v LED floodlights on a board, powered from a marine battery that was activated from a cheap 12v timer. Fast forward and the wood structure and the other hardware that I used to fabricate the structure started rotting and the battery was shot. The costs to restore this structure were way more expensive than to just replace the whole thing with one of the self contained LED/lithium battery streetlights you can get from places like Walmart or online. That setup was easier to setup than my old floodlight setup. Anyway, that meant I had several parts to put to use, namely the LED floodlights. I came up with an idea to use one of the LED lights to illuminate the area around the Storage Trailer's entry door. In order to do this I decided to use a dusk/dawn sensor along with a 12v adapter to power the LED from 120vac. I would install an outlet box that would be cycled from the sensor and would power the 12v adapter to power the LED.
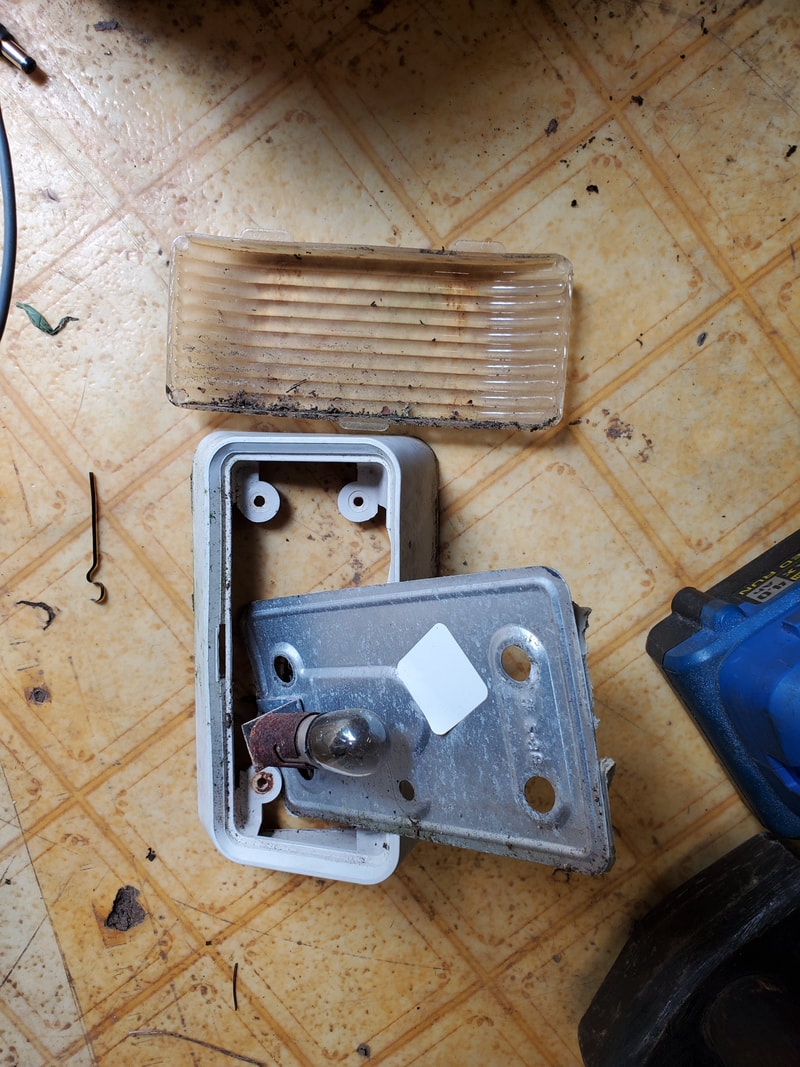
The old 12v trailer light that needed to come down to open up the area for our new hardware.
The area that I wanted to install the hardware had a 12v area light already over it. This had to go to make room for both the sensor and the LED. After removing this light, the hole on the wall behind the old area light ended up being too big so I had to drill another hole next to the big hole with which to secure the dusk/dawn sensor. With the sensor in place I secured the bracket for the LED light next to the sensor. I ran the wires for the LED through the original big hole in the wall, but will have to find some kind of way to plug that big hole so it doesn't end up being an entry way for wasps or other bugs, much less the rain. 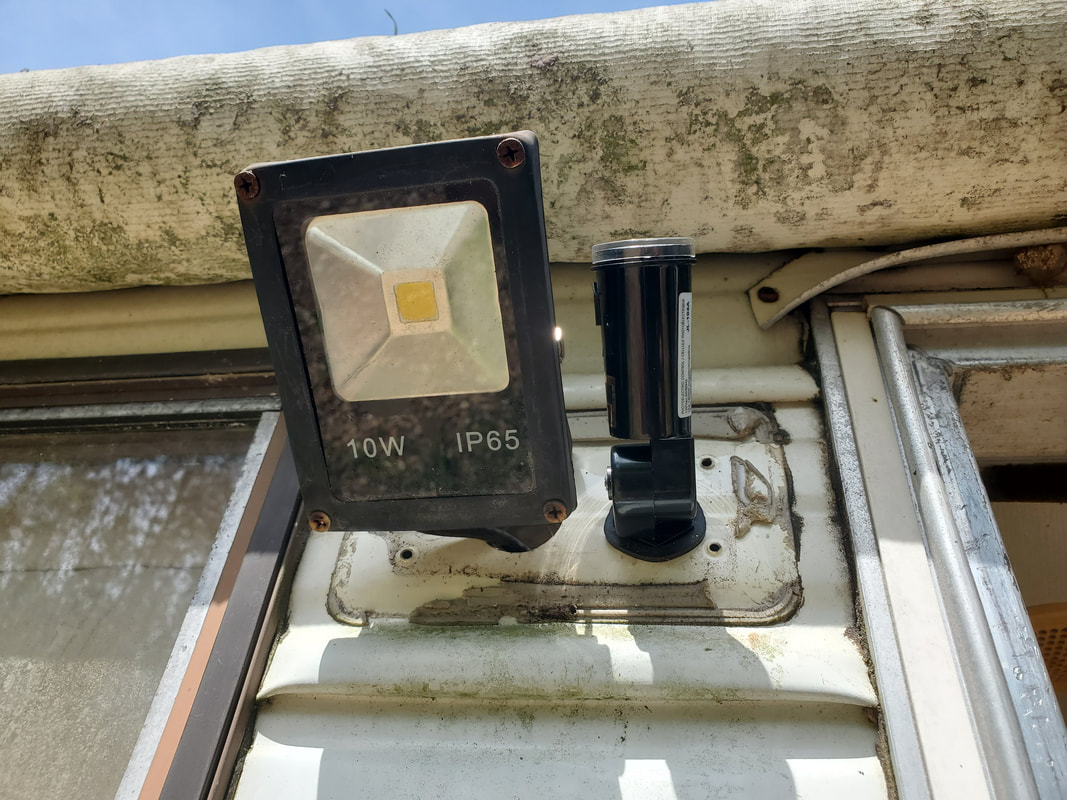
The 12v 10w LED light and the dusk/dawn sensor mounted on the wall of the trailer.
In order to keep this project cheap, I used what I had available. I had a blue plastic outlet box among other things, that I decided to use. I secured that box to an open area on the wall above the other outlet that I'm currently using to power the trailer's interior lights. Of course I couldn't use this outlet because its powered off a switch. I had to pull the interior light's outlet off its box and route the wires for the dusk/dawn sensor and the romex cable from the new outlet. 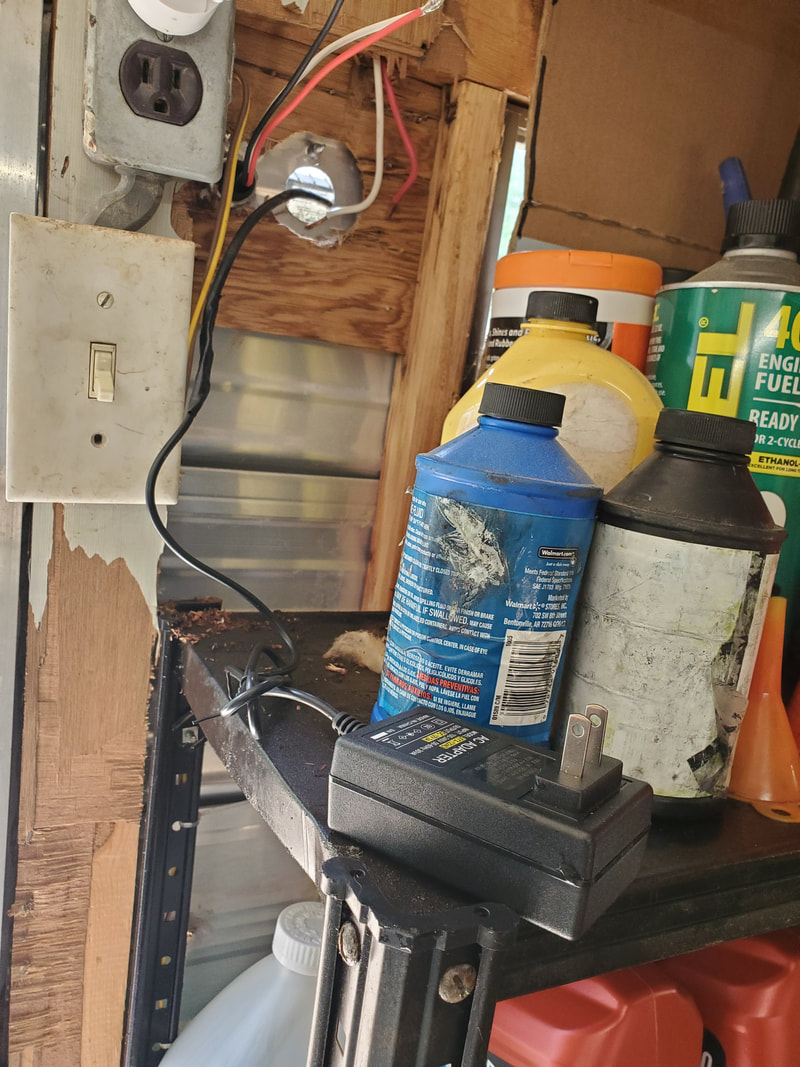
The new wiring from the sensor and the LED, with the LED wiring hooked up to the 12v power supply.
All the connections for the new hardware will be routed through the old outlet box. I had to connect the black and white wires from the sensor to the line/neutral wires being fed into the old outlet box. The neutral line is connected to the old outlet's switch. The neutral line which is going to the switch is also connected to the neutral on the Romex line feeding the new outlet. Three wires are hooked to the neutral line. The load wire on the sensor is hooked up to the black wire on the Romex cable feeding the new outlet. With all this stuff wired up, I could finalize things with the 12v adapter.
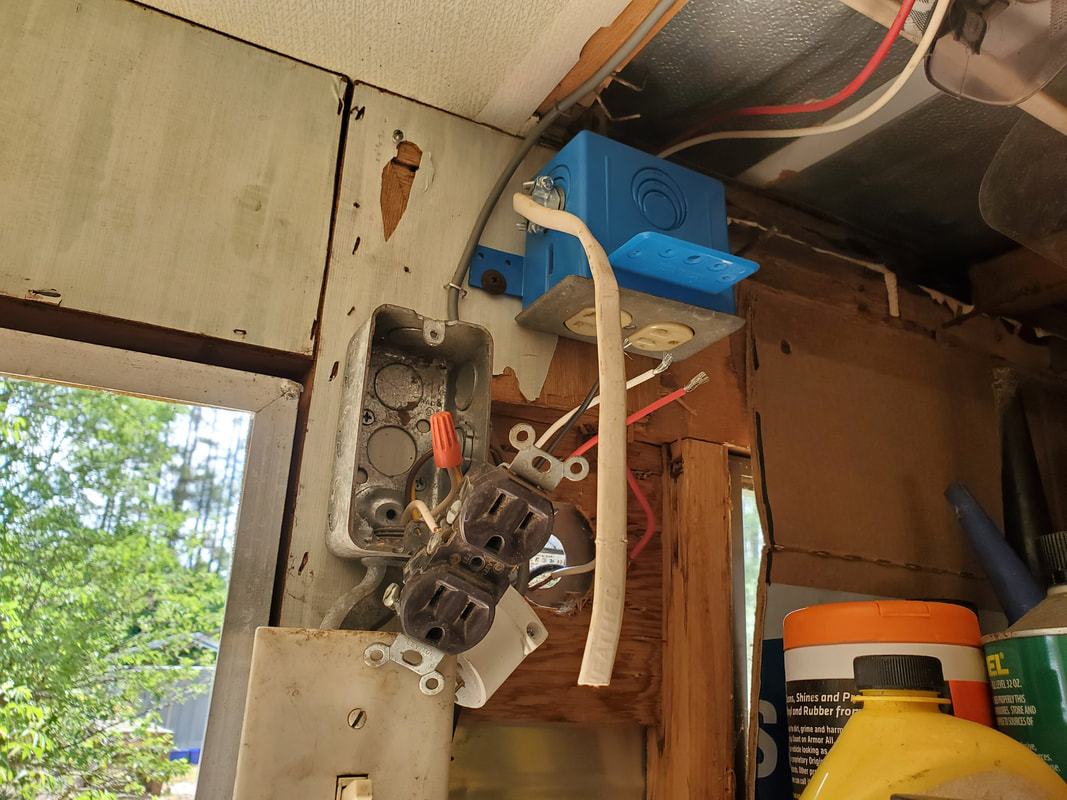
The extra outlet box and outlet which is hooked up to the dusk/dawn sensor. Other outlet is the old outlet for the interior lights and our source of 110vac power for our new hardware.
After plugging up the 12v adapter and turning on the power to the trailer, the LED light came on as the sensor got power. Once the light activated the sensor, in about a minute, the sensor cycled off and killed power to the LED light. I held my hand over the sensor and after a couple minutes the sensor cycled back on, turning the LED light on as intended. I adjusted the sensor where it would be above the LED light so any glare from the light won't activate the sensor accidentally. 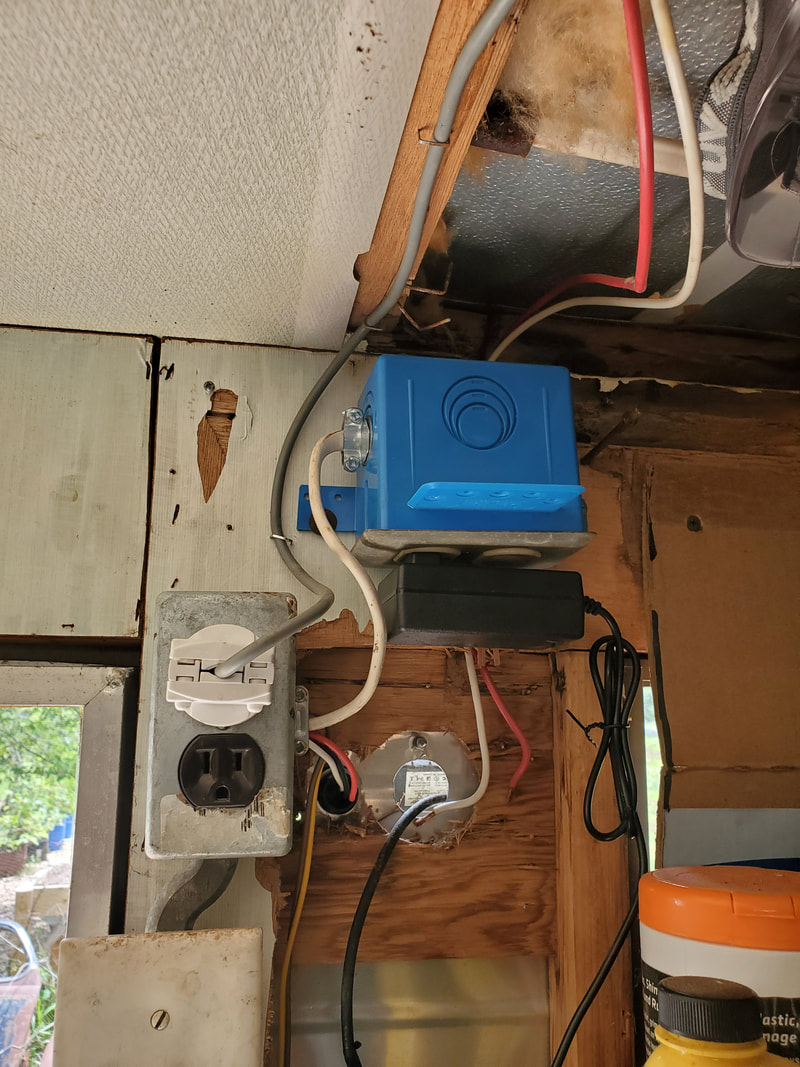
Everything put back together and power supply plugged in and ready to go.
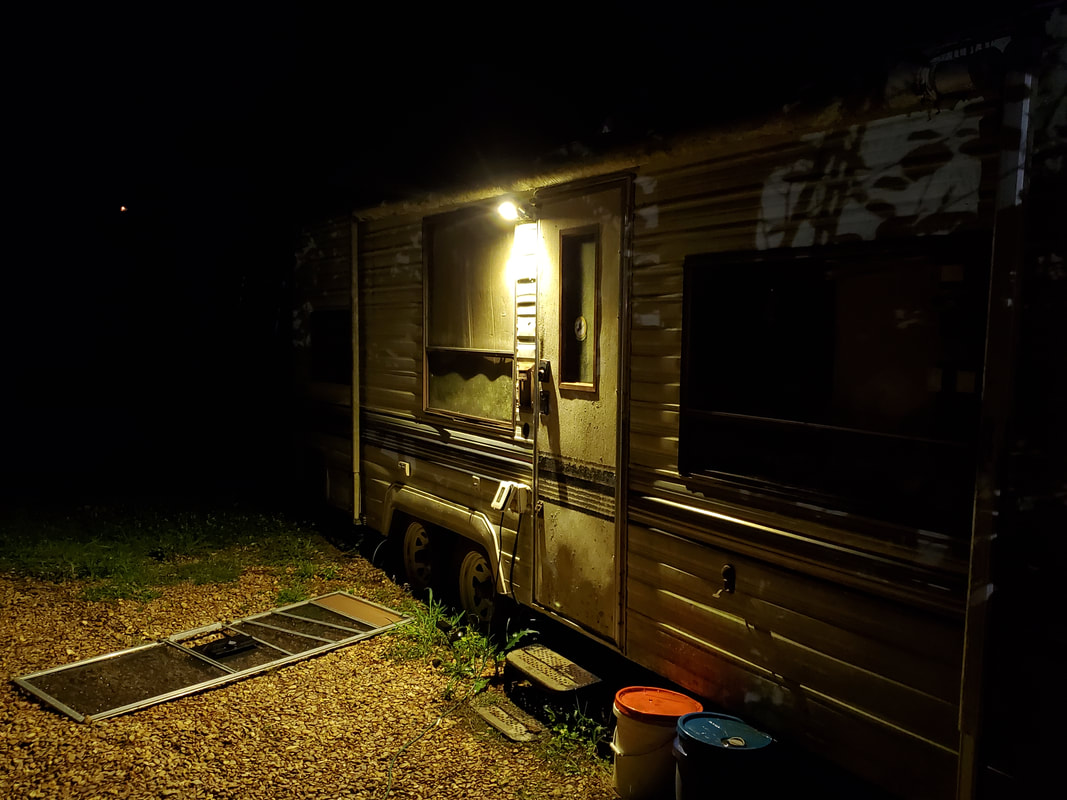
LED light illuminating the area the following night, more than enough light for what we need here.
Of course I'll have to wait until night time to get a good idea of the level of illumination this little LED will cover but I'm confident that the single light will cover the area around the door pretty good as I had four of these lights light up a large area around the driveway pretty good. I really don't need too much light around the door anyway, just enough to be able to see the door, steps and the keypad lock so I can go over to and into the door without needing a headlight or other flashlight. This little setup is just one of many little conveniences that I plan on setting up around here.
0 Comments
After watching multiple videos on the subject, I decided it was time to give the idea a shot. I had a few old batteries that were perfect candidates for this process, which involves using epsom salt and distilled water in the rejuvenation process. I took three old batteries, one a marine battery, one a mid sized top post and the other a higher end side post battery, and popped the caps off to drain the old acid/water mixture from them. After draining the old acid, which included a lot of particulate matter, I mixed up some baking soda and tap water and poured this inside each of the six ports. The baking soda would help neutralize any remaining acid in the cells. Once this mixture was shaken up some, I drained this out then flushed the batteries several times with fresh water until no more heavy particulate matter came from the water. Once that was done I mixed up a mixture of epsom salt with distilled water. I mixed enough until it started getting more difficult to dissolve the salt. Once at that stage, I poured this mixture into the marine battery and the top post battery. The charger that would have to be used is a manual charger as the newer electronic chargers require the battery to have some voltage in it to activate the charger. The charger wouldn't turn on with a dead battery. I ended up using the large jump starter, which has a maintainer setting which should be around 1-2 amps, along with a 10 amp setting. I started the charge on the maintainer, but after about an hour I cranked it up to the 10 amp setting and left it there for the rest of the day afternoon/evening. 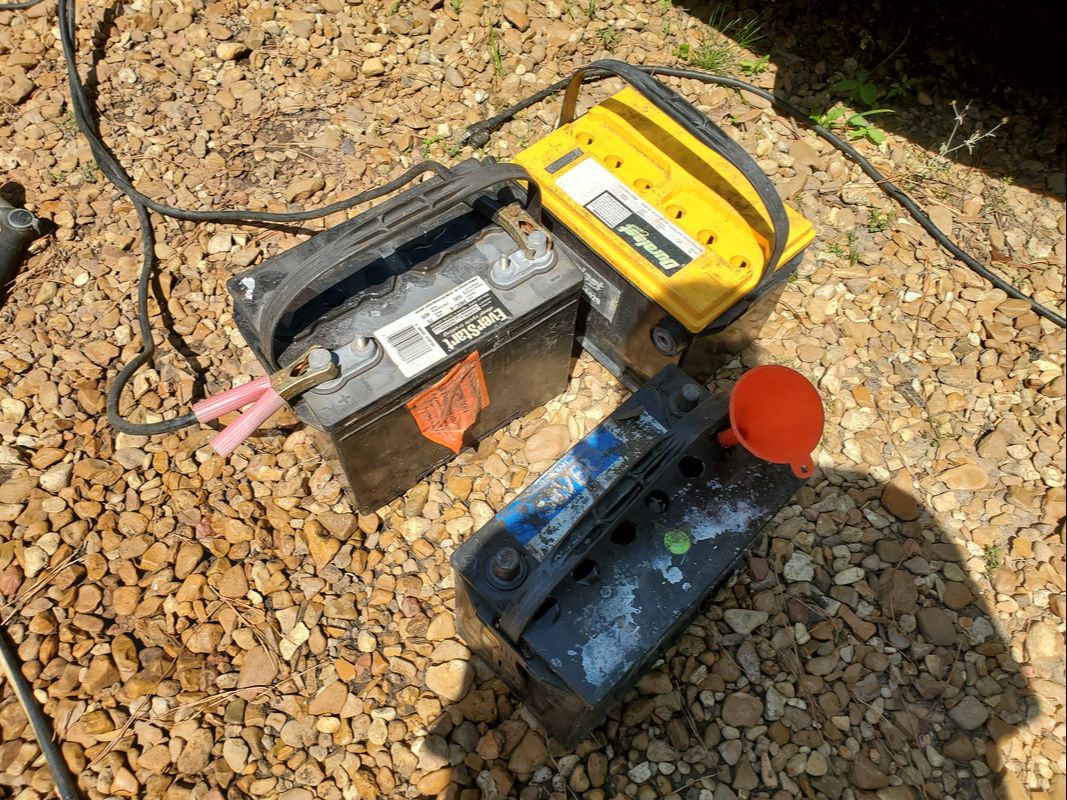 The three test batteries that have been prepared for the rejuvenation process, with the marine battery hooked up to the charger. While our battery was charging, I turned my attention to the next little project we had, which was installing a new keypad lock on the storage trailer door. The old lock had a mishap where I bent the key some, and since this was the only key, getting a replacement wasn't going to be possible. Besides, I was already wanting to replace this lock with a smart lock or keypad lock so that plan was pushed forward some with the key episode. We picked up a keypad lock from Walmart. The first thing I had to do was remove the old lock. This thing was rusty inside and gave me instant trouble. One of the screws stripped and required me to pry the inside portion of the lock loose enough to get the metal cutting blade of the reciprocating saw behind the lock body to cut through the screw. Once the inner and outer sides of the lock were out, I had to hammer and pry on the tongue portion to manage to get it out, all while not damaging the door. I got it out though.  The old rusty lock cut free from the trailer's entry door. I laid out the components of the new lock in order to see how to piece all this shit together. The first thing to do was install the tongue section. I had to adjust this piece to the longer length for our door. Later on I would have to remove a spring inside the tongue that puts some kind of pressure on the rotating piece that pushes the tongue in and out. Once that piece was in I was able to mount the keypad/outside body of the lock. 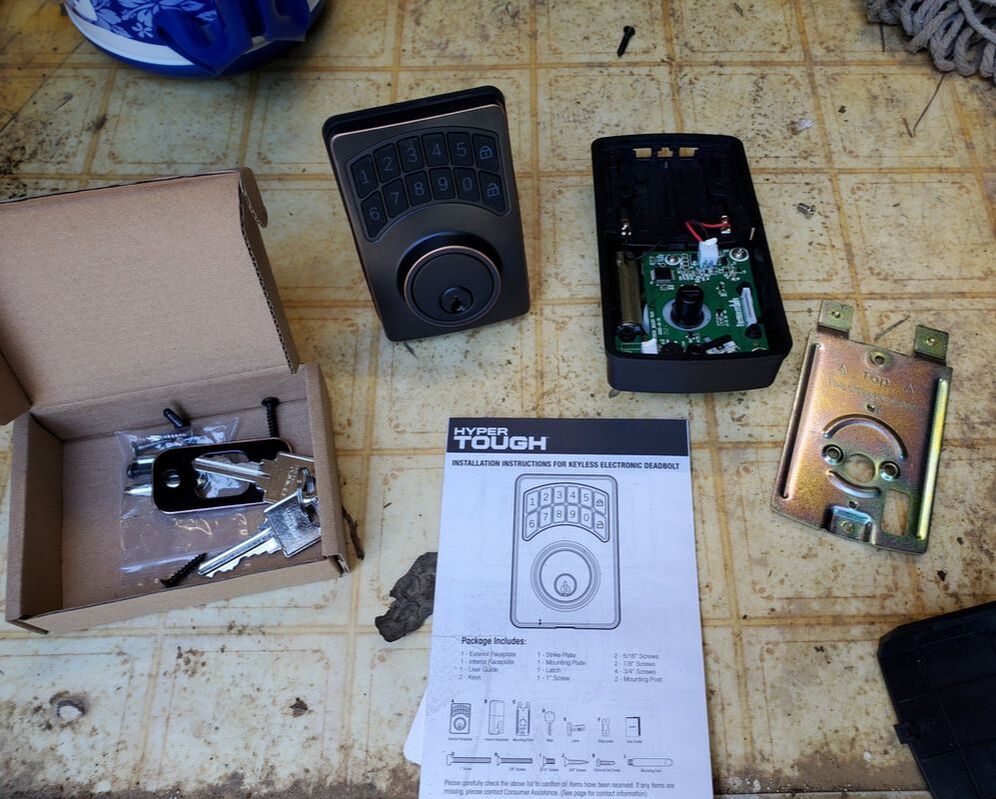 The new keypad lock kit with all the pieces for the installation. With the keypad body in place, I still had to install the metal plate on the inside that would hold the keypad body in place as well as provide an anchor point for the inner body of the lock, which holds the batteries and the electronics, along with the mechanical locking mechanism. I had to secure the plate with screws to the door body, then use three screws to secure the inner lock body to the plate. With the body on, I was able to install the batteries and move forward to the testing and the code programming. 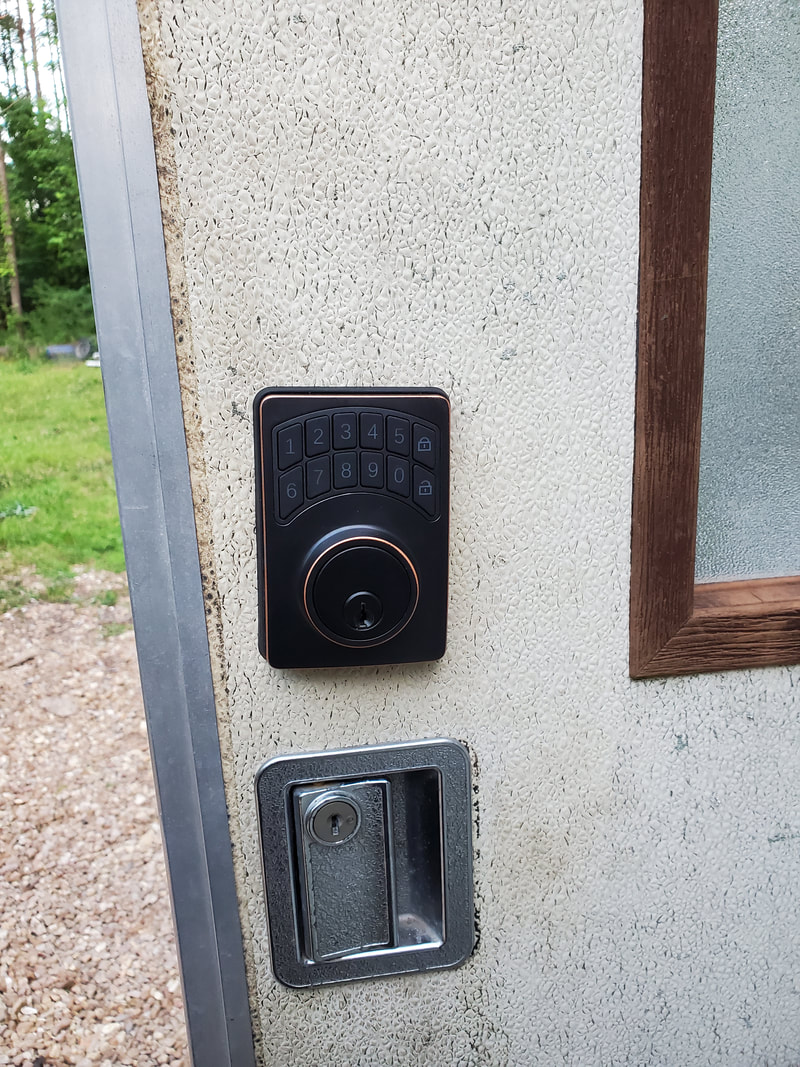 The keypad body of the lock, mounted on the outside of the door. Body has a rubber seal to waterproof the inside of the door. Don't mind the crooked lock body, with the way this door is wonky, this was the position I had to have the lock in for everything to work properly. 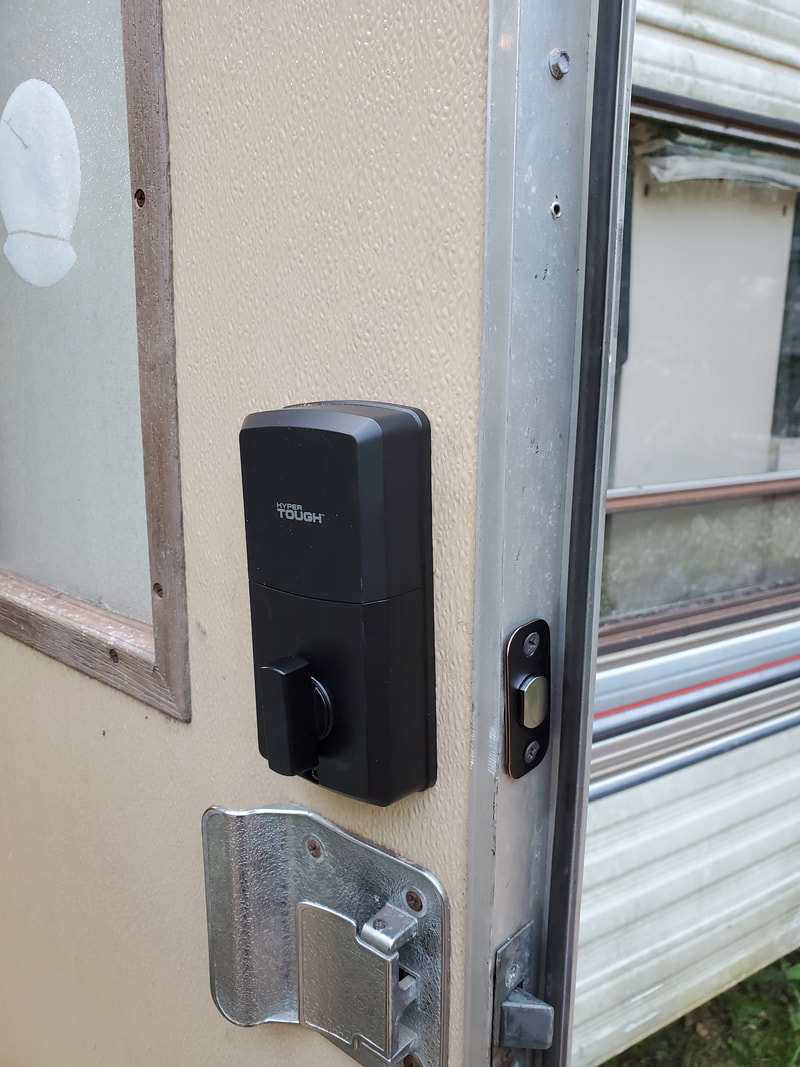 The inner body of the lock that contains the batteries and electronics plus the lock mechanism. The whole saga didn't end here. I had to do some other things first. Well to rewind, I did have to straighten out the door as it was partially falling apart again due to screws loosening up that I had installed a while back to hold the door together. I also had to drill out the door jamb where the tongue would extend into it due to the fact that the tongue was pretty long compared to the depth of the hole. I also had to widen the hole some, along with beating on the aluminum of the door jamb in order to eliminate points where the door was scraping against the door frame. Once all the tweaks were made I was able to open and close the door without binding and the lock itself was able to open and close all the way as intended. 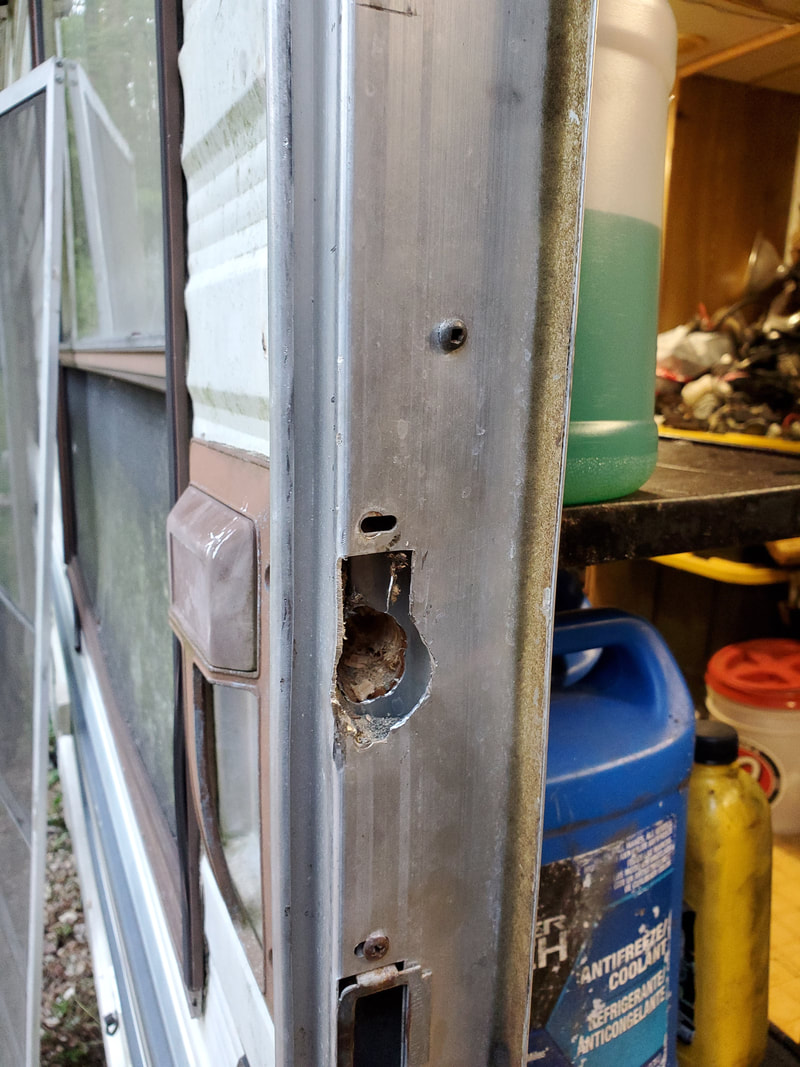 The door jamb hole where the tongue passes into, after reaming it out to allow the mechanism to operate properly. One more thing I had to do was remove the storm door. The inner body of the lock hit against the storm door body so the only option was to remove it. Besides, the storm door was useless on a storage trailer. It's not like we're using the trailer as a mini house or anything. So with the lock ready to rock and roll, I tested out the lock by hitting the button to engage the lock. Once finding that to work, out came the instructions to get the codes programmed.  The storm door removed from the trailer after it interfered with the closing of the entry door with the keypad lock in place. The first thing I did was go thru the process to delete any user codes that may have been in the device, even though this thing was new. Once that was done I programmed a new admin code, which was a six digit code. With that done, I went through the procedure to set two separate user codes, both are four digit codes, to coincide with the four digit codes we typically use. After going through the processes and getting the quirks figured out, I was able to get everything programmed properly. After running the final tests to confirm the codes worked, I was able to relish in the victory of installing this cheap lock on this raggedy door and have everything work like its supposed to. On the next go around I want to get some regular smart locks, the ones that use RFID chips that can go on our keychains to activate the lock without having to even touch anything. I'll also want to add one of these locks to the garage lock as well, as it would be nice to be able to lock that place down, due to the fact that there's plenty of expensive tools held within, plus the Dodge. Once I do that, it'll be showcased here.
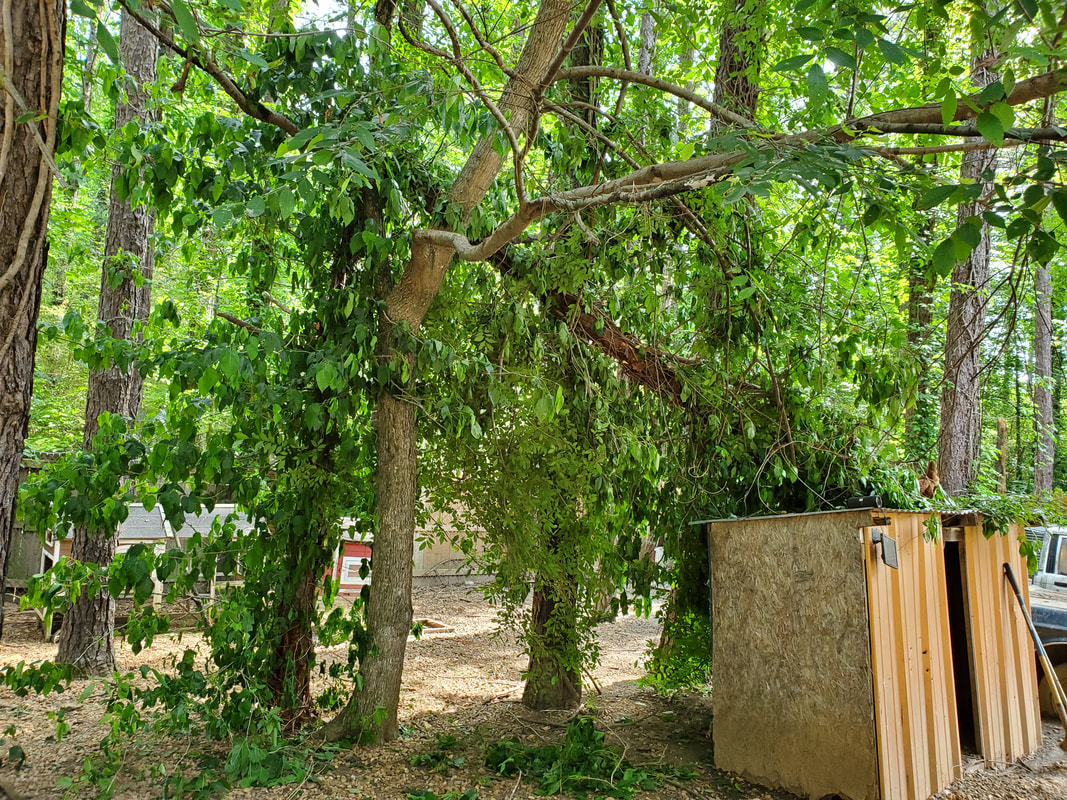
I finally took the time to address the fallen trees behind the chicken yard fence at the northeast corner. These trees had been down for some time and should've been taken care of during the winter when weeds and ground brush were at a minimum but other obligation kept me from getting back there until now. Either way, this trash needed to be cleaned up so the area around the back of the fence can be accessible once again. I had already started with the weed trimming of the ground all the way up to the fallen trees on either side. I still had to use the hedge trimmer to cut the smaller pieces of branches around the trees that were low enough to access, as well as clear the branches enough to allow me to get in close to use the chainsaw to cut the larger stuff up.
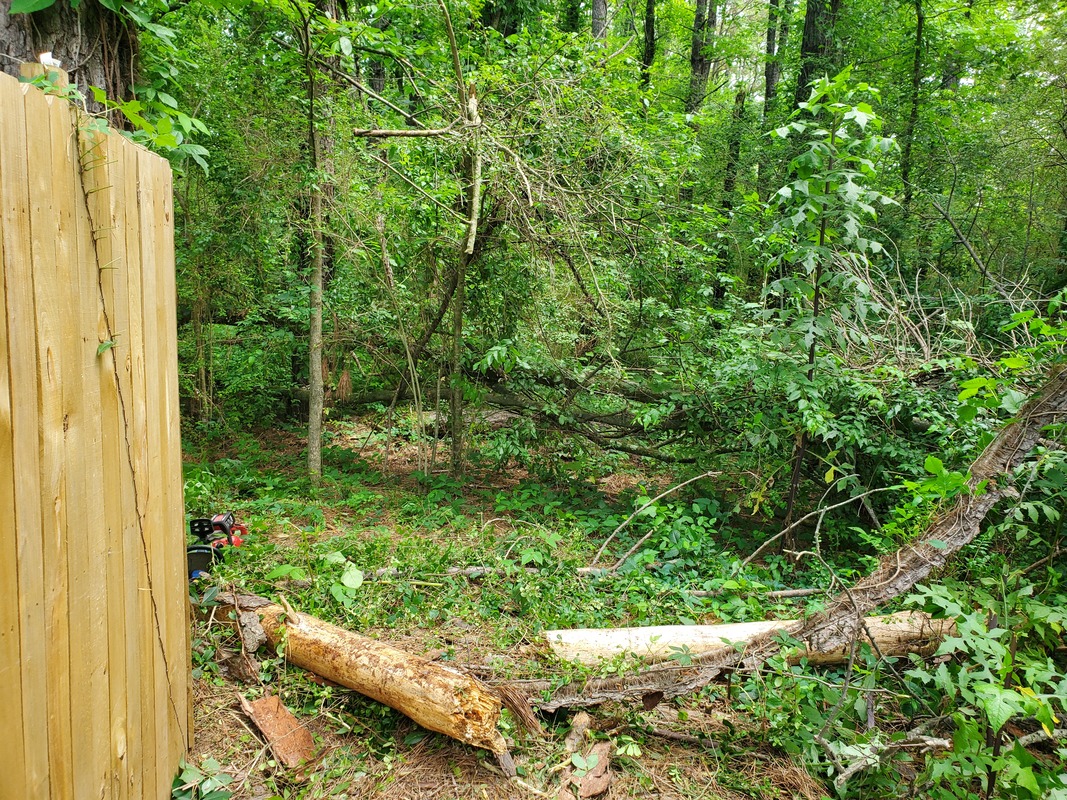
Section of fallen tree trunks that fell alongside the north fence. Note the poison ivy covered bark.
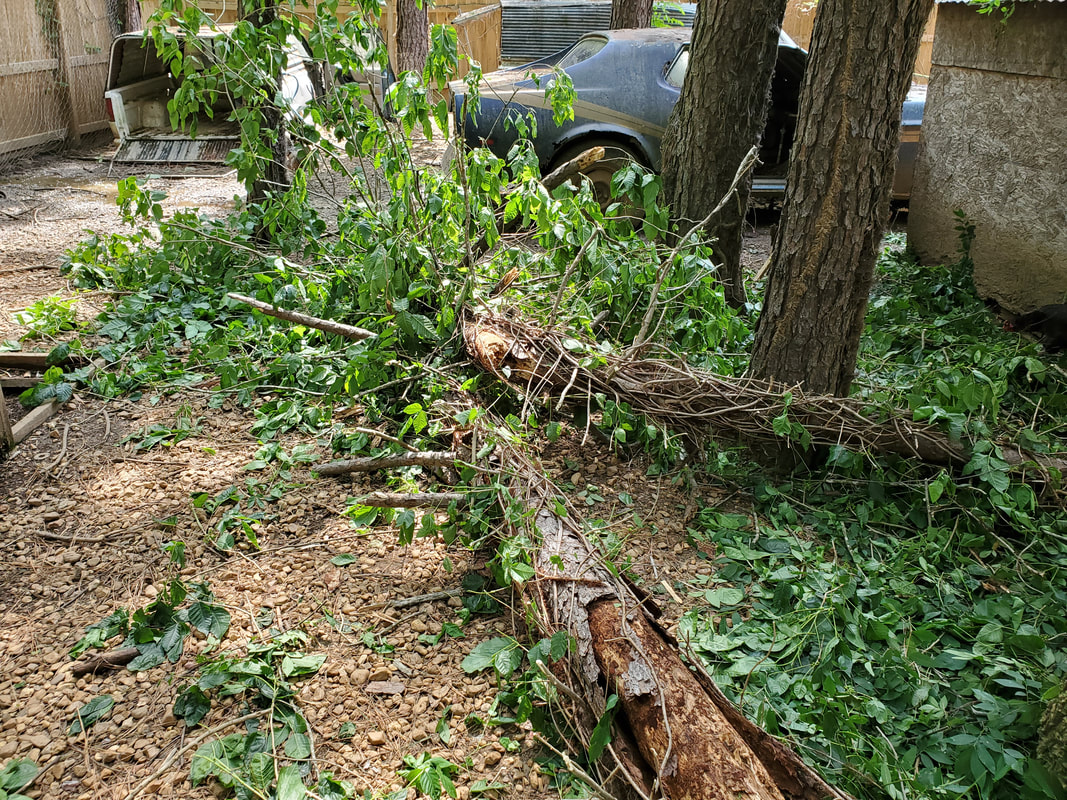
After getting a good cutting of branches and other trash around the tree trunks, I was able to get to work on the two immediate trunks on the ground. I started off with cutting the bark sections with the poison ivy vines into smaller sections I was able to move safely over to the burn pile. Of course its not good to burn PI, but from a distance one can do so without breathing in the vapors. Once the PI covered bark was cut free and thrown on the burn pile I commenced to cutting the two trunk sections into smaller logs so I can split that wood later for stacking on the firewood pile. Since this wood was still pretty solid, I felt it was worth trying to save this stuff versus tossing it on the burn pile. 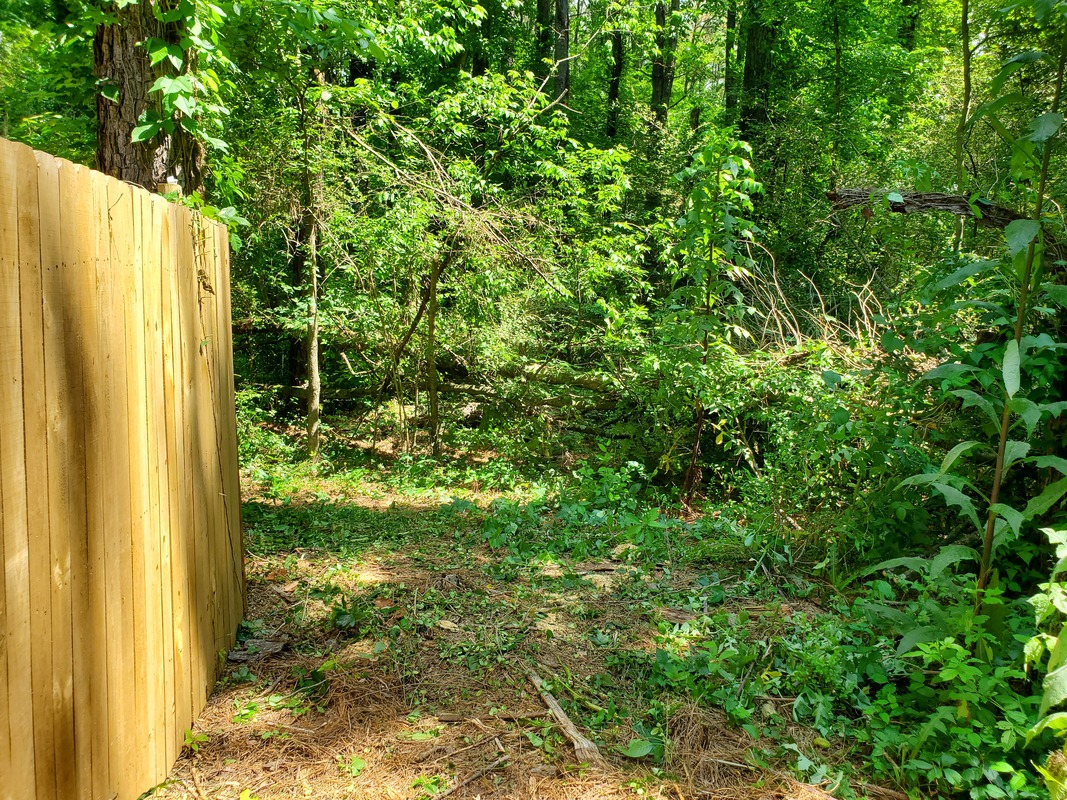
Area after clearing the brush and the trunks fully.
With the first set of trunk pieces cut up and moved over to the log splitter, I did a little more trimming to rid the area of more smaller trash, then cut the next section of trunk, which was right alongside the fence. As before, I had to cut the PI covered bark from the section of trunks and cut the trunks into smaller pieces to stack by the splitter. Once that section was done, I cut the bark on the last couple sections of tree trunk that was facing the fence. 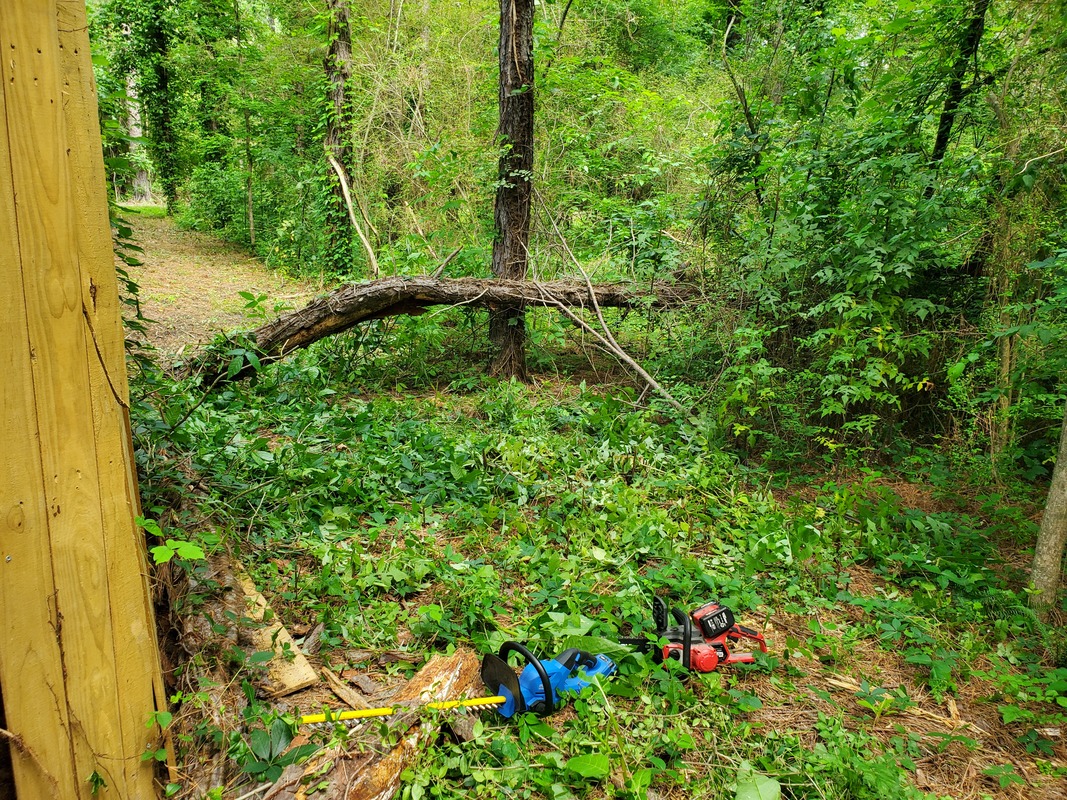
Section of tree that fell at the north fence, just missing it. Note the bed of poison ivy mulch on the ground.
I cut these trunk sections into more small logs, further building up the stack of logs by the log splitter. I'll have a good amount of wood to stack by the firewood pile when this stuff is processed, which in addition to the Fallen Trees on the other end of the yard will further add to our wood reserves. The trimming of the brush around the tree trunks and the other tree sections that had to be brought down as a result of the fallen trees left a bed of mulch mixed with poison ivy and other miscellaneous brush. There's still some tree stuff that I can cut back some more to further clear the area around the path alongside the fence but for the time being I have the path pretty cleared, at least to about where it was before. 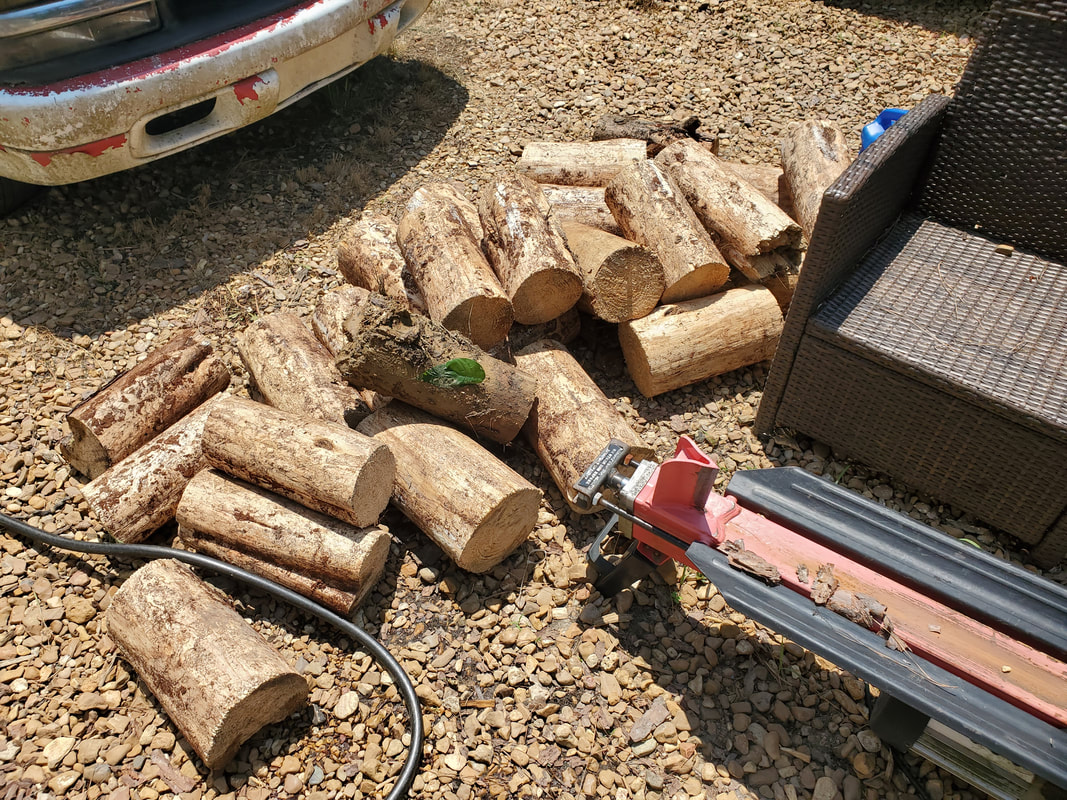
Logs cut from the tree trunks that were cut up from the fallen trees.
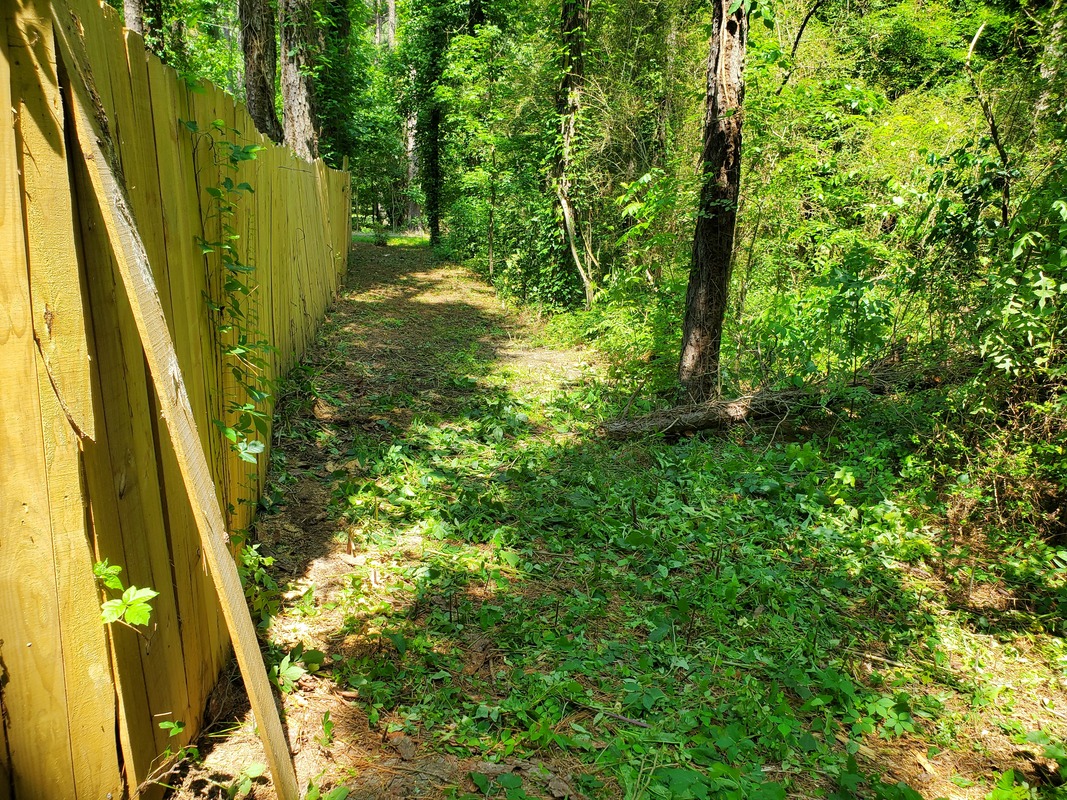
Path along north fence cleared after cutting up the tree trunks.
With the burn pile stacked up pretty good with the trash that was cut from all this fallen tree trash, I was ready to fire the pile. I had some other miscellaneous garbage to add to the pile to further help burn down all the brush, as well as dispose of other useless crap. Using old gas/oil mixture, I was able to get the pile going pretty good and inside of an hour, the pile was reduced to ashes and smaller pieces of trash that I'll have to stack in closer to start up on a new burn pile later on for another burn. I'll probably add to this new burn pile with more stuff I cut from this same area. 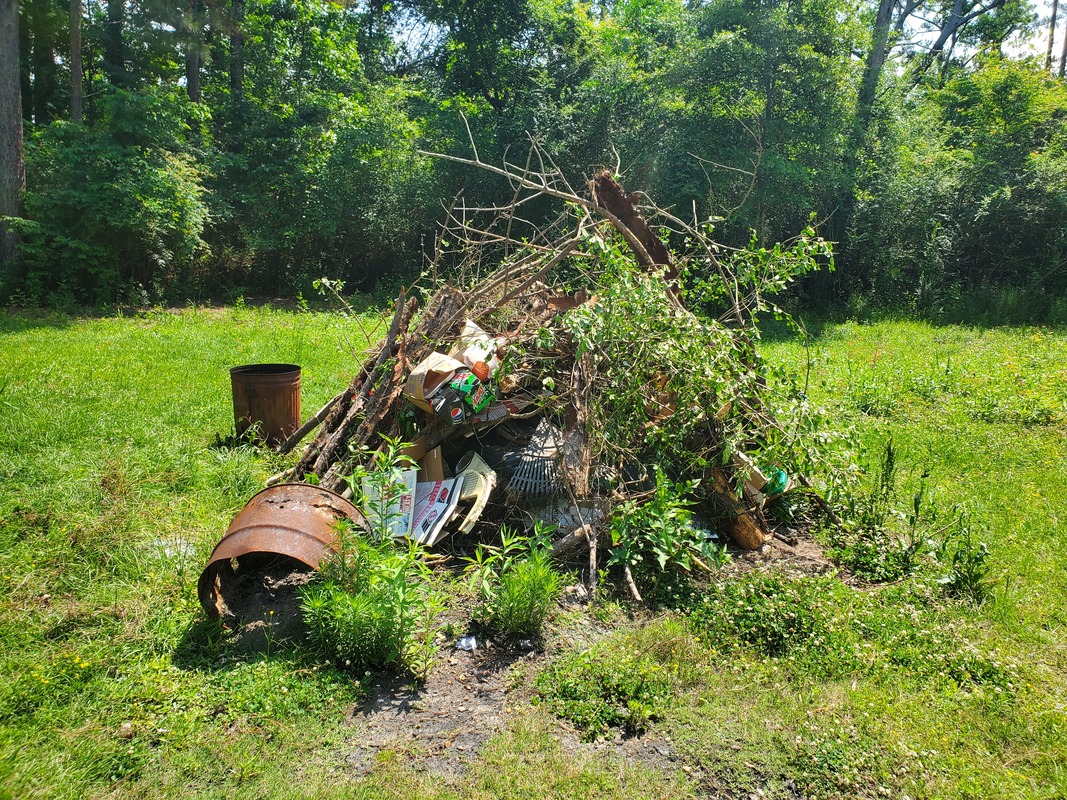
Burn pile stacked with fallen tree detritus and miscellaneous garbage.
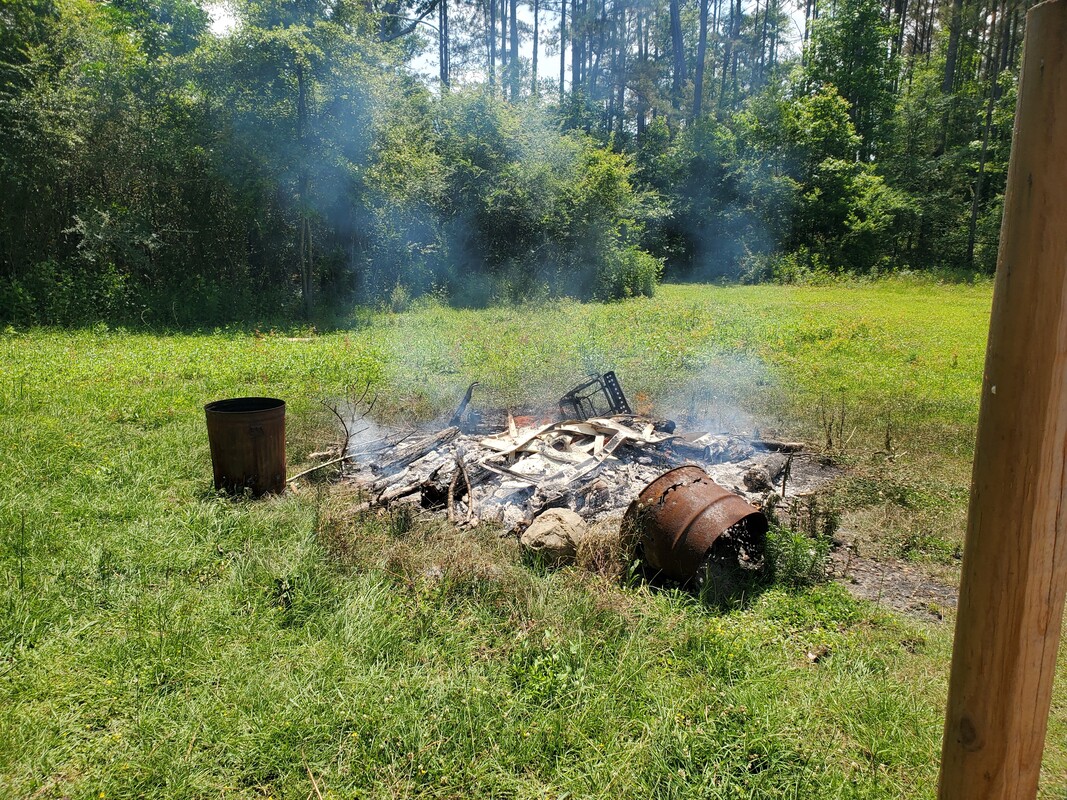
Burn pile reduced to smoldering ashes. Remaining material will be stacked into core as the basis of another burn pile.
One of the goals this year is to cut away enough areas around the outside of the fences to make it cleaner, getting rid of a lot of the dead fall and smaller weed trees that make the woods more cluttered. As time progresses, more trees will shed sections during storms, hopefully not damaging anything in or around the compound. The more of the surrounding woods gets cleaned up, the better the overall health of the woods will be. Of course this will mean a lot more burn piles as I move material from the woods to the burn area. This also holds itself as a bit of a safety precaution against runaway wildfire when this ground brush is cleared away. The trees themselves may take a little effort to catch but if there isn't a huge bed of burnable trash on the ground, it will take much more to catch the high branches of the trees. Besides, it just looks a lot better.
A while back we brought home a large fan from a friend of ours that appeared like it was used in a warehouse or similar building for ventilation. It appeared to be old and used a belt driven fan blade versus a direct drive blade on the motor. This fan body was wide open and just sits on the ground and had a sketchy wiring setup on the motor. It needed work to make it a viable and more or less safe piece of equipment for use in the garage. I planned on installing wheels to be able to easily move the thing around and cover it up with an extra frame to hold chicken wire that would cover the internals of the fan so no idiots feel compelled to stick their hands or other foreign objects within. Or more realistically, a dog stick its dumb nose in the blade.
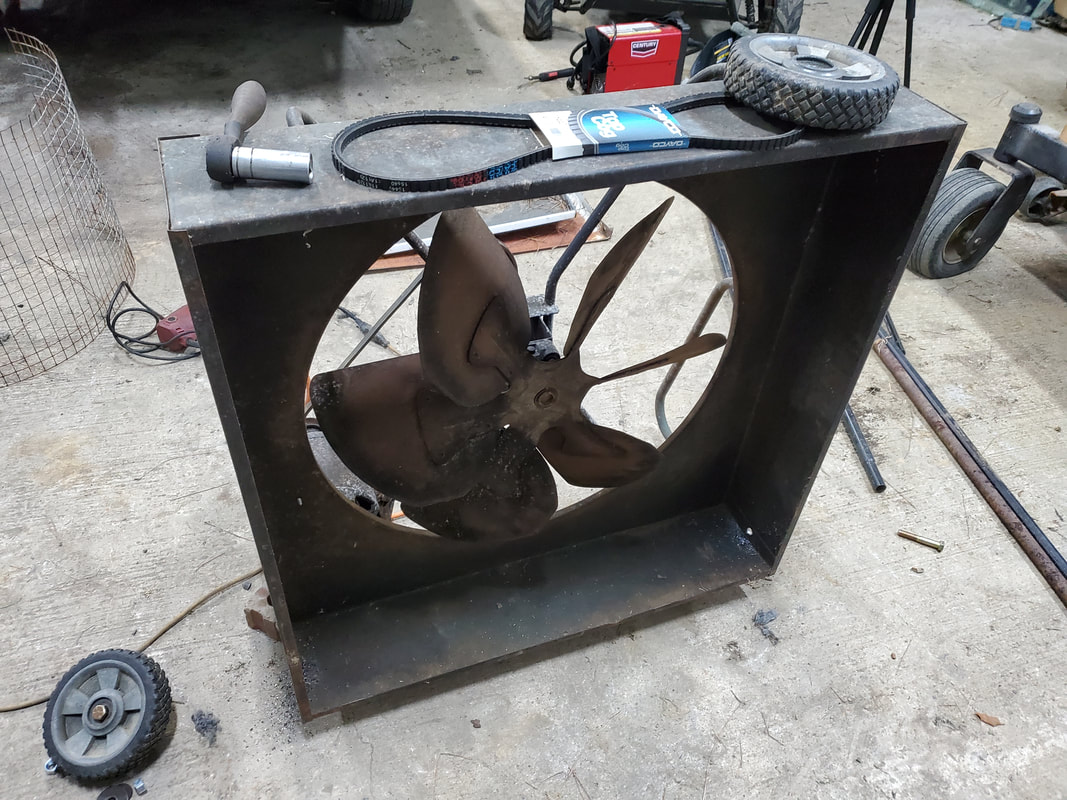
The old warehouse fan along with some parts scattered around to be used in the build.
The first thing I wanted to do was add the wheels. I started off by putting the fan body on a couple bricks to raise it off the ground so when I attach the wheels and remove the bricks, the body will rest on the wheels. I used a couple of the lawn mower wheels I salvaged from that old electric mower I stripped a little while back along with a couple 1/2" bolts. I had to install the bolts on the wheels then install a nut on the bolt to help hold the wheel in place but not tighten the nut against the wheel. After drilling holes on either side of the fan body I inserted the bolt ends through said holes and capped them off with another nut, tightening both nuts against one another. Washers were of course used to help keep things sturdier in the sheet metal body of the fan. With the wheels in place I was able to move on to the next course of action, which is starting on the frame to cover the motor and belt drive system of the blade. 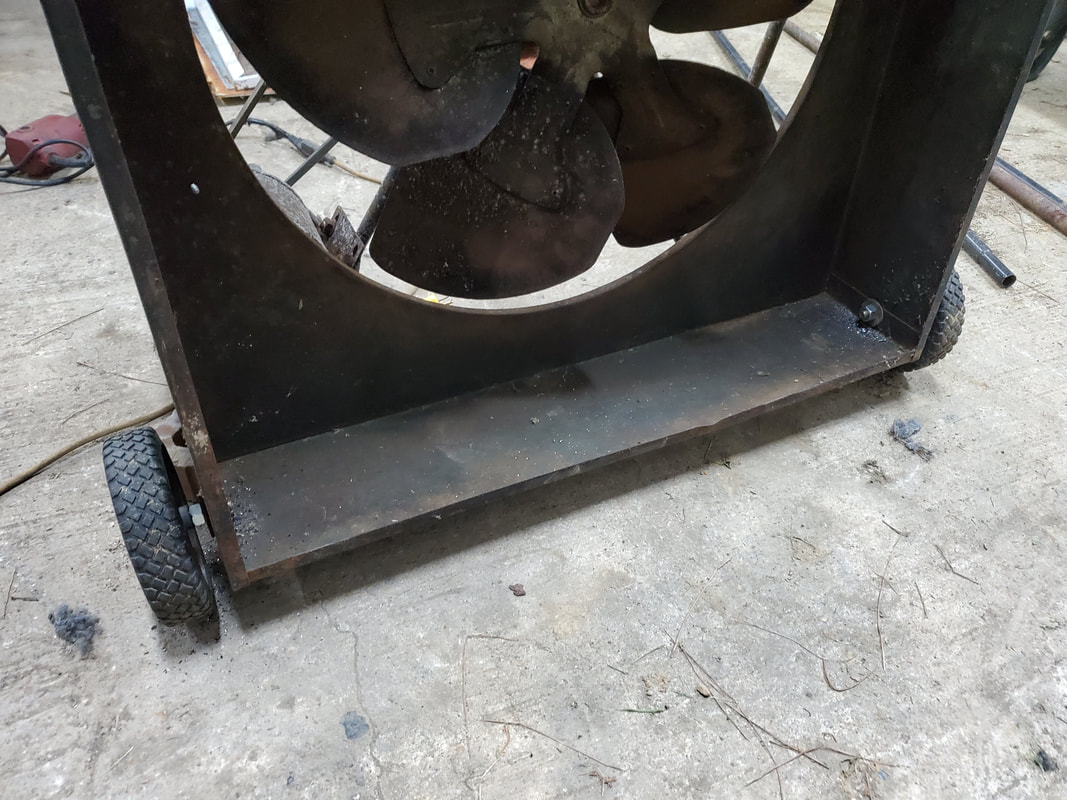
Mower wheels mounted on sides of fan body.
Using several pieces of salvaged tubing, some of which came from that same battery mower the wheels came from, I measured out the lengths of tubing I would need to fabricate the frame. After grinding things down on the ends I started welding, getting what would be the base of the frame assembled. While I was at it I took the mower handle and cut off the very end of the handle where one would actually grip the handle, taking care to cut it in a way where it would sit like a leg when I welded it in place on the base frame section. This bent metal tubing piece will serve as a leg to hold the fan upright while resting on its wheels. The rubber hand grip around the handle will further serve as a "shoe" to keep the fan from just vibrating across the floor while running. It actually turned out pretty good. 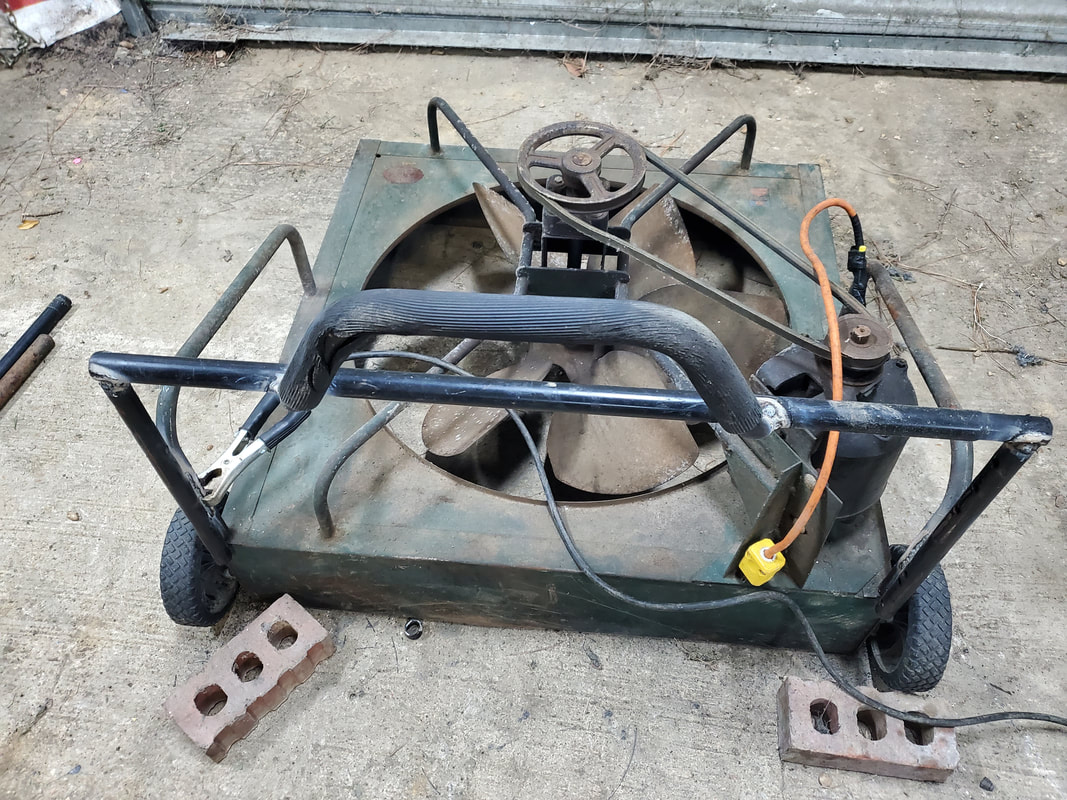
Tube base welded in place along with bent tube leg to prop up the fan.
With the base and the leg taken care of, I continued to weld up the frame using the remaining pieces of tubing. I couldn't make the frame to span the whole height of the fan body as the longest pieces of sheet metal I had came up a few inches short. This is fine since I was going to use chicken wire in a special way to cover the top area. I had all this mapped out in my head. But with the frame sections done, I was able to move on to the sheet metal sides, which are salvaged metal from some stripped appliances I processed a while back. 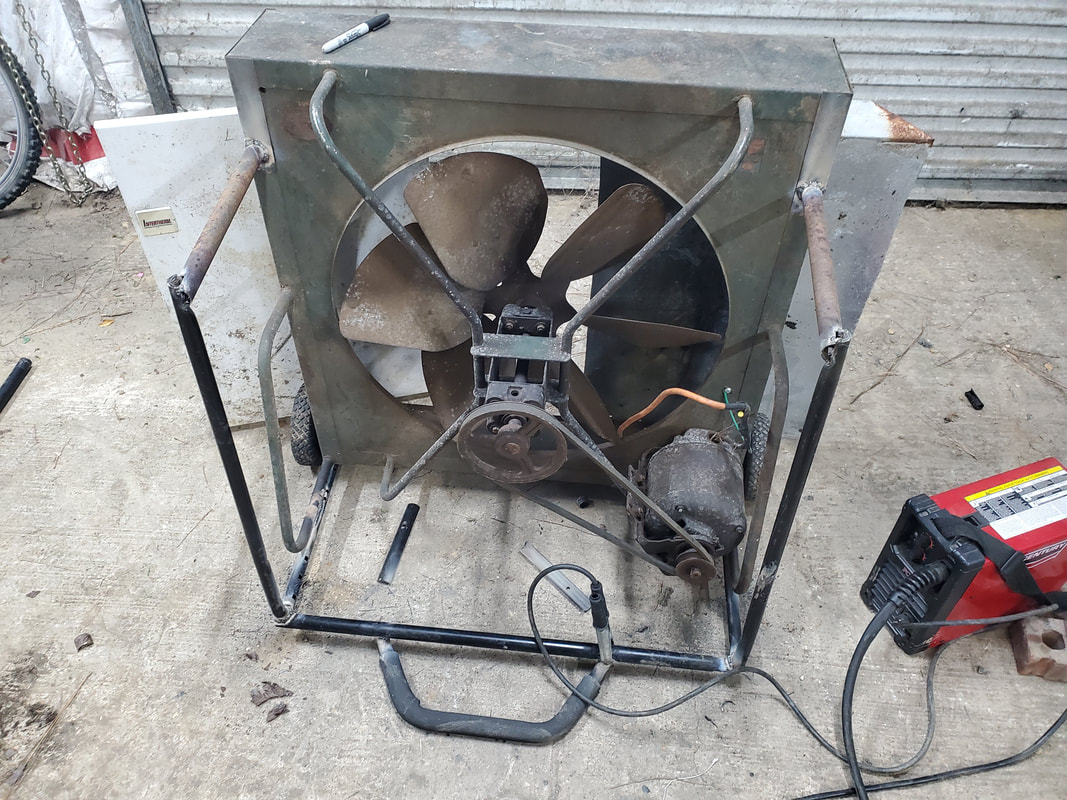
More tubing welded in place around the motor/belt drive on the fan.
The sheet metal panels were trimmed down to fit over the sides as they were made, taking some care to make sure there were no overhanging edges from the tubes that we could brush up against and cut ourselves. Afterward I started securing the sheet metal in place with self tapping screws into the tubes to hold the panels in place. These two pieces of sheet metal would be the only sheet metal used on the whole build. From this point on the rest of the coverings will be chicken wire pieces attached over the front and back of the fan body. The bottom will be left alone. 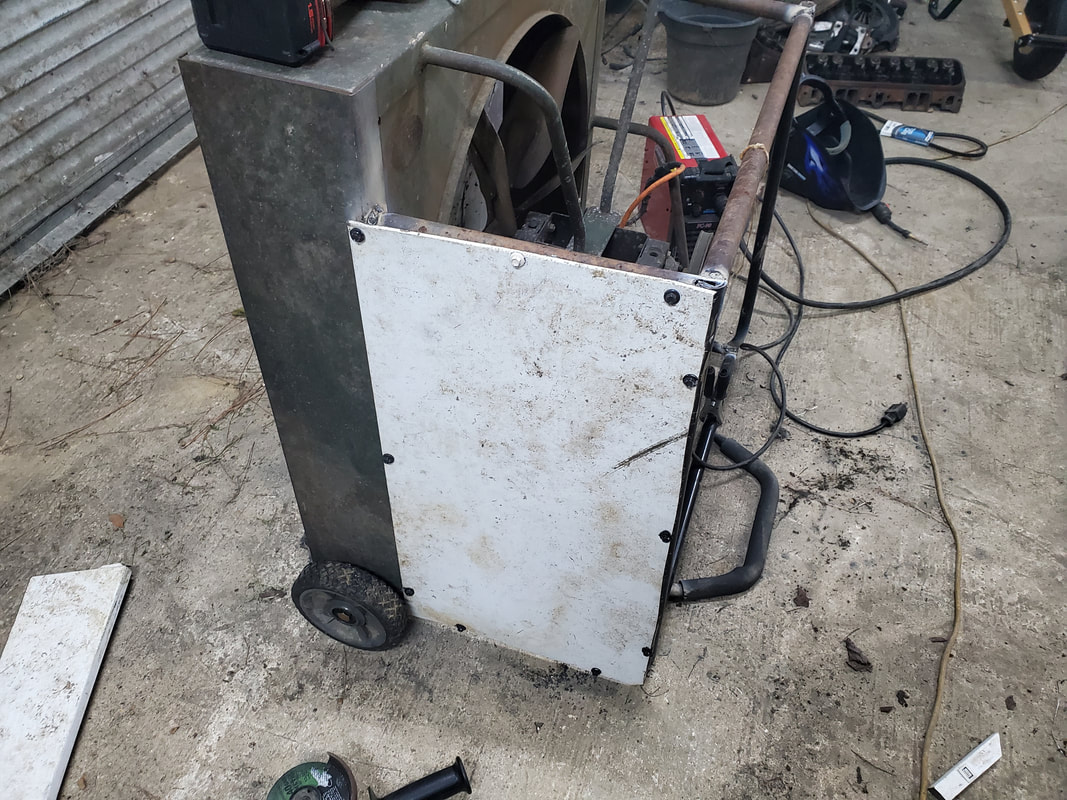
Sheet metal panel secured with self tapping screws on the side of the new frame.
I started off with cutting two pieces of chicken wire to cover the front. I attached one section then overlapped the other piece in order to cover the other section. I used more self tapping screws along with washers to hold the chicken wire in place. The front of the fan body had a lip that allowed for the securing of the screws around the front. I would later trim the overhanging piece back enough so the middle didn't have a wide section of doubled up chicken wire. I cut the wire back to leave wire edges that I was able to bend those wires back around the other wire panel to link the two panels together in the middle. 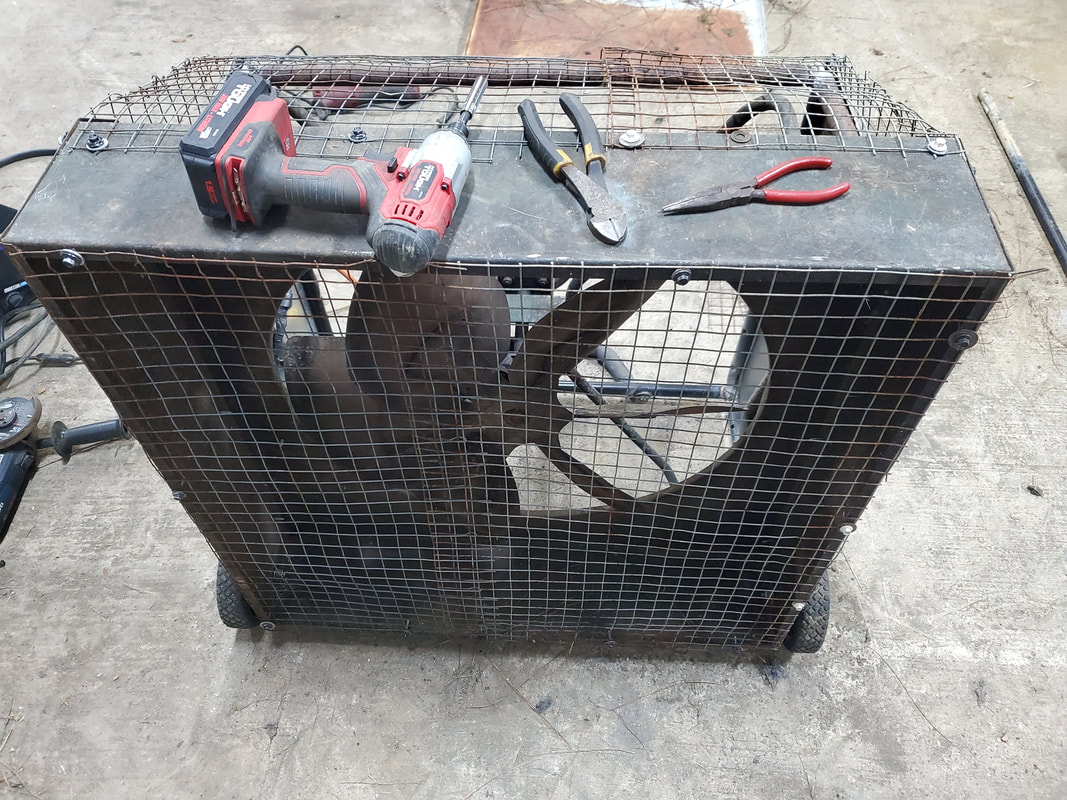
Chicken wire screening secured over the front of the fan body, also with self tapping screws.
With the front taken care of I took care of the top section of the back of the fan body. Since the sides were not built to go up to the top of the fan body, I took chicken wire panels and attached them along the top of the fan body then bent them at a slight angle to attach to the back of the frame. I took some of the excess wire I trimmed from these two pieces and made two smaller pieces to cover the small open sides just above the sheet metal panels, leaving wires on the edges to bend over to link everything together. With the top and the top sides taken care of, this just left the back side. 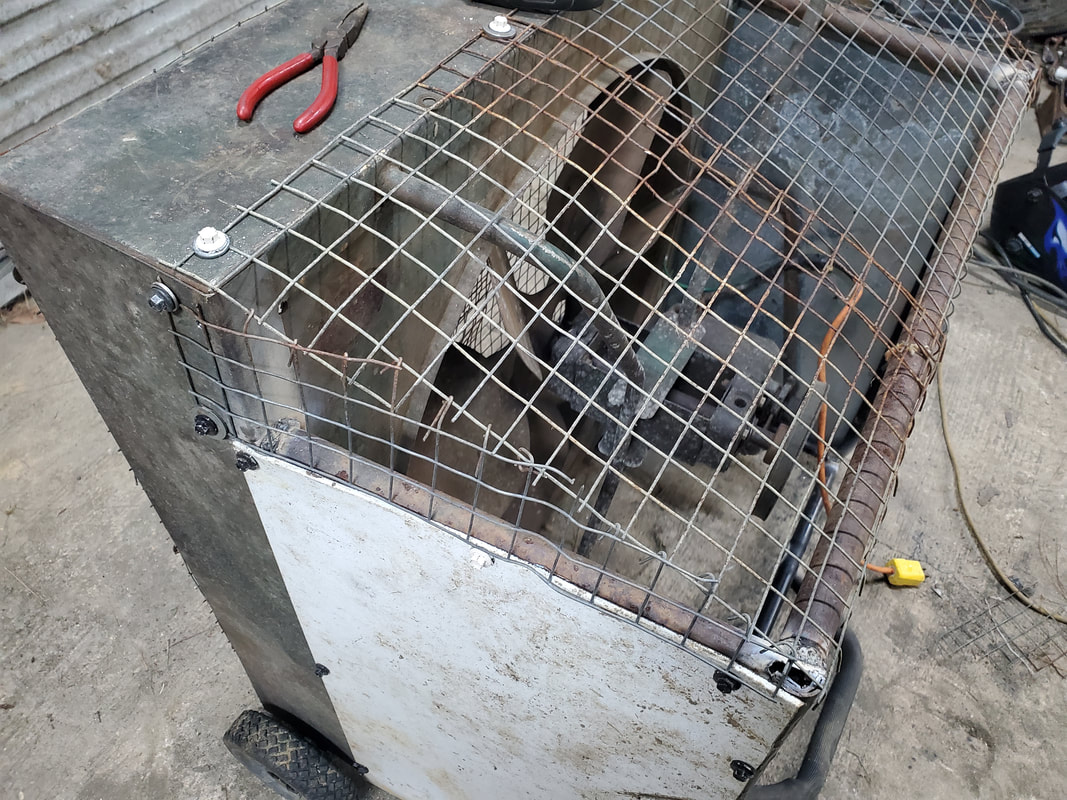
Chicken wire top formed over the odd shaped framework. Pieces were linked together with the ends of the wire twisted amongst the two pieces being connected, while other ends were secured with self tapping screws.
As with the front of the fan, I cut two panels to cover the rear of the fan, again using self tapping screws with washers to help cover as much area to hold the wire panels to the tubing. I used the same technique of bending the exposed wires from the trimming to link the two panels together at the middle. With the rear panels on, all that was left was to get the wires straight on the motor. 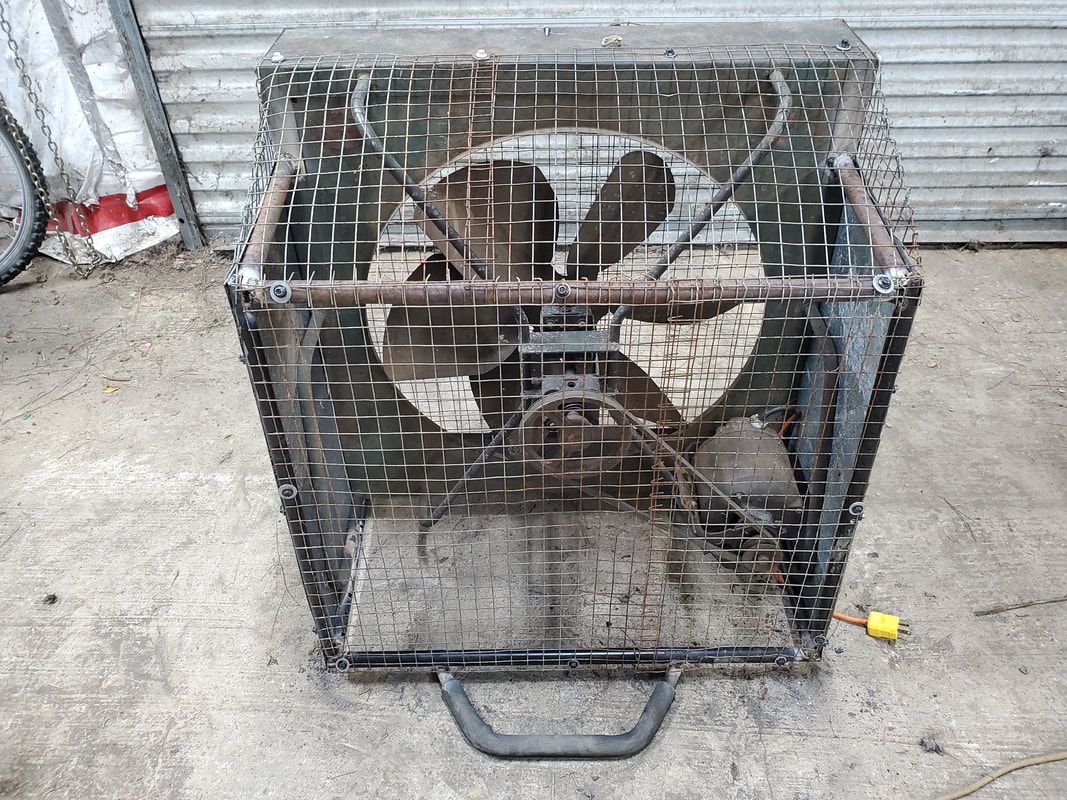
The completed shop fan with everything added to it, ready for use.
Since the whole fan was covered with chicken wire and sheet metal, I had to tip the fan on the front end to expose the bottom. Four bolts holding the motor in place had to come off to remove the motor from its base. Afterward I opened the panel on the back of the motor to remove the wires that were attached. The motor has a round fitting to accommodate a junction box cable clamp fitting so the wires won't be scraping against the edges of the hole on the motor body. After removing the wires I added this fitting then strung the wires back through the fitting and wired everything back in place. After remounting the motor and securing the belt, I was ready to test. 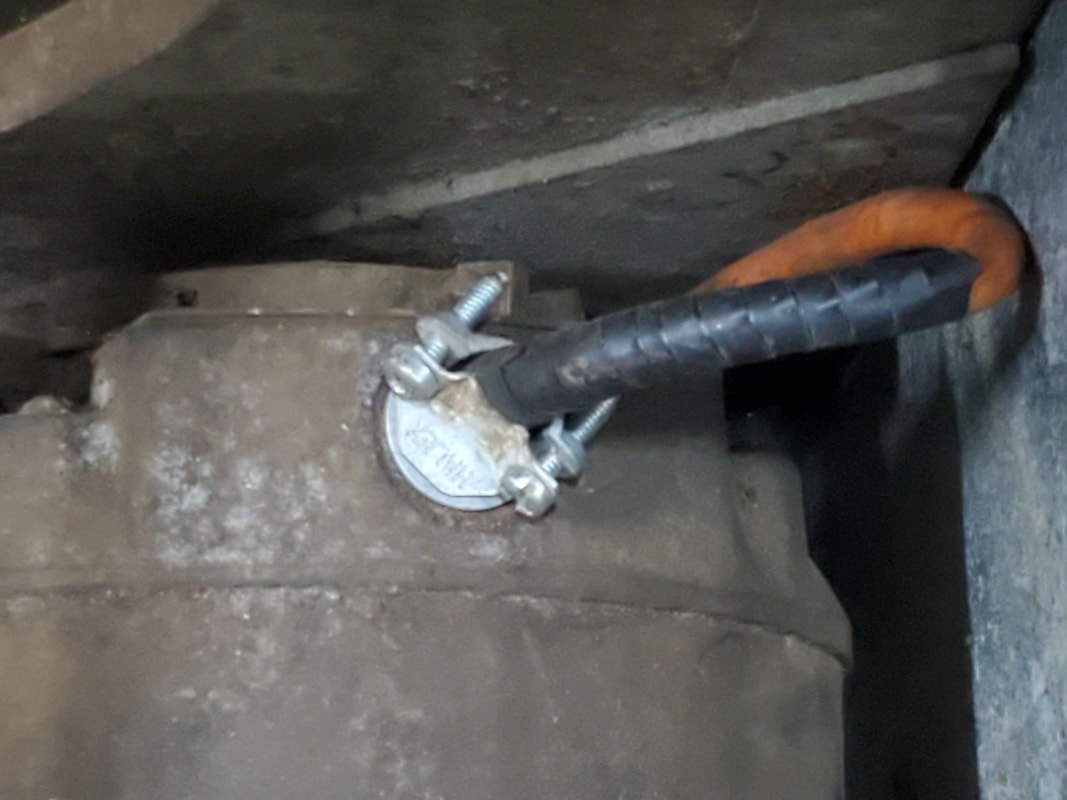
Closeup of the electrical cable connector used on the motor to safely secure the cord cable.
When I plugged up the fan, the unit came on with no problem, except for one. That problem was that the fan was running in reverse relative to the body of the fan. What most would consider the front of the fan is really the back as it's drawing air through this point and pushing it through the back area where the motor and belt drive are at. While this doesn't stop the fan from being used since the back of the fan is covered in chicken wire, allowing for air to freely move, its something that I may address later. It will involve going back into the motor and swapping a couple of the leads on the motor panel to change the rotation. But until then, I can still use the fan as it is to move air. The fan ran smoothly and quietly, moving a decent amount of air that should allow the climate inside the garage to be a little more bearable in the heat of summer. With the wheels the fan is able to be easily moved around the garage as well. We now have a vital piece of equipment for use in the garage to make work more comfortable, even if by just a little.
For anyone who's familiar with the goings on around here, they would know about our intimate love/hate relationship with trees. Many episodes have passed where we had run ins with hostile trees that either came down with resulting destruction or otherwise leaving a horrendous mess. Well this time is no different. Our latest occurrence is in the chicken yard. Another tree that was long dead, finally decided to take its death fall, at least partially. This tree was brought down about halfway up, during one of the last storms, which is always the case. Ironically, the top half came down towards one of the older chicken coop structures, but got caught in one of the other trees next to the structure, causing it to further break in two, getting caught in a weird manner. Main thing is, nothing was damaged. But there was still the case of a broken tree just sitting there in the way. To make matters worse, this tree was covered in a layer of poison ivy vines. This would take a couple steps to dispose of.
The two halves of the top half of the dead tree as they fell. One half was caught in the tree next to the chicken coop and is resting on the roof. The other half came straight down and is at rest vertically.
The remaining trunk is still about 30 ft tall but is in a position where it will most likely not come down, and even if it does, worst case is it knocks a fence panel down, which can be put back up after the disposal of the trunk. For the time being that trunk will be left alone since its really not causing any problems anywhere. The main thing is the fallen parts. In order to "safely" remove the two broken sections, I would have to trim all the PI vines and the branches from the tree it fell into, so I can more easily access the trunks with the chainsaw and not be swimming in PI vines. 
The bottom half of the dead tree that shed part of its trunk. This section is also covered in poison ivy vines.
Using one of the hedge trimmers, I slowly but surely cut away at the vines, leaving a bed of PI mulch all over the place. One of the halves of the fallen tree were resting on the roof of the older chicken coop that it could've taken out had it not hit the other tree first. As I cut away vines and smaller branches, I was able to get to the point where I was able to pull the top half of the fallen trunk from the roof of the coop and get it all the way on the ground, where I was able to further cut the vines away, exposing more of the trunk. My next plan was to use the chainsaw to cut the trunks into short sections, a couple feet long each, and load them up in the wheelbarrow and move them to the burn pile to stack them up with the other detritus for later disposal. 
Shot of the two halves of the fallen trunk after bringing one of the halves down to the ground from the roof of the chicken coop.
Closeup of the half of the fallen trunk that was removed from the roof of the chicken coop after trimming the vines from around it.
Once I got the trunks exposed enough, I chopped the trunks as stated, and loaded them up. Some of the trunk sections had their bark peeled off so I had to load the bark section, which of course still had PI vines on them, along with the actual trunk sections. All this mess was tossed onto the burn pile. Unfortunately, these types of actions still result in exposure to PI, maybe not as bad as if I was just rolling around in the stuff, but enough that I will have some itching later. The cut up vine pieces will of course be left on the ground, as I can't just pick it up, or burn it en masse as the vapors are toxic. I'll just let the brush on the ground dry up over time and return to the earth. 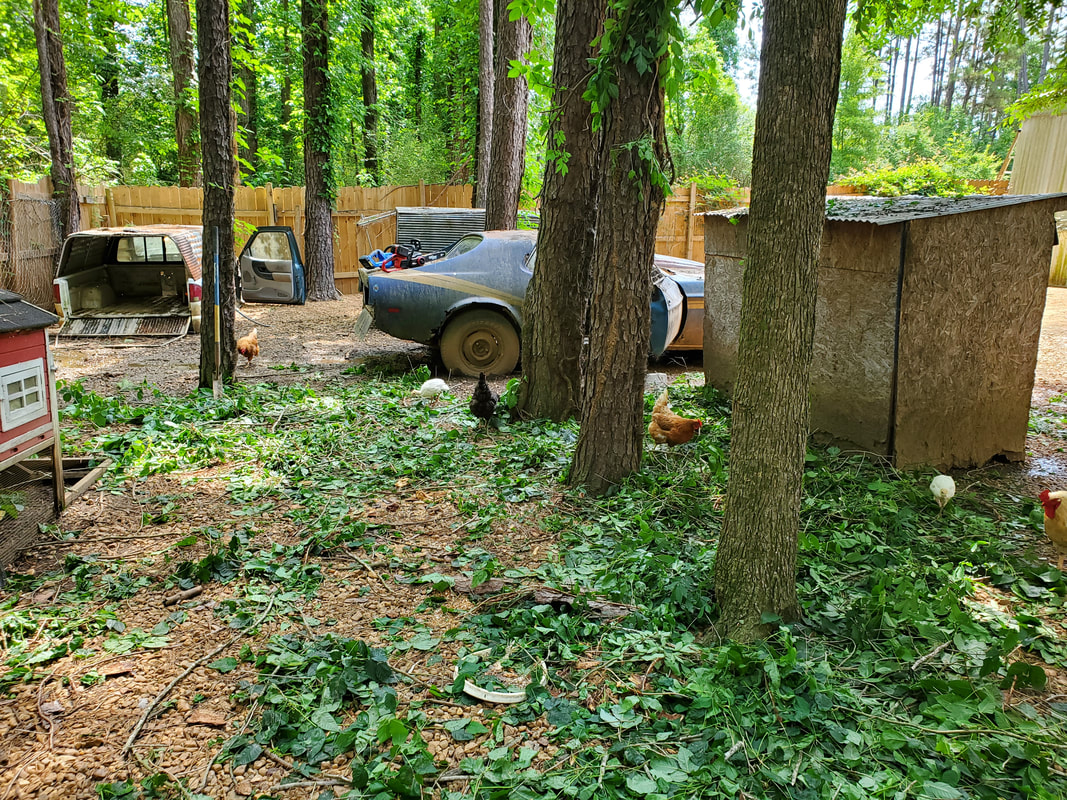
Area cleared after removing cut up trunks. Ground is still covered in all the trimmed pieces of PI vines and other smaller branches from the other tree that caught the fallen tree trunk.
This isn't the end of the landscaping that we have to deal with around here. There's still the matter of cutting up the fallen trees behind the northern fence that shields the chicken yard. I'll have to do the same course of action as I did in the chicken yard with the trimming of the vines and smaller branches before further cutting into the larger material, cutting the stuff into smaller more portable sections for disposal on the burn pile. Normally I'd try to cut the larger stuff into large sections, just small enough to move, but still large nonetheless. With the PI vines covering most of this mess, I can't afford to keep coming in contact with that stuff as I'll never get rid of the rashes and itching that result from coming in contact with the toxic oils from the plants. I just have to take my time in the disposal of this stuff and eventually work on further cutting into the woods to rid the area of any stuff that either looks dead or is growing in a menacing manner where it can get in the way or threaten the integrity of any of our fences and the like.
During the ole lady's travels in her work, she sometimes comes across little gems that people leave on the side of the road for refuse due to any number of reasons. Items like furniture, luggage, even push mowers have been recovered. Some items we were able to resurrect enough to be functional then resold while other items were given to charity mediums after no sales were made. One of those such items is a battery electric push mower that she found. This push mower is one of the first generation push mowers, rated at 36v and using sealed lead acid batteries for power with a direct connection to the motor through a series of safety switches. It was a pretty simple design for the time but outdated with today's brushless 3 phase AC motors run off of DC motor controllers coupled with lithium batteries, making for machines that are more powerful and longer lasting with a certain level of efficiency where internal regulating electronics can cut power under light loads to preserve battery life. Anyway, because we already have one of those such push mowers so there's no need to try and resurrect this machine in its normal state. Plus, we already have a faux bush hog, made from one of these old school battery mowers, which depending on what I might think up next, may still end up becoming a donor for parts. As for this machine, my intent right now is to strip this machine down and harvest the usable parts while dividing those parts that can go to metal scrap and the rest, the plastic, be disposed of later. 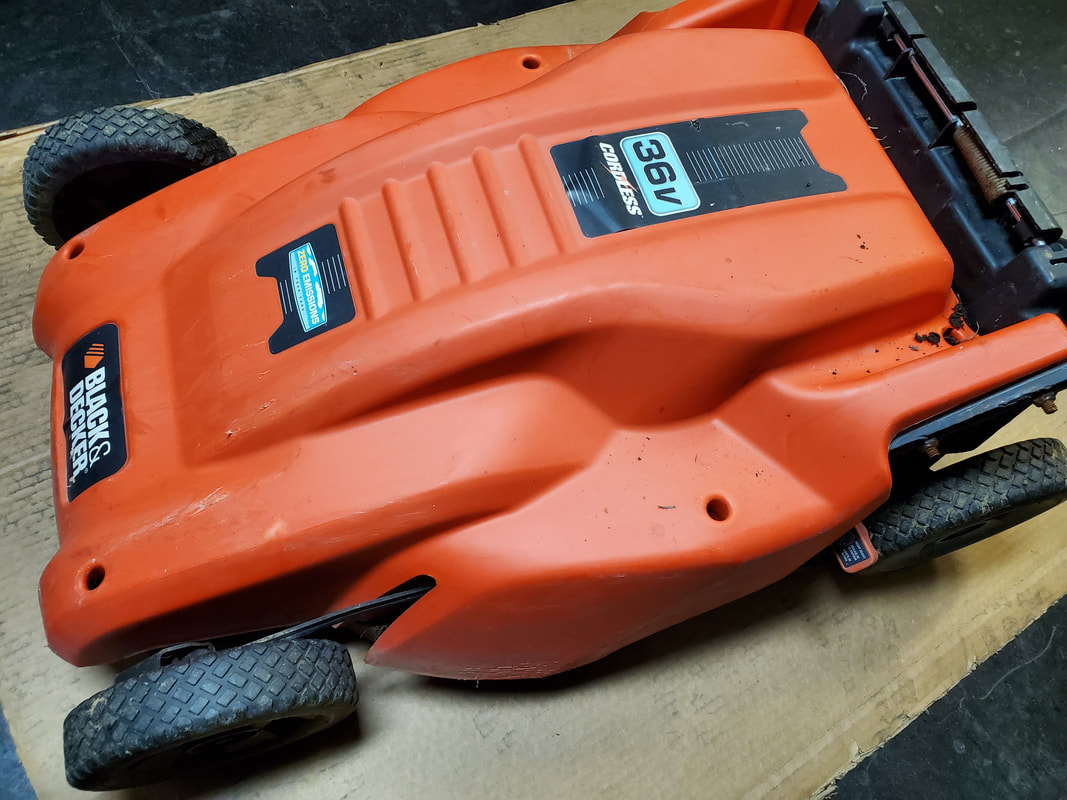 The old battery electric mower, ready to be "processed" into usable scrap. First thing that came off was the handle, which also has the multi switch assembly for activating the machine. I wanted to pull the switch box free to free the handle so it'll be completely out of the way while I further disassemble the mower body. I will further break down the switch box to get the main switch that would be used for activating the motor. Such a switch could be used for turning the motor on in an application like an electric bike where the motor may not be activated all the time, and just used for short bursts to get a bike or similar machine up to speed. 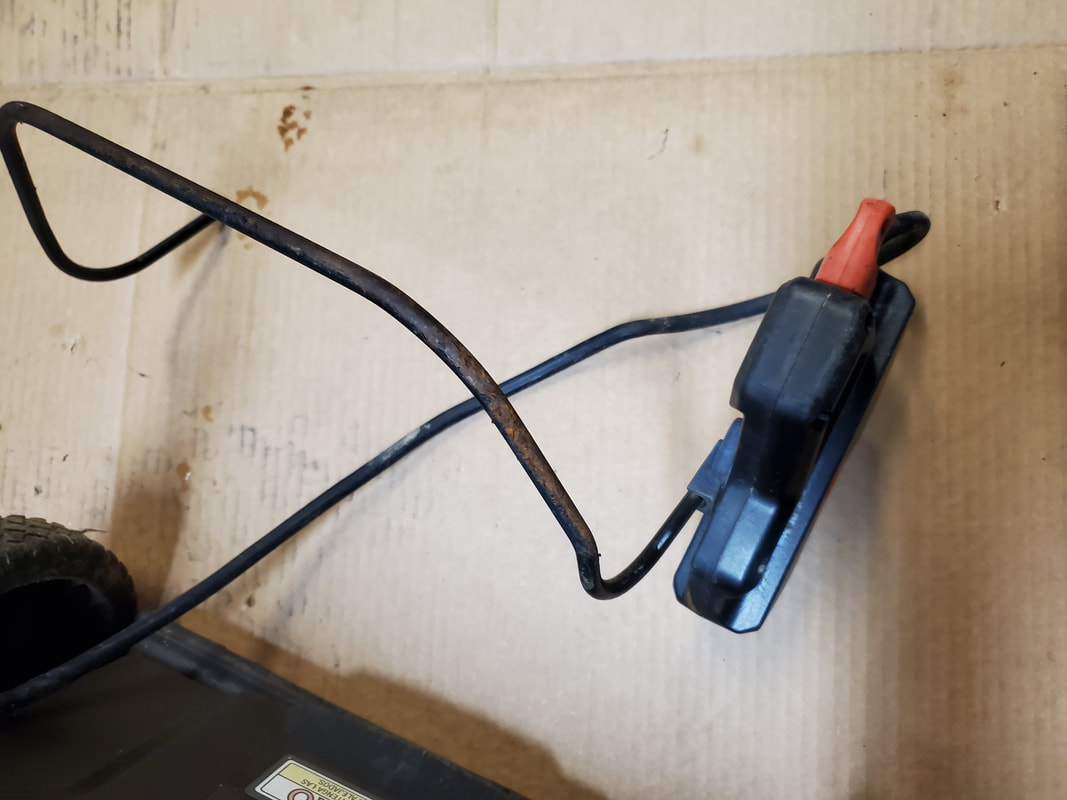 The switch box, with the safety handle still attached. I'll be separating this box later to remove the actual switch and disposing of the rest, minus the bar. Several star bit screws held the cover in place over the mower. After pulling the cover off, I had before me three large batteries and a large electric motor along with a minimum of wiring. I pulled the batteries free to get those out of the way, then separated the wiring from their respective points, having to cut one of the wires from the motor, leaving two wires on the motor that are long enough to be spliced into for any future project. The rest of the wiring was removed, which was obviously connected to the switch box. 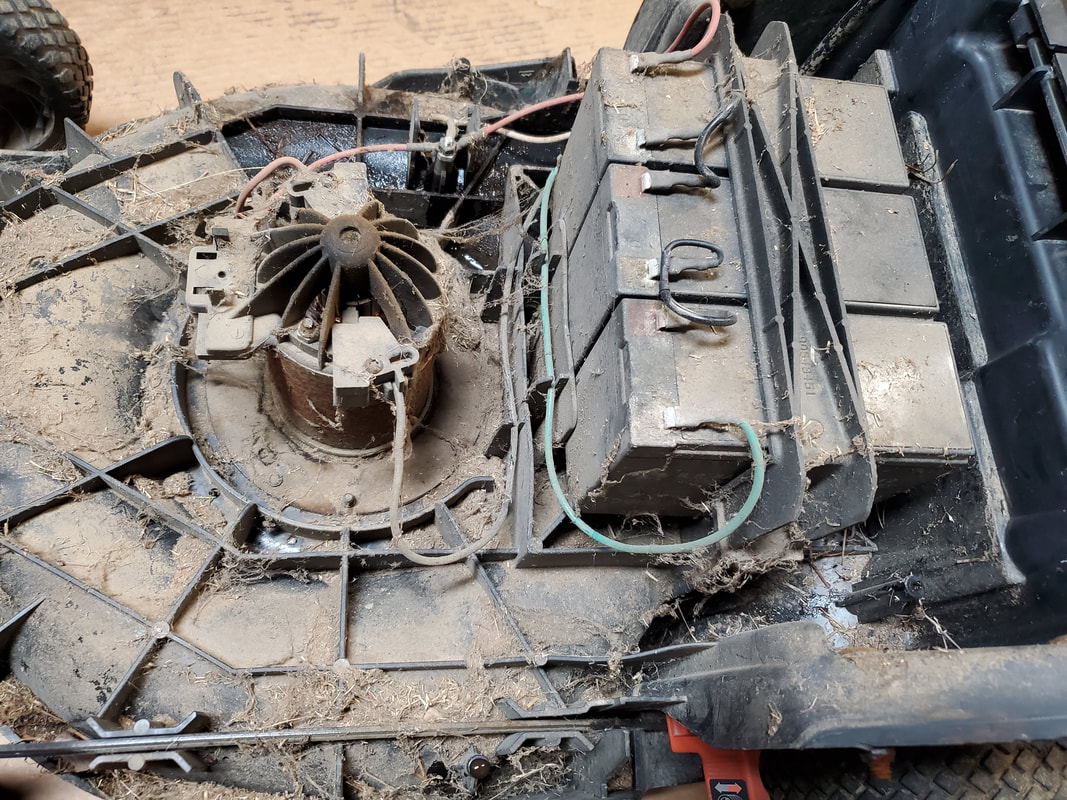 The internals of the mower after removing the cover, the batteries, if not able to be rejuvenated, will still sell for scrap. The motor, is pretty obvious what it can be used for. 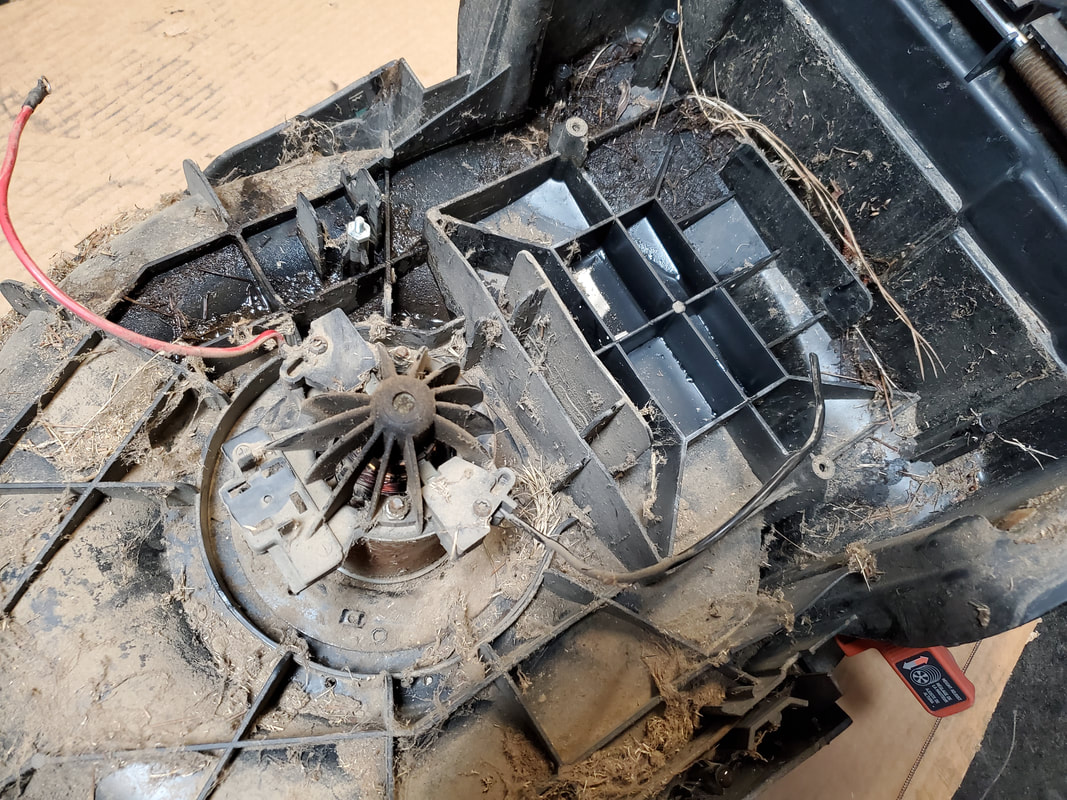 Mower body after removing batteries and separating the wires from the harness going to the switch box. The next move was flipping the mower body over to remove the blade from the motor shaft, which surprisingly was pretty easy despite the rusty nut and threads. A little WD40 helped in making the nut come off easier. Three small bolts then came off to fully remove the motor from the mower body. This large motor should be more than able to power something like a bike or even a small go kart with the right gear ratio on the drive sprockets. 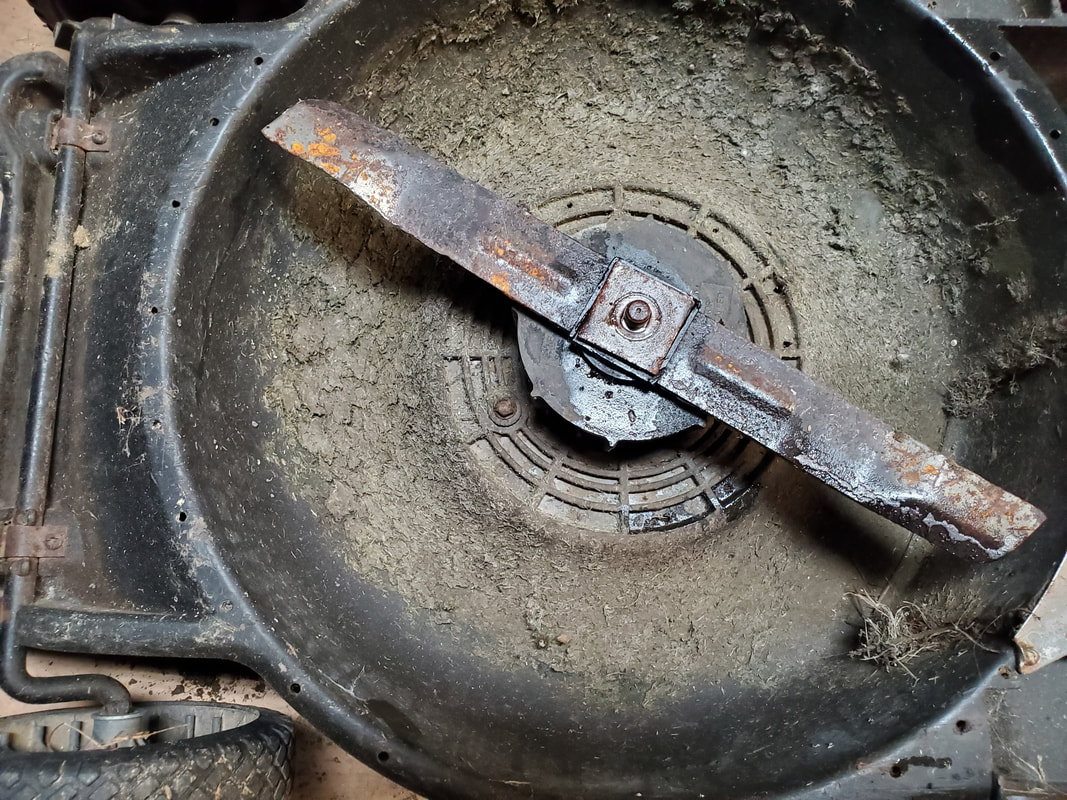 The blade just before removal from the motor shaft. Even this piece can be used for something like a forged sword blade or something similar.  The electric motor pulled from the mower body, the main part I wanted from this machine. With the motor out, now its just a matter of stripping all the metal parts from the body so I can make my separate piles for recycling. The wheels were pulled free and set aside as these always come in handy for adding wheels to different machines around the yard. The axles were removed along with their associated hardware, some of which are U braces that can be used for retaining multiple things. The axles more than likely will be immediately recycled if I don't come up with a use for the metal rods that make up the axles. We'd just have to see. With the removal of the axles, I was left with a uniquely shaped mower body that gave me some ideas as to what I could do with this stuff. 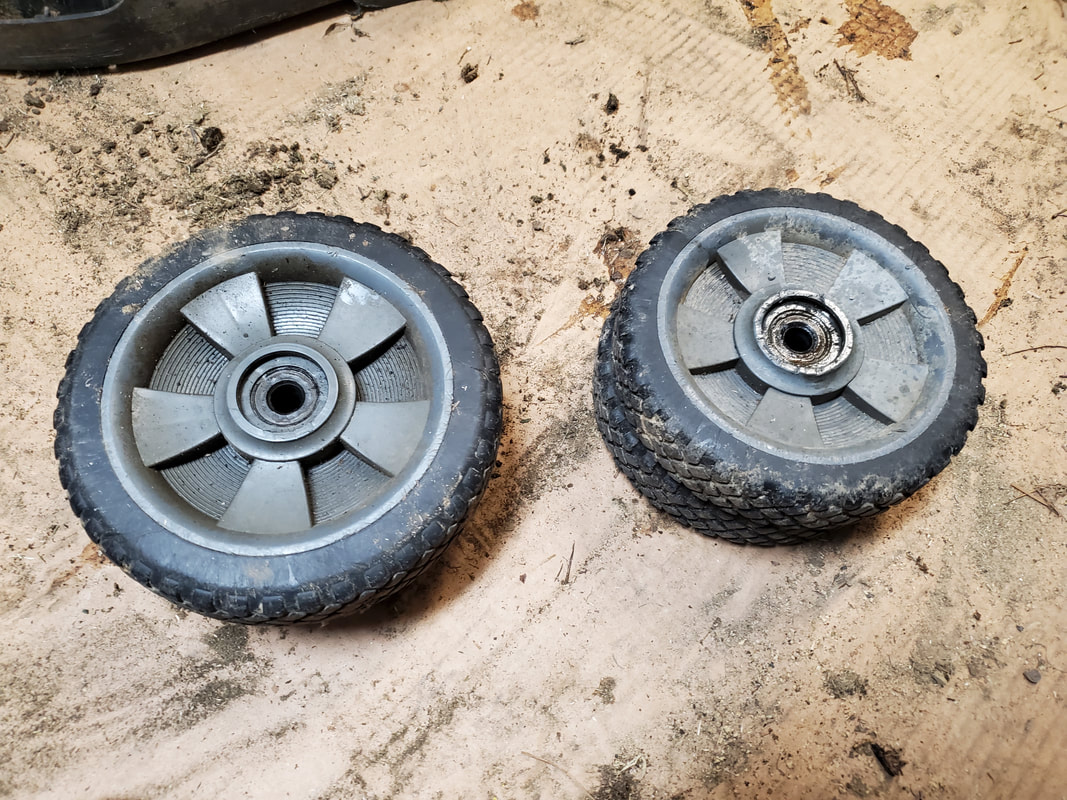 The set of wheels pulled from the mower; these things always come in handy adding wheels to different machines. 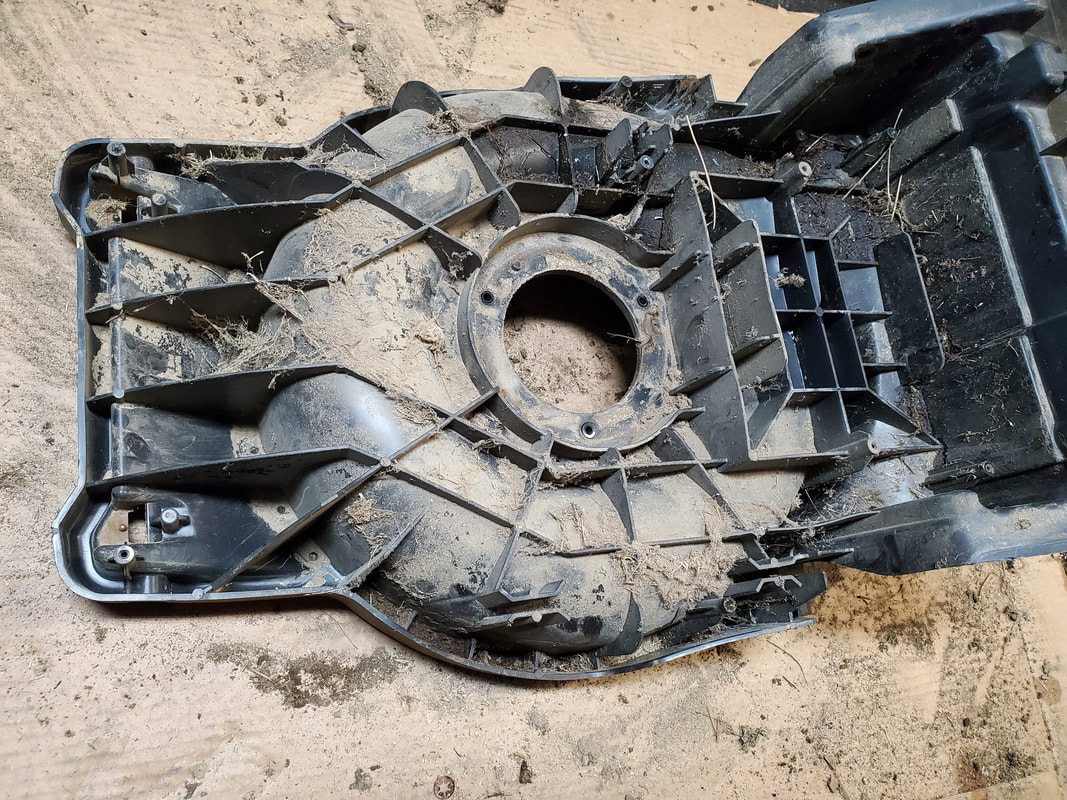 The mower body after stripping all the hardware from the body. Note the unique form of the body and why I came up with the idea I did. Looking at the mower body at the right angle gave me the idea that it could serve as the body for some kind of go kart like machine, that could very well be powered by the same motor removed from it. I even thought to go as far as use bike wheels as the drive wheels and rigging up a front steering that also uses bike wheels, making what amounts to a bike car of sorts, powered off the 36v motor and using regular lead acid batteries for yard use, or even for recreational purposes for kids. Possibilities are endless. 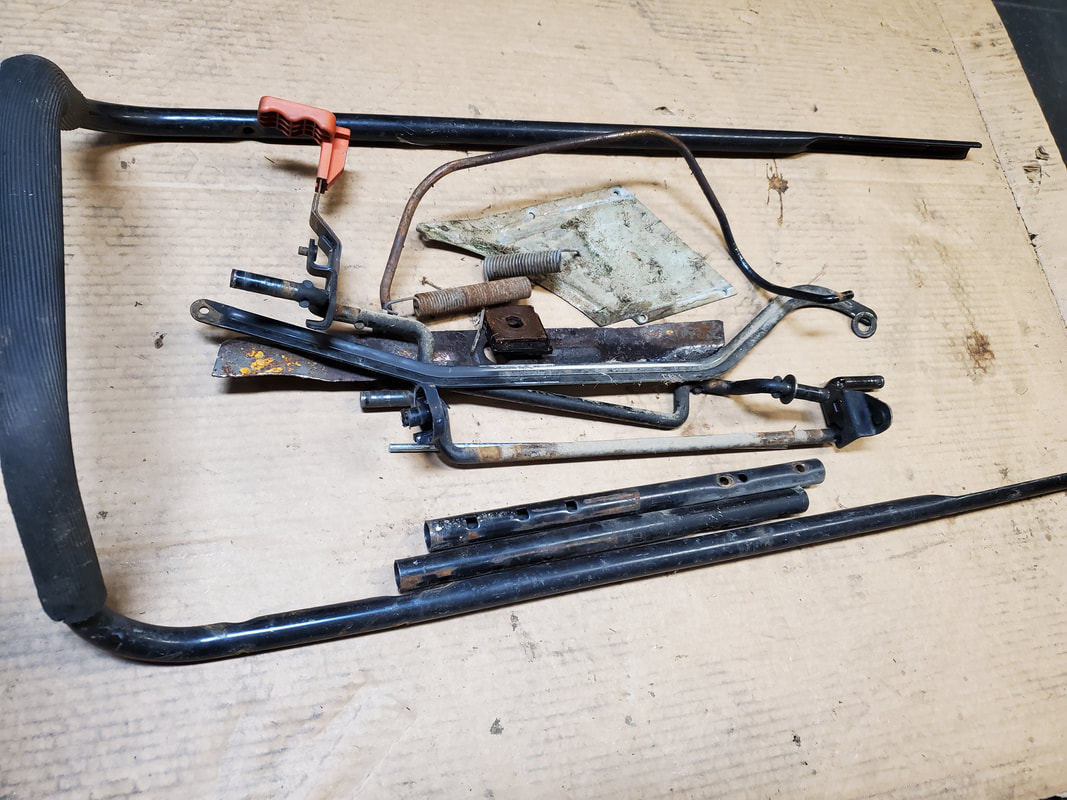 The batch of metal parts salvaged, some of this stuff will possibly be used in scrap form to build other devices later on, before being scrapped. 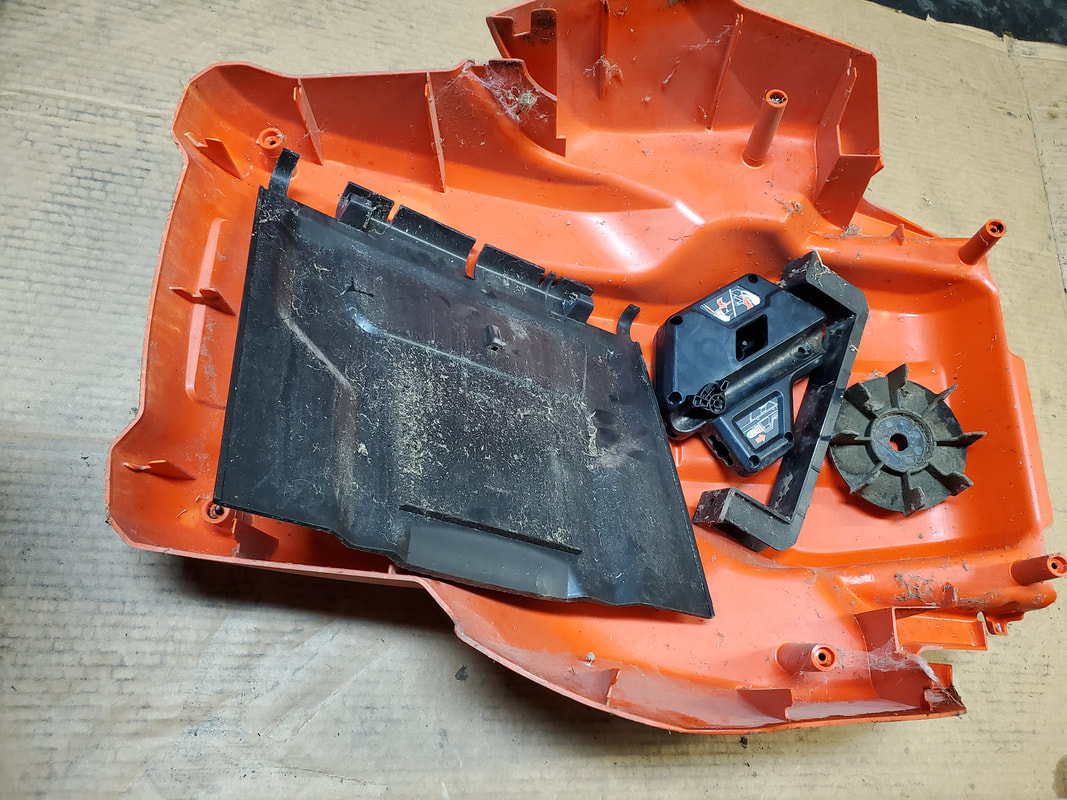 Plastic parts left over from the mower disassembly. These parts will be disposed of immediately. As can be seen, I have many parts left over. The metal pile may very well be put to use in lesser ways as scrap in the process of building something such as what I described earlier and if not, just scrapped completely. The plastic on the other hand will just be disposed of like any other trash as molded plastic pieces have very few uses outside of what they were designed for. This is fine, the point to this whole project was to "process" this piece of junk hardware into several usable parts that can be assembled into something that is, well, usable, versus just letting this dead mower sit in the middle of the yard. Stay tuned for whatever future project idea that I may come up with for this salvaged hardware. With many of the raised beds, especially in the greenhouse, now filled with dirt, it would only be right to put these areas to use planting more stuff. It would be a waste of space to not plant anything extra so I can increase the yields for this season, so we went ahead and picked up some more plants. Another thing too is the idea that some of the stuff we planted initially didn't fare too well. The green bean plants we did get, aren't really doing all to well, with maybe a couple plants still actually somewhat green. I'm not going to hold my breath on these plants coming back. I also lost probably three small cucumber plants in one of the drum planters, the seedlings must've went into shock when they were initially planted and never really recovered so with the weather that we had, these plants didn't survive. We got a couple of snap bean plants, a six pack of cucumbers, another six pack of creole tomatoes (heat resistant variety), a basil plant and two pumpkin plants. I took the two pumpkin plants and planted them in the one drum planter that held the now defunct cucumbers. 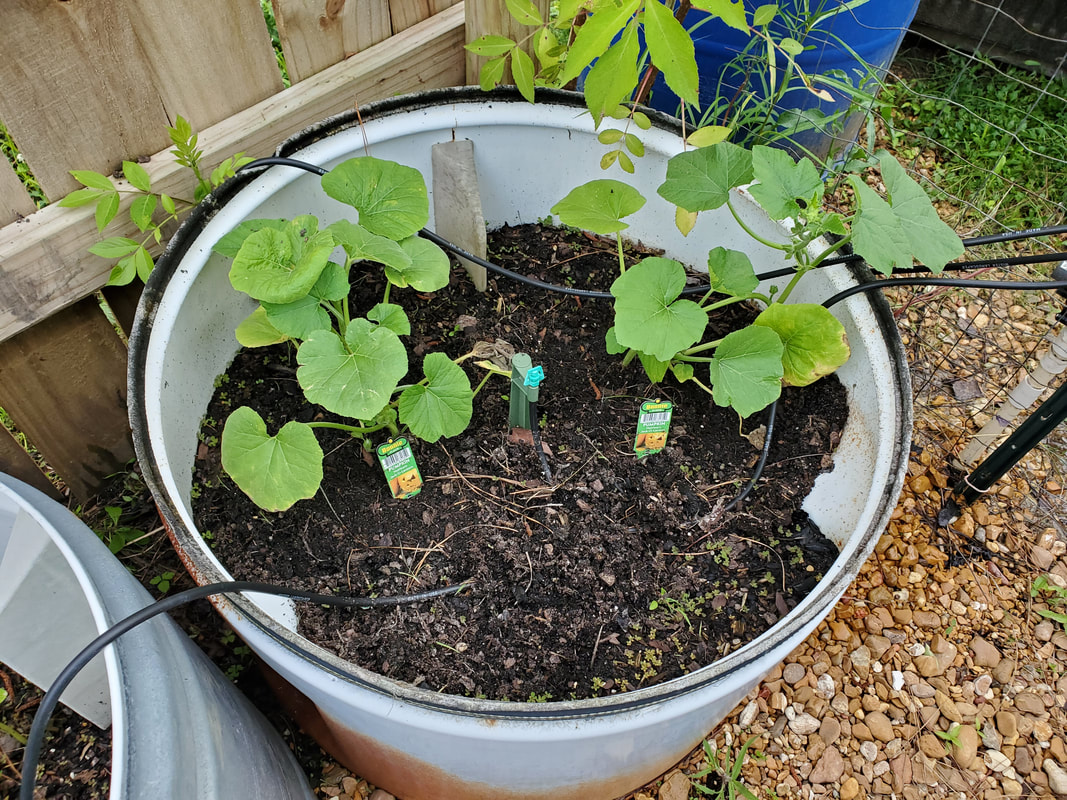 The two pumpkin plants planted in the drum planter that held some cucumbers that didn't make it. I took each of the two snap bean plants and planted them in each bed that held the now defunct bean plants. We still have one more bed with a couple bean plants that are still holding on. Right now the other two beds each have one plant. Hopefully they'll do a lot better than the last group did. 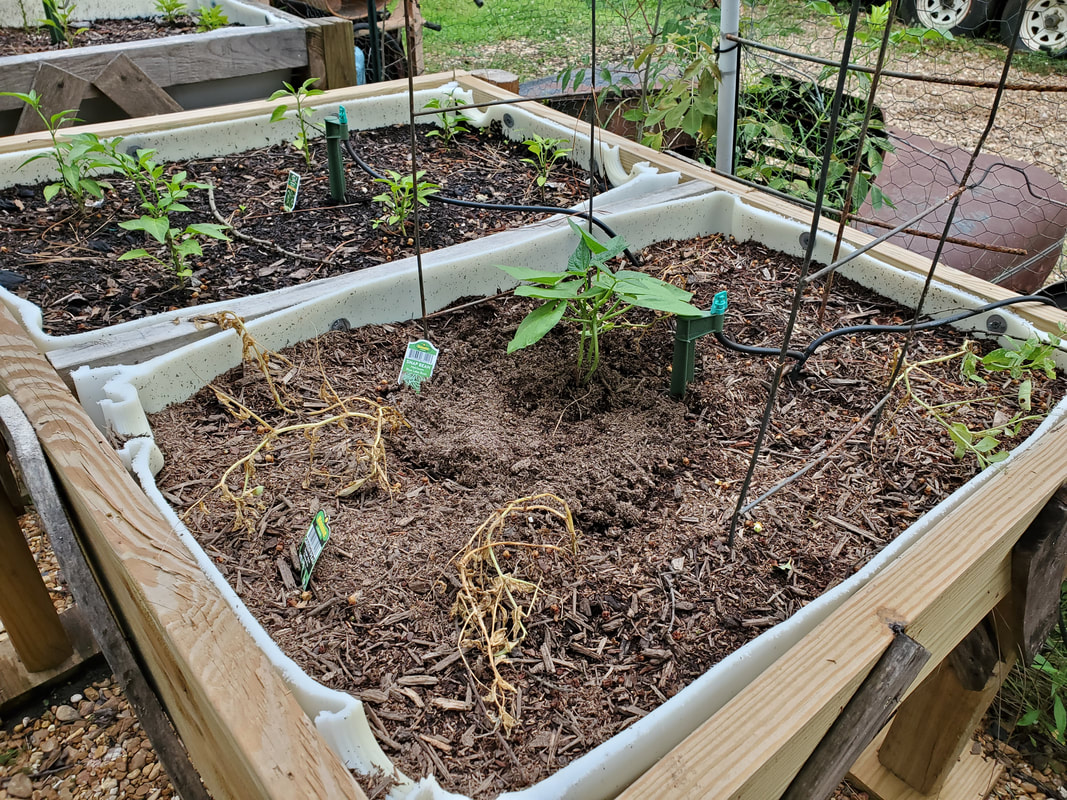 The one snap bean plant planted within this drum bed, among the defunct bean plants, well except for the one to the right. It looks like it's trying to hold on. As for the cucumbers, I planted four of them in the lowest drum raised bed, the one made from the shop fan body. This bed wasn't planted at all and was actually holding three small pots with catnip plants, staged by the sprinkler so they can catch water when the irrigation system was running. I moved the catnips around so they can still take advantage of the sprinkler while still accommodating the cukes in the soil of the bed. 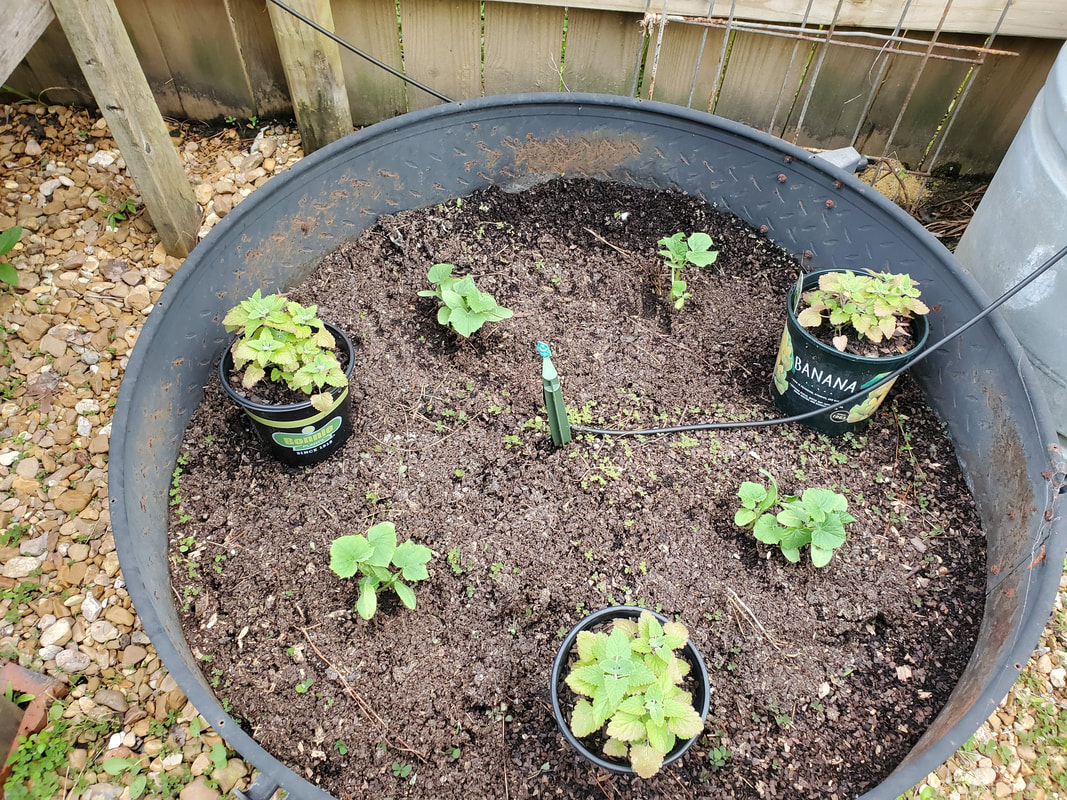 The four cucumber plants in the large planter, with the catnip plants staged within to catch the spray from the sprinkler. The other two cukes in the six pack were planted in the one drum bed in the greenhouse that is filled up with dirt. It's just as well to have two plants within the drum planter instead of multiple plants like if I planted peppers. Once these plants start running they're going to need all the room they can get. I'll end up hanging something that can serve as a ladder for the cuke vines to climb on at a later date. In the greenhouse this is easily doable since I can run tubes along the ceiling to hold the trellises for the cukes, or even tomatoes, which we'll get to next. 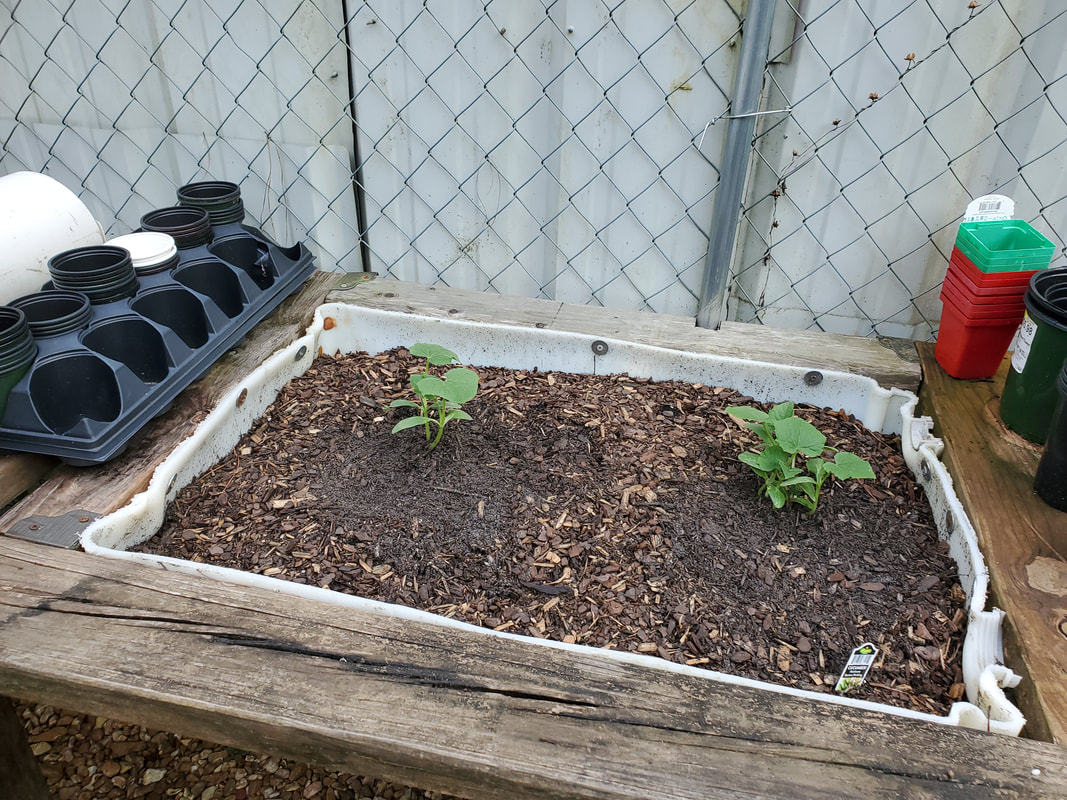 The two cucumber plants planted in the drum planter in the greenhouse. The six pack of tomatoes went in six of the cat litter buckets within the greenhouse, similar to the cat litter bucket beds outside of the greenhouse that are currently holding tomatoes. Next to the six tomatoes, I planted the one basil plant in the seventh bucket, leaving one more bucket. Now only reason I didn't plant in this one with anything is because recently I tried to germinate some tomato seeds I harvested from some store bought tomatoes, and while some were sprouted and eventually rotted because I didn't get to them in time, there were some seeds that were just starting to sprout. I threw this whole mess into the dirt of that eighth bucket to see if any of the seeds would take and start growing. So far, no dice. 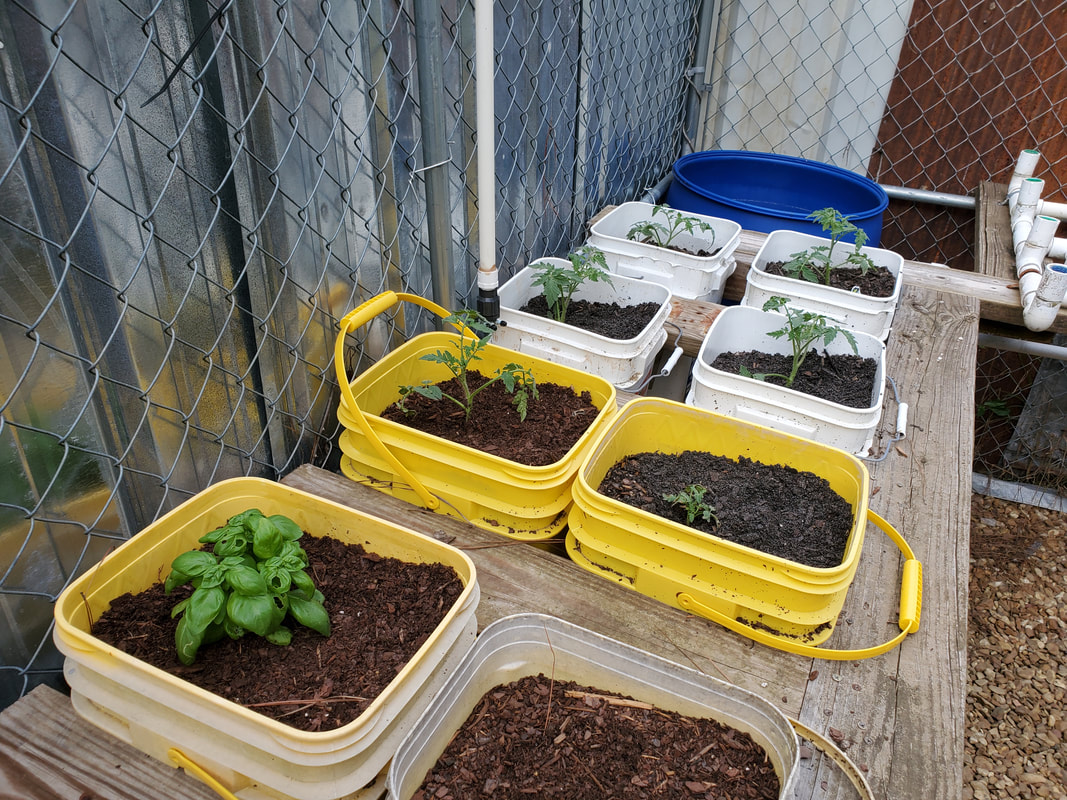 The six tomatoes and one basil plant in the greenhouse bucket beds. As an update, a lot of the plants we planted earlier are doing rather well. The spaghetti squash we planted in the pair of drum beds are growing rather well, sending vines out, with plenty of flowers growing, which should start forming the fruits or veggies or whatever the hell squash is classified as. The okra plants in the greenhouse are also off to a good start, with each plant in their own bucket, growing good. I'll need to hit all these plants with a hefty dose of fertilizer to give them that turbo boost to really see them off into the clouds hopefully. 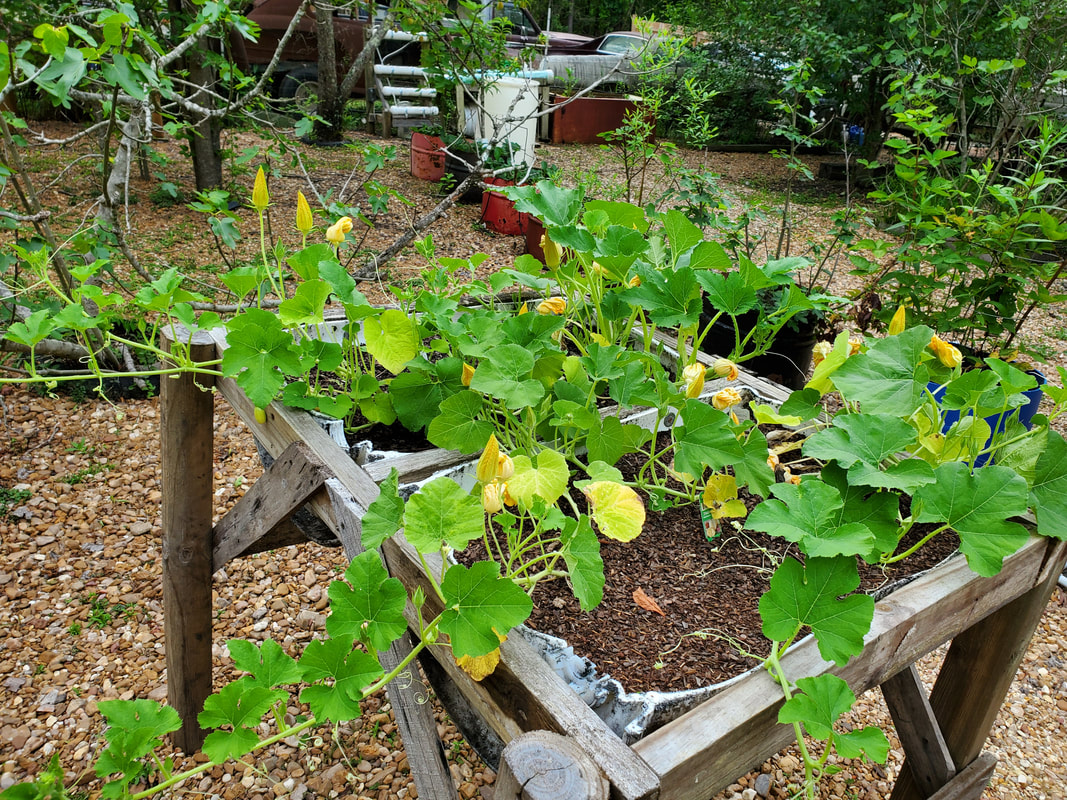 The four spaghetti squash plants well off in their raised bed home.  The four okra plants progressing nicely. Another issue that needed to be addressed was that of landscaping. The area behind the north fence, where the chicken yard is, started to become overgrown with the typical weeds. As an added bonus a couple dead trees fell down from past storms. One tree fell just shy of hitting the fence T bone style and the other tree fell parallel to the fence, falling almost perfectly alongside the fence, missing it. The fence remained undamaged. Of course this still doesn't take away from the fact that there's two dead trees laying on the ground by the fence that need disposal. Even after weeding the area up to the trees on both sides, I will still need to come through there with the saw and hedge trimmer to clean up all this mess to open the area back up again. 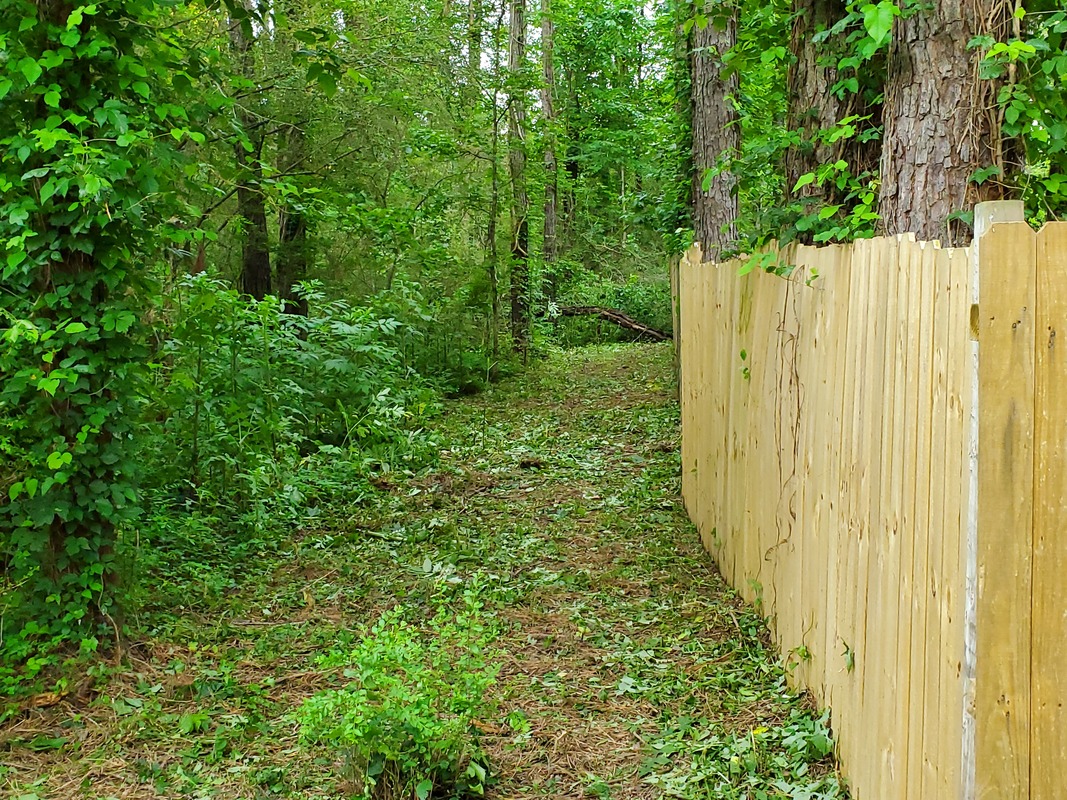 Area along the northern fence, trimmed and cleaned up of dead fall leading up to the fallen trees. 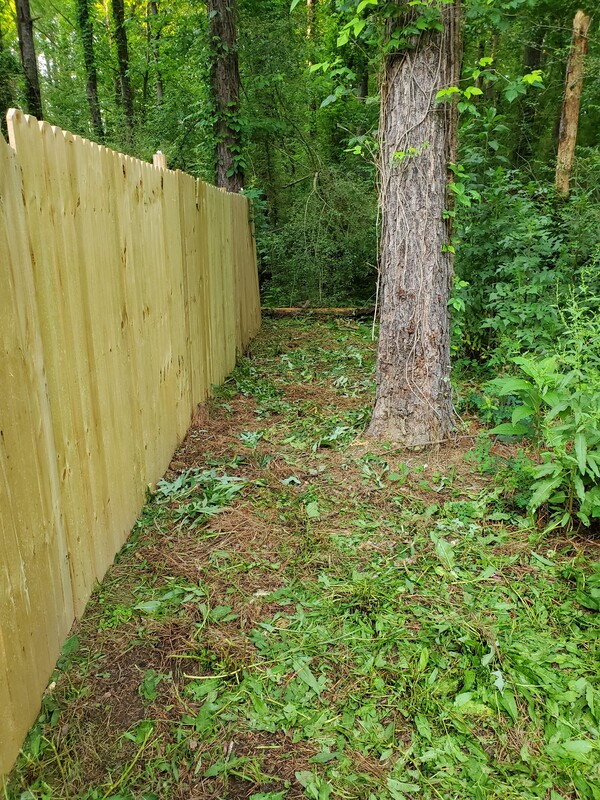 Area alongside the eastern fence to the NE corner, trimmed down to gain access to the fallen trees. 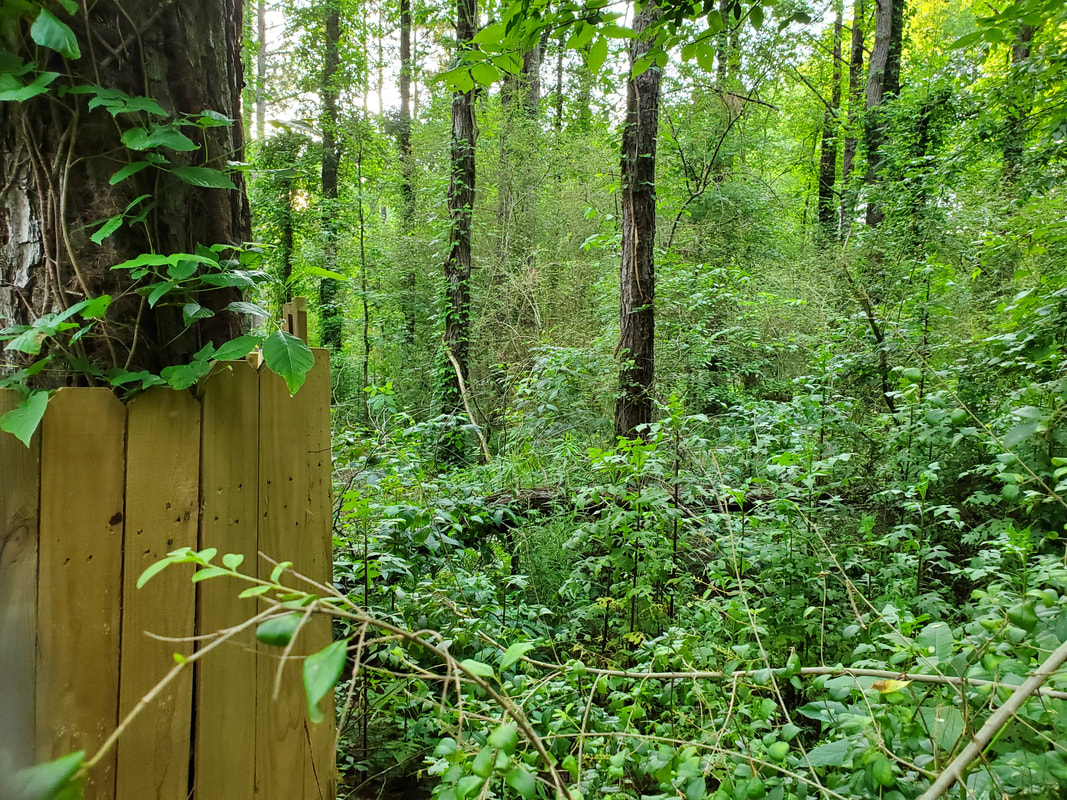 The other tree that fell at the fence, bringing with it multiple branches from other weed trees alongside the fallen tree. 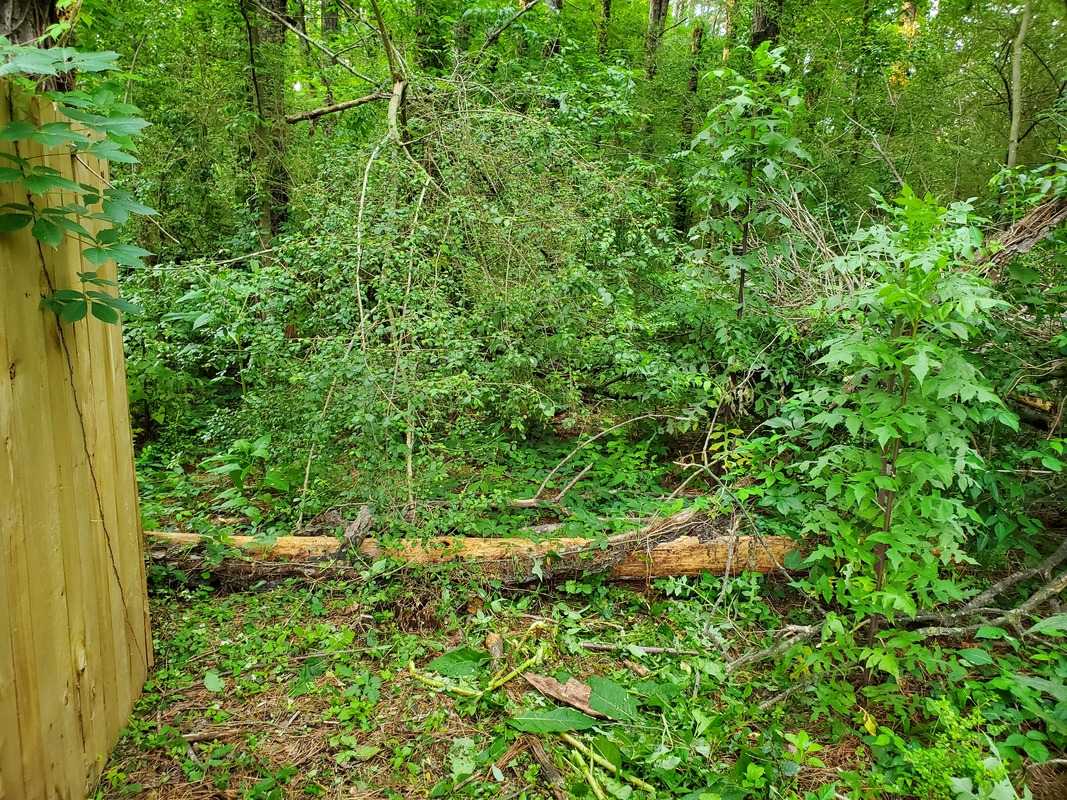 One of the trees fallen parallel to the north fence, almost perfectly, completely missing the fence. As usual, the gravel spreading continues throughout the grounds, with us still working on the chicken yard. There's some areas that are soupy that will need extra gravel as the mud will swallow up more than the dryer areas of the chicken yard. We are even planning on starting an erosion control project, starting in the chicken yard. This will involve applying bags of concrete along the base of the house skirting where dirt is washing away. Along with the concrete I need to add concrete blocks in some of the mor depressed areas. This will be a precursor to applying loose concrete, rock, and dirt around the areas extending from the skirting of the house in order to build up a platform of sorts that will later accommodate either some simple mobile home stairs or a full blown back porch/staircase that will finally give us the easy access through the back door to the chicken yard that we've been missing. The platform will probably incorporate concrete blocks around the borders of the platform to hold everything in. Gravel spread throughout the chicken yard will end at the platform so there won't be any areas that are exposed or able to continue to erode over time. 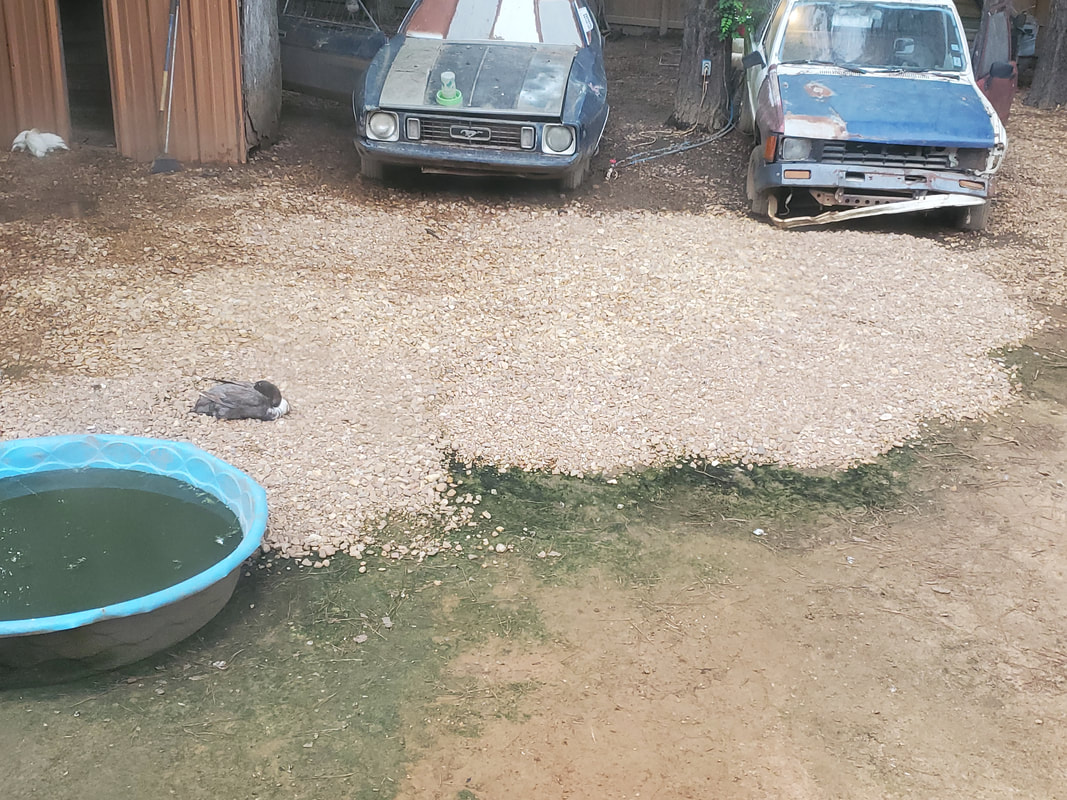 Latest batch of gravel covering a spot that collects more water and as a result, became soupy. This project will go a long ways towards the preservation of the house and the structural integrity of such, since we will be able to keep the dirt from washing away further, risking the collapse of any of the support blocks that can cause the house to fall over or shift enough to cause structural damage. The next thing that I turned my attention to was getting the DOB back up. I had already bled the brakes, sorta, and put a new battery in, as well as added approximately 5 gallons + of fuel to the tank. I had to fight the damn thing to get fuel up to the carburetor, using the pump in the Portable Fuel System to draw fuel through the mechanical fuel pump and later up through the metal line going to the carburetor. Looking at the clear fuel filter, when I did get the engine to run, even for a few seconds, it appeared that there was hardly any fuel moving through the system. Later on, I had to adjust the timing since it just appeared that the engine was...anemic. Of course as is the case with these things, even something as simple as adjusting the distributor wasn't as simple as it should be. Because of the layout of the accessory bracket setup, I couldn't access the bolt holding the retainer for the distributor. I ended up having to remove the AC compressor to open up the area so I could get the wrench in to loosen the bolt. 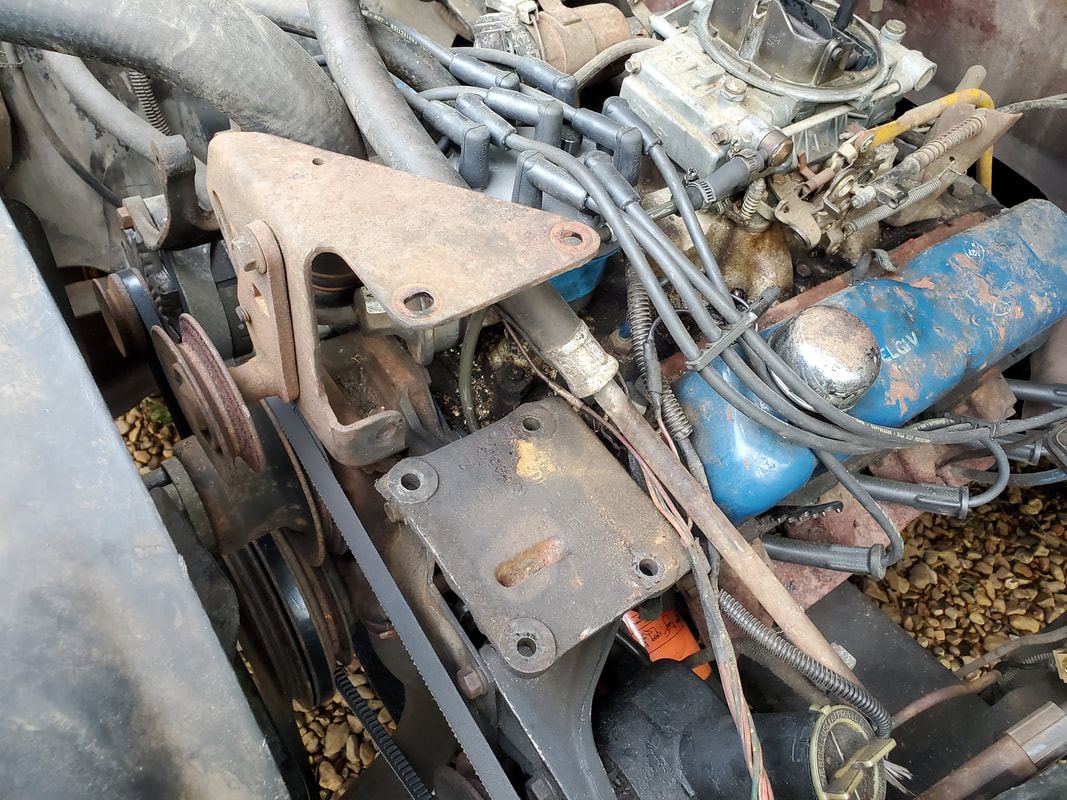 AC compressor removed in order to access distributor retainer bolt to adjust timing. Compressor can be removed along with the belt without affecting any other accessory on the engine. Once I made a slight tweak to the dizzy to advance it a little bit, the engine instantly sounded a lot better. Apparently, this thing was retarded all its life and with the questionable carb in place, this thing was just not at its best. I'm sure the adjustments were for emission purposes, having a tune that optimized the lower emissions for the time. Who knows. All I know is that the slight advancement worked wonders for engine performance, enough so that the thing started up cold with minimum effort. It idled nicely, even under choke then at wide open choke, still ran good. I bumped the idle up a bit for open choke as it was just a little too low for my taste. The transmission went into gear without choking the engine out, holding steady under load and took the throttle with the brake applied without incident. Things looked good enough to be able to move forward with some test driving.  Truck moved up to new spot closer to entrance after getting the engine running, just before driveway/road test. On the first run once I pulled into the driveway, the engine did bog down when I tried to goose it some from a dead stop. With a slight throttle from a dead stop, which could be considered a more conservative acceleration, the truck accelerated nicely and from there jumped up to speed rather well. One thing that I did notice was that the brakes weren't working as they should. It appeared that the rear brakes were grabbing more than the fronts. I pulled back into the driveway and with some help, we did the old two man bleeding method, taking care of all four wheels. From there I went out for another run. Again, the engine bogged down and stalled out because I didn't get off the throttle fast enough. The engine started back up quick and I proceeded on down the driveway and down the access road going down to the mailboxes, approximately 1/4 mile give or take. The truck still ran good, allowing me to stop, as the brakes were working 100% better than they were, grabbing evenly with the new proportioning valve in place. I backed up and turned around and came back up the road and back to the compound. After docking the truck, I checked out the engine, further confirming what I already observed, that the carburetor was leaking around the accelerator pump. This by itself would contribute to the bogging down when I try to goose the throttle as I didn't have any accelerator pump action to give that extra juice to make the engine rev up. That's the least of my concern though. With these fucking Holley carburetors and their side float bowls and accelerator pumps on the bottom, this leaking fuel is a serious fire hazard. Just like on the 84 F150 we picked up, which suffered from the same fate, this leaky carb can cause this truck to easily catch fire as fuel will pool up on the intake and one spark, whether from a backfire, or a leaky exhaust gasket or even a "leaky" spark plug wire, can cause this polled up fuel to ignite, resulting in a hot mess, literally. So before I can really comfortably continue with further testing on this truck, I will either have to rebuild this carb, replacing all the gaskets, or in the best case, replacing the whole carb. 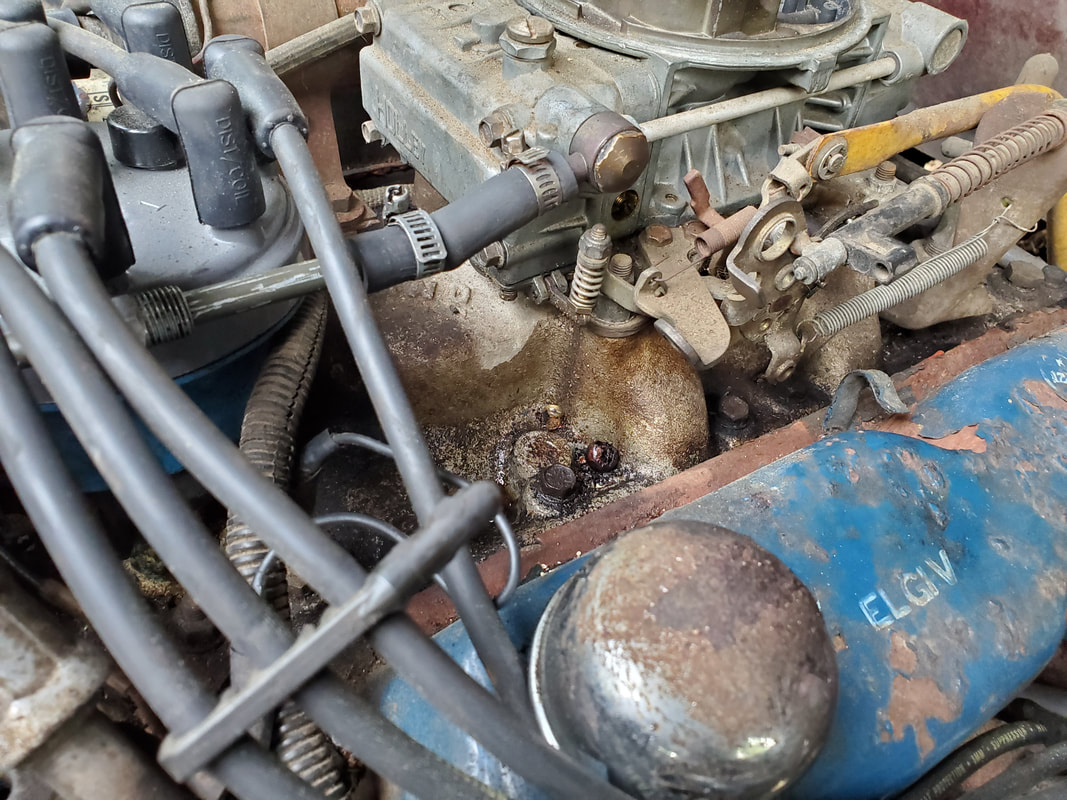 Area under front float bowl on Holley, showing fuel moisture on intake body. This needs to be addressed before further operation continues. I'm completely confident that once I either rebuild or replace this carburetor this truck will run like a sewing machine, as it had already shown to do in these initial tests on the bad carb. Other than the slightly smoking engine, this truck will probably be good and able to make the trip back to our friends house where it can then continue to serve for the foreseeable future, so long as oil levels are kept in check so the thing doesn't eventually run dry. Again I will go on record to say that it will make my day to be able to clear yet another vehicle from our ranks, allowing me to further focus on our own ongoing projects. With the seats in, and the engine assembled as far as we can get it, all that was left was to hook up the wires for the temp and oil sensors on the engine, the plug on the distributor, and a few other odds and ends. I had already hooked wires up to the oil and temp gauges and routed the wires out through the firewall to the engine in preparation for when I did get everything together so I can finish the hookup of those wires. I had to crimp the terminals on the wire ends to hook them up so with that, I was able to hook things up once and for all. 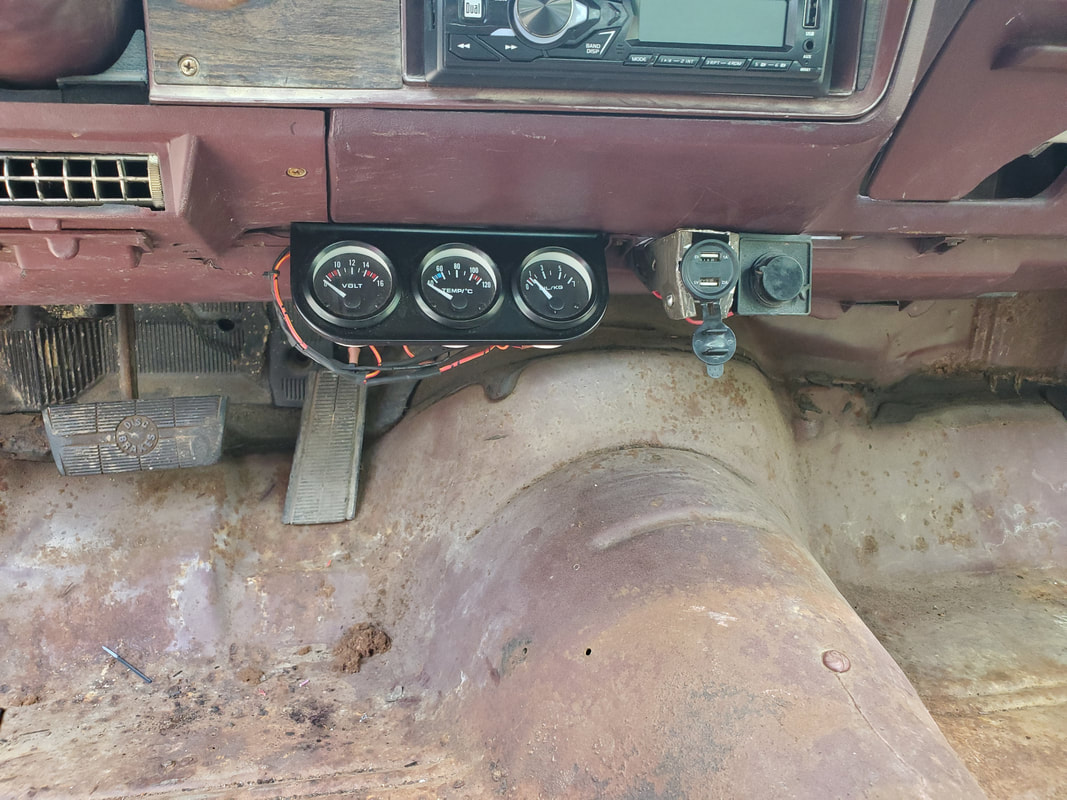 Gauge cluster under dash with wires already hooked up and routed through firewall. Note the cleaned out floors in the car as well. As is usual, I always have to run into some kind of hurdle. The hurdle in this case is the fact that the metal port at the back of the engine that holds the oil pressure sensor is 1/4" NPT thread and the thread on the oil sensor that came with the gauge is 1/8" NPT. While this is minor due to the fact that I need a 1/4"-1/8" NPT bushing, when one doesn't have said bushing in hand, it goes from a minor inconvenience to a full blown hurdle since I can't screw in the oil pressure sensor to finalize the hookup. So for now, I just have the oil pressure sensor sitting on standby on the intake with the plug attached to the wire so when I do finally get a bushing in place I can just screw everything together and plug it all up. 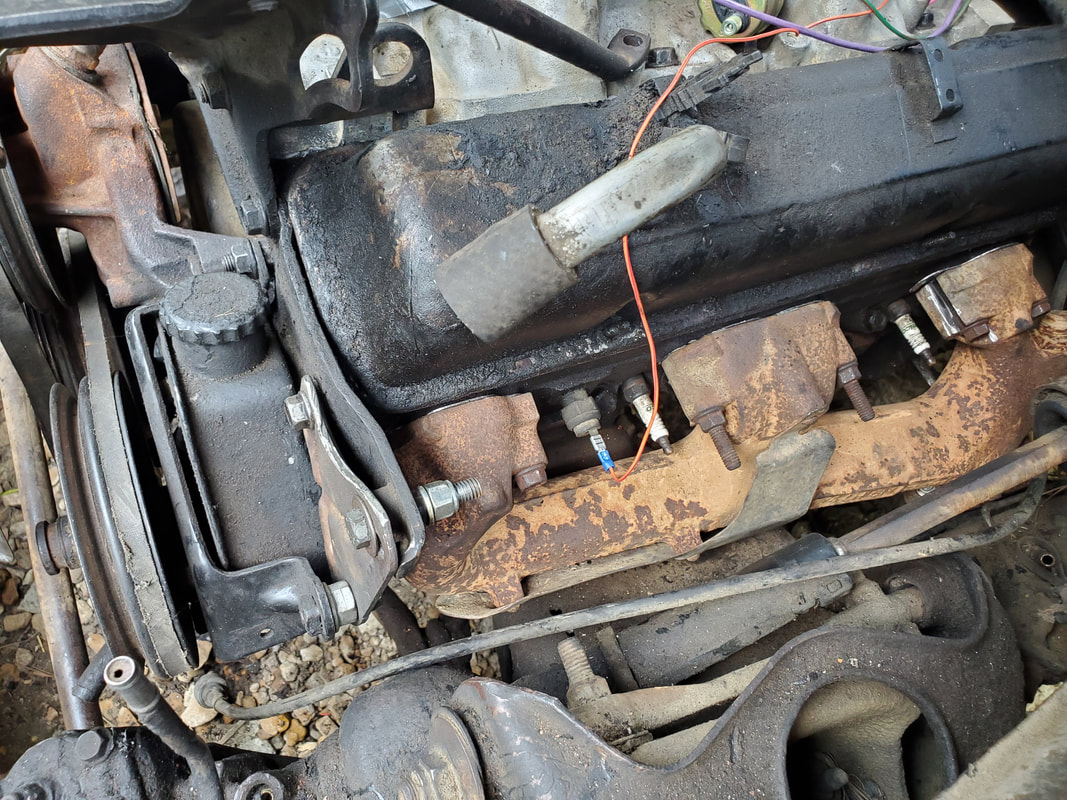 Orange wire routed over to and plugged up to temp sensor (maybe). This might be an oil pressure sensor, not sure, we'll find out when the time comes to run this thing. 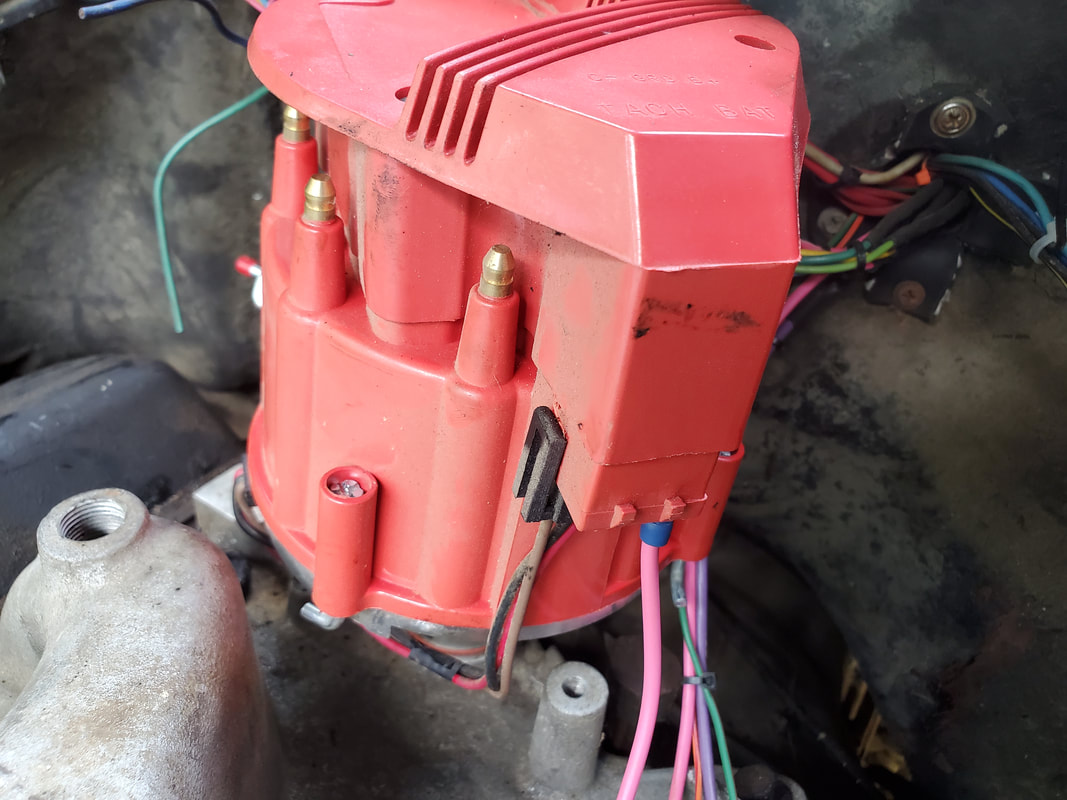 Distributor with its power wire plugged up. Note the fitting under the distributor for the oil sensor. For right now I just have the wire hooked up to supply power to the distributor. In the future I will hook up a tach which will of course require another wire routed through the firewall to the distributor. That will of course be well into the future. Another thing that I wanted to take care of is covering up the carb port on the intake so water and/or other foreign matter doesn't end up in the intake ports. I also covered up the thermostat port since I still need to install a thermostat and its housing. Again, these things are part of the next and hopefully final installment of the work on this car. 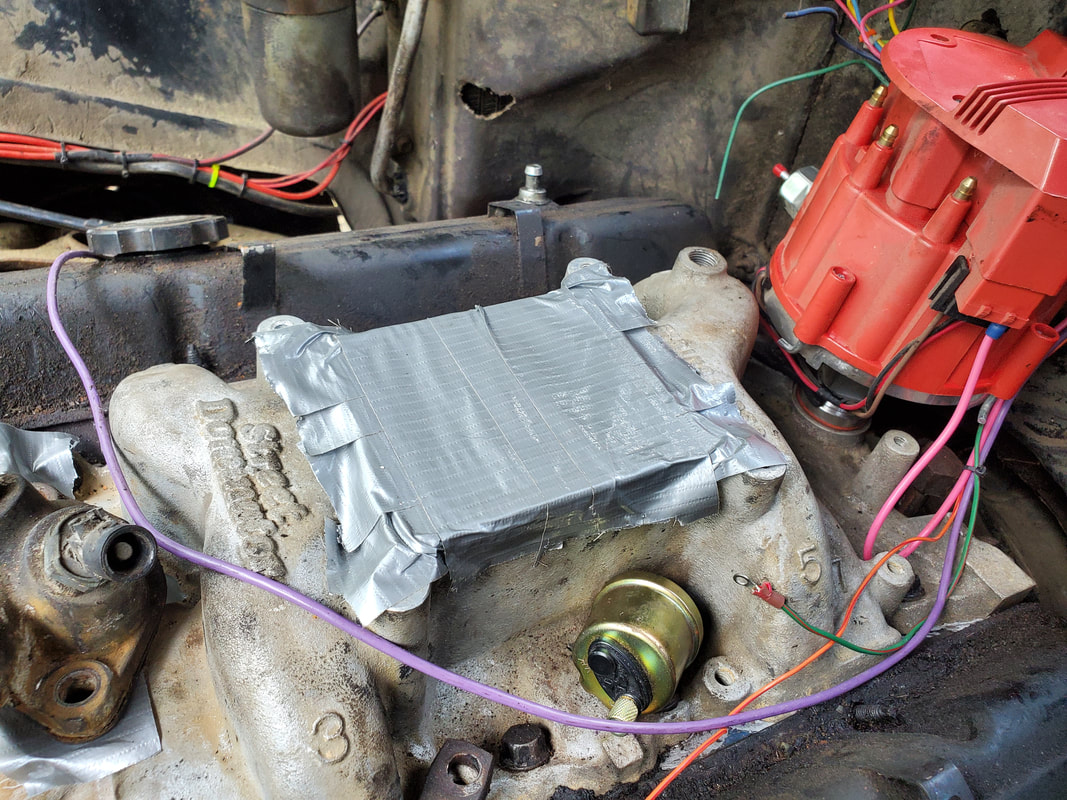 Carb port on intake taped up, along with thermostat port. Note the thermostat housing on the left covering the taped up port. Also note the oil sensor on the intake, awaiting its bushing to secure it in place. After getting all the other final stuff done that was directly related to getting the car more complete, I took a few moments to clean up in and around the car. I cleaned out the bed of different material as well as some other little parts such as the emblems, which still need to be attached, but won't be until some body work is taken care of. I also had the old plastic seat bases from the original seats, which obviously aren't needed so I may as well see if I could sell them. Only other option is tossing them out. I also took time to clean out the interior, removing the containers of extra parts I had and combining other containers of parts and hardware into one container. Most of this hardware will probably not be used as its just random nuts and bolts and the like. All of the minute assembly that needs to be done has pretty much been done, now its a matter of getting the bigger things addressed on the outside of the car. 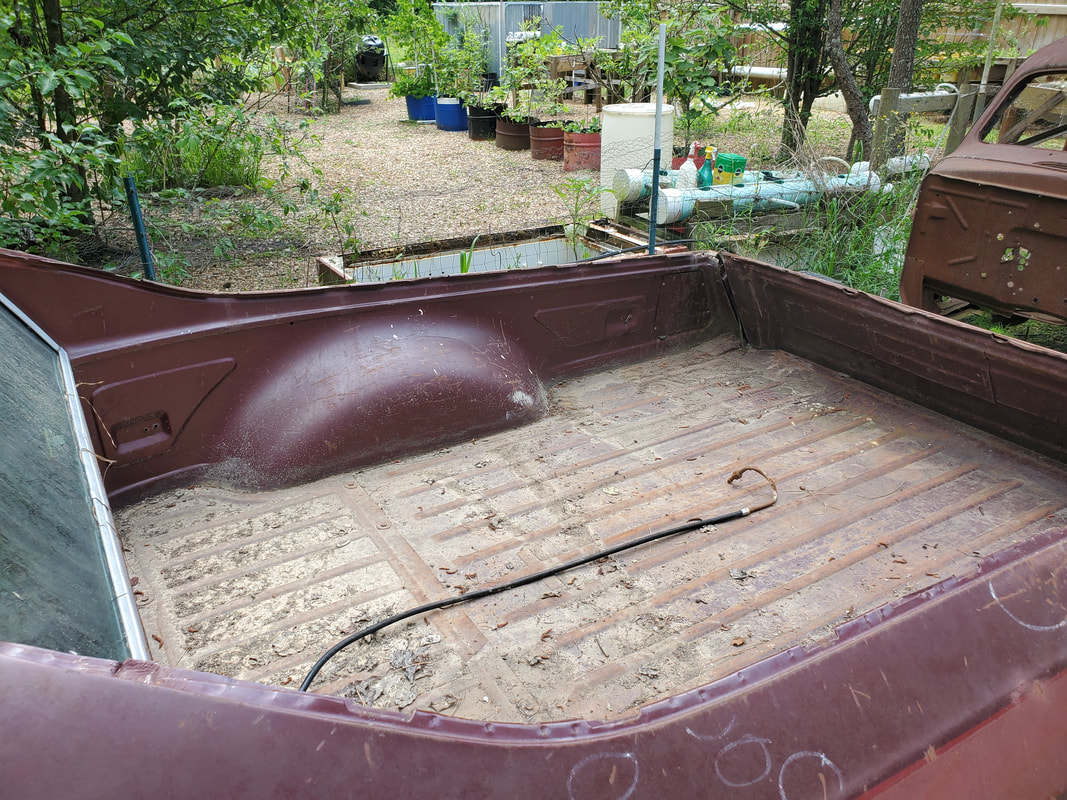 The bed on the Elco cleaned out, minus an old AC hose from the old system. With the interior done I don't need as much of this extra shit. The stuff that needs addressing are the brakes and suspension, will not require little bitty sheet metal screws and the like. I'll probably clear out more of this shit when I do get around to messing with the car again after I get more parts. Hell, most of the hardware I need for the brakes and suspension are either already in place or will need to be replaced due to their uniqueness, such as the hollow bolts for holding the brake line to the calipers on the front disc brakes. Until then, the Elco is put back onto the back burner so we can focus on one of the other cars, most likely the DOB, since I need to run this thing and tune it, do a final check on the brakes, then put the truck through some heavy test driving to confirm its functionality before I drive it back to its owner.
After the initial fiasco with the seat mounts and trying to make all this trash fit, I finally got to a happy medium where I modified the seats and the seat mounts and the seats sat at a position that I could work with. I still had to do the passenger side seat as far as hacking up the unneeded material and prepping the T base on the VW seat to accommodate the modified minivan seats. At least with me knowing how to do everything I can get the seat done pretty fast, compared to the trial and error with the first seat.
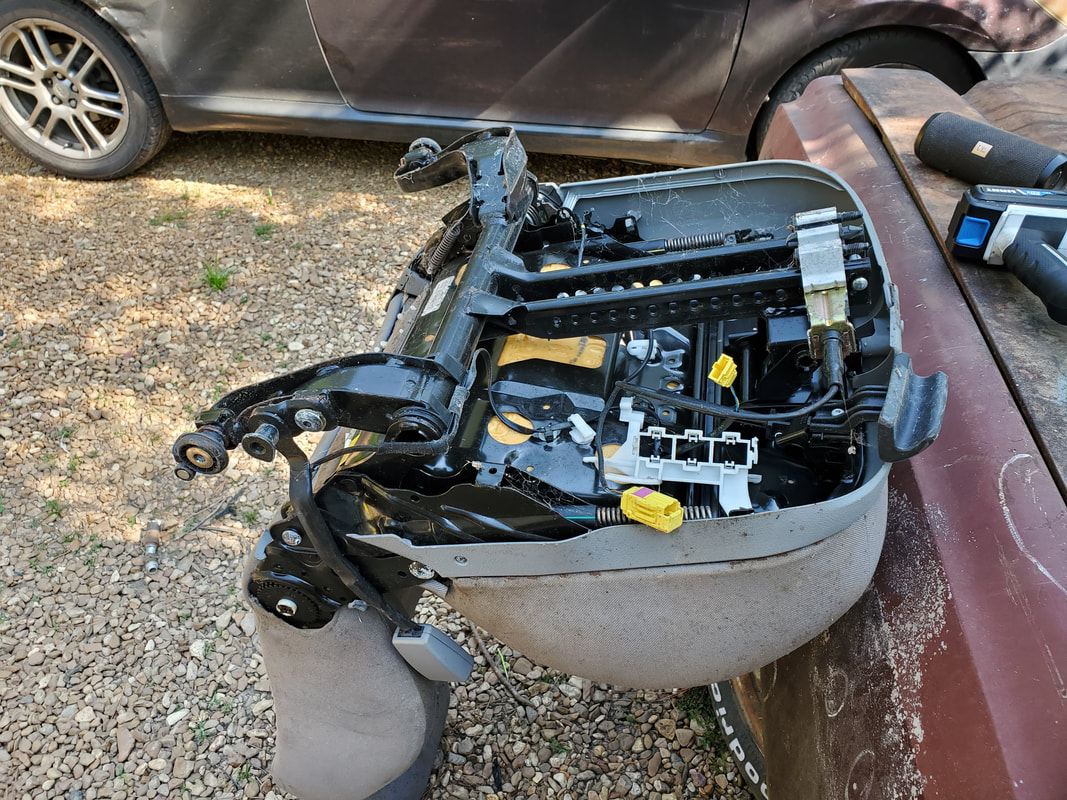
The passenger side seat in position for me to chop off the excess material from the T frame in order to accommodate the modified minivan frame.
After cutting the excess material from the T, I cut the notches at the arms of the T to accommodate the frame rails. From there I drilled the holes for the rear mounts. I cut a notch at the bottom of the T at the front of the seat to accommodate the other bar of the frame. With the rear of the seat frame bolted down to the T, I was able to weld up the front bar to the bottom of the T to fully secure the minivan frame to the T of the VW seat. Still following? Ok then.... 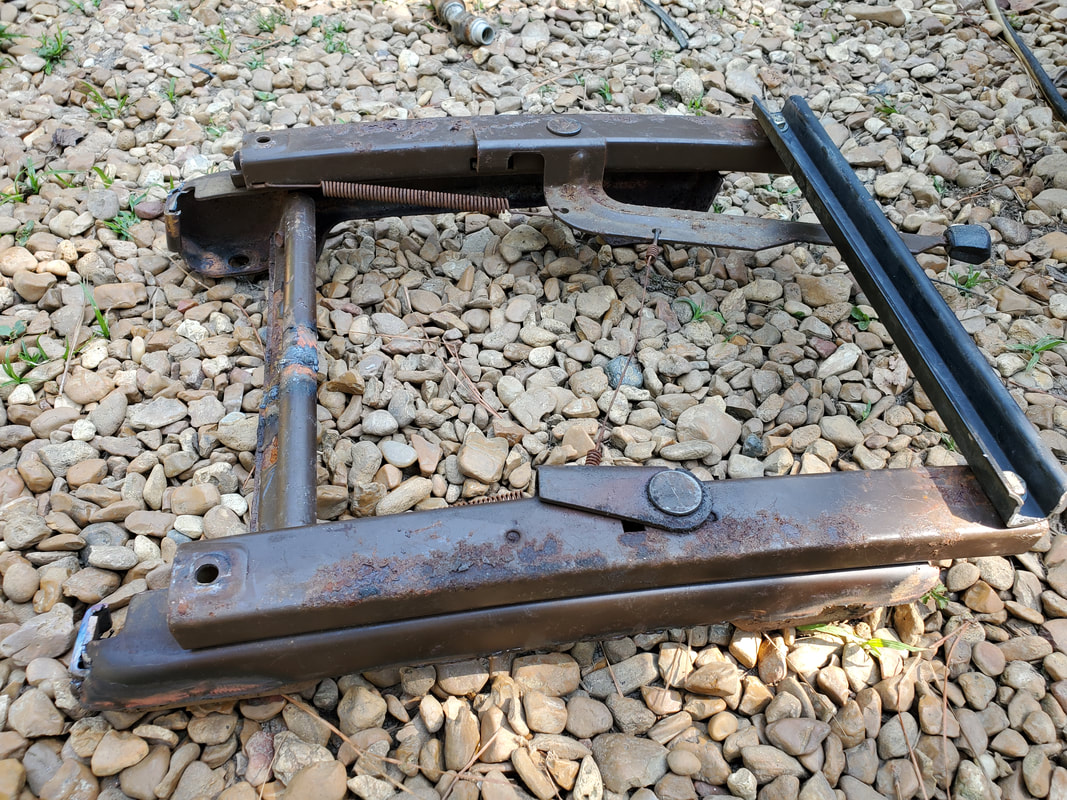
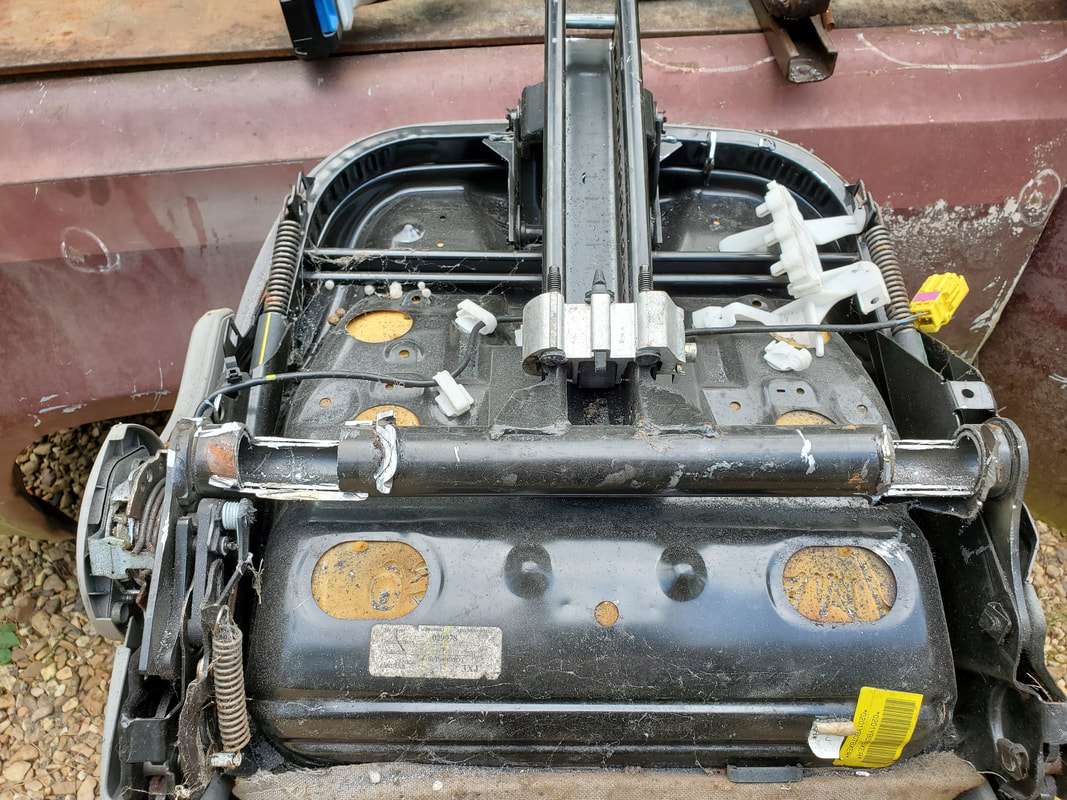
The modified minivan seat frame after all the cutting and welding to bring you the creation in this picture.
Notches cut into arms of the T frame to accommodate the minivan frame.
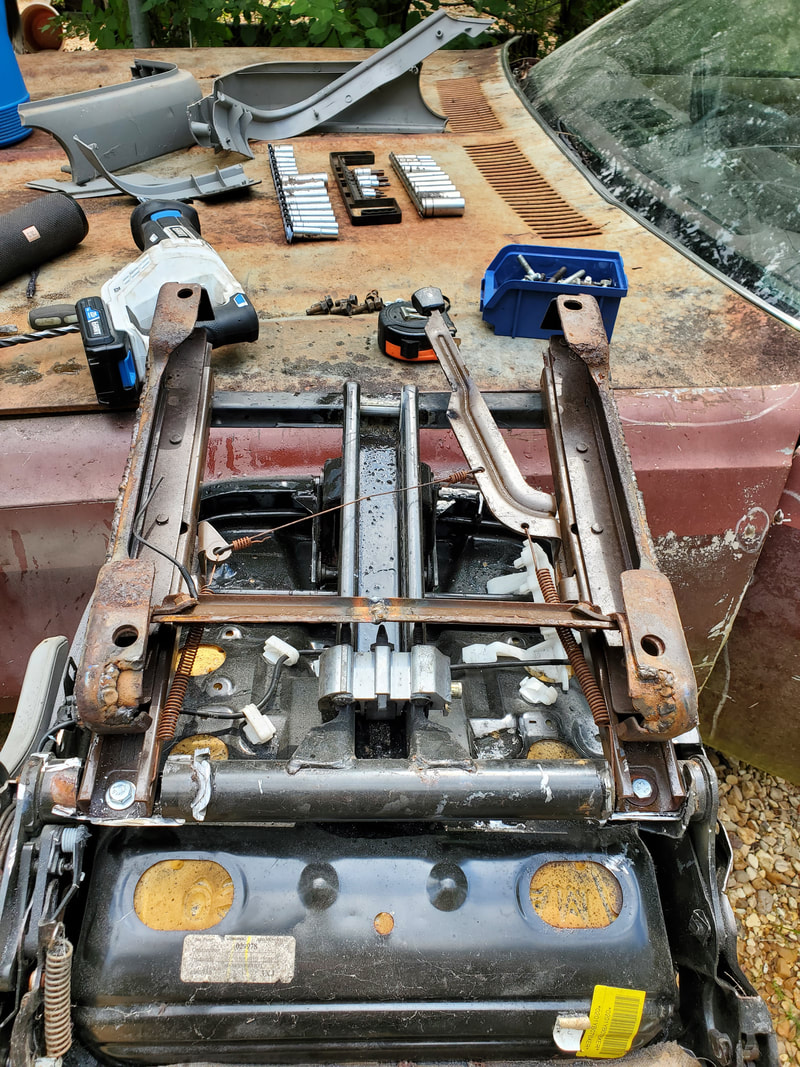
Modified minivan seat bolted to T frame on the VW seat.
With the minivan frame attached to the seat, the next move was to drill holes in the floor for mounting the frames and by extension, the seats to the floor of the car. It took a little trial and error but I managed to get the holes pretty much figured out. I would later have to drill a couple holes that were off from the original holes I drilled. It's kind of hard to get the holes lined up with those holes in the frame when you're looking at it from different angles. 
Holes drilled in floor on driver's side floor and marked with bolts for sake of the picture.
With the holes drilled in the passenger side, I mounted that seat first. As stated before, I had to drill an extra couple holes that were offset from the first holes since a couple holes didn't line up. I also had to use a large nut as a spacer under one of the corners, so we didn't have any teeter action with the seat since the contact points weren't all level with one another. Other than the one corner that needed the spacer, all the other bolts went in just fine, washers on both ends, and tightened down. Now for the driver's side seat. 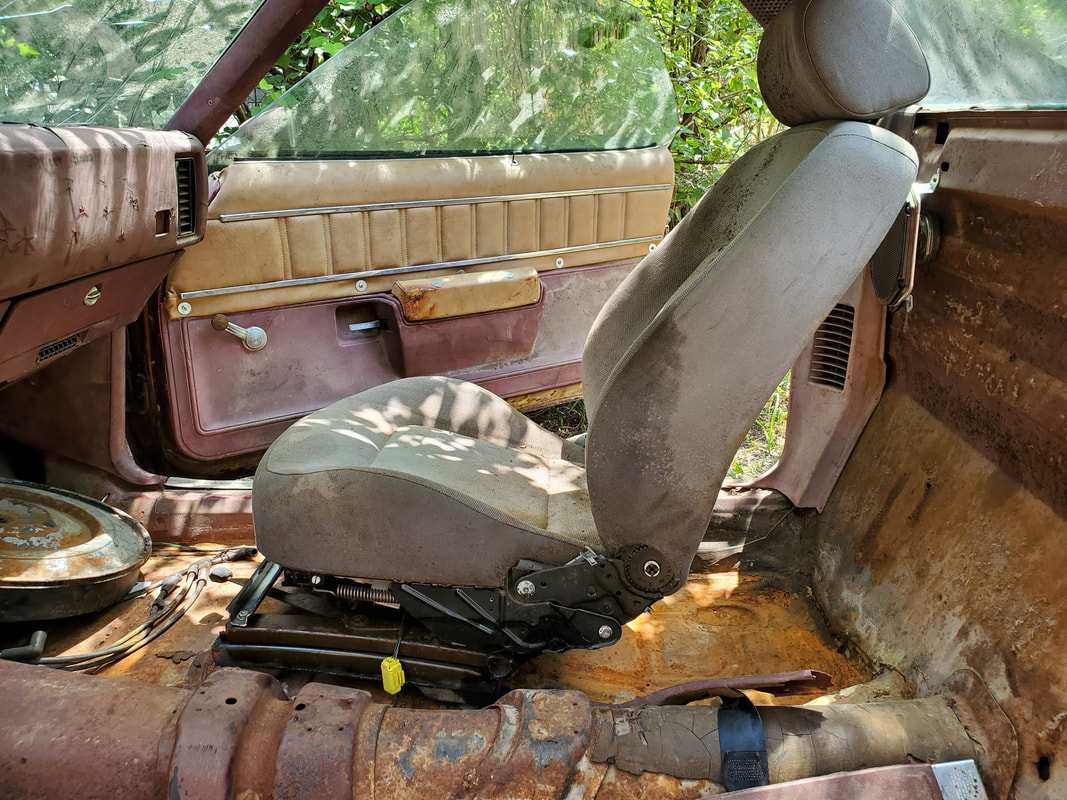
Passenger seat bolted to floor and set into position for optimum comfort.
As before I had to drill another hole offset from the first hole as well as use a large nut as a spacer for the leveling of the seat frame. After bolting everything down I was able to sit in both seats to test fit them for my frame. I reclined the seat backs some to get a comfortable posture in the seat, making for a comfortable ride, whether passenger or driver. The steering wheel only had to be raised halfway to give me more than enough clearance between the bottom of the steering wheel and my legs. I slid the seat to the right position where my posture would be comfortable and my feet would reach the pedals nicely. 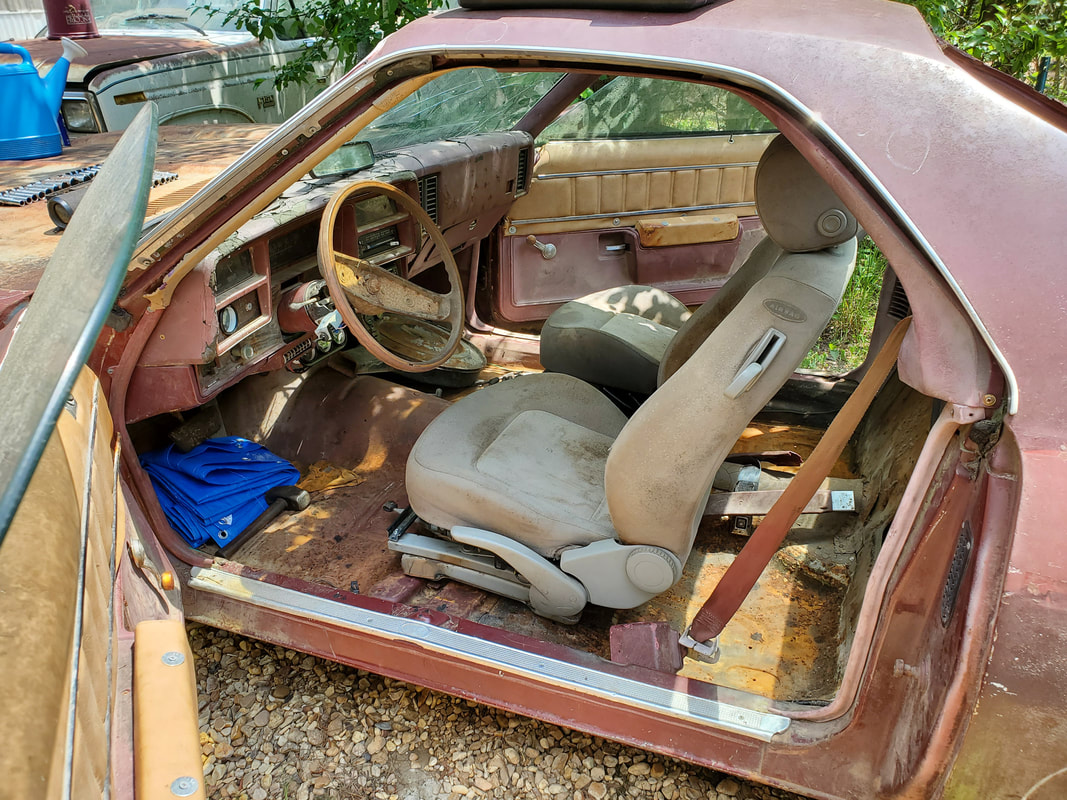
Both seats in position after bolting to the floor. These seats are ready for use, whenever the car is actually drivable.
The seats are in positions on the floor where they clear the seatbelt reels and buckles, allowing for their use just as well. With the seats done, all that I have left to do now is wire up the oil and temp gauges to their respective sensors on the engine. Once that's done I can clean up the car inside and out of anything that is not needed, which would pretty much be everything, and consider myself done on the Elco until I get a new batch of parts to continue the build. Of course those parts would be exhaust, some brake parts, maybe some shocks for the suspension, who knows. We'll see.
|
