|
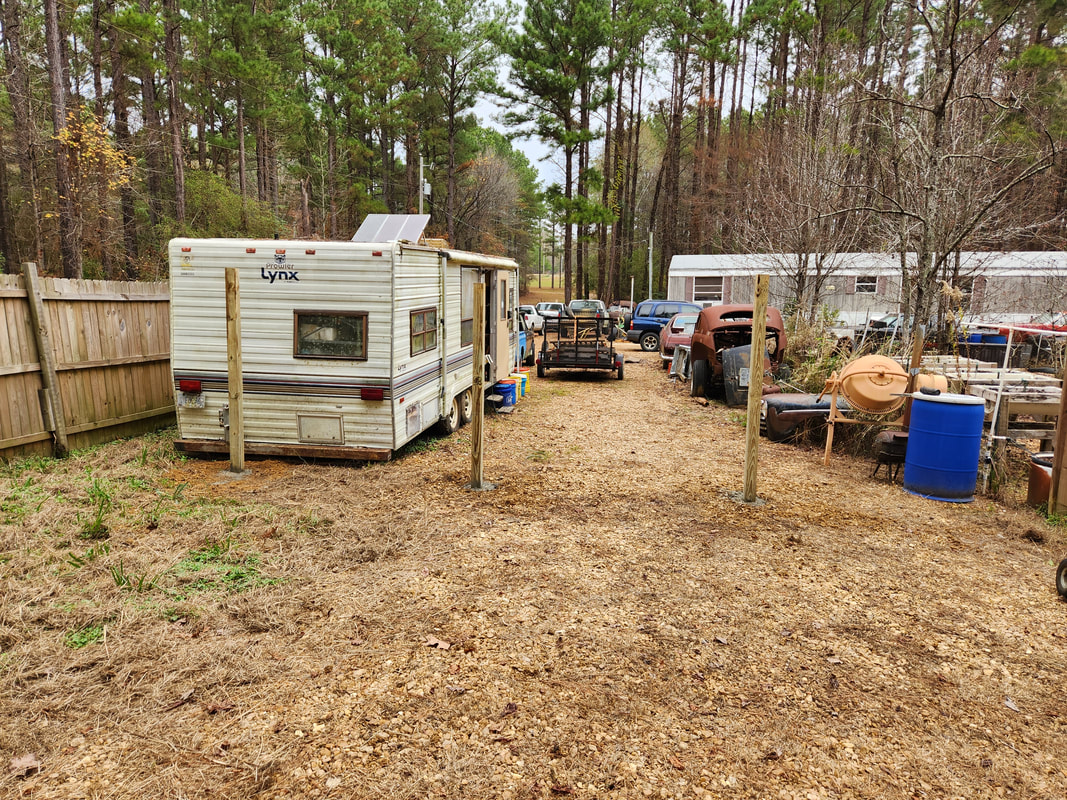
With more stuff being cleared from the new south fence line, I've made it to the point where I need to do some more thorough cleanup. After moving the tow dolly, I would have to clean up the overgrown weeds and grass before I could move the catamaran boat and boat trailer. Never mind the idea that the axle on the boat trailer is broken. I took the weed and hedge trimmers and chopped through the high grass and woody weeds, clearing around the boat and under and around the trailer. Once the floral detritus was cleared away in its entirety, I could then focus on moving the boat. 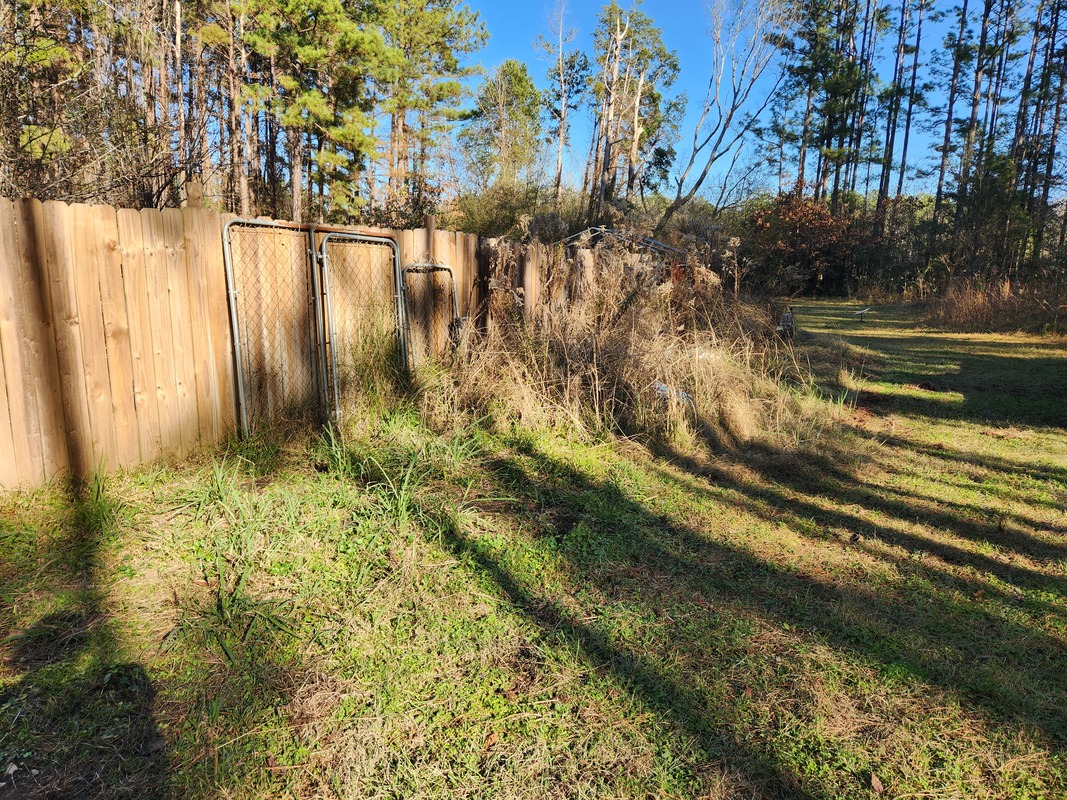 The high grass and weeds that completely enshroud the catamaran and boat trailer. This will be cleared away. 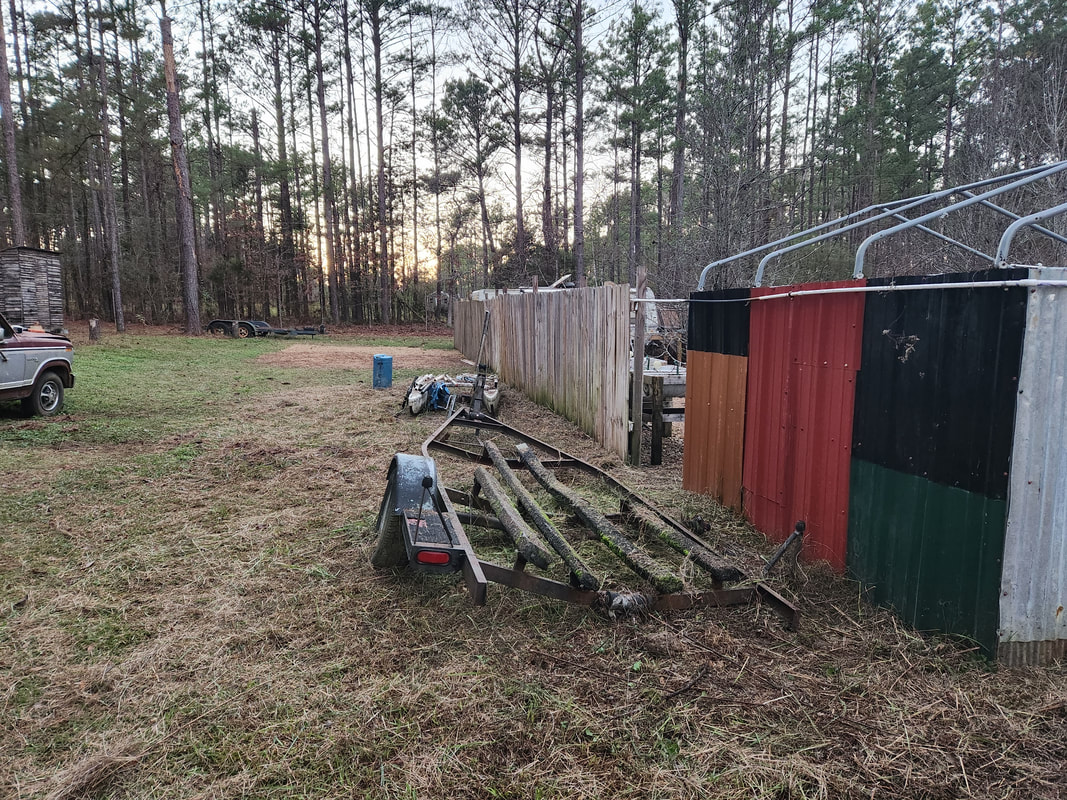 The boat trailer in its degraded state along with the catamaran alongside the south fence line. Note how all the high grass and weeds have been cut away to clear these two large items. I cleared the different items from the top of the boat that I staged there a while back when I first moved the boat to the backyard area. Sections of large PVC pipe, parts of the old mast from this boat, as well as the makeshift lateen sail assembly, made from conduit, were all moved from the top of the boat to lessen the weight on top. I slowly scooted the boat across the yard and around the fence line until I got to the east gate. Once on the gravel, the boat scooted easily, allowing me to quickly scoot the boat to a parking spot along the chicken fence right where the fence meets the house. 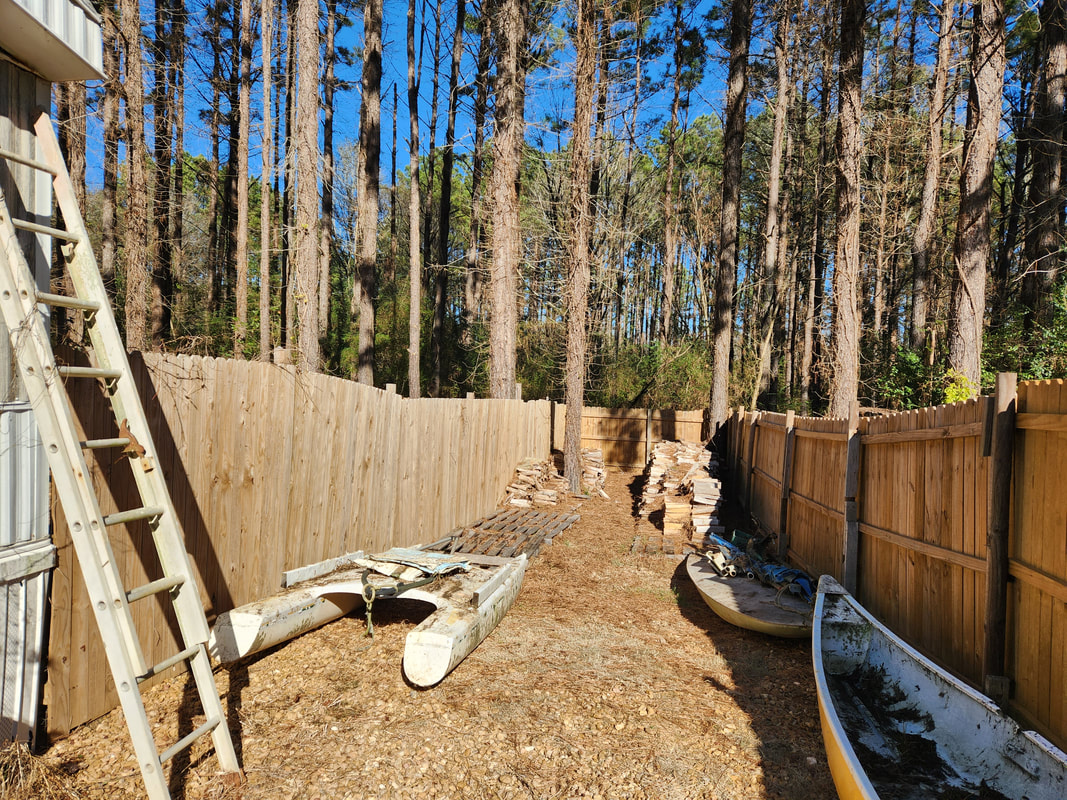 The catamaran boat moved alongside the chicken yard fence, with all of the crap that was on top stored on the small boat in front of the canoe. The next order of business was the boat trailer. This thing, as stated before, has a broken axle. The first thing I had to do was jack the trailer body up so I can rearrange the axle to get it staged for welding and reinforcement later. This required me to place the jack under one spot to jack the trailer up enough to place a block under another spot, then move the jack to another spot to jack the trailer up more. Once the trailer was up high enough, I was able to resituate the broken axle. I also installed the extra trailer tire on the hub to aid in this task. I placed a masonry block under the trailer to hold it up high enough to allow me to situate the axle, then use the jack to hold the axle close to the position it would need to be in for me to weld it up. Unlike the last time I welded the axle up, I will have to do a lot more prep work to strengthen the axle in the middle where it broke, then strengthen the point where the axle attaches to the frame rail. Obviously, this extra metal work will be necessary if this trailer is to be able to endure the rough roads while being dragged behind a truck with the load of a boat on board.  The boat trailer with a concrete block propping up the right end and the tire on the right hub. The axle has been resituated pending reattachment. 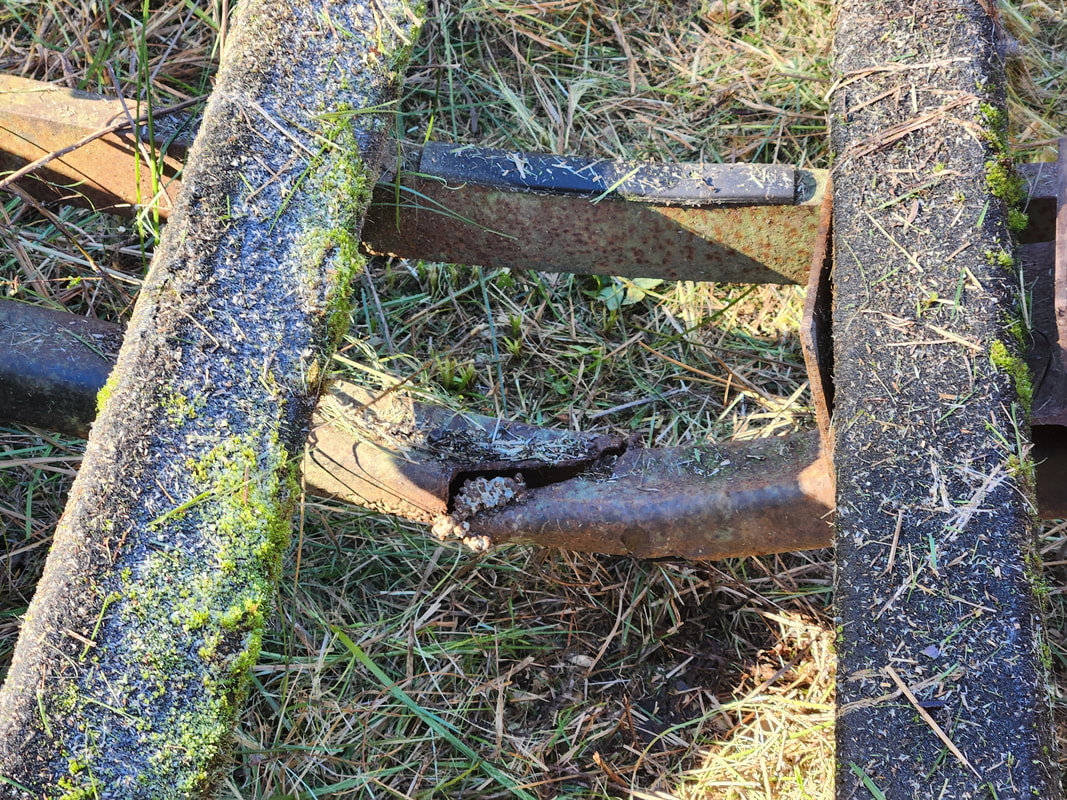 The middle of the axle where it broke through completely. This area will need a little extra work done to ensure its strength so the axle doesn't break again and sent the trailer into an uncontrollable wipe out situation. 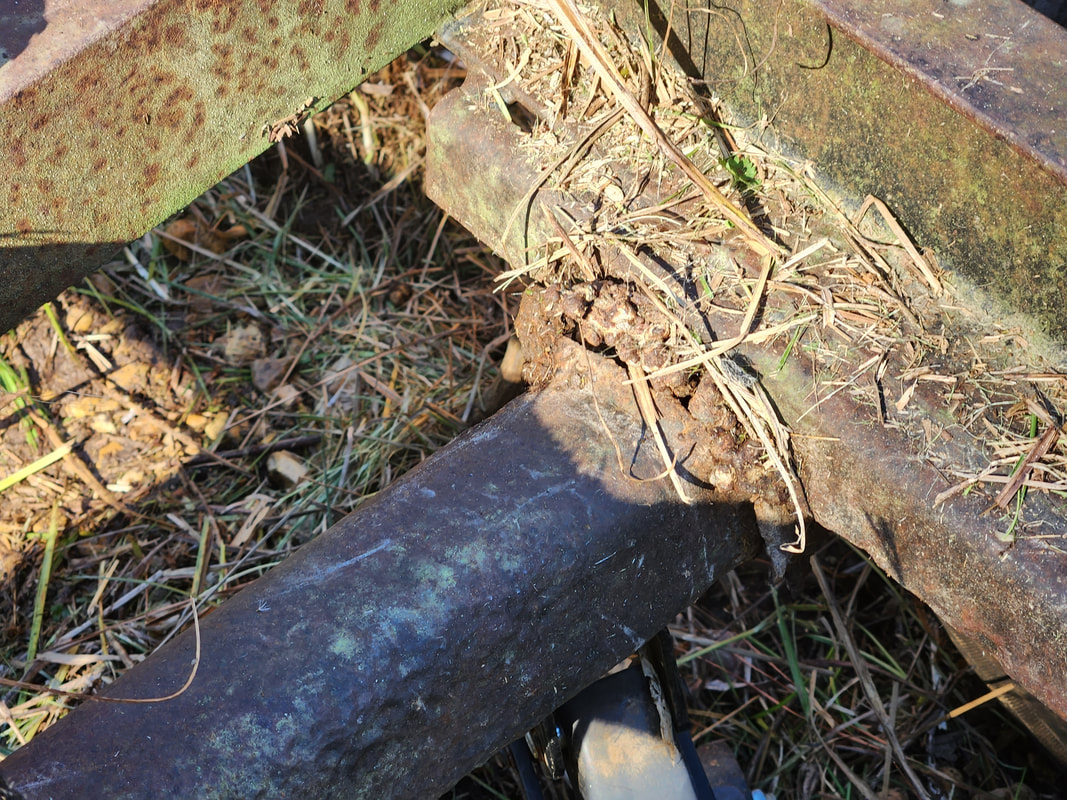 The outer frame mounting point of the axle, with old shitty welds that broke. All of this will need to be reinforced if this trailer is to withstand road conditions. With the catamaran staged by the other two boats, once I get the trailer fixed up, I can move it over to where the tow dolly is, along the east fence line, therefore clearing the area along the south fence line. Of course, I will have to continue laying gravel over this whole area to finish up the path leading to the new "backyard". Even the area where the boat trailer and tow dolly are going to be situated will be covered in gravel to make it easy to bring a truck in to hook up and haul out. It won't be long before I have the old backyard area cleared in its entirety, closing the chapter on the old arrangement with the compound.
0 Comments
With most of the old backyard area taken care of, save for the old wood/PVC storage rack and a couple partial fence panels, I was getting myself geared up for the work on the east fence line. I took a moment to finish moving the remaining PVC pipe to the new staging area at the northwest side of the compound, with the remaining wood going to the staging pile for firewood, since most of this wood was too old to really be viable in any project. Once the rack was cleared, it didn't take long to separate and cut up the rack into pieces and moved to the same staging pile for cutting up later. From there the two panels came down. One of the panels was a section cut to around 6' in length while the other one was around 8ft but needed to be disassembled. The 2x4's were old and on their way out. I salvaged the pickets and threw the old 2x4's onto the scrap firewood pile, to be cut up later.
The old wood/PVC rack after removing the rest of the PVC pipe. This and the fencing will all be gone from here soon.
The area after cutting away the rack and removing the fencing.
At this same time I also picked up another load of gravel, but the new target area is the old backyard area. Some of this area was already covered with some gravel before I made the change of plan on the fencing arrangement. With the new south fence line, the patch of grave I laid in the backyard area stretches out about ten to twelve feet from the fence line. I decided to add to this patch and use this area along the south fence as a road to take us to the rear of the compound, for when we move trailers to the rear and maybe the occasional overflow vehicle. The load of gravel got me to within a couple feet of the west fence line, even though the gravel path will reach out to the main driveway. I did save some gravel for use along the inside of the east fence in the garden area. After removing the old chicken wire fencing, there was a narrow patch of ground that needed to be covered to blend the garden with the new fence line. 
The gravel patch that is after setting up the new south fence line. Out from the old patch is the new gravel that was just laid, note how close this path is to the main driveway.
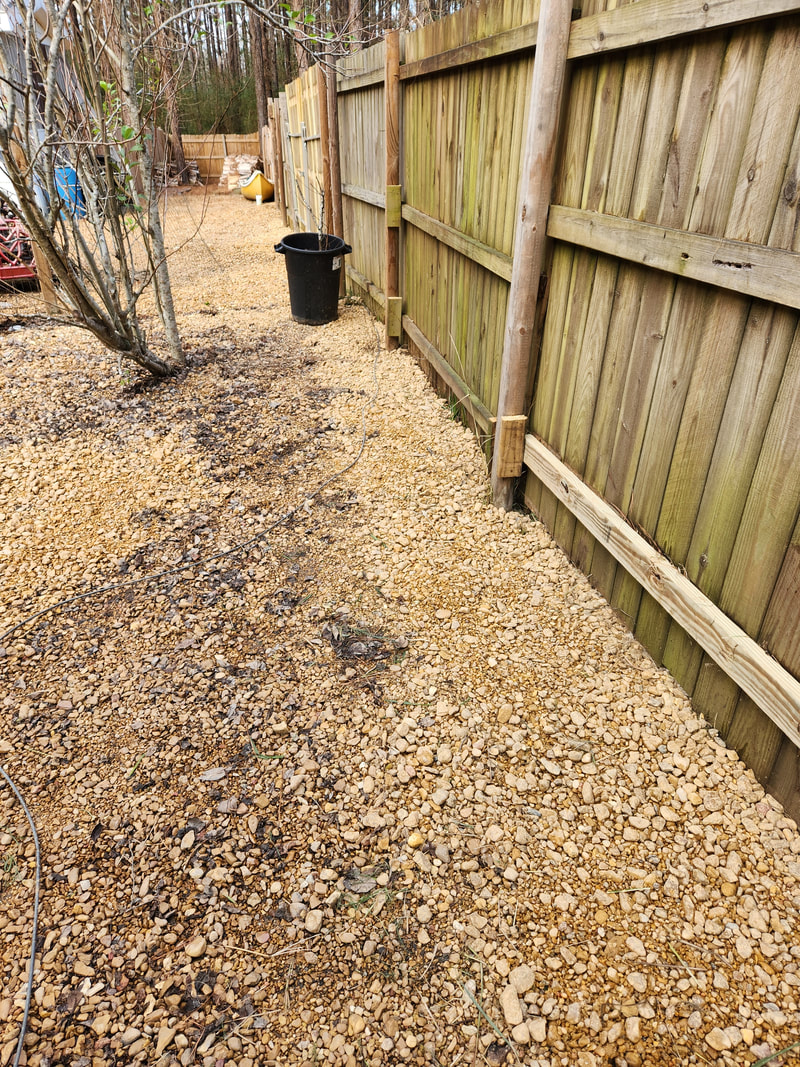
The small layer of patch gravel laid on the ground to cover up the area between the new fence line and the old garden gravel.
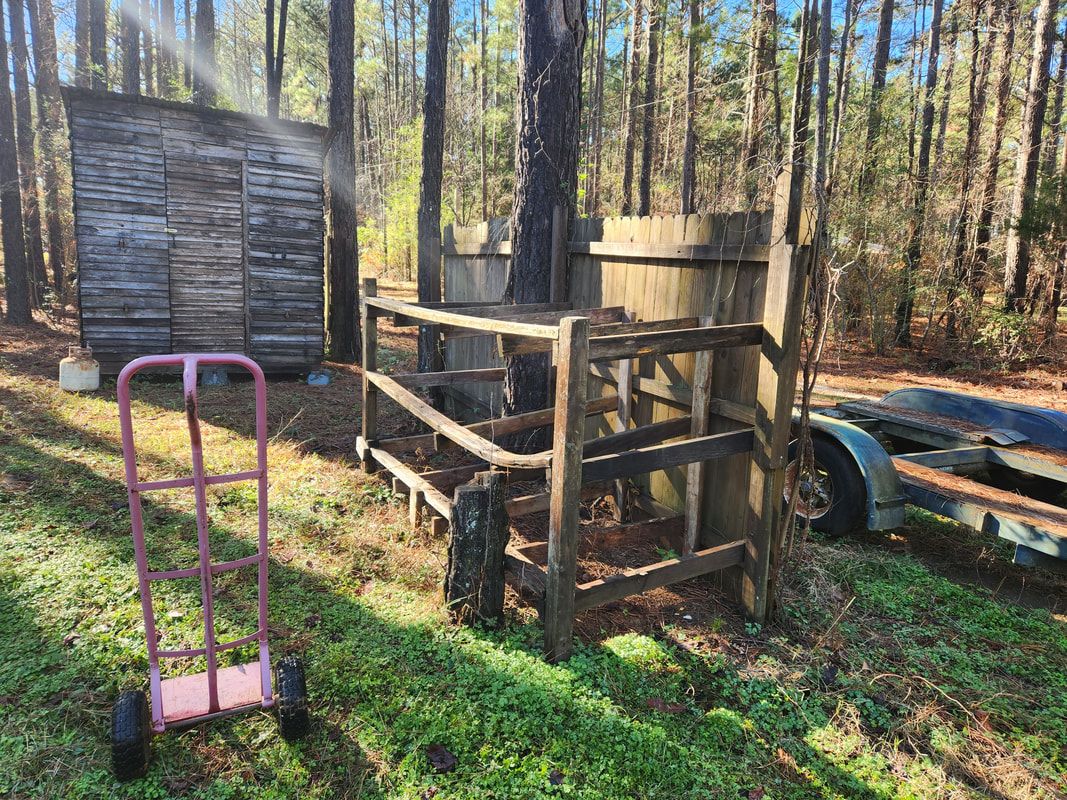
After moving the panel and pickets to the staging area at the east fence line, I picked up three 2x4's and 4x4 posts so I can get another length of the fence set up. The three boards would allow me to assemble one panel with the pickets from the salvaged fence, with a few extra pickets from a short piece of fence I still had available. The other panel would be used as a whole panel, with the post being offset to allow for a 6' spacing versus the regular 8' spacing for regular panels. Before I could get started with the fence however, I would have to clean up the area thoroughly. There was high grass, weeds, and blackberry briars that needed to be removed. There was some old chicken wire fencing that was still mixed up among the weeds, and lastly, two boats and some other miscellaneous crap staged in the area with the boats. All of this would have to be moved. The plan was to move the two boats and the miscellaneous crap to the inside of the east fence line, just in front of the firewood staging area. The miscellaneous crap was a crate of parts for a kayak rudder, a keel for the catamaran boat still sitting along the southern fence line, and an old kids bike, which will be used for setting up the pedal power system for one of the boats, when I do get to that project. I chopped up the grass and weeds and briars using the weed and hedge trimmers, freeing up the chicken wire so I could fold it up. The folded up wire bundle was stacked on the burn pile to burn out the intertwined weeds before tossing this with the rest of the metal scrap. 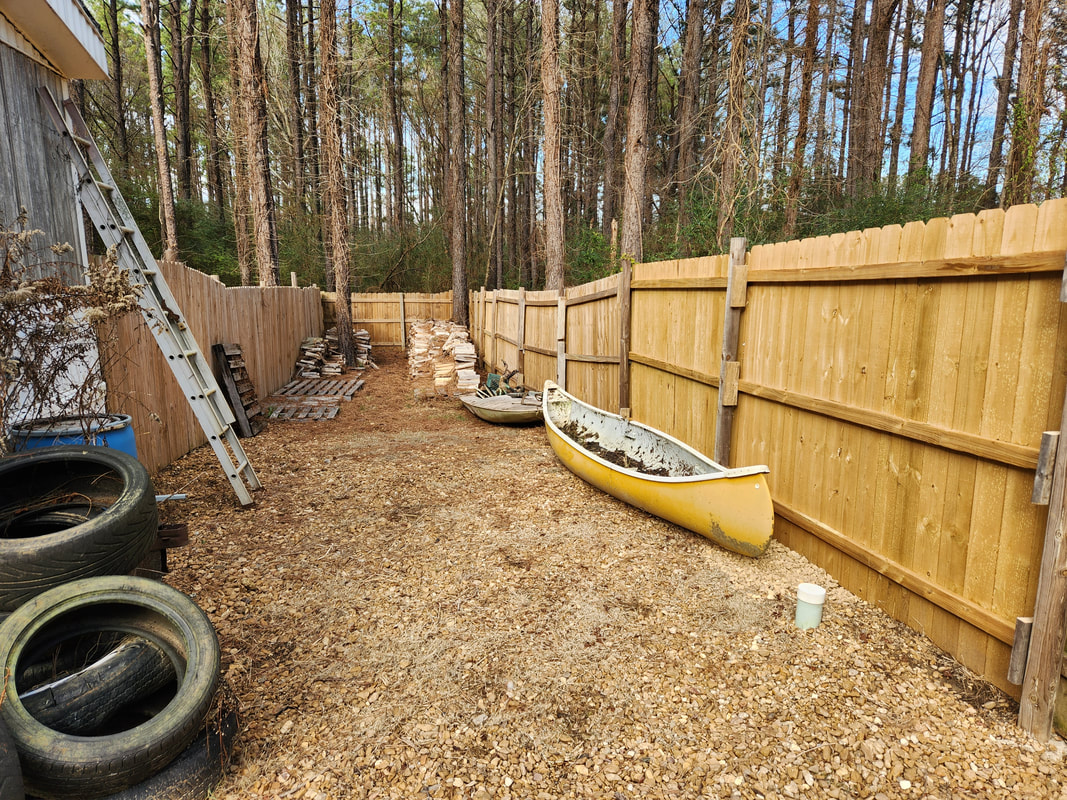
The two boats moved to the inside of the compound along the east fence line, just in front of the firewood staging area.
The east fence line after clearing all the trash from the area. In time grass will grow over and level off this area, but by then I'll have a gravel path laid over this area up to the fence as well. Trailers will be parked alongside the fence here.
With the area cleared away, I brought out the post hole auger and drilled out a hole. Even though I took time to line up an 8' board, the auger somehow worked itself off center some, causing the post to set just outside the 8' spacing. As much as I wanted the spacing to be proper enough to be able to anchor the 2x4's without incident, I ended up having to anchor some short 2x4 cuts to the side of the post to provide the anchor point for the 8' 2x4's. Before anchoring the 2x4's, I used one to measure out another 8' spacing before sinking the 2nd post. From there I hung all three 2x4's, then added the pickets, needing to use the extra pickets from the short section of panel I still had left over. This netted three short boards, which can be used later as extender boards on posts, if need be. I measured out a 6' spacing so I could auger the last post hole and sink that post for the 6ft panel. This is fine since the last panel that will be hung after this is going to be a 4' section, ending at the southeast corner of the fence line. I decided on this instead of just adding two 8' panels since I would only have to buy one 8' panel, use the 6' panel I already have, and just get a 12' 2x4 and some pickets to make up the short panel that will close in the last little section of fence at the corner. 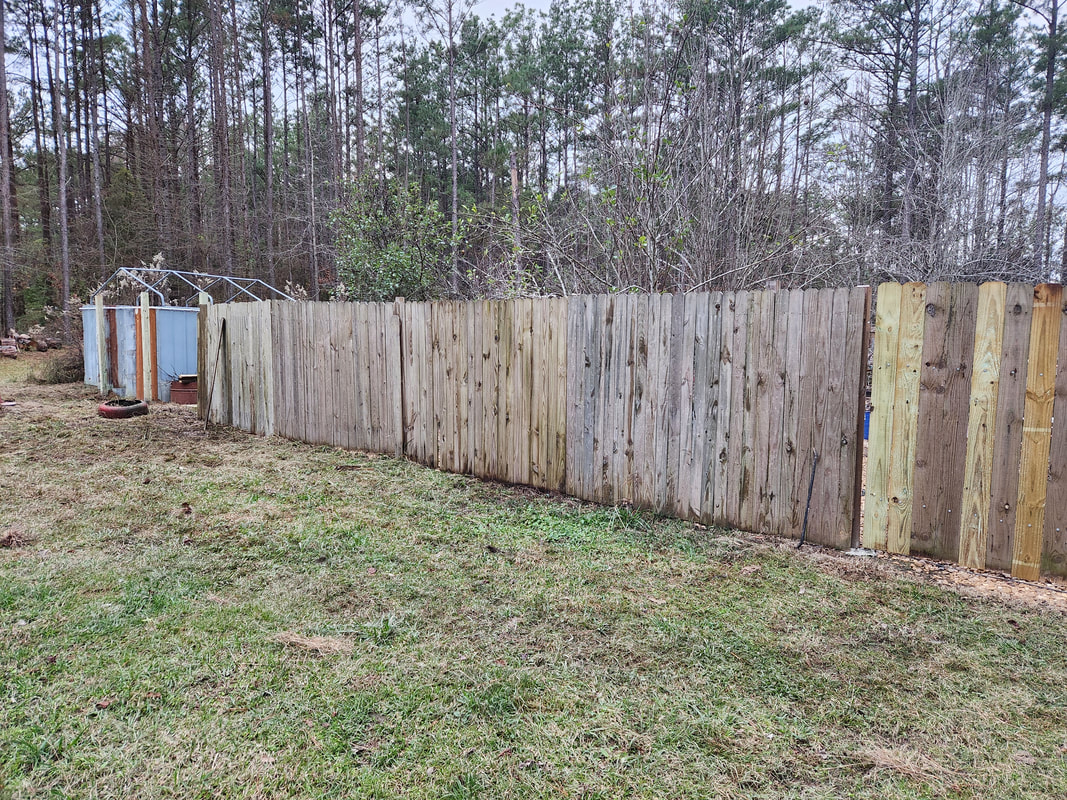
An outside shot of the eastern fence line showing how close to the Dog Kennel Greenhouse the fence is. One more 8' panel will close in the garden and yard as a whole, since it will meet up with the greenhouse.
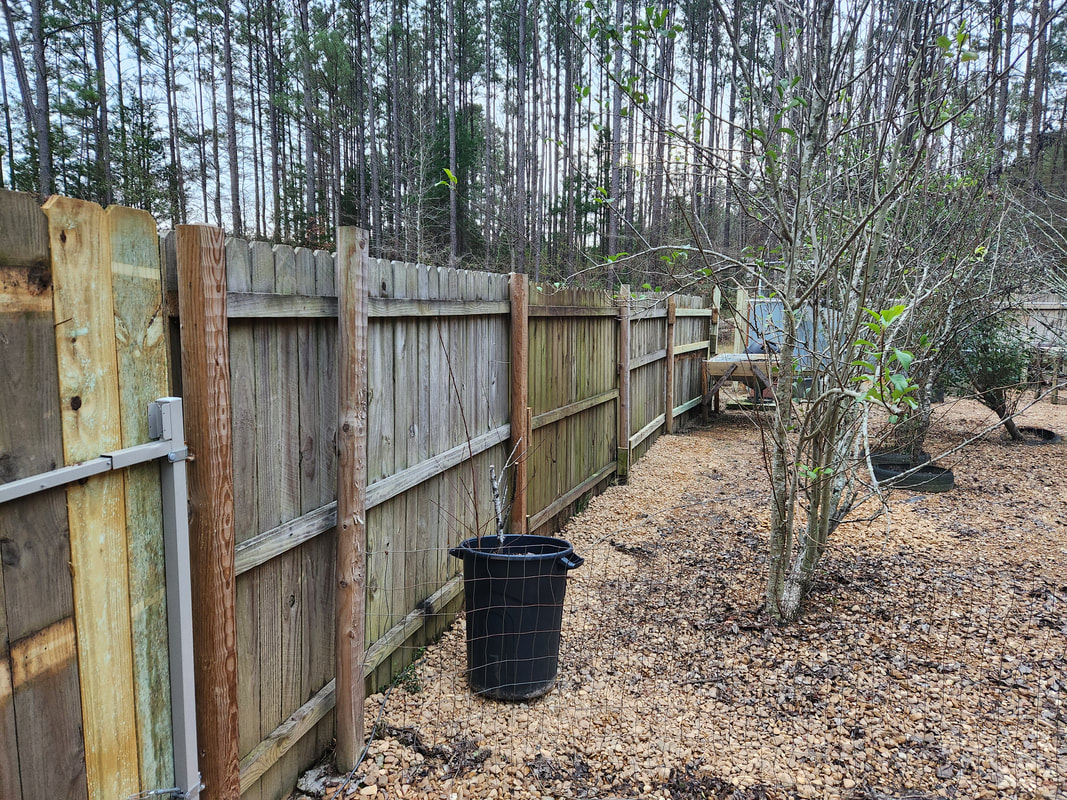
An inside shot of the eastern fence from the east gate looking down towards the Dog Kennel Greenhouse. Note how the spacing is small, as the fence is almost done.
Our next move will be to pick up an 8' fence panel and hang it, which will then allow us to hang the already supplied 6' section. From there I can get the board and pickets, plus some posts, probably three posts. With the corner post in place, it appears that I'll need only two more posts to cover the remaining area alongside the Dog Kennel Greenhouse before I can fully close in the rest of the south fence line up to the southeast corner. With that done, all that'll be left is the main gate before I can experience the completed perimeter fence for the compound.
The next order of business on the fence job was adding pickets to the two sections of the east gate. This would involve using self-tapping screws to drill through the wood of the pickets and into the metal tubing of the gates. Along with the salvaged pickets from a section of fencing pulled from the old south fence, we got more pickets along with the self-tapping screws. Luckily, we had just enough pickets between the salvaged and new pickets to cover the two sections of gate. We only needed one narrower picket for each gate to cover the small remaining gap at the ends of each gate where they meet. 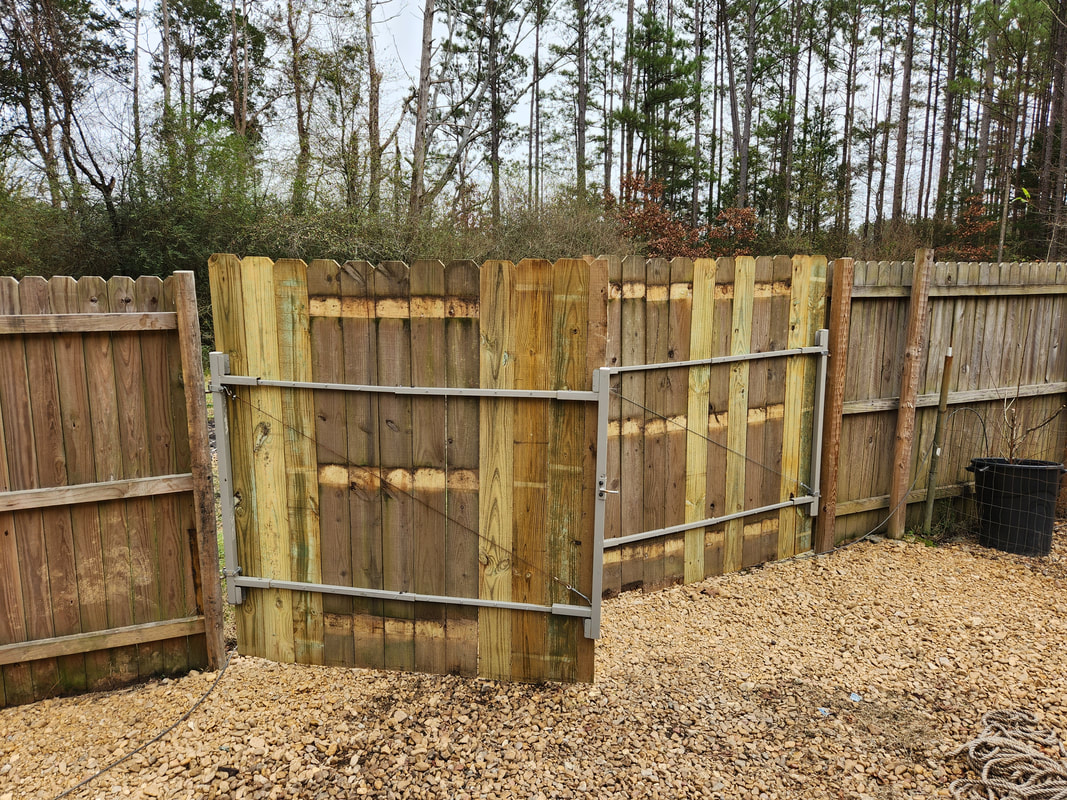 The east gate as seen from the inside, with the half cut wide board on the inside ends. At first I took a spare wide picket and cut it in half the long way to fill the narrow space on the ends of the gate sections, but when we moved on to install a couple panels, a small section of fencing that remained after cutting a 6ft section from another panel presented itself so I pulled a couple narrow pickets to use instead of the ripped picket. I had to move the latches a couple times and adjust the tension cable to get the gates somewhat leveled and able to latch to each other while also being able to be opened to the inside without dragging the gravel away from the area. 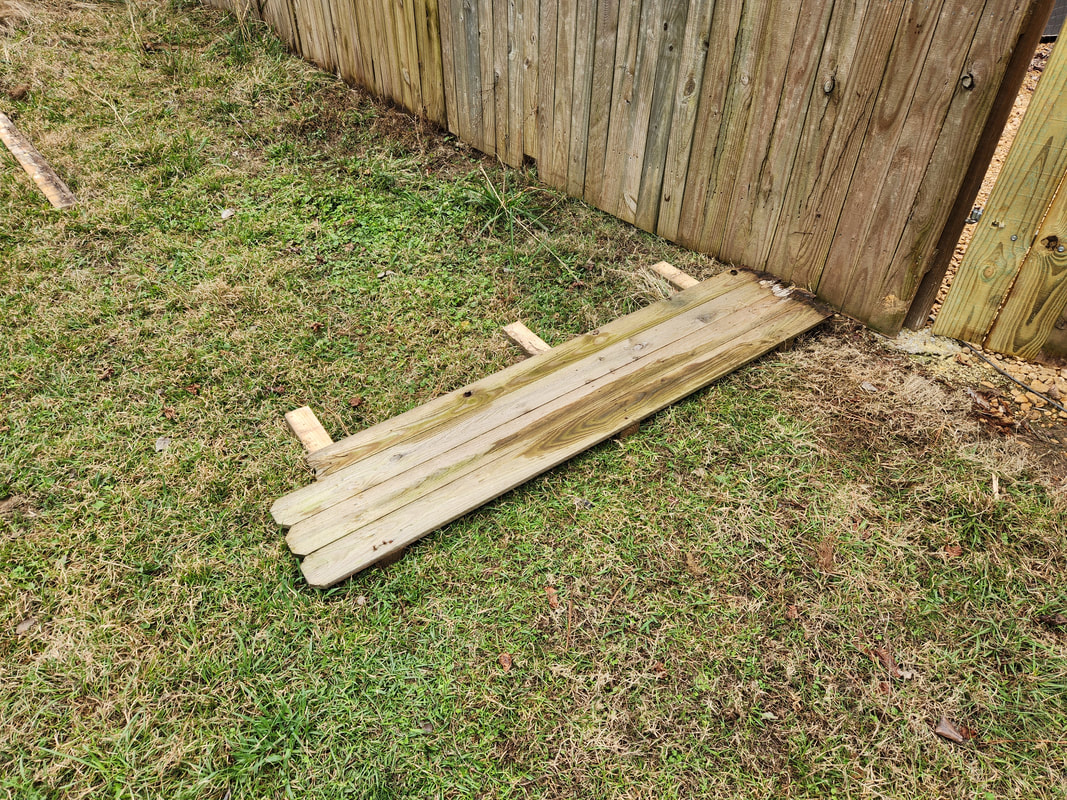 The small section of old fence panel that was removed from the old south fence line and was used as a source of spare pickets for the gate sections. 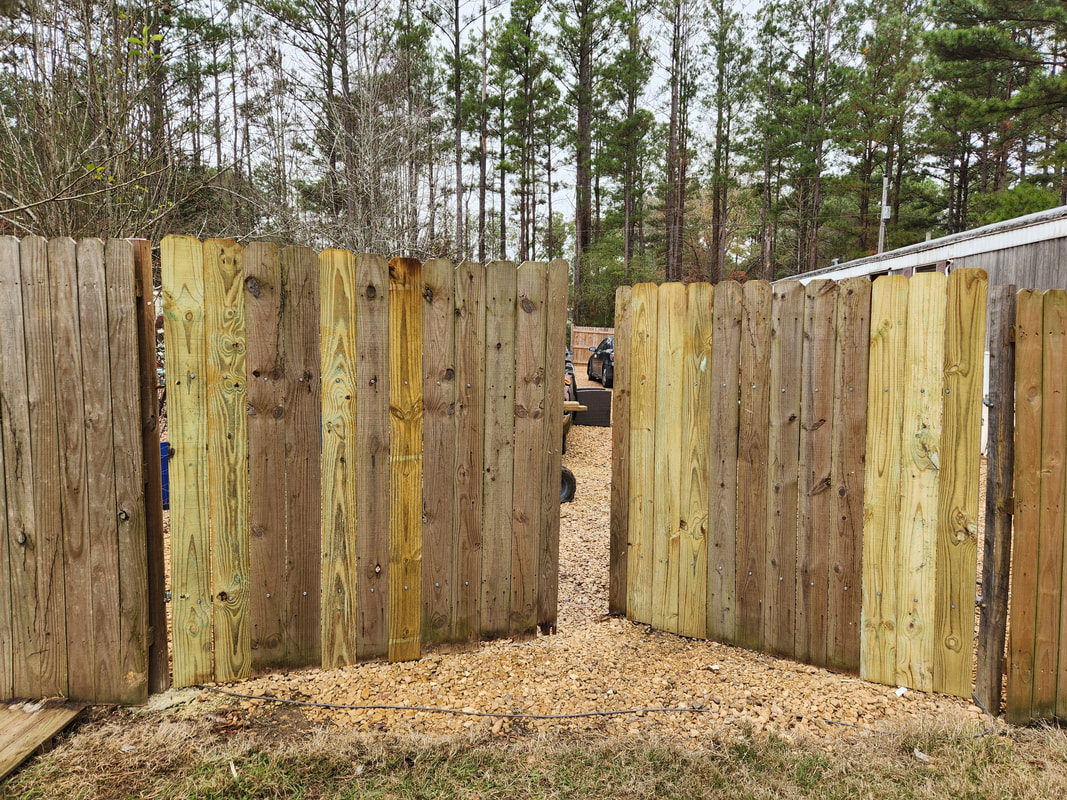 The east gate now covered in pickets, with narrower pickets installed on the inside ends of each gate to cover the small gap that was left after adding the wider pickets. As for the panels that we went ahead and hung up, one of these came from the south section, just behind the Fuel Shed. This last section of the old south fence line, had one picket that was cut at an angle to allow the panel to mate against the tree that served as a fence post. Because of this, I had to use an extra picket to cover the opening that was present from the half cut picket. I also had to use pieces of short 2x4 to the fence posts to cover the gaps that were present from the unevenness of the fence panels relative to the posts. On one of the panels, which was the panel of the west fence line where it met the corner with the south fence line, needed a replacement 2x4. Luckily we also got a spare 2x4x8, originally intended for use in making short pieces of boards to help hang the panels against fence posts. After refurbishing the fence panel and hanging short boards to the posts, we managed to get two more panels hung, covering the span along the posts that are already sunk in the ground along the east fence line. 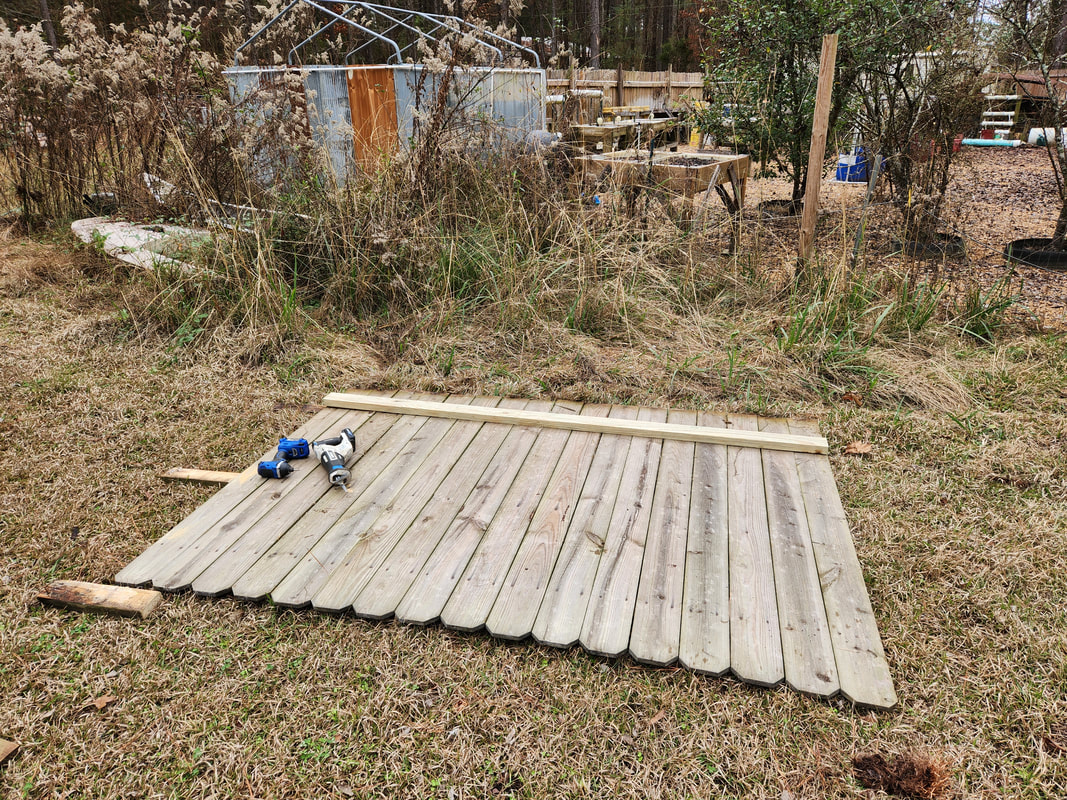 This panel was a little more than 8ft long so a couple pickets were removed from the worst end and the 2x4's cut short. The new 2x4 is present to replace the rotted board that was removed from the fence panel. 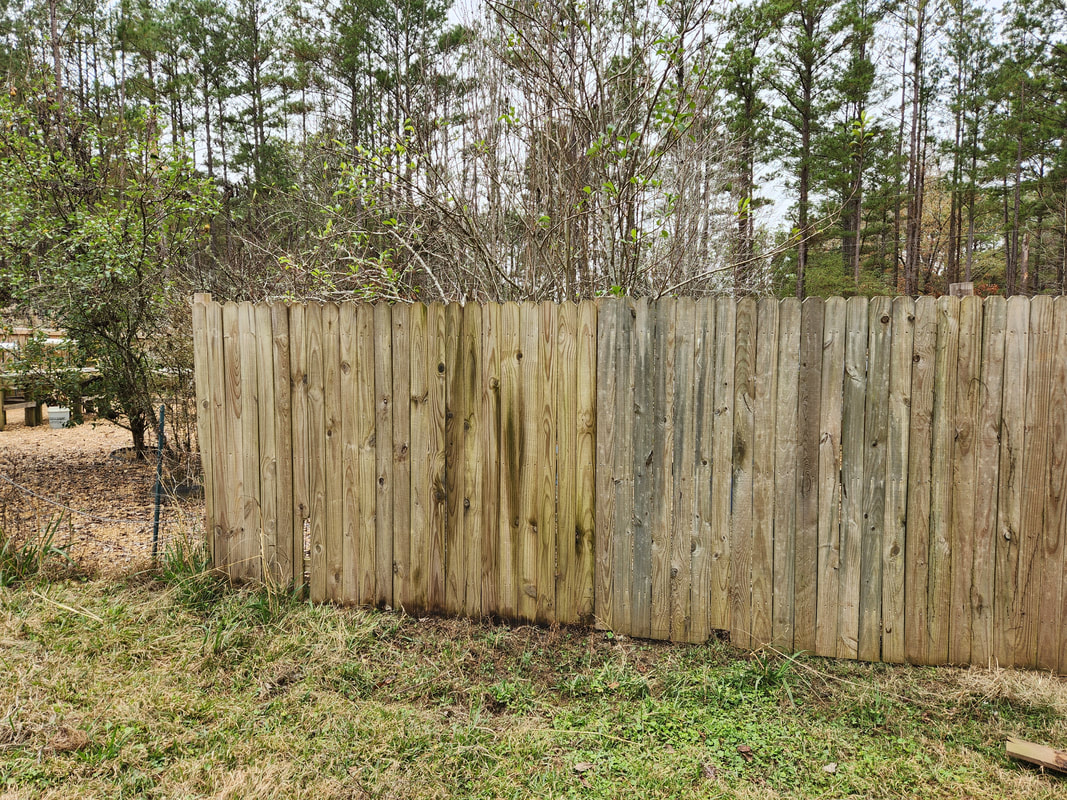 The two new old sections of fence panel hung up along the east fence line, with the extra picket added to cover up the half cut picket at the end of one of the fence panels. At this point there are several things I'll have to do to get ready to continue with the fence job. First thing is cutting the high grass and weeds along the east fence line as it works its way further south. Also along this fence line are two small boats and some parts staged there for a future project that will have to be temporarily moved out of the way. Another thing is some pulled chicken wire from the old garden fence, pulled from the south corner of the garden but never fully removed. Along with this old chicken wire fencing, the old fencing that is now blocked by the three wood panels will also have to be removed, along with the old T-posts holding the fencing up. Once all of this is removed and the area fully cleaned up, I can then auger out post holes for more panels. I have two panels left, not sure of the dimensions of them, however. Since the panels were attached to trees of different spacing, these panels may not even be 8ft long. I might end up having to just build a panel using new 2x4's and the salvaged pickets from these panels. Either way, we're very close to fully covering the span of the east fence line. I also have to finish removing the wood rack in its entirety so once the west fence panels are removed, this eyesore will not be present to be viewed from the main driveway. At that point there won't be much left in the old backyard area to be addressed before we can fully write off the area as being open and given back to nature once again.
With a lot of the cleanup done around the back yard area, I decided to finally get started on the fence rearrangement that I talked about earlier. The first part of this was setting three new posts in the ground along the imaginary line between the garden rear fence and the rear of the Storage Trailer, where it intersects with a post on the west fence. From here I dug out the post holes with the power auger, setting the posts in with the powdered concrete, then pouring water into that to let it set.
The three new posts set in the ground behind the Storage Trailer to make up the new south fence line.
The next move was to measure out 8 ft sections on the old south fence and cut the 2x4's at the 8ft points, getting us a first panel. We moved the panel in place and secured the panel in place with 4" deck screws. I did have to add some short 2x4's to the post on the garden fence since there was no extra space with which to attach the fence panel. With the first panel in, I had to add some more short 2x4's so I could secure the 2nd fence panel, measured and cut from the old southern fence line. After getting the third 8ft panel in, I had to install a panel that was 6ft long instead of 8ft. 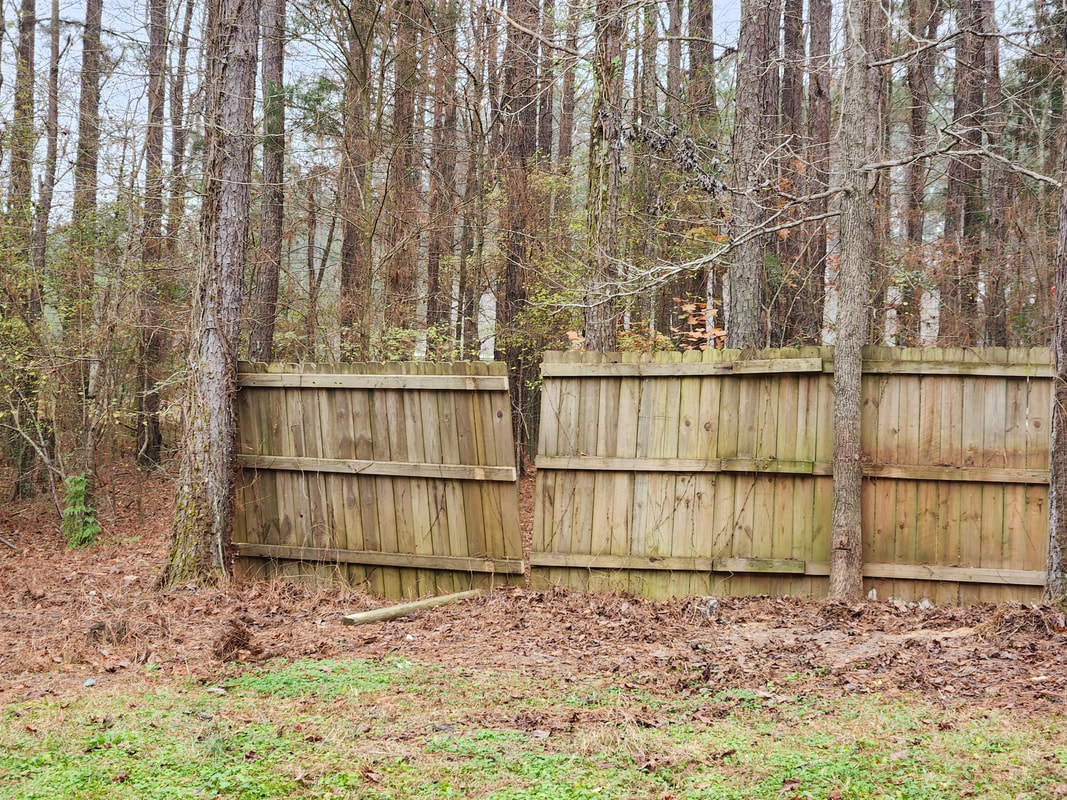
Dismantling the old south fence line.
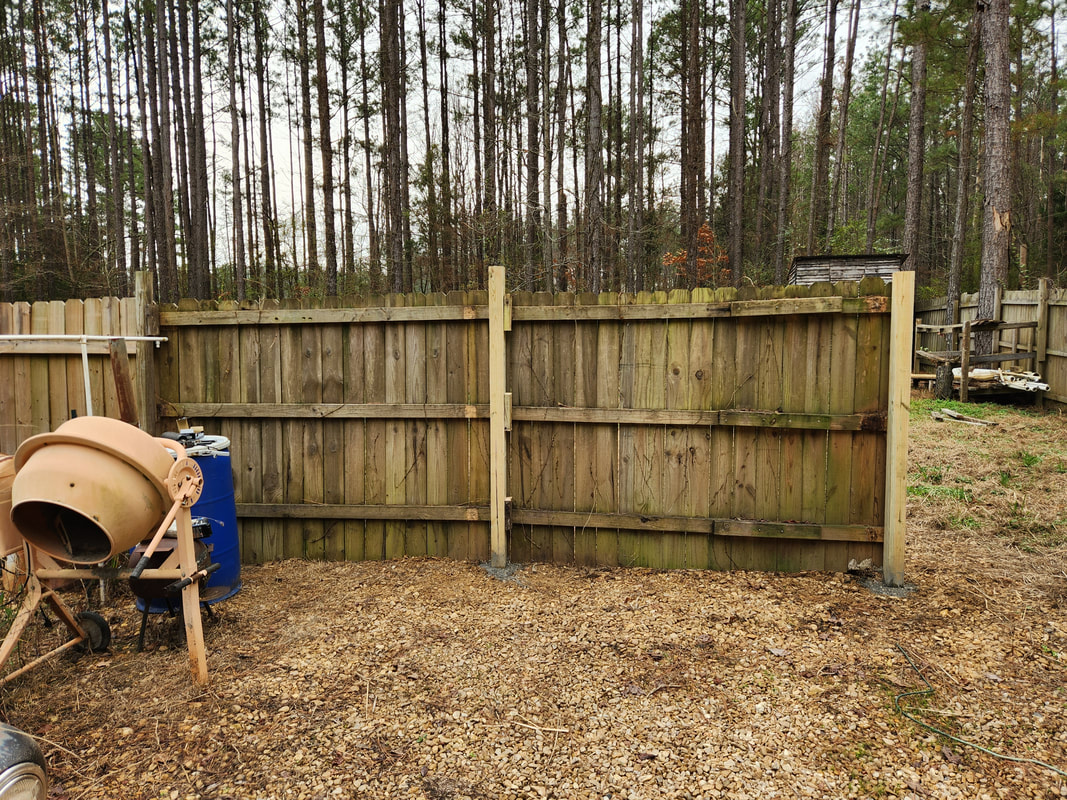
Two panels from the old south fence line are hung in place on the newly set posts between the garden fence and Storage Trailer.
The old south fence line is coming down little by little.
After cutting the first three 8ft sections, I was left with a section that was about six inches short of 6ft. I ended up setting this section aside and removing another panel that was a preassembled 8ft panel. The previous length of fence was assembled by me, using 10ft 2x4s and pickets so I had to cut out 8ft sections. One of the sections was actually two separate sections with 2x4s used as tie boards to attach the two together. Anyway, I took the panel and chopped out the 6ft section I needed. Before I could secure it in place, I had to remove one of the panels on the west fence to open up the new corner so I could secure the panel. Once that was done, I screwed the panel in place, fully closing up the opening between the garden fence and Storage Trailer to the west fence line. With the new south fence line done, it was time to turn our attention to the east fence. 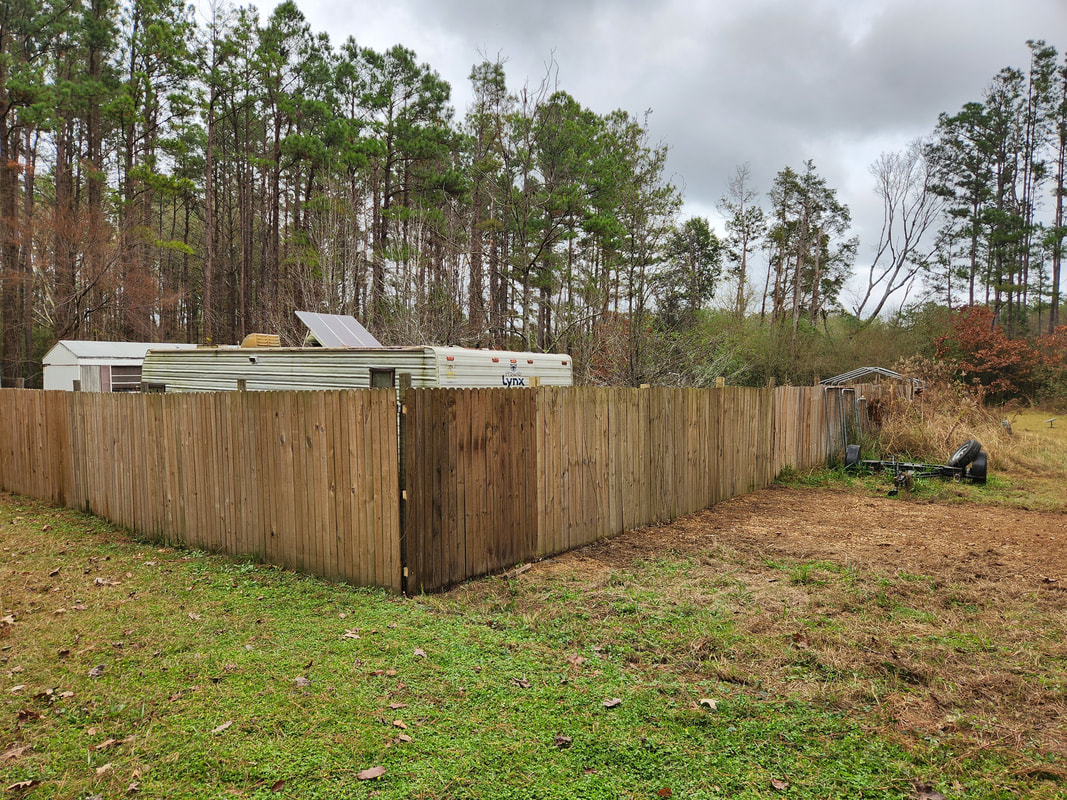
The new south fence line after hanging the old south fence line panels up along the rear of the Storage Trailer and connecting to the rear garden fence, making it the new south fence line.
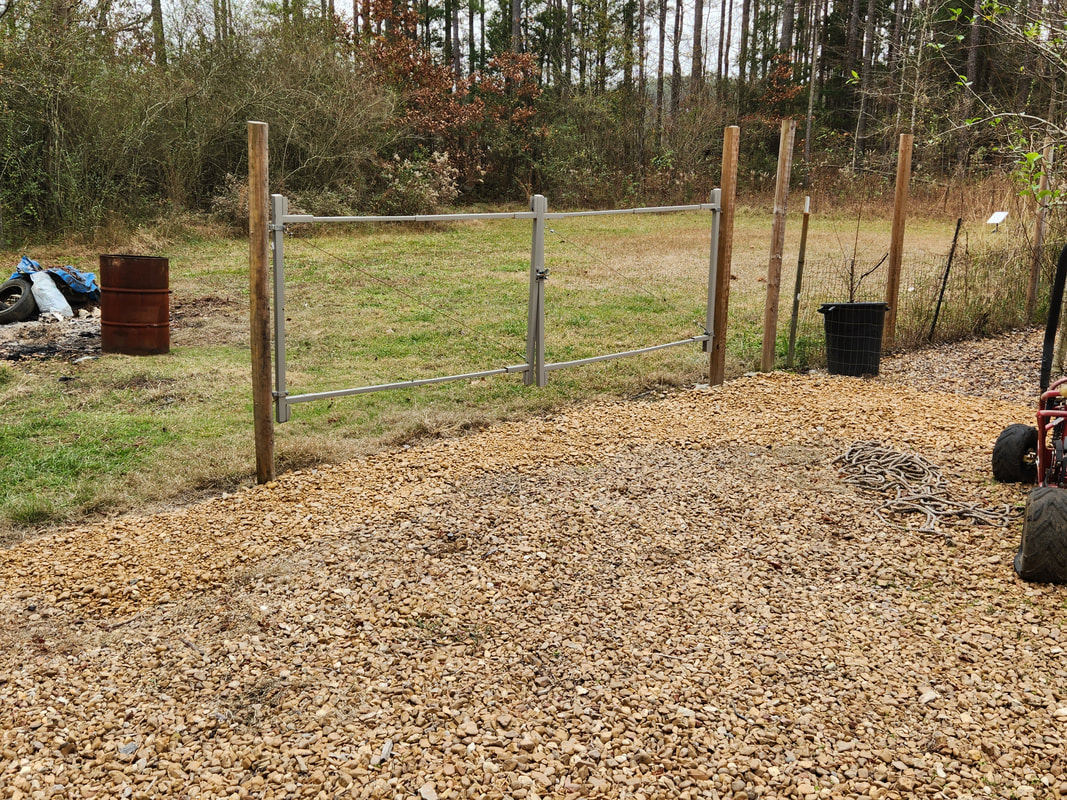
The east fence line with the gate frame in place prior to hanging the old west fence line panels.
Starting with the first panel from the west fence that we pulled down, we moved the panel to the east fence, screwing it in place, using a couple 2x4 extenders on the fence post to get the panel hung. After that panel was done we quickly pulled the 2nd panel from the west fence and moved it to the east fence and hung it as well. This closed in the section of east fence connecting to the east gate. Not wanting to quit, we pulled a third panel and moved it in place to hang it on the other side of the east gate, starting the final section of fence line. 
The two remaining sections of fence were closed in with two panels from the west fence line.

The east fence line after hanging the panels up around the gate. We just need pickets to fully close in the gate as well.

The open area along the west fence line were panels were pulled and relocated to the east fence line. Soon all this area will be fully cleared of anything we have situated here, including the Fuel Shed.
At this point we quit for the day as it was starting to get a little late. As it stands, there's room for three more panels, with two of them on the east fence line and one on the garden fence parallel to the midway. I will have to clean up the area along the east fence line where we have some boat stuff stashed. I'll have to move all this and clean up the grounds along the fence line so I can come in with the auger to drill post holes. Of course, I'll need to get some more posts to set in the ground plus some pickets for the east gate. Once I get more posts in the ground, I can pull the remaining fence panels from the rest of the old south fence line and southwest fence line, which may very well cover the remaining run of east fence, fully closing in the yard, save for a small section around the Dog Kennel Greenhouse. Soon the compound will be closed in.
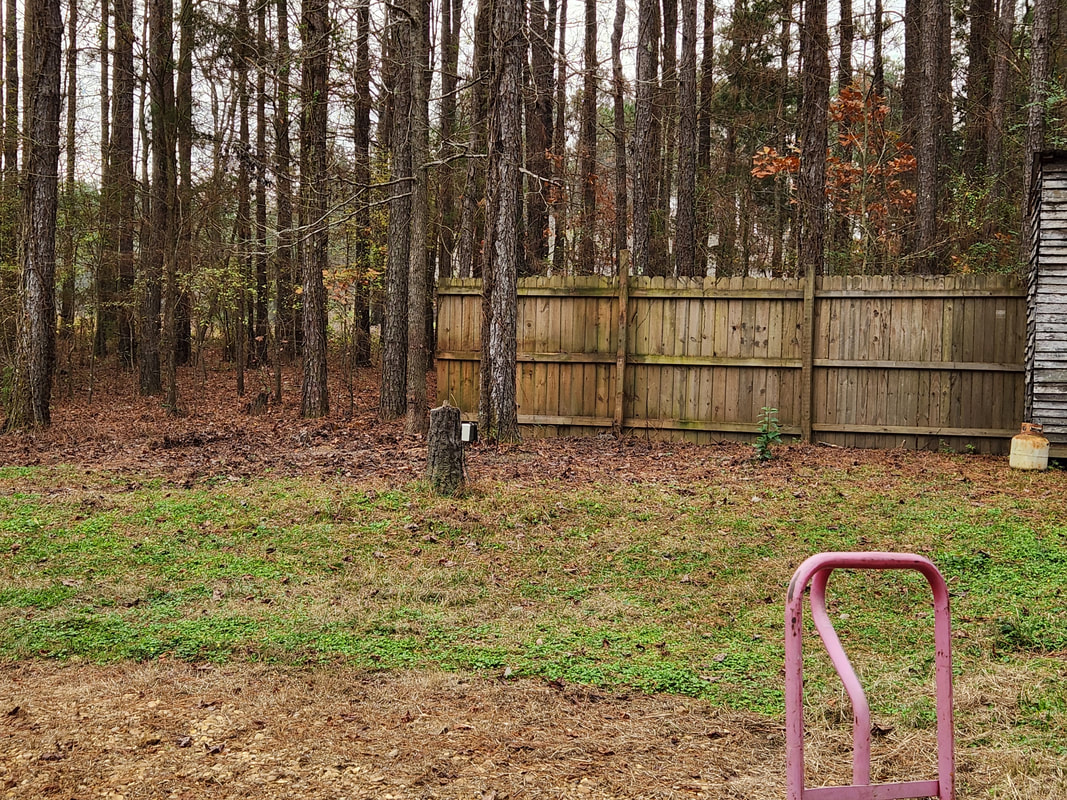
After clearing up the south fence line of all the crap we had stored along the fence, I turned my attention to the wood/PVC pipe storage rack that is tacked up against a dead tree and the west fence. The rack, just like the auto parts racks, is degrading heavily, so it'll be cut up once everything is cleared. As for the stuff to be cleared, miscellaneous pieces of wood are stored that I have to sort through, as some of this wood is also degrading to a degree and would not be viable pieces for use in future projects. A lot of this wood is short cut pieces of posts, several pallet pickets, and different lengths of old 2x4's, among other wood. There's several pieces of PVC pipe of different lengths and sizes that I also have to sort through. The older wood will obviously be cut up for firewood but the wood that I'll be keeping will be relocated to the north end of the compound, where all the other crap has been moved. 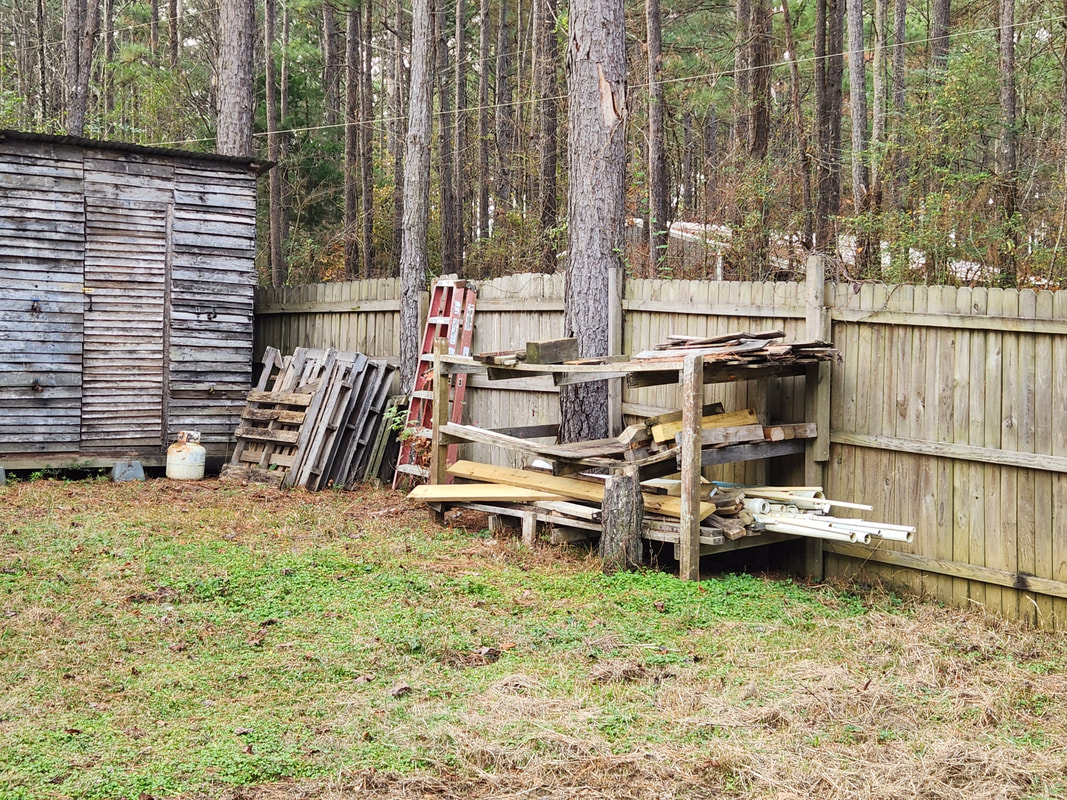 Along the west fence line is the wood/PVC rack, stacked with different scrap wood and PVC pipe. All of this stuff has to go. Another thing that had to be addressed is a small stack of pallets and old sections of porch railing I saved after dismantling the old porch from the side of the house. Our friend who the DOB truck belongs to needed pallets to prop up alongside his house which is on posts as part of a method of covering up open spots along the crude skirting, so he requested pallets. I figured he might be able to make use of these old porch rails for the same application as well. I can't do anything with them as they are degrading more so than I would be comfortable with when it comes to reusing any old wood item. If I kept them, they'd end up being cut up for more firewood. So along with the pallets, the porch rails were loaded up on the trailer, destined to be hauled out in the next couple days. 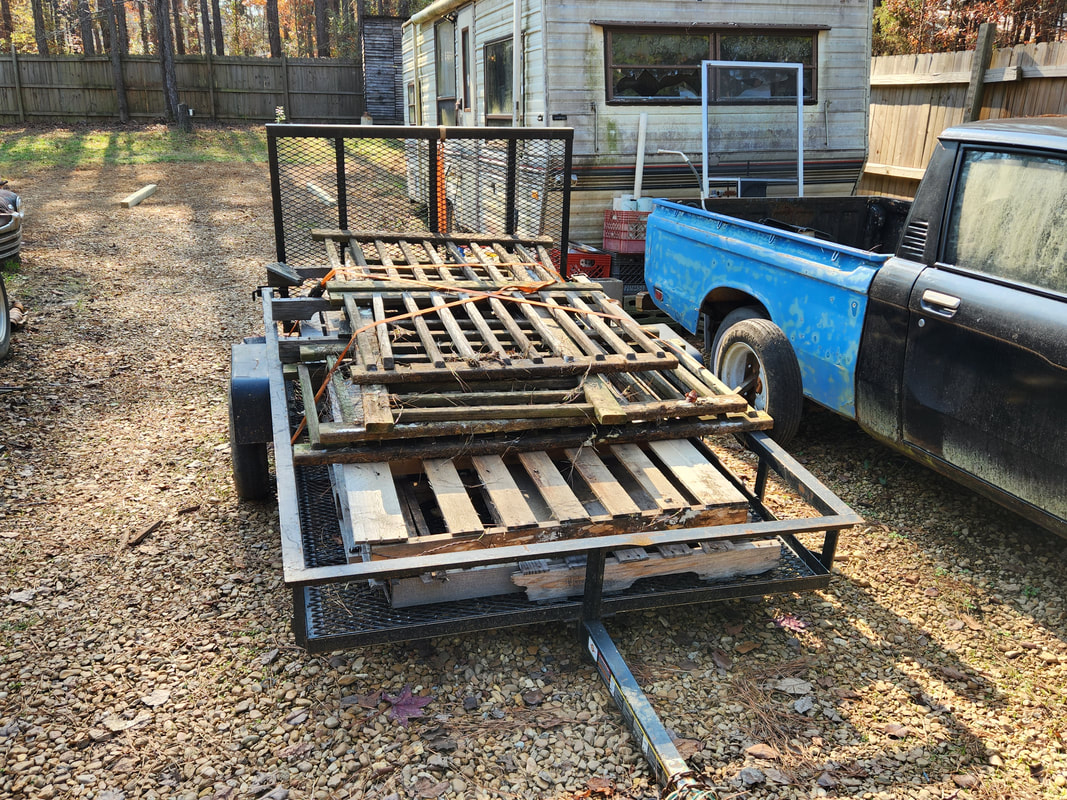 The trailer stacked with pallets and porch rails, strapped down and ready to haul out. As I sorted through the wood, I focused on the heavy stuff first, as this stuff would end up on the ground temporarily. I did have a couple small pallets that were of the size that would make them suitable for standing an engine on, so these were saved as well. I had to find a suitable place to start staging wood so I ended up picking a spot along the west chicken yard fence. I stacked the two small pallets and the larger pieces of wood that I started with. Several short cuts of posts, some short 2x10/12 cuts and a large wood panel were stacked along the fence. I started moving the pallet pickets next. I was able to weed out some older pieces of posts, pickets and short pieces of 2x4 before finishing up the top and middle racks. I still have the bottom rack which has the longer pieces of 2x4's, the two 2x8's I used for mounting the Truckstang body on the drums, and a bunch of PVC pipe. When I do start sorting through the PVC, I'm more than likely going to be moving all the PVC since there's really nothing that can be weeded out from PVC. It's going to be a matter of trying to come up with some quick and practical uses for the pipe so as to lessen the amount of scrap pipe that has to be stored. 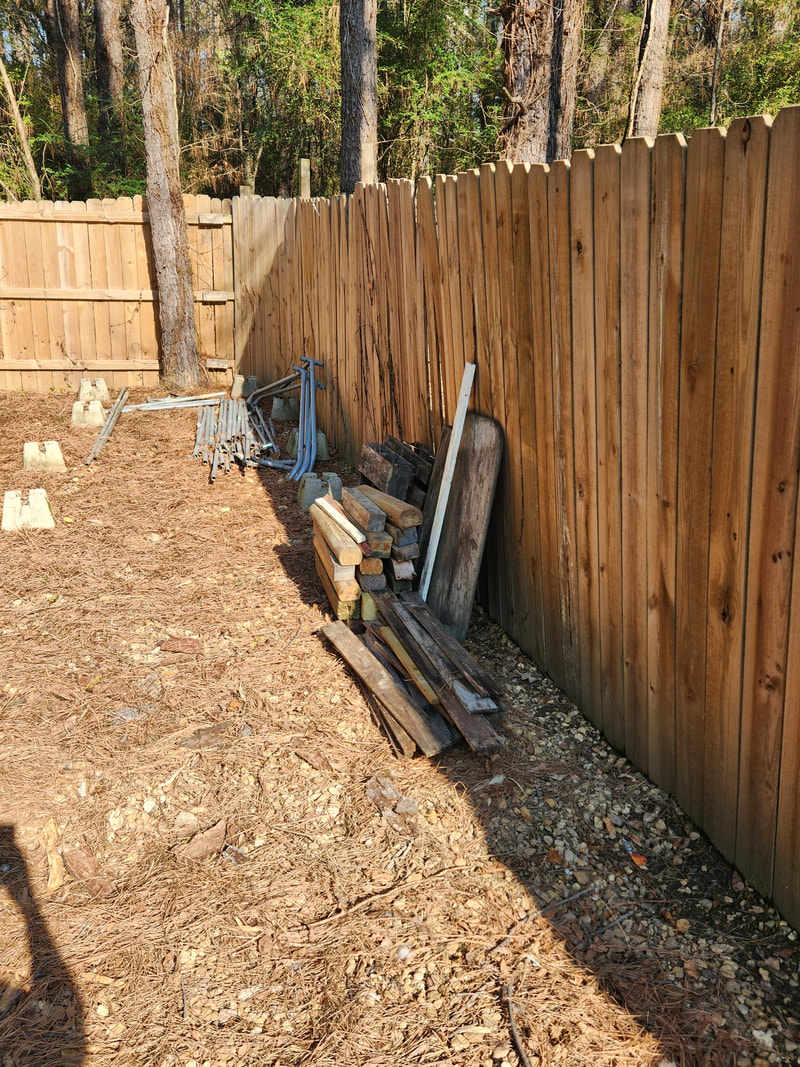 Along the west chicken yard fence line I begin stacking scrap wood pieces. At least now when I do clear this rack of everything and cut the thing up, we will be ready to pull the fence. There's still the matter of those couple pieces of iron pipe around the old south fence line but these are those wild card items that even though I don't have any real use for them, I can't bring myself to just scrap the stuff. I'll probably try to sell this crap more so, just to get them out of the way. But as for the rest of the area, once everything is cleared, I'll take a moment to chop up all the stumps to further clear the area. This will be a case of getting the area back to just a plain grass field, so I'll be doing what I can to clear everything from the area, including the old fence posts, which will also be chopped at ground level. The work continues. After over a week of moving junk from one end of the yard to the other in a long slow process, I finally managed to get the south fence line clear. Save for a few large items, namely a couple large iron tubes, the area is totally clear. There are some tree stumps that I will end up chopping down flush with the ground so it'll be easier to run over with a mower. Of course one would ask, where did all the crap go that was stored over in this area? Well there is a multi-part process to how the junk was stored, or otherwise staged. First is the sheet metal. I managed to save up a large batch of different sized pieces of sheet metal, salvaged from appliances and things like cabinets and the like. Because the next project that will use up a large amount of sheet metal will be the 46 Ford, it only made sense to move all the sheet metal over to where that car is, staging it close. I ended up putting all the sheet metal in the Elco's bed, due to the fact its parked in front of the 46 Ford. Other "sheet" metal, namely corrugated roofing metal, which was in small pieces, was moved over to the scrap pile since there was no practical use for these pieces.  Sheet metal staged in the bed of the Elco for use on the 46 Ford (to the right) when we begin that project. The larger pieces of roofing metal were moved over to the build site where I'll be building the new storage building, along the northwest fence line area. This is also the same area where all the auto parts, tires and other miscellaneous scrap metal are being stored. The larger pieces of roofing metal were staged here as they could be used for covering sections like the triangular section at the top under the roof, or between the door and wall corner. Either way, when we do build this structure, any of this metal that isn't used will be immediately moved to the scrap pile as there won't really be any practical use for the stuff. As for the miscellaneous scrap, this stuff consisted of short pieces of tubing, whether conduit, fence tubing or other thin-walled tubing. I saved this stuff as there may be applications that require me to make some kind of frame or structure for other devices I may build. Some other mid-range sized pieces of roofing metal were also stored against the fence for possible use in other applications that might require these sized pieces of metal. The thing is, it's not certain that any of this metal will be used in any kind of process, so it's really more of a "purgatory" for these pieces of metal. I'm giving the stuff a little more time before I can decide whether this metal can be used in a future project or just end up in the scrap pile later on. We'll see. 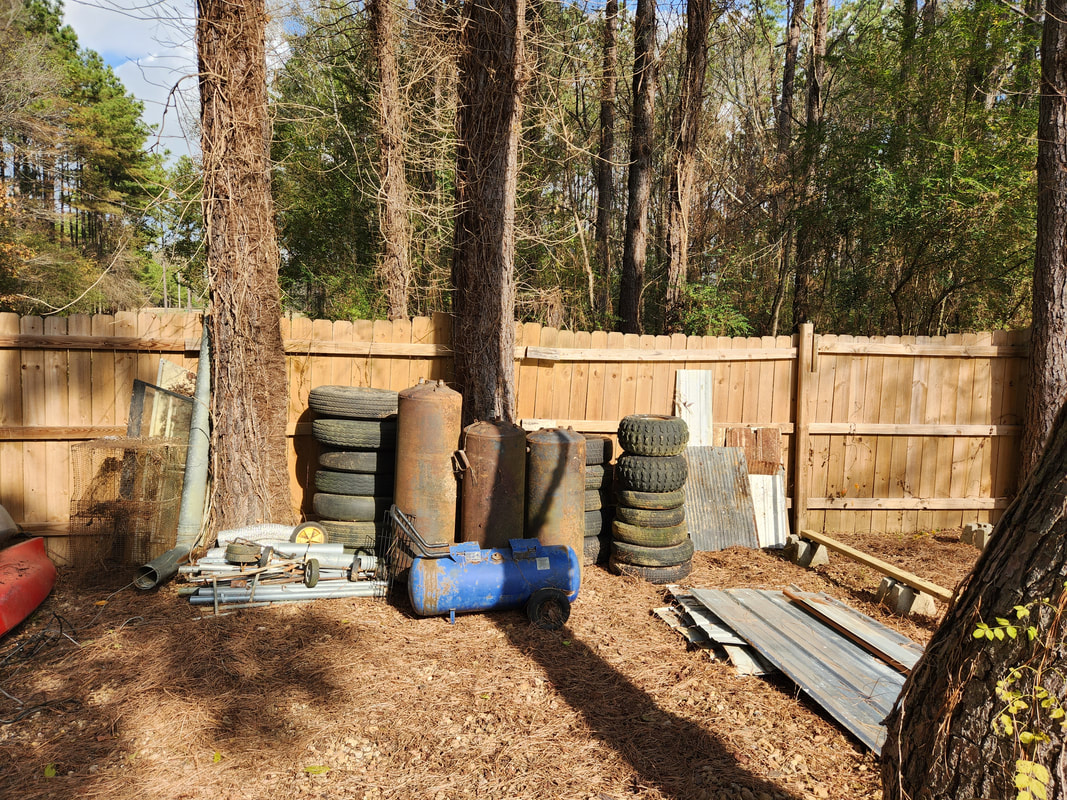 The north fence line showing the smaller pieces of roofing metal stacked against the fence, along with the miscellaneous scrap stacked to the left on the ground. As stated, the south fence line is cleared and pretty much ready for removal. Soon, I'll be getting fence posts and concrete to sink in the ground behind the Storage Trailer so I can then start removing sections of the south fence to relocate to that new point. At the same time a couple fence panels on the west fence that meet up with the soon to be southwest corner will also be removed so they can be relocated to the east fence to cover the couple spaces connecting to the east gate. I do still have to clear the wood/PVC rack, which is my next target. Some pallets and a couple ladders will also need to be moved.  The south fence line, cleared of everything save a few tree stumps and a couple iron pipes that need to be hefted out of the area. With the majority of the crap moved to the north side of the compound, I stand back and look at the arrangement and am actually satisfied with the layout since everything isn't just stacked and piled in an organized mess. Again, a lot of this stuff is in purgatory, since I my still end up scrapping a lot of this stuff later on after determining that its useless to me. But for now, everything is staged as neatly as I can store it, still leaving plenty of room in the area since everything is staged along the fence line, standing up or stacking a lot of items to capitalize on vertical space. 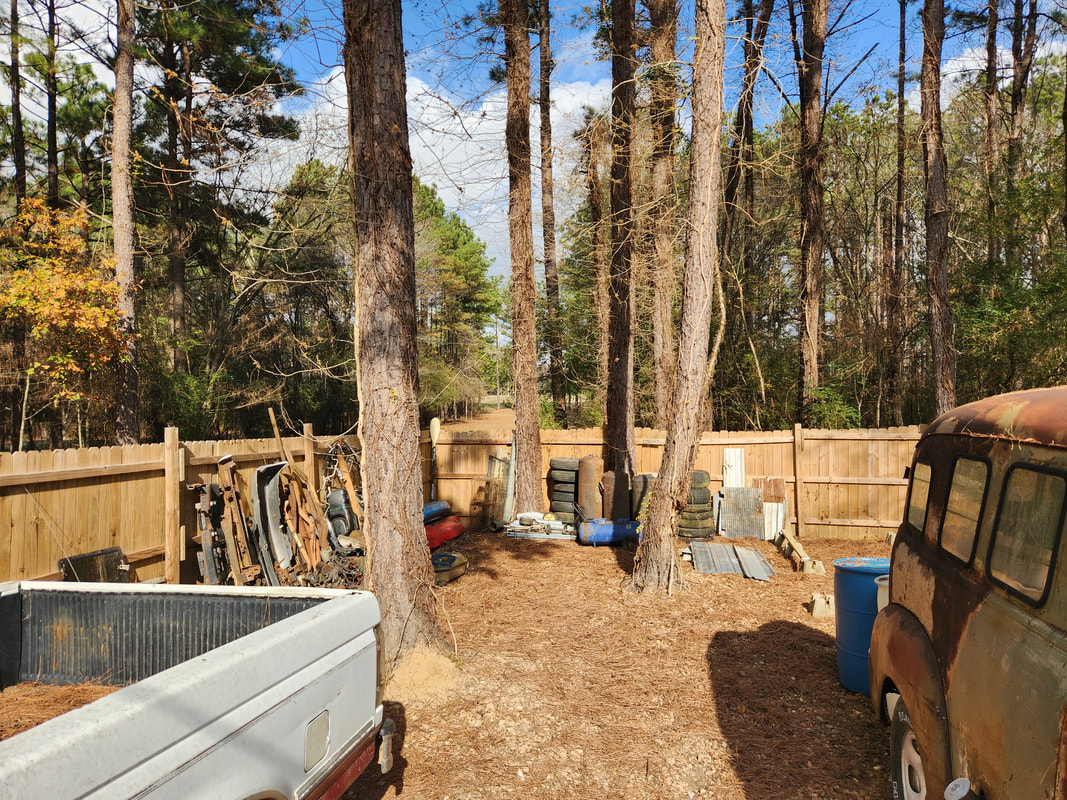 A long distance view of the new staging/storage area along the northwest fence line, showing the auto parts and scrap staged and stacked as neatly as possible while still allowing for plenty of space around the area. One of the biggest concerns with any homestead/farmstead/shop area is the idea that when one allows themselves to accumulate too much crap, it causes one to go down a rabbit hole of needing to make more outbuildings, storage racks, etc to accommodate these items. Of course as for me, this means actually taking the time to utilize any and all of the things we've accumulated so as to lessen the storage burden so there won't be any need to build extra facilities. Even the storage building that I plan on building along the northwest fence line will be a small fraction of the size of the original frame that I disassembled from behind the Storage Trailer. The same rules apply, don't plan on storing too much crap. I have a vision as to what will need to be stored, which is a relatively small amount of items, most of which need to be stored within to get them out of the areas where they're currently stored. Items like the power tools I have, which are sitting in the house in a staging area along with battery chargers and the like, would be located to the storage building. My electric ATV project, once completed, would go within. One of the go karts we have that I do decide to hang on to, would go within. The John Deere Yard Tractor would go within. The electric mower would go within. The generator would go within. These items are items that I need to put under cover, but with the vision I have for the storage building, and how I plan on arranging things, even shelves and other ways of storing items vertically, I determined that the storage building will not need to be large at all. So far I'm looking at an 8x8 building, small enough to not be too taxing to build but big enough to do the job asked of it. As has been the case for the last few days, the cleanup work at the back yard area has been moving along pretty good. I've been moving car parts from the old racks over to the new staging area along the northwest fence corner and west fence line. Eventually I hope to either sell, use or scrap most of this stuff so I won't have to worry about having to build any kind of shelves or racks to house most of this stuff. Of course, such a goal won't happen overnight, but it won't be for my lack of trying. In the meantime, the next target area that I had to focus on to clear the south fence line is the multi-level wood shelf I moved outside to store the smaller car parts and scrap hoses I accumulated over the last few years. This wood rack wasn't intended to be a permanent fixture as anything made of wood inevitably rots away when outside in the elements. I had to sort through these parts to see what can be scrapped as well as what I might be able to sell, if any. There really wasn't much that I could sell, given that most of the parts were different engine brackets, pulleys, and other small associated parts, many of which were for the current vehicles on our lot. I ended up staging all this stuff with the other parts as I feel I could use all this stuff. The brackets and pulleys can be used on either the engines, or in other projects that may incorporate any kind of power transmission application, such as generators, go karts, or whatever. There were a few small parts I was able to scrap, not much. A lot of the hoses I was able to save but a lot were tossed to the burn pile as they were either showing signs of degradation or small flaws that would manifest themselves later when I tried to press these hoses into service. 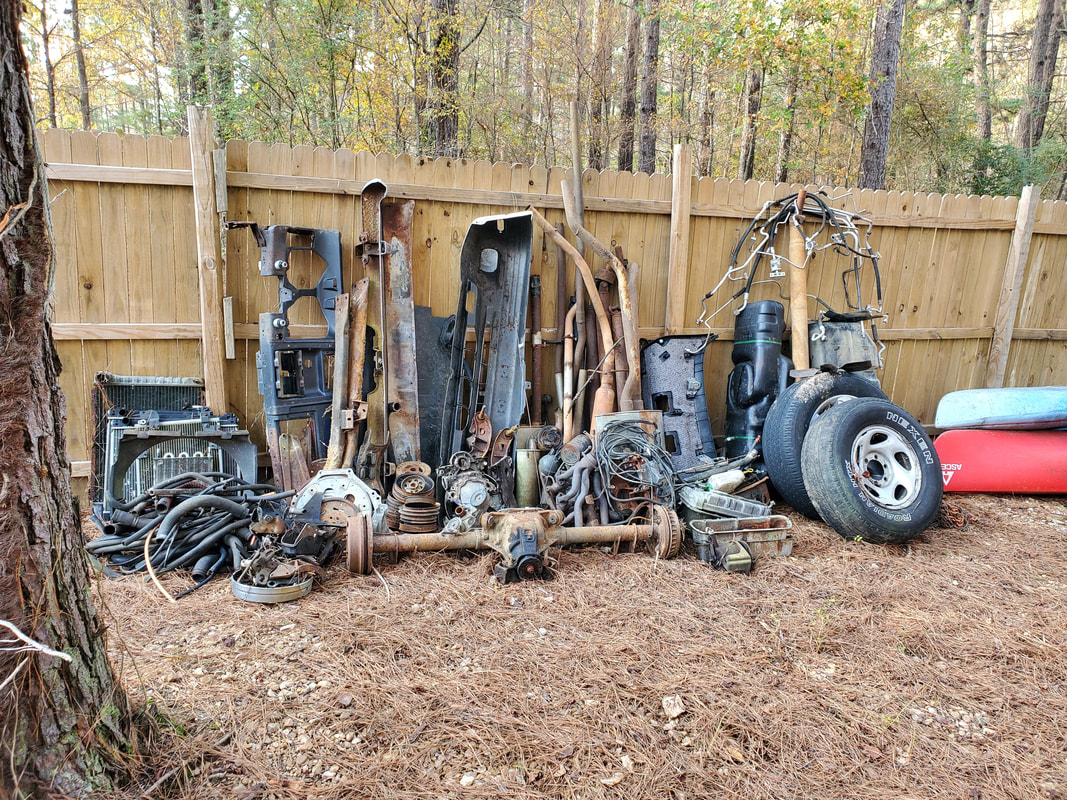 The new staging area for the car parts moved from the old back yard area. Hopefully I'll be able to use or otherwise get rid of a lot of this stuff. With the car parts removed from the old shelf, I was able to commence the breaking of the shelf. This was rather easy, all things considered, since the thing was already rotting away. I did use the impact driver to remove a lot of the wood screws that were used to hold this unit together so they can be reused elsewhere. A lot of the screws were either rusty, bent or both and were scrapped if they were successfully removed. 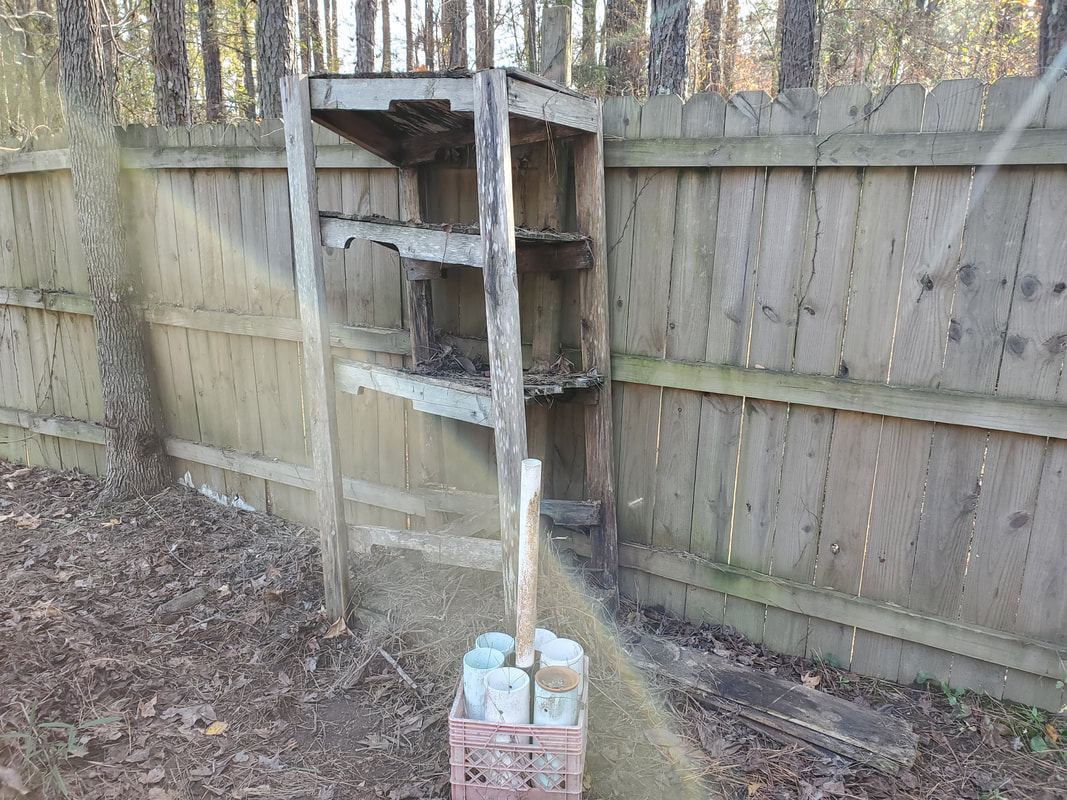 The old parts shelf after clearing the car parts and relocating them to the new staging area. I didn't even have to use the saw to break this thing down. I just tipped the whole thing over and it fell apart a good way from the start. Removing the screws just helped me separate the wood even further, allowing me to stack the pieces over by the other pile of cut wood that came from the other parts shelf. I moved everything over to this spot so I could cut the wood and stack it right on the spot versus trying to cut everything up then move the smaller pieces en masse to the staging spot for later use. Once I do cut this wood up further, I'll have a rather large pile of firewood available for use for probably a few days, as we typically go through a fair amount of wood when the temps drop. 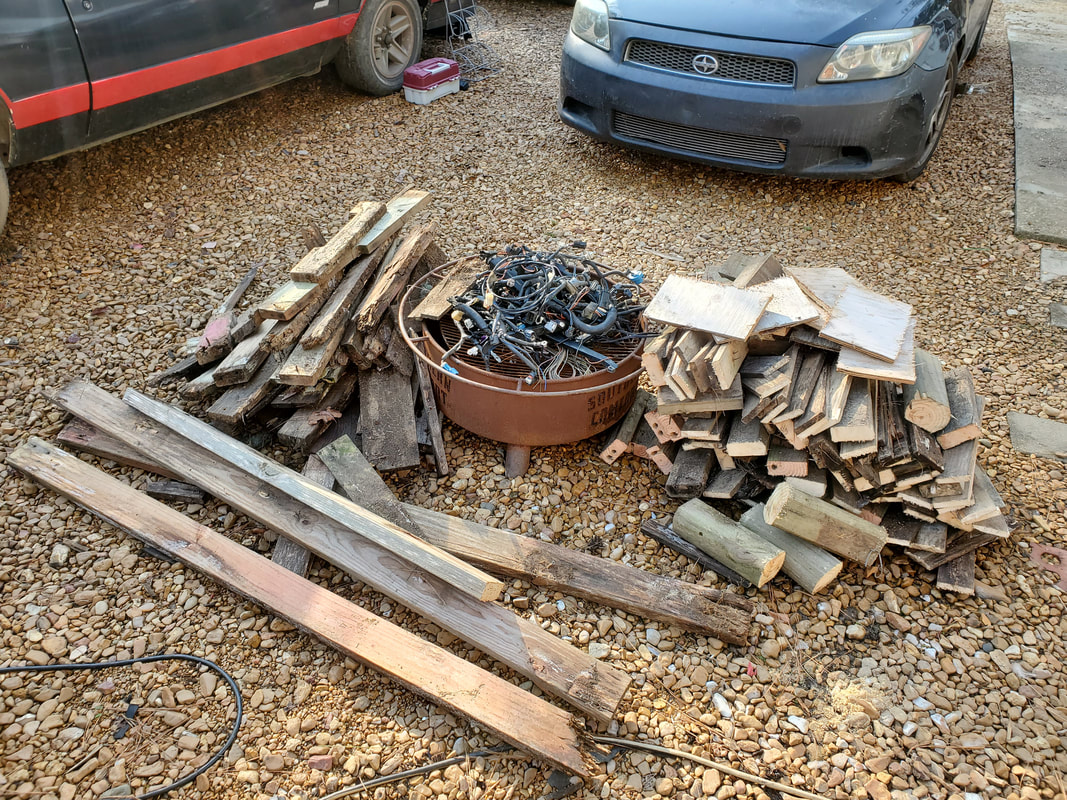 The added wood that came from the old shelf after its breaking up. The pile to the right is the first shelf, which was cut into firewood sized pieces. With the old shelf broken up and the wood moved, the southern fence is even more bare. I moved the bricks that were used to stabilize the shelf and took care of a few more other smaller pieces. There's still some work to be done to clear this area as there's some larger parts that have to be moved, such as the 65 Mustang rear end, the 5spd Toyota transmission from the Toyota Chicken Truck, and some other parts that have to be moved to the new spot. I do still have a lot of regular scrap metal, all of which has to be sorted through. 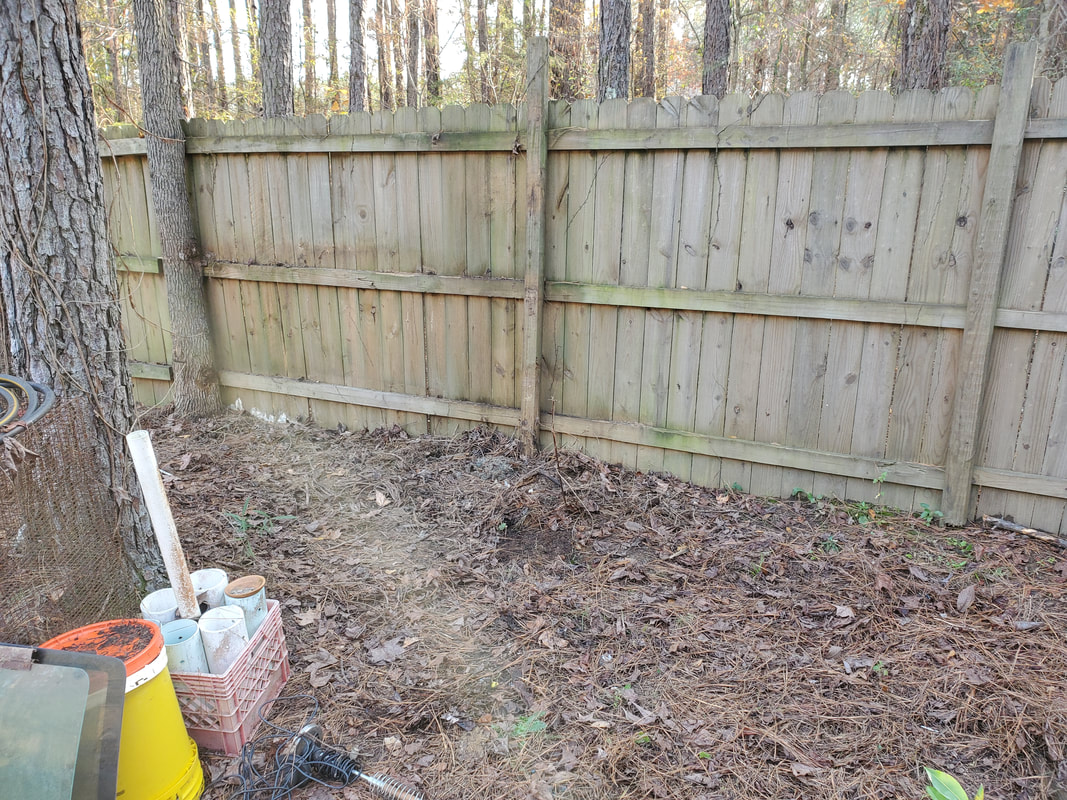 The southern fence line after the removal of the old shelf. A lot of these scrap metal pieces are large sections of sheet metal cut from old appliances, along with pieces of tubing. A lot of this sheet metal will be used when we start the 46 Ford build, as I'll need to close in parts of the floor on the body. Tubing will be used for when I work on the storage garage later in the future. I may be able to weed out some pieces of metal for scrap but it won't be enough to really make a serious dent. We'll see, in the end the goal is to clear all the crap from this area so once I remove the fencing, the area won't have any of this crap exposed for anyone to see. It'll just be open ground.
After stacking and staging the motherlode of scrap on the F250 and trailer, I finally got to haul all this stuff off today. Of course, this was without its issues, due to the idea that the truck was having some weird engine management issues. The engine idle would change, which in itself isn't a big deal but when it's because of a malfunctioning sensor, it's a big deal. When this happened, the throttle response was delayed to the point where I'd have to feather the pedal to get the truck to accelerate. This sporadic engine idle/bad throttle response condition would go on and off throughout the time I drove the truck. Previously, I did bump the idle screw on the throttle body up a bit, just because when this condition originally happened, it would cause the engine to stall out during a throttle cycling. Now, whether it's because of the screw adjustment or the malfunctioning sensor finally being registered by the truck's ECU, the check engine light finally popped on. For a little while the light would go on during idle and off during open throttle, but it finally stayed on all the time. I will have to put batteries in my OBD 1 scanner and scan this old POS to see what the light is saying. Anyway, despite the truck's erratic operation, I managed to make it to the scrap yard to get rid of the scrap as well as to the cement plant to get my gravel. Upon returning, I spread the load out over all the muddy areas, managing to actually cover up everything that was left, including the open spot where the old chicken coop/tractor sat.
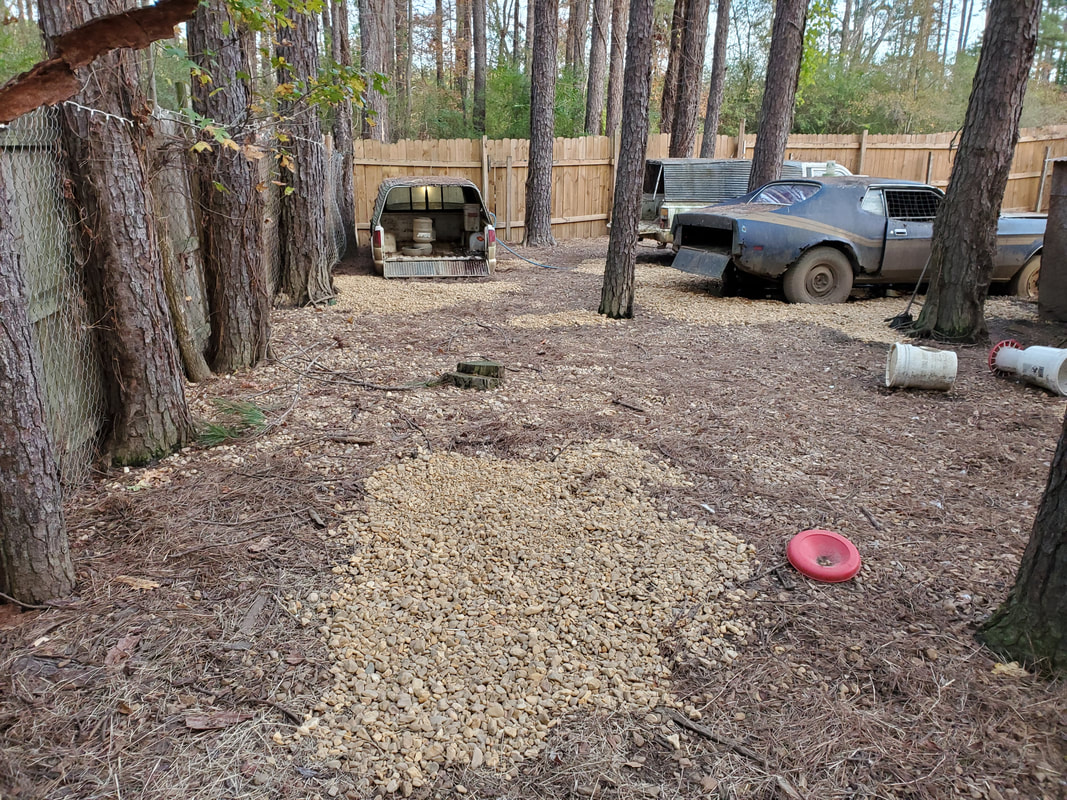
The chicken yard after covering several areas with patches of gravel from this latest load.
With the gravel and the chicken yard taken care of, after putting the scrap cans back in their staging place along the garden fence, I turned my attention back to the scrap pile by the southern fence. I moved several tires over to the northwest fence, along with some other miscellaneous car parts. After clearing the car parts storage rack, I pulled out the saw and started hacking that thing up, cutting everything into small manageable pieces for use in the stove or fire pit. 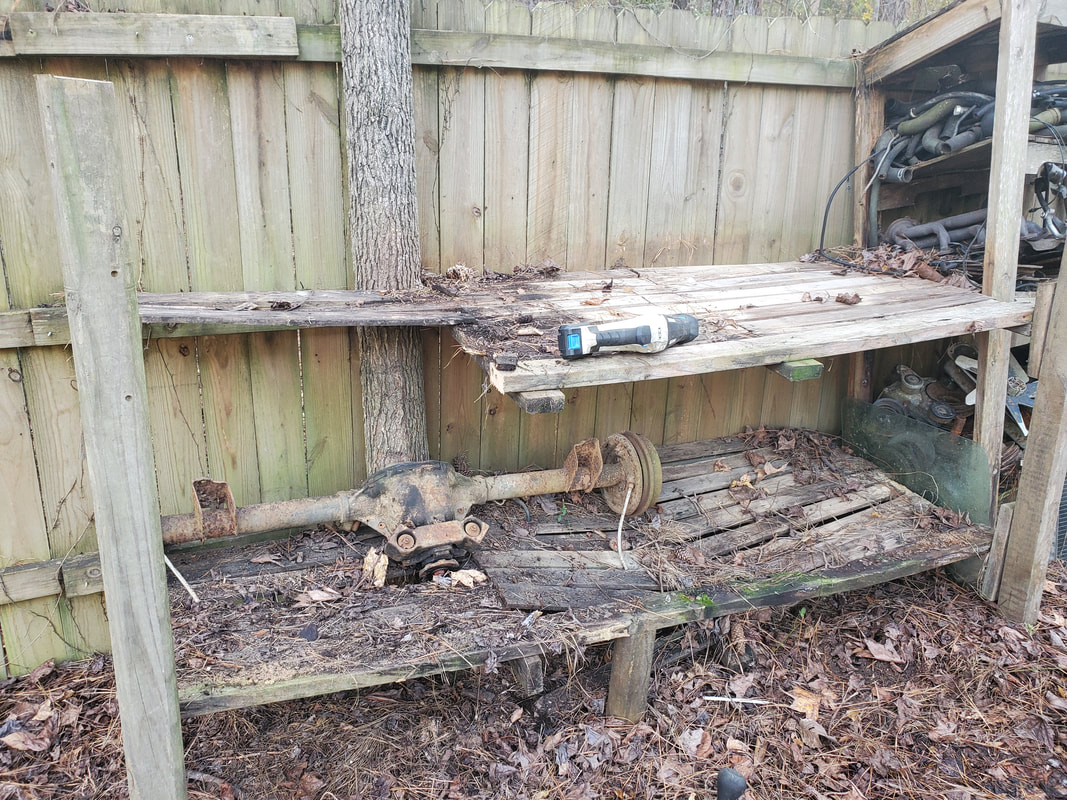
The old auto parts rack after removing most of the parts, the disassembly begins.
Despite having only two batteries for the newer saw, I managed to cut up a bunch of wood before the first battery crapped out. I put that one on charge and for a while took time to move the cut wood and do further cutting in sporadic intervals, giving the battery time to charge. I also took a moment to move a spare Fox body Mustang rear end I had on the lower tier of the rack. I had to use the dolly to move this thing to the new parts staging area, which again took a minute due to the weight of this thing. All that I needed to give the battery time to juice up. I was able to finish cutting with the 2nd battery and when that one crapped out, I pulled the first one back out and cut more wood, killing that battery once again. I fell short by two full cuts through an old landscape timber before the battery died. Needless to say, I have a good stack of firewood built up and the old auto parts rack is no more. 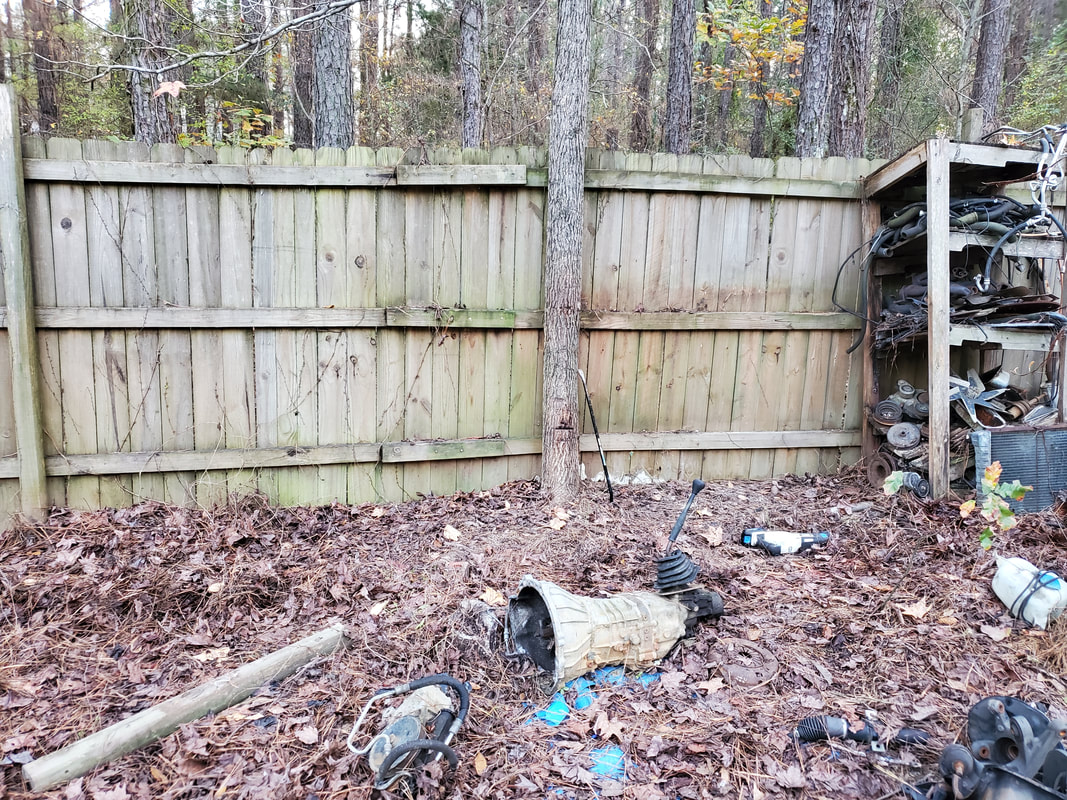
After the conclusion of the chop job, the auto parts rack is no more.
Some other auto parts were moved up to the garage to be staged on the shelves up there. Parts like a couple cylinder heads that were outside, along with two more that were in the Storage Trailer were moved. A crankshaft and camshaft were also moved. There are still some parts around the area that need to be relocated to the new area. At the same time in some of these parts are some items that will either be scrapped or otherwise disposed of, things like old hoses that are too dry rotted or other smaller parts that may have no use at this point. Who knows? Point is, with cleanup comes the ability to be able to part with stuff that meets these criteria. At least I come closer to being ready to start dismantling the old southern fence line and getting ready to finish up the fence as a whole using the panels removed from this old fence line.
After some storms that came through later in the night, we were greeted by yet another tree that decided it would rather lay down on the ground than remain standing. In its defense the tree was dead and was the lower half of the trunk. The tree fell into the chicken yard, hitting the dividing fence that separates the yard from the rest of the fenced in compound. In the process of coming down and hitting the fence, the dead tree trunk knocked a few pickets from the 2x4s that make up the fence, even pushing one of the pickets straight down into the soft ground several inches. 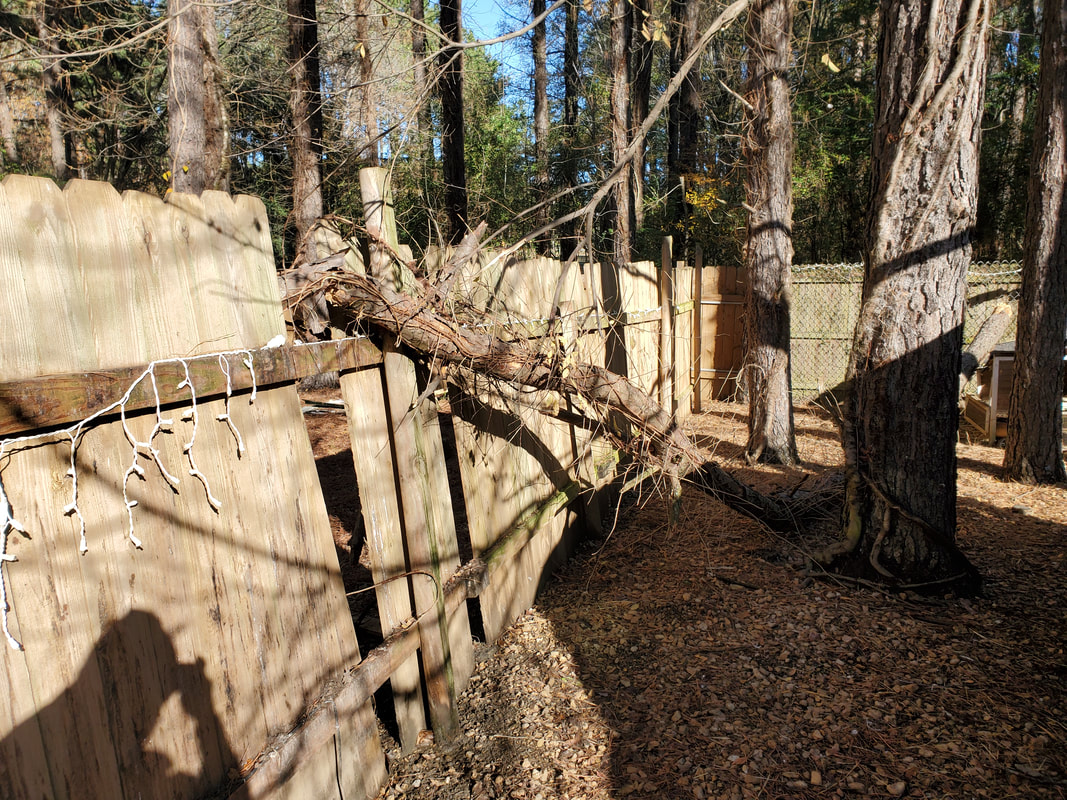 The fallen tree came to rest on the top 2x4 of the fence, knocking a few pickets free and distorting the fence overall. At least the tree didn't break the 2x4s but it did further weaken the two posts that are used in holding up the fence. An attempt to try and straighten out one of the landscape timber posts resulted in some cracking sounds, meaning the board was already to the point of rotting at the base, any more movement would break the post. I'd have to fix this by pounding a metal fence post in the ground next to this post and anchoring the fence to that instead. Anyway, another fatality of the falling tree was this small chicken coop/tractor we had set up a couple years ago and patched on a couple times since then, even with the car coops already in the game. This particle board and weak wood structure was no match for the falling tree. It was just as well because it wouldn't have been long before this structure fell in on itself through its own rot anyway. 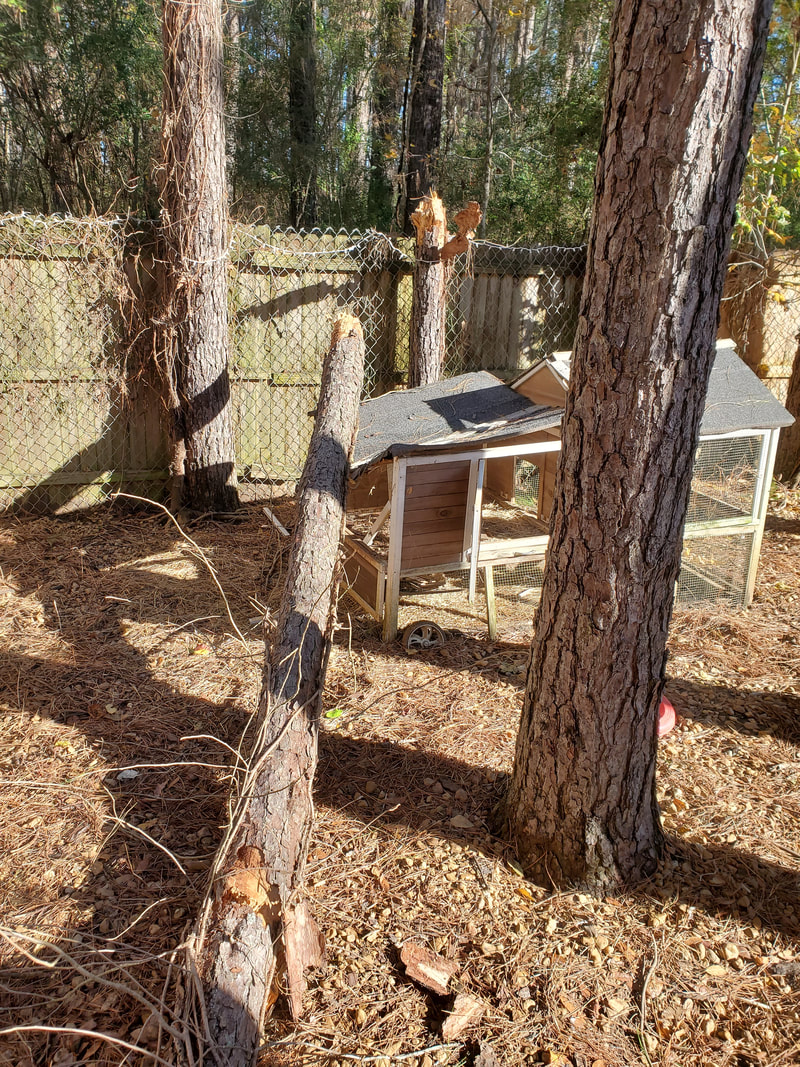 The fallen tree as it sits, right on top of the old chicken coop/tractor. Well, down to business. We had to chop up this fallen tree, even the poison ivy vines that covered the trunk from top to bottom. The trunk was chopped up into short enough sections that we could load everything into the wheelbarrow in batches and move everything over to the burn pile, which was already stacked up with other garbage. This tree matter would be what was needed to top off the pile so we can fire everything. 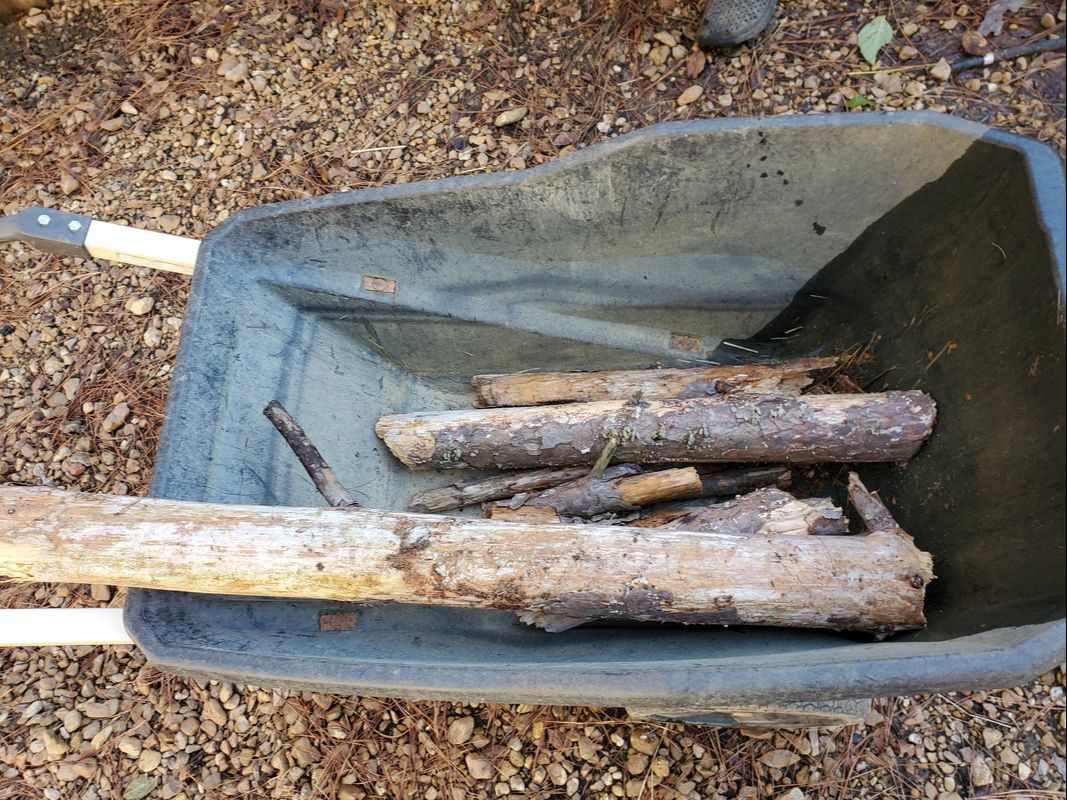 Cutting up pieces of tree into small enough pieces to move with the wheelbarrow. With the fence cleared, I was able to pull the pickets back up and set in place. Instead of using tacks with the nail gun to secure the pickets, I just used wood screws. At least these few pickets won't be falling off spontaneously like many of the others when the tacks weaken. With the fence fixed, I moved on and dismantled the remainder of the chicken coop, saving the screws and hinges and other useable hardware from the structure, stacking these pieces onto the burn pile just as well. 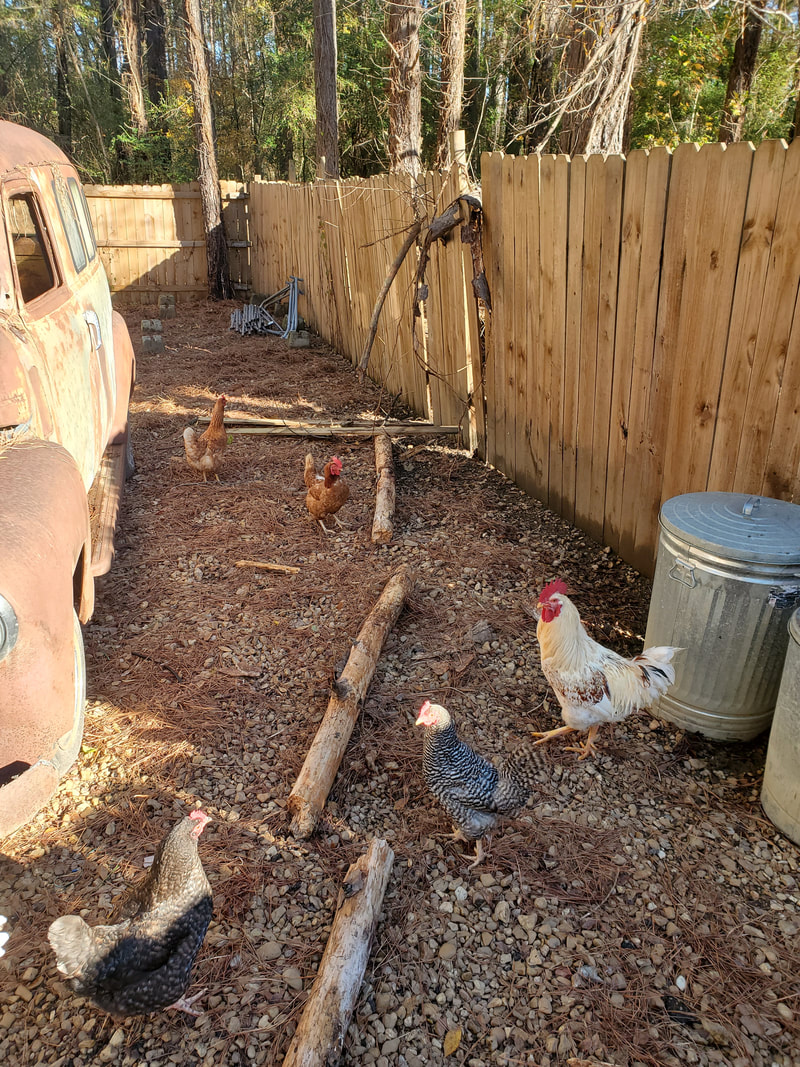 The chickens don't really approve of the mess around their turf. With the old chicken coop broken down and stacked and all the hardware stored in the trailer in their respective hardware bins, I fired the pile, letting that stuff burn down enough before going back inside, even after the rains passed through. Last thing I need is for something to catch an ember enough to spring to life. Anyway, with this little business taken care of, I can get back to finishing up the scrapping which of course will lead on to other business we have planned for the compound.
One of the things that I've been putting off for some time was a simple little project involving headlights. More accurately the headlights on the Scion. As is the case with any plastic headlight housing, the surface gets oxidized and starts to develop a glazed color that obscures the projection of light. Well, it's already known that there's simple little kits out there that allow anyone to restore the headlight housing's surface to near original clarity. Of course these kits aren't going to bring the plastic to full crystal clear clarity, but it'll be a helluva lot better than what one may be typically dealing with.
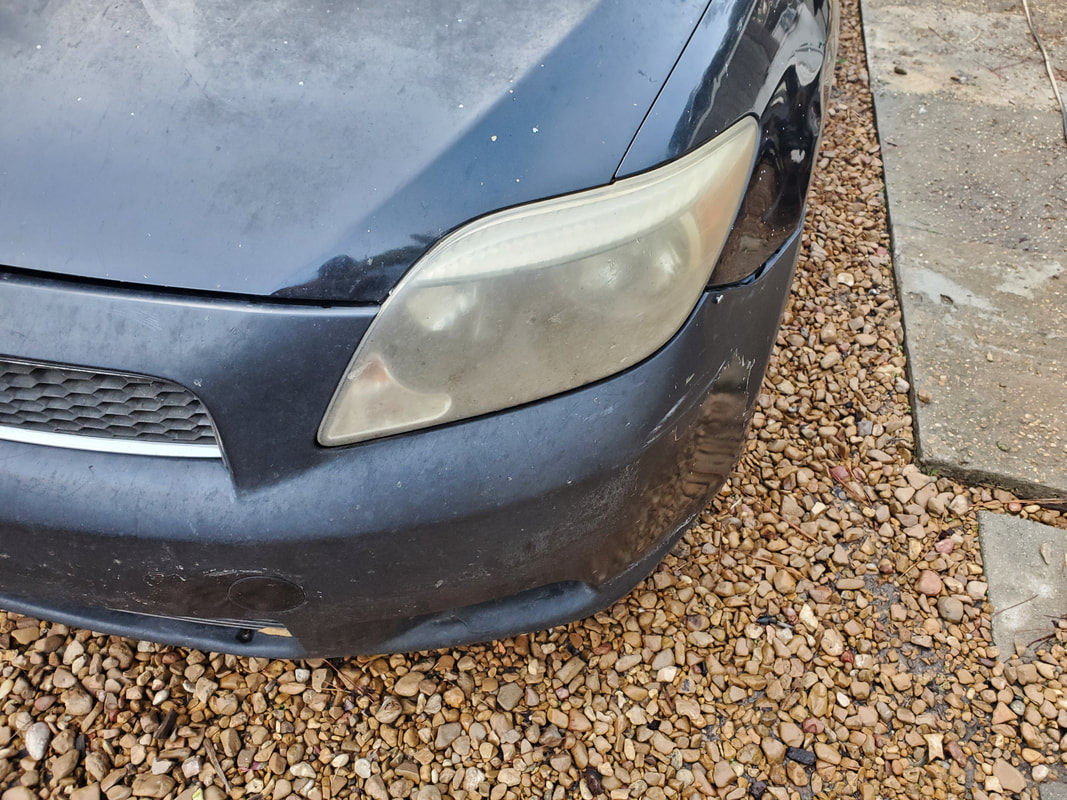
Driver's side headlight with the oxidized glaze we have to deal with.
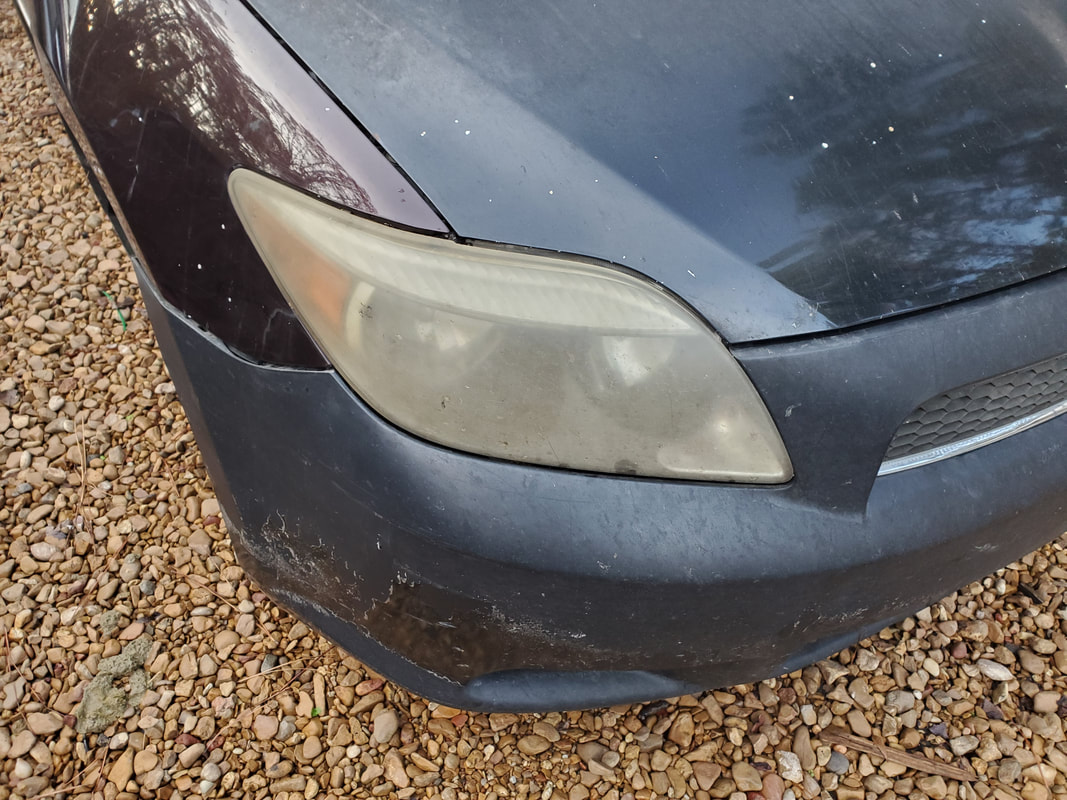
Passenger side isn't any better.
The kit starts off with using 500 grit sanding discs that velcro stick to a wheel that can be used in a standard drill. After sanding down the headlights a few times, using a couple discs for each light, I moved up to the 800 grit discs, doing the same thing. After this step I moved to the buffing pad/wheel. Along with this I had to apply a little blob of polishing compound. This stuff is synonymous to the same polishing/rubbing compounds used in auto paint finishing. I did this process a couple times per headlight to get proper coverage of the polishing until the surface was clear. There were still small scratches and minor scuffs, present from the sanding as well as the normal knicks and dings. Again this would be expected but in the end, the results were a lot better than what we started with. 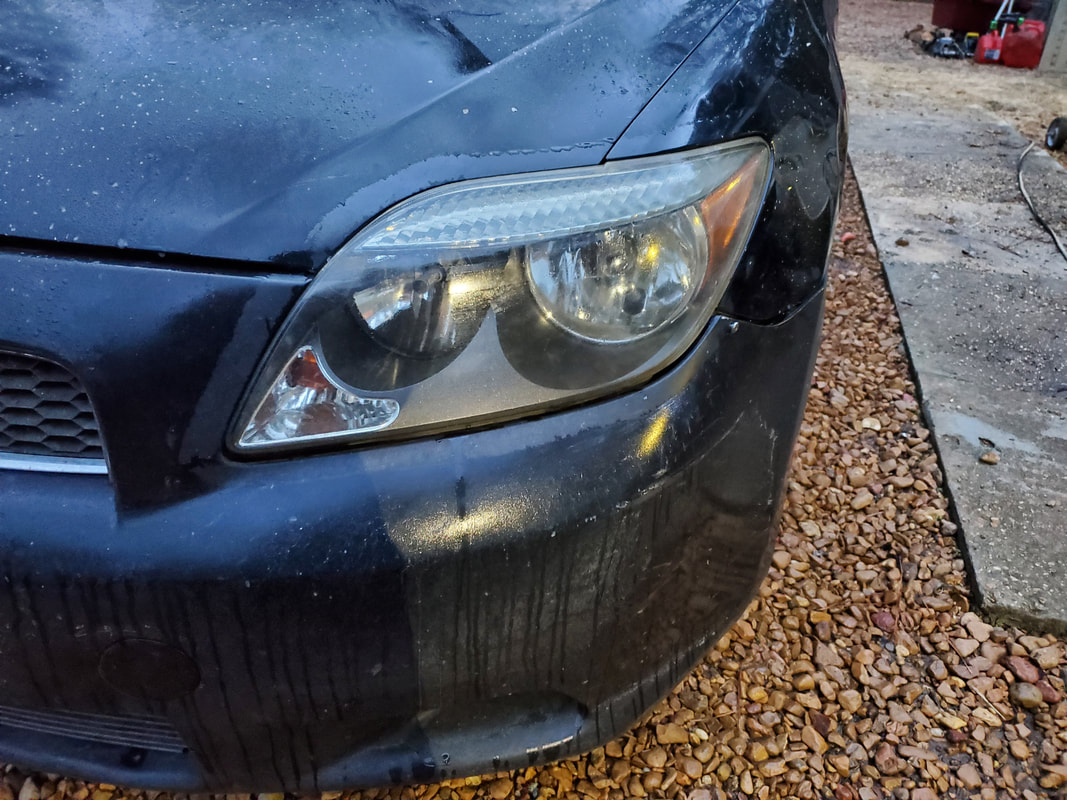
Driver's side light after the restoration process.
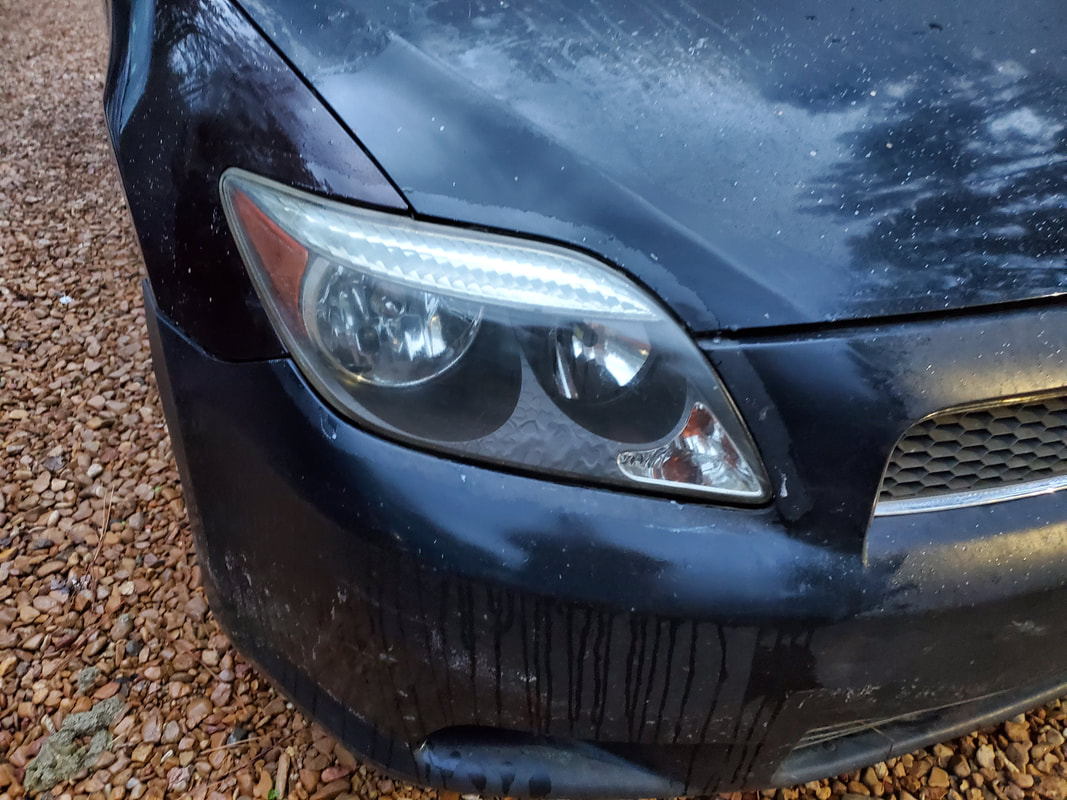
Passenger side is better as well.
Another thing that I had to start doing was sorting through the scrap that I acquired from the neighbors as well as from the scrap pile at the back of the yard. Since the amount of material is growing past the point of being in the way, its time to get all this crap staged so I can get it hauled out, allowing me to move on to the next batch of processes I want to implement. 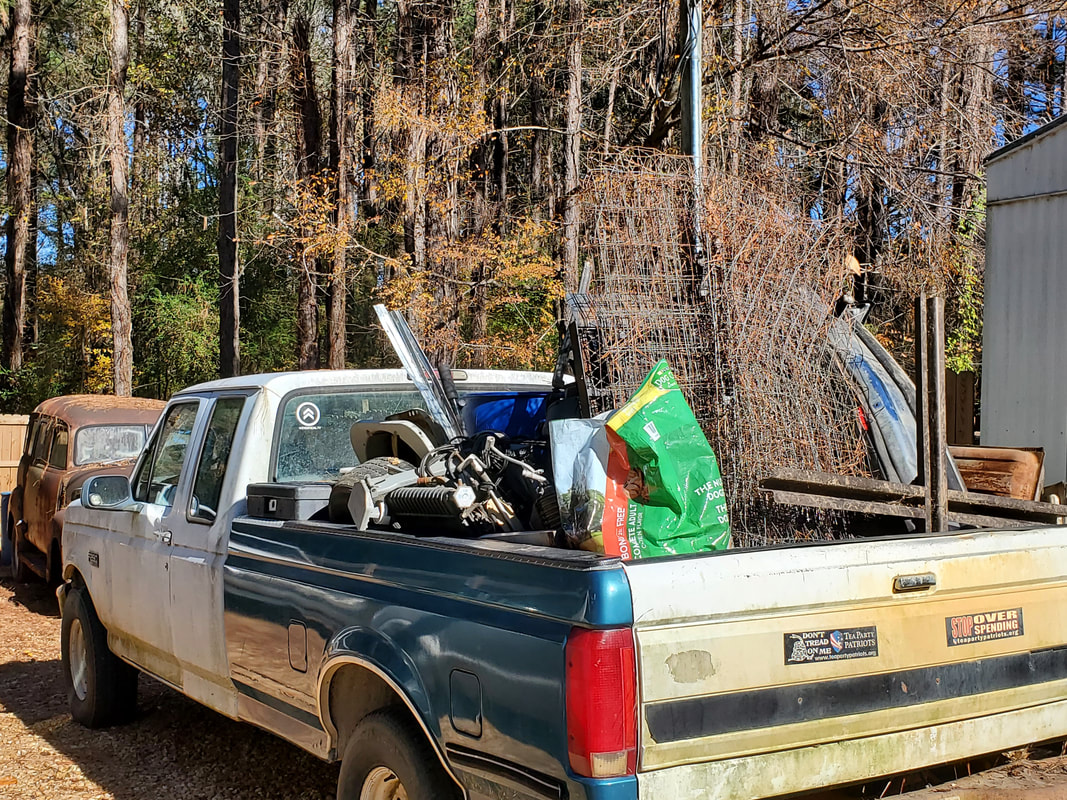
The truck is fully loaded down with all kinds of scrap, I might end up moving some of this larger stuff to the trailer.
Since I have such a large amount of scrap, I will have to use the trailer along with the truck to make the haul. A lot of the stuff getting pulled that was sorted from the automotive stuff at the back of the yard is parts that I had tried to sell after parting out vehicles that were used in other projects (Minivan chicken coop, Toyota Chicken Truck, etc.). After sitting on these parts for so long I decided I may as well just scrap all this stuff in order to make room for the other projects and tasks I want to start on. Who knows how long it may take before someone comes along around here looking to buy one of these parts. 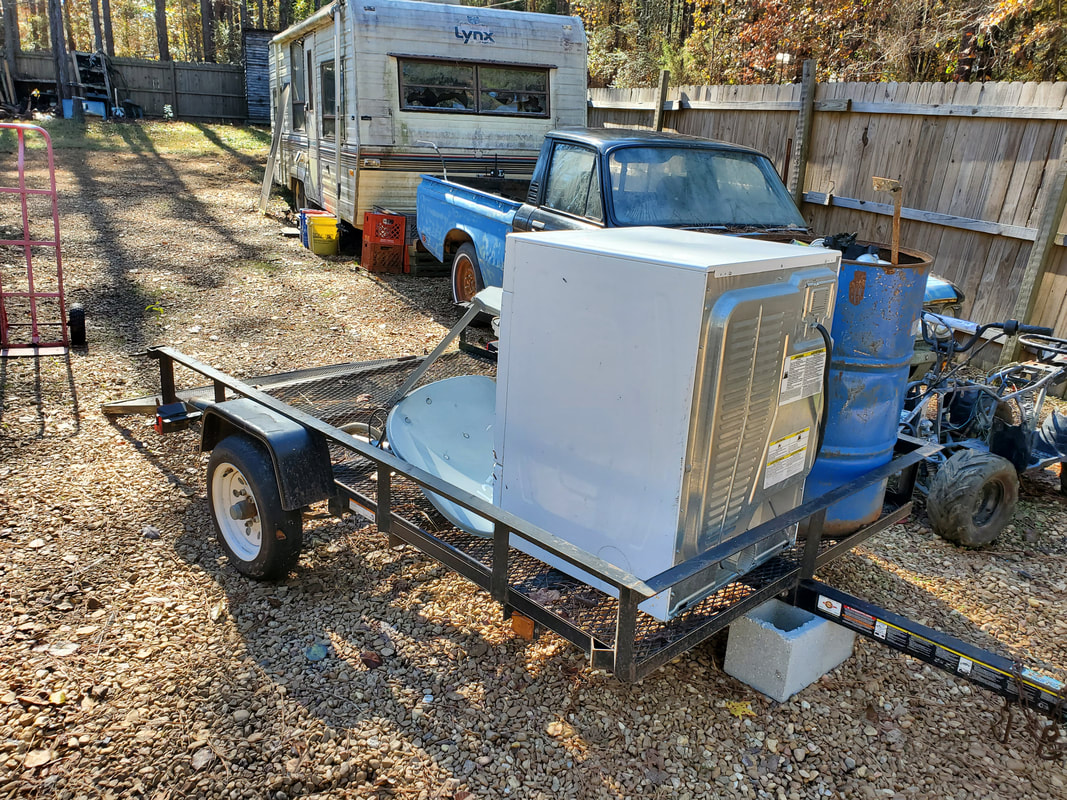
The trailer is going to be loaded down with more scrap just as well.
Scrapping these parts will also open up the old racks at the back so they can be dismantled, allowing me to start on the removal of the fence panels along the southern fence line. These panels will serve as the pieces to close in the opening behind the Storage Trailer, connecting to the rear of the garden fence. Some of the parts from this area are being relocated to the northeastern fence line for either selling purposes or for possible use in a future project later. These parts include - driveshafts, fuel tanks, different lengths of tubing, a couple rear ends, etc. 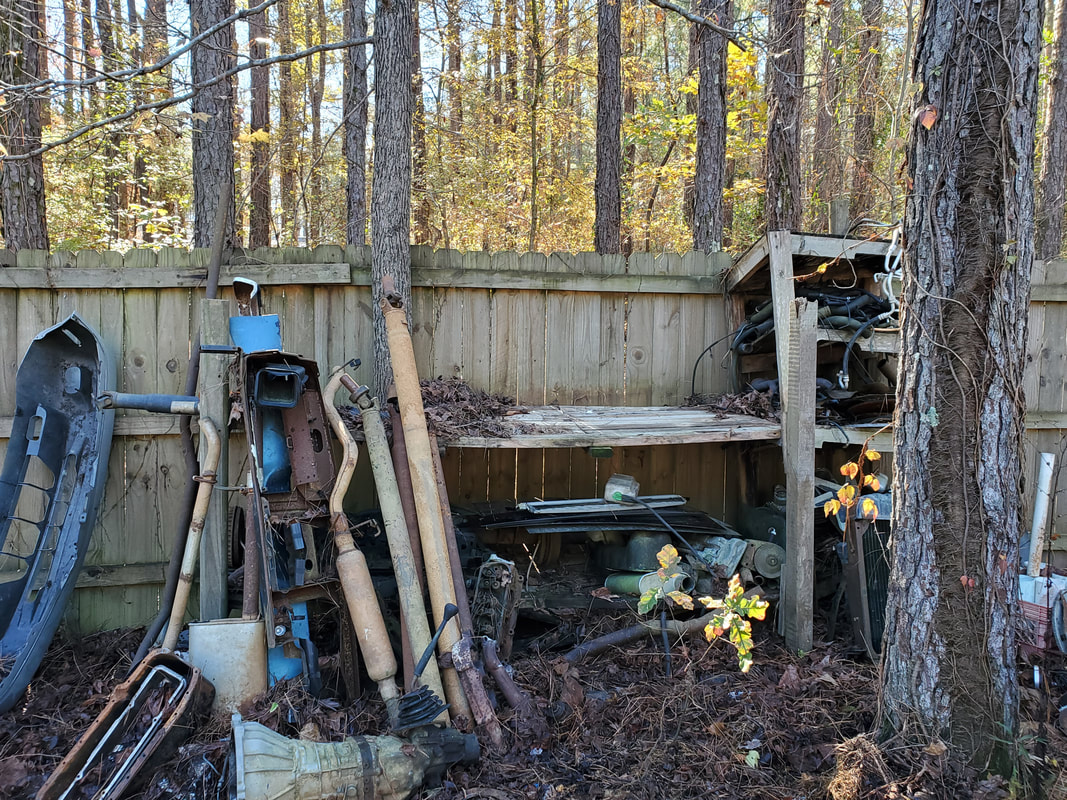
These driveshafts and exhaust pipes along with the dash frame from the 73 Mustang will be saved, along with miscellaneous oil pans and valve covers, all from old V8's.
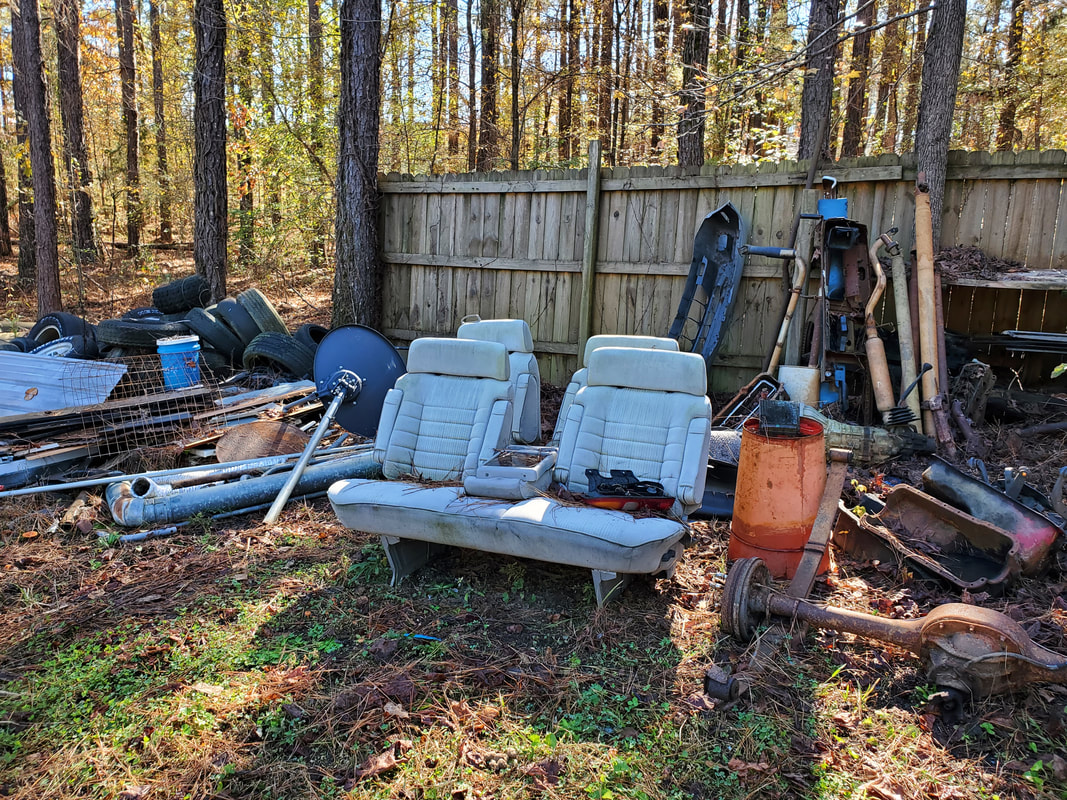
These seats will be on the outbound scrap run just as well. To the right are some oil pans and a rear end that'll be saved.
After the southern fencing is relocated to fill in the gap behind the Storage Trailer, the next area is the eastern fence line, where I need to close in two sections, leaving the east gate. I can then start closing in the rest of the eastern fence along the garden. I'll still need to sink a few posts along that line to fully close in the section of eastern fence line along the garden, but I should have enough fencing available from the southern line over to the southwest corner and a short length of the west fence up to the Storage Trailer. This repurposed fencing should be enough to fully close in the rest of the compound all the way around the Dog Kennel Greenhouse. I'll only have to source fence pickets for the eastern gate, and figure out a plan for the main gate, which I do have some ideas that for the most part may be temporary until I can work out the logistics behind setting up a powered gate assembly. At least until then I'll still be able to close in the compound properly.
|
