Spreading The Last Few Bags Of Lowes Recovery Bag Gravel And Putting Up A Little More Garden Fence8/30/2020 Even though I had the gravel that I picked up from the cement plant, I did still have a few recovery bags of gravel from Lowe's. These are the bags that have been ripped or maybe lost a little material and was repackaged in recovery bags for sale at a lesser price. Most of the time the quantity of gravel (or dirt or mulch) is not a lot and the discount is upwards of 50% off retail. Since I got these bags before accessing the cement plant gravel, I still had them laying around and had not spread the stuff yet. Since I pretty much said that I was done with getting the recovery bags of gravel, I figured I might as well just dump this stuff in the next suitable spot - in front of the garden gate. Of course this didn't take any time, the most I did was get an even spread over a relatively small area then mash it into the mud just to get a very rough start before I get my next load of cement plant gravel. 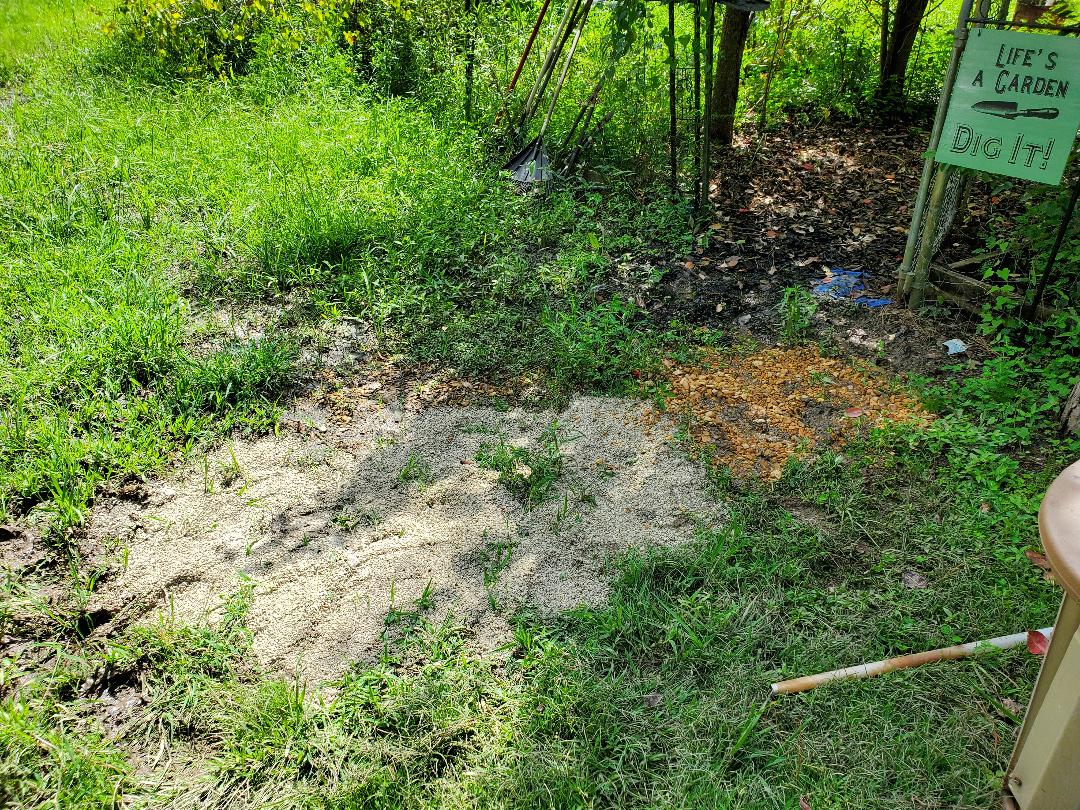 Recovery bag gravel spread over area in front of garden gate. The next thing that I took care of was use up the "extra" fence pickets that I had after covering the last couple of sections of rear fence to the garden. In order to do that I had to pick up a couple of 2x4's to nail up over the next section. After making a stop at Lowe's to get these on the way to the job, I had a couple of boards in the car ready to be used this day. This went pretty fast as it was just two boards and about eight pickets. But even that little bit of work went a long ways towards finishing the fence as it'll only take about 10 boards give or take to finish this section. 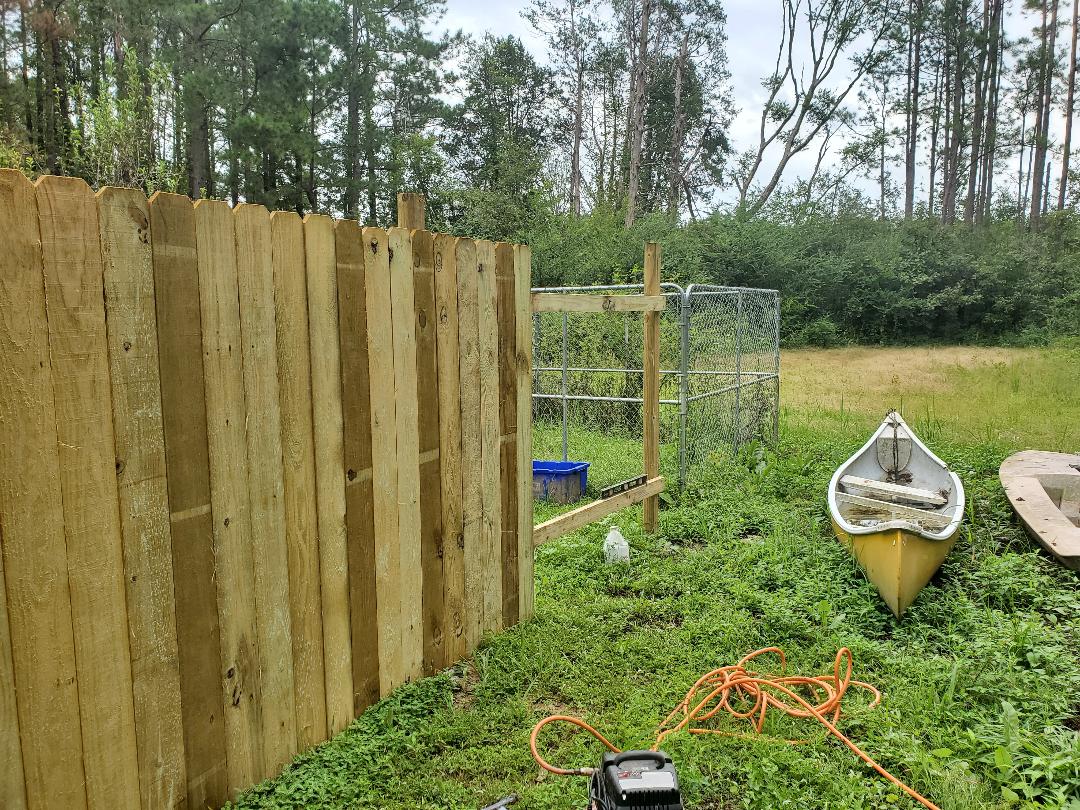 Another section of fence being put together with the pickets i had remaining after the last session of fence building. Note how I'm close to the end of the line on this run of fence.
0 Comments
After finding out that a local hardware store had bulk gravel for what I thought was a reasonable price, I made a plan to start getting gravel to start covering some of the sloppy areas around the grounds here. The amount was what a small front loader bucket can hold and was $40. It would be enough to fill the 8ft bed of the F250 about half way. The thing is, the store was about 30 miles away, a long run for a truck that gets 10 mpg when its not carrying a load, less with 1000+ lbs of gravel. I inquired about local sources of gravel. This is where we ended up finding out that the local cement supply facility in town was actually selling bulk gravel that is used for mixing in their cement for $10 a scoop. I had to check this out. Upon going there, I found that the scoop amount was a large industrial sized front end loader bucket, probably 2x what the other store had. They had three different grades: pea gravel, 3/4" average size and 1" average size gravel. I ended up getting the 3/4" size since the first area I wanted to start covering was the area around the Mustang Chicken Coop. 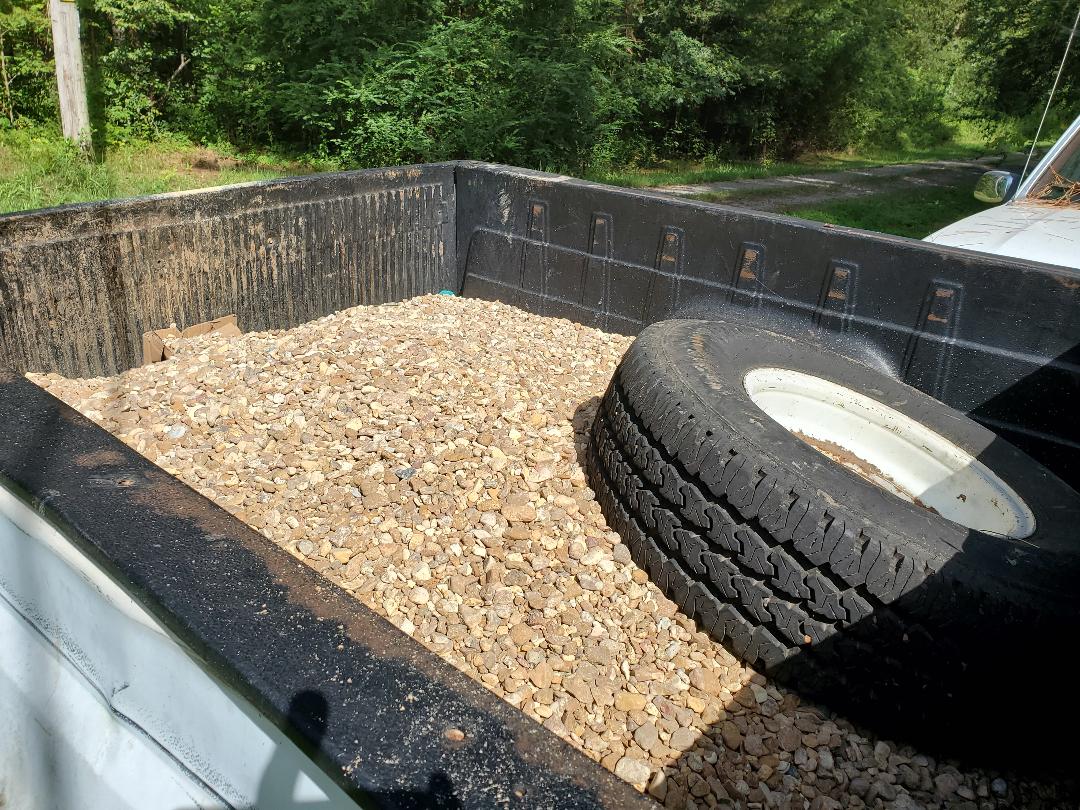 Bed filled about half way with gravel from cement plant. Even with this load of gravel the rear of the truck was riding low under the weight of the gravel. The truck still handled it just fine but it was a lot better only driving 10 miles give or take to town to get this gravel versus 30+ miles to get the other gravel and pay 4x as much. The area around the Mustang Chicken Coop has become sloppy over the weeks after the car had been set up in its spot. Between the leaky hose and fittings at the water line up to us having to spray water to clean the car coop, the grounds were pretty sloppy. Add to it our walking through the mud during our regular work around the coop, that made the area stay sloppy. Time for the gravel. I had to shovel the gravel into a wheelbarrow slowly since it wouldn't take long to get exhausted shoveling gravel, even more so when pushing the wheelbarrow across the yard. It of course took many trips to get the gravel out. When I dumped it I had to walk it into the mud to get it established in the mud then covered some more so I can form a nice bed of gravel that won't just disappear after a while. 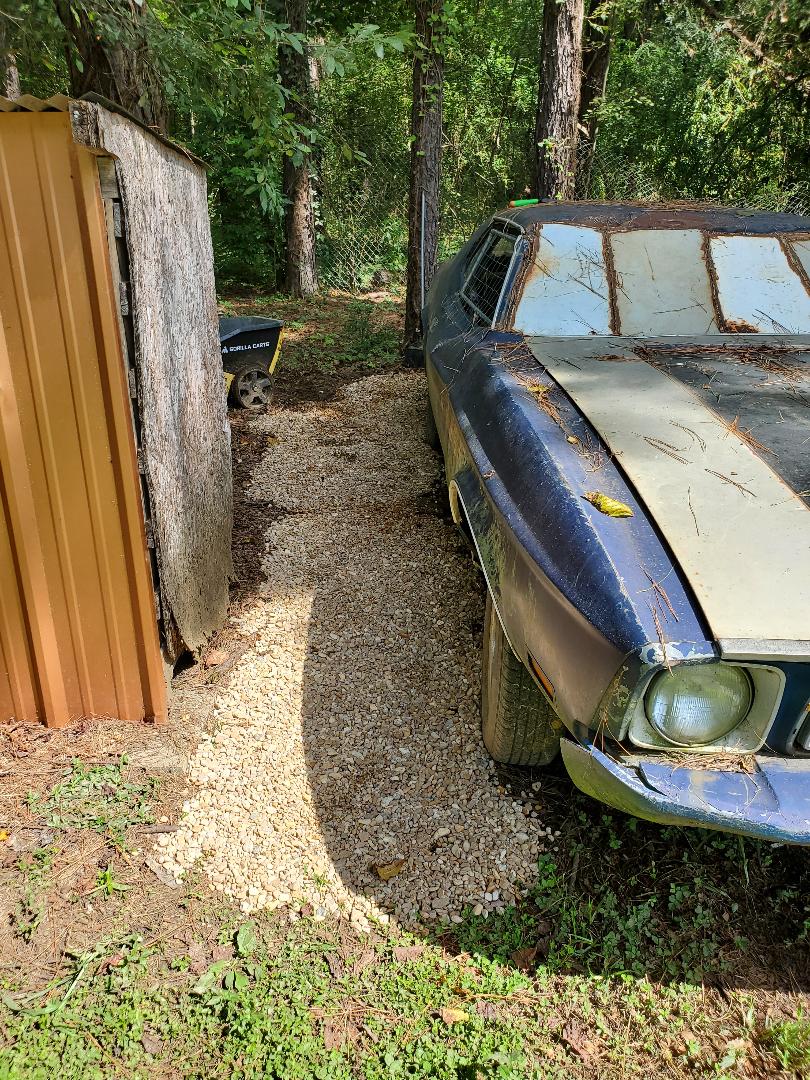 Bed of gravel laid on right side of Mustang Chicken Coop. I took the time to get a nice even bed spread all the way around the car, extending out for a couple of feet to serve as a good walkway to stand on while cleaning or otherwise servicing the chicken coop. I even made sure to get plenty of gravel around the water line since that area was one of the bigger slop areas that would require a larger amount of gravel to get a good bed established. The whole truck load of gravel was enough to make my way all the way around the car with just a very small patch still left open. 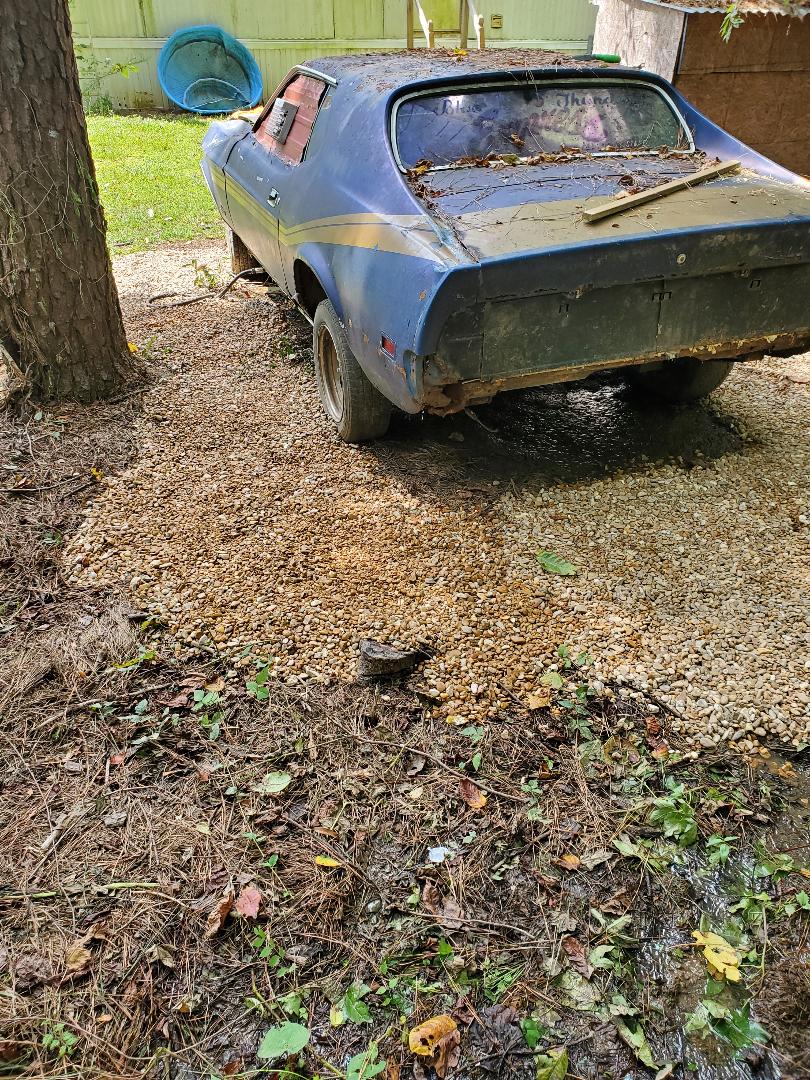 Gravel spread all around the car coop, around the back and around the driver's side. I will eventually add more gravel around the car coop to further cover the sloppy areas that extend further our from the covered areas. My goal is to cover as much ground as possible with gravel so besides covering the sloppy muddy areas I can also cover areas that are more problematic when it comes to cutting grass. Areas along the fence line or around the trees or around the other chicken coops would be covered with gravel so the grass would not be allowed to grow high where I would have to come through with the trimmer. I would just leave areas that are out in the open covered with grass that way all I have to do is just go over the area with the push mower, real quick. After this little episode with the gravel, I already decided that I'll be going back to that cement plant to get plenty more gravel. I'll be hitting them up at least once a week to get a truck load since I can make that run and be back at the house with time to spare during a regular work day. Even during those days I might be able to get a little of the gravel spread out depending on where I park the truck or where I need the gravel. I plan on getting some gravel for the main driveway as well since there has been some erosion in spots that twill need to be filled in. Again, I will be getting lots of gravel from these guys.
During this session I worked on installing a couple more spans of fencing over the back end of the garden as well as dropped a couple of trees and cleaned up the area that used to be the dog yard. Since this was over a weekend day, I had plenty of time to do this as I had all day.
First off was the garden fence. As usual with this portion of the fence I had to get some 2x4's and a bunch of pickets. I started off with installing the 2x4's, using a level to get the boards horizontal prior to nailing them up all the way. Of course since the posts seem to never be perfectly set at 8ft spacing, the ends of the boards never sit like they need to. I end up having to add some cuts of 2x4's to serve as extension boards to be able to hold the ends of the main 2x4's. 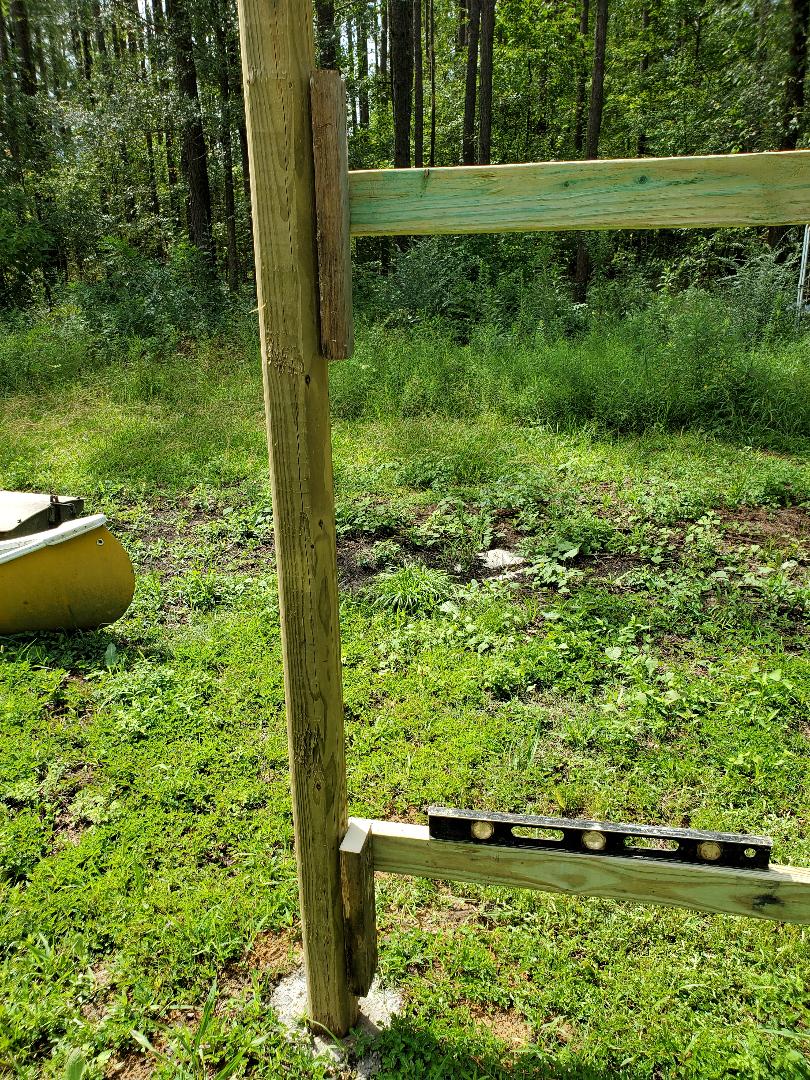
Post showing added 2x4s to serve as extensions to the posts to be able to hold the main 2x4s for the pickets. Note level on board.
With the boards nailed in place across two spans of the fence, it was time for the pickets. We picked up 45 pickets on this latest batch. There should be enough pickets to be able to cover the two spans and maybe have some extra for starting the next span of fence. 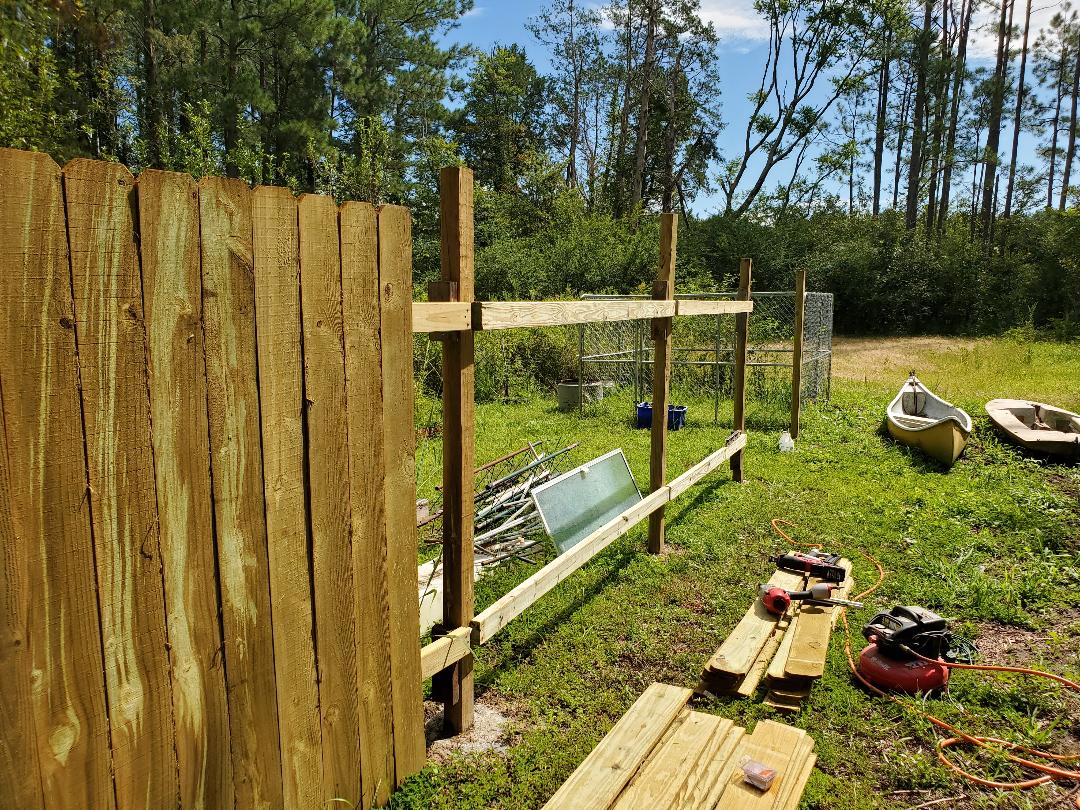
2x4's nailed up across two spans of fencing, ready to accept pickets. Note tools laid out on ground among stacked pickets.
It didn't take long to nail up the pickets. Other than the quick reloads of brads into the smaller nail gun, putting up the pickets went pretty fast. When I got through covering the two spans of fence I still had probably 5 or so pickets left over. While this isn't enough to cover a complete section, I will still need to get a couple of 2x4's to at least get another span set up so I can nail up those few pickets that are left over so I can be off to a start with the next installment of fence building. 
Two spans of fencing completed with leftover pickets on the ground next to compressor.
Its hard to see in the previous pic but there are only two more posts that need to be added to complete the run of fencing. The two posts will be close together, but if I really wanted to I could just put one post in the ground and instead of 8ft 2x4's I can just get a couple of 10 or 12 ft boards to cover the final span of fencing. I plan on getting a couple of 8ft 2x4's for the next section so I can finish using up the remaining pickets, but with that, to finish this fence I will need one post and a couple of 10 or 12ft boards if I go that route. Of course I will need pickets, probably about 30-35 pickets. Once I get those boards and posts and install them I will officially be done with the rear section of the garden fence. The next thing I did was clean up the old dog yard area. Besides moving the feeder dog house and dismantling the dog lease/cable assembly I set up earlier there was also removing the automatic watering dish and capping the water since it doesn't have a valve. After removing these things I decided to cut down a couple of trees that were in the immediate area where the dog yard was. One of the trees was a dead section of pine trunk that wasn't high enough to concerned with it falling on something like a car or the storage trailer. I dropped it pretty fast then commenced to chopping the trunk into smaller sections like what I would stick in the wood stove as is. Since the tree was rotted the trunk was easy to cut through, since it was already seasoned. The other tree is a larger weed tree, but it wasn't larger as far as height. It was just thick with branches and foliage. After bringing the tree down I had to spend several moments afterward cutting the branches down into manageable pieces that I could stack up at the burn pile site. 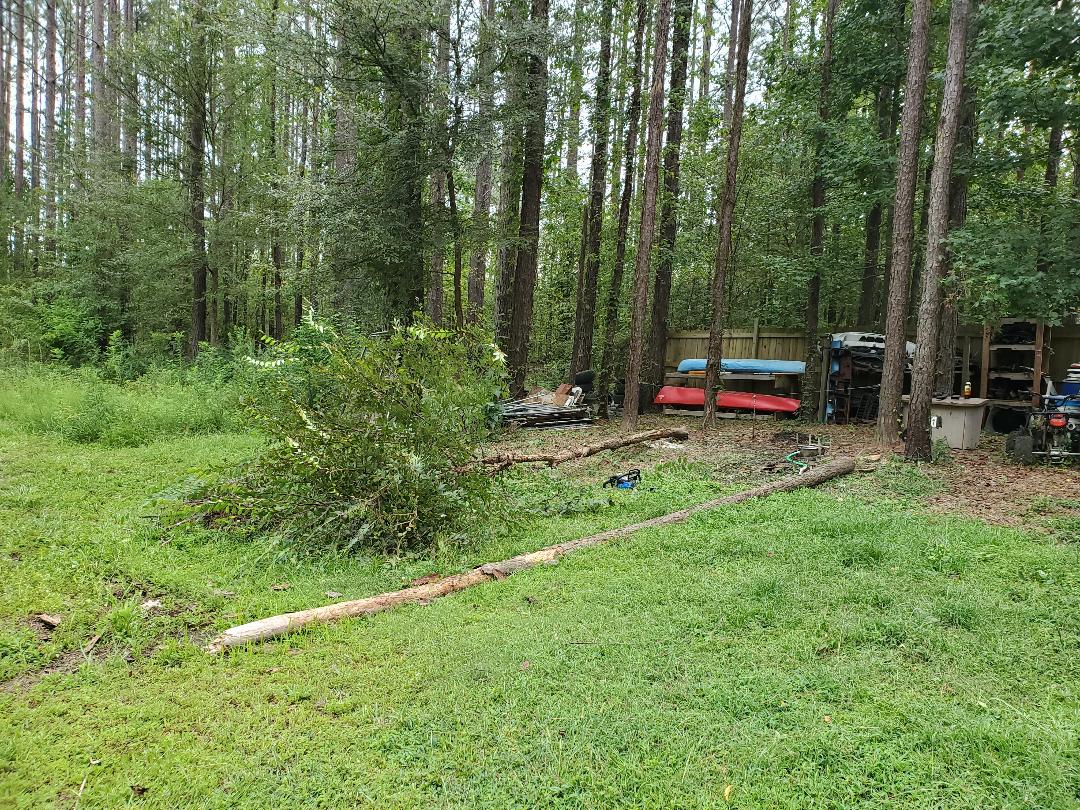
Trees brought down in old dog yard area.
After multiple trips from the downed tree to the burn pile, I managed to get everything stacked up as intended. This included the trunk as I wasn't even feeling like trying to cut the trunk into manageable pieces for use as firewood in the wood stove or elsewhere. I was getting to the point of being a little too tired to care about that small amount of wood so everything went on the burn pile. Of course all of the foliage will have to dry out before I try to fire the pile since green shit takes a lot more effort to burn. 
Burn pile staged and waiting drying before burning.
As far as the plans for the old dog yard area, I planned on setting up one of the portable garage frames for use as a storage structure for the remaining scrap metal and wood and PVC pipe that is currently stacked on the homemade racks along the fence line. Doing this will allow me to remove those racks to clean up the fence line more and compress the storage space some more to make room for other possible things, or maybe nothing at all. Maybe just squeezing these racks into a floor plan that can be covered by the 10x20 garage frame will be enough to make things even more neater. I do plan on using the other portable garage frame as an actual garage structure for storing things like the go kart and lawn equipment among other heavy tools like the cement mixer, etc. The only other thing left to address would be the rack holding all of the old auto parts.
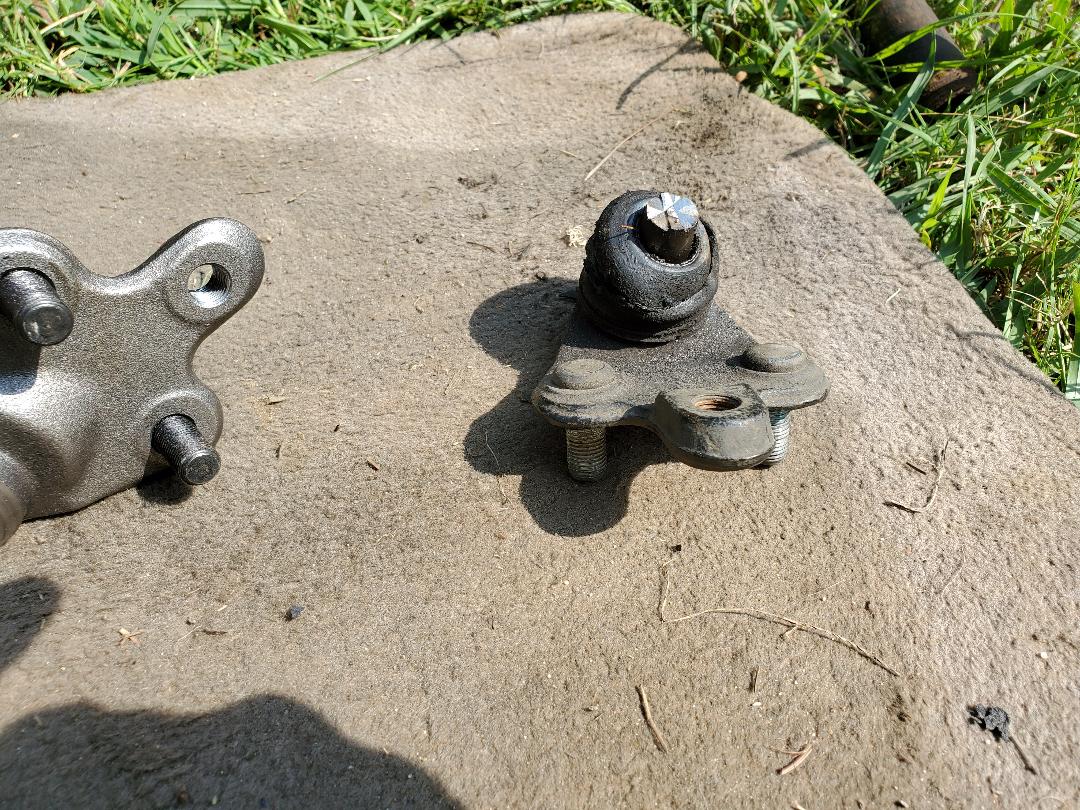 Old ball joint after cutting shaft to remove unit from spindle knuckle. After removing the old ball joint I went to install the fresh ball joint. I ended up finding that with the knuckle hole being wallowed out, when the shaft is fully seated, the edge of the thread sticks up above the surface of the knuckle. Because of this I was unable to tighten the nut all the way down, which would allow the tapered shaft to fully seat itself properly. I ended up having to use a washer and a lock washer to serve as spacers so I could put the nut on and be able to draw the ball joint shaft farther into the knuckle hole. This had the added benefit of putting the nut at just the right level where the groves on the nut lined up with the retaining pin hole on the ball joint shaft. I was able to install the retaining/cotter pin where the retaining nut should not walk off enough to allow the ball joint shaft to pull free from the knuckle. 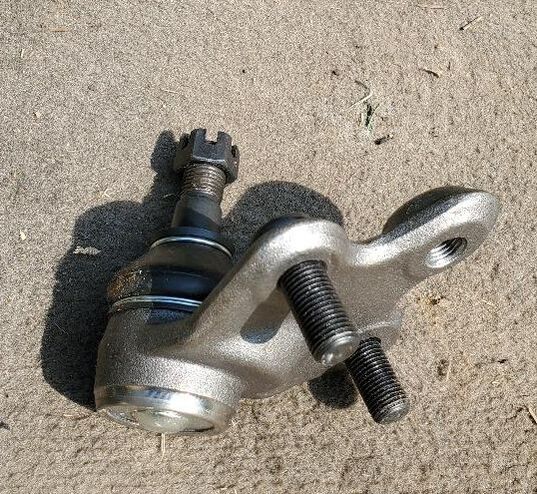 New ball joint, note taper of shaft and where threads end. With the bad ball joint replaced and fully settled, I moved on to the other side. This should be a piece of cake since the other side did not have any issues with loosening up. It's just getting replaced because I want to keep things even. I was able to get things separated in no time and get the old unit popped free with a few small taps of the baby sledgehammer. The new unit went in fast and was finished in a fraction of the time that the bad one took. With the cotter pin in place, I was officially finished with the ball joints on this car and it was ready for the road again. 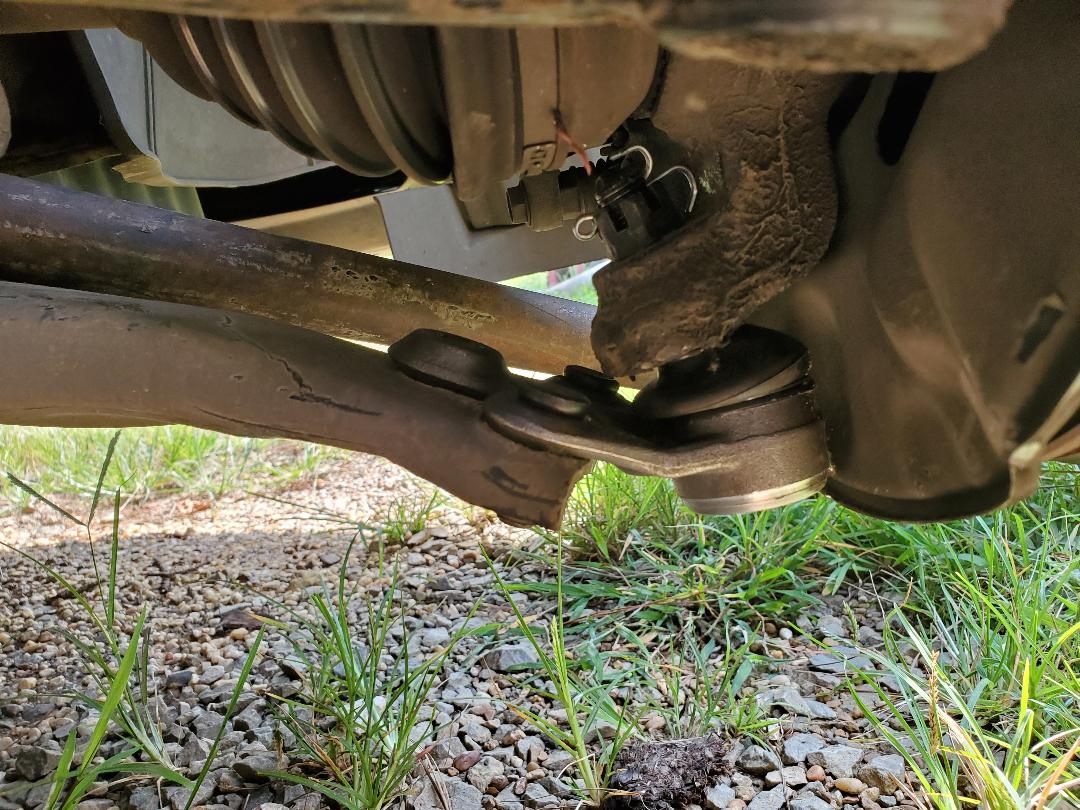 New ball joint installed on "good" side. Even though things were fine with the new ball joints, the idea that the spindle knuckle was compromised is something that can't go unchecked. I ended up sourcing a replacement spindle, used obviously, online for a fair price. I ordered this part but will not put it in yet as I would want to replace the wheel bearing in the spindle before putting the unit in. The wheel bearings are pressed in and can be a royal PITA to remove. With that I would rather get the bearing replaced before putting the new spindle in since it would do me absolutely no good to put this replacement part in only to have the wheel bearing go bad a month later. So yep, whether I get the bearing pressing tool set or pay a shop to replace the bearing in the spindle, either way it goes the bearing will be replaced before putting the spindle in.
Unlike other engines Chrysler engines valve train consists of a tube with rocker arms that has to be installed as one unit. Pushrods have to be put in their place and the whole unit bolted down with even tightening of the bolts to ensure that the rocker arm tube doesn't twist or bend where it might snap. This wasn't that big of a deal but even then I still rotated the engine to make sure all of the valves opened and closed properly to ensure that nothing was binding anywhere so there would be no catastrophic failures upon starting.
After getting the rockers installed, the distributor was installed since I was able to see where the #1 cylinder was at to make sure it was at TDC (top dead center) prior to putting the unit in so I can make sure I have the rotor turned where it needed to be when the distributor is set down to coincide with firing the #1 cylinder after reaching TDC. With the distributor in the exhaust manifolds and alternator went on. I also started prepping the engine to hoist up to reinstall in the engine bay. 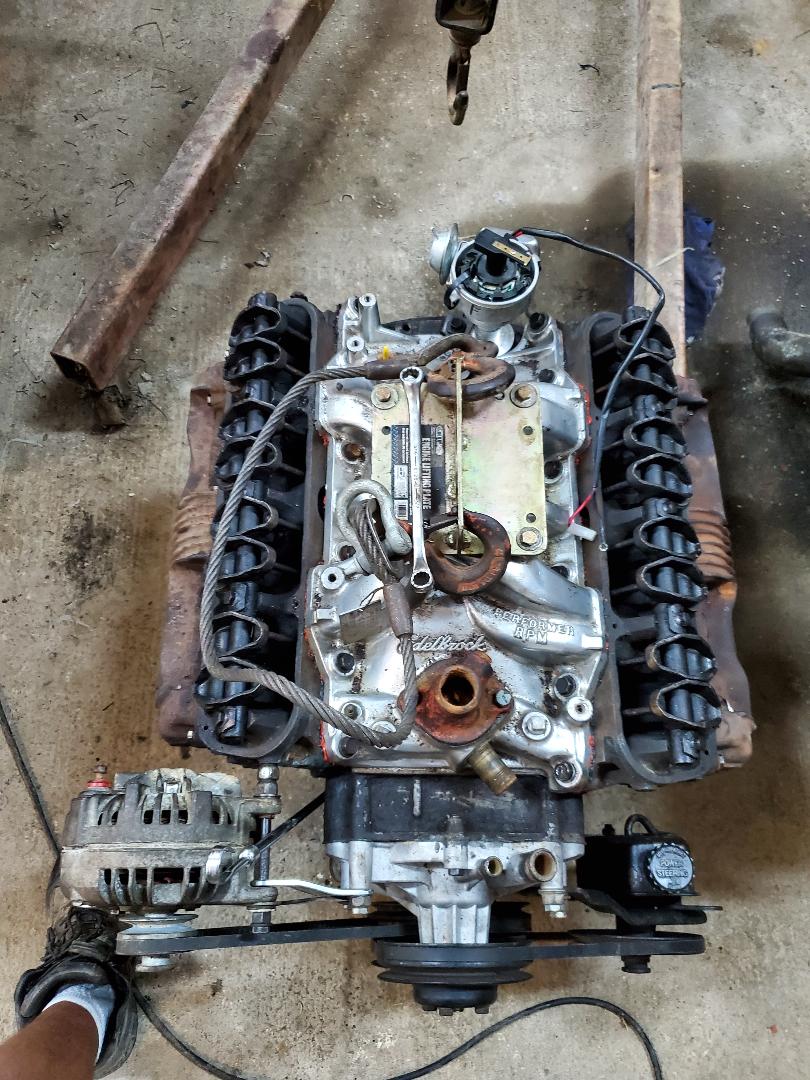
Engine with rocker arm assemblies in place and crane staged over it with carb plate secured, ready for lifting.
Valve covers and distributor cap and wires all in place on engine.
After hoisting the engine up and working it into position and of course fighting to get things lined up enough for the engine to pop into place against the transmission, I was able to get the mounts hooked up where I could disconnect the crane to let the engine sit. With the crane out of the way I was able to start hooking everything up to get the engine completed so I can try to start it. 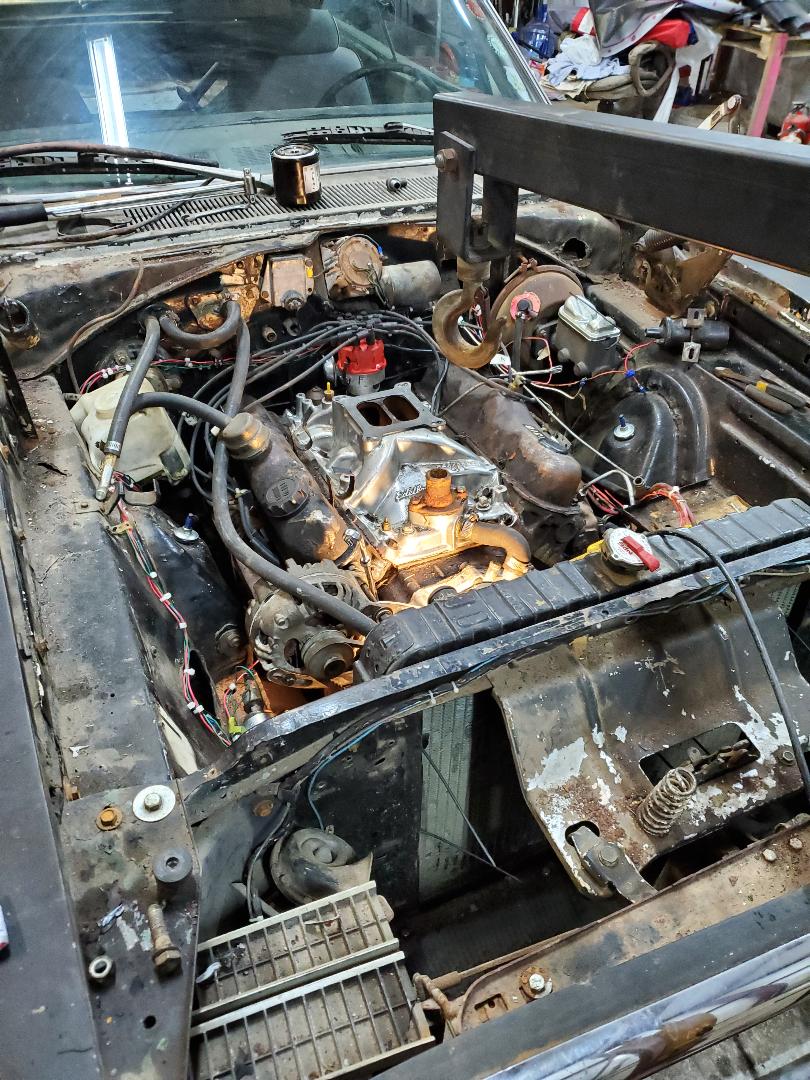
Engine lowered back into engine bay with crane still in foreground.

Engine secured and hooked up and ready to go.
With everything hooked back up I was able to go ahead and get the hood on as well. Of course that is the last thing before trying to start since the car has fuel and everything else prior to the removal of the engine was left untouched. Plus its just a nice gesture to let me know that I am closer to finally getting this thing rolling one again. 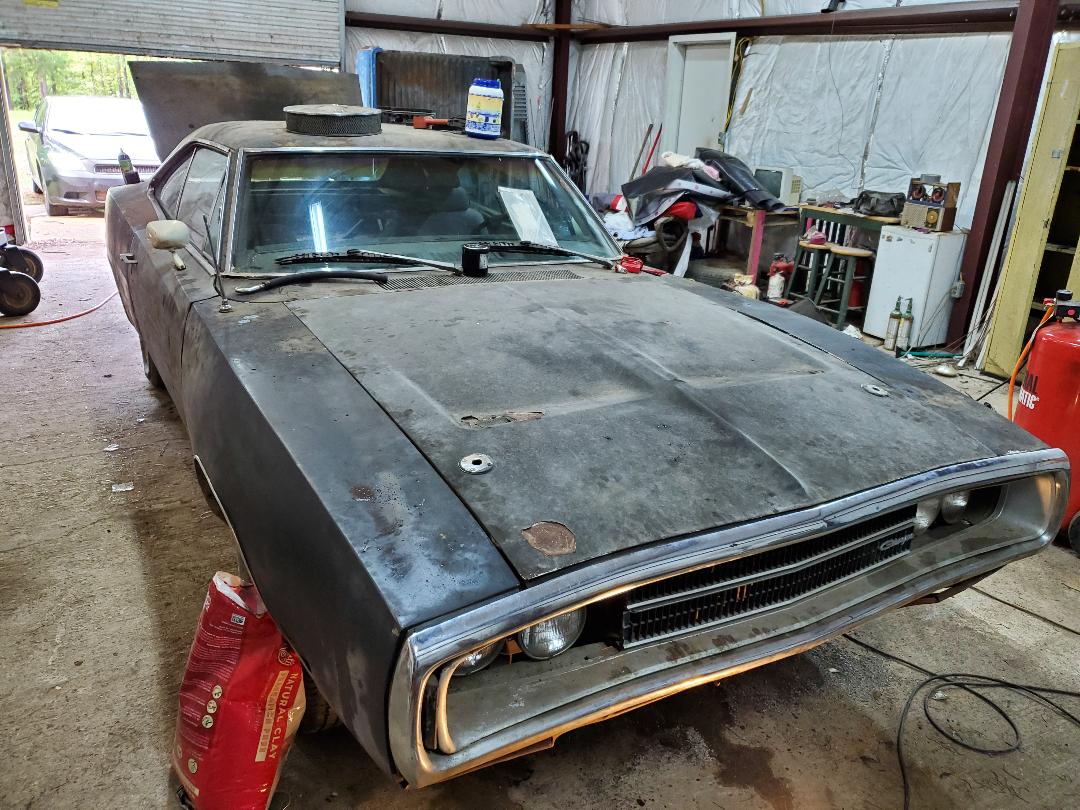
Hood put back on car.
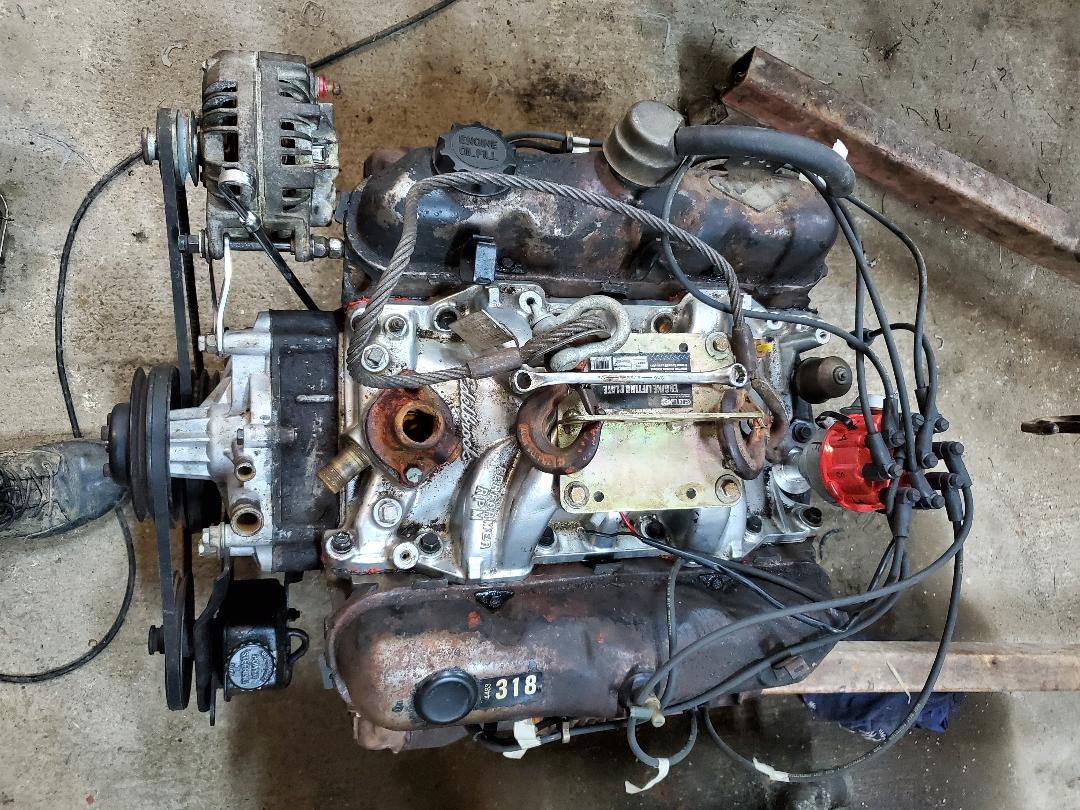
At this point I got the parts that I needed I began the reassembly of the 318 after fixing the issue with the fried piston. First thing was of course putting the head gaskets back on and reinstalling the heads. The main thing though was the old heads had a couple of things going on with them that I didn't like. The first thing was one of the heads had studs on either end of the unit that were used for helping in mounting the exhaust manifolds and their gaskets. Now while this was a good idea, when there is a small amount of space from the ends of the heads to the shock towers, having to pull the exhaust manifold a couple of inches away from the head in order to remove them can be problematic. The 2nd problem was the other head has two broken bolts in the unit, on the ends, where there would've been studs. While I did have the exhaust manifold mounted, it did not fully seal like it needed to. To fix this I had an extra set of heads that I picked up with the other 318 that I was going to use. These heads didn't have any broken bolts or anything wrong like that. Only thing was I had to swap out the rocker arm assemblies from the old heads to these. 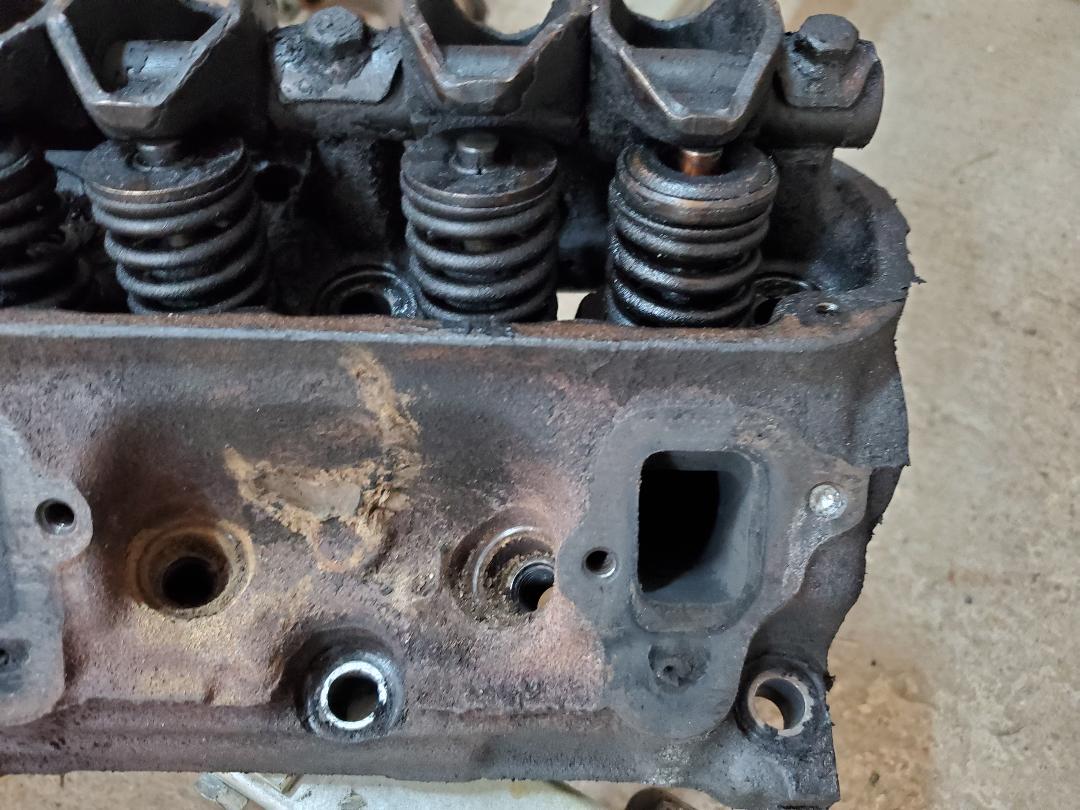 Old cylinder head with broken bolt/stud on right side of exhaust port. 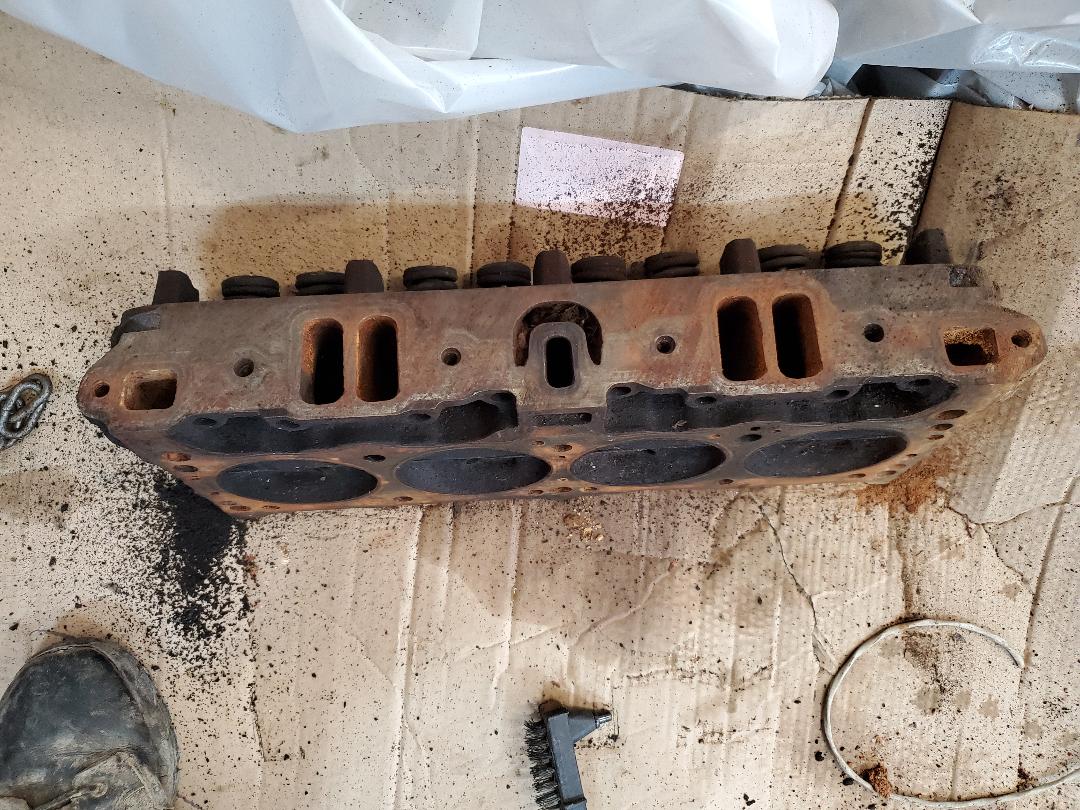 "New" cylinder head after cleaning up surfaces prior to installation. Of course the installation of the head is pretty straightforward. There are studs on the top of the block that act as guides for lining up the gasket prior to setting down the head. After setting down the gaskets I carefully set down the heads on top, making sure to get them lined up before releasing my grip on the units. These things are pretty heavy so I can't just drop them on top of the gaskets without risking damage to the units. 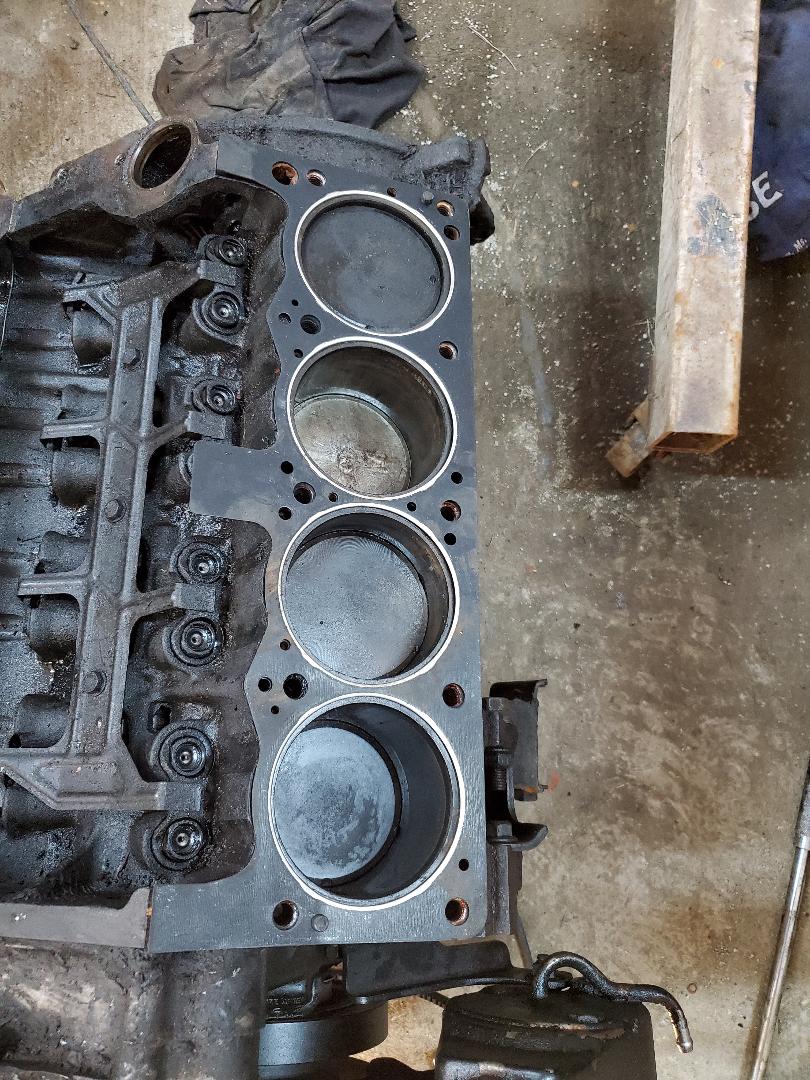 Head gasket set down on top of block, the guide peg is noticeable at the bottom of the gasket in the pic. After setting down the head there is putting the bolts in. Of course the bolts don't get torqued down right away, nor are they fully tightened. It may be necessary to move the head, ever so slightly, to help the holes line up for the bolts to pass through the head into the block. Only after getting all the bolts screwed down do I snug them up then go through a torque sequence involving torqueing the bolts in the center and working my way out, going back and forth until I'm at the outer bolts. I torque the bolts to half the amount determined then come back with a final torqueing to the factory specs. 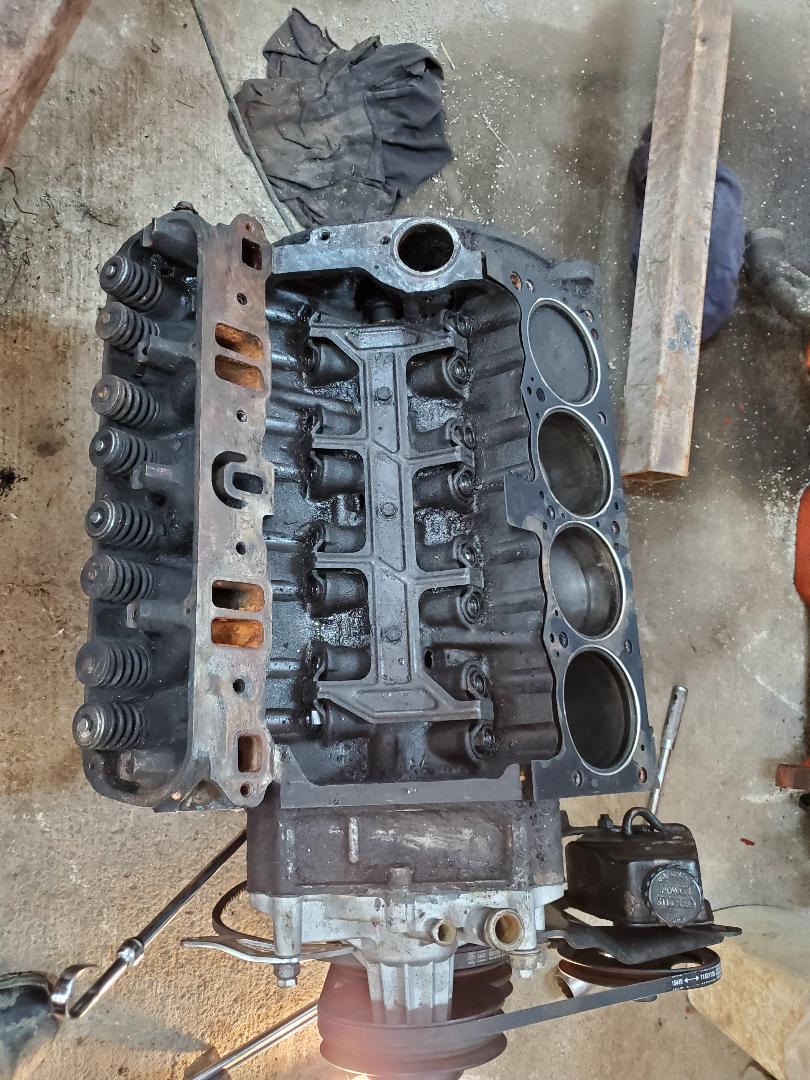 Torqueing down right side cylinder head. With the right side cylinder head secured and torqued down I moved on to the left side, repeating everything. Once that head was down, it was time to install the rocker arm assembly and the push rods. 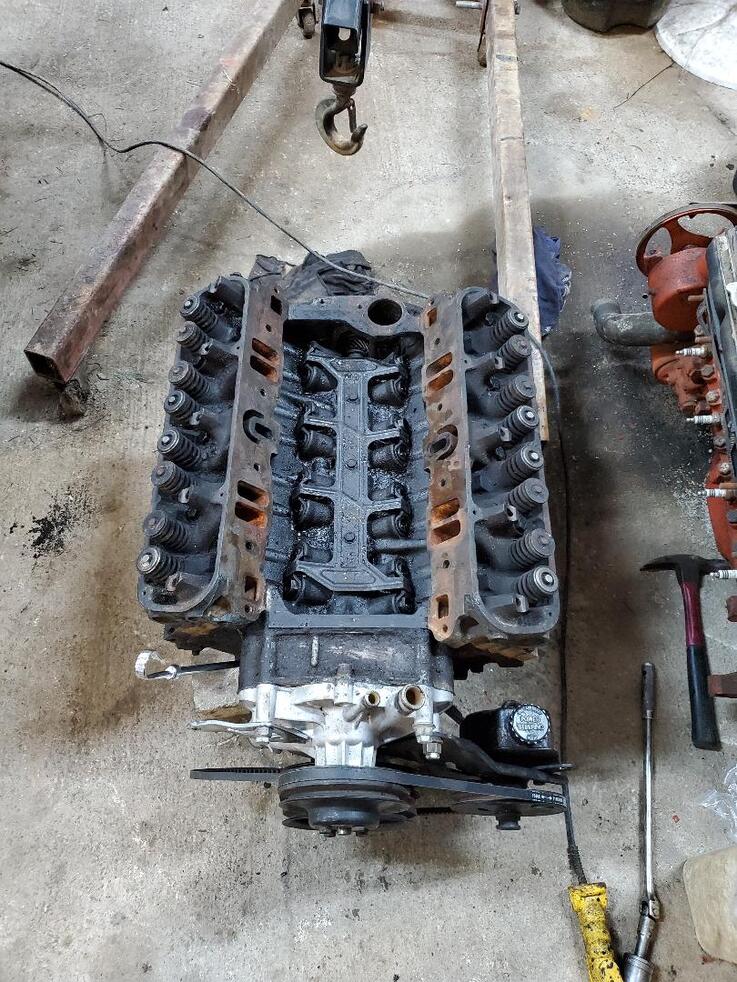 Engine block with heads bolted down. Engine block with heads bolted down. Unlike other brands, Chrysler engines have the rocker arms secured on a tube that is bolted down as one whole unit. The push rods must be installed and the torqueing down of the bolts holding the rocker assembly must be done gradually so there isn't unnecessary bending tension of the tube/rod that holds the rocker arms, possibly causing it to snap. I don't know the tensile strength of this rod so I'm not going to take a chance with these otherwise hard to replace components.
After having sunk a couple of posts in the ground along the new fence line at the back of the garden, I had enough material to be able to get a good start to that run of fence. I had more posts, some 2x4's and pickets with which to get some complete spans of fence put up. Just like with the chicken yard fence I only used two 2x4's for each section of fence versus three like the completed panels are made with. Since this length of fence is mainly for dividing the garden from the rest of the yard, it doesn't necessarily need to be super strong.
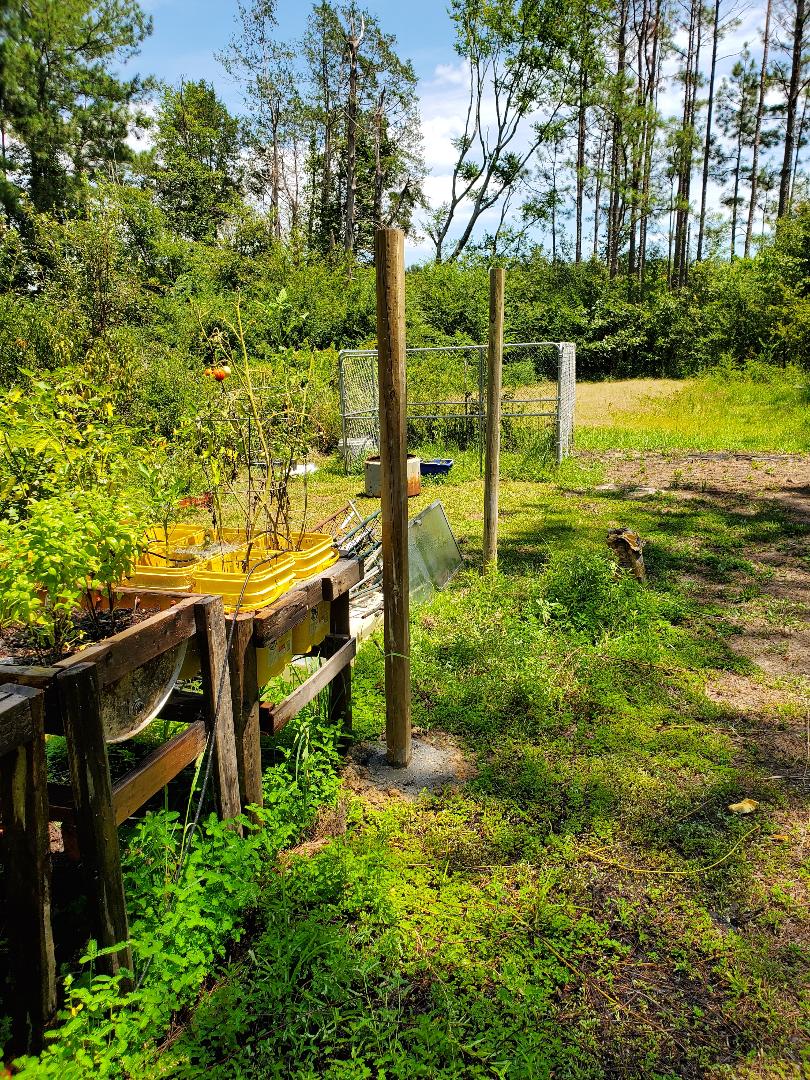
Posts sunk in ground along new fence line for back of garden, ready to take 2x4's and pickets.
With three posts in the ground I was able to nail up the four boards necessary to cover the two spans of fence to accommodate the amount of pickets I had available. Of course with the nail guns all of this was done pretty fast so I had two spans of fence up in no time. Next on the list was sinking the rest of the posts that I had. 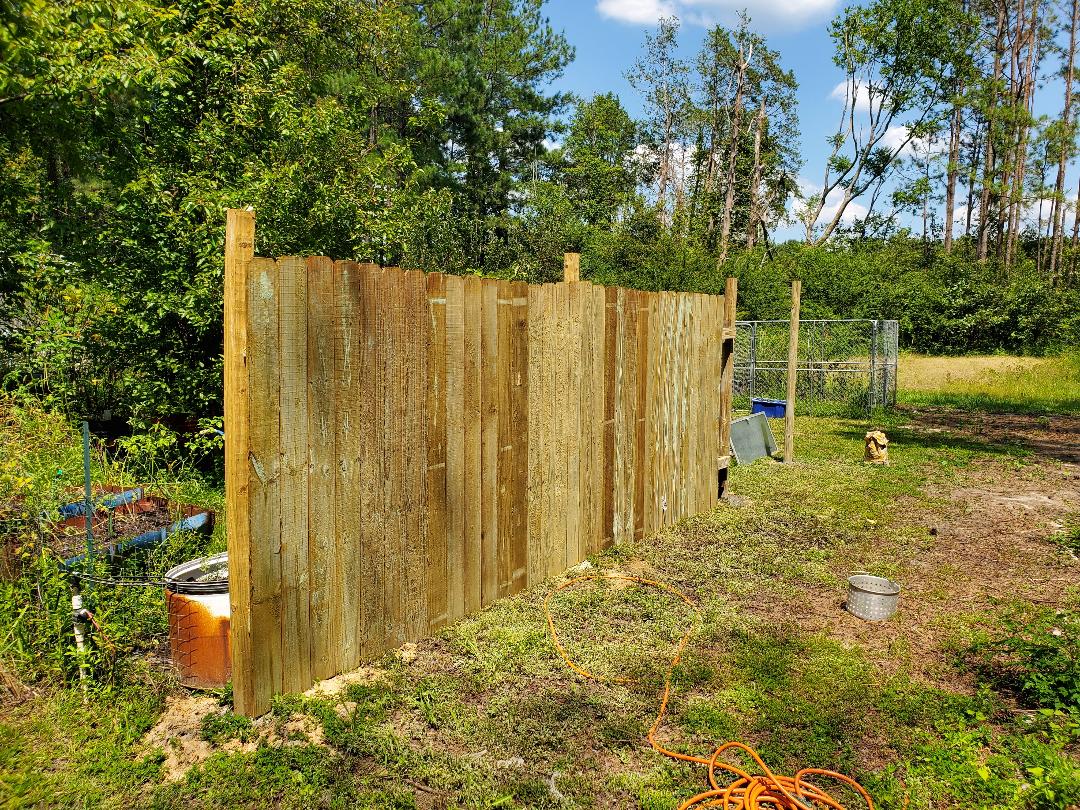
Two spans of fence covered with pickets, hiding the line of raised beds and drums along this section.
With the auger, digging the holes for the posts went super fast. I measured out the points at 8ft intervals marking them prior to drilling them. After drilling them I set the posts in the ground. Just like with past posts, instead of mixing concrete for the holes I just poured the dry concrete around the posts then soaked the powder with water, filling in with more dry concrete as needed until the hole was over the level of the ground. 
Setting posts in the freshly dug holes, note bag of concrete at the ready for pouring around posts.

Posts set in the ground with concrete, standing tall, ready for future 2x4's and pickets.
After sinking the remaining posts in the ground I did more measuring and found that I only needed two more posts to complete the length of fencing at the back of the garden. At the end of the run there will be a short run of about 4ft from one post to the end post that will make up the perimeter fence. Since the fence is put up with just boards and pickets piece by piece, this will be acceptable, just measuring the length and cutting the 2x4's shorter to cover that smaller span. Once this length of fence is done I will move back over where the chicken yard fence and that corner where the two trucks are at and start sinking posts there so I can start hanging full panels to make up the perimeter fence. Things are surely coming together pretty fast.
After getting our hands on some more fencing materials I was able to go ahead and deal the final blow to the run of fence dividing the chicken yard from the rest of the area. Leaving only a small opening that needs to be set up to serve as a back door opening, the chicken yard fence will be done once I put up the pickets on the last span of fence. Of course with the nail gun I made quick work of the section of fence, getting the boards up. After looking at how things were and mentally planning out how I want to do the posts and other sections in order to fully close in the chicken yard, I decided to change directions. 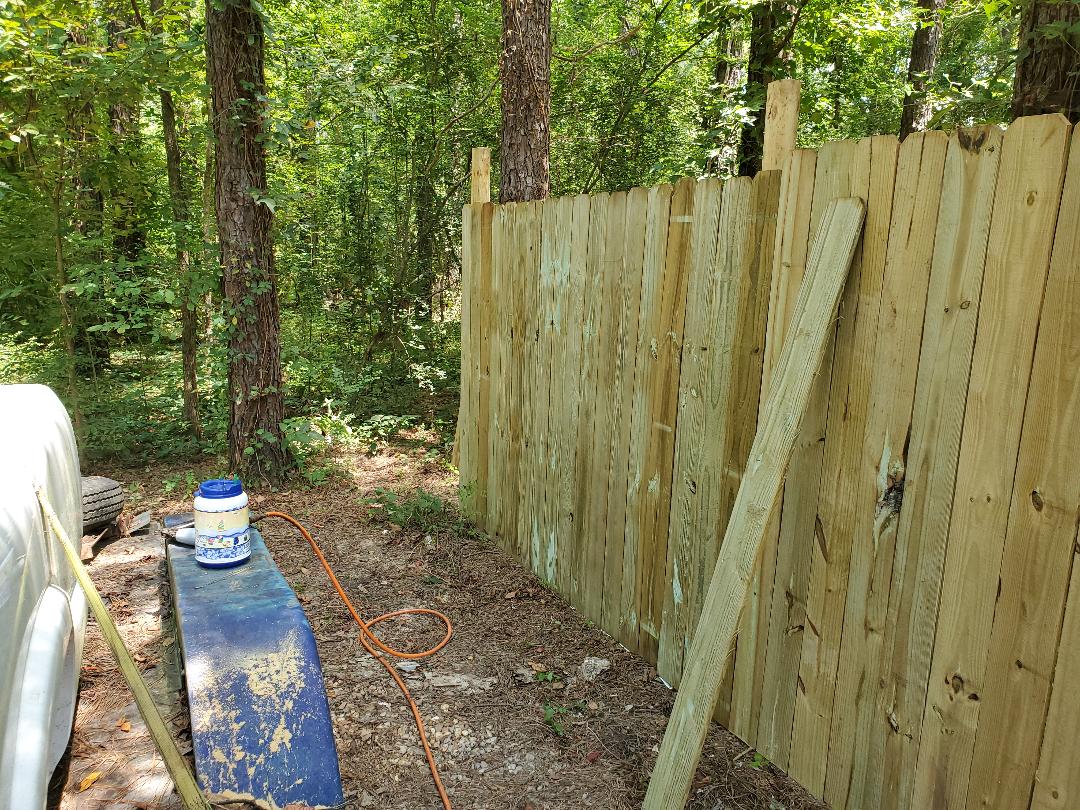 Chicken yard fence fully lined with pickets save the small area at the back for the gate. The F150 was staged in the midway between the house and the garden, effectively blocking the way to the rest of the yard and the way around the back to where the old dog yard area is. This is especially problematic since for one, the ground around where the truck sat was muddy and sloppy, making it hard to maneuver the zero turn mower through in order to cut the rest of the grounds all the way around to the old dog yard area. Second, with the truck in the way I couldn't even do anything like use one of the trucks to pull a trailer around the back to the old dog yard area in order to stage anything like another camper trailer or what not. Since I will be sinking posts along the driveway at some point in the near future in order to put up that line of fence, I figured that I could move the F150 to the spot right next to where I parked the F250 running parallel to the driveway. Even though as it stands the F150 and F250 would be dead in the middle of the yard, once the fence is up along the driveway, the truck will not be visible from the driveway and that section of yard will be like a channel that has fence on the driveway side as well as the chicken yard side. I ended up using the F250 to pull the F150 from its resting area in the midway. I pulled the truck up into the main driveway pointing up away from where I wanted it to go because my next move was going to be to push the truck a little and let it roll down into its resting place. We had to work to get it moving since the stretch of ground wasn't at a sharp grade. Once I did get the truck rolling I was able to steer it and let it roll right where I wanted it. At least the brakes worked so I didn't have to gradually push it to keep it from running away from me into a tree. 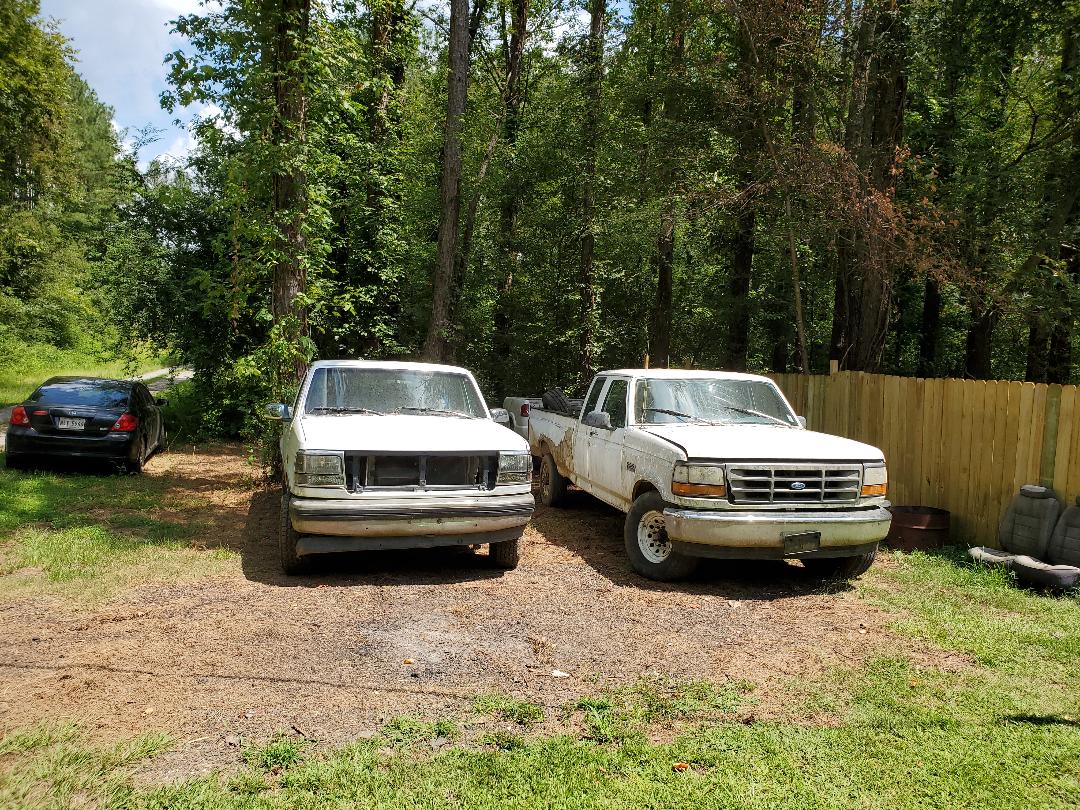 F trucks parked next to each other in their new spot. Fence line will run along the right side of the F150 (the truck w/o the grille). With the F150 moved the midway was cleared as intended. The ground directly underneath the truck was pretty dry and solid while the ground on either side was mushy as hell. Of course the hope is that the constant sun and heat will eventually dry up the ground enough to allow all of it to be easily traversed even by a full size vehicle. Even though there is chain link fencing in the mud, I will probably end up having to drop gravel or crushed asphalt onto the grounds as intended anyway to cover all of this shit up. That's always been my plan, covering damn near every square foot of ground with gravel, having no grass to deal with anywhere within the fenced in confines of my compound. 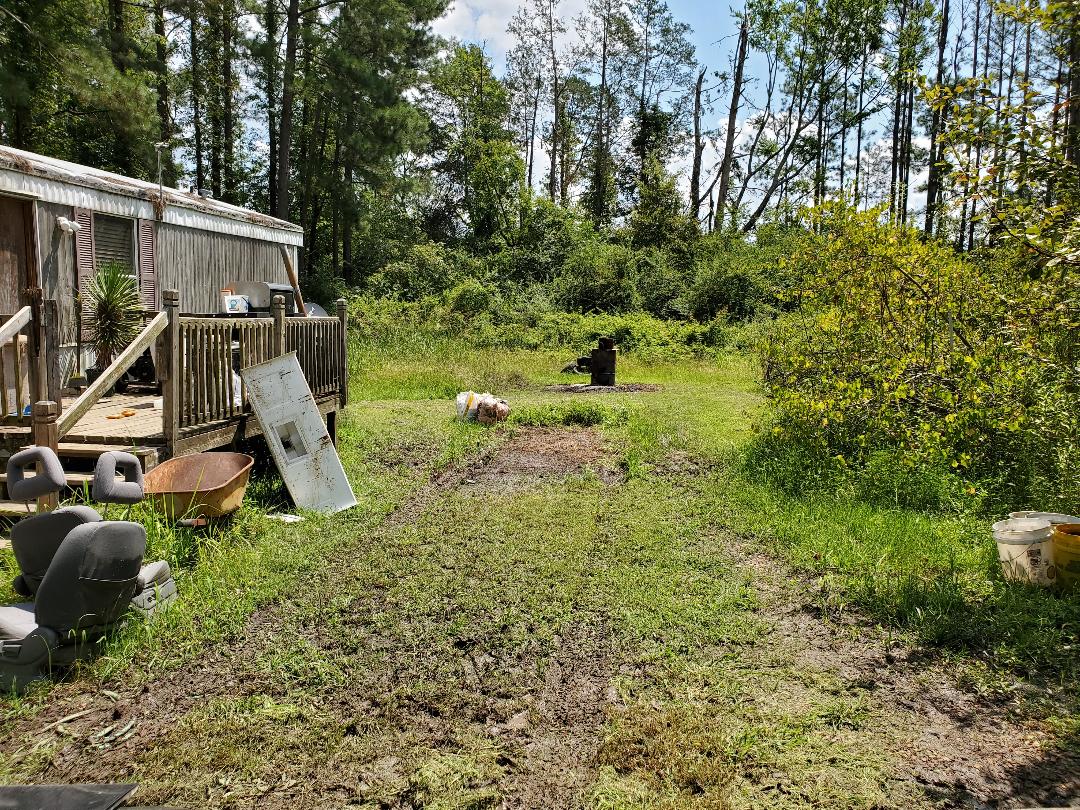 With the midway cleared, even with the mud, there is enough area that is somewhat tolerable where the zero turn can be walked across without getting stuck. Again, I will probably end up having to put shit down to at least fill in the mud and act like concrete to some degree. Hell pouring concrete into the mud may even be an option to help soak up the excess water.
For a while now it's been difficult finding the building materials for setting up wood fences. Not sure why but the cheap pressure treated pickets as well as the whole finished panels are few and far between. Because of this we end up grabbing what we can when its available since we don't know when it may become available. Well sometimes you have to take what you can get and in this case, what we was able to get was some 8ft pickets instead of the normal 6ft pickets we typically get.
Even though these boards were a little more than the standard 6ft boards, they were available. So the ole lady ended up grabbing 15 of these boards just to get a little farther on the completion of the chicken yard fence. I figured that I would trim these boards down to the 6ft length needed and save the cut offs for other miscellaneous uses later on. 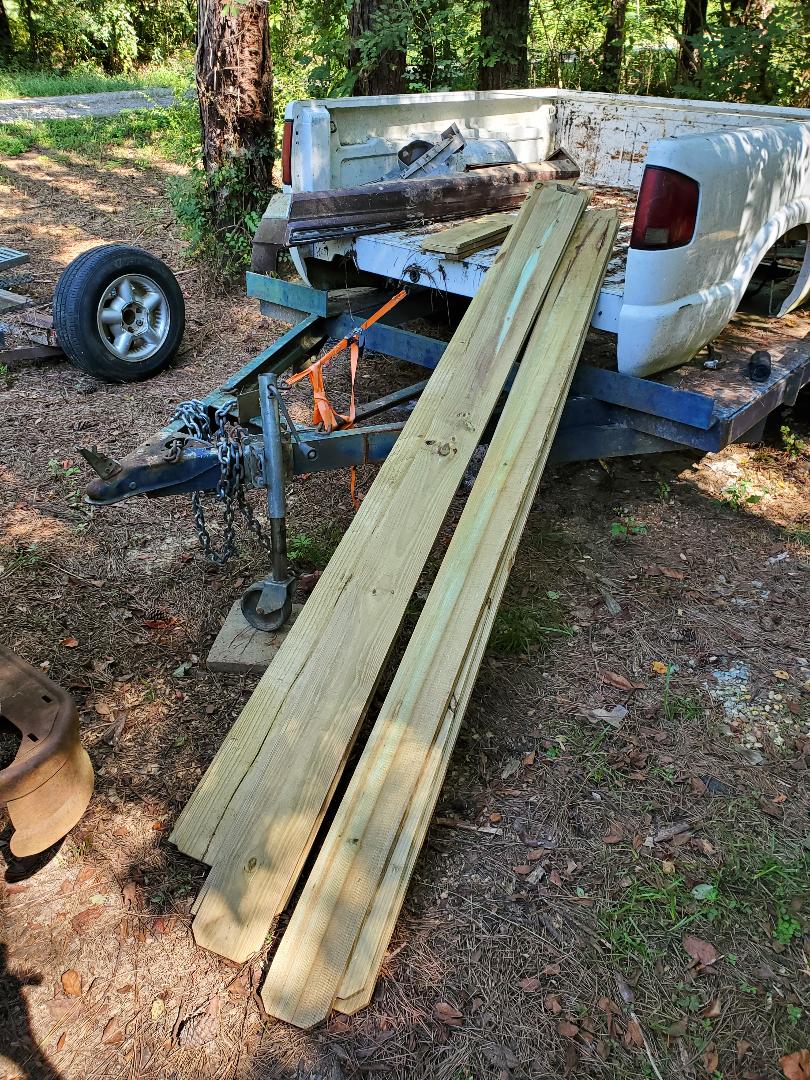
8ft pickets stacked up ready for cutting.
After taking the measurement of one board I was able to follow suit in getting the other boards cut. I would stack four boards with one marked then cut through all of the boards simultaneously. When I tacked up the boards I would take the last board and use it as a reference to cut the next set of boards. After repeating this process I managed to get all the boards cut and tacked up, finishing more of the chicken yard fence. After this I'm left with a little better than one more span of fence to cover up with pickets. 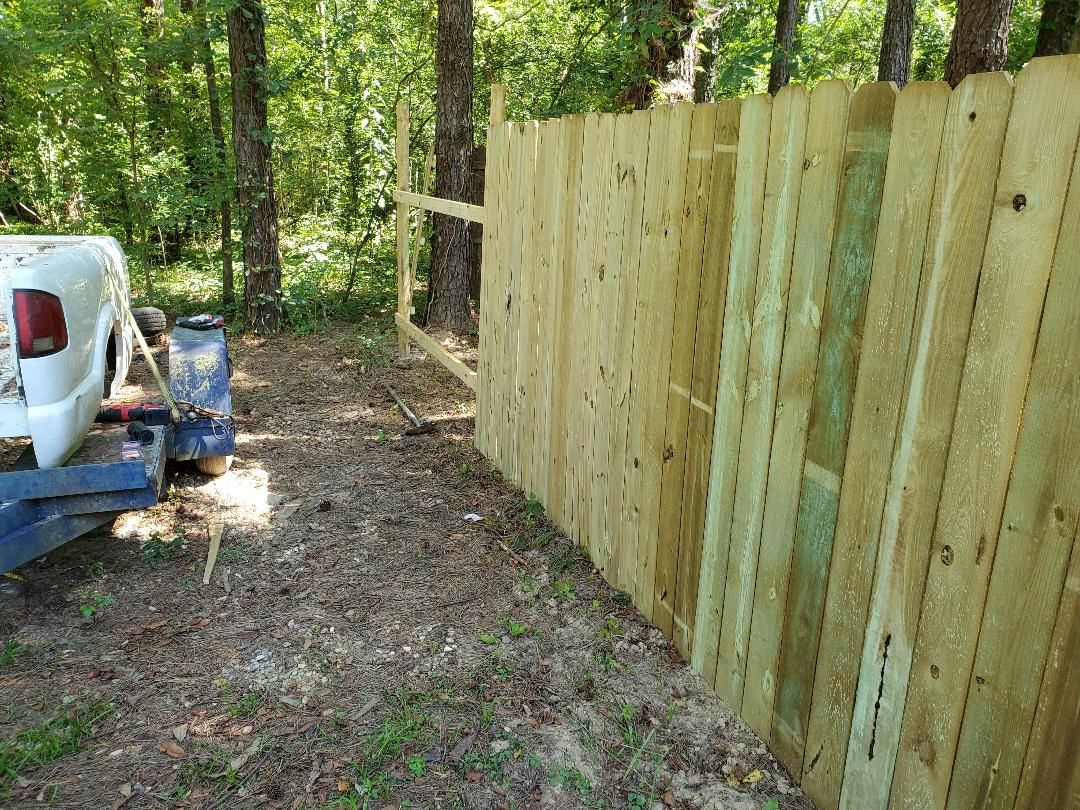
More of the chicken yard fence done, showing the last span of fence still exposed.
As stated before it wasn't total loss. The extra boards cut from the pickets are about 5/8" thick and 6" wide. I can put these boards to use in a number of ways for different projects around here. Of course I will be doing my best to use these boards as I don't want them just laying around like a lot of the other salvage materials. Also being pressure treated at least this wood will last better than regular thin boards. 
Cut boards from 8ft pickets stacked and ready to be stored with other salvage wood.
After riding the Scion for over half the year, putting a good amount of miles on it with the ole lady's food delivery work, the alternator finally gave up the ghost. With around 140k on the clock, the alternator did have a good run before giving out. It started with it going out for a minute then working again. On this car it doesn't have an ammeter or voltmeter, just an idiot light. Well the idiot light came on to indicate the system wasn't charging. When the light went off I figured that things might be ok, at least enough to get us back to the house. After making a stop to pick up some shit we needed for another project, starting the car up had the idiot light come back on again. The volt meter in the Bluetooth radio relay for patching a phone into the car's stereo showed the voltage at 11.2 volts. The shit wasn't charging again. This time the light didn't go off and the voltage stayed around that range. We're running off the battery now. Well by the time we made it back to the house the voltage was around 10.6v, so yep, alternator's dead and the battery held out plenty long enough to get us back to the house. After doing some checking with another voltmeter just to confirm what was coming from the alternator and what the battery was putting out it pretty much was official that the alternator was dead. The problem here was the idea that a replacement unit at auto zone was over $200. Replacement units on ebay were under $100. Of course we needed this shit ASAP otherwise the ole lady would have to use the Tracker and I would be forced to have to press another standby vehicle into service, quite possibly the S10 since its the only other vehicle with working AC. The solution was to order the ebay alternator, then go pick up a used alternator from a local salvage yard to throw on the following night. Of course we had to use the Tracker for the day but at least I didn't have to go back to my job until the following day. We did manage to get a used alternator that was removed for us and ready for us to pick up for $70. It wasn't the low pull a part junk yard price that's around $35-$40, but then again I didn't have to go hunt the yard for an exact alternator and remove it myself in the heat. In the meantime I had pulled the old alternator from the Scion since they did want a core return. Plus by pulling the old unit off, half the job was done. 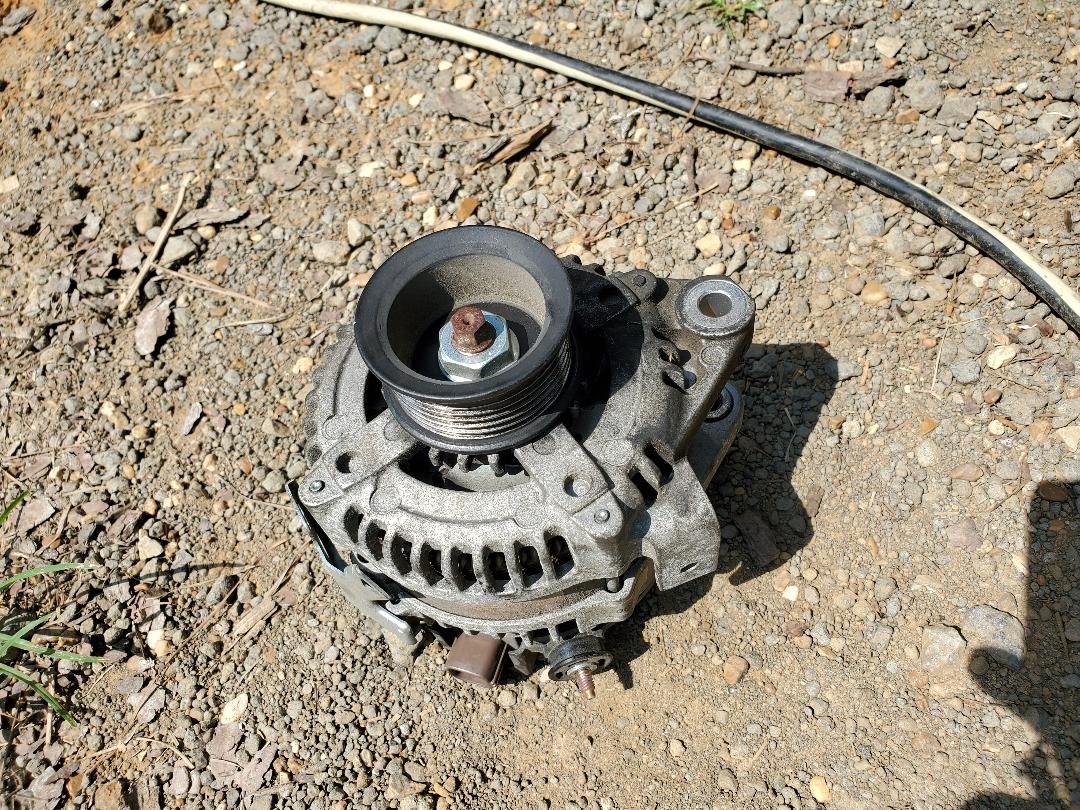 Old Scion alternator removed from engine bay. The removal wasn't too horrifying. Just a couple of wires that had to be removed, then a large bolt at the top of the alternator, then a smaller bolt at the bottom. The bottom bolt was a little bit of a PITA to get to but once I got a tool situated in there I was able to manipulate my hands to work the ratchet to loosen the bolt and get it out. The tensioner pulley needed a cheater bar to put enough leverage on it to hold it and allow me to pull the belt free prior to removal of the alternator. But with those few things done the unit came out, no problem. 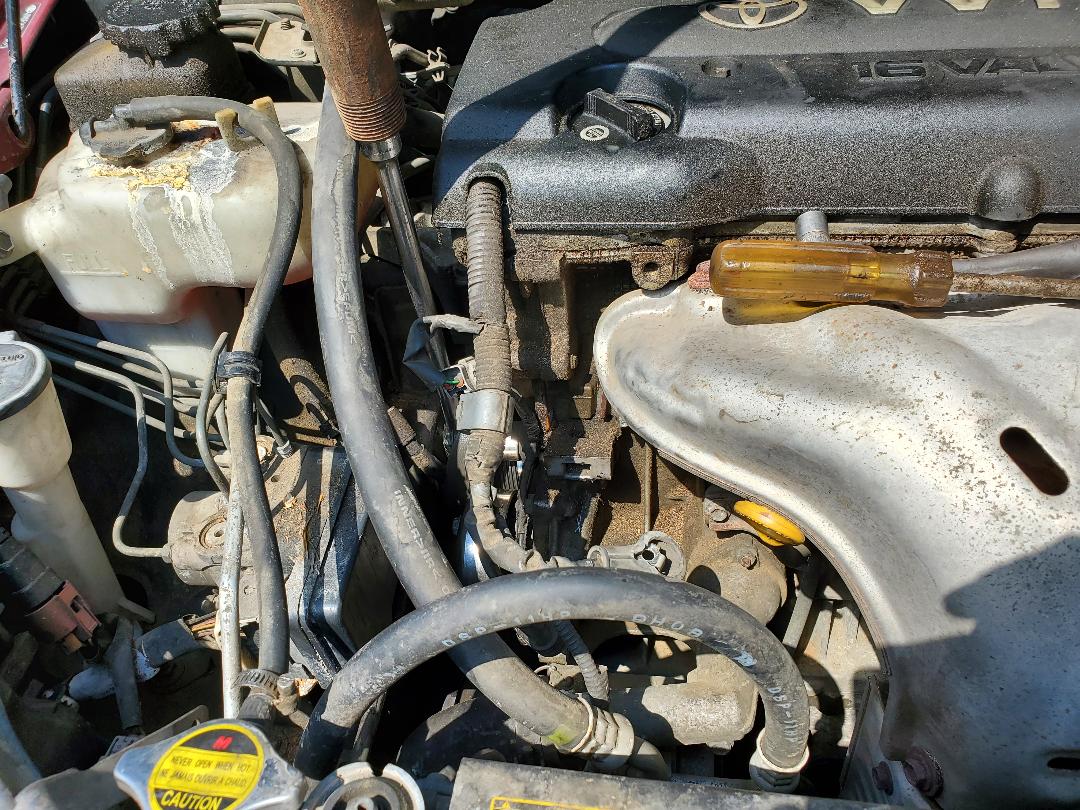 Scion engine bay sans alternator. Once we got the replacement salvage yard alternator in hand, soon as we got back to the house that night I donned my head light and grabbed my tools and went to work. Doing everything in reverse I managed to get the unit in place, again, having a couple issues with that small bolt at the bottom of the alternator. Trying to get the bolt in place was problematic for a second but I did get it in. The other area where I had a problem was getting the belt back on, mainly because I had to keep the belt in place on the other pulleys while applying tension on the breaker bar on the tensioner pulley. I did manage to finally get the belt slipped around the alternator pulley and after securing the plugs I was able to fire up the car. Of course I had to put the battery charger on the battery prior to even leaving the house earlier in the day to ensure that the battery would be topped off and ready to go. 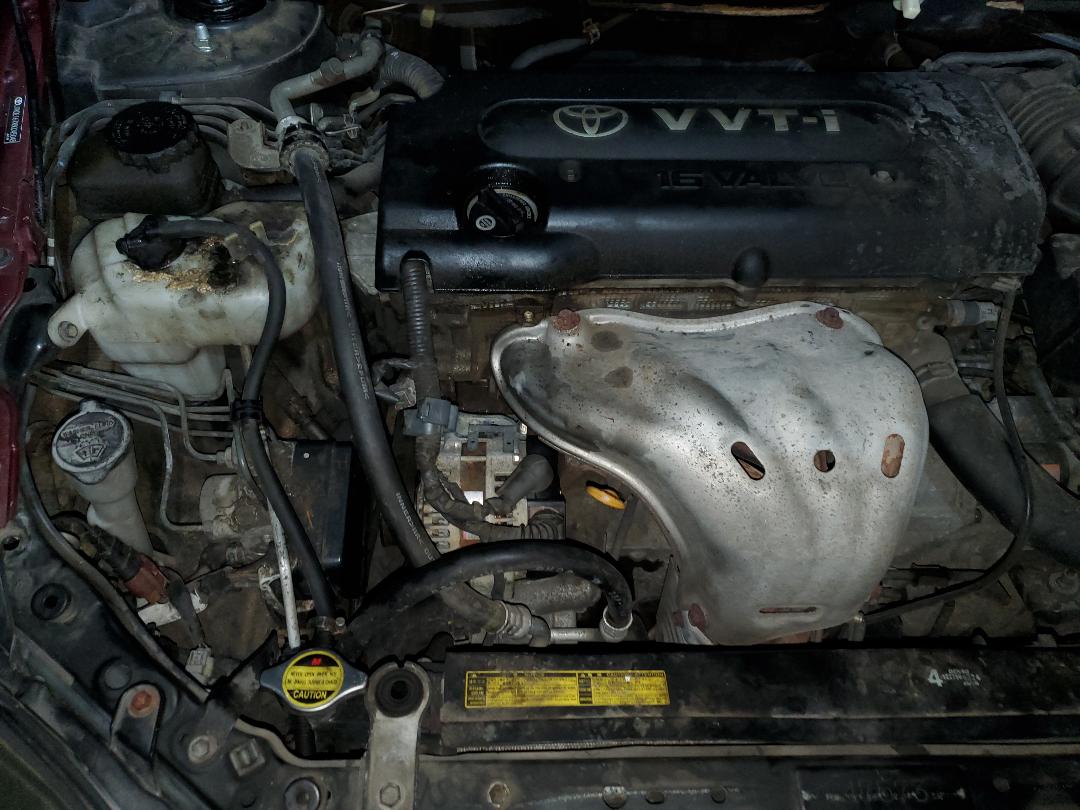 Scion engine with new used alternator installed. 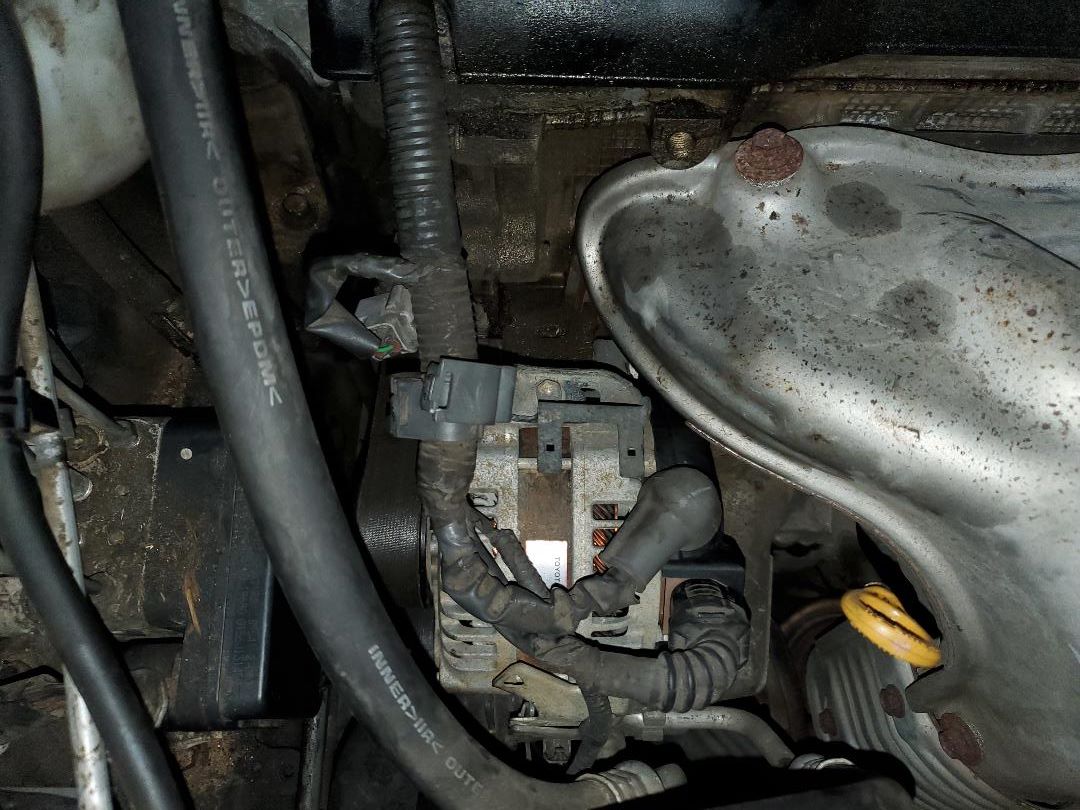 Closeup of alternator in place. Closeup of alternator in place. After cranking the car up we immediately seen that the idiot light never came on. After putting the voltmeter on the battery I found that the voltage was 13.9 volts, showing that the alternator was indeed cranking out voltage to the battery. With the success o this little job, the ole lady gets her car back and I don't have to either use a vehicle with no AC or be pressed to put the one vehicle that does into service despite its having its own problems. At least we do have a replacement alternator that is new in box, or more accurately, newly refurbished, in box, coming from the ebay order. This unit will go on the shelf in the storage trailer so in case this old alternator craps out I can immediately swap it out without any interruption in the use of the car. |
