|
Of course there is never a dull moment around here, especially when it comes to the cars. This time the Monte Carlo wants to take the stage. One day while driving to the job the horn gave a chirp. I messed with the horn button a little to see if it was just sticking or maybe shifted over where it might've made contact for just a brief second. This of course didn't last because as I further made my way down the road the horn started sounding off for even longer periods of time.
Now the bearing in the steering column is messed up so the steering wheel does have some wobble to it and it seemed like the wobble was contributing to the horn acting goofy. It was kind of embarrassing because I could only imagine that people around me were wondering what the hell is wrong with this fucker in this old car always blowing his horn at whoever. Finally it got to the point where the damned horn kept blowing and I had to pull over to address this shit. I tried working the steering wheel and had no luck, I tried to see if I could identify the fuse for the horn and had no real luck with that either, the identifying markings were faded, couldn't see them at all. I popped the hood to see if I could unplug the wires from the horn as well. At the spur of the moment I couldn't tell how the plug was made to disconnected so after getting tired of hearing the horn blaring and knowing that I had to hit the road to get to the job I yanked the wire out from the horns in a fit of rage. I made it to the job without incident and planned to look at this issue the next day. The first thing I did was fix the broken wires to the horn. After putting my eyes on the plug under more rational circumstances I was able to see how the plug comes loose so I can disconnect the plug easily if necessary. Of course I had to leave the horn unplugged while I figure out what was up with the horn button. Upon pulling apart the steering wheel cap I did find that the nut that holds the wheel was loose, so for all intents the only thing keeping the steering wheel solid on the steering shaft was the three bolts that hold the conductor plate to the column through the steering wheel. These bolts allow the conductor plate to move freely enough to be pressed against the surface of the steering column to complete the circuit to activate the horn. I went ahead and tightened the nut up then reseated everything in the steering wheel/horn button setup so it would hopefully work. One of the things I did look at while hooking things back up was the single wire that went to that plate I mentioned before. I noticed moving it around a certain way completed the circuit. I had to reseat that wire good enough that it wouldn't move excessively and make the horn go off yet again. I hooked everything back up and so far, so good, the button moved like it needed to and returned to its standby position. I even moved the wheel and couldn't make the horn activate so maybe this crap is fixed, maybe.... NOPE! After the next day I made it about 3/4 of the way to the job and the damned thing started chirping on me yet again. More than likely that one wire I was farting around with before is shifting excessively and shorting on metal making the horn go off. Rather than fuck around again I ended up pulling over and this time because I knew how to unplug the horn I was able to do that quickly and be back on the road with no issues. The only thing I hate about this is the idea that I'm caught between a couple of decisions. One is to go bootleg or cheesy or whatever term you may use to describe the half assed shit we tend to do to make something work on the fly, and hook up an external horn button somewhere and just wire things up like that and say fuck the horn button in the steering wheel. The second option is to repair everything in the steering column, that includes the shitty shaft bearing and try to see if any of the other stuff that pertains to the horn button setup may need replacing. I would really love to just fix everything correctly but as we all know time and money issues can have us needing to get something done but unable to do it the right way in a timely manner so we end up going the shitty route, just to get something working again and usually we end up just leaving it that way because face it, no matter how shitty something looks, its the results that matter most when it comes to this improvisation thing. Only time will tell but in the meantime, the MC has no damned horn.... 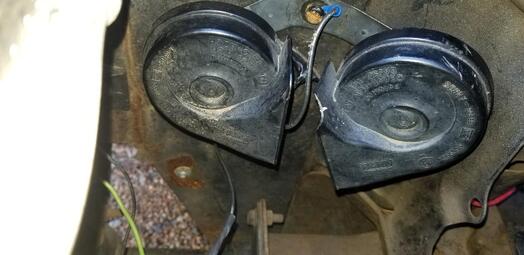
Pair of horns puled from junkyard car, mounted in MC.
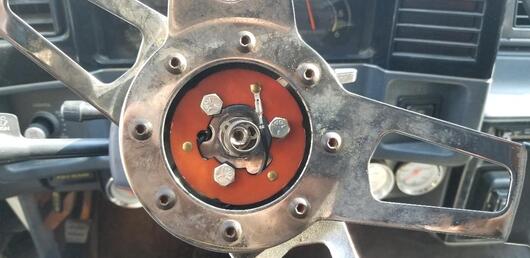
Aftermarket steering wheel and horn button assembly.
0 Comments
When it comes to old cars, one has to pretty much accept the idea that they will be constantly working on them. It don't matter if its an old school/classic muscle car or other collector car or just a late model POS modern car with beau coup miles, work will need to be done. After playing around with the old Monte Carlo's brakes, now its time to revisit an ongoing issue with the ole lady's Chevy Tracker that she uses for doing her GrubHub food delivery.
This vehicle has had some issues that have plagued us since we had the car/truck. Since one of the catalytic converters was known to be shitty the thing has tripped a couple of codes pertaining to "catalyst efficiency" or some shit like that, and the system running lean, which is triggering the ECU to fire the fuel injectors more to compensate, even though it really isn't necessary, which is really creating a rich condition now. Well with the excess driving that is being done with this vehicle, what was an otherwise innocuous problem is now becoming more pronounced. At times the vehicle will be hard to start, especially when warm and when it does start it'll idle shitty for a minute, sometimes stalling, and requiring restarting and playing with the throttle to get things to level off to a point where it can be driven. Anyhoo, I had to look at that problem, plus the problem with a leaky coolant tube that runs along the driver's side of the cylinder head. The tube enters into a port on the back of the engine where an O-ring separates the tube from the engine. This O-ring is what's leaking. Also, prior to this, I had to change out the camshaft sensor again since the truck was doing the shit where it would be hard to start when warm. In the past we would find ourselves either letting the engine cool a few minutes prior to trying to start again, or even pouring water over the cam sensor to cool it down rapidly. A preventative measure we would use was to open the hood every time the vehicle is stopped to let the heat escape from the engine bay. It worked, for the most part. We did change the cam sensor sometimes later in the summer but as a preventative measure, we invoked the warranty and just got another cam sensor to see if that would help remedy the problem. It really didn't. At the same time we got the cam sensor we went ahead and matched up a replacement O-ring using a spare coolant tube that I had in storage from a junkyard Tracker. The next day I pulled the coolant tube from the truck and replaced the O-ring, no sweat, I wasn't really worried about this shit. In the meantime I decided to do a few little things to see if I can fix this problem. The first thing was pull the mass air flow sensor and clean it out using some leftover spray cleaner I had. The second thing I did was use some leftover throttle body cleaner and spray that out and wipe some of the carbon buildup I noticed. I also had to tie the battery to the side as its excessive movement caused the wire I had plugged to a relay for the cooling fan to keep getting pulled out. I also did a test with the fuel pressure regulator. In order to test this component the only thing I could do was pull the vacuum line from the regulator itself and see what kind of reaction the engine gave. When I did this, the only reaction I got was a slight change from the vacuum leak that I created from pulling the line. Of course I managed to work a technique where I immediately covered the vacuum line right after pulling it from the regulator. When I did this, I didn't get any change to the engine RPM or any other effects. This pretty much tells me the regulator is non functional. Now I really don't know whether its failed open or closed. If its failed open it would explain the hard starts with regard to the fuel system being depressurized and needing to build up pressure from the fuel pump prior to starting. This would be done by turning the key on a few seconds before cranking. If the regulator is failed closed then that would mean that the pressure in the fuel rails will be able to reach higher than normal levels which can cause a rich condition in the system, which does not seem to be the case. Either way the regulator needs to be replaced. Unfortunately the damned thing is expensive at auto zone, over $100. Back to the good ole standby, ebay. They have one for around $15, which I will be getting soon enough. In the meantime I found one more thing I wanted to look at, the idle air solenoid. I pulled this thing off and cleaned it out due to the carbon that was on the surface of the plunger. I oiled it up as well just to hopefully help it along in its movements so hopefully any symptoms may be lessened. 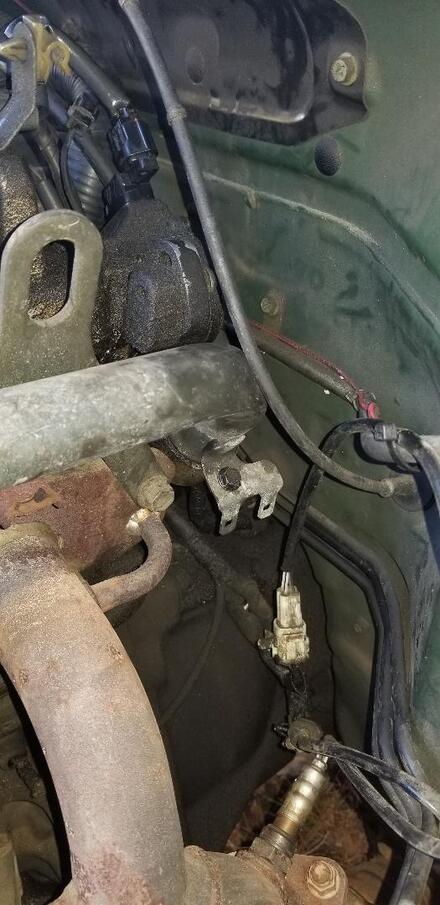
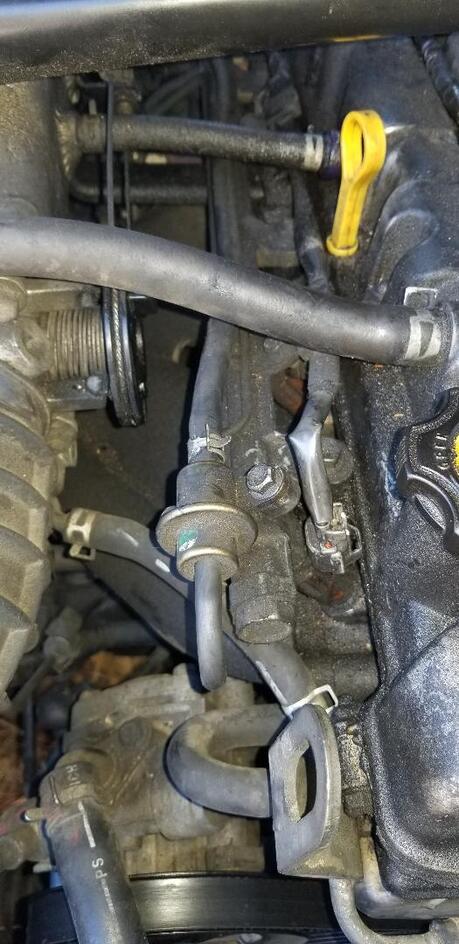
Cooling tube where it enters port to cylinder head. Note cam sensor near top of pic, black component with plug in top. Also note bare exhaust manifold.
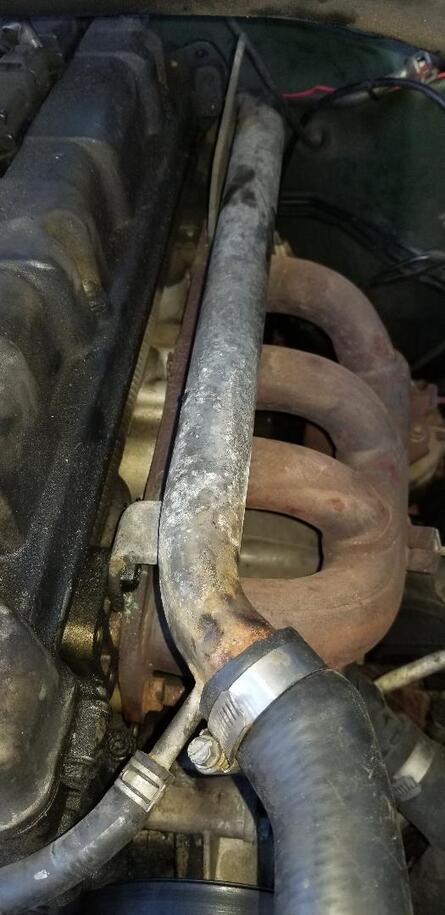
Coolant tube running length of cylinder head. Again note bare exhaust manifold.
Fuel pressure regulator. Note how fuel rail does not have a shrader valve for hooking up a pressure gauge to test fuel rail pressure.
On a final note I did decide to pull the heat shield that was over the exhaust manifold with the intent on allowing the exhaust pipes to dissipate their heat a lot faster during shut down. Even when the engine is running, hopefully with the shield off the heat that is built up will be able to vent off a lot faster than with it on. Hopefully this simple step will help things out under the hood when it comes to excess heat in general. Another thing that I wanted to vent about was the lack of a shrader valve on the fuel rail for allowing the hook up of a pressure testing gauge to test fuel rail pressure, another dumbass engineering design on this powerplant? Makes no damned sense. Only thing I can say is if there is a possibility of a greater fuel system issue rearing its ugly head, we won't know about it until it fully happens, fuel pumps, injectors, etc, until the shit fails we won't know since we can't hook up a pressure gauge to test operating pressures to make a more educated guess on how this system is operating. There were some online suggestions talking about drilling and tapping out a fitting to allow for the addition of a shrader valve for pressure testing. This idea doesn't appeal to me since I don't feel like removing what amounts to a vital component of a vital system and damaging it where I can't even operate the vehicle since the fuel system is out of play. I guess we'll just have to see what happens next with this truck.
On the first day that I drove the Monte Carlo things went pretty good, supposedly. The brakes for all intents worked, there wasn't much of a spongy pedal but I knew there was still an issue. I kinda figured that the proportioning valve was still compromised and was keeping the rear brakes from functioning properly but since the brakes were functioning better, I figured I could pretty much ignore it until I got around to just getting another proportioning valve and just fixing everything completely at a later date. That was all good and well until the 2nd day of driving when I parked at the job. I noticed there was a little more sponginess in the brake pedal than it was yesterday. I also noticed that there was a small puddle right under where the proportioning valve was, or so I thought. After doing an inspection I found that the puddle was in line with the master cylinder. After pumping the pedal I noticed oil oozing from around the fitting holding the brake line in the chamber for the rear brakes on the master cylinder. I tried reseating the tube without completely removing the fitting but still had no luck. After bringing out a friend to check it out with me and give me a second opinion we took the line off and he was able to see the reverse flare inside the port was not perfectly conical, like it was distorted at some point prior to it being rebuilt. I wasn't sure how I was going to handle this as the MC was ordered online and having to return a defective unit is always a pain in the ass that ends up costing me money and would end up putting me in a position where I could've just ordered the shit from auto zone, paid a little more and if it was defective I'd have been able to just take it back without spending extra money.  Monte Carlo master cylinder, new but flawed. Another problem that has been surfacing on and off was the operation of the ole lady's vehicle, our beater Chevy Tracker. When this thing seems to get hot it'll have problems starting, sometimes needing a little more cranking than usual before it finally fires up. Sometimes leaving the key on a few seconds prior to cranking helps, sometimes just sitting and trying it again does the trick. One day when the ole lady came by the job to drop off some food I noticed some water leaking from under the engine bay. After doing a fast inspection we found that the water was coming from this tube that connects to a short port on the back of the engine that bridges the span between the radiator hose and the port for the water to enter the engine. It's a stupid design because the port could've been on the front of the engine block or cylinder head. Anyway, the tube has a large rubber o-ring that helps seal the tube where it pushes into the entry tube for the engine itself. The leak wasn't bad enough that the vehicle couldn't be used like normal, it was just a matter of keeping an eye on the temp level and periodically checking to see if the rad was low after the engine cooled down a bit. Also when I did some more troubleshooting on the vehicle at the house I came to realize just how aggravating this vehicle was. I couldn't even check the fuel pressure to see if there was a discrepancy i the fuel system since the engineers of the vehicle couldn't even work a damn shrader valve into the damn fuel rail to hook up a pressure tester. The only thing that I've got to work on is a couple of codes that I've pretty much had since we had the vehicle, one saying the system is reporting a lean condition and the catalytic converter is not operating properly. I can see the lean condition being caused by a bad cat that's been blown out enough to let extra exhaust to flow than usual. I guess for all intents I need to be making plans to replace the cats (yes there's two) before I can really continue troublehsooting.  Coolant tube on Tracker running along cylinder head.  Port on back of cylinder head where coolant port plugs into and seals via O-ring.
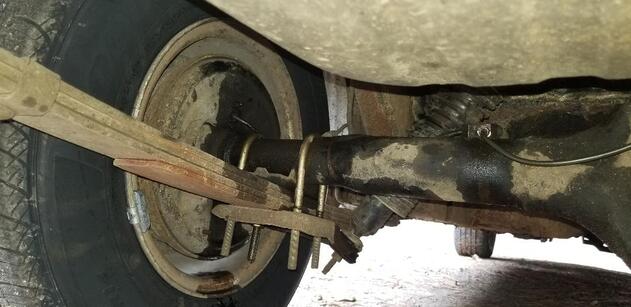
Seems like as of lately I'm having "wonderful" luck with brakes, this time the Mustang is the next contestant. When I went to go check out a problem on a friends car I had checked out the exhaust pipe on the Mustang as I had heard some clunking while driving which sounded like the exhaust pipe was bouncing around. When I moved the pipe my suspicions were correct when the pipe moved excessively, indicating that a hanger came loose. After looking underneath, I did see a hanger that was right behind the muffler had slipped free from its U-bolt, plus the nuts on the exhaust manifold flange had also loosened up enough to have the pipe wobbling at that point as well.
Well after checking out the friend's car I decided I better address this exhaust shit since I can't have the damned pipe come loose while driving as that would be a complete disaster. I was able to loosen up the U-bolt and slide it into a better position where I can re-hook the hanger and secure the U-bolt so the hanger can do its job of supporting the rear half of the exhaust system. While under there though I did notice something, the brake line going from the junction block to the rear wheel was damaged. Apparently the exhaust pipe where it bends up and over the rear axle assembly was able to move close enough to smash against the brake line, crushing it to the point of making it leak over time with every brake pump. Since the front brakes were still good I was able to drive where I needed to go and still make it back home with no real issues. I did tighten up the two nuts on the exhaust flange afterward by the way. Once home I dragged out my bag of metal tubing, fittings and tools so I can make a new line to replace this bad brake line. This wasn't too hard as I had the cutter and flaring tools in the bag along with a bulk roll of tubing and I recycled the fittings from the old brake line. I made the length of brake line complete with the flares and fittings in place. I had to do some grinding to even out the flare as it wasn't perfectly even since the flare tool rarely allows for even pressure to open the tip of the tubing up. Once that was done I put the brake line in place and secured everything. I even used a couple of zip ties to double secure the line so it wouldn't shift around where it may get hit by the exhaust pipe again. 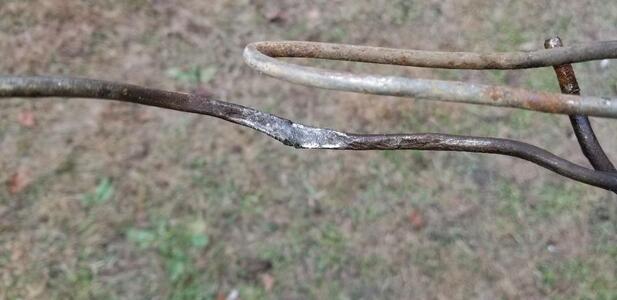
Old brake line, note pinched/crushed section.
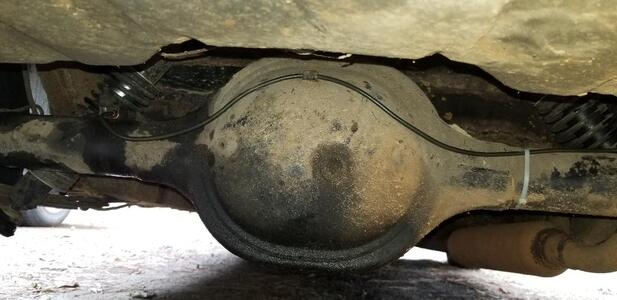
Mustang rear end, note new brake line snaking over top of rear end and wire tie to right holding it in place.
The next thing was bleeding the brakes. This time I tried to use the vacuum pump again since the bleeder valves on the wheel cylinders stuck out plenty far enough to put the hose onto them from the vac pump. I went ahead and topped off the master cylinder and went ahead to pull vacuum and draw the air from the lines. I did pull fluid and air through the pump but for some reason it just seemed like I kept getting air. I tried both sides and really it was the same thing. I had to top off the master cylinder a couple more times before I went back to the old fashioned way with the ole lady in the car pumping the brake pedal while I opened the bleeder on each wheel. It was then that I saw why I couldn't stop getting air from the wheel cylinders. Every time the brake pedal was pumped a little air and brake fluid squirted from around the fitting holding the brake line into the wheel cylinder. The brake line that I put on wasn't seated perfectly on the cone inside the port where the flared end of the tube rests against it. Because of the slightly "off" flaring made by the rather crude flare tool set, I couldn't get the flare to sit right unless I moved the tube a little bit off to allow the flare to rest snugly against the cone inside the wheel cylinder port. After re-seating the flared end of the brake line and tightening the fitting up I was finally able to get fluid coming out when I went to bleed the system. After topping off the master cylinder I was finally able to get the rear brakes bled and working seemingly fine, all things considered. Even though this is a manual brake setup, it did seem like the pedal was firm enough for things to work properly. Every time I pumped the pedal I did hear the rear brakes moving so that's definitely a good sign. I should be alright now on the Mustang and its brakes. 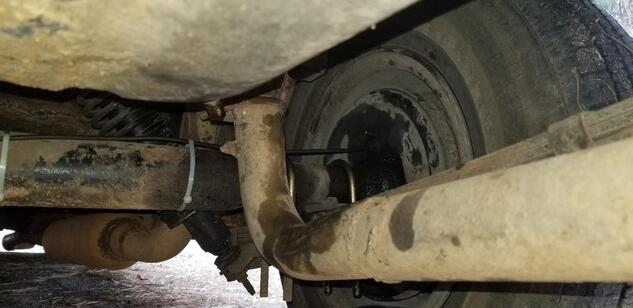
Shot of right rear brake setup, note all the oil residue from the attempts at bleeding. Note exhaust pipe going over area, right where the old brake line was damaged.
Left rear brake assembly, also covered in brake fluid residue from attempts at bleeding.
Mustang master cylinder, all metal, no plastic.
Well the new master cylinder came in for the Monte Carlo and one thing I can at least say about this part of the whole brake situation with the car is that replacing the MC in the MC was pretty easy. Two nuts hold the MC in and there's only two brake lines going to the unit. The thing really took about 5 minutes to put in. I did gravity bleed the MC first though. Instead of doing the MC bleeding procedure (This is where you attach short brake line runs from the ports on the MC that bend right back up and into the oil chambers so when you pump the brake pedal it pushes the air out into the reservoir of brake oil while sucking oil back into the line), I just filled the reservoir with brake oil then let the oil work its way down into and through the MC via gravity before putting the brake lines onto the unit. This way I can say that the MC is full of oil and not air.
I immediately tried to bleed the rear brakes, but had no luck. The whole system did the same shit where no oil made its way back to the rear brakes when I pumped the brake pedal. At this point I had already determined that the proportioning valve was bad. Well in reality it wasn't "bad" in the traditional sense of the word. After having done some research just prior to putting the MC on, I did find out on these older GM cars the proportioning valve actually has a fail safe built in where if brake pressure is lost on one side of the system (in our case the rear), when you push the brake pedal, the regular pressure on the working side will actually push a valve inside the PV that will seal the oil passages to the bad side, causing the brake light warning switch to be activated (which is built in the proportioning valve) and stop oil flow to the bad side of the system so the working side will continue to have decent enough pressure to allow for the car to be safely driven to a shop. Online forums did state that it was possible to reset this tripped valve inside the PV in order to restore operation to the PV, but there were mixed reviews on that action. Some say when the shit trips the whole unit needs to be replaced, others say the thing can be reset by removing the switch and manually moving the valve back into the standby position inside the proportioning valve. Either way this goes it will require removal of the PV, which also requires removal of the brake lines going to the unit and this in and of itself is not an easy feat due to the tight quarters made by the exhaust header and just the physical location of the PV in the first place. This is where I actually thought about getting an adjustable PV and just bypassing the stock unit altogether. I did do some more troubleshooting and other tests, like letting brake oil gravity feed to the rear brake bleeders, which in this case, did not work either since the system seemed to still be blocked. What is bizarre though is the idea that when this problem first manifested itself in the form of broken wheel cylinders, oil made its way to the rear hard, I pretty much emptied the MC with one good driving session. That's what really fucked me up because I can understand the fail safe in the PV stopping oil flow but the exact opposite had happened at first but now no oil is getting to the rear. I did a little more troubleshooting just to see if I could make something happen before I take any other measures that would cost me more time and money. 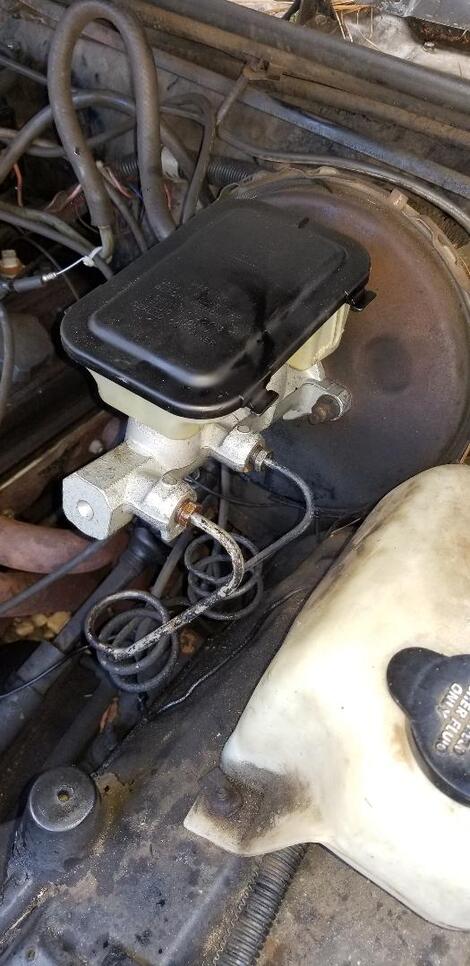
New master cylinder installed in place.
I ended up using my vacuum pump to try and pull fluid down to the wheel cylinders, trying to see if maybe I can force the check valve in the PV to reset or at least open up to let fluid down. After several attempts to pull fluid down that also included pulling lines loose from multiple points along the rear brake circuit, I managed to get oil to finally make its way down to the rear wheels. Once I got oil coming out of the wheels and a brake pedal that was somewhat fair I buttoned up everything so I can try to see how things work during the next driving session with the car. We will see how things go.
While the brake debacle has still not been fully resolved on the Monte Carlo there were a couple of other things that I wanted to address on the car. One is the idea that the engine had been acting like it was out of time again. When I go to start the thing warm it'll sometimes want to give that binding crank, which happens when the thing is either too retarded or advanced in timing. Also when the engine decelerates from a high rpm, such as when driving down the highway, I'll hear some sputtering from the exhaust. Now I did learn later on that when there are major exhaust leaks downstream yet still close to the engine, this sputtering will happen, from what I'm guessing is air making its way into the exhaust system right at the hot zones in the exhaust near the headers where unburned gases still present can ignite, versus a more or less sealed exhaust system where these conditions are not created.
Barring that. I had to mess with the timing on this car once before for the same reasons. When I advanced the timing the engine actually ran better, for a good while. Then when I had started driving the thing again after the summer weather started to go away, I suddenly started getting this same goofy engine action once again. When I checked the dizzy I found that the thing spontaneously walked back, like the retaining bolt and clip wasn't really holding the dizzy down as tight as I thought and normal engine rotation made the whole unit walk back some. Well when I advanced the thing back where I had it and drove the car again the thing still had this same goofy attitude. I played with the timing going back and forth, until I found myself even advancing the thing up to a point where the dizzy couldn't advance anymore due to the vacuum diaphragm hitting the side of the intake manifold. It was like the thing wouldn't really respond regardless of timing. Now before you say, "didn't you use a timing light?", the answer is no because this engine, having been a fuel injected vortec variant from a 99 year truck, the timing cover did not come with a timing gauge as the engine was not intended to have its timing adjusted. Because of this, you have to time this thing by ear. The only other option at this point is to pull the distributor and reseat it and set timing from scratch. For all of you old school car guys, you already know what I'm talking about. In order to set timing on a distributor, you first pull the #1 spark plug out, then have someone bump the starter while you hold your finger over the spark plug hole on the engine. They keep bumping the starter until the piston in #1 cylinder hits top dead center (TDC) where both the intake and exhaust valves are closed and the piston is in its compression stroke. When the piston hits TDC, the pressure will push your finger off the spark plug hole. At this point you then take your distributor, sans cap, and carefully seat the body into the hole, rotating the rotor slightly to allow for the oil pump drive shaft to seat itself into the bottom of the distributor shaft and the whole unit to seat firmly on the top of the intake manifold or engine block (depending on the engine). Afterward you can install the retaining clip and bolt but don't tighten as you'll need to still turn the dizzy afterwards. You then make note of where the rotor is pointing by making a mark somewhere outside of the distributor so when you put the cap on you'll know where the rotor is pointing. Making note of rotor rotation, you try to turn the dizzy so one of the plug sockets on the cap is right on the TDC mark you made. You wanna make sure there's a somewhat equal amount of travel room on either side so you can tweak the dizzy in either direction as needed. Once you've established which plug socket is at that mark, this is your #1 cylinder/plug. You can plug the spark plug wire up to this point. Then with the firing order established you can plug the remaining wires to their respective plug sockets around the distributor cap until you cover every plug. At this point you should be able to crank the engine and the engine should either start immediately, or start and run kind of funny, until you tweak the dizzy to advance or retard the timing to which the engine will respond accordingly. In my case, I wanted to move the rotor to try and advance the thing a little bit to I can have the spot where the thing was working at set at a point that was more retarded so I can b able to advance the engine timing more. When I did get the thing seated with the rotor advanced, it was apparently too much. I ended up having to reseat the distributor again where it should've been, then retarding the thing as far as it would go then moving #1 plug over one socket so I can have that equal amount of play in either direction that I was seeking. With that I was able to get the engine to start up. I tweaked the timing until the engine ran at an idle rpm that was reasonable after the choke was opened up some. I shut the car down and cranked it again and didn't get the binding cranking that I got before, plus the engine seemed to run a little smoother. Hopefully at this point the damn thing is alright so I can move on to some other shit on this car and get this thing to a place where I can actually drive it without worrying about shit for a good while.
The next thing that I've been looking at with the Monte was removing the meat grinder cooling fan and installing an electric fan in its place, which of course, would remove the meat grinder, and it would delete the fan shroud, which takes up room at the front of the engine. When it comes to doing things like changing water pumps or fan belts, that shroud gets to be a royal pain in the ass. Not to mention the idea that you gotta be careful when the engine's running as you don't wanna lose any digits, or accidentally drop a tool and have it get flung back by the fan into some shit, or into the radiator or into your face. There are plenty of pros to deleting the belt driven fan. Another is the horsepower drop from having the engine turn this thing as its almost like a prop driven airplane engine. The few amps used to drive an electric fan does not equate to the several HP used to drive the fan from the engine, lot of resistance there.
I pulled a dual fan assembly from the 2002 Grand Prix that I'm currently parting out as this assembly matches the dimensions of the Monte's radiator. I wanted to see if it would be possible to mate this fan to the radiator with minimal modifications. I figured I'd have to make something, whether its a couple of brackets or add studs to bolt the fan assembly to the radiator support structure. Of course if it turns out that too much will have to be done then I will abort the mission to use the Grand Prix fan and look for another alternative, even if it means going for an aftermarket performance electric fan. This may very well be the case too as I do plan on getting a 3-core radiator for the car, so any modifications I make have to be relatively minimal as I can't do something permanent that will end up having to be reversed because the 3 core rad is different in some way from the stock rad. Well, I pulled the fan from the water pump hub and removed the fan shroud, both halves, so I can open up the space. The top half of the shroud also supports the radiator from the top, so if I delete the shroud, I will either have to fabricate some alternative mounting bracket for the top of the radiator, or butcher the top half of the shroud to just keep the radiator retaining section and omit the the rest of the shroud body. Anyhoo, I went to test fit the GP fan assembly in place and it appears that it would take some effort to fit the fan in place. It could be done but what will end up happening is the fan won't be flush against the back of the radiator so the air movement won't be optimized like with the shroud. Also with the brackets I'd have to make, I'd probably end up having to re-do shit when I put the 3-core rad in place as well. So now at this point I'm debating on whether to do a little more fast research to see what's out there for a fair cost when it comes to aftermarket electric fans as well as hitting the junkyards to see what's out there that might fit my application up to just putting shit back together and possibly just taking advantage of one of the combo kits I've seen on Ebay for 3-core radiators with associated cooling fans where all I have to do is just install the shit and hook everything up. We'll have to see on that part. I could do like I did on the Mustang and just omit the shroud but I will still need the top half to hold the rad down. I may just install the top half with the fan and just roll with that until I make a final decision and get the associated hardware to go along with that decision. 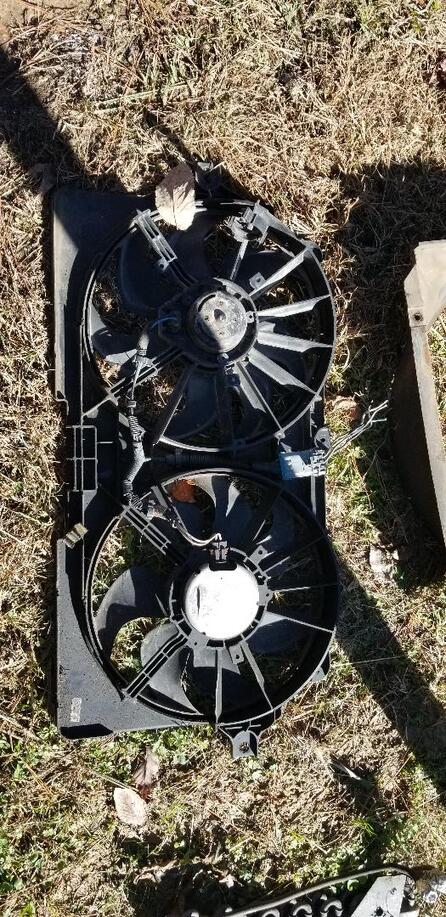
Cooling fan removed from Grand Prix, unfortunately unable to fit easily in the Monte.
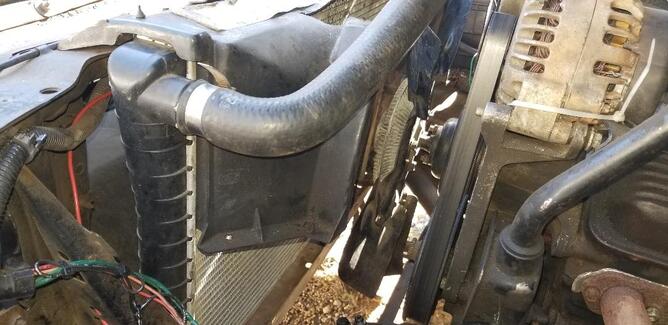
Radiator with top fan shroud in place. Note how rad is made and how it makes it difficult to really attach an electric fan to front of unit.
The last thing that I did was add a new air cleaner to the carburetor. The old air cleaner was a 14" unit that didn't clear the distributor and was actually not seated on the carburetor neck properly. I ended up ordering another aftermarket air cleaner but this time a 10" unit, which fit just right, clearing the distributor cap and seating on the carburetor neck properly. With that there's still the brake issue that has to be resolved. I ended up ordering a master cylinder to try since its the next thing in line as far as major components in the braking system that can cause the problems that I'm having. There's also the proportioning valve, but that's a component that I'm having second thoughts about replacing as its in a shitty spot and I had to do some more research on this braking system to see if there's something I'm missing. Sometimes you have a hunch about something and you do good to wait before making kneejerk decisions that will end up being a waste of time and money. 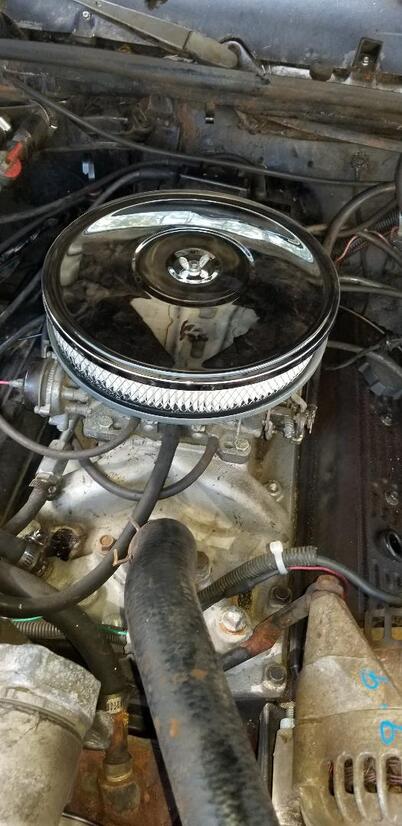
New 10" air cleaner, note top of distributor cap behind air cleaner. 14" unit was unable to fit because of height of distributor cap.
I came up with an idea that ended up killing two birds with one stone. In order to get power to the work zone between the storage trailer and back towards the fuel shed I had to use several extension cords. The other problem was the idea that in order to keep the outside dog comfortable in her dog house as the weather gets cooler, we needed to pack the house with hay so she can curl up in the hay, much like a nest. Of course it doesn't help that the idiot pulls most of the hay out after a while. I ended up thinking about an idea after talking with a friend about a past idea that he did.
My friend had a dog that he kept outside but in order to keep that dog warm he rigged up a little forced air heating setup using some dryer tubing and an off the shelf electric heater. While this idea was pretty good, it involved setting up some extra stuff to make this happen. Fast forward to the present and I had remembered a little electric heater I seen in Walmart that plugs in the wall directly, much like a night light and is thermostatically controlled. My idea was to install an outlet inside the dog house for the little heater to be plugged up to so it can heat up the dog house and do so efficiently on the count of its thermostat. Only other problem with this plan is the idea that I would've needed an outlet near the dog house. This lead me to the other part of the plan, which was to install some outlets through the area that would provide me with multiple places I can plug up power tools to work on who knows what as well as providing me with the outlet that would be needed for the dog house heater. First I needed to get some supplies. This consisted of three outdoor electrical boxes and outlet boxes to go with them. I also had to get a 100' extension cord with which to use as a donor for the power run from the outdoor breaker/meter box. Most of the other stuff I already had on hand, since as stated before, my philosophy is to use shit up that I already have before I buy any new shit. First order of business was to install the first electrical box combo right on the breaker box. Using an old knockout where I had installed a conduit for an old power run, I attached the box to the side of the breaker box using self tapping screws, right over the knockout opening. Before I did put the box up I did apply a liberal amount of caulk around the back of the box to ensure a water tight seal around the knockout opening as well as where the self tapping screws passed through the metal. With the box secured I ran some wire through and attached them to the chosen breaker, then hooked up the first outlet. I topped this off with the outdoor outlet cover portion of the box then installed the plugs in the threaded openings of the box to ensure a complete water tight seal. Next I stretched out the extension cord along the run towards the storage trailer. I plugged the cord into the outlet then wire tied the cord along the ground cable all the way to ground level. Afterwards the fun part began. Using a shovel, I cut a trench for a good 100' from the power pole by the house over to the side of the storage trailer. As I cut 5' of trench I put the cord into the trench and covered it with dirt then continued with another 5' of trench. 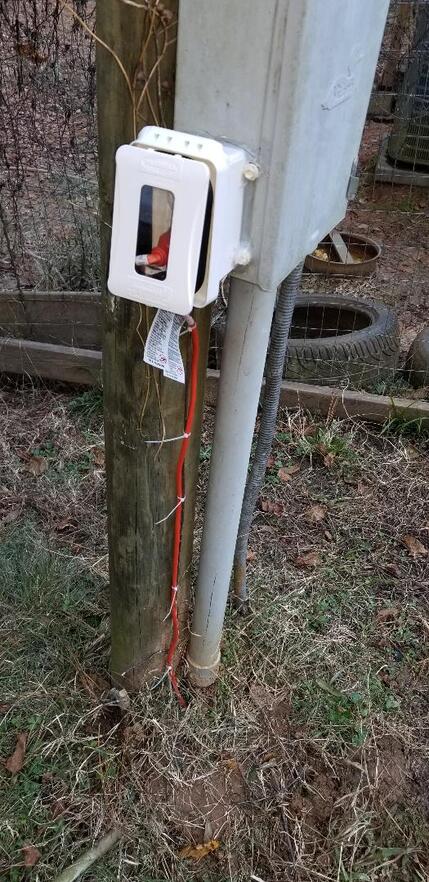
Outdoor outlet on breaker box against power pole near house. Note the wire tied extension cord going into the ground.
When I made it to the storage trailer I then went ahead and installed another electrical box and outlet cover on the side of the trailer, taking time to drill a 3/4" hole in the side first for the wires to pass through and caulking the back of the box up before using the self tapping screws to secure the box to the side of the trailer, right by the door. I disconnected the short cable/plug from the outlet box inside the trailer that I was temporarily using to plug up to in order to power the trailer. I ran some regular wires from the box inside the trailer over to the outlet in the outdoor electrical box. What I ended up doing next was really part utility and part necessity. Since the extension cord I trenched over to the trailer was just a hair short, I ended up taking that same short plug I removed from the trailer's indoor box and installed it in the outdoor box, hooked up to the same outlet. This plug was plugged to the trenched extension cord. This took care of the "too short" problem with the cord and also provided me with a means to disconnect the power from the trailer and the dog house outlet downstream if need be. I then had to take another extension cord, one that I've been using to hook up power to the trailer and is pretty rough but still solid enough to be safely used, and laid it out to make the final run between the trailer and the dog house. This cord I cut one end off of the cord and spliced it into the outdoor electrical box outlet. This means that the outside outlet has three cables hooked up to it, the cable supplying power to the trailer, the cable taking power into the trailer to the interior outlet, and the cable going towards the doghouse. I wire tied the two cables on the outside going into the ground to keep things nice and neat. I continued with the trenching from the trailer along for about another 60' give or take over to the tree I chose to use for the last outlet. Once at the tree I ended up using some 3" deck screws to secure the electrical box to the tree since the tree is obviously not a flat solid surface. With the box in place I cut the excess from the rest of the extension cord and ran the cable up through the box and spliced it to another outlet which was installed in the box. With that the whole power run portion of the project was complete. 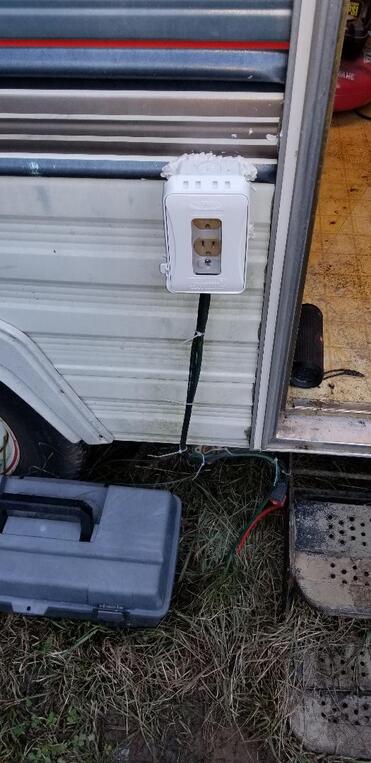
Outlet box installed on side of trailer, note pair of wire tied cables running from box into ground.

Tree outlet box, note green cable running into ground and black cable, which is plug going to dog house.
Now at the doghouse, this part of the project went pretty easy. I took a standard metal outlet box that I had laying around with my other surplus electrical shit and used some wood screws to secure the box to the plastic wall inside the doghouse, near the top. I drilled a 3/8" hole through the wall to the outside. I took the short plug/cable and fed the cable through from the outside into the doghouse through the electrical box. The last outlet was hooked to the end of that cable and secured with an outlet cover. Some caulk was used to cover the cable around the outside opening in the doghouse wall. I was able to plug the wall heater up and plug the doghouse up to the tree outlet and activate the unit to get heat flowing. The final thing that I had to do was make a cover for the opening of the doghouse. The easiest thing I could come up with was taking an old car floor mat and cutting it into strips, leaving a few inches on one side uncut so it looks like one of those flappy door opening blockers for allowing factory motorized traffic to pass through the opening without keeping the door open. I secured this cover over the opening with some wood screws backed with washers to hold the mat against the plastic doghouse surface. I also cleaned out all the old hay from the doghouse and took a moving blanket that we got from Harbor Freight for free with a coupon and folded it up to cover the floor in the doghouse. I didn't want hay in there because loose hay with an ignition source seems to not be a good combination. A blanket on the floor can't be kicked up all over along with flammable dust like hay does. It's not to say that a cloth blanket is safe but its much safer in these circumstances compared to loose hay. 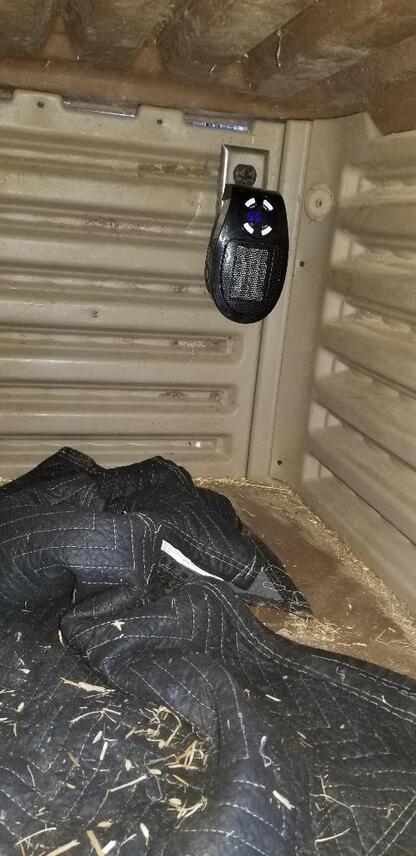
Heater plugged up to outlet box inside doghouse. Note blue digital display on heater, unit is doing its job.
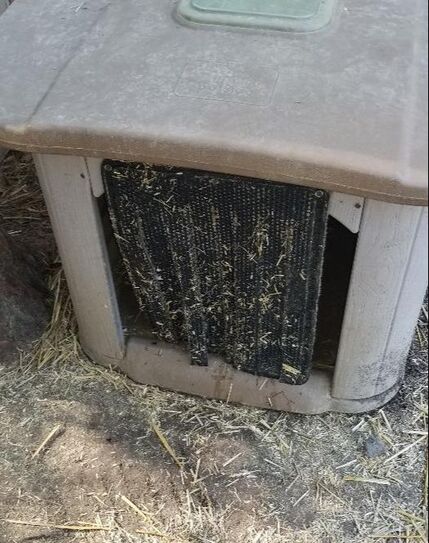
Floor mat flappy door for doghouse to keep heat inside.
So far the heater has been doing its job splendidly as far as keeping it nice and warm inside. With the thermostat set to 72, it is extremely comfortable inside the doghouse even when the temps dip down low. With the thermostat the heater does not run all the time so there isn't really a concern with using a lot of electricity in order to run this device. The heater's 350 watts by itself is still a small number compared to larger heaters that run in the 1100 watt + range. All in all this was another successful project to help make the farmstead a much better place for all of us.
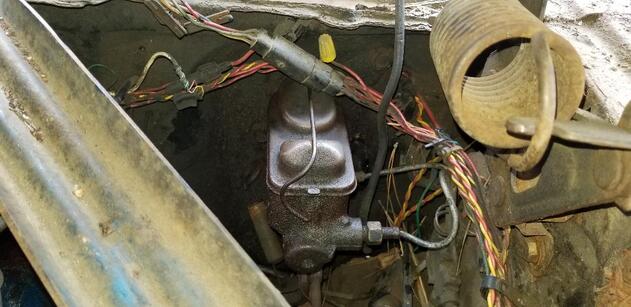
Yep you guessed it, still working on the brakes on the Monte Carlo. I ended up having to make the brake line that ran between the proportioning valve at the front back to the rubber brake hose at the rear end. For whatever reason or another I had to fight to get the damn fitting to screw into the proportioning valve. I had to check and check again to make sure there was no grains of dirt in the threads of the fitting or the proportioning valve. After what seemed like 30+ minutes of fighting and cussing the existence of this shit, I finally got the fitting secured in the proportioning valve.
Next was bending the tubing to make the run to the back. This involved having to bend around a couple of things under the cab and getting the tubing into the trough along the inner rocker panel then over to the rear end where the hose was at. The fun part here though was making a sharp enough bend to get the tubing into a tight space that would allow me to secure the brake hose with a clip then screw the fitting for the tube in place. Of course I had to fight this shit just as well but after what seemed like another 30+ minutes I finally got things situated where they needed to be. At this point I had to bleed the brakes. Of course, just like before, when I went to pump the pedal I got nothing out of the rear. Again I pulled the line apart at the wheel cylinder, nothing. I even went as far as to pull the line from the master cylinder and pump the pedal to see how the oil came out. Pushing the pedal didn't deliver a nice stream like it should've and even with my thumb over the port pumping the pedal didn't provide the pressure that should've been present to push my finger away to allow oil to shoot out. In no lesser terms it appears the master cylinder is weak. I was kind of nervous and about ready to order the proportioning valve as well when I ordered another master cylinder off of ebay. I just hate the idea of not getting something proactively and ending up actually needing it when I replace the next component in line only to find out it wasn't the culprit in the system's failure. After a while I just got the master cylinder and told myself if necessary I'll get the proportioning valve. I just hate to make myself replace the thing whether its good or bad then have to fight the brake lines that screw into the unit. It would be just like it that I decide to replace the proportioning valve when its not necessary only to have the lines break at the fittings or midways down, prompting another long process of making new brake lines to screw into the proportioning valve and front brakes. Hopefully this master cylinder will do the trick. 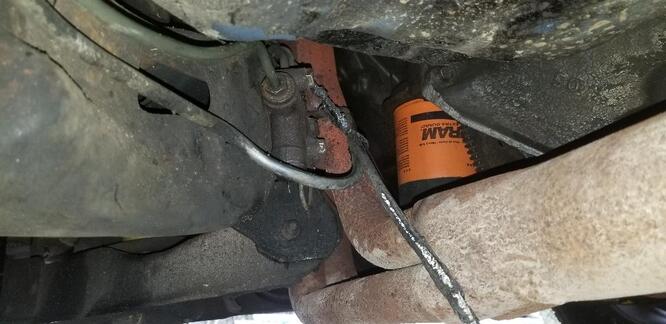
Proportioning valve on Monte Carlo, you can see why this will be a pain in the ass.
Well this is something like day 3 or 4 on the otherwise simple brake job on the Monte Carlo. What started off as a simple rear wheel cylinder replacement ended up being damn near a rebuild of the brake system. First I had to deal with the simple act of replacing the wheel cylinders, which because of the hardware in the wheel assembly and the nature of the retaining clip that holds each wheel cylinder, ended up taking a couple of days. When I went to remove the brake line on the last of the two wheel cylinders, the fitting was rusted to the brake line so the tube twisted and broke when I unscrewed the fitting from the old wheel cylinder. At this point I had to stop to get some replacement brake lines. I ended up getting two since I wanted to be proactive and just replace the one on the other side that I started with since that one might be compromised as well and I don't wanna have to go back to it sometime later when it weakens.
Well the one side that was broken went on pretty effortlessly. When I went to put on the other side, it turned out the damned line was the wrong size. Stupid me for assuming that the line that was missing the tag but was hanging on the rack in the spot labeled for the size I need would be the correct size. Luckily the guy let me have the line for free since it was missing the label so no real loss there. Of course that meant me putting the old line back on, no big deal right? Wrong! When I went to put the line back on to the rear brake hose block I had to fight to get the damned thing to grab the threads. When it did finally grab the threads, the slight bit of resistance that I thought was from some dirt in the threads ended up being the cross threading of the goddamned fitting! So with that fitting on the old brake line being ruined, I had to automatically assume that the block in the rear brake hose was also compromised. Now I had to get another rear brake hose along with the brake line to replace the old one! Now, I was able to put on the brake line at the wheel cylinder no problem. When I went to remove the brake hose from the line that goes back up front to the proportioning valve, I had to struggle to get the fitting to turn free. It was all in a tight space so a lot of this shit went by feel. When I finally got the fitting to start turning, I started to rejoice thinking that this debacle was finally going to come to an end. When the fitting from the main line going forward finally came free of the brake hose it fell to the ground, meaning.....of course, it twisted the brake line and snapped it free. At this point I said fuck it and went ahead and got the brake hose replaced and hooked up to the brake lines going to the wheel cylinders. I ended up removing the line from the proportioning valve in preparation to replace the whole length of metal tube. I had to pull the front fitting loose along with a short length of the metal tube in order to cross reference the size tube with what auto zone has to get the right size. I also had to check my little stash of metal fittings to see if I had a replacement fitting for the one that snapped off at the back of the brake line. Luckily I ended up finding a replacement fitting of the right size for the tubing I needed. I used my die grinder to cut the other end of the tube to remove that fitting in order to reuse it on the new tubing. I ended up getting a roll of tubing that I'l be able to use to make my own custom run of brake line from the proportioning valve back to the rear brake tube. My mistake in this whole bullshit story was the idea that I actually thought this job would be a straightforward thing, knowing that the brake system on this car is old as hell. If I went ahead and just anticipated that the brake lines might be fucked up along with the wheel cylinders, hell even the master cylinder, other components, and just went ahead and bought everything, then when shit turned out to be fucked up as I put my hands on individual components, it would've been no big deal, I'd have just replaced whatever was fucked up in the circuit. But when I think one thing's fucked up, replace it, then find the next thing in line to also be fucked up, then have to go to the store to get that shit, put it on, then find the next thing in line to be bad as well, it gets real aggravating. Add to this the idea that the weather's been sucking lately. First it rained pretty good so the ground was nice and moist. While this was not too big of a deal as I was using a tarp on the ground under the car the whole time, the next big kicker was the idea that it's been cold as hell the last few days. The night before it was a low of 21, the day time high was in the low 40's, too fucking cold to be trying to work on anything on the ground especially, in the shade, under a car, with not even the sun to help warm things up. I had to have my half drum burning hot with oil wood and scrap wood to at least serve as a brief reprieve for my cold hands while working on this brake shit. This went on for a couple of days, the freezing my ass off part that is. Now that I got the brake tubing, hopefully this will be the last day I have to fuck with this shit for a while. We'll see.... 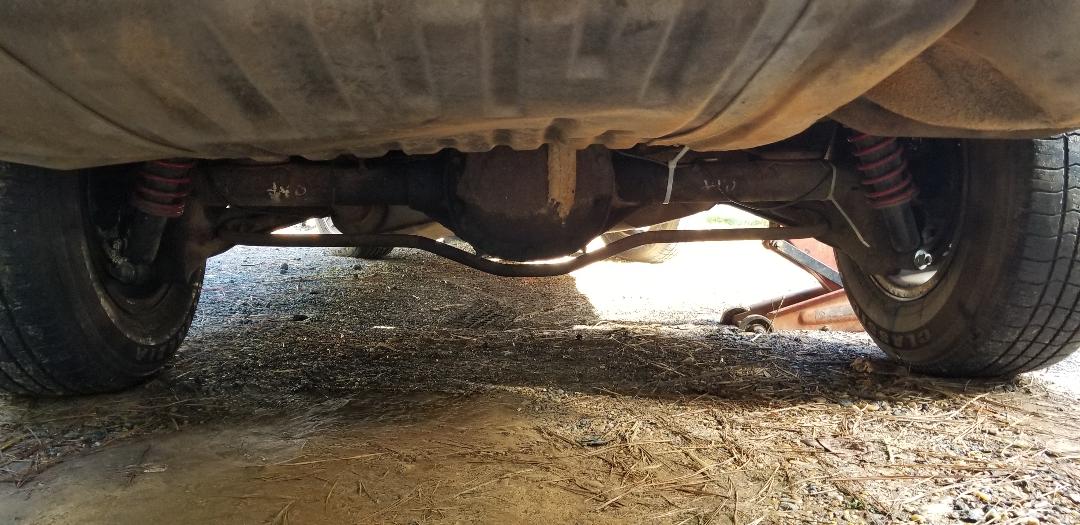
The undercar hell that was my domain for the last few days while working on brakes.
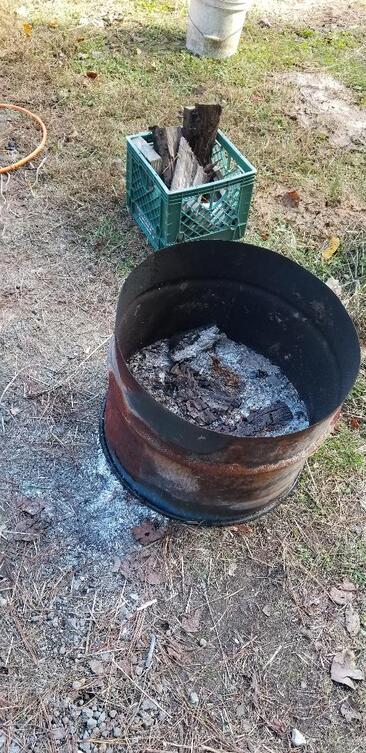
My only salvation during this nightmare, the half drum, supplying its precious heat.
In a previous post I mentioned a car we had that was awaiting work, well really it was a matter of me determining whether it would be fixed up for future use and/or sale, or scrapped. I did get an oil filter and oil along with an air filter for starters. The next thing I got was a fuel filter and a battery. The intent was going to be to use the battery to put power on the fuel pump then disconnect the fuel line so I can change out the fuel filter but before putting the new filter on I would jumper out the fuel pump relay to turn the pump on manually so I can pump out the old fuel from the tank. Something told me when I put the battery in to just crank the engine for shits and giggles. When I hit the key I got the click of the starter but nothing more, it engaged, but no crank. I tried cranking over the thing manually with a breaker bar and socket on the crank pulley bolt but even that wasn't happening. One little factoid though. When I drained the oil, a quart of water came out first. That was definitely not a good sign. Well with the lack of cranking upon turning the key, it confirmed what I suspected, this engine was fucked. Apparently the engine probably had a head gasket failure (which these engines are known for, fucking 3.8L V6) and when they parked it the water had its chance to wreak havoc on the internals. There was no saving this POS. At that rate I didn't even have to think about it, I just started removing bolts, commencing the disassembly of the vehicle, starting with the cooling fan. The intent with the fan is to use it in the Monte Carlo in place of the belt driven fan that's in the car now. After I pulled the fan I kept going and pulled a shit load of parts off. The radiator, headlight housings, air cleaner box, radiator hoses, fenders, hood, front and rear bumpers, trunk lid, taillights,along with some brackets and other pieces that came off in the process of pulling off the other bigger parts, all came off in the few hours I had with the car. I still have the doors and the interior to disassemble though. I cleaned the trunk of garbage as well and will pull some parts from the engine compartment. There's a shitload of parts to pull off and if I play my cards right I will make back the money I spent on the car and then some. Then even after I get through selling off the parts there's still the matter of hauling the carcass to the junkyard to cash out on that too. This is just another example of how I needed to try to get to this project at the very beginning as we could've had this thing broken down and scrapped out by now. The car's been sitting for a good couple of months or so up until now, I could've easily broken it down and scrapped the rest. We do have another vehicle that will probably undergo the same treatment, my mom's old Ford Explorer. Since that one has a shit ton of miles on it and its had an issue with starting that I still can't pinpoint since there is no fault to indicate a malfunction (other than an overly worn engine), it only makes sense to start breaking this one down too so I can gather a batch of salable parts. The other kicker is the idea that after I break this one down, I can break it down enough to get the body off the frame and have a perfectly usable frame for one of the old Mustang body on frame conversions I've been planning on. Other than the work to break everything down, it sounds like a win/win for me as well as the homestead as it'll get yet more junk out of the way. 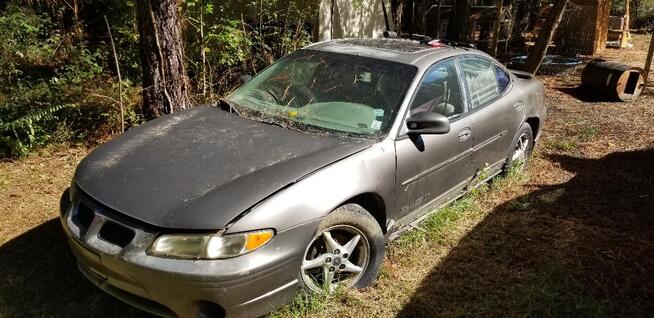 Grand prix, awaiting its disassembly. 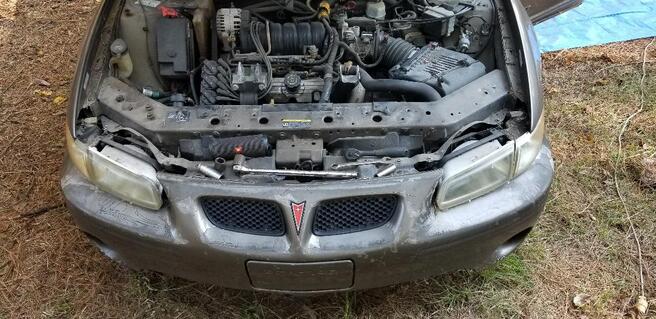 Grand prix engine bay. 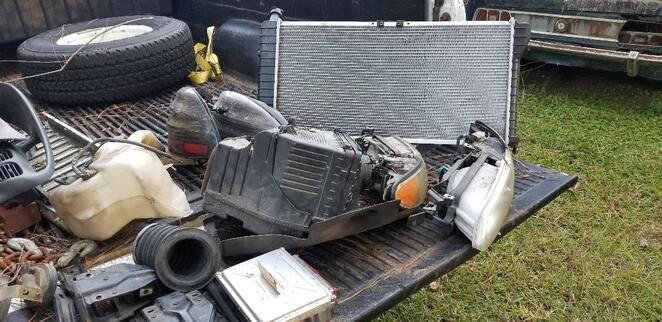 First batch of parts, mostly from engine compartment. 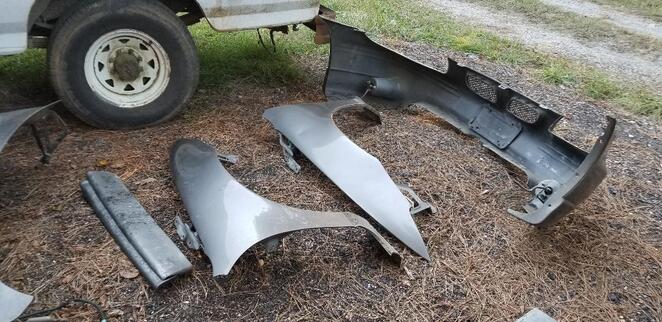 Batch of body parts pulled from car. 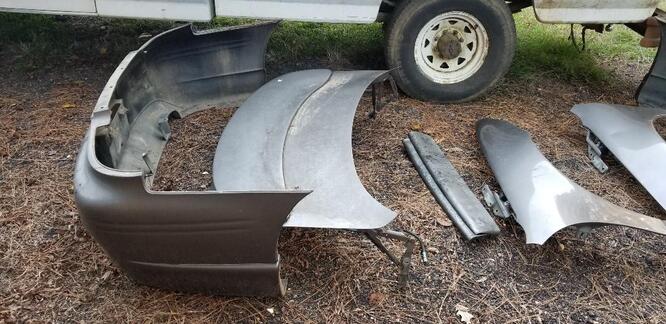 More body parts. |
