|
After taking care of the moldings and bumpers and other body trim on the El Camino, the next target area was the undercarriage. Here I had a homemade crossmember that I threw together from some angle iron and iron pipe. The crossmember is only held in with a bolt on each side temporarily just to keep the tail of the transmission held up. I also had remnants of the old exhaust system still in place. The axle pipe and most of the intermediate run of pipes on each side were still in place. Now most of these pipes were either bent or rusted or both, enough so that it wasn't worth even trying to save any of this pipe. This stuff will have to go. Now I did have a factory crossmember that we picked up in Texas along with the rear bumper. Only problem is the factory crossmember only has a depression on one side, meant to accommodate one pipe going to the muffler. This car was made during the time when engines were detuned for emissions purposes so there weren't any dual exhaust systems and high performance engines. The exhaust manifolds' flange pipes merged into a Y pipe which then routed to a single pipe going through a catalytic converter and muffler and out a single exhaust pipe. Any aftermarket modification required custom crossmembers made for dual exhaust systems. Ironically the homemade crossmember I made conveniently sits in a way under the frame rails where there is proper spacing between the top of the crossmember and the floor of the car to allow for exhaust pipes to pass over without interference. 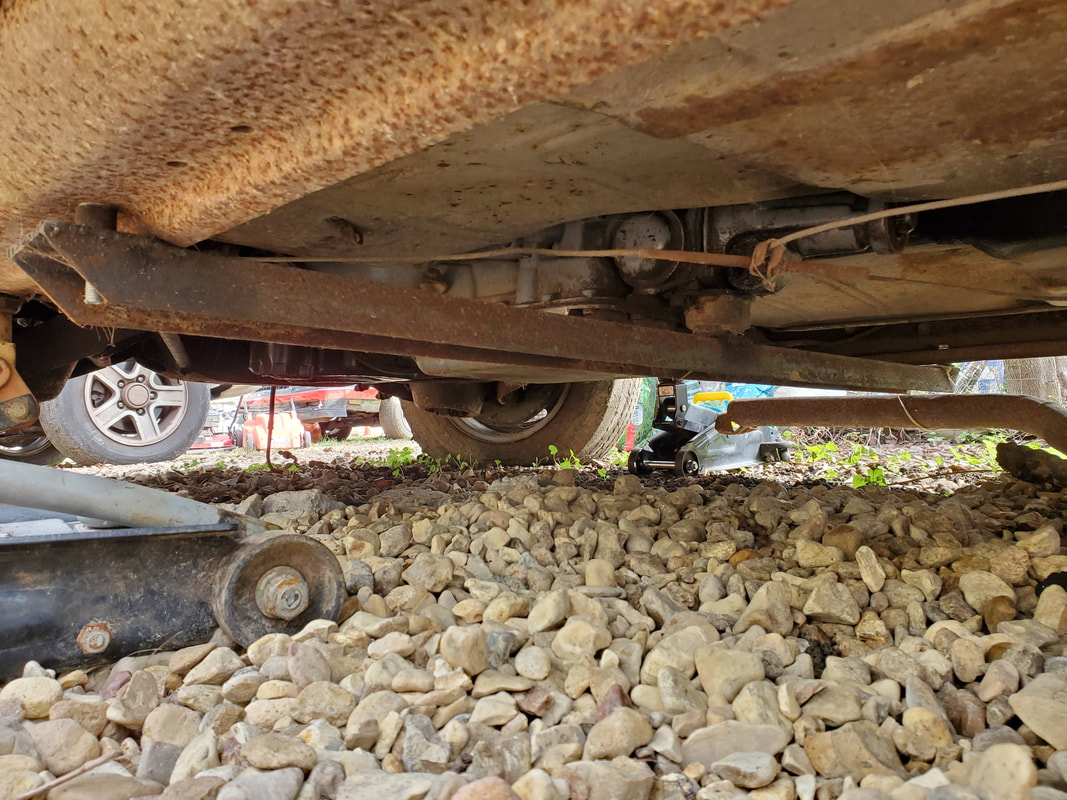 The homemade angle iron/pipe crossmember as it's mounted prior to removal. Note the exhaust pipe on the right side of the pic. As for the exhaust pipes, I'm still up in the air on how I want to handle this. The engine currently has regular exhaust manifolds in place. I would need to hit the junkyard and remove a couple of flange pipes from another truck's exhaust manifolds then cut a length of the pipe with the flange so these can be attached to our exhaust manifolds and terminate at a point where extra pipe can be added easily. Of course the extra pipe would have to be sourced from the junkyard from other donor trucks/cars as well. This includes the axle pipe. Now I could do that on the cheap end or I can add a set of cheap headers with their own flange pipes and piece together an exhaust system from generic pieces of pipe like the U pipe for the axle and straight lengths of pipe for the intermediate runs between the engine and the axle. 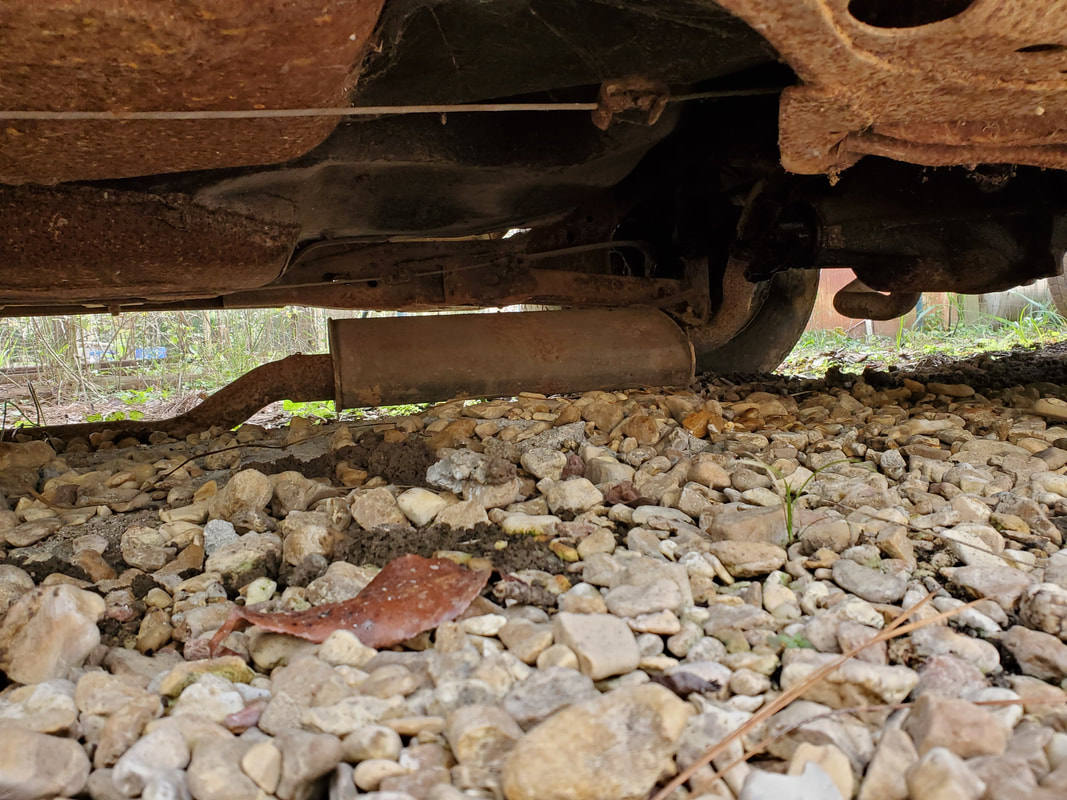 Old exhaust pipes and muffler under car that have to be removed to make way for new apparatus. Of course to remove these pipes the reciprocating saw had to come out so I can chop these lengths of pipe into multiple pieces in order to remove them with the least amount of trouble to myself. Since the pipes were getting scrapped anyway it didn't matter just how badly I hacked up these pipes. Now as for the mufflers, I could recycle the mufflers as they were still in good shape and not rusted through. I would just need to weld on any fittings to adapt to whatever size exhaust pipe I do use. If I was really on some bootlegging I could actually acquire some lengths and bends of pipe and make what would be the bootleg equivalent of a header by welding a short length of 45 degree bend pipe to the ports of each manifold and just connect to these with couplings and the pipes for the exhaust system. There are a few ways I can approach the exhaust system and I'll have that figured out when I get to that point. 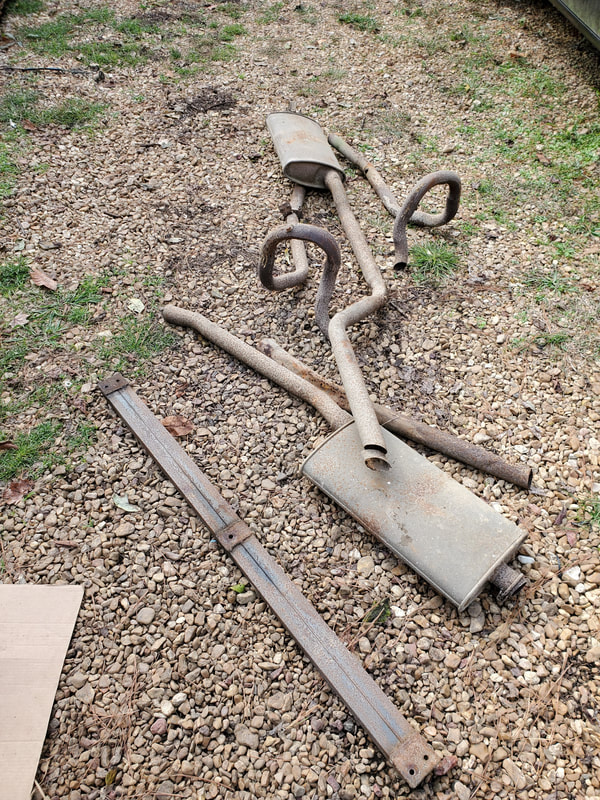 The pieces of exhaust pipe and the homemade crossmember after removing everything from under the car. Now back to the crossmember. What I planned on was still using the homemade crossmember, but adding to it to make it stronger. I planned on doing this by adding a piece of thick flat stock crossways to both ends, then drill holes in the ends of that piece of flat stock so they can be secured to the holes on the car's frame. This will be about the same as the two bolts per side that the factory crossmember uses except it'll allow for exhaust pipes to pass over the top. That doesn't fully write off the factory crossmember though. I do have to cut the tongue that the transmission mount rests on and invert it since this crossmember is meant for a Turbo 350 transmission and the 700R4 that is currently in the car has a thicker mount that would require the tongue to be mounted lower on the crossmember. I'll remount the tongue and that should make this crossmember able to be mounted with the 700R4. As for the ability to accommodate dual exhaust, I'll probably have to cut a chunk out of the crossmember tube and reweld the metal in to have the same depression like the factory depression for the one exhaust pipe. This had to be done on the Monte Carlo's crossmember as it had the same situation that this one has. If I get the factory crossmember reconfigured to accommodate dual exhaust then I may very well go with the factory piece and put the homemade piece aside, just in case I run across another similar GM car missing a crossmember. The homemade unit is more easily modified than the factory piece.
0 Comments
When we left off we were finishing up the installation of the front bumper. We had to do a number of things to be able to get the bumper installed, like freshening up the stud brackets so they will accept nuts as well as straightening out the damaged inner bumper so it will sit straight when it was mounted. New carriage bolts were installed to replace those that were cut off during the disassembly of the two piece front bumper. The last thing to do was install the rubber strip that goes across the outer bumper to cover the carriage bolts that hold the two bumper sections together. This rubber strip has integrated studs that normally accepted cap nuts but can accept 1/4" nuts. Since I used most of the cap nuts installing the grille moldings, I needed to use 1/4" nuts to cover the rest of the studs. 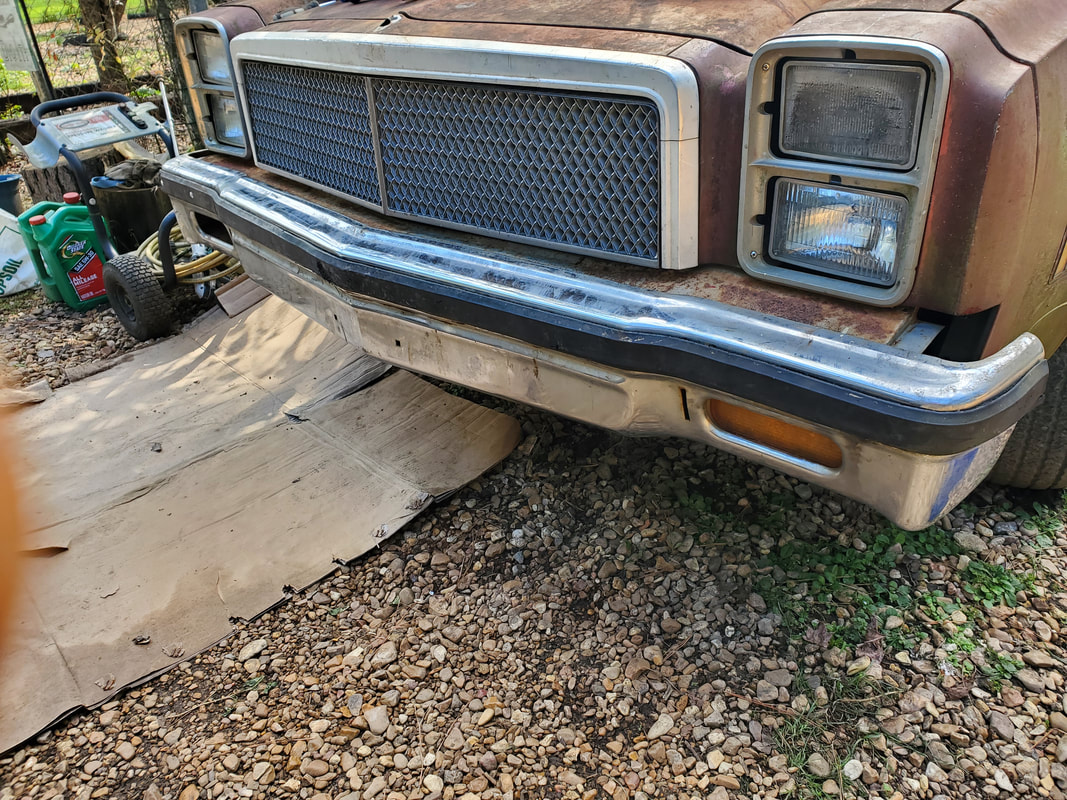 Rubber strip installed on outer bumper of elco. On the very end of the right side of the rubber strip a couple of the studs were pulled free so a good foot long section of the end was free flapping. To remedy this in a bootleg sort of way, I drilled two holes in the rubber where the studs would've been then installed carriage bolts in the holes. Finishing things up with nuts, the carriage bolts will at least sit flush enough to not be too noticeable. If I paint over the bolt heads with some flat paint, it'll make them that much less noticeable, at least until I can replace the rubber strip with a fresh piece.... 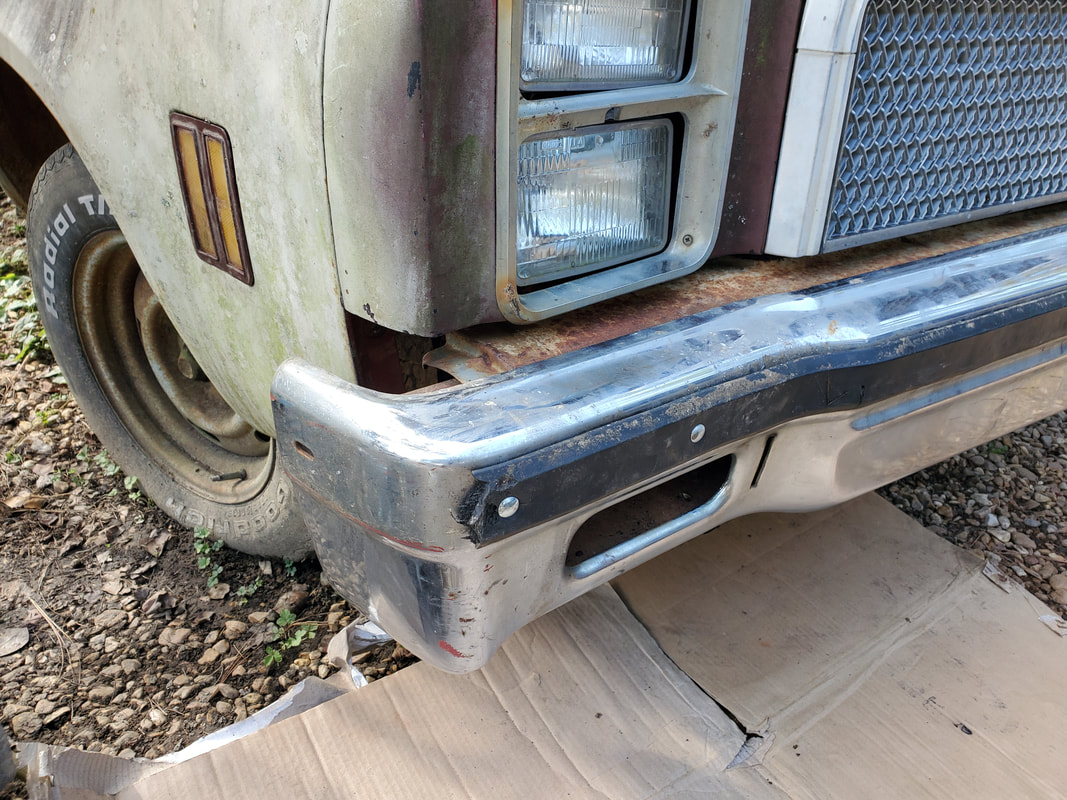 Two carriage bolts installed on end of rubber strip to hold to the bumper. Next I turned my attention to installing the tailgate. This is probably one of the easier parts of the operation due to the idea that the hinges only take three bolts to hold each end on. There were two thread plates installed to accommodate the bolts for each side but just like with the other threaded components on this car, they too were rusty. Even after trying to cut the threads with WD40 and a grade 8 bolt, I ended up snapping one thread plate free. Luckily the bed had access panels right in front of where the thread plates go. These were held in with small sheet metal screws that came out easily except for one on each side. This still allowed me to tip the panel out of the way in order to get my hand inside the fender. I ended up taking a hammer and screwdriver and knocking out the other thread plate.  Access panel on left side of bed, held in place with our sheet metal screws.  Right side access panel removed to access hinge area inside fender, note bolts in place already. I had the bolts for the tailgate hinges already, these were large Phillips bolts that were of 3/8" thread. Since any kind of Phillips or flathead bolts are easily stripped, I had to ensure that they were screwed into clean threads, hence new nuts instead of the dirty thread plates. With the access panels removed, it made it easy to get my hand inside to install the nuts on the bolts. With a little help holding the tailgate, I got the six bolts in place and tightened up. 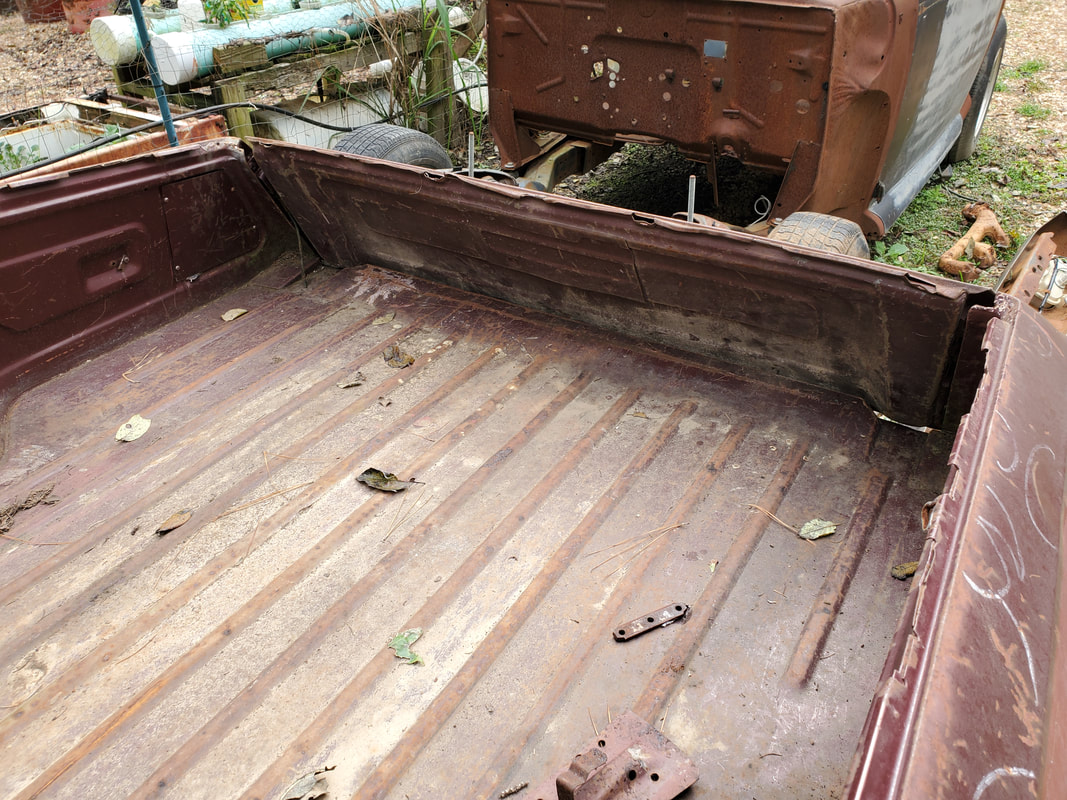 Shot of inside of bed and tailgate in closed position. Access panels have been put back in place. 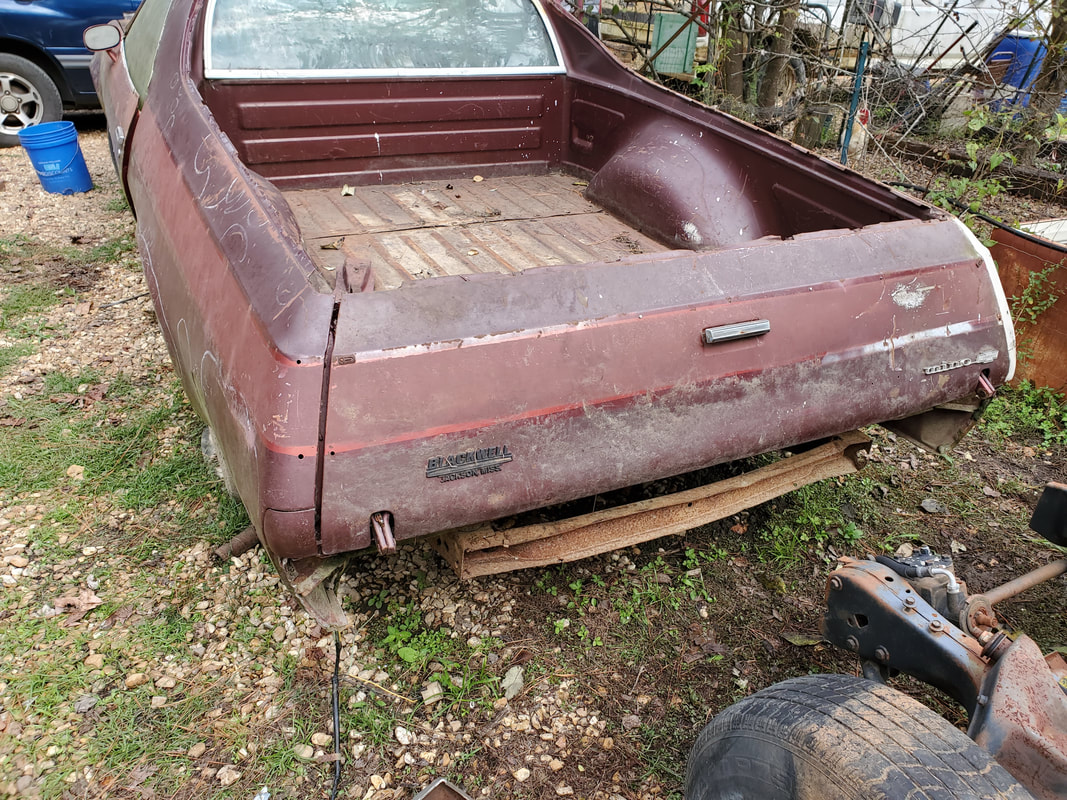 Outside of tailgate in closed position. There is a dent I'll have to try and address as well as the name emblem that'll need replacing. A dealership logo will also be removed as I don't want some dealer's logo feces sullying the fine lines of this automobile. The tailgate does close properly but the latch is boogered up where I have to pull on the linkage going to the left latch in order to release the tailgate for opening. I'll have to remove the access panel on the tailgate itself to examine the linkages and the lever itself to see what may need replacing. Hopefully it'll just need a latch and the linkages are intact enough to just be reconnected to the new latch. With that little bit of business taken care of, the next task on this car is installing the new used crossmember. While I'm at it I'll remove the remnants of the old exhaust system and the fuel tank if its still there. After having the episode with the front bumper earlier due to the damage that was sustained on the inner bumper before I ever got the car, I had to do some things to ready this bumper to be installed again, in as straight a manner as possible. There were a couple of things I had to do in order to do this. The first thing was to cut/clean the threads on the two stud plates since they were covered in surface rust that made it more than difficult to screw down the nuts. This was done with a simple die and some WD40. I had to also straighten the edges of the bracket where the studs were located but I cut the threads first since the die holder was too big to be rotated between the studs. Once the studs' threads were cut, I straightened out the tabs and made each bracket ready to be reinstalled. As stated before, the front bumper comes in two pieces. The inner bumper was the problem area, and the heaviest of the two. After separating the two bumper sections I took a sledgehammer and beat the shit out of the inner bumper at the spot where the brackets sit in order to straighten the inner bumper as much as possible. I knew I wouldn't get the inner bumper completely straight, plus the mounts in the car's frame were also compromised due to the accident. Because of this I figured I'd have to add some washers on one or more studs for spacers to mount the inner bumper at a level point across the front of the car. To help make things easy to hang the inner bumper with the bumper I went ahead and tack welded the passenger side bracket to the inner bumper. I did this to hold the bracket in place while still giving me the option to break the small welds if need be to move the bracket. I centered the bracket on the slotted holes before welding the thing in place. I then hung the inner bumper from the passenger side bracket, holding it in place with a couple of nuts. 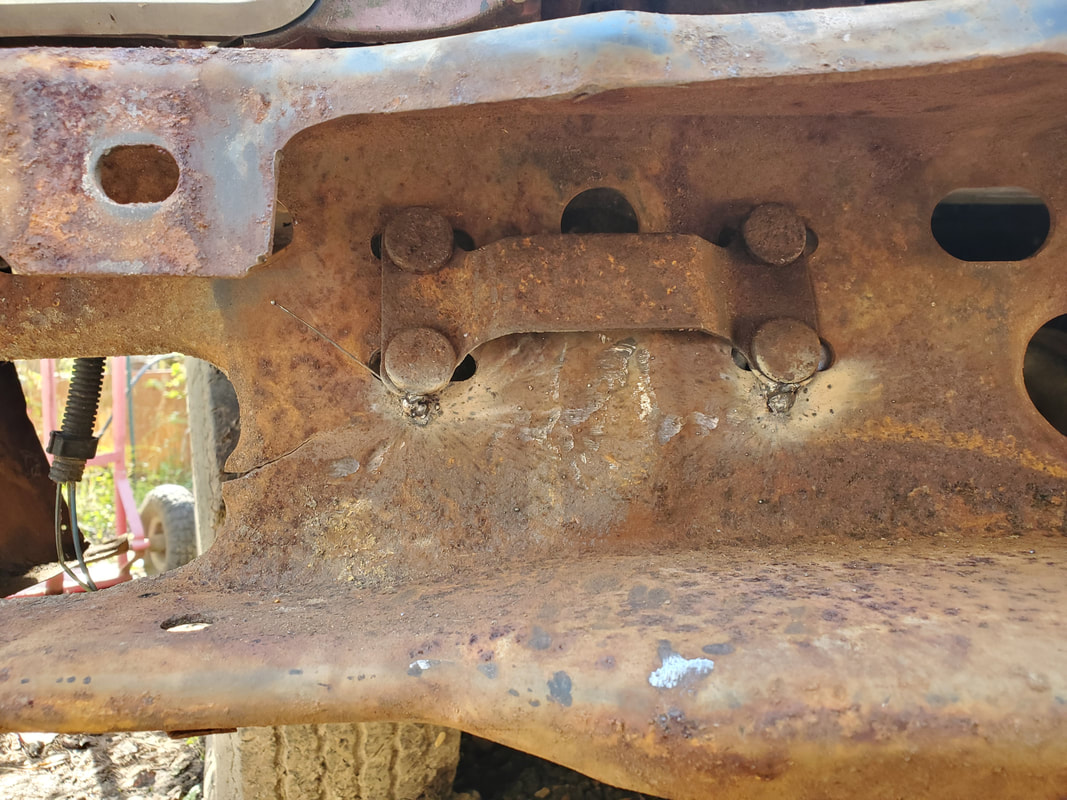 Bumper bracket tack welded to inner bumper to help hold the piece in place during the mounting of the bumper piece. 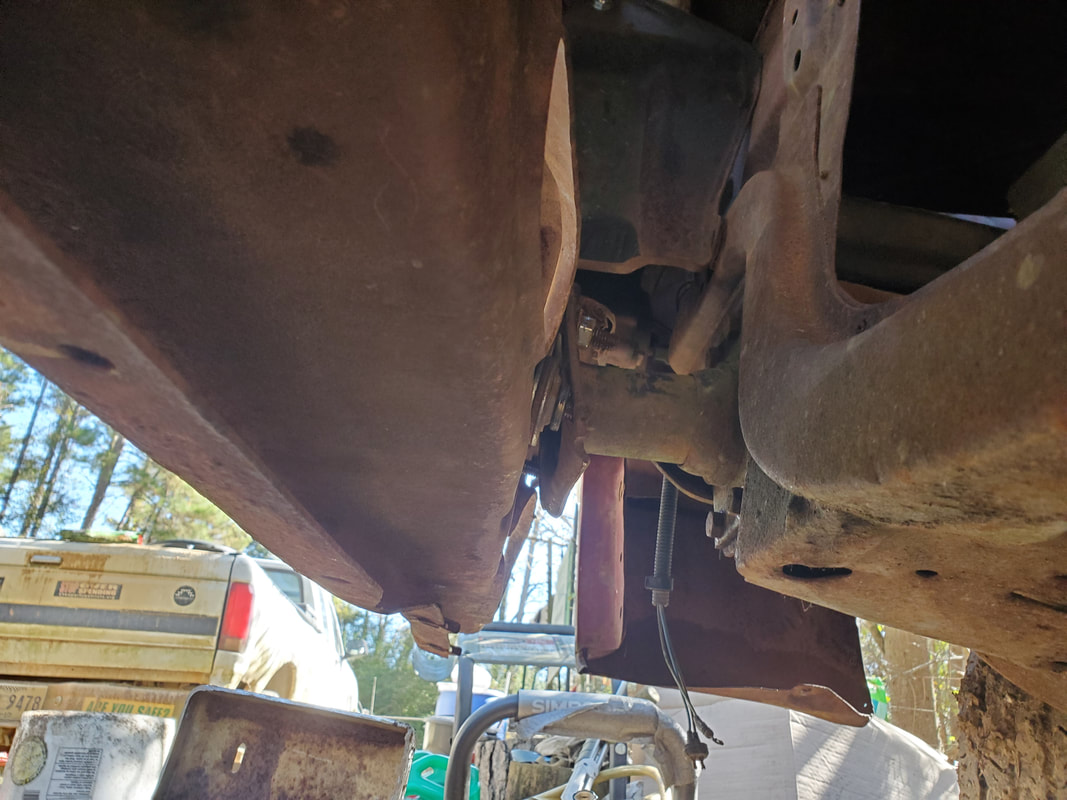 View under bumper showing set of washers added to stud to help level the inner bumper. I inserted the driver's side bracket and held it in place with a couple of nuts. I had to add some washers to one of the studs on the passenger side bracket. Tightening the top nuts on the studs was plenty to hold the inner bumper to the mounts with the bottom nuts being just a small addition to the support. One of the brackets doesn't have a nut on it due to not having enough nuts in house. After tightening everything, the inner bumper was pretty solid. Now it was time for the outer bumper. 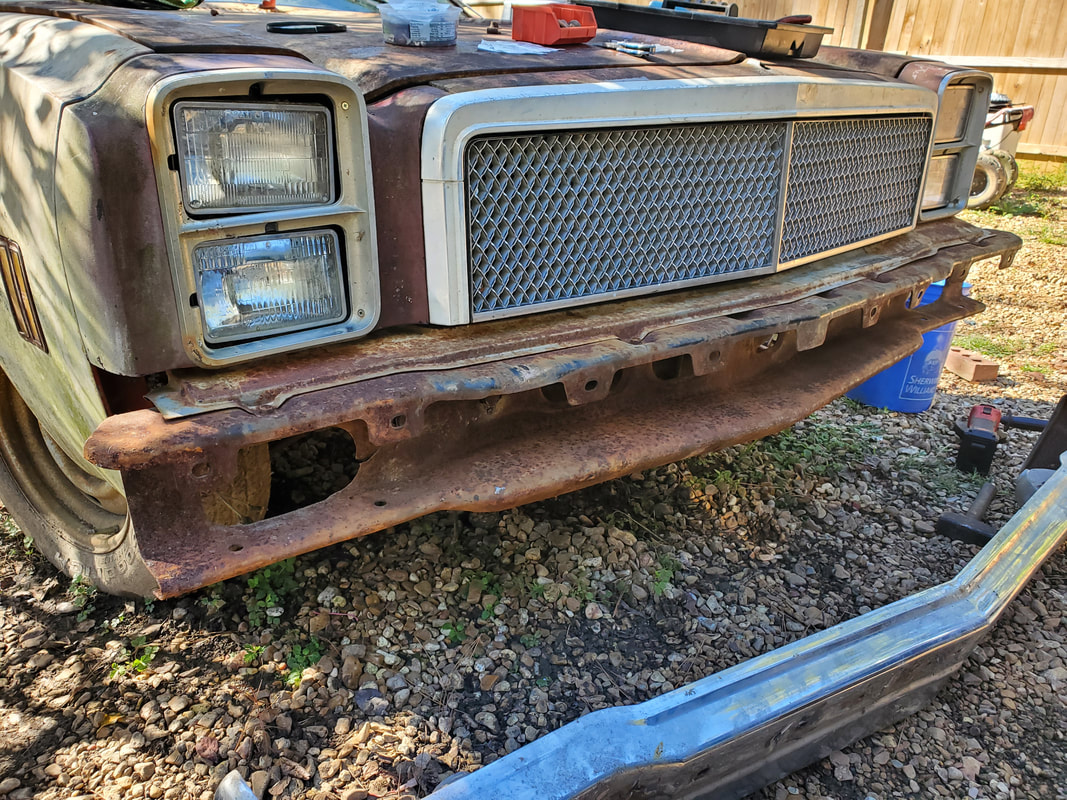 Inner bumper mounted on frame mounts on front of car. Unlike the inner bumper, the outer bumper wasn't distorted nor were the mounting points on the edge of the inner bumper. This allowed me to just slide the outer bumper onto the inner bumper and lined up the bolt holes, starting with the carriage bolts. I had five new carriage bolts to insert, spread across the bumper evenly to ensure that its in place solidly. Only one carriage bolt didn't line up perfectly and needed a little reaming with the drill on the inner bumper hole to allow the bolt to fully insert. With that, the nuts and washers on each bolt went on and secured the outer bumper to the inner bumper. Afterward the row of regular hex head bolts were screwed in place through the outer bumper into the snap on thread pieces on the inner bumper. With that I had the outer bumper fully secured to the inner bumper, lined up properly, not leaning or otherwise uneven. Other than the rubber strip that goes on the bumper, I will be ready to move on. 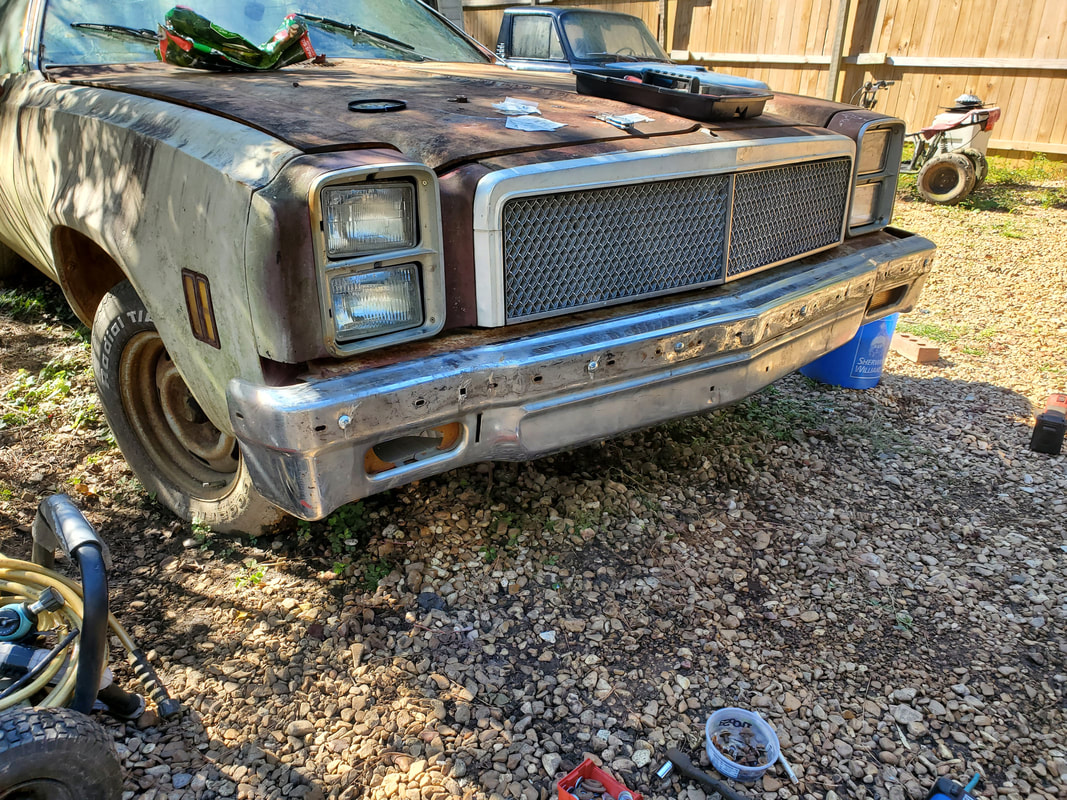 Front bumper mounted in place on car. As can be seen in the pic one of the signal light fixtures will need a new lens, not a big deal but it is something that'll need to be addressed. From here I'll be moving on to the tailgate to see if I can get it mounted. I would've mounted the rear bumper but I don't have the bumper mounts/brackets for the rear bumper so I'll have to try and source a pair of mounts to hang that piece. Until then I'll try the tailgate. If I can't find any mounts for the rear bumper I may have to fabricate a pair from some heavy angle iron or even a pair of mounts removed from another truck or older car. After getting the bulk of the trim pieces installed on the Elco, I was left with one other set of pieces, the front side marker lights. As stated before, these light fixtures are held in place with two cap nuts on the two studs on each fixture. These fixtures are actually installed with the inner housing inserted from the inside of the fender and the outer frame piece, which has the studs, installed from the outside through the fender tabs and into the inner housing, where the cap nuts are then installed behind the inner housing to secure the whole works. After getting these two pieces out of the way, I moved on to the real highlight of the day, installing the second hood hinge and the hood itself. 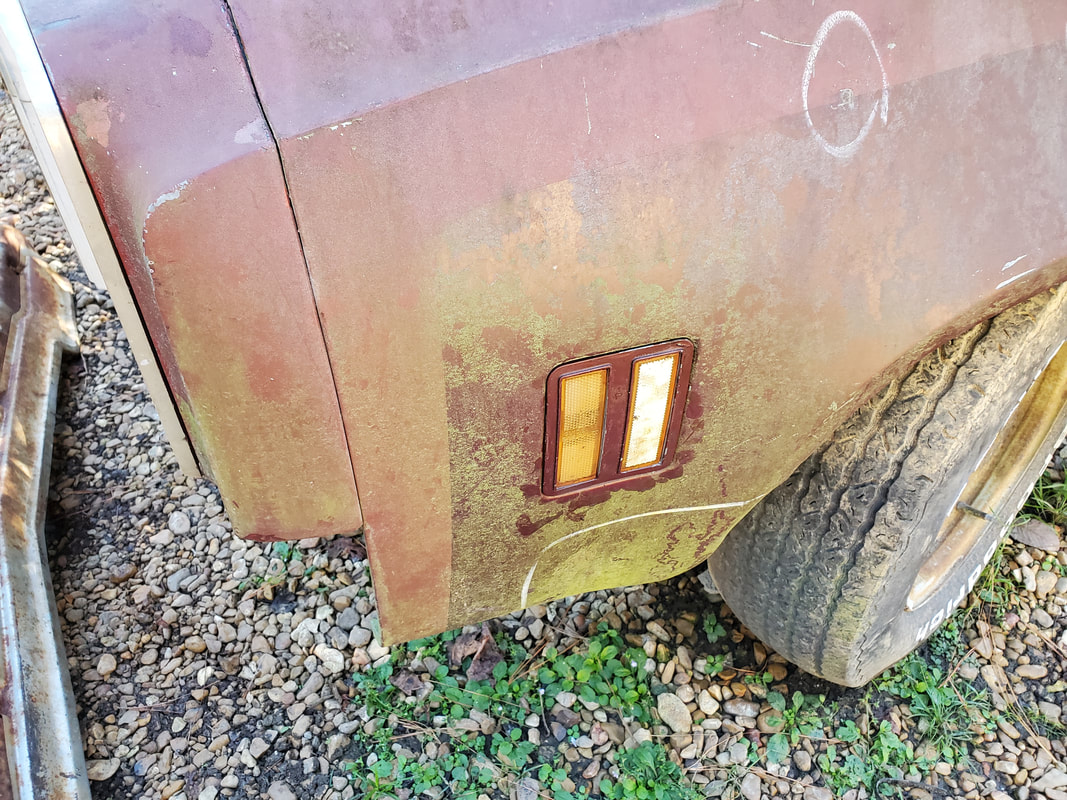 Driver's front side marker light fixture in place. 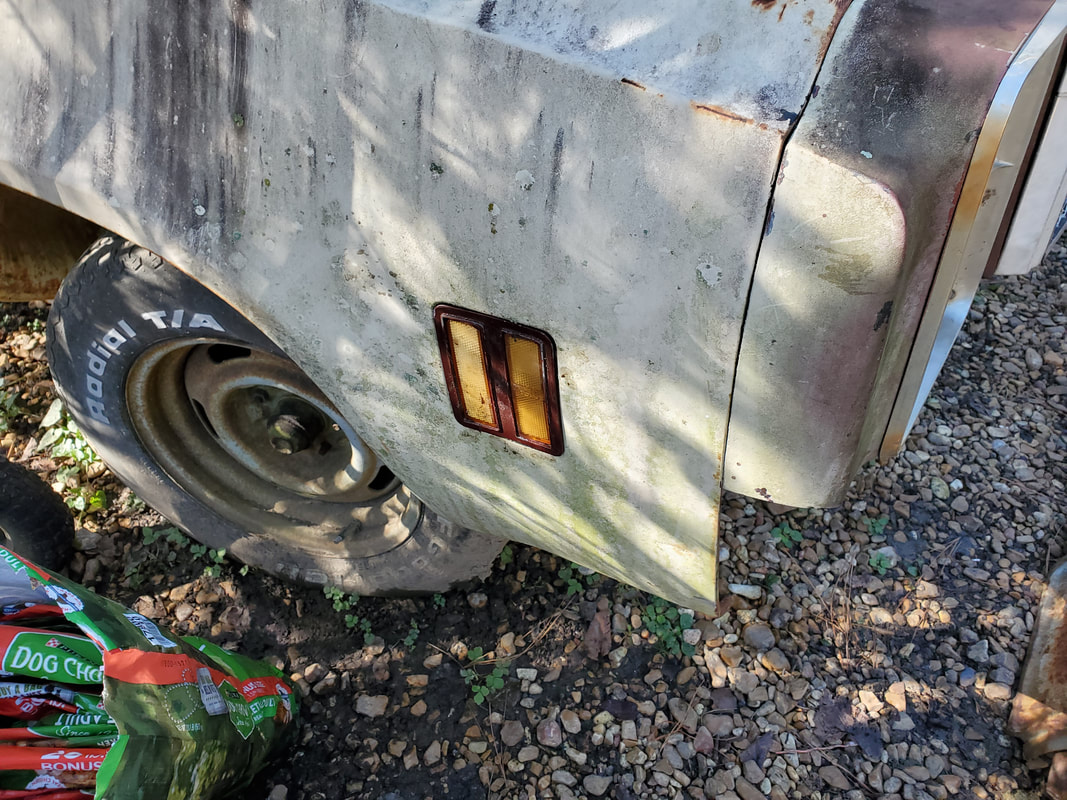 Passenger front side marker light fixture in place. The driver's side hood hinge was already in place but the other was sitting loose in the cab with the rest of the crap. Also missing was the two springs that were supposed to be on the two hinges. I had to use a grade 8 bolt to cut the threads in the hood so the bolts that'll be used to hold the hood will go in easily without incident. After getting the passenger side hinge in place I went ahead and put the springs on the two hinges. These springs pull into tension when the hinges move into the closed position so when the hood is opened, the springs will assist and hold the hinges in the open position. 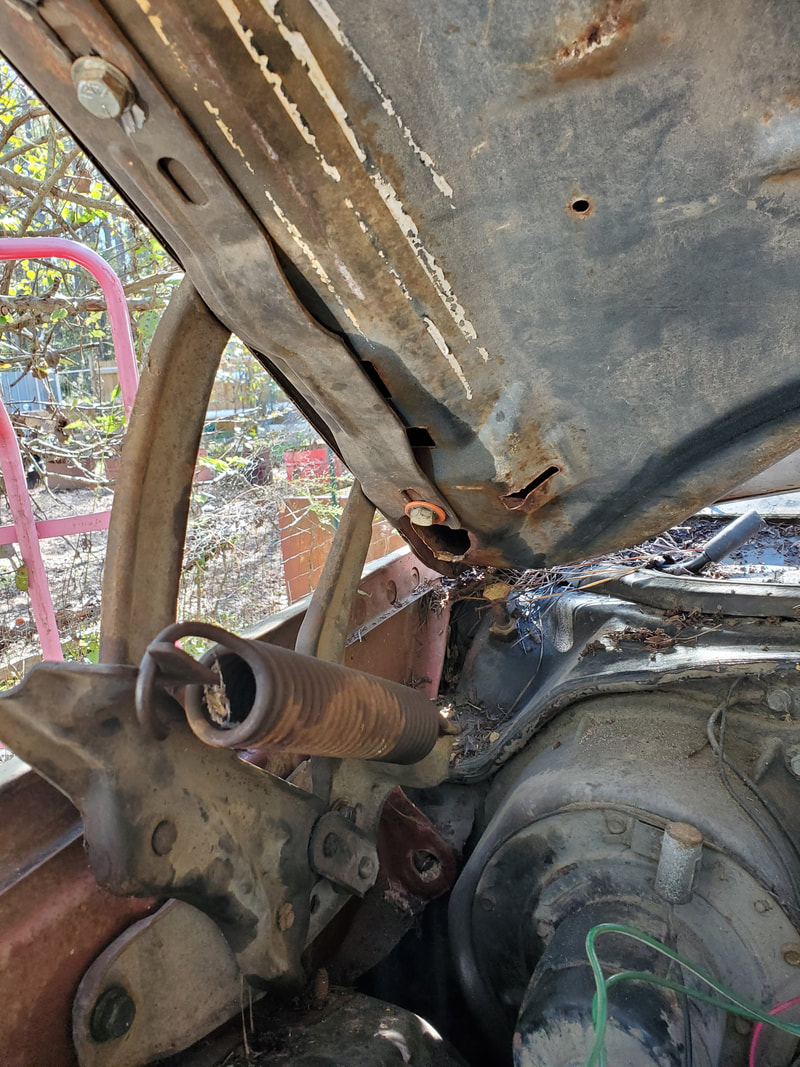 Passenger side hood hinge bolted in place with spring hooked in place. 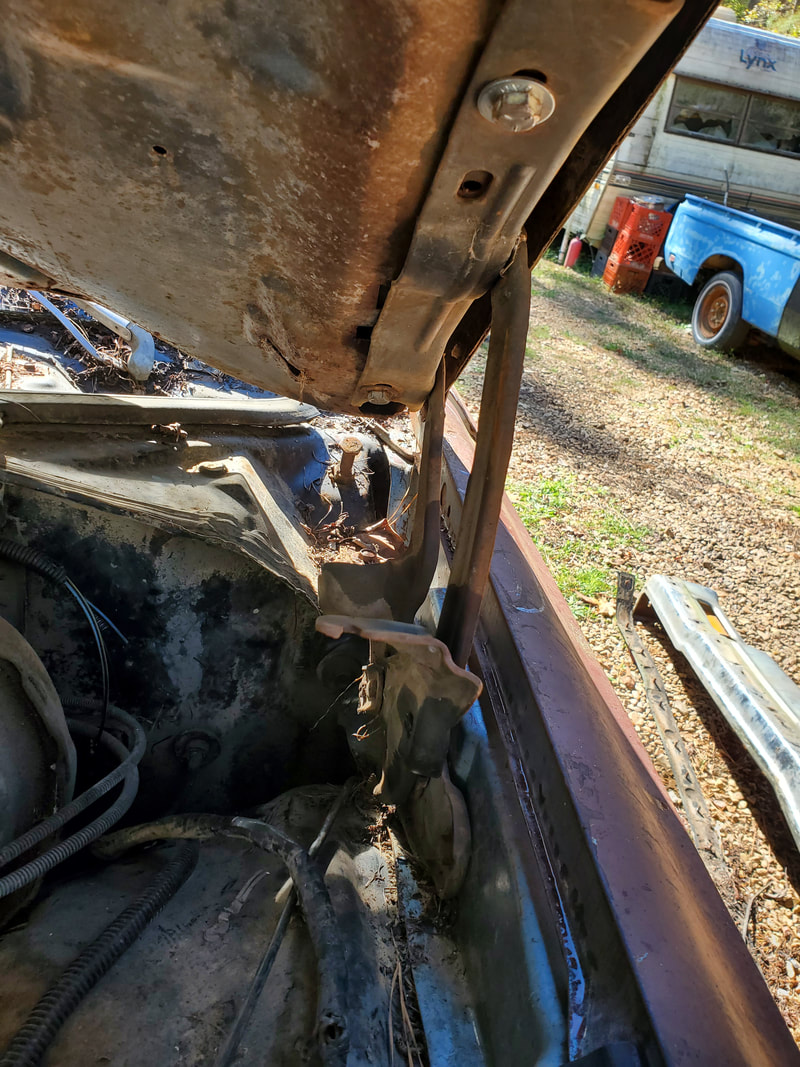 Driver's side hood hinge, note missing spring, more on this in next paragraph. I ended up having to recruit the help of the other half in order to hold the hinge up while I put the bolts in place. After putting everything together, as soon as I tried to close the hood the driver's side hinge started flexing sideways, not giving under the tension of the spring. This hinge is clearly bad. I ended up having to remove the spring to allow the hinge to fold properly since causing the hinge to bend up to the point of being unusable is not pertinent to my reassembly of everything on this car. Having to prop the hood up with a post is a small price to pay to allow me to keep getting things back together until the point I can replace the hinges with fresh specimens that will operate properly. Another thing that I ended up having to do, which falls into the category of jury rigging or Mickey Mouse bootleg work, is having to lengthen the holes on the passenger side hood hinge to allow for more travel of the right side of the hood in the realignment of the hood to allow it to close up and not hit any part of the car's body. I ended up using the die grinder to cut into the hinge, it was a pretty messy job but once I got the oval holes lengthened more, I was able to get the travel needed to move the hood back. Once I tightened everything I was able to close the hood, of course without the left side spring interfering, and have the hood lay down flush with the fenders and the front body trim of the car. 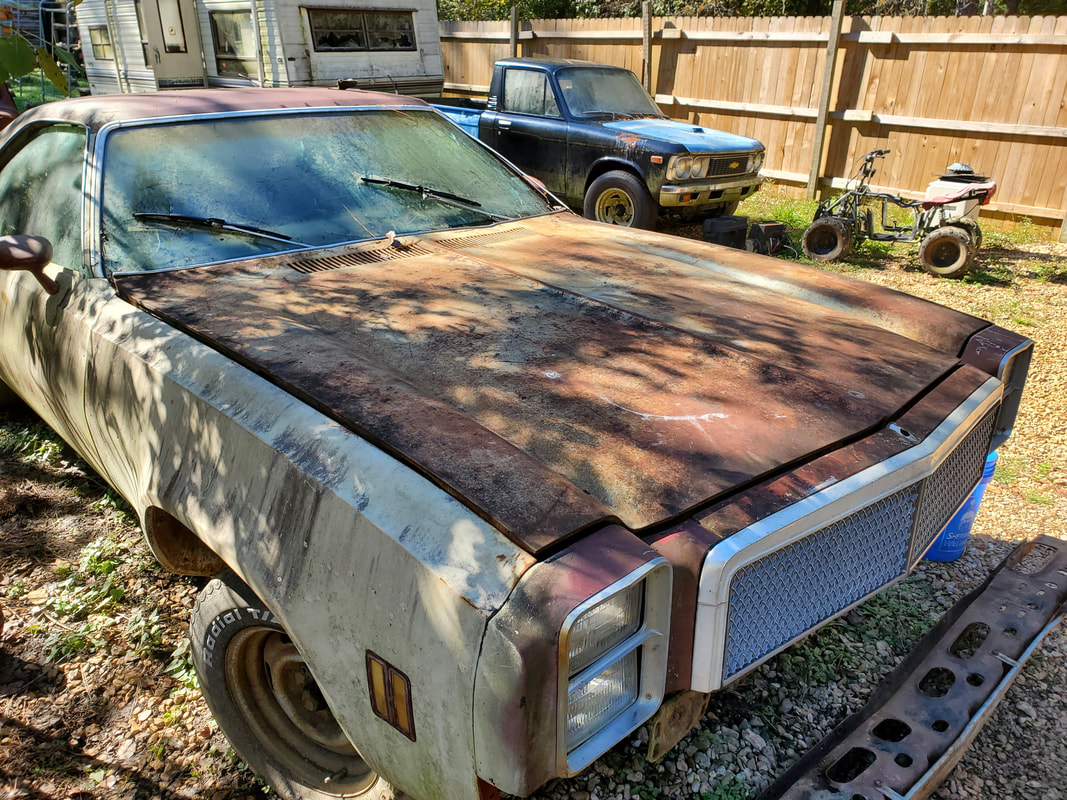 Hood laid down flush with the rest of the car's body after trimming the holes in the passenger side hinge to allow for more movement of the right rear corner of the hood. With the hood able to close the way it does, the next thing I would have to do is pick up a latch point to bolt to the bottom of the hood in the front so when the hood is closed, it will latch into the the hood latch mechanism. Of course I'll have to check and make sure the hood latch is operable and able to be released either from inside the car or from a manual release under the grille. I'll have to put new hinges on the car before I can fully see what is going on with the hood regarding how it lays when it closes before I even contemplate cutting into the holes to lengthen them like I did the old hinge. I'm guessing possibly the past accident may have knocked something out of alignment to the point that the headlight frame and front body panel over the grille are pushed back some. We'll have to see. After the debacle with the front bumper on the car, I decided to divert my attention to the body trim pieces that I have scattered about the inside of the car. I still have to do the work I said I needed to do to the inner bumper and the four stud brackets before I can install the bumper so putting trim pieces on will pass the time as well as rid the inside of extra parts. The first thing I did was go for the grille and the associated trim pieces. I put the bordering trim piece in which is held in with cap nuts around the grille. The grille itself is held on with six screws that go through the grille itself and are anchored on clips that snap in tabs on the body panel where the grille mounts. Along with these two pieces I also installed the headlight trim pieces, which also screw in place with simple sheet metal screws. 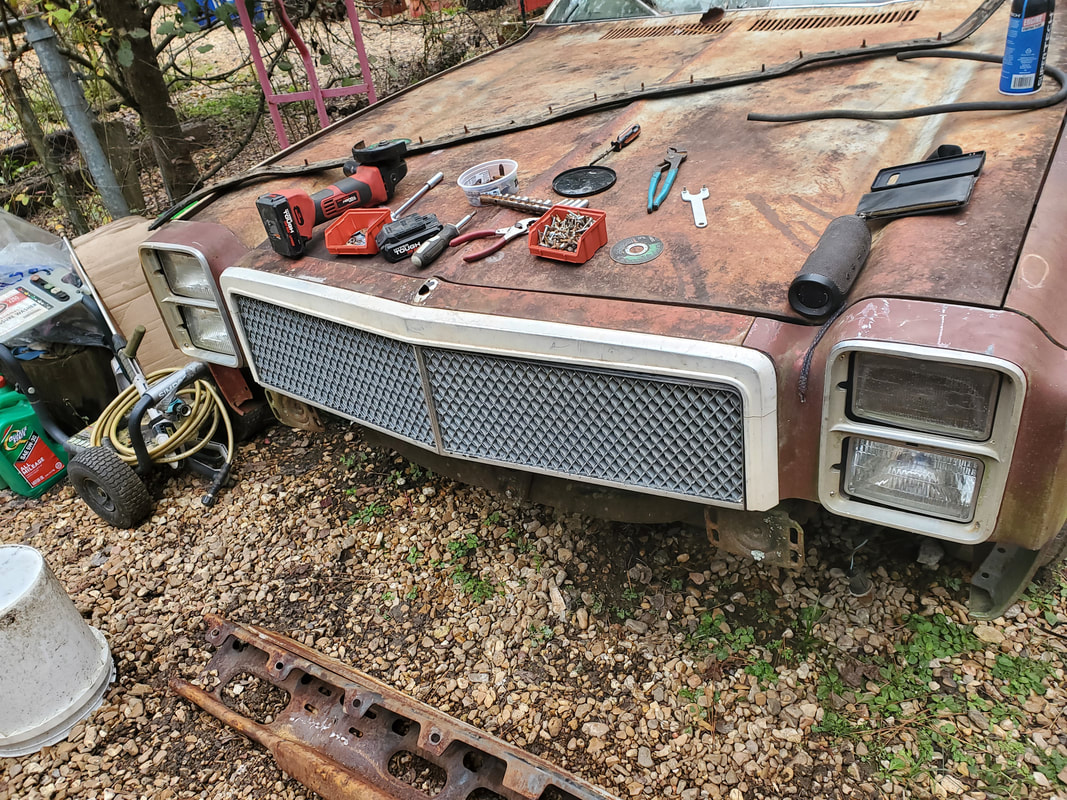 Grille and associated grille trim pieces installed along with headlight trim pieces all installed. The next thing I put on was the mirrors. After digging the mirrors out, I found that the driver's side mirror is a cable operated mirror, which I definitely wanted to save. I had to put the mirror back together but after doing that I went ahead and mounted the piece in the door. I had to lower the window in order to route the cable in place through the door. The passenger side mirror was just a regular mirror so just two nuts held the piece in place in the door. That's two more pieces eliminated from the batch. 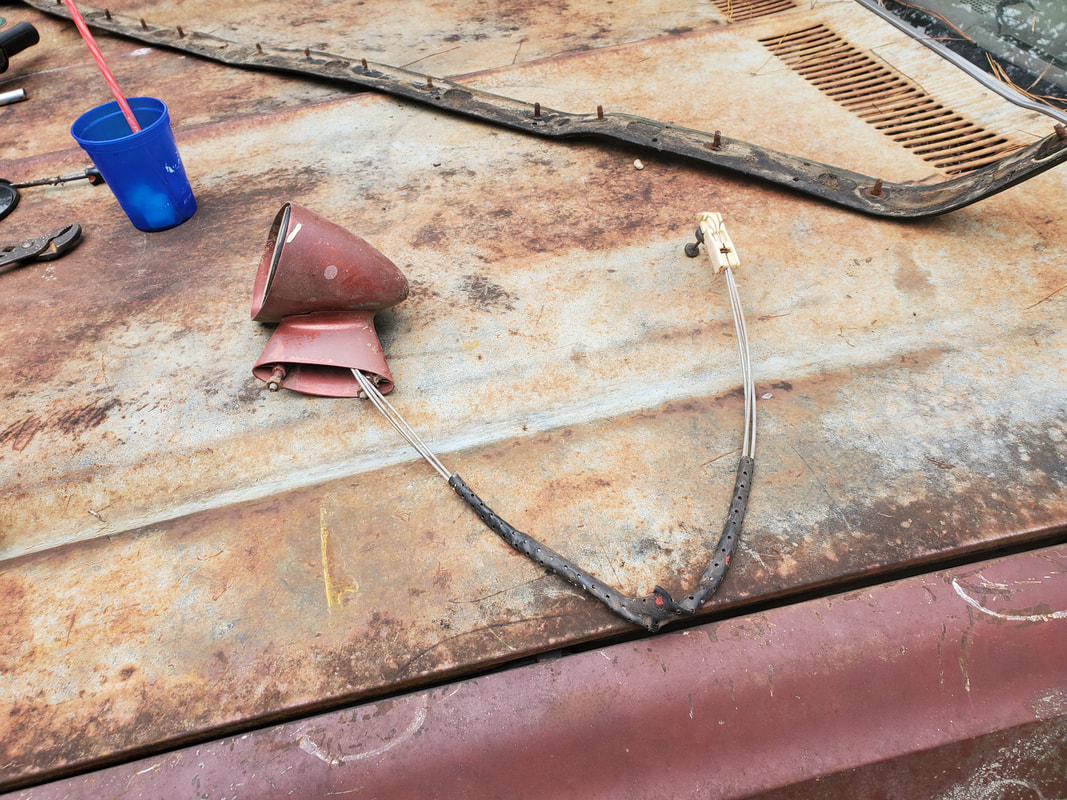 Driver's side mirror with cable control. 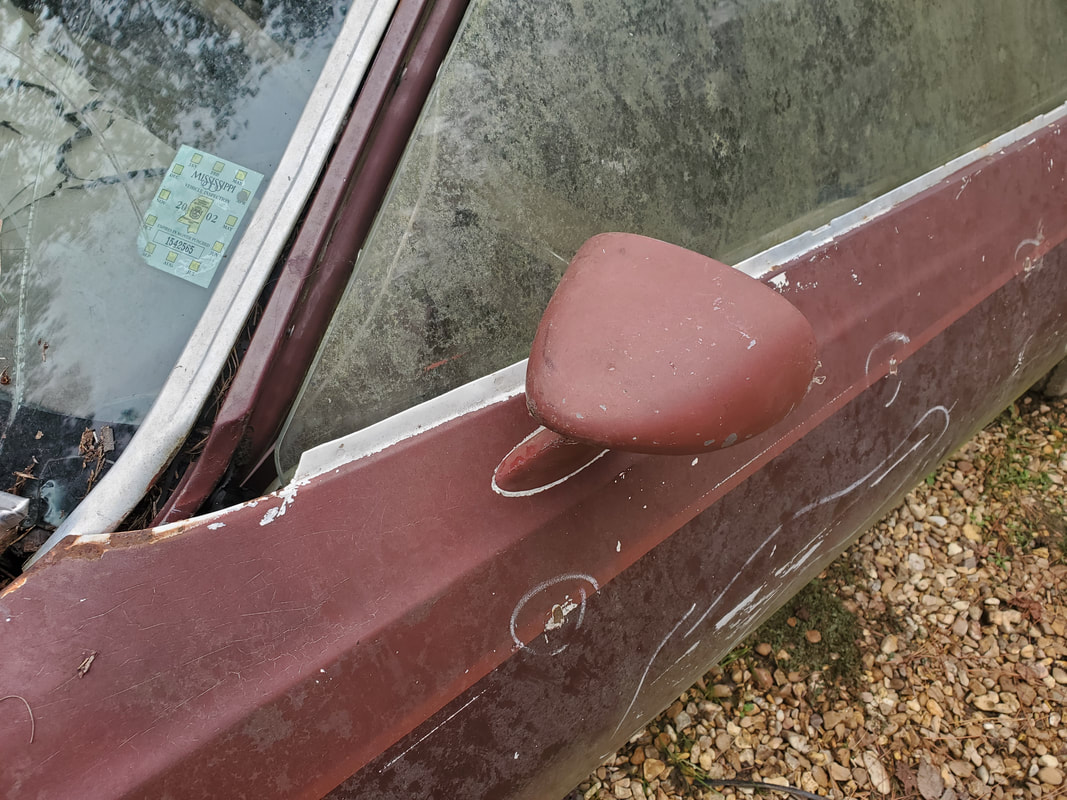 Driver's side mirror secured in place on door.  Mirror control cable and knob hanging free on inside of door, waiting for panel to be hung so control knob can be secured. 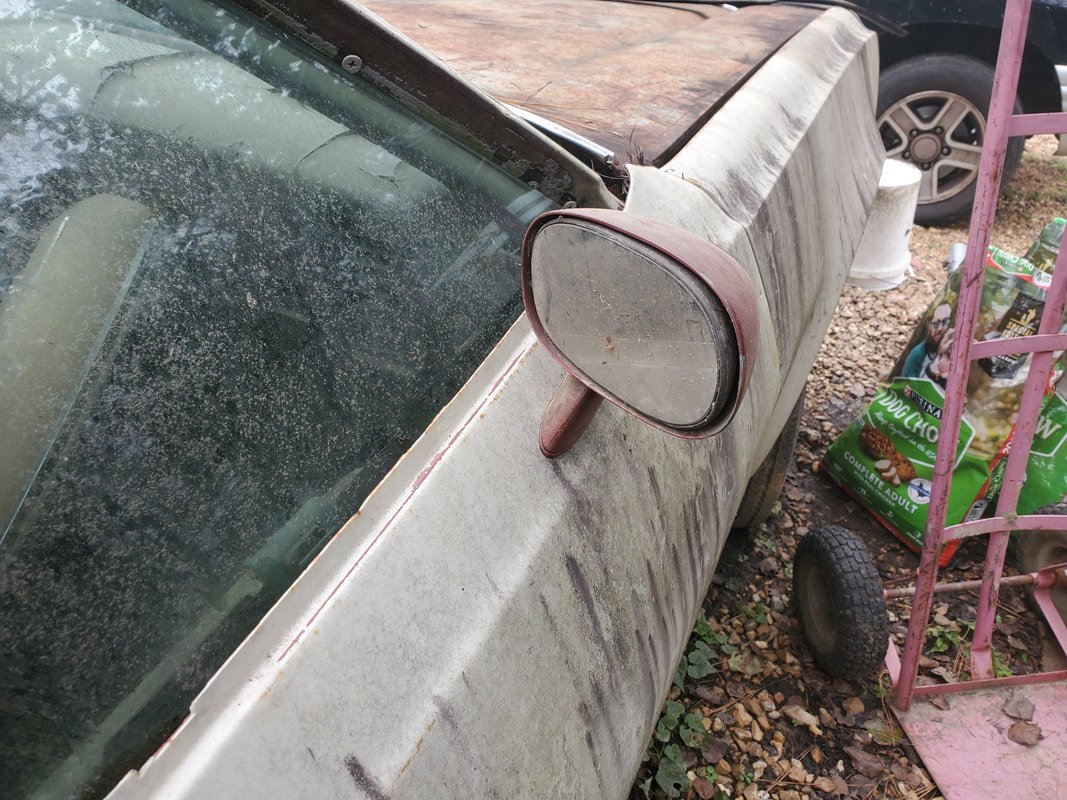 Passenger side mirror installed on door. The next trim piece or pieces that I added were the rocker panel/door jamb panels. These are the panels that accent the bottom of the door jamb and at times cover the trough where wires run along the door jamb to the back of the car. These were just a matter of screwing some sheet metal screws in place to hold them to the door jamb and ensure the doors shut properly, which they did, all was well. It really appears that the previous owners just disassembled the car with the intent on restoring it but never finished for whatever reason. For me its just a matter of reassembling the car and restoring those operations of the car that are not operating, basically getting the car mechanically operable. 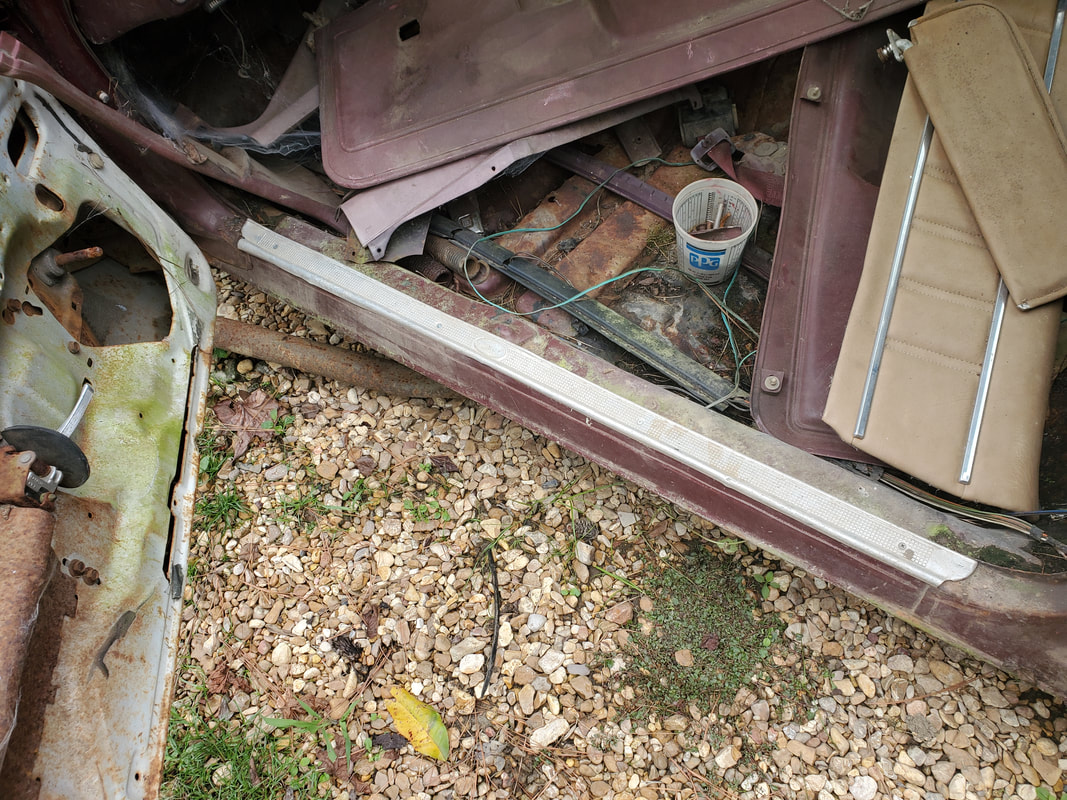 Driver's side door jamb/rocker panel trim piece installed. 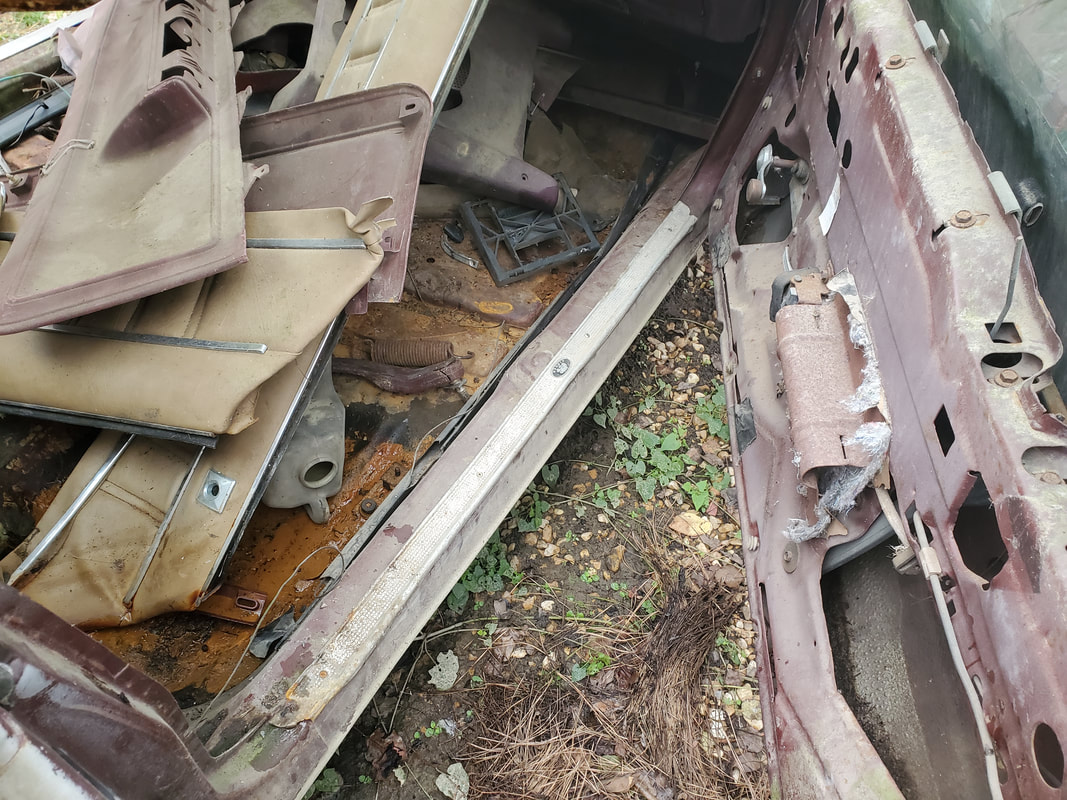 Passenger side door jamb/rocker panel trim piece installed. Note loose interior pieces littering cab. The next set of pieces to be installed on the car were the door frame/A pillar trim pieces. These moldings come in two pieces for each side, held in place with short sheet metal screws. Normally there would've been some weatherstripping under the moldings, to cushion the door windows when the doors are shut. Since this rubber is long gone, I will have to later on remove the moldings to install new weatherstripping. This is fine as I don't want the weatherstripping sitting around loose, it would be better for the pieces to just be on the car, out of the way. 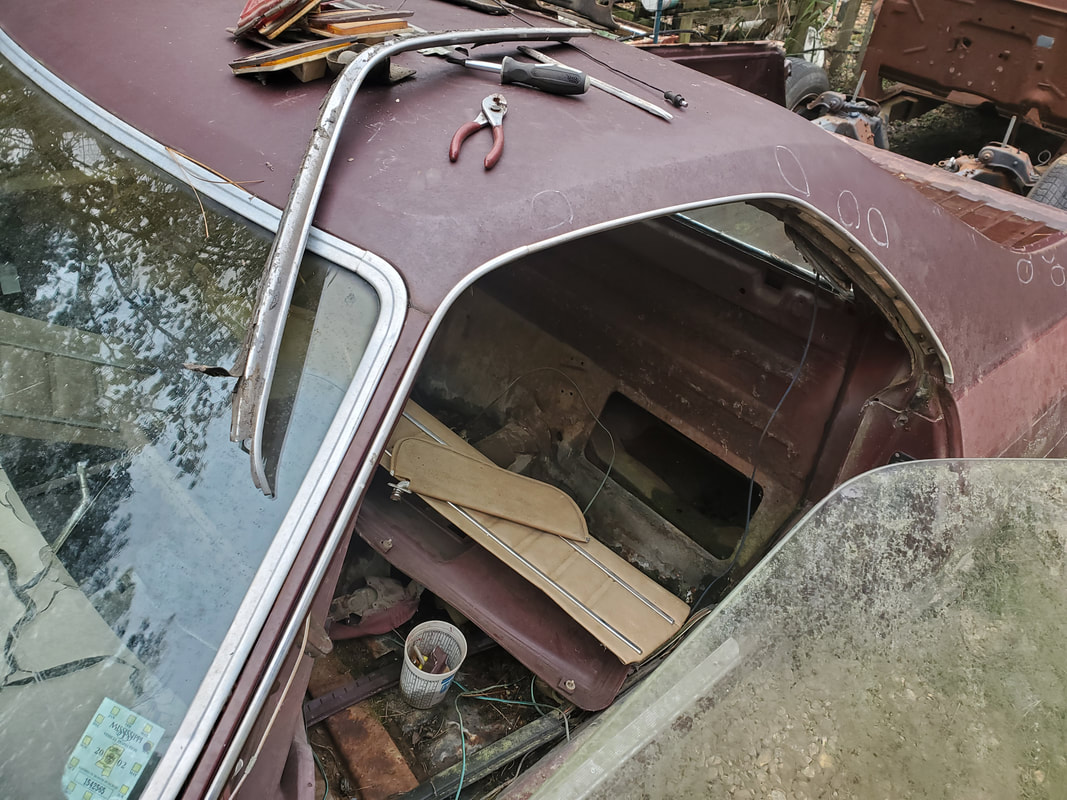 Driver's side door frame/A pillar molding installed. 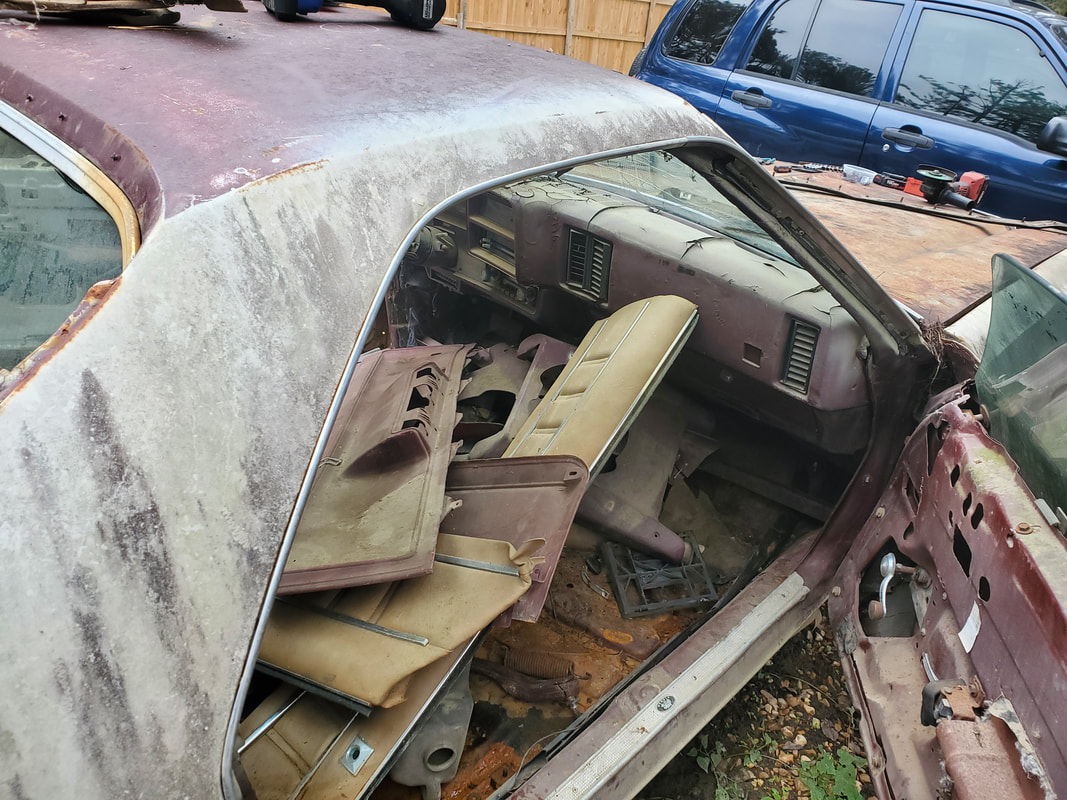 Passenger side door frame/A pillar moldings installed. Lastly in this session, I installed the two rear side marker lights. These, just like most of the other pieces that were loose on the car, had nothing wrong with them other than having faded paint on them and being old. The plastic backing that holds the bulb sockets are both in good shape and the outer frame piece along with the red lenses are all in good shape. Both marker lights are held in with simple sheet metal screws, making the installation quick and easy. The fixtures even have raised letters identifying them by side and where the top of the fixture is so there is no mistakes or confusion in their installation. These went pretty fast. 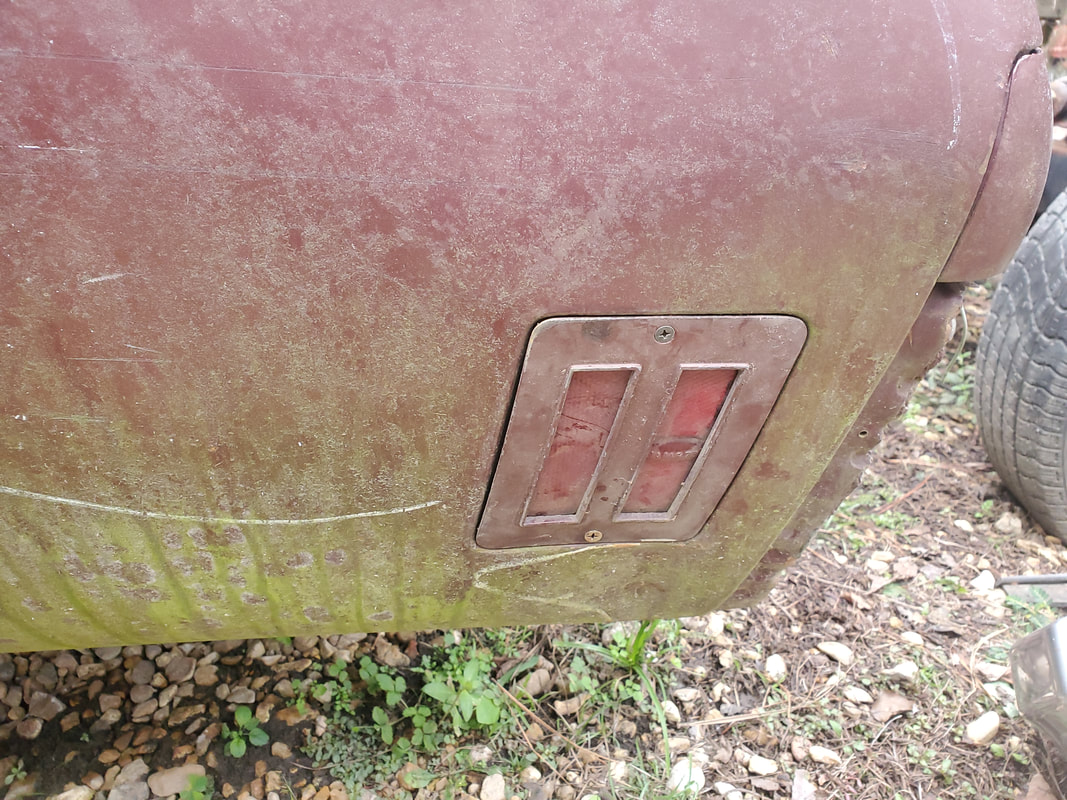 Driver's side rear side marker light installed. 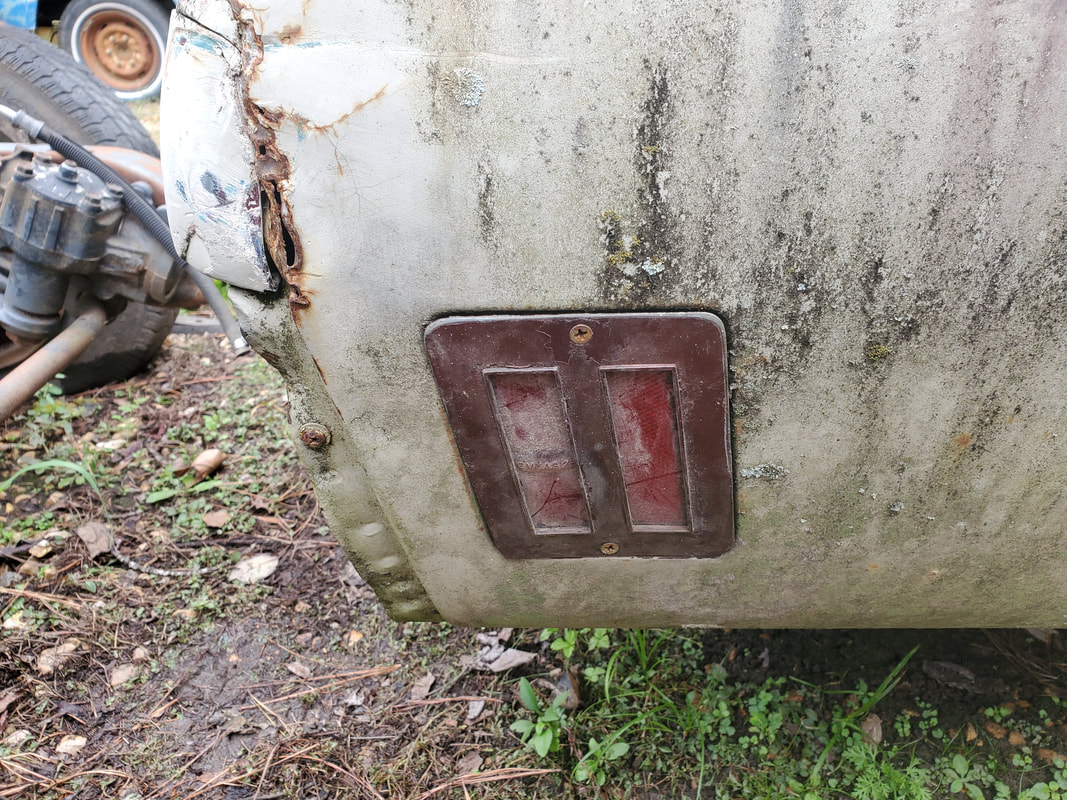 Passenger side rear side marker light installed. I was about to install the two front side marker lights except that they unlike the rear lights, are held in place with cap nuts. While I could've probably gotten these installed pretty fast, it was getting late in the day and I was tired so I concluded things here and planned on continuing things the next day. Little by little this car is coming back together, even if the pieces may need "restoring" as far as making them look better. At this point I just want the car put back together and running and drivable. When the time comes to do extensive body work I can slowly work on disassembling parts and doing the body prep and paint work as intended. Since we're not exactly building show cars here, I can probably get around doing a lot of the more extensive body disassembly work that would involve allowing me to paint every surface of metal where panels and trim pieces would've went. Today was a day for me to start off with a load of gravel once again, still working in the garden, trying to cover up the bare ground so hopefully next year I'll be well off where I won't have to worry about trimming any grass within. I also need the gravel down so when I expand the raised beds to other areas of the garden, it will be easier to work around if there's already gravel on the ground and I don't have to spread any around existing raised bed, like now. 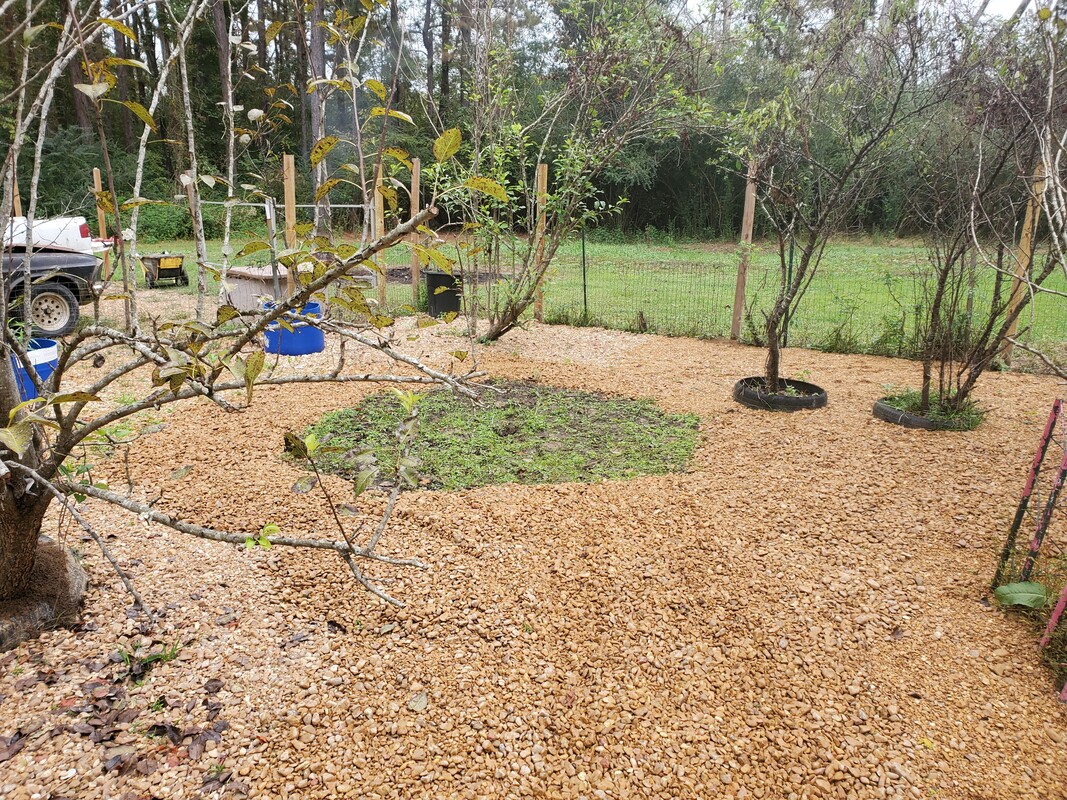 Garden area after spreading current load of gravel. Most of the newly added gravel can be pointed out due to the moisture still in the rocks. From there I turned my attention to the El Camino. After removing the different hardware from the engine bay I wanted to try and hang the front bumper on the car. That was fun. But before that I took a few moments to add a couple of bolts to the right headlight housing and on the top body piece that goes over the grille. I wouldn't know the official names to these body parts, all I know is they needed some bolts put in to mount them solidly. 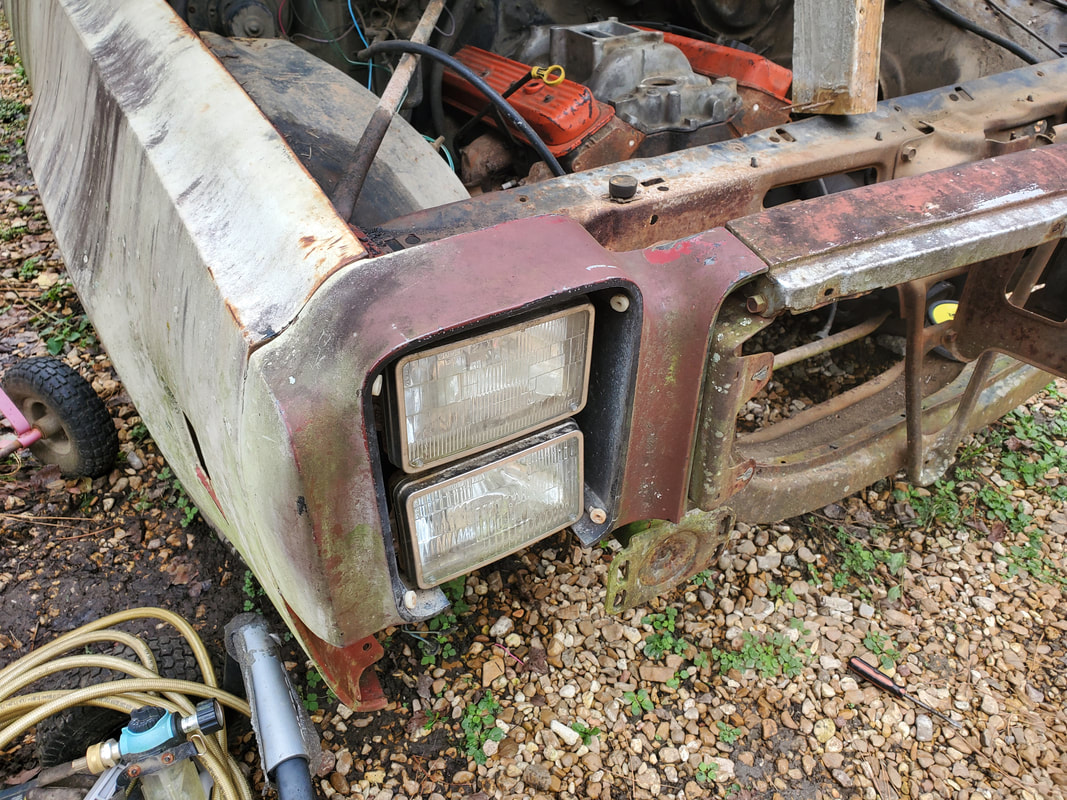 Right headlight housing that was re-secured with a couple of bolts behind it. The bumper has two four stud plates that go inside the bumper and are supposed to be held on by lock washers that have teeth on the inside. From there the studs would slide through two end plates on the frame that have four holes in them for inserting the studs and securing with nuts. The bumper is actually two separate sections bolted together: the inner bumper that is the heavier part that bolts to the frame and the outer bumper that is chromed out and goes on the outside for appearance more so than actually being effective. 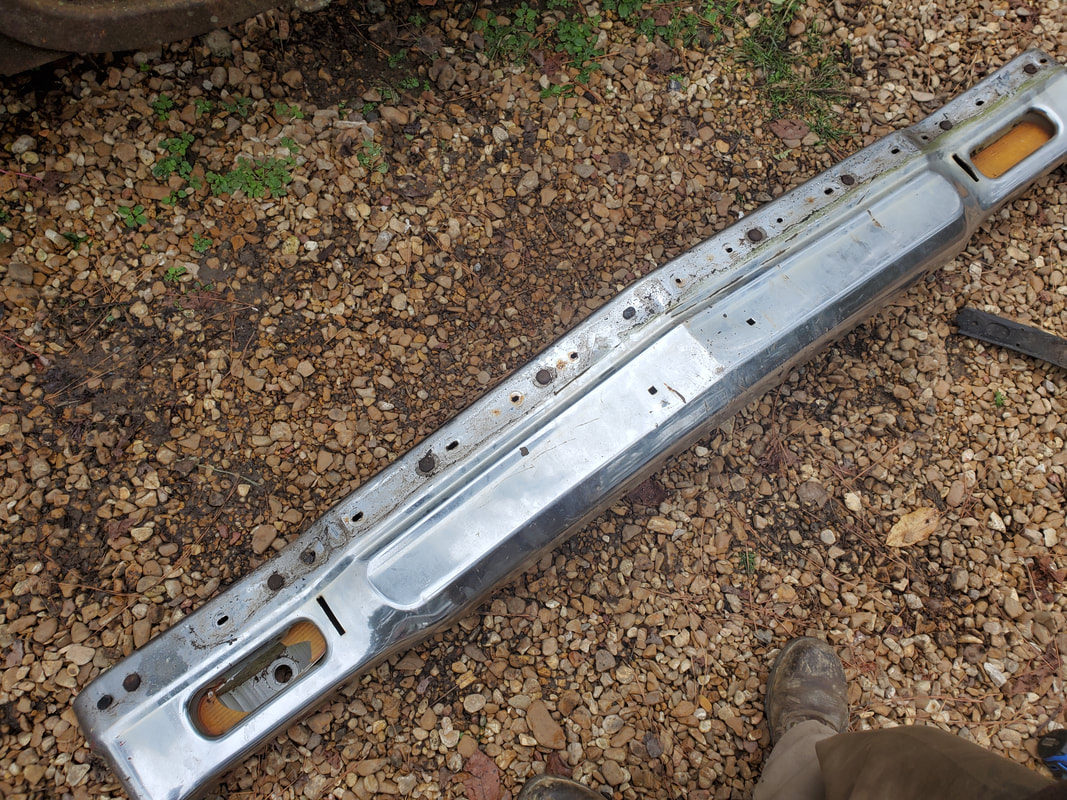 Front bumper assembly. Once I was able to get the bumper up enough to line the studs up and in to put a few nuts in I stopped to look at the bumper. The bumper was pushed in from a front end collision. Being at a downward angle I would have to do some jackleg crap like shimming the bottom bolts holding the bumper up or just redo everything and be done with it. First thing I did was remove the four stud brackets, then remove the top bolts that were really easy to get to. Looking at the surface where the stud plates went showed clearly that the inner bumper metal was compromised. From here I knew I was in for a real treat. 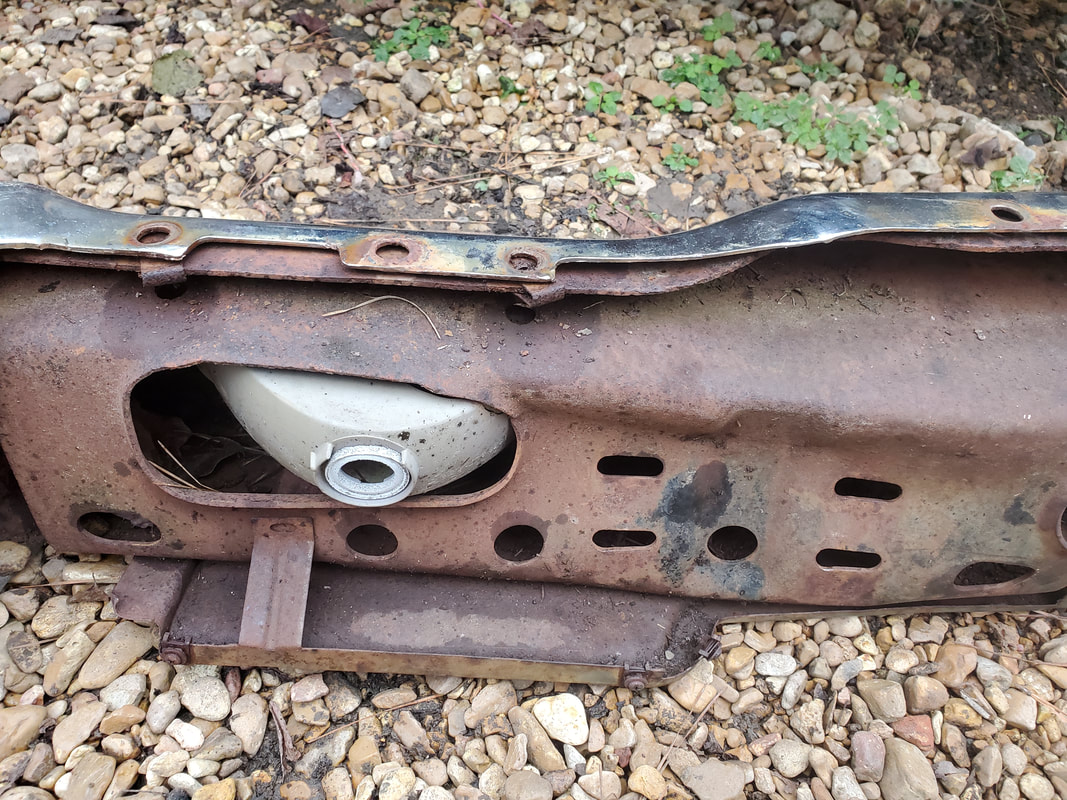 Inward push in of metal over four sideways slotted holes show where the damage is at. This pushed in metal makes it more obvious where the damage is at. In order to remedy this mess I would have to separate the inner bumper from the outer then take a sledgehammer and beat the crap out of the inner side of the inner bumper n order to straighten out the metal enough that when I rehang the thing it won't be at a downward angle. I had to remove the heavy rubber strip from the front of the bumper in order to expose the carriage bolts that held the bottom portion of the bumper together. 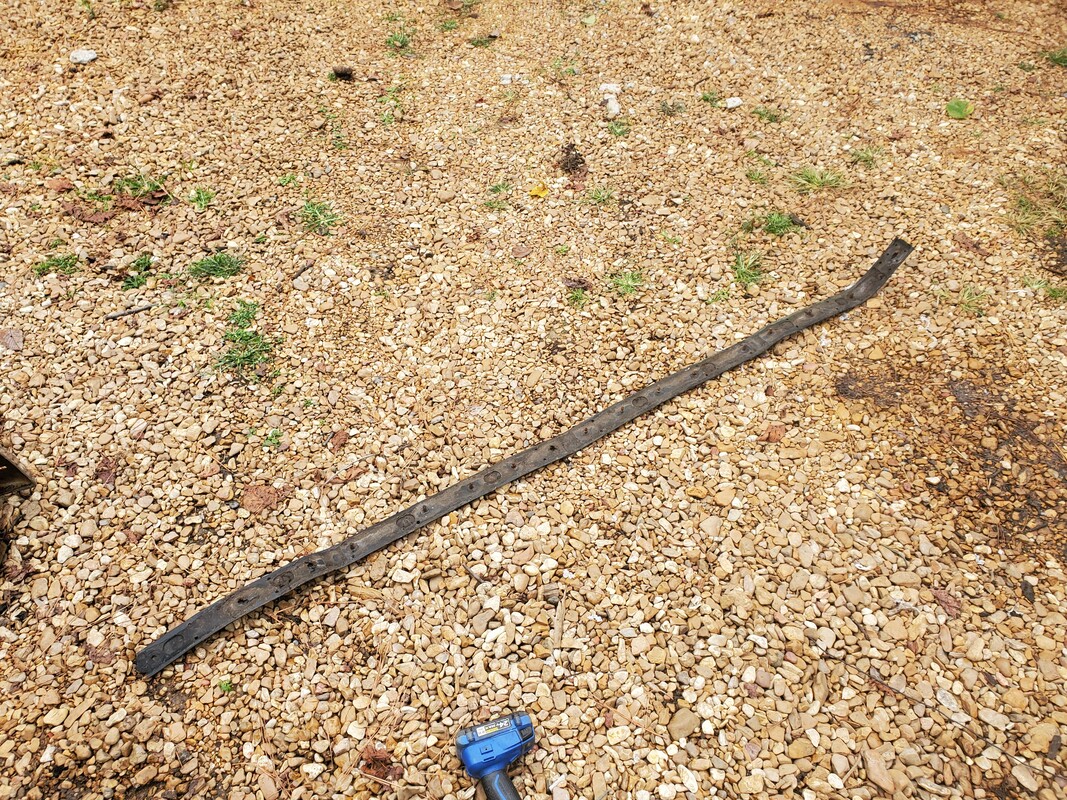 Heavy rubber strip that goes across the front of the bumper to help protect the front a little bit. Another thing that showed signs of physical damage were the two mounting brackets coming rom the frame. After looking at them I determined that the effort needed to get these two places out would not help as they appeared to be secured with some kind of stud and large lock washer, plus they're in a bad spot where I can't easily beat them with the sledgehammer. 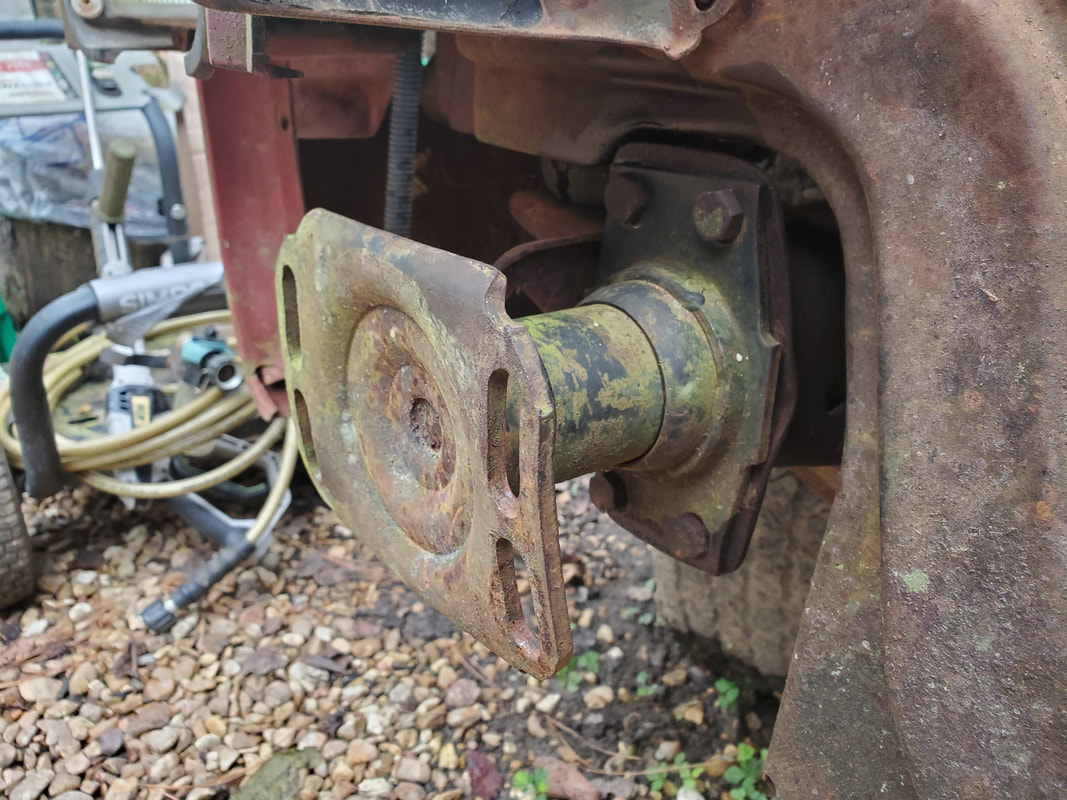 Right side frame mount showing the damage at the bottom, note how the corner is pushed in. 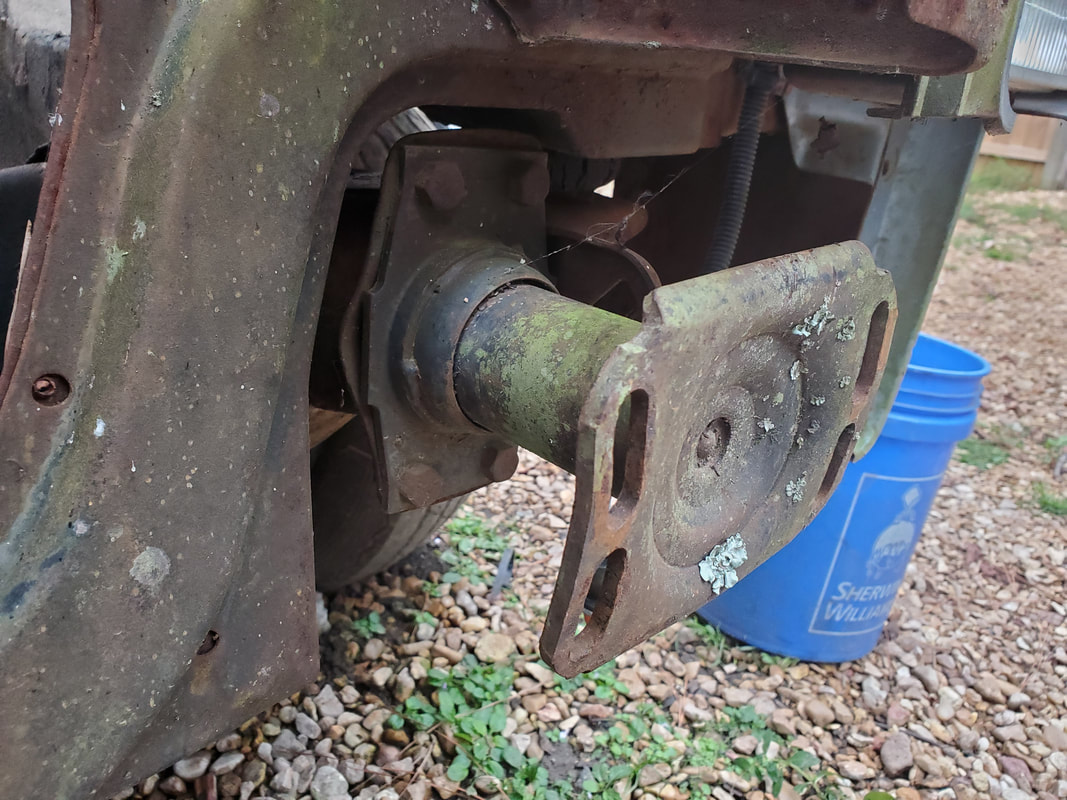 Left side frame mount is just as bad. While I may not be able to do anything about the frame mounts for the bumper, I'll be separating the bumper set into the two sections so I can take the inner bumper and beat the hell out of it to straighten the metal out. From there I have to use a die to re-cut the threads on the stud plates so the nuts will go on properly. Afterward I can attempt to re-hang the inner bumper, possibly having to use washers as spacers/shims to level off the inner bumper. Lastly I can re-install the outer bumper and put the bolts on afterward, having to reach around the inside to get to where the bolts would be poking into in order to apply the nuts to hold everything together. More on all of that next time. After having pulled the larger body parts from the car and doing some preliminary cleanup I got started with the removing of components that won't be used or at least are unable to be used due to not having the provisions for their use when I do resurrect the car. I started in the engine bay as there were some components that pertain to the emissions system and other functions this car had when it was new. Since the powerplant is going to be a simple HEI ignition with a plain 4bbl, there won't be any need for EGR valves and smog pumps or charcoal canisters or any of the stuff we know of that pertain to emissions. Along with these components I will also have to look at removing the wire harness in the engine bay since I do plan on rewiring the car and just like with the Dodge, I just need to save the plugs with a short piece of wire that go to the different loads. 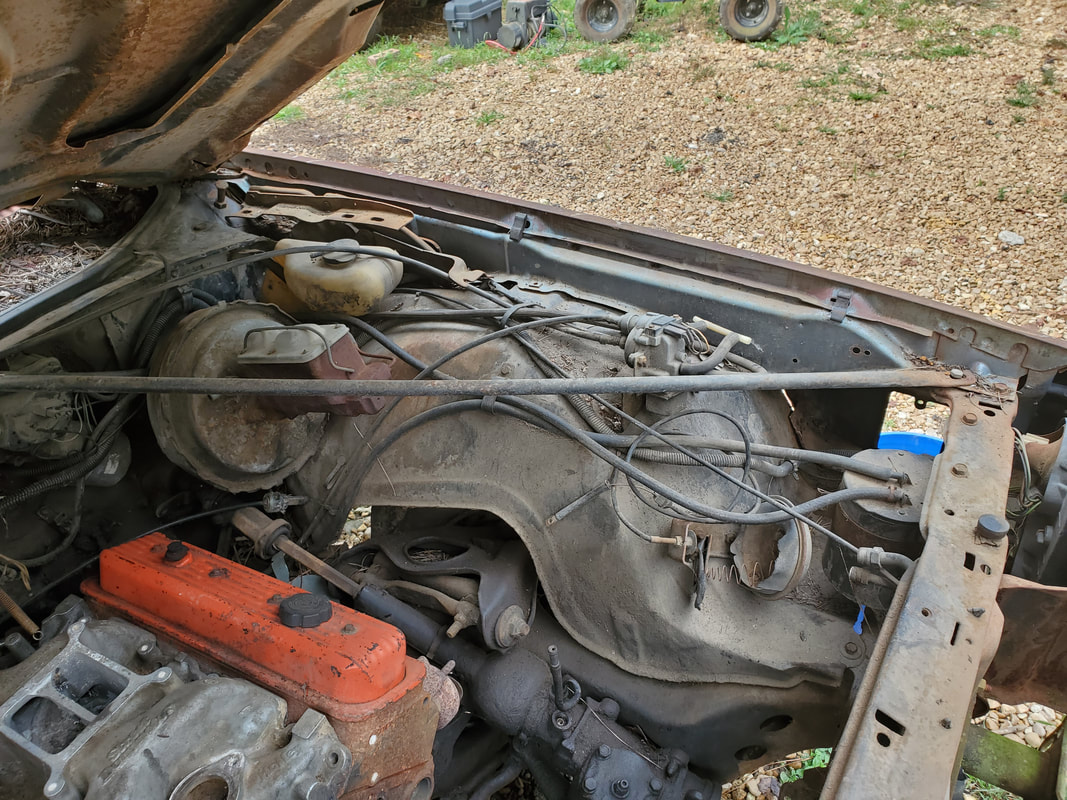 Old emissions components and old cruise control module on left fender well. All of this will come out. 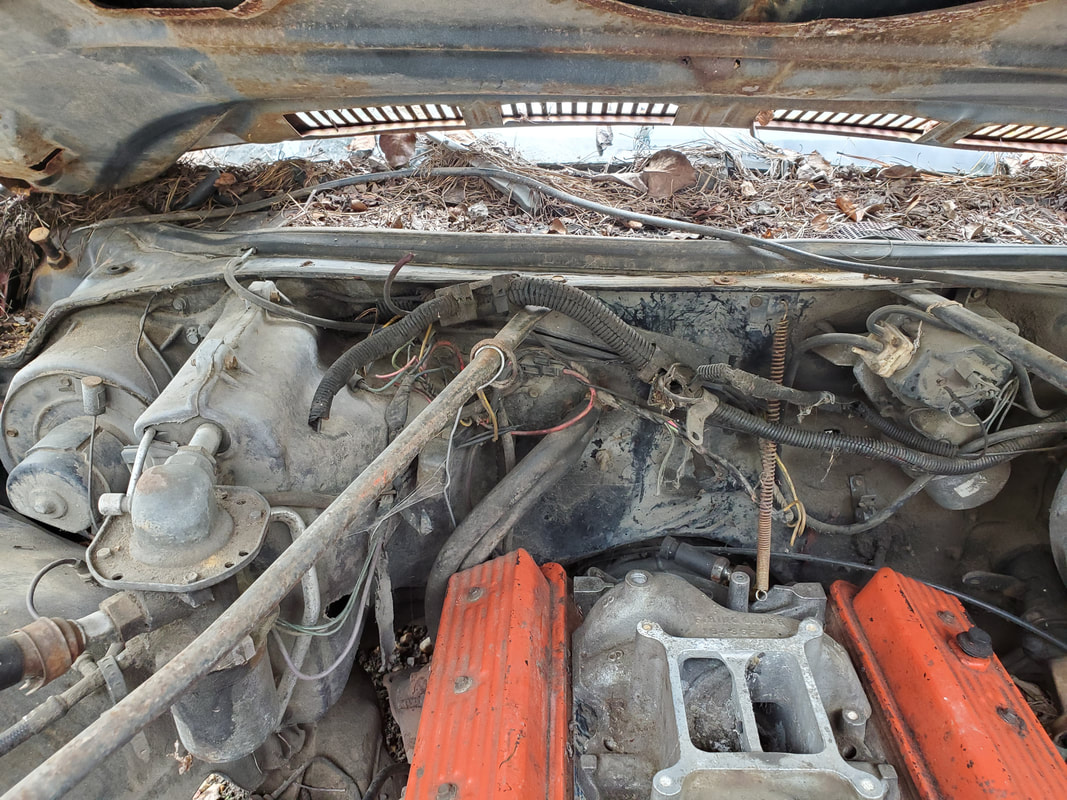 Old wire harness as its routed around firewall to hook up to the different components, all of this will be replaced. The first thing I did that was pretty easy was remove the old AC condenser as it was bent some and would need to be replaced anyway. This was pretty easy as it was held in with four bolts. With it out, it opened things up so I can work better later on in the engine bay. From there I removed the charcoal canister and some other component that looked like it fell apart. The next thing I pulled off that I didn't know what it was at first turned out to be a cruise control module. This thing has two speedometer cables coming from it, one going to the transmission and one going to the speedometer gauge itself. It also had a couple of vacuum hoses going to it and a two wire plug coming from it. I'm guessing that the thing uses engine vacuum to determine when to work the throttle, or maybe lock the throttle, and when the speed goes down (such as when you go uphill), the vacuum changes and the speed drops, causing the module to see these changes and work a solenoid that pushes the throttle up some to get back to the set speed that would disable the advancement of the throttle. I could be wrong, I'll have to research this first generation cruise control to see what all it involves and if possible, see how to maybe resurrect it, it would be a cool feature to have on this old car. 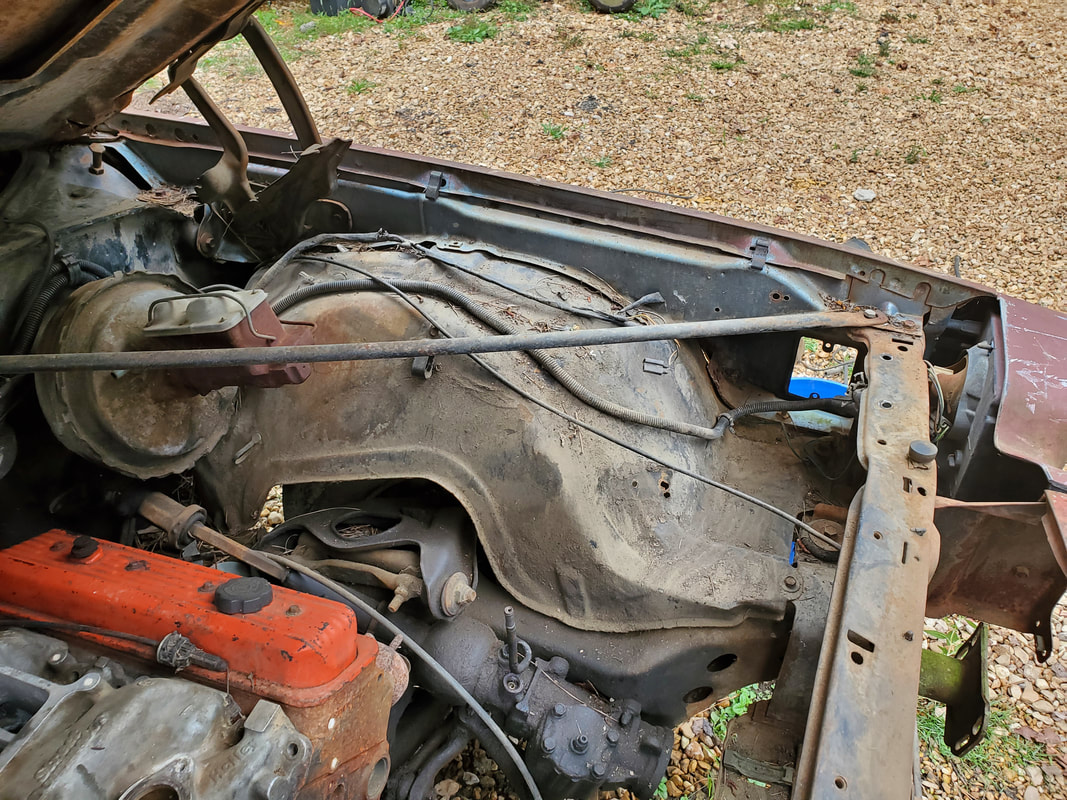 Left fender well cleared of components. 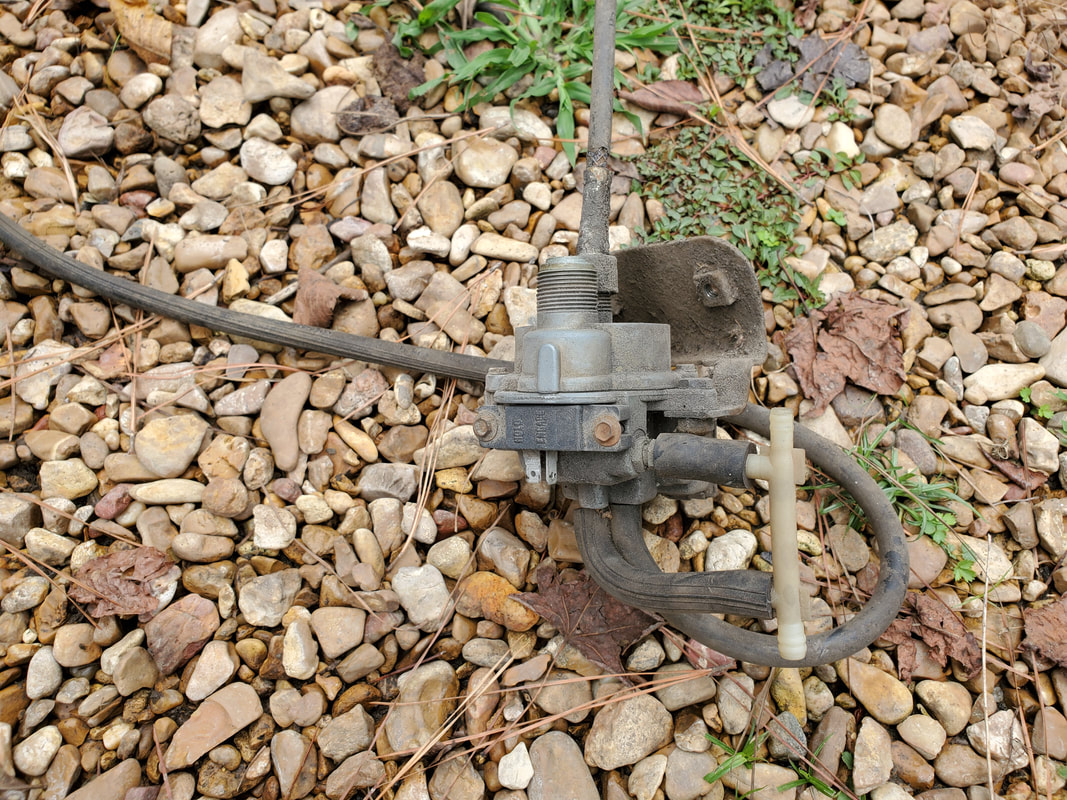 The cruise control module pulled from the fender well of the car. Along with some vacuum hoses and the speedo cables, removing the cruise control module was the last thing I had to do before writing off the fender well as cleared. Some of the hardware went into the scrap pile while the cruise control module got set aside for that mentioned research I want to do. I'll be targeting the wiring next, trying to see if its possible to pull the whole bundle out in one piece where the harness may plug to a junction block so I don't have to resort to chopping up wiring. I'd rather do my disassembly in a clean manner so I can more easily salvage parts I may need from the things I pull free. 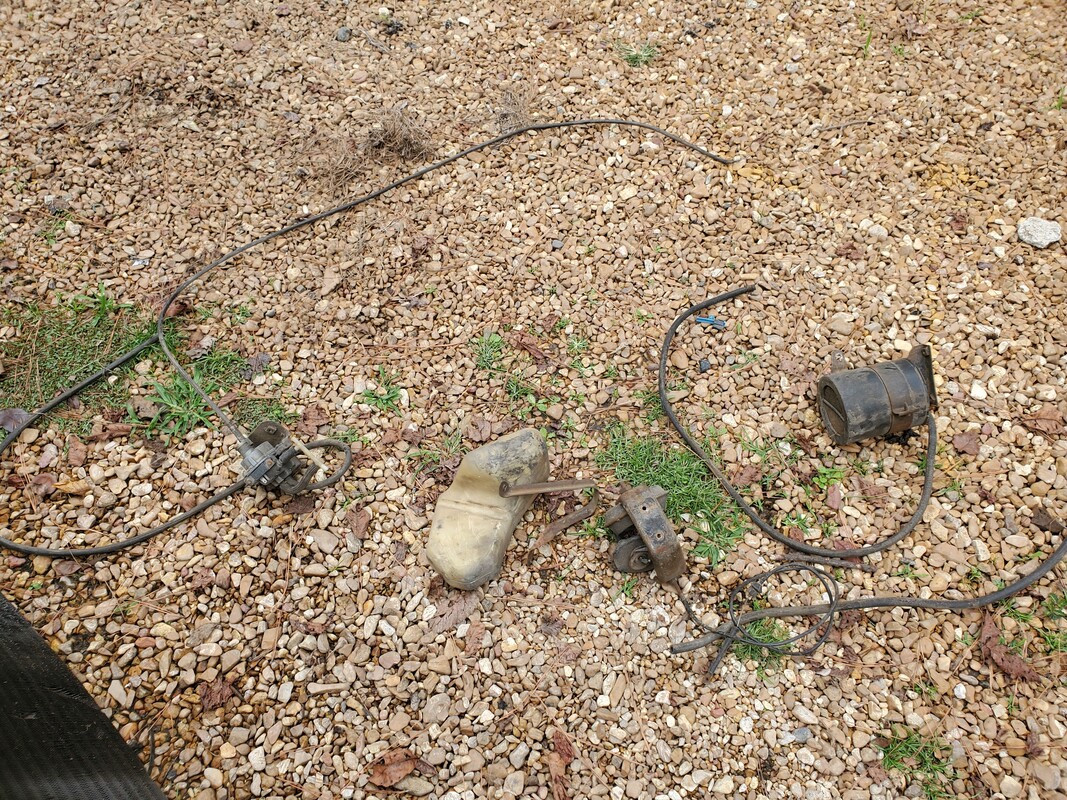 Hoses, overflow bottle and charcoal canister pulled from fender well. From the way it appears, I'll also have to do some repairs to the HVAC box as it looks like a rat was chewing on the plastic shell, causing a hole to be formed. Along with that, I may start mapping out the electrical loads so I could just prematurely start on the rewiring by just cutting the pigtails from the plugs and leaving them on their respective electrical loads while removing the rest of the wire by any means necessary. This way when it does come time to do the rewiring, I'll already have some of the work done. Things like the headlights and turn signals could be pre-wired before actually working on the rewiring, with me just having to splice into the wires I run beforehand for the loads. Whatever I do, I want to try and make this project go by pretty smooth and if possible, quick. We will see though. After moving the Elco to its new spot within the fenced in section of yard and looking at it for so long I decided it was time to start getting the car ready for me to start doing some work on it. Like many of the projects around here, I can actually do a lot of work with the parts I have available, until I reach a point where I need to buy new stuff. Maybe by adopting this concept I can actually get farther ahead on all of the different projects, not just the cars. But first things first, I had to clean things off and more or less inventory the larger parts that I would be working with in getting the body put together. We managed to get a replacement rear bumper, one of the hardest parts to find for this year Elco, since it has the integrated taillights. We also got a replacement transmission crossmember, another hard part to find. Along with the front bumper that we already had and the tailgate, I could get most of the body put back together, leaving the interior parts that are scattered about the cab of the car.  Bumpers, tailgate and crossmember all laid out on ground. 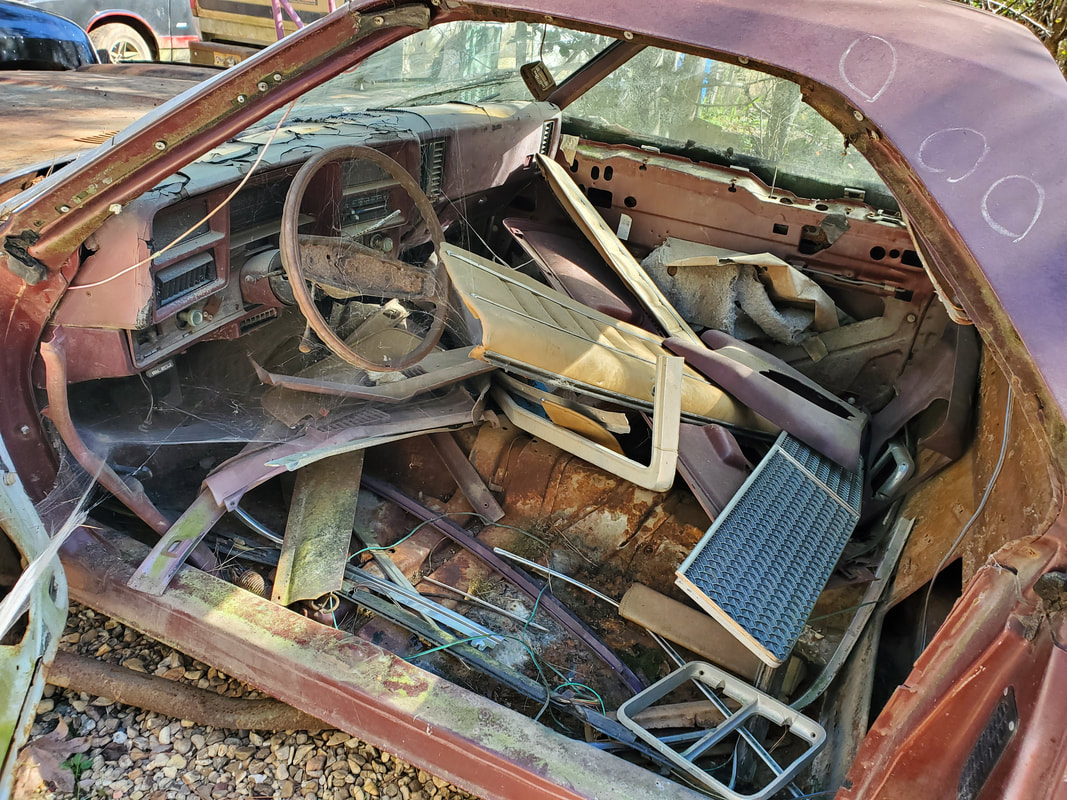 Extra external parts and interior parts scattered about in cab of car. Another thing that had to be done was cleaning out the bed of the car. I had all the large body parts in the bed along with some other crap, one of which was a winch I got for our car trailer but never installed it yet. Also there was a bunch of mulch from the pine trees that dropped pine needles into the bed over the years that had accumulated and had to be cleaned out. After pulling the body parts out I removed the winch and the couple of garbage items then swept out the pine mulch to get the bed nice and clean. To a degree this wasn't really necessary but it has that effect of accomplishment that one gets when they take time to clean something up prior to working on it. 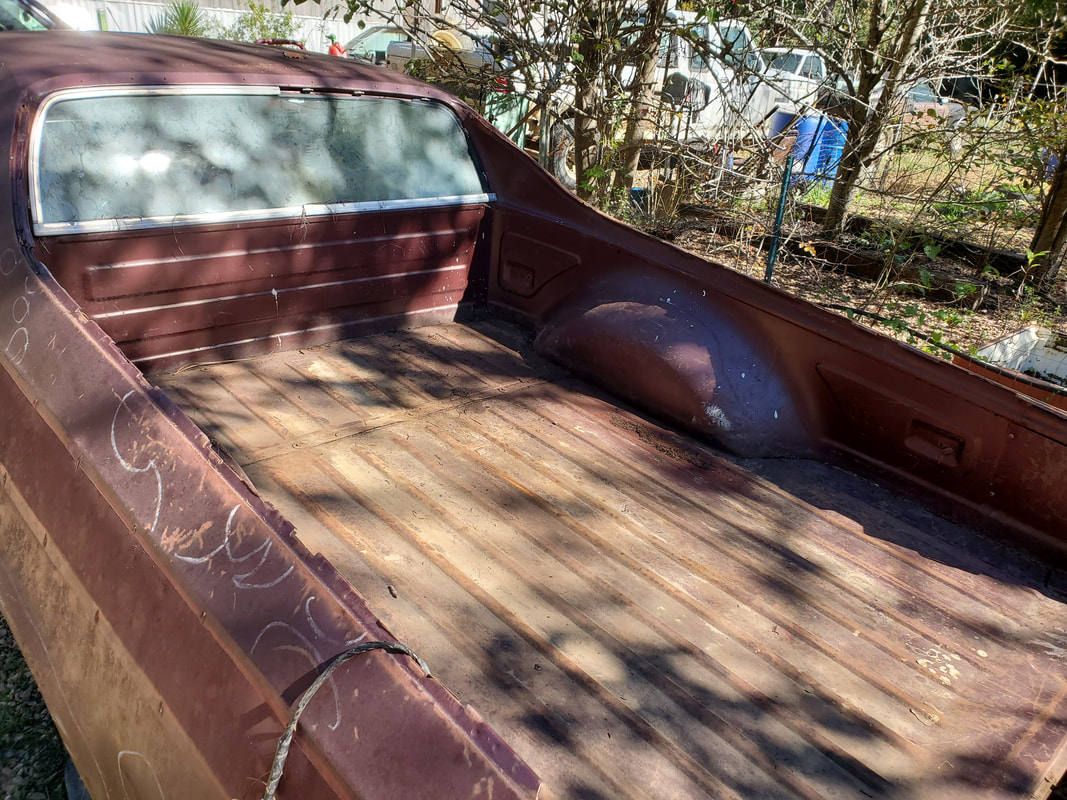 Bed of car cleaned and swept out of all crap. The next thing I wanted to do was look at the engine and verify that the thing still turns over and hadn't frozen up somehow over the years. The hood isn't mounted on hinges, its just laying on the top so all I had to do was lift it up, but I had to prop the thing with a 2x4. After opening it I found a huge amount of rat shit in and around the intake manifold. Luckily the intake wasn't bolted down so I was able to remove the thing to get the larger amount from out of the inside of the intake. Before removing it I did take time to vacuum the external shit from around the intake so nothing would fall into the intake valley. After getting the external shit out I pulled the intake and shook it out real good to make sure all shit was gone before putting the intake back on the engine. I then took the crank pulley and attempted to turn the engine over by hand, being successful, making me happy that the engine was still good since I did see this engine run before I bought it. 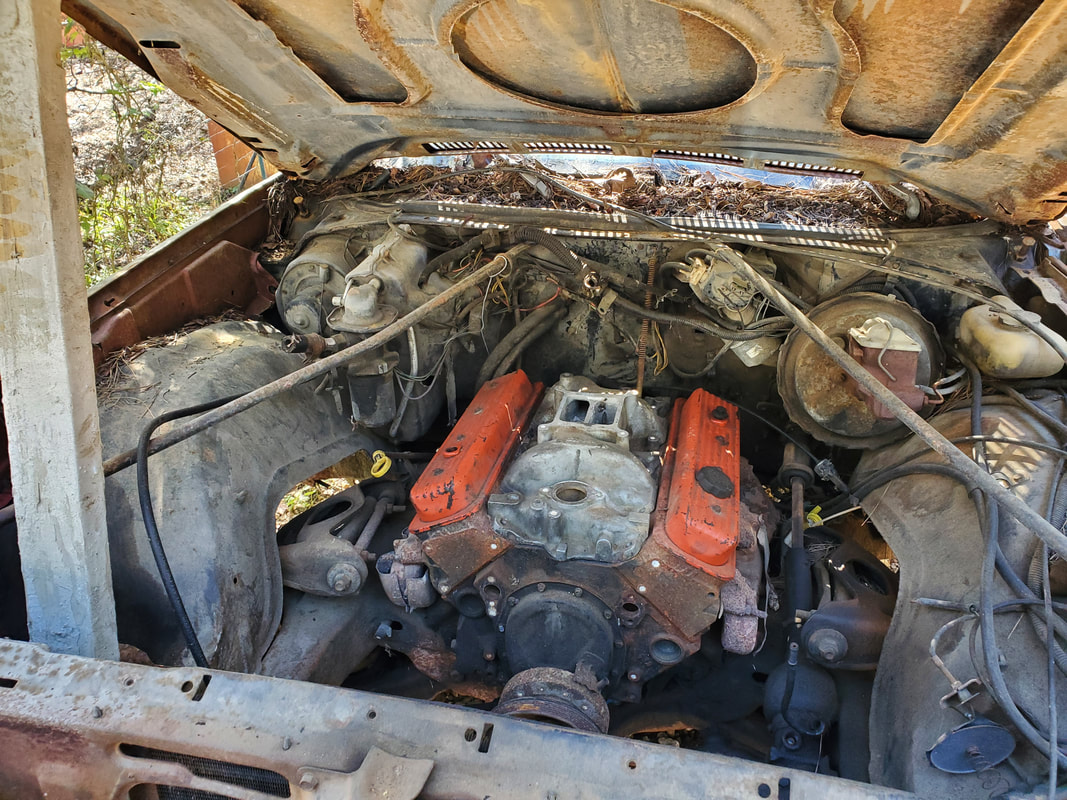 Engine after cleaning up rat shit from intake manifold. With that I managed to get things where I wanted them to be. The next move will be to start installing the rear bumper and tailgate on since those would be the easiest, all things considered. The front bumper won't get put on until I get the headlight frames secured to the front fenders since those parts are loosely in place. Once that's done I can get the front bumper on, along with the grille and the headlight bucket trim and other associated moldings that I spotted in the cab. Putting all that stuff on will go a long ways as well as it would clear the cab of loose parts. Once the cab's clear then I can really start moving forward doing things like rewiring the car. 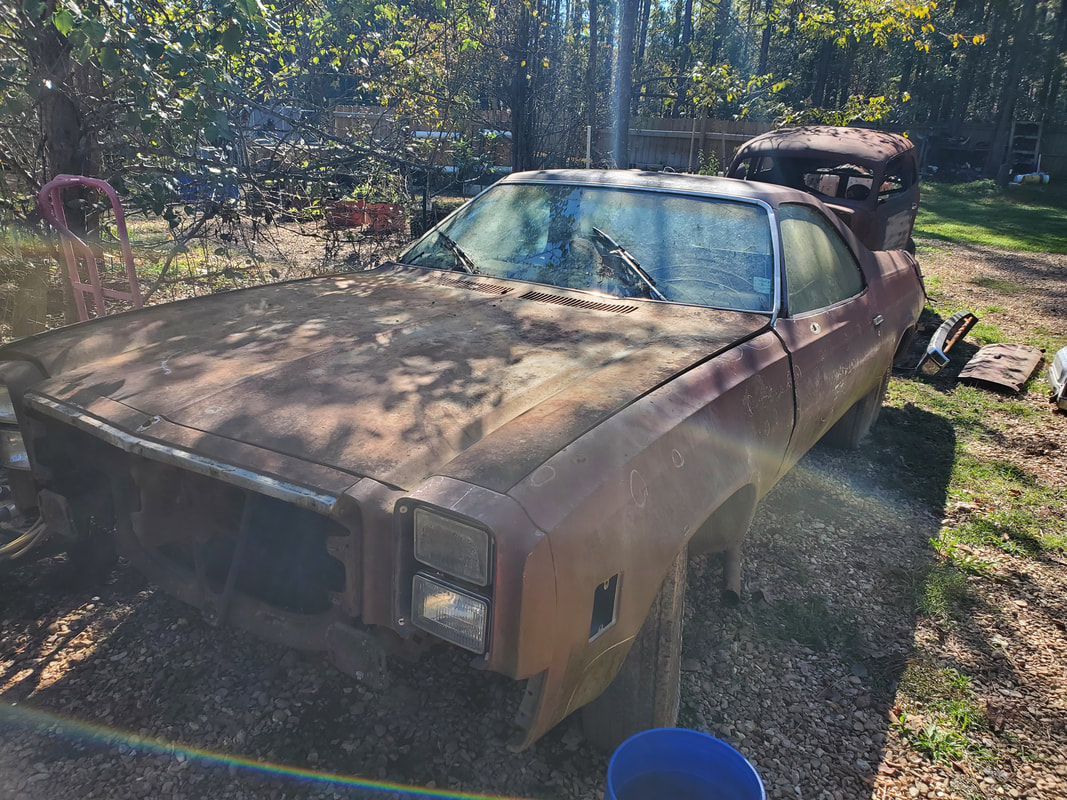 Front of car, note how headlight frame on passenger side is not mounted solidly. I will also have to prop the car up so I can remove the homemade crossmember in order to install the factory crossmember. I will have to get some replacement bolts in order to put the right ones in place as I just threw whatever bolts in that I had laying around. I want to have the right bolts in there from the start so I don't have to worry about taking care of that little detail later on. At the same time I can cut out the old exhaust system to get it out of the way. I can also survey whatever other things under there that might need to come out such as the fuel and brake lines or wiring or if I need to do any welding underneath. Just like with the Dodge, little by little I'll get this car back together and hopefully up and running and on the road more sooner than later, even if it doesn't look pretty.
A while back we picked up a used 302 V8 engine from a local mechanic that stripped an old Ford truck from the late 70s for a fair price. This engine would be the donor engine that would be set up to go into the 94 F150 truck that we have that was named the FMT or Ford Muscle Truck, paying homage to Roadkill for coming up with this acronym. Anyway, part of prepping the engine was to remove all of the accessory brackets that held the old alternator and power steering pump and other hardware, since the stuff that went on the FMT's original engine are obviously different.
Now we did have to pick up another accessory bracket as we were missing one of them. We did get everything bracket-wise but may still need to replace something like the alternator or what not. By putting the FMT's original hardware back on we can be able to drop the engine into the truck and hook everything back up the way it should be. There were some obvious changes to be made though. The first thing was the intake. The old V8 had a 2bbl carburetor and intake on it, which despite the fuel savings with a 2bbl versus a 4bbl, I pulled all that stuff off. I needed a 4bbl intake but didn't really want to shell out the $150+ to get a new intake. I did the next best thing, borrowing. Since we recently pulled the 289 powertrain from the 65 Mustang, I had its engine sitting on the floor in the garage. This engine has a 4bbl intake on it. So, it was obvious at this point what was going to happen. I pulled the intake off and cleaned it up since it did have rat shit on it. With that, I was able to transfer the intake over to the 302 engine. 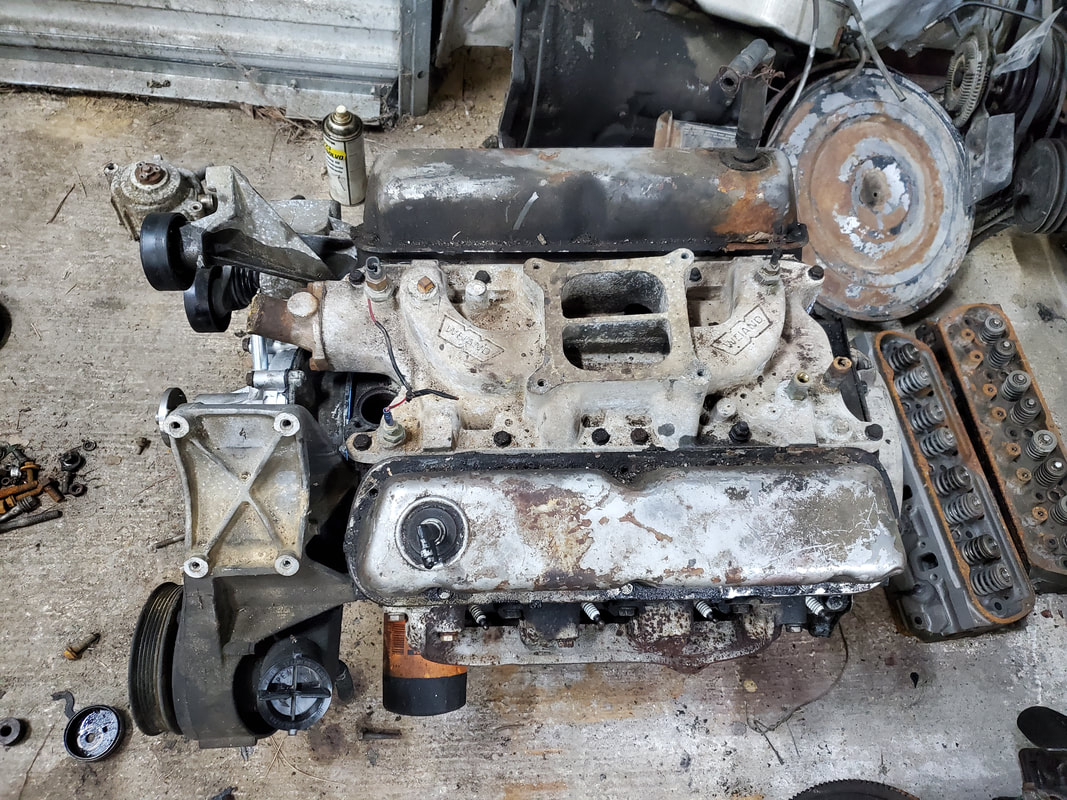
The aftermarket 4bbl intake manifold removed from the 65 Mustang's 289 V8 to be used on the FMT's 302.
With the intake installed on the 302 the next thing was the front of the engine. Upon trying to test fit the accessory brackets, I ended up seeing the engine's old water pump would not allow for the newer accessory brackets to be bolted up. I ended up ordering a new water pump intended for use on a 94 F150. Upon trying to install the newer water pump I found that the gasket outline for the newer water pump didn't match up to the old timing cover. Also with the mechanical fuel pump on the timing cover, the accessory bracket on the left that holds the power steering pump and compressor would not fit. Basically the older timing cover had to be swapped out. Luckily I still had the newer timing cover from the FMT's old 302. With a replacement gasket set I was able to get a new front main seal installed in the timing cover and get the gaskets staged so I can install the new cover on the engine. After having to fight with the cover some to get it to set straight, I got bolts installed and went ahead and installed the newer water pump. From there I started installing the accessory brackets. The bracket on the right side holds the alternator and smog pump. In the process of installing this stuff I had to hunt down bolts to fit everything since some of the bolts required were long bolts. I was able to find some salvaged bolts from the FMT's old engine but had to source others from my stock as well. 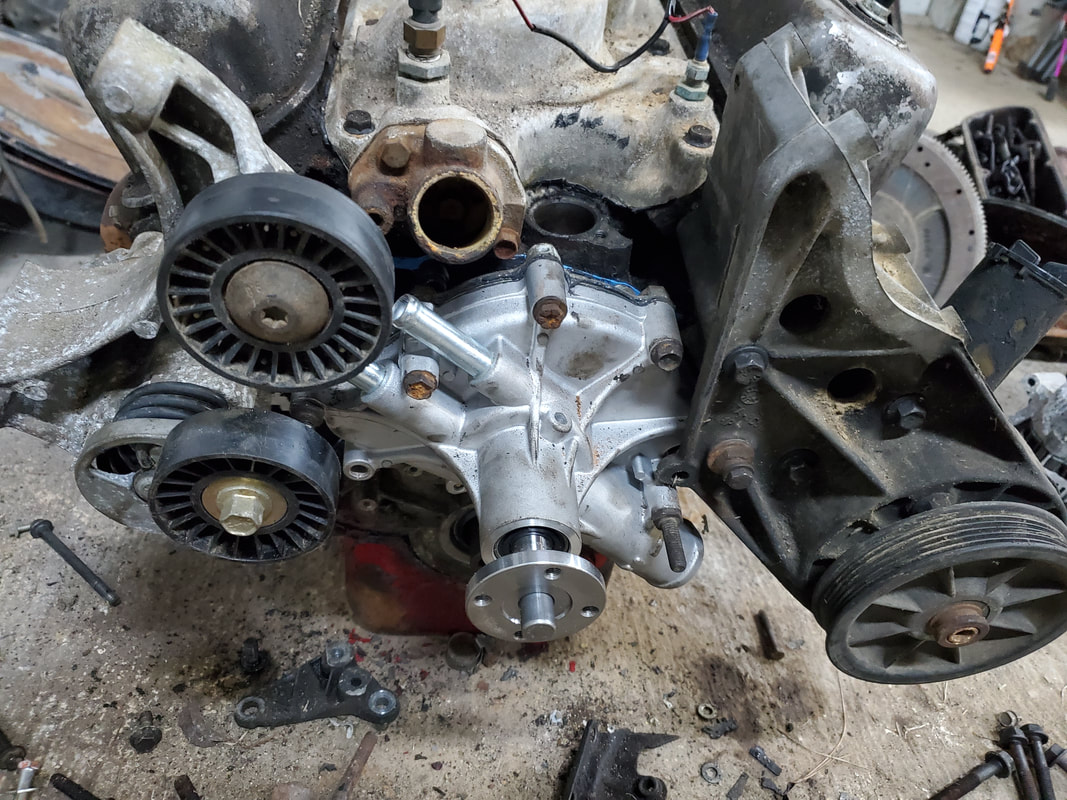
The accessories and their respective brackets bolted in place around and over the new water pump and timing cover.
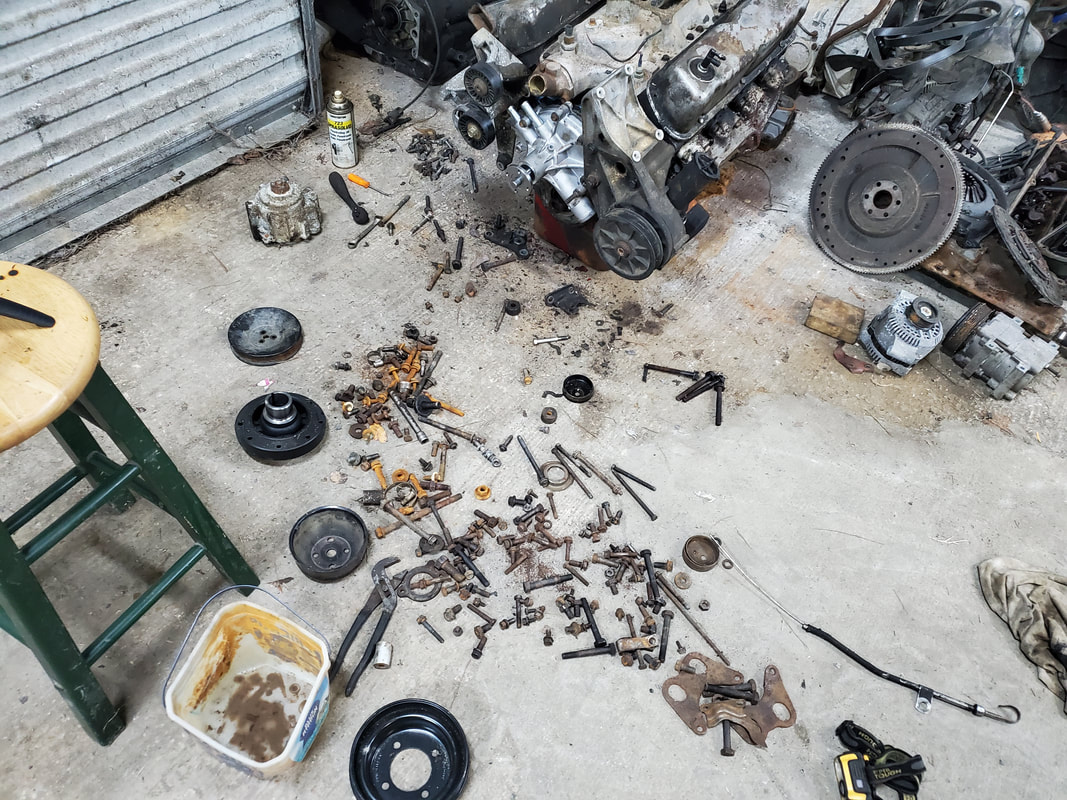
All the miscellaneous bolts that were scattered about the work site to search for bolts that would fit to help me get the hardware bolted onto the 302.
With the accessory brackets bolted up I had to survey what was left to do. I still have to install the harmonic balancer and the crank pulley for the serpentine belt. I also have to install the pulley for the water pump as well. I could re-install the fan clutch, but I have to see if I still have that piece of hardware, otherwise I will have to install a pair of generic electric fans, like the ones on the Dodge, or get a dedicated radiator shroud with a couple of fans installed, or make an assembly as such to use with a couple of generic fans. I also have to install the AC compressor and alternator on their respective bases on the two brackets. The left side bracket has the power steering pump already on it and the right side has the smog pump. Originally I planned on keeping the smog pump since I would need it for its pulley to hold the serpentine belt in place. After doing a quick check I found the smog pump was frozen, never to turn again. I went ahead and removed the part, but immediately started researching the existence of a smog pump bypass or delete pulley, which would be a pulley that has a bracket that can be mounted in place of the smog pump, but hold an idler pulley in the same spot as the smog pump's pulley. I hadn't seen anything yet but had seen how some people just removed the smog pump and got a smaller serpentine belt that allowed them to belt everything up without worrying about the smog pump or a pulley assembly to delete the smog pump from the system. 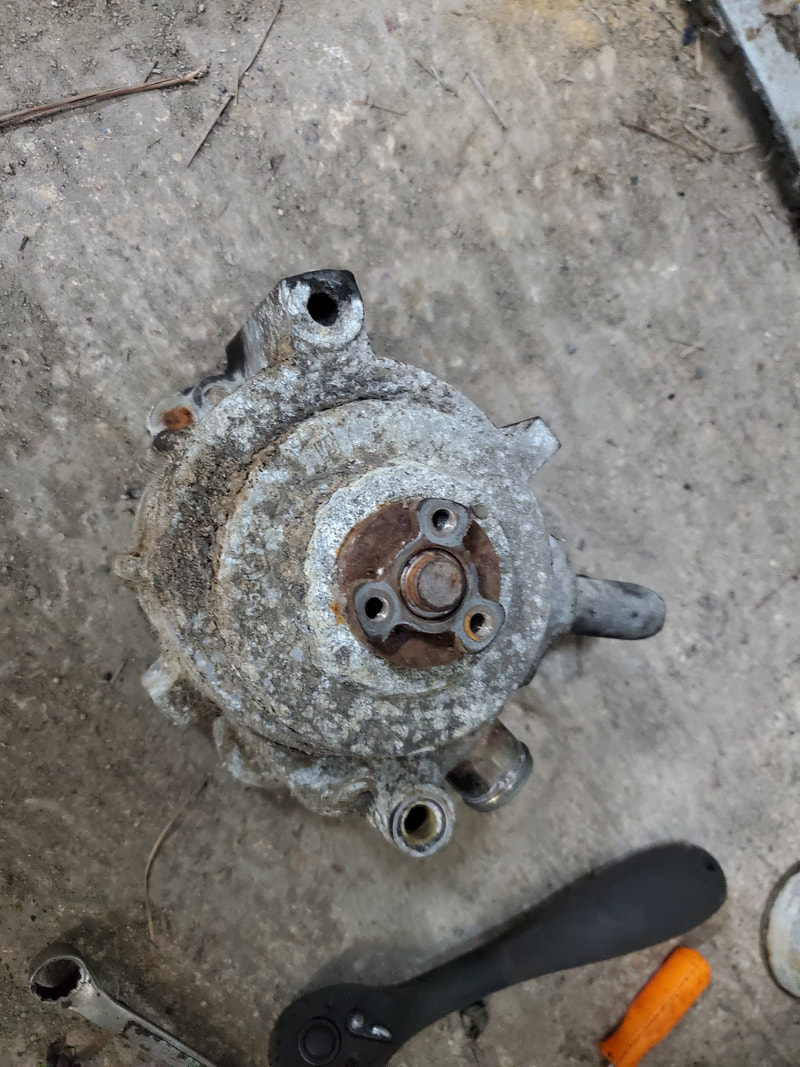
The old frozen smog pump that was removed from the accessory bracket on the engine. The pulley had to come off first in order to reach one of the bolts holding the part on.
I did find some info from some forums about the smog pump issue with some belt part numbers and reference to the idea that a belt can be safely routed in a way that excludes the smog pump all together. I will have to test that theory out by getting a belt of that part number and doing what some of these guys did to make things work as they said it did for them. If I can succeed at that, then I'll have saved myself some money and headache by not having to get a pulley assembly or even worse, getting a replacement smog pump just to use it for the pulley. It would be nice to have this resolved so when I do get everything put on the engine I can throw the belt on and have that part of the engine build completed, leaving just the clutch master cylinder and slave cylinder, the latter which has to be installed on the transmission's input shaft, which will be blocked when the tranny is installed on the back of the engine. Once that's all done the powertrain will be ready to install into the truck.
After making replacement door panels for the Dodge using off the shelf vinyl sheet and some paneling for backing, I had to turn my attention to the top trim panels on both doors. These panels are metal backed with a Charger badge in the center and some design lines in the vinyl material on the outside of the trim panel. The color in the vinyl has been chipping and fading away due to the simple fact the material is 50 years old. Of course, just like with the regular door panels, these top trim panels are expensive as hell and until I can get to some point where I can afford to spend several hundred bucks for a couple of trim pieces, I'll have to make due with what I have. In this case since the panels are still in fairly decent shape, barring the chipping and fading color from the vinyl, I figured I could just paint the panels with some trim paint and reinstall them on the doors to go along with the new generic door panels. Since the door panels are black, I figured I'd paint the top trim black as well, duh. They used to be white but the white material has flaked off enough that under the old paint or dye or whatever the hell it is, the surface is a dark grey shade. 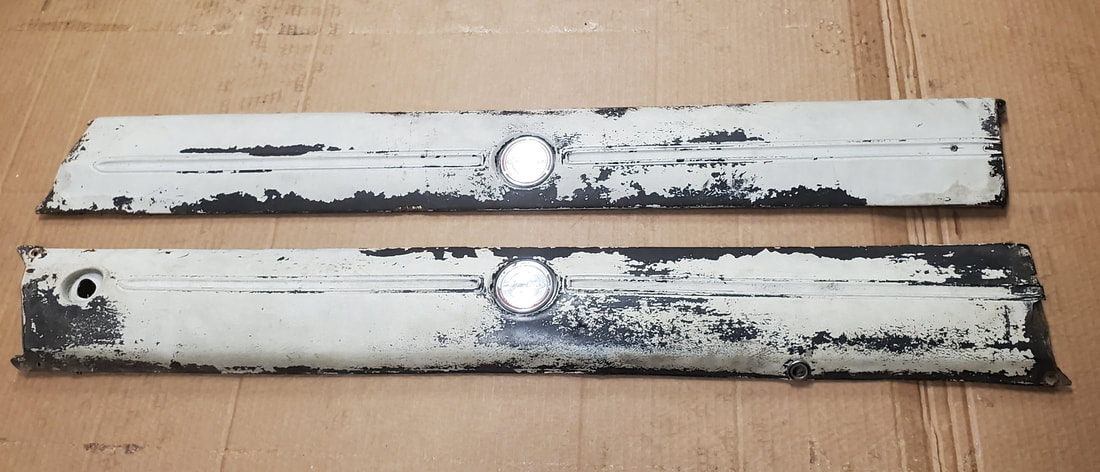 Old top door trim panels removed from Charger's doors. The easiest way to prep the surfaces of the panels was to pull out a plain wire brush and get to work scrubbing the surface, breaking up any loose color from the vinyl. Of course I couldn't get all of the white off the panels as I don't know what this material is or how it was put on the vinyl to begin with. I just scrubbed and scrubbed until there was no more material flaking off. What remained was scuffed up well enough that it should help the paint to adhere better when I do spray it on. I then masked off the Charger badging and the one chrome ring where the lock knob goes that I still had on one panel. With that I went to spraying. 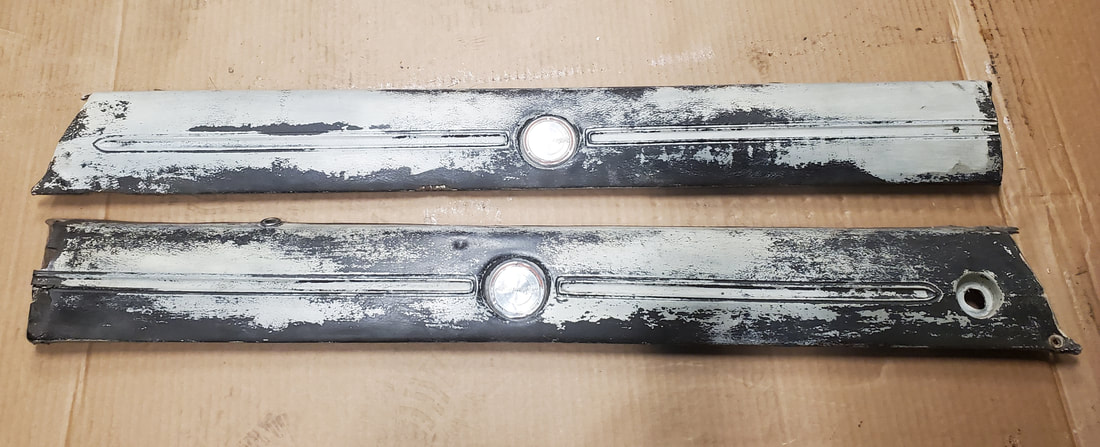 Panels after wire brushing as much loose material from the vinyl as I could. 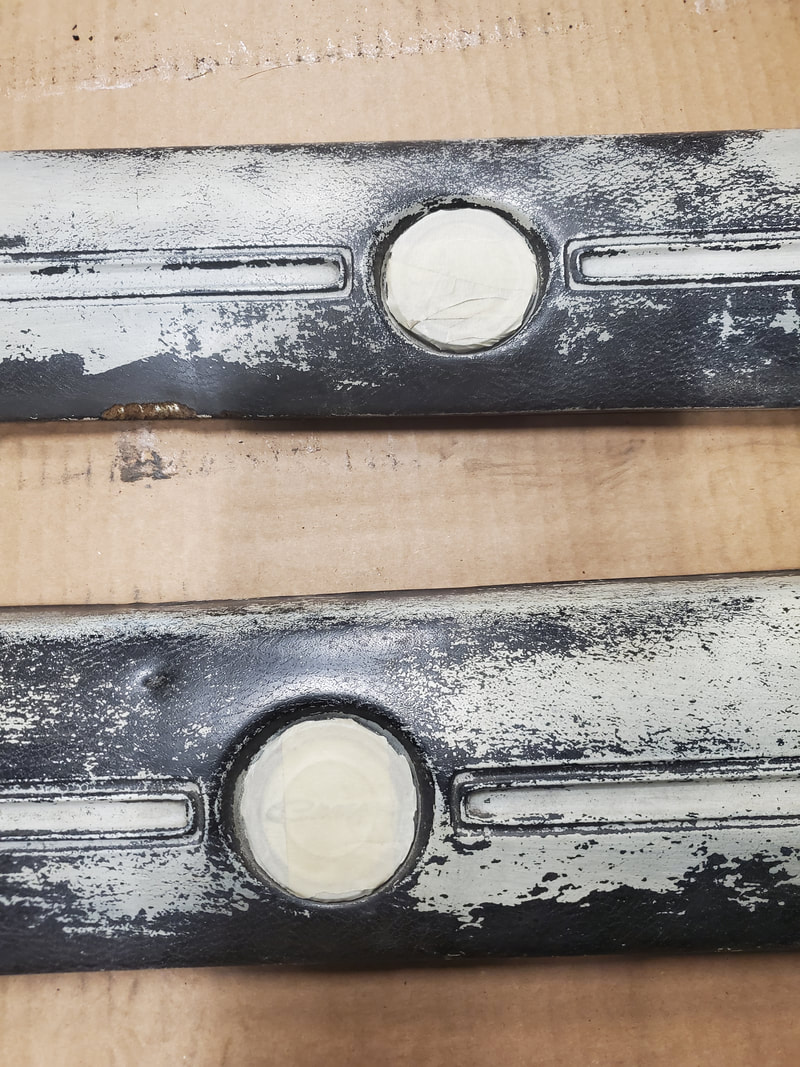 Charger badges masked off prior to spraying paint on panels. I sprayed around the edges, holding the panels up to allow me to get all of the remaining trim paint out of one can and so I can get the harder to reach areas first. Once I emptied the first can, which had very little paint left, I laid the panels down and sprayed two heavy coats onto the panels, taking time to let the first coat dry real good, almost to the touch, before laying down the second coat. Once it dried, I checked the panels and touched up in spots, especially around the edges to make sure that every bit of visible surface will be evenly covered so when I put these panels back on, there won't be any white showing on these panels. With that I let them dry even more for a good 30 min or so, before pulling the masking tape from the badges and the lock knob ring. 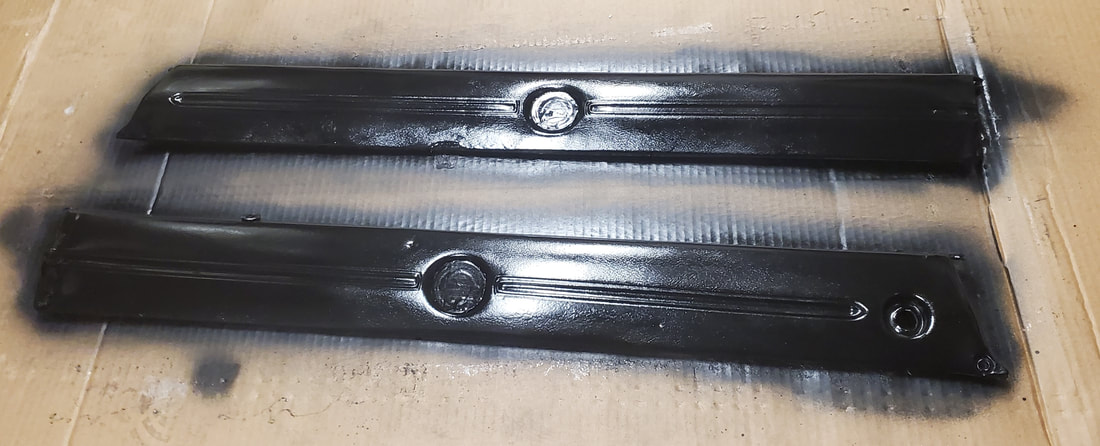 Panels after paint has been laid and cured some. 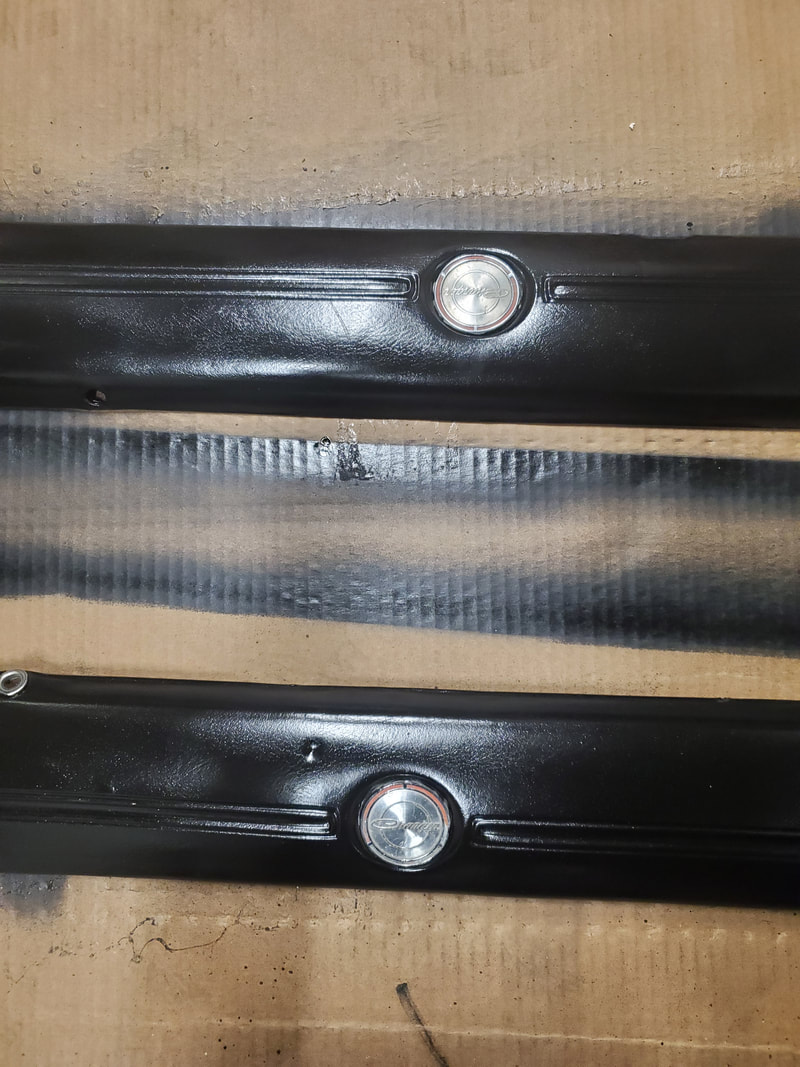 Charger emblems after removing masking tape, showing how they contrast against the black surface of the panels. If I feel compelled I may take a modeling paint brush and some red paint to touch up the accents of the badges to make them look better. By the time I do get around to installing these panels back on the doors, the paint should be plenty dried enough that I can pick them up without my fingers leaving prints in the semi-tacky paint. Both panels still have some of the clips in them that snap them to the doors but the driver's side panel had a couple of screws installed at the very corners to hold it on more solidly. With the screws at the corners, they aren't as visible and to the untrained eye, may even appear to be factory. With those panels installed, the doors will be fully complete as far as the interior, the next thing will be making and installing the interior panels that go on the sides in the back seat area. I'll do the same with these panels that I did for the door panels, using paneling and sheet vinyl to make them, cutting the holes for the side window cranks. The next thing from there will be a rear firewall to cover the opening in the back seat going to the trunk. From there the last thing is figuring out how to cover up the sides of the sails where the interior works it way up to the ceiling of the cab. The more surface I cover, the better the car will look, even if it's not a factory look. |
