|
Sometime in the late winter going into spring we started a bunch of seedlings of different varieties, first in the house then as the temps got a little better, in the greenhouse. Even with nighttime lows being a little too cool for plants, the greenhouse still did its job of keeping the seedlings warm enough to continue to flourish until I can get around to planting them. My plans do involve incorporating more hydroponics, specifically the Kratky method, where no pumps are used. I did manage to get a few small plantings started, using some old apparatus from last season. One planting even has a couple of lettuce plants that were started from seed in rock wool blocks that were planted in the net pots with clay pebbles in a solution of fertilizer and fish emulsion. 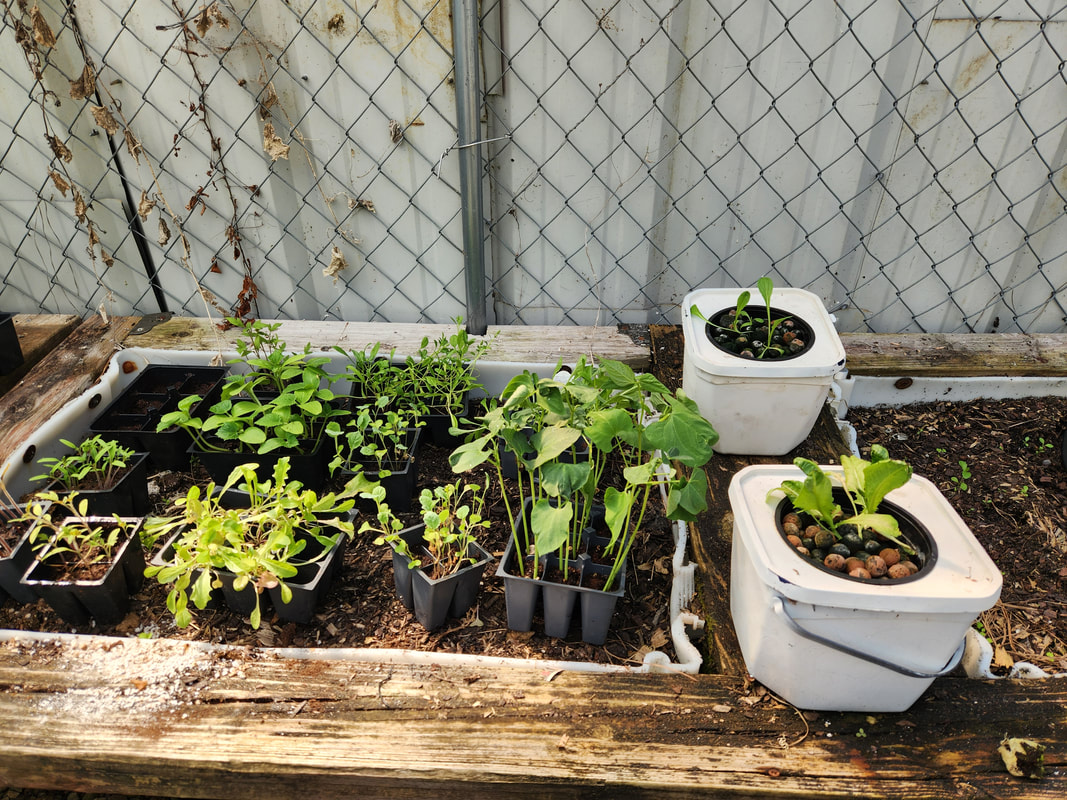 Some seeds were started later in these salvaged seed packs, using starter mix. These were started in the greenhouse, only moved in the house a couple nights when the lows dipped into the 30s. Otherwise the seedlings stayed in the greenhouse. 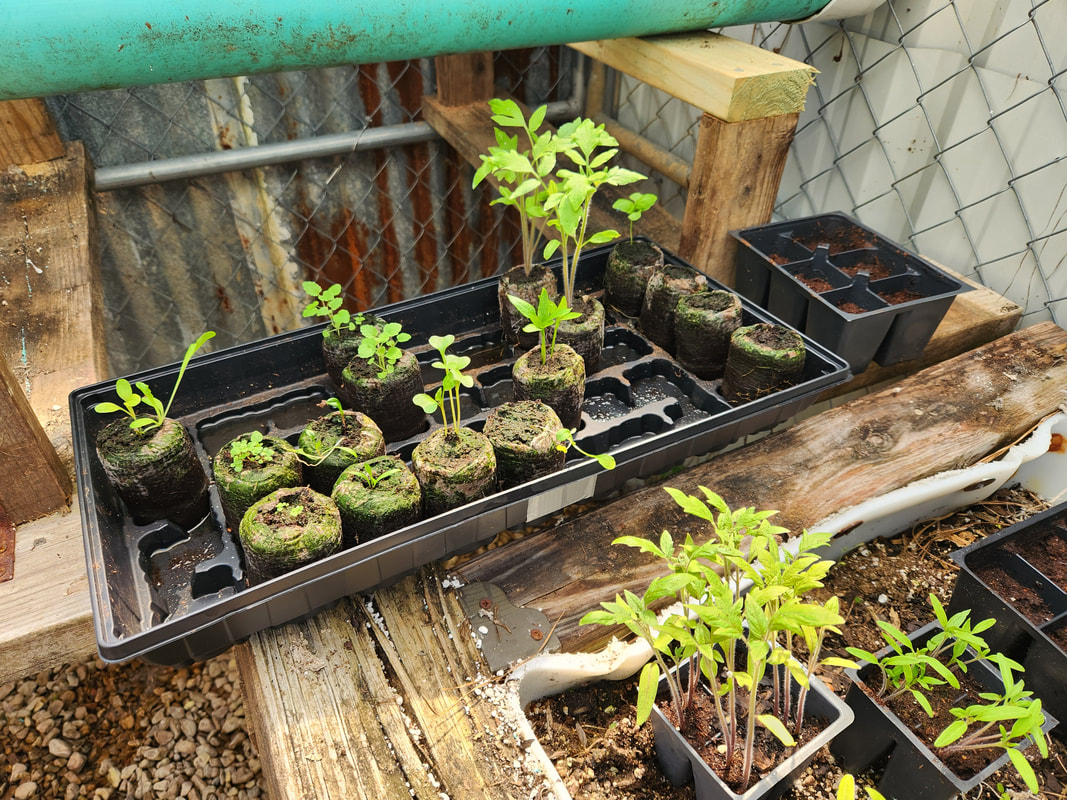 The original seed starter set that was started in the house was later moved into the greenhouse after a few weeks of growing and the plants getting large enough to require more sunlight. Some of the seedlings are already relocated to different spots. 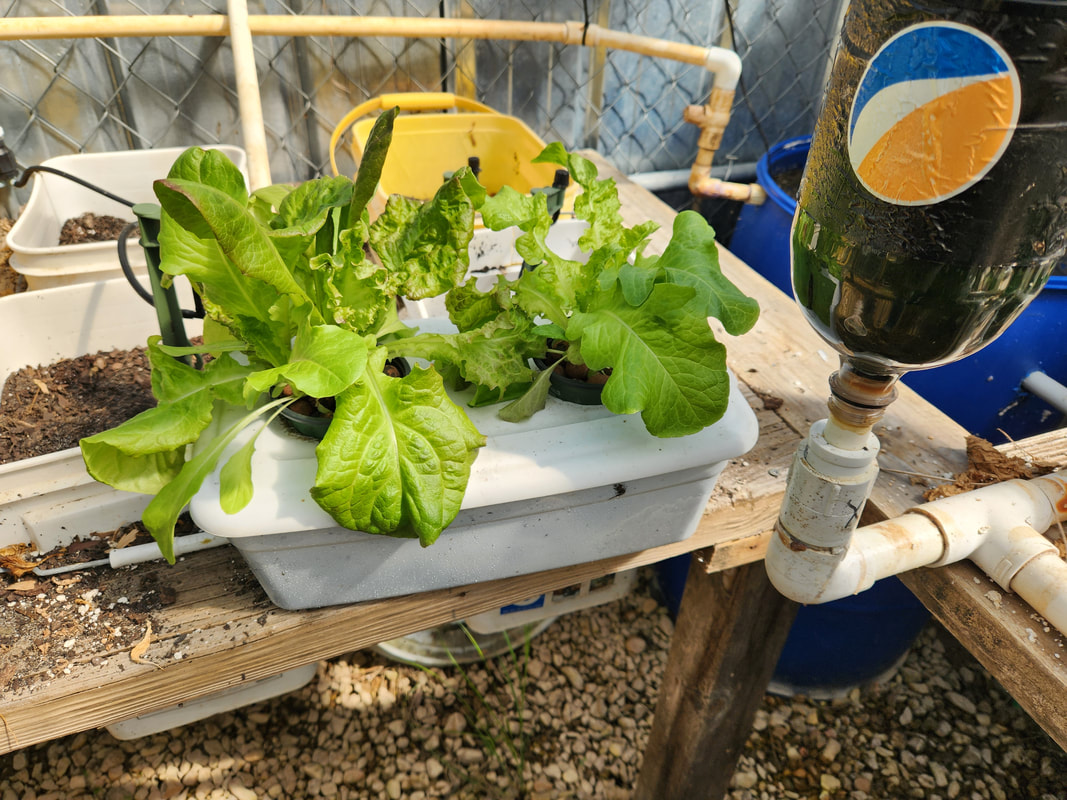 The first Kratky planter that I made to test this theory is now growing s couple lettuce plants rather well, even after starting the plants from seed in less than ideal conditions. Since I'm trying to go away from regular dirt planting, only using the dirt beds for onions, garlic and potatoes, I had a limited ability to put any of our seedlings in dirt. I had one more raised bed next to some dirt raised beds that were already planted with onions and garlic that required dirt. I also have a couple old raised beds that are about to fall in on themselves and will need to be rebuilt, but still had dirt in them. I transferred the dirt from these old beds into the one bed amongst the onion beds to set up a spot to plant a couple cucumber seedlings so I can have a couple plants that are growing in the natural way. Everything else for all intents will be hydroponic. 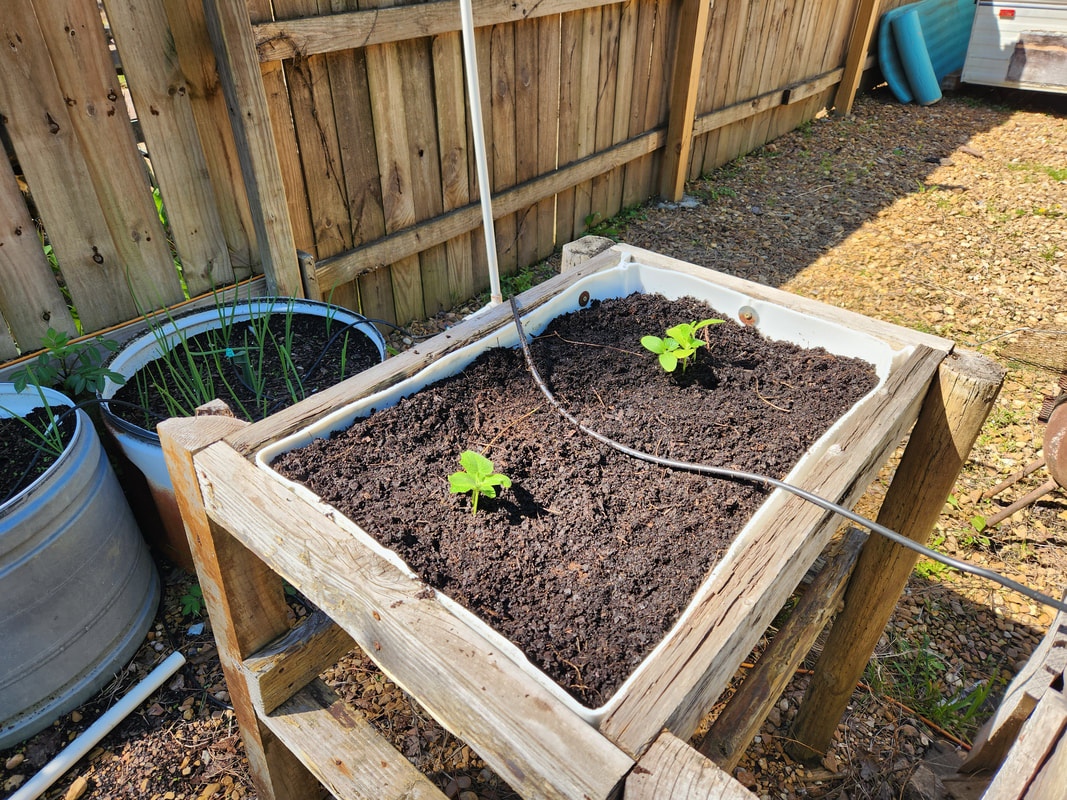 This remaining raised bed that wasn't converted to a Kratky bed was filled with dirt from a couple old beds so I can plant a couple of cucumber plants. This bed like the other beds around it that are housing onions and garlic, are close to a micro irrigation manifold that allows me to get water to the sprinklers in each garden without running too much hose. 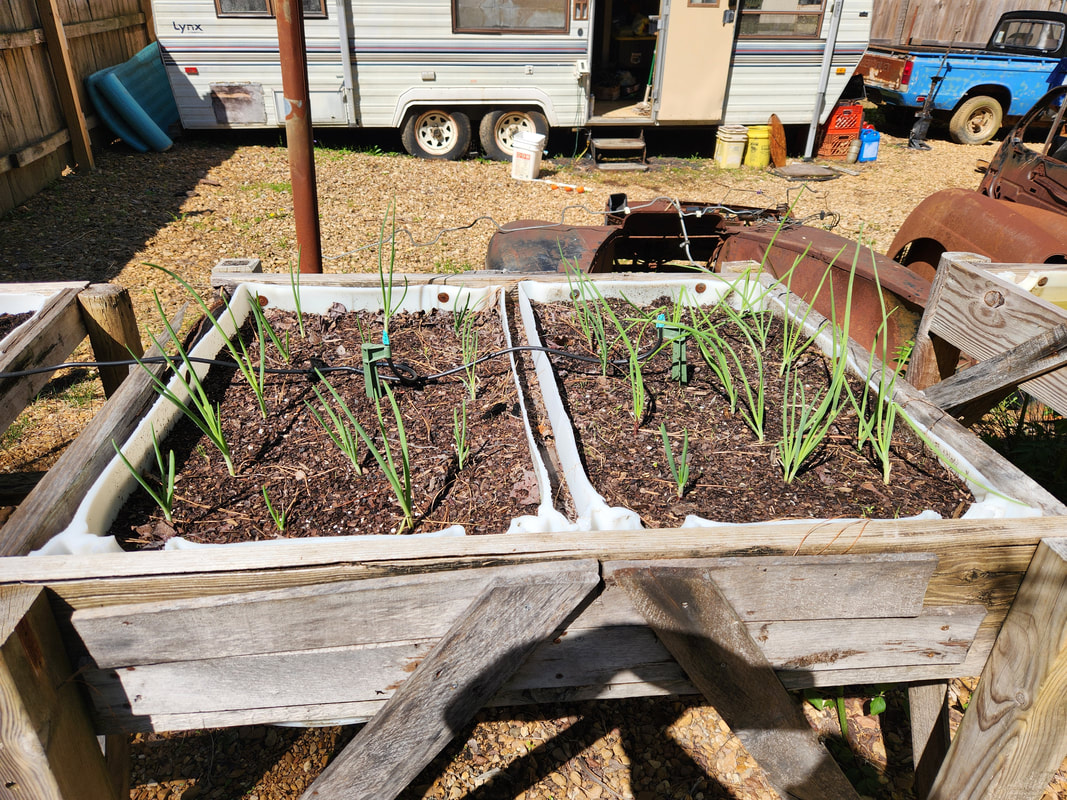 This double drum raised bed next to the cucumber bed has multiple onion plants in place that are growing. 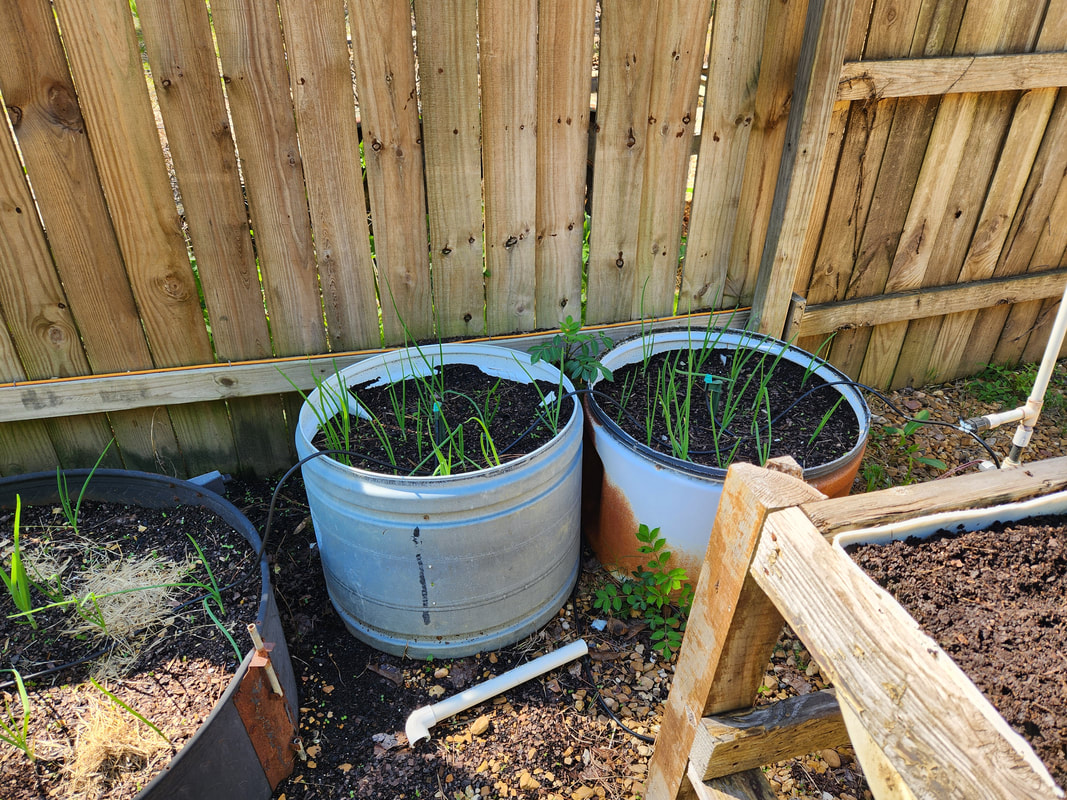 With the cucumber bed in the right foreground, we see here the raised beds made from washer/dryer drums and a fan shell, all growing more onions. 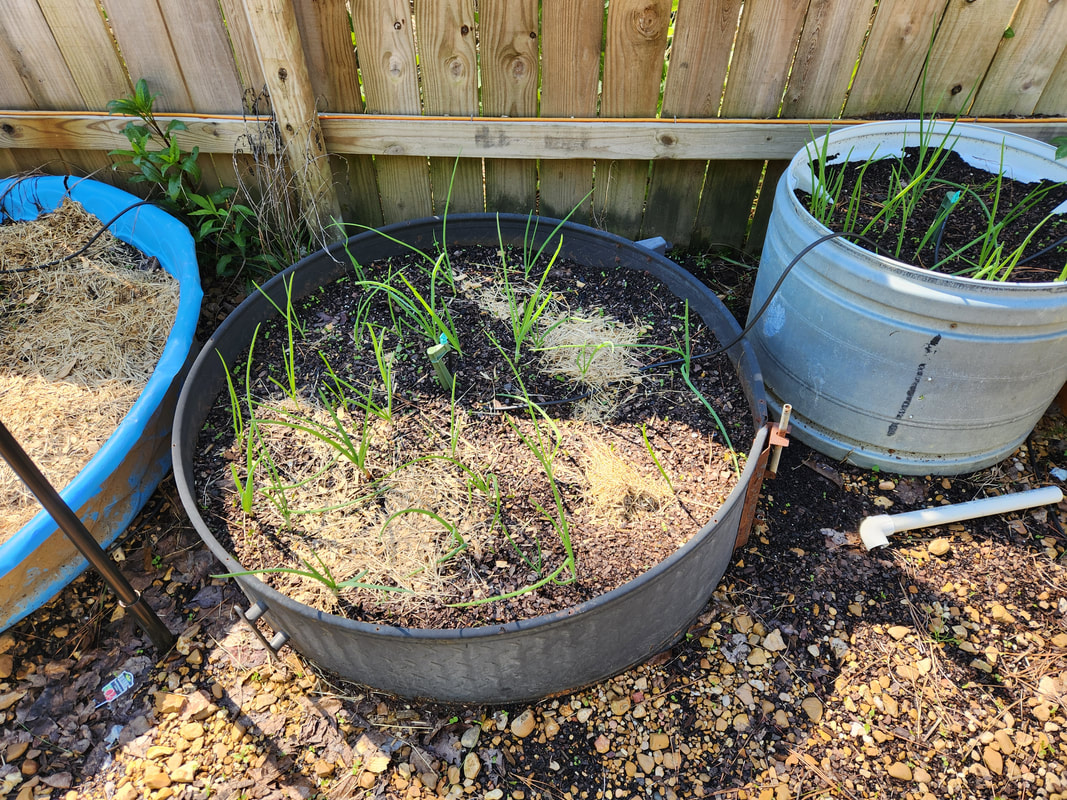 A shot of the fan shell and part of the kiddie pool that is used for some potato plantings. The fan shell has more onions in them (yes we got a lot of onions) 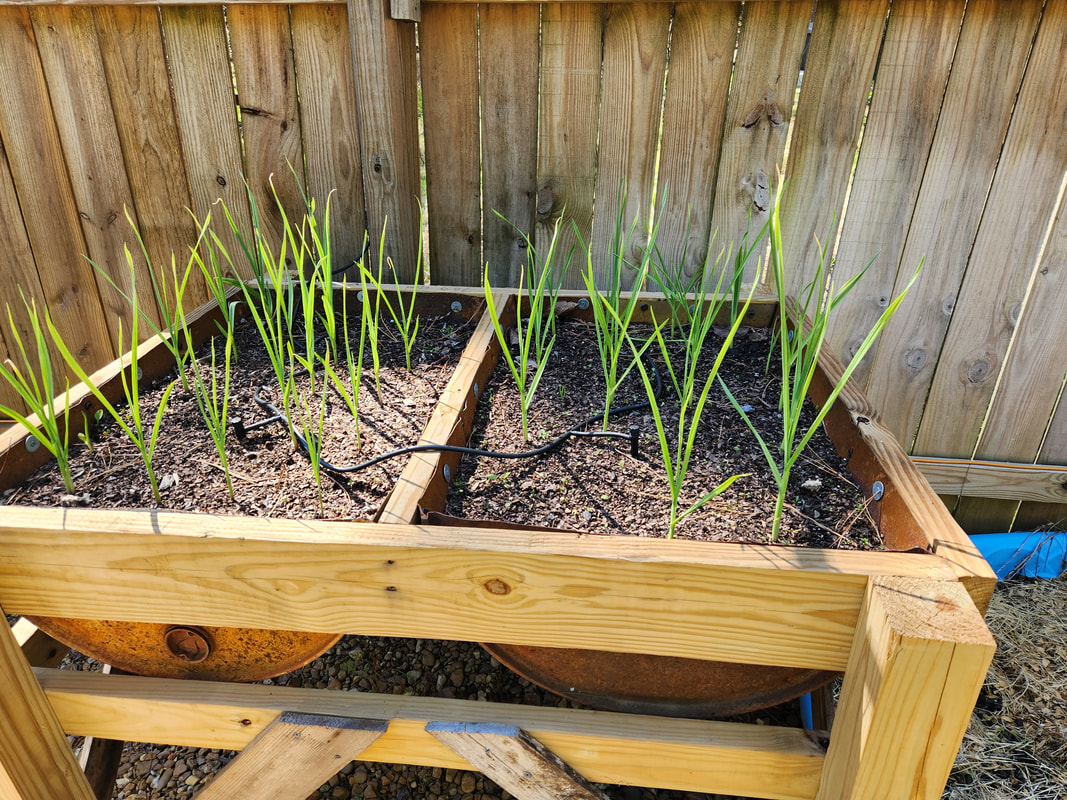 This newer drum raised bed frame made using old metal drum halves holds dirt for the garlic plantings that are housed within. Going back into the greenhouse, I decided to utilize some of the hydroponic apparatus, even though I have plans to redo a lot of this hardware to incorporate Kratky style planters. The double barrel PVC pipe section has eight holes for pots. Instead of using the Perlite and recycled seedling cups, I used 4" net pots with clay pebbles to hold some off the seedlings, the ones that were started in the seed starter using the peat moss balls as a medium. The whole peat moss ball with the seedling is placed in the net pot with clay pebbles placed around the ball When the pump fills the pipes, the peat will become saturated with solution to feed the plant. The obvious hope will be that the plants shoot out enough roots that they'll reach out beyond the clay pebbles and into the solution. I also took a moment to trim down several of the soda bottle planters on that section of the hydroponic setup so more of the 4" net pots can become submerged in solution when the pump is on. As with the double barrel setup, the plantings are seedlings with the peat balls so they can retain water after the pump shuts down. 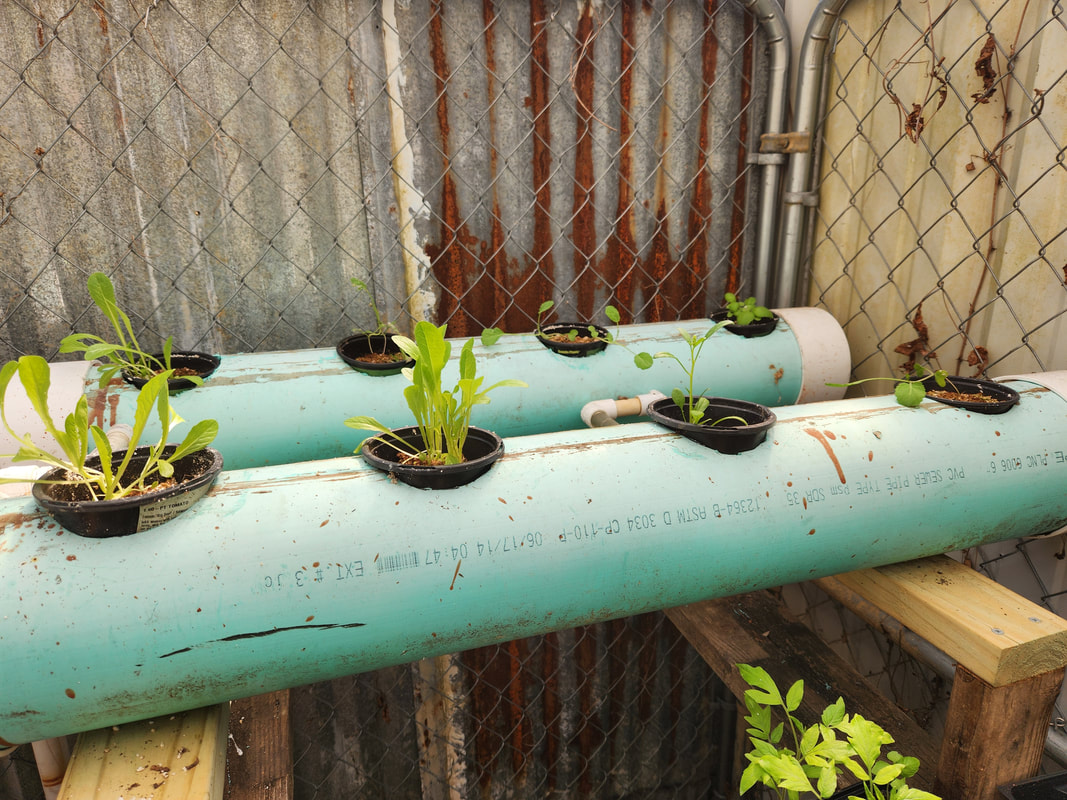 The double barrel hydroponic setup has net pots with clay pebbles and seedlings in place to allow them to move into the advanced stages of growth while in the greenhouse. 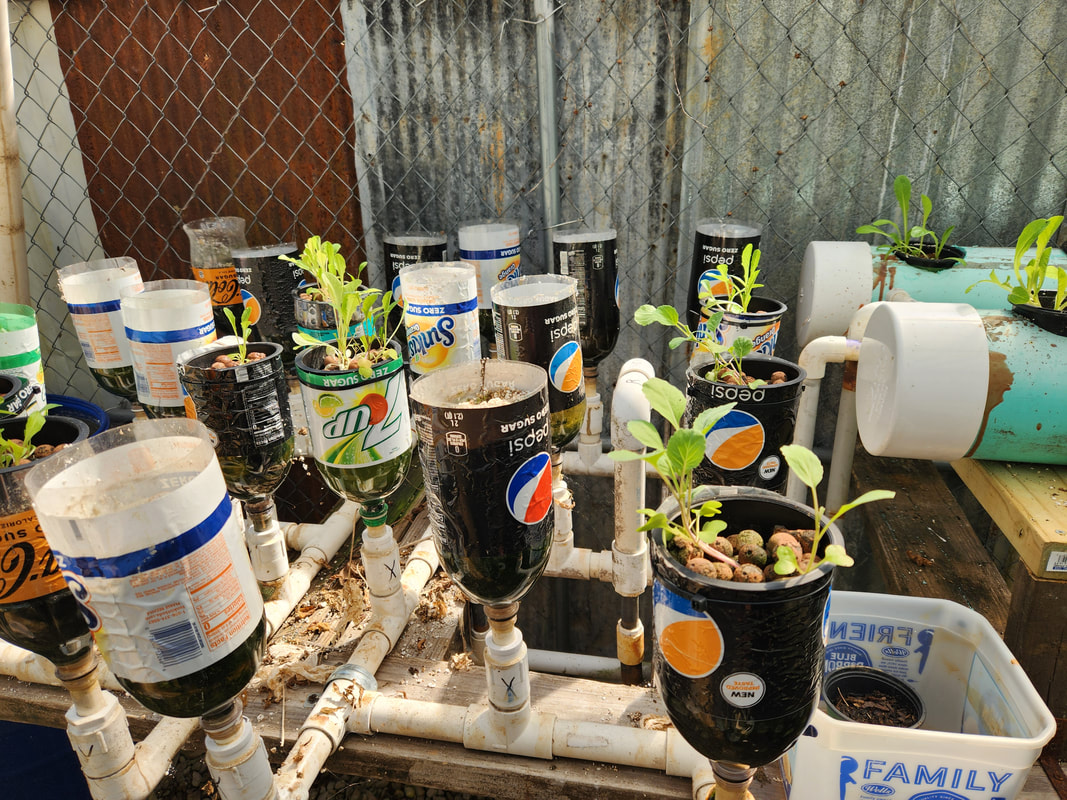 The soda bottle hydroponic setup has some of the bottles trimmed down to hold net pots where they will be able to be immersed in solution when the pumps are on and dry when they're not. The peat balls that the seedlings are in will retain moisture enough to allow the plants to still feed and drink. Since the greenhouse will end up getting unbearably hot in the summer, the plan will be to have some other apparatus set up for outside so the net pots in both hydroponic plantings can be removed with the larger plants and transplanted into the other apparatus. Everything in the greenhouse will not be there throughout the growing season. Now on a lighter note, I may be able to start plantings of greens to transplant into these hydroponic settings in the fall and going into the winter. Eventually I may look at installing one of those little diesel heaters in the greenhouse to keep the structure warm going into the worst of the winter nights. 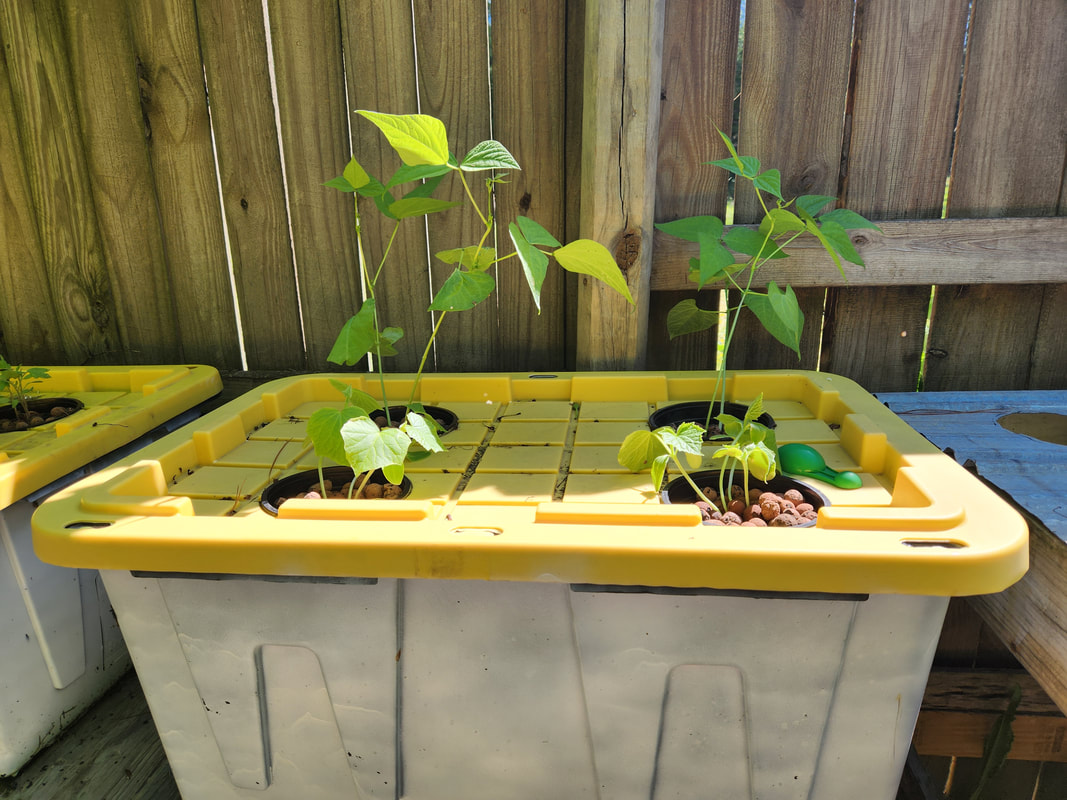 A Kratky planter made from a storage container is set up to accommodate 5" net pots which are holding a couple of bean plants with peat ball mediums and a couple of cucumber plantings, also with peat ball planting mediums. A hole is drilled on the side at the desired water level so if rains overfill the container, the excess water will run out. 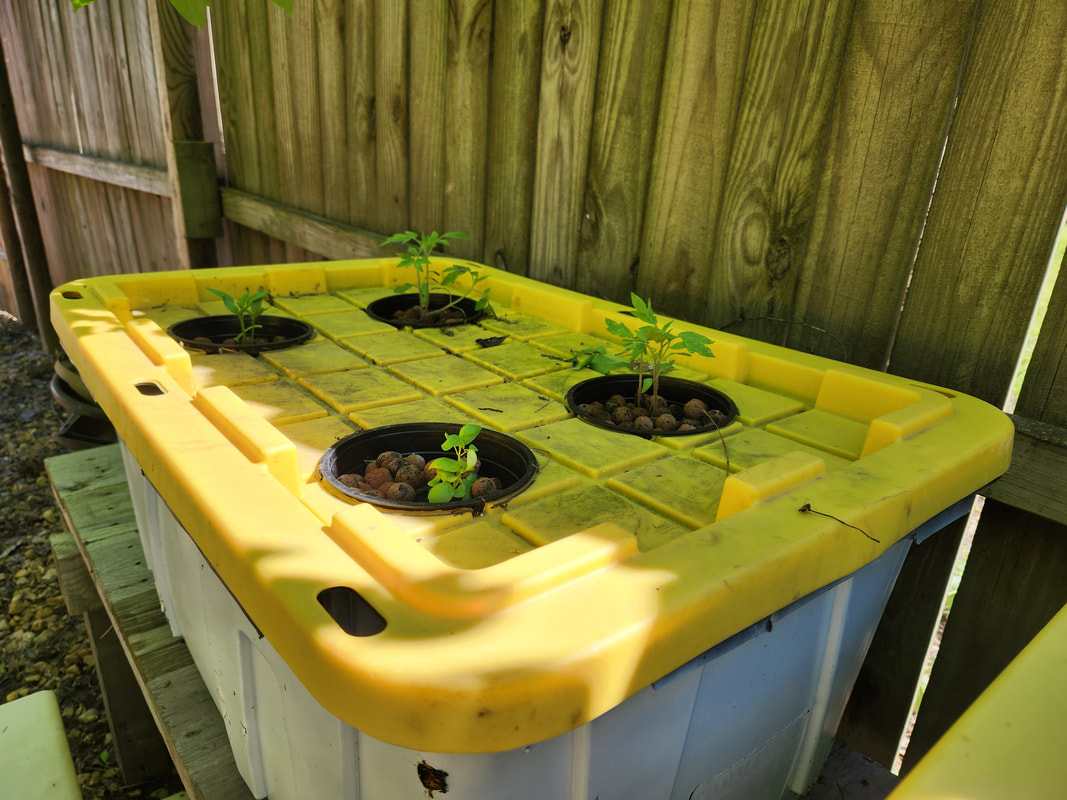 This Kratky container is housing a couple of tomatoes and basil seedlings from the seed starter container, using peat balls for planting medium, along with clay pebbles in the 5" net pots. 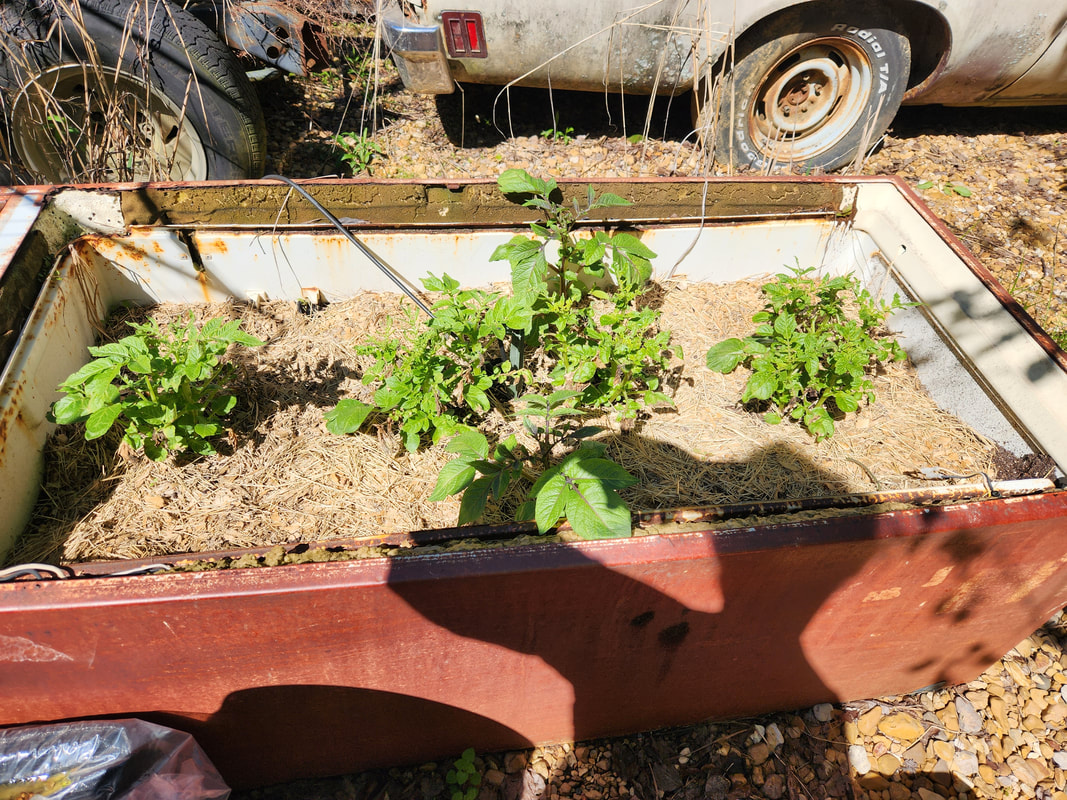 As an added bonus, the old fridge planter is serving once again as a potato planter, after having been fertilized with wood ash, chicken litter and other miscellaneous trash. I did take a moment to set up the Kratky planters using old storage containers and 5" net pots with clay pebbles. I used more of the older seedlings from the seed starter tray that used the peat balls. Instead of disturbing the roots in the peat balls I just planted the entire thing in the net pot with the clay pebbles around the peat ball. I did take a moment to poke a hole in the sides of both storage containers to allow for a water level that will not flood out the net pots if it rains. Excess water will run out, allowing the planter to keep the level below what will drown the plants' roots. Now, I might add a hose nipple to each container with a hose running to a bucket to catch the excess water since it will have some nutrients within. Rather than waste this water, it can be recycled for future plant solution with extra fertilizer being added as needed. Once I get more clay pebbles and modify the raised bed Kratky planters with overflow nipples, I can get the remaining seedlings transplanted. I will have to set up more apparatus for the 4" net pots, not just the ones in the greenhouse hydroponics so I can have more options for planting. There is also the matter of setting up my shade cloth for everything so the summer sun doesn't cook everything like it did last year.
0 Comments
After having recently replaced the water pump on stubby and getting a good run of no problems I had another problem that thankfully happened just after leaving the house. While riding I started smelling coolant fumes so I stopped to investigate. Upon stopping I started seeing steam coming from under the hood. After popping the hood I found out what happened, the cooling fan, which is mounted on a bracket with its own pulley, had shredded the bearing for the pulley, launching the fan into the radiator. My radio must've been a little high that I didn't hear the clank that should've occurred to indicate the fan separating from the bearing, even though it could've happened during an impact with a bump, who knows. Anyway, after returning home before the rad went dry I had to start hunting down the pulley bracket that broke, knowing this component is kind of hard to come by. 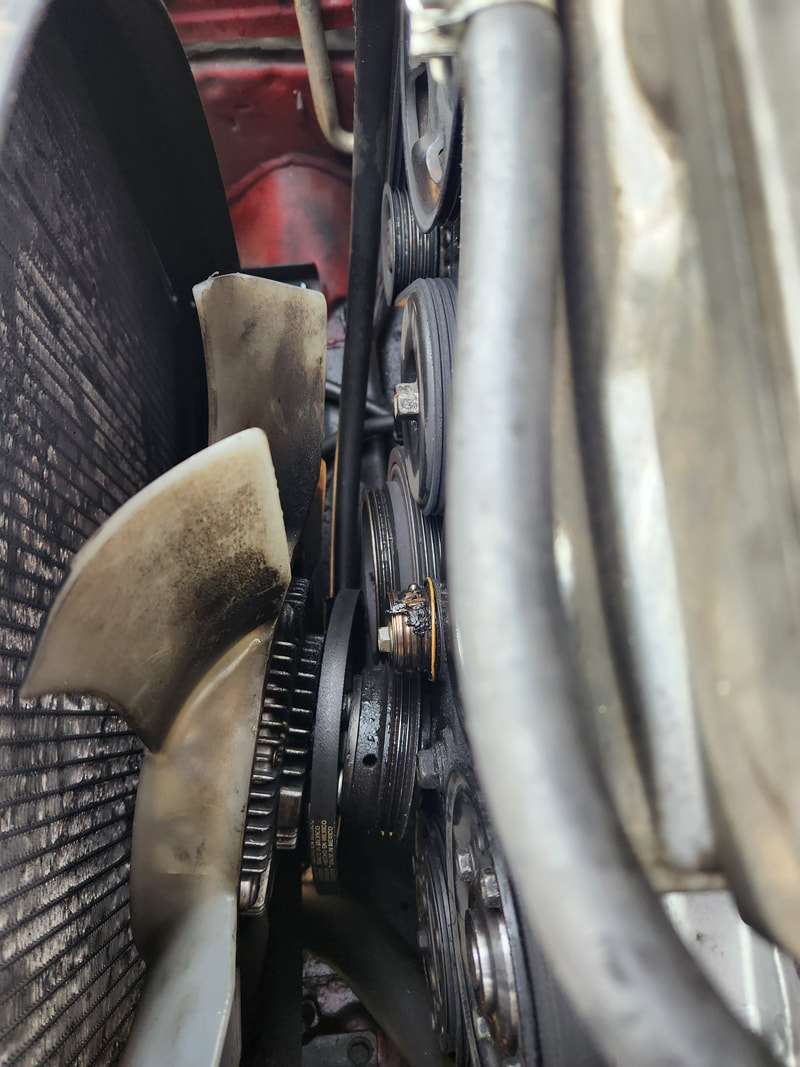 What I was greeted with after discovering a serious coolant leak; the fan is laying on the bottom of the core support and against the radiator. 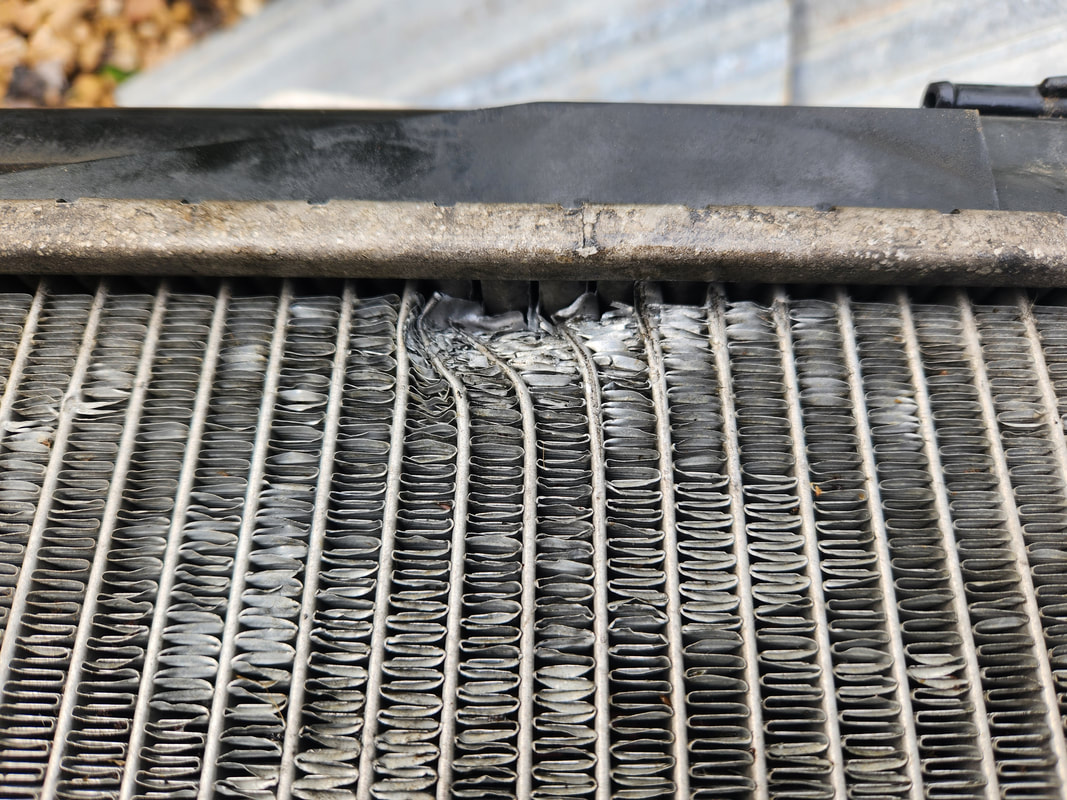 The area of the radiator that was impacted by the spinning fan as it broke free. The rows of the core are damaged beyond repair so this rad is trashed. 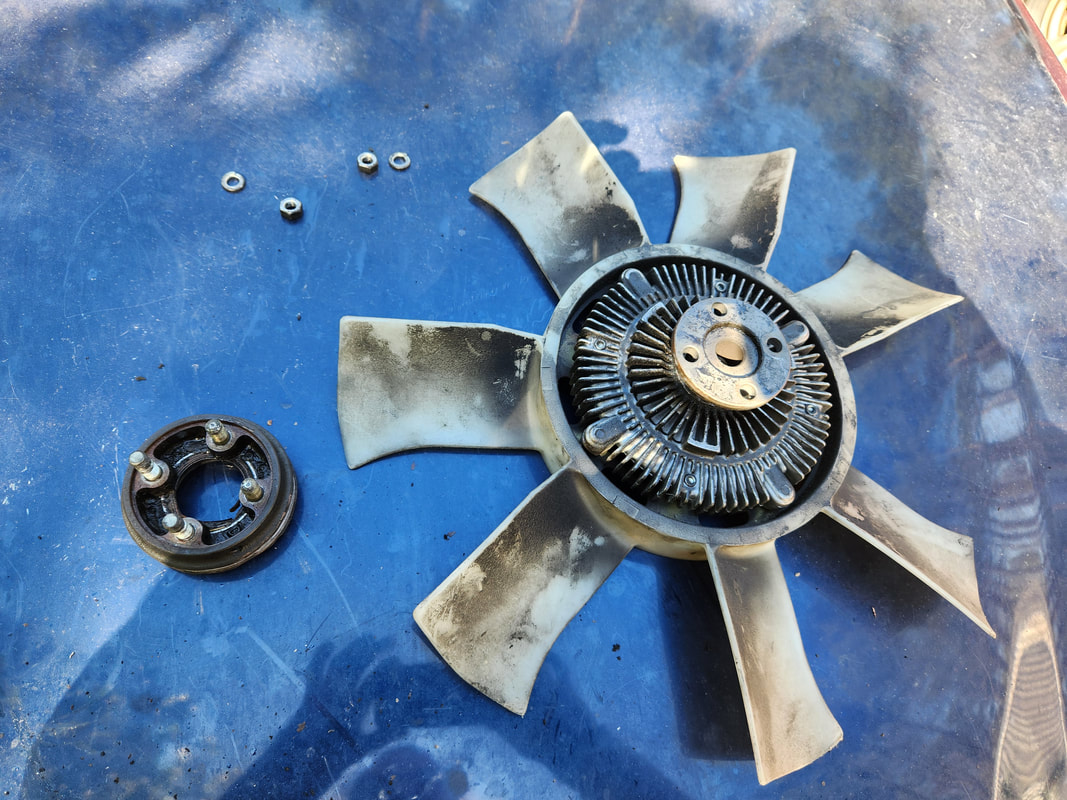 The fan clutch is removed from the engine bay after the pulley bearing disassembled itself. The pulley itself is separated from the clutch assembly since I will be reusing the fan clutch. The next day I pulled everything apart, seeing just what happened. The fan did hit the rad pretty good, damaging a section of the core at the end of the rows, covering a couple inches. Clearly the rad was shot. Luckily I had a spare rad that was removed from the old Tracker that we scrapped in 2020. The only other option I have as far as the fan is concerned is to install an electric fan on the rad until the replacement part comes in. This would involve strapping the fan to the surface of the rad, using something to insulate the areas between the fan and rad core so vibrations don't cause any chafing that will compromise the rad. 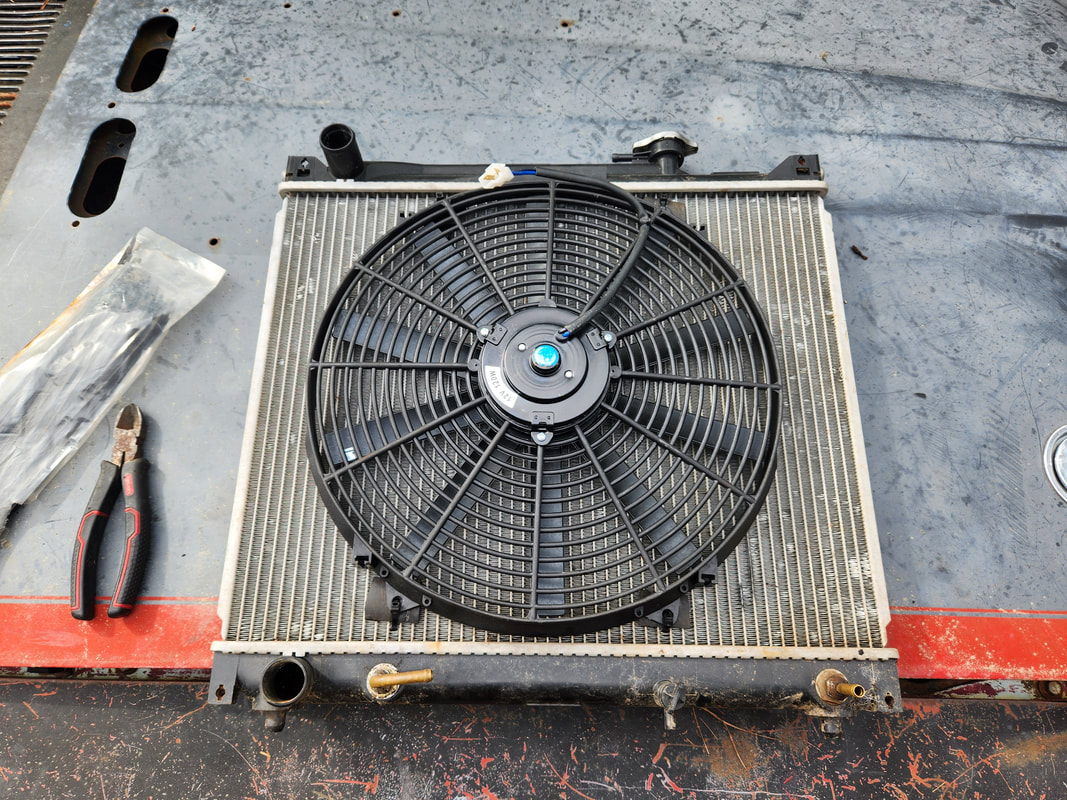 With the use of pieces of cut hose to serve as insulators between the four corners of the fan body and the surface of the rad, I am able to safely apply zip ties to hold the fan in place firmly against the rad. After mounting the fan to the rad and remounting the rad in the engine bay, sans shroud, even though I might need to reinstall the shroud if it allows, the next thing is hooking up an automotive relay to switch the fan on when the key is turned on. While this is relatively simple, the hard part is finding a switched 12v line in the engine bay that I can tap into to feed the relay. Even though the relay is a low power device, I can't just tap off a line for a sensor or other ECU connected device, as the power draw from the relay will probably disrupt the signal going to the ECU with the back EMF from the relay's coil. 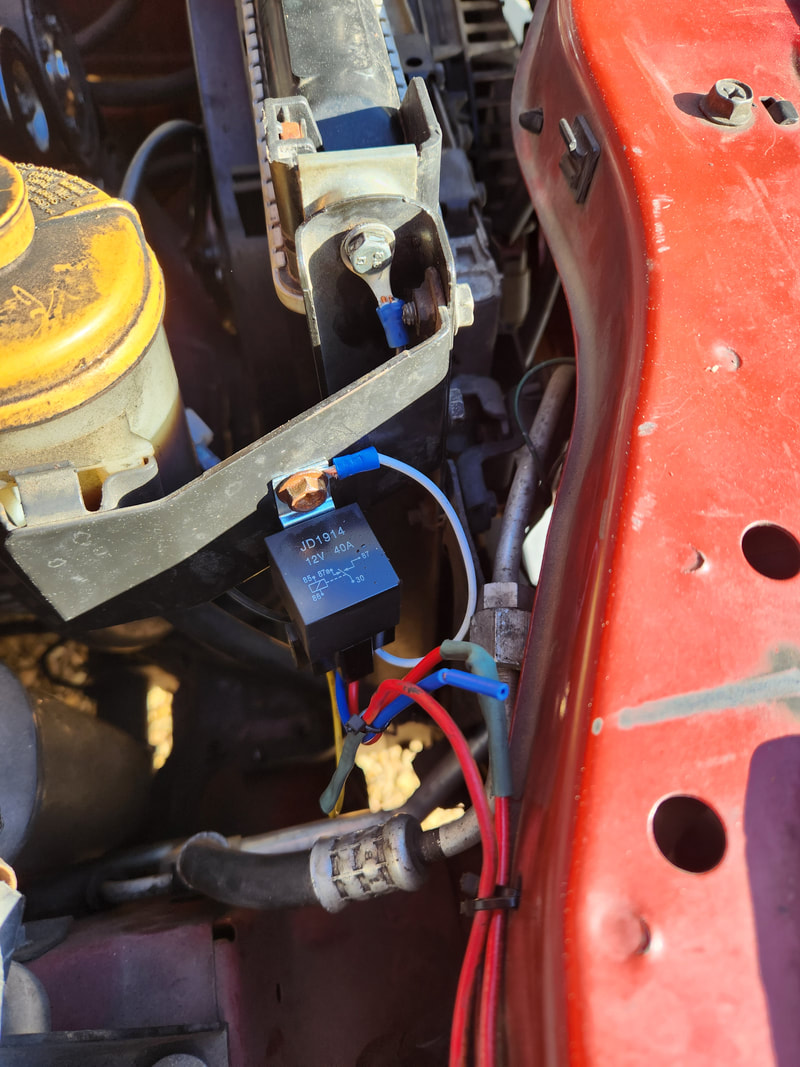 An automotive relay is attached to the bracket holding the power steering reservoir. Wires from the plug on the relay are routed to the fan and to the battery. After probing around with the key on and off, I finally metered a line that was switched. Using a combo clamp with terminal for a male crimp terminal to plug up to, I was able to get a circuit established for the coil on the relay so the fan can switch on and off automatically. 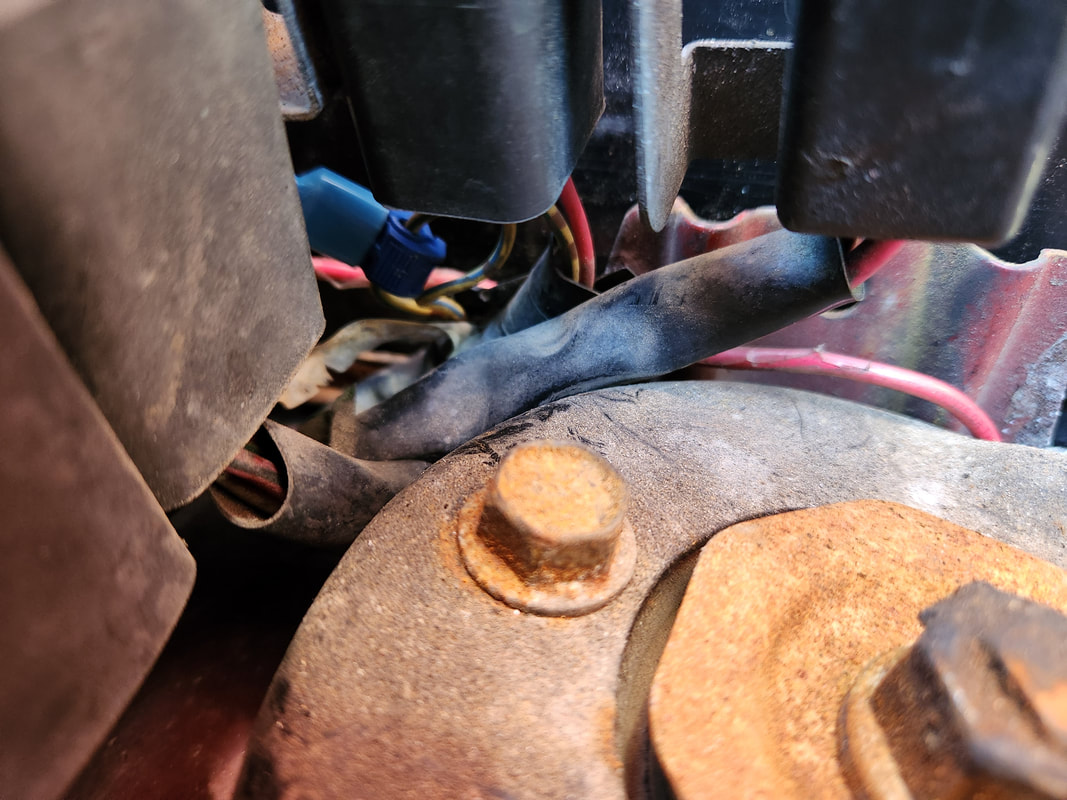 After pulling up the relay center on the passenger side and probing multiple circuits I managed to find a switched 12v line that I was able to tap into with a terminal that taps into the wire and has a terminal to plug a male terminal to for a secondary circuit. After running the engine for a while just to test the system to determine how a standing idle will warm the engine, I found the engine was running a little hotter than usual. Now, I would hope that under driving conditions, air movement will alleviate this. Even if it does, it just means that until I can replace the pulley/bearing assembly, I will have to relegate use of Stubby to a straight run to the job and back, where all the driving is mostly highway driving with only a minimum of slow city riding. I will still have to see if its possible to install the fan shroud over the electric fan to maybe be better able to channel the air better so even the electric fan can handle the load. Hopefully the replacement part gets in more sooner than later. With the construction of the front of the aviary the next move is to start getting the top covered. The first step here is to build a roof section along the rear of the aviary, that will consist of building a frame with 2x6's that will go between the post and tree trunk then adding more lumber that will reach out from that frame to the rear where we will be able to hang the sheet metal to make up the roof. 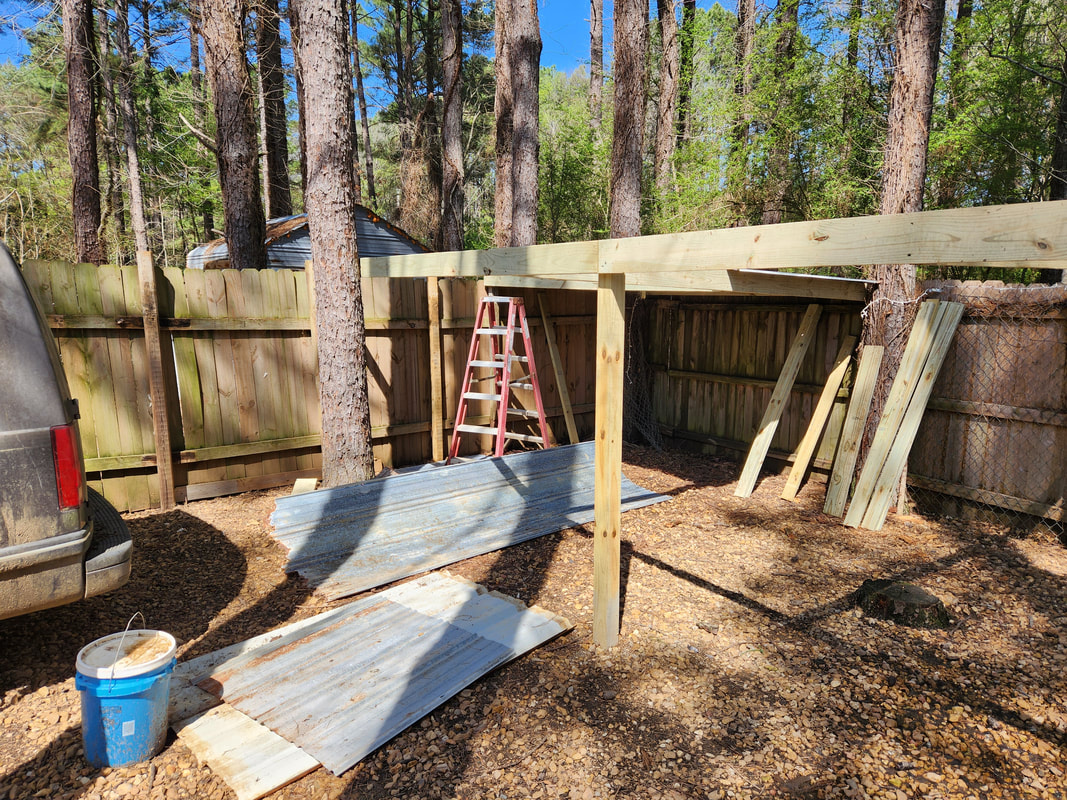 A line of 2x6s span the width of the aviary with some boards reaching back towards the rear of the aviary to connect with another row of boards that also span the width of the aviary. It is this second row of boards that will be where the sheet metal ends are laid upon. 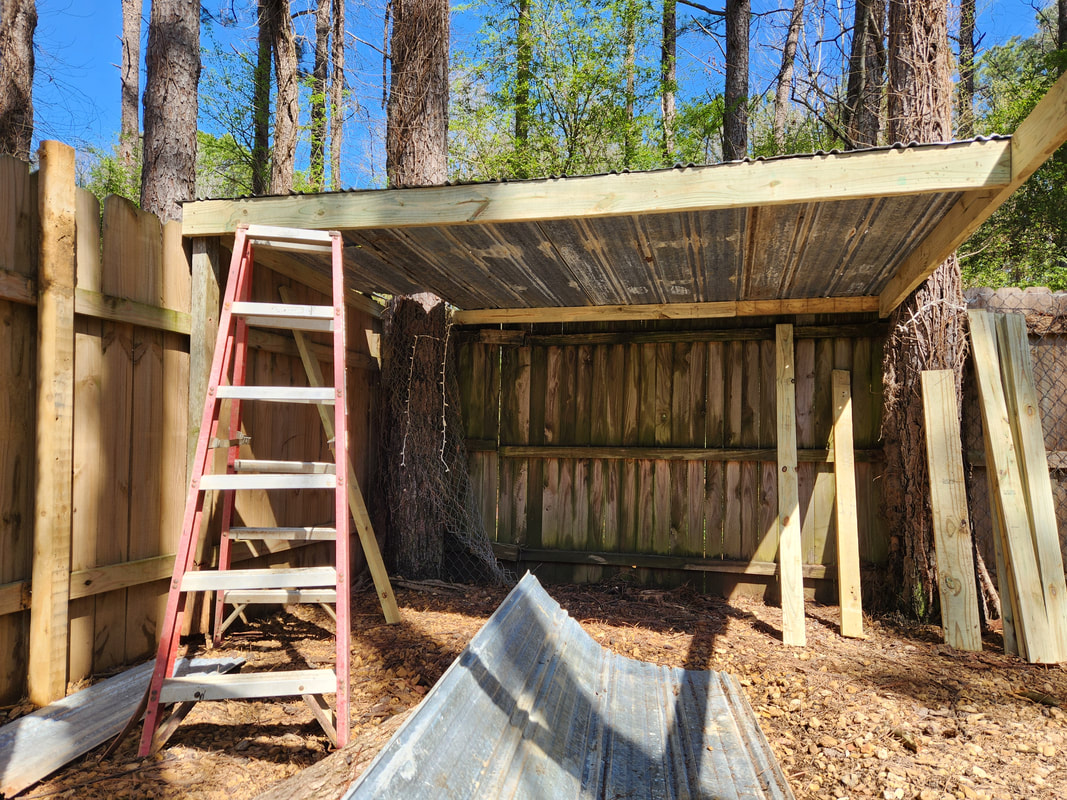 The first few sections of sheet metal are attached to the rear row of 2x6's covering the first third of the rear area. 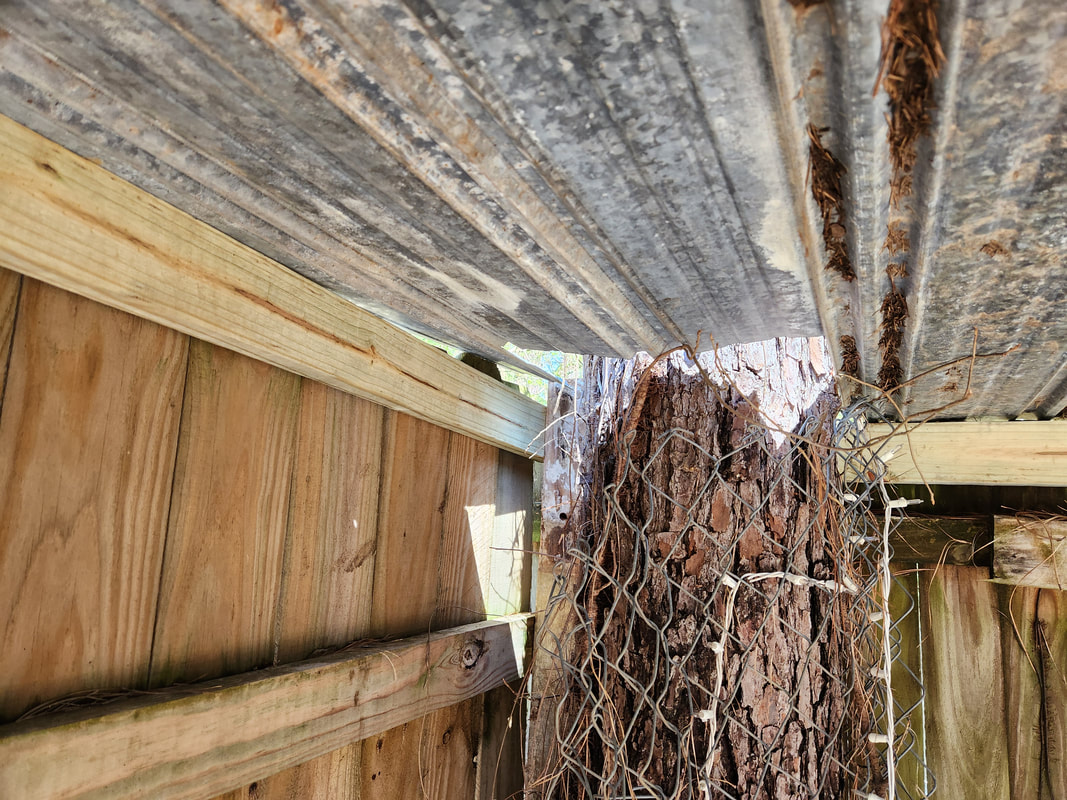 Because of the tree at the rear corner of the aviary, I had to cut a piece of sheet metal short to go around the tree. This end section is made up of two sections of sheet metal, with the one piece cut short to go around the tree. I also had to add some small pieces of 2x4 around the tree to help support the short sections of sheet metal. 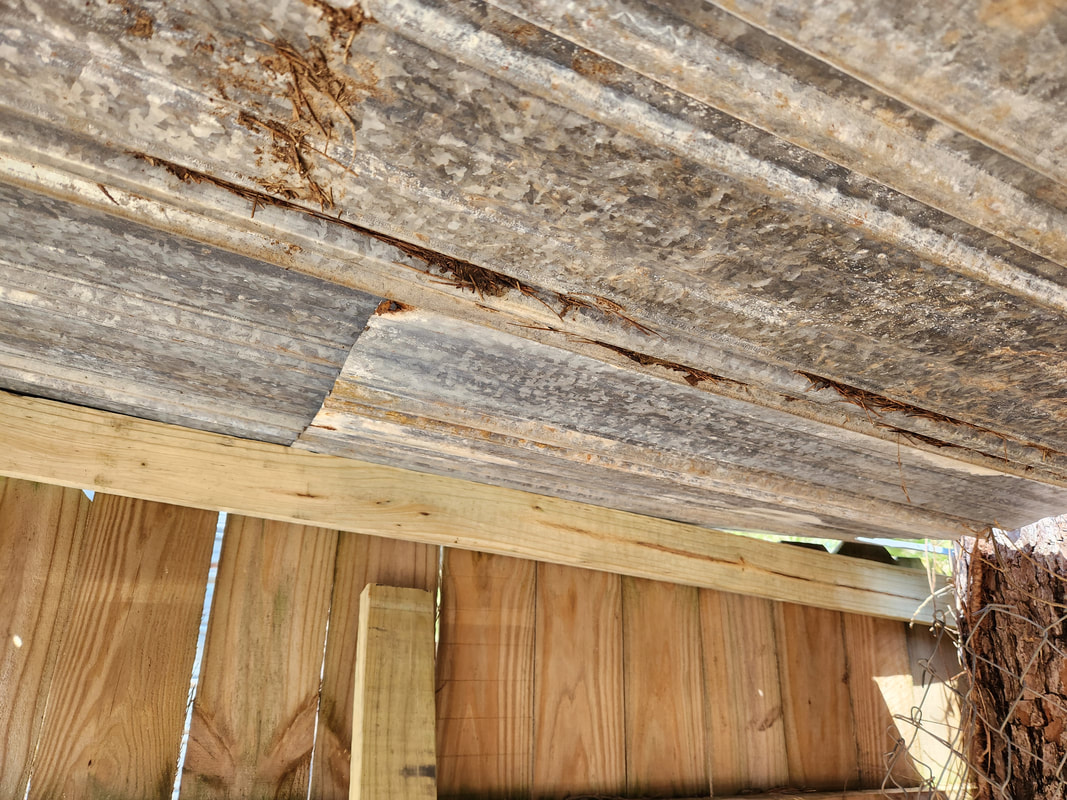 The way these two sections of sheet metal are sagging and not mating firmly required extra wood for support so the sheet metal doesn't flap around. I ran out of the long pieces of sheet metal early and ended up having to use some other surplus sheet metal I had laying around. These pieces are of a different pattern and were a few inches shorter than what was needed. As a result I had to cut short pieces of sheet metal to fill the gap at the very back of the aviary. I also had to add some more wood framing to help in supporting the sheet metal, especially around the trees. 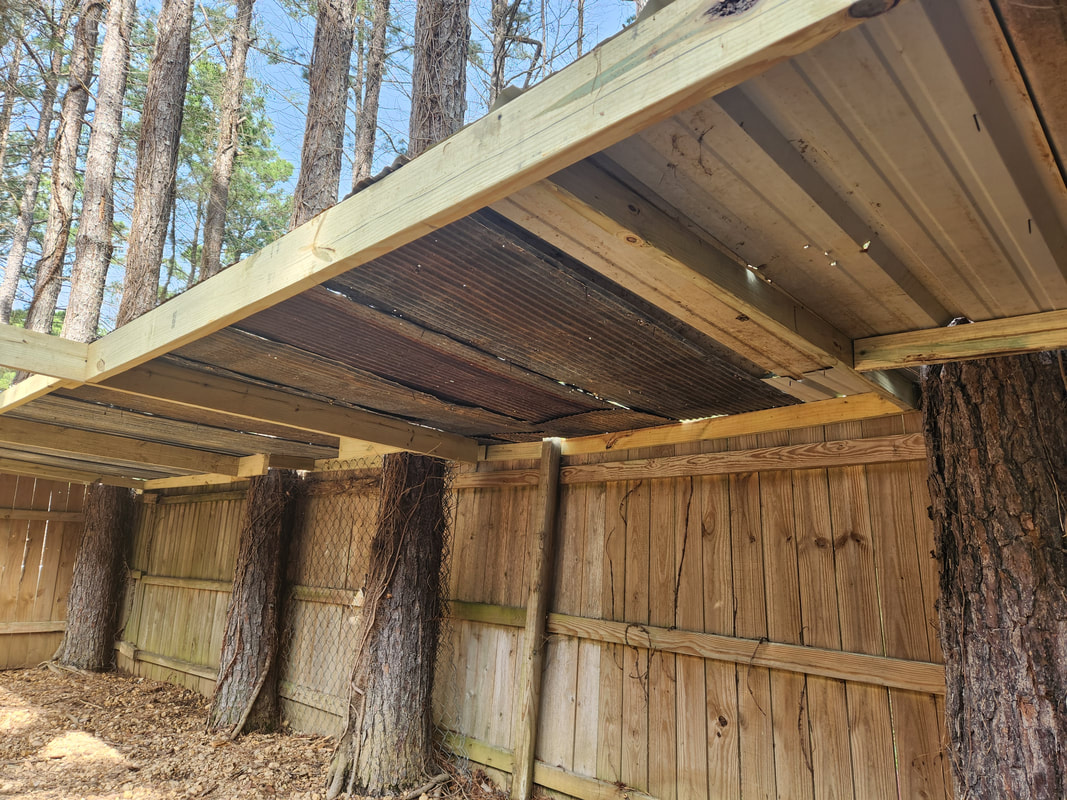 In the middle third of the roof, some older sheet metal is used, with extra wood and shorter pieces being used to fill in the gaps at the rear of the roof section. 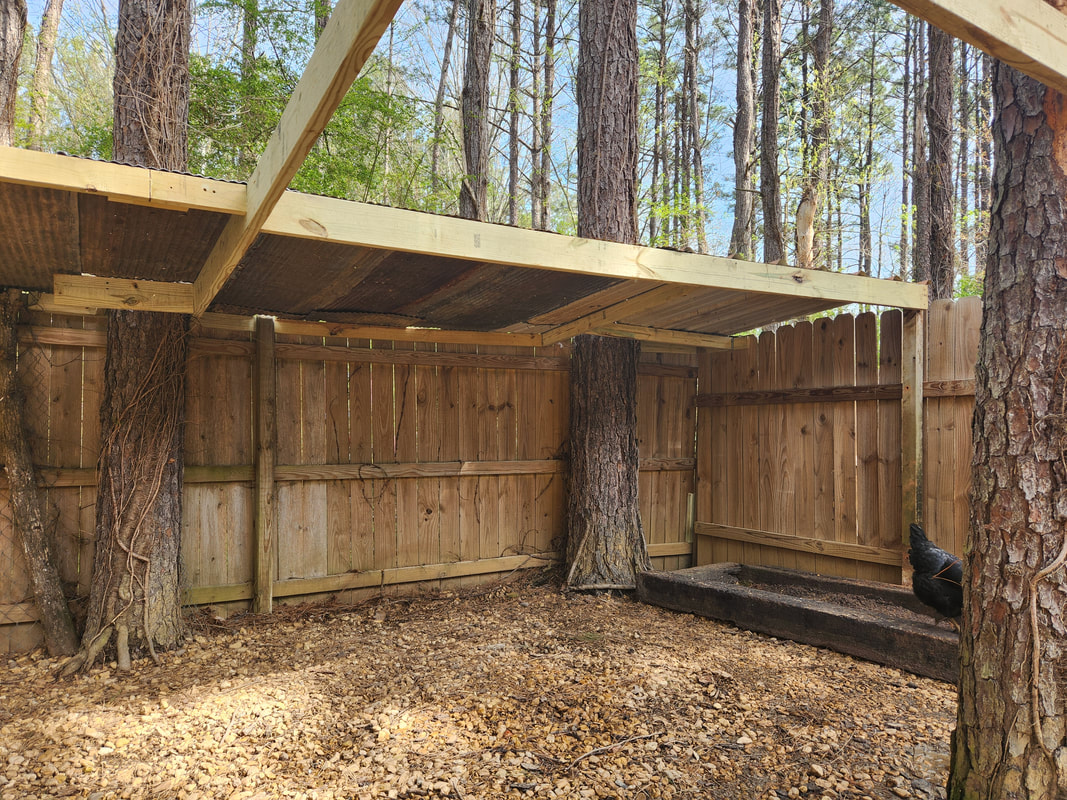 Even on the last third of the roof, the shorter pieces of sheet metal are complemented with shorter pieces of sheet metal and added wood at the rear fence and around the trees to support the metal so everything can be nice and sturdy. 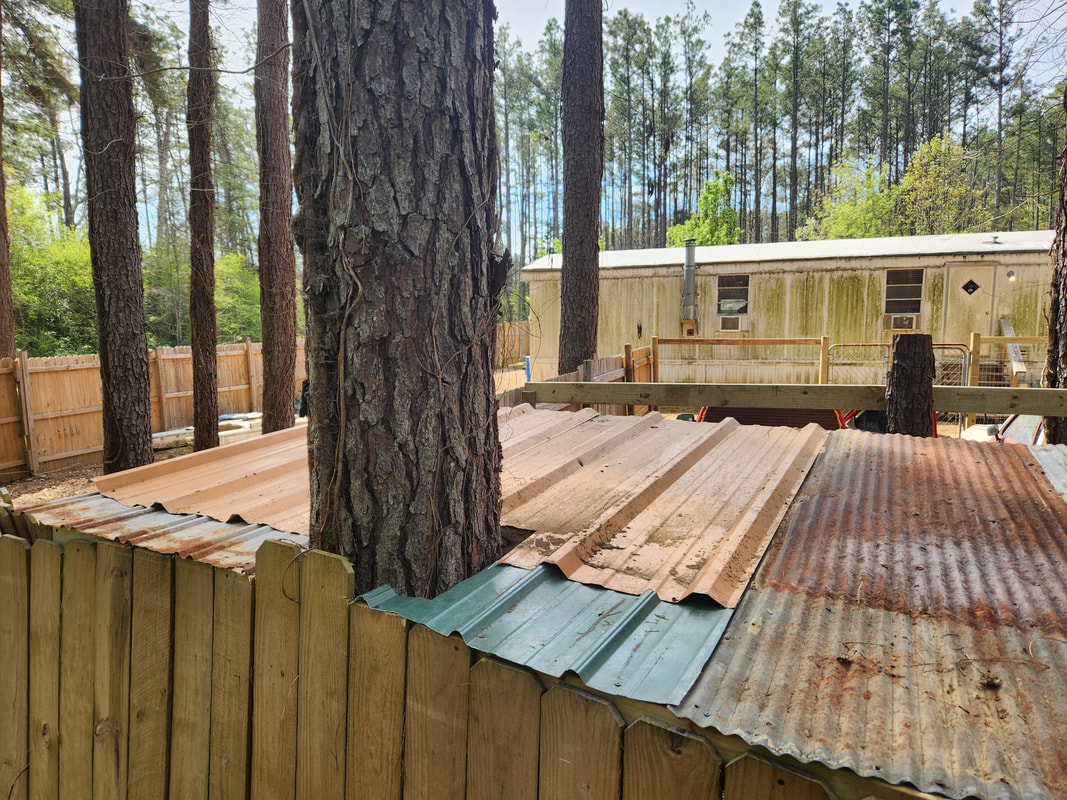 A top shot of a section of the roof showing the sections of sheet metal and how they overlap one another to complete the overall roof, even around this tree.  In this middle section of the roof this crappier metal is used, with the same situation of having to use smaller pieces to complete the entire covering of the roof. 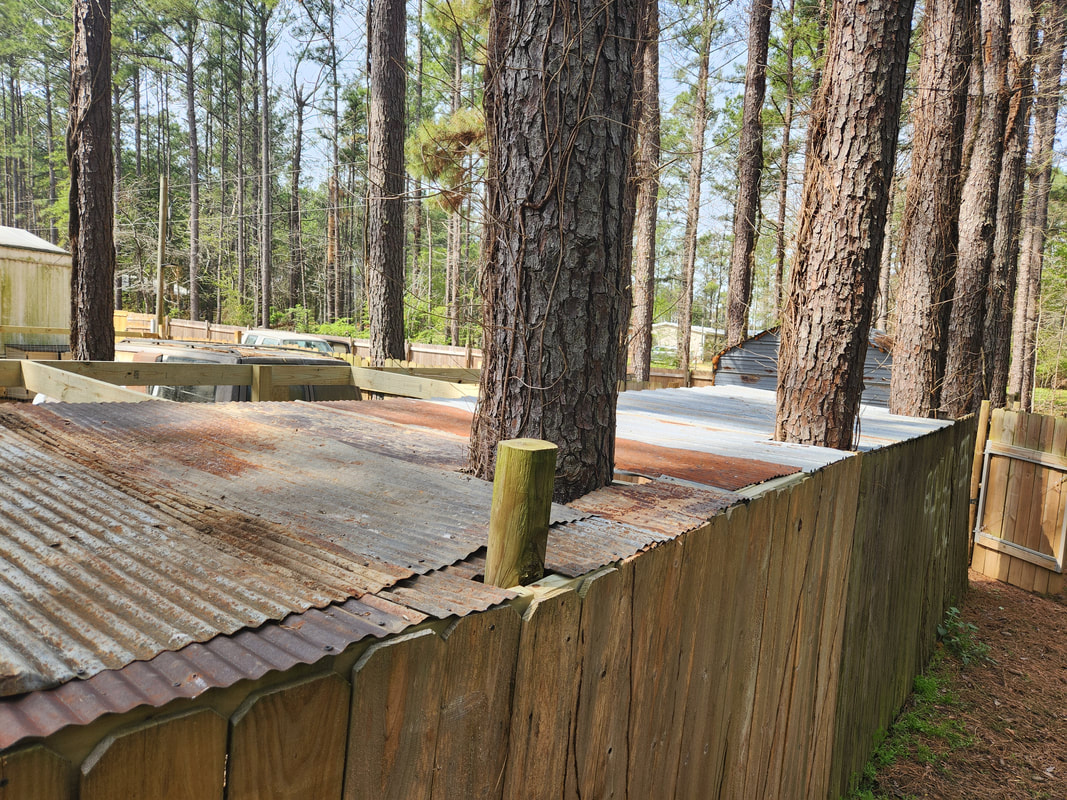 The coverage is as complete as we can get, given the idea that we're using odd pieces of sheet metal and are working around trees and a fence post. With the roof section done, we can now start working on the last section of framing that will span the width of the aviary over the cab and minivan coops.. This section of framing will be used as a support for the bird netting that will be hung over the open section of the aviary. Once the bird netting is installed, we can write off the aviary as complete, allowing us to add different things inside for the chickens to use so their lives within this "cage" will be comfortable. A while back we had picked up a Ranger frame that we thought was a SWB cab. While it was a single cab, the frame turned out to be a long bed wheelbase. This means the wheelbase of this frame is about 5 inches more than that of the vintage Mustangs we work with. One of the things I noticed with this frame is that it actually is a two piece frame, being riveted together right where the front spring shackles mount to the frame. The rivets that hold the front shackles also hold the sections of frame together. The way it looks, if I break these rivets, I should be able to bring the two frame halves in enough to shorten the wheelbase to meet the measurements of the Mustangs. 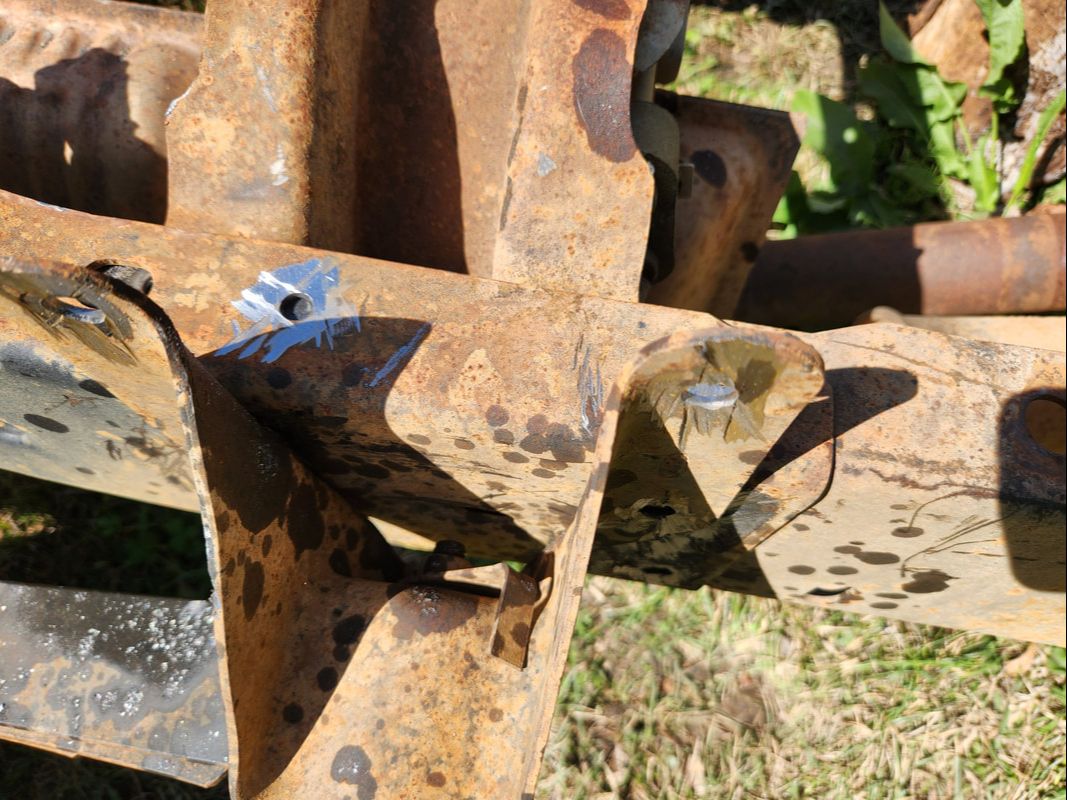 After a lot of cutting and grinding with the angle grinder, I'm able to break the bond that the front spring shackle has with the frame. 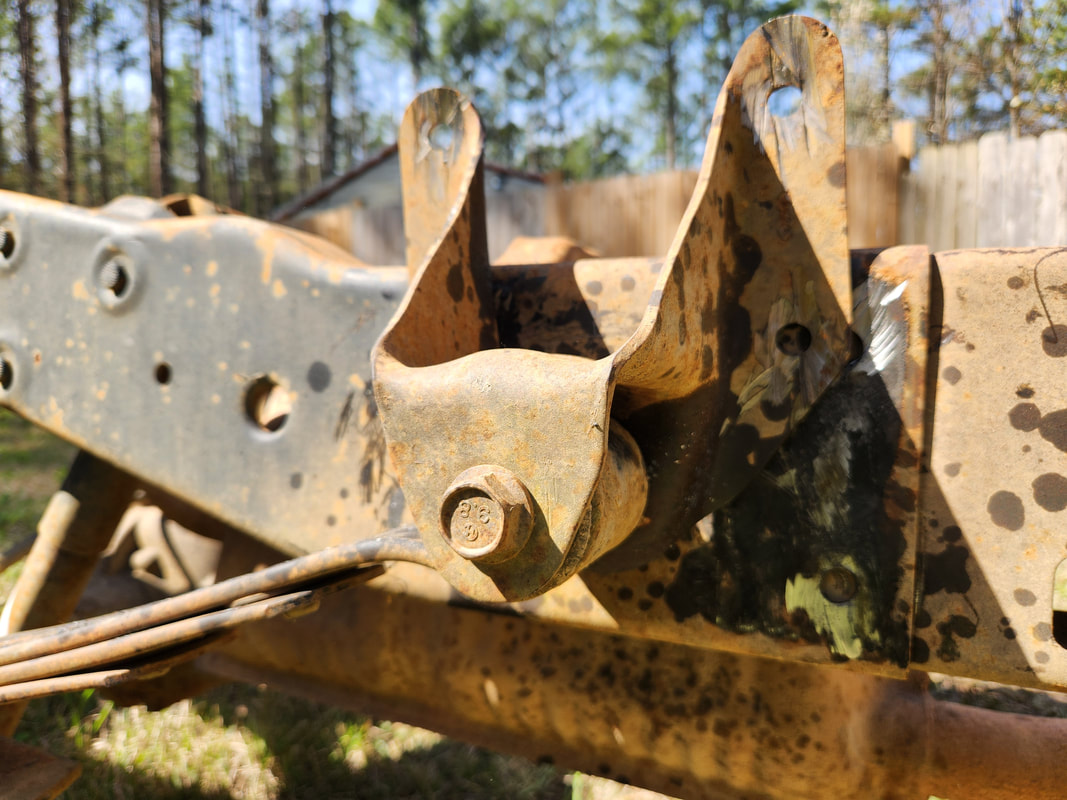 Another angle showing the right front shackle after its separation from the frame. The spring is able to flex up and down freely. After cutting the heads of the rivets and separating the shackles, I still had to grind down the studs from the rivets that protruded from the holes in the frame. 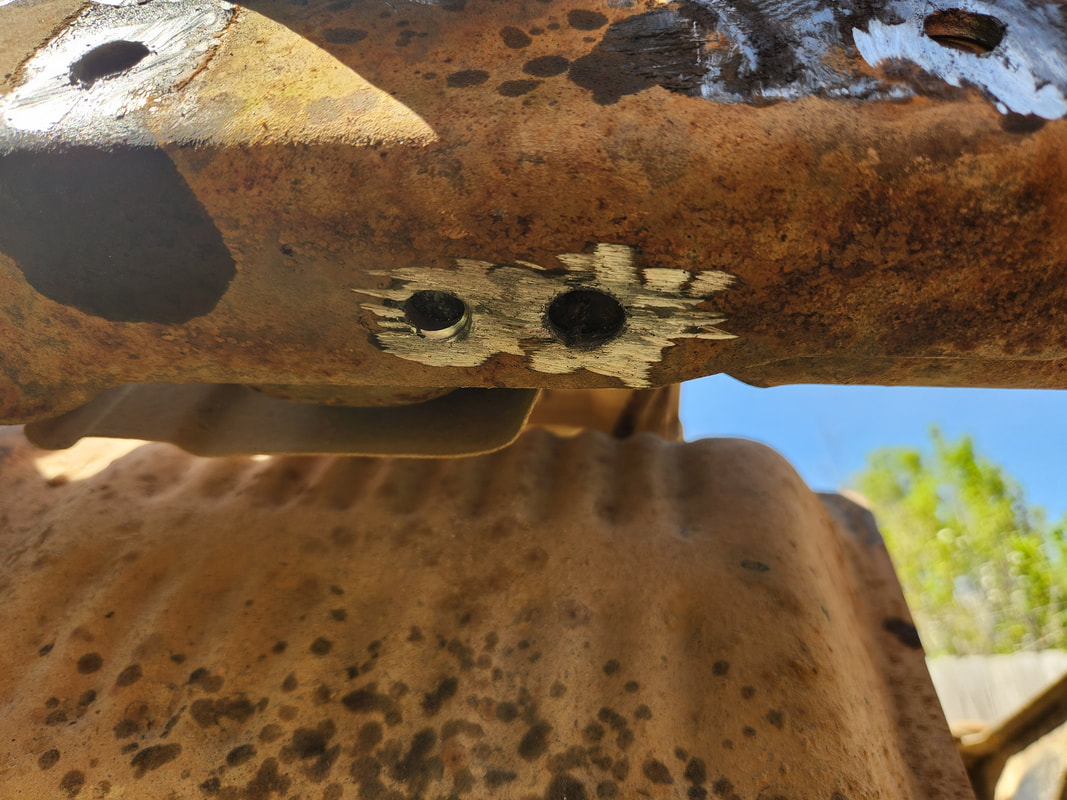 Along with the four rivets holding the spring shackles on the side there were four more rivets holding the frame sections together, two spaced apart on the top and these two that are close together on the bottom. After cutting and grinding the rivets, I had to grind the studs and tap them out in order to completely separate the frame rails. Only a couple of rivets would not tap out and as a result they had to be drilled out deep enough to allow for the frame rails to separate without catching on the studs. The protruding portions of the studs had to be ground down first before drilling. The next order of business is dropping the transmission in place, putting the short driveshaft I grabbed from the junkyard into the transmission, and bringing the frame sections together. 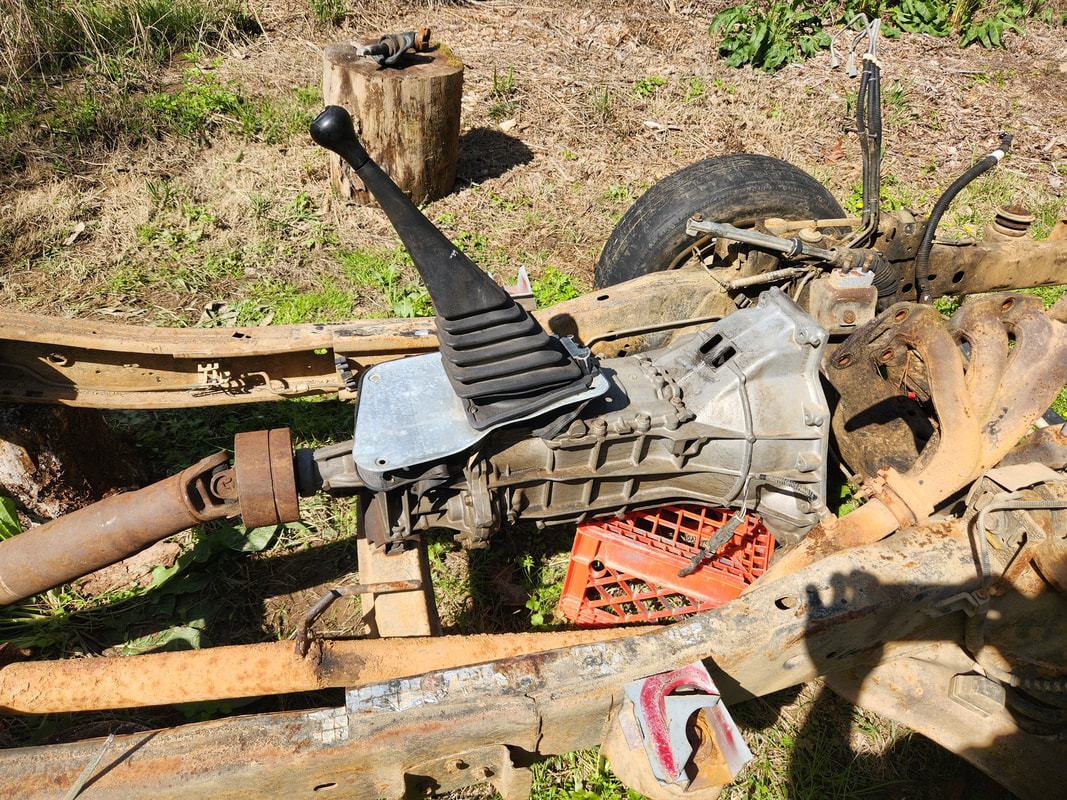 The only difference between this transmission and the old unit is the bellhousing patterns. Otherwise everything is the same. The transmission is placed on the crossmember with the mount in place. The driveshaft yoke is placed in the tail shaft, awaiting a test fit after bringing the frame sections together. I had to use the sledgehammer to beat on the rear of the frame to bring them together. I managed to get sections moved in closer, but the physical shape of the frame sections have them unable to come together close enough to yield me the 108" wheelbase I seek. I even trimmed the outer frame rail ends hoping they would come in closer but the inner portions will also need to be trimmed to allow for the ends to come in closer without hitting the folds in the rails. 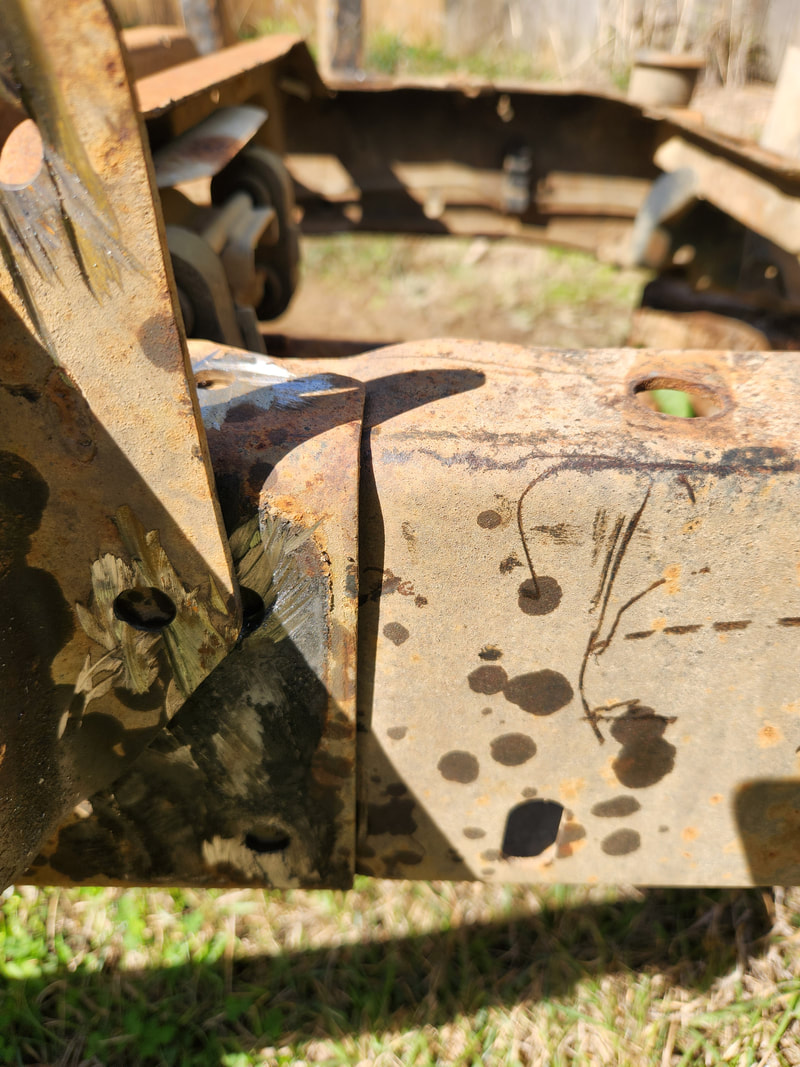 The front section of frame has a taper that makes the overall lines of the frame be even from front to back. Even with the trimming of the rear frame section, the front frame rails (which are inside the rear frame rails) also have a taper they hit that will require me to separate the two sections so I can trim the front frame rail ends as well. I could possibly go with the wheelbase that I have with the frame sitting where its at, but when I attach the driveshaft to the rear end, there is only half of the tail shaft spline being covered by the yoke. This isn't desirable as it will stress the transmission tail shaft, bearing and U-joint to the point of premature failure. The wheelbase is around 109-110, which could be worked around, but now the driveshaft is the main focus, since lengthening the driveshaft will be expensive versus just doing the extra work to separate the frame sections. 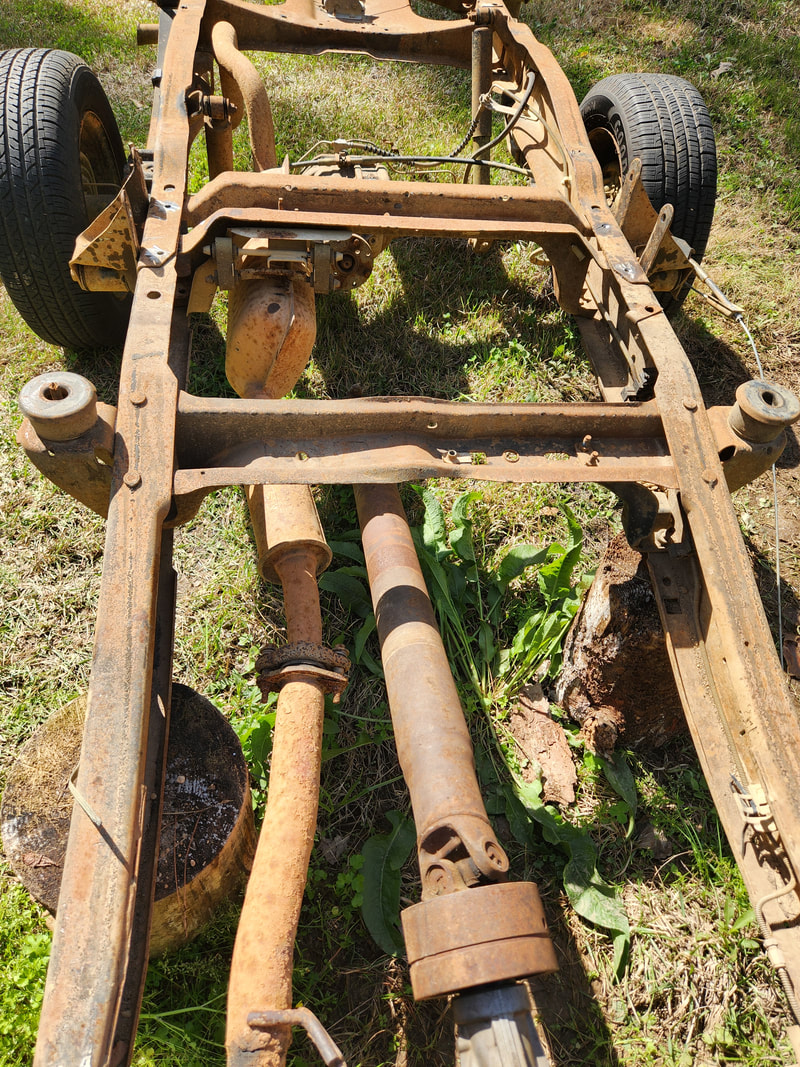 With the driveshaft inserted into the transmission tail shaft where it needs to be, the driveshaft is unable to meet the rear end yoke, requiring either the frame rails be brought in closer somehow or the spring shackles be remounted farther forward to allow the rear end to sit forward more, using the pivoting rear shackles to work the whole assembly forward some. In the next go around I will be propping up the frame sections so I can beat the rear section out to separate them. The only other possible option will be to reposition the front shackles about an inch forward on the frame, which will allow for the rear end to sit forward an inch or two, achieving the desired wheelbase. This will require some force to work against the weight of the rear end as well as the springs themselves. This might be my first option versus trying to separate the whole frame into two separate halves. After making a little road trip to retrieve a replacement engine for the Trackers, we were heading back home, late at night and in a tired stupor was awakened when a dumbass deer decided to run right in front of us. Luckily reflexes kicked in at the last absolute millisecond and had me hit the brakes to soften the blow and delay the impact with the deer until he/she was 80% past, causing me to hit the animal on the left side of the bumper. This still caused some damage with the headlight housing being fragged along with the left most part of the grille. The left fender was bent up a little bit and pushed into the driver's door a half inch so the door was unable to be opened all the way. As a result, I would have to do some impromptu reconstructive surgery to get this little SUV back on the road again and in a hurry. Luckily I still had a headlight housing that I saved from the first Tracker we had that was scrapped after being partially crushed by a tree. It wasn't perfect but it was still whole. I didn't have a fender or a hood or grille unfortunately. The bumper skin was still good though. I would have to straighten out the rest of the bent sheet metal and try to straighten out the substructure where the headlight housing sits to allow me to remount the housing and be able to remount the fender as straight as possible so the truck doesn't look too goofy. 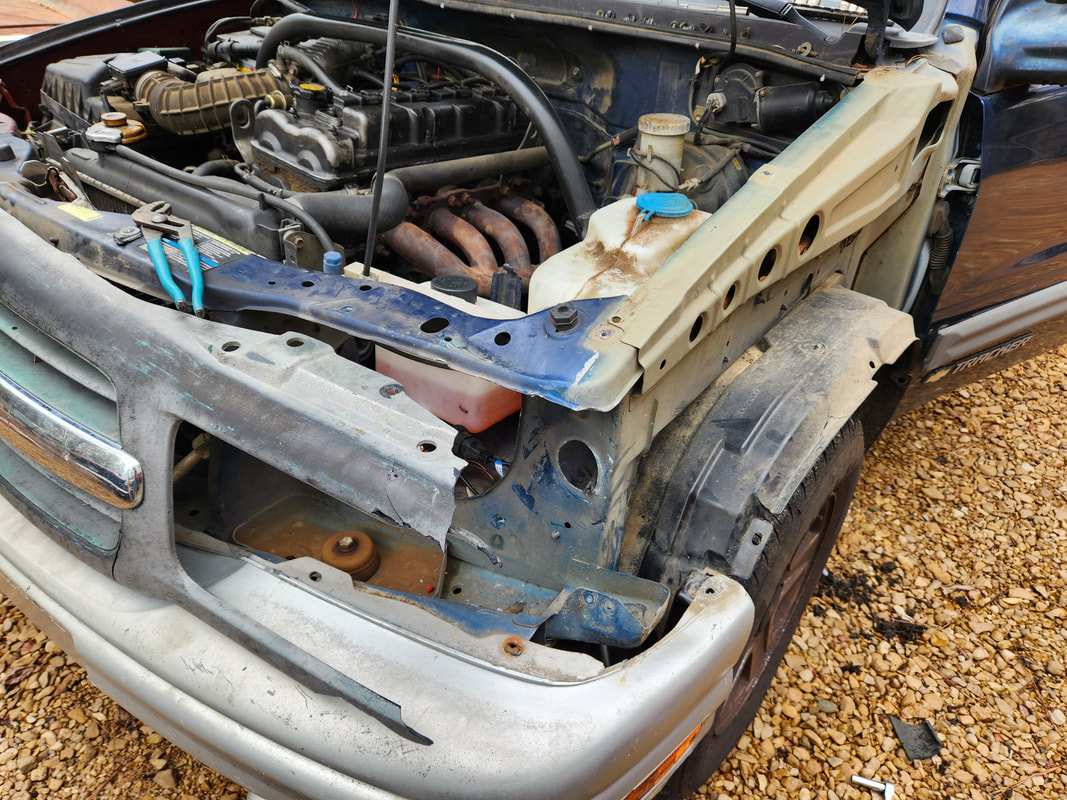 After removing the remnants of the headlight housing, I beat on the core support structure to straighten it out enough to hopefully accept the replacement headlight housing without any incident. 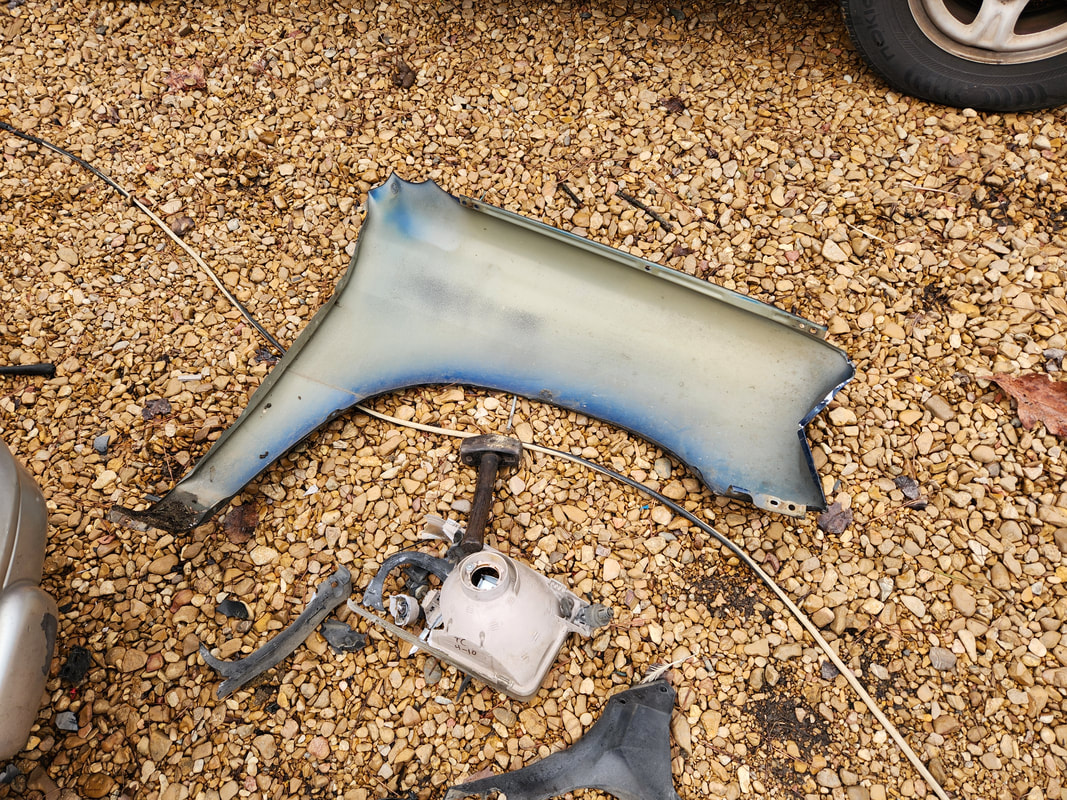 The fender after removing, it too will need to be beaten on in order to straighten it out enough to be remounted at least enough to sit straight on the body relative to the other body panels. After beating on the metal core support/headlight mounting area, I was able to get the metal straightened out enough to be able to remount the headlight housing. Things sat surprisingly straight, all things considered. The next thing is the fender. I had to straighten out the very front of the fender since the metal was folded in from the impact. After straightening that part out I had to fit the fender then straighten out the top lip where the bolts hold the fender to the inner body so when the hood is closed, the gap along the two members was minimum and even from front to back. I also had to use a large flat screwdriver to pry out the back edge of the fender so it was out a little farther than the door so the door could open and close without binding. 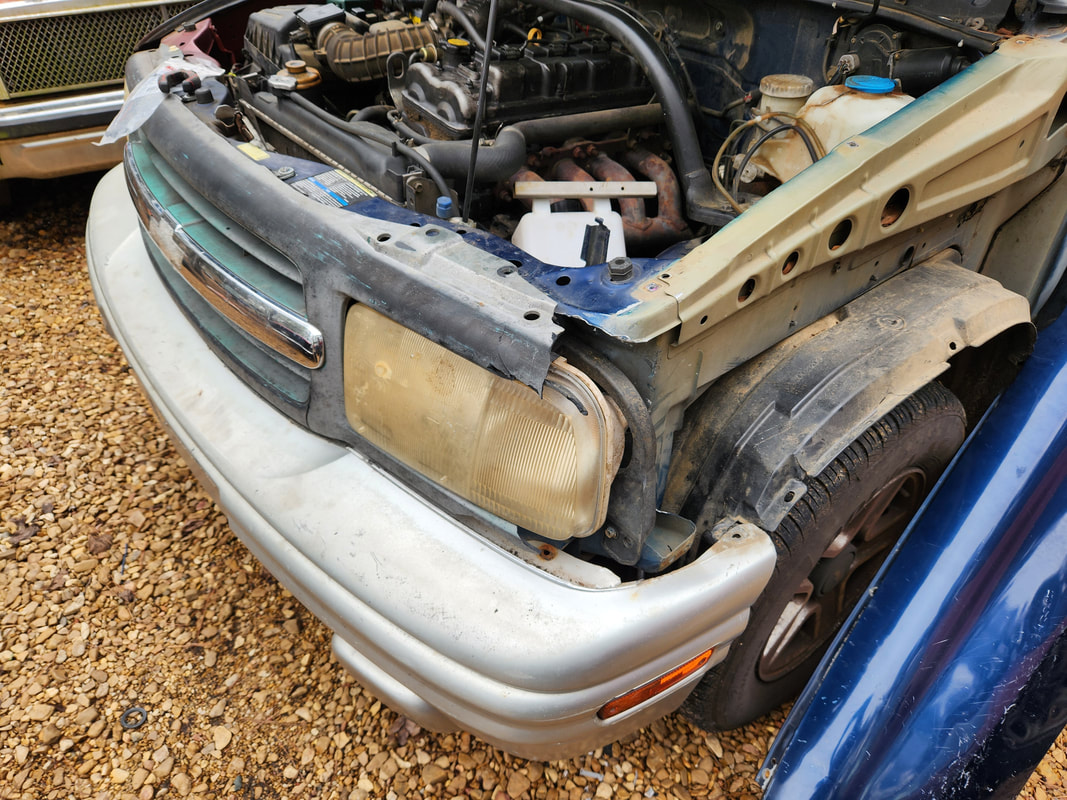 The replacement headlight housing sits pretty good on the core support body, allowing me to install all three of the mounting bolts to hold the unit in place without binding or stretching. 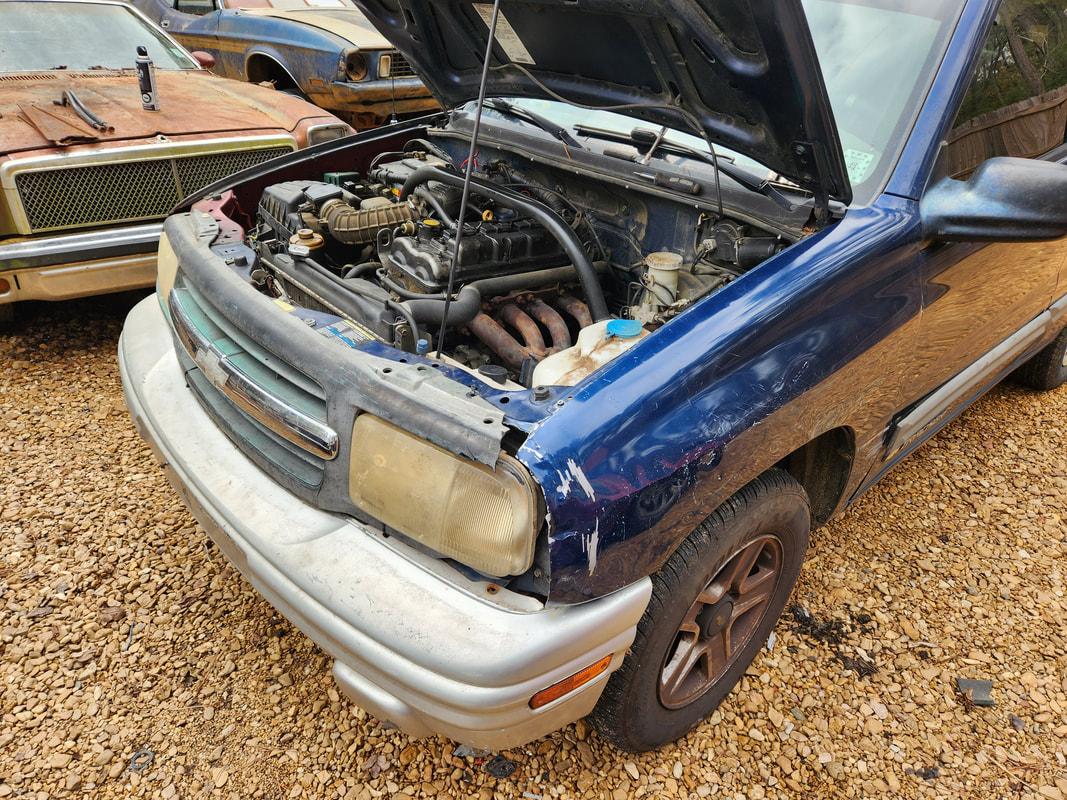 The fender is reinstalled on the body after several episodes of fitting the piece and lining it up with the other body panels. The bolts to hold this panel all lined up pretty good with no stretching or binding as well. 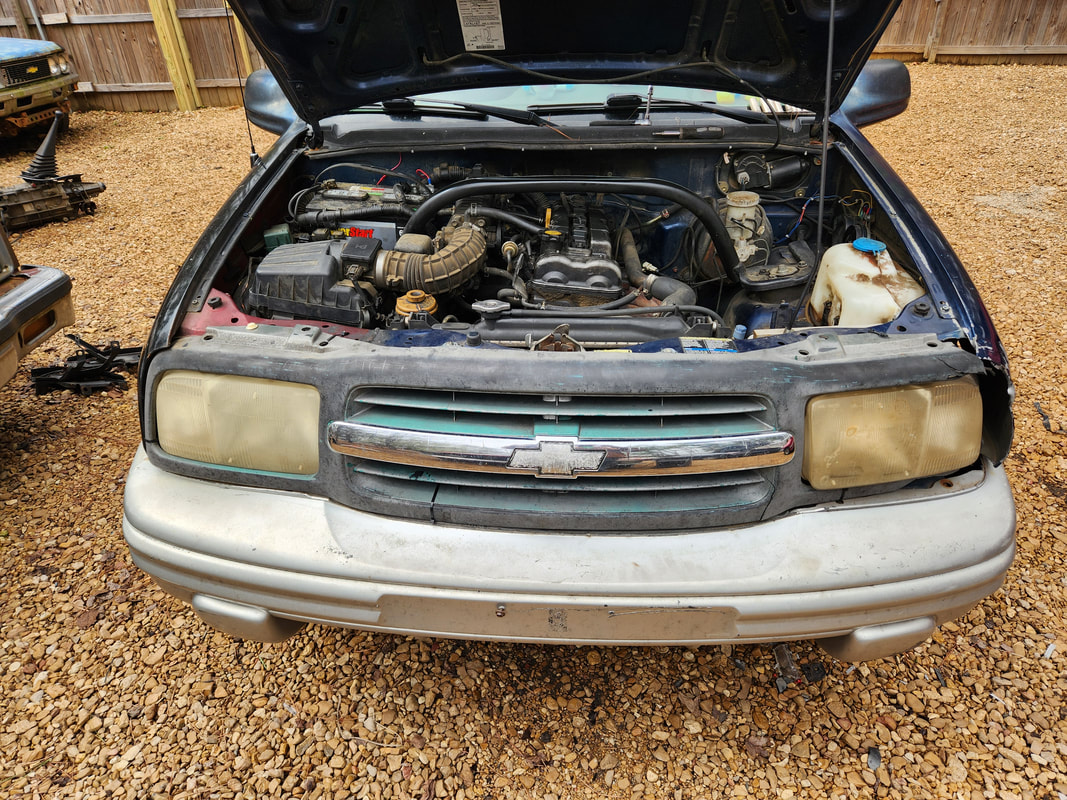 A frontal shot of the truck with the headlight in place and fender fully installed. The grille hasn't been zip tied yet but all in all everything sits straight. 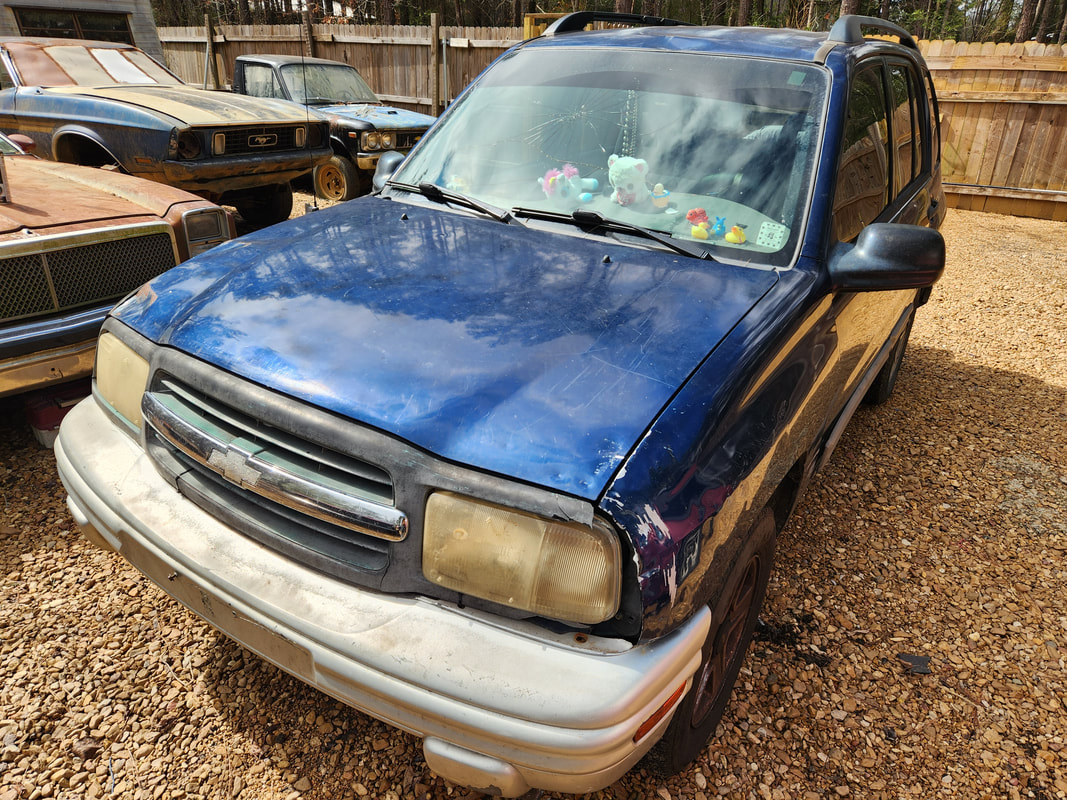 With the grille secured with zip ties and the hood and fender aligned, everything is snugged down for the last time. The fender sits even with the hood as well as the A-pillar and the door. The door opens smoothly just as well. Most people would've probably written off this vehicle after suffering so many beatings but when I know I can do some fuckery to put things back together to at least restore the image of a straight vehicle, I will do so because it doesn't make economical sense to trash a car because of a few body flaws that can be corrected, even if they're not perfect. In the meantime I will have to keep an eye out for some replacement panels, and when the time comes, possibly shooting some paint on the thing, even if its just on the replacement panels. With plenty of car and yard stuff under my belt its time to get some gardening in. I had to clean out the old planters in the greenhouse as well as the hydroponic planters. One of the things that we're doing is getting seeds started so we can start planting those in order to get plenty of plants without spending an arm and a leg versus getting already started seedlings from the store. Some of the old raised drum beds were converted to kratky hydroponic planters last year so I decided to get a few of these started. I used the net pots with clay pebbles and little cubes of rock wool to hold the seeds. A fertilizer solution was mixed up and two drums were filled up, with me planting five of the six planters in the two beds. 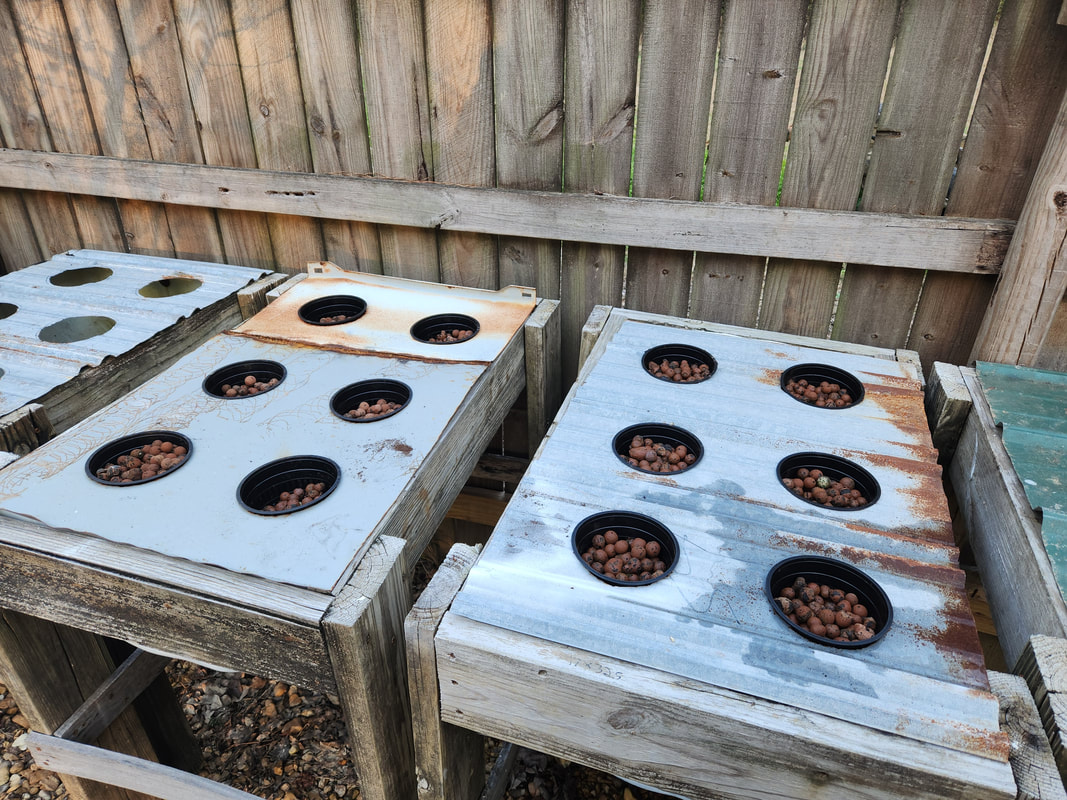 Two of the Kratky hydroponic planters are planted with clay pebbles and rock wool cubes with seeds. I have plenty more of these planters but will need more clay pebbles plus I still need to better seal the caps in some of the drums so they will allow me to fill them above those points without water leaking out. I do have other smaller net pot planters, ranging from single pot buckets up to a couple of storage container planters able to hold six pots. When I get more clay pebbles I'll be planting these just as well. With the chickens contained I'll probably expand my planting to other areas of the yard like the north and east sides of the house where I can build platforms to hold these planters and keep them shaded partially as well. I did take a moment to plant small plants of grapes and raspberries along with strawberry roots around the central berry plants to create a dual plant setup for several of the drum planters. 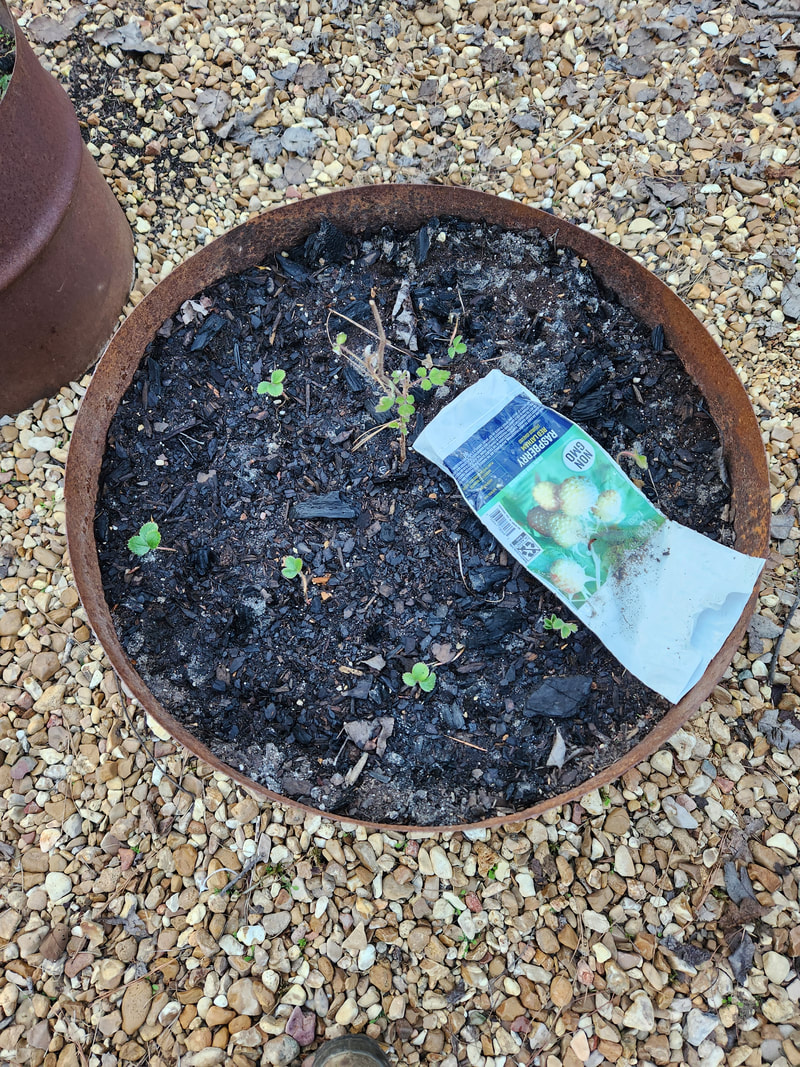 A drum planter with a raspberry root stock along with some strawberry roots planted around the central stem. The strawberries are already coming up. Along with the hydroponic plantings I took some salvaged seed flats and filled them with peat moss to start more seedlings so they can be planted later in the spring in the bucket kratky planters that use the pool noodles to hold the seedlings. Another thing that I took a moment to address was some trees in the garden that while small parts of them were still alive, they were more or less dead and not viable so it made no sense to keep them around when they won't be doing anything. I chopped them down and stacked them for later disposal, removing the excess dirt and leveling off the ground. I will still have to spread some fresh gravel over the areas to cover them up. There's one more tire planter with a muscadine plant in it that I have to see if its going to come back. If it doesn't I will be pulling that up just as well. This would actually be a good thing as it will clean up the north area of the garden along where the old fence was routed. Opening up this area will allow me better movement of vehicles and equipment without the worry of hitting the muscadine plant. In the event the plant is still alive I will just wait until next fall/winter when it goes dormant and uproot the plant and transplant it into a drum planter within a more confined zone near the rear/south end of the garden. 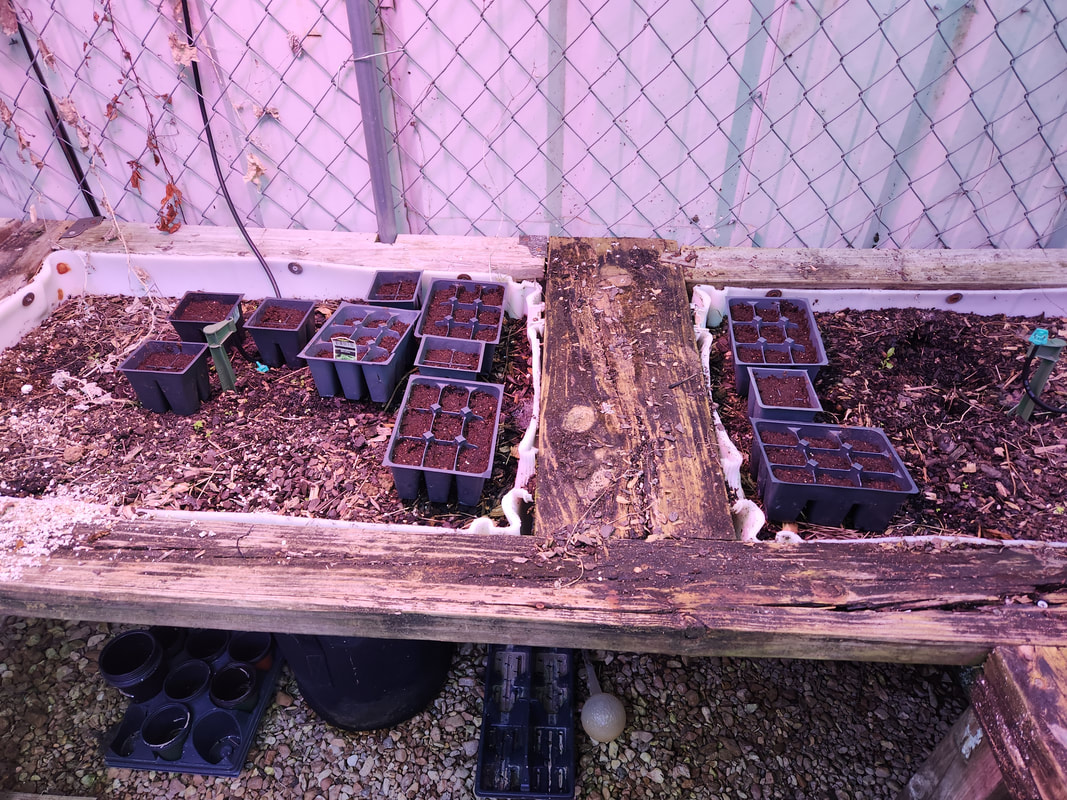 Inside the greenhouse some salvaged seed flats are being used to start seeds for planting later in the hydroponic planters. Eventually the old beds in this greenhouse will be dismantled and replaced with more hydroponic planters. 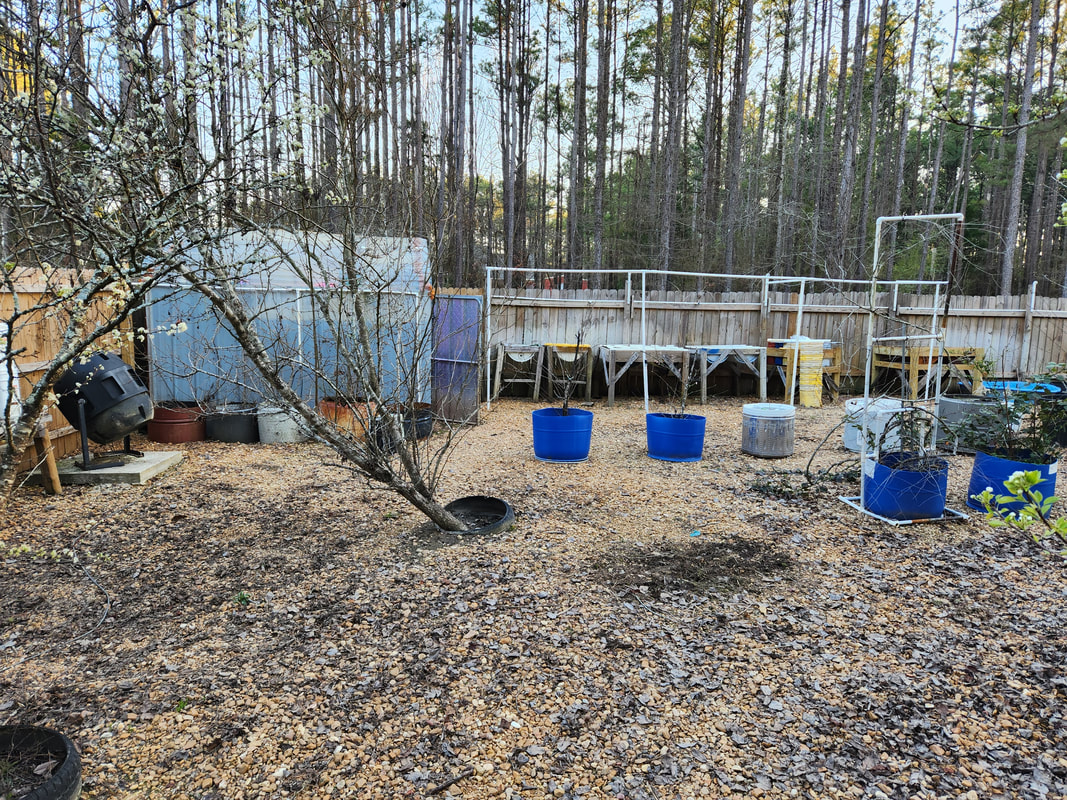 Just to the right of this left leaning apple tree was another apple tree that was 90% dead. The few green branches that remained were not enough to justify saving this tree, especially since it was leaning just like the other one and was a ground planting. I can start new trees in drums or large pots like the other recent tree, which makes it easier for me to move them around as desired. 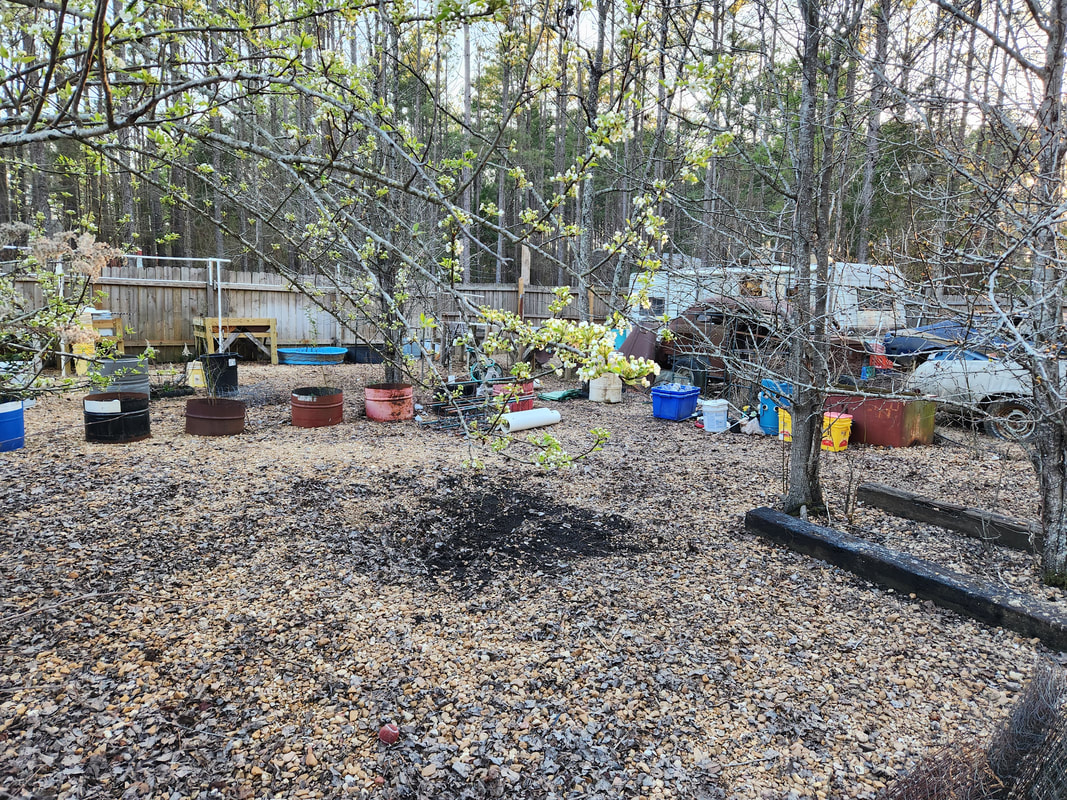 The remains of an old fig tree that was planted here somewhere around 15 years ago. It still had a few green stalks but for all intents did not appear to be viable anymore so it only made sense to pull it up and later on a drum planter will be used to start a new fig tree. Along with a 36 count seed starter that we have going, hopefully we will have more than enough plantings to take care of all our kratky buckets and drum planters along with a few dirt raised beds. But again, since I plan on expanding with other planters around the yard, I will probably need to start more seedlings throughout the year, especially if I make more changes in the greenhouse, all the way up to and including the addition of a heater to keep the structure warm in the coldest nights of winter where temps will dip as low as the teens, which not even the greenhouse can handle. The work will continue through the summer and into the fall. I only needed to get one more post sunk in order to get the last section of fence panel installed for the east side of the aviary wall. Once that is done I can start the construction of the front of the aviary, which will involve actually making a half and half wall, with the bottom half being more or less a fence and the top half a chicken wire fence. The reason for this is so any small birds that are released to the general population won't be able to slip through any gaps or cracks with the chicken wire. Plus the image that I have in my head has it where the whole front will look more aesthetically pleasing than just a whole chicken wire wall. 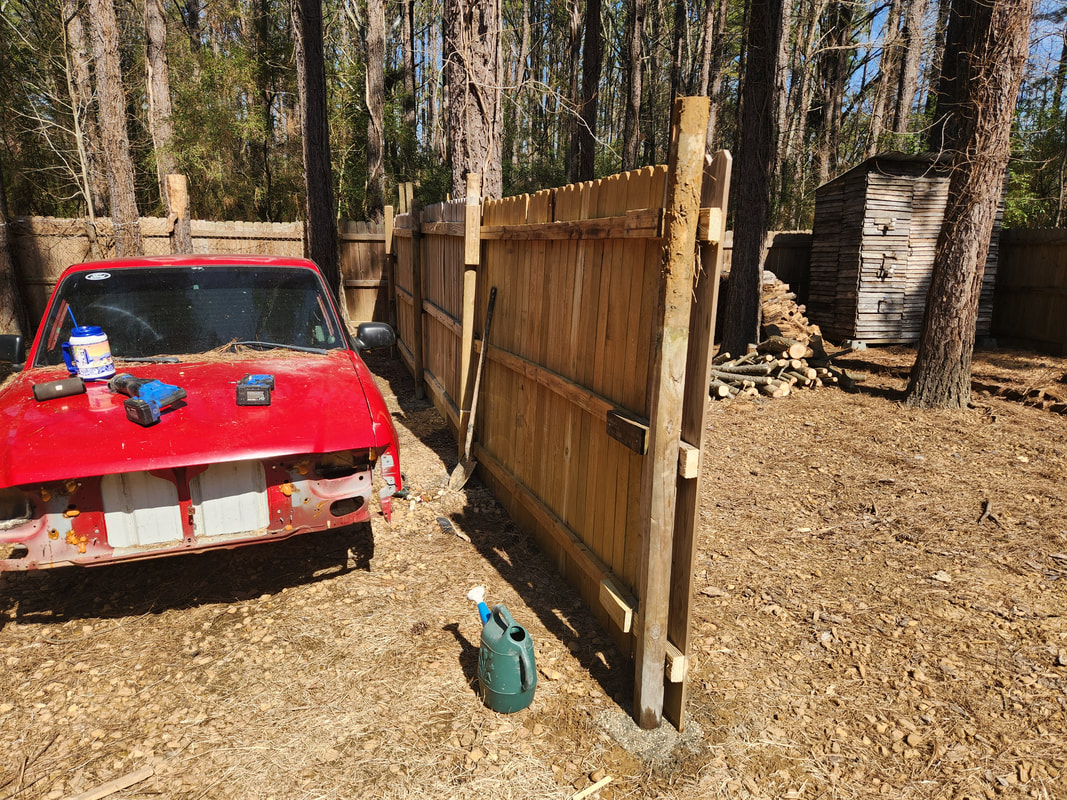 The last post is sunk on the east wall to allow me to hang the final fence panel for this wall. 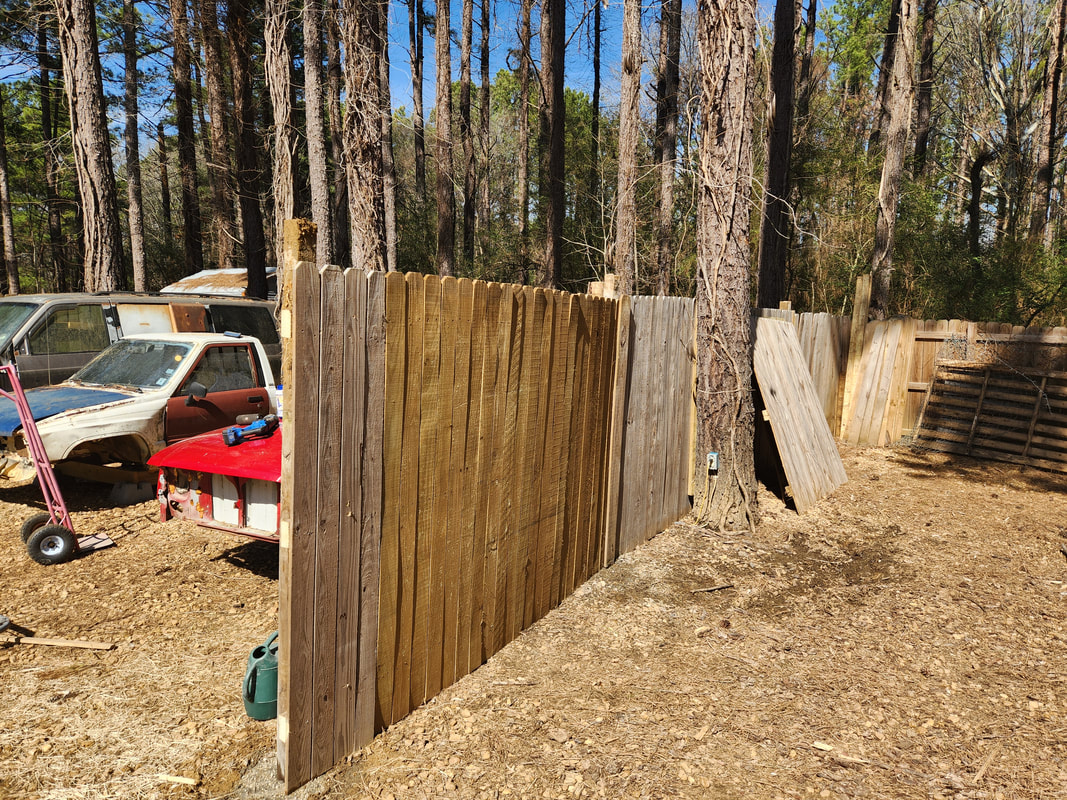 An outside shot of the east wall of the aviary, showing the extra panels and pickets and wood from the leftover fence staged off to the right. The panel that was hung was about a foot or two shorter than the span that was needed so I cut a short piece of another panel and tied it to the larger panel with 2x4's. To start off the construction of the front, I sunk two more posts at a midway spot between the two cab coops in order to hang a chain link gate panel. From these posts I hung three 2x4's, one at about a foot off the ground and the other around 2.5ft off the ground. The third one was hung at the very top of the posts. I sunk one more posts at about a midway point between the west fence and the gate. I hung more 2x4's to complete the framing of the front as visualized. 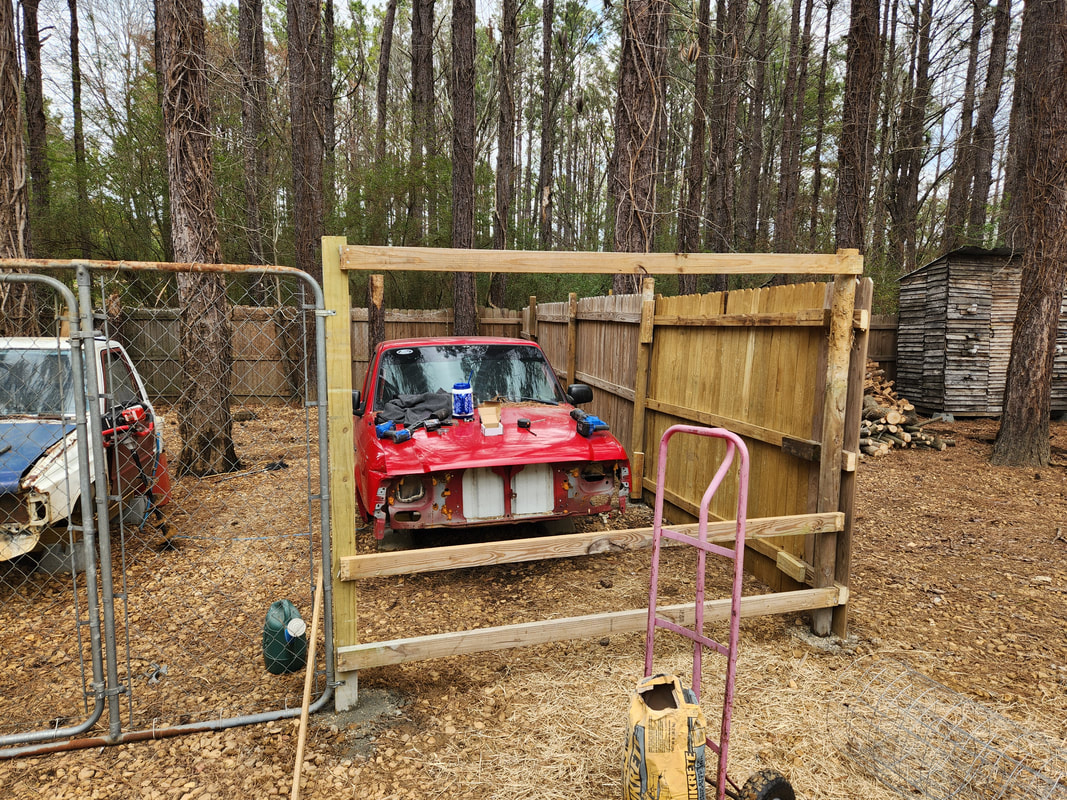 With the posts sunk in order to hang the chain link gate panel, I installed 2x4's to begin the construction of the front wall. The two lower 2x4's will be where the shortened fence pickets will be secured to create the shorter fence panel wall. 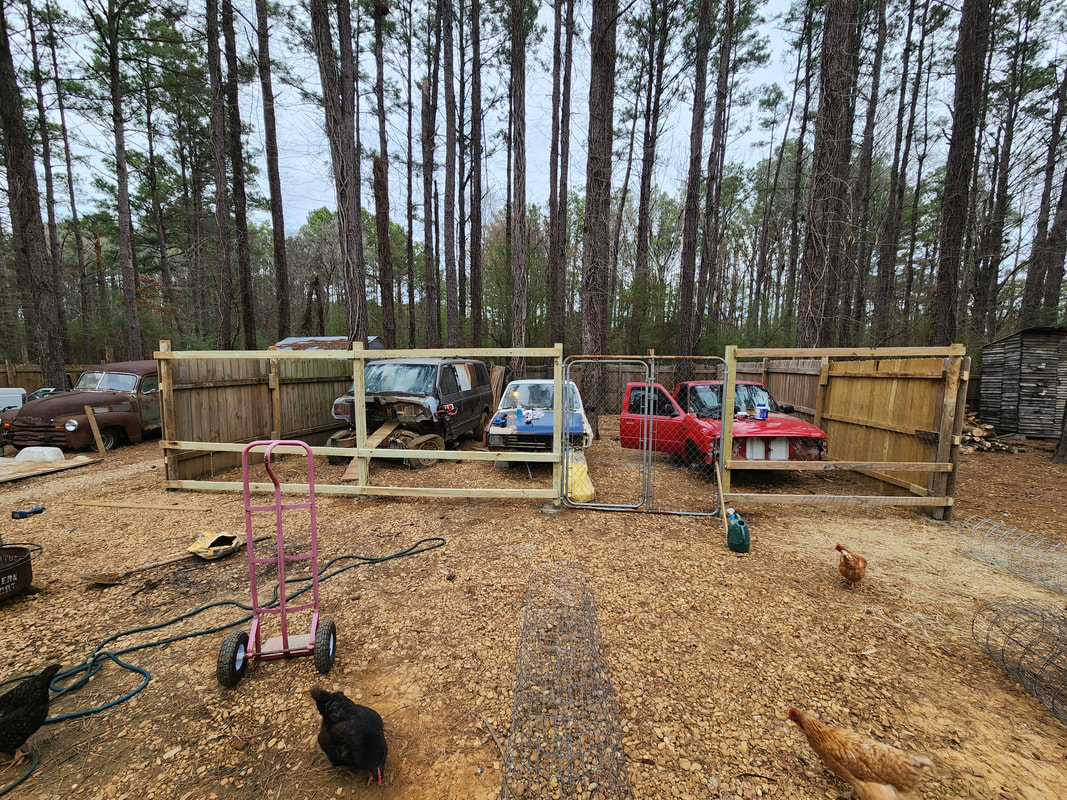 With all posts sunk and all the 2x4's secured between the posts, along with our chain link gate panel, we're now ready to hang and cut the fence pickets for the lower part of the wall. The next move that I had to do was hang fence pickets along the bottom half of the wall where the 2x4s are spaced close together. To make things easier, I just screwed down a picket then cut the thing level with the middle 2x4, then took that section of picket and hung it next to the previous picket, repeating the process. There was plenty of waste pieces left from all the pickets after getting the bottom half of the wall covered but it was an acceptable outcome as I go the wall totally covered. 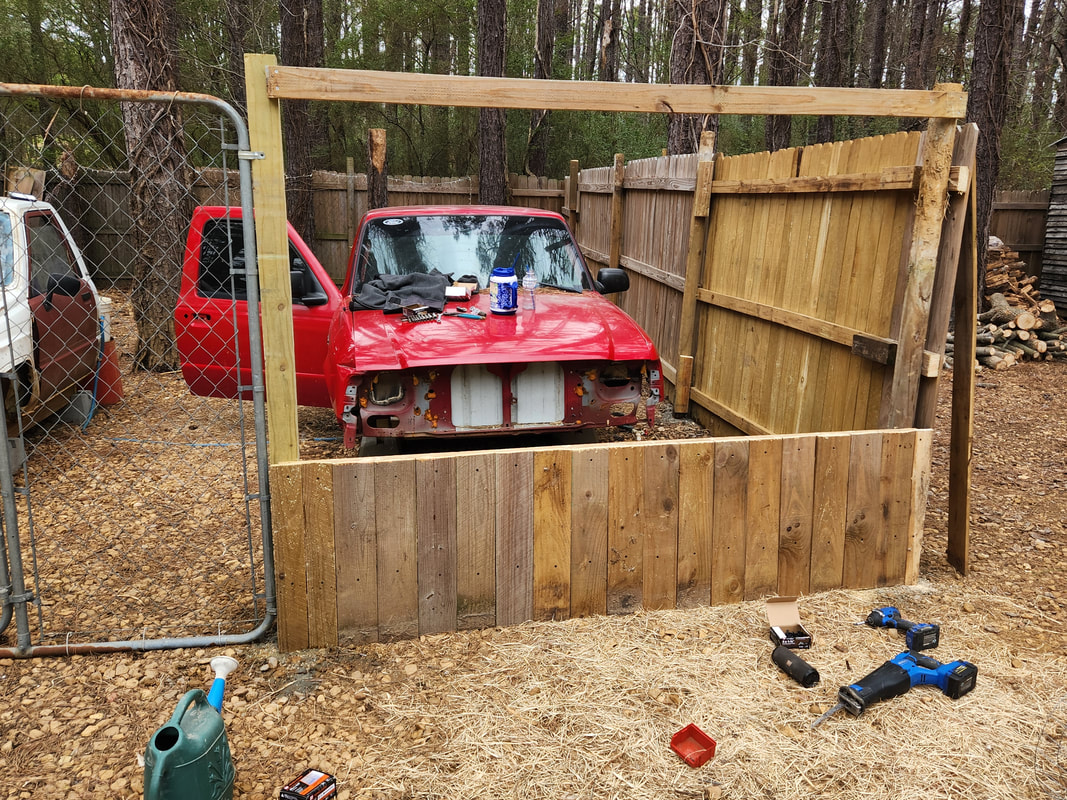 The beginning of hanging and cutting the fence pickets to cover the bottom half of the front wall. 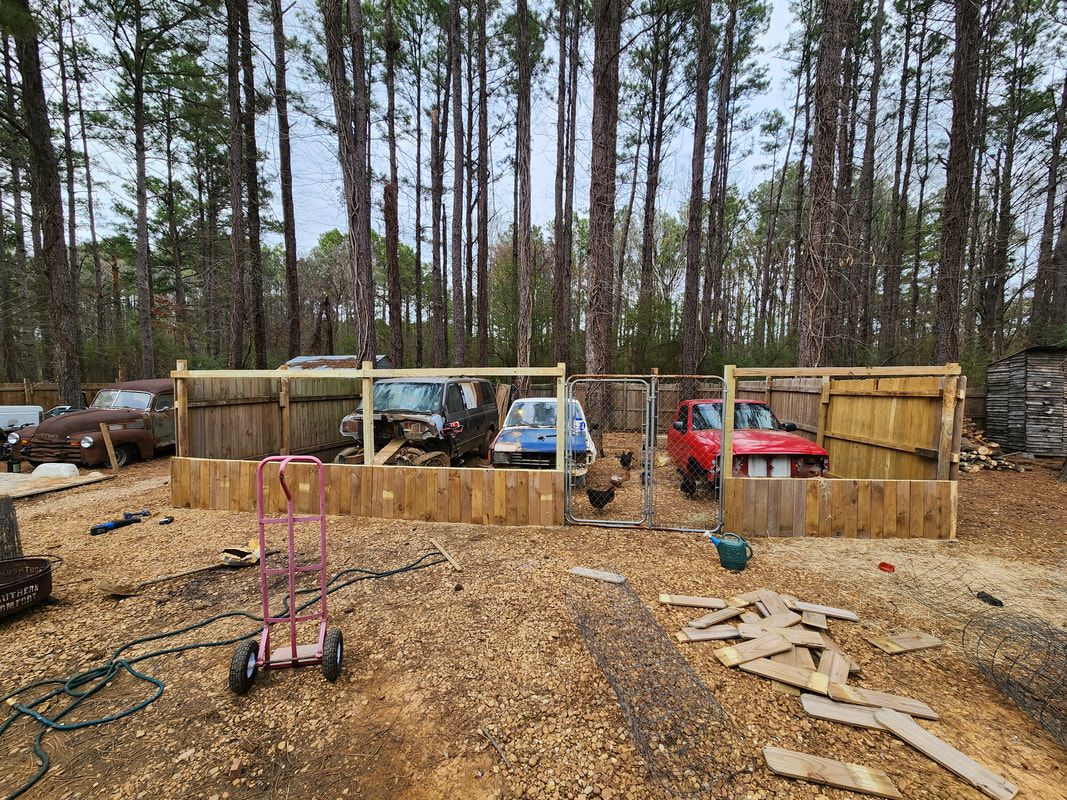 The pickets are all hung along the bottom half of the front wall, with the refuse stacked on the ground to the right. With the pickets done next was the chicken wire. I had some rolls of 4ft wire that would work just fine for this application. The wire overhung at the top by maybe 6 inches which was no big deal as I could just snip that off along the top. I used U-tacks to secure the wire along the 2x4s at the top and bottom, taking time to stretch the chicken wire some as I secured it in place. 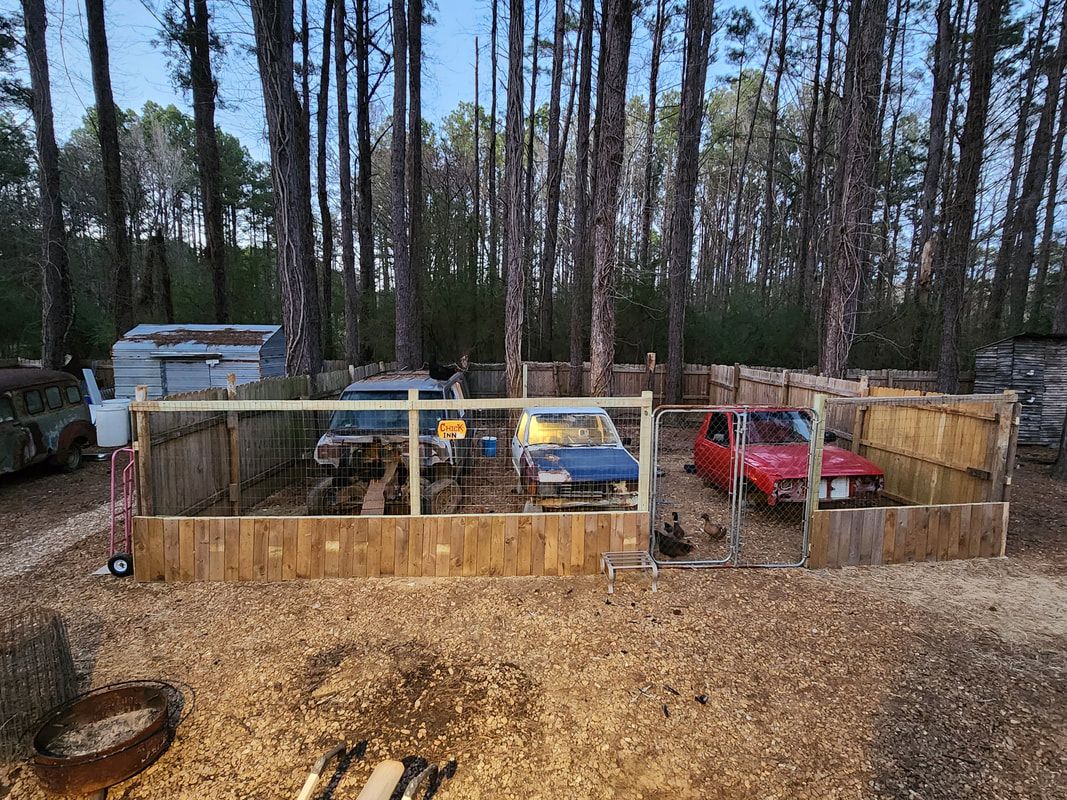 The front of the aviary with the chicken wire in place, the birds are now contained. 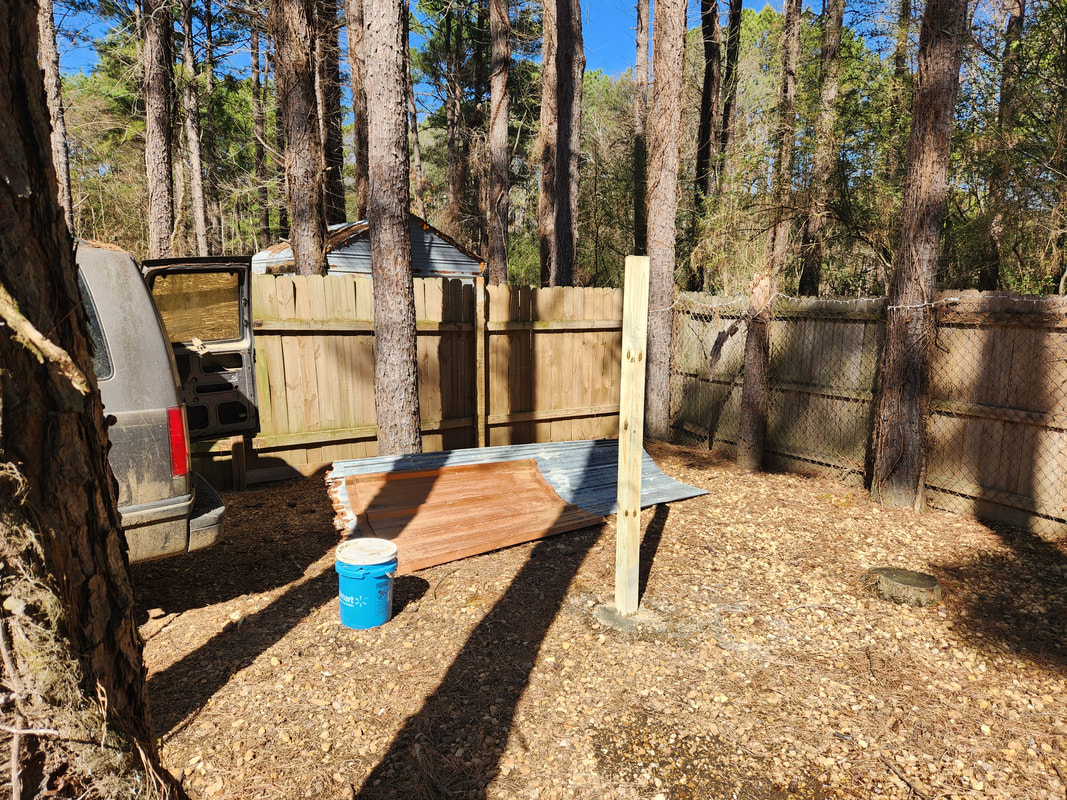 A single post is sunk in the middle of the yard, running in line with the dead tree whose trunk is to the far right, in a straight line east to west to begin the first of the lines of roofing framing for hanging the bird netting. With the chicken wire hung the aviary was pretty much ready to admit the birds into. We still have to build a covering to fully contain the birds so it can be considered a true aviary and not just a pen by definition. The birds' wings needed to be clipped to keep the few smart ones from making their way to the top of the front wall and going over. More than likely I will go back to the original bird netting idea in unison with the framing so if necessary I can remove the material to get to any branches that may fall on top, which will be more difficult if there's chicken wire permanently attached to the top. For right now the birds are officially contained. One of the other things that I decided to look at was redoing things in the garden, especially since the chicken yard area is completely redone. With the chickens soon to be locked down, I decided to remove the old raggedy fences that went around the garden. Most of the fence was 3ft chicken wire tied against T-posts on two sides. I originally planned to replace this with 6ft chain link but this is totally unnecessary with the lockdown of the birds. Plus, removing the fencing will open things up more and give me more space, figuratively and literally, to do different things in the general area. 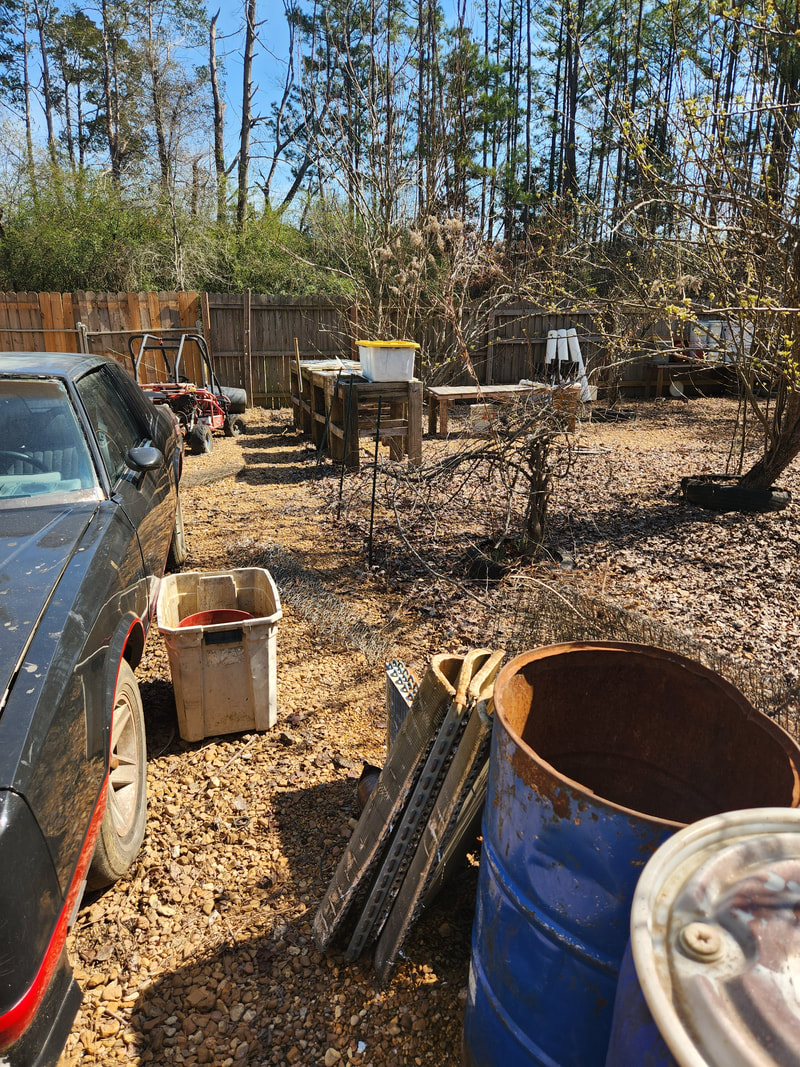 Beginning the removal of the chicken wire from the T-posts along the east/west run of fence. 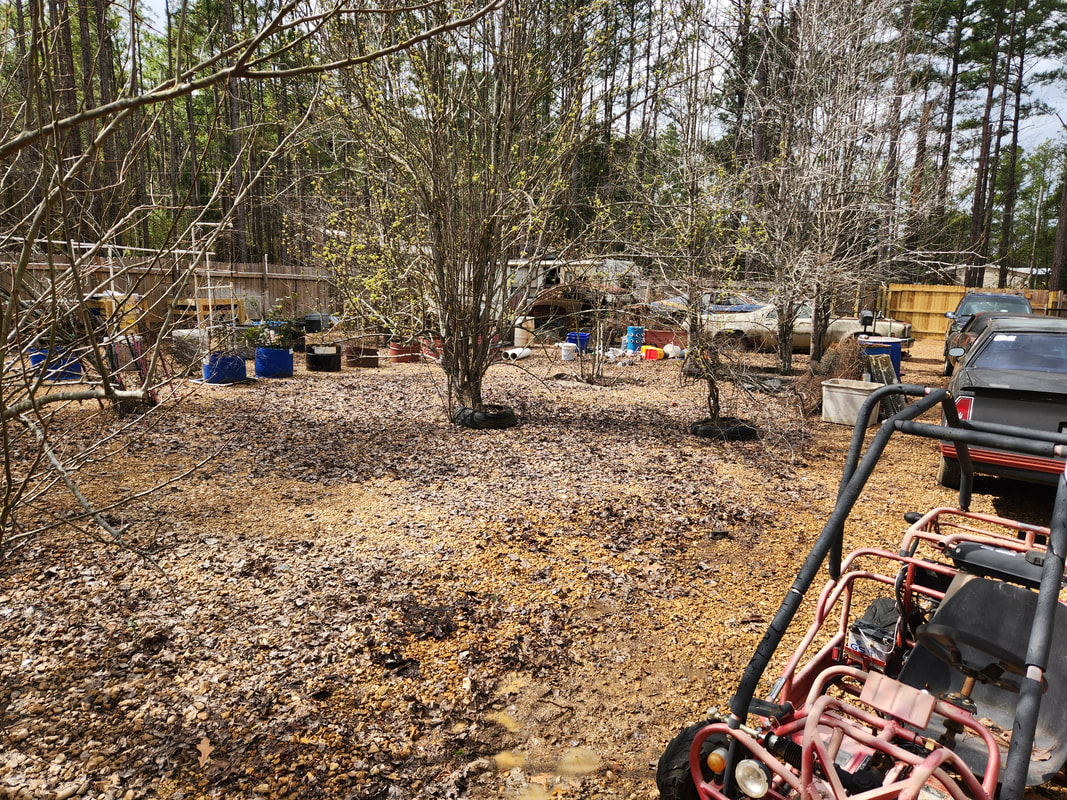 The east/west fence run is no more, with both the chicken wire and T-posts removed, opening up this area in its entirety. By removing the fence along the east/west run, it opens up what I called "The Midway", allowing for more movement of vehicles and even other equipment, such as a lawn tractor or a dolly or what not, not being limited to the small gaps between the two rows of vehicles that are parked in the midway area. This also allows for the vehicles to be spaced better, taking advantage of the open space in the garden. Along with the removal of the fence, I also plan on moving the raised hydroponic beds that I staged along this fence line, relocating them to an open spot along the east fence where I can take advantage of more shade. I also have a lone muscadine plant in a tire that I have to determine if its alive or dead. If it comes back then I will wait until next fall/winter to relocate the plant into a new raised drum bed in another spot in order to remove it from this now opened up area. I also plan on relocating the railroad ties that were set up along a spot by a pear tree in order to create a crude bed that never fully materialized, as the blueberry plants that were planted on either side of the tree never really made it. 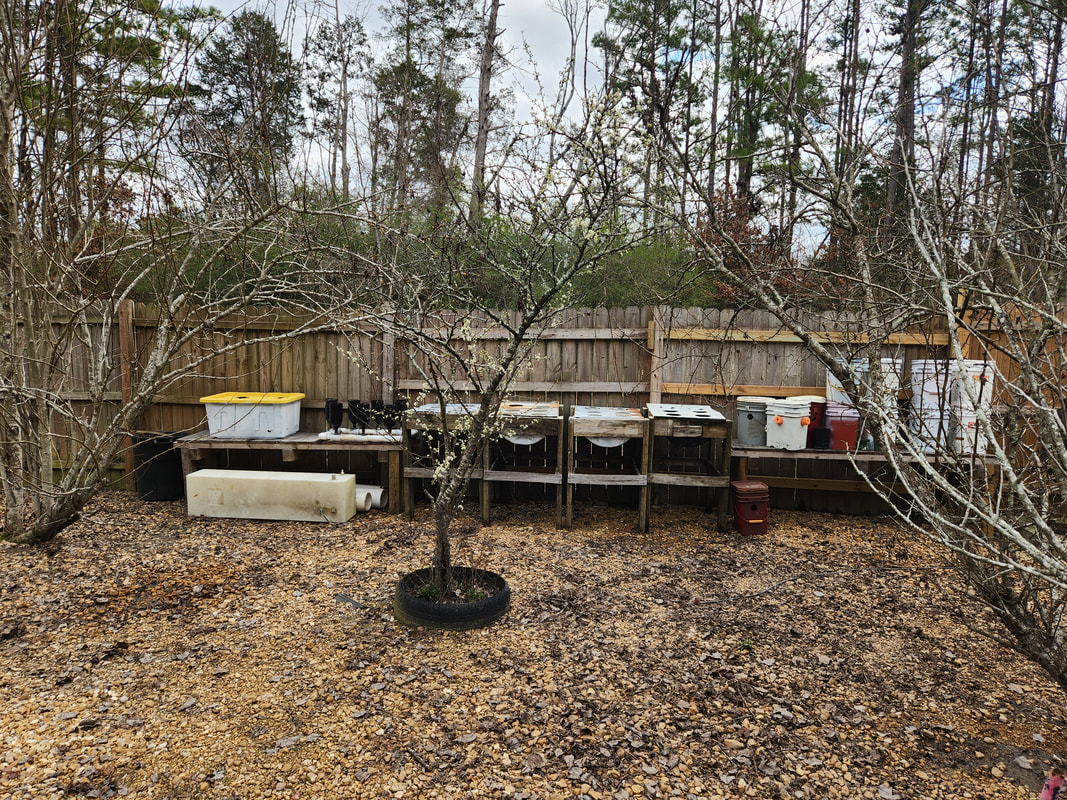 The raised hydroponic beds that were along the east/west fence line, now removed, are moved along the east perimeter fence where they can take advantage of more shade. 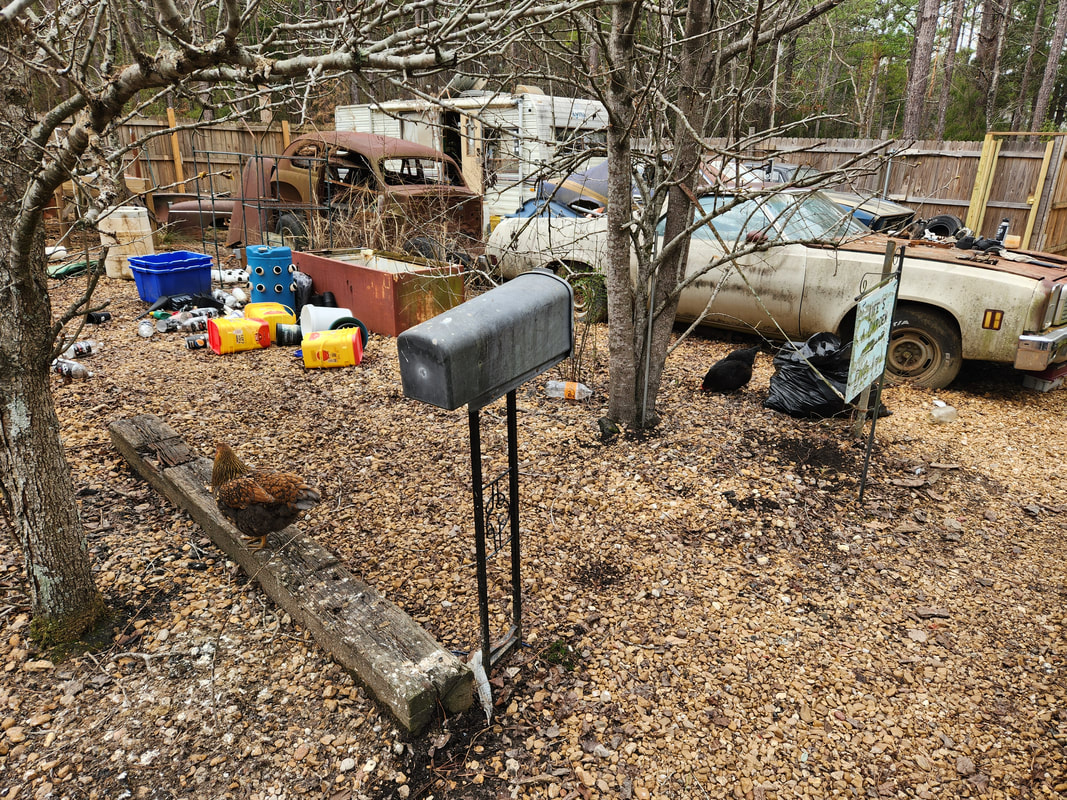 This area where the gate to the garden fence was, will be opened up more with the relocation of mailbox and sign, along with the relocation of the railroad ties, which will be used in the new aviary. Along the north/south portion of the garden fence we have the Elco and the 46 Ford parked, along with parts to the 46. This fence line required some climbing over and through crap to get the chicken wire out as well as the T-posts, but eventually it was all fully removed. The raised beds that are set up along this area will be left behind for all intents as I have most of the irrigation water lines and other apparatus arranged along this old fence line. Besides, at some point I plan on building a garage over this area that would be between the garden and the Storage Trailer, so leaving the raised beds there won't really interfere with anything. Worst case I might relocate the hydroponic raised beds as they won't need the irrigation system and just move the fridge raised bed back to be nestled with the other traditional raised beds where they can all feed off of one irrigation feed instead of two. 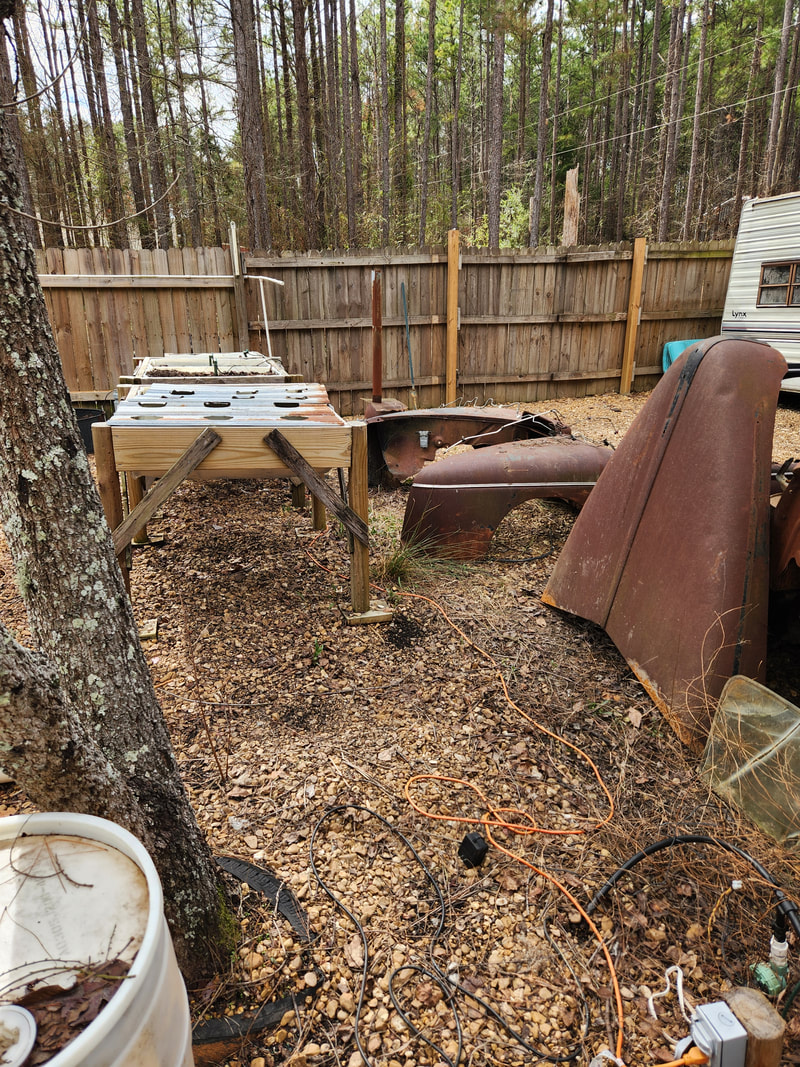 The north/south fence run is removed, opening up the area and allowing for movement straight to the Storage Trailer from the garden to do whatever work may be needed. One other thing that I'll be looking at is a number of old established trees in the garden. Some of these trees are either dead or partially dead but for all intents not really viable. I will be planning on pulling up these trees as it doesn't make sense for me to keep them around when they won't be producing anything. Any new trees that I plant will be in large drum beds and will be dwarf varieties so they can be moved with ease and not take up too much room compared to full grown trees. It's a lot easier to "build" a garden when everything can be moved with a dolly versus having to fully chop down trees or dig up plots. Plus, if I plan on spreading the garden across the compound where plantings can be staged in different areas where shade can be utilized, such as along the north side of the house or along the north fence line or really anywhere else where a nook can be filled with a raised bed, especially a Kratky hydroponic planter where I wouldn't even have to worry about running irrigation. Everything is in a constant state of evolution. With the timing cover cleared of all the external hardware, its time to remove all the bolts to remove the cover itself. While the removal of the bolts was no big deal, even the studs which also had to come out, I had to fight the timing cover to get the damned thing out. The clearance between the front of the engine and the side wall is so small that there is no room to maneuver the large cover out. Just when I thought I would've had to remove the water pump to gain just a little more clearance, I managed to finally find the sweet spot that allowed me to pull the cover out in its entirety. 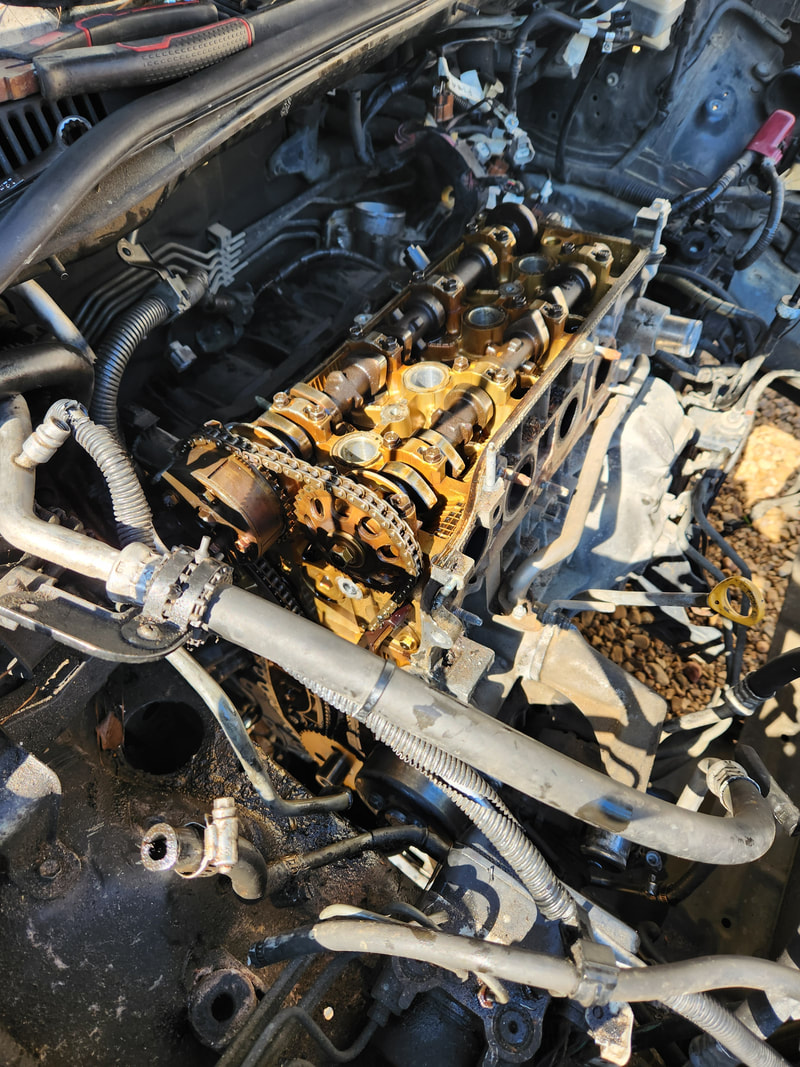 The timing cover is free and clear, exposing everything on the engine that will need to be removed for the job 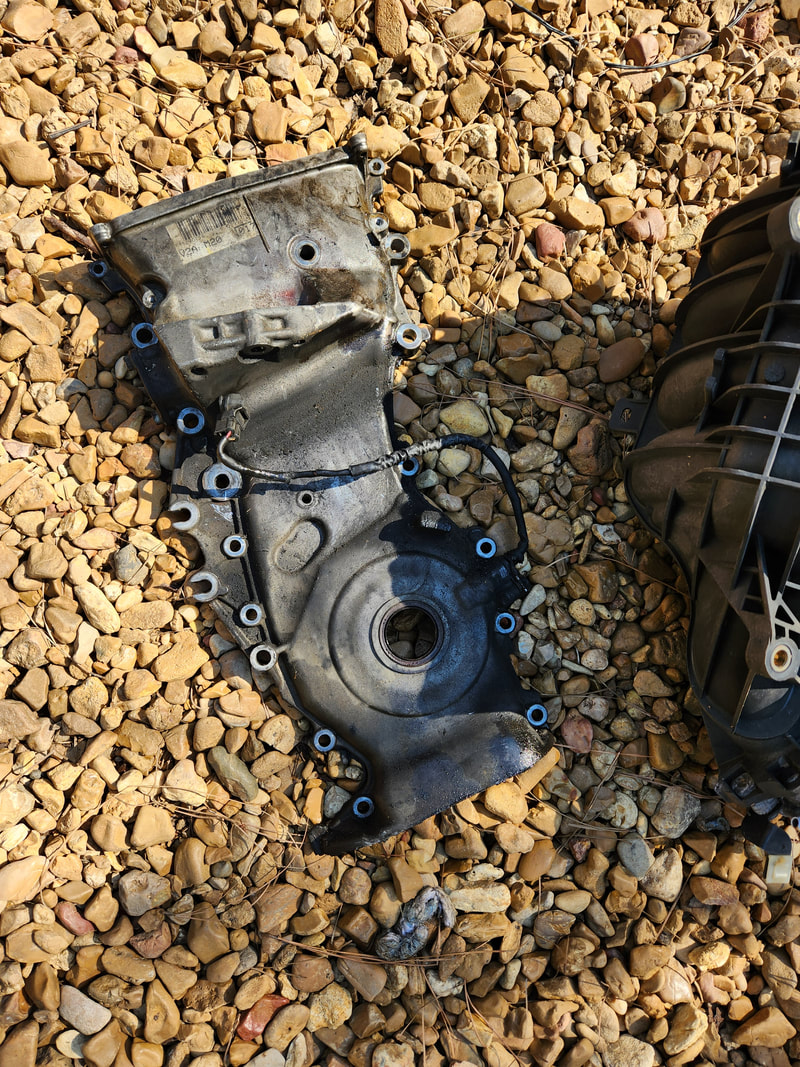 The timing cover with its crank sensor wire still intact, is removed and off to the side out of my way so I can move on to the next level of BS. To remove the cylinder head and timing chain set I will have to remove the camshafts since they hold tension on the chain and also cover the head bolts. I could've just removed the tensioners if I was only doing the chain set and left the cams alone. After pulling the cams and the cam phasing solenoid thingy, I was able to get to the head bolts. 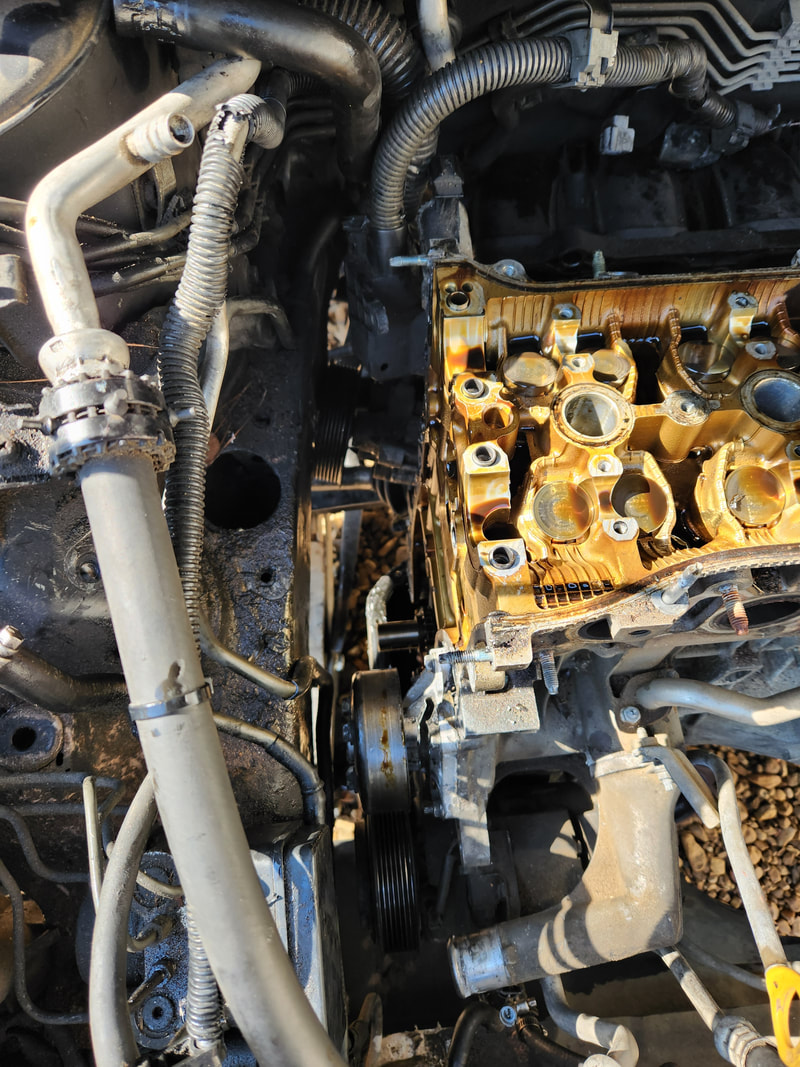 A shot of the timing chain area, void of the timing chain and tensioners, including the crank gear. 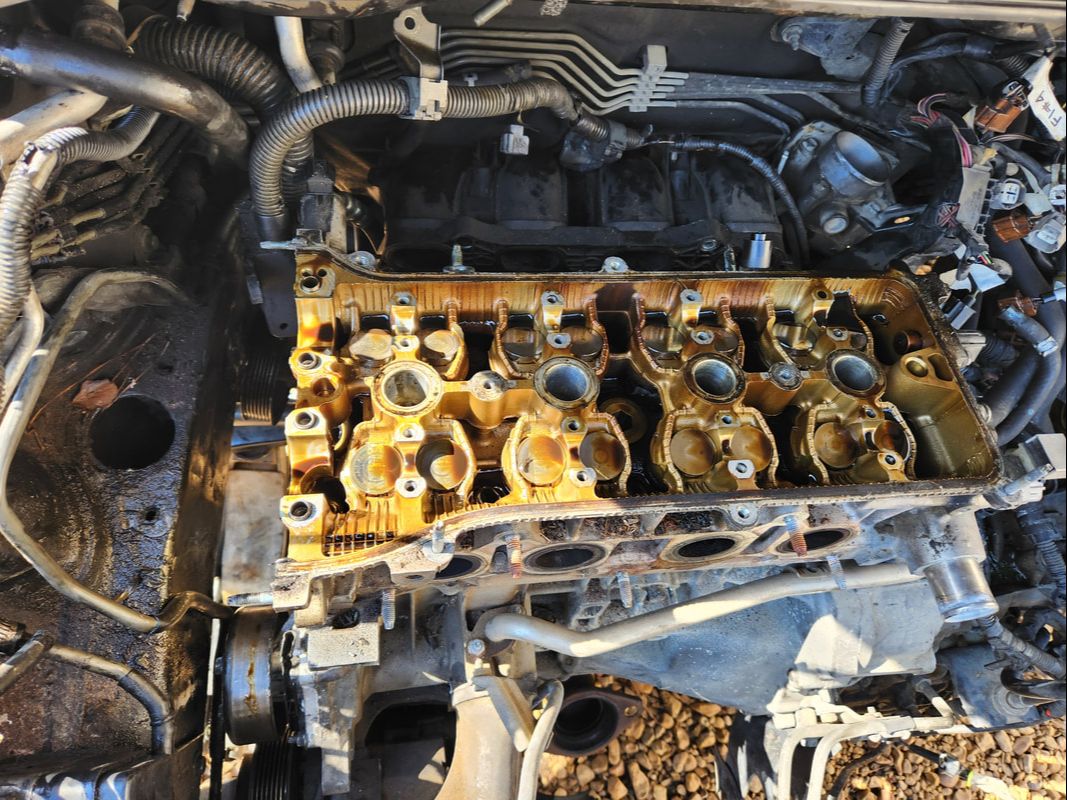 An overall shot of the cylinder head, void of the cams and everything that stands in the way of me removing the head bolts. 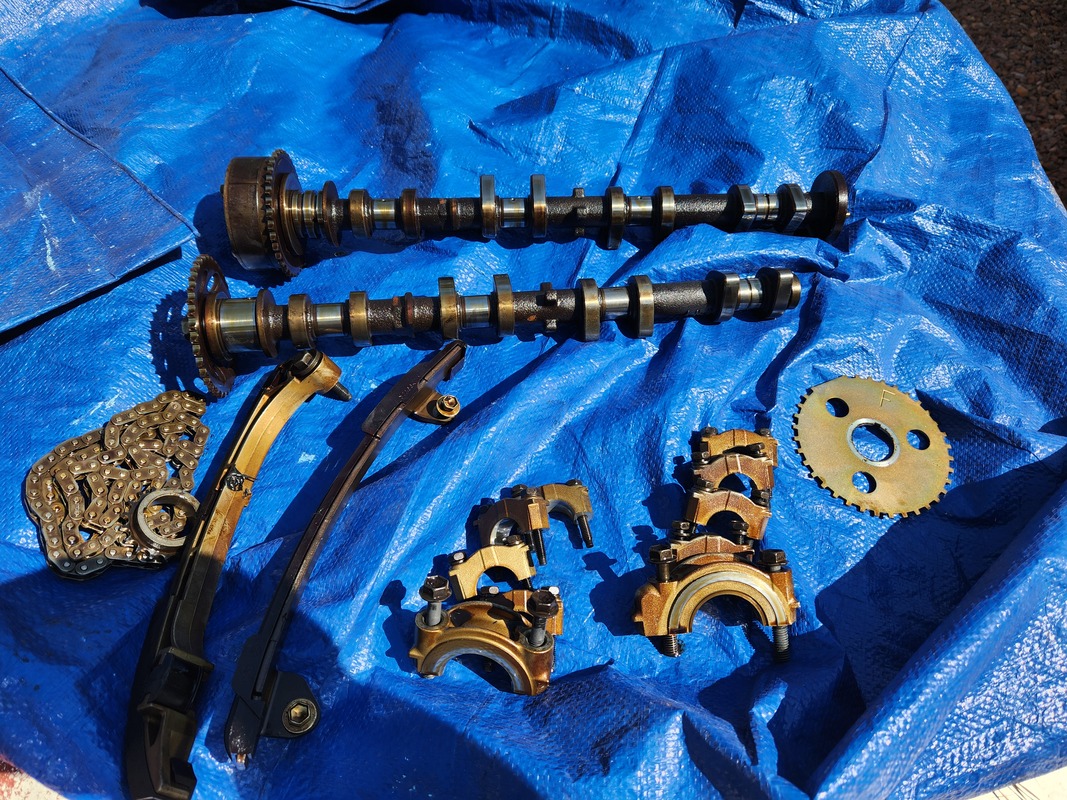 All the cam and timing components removed and staged on the tarp to keep things somewhat clean. The next level of BS to be encountered was with the head bolts. These bolts were the type that use a star/torx type socket, except that these were 12 point triple square bolt heads. Unlike star/torx bits that are 6 point, these have 12 points, meaning that most people probably will not have these tools and will need to source them, as did I. After getting the tools in hand, I removed the bolts, finding out something else about these engines that makes me hate them even more. Apparently the 2AZFE Toyota engines were known for head bolts to sometimes walk out a little bit, getting loose and causing premature head gasket failure. I found three bolts that were almost hand tight while the majority of these bolts required a breaker bar for me to break them. Once I pulled the bolts and removed the head, the spot on the gasket where the loose bolts were showed where the gasket material on the metal sheet was gone. This material was gone from the combustion chamber side all the way through to the outside edges of the water jackets. What this meant was that combustion pressure was able to push out through the water jackets and in turn push water out to the outside of the block, which was at the rear of the engine against the firewall . There was white residue on the inside of the intake and wire harness and the back side of the block where combustion gases and coolant blew out. Basically I caught what amounted to a potential disaster that was already brewing had I kept trying to drive the car in this compromised condition. 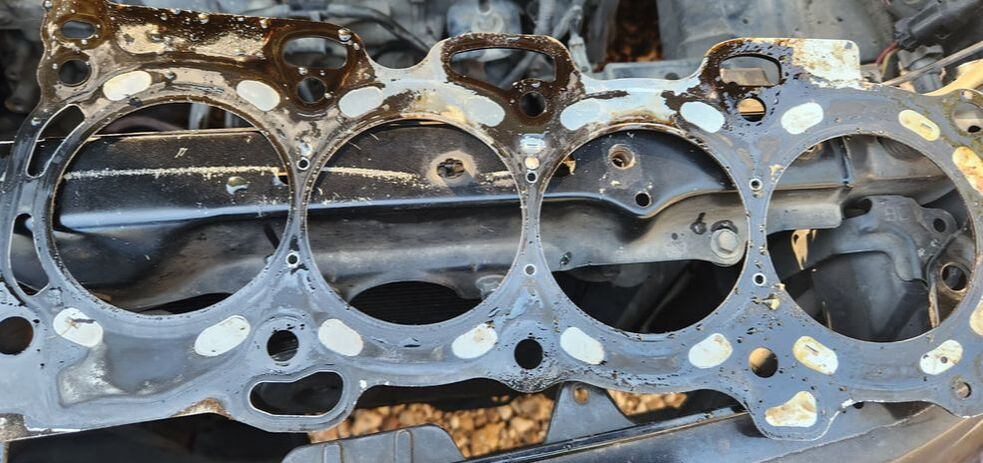 One side of the head gasket, showing the white areas where bare metal indicates where material was blown out from the loose head bolts. 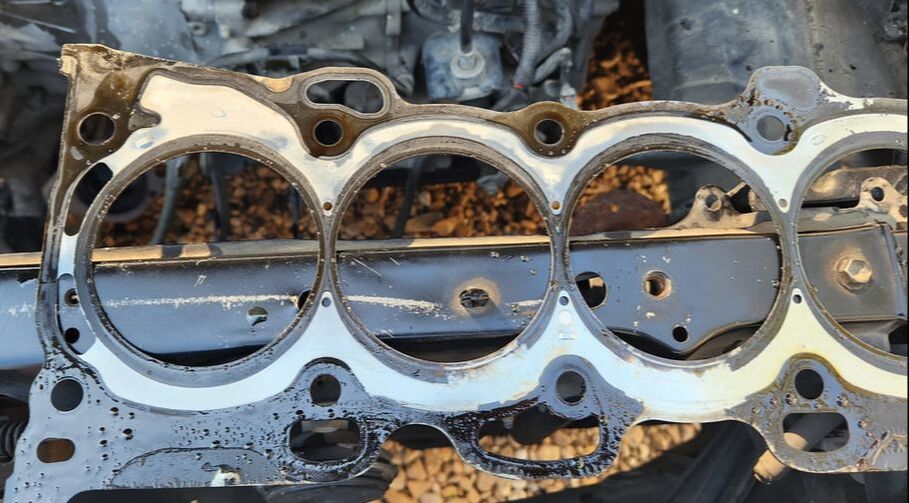 The other side of the gasket showing the spot where the material is missing from the combustion chamber all the way to the outside edge of the gasket where it would pass through to the outside world. The 2nd from the right cylinder, #2, is the spot in case it isn't spotted. 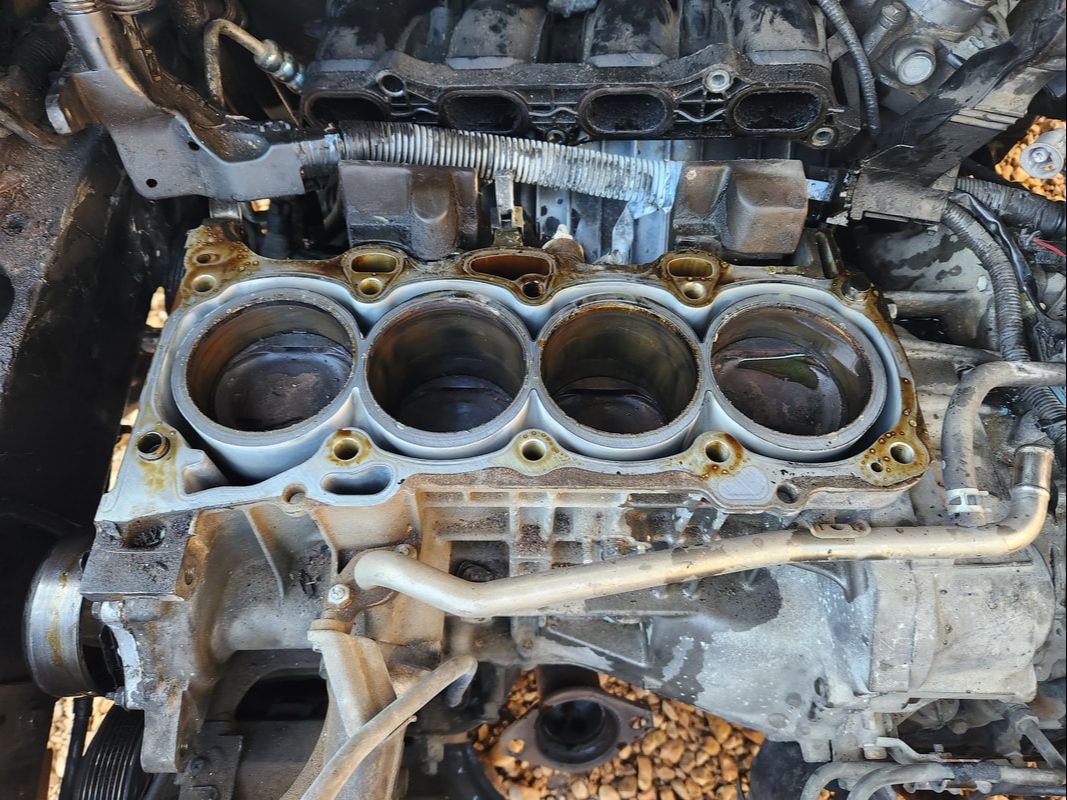 A shot of the top of the engine block. From the naked eye view, everything looks fine, no visible cracks or damage to the cylinder walls. 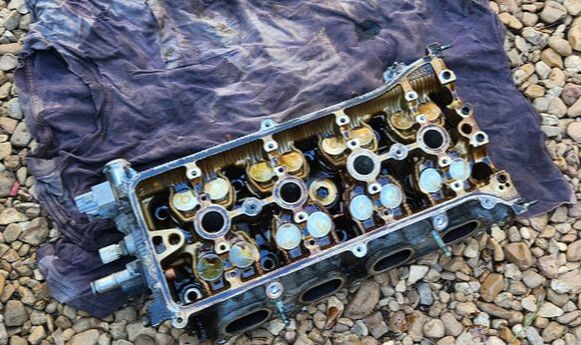 The cylinder head removed from the engine. 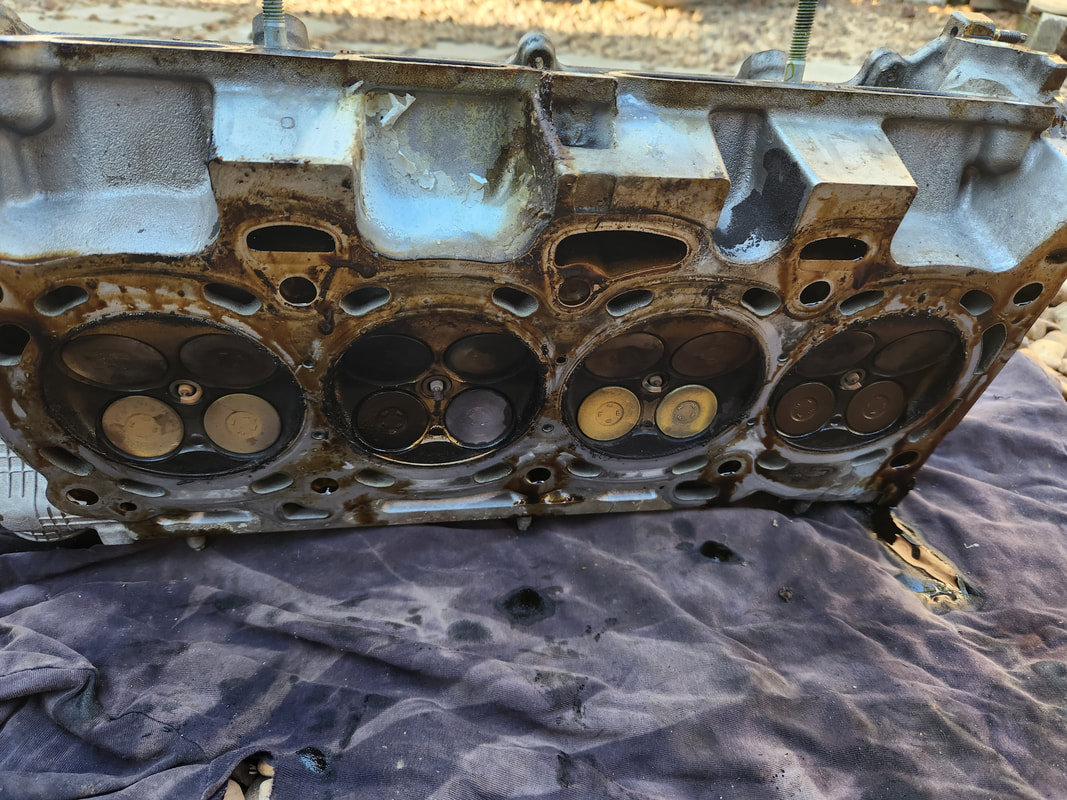 So far from what I can see the inside of the combustion chambers everything looks fine with no cracks that can be seen. The head will still need to be checked to make sure it isn't warped or has any hairline cracks that aren't visible to the naked eye. With the head off we come to a standstill for one good reason, I have to get the cylinder head checked to make sure there's no hairline cracks or the head is warped, requiring a shaving down to level things out. The last thing I want to do is take a chance putting all this crap back together then find out the head is warped and ends up giving me the same exact problems all over again. I do not want to have to do this job again on this fucking car, if I have to go this far it will be with another engine swap, if I don't just say fuck it and get rid of this pooch. At long last the time has come to begin the job of replacing the head gasket and timing chain set on the Scion's engine. I've been dreading this job for almost a month due to the fact that I know how this engine is set up and I know how FWD cars are and all of it is bad. This is going to involve having to pull apart almost everything on the engine to allow me to open the engine up at the top and front of the block. Just like with the engine replacement, I would have to disconnect everything on the engine: exhaust, intake, wiring, fuel lines, belts, etc. 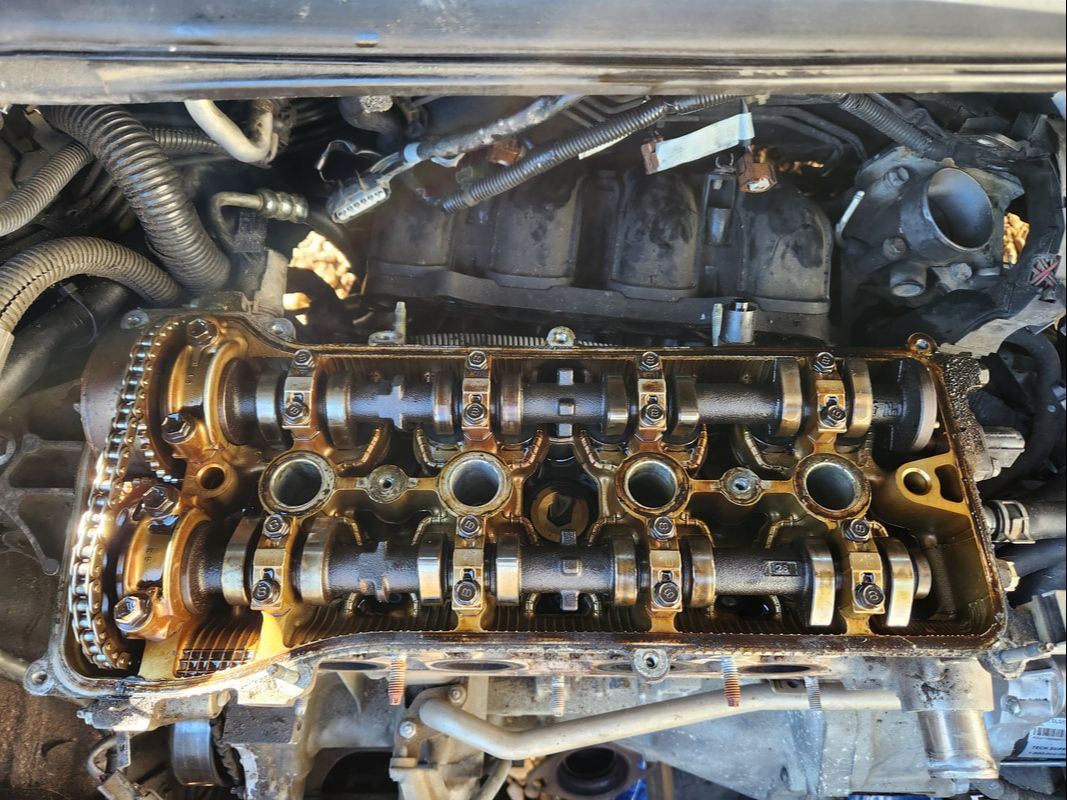 After disconnecting everything on the top and front of the engine, which included the exhaust, I was able to remove the valve cover to allow for the viewing of the inside of the cylinder head to see what we're working with. 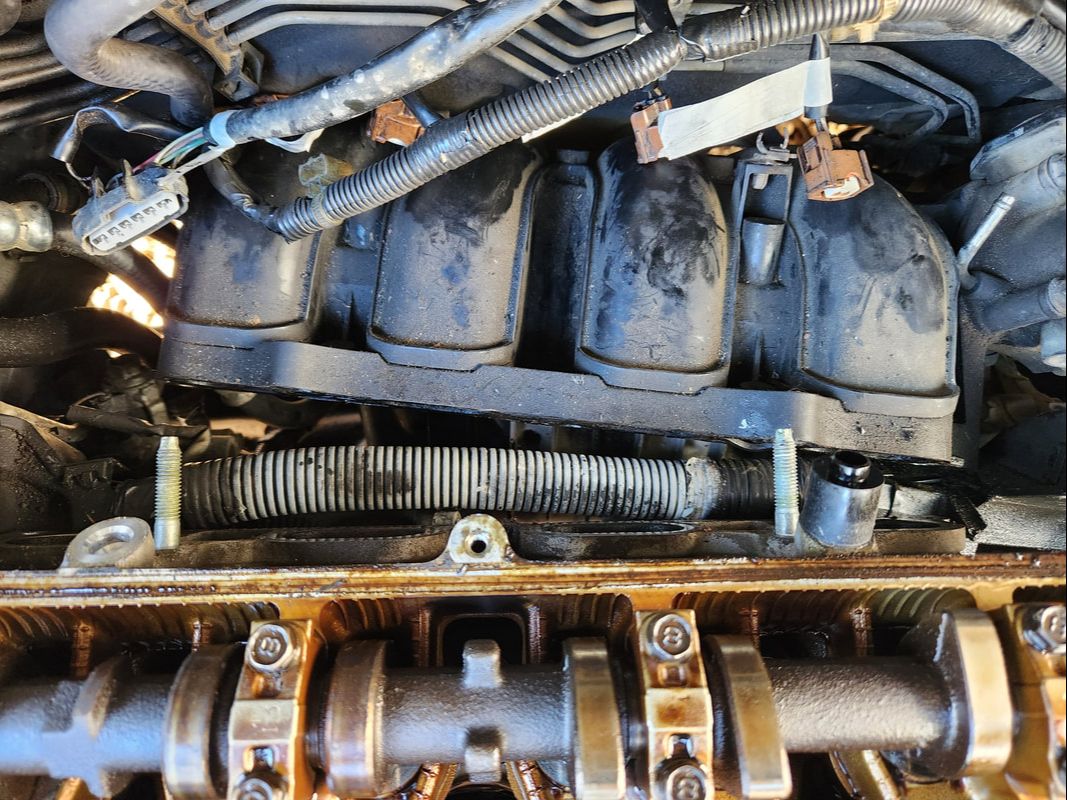 The intake manifold is disconnected from the head. Due to clearances, removing the whole intake was not really happening so I just left the component to the side out of the way. The next move was to start removing the remainder of the crap on the front of the engine so I can start pulling the timing cover. I pulled the crank pulley but the tensioner pulley assembly only partially came out. I would also have to remove the power steering pump to clear that side of the timing cover. I was unable to even remove the bolts to get either the PS pump or the tensioner out. I ended up having to remove the front engine mount and crossmember and lowering the engine as far as it would go so the tensioner can come out as well as the bolts to the PS pump. Since I didn't want to pull the hoses from the pump I just pried the pump off its mount and pushed it to the side out of the way, just like with the intake. 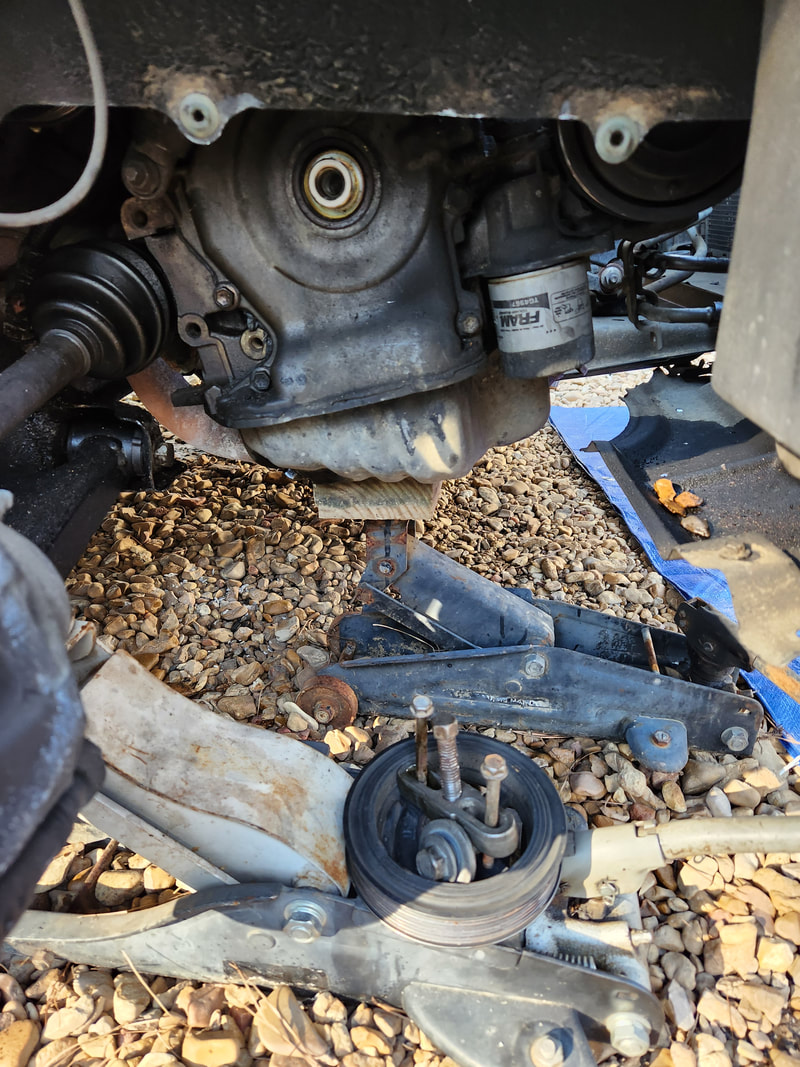 The crank pulley is removed, with the help of the gear puller tool. 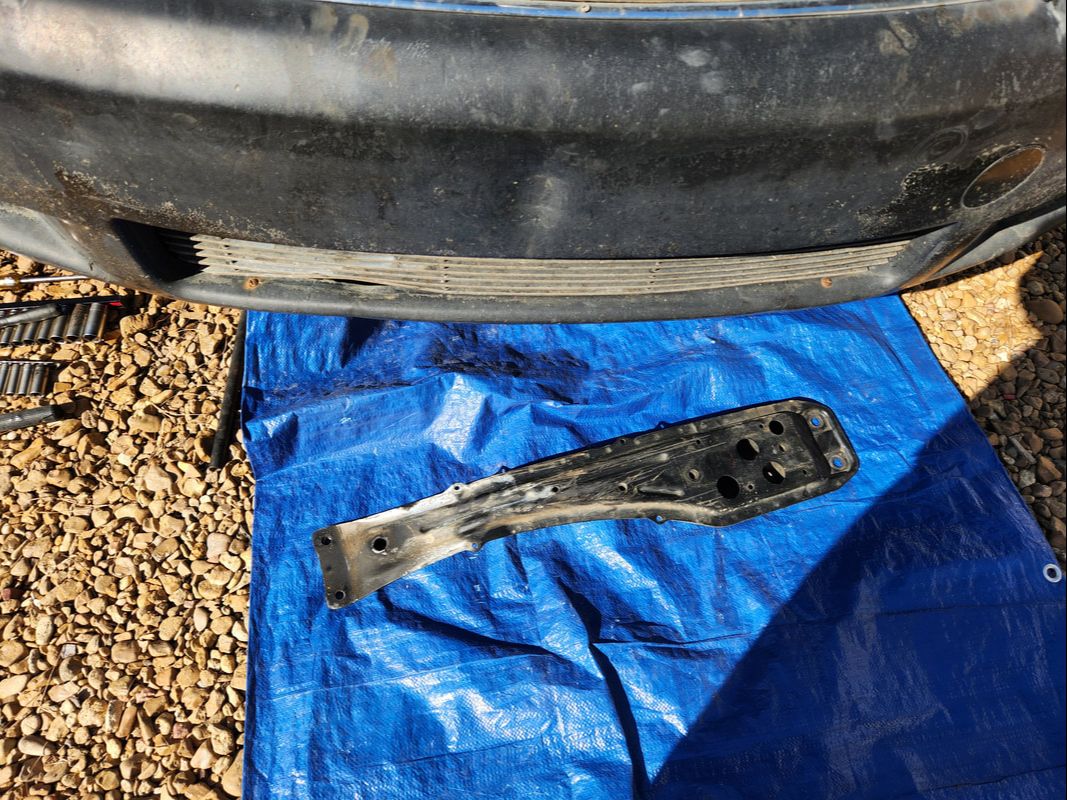 The front engine mount and cross member had to be removed to allow for the engine to be lowered much lower than it would've been with the removal of the right side mount. This allowed for the removal of the tensioner and PS pump. After the scion kicked my ass on the first day I retreated to lick my wounds (figuratively and literally) and get my next stage of plans established for the next round of bullshit that this car is sure to throw at me. Ugh I hate this car at times.... |
