|
After landing another load of garden "supplies" from Walmart, we were able to get some more work in with the garden. This was really a chance opportunity to get some more stuff when it wasn't really necessary at the moment but when it comes to reaching a goal, why not? Nonetheless, we did manage to check off some more boxes with regard to what needed to be taken care of in the garden. The biggest thing that was brought back was several bags of dirt, which when it comes to Walmart, were cheaper than the other hardware stores around. One of the first things that I wanted to take care of was the filling of one of the newer drum, or in this case, garbage can planters. This was a plastic garbage can that was once used to hold chicken feed until varmints chewed a hole in the bottom, rendering this can useless for such a task. It was however perfect for use as a planter. I planted one of the transplanted fruit trees in this garbage can last year but couldn't fill the can to the top with dirt. But now that box has been checked off since the dirt we got was more than plentiful. 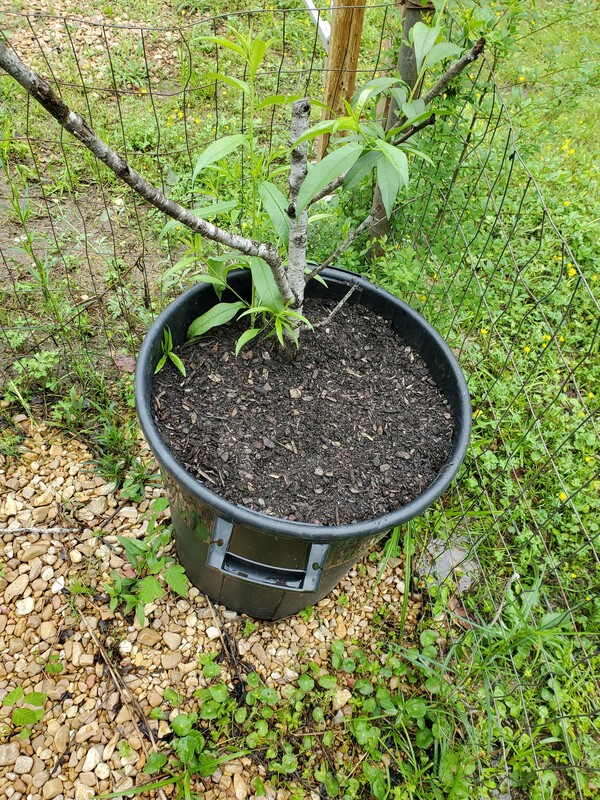 Garbage can fruit tree planter filled with dirt to the top, now for the strawberries, later.. With that planter done I can start putting strawberries in it, along with the other drum planter, finishing up that little task as well. That'll be for a later date though. As for the dirt we moved on to the greenhouse once again. There were only a couple bucket planters remaining to fill with dirt before I could check off the box for filling all the buckets in the greenhouse. With that I turned my attention to the half drum raised beds on the opposite side of the greenhouse. 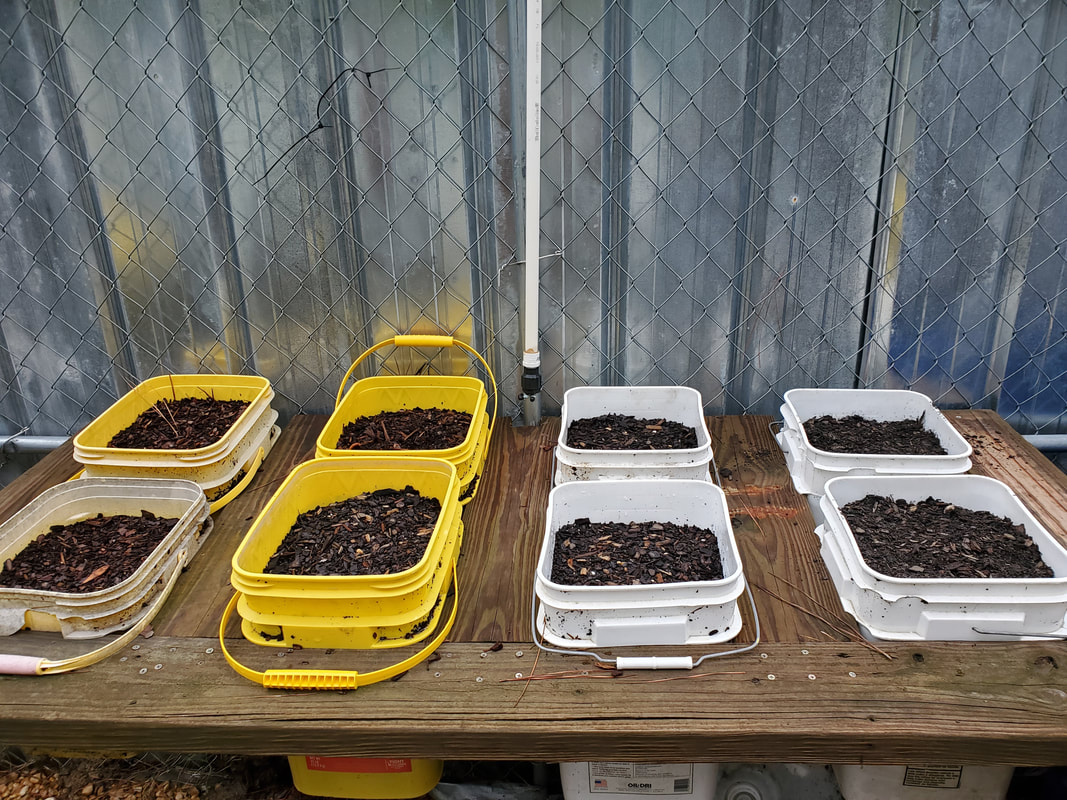 The remaining bucket planters in the greenhouse have been filled with dirt, completing that part of the greenhouse project. In one of the drum raised beds there was already some compost within. I had to pick out some weeds from this matter before I dump the dirt within so I will hopefully not have to worry about picking weeds from the dirt sometime in the future when veggies are growing within. I'll probably not be able to avoid this but I can try. Anyway, after pulling what I could, we dumped probably around four bags of dirt in the half drum, filling it to the top, checking off yet another box on the list. As for the other half drum, I was only able to put maybe a half gallon of remaining dirt in the bottom of the bed. Of course this means another four bags will be needed to get that bed filled up, with some leftover. We'll get it done though. 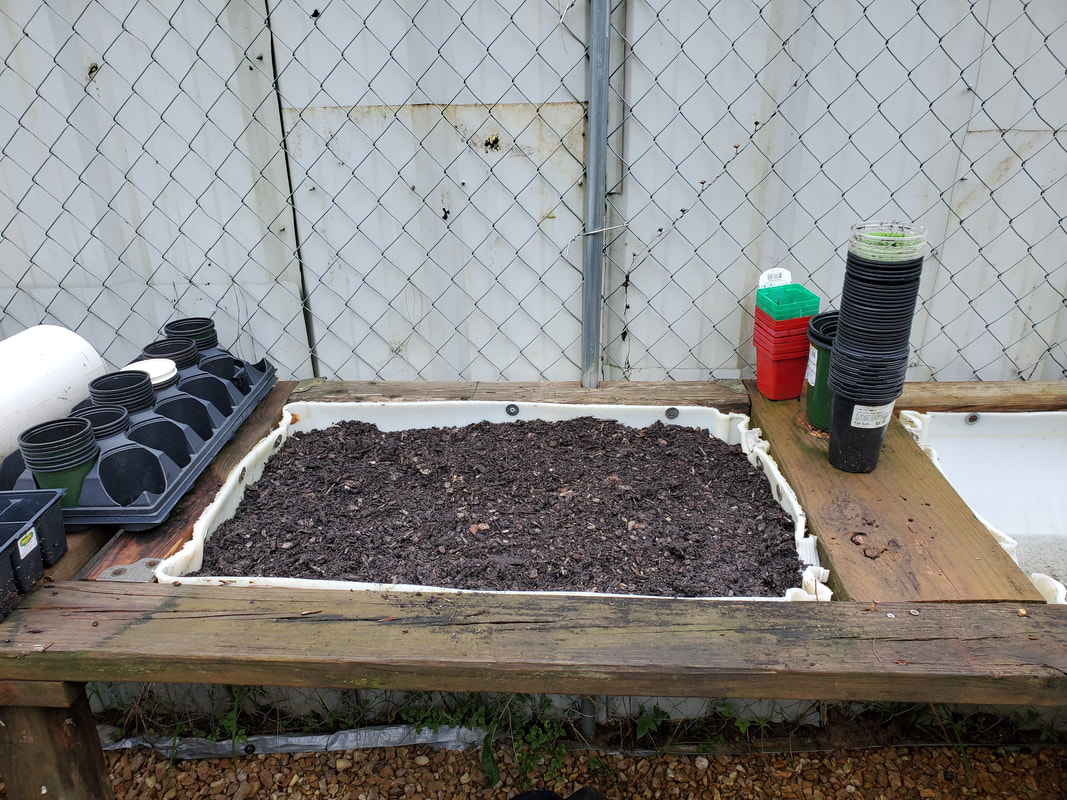 Half drum raised bed in the greenhouse filled with dirt to the top, ready for planting for all intents. It'll still need micro irrigation to complete the set up though. After finishing our dirty job we moved on to more simpler things, planting veggies. Since we still had one spot remaining in one of the raised beds that contained spaghetti squash, we brought back one more spaghetti squash to fill that void, and check off that box too. Of course the other plants already got a head start so this plant here will be lagging behind somewhat but better late than never. At least this is another raised bed that is filled up for the season, and hopefully will produce well for us. 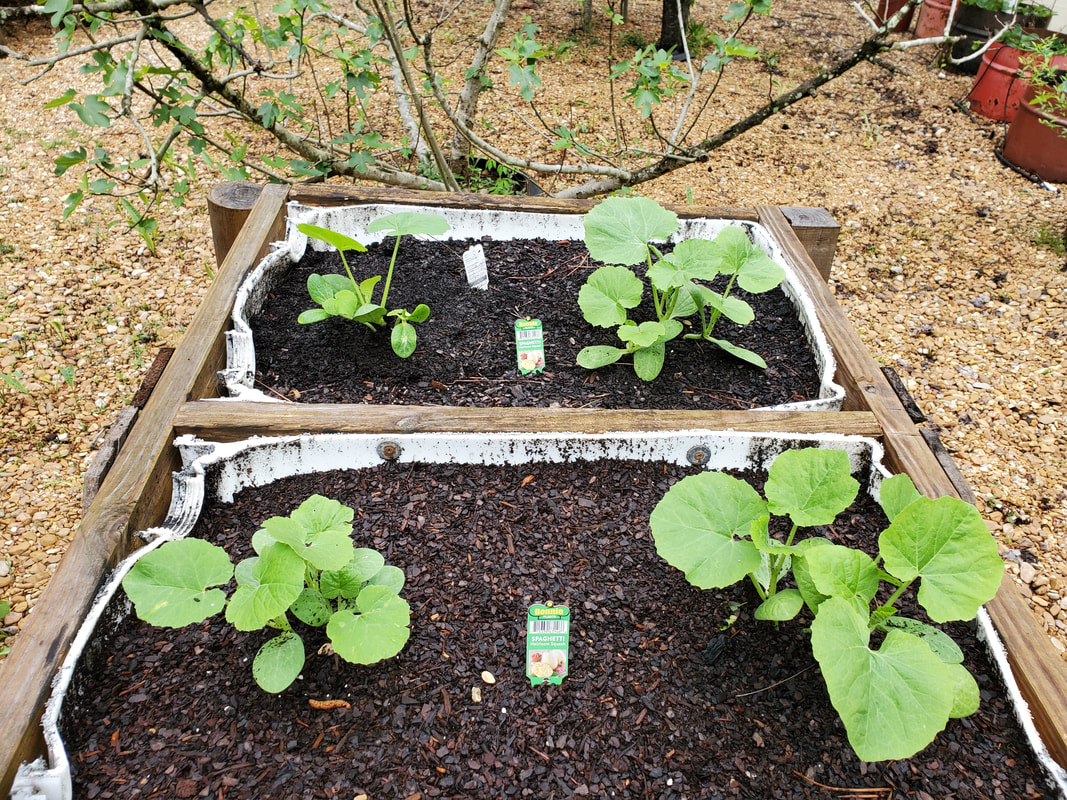 The spaghetti squash plants in the standalone double drum raised bed. Note the runt in the upper left, that's the most recent plant. The last thing that was taken care of that really didn't have anything to do with the supply haul was the planting of some potato eyes. Even though we didn't get any seed potatoes this year, I did still have a couple of mini spuds that I dug up sometime in the late winter that I missed from last fall. These spuds were left to sit on the counter, causing them to inevitably grow eyes on them, as spuds always do when allowed to sit. These three little spuds were perfect to plant to at least try and see if we could get at least a small amount of potatoes this season. These were planted in the old refrigerator raised bed, the same that we used last year for spuds. Ironically I must've missed another mini spud because there was a potato plant growing in the corner of the raised bed, already off to a start. Maybe it was a mini spud or maybe just enough root that it was able to start growing into a plant, who knows?  The fridge raised bed used for potatoes last year, used to plant three mini spuds with eyes on them this year. Note the disturbed dirt showing where the spuds were sunk. 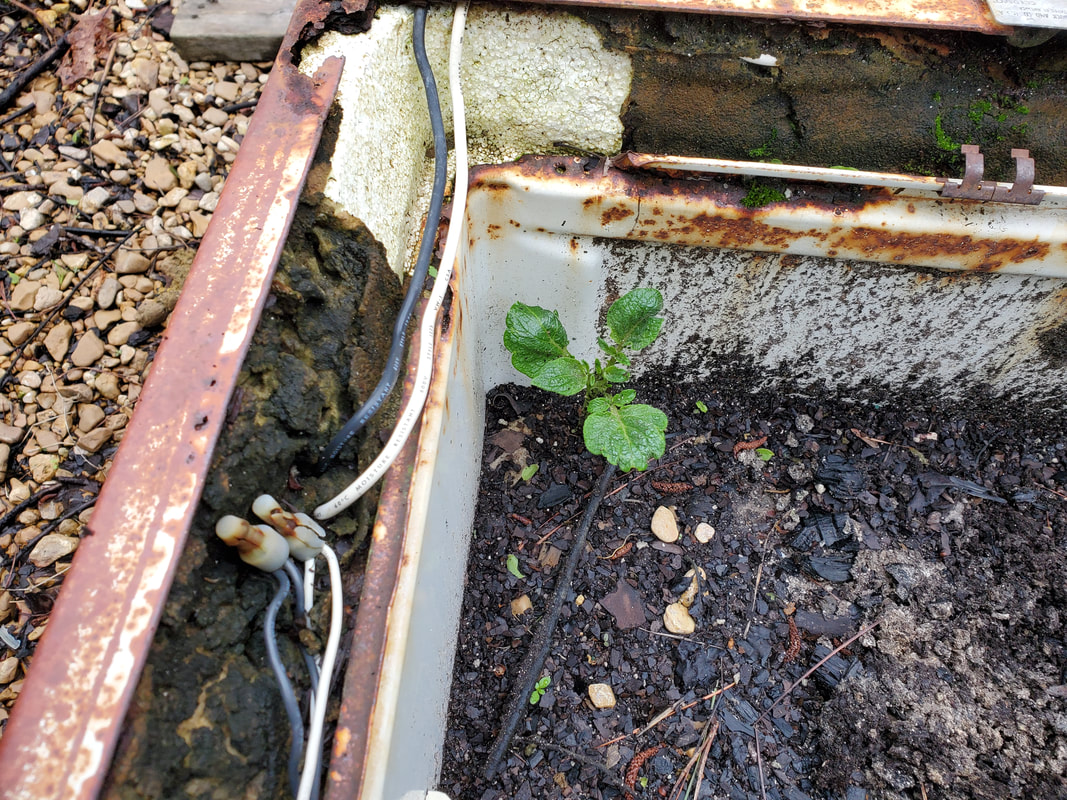 The little surprise potato plant that popped up in a corner of the fridge raised bed, probably from an errant root or even mini spud that was missed from last year's harvest. With all this stuff done I can move on to some other little bullshit tasks around the yard while i wait for the weather to cooperate and dry up enough that I can lay on the ground without getting soaked. The garden still does have a long ways to go before I could honestly write it off as complete. Between the fences, adding more raised beds, finishing the greenhouse and hydroponics and running micro irrigation all over to feed every plant within the gates, the garden can't be considered nowhere near complete yet. Hell for all intents I'll even have to come back over the gravel bed to touch up some areas where gravel has settled so we can continue to have a good uniform ground covering where no standing water is allowed to surface, much less any muddy spots. The year is still young and we're moving along rather well, I must say, so I'm confident that we'll get this stuff done.
0 Comments
Depending on circumstances, one can sometimes find themselves in a position where they don't have any one important task to do. In my case, I was in a position where I really couldn't do anything on any number of projects around the yard. Most of the car stuff was at a standstill whether because of the weather conditions or the need for resources. To combat these types of days, we sometimes have to just find something to do that we might've been putting off because of its seemingly unimportant nature. As is always the case around a homestead, for every priority A project, there's plenty of priority Z projects, however small. One of the first things I decided to address for shits and giggles was the watering hose we always use that has a pinhole about two feet from the nozzle that will spray a long jet of water out when the water's on. As a result, the water has to be on full power in order to cancel out the pressure loss from this hole. After hitting the storage trailer trying to find some parts for one of the other tasks I will talk about next, I found some hose repair ends. I needed a worm clamp to secure the fitting as I would have to cut the hose then slip the repair fitting in place then secure the hose to the fitting with the clamp, like any other hose. 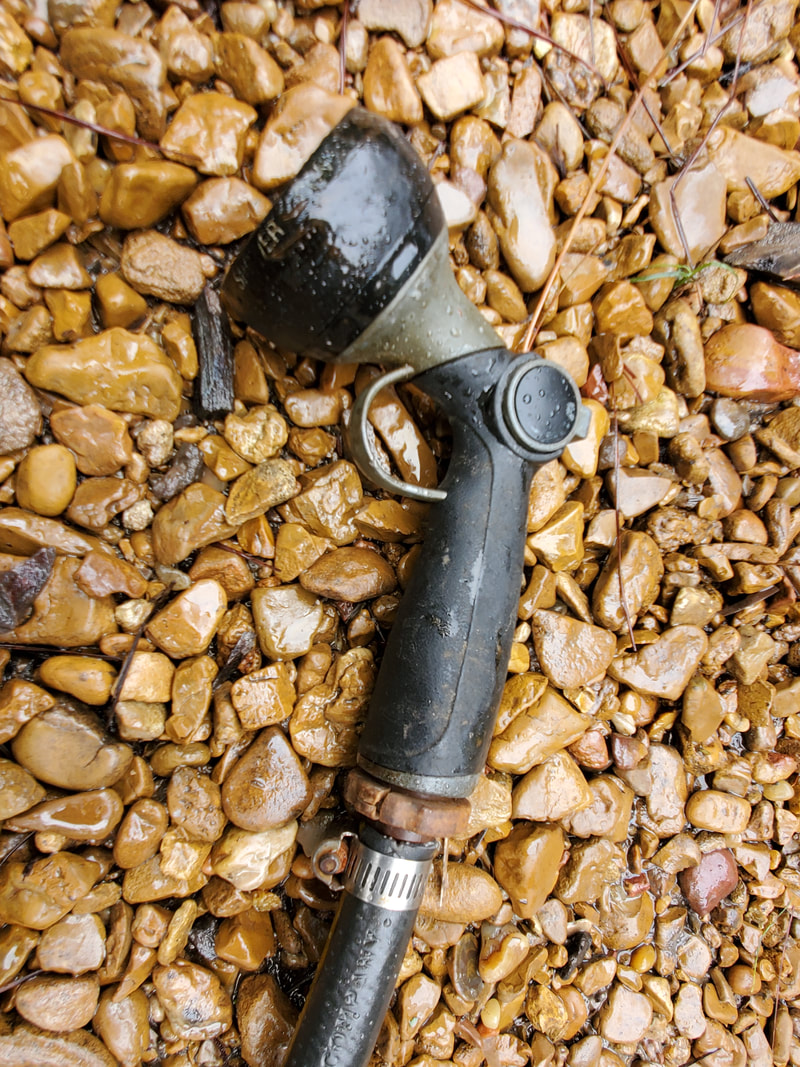 The hose with the repair fitting and clamp in place, one bullshit task taken care of. With the hose fixed, I was able to move on to the next low-level task. While in the trailer, I was looking for these special PVC tees that neck down to an 1/8" fitting to accommodate the automatic drinker cups we've been using in the chicken coops. Reason for this is in the Mustang Chicken Coupe, the watering manifold in the brooder section. Because these fittings were glued together, when we had some freezes in the past winter, this manifold, even with the light water pressure it had, froze over and the expanding water created a crack along most of the length of the manifold. This whole unit would have to be replaced. Luckily, I set the thing up where the screw in PVC fitting had enough length of pipe coming from it to allow me to cut the manifold free, then twist out the screw on fitting the rest of the way. 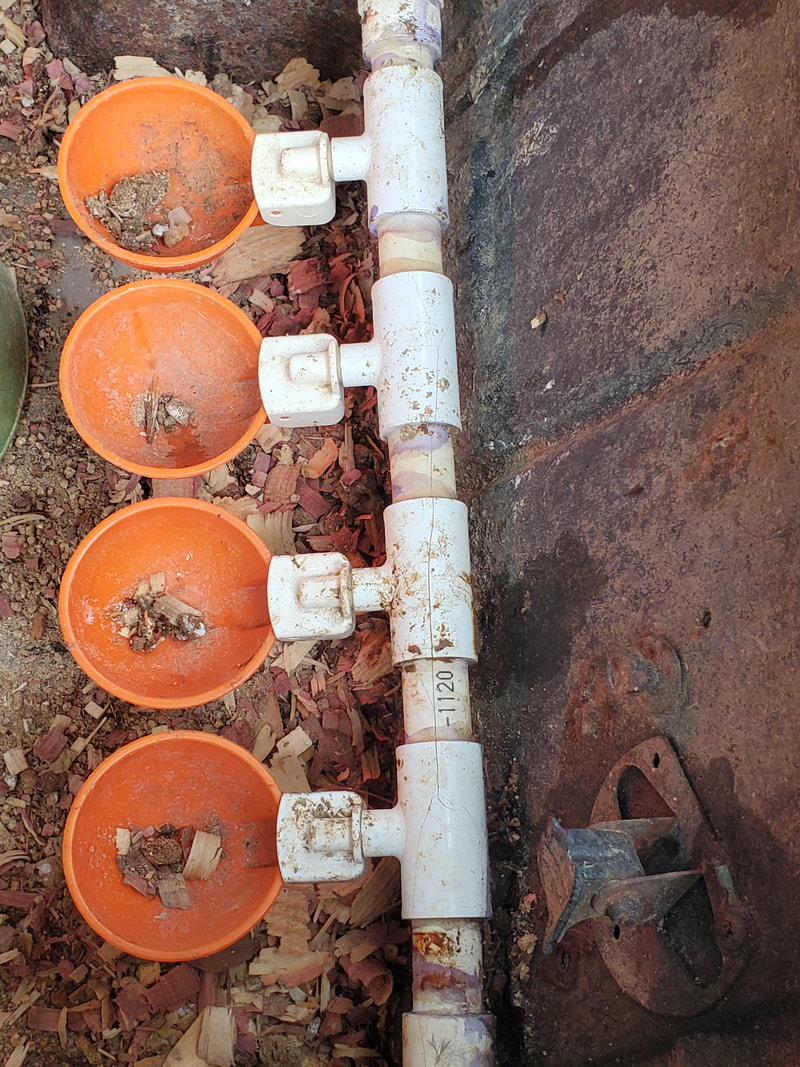 The drinker cup/tee manifold with the lengthwise crack running along the top of the unit. I had to dig through my stock of PVC pieces to see if I had a 1/2" male thread/female slip fitting as well as look for the tees. I found three tees and enough short pieces of 1/2" PVC pipe to allow me to piece together a manifold for three drinker cups. Luckily the drinker cups weren't damaged so I was able to salvage two of the drinker cups from the old manifold to supplement the 1st drinker I had in stock. Unlike the old manifold, this new one was just pressed together, intent being that the pressure will be low enough to keep the manifold together w/o popping anything. Later on I might modify the Mustang's system to mimic the later systems that incorporate a float valve/reservoir system that then gravity feeds the drinker cups, preventing any high pressure issues with the drinker cups. 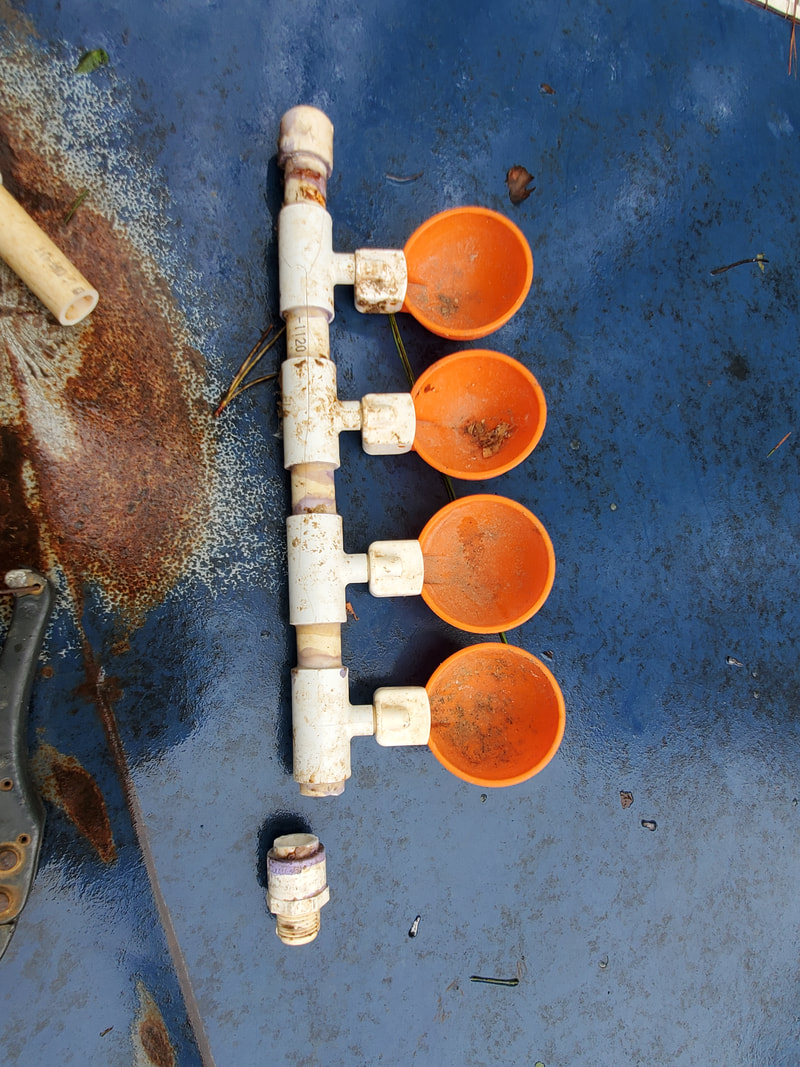 The old manifold removed from the brooder area along with the screw on bushing, separated to make removal easier in this instance. 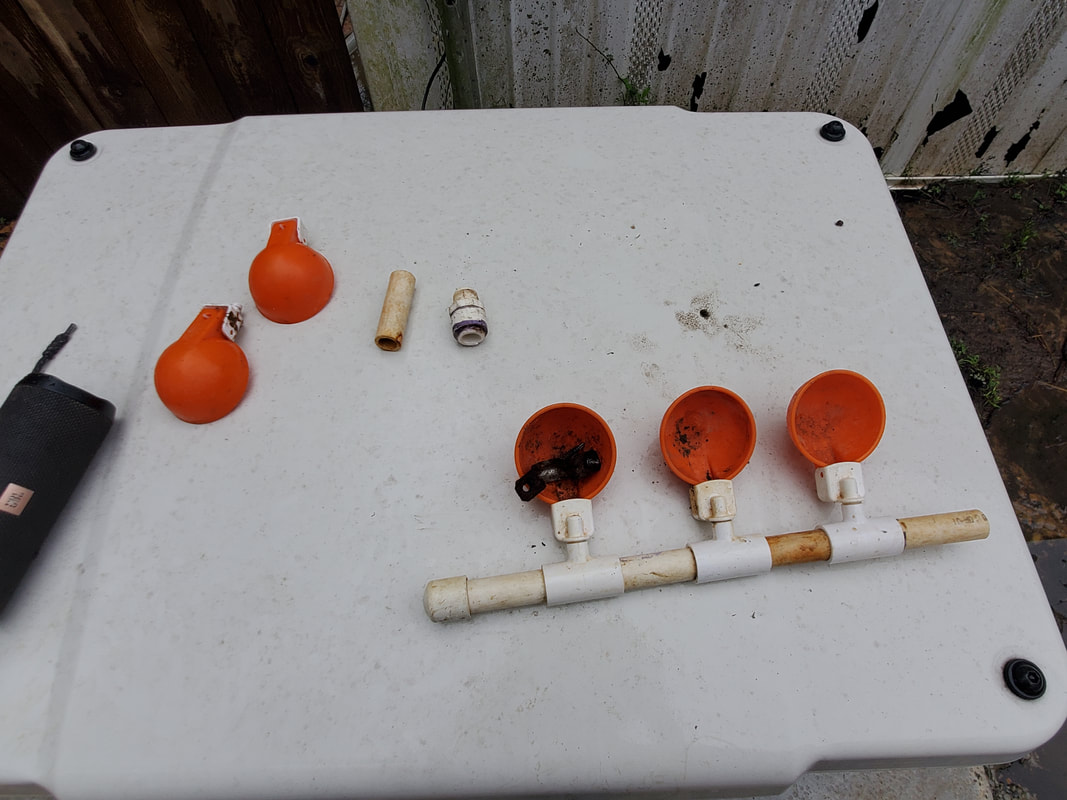 New drinker cup manifold assembled, minus the replacement screw adapter. Unfortunately I didn't have any 1/2" male thread/female slip fittings so I was kind of screwed on finishing the assembly of the drinker cup manifold. As is always the case, this ends up being another job that gets put off, pending my resupply. Luckily the baby chickens in the brooder area are getting by just fine with bottle waterers so a couple extra days won't hurt anything. Once this repair is made, I can then look at making the other mods I mentioned, more sooner than later. On a side note, making this mod allows the Mustang Chicken Coupe have watering ability independent of a dedicated water line. 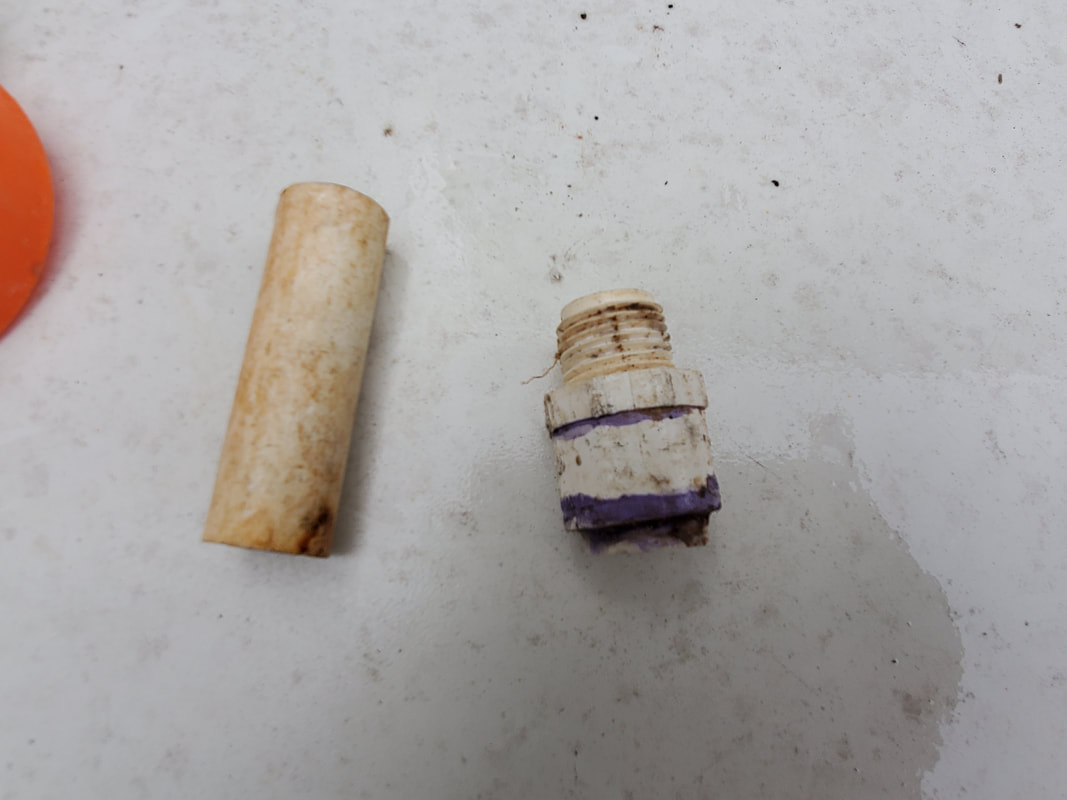 The elusive adapter that's needed to finish this lower priority job. The job ain't a Z priority but still low on the scale nonetheless. Nearing the end of this monotonous day, I had to get things set up so I can take care of the last in this batch of low priority jobs, splitting a batch of wood that we salvaged from the landscaping job we did a while back. Among the branches and other trash we cut up, we also managed to cut up some fallen trunks into logs for further processing into firewood. As is always the case, this wood gets piled up around the log splitter in order to be split, then stacked into the wheelbarrow and moved over to the firewood staging area. I had to empty the wheelbarrow of standing water from past rains and stage it by the wood, as well as get extension cords over to the splitter in order to be ready to start the splitting first chance I get, which will probably be the same time I'm finishing up the drinker cup manifold on the Mustang Chicken Coupe. 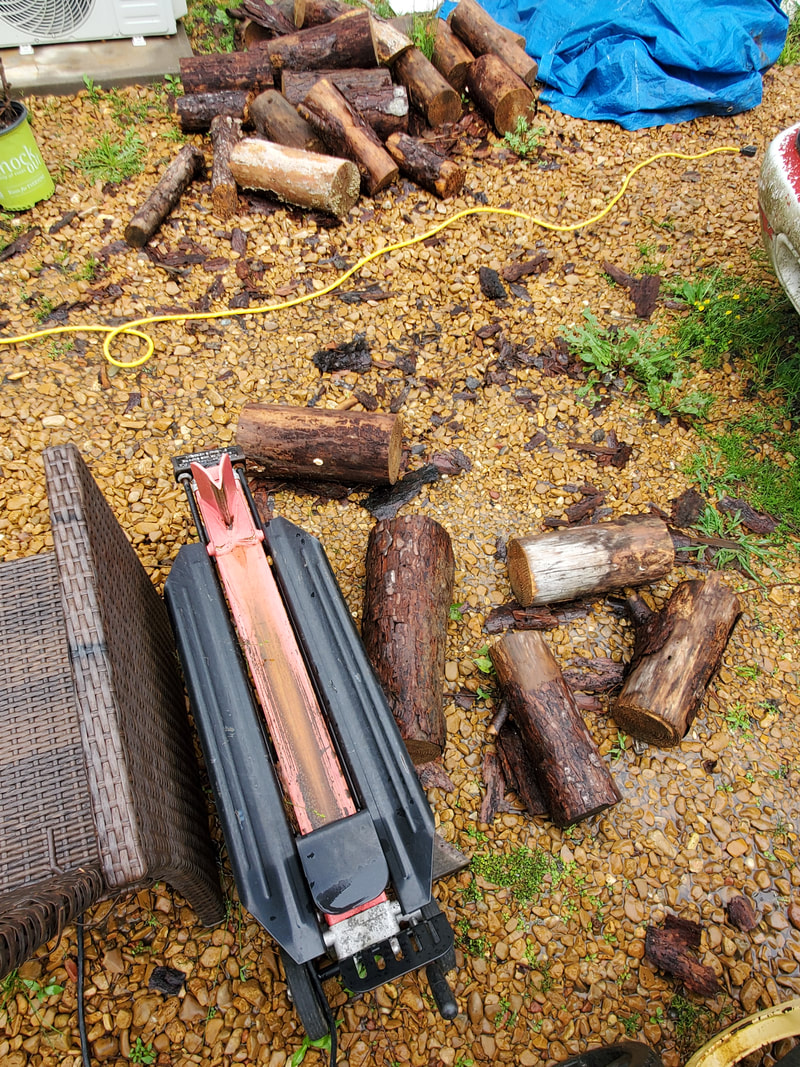 All the loose wood piled around the log splitter along with a power cord. Getting this done will clean up the area which is always my goal around the homestead. One thing that has to be realized about getting these low priority jobs done is that just like with standing trash around the yard, if the stuff isn't addressed more sooner than later, the buildup will get to the point that it will be so overwhelming that addressing it then will seem impossible. Taking time out every now and then while working other higher priority projects to address low level projects allows us to keep the "trash" buildup in check. Having a bunch of little bullshit jobs building up can be overwhelming just like a buildup of trash. While these jobs aren't trash, getting them done is just as important.
As is always the case around here, we come across new junk, whether from old project waste or found junk or newly created junk in the form of dead devices. In our case, I'm referring to a couple old battery tools that have outlived what was probably their life expectancies. These tools are a couple Hyper Tough tools, one of which was from the first generation of tools I started gathering, which is the weed trimmer. The other one was actually a tool that was picked up somewhat recently, the hedge trimmer.
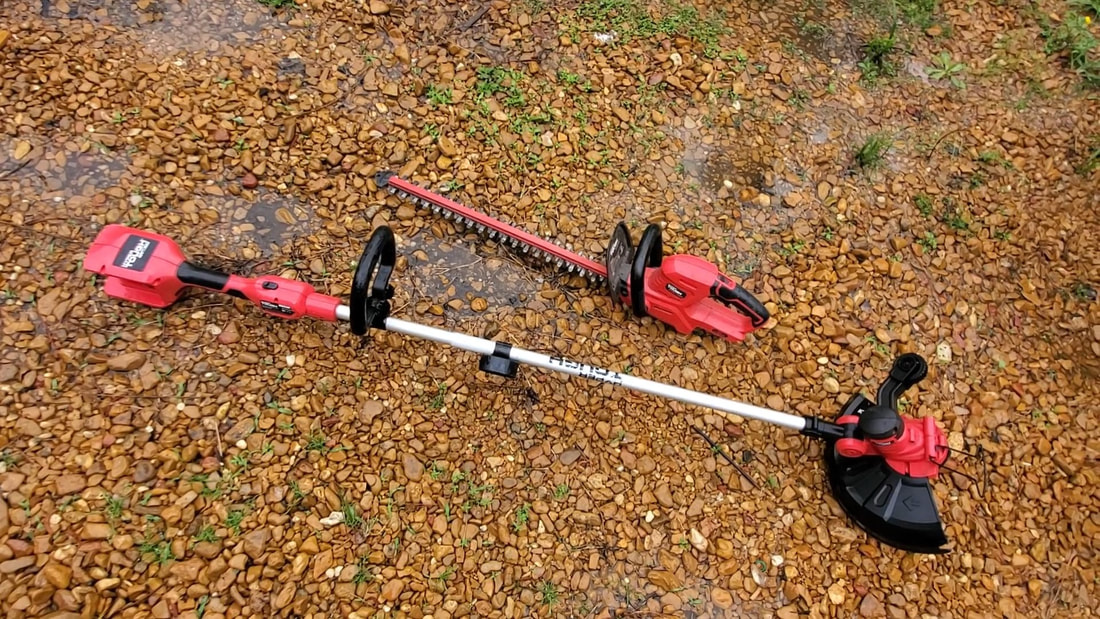
The Hyper Tough weed trimmer and hedge trimmers that will be used in our project.
The problem with the weed trimmer is the support structure inside the trimmer head end has a wallowed out bearing cradle, which in turn caused the drive gear to eventually strip due to the excessive movement when the device was running. Eventually it got to the point where there were no teeth left on the drive gear where it made contact with the motor gear. As for the hedge trimmer, the motor is just shot. At times it will run around 60% power/torque then at times it will run around 30%. It isn't a battery issue, the motor is just worn out, brushes or an internal coil issue, either way, motor's shot. The plan here is to take the good motor out of the weed trimmer, along with the dual battery back end and swap out the bad 18v hedge trimmer motor with the good 36v weed trimmer motor. Afterward I would then somehow blend the dual battery back end with the back end of the hedge trimmer, creating a super hedge trimmer that has a 36v motor with dual battery power. 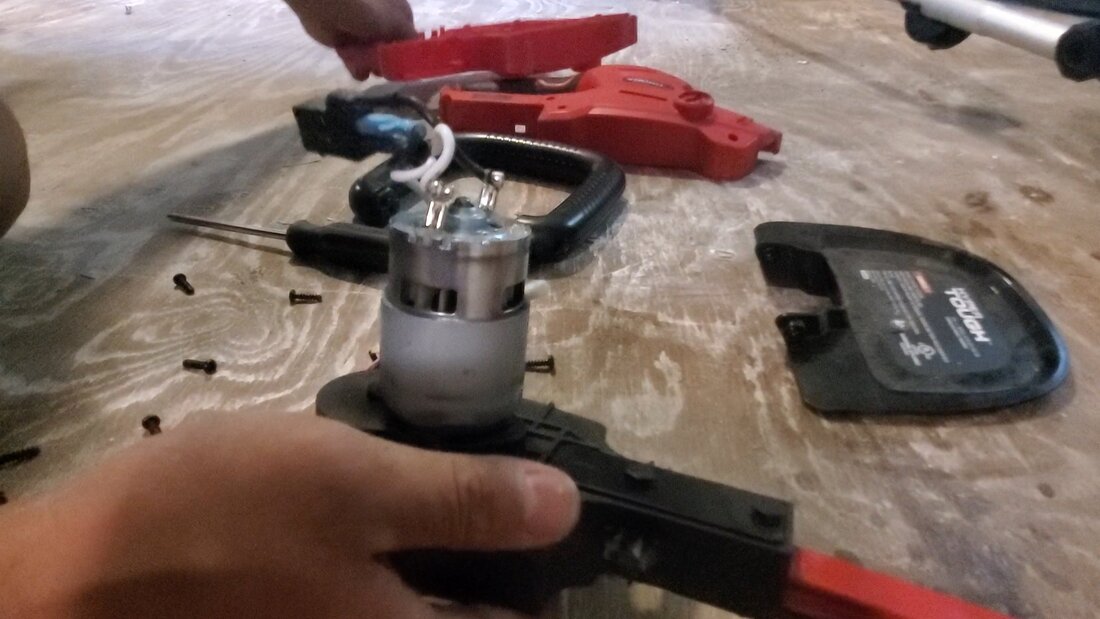
Disassembling the hedge trimmer to get to the cutter drive system where we do the real work.
First thing I had to do was disassemble the two devices. I started with the hedge trimmer, breaking the machine down to get to the cutter drive system where the bad motor is mounted to. I wanted to put my eye on this anyway in order to see how this thing goes together. It didn't take too much effort to pop the shell loose and get the driveline separated. From the way it looks the motor is easily removed after popping a cap off the bottom of the drive system and removing the two screws holding the motor in place. With this machine now broken down, I could move on to the weed trimmer. 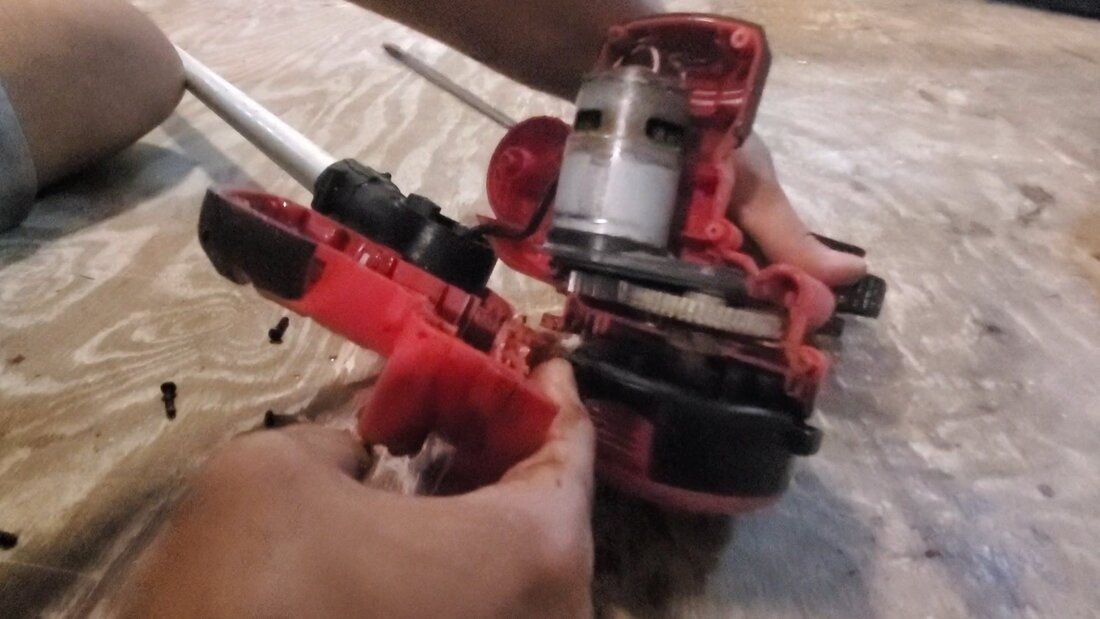
Removing the weed trimmer head/motor components.
On the weed trimmer I had to pop off the battery end of the device as well as the motor/trimmer head end in order to recover the components for the build. I removed the battery end first, removing just enough screws to allow me to pull the end off the aluminum tube that makes up the center of the weed trimmer body. I would need some of the wire coming from the battery end in order to wire up the dual battery end to the hedge trimmer's motor. I then removed the screws to open up the head end to remove the drive gear and trimmer head while removing the motor along with a few inches of wire. With these vital components removed, I separated the garbage from the parts we'll be using in our project. 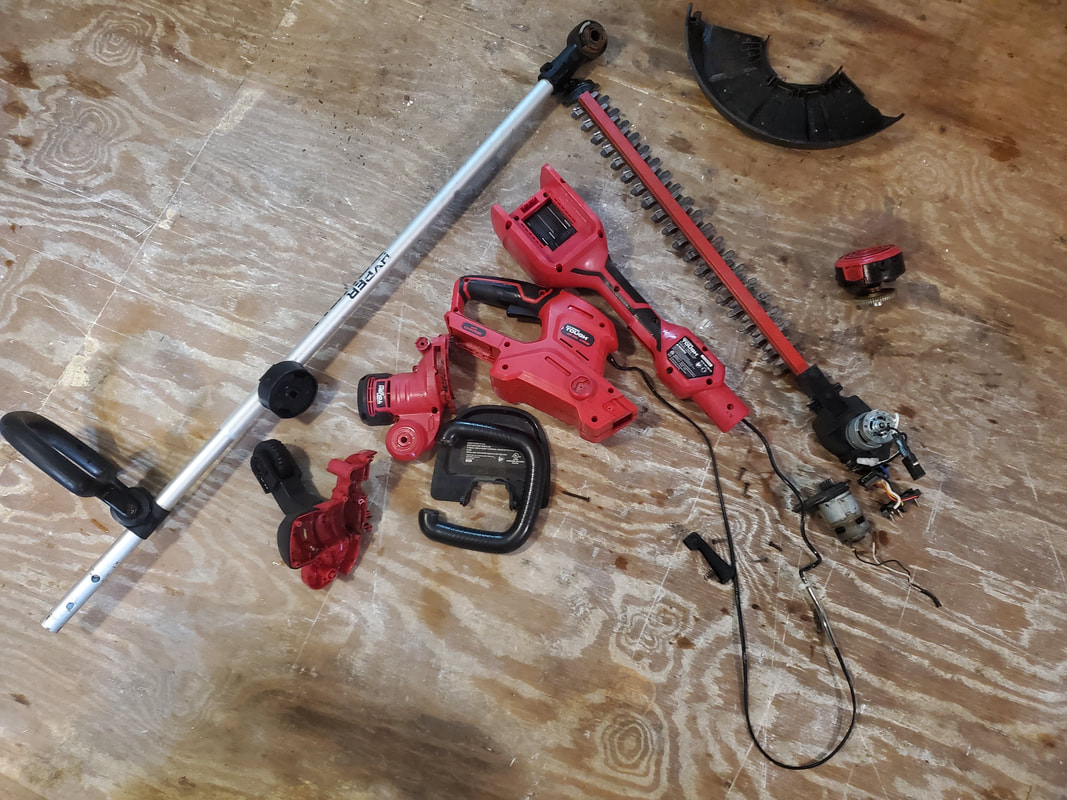
All the components harvested from the two dead tools. Some of these parts will be discarded due to their not being needed.
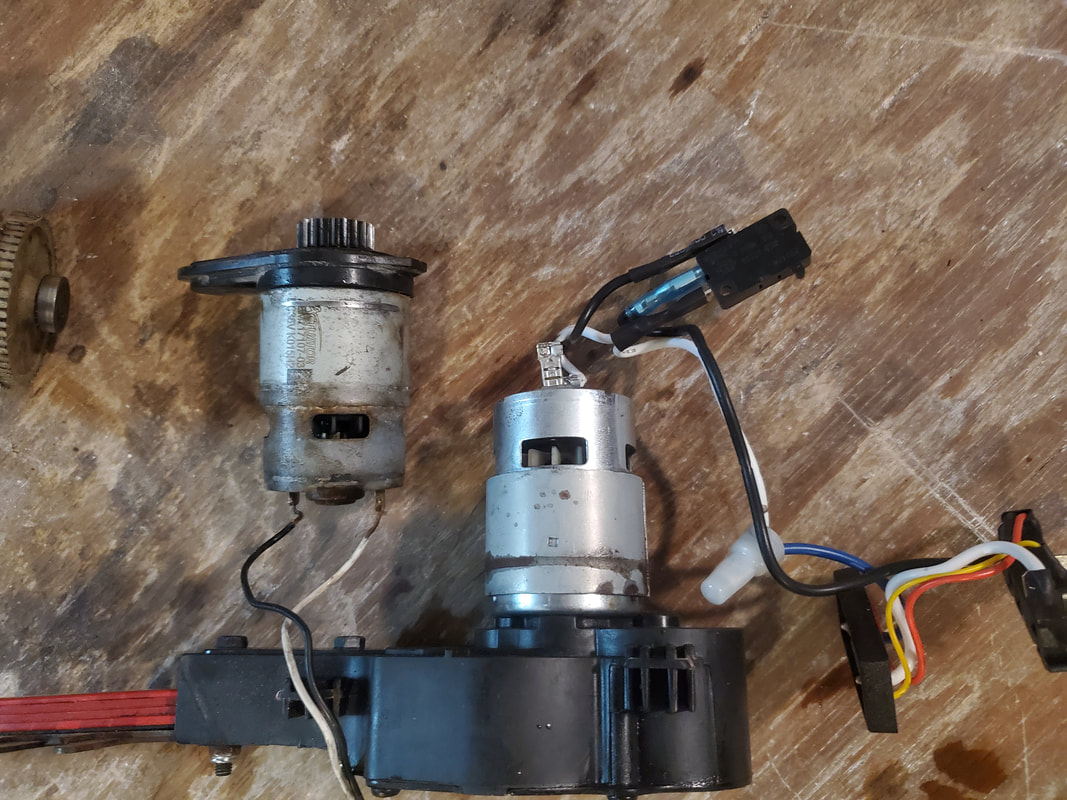
The two motors side by side showing the similarities between the two. Other than the voltages, they are one in the same.
Looking at the two motors, they almost appear to be identical, outside of the stampings of the motor model numbers and voltage ratings. The dimensions are the same, and I suspect the motors are interchangeable as well, which would be awesome as this would simplify that part of the project - installing the good 36v motor in place of the bad 18v motor. Another thing that I was looking at was the back end of the two machines. The weed trimmer end as well as the hedge trimmer body. I have some rough ideas of how to blend the two together. I've already come to the conclusion that the blending of the two bodies is going to be an ugly Frankenstein of a creation, so at this point I'll just focus on functionality, not cosmetics. The more I focus on cosmetics the more I'll probably end up with something that won't work at all, or something that may not be attainable at all. 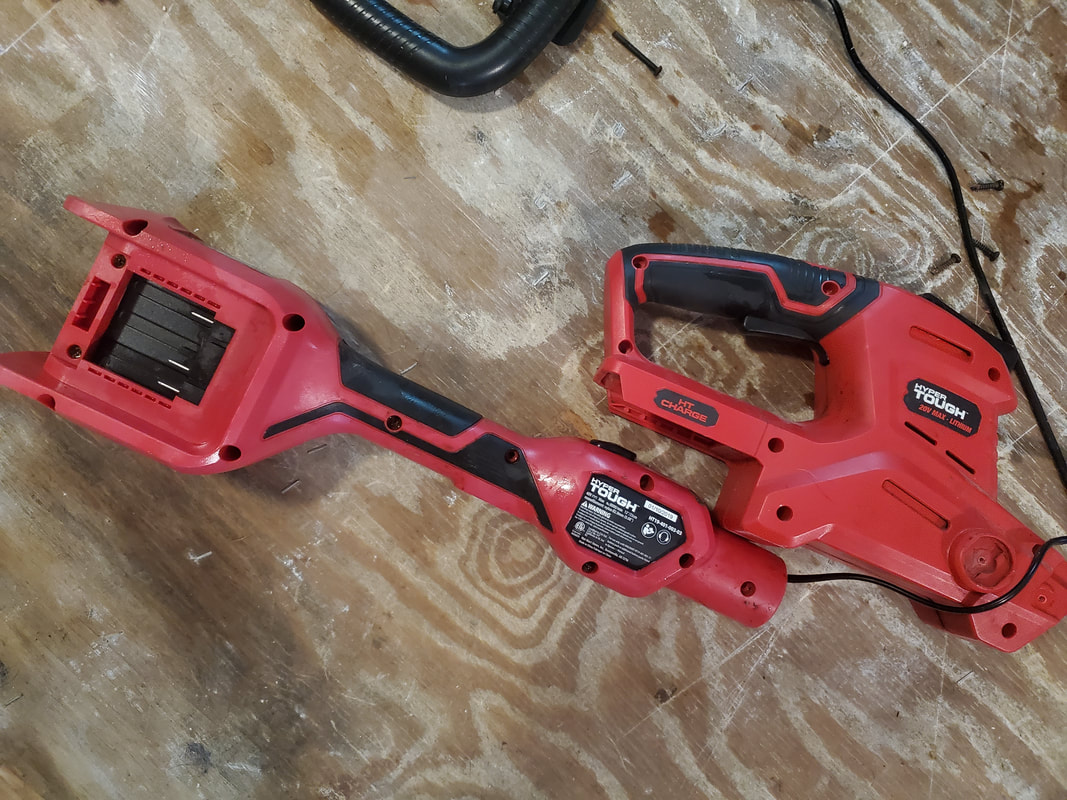
The weed trimmer and hedge trimmer bodies placed together to show how they may go together, however crude the build may be.
With all the parts for the build, I can move forward to swap motors then start cutting up the bodies to blend everything together. As stated before, the goal is to create a super hedge trimmer that will be even more able to chop through everything. Of course I could've just went and bought the 40v Kobalt hedge trimmer, the next version up from the regular 24v Kobalt trimmer we picked up to replace the Hyper Tough unit. But since I have these two dead tools, or more accurately, the components from these two tools, why not try to build one? Especially one that can use the batteries for the tools I already have? So let the building begin...
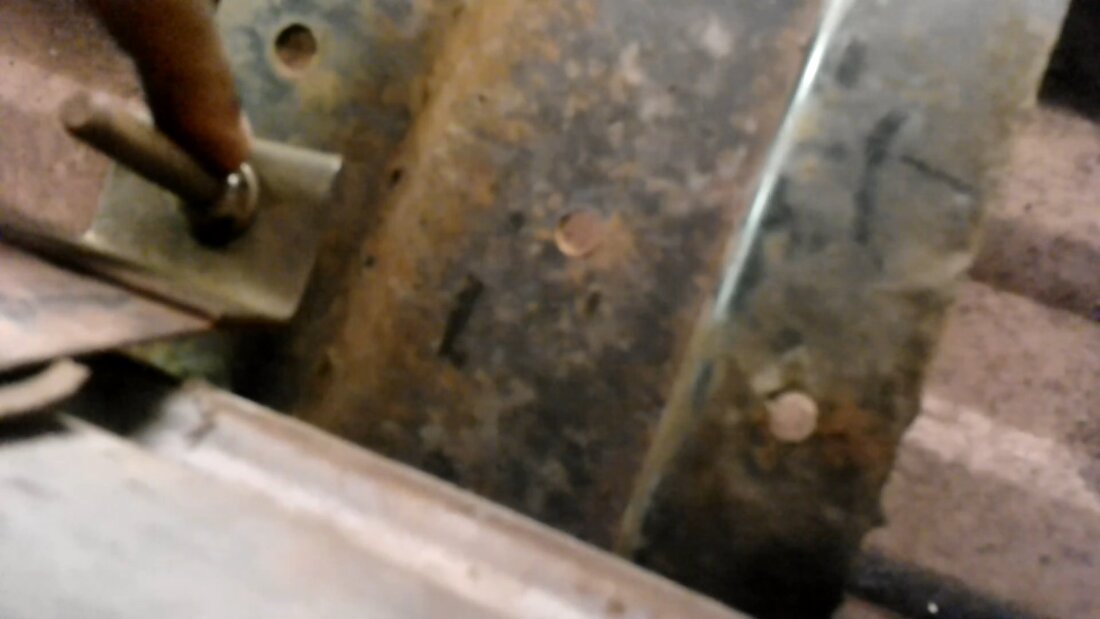
Since this is the planting/growing season, we had taken it upon ourselves to get some more plants for the gardens. We grabbed some more strawberries along with a four pack of okra, along with some catnip, oregano and parsley herbs. After having gotten these plants, we had to get them in the ground more sooner than later in order to allow them to do their jobs of growing to produce for us throughout the year. We started off with the strawberries. One of the most recent drum planters already had a couple strawberries planted, with room for four more. After planting four of the six strawberries we had, we moved on to the 2nd drum planter, one of the lower ones made from a half drum and planted the remaining two strawberries within. There's room for probably three to four more in this planter as well. 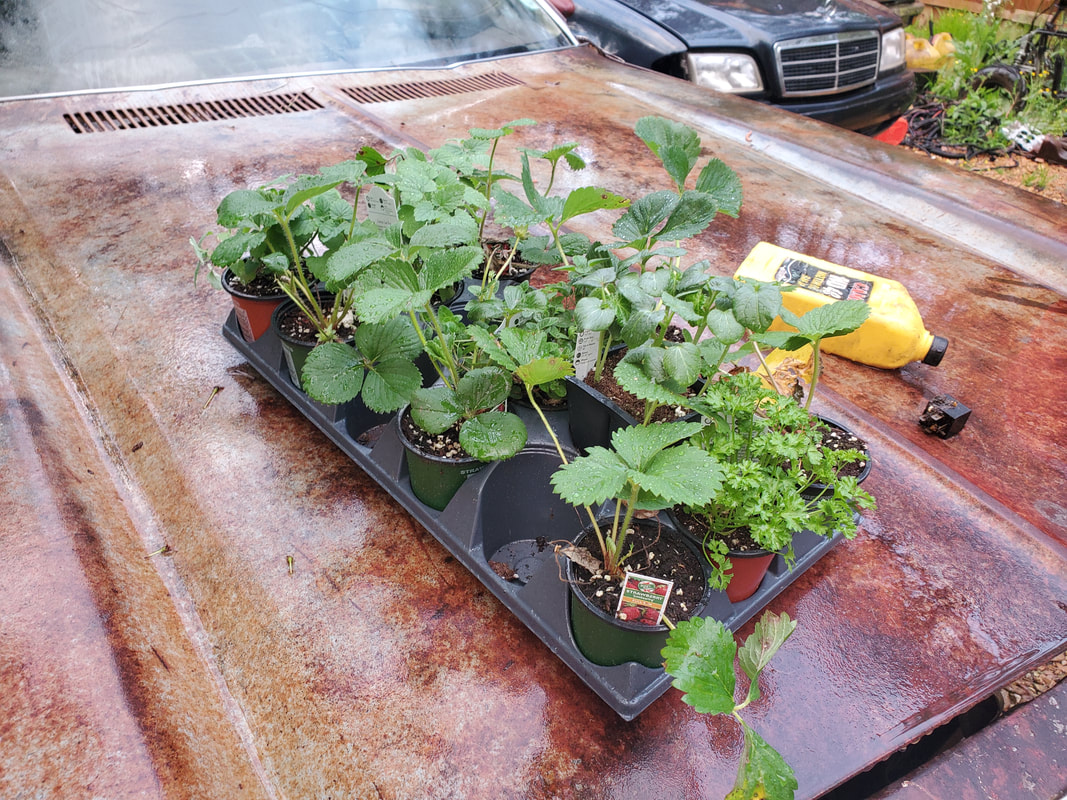 The flat full of plants from the store, ready for planting. 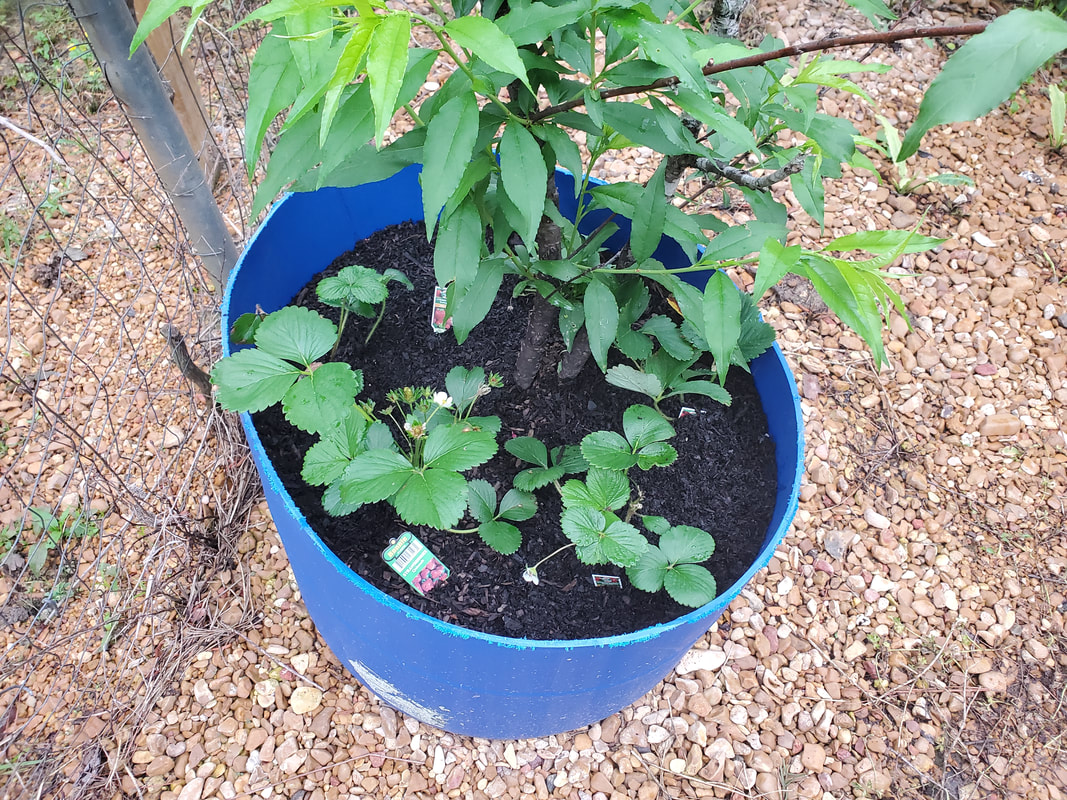 One drum planter with a peach or nectarine tree, not sure which, along with six strawberries surrounding the tree. 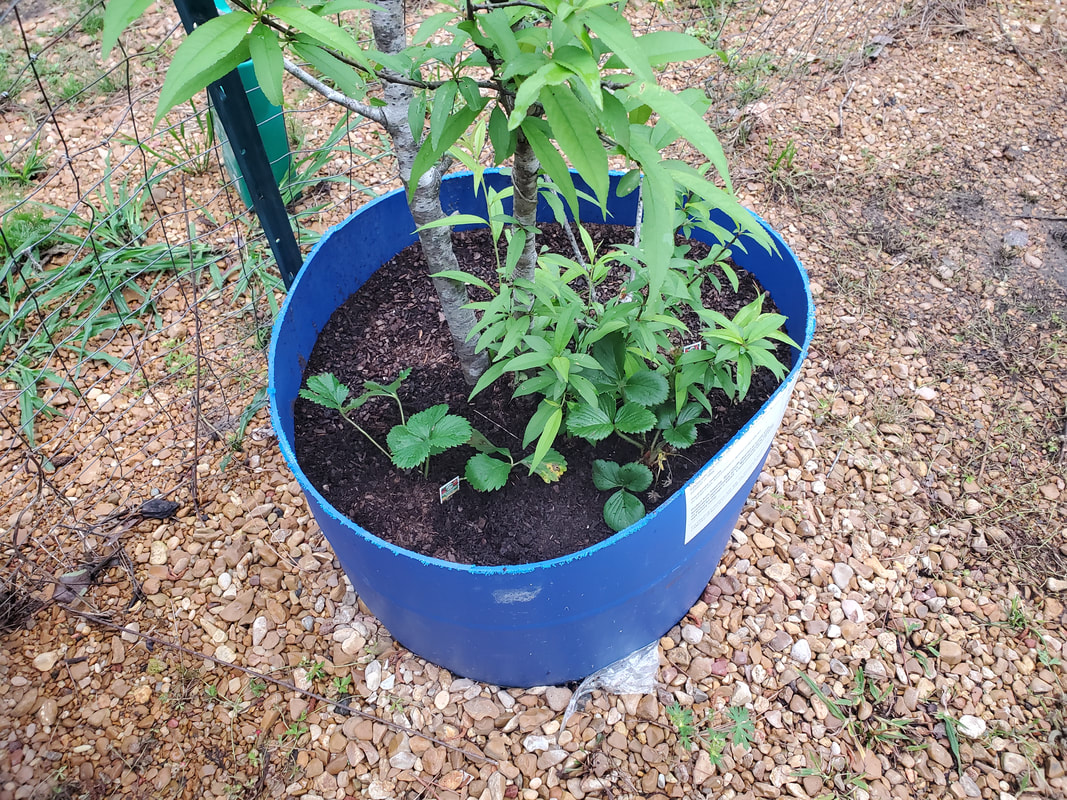 Moving to the herbs, I took the oregano and parsley plants and planted those in the same old raised bed where the basils and other herbs are planted in. That bed still has a sage plant along with what I believe to be more of another variety of parsley and/or oregano. It was only appropriate to plant the new herbs in the same bed as the rest. Now perhaps when I get more raised beds constructed, I'll have whole sections of beds dedicated to herbs. Perhaps use some hydroponics for growing herbs since these plants are just leaves and would be perfect for growing in hydroponic garden setups. 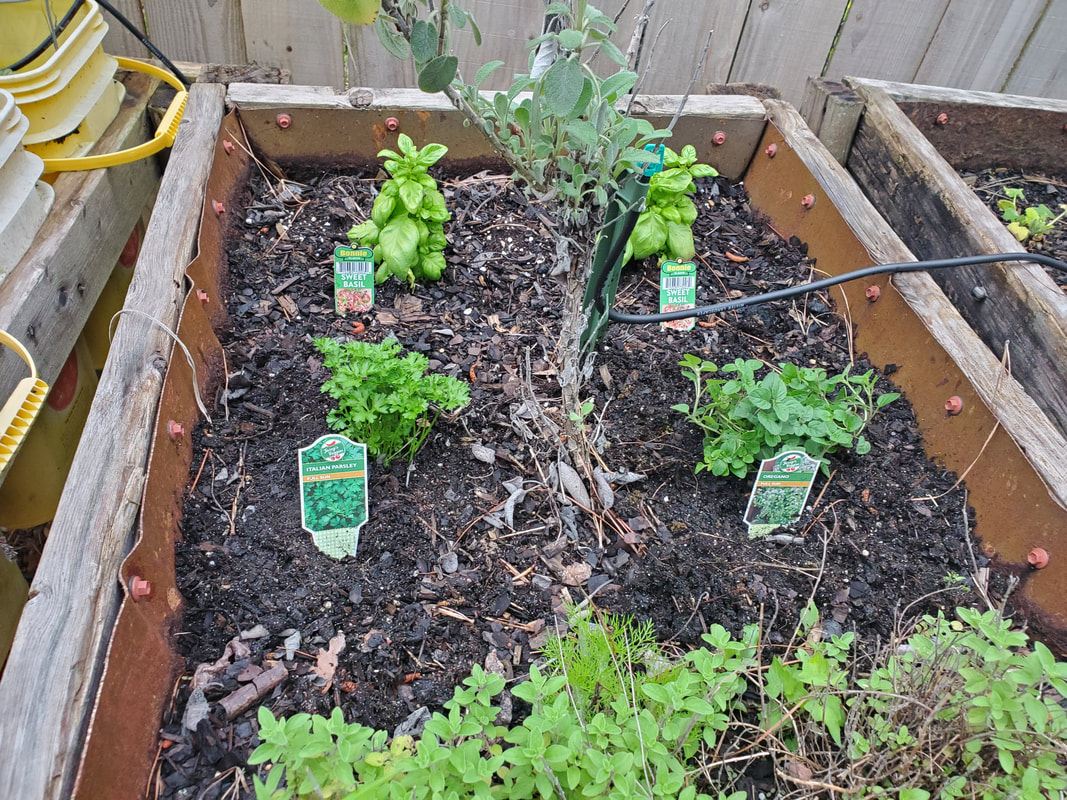 Oregano and parsley herbs planted in the bed with other herbs. Moving on to the catnip, I had to find something to put these plants in, even on a temporary basis. I had some smaller gallon sized plant bowls that I saved, so these were going to have to do for bigger planters until I can get to some point where I could dedicate a whole raised bed for just catnip. With the drums that we just picked up, this may become a reality more sooner than later. Until then, the three planters with the catnip were staged inside of one of the larger drum planters that was used for potatoes last year. The sprinkler head will at least keep those plants watered for the time being. 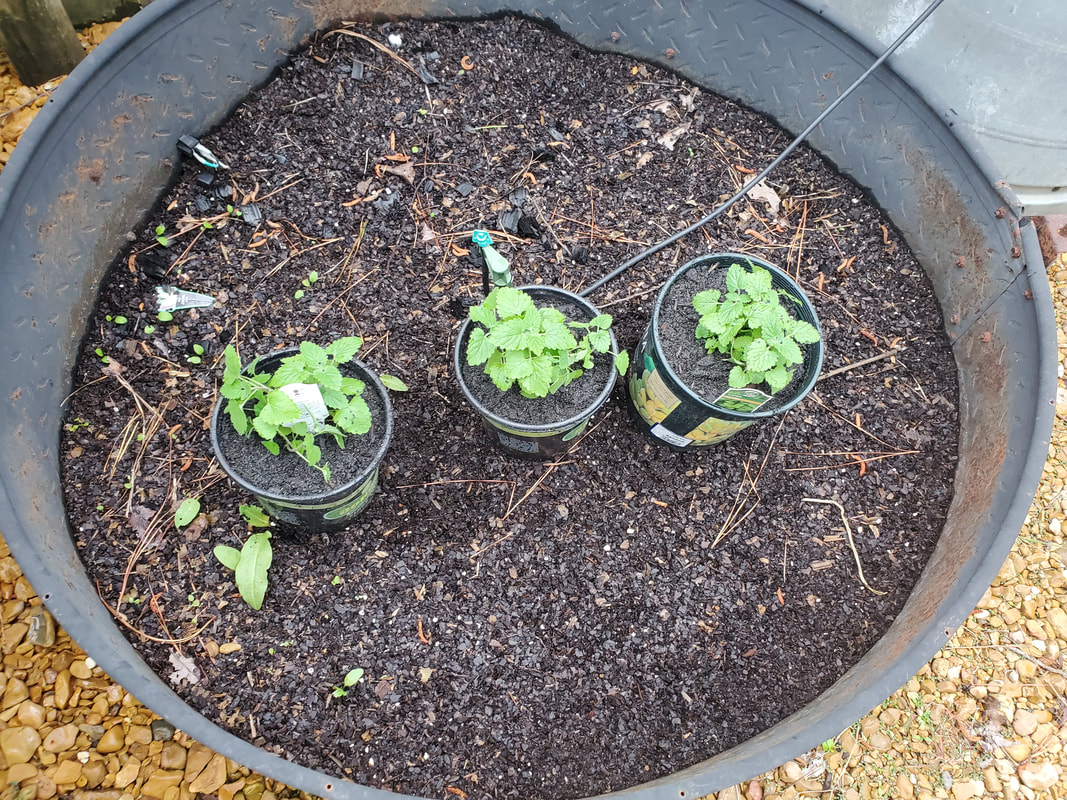 Catnip plants in their gallon sized planters sitting inside larger drum bed to gain access to sprinkler head for watering. For shits and giggles we also grabbed a couple bags of composted manure since this particular store had the bags at a pretty decent price compared to other stores. Even if the prices were the same as others, we would've still grabbed a couple bags since we will always need dirt for the raised beds in the garden. We have a long ways to go before we get everything filled up, and at the rate I'm going with the construction of more raised beds, we're going to need more dirt for the foreseeable future, just like gravel. The couple bags we did get I used to fill up some more of the cat litter bucket planters in the greenhouse. The greenhouse by itself will need a sizeable amount of dirt by itself. 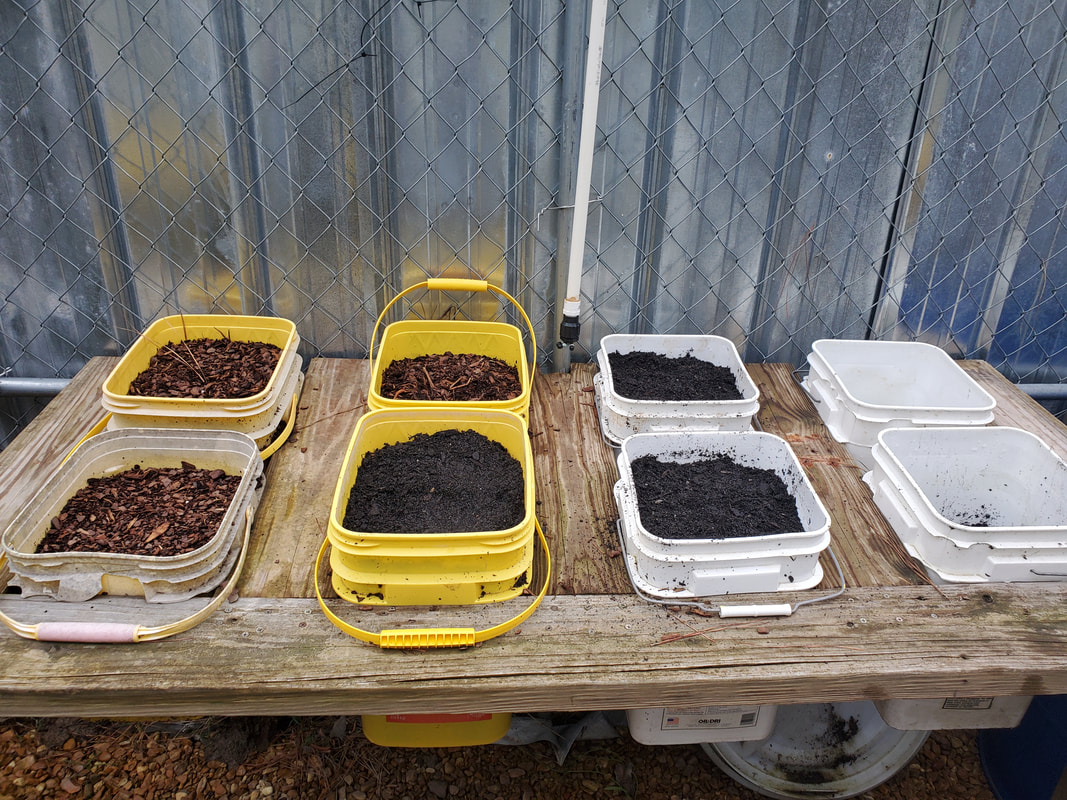 Eight pack of bucket bed planters with six of them full of dirt, courtesy of the two bags of dirt. While in the greenhouse I finished up the planting with the four pack of okra. I chose to plant these little plants in the section of raised beds containing just four buckets. If these okra plants do like most okra plants, these things will end up growing several feet tall, which will probably put them up past the roof of the greenhouse. If that's the case I may have to trim the plants down, especially if I end up getting the roof on before these plants fully reach max height. 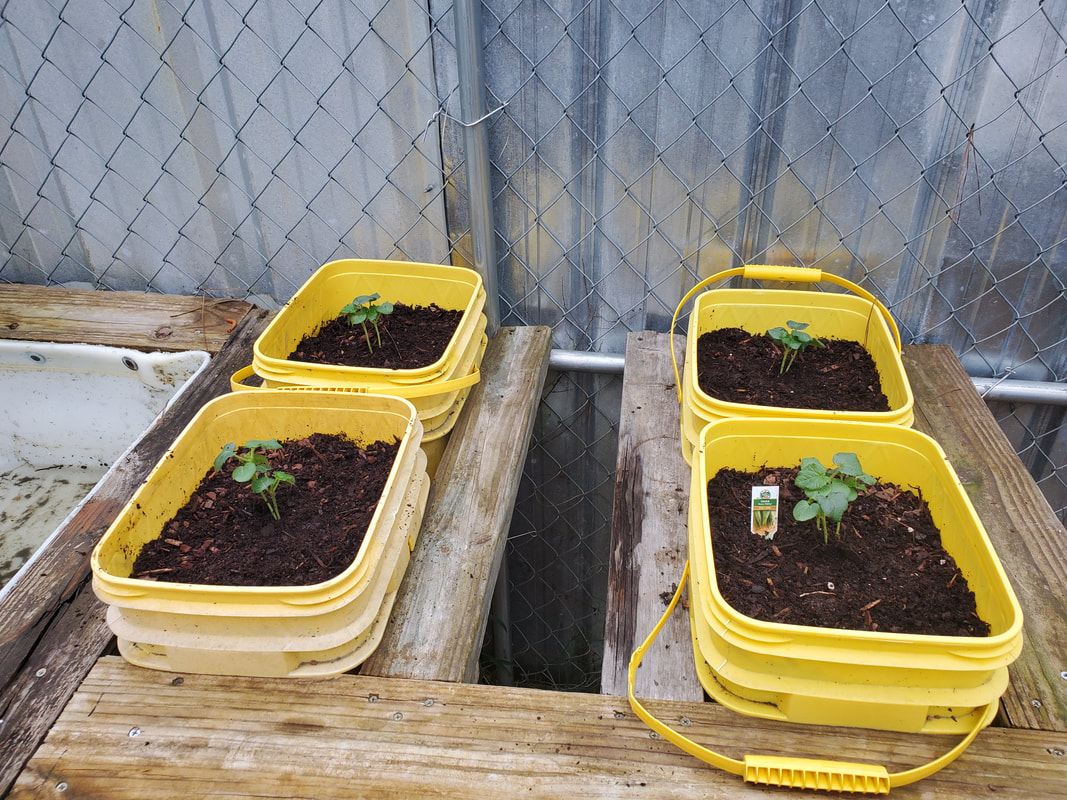 Okra plants planted in section with four buckets. With the drums we picked up the next garden work will be the construction of the next couple sets of raised beds. Other than continually bringing in dirt to fill up the existing beds, I'll be trying to focus on building more beds to fill up the garden space. With the way it's been raining every couple days here we almost don't have to worry about running the irrigation system to water everything, much less expanding the irrigation system to cover the most recent beds that were not accommodated yet. Little by little we'll get it done. Trying to continue on with the work on the DOB, I had to address the pinholes in the fuel tank. Before I can even put a drop of fuel in the tank, I had to get some epoxy to plug the holes. Unfortunately I didn't have any of the special epoxy that is made specifically for sealing holes in fuel tanks. After making my gravel run I was able to stop by the local Autozone in order to get some Tankweld, another version of JB Weld that is made for sealing metal fuel tanks. This stuff, unlike the regular JB, is more of a clay like epoxy, with a core of one material that is wrapped by an outer layer of another material. 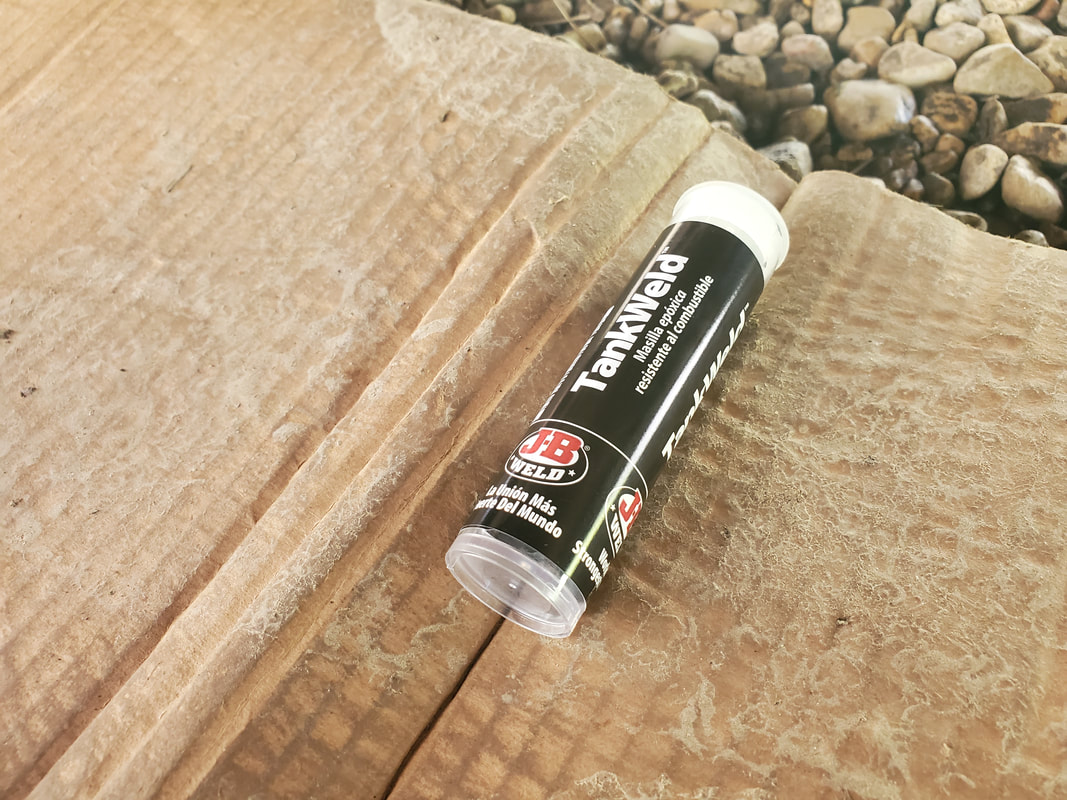 TankWeld epoxy, used for sealing small holes in fuel tanks. After cleaning the surface of the fuel tank, which especially includes any liquid, whether fuel or in our case, water, I would have to break off a small piece of the clay chunk and start kneading it to mix the two clays together until the final product is of a uniform color. Once the stuff is mixed up it will start heating up as the two compounds start to undergo some light reactions. At this time the glob of mixed epoxy is plopped on the fuel tank over the hole then spread out over the surface of the tank, around the hole, making sure the hole is in the center of the disc of epoxy. You want a relatively thin layer of stuff over the hole. The disc still needs to be thick enough that it won't crack or peel away from the surface of the fuel tank after it dries. Once the epoxy is applied, I let it dry overnight to ensure proper curing before I put any fuel in the tank. 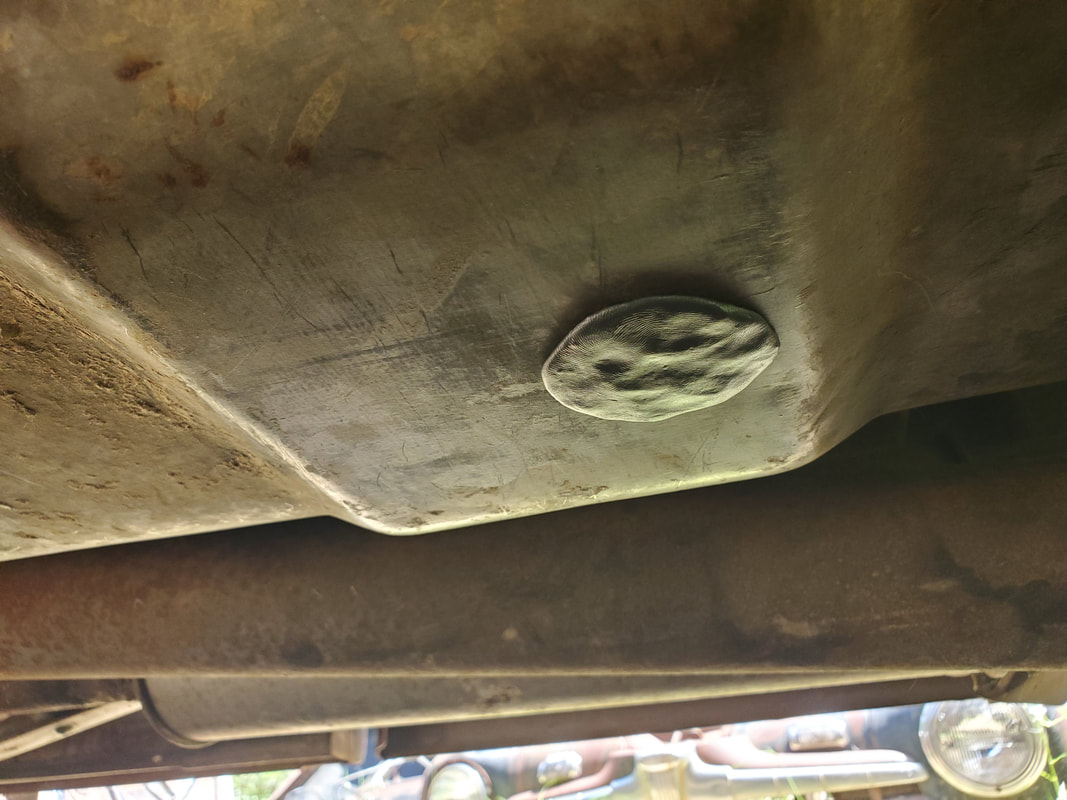 Glob of mixed epoxy formed into a disc and smashed onto fuel tank over pinholes. We had other engagements to tend to this day, so I wasn't able to continue with any extra work on the truck so at least I can confidently say that the epoxy will have ample time to cure before I get around to adding any fuel to the tank. Anyway, one of the engagements we had to tend to was checking out leads on some plastic barrels. The first place we went to ended up being closed early, which was a bummer, they wanted $12 per drum. The 2nd place we checked out ended up only wanting $5 per drum, like it was divine intervention that the other place was closed, since we ended up getting six drums for $5 versus the originally planned four for $48. The drums from both places contained stuff that would need to be flushed out better before using the drums for anything like raised beds. The first place had drums that had hydrochloric acid stored in them and the other one had drums that had an aluminum cleaner stored in them. Now what are we going to do with all these drums? Well obviously the first guess is using them for raised beds or drum planters for fruit trees. The initial plan for the drums was to use them for an upcoming project, which is the 65 Mustang truck frame swap. How do the drums factor in here? Well after doing some research, I found that one way builders propped up the car bodies for frame swaps was to use a pair of drums with a large board between the two. The drums would be spaced apart more than enough to clear the car body and the truck frame while the board would be under the car body, holding it up high off the ground. An engine crane would be used to jack up the car body on one end, propping it on the drums and board, then moved to the other end and the same thing repeated. When all is done, the car body should be sitting on two pairs of drums and boards. This will allow me to do whatever work I have to do under the car body, like removing any unneeded components or metal, or adding metal to facilitate the mounting of the body to the truck frame. Of course with the height achieved with the drums, the truck frame will be able to be rolled under the setup in order to get things ready for the final mounting. 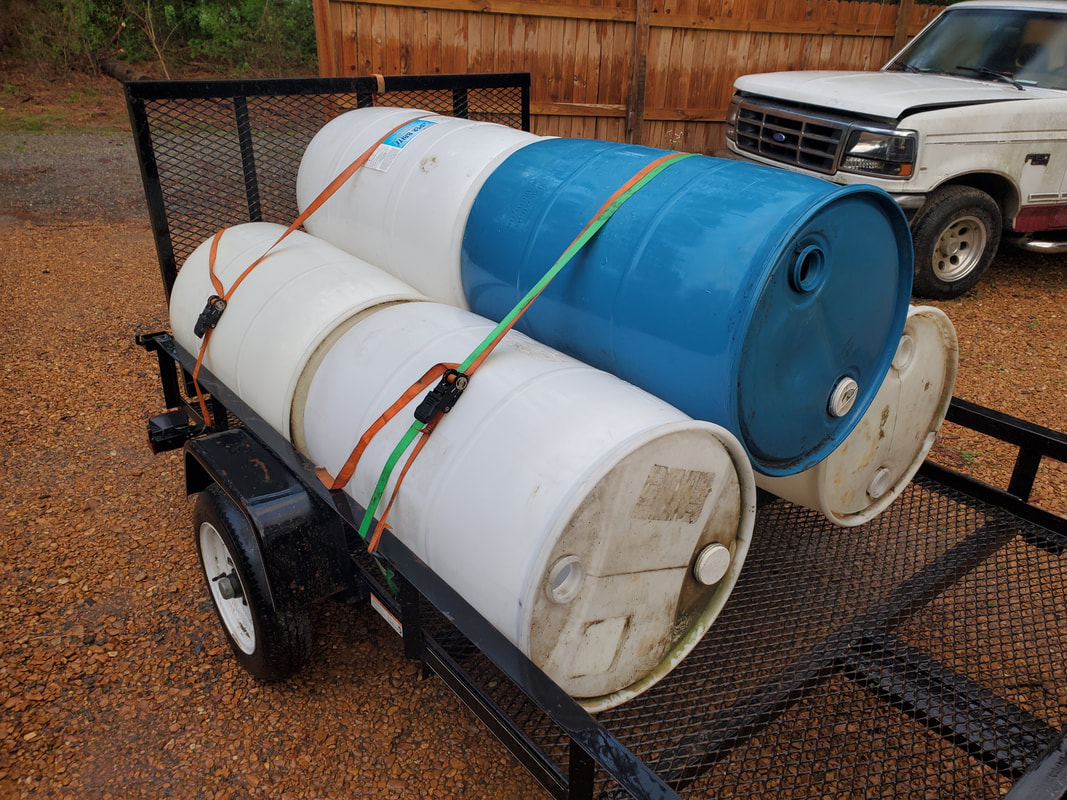 Six plastic 55 gallon drums just picked up for future projects. We will be getting more of these at the price we got them for. For the longest time I had been pondering how I would get things set up in order to do this truck frame swap. Without a lift it would be more difficult to do this type of build but after seeing the simple method of using the drums and lumber, I can now start getting things ready to start the build, which in the case of the 65 Mustang will involve me removing the remainder of the driveline and the front suspension. With the four drums being set aside for use in the car build, the other two drums will be used for building raised beds. Cutting the drums in half the long way will provide me with a pair of beds to make two whole raised bed assemblies, which will go a long ways towards filling up space in the garden and providing us with more useable growing space. And speaking of growing things, we also made a stop back at the same local hardware store to see if they had more strawberries, along with some other herbs that we didn't get. I would need a lot more strawberries to fill spaces in the drum planters. The two larger food forest raised beds right at the entry gate to the garden will also be getting more strawberries once I add some railroad ties to the beds to close them in, along with a lot more dirt. That's a long ways off, for all intents since I'm focusing on the raised beds, and soon enough, hydroponic gardens. But along with the strawberries, we grabbed some catnip, oregano, parsley and even a four pack of okra plants. Pack of new plants just brought home. We also took the liberty of grabbing a couple extra bags of dirt, since we will end up needing a lot of dirt to continue to fill up the remaining raised beds in the greenhouse along with the three newest drum planters. Of course I'll have to get some lumber so I can throw together some raised beds, but that too, is for a slightly later date. The same lumber I need for the raised beds I'll need for the drum stands for the car body. As is always the case with homestead projects, money flows freely to keep the gears turning. After not being able to finish the fuel tank install due to not having a fuel hose, I had to wait until the next day, after getting a piece of hose. With that, I could finish up on the install of the fuel tank. Unfortunately, things don't always go as easily as they should. After installing the hose, I noticed some moisture under the fuel tank and after wiping it away, found that the moisture was from some water that was still in the fuel tank, leaking from a couple of pinholes in the thing. This means I'm going to have to get some epoxy to plug up the pinholes on the fuel tank, since replacing the whole tank isn't going to be a viable solution when it comes to trying to do things on a budget.  Fuel hose hooked up to metal line running forward to engine. 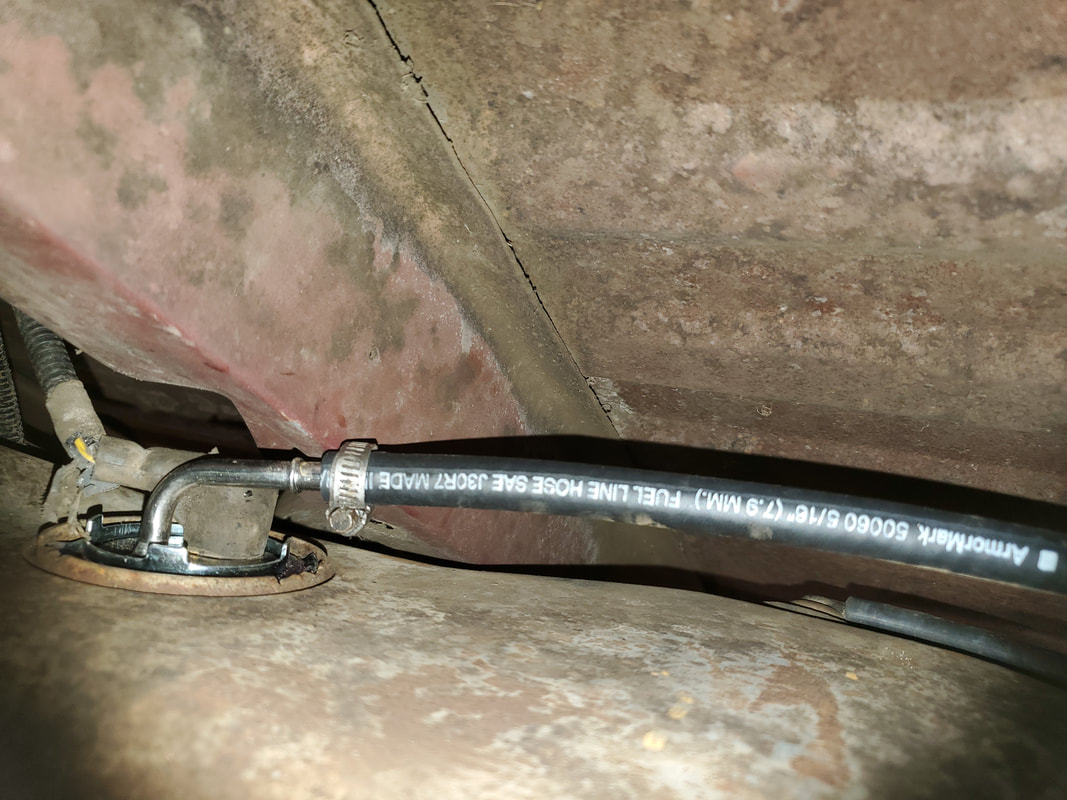 Fuel hose hooked up to sending unit on top of fuel tank. 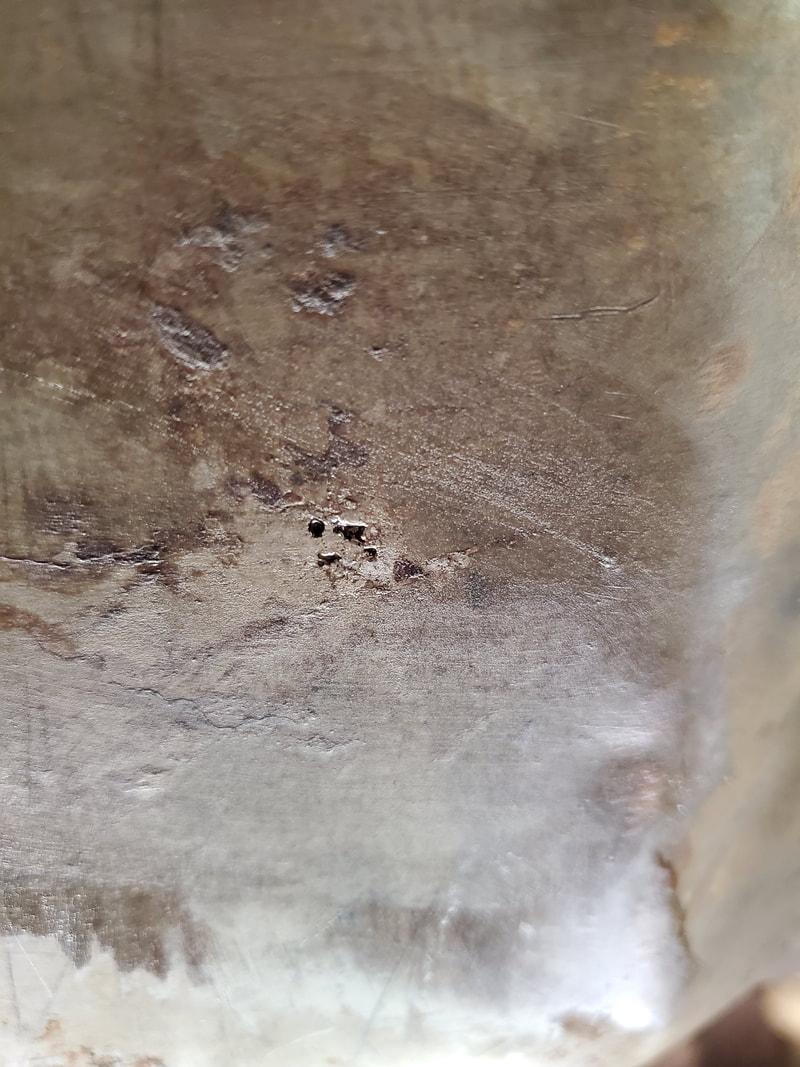 Pinholes in bottom of fuel tank. The next thing to address is the proportioning valve. As is the case with anything brake related, this tends to be a pain in the ass at times due to the fact that old compression fittings need to be broken free, hopefully without damaging the metal brake lines. My plan was to remove the bottom brake lines and hook them up to the new unit, then remove the top lines before removing the old proportioning valve. After installing the new PV, I can then install the top brake lines to finish the job. 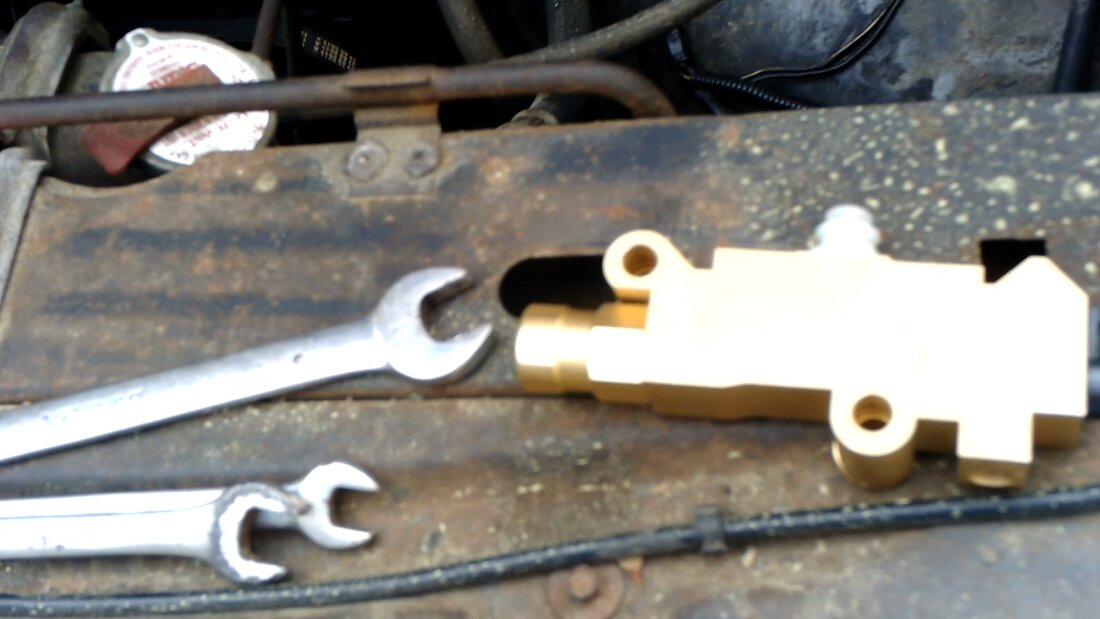 New proportioning valve, ready for installation. 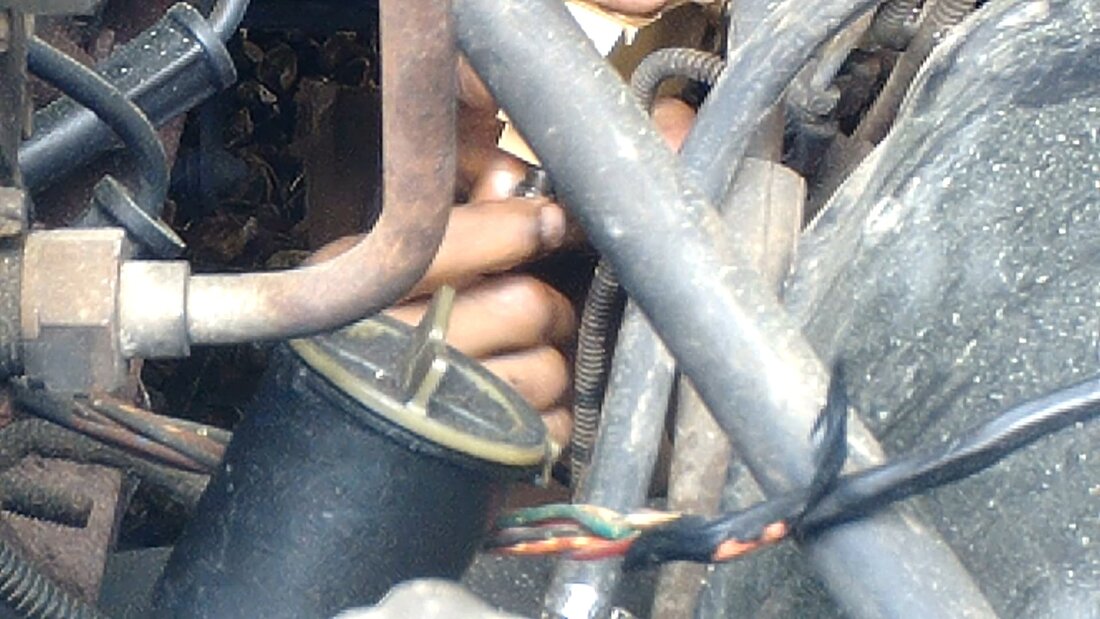 Under truck removing bottom brake lines to hook up to new proportioning valve. After getting the new PV bolted down and two out of three of the top brake lines installed, I found the last one's compression fitting was a different size relative to the new PV's port. As is the case with these aftermarket generic parts, you run the risk of having the unit not be a direct fit in your vehicle, something might need to be modified. In this case, I had to remove the old fitting, install one that fits on the new PV, then re-flare the tube end so I can secure the brake line in the new PV. It's always something when one tries to save a few bucks by getting something that is not name brand or a direct fit. 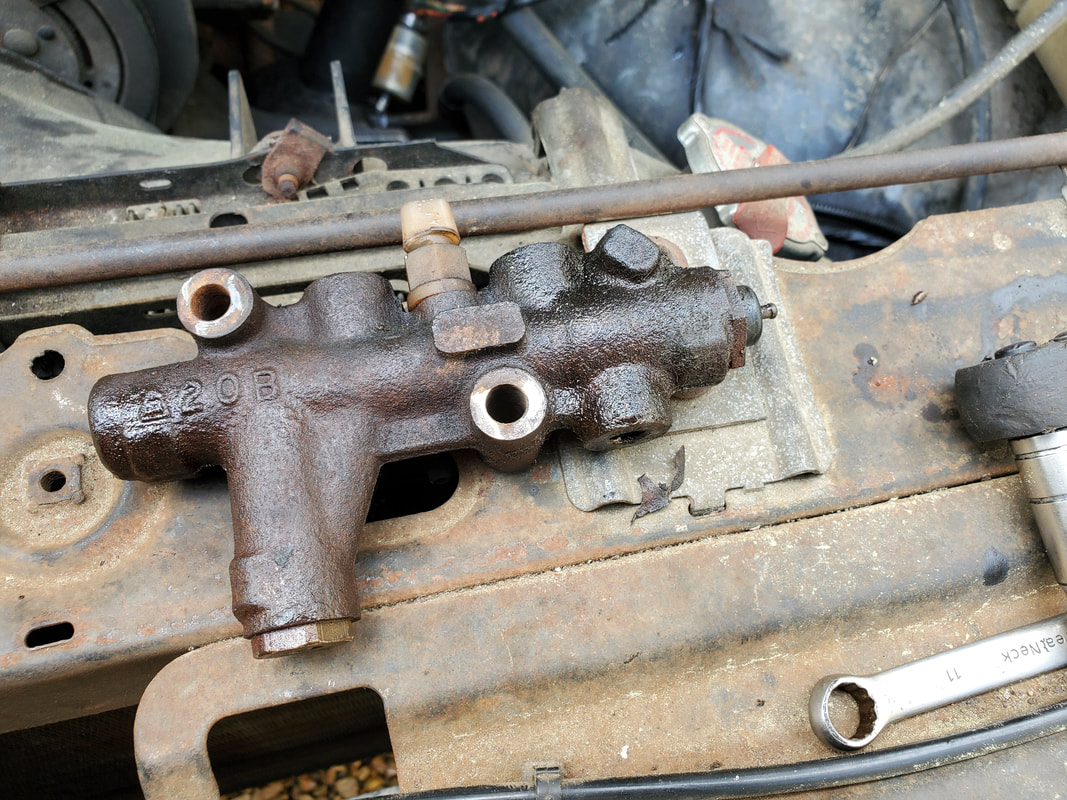 Old proportioning valve after removal. Note the nipple on the right of the unit, indicating the device failsafe to one side or the other to prevent brake oil from being lost in case of a line rupture. 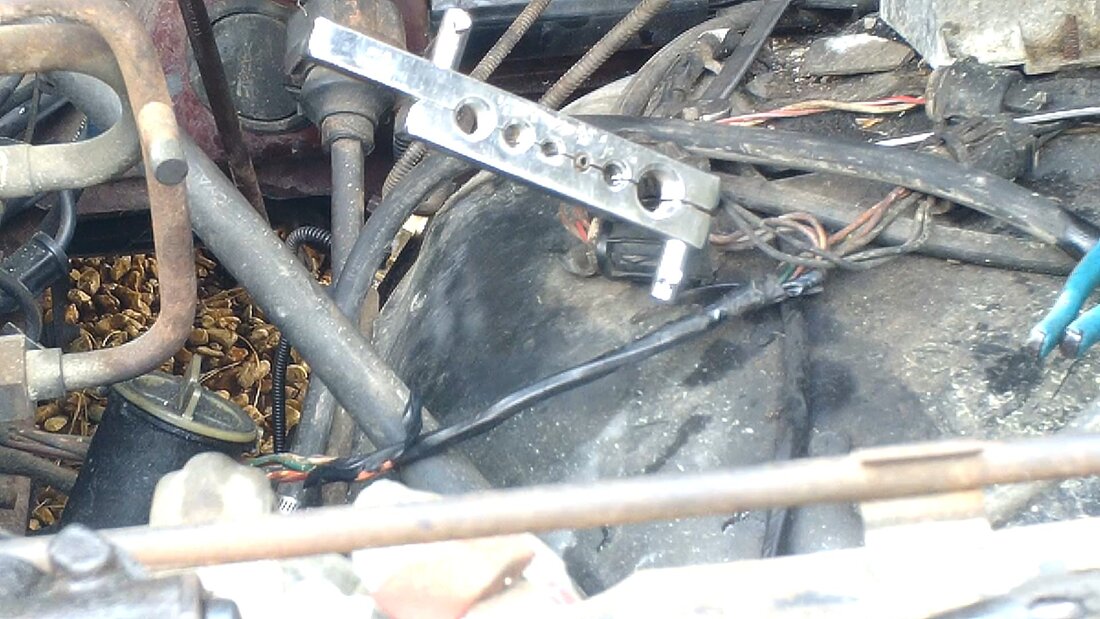 Using a metal line flaring tool to flare the brake line after cutting old flare and installing new compression fitting. 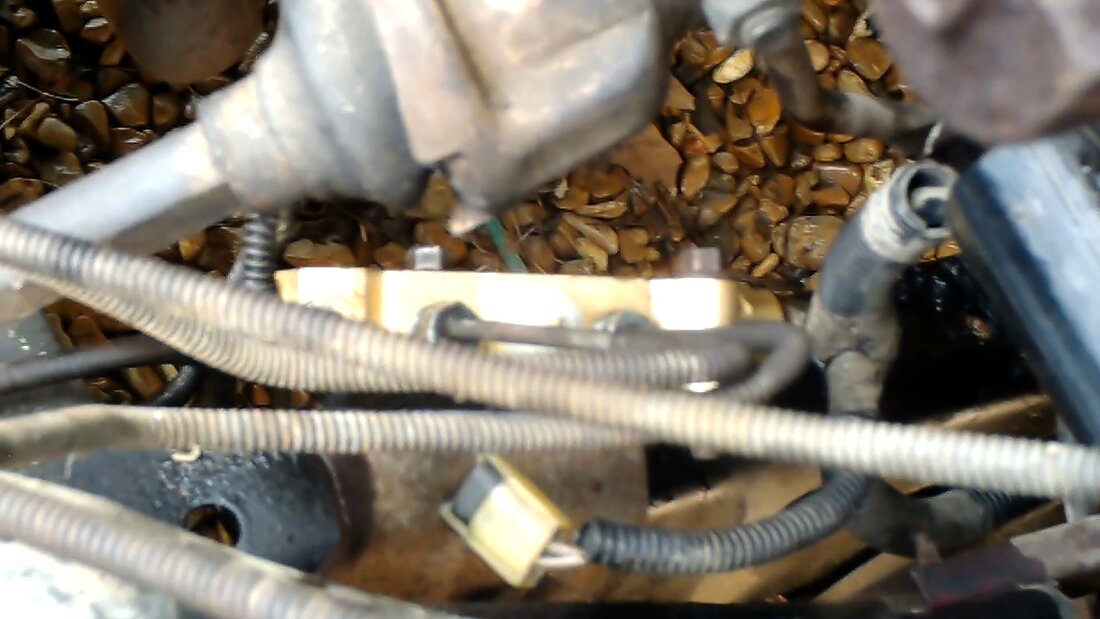 Brake lines secured to ports on top of the new proportioning valve. Of course the BS didn't stop here. The brake fail switch on the proportioning valve that activates the brake system light on the dash was different on the new PV compared to the old unit. At first I thought maybe I could switch these pieces between the new and old but as the case was with the aftermarket generic shit, the thread size was different between the two switches. The old plug on the truck was a two wire unit while the new one is a single wire unit. For right now, it looks like there won't be a brake fail switch, I'll have to jumper out the plug so the brake light doesn't stay on in the cab. Thanks aftermarket generic shit. In the meantime, I had to refill the reservoir on the master cylinder, and will let it sit overnight with the hope that the oil gravity feeds down into the PV, hopefully displacing the air in the unit and sparing me the need to bleed the brakes. Another thing I need to take into account is the idea that these "stock" proportioning valves have a feature where they can fail safe to one side or the other. If the front or back brakes fail due to a line rupture, instead of letting all the brake oil piss out, it will pop a valve lock in the PV to that side so oil isn't allowed to go past the PV down to the wheels. Sometimes if one isn't careful bleeding the brakes, they can trip this failsafe. I hadn't researched how to reset, or if its possible to reset, the proportioning valve. So as far as bleeding is concerned I'll exercise caution. There's a couple things I still need to do before I can move on to the advanced, and hopefully final stages of this truck project so I can get it back to our friend more sooner than later.
After finally getting some more parts, I can start back up on the DOB, with the intent to try and finish up the main work I need to do in order to make this truck drivable, mainly with the intent to get it back to our friend who's gonna need it for personal reasons. The first thing I had to do was replace the fuel sending unit and reinstall the fuel tank so I can complete the fuel system on the truck. This little part of the job went rather fast, which is kind of scary, because it means that some bullshit is in store for me later.
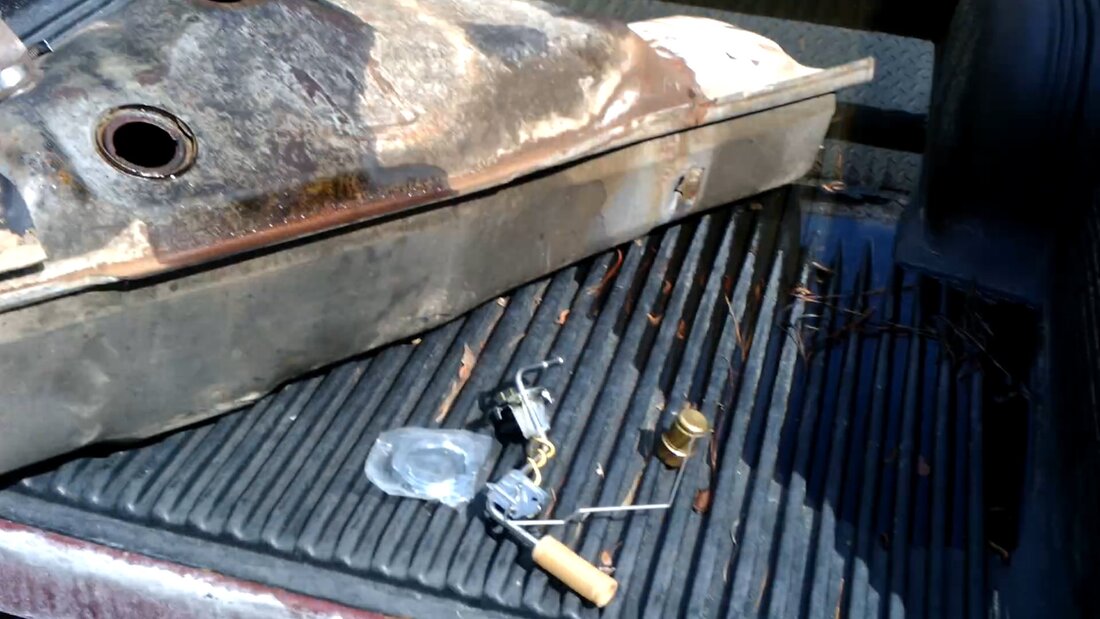
Fuel sending unit ready for install in the fuel tank.
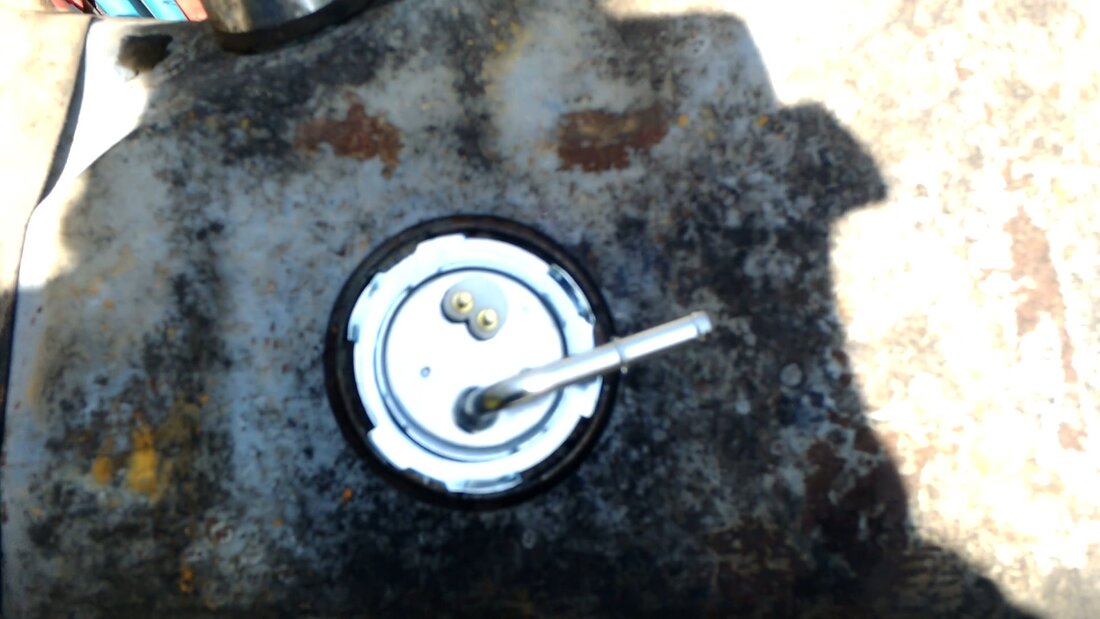
Sending unit locked in its resting place in the fuel tank, lock ring installed.
The fun part was reinstalling the fuel tank. I say this because of the idea that trying to get the fuel tank aligned in a way where I can get the two straps installed and bolted down. The first thing I had to do was reinstall the vent port on the top of the fuel tank that connects the truck's evaporative fuel recirculating system to the fuel tank. With this taken care of the next thing was getting the filler tube situated. 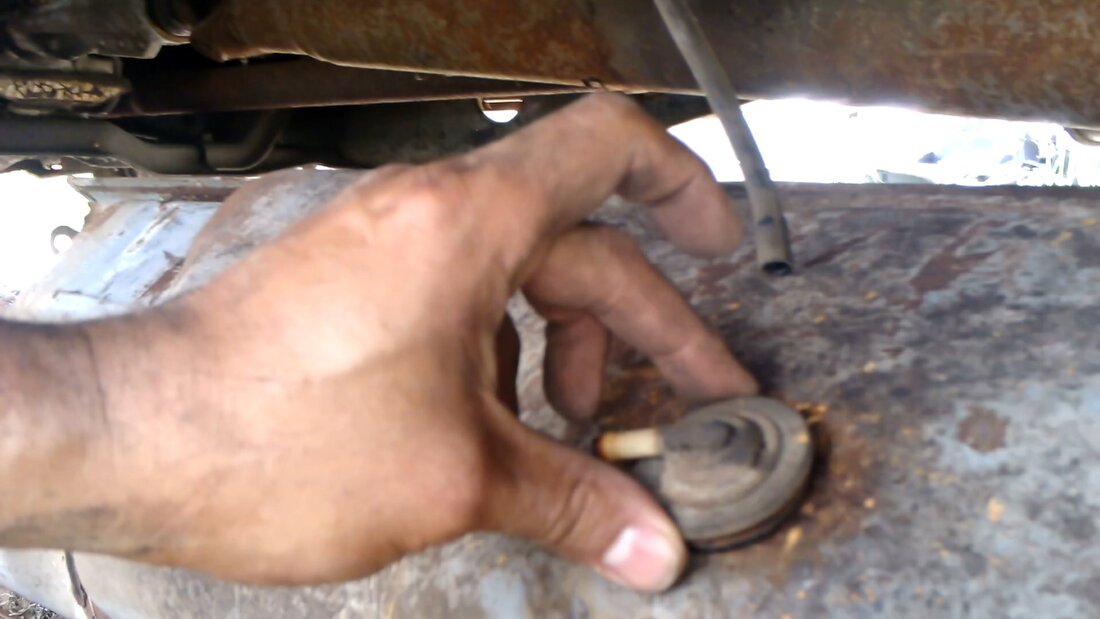
Installing the vent port into the top of the fuel tank.
I also wanted to target the filler tube first as this was an easy way to hold the tank where I need it so I can focus more strength on getting the straps in place. Once I got the filler tube locked down, including the hanger, the fuel tank was about 80% installed as far as hanging up in its resting spot. I took the time to plug up the sending unit as well as install a new hose on the vent port to complete that part. With that done I focused on getting the rear strap in first. 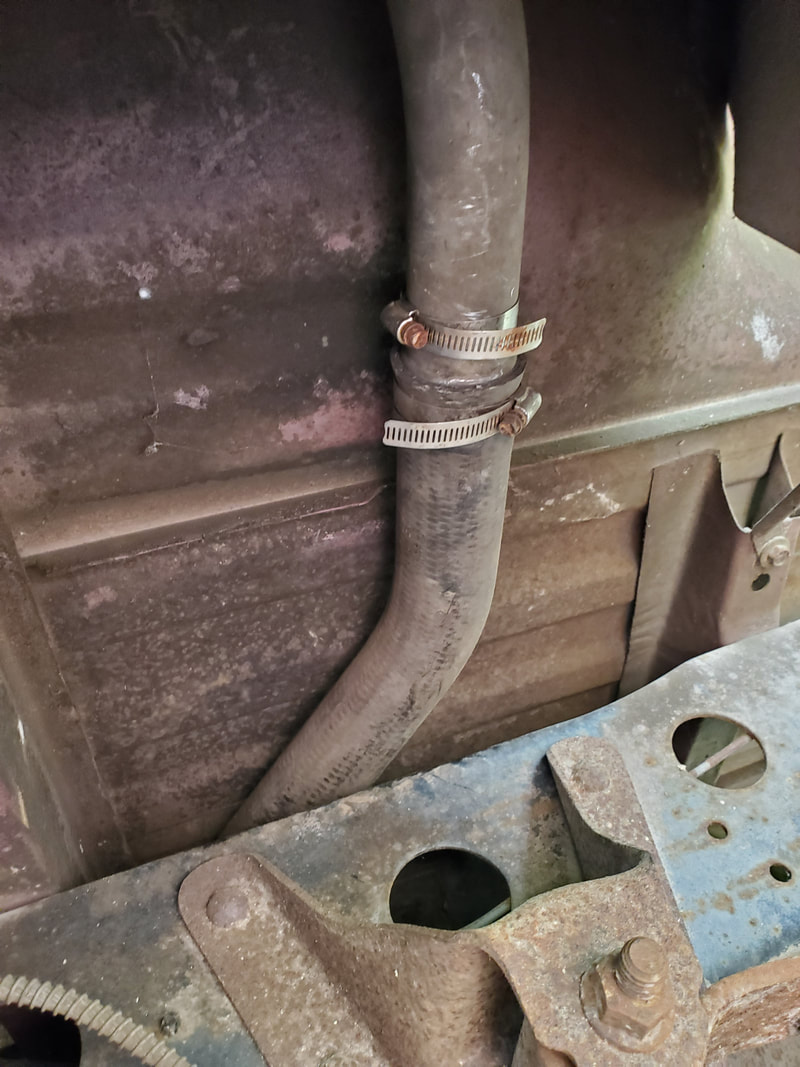
Filler tube installed on filler hose coming from fuel tank, also note the 2nd clamp holding the filler tube to the hanger under the bed.
Vent tube with new hose plugged.
After wrestling with the strap and the long bolts, coming just short of being able to get the strap on the bolt, I ended up moving the bolt over to the end of the bed frame rail where there were more holes made. This hole was a slight bit lower and also allowed the strap to be moved where it would move up enough to connect with the bolt and be fully secured with its nut. After getting that strap in I did the same with the front strap to secure the whole fuel tank in place. 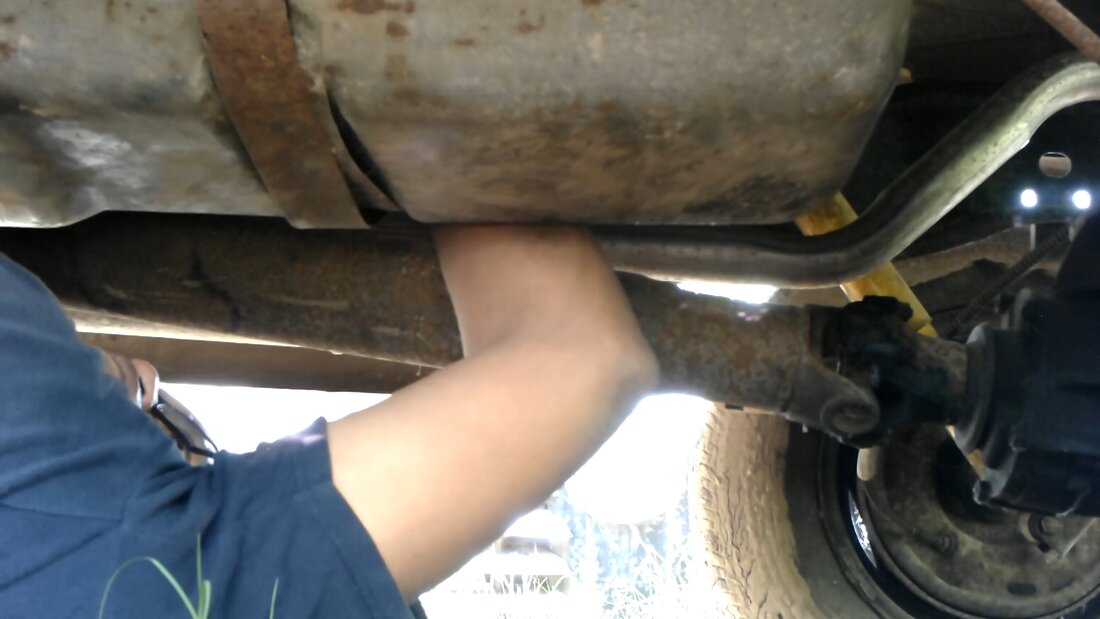
Installing fuel tank by securing rear strap first.
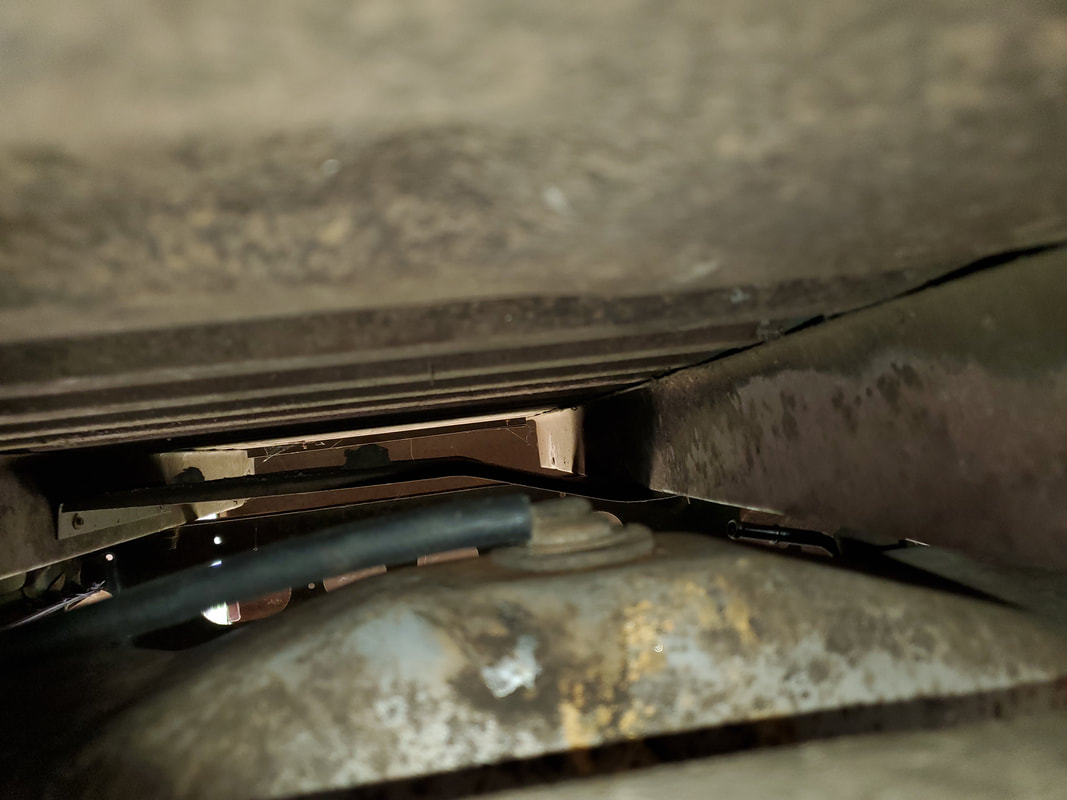
Showing how retaining bolt for strap was moved to another hole on the frame rail for the bed instead of the dead center hole.
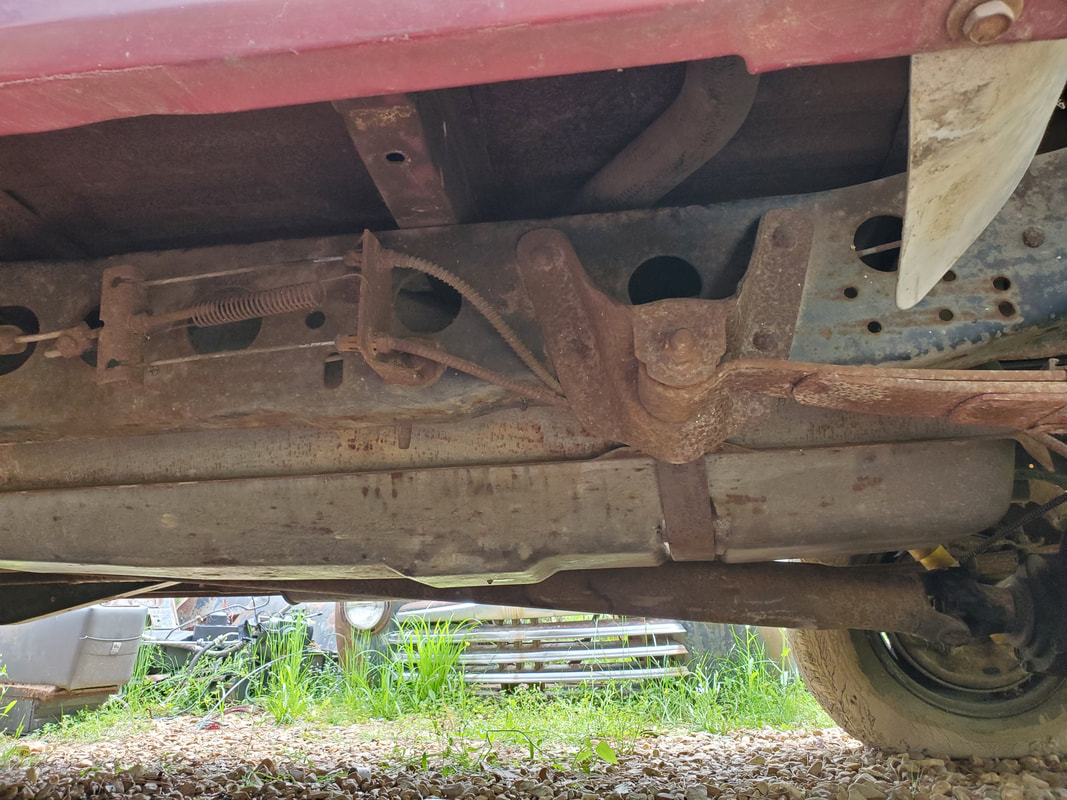
Fuel tank installed under truck.
The only thing left for me to do at this point with regard to the fuel system is installing the fuel line. I didn't have any bulk fuel hose in my stockpile so I had to conclude this session of the DOB work until I can get some hose. I can reach the ports on both the fuel tank and fuel rail to install the hose with the tank in place, so this is no big deal. With that done, I can move on to the next phase of the job, which is installing the proportioning valve on the brake system.
With my finally getting the engine running and tuned for the most part, I have the added bonus of having a rod or rods knocking. It really sounds like one is knocking but regardless the case, that is something that needs to be addressed somehow. Of course, the simple way to try and address it is by changing the oil and adding some oil treatment to see if its something that can be "masked" enough to get more life out of the engine before the inevitable rebuild. I ended up using 20w oil in the engine to get enough thickness that any worn bearings should have a good thick coating of honey between them. Add to this the oil treatment which in addition to any other additives, the extra viscosity should allow any worn bearings to shush in a medium of goo that should hopefully quiet down a noisy engine, in theory anyway. 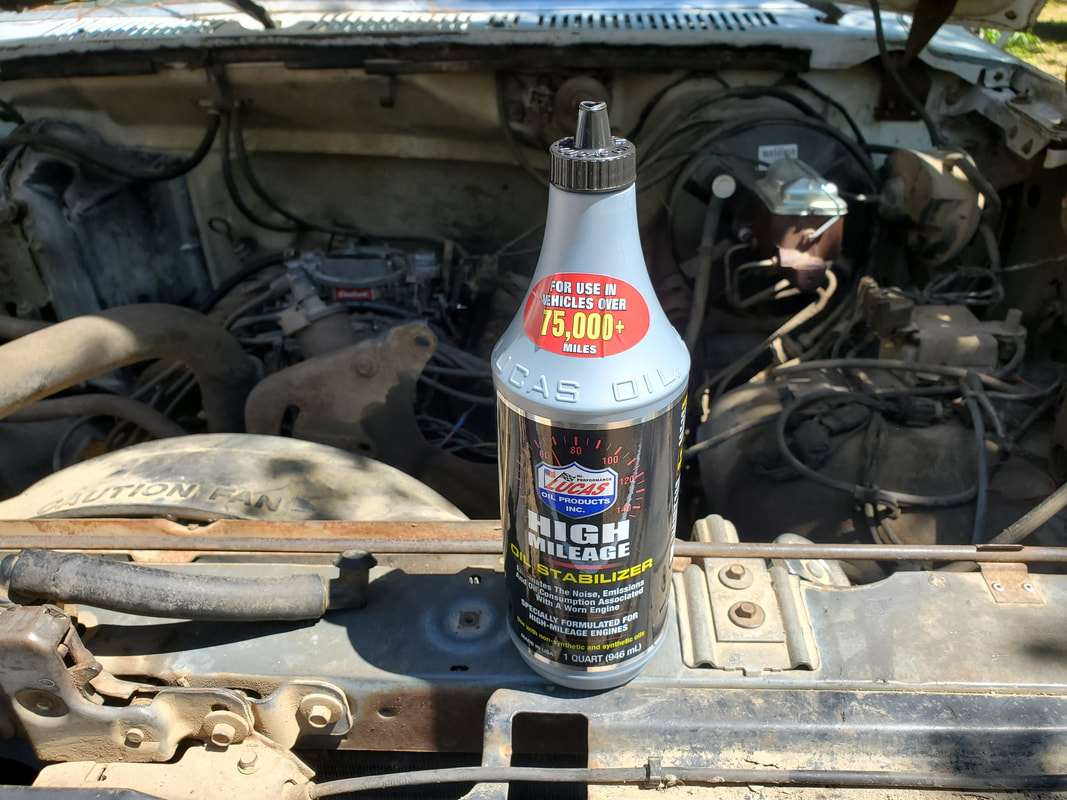 Lucas High Mileage Oil Treatment, for all intents it's fucking gear oil in a bottle. 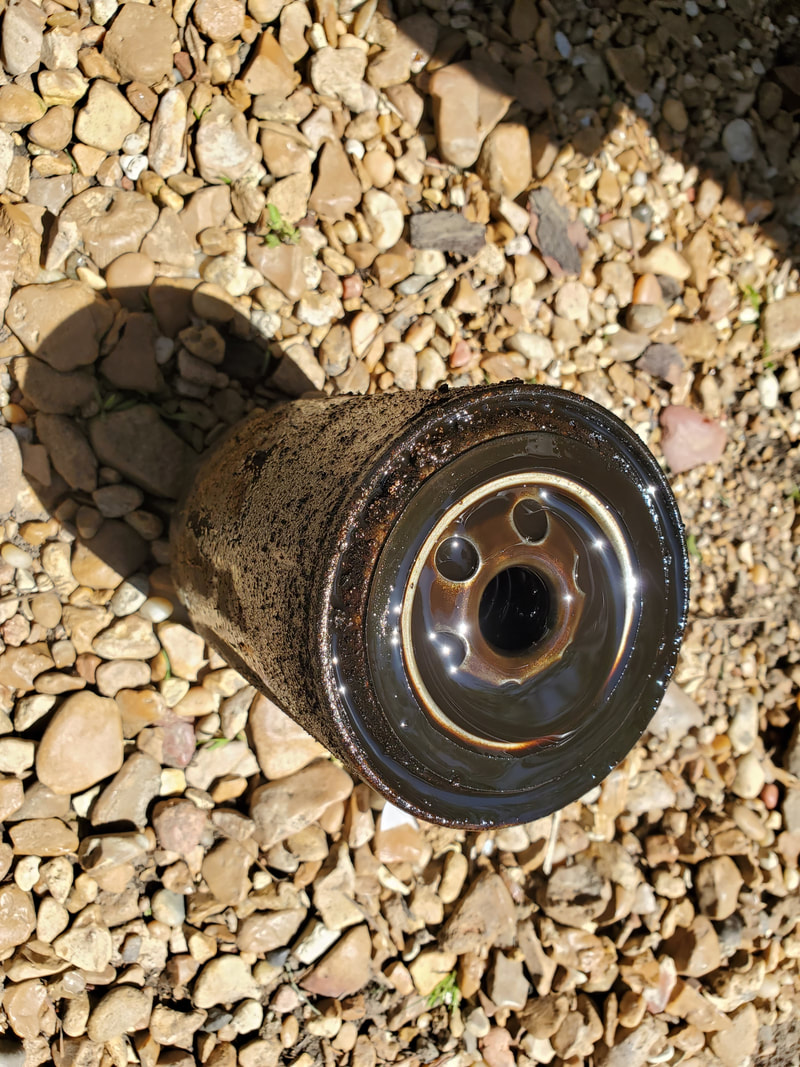 This old ass oil filter with this pure crude passing for motor oil. Of course, the rod knock was not eliminated. Its kind of funny but I have had episodes where what was thought to be a rod knock ended up being a warped flexplate, causing the bolts on the torque converter to hit at a certain point, creating the tapping that was heard while the engine was running. Now its not to say that's what's up here, and its a shaky ground to travel on because making assumptions that the engine may be fine and its a bad flexplate or loose torque converter bolts could cause me to double work when I have to pull the engine out again to replace rod bearings after all. It really wouldn't be too much work to put the engine on an engine stand flip it over to replace the rod bearings just to eliminate that variable regardless what's going on. Hell even replacing the flexplate would probably be smart too. By replacing both of these we can eliminate these two known causes to the loud tapping that can be heard in old engines. Another thing that I ended up having to do was replace the starter on the engine. With the advancing of the timing, it didn't take much effort to get the engine into a condition where the starter binds when gas vapors are being inhaled and ignited on one or two cylinders. Even cold cranking was kind of fatigued, which told me I had a hot starter. A hot starter is one that even when it still cranks for the most part, its drawing way more current than usual and as a result isn't producing the maximum amount of torque to the engine to crank it under load, hot or cold. 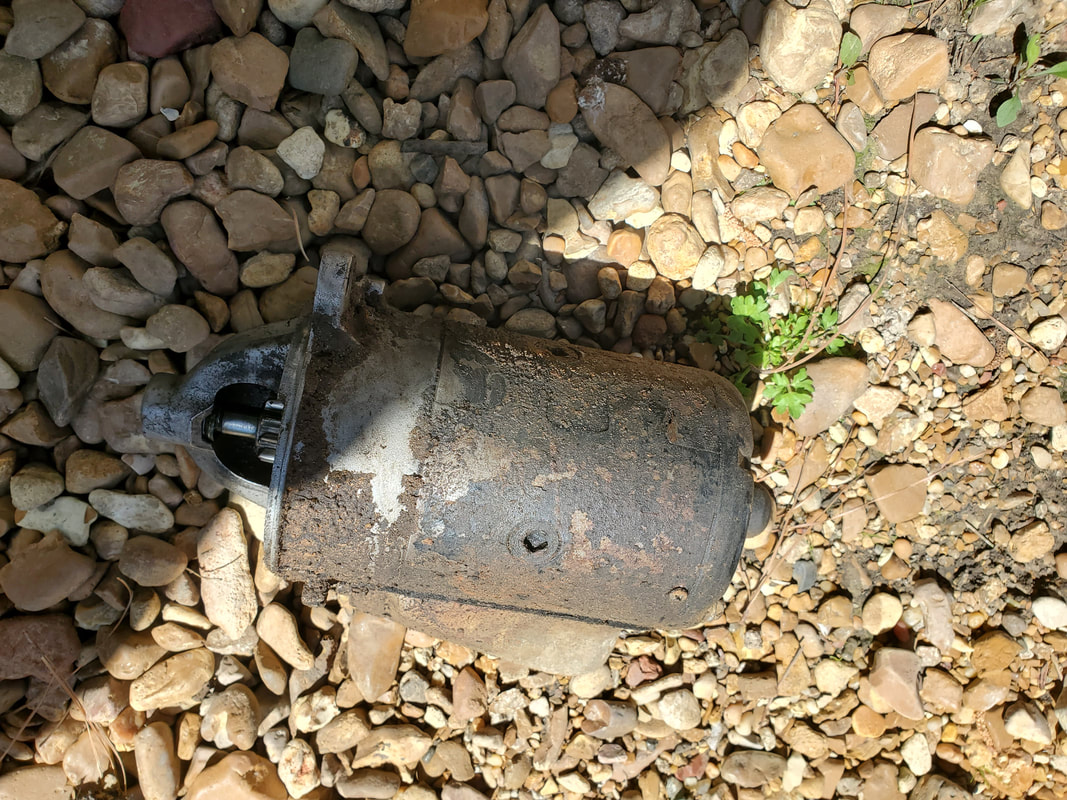 This old chunk of shit was the cause of all my difficulties in starting this engine the whole time. Upon removing the starter after trying to crank the engine cold and failing, I found the starter was rather warm, confirming what I already knew. I had spare starters of this type as the starters were the same for the 65 Mustang with the 289/C4, and the Rustang's old 351/C4/FMX powertrain. This starter was probably used for every SBF powerplant used from the middle 60s through the 80's. With that, I had spares. After a quick two mounting bolts and a small cable bolt, I had the new starter installed. Upon cranking, the fresh starter spun the engine around like a top, starting it up quickly. 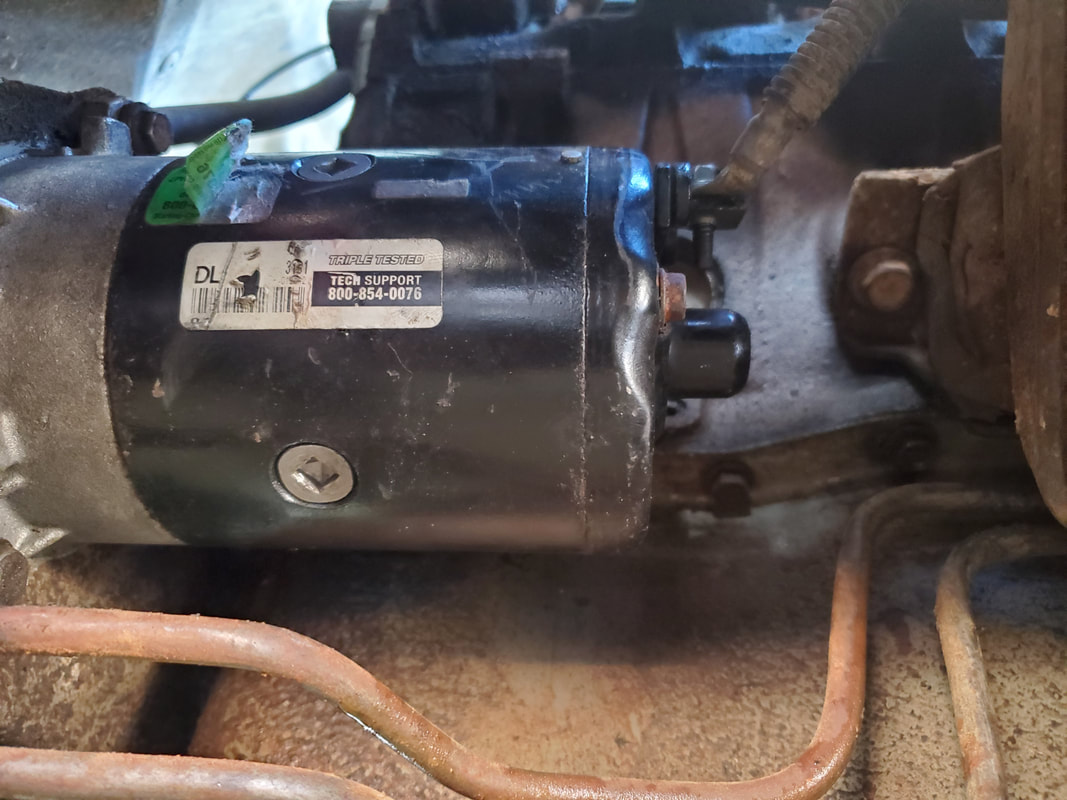 And this little clean beauty is the reason for my rejoicing in being able to crank the engine over with a minimum of effort now. One more thing that I wanted to do was test drive the truck, not so much because I want to make sure the engine is fine, we know we have something else going on with the engine, but to confirm that the transmission is doing its job. Just like with the engine, it would be anticlimactic to install this shit in the Rustang only to find out the transmission is shot. So, with the engine tuned enough to run and go into gear and still idle, we hopped in and drove the truck up and down the driveway and even down the gravel road down to the main road and back, running the truck up enough to induce shifting. Because it almost seemed like I wasn't shifting, I went ahead and manually shifted from 1st to 2nd then revved up to a speed where another upshift should've occurred and shifted up to 3rd, which I felt, albeit softly. I downshifted to 2nd, feeling the soft downshift then back up to 3rd, feeling it softly again. Now whether this transmission is set up for soft shifting to make the truck more comfortable to drive or its just worn, it does shift. Once everything is removed, I might even go in the transmission to tighten up the bands on the drums inside the transmission just to be able to compensate for normal wear so when its installed in the Rustang, it will either still shift softly, or with tighter bands, have a more crisper upshifting, either of which I'll be ok with. As long as the transmission shifts, I'm happy. 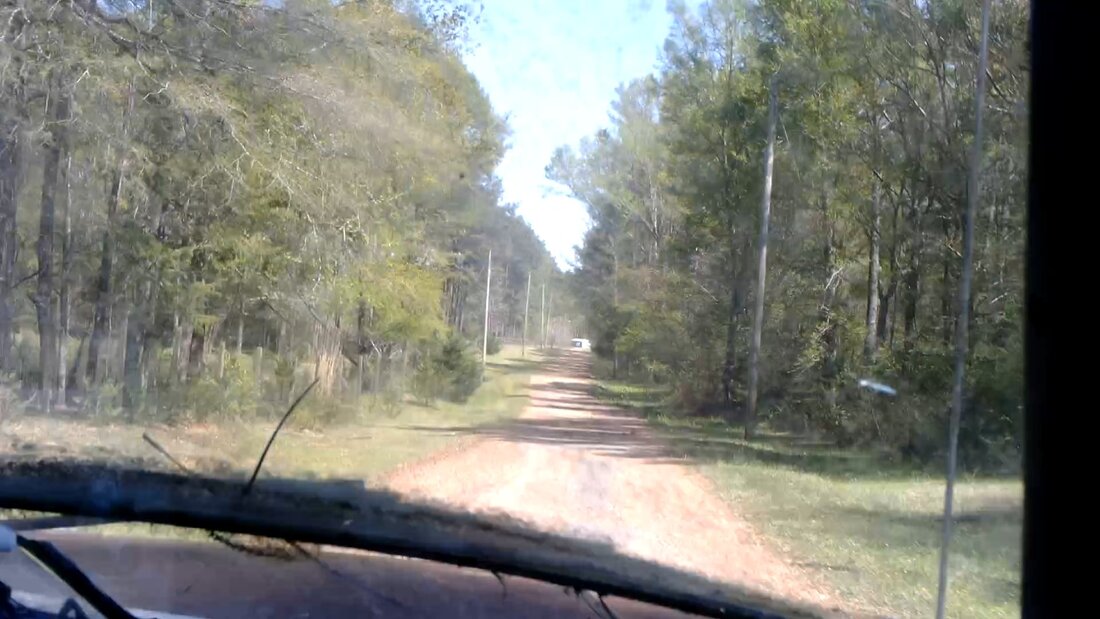 Going down the driveway during the test drive. Worst case scenario, I'll be froggy enough to hunt down a reverse/manual valve body to install in the C6 in order to make this transmission act as a manual transmission, as I've done before with other transmissions, including the C4 that was used behind the Rustang's 351 and 200 I-6 in past years. Since I really would rather have an actual manual transmission, I will probably just focus on getting things tuned on the transmission in its current state and just make sure to have the kickdown linkage hooked up with the right hardware or with viable improvised hardware so the machine will shift like it's supposed to in all circumstances. Until I can source a T-5, I'll just roll with the pussy automatic until then. But either way, the engine will have to come out, most likely to be torn down some to replace some internal components before getting to the point where we're planting this powerplant in the Rustang.
As usual I bring back another load of gravel to continue the mission of covering up the bare grounds within the compound to make work easier with the annoyances of mud eliminated. The NW area of the yard is almost completely covered after laying down this latest batch of gravel, with one more load most likely being the capping of this area. Once this area is done, I will go back into the chicken yard to cover up some old areas that have settled as well as the bare area that I was going to try to lay sod down. With chickens, there's no way in hell sod would last.
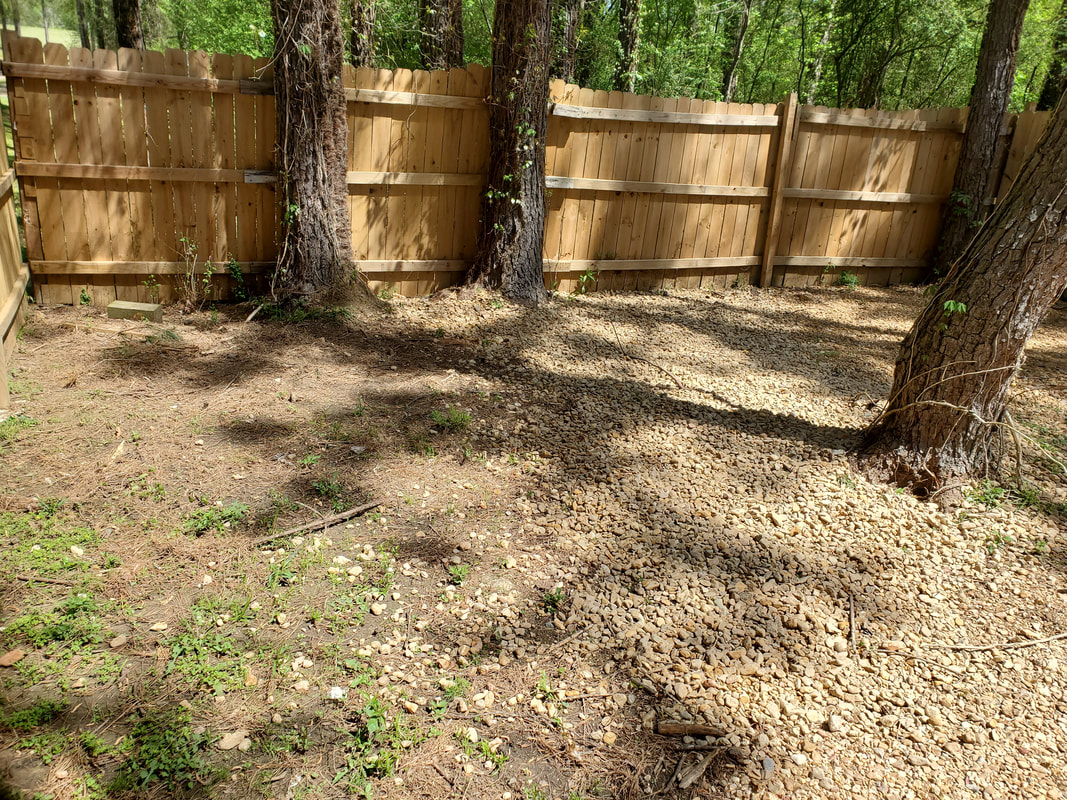
The NW area of the compound almost completely covered with gravel.
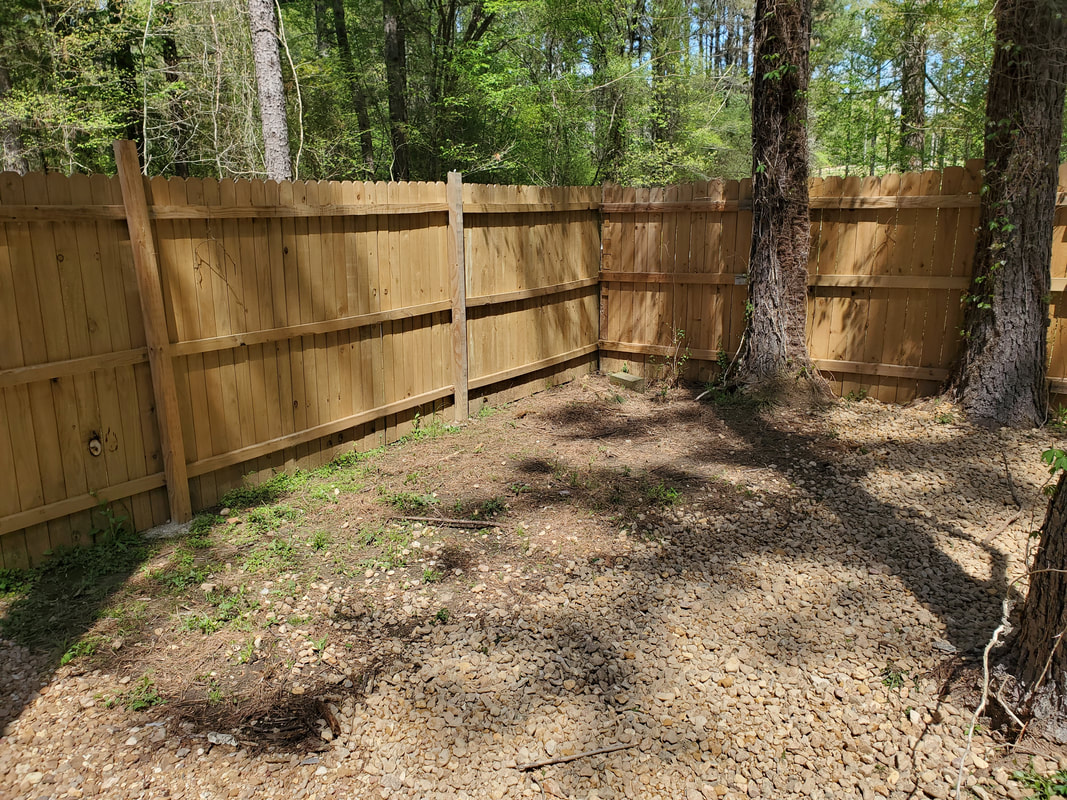
Another angle showing the remaining ground that needs to be covered.
Back in the garden, we managed to get another load of dirt with which to use to fill more planters and beds. I focused my attention on the three drum planters on the north side of the garden that each have a fruit tree. Two of the drums are actually halves from one 55 gallon drum and the other is an old garbage can that got chewed from varmints at the bottom and was no longer good for holding chicken feed. With more dirt in these beds, I can then start putting strawberries within to complete those mini "food forests" for the garden. 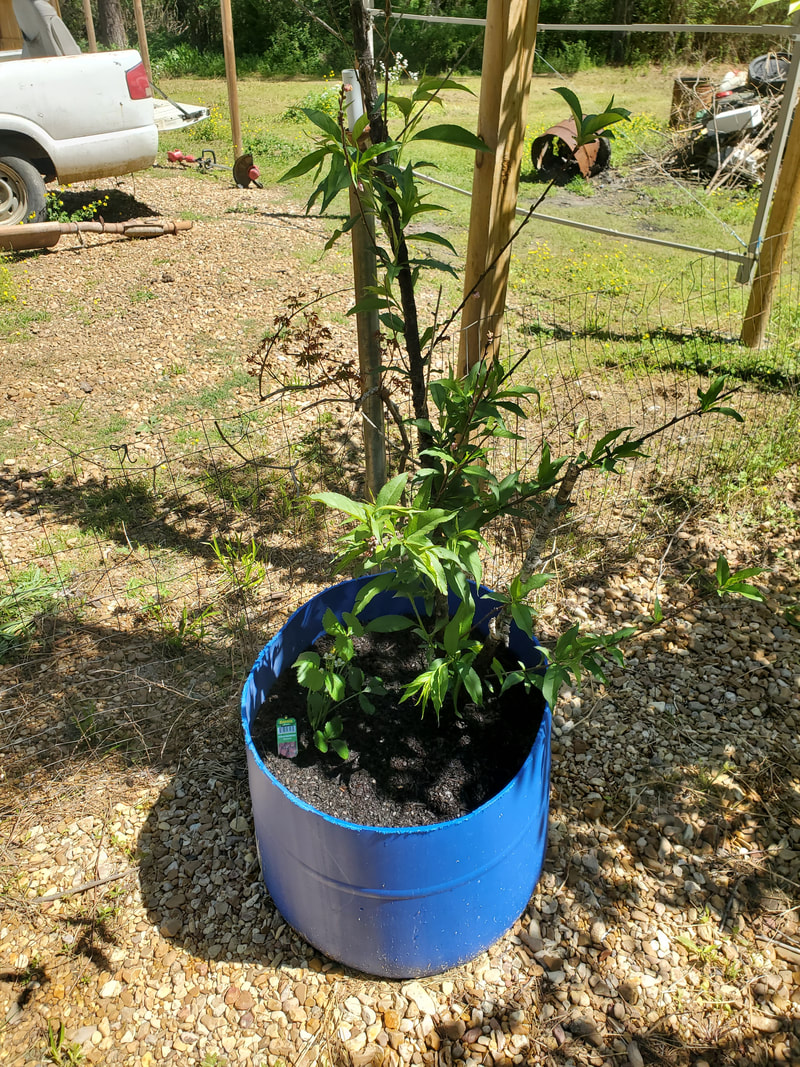
This should be a peach tree if I'm not mistaken, but with the extra dirt added I was able to plant an extra strawberry plant that I had from the last round of plant purchases.
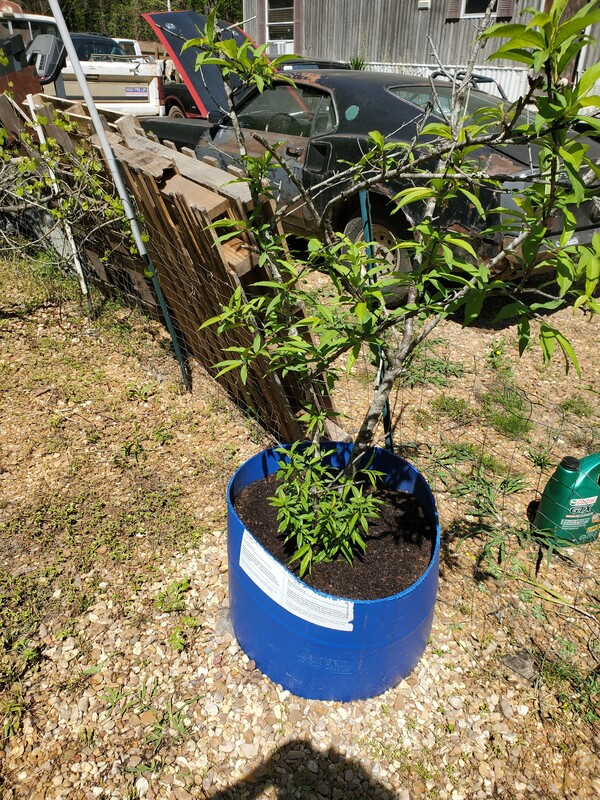
Another peach or plum tree that was transplanted into a drum planter and now filled up with more fresh nutrient rich dirt.
I then used this batch of dirt to fill several cat litter buckets in the raised bed arrangement within the Dog Kennel Greenhouse. Most of these buckets already had some compost placed within to further decompose so when I did put dirt in the buckets. They would have a head start with some nutrients to help whatever plants I to place in these buckets grow better than otherwise. After I get the buckets filled up I can then start dumping dirt in the two half drum raised beds that are also in the greenhouse. The last thing I'll have to do then is finish the construction of the hydroponic garden arrangements. 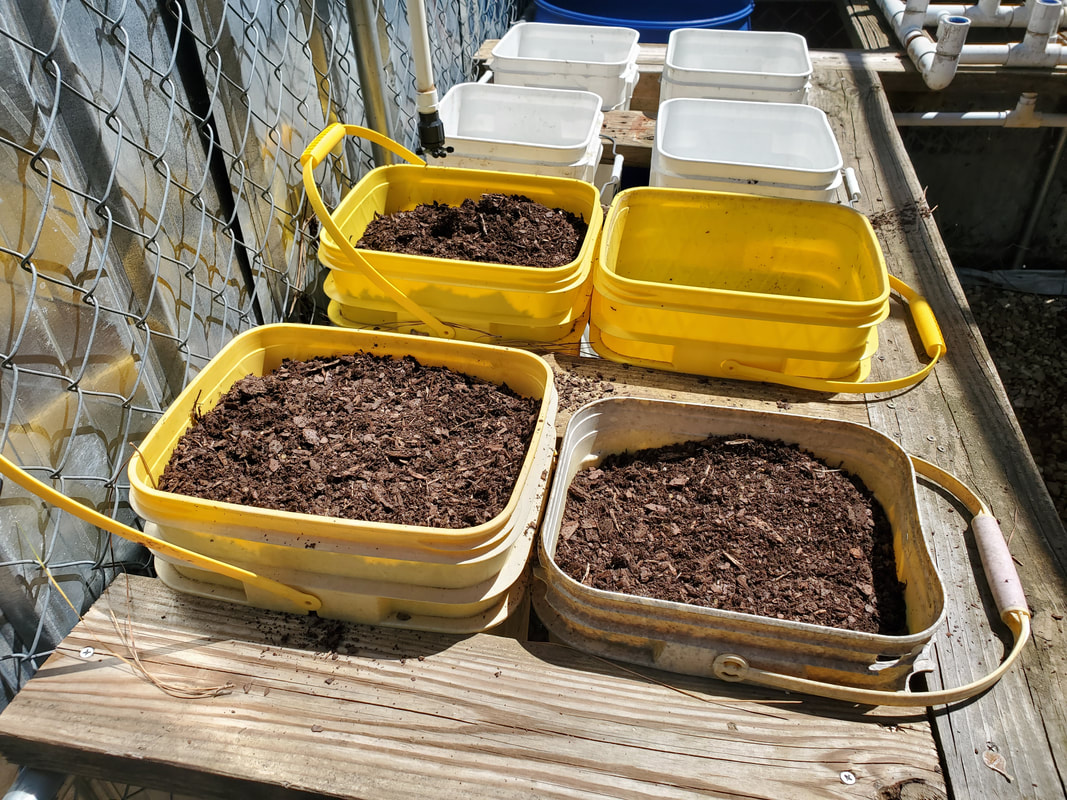
One set of bucket raised beds with three full buckets, ready for planting for all intents. I still need to set up the micro irrigation for these planters as well.
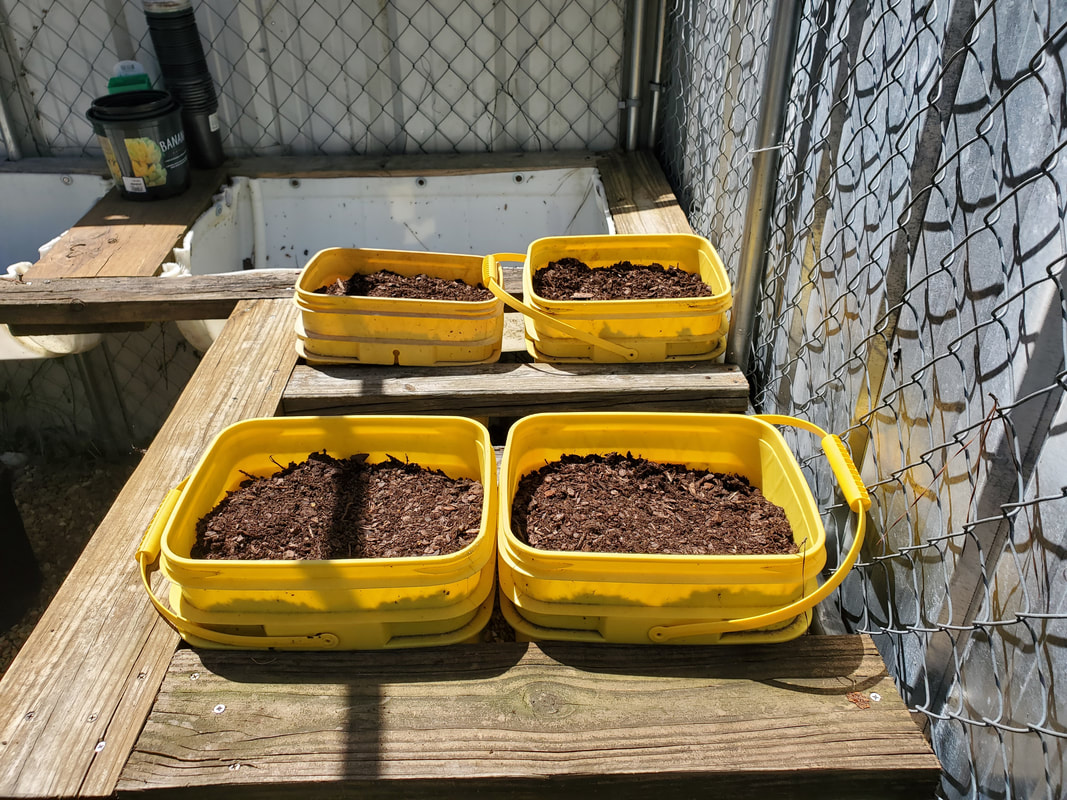
One whole bucket raised bed arrangement full of dirt and ready to go.
There's another thing that we ended up grabbing that we might've normally not wanted to try and mess with, but with our enthusiasm for having a decent growing season, we thought, why not. Lowe's had a bunch of small banana plants that come in gallon planter pots but can and should be transplanted into a larger vessel. These plants are supposed to grow upwards of 10 ft tall but the average is more like 6ft. These mini banana plants are of course not supposed to be allowed to get to freezing if one would want them to survive year after year. With that, it means the plant would need to be planted in a small enough vessel to allow the plant to be moved to a greenhouse or indoors in the winter. This would also mean that the plants would need a good dose of fertilizer to stay viable and productive. 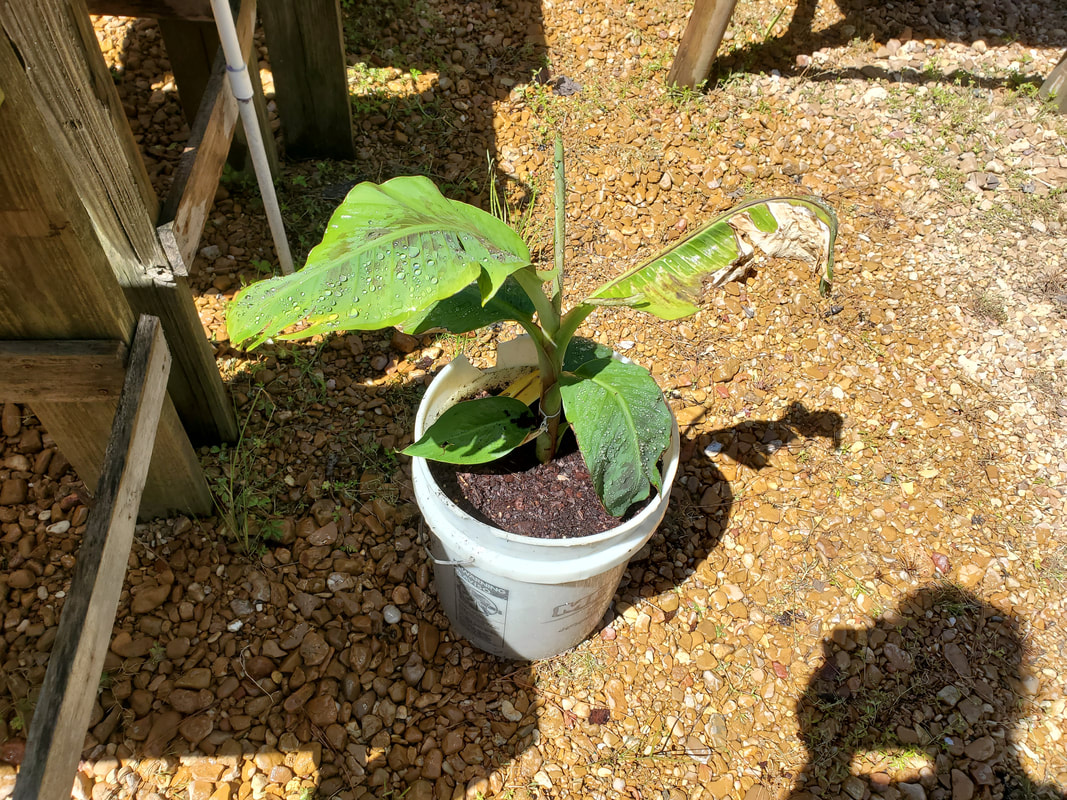
Again, we still have plenty of planters and drums to fill with dirt. The current planters should allow us to have a large production of veggies and fruits. Of course there's still plenty of real estate available to allow us to build even more raised beds and even set up more fruit trees in drum planters in a neat manner to optimize the routing of micro irrigation lines so everything can be watered properly. Once completed, this garden should be able to produce more fruits and veggies than we ever thought we could produce.
With the first round of plants laid out in the garden, I still had room for more plants in some of the other raised beds. I had to get more dirt to further fill some raised beds as well as the drum planters for the most recent trees. Even the bucket planters in the Kennel Greenhouse need to be filled with dirt to get them ready to be able to plant stuff, even before finishing the actual structure. Unlike the one local hardware store where I picked up the first batch of plants, I ended up checking out Lowe's for a better selection of plants, albeit at higher prices. I grabbed another batch of sweet potato plants so I can get another round of those going in some of the raised beds like we did last year. Unfortunately it is a little too late for regular potatoes so I didn't even bother to grab any of those. Besides, after planting some other plants in the planters that would've held potatoes, I wouldn't have the room for the number of eyes that would've been available anyway. 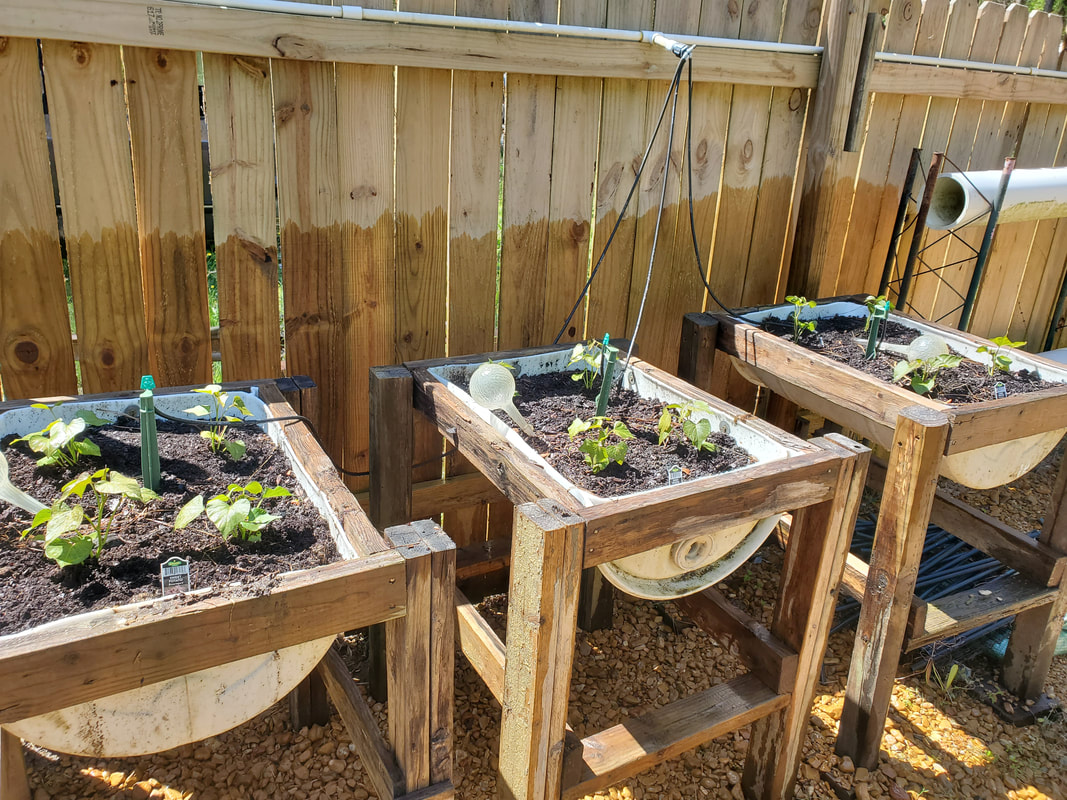 Three raised beds with four sweet potato plants each, for a total of 12 plants. Another selection that I picked up from Lowe's was sweet pea plants. We did get these last year and they were actually pretty decent producers, yielding plenty of pods to allow us to cook up bean pod stews with bacon and potatoes and sometimes gumbo/soups with a bunch of other veggies. These plants will require some form of trellis when they get bigger in order to support the plants vines. More than likely I will have to spring for more tomato cages as I had used for last year's bean plants. At least the tomato cages are a pretty universal device that can work for tomatoes, beans and even cucumbers. 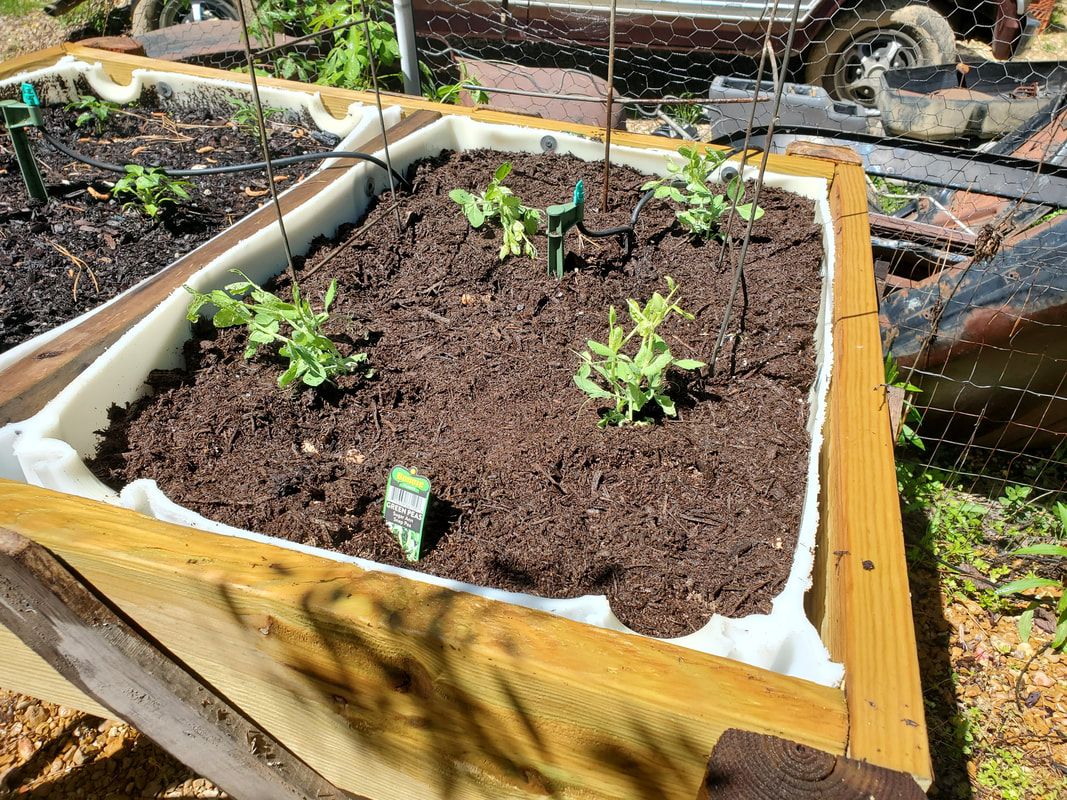 Batch of bean plants in a raised bed with some metal thingies in place to serve as a trellis network for the plants as they grow. 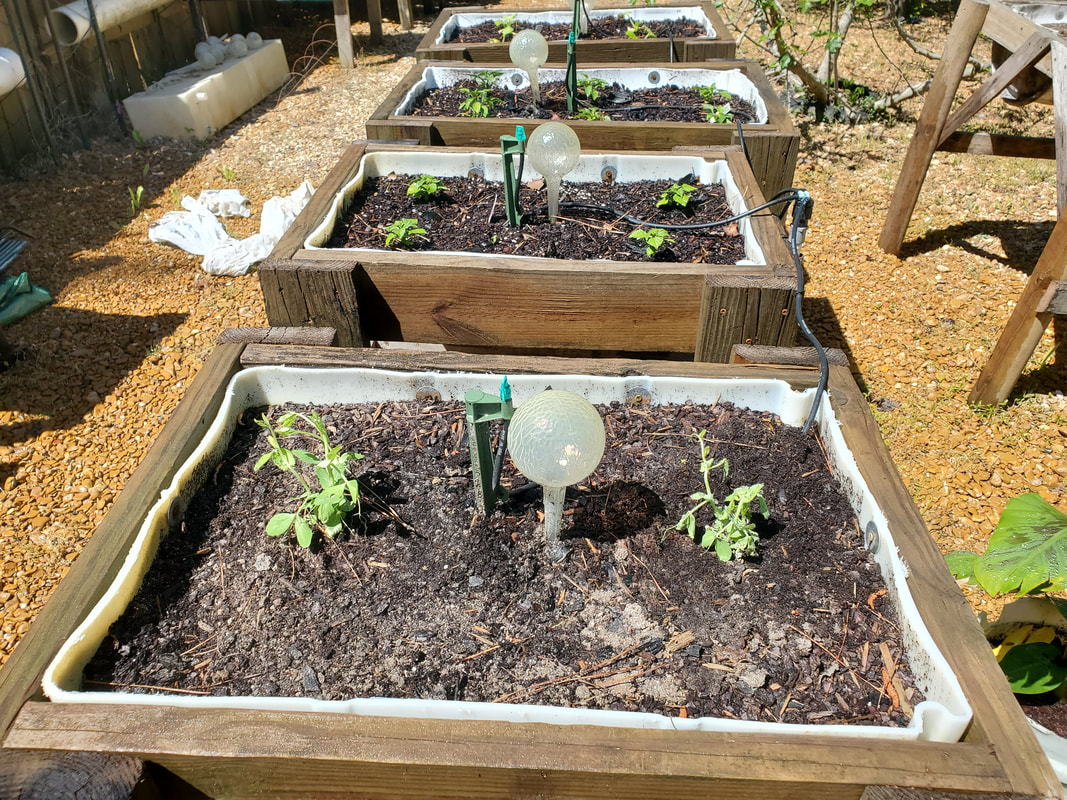 The final two bean plants from a flat of six plants in a smaller raised bed on the other end of the garden. As had been noted, most of the drum raised beds have micro irrigation sprinklers in place for watering. Another unique plant that I found at Lowe's was spaghetti squash. This squash has insides that mimic spaghetti, and if I'm not mistaken, can be cooked up in much the same way as the starchy grain based original. This is an heirloom variety of squash, meaning the seeds harvested from the squash can be saved and used with the knowing that the offspring will reproduce the same plant as the parent plants. Of course these plants were a little pricier but worth it if seeds can be saved from these veggies to reproduce more plants later on. 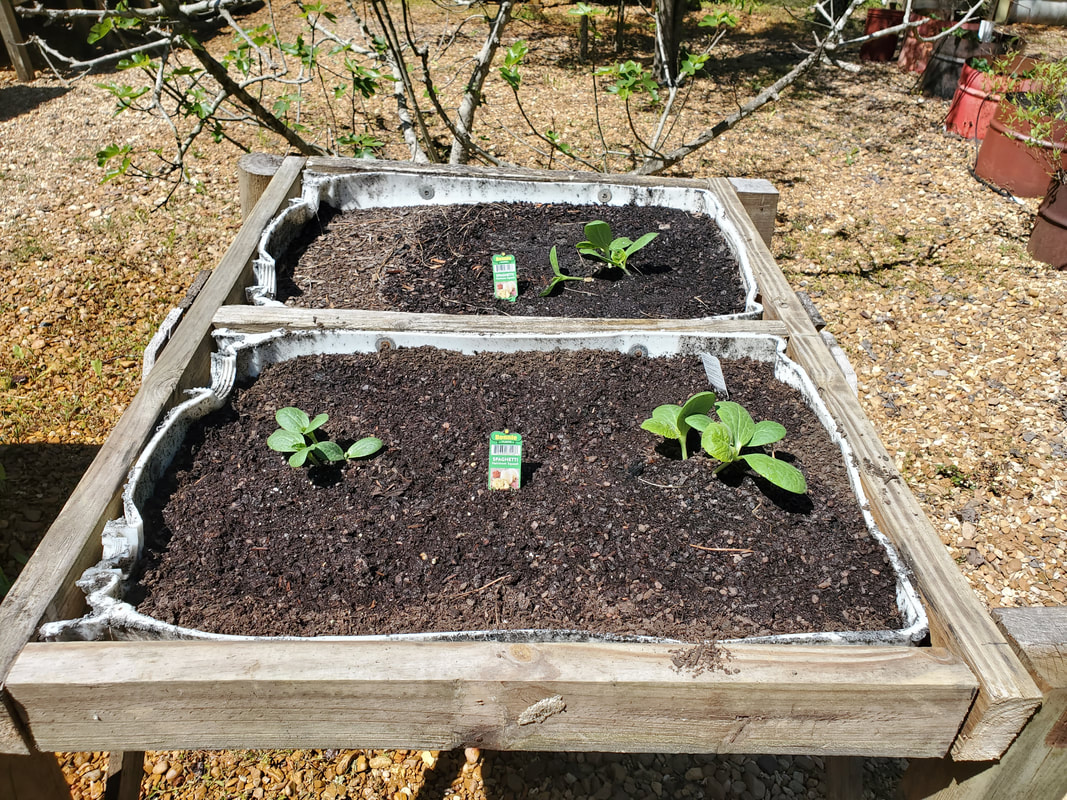 Three spaghetti squash plants in a raised bed pair. There's still a slot for one more plant, which we'll probably grab soon enough. I still need to run conduits for more micro irrigation to these beds, and the future beds I can set up alongside this arrangement. The last thing in this session of planting was a pair of basil plants, herbs. These are one of my favorite herbs due to its aromatic leaves and the flavor it imparts into soups and stews. I planted these plants in the same raised bed that I used for the herbs last year and that still currently has a couple of herbs that overwintered well enough to come right back this spring. With a dose of some fertilizer, all these herbs should be off to a hearty start and a healthy run this growing season. 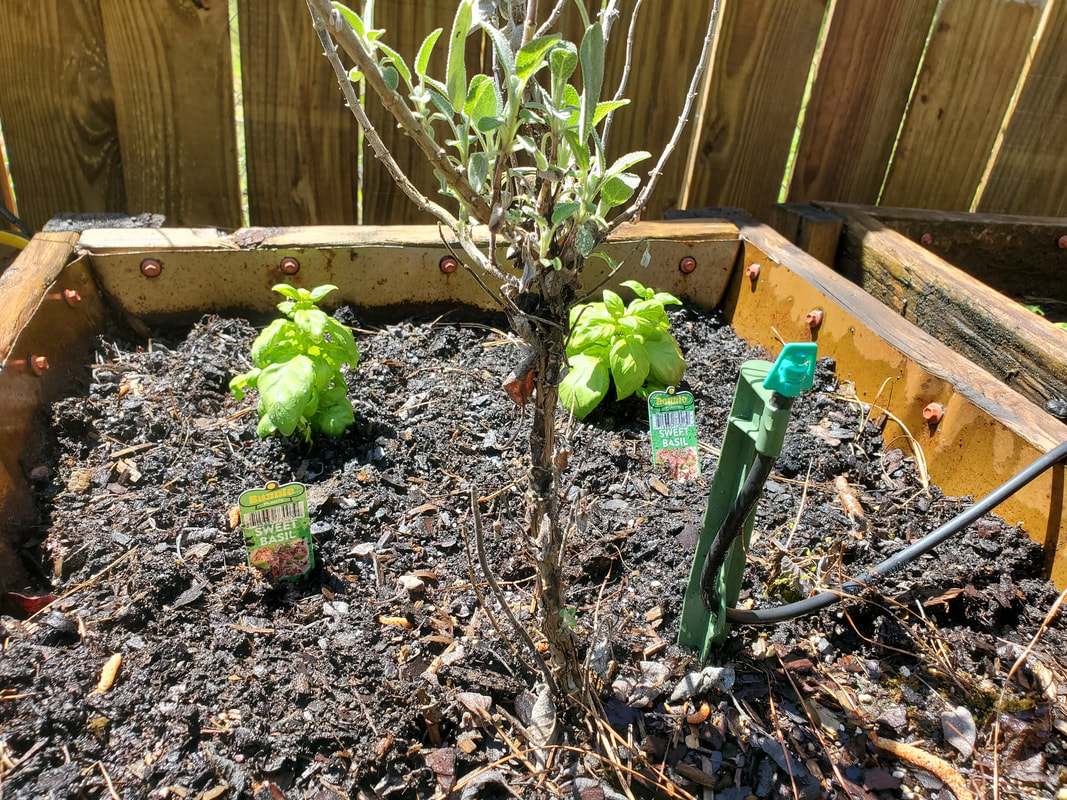 Pair of basil plants in the raised bed with a couple old herbs from last year still alive and kickin' in the same bed. Even with all this planting that was done, there is still plenty more to do as far as getting the garden more complete. As stated before, the bucket beds and drum beds in the greenhouse need dirt and micro irrigation set up so I can grow plants in these mediums even before the greenhouse is complete. The drum planters that I set up on one end of the garden to transplant some fruit trees will need more dirt and even strawberries to fill the empty dirt around the trees to create more of these mini "food forests" for the garden to optimize the production of the garden. I still need to get the hydroponics gardens either completed or repaired so I can put them into play as well. If I don't get more apparatus online to grow summer plants, I can at least have the stuff ready to grow for the fall season, namely greens like lettuce and spinach plants, maybe some potatoes can be grown then after the other summer plants were harvested from the beds I would use for potatoes. |
