|
I was in the garage trying to clean up one day and was going through a storage container full of miscellaneous crap when I stumbled across this old fluorescent lantern that my old man had from the 80's. This thing was kind of cutting edge in consumer technology at the time, a rechargeable light that didn't have the short life span of incandescent bulbs nor the need to have to swap out batteries all the time. This thing was pretty good for its time. Obviously being old as it was, the battery had long since died but the electronics inside were still good, along with the bulb. Even the container was still solid, albeit not able to be snapped together like it should. I had removed the old rechargeable battery and installed two 4 battery holders for D batteries, totaling eight D batteries. Both holders were wired in parallel to deliver 6 volts at double the amperage of the single D battery pack. This thing could've still held its own as is, but in today's world we've advanced to lithium batteries and almost everything we can think of that's worth mentioning is rechargeable. Not to mention CFL's and other fluorescent lights have fallen to the wayside as LED light technology has advanced leaps and bounds.
With that, since this old light did hold a bit of a sentimental value to it due to it being a relic from a distant childhood, I didn't want to get rid of it so I figured, why not just convert the thing to the new tech. I already had some 12v LED light strips that were geared for use in automotive applications being 12v powered. These LED's are the COB (chip on board) technology and are such a low amperage draw that it doesn't take much juice to run these things. Not to mention most of these LED's will blind you. Only thing I needed was a lithium battery pack. I ended up getting a battery pack online that included the plug in charger. This battery is rated at 9800 mAh (9.8 Ah) at 12v. This thing doesn't weigh much and is about a third the size of the same rated lead acid battery. This battery pack will fit in the light's shell with plenty of room to spare. Also the battery pack has the charging jack built right in so the only wiring I'll have to worry about is hooking the battery up to the LED's. 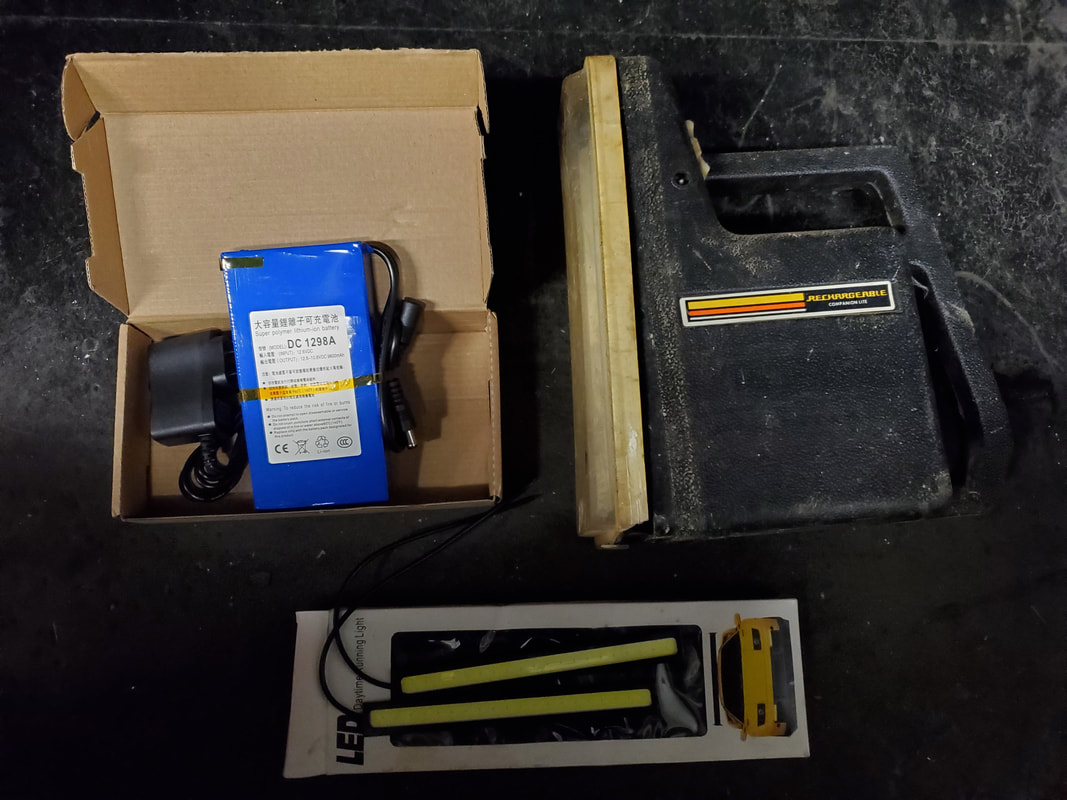
Old fluorescent light with lithium battery and LED strips.
I disassembled the old light and removed the battery holders and the fluorescent circuit board along with the reflector that contained the sockets for the bulb. I'll still be using the reflector so I had to pull the bulb plugs from the reflector and just prep that so I can install my LED's in place. I didn't want to get rid of the old electronics since I may very well be able to use this stuff in another application elsewhere, especially the battery clips. Hell I can use rechargeable batteries, even lithium equivalent D batteries and just wire up the set to be recharged using whatever means I feel is necessary for the application. 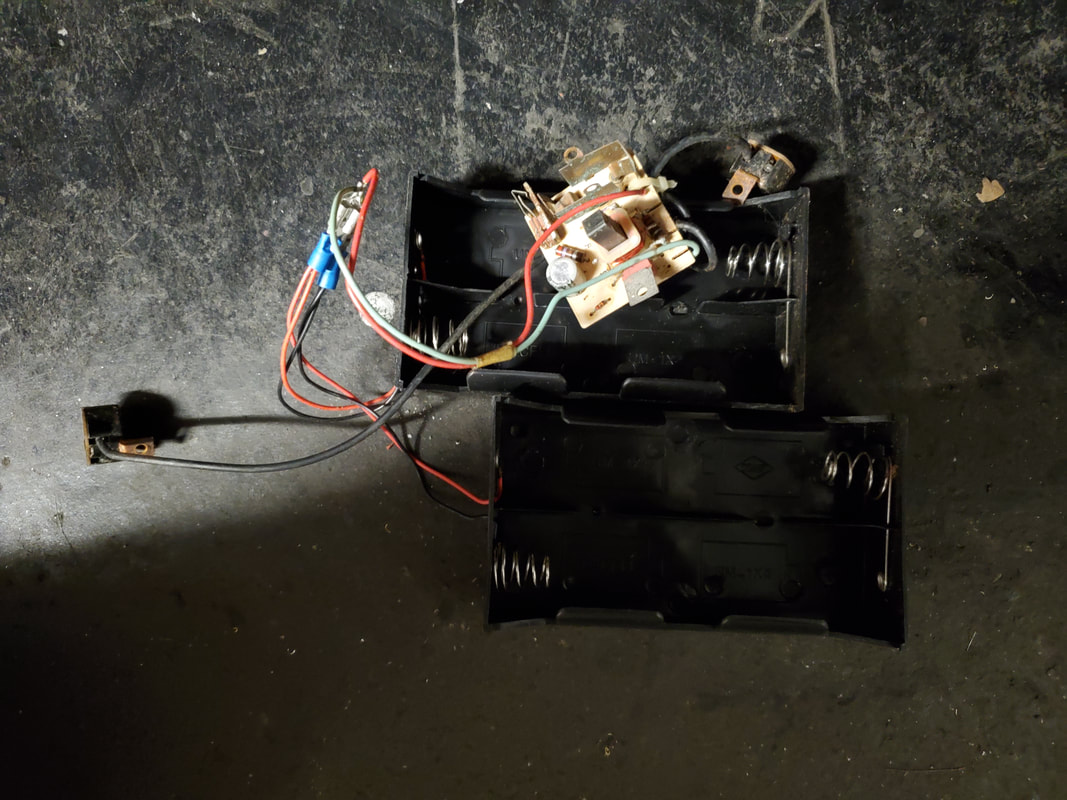
Old battery holders and ballast circuit board for fluorescent bulb, removed from light housing.
As for the preparation of the reflector, I started off by gluing some aluminum foil to the surface of the plastic. After getting the foil as smooth and ripple free as possible, I took both LED strips and glued them lengthwise to the middle of the reflector. I then used my hot glue gun to glue the wires from each LED strip to the middle of the reflector, leading up to one end of the unit to run behind it and into the light body. 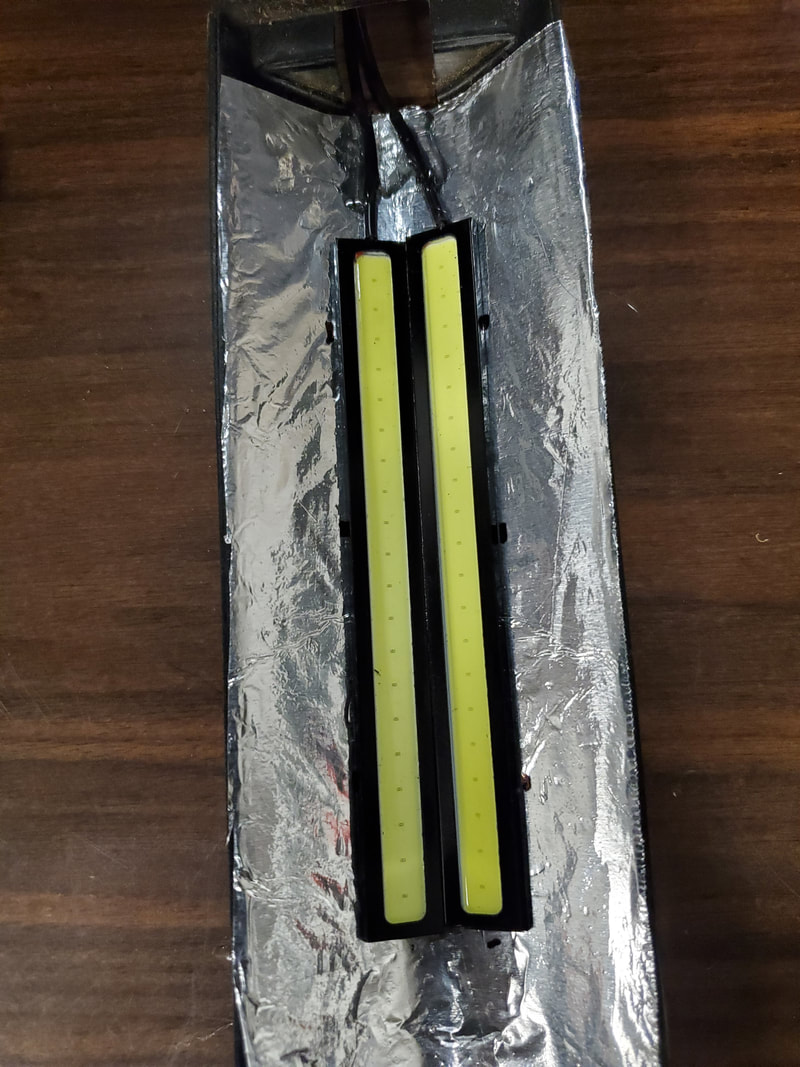
LED strips glued to the reflector base along with the aluminum foil.
The next thing I did was take the plug connected to the lithium battery and size it up with the hole that was used for the charging port from the old system. I ended up having to drill it a little bit wider to accommodate the plug. Afterwards I placed the plug in the hole from the inside and having the plug just flush with the outside surface of the light fixture, I glued the plug in place with hot glue. Having the plug in place like that simulates how the light used to be set up before. I then cut the other plug end from the other wire since I needed the bare wires on the battery to hook them up to the LED's. From there I hot glued the battery pack inside the light housing, using enough glue to ensure that the battery won't break free and move around when the light is in use or in transit in a bag or something. After gluing the battery down I then addressed the switches. 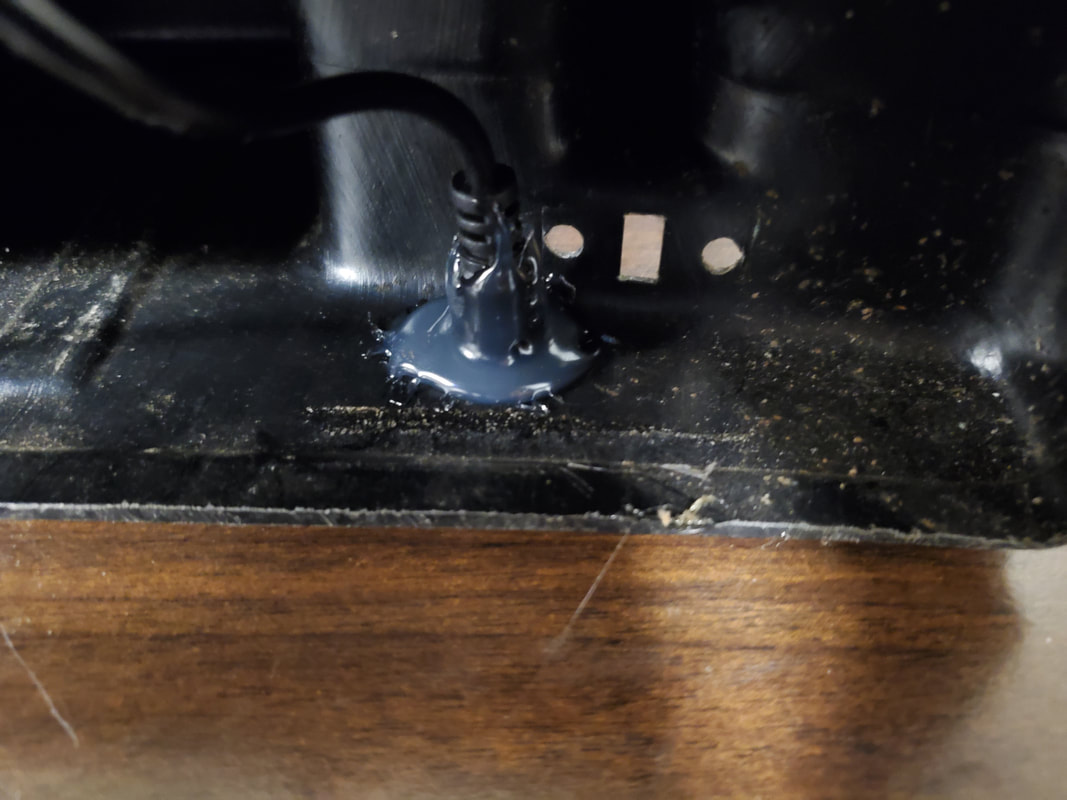
Charging plug of lithium battery hot glued from inside light housing.
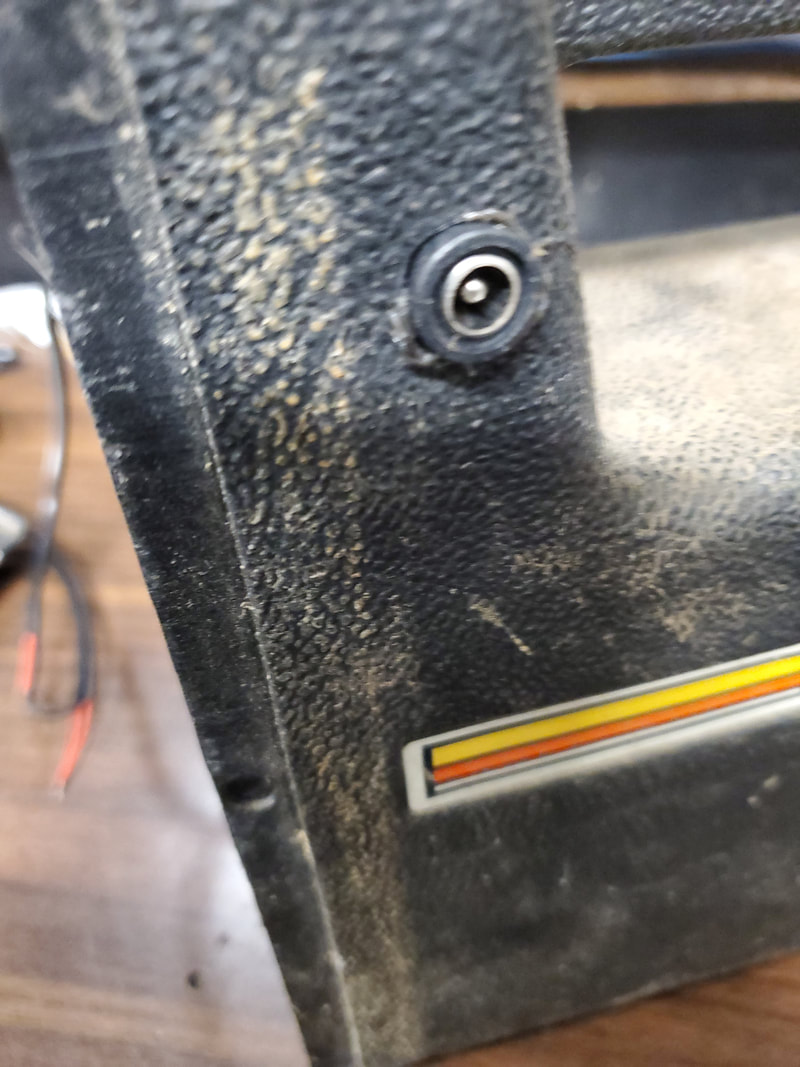
Charging plug as it rests in light housing, flush against the body.
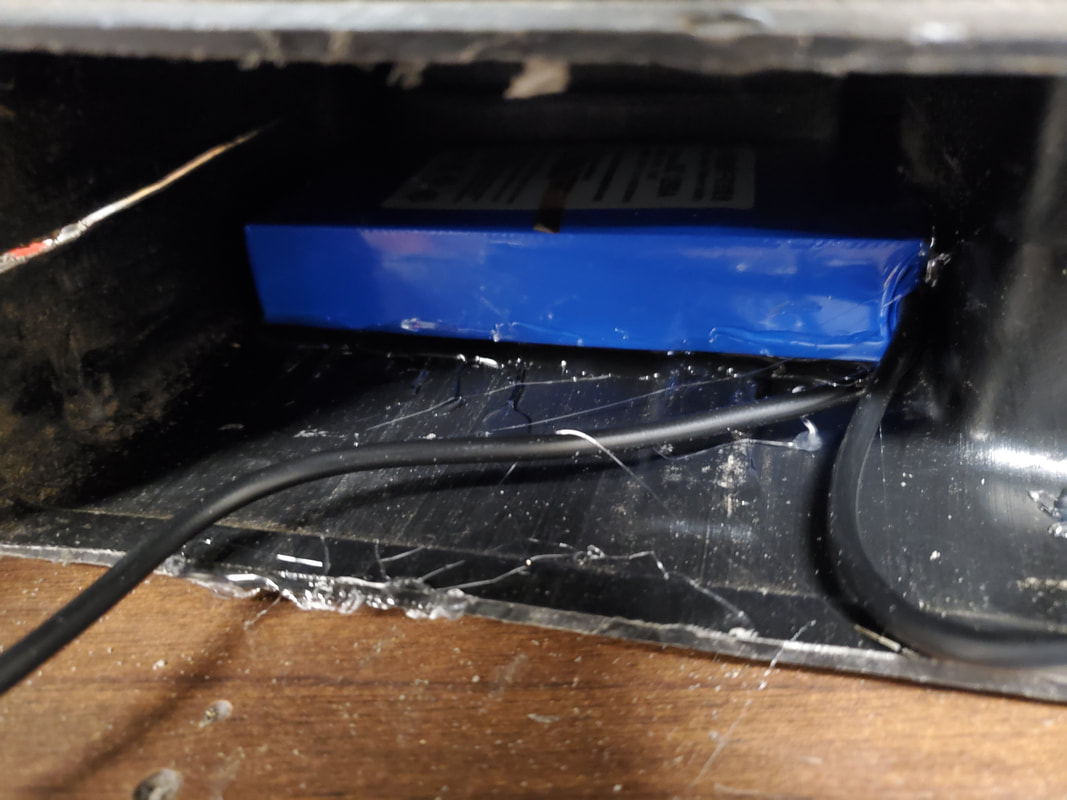
Battery pack glued in place inside the light housing.
Since the battery pack actually had a small switch on it that was tied to a small LED to indicate that the battery was ready for use, I had to accommodate that switch since I couldn't leave it on all the time otherwise even the little LED light will eventually drain the battery. In order to do this I glued the battery in a way where it allowed me to cut out a small corner of the light housing's skin to expose the spot where the switch would be situated. This allowed me to be able to flick the switch on and off easily while not being too conspicuous either. From there I glued the wiring from the two LED strips together along the back of the reflector to keep things neat. I wired the two sets of wires in parallel so I could wire them directly to the battery's wires. Now another weird thing had occurred that I will fast forward to then go back. When I did test the unit out with the charger, I found out that the battery pack was wired up in a way where even when I turned the battery's switch to the off position, when I plugged up the charger, it routed power through to the LED's as well, turning them on as well as charging the battery. I ended up having to add another cut off switch to break the connection from the battery to the LED's during charging. I did this by cutting a small rectangular hole to accommodate a small rocker switch that I snapped into the hole. I tapped into the positive side of the LED to battery wiring, hooking the switch up there so when I put the switch in the off position, the LED's would not get power when the charger was plugged up. Simple solution. 
Hole cut in light housing to accommodate switch on battery pack.
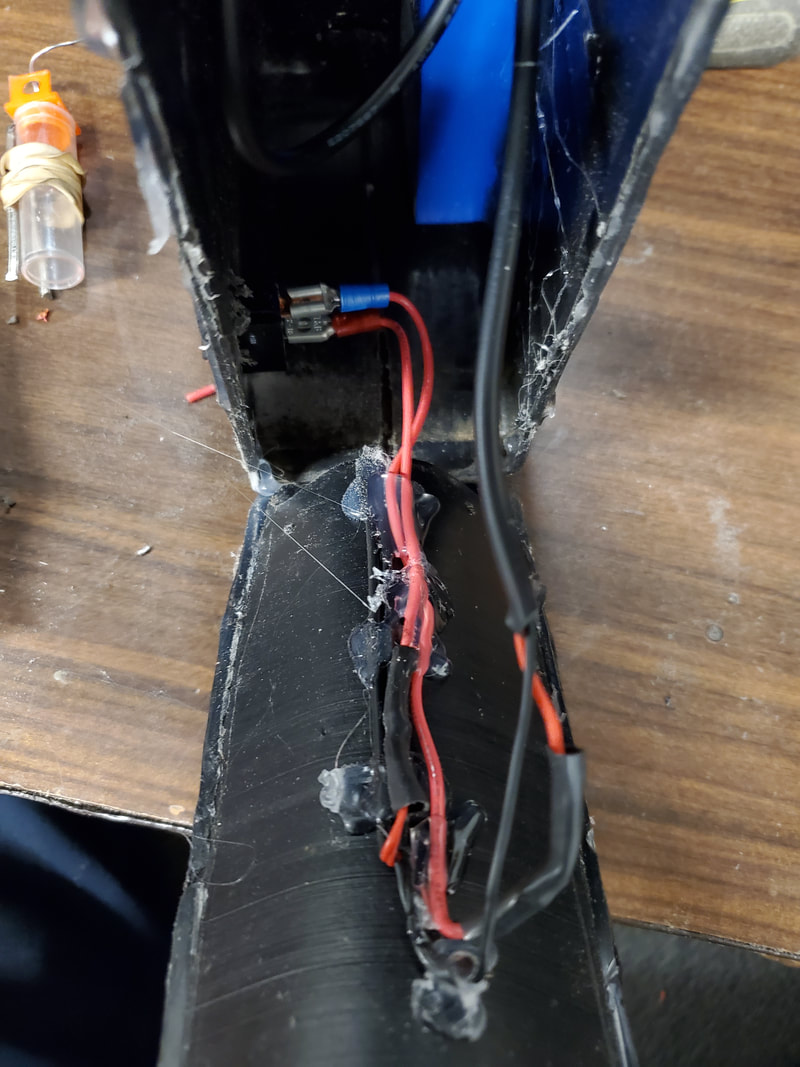
LED wires glued to back of reflector and the cut off switch secured in place in the light housing.

Rocker switch mounted in light housing.
Coming into the home stretch I went ahead and got the reflector mounted. I ended up using the hot glue gun again to glue the reflector to the opening in the light housing. Despite the distortion of the old plastic, I got the reflector secured in the opening. Lastly, I had to mount the lens over the reflector. Since the lens was faded with age, I took time to wipe the plastic as clean as I could get it. Surprisingly I got the plastic pretty clean and clear, better than it ever had been since I had the light. From there I hot glued the lens over the reflector. With that, the light was all done. 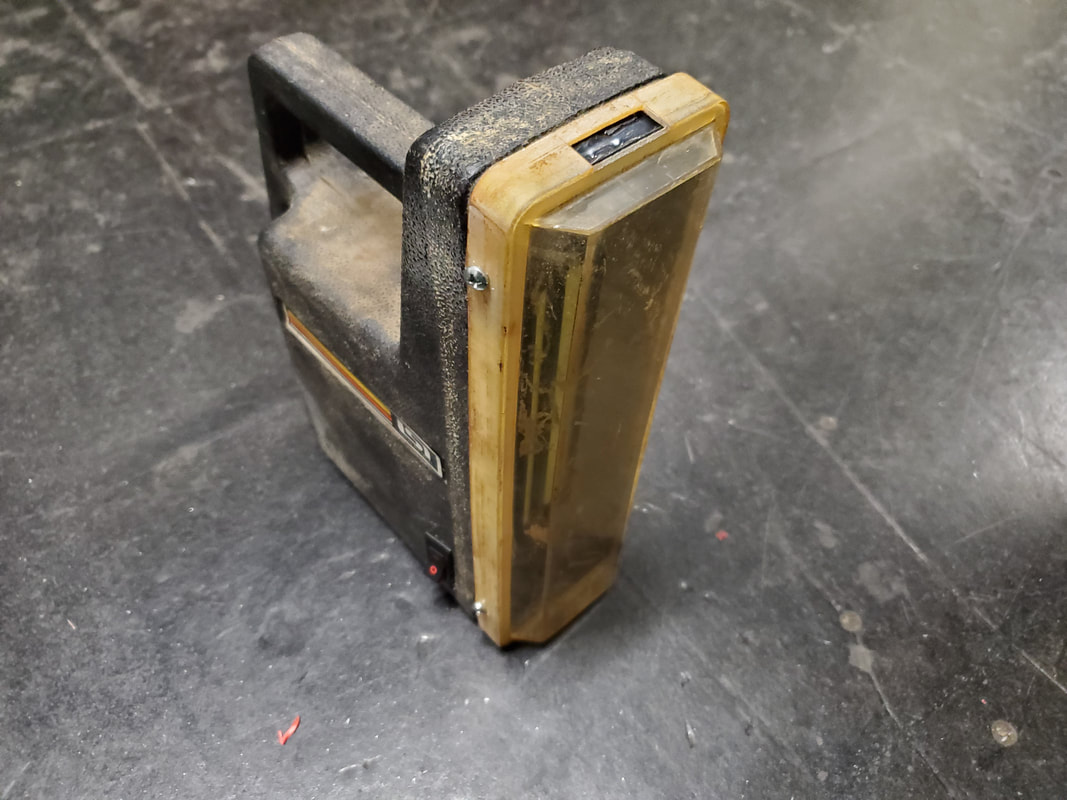
The completed LED lithium battery powered lantern.
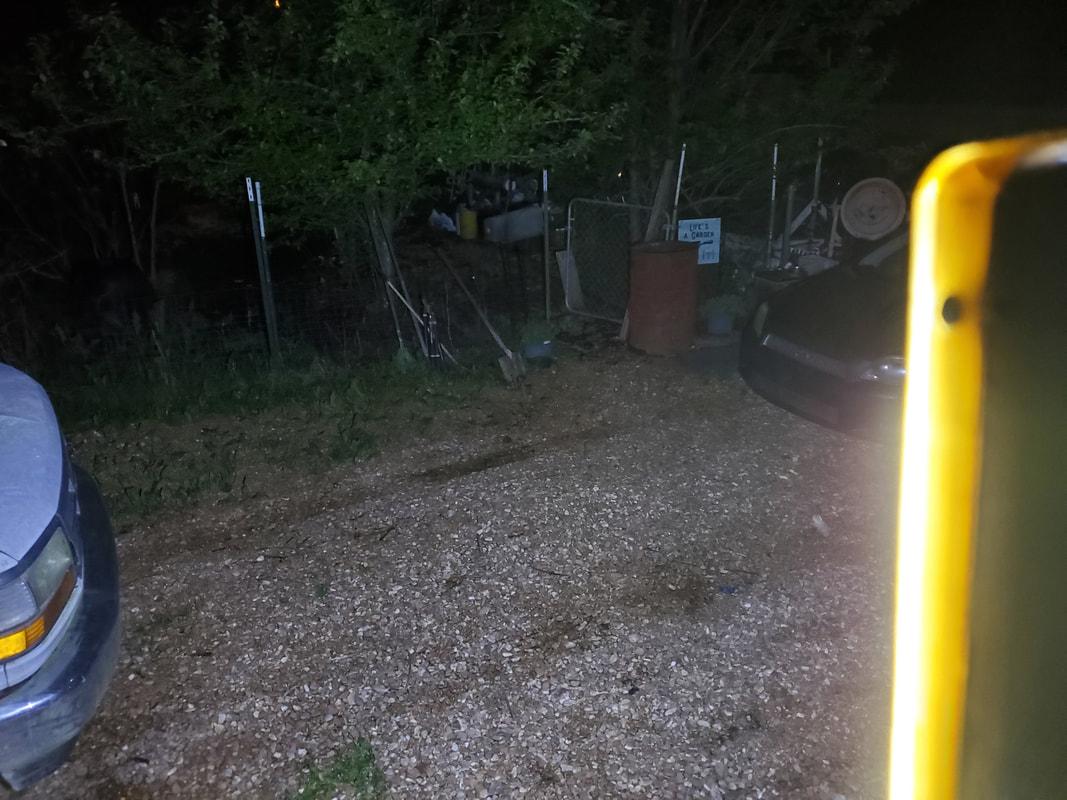
Lighting up the driveway with the lantern.
I was pleasantly surprised at the brightness of the two LED strips when getting the full 12v power from the battery. This light is more than capable of holding its own when it comes to viable emergency lighting, being more than able to light up a good sized area as can be seen in the last picture. In the house is even better. Funny thing too, since these LED's use so little power, I can only imagine that the battery will probably be able to power this thing for a long long time. I need to do an endurance test to see just how long this thing will run so I can have a good idea of just how useful this light is. Now I know many people out there will balk and say that I could've bought a commercially made version for very little and not have to go through the "hassle" of building one from scratch. It's not necessarily about saving money when we do projects like this, its about keeping our creative blades sharp and in the case of small memorial items like this, you may not want to just toss it aside as its mere being holds a lot of memories, so why not spend a few bucks and make it something that has a practical use while holding on to the memory. Of course I could've bought an LED light that worked even better than this one but whenever I pick this one up a memory will open up that will bring me back to the 80s when I was a kid seeing the old man using this light and thinking that it was way better than the dim flashlights we were all used to at that time. Sometimes you have to put costs aside to keep your creativity sharp. It's the easy access to just about everything known to man that has stifled our collective creativity to where we don't bother to build anything anymore. Even though some of us might be able to get our hands on components for free from salvage or just having the stuff laying around, sometimes it's worthwhile to buy the stuff new just to be able to build the gadgets and know that you had a hand in this gadget's creation versus being like everyone else where the only hand you had in its creation is opening the box to pull it out after you brought it home. So go ahead, don't be afraid to build something even if it does cost you a little more than buying the same thing from the store.
0 Comments
After finishing up the chicken yard fence in its entirety, my next move was to start getting the stage set for erecting the eastern perimeter fence. This fence line would create a narrow patch of land that will serve as our new firewood storage site. The firewood will be stored at the back of the area, starting against the north fence. The existing firewood will be staged at the back moving out, with new wood stacked working our way out towards the driveway. I will lay down gravel all the way back through here, blemding the ground with the rest of the driveway/midway area so as to not have to worry about grass or other landscaping issues. Pallets will be laid on opposite sides of the area, creating a central corridor to allow us to navigate the wheelbarrow through for collecting or depositing firewood.
Anyway, I had to get things started by drilling post holes with the gas auger, working my way all the way down to the edge of the garden area. From there I was able to drop the posts in the holes, fill them in with concrete and make sure they were plumb. 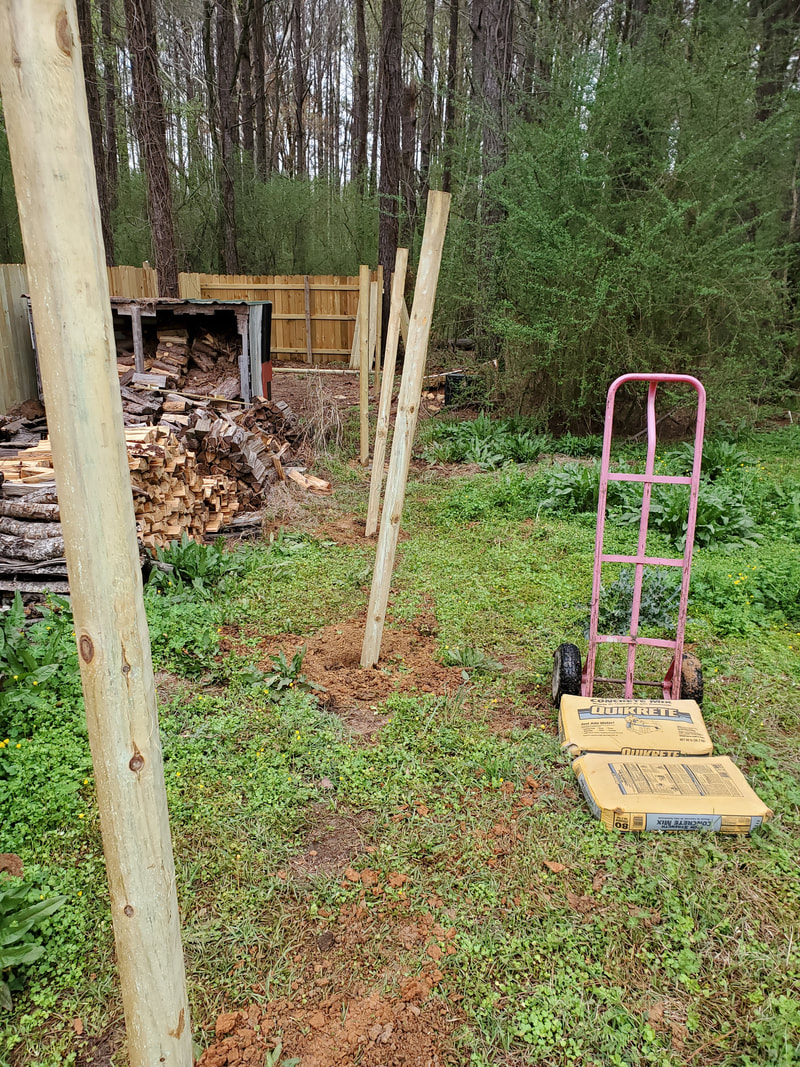
Getting posts set up prior to pouring concrete into holes.

Fence posts in the ground and locked in.
Now I did run into a sorta stupid issue as I closed in on the edge of the garden fence. The eastern fence line ran right against where I have the burn/brush pile staged at. And it is topped off with a bunch of trash, waiting for me to chop up some weed trees or other foliage to toss on top of the pile in order for the garbage to consume the material. Either way I can't sink a post right here as I would have to move the garbage and the ash mound out of the way. All I could do at this point was gauge where the posts would go in this area and skip over to the edge of the garden fence, putting a post in at the corner of said fence since this will be a junction point for thr branch off that will be the north side of the garden fence when I do start setting it up. 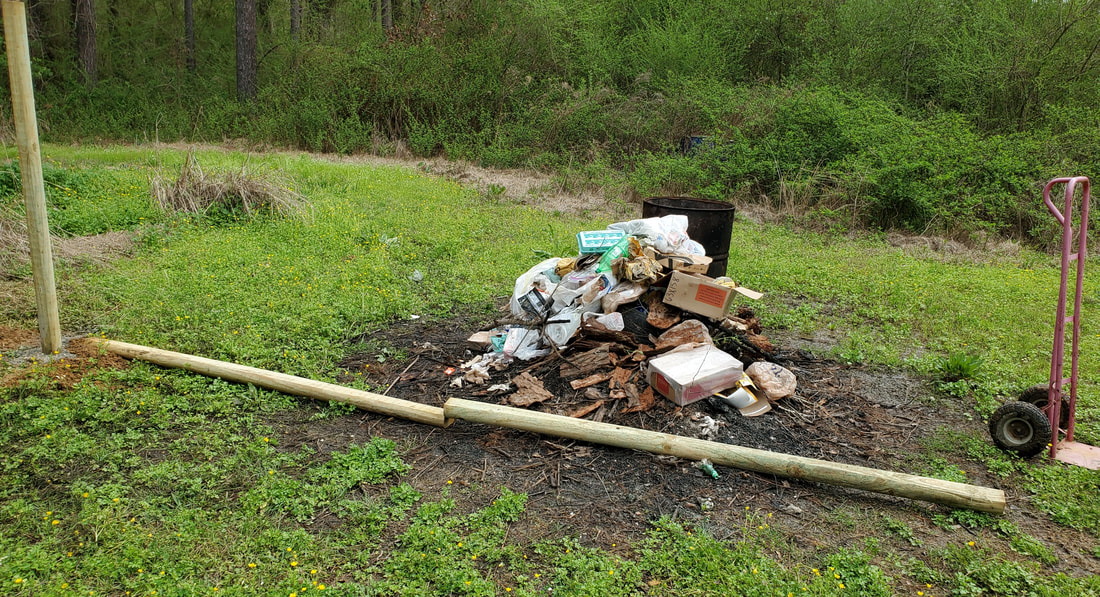
Burn pile and posts laid on ground end to end to show where post will need to go once burn pile is gone.
The one post that will go at this spot right in front of the burn pile will actually be one of the posts for holding the back gate that will be set up to allow egress through the back end of the midway for purposes such as pulling trailers around to move them around the other side of the compound. There will be another set of gates on the southeast end of the fence line for the same use, effectively turning this area into a turn around for trailers if need be. A post was sunk at the corner and the extra post I had left was sunk along the garden fence line just to get that run started. 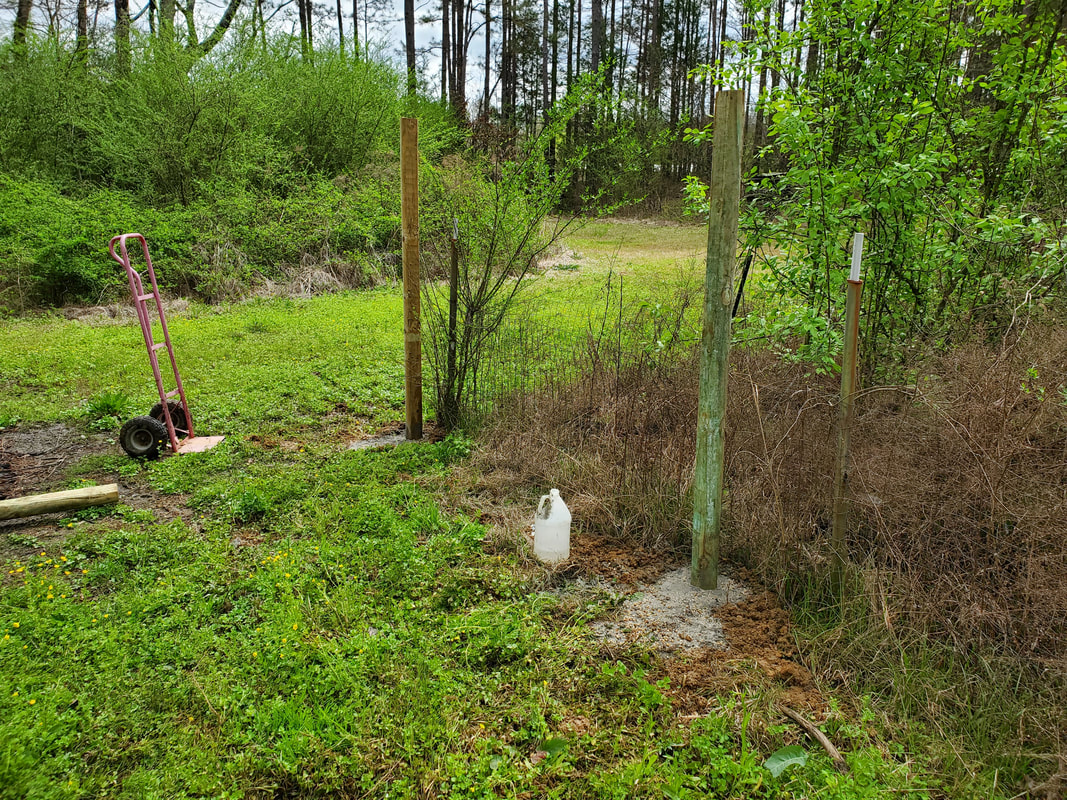
North side of garden fence where posts were sunk to complete the first leg of the eastern fence and start the north side of the new garden fence.
As can be noted in the above picture, to the left there is a post end showing. This end is where another post will need to go as the gate opening will be 10ft wide to allow for the passing of our larger trucks and trailers. Each half of fence will be 5ft long, making for a 10ft wide opening. I will more than likely use 6x6 posts for the gates versus the landscape timbers but even then I will end up having to put some kind of casters on the open ends of each gate to support the weight and keep the gates from sagging and distorting the posts in the process. The last thing I did was add another post at the beginning of the eastern fence line. Since I had an extra fence panel, I was able to gauge how the panel would sit against the tree that serves as the northeast corner of the perimeter fence. The contours of the tree prevent me from easily attaching the end of the panel to the tree in a solid manner so I endef up drilling a post hole in the ground a couple feet from the tree to sink a post that will hold the fence panel 1/3 of the way from the tree end. I can trim the panel or add material or whatever in order to fill any gaps made by thr end of the panel mating to the tree. 
Extra post hole dug with post staged a couple feet from tree to hold fence panel more solidly along fence line.
At this point the next thing for me is to get the fence panel attached to the tree and get the corner completly closed in as there will be some gaps between the ends of the fence and the tree trunk. At the same time I will be spreading gravel starting in the back so I can get the new firewood area set up so I can start moving the firewood all the way to the back. This will allow me to dismantle the old firewood shed and pull up any rotted pallets before I start putting up fence panels to complete this segment of the eastern fence line. Once the panels go up the area will be completely closed in and where the firewood sits currently will not allow for any traffic through to the back. The work continues.
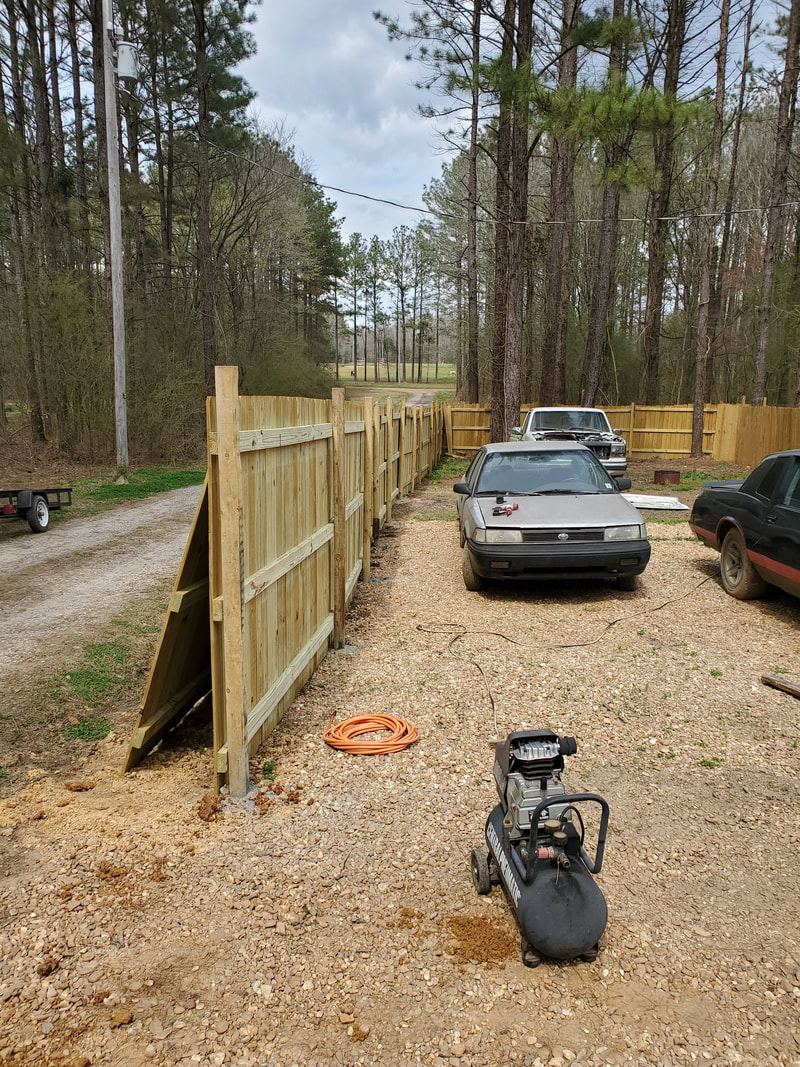
For the longest time I put off finishing up the east side of the chicken yard fence. There were two reasons for this. One, there was firewood all along the fence line that would've made getting up to the fence line difficult, and two, there were more important areas to get fencing up, since the east side of the chicken yard still had some chicken wire fencing. Well after the last session of fencing that completed the west end of the perimeter fence, I had been getting my hands on whole panels and the whole panels ended up being way cheaper than getting the individual pieces. Also it would typically take lesser time to put up the whole panel compared to the individual boards and pickets.
Previously, I managed to get the remaining posts sunk in the ground for the east side of the chicken yard fence when I was putting posts in the ground for the west side of the perimeter fence. Since I was getting things in bulk to some degree, I figured I may as well get the few posts to complete the chicken yard fence. Anyway, when I did get the latest batch of fence panels, I ended up staging them along the chicken yard fence line temporarily while I wrapped up things on the perimeter fence. 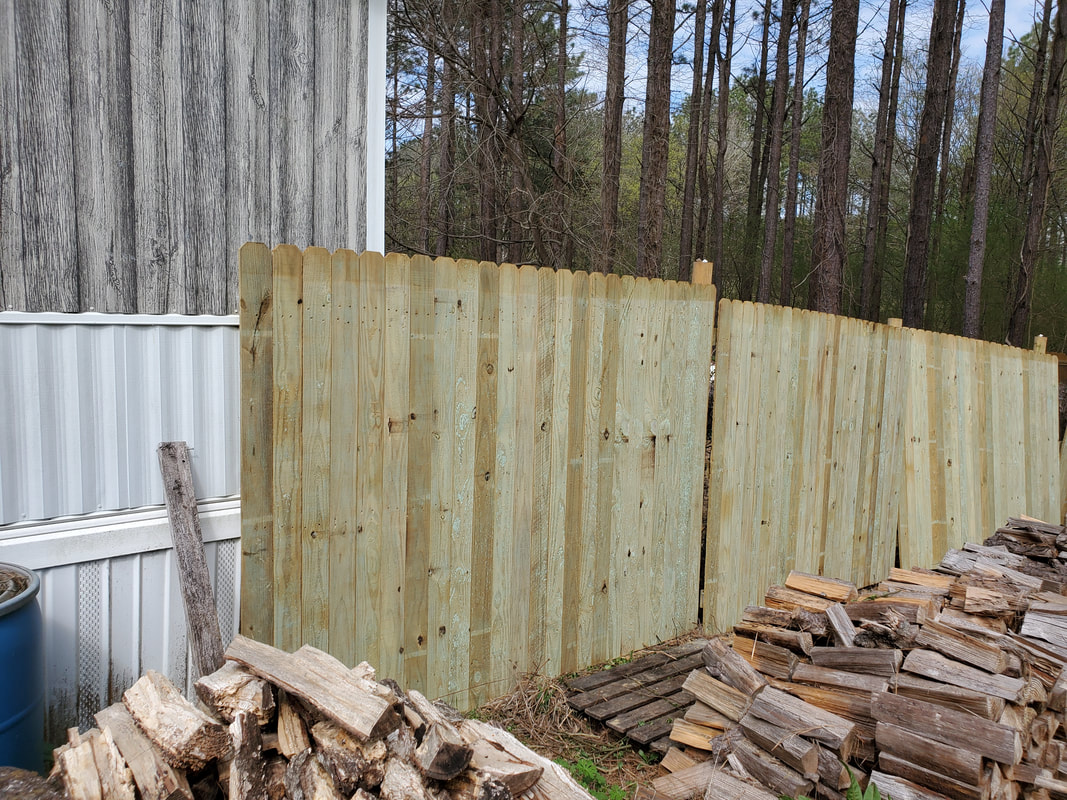
Fence panels staged along fence line of chicken yard.
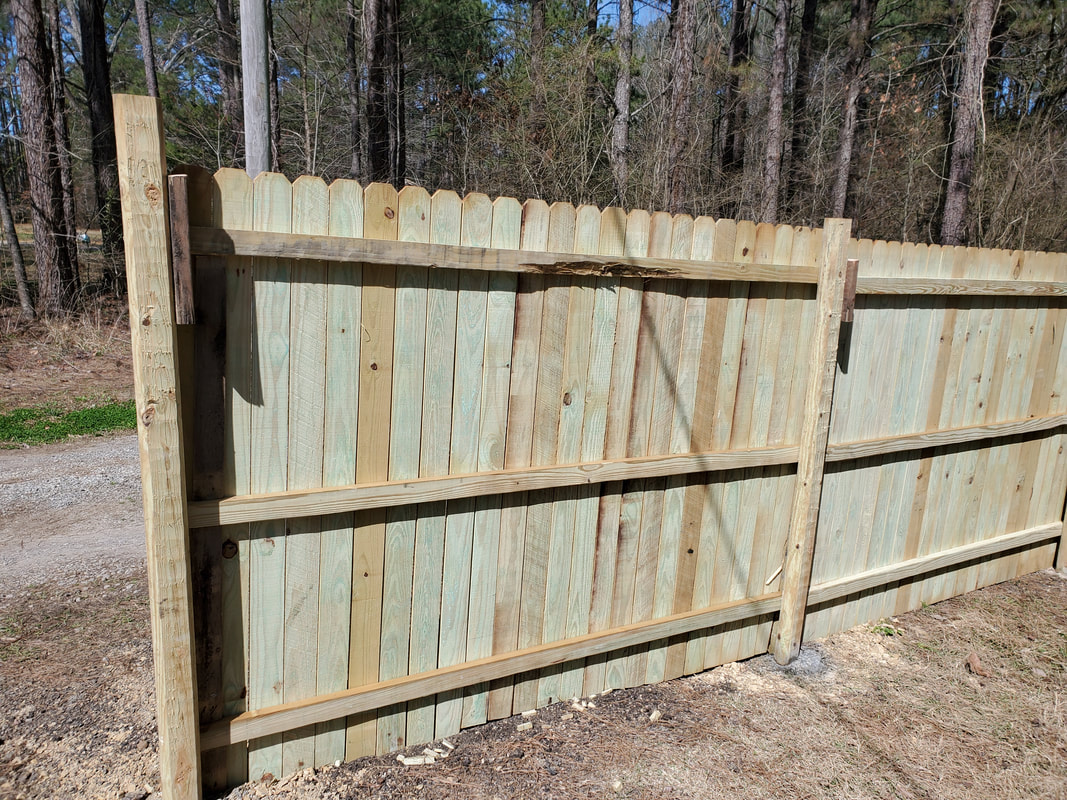
As can be seen in the picture, the last panel that goes up against the house ended up being too long. Obviously I would have to cut that panel down to get it mated up properly so I decided to start at this point and work towards the existing fence. We had already taken time to make note of the meeting points of the ends of each panel on the posts so I was able to determine that we will be more likely to have excess on the panels that'll require trimming versus having panels that are too short. When we do get to the last panel where it'll mate up to the existing fence, we will end up having to trim things down to mate up to the fence. 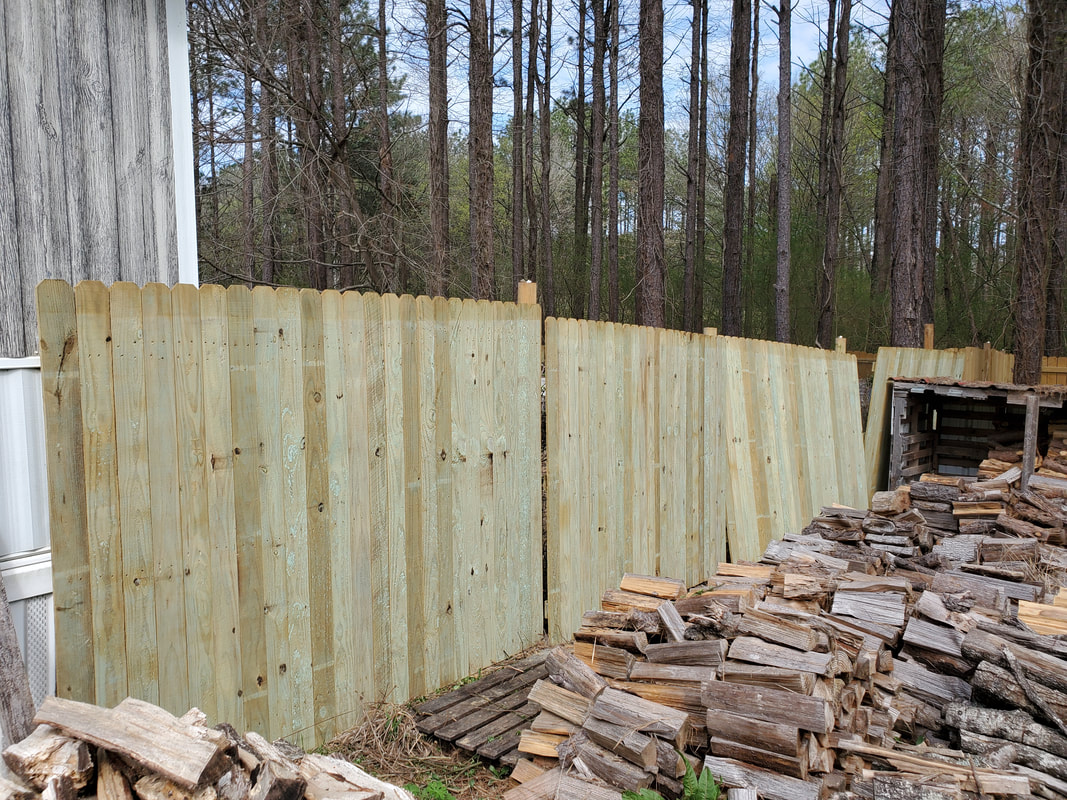
Lining up the first panel with the post to determine how much panel will need to be cut to get it to mate up to the house properly.
We took time to get the right side of the fence panel lined up dead center with the post so I can then take time to determine just how much panel I needed to trim and even determine what angles I need to make the cuts in order for the left side of the panel to mate up almost perfectly to the side of the house. This really wasn't that bad as the saw made fast work of the wood and the nailgun finished things up by securing the panel to the posts with very little gap between the end of the panel and the side of the house. 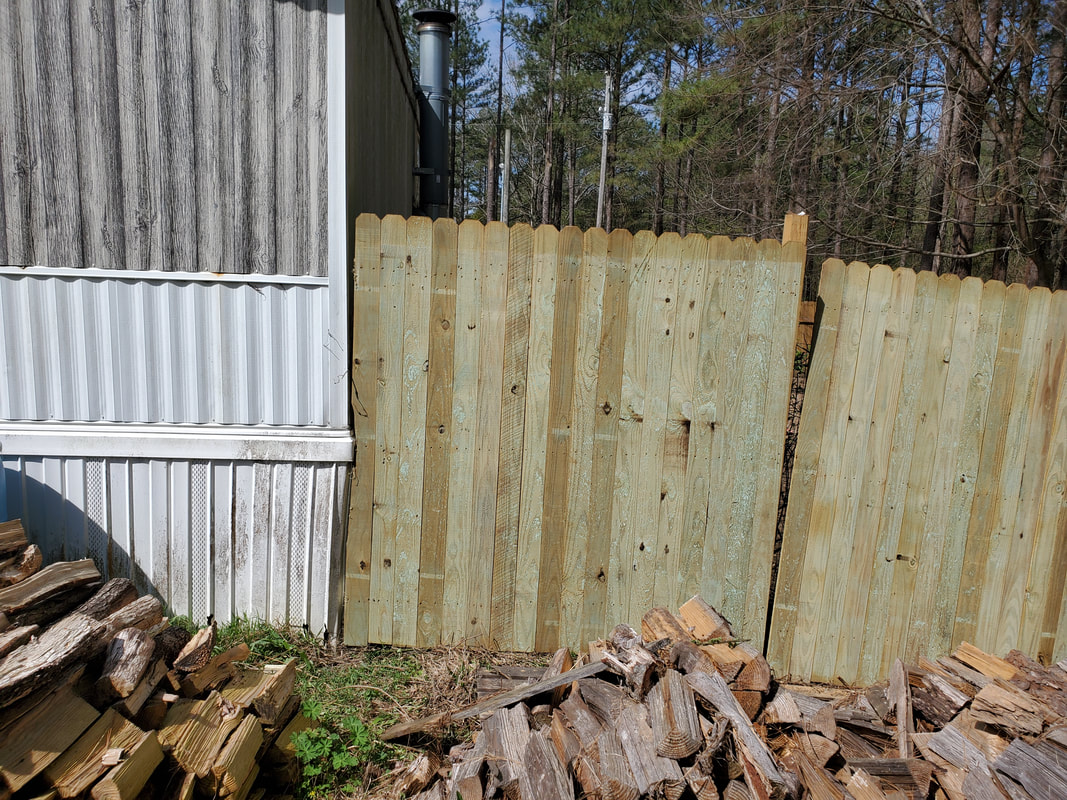
Fence panel after trimming and nailing up to posts, note how cuts were made to get the panel to mate up to the house perfectly.
Now this is where things get interesting. If you remember the problems we had with the western perimeter fence due to the grade of the land, that same problem manifested itself here as well, probably worse due to a steeper grade right at this point. What this meant was a batch of fuckery that would persist all the way to the last fence panel since the grade caused me to have to cut the panels at odd angles to get the panels to mate up properly while following the grade of the ground. The next panel really needed to be cut to get the angles right enough so the bottom of the panel sat nicely along the ground. What this also meant was the idea that I would have to attach pieces of 2x4's to the posts to widen the available surface area for the 2x4's on the panels to be able to take a nail through to be able to secure them in place. 
The next panel with the sharp angled cut made to get the panel to mate up on all sides.
Despite the apparent ugliness of this install, it had to be done. The following panels weren't too bad but still bad enough due to the cuts that had to be made to get them hung. Again I had to attach pieces of 2x4's to the rest of the posts to be able to have anchor points for the ends of the panels. Proper coverage to the ground is doubly important due to the fact that baby chickens are roaming the yard and we can't have birds that are able to squeeze under the fence and escape, much more so any varmints being able to do the same to get into the chicken yard to grab a chicken or two. 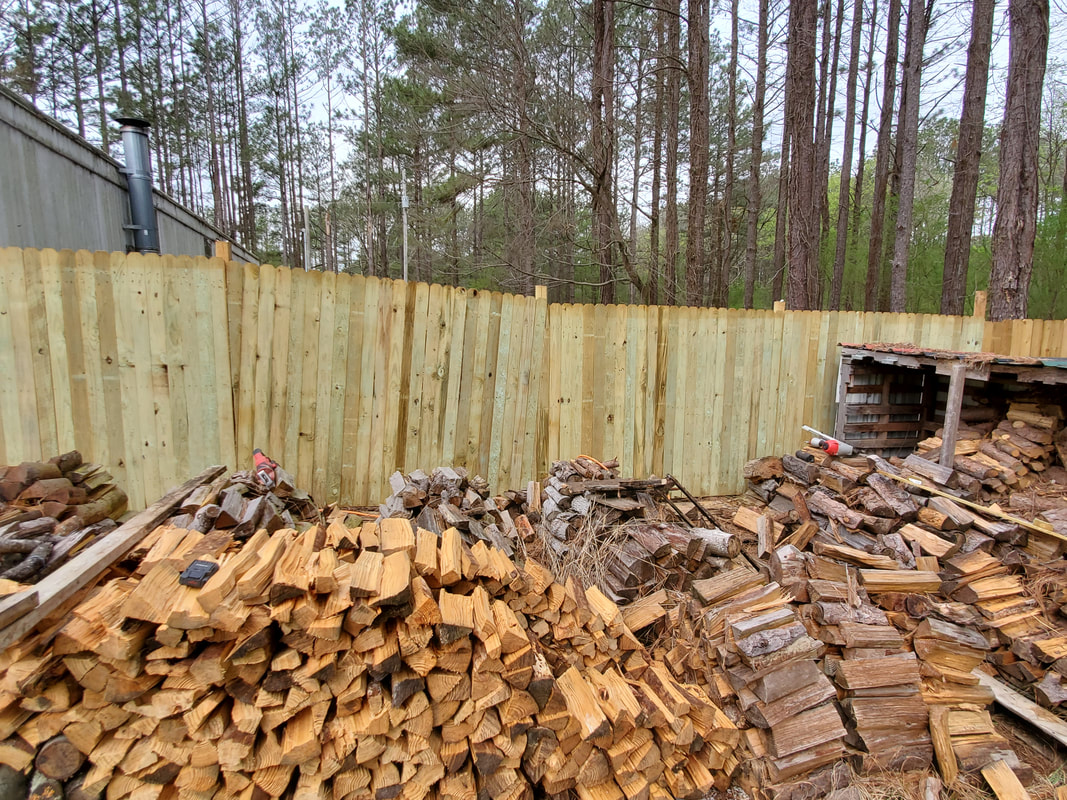
This pic shows how the 2nd panel was really butchered up to get it to fit while the other panels only have minor trimming to get them to mate up properly to get the full coverage desired on this length of fence.
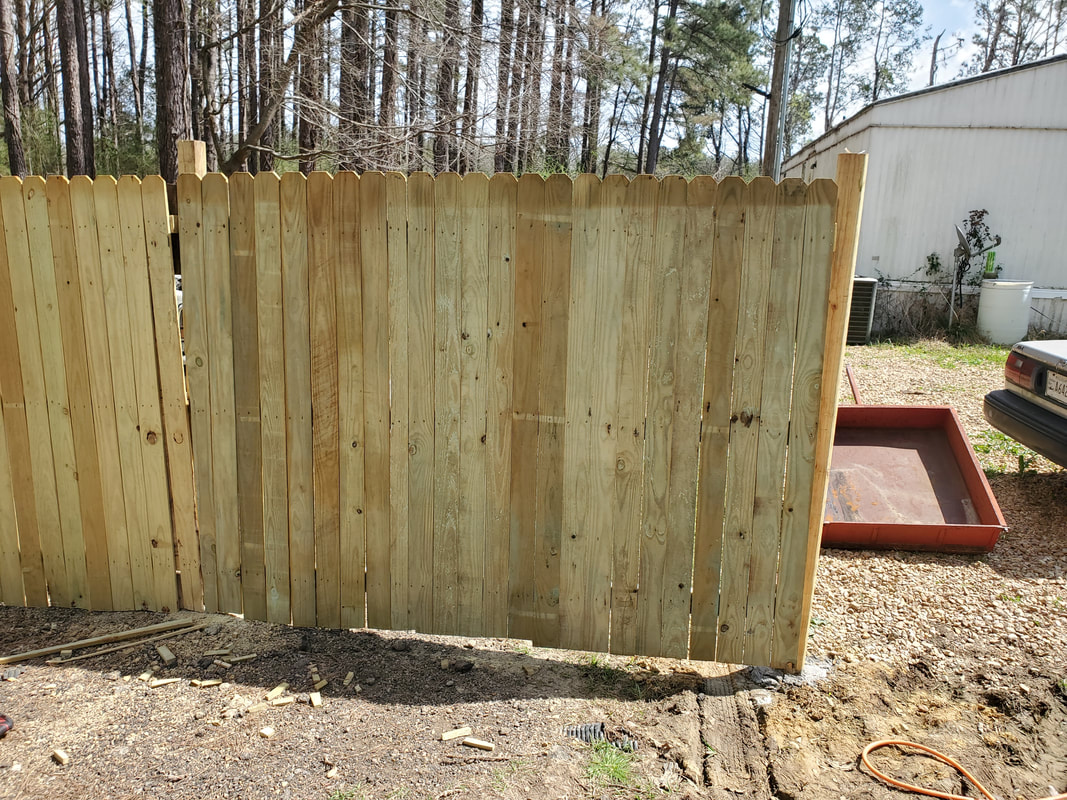
As stated in the beginning, the last panel would have to be trimmed to get it to mate up with the already existing fence since the spacing was made a little narrow just to be safe. Better to have to trim excess than to have gaps due to the panels being too short. As before, extra 2x4's were used for providing anchor points where needed. With minor trimming I was able to get the last panel mated up between the new and the old fencing and get everything secured on that front. 
Last section of fence mated up to existing section with some filler material from previous trimmings used to fill gaps.
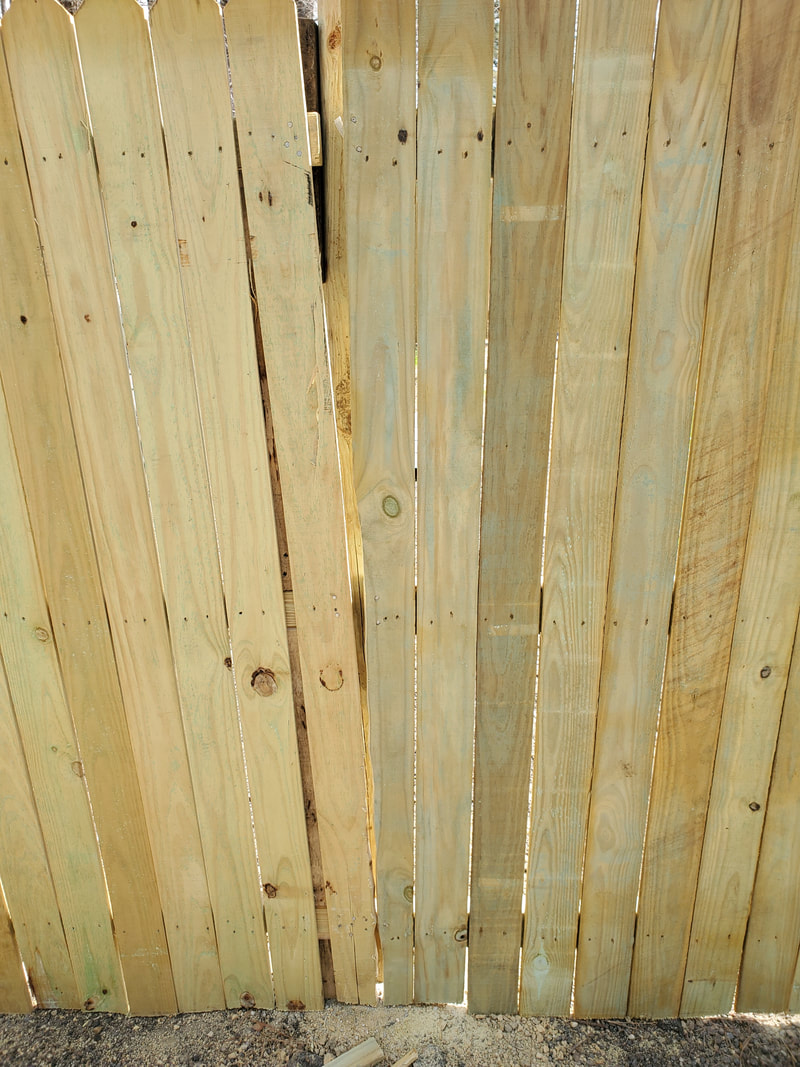
I did have to use some small pieces of old trimming to fill a couple of gaps to get the junction point completely filled in but this was pretty minor. After getting this done I moved on to the inside of the chicken yard to dismantle the old chicken wire fencing since it was obviously no longer needed. I pulled the fencing free and rolled it up and staged it with the scrap metal can to be hauled out on the next scrap run. Despite having taken time to get the panels trimmed so they would mate to the ground properly, after looking from the inside out, there were small gaps that I wasn't really satisfied with so I had to cut some extra board to run along the bottom to get a redundant covering of the bottom. 
Extra boards tacked up along the inside bottom of the fence panels to cover up some wider gaps in the ground that were still present even after getting the panels to meet up to the ground.
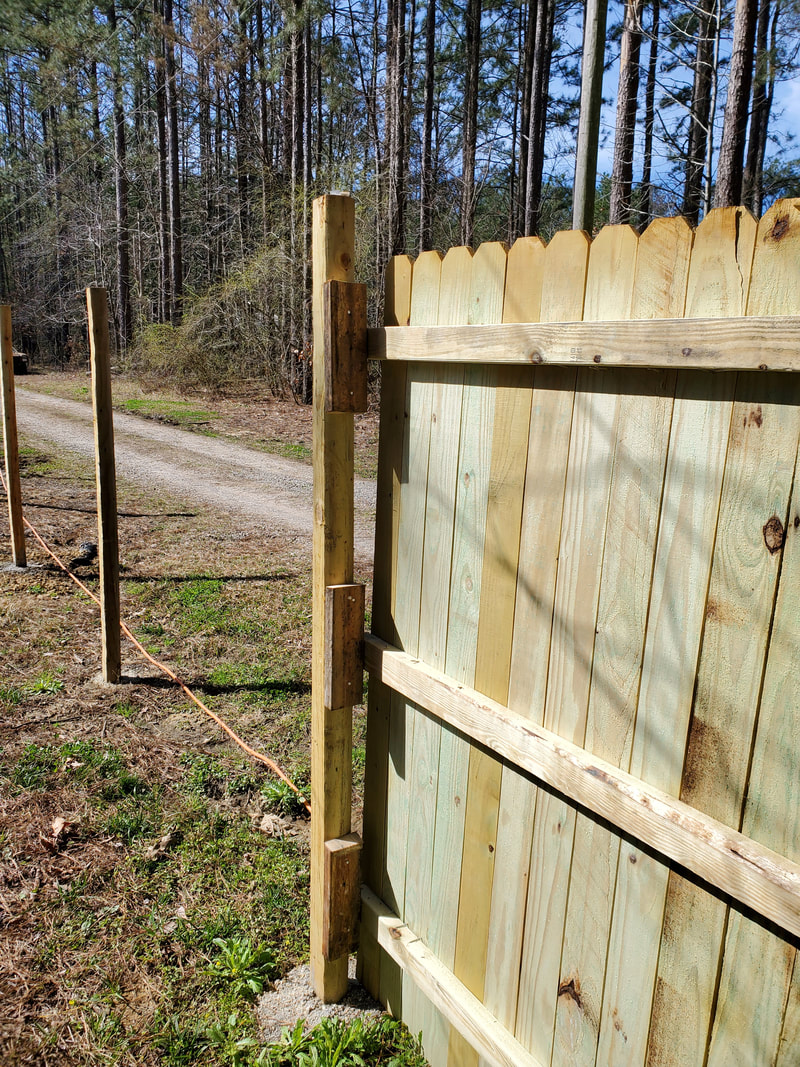
Now on a side note, another reason I was hesitant to finish the fence was because of how I had been setting up the fence previously. Since this was a more interior section of fence and not a perimeter fence, I was only using two 2x4s to hang the pickets between posts. The extra strength wasn't needed since there would be another run of fence that would be making up the eastern perimeter fence. Now, since I had been adopting the use of panels all over until further notice, I would have to accept the fact that this one junction point would look awkward due to the two board fence mating up to the three board fence in the remainder of the fence run. Again, extra pieces of 2x4's helped solve this problem in getting things secured properly. As for aesthetics, with the goofy angled cutting and trimming, the support boards on the inside are hardly the focal point of the overall appearance of the fence. 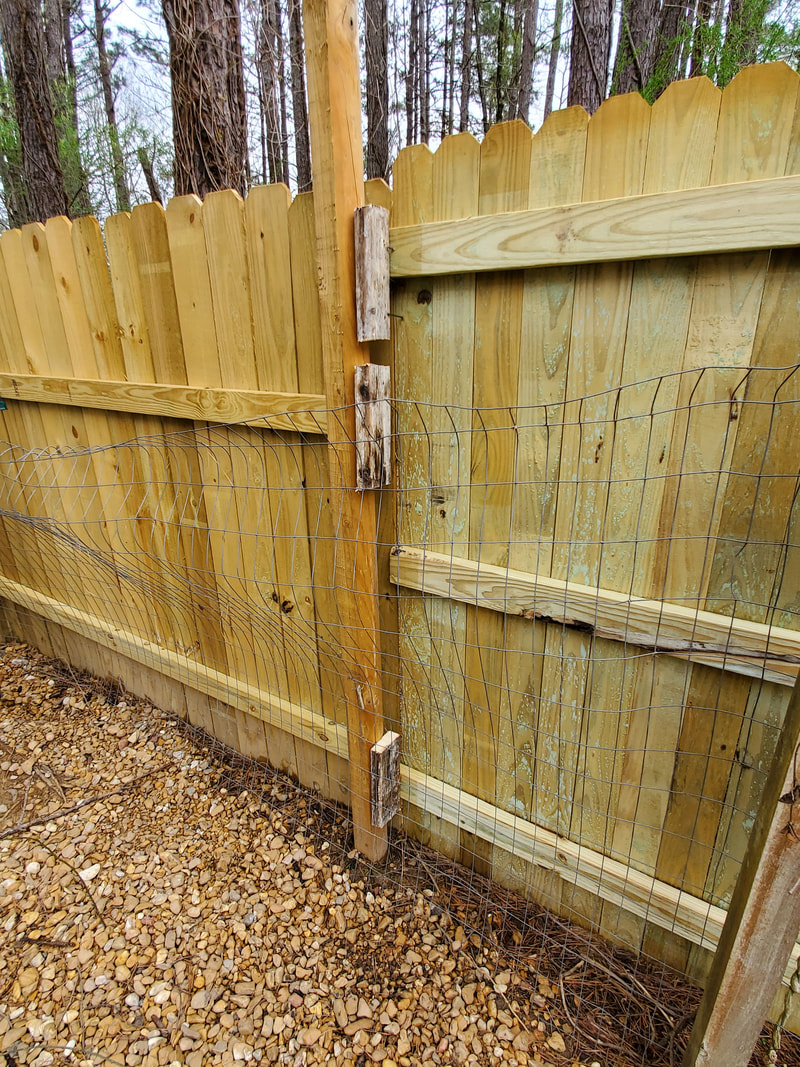
Junction where two post fence meets three post fence, note extra 2x4 boards used to provide anchor points for panels. Also note old chicken wire fencing prior to removal.
For a little while now I've been focusing my energy on spreading gravel over the midway of the compound, that area that goes between the house and the garden, stretching all the way from West to East. A large section of this area is soupy due to runoff saturating the ground and creating some erosion conditions that are contributing to the washing away of soil from under the house. That is another animal we need to corral in the near future as well. But for right now, I'm trying to get gravel over all of the midway grounds so as to create a solid surface with which to be able to drive vehicles back and forth over with no hassles and no bogging down. The good thing about this particular gravel mission is the idea that I can just back the F250 right up to the edge of the graveled up ground and open the tailgate to shovel out gravel directly on to the ground. There's no need to shovel gravel into the wheelbarrow then cart it off to a remote site for dumping. This obviously makes my gravel runs go by pretty fast as I can get the bed emptied out in 30 min give or take. 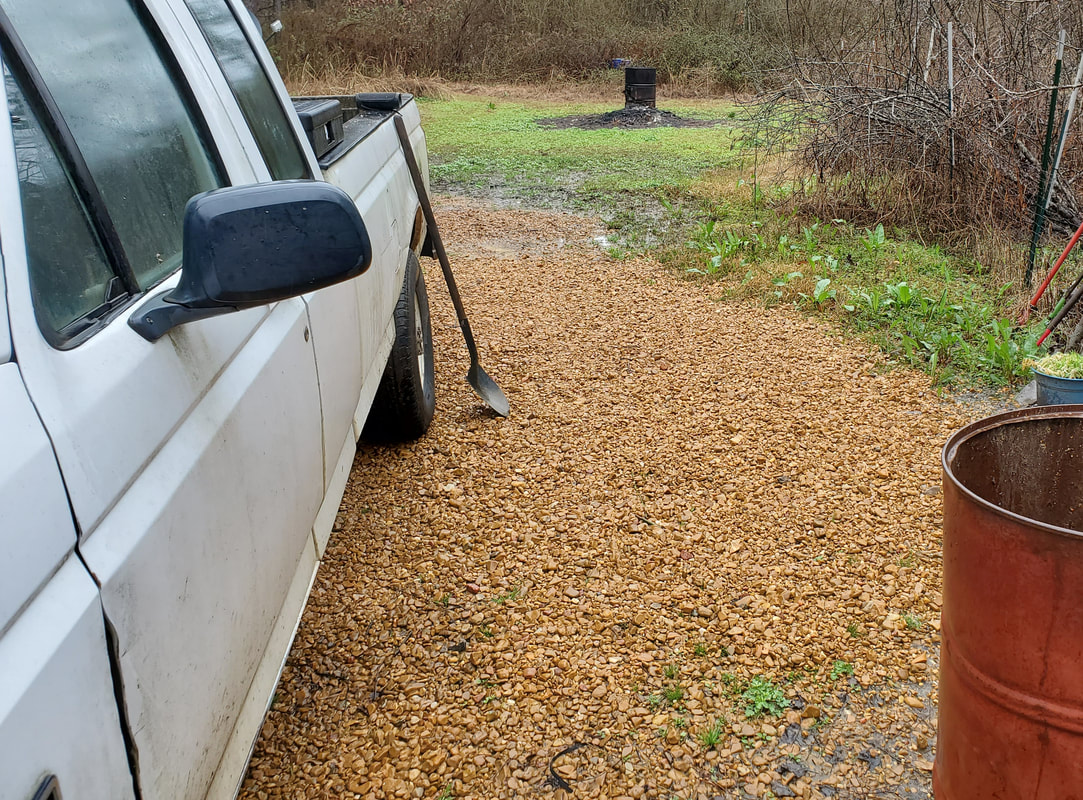 Gravel spread on midway next to and behind F250 truck. The farther back East I get into the midway, the more I'm able to dump gravel on the section of ground that is blocked by the porch, right next to the house. Getting this area covered is important as well since in the near future we will be installing a ductless AC unit and part of the unit is the compressor/heat pump unit that goes outside on a slab or other solid surface. It would be nice to have a graveled surface for the slab to rest on for the AC unit. Plus by getting gravel over all of this area, that will be that much less ground we have to worry about landscaping since any grass or weeds that do pop up can be sprayed with weed killer to knock them back. 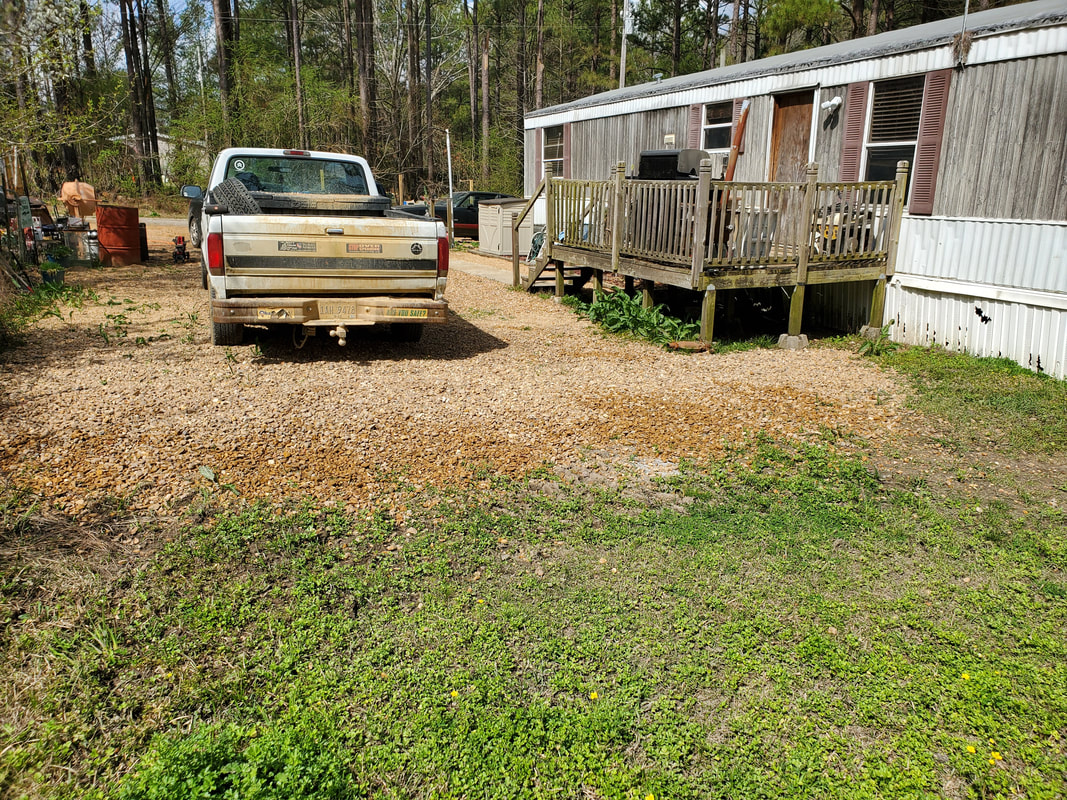 Midway grounds covered in gravel just behind the truck, note gravel extending to the right towards the house by the porch. Another little project I had to take on by necessity was the replacement of the HVAC blower motor in the Tracker. This thing had been making noises for a while but was still running fairly well. One day the thing decided to just start making some obnoxious noises and not run all too well. After a couple of days of not even having the option to turn the fan on to defog the windshield much less run the heat or AC, we ended up hunting down a used unit from a salvage yard. At least we didn't have to worry about pulling the motor ourselves, they pulled it for us. At the same time I also needed the speed control resistor since the motor had only been running on high for a while. With that I was able to take on the replacement of this unit. At first I was nervous because I was hoping I wouldn't have to tear the dash apart to replace this thing since most newer vehicles are made where the whole HVAC box has to be removed to replace these critical components. After doing some fast research I found that the blower motor was located at the bottom of the HVAC box right at the front, just behind the glovebox. Everyone said that it can be removed easily without pulling apart the dash, alrighty, game on. 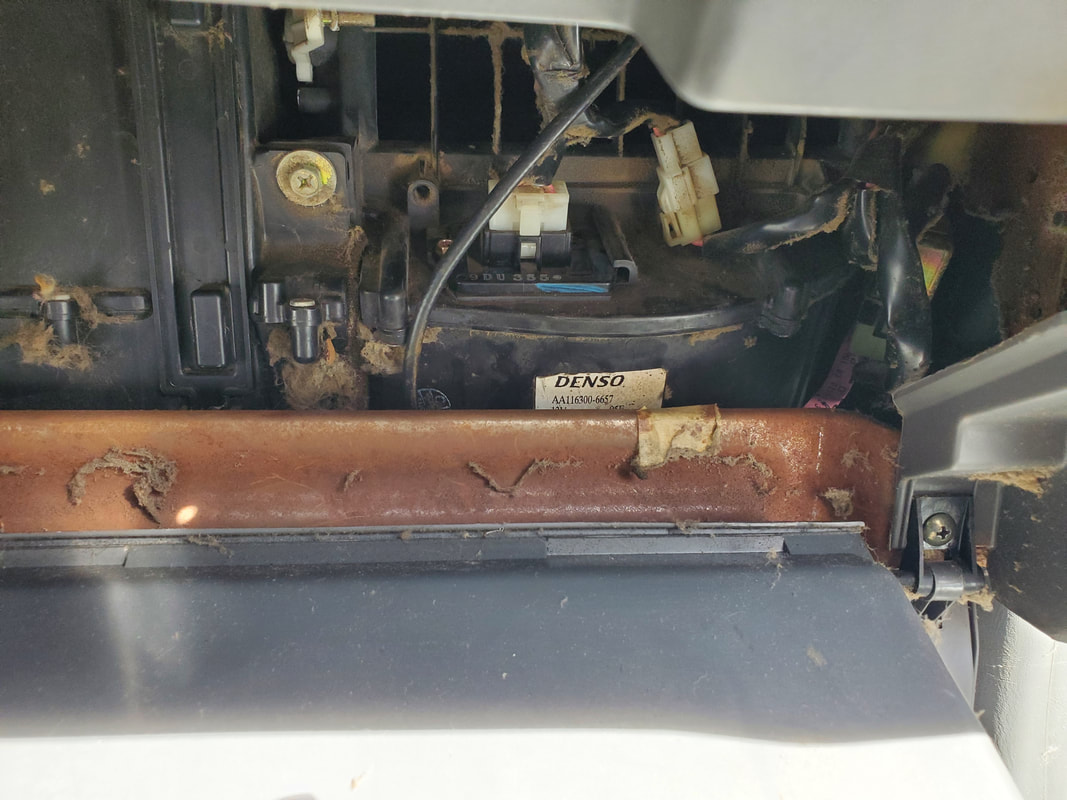 HVAC box with blower motor at the bottom with "Denso" on the label. Unit will come straight down and out. After pulling the glove box out I had to remove the bolts that secure the ECU to the internal framework behind the dash. This wasn't that big of a deal as I was able to get the box down without having to unplug anything. I never want to play around with unplugging ECU's from these newer cars since it could flake out things like the security system that'll have you hunting around for the procedure to re-teach the system to recognize the ignition switch and all that crap. So the ECU stayed hooked up, just dangling out of the way. A couple of these bolts were a pain to reach but with the correct combo of extensions and short sockets and U-joints I was able to get the bolts out and be able to open up the area for the blower motor. This same procedure also had to be done with the blower motor since a couple of the bolts were in awkward spots that caused be to curse the engineers of this vehicle. Needless to say I did get the blower motor down. But there was another small hassle. The firewall insulation was very thick at this spot. Right in the path where the blower had to travel down and out there was a thick layer of insulation that no matter what I tried, I wasn't going to easily get this thing out without flexing and stressing something that if it broke, I'd be screwed. I ended up doing the most logical thing anyone could do-get a knife and cut out that section of insulation from the firewall, exposing the bare metal panel and giving me the clearance necessary to pull the blower motor free from the HVAC box. 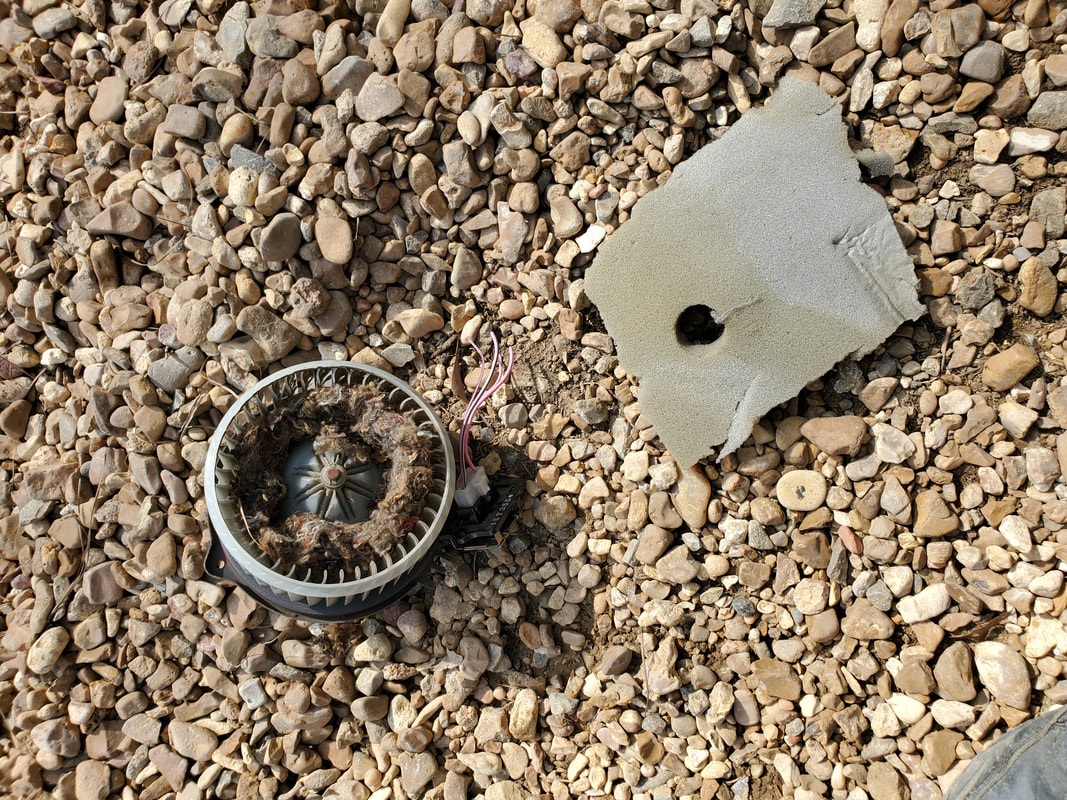 After removing the old motor, I found that the squirrel cage was full of crap, insulation, most likely from varmints that were nesting in this truck when it was parked for an undermined amount of time before I bought it. The squirrel cage was also a little off kilter, explaining the noise I heard - it was scraping against the walls of the HVAC box while running. Of course reinstalling the fresh unit was the reverse of removing it, including using the extensions and U joints with the socket to get those problematic bolts back in place. With the new unit in though, I was able to move right on to the resistor, which was rather easy to replace as the unit was right on the top of the HVAC box above where the blower motor was mounted, making the rest a piece o' cake. Lastly I reinstalled the ECU in its cradle under the HVAC box so I could replace the glove box and turn this crap on to see how it works. 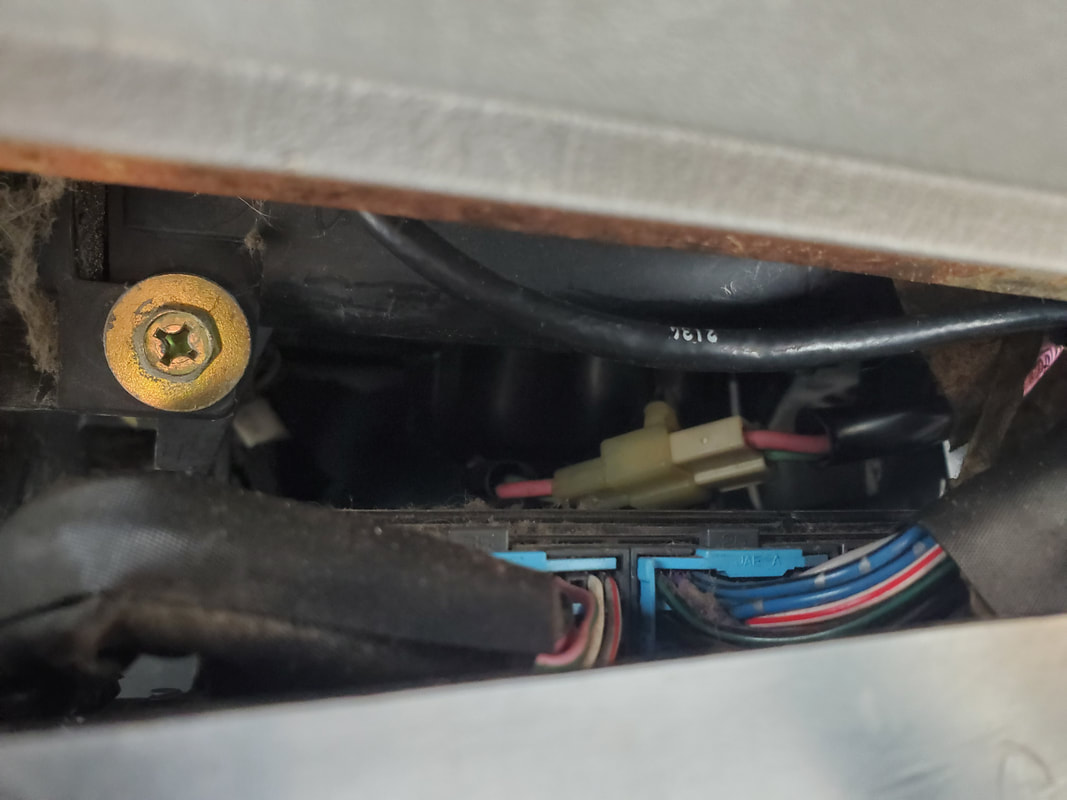 ECU mounted back under frame under the HVAC box, note large plugs going to box. Of course with the new used stuff installed, turning the blower on was a pleasant experience. Everything was nice and quiet and smooth. In fact the unit blew harder than it ever blew, plus I had my speed control restored once again too. At least now we can ride in this thing without another obnoxious sound driving us nuts and be able to stay warm or cool as we desire. One of the fixtures around here for a while now has been the 1994 F150 short bed pickup truck that we picked up early last year for $500. This truck had a dead engine that was already broken down in an attempt to overhaul it but when I got to it the short block was already rusted up so there was no hope of saving that. When I pulled the 302 V8 from the 73 Mustang that ended up being turned into the Mustang Chicken Coupe, I planned on using that engine as the basis of the rebuild of this truck. The long blocks are pretty much the same through the years with the only difference being the balancing of the crankshaft via the use of a weighted flywheel and harmonic balancer. Anyway, the old engine has long since been removed and scrapped and most of the parts going to the engine were laying in the truck loose. My first step in the project was going to be to inventory the parts that would be needed to put the engine back together. Now, I did plan on converting the truck to an old school 4bbl carbureted powerplant using a 5 spd manual transmission so as to keep things simple and not have to worry about the potential complications of the EFI system that is normally in these trucks. I would also keep the serpentine belt assembly with all of the accessories that are normally on this truck so I don't have to do anything extra short of installing a regular 4bbl intake manifold and changing the fuel system around to accommodate the need for lower fuel pressure. Well as of lately I did pick up another 302 V8 engine that is supposed to be running and for all intents ready to drop in. I look at things this way, the claim of the engine being a running engine just means that its not seized up or in a critical state of wear that I shouldn't have to worry about any surprises when I pull the unit apart to overhaul it. I shouldn't find any spun bearings or other issues that would more or less render this engine junk. So with that though, I figured I can start on some small jobs to get the body ready for when I do get the 5spd transmission in my hands and get the engine rebuilt and ready to install. It would be nice to have the truck body ready to go where when I do drop the powertrain into the truck all I have to do is hook everything up, start it up and be able to drive off immediately. I had to clean out the loose parts that came from the other engine that were scattered through the cab and the bed. Some of these parts will be reused, like the alternator and AC compressor brackets and the radiator. Some things were missing like the power steering pump and bracket and harmonic balancer. I ended up finding another PS pump and bracket at the junkyard along with a couple of other small pieces to help complete the front accessory assembly. I'll get a new balancer so I know I have a fresh unit to work with. Same goes for the water pump. I'll end up going with a twin low profile electric fan assembly instead of trying to reuse the fan clutch assembly that can sometimes be worn enough that it doesn't properly cool when at idle. Other parts like the intake manifold assembly with the EFI hardware, the air intake tubes, and some other EFI related components also had to come out, but these will obviously not be reused since I'm going to a 4 bbl. I'll either end up selling this stuff or hanging on to it in case I run across another truck that may need these components, maybe use this stuff in a proposed hybrid gas vapor injection system that I could throw together for injecting propane or maybe producer/wood gas into an engine. Who knows, all I know is these parts will not be taking part in the rebuild of this truck so they will go off to the side. 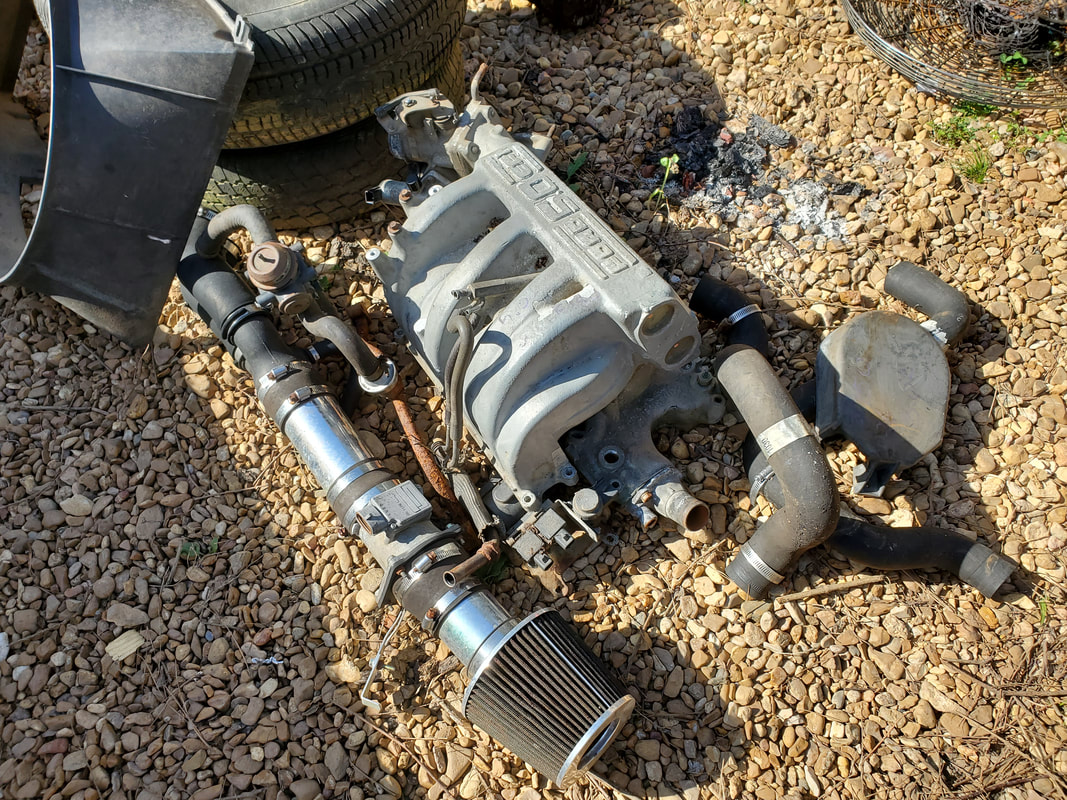 EFI related engine parts staged on ground, awaiting my decision on what to do with them. 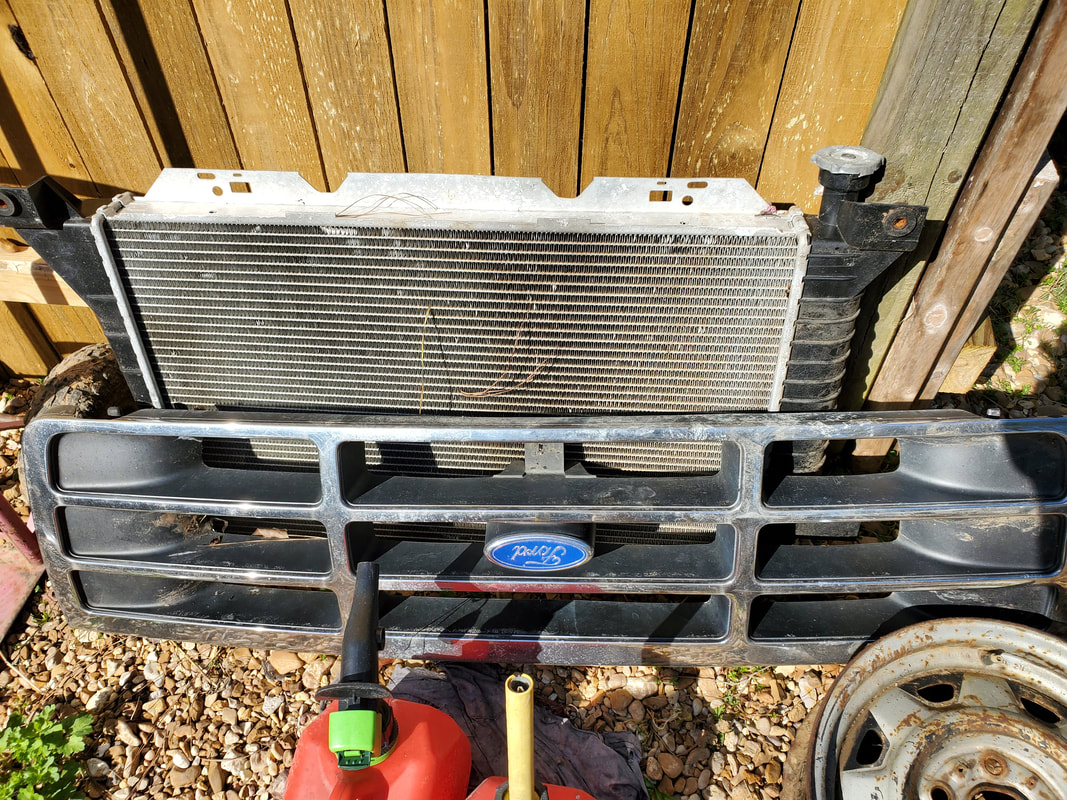 Radiator and grille from truck, staged against fence out of the way. The other thing I had to deal with was removing some trash from the bed, all the way up to an actual bag of garbage that was in there. Some of the stuff was loose and had to be picked up and put into a new garbage bag while the bag that was in the bed had to be carefully removed lest it break open and leave me with a real mess on my hands. After getting the garbage removed from the bed I had to rake out the bed of humus that came from everything from pine needles and other plant matter that settled in the bed before I got it and during its time in our yard. At least this was less disgusting since all I had to do was remove the tailgate and rake everything out. 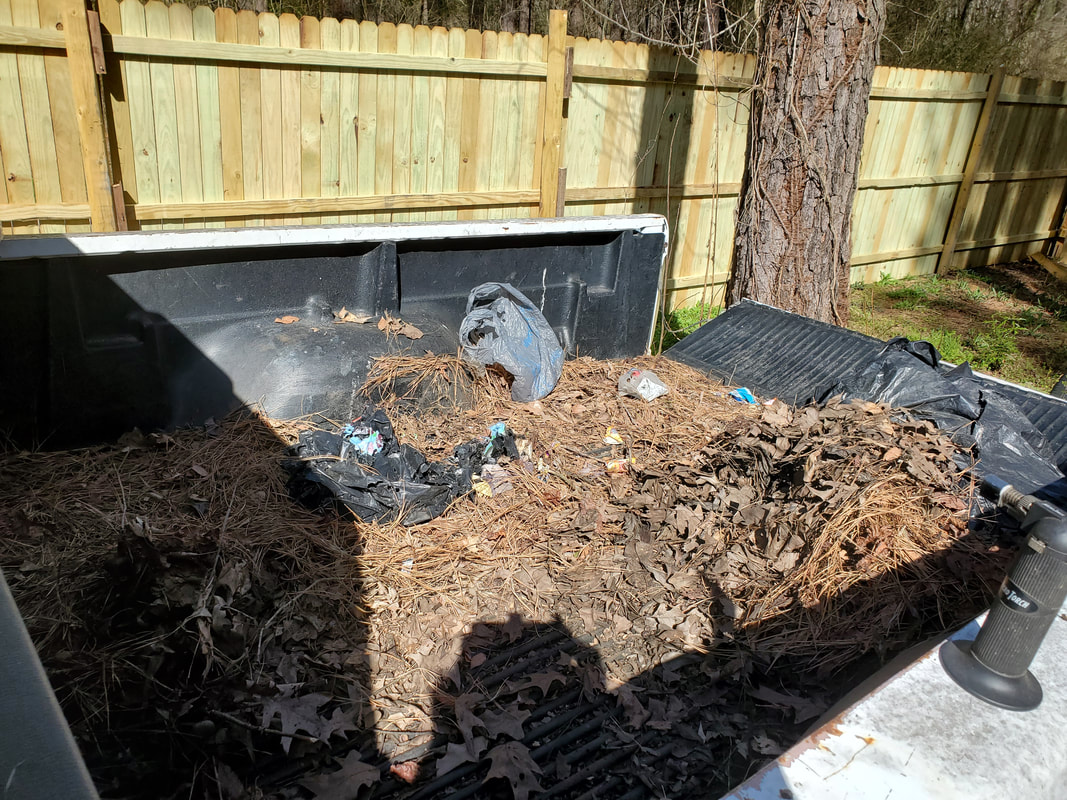 Bed full of leaves and pine needles and other detritus. With the material raked out of the bed I moved on to drag the garden hose from the chicken yard over to the truck and give the bed a good hosing down to get everything I could out of the bed. As I said, I want this whole truck body prepared and ready so when I put the powertrain in and hook it up, I can go right to driving the thing, with the proper engine break in of course.  Bed cleared of everything cluttering up the spot. The other area that will need attention is the engine bay. While the engine is gone and most of the components are sitting on the ground away from the truck, there is still a matter of removing the E4OD transmission that I won't be able to use due to its being a computer controlled transmission. I would need an outside controller for that particular transmission or find some kind of bootleg way of rigging up the unit to be controlled, which can result in the premature demise of the transmission as the control of the unit is precisely controlled all throughout the RPM range of the engine and through varying load conditions. No, this transmission just has to go and be replaced with the 5spd manual that was an option in these trucks. Another thing I have to do is remove most of the wiring and hoses and other crap that are associated with the EFI system, since most of this stuff won't be used. When I install the 4bbl setup, I plan on using an aftermarket HEI hybrid distributor that only requires one power line running to it to operate the unit. I won't need the extra wires that are used in the EEC-IV distributor that came on the truck originally. 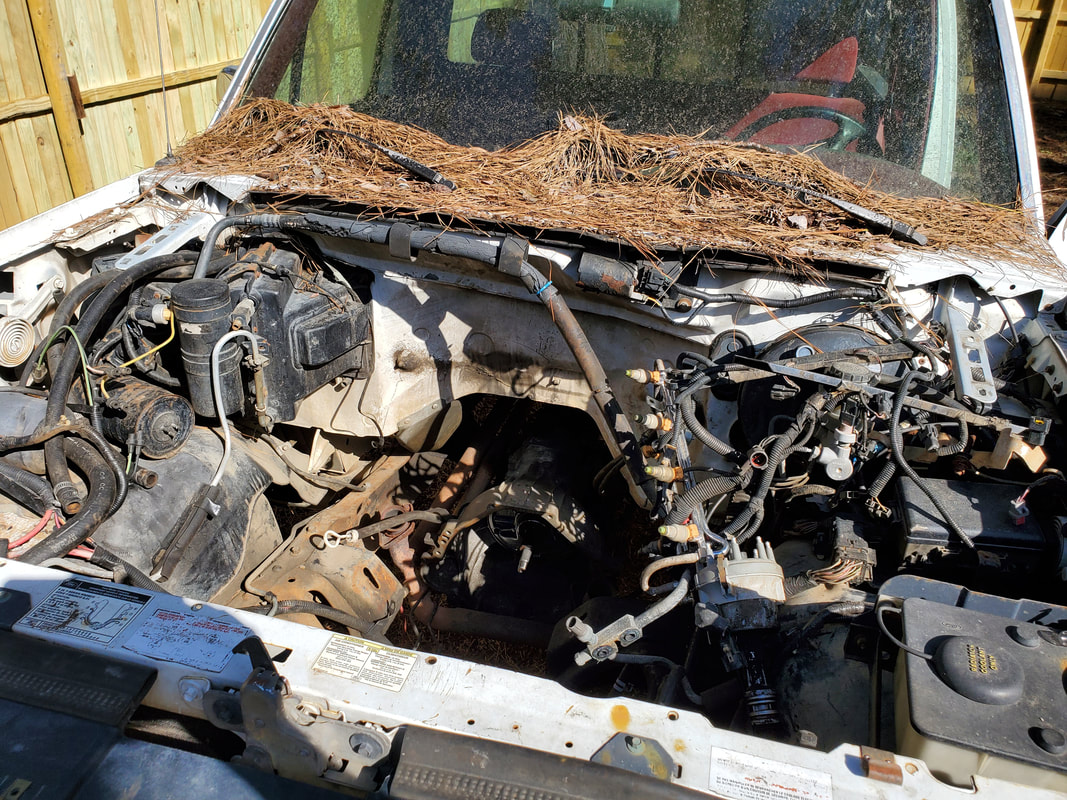 Engine bay with all the wiring and hoses and other crap associated with the old EFI system, soon to be changed around. The only hookups I will need from the engine compartment wiring harness will be those for the oil and temp gauges and the tachometer. Other than that, all the hookups to the relays, solenoids, sensors, etc will not be needed. Now I do need to see if possible I can remove that segment of the wiring harness whole and just tap into the individual circuits that feed the gauges so I can just hook those up individually versus cutting up the old wiring harness to remove all the unnecessary wiring and then bundling the remainder back up. Either way, I would be looking at keeping most of that wiring for use on the F250 since it still has the EFI system and I already had to borrow a couple of lengths of wiring for a couple of fuel injectors since a rat chewed up the old lines going to two injectors. It would be nice to at least have some of the plugs for this system so I can make repairs when needed on the F250. Unless I end up de-converting the F250 to a 4bbl setup just as well. That's a whole other topic for a whole other time. I might not have that truck in the future, who knows? But for now, we're focusing on getting the F150 Ford Muscle Truck ready to be another member of the family, ready to perform any number of duties that will make it a staple in our automotive family for years to come.
After setting the stage for allowing me to sink the necessary posts in the ground, I had everything ready for me to install fence panels to get the western perimeter fence set up. Reason again why I decided upon using already built panels was because the individual components went up in price, most particularly the pressure treated 2x4's. The pickets still hovered around $2 a picket but the boards doubled from $5 to $10 what seemed to be overnight. The whole panels were $45, which when you add up the costs of all the components would make the ready made panels half the price of a pieced together panel. So we dragged the trailer out and muscled several completed panels onto the trailer and repeated the process in reverse when it came time to install the panels.
As usual, I can never get the posts in the ground perfectly as far as 8ft centers are concerned. Even when I nailed one end of the first panel up perfectly centered on the first post, it came up short where I had to attach pieces of 2x4 to the side of the post to add some surface area that will be able to take the nails on the other end of the fence panel to hold the unit in place against the post. Of course this meant that the following panels would be off center as well. But as with the first install, more pieces of 2x4's would follow, allowing me to continue in getting the panels up. 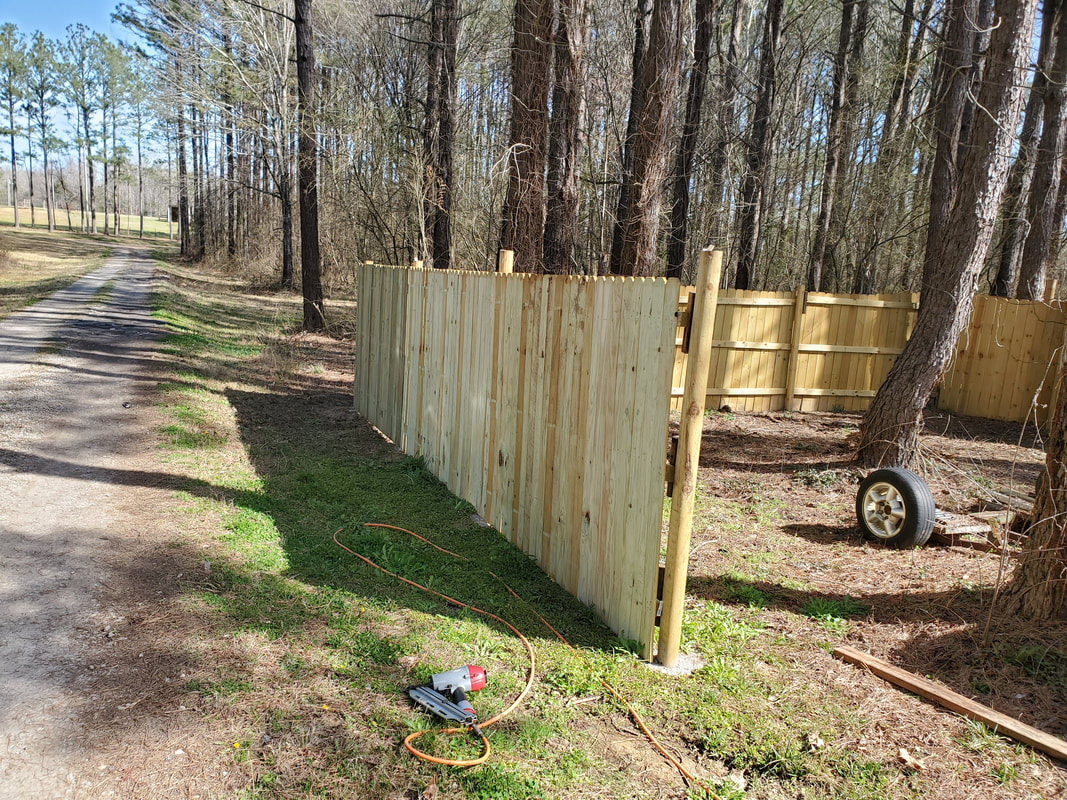
Fence panels going up from the NW corner.
Added pieces of 2x4's to posts to widen the usable surface area to attach the fence panel to the post.
As we got fence panels up and proceeded upstream, we started to run into some interesting problems. Since the ground does indeed go upstream at a slight grade, the already made fence panels would not sit perfectly level relative to the posts or the ground. To keep from having the ends of the panels be too far off from the posts that even the added 2x4's wouldn't be enough to allow for attachment to the posts, I had to use the saw to whittle away at the bottoms of some of the panels to ge them to match the contour of the ground enough so that the panels would butt up to one another properly and compensate by having the next panel be a tad higher. At one spot, where we had spread some crushed asphalt, the ground over that area was a little higher than it was on either side, which further made for some unevenness in that I had to really chop away at the bottom of the panel that went over this area so that the panel would fit in a way where the top of it would meet up pretty close to the panels on either side. This ended up stretching what should've taken 30 to 45 minutes to almost a couple hours. In the end we came out victorious and got more panels up. 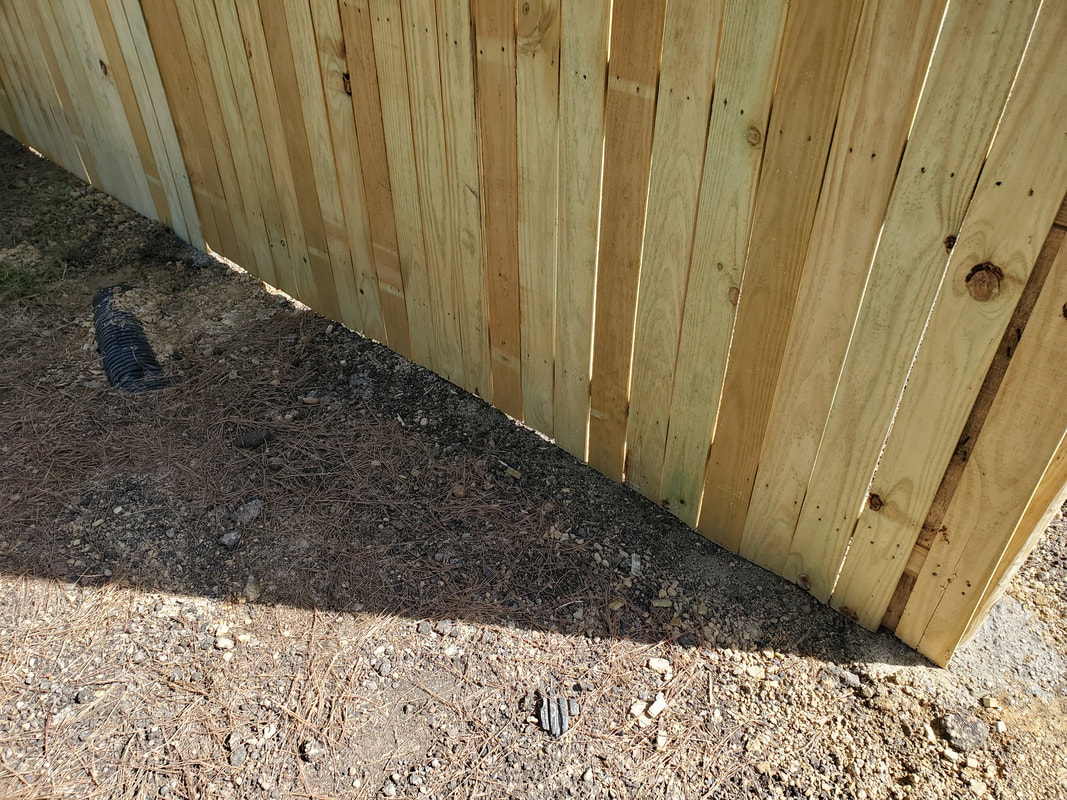
Gaps at bottom of fence panel as fence extends over crushed asphalt indicating the unevenness of the ground where I had to trim the bottoms of the panels to get things to line up properly.
Back side of the panels showing where 2x4's had to be attached in order to hang the panels up against the posts.
Extending on up to the main driveway still presented the same problem with regard to the grade of the ground. I still had to trim along the bottoms of the fence panels and add pieces of 2x4s to the posts to allow us to nail up the panels and keep them butted together enough to not have gaps where the panels meet up at. I will end up having to add more gravel to the ground along the inside of the fence line where I had to trim the bottoms so as to be able to fill in the gaps that were created by the unevenness of the cuts and the ground. Even though the chickens are behind their own fence, slowing down the progression of any critters from passing these barriers will keep them safer and if in the event any of those birds do make their way out of the chicken yard, they will still be contained. 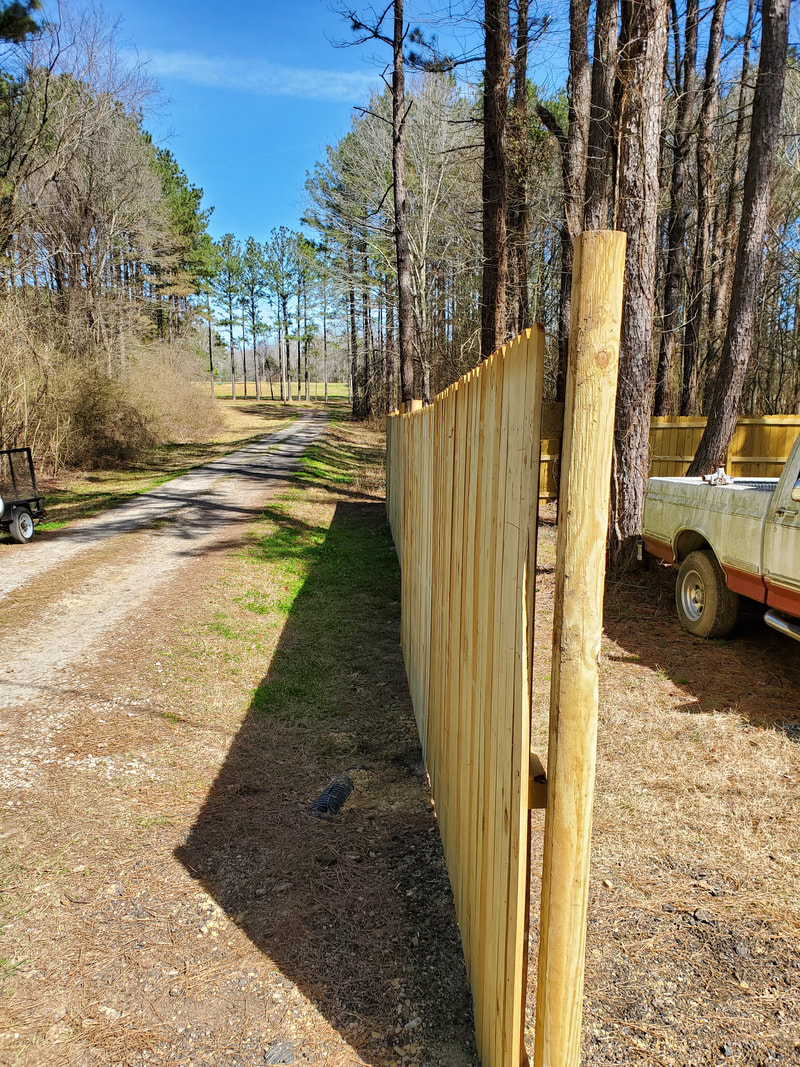
Fence line as it gets closer to the driveway. This area is where the crushed asphalt driveway is located.
Fence panel as it overhangs the asphalt area which was higher than the rest of the ground, note the gaps on the side and the bottom.
Closeup of the gap between the fence panels, with the post blocking full view into the yard behind.
Once we finally made it to the end of the line, I determined that I wanted to add one more section of fencing to the run since the opening for the driveway was too wide after looking at it. I ended up sinking another post real quick then taking an extra panel we had left over that was intended to be used to finish up the remainder of the chicken yard fence and use it to set up the last section of fencing. With that we finished the western section of the perimeter fence. 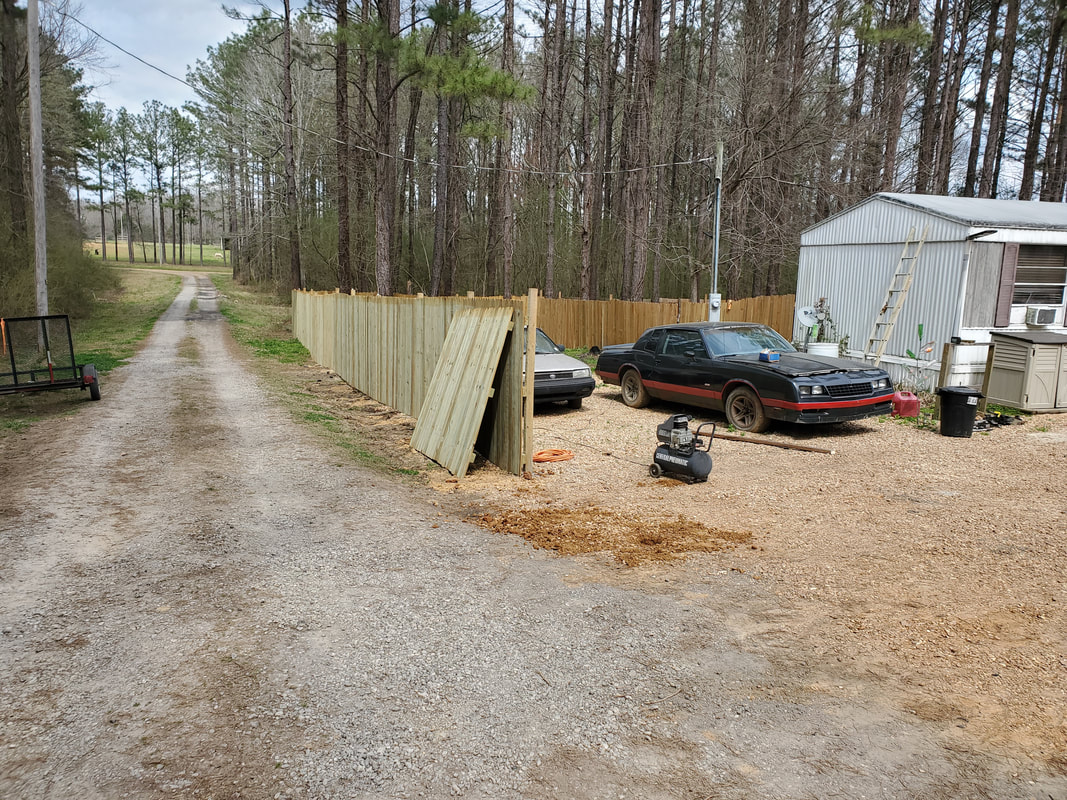
Fence up to the driveway before adding the last panel. Note the vastness of the driveway opening all the way to the right.
Shot from wide driveway of fence run down the line.
Fence after adding extra panel, shadow to left is vehicle in driveway, showing opening is a little wider than a regular truck.
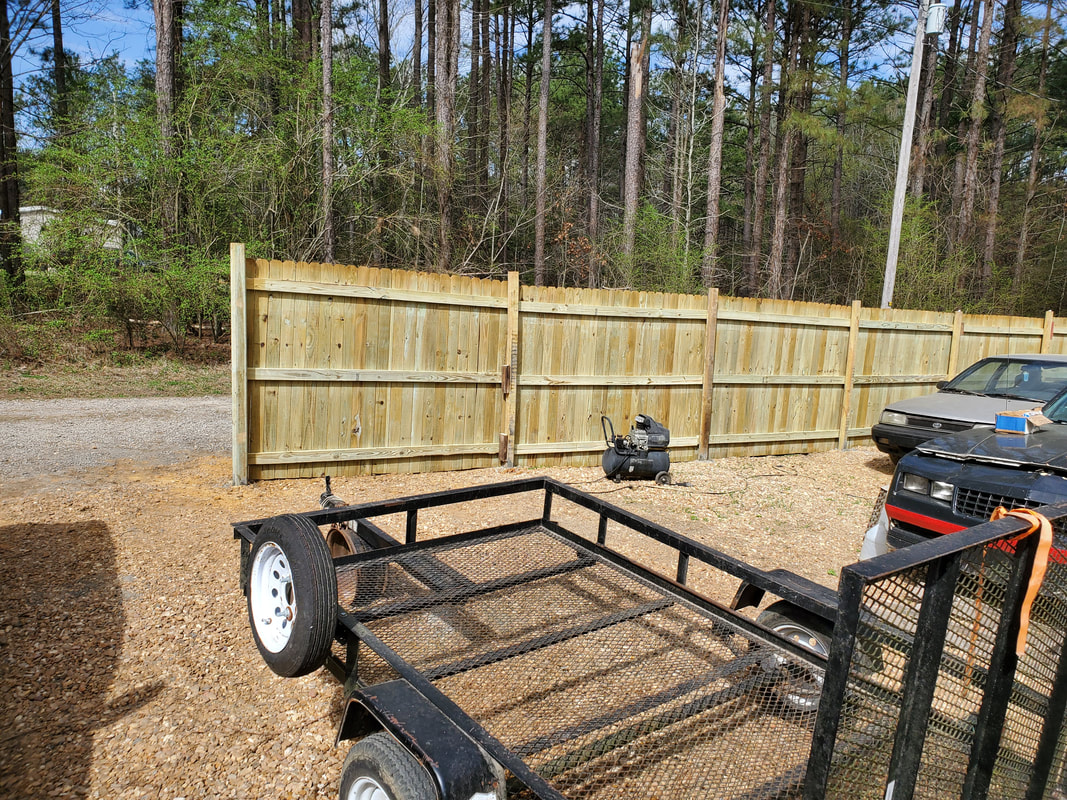
With the fence run done the next phase for this area will be planning and building the gate system. From what I'm visioning in my head so far, I'd have a couple of large posts sunk in the ground along the inside of the fence line. These posts will hold some type of rollers that will allow the frame of the gate to roll along across the two posts, using a gate opener to pull it back and forth. The gate will be made from fence pipe and have wood pickets secured with self tapping screws to make it match up to the rest of the fence. The gate will also have a wheel carriage on the opposite end to keep the gate from sagging and help it roll along smoothly as it opens and closes. In the meantime I'll be moving on to other sections of the perimeter fence, trying to get the rest of these areas closed in.
As I've been doing, the task of covering the grounds with gravel and erecting a fence all the way around the grounds has been and will continue for a good while. I've been focusing on the midway as far as the graveling is concerned since this area is long and covered in mushy ground. Because of that, the gravel doesn't go as far as it would on more solid ground since I have to mush the gravel into the mud then come back over that area with more gravel to ensure a good covering of ground that will take the weight of the truck. On the last gravel run the old guy the cement place had working the front end loader that day mistakenly loaded me up with pea gravel instead of the 1" gravel I typically get. While I could've been upset about it, there was really no remedy to this since no one is going to shovel all this gravel out of the bed of my truck so I just said screw it and rolled with it. After thinking about it, it might've been a blessing in disguise as it allowed me to fill in the intermediate area between the walkway and the rock garden with more pea gravel. I was planning on getting bags of pea gravel from Lowe's to further cover this area but at $4 a bag, I would've spent way more than the $10 for the bed load of pea gravel I ended up with. I was able to fully cover the intermediate area with a thick bed of pea gravel and have plenty left over to cover more area of the midway with pea gravel. I'll end up covering this stuff with more of the larger stuff in the future as we drive over it and smash it into the mud. 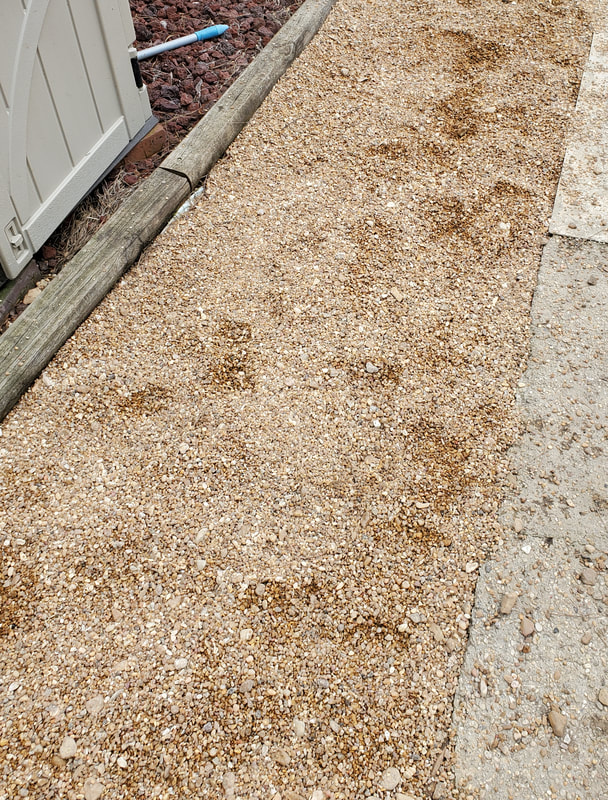 Intermediate area between walkway and rock garden covered with more pea gravel to ensure a thick covering. Since the pea gravel that got spread would be covered later on by the larger gravel, I figured I could just focus on filling in the mushier areas in the yard as well as the farther out areas that will get a second covering of rock. The pea gravel in many spots is the first layer in what would be several layers of rock so rather than waste good rock on a base layer, its pea gravel to the rescue!  Small patch of pea gravel covering a mushy area over an already covered gravel spot. Even though the plan was to put the pea gravel in spots that will be driven over to get a base layer started, I did decide to lay the thickest layer off center towards the garden fence line since this area of the midway will most likely not see any vehicular traffic. This area will almost be more of a walkway for foot traffic after getting in and out of a car that is sitting on the center of the midway. Even if a car is parked more to the garden side of the midway, it'll only be one side of the vehicle putting weight on the pea gravel. 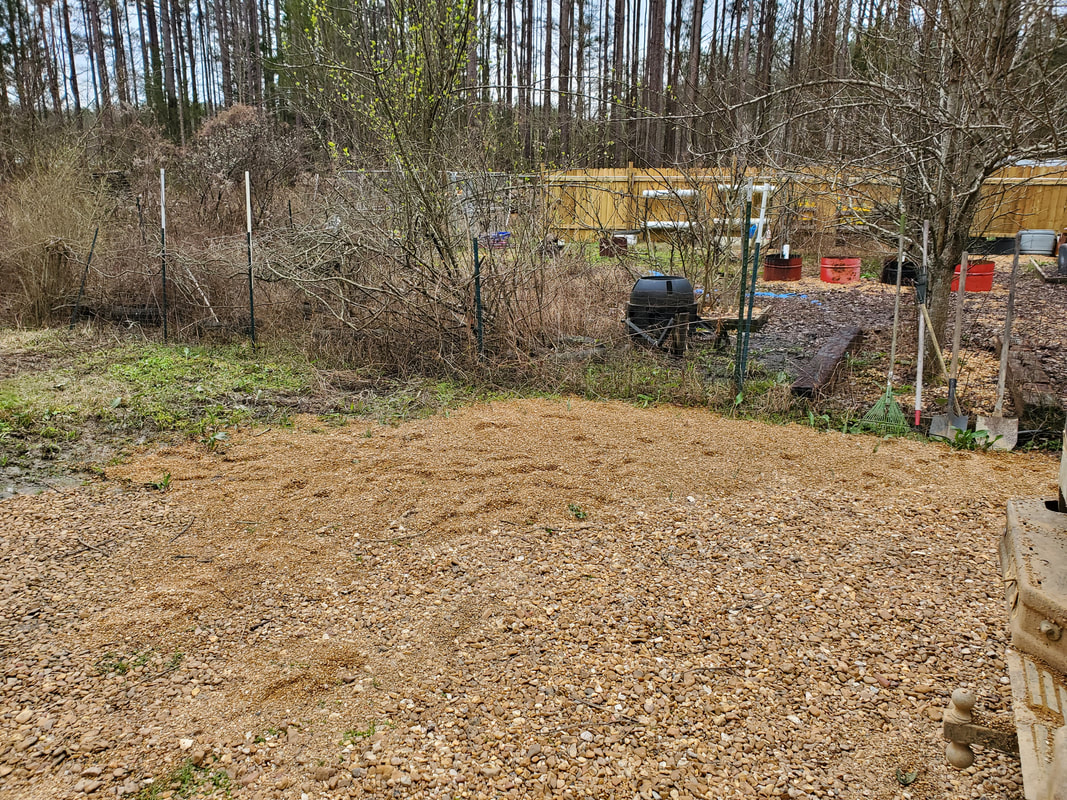 Pea gravel spread on garden side of the midway extending to the center. The next thing I turned my attention to was the sinking of fence posts along the west side fence line running parallel to the driveway. After getting more posts to finish the run terminating at the main driveway, I had to rearrange a couple of the vehicles parked in the general park area since they were parked with their noses pointed out to the driveway. Since the fence posts would be going in the ground right through where the cars were parked, they had to be turned 90 degrees, putting them parallel to the driveway. Also they had to be reoriented this way because when I put the fence panels up, even if the cars weren't in the way, they would be blocked in. Besides after the fence is up, vehicles and other equipment would be brought in and oriented this way anyway. 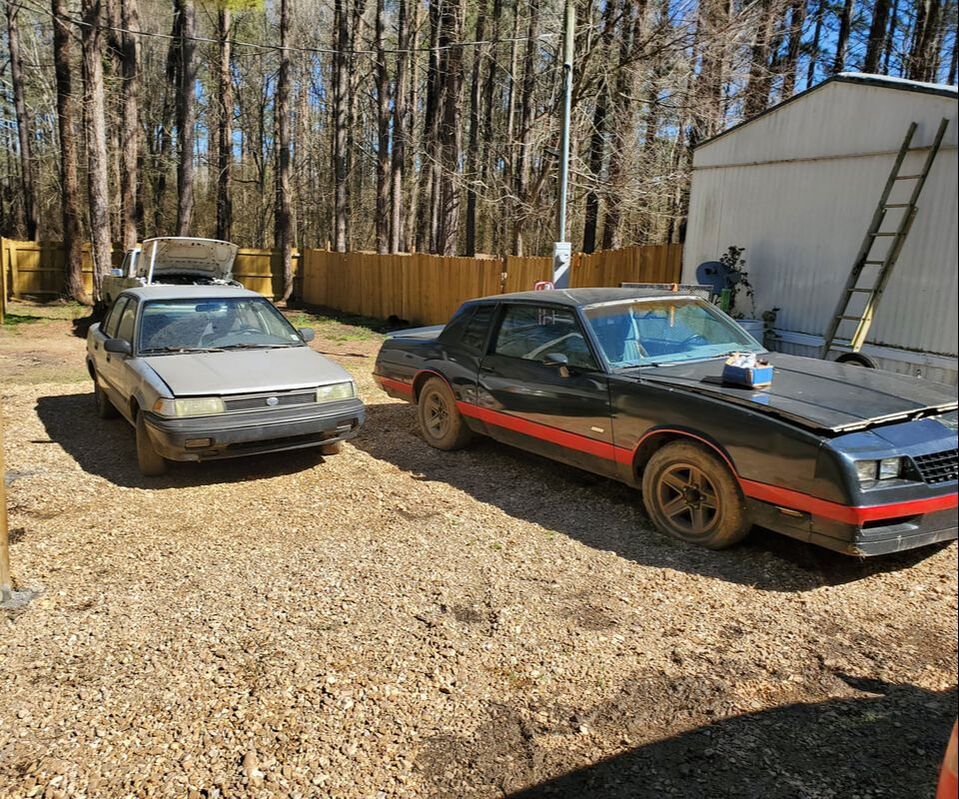 Cars reoriented in the general car park area after sinking fence posts. With the post hole auger I was able to get all the holes drilled super fast. As with other fence posts, to make things go fast I just laid the post in the hole then poured the dry concrete into the hole along with water until the hole was completely filled up with soaked concrete. With all the posts in the ground, I was ready to start installing panels.  Fence posts in ground ready for panels. The only reason that I decided to go to panels instead of piecing together the fencing like we had been is because the components have went up in price drastically in some areas. While the pickets still held strong around $2 average per picket (which is still high compared to what they should cost in a complete panel), the pressure treated 2x4's went up twofold. Normally they were $5 a board for 2x4x8 boards, now, they're $10 a board. The completed panels are around $43 a panel. When you factor in the cost of the three 2x4's and the approximately 20 pickets, even without the nails and time a completed panel will end up costing 2x as much as a commercially made panel. So yep, we'll be getting completed panels as long as we can still find them.
As the fencing goes up at a rapid pace, some things around the yard that were being put off are now on the table as far as the need to expedite gets painted on these tasks. If they continue to be put off after the fencing covers the areas around the locations where these tasks need to be performed, it will make the completion of said tasks very difficult.
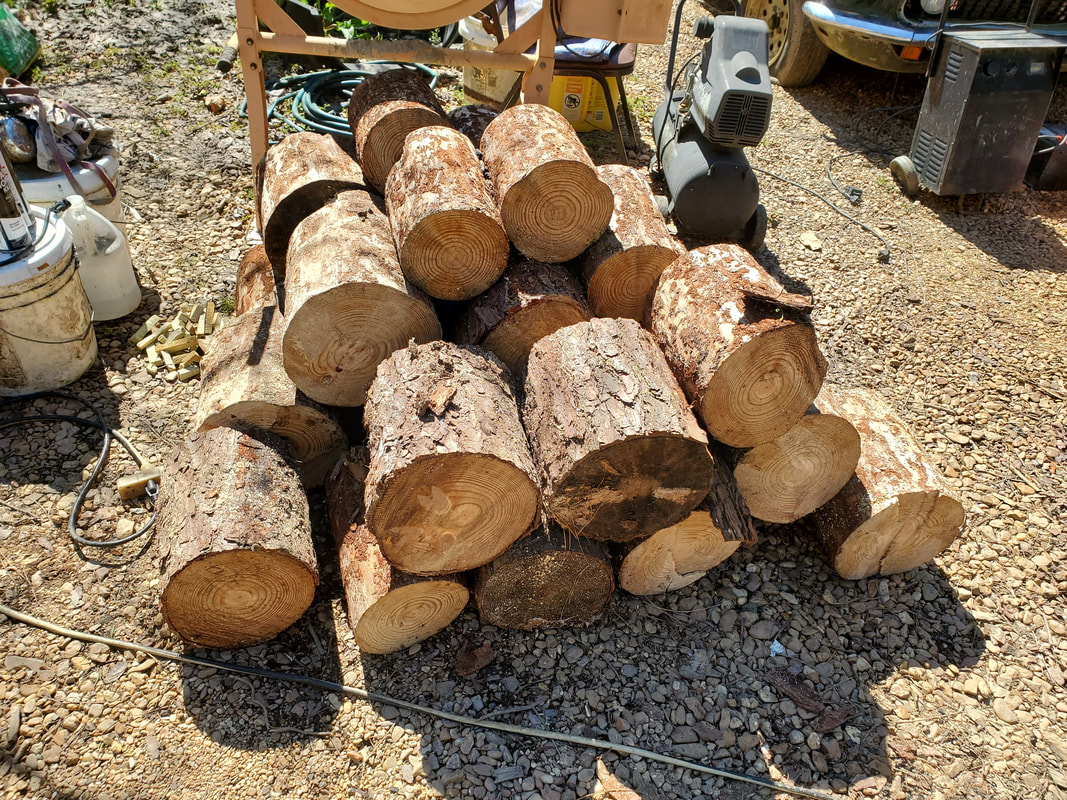
One of these tasks is the clearing of some old cut tree trunks from a tree that we had brought down around this same time last year. The tree was a tree that was pushed by the straight line winds that came through our area early last year. This tree was leaning by the root ball precariously towards the house so it had to go. After the tree guys dropped the tree, they cut it up into small enough sections that they were able to stack it in what is now the Northeast corner of the compound. These sections are around 8ft long so they would need to be further cut down to move under any circumstance. Either way, before I put the fencing along the east side of the compound, I have to remove these tree trunks. Otherwise they will never be moved. The other problem is the fact that the firewood shed is blocking the area going back to this area almost completely, based on where the fence will go. Of course the firewood shed will need to go in order to open this area up to the rest of the yard. My plan is going to be to move the firewood storage to this very rear most section of the yard, right where the tree trunks sit at. Unlike how I have the firewood stored currently, I do plan on laying gravel down over all of this area to create a covered base with which to set pallets down in order to stack all firewood. Since I have so much firewood and the area will be relatively narrow once the fencing is set up, I plan on laying the pallets and the stacked firewood in a way where there will be a central corridor that will allow us to walk between the stacks of firewood all the way to the back fence. We can then collect the older firewood that will be getting stacked first at the back as well as place new wood on the pallets as we use old wood. Reason why I say I'll store old wood in the back instead of the front is because I want to clear the firewood shed of all its wood so I can dismantle the structure. If I wanted to put new wood in the back first I would end up having to spread a lot of gravel first and lay a lot of pallets and stack a lot of firewood before I can get to the old wood. There's really no way to get the wood staged where the oldest will be up front. We still have a lot more wood and whole trees to cut up. So in the meantime, I have to cut up these tree trunks in the back so I can split them into usable firewood and get the area completely cleared before moving on to the next phase of the project. Since I already used a lot of firewood from the existing stacks, this newly cut wood will go in those opened spots for the time being so there is no new stacks created. 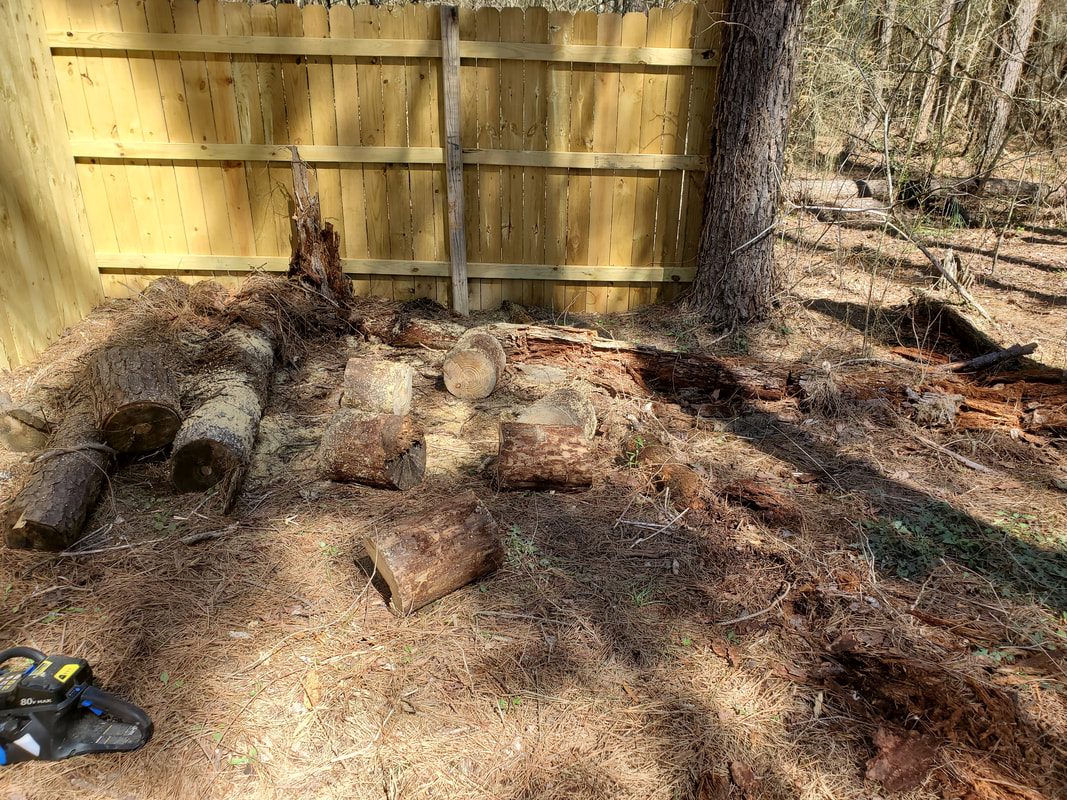
NE area with tree trunks that were just cut up with the chainsaw, note longer logs to left that still need to be cut. Also note width from chicken yard fence to left to the tree on the right.
After going through another chain on the saw and several battery rechargings, I managed to get all of the tree trunks chopped up, I ended up with a huge stack of raw firewood logs. This huge pile was staged in the driveway where I normally stage wood prior to splitting since the extension cord and log splitter are in this area. I ended up going through a bunch of splitting to get all this wood split up, generating bunches of tree bark from the partially dried and seasoned wood, all of which went into the burn pile. 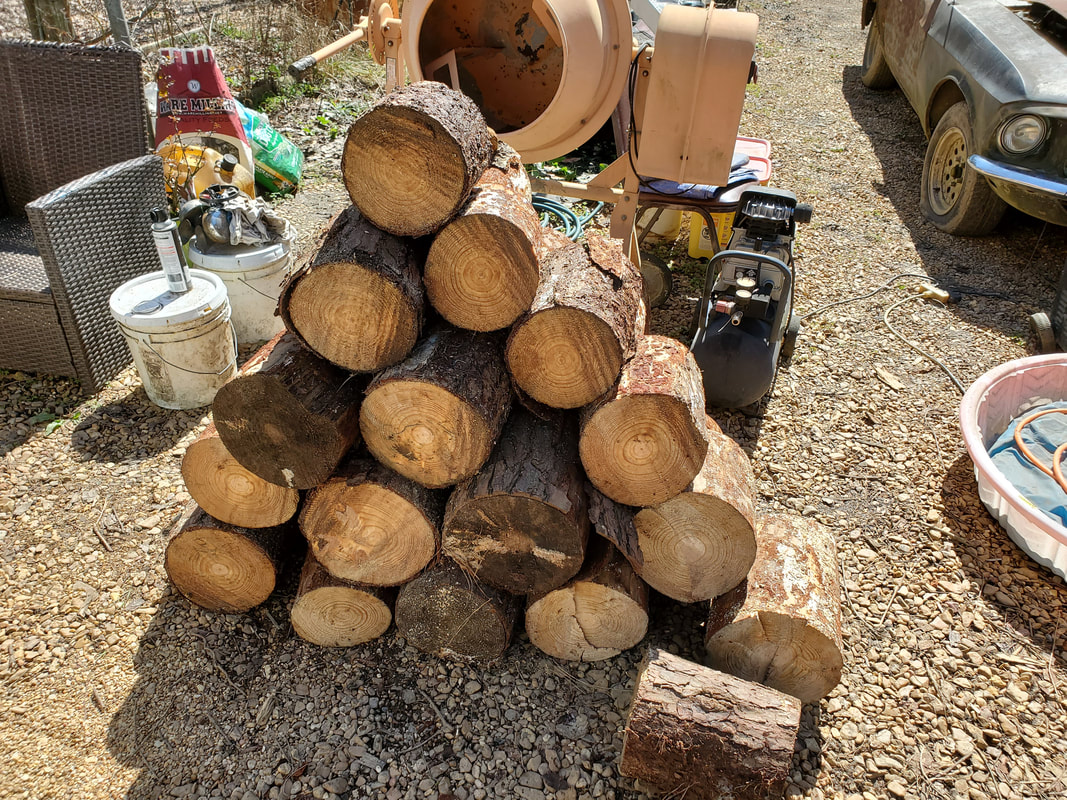
Log pile stacking up as the tree trunks get cut up.
The large pile of firewood logs, awaiting splitting.
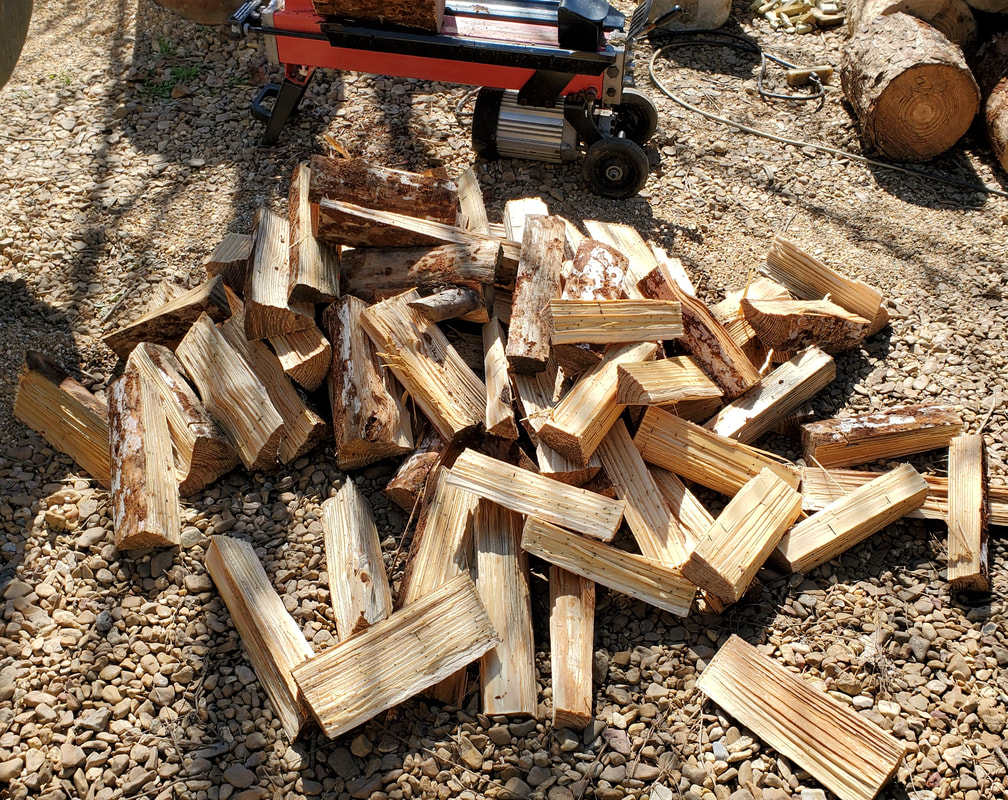
Fresh split firewood awaiting transport and stacking at the firewood staging area in the back of the yard.
After getting all the wood split up I went ahead and started stacking the wood in one of the spots on a pallet that I managed to clear up. Since the empty spot was right in the middle of the line of firewood stacks, this was a perfect spot to stack the fresh firewood, as stated before, to keep the wood out of the way by not creating a new pile that would break up the straight line of firewood that would be running along the new fence line as its established. Even though all this wood will be moved to the back when the firewood shed is gone and gravel is laid, the last thing I want is for something like a stack of firewood to be dead in the way. 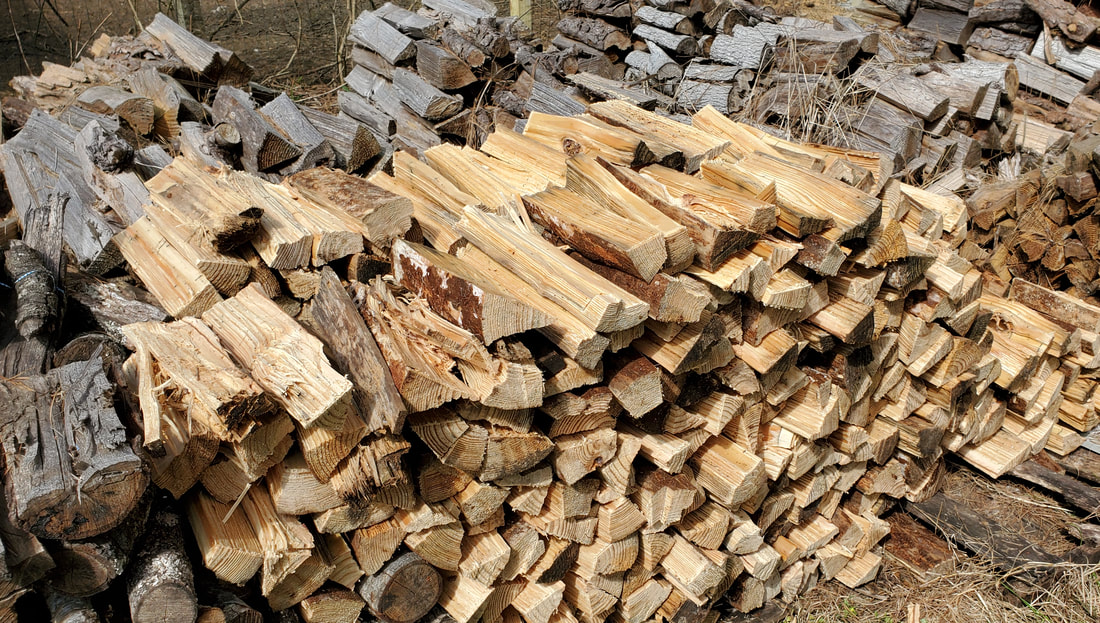
Fresh split firewood stacked in empty spot in firewood staging area.
Even though we did use a good amount of firewood through the winter, when you look at the pile from end to end, it hardly looks like we dented the pile. The vastness of the firewood pile is so great that we will be set in wood for several years, if we keep the wood preserved and off the ground. This is why I wanted to lay gravel down and put fresh pallets down to set the wood on top of so air can move under the wood as well as prevent moisture from the ground from penetrating into the bottom most pieces of wood. Adding some type of covering, even something as simple as some large tarps, will further preserve the wood enough so that this supply should last us a long time. 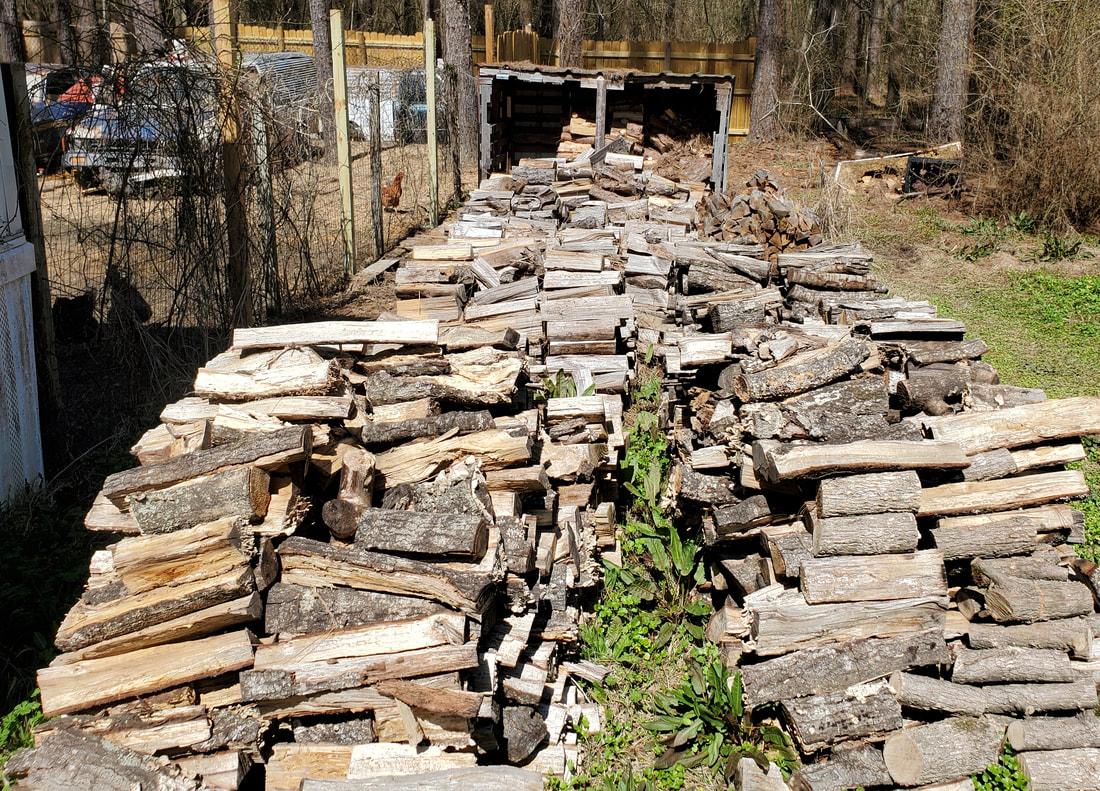
With the back area cleared I was able to do some extra fine tuning to the area, chopping up old stumps from weed trees I cut down in the past as well as chopping up any new growth that's trying to make an attempt at popping up. I had to remove some old fallen tree trunks that have long since rotted into brittle dusty garbage that was good for nothing other than harboring carpenter ants and other six legged critters. After getting all of this trash removed, I was left with a nice clean slate with which to lay my gravel down and start the building of my new firewood storage area, tucked away enough so as to not take away from the rest of the compound. 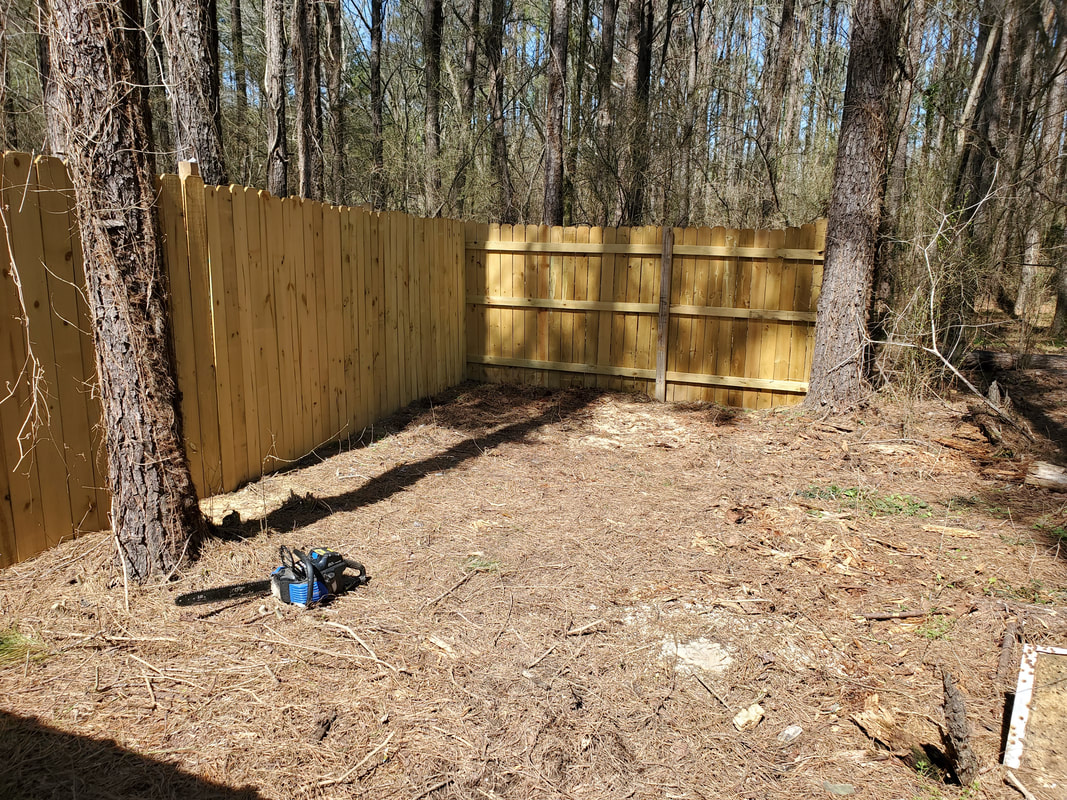
Back area cleared of everything, ready for gravel.
This little job ran right behind my next task which is going to be sinking posts and finishing up the west side of the fence that runs along the driveway, which will probably net me some extra posts which I will end up sinking along the eastern fence line, which runs right by this area. The sooner I get the gravel down and the firewood resituated the sooner I can jump right to hanging fence panels to fully enclose this area and get that much closer to containing the homestead and getting more critical areas organized.
After moving over to the midway in the yard (the area going between the house and the garden, effectively dividing the grounds in half), I've been focusing my gravel laying energy to covering this area as much as possible. Because the ground here has been mushy for quite a while, being bad enough to almost take a shoe, I had to get this ground covered up as much and as deeply as possible so I can be able to move vehicular traffic over this area without incident. Many of the tasks that I will be conducting on these grounds will involve me needing to be able to move vehicles and other equipment over this midway to get to the eastern part of the yard, or to just turn around by pulling through the area, around the east yard and back around through the southern section of the yard and back into the midway again. We won't be able to do this if every vehicle ends up sinking in the mud badly enough to need double the tow chains and a vehicle setting on more solid ground in the main driveway to be able to pull without getting stuck itself. So with that I've been dumping gravel on the ground then driving over the newly spread gravel, sometimes pulling forward and going back over the rock to widen the coverage and mashing of gravel into the mud so I can come back over this compressed rock/mud combo with even more gravel. Gravel spread on midway near garden near gate. Note wet areas in foreground and in far background One of the problems that I was having with the gravel on the mushy ground, especially with the heavy truck driving over the area, was with the tires mashing into the soft ground, pushing the gravel underneath it into the mud, but then mashing a gravel/mud mix from the sides of the tires. Even when I pulled off the area or when I just kept going backwards, I would leave a track in the ground that was still covered with gravel but was deep enough that it would be a problem later on if left unchecked. To help this along I would have to kick the side ooze of gravel mud back into the tire track, then drive forward over this area to mash the reapplied gravel mud further into the soft ground, then do the same behind the tire before going backwards deeper into the midway once again. 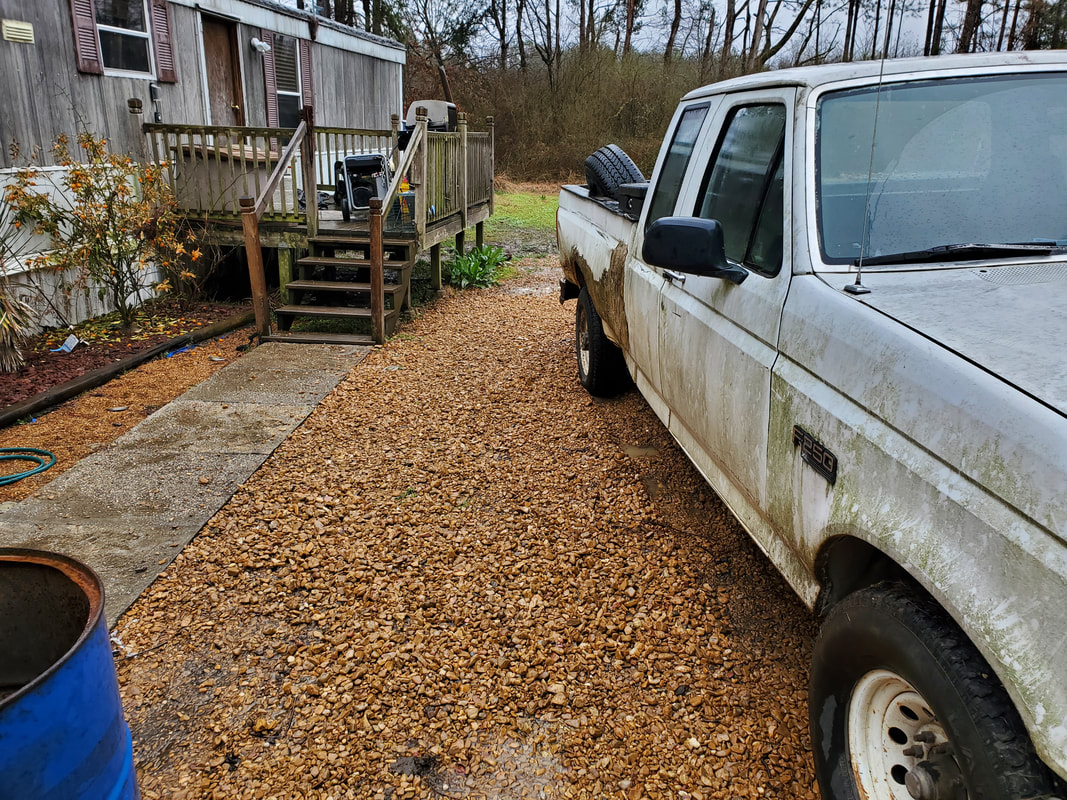 Gravel spread along midway bringing the ground level with the walkway. Note wet spots where more gravel would be needed to cover surfacing mud. Of course just merely walking over the soft ground with the freshly laid gravel helped settle the rock into the mud, nowhere near as much as four tires rolling over it but still a little something. In a way walking over the soft ground was a bit of a controlled settling of the gravel into the mud. One bonus that I did get from spreading this extra gravel over this area was that it allowed me to make the ground from the driveway up to the side of the walkway even out. The walkway is no longer elevated from the original ground as the layers of gravel effectively raised the ground up. Not every square foot of the ground in the midway was soft and mushy though. The biggest problem was the area directly across from the porch, what would appear to be the middle third of the length of the house. This area was the worst for the soft ground. Further east over the midway the ground starts to get hard again so the biggest concentration of gravel will end up being over this middle third of the area running along the length of the house. As far as I'm concerned, if it takes 3x the gravel to get this area completely covered and hardened back up to where I no longer need to worry about any kind of softness in the ground, it is totally worth it. 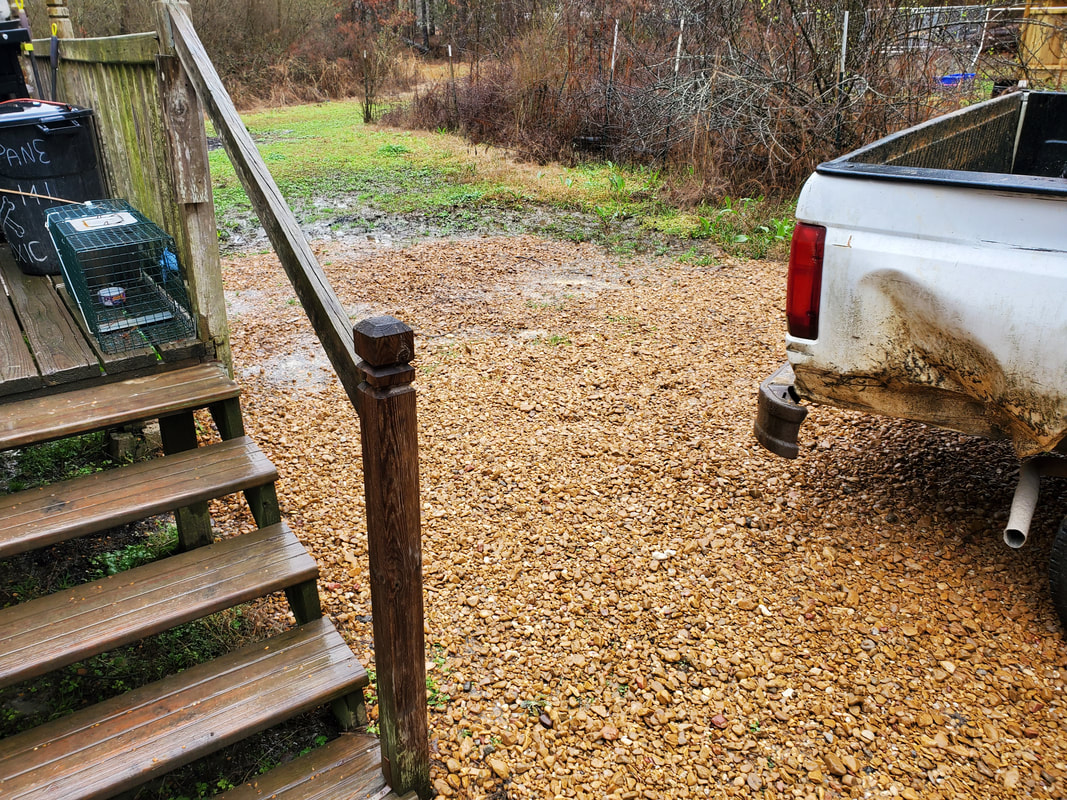 Area of midway covered with gravel showing level of mush from the muddy ground as it goes back deeper into the area from the main driveway. Due to its age, the porch that's been serving as a platform and landing for us to enter and exit the house as well as situate appliances and other items for random use will end up needing to be replaced. Under the porch, erosion has taken its toll, washing dirt from this area, under the house and out of the other side, taking lots of soil with it. This is part of the reason the middle third of the midway has always been mushy, its been a funnel of sorts to channel water from up slope through this area and under the house versus just evenly spreading over all of the grounds so as to prevent an over saturation of the grounds. As part of trying to strengthen the grounds of the midway, I'll have to shore up the ground under the porch as well as the grounds on the other side of the house in the chicken yard where erosion has taken its toll just as well. This will most likely be done with the use of masonry blocks placed to serve as barriers while I add some soil to fill in the eroded spots under the porch then covering this up with gravel so as to level off the ground enough so that I can reposition the concrete blocks that are used to support the porch's posts. I may even use bags of concrete where the soil eroded instead, ensuring a solid foundation for the concrete blocks to set on, and also ensuring that further erosion, with the help of the gravel will no longer be a problem from the midway all the way under the house and beyond.
One of the small projects I decided to take on in the process of cleaning up the garage was making an engine stand for one of the engines in storage within. At this moment we have two SBC 305's, two SBF 302's (one complete, one broken down), a SBF 289, a Chrysler 440 BB, a SBM 318 disassembled, and a number of transmissions. Well engines typically weigh upwards to 600 lbs a piece with all of the accessories hooked up. With that, one can imagine that moving one of these would be a bear to move around the garage when necessary. The only option really was to use the engine crane to lift the engine up and roll the whole works around in order to set the engine down in its new spot. The other option is to build engine stands/cradles for each engine so they can be moved around the garage when need be without the use of the engine crane.
The first engine in question is one of the SBC engines. It's not complete but its enough that it's a PITA to move. It was sitting on top of a tire to keep it upright so its not laying on its side or on any critical component. I also had a couple of homemade stands that were made specifically for the SBC block. I figured I can build onto these stands and produce a rolling platform that will properly cradle the engine. I figured I could attach a some 2x4's to the stands to make a base that would hold the stands then attach some heavy duty caster wheels that can hold the weight of the heavy engine. 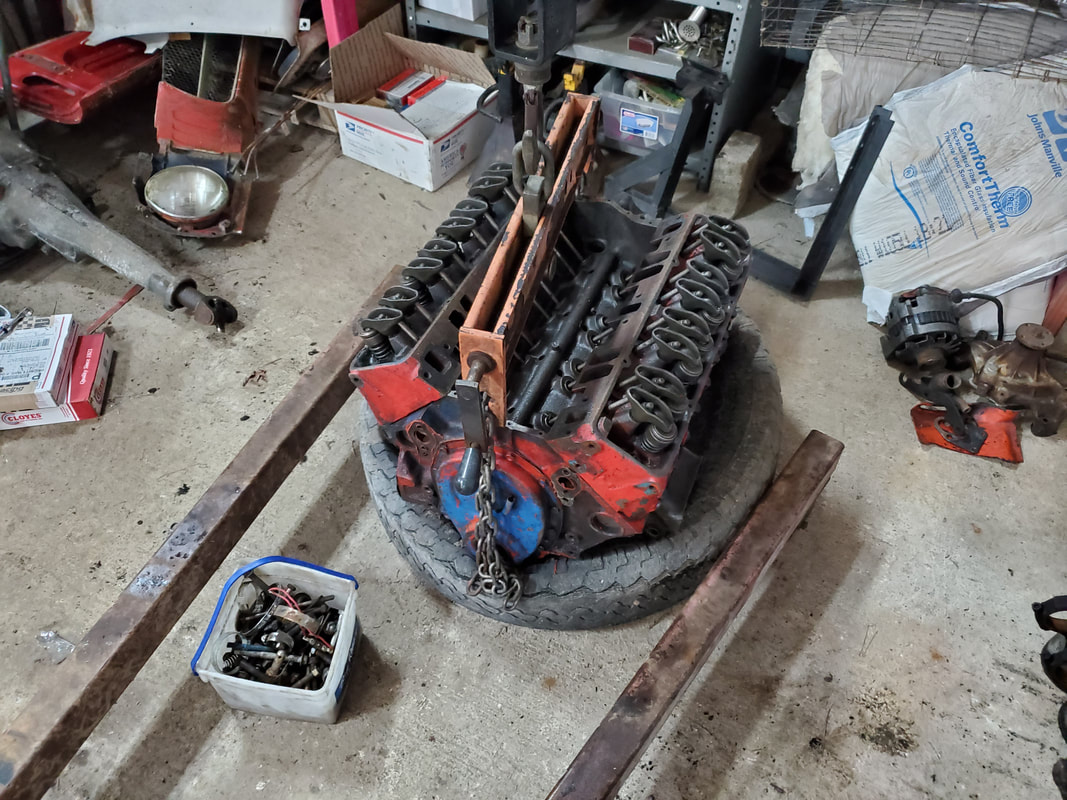
SBC engine sitting on tire with crane over it ready to hook up.
The first thing I had to do was get the engine crane into position and hook up the balancer to the block so I can lift the whole works up to attach the two frame/stand pieces. This was rather easy, just hooking the two chains on the balancer to two bolt points on the cylinder heads at the front and back, using grade 8 bolts so as to ensure that the chains won't break free. Once the balancer was hooked up I was able to lift the thing up. 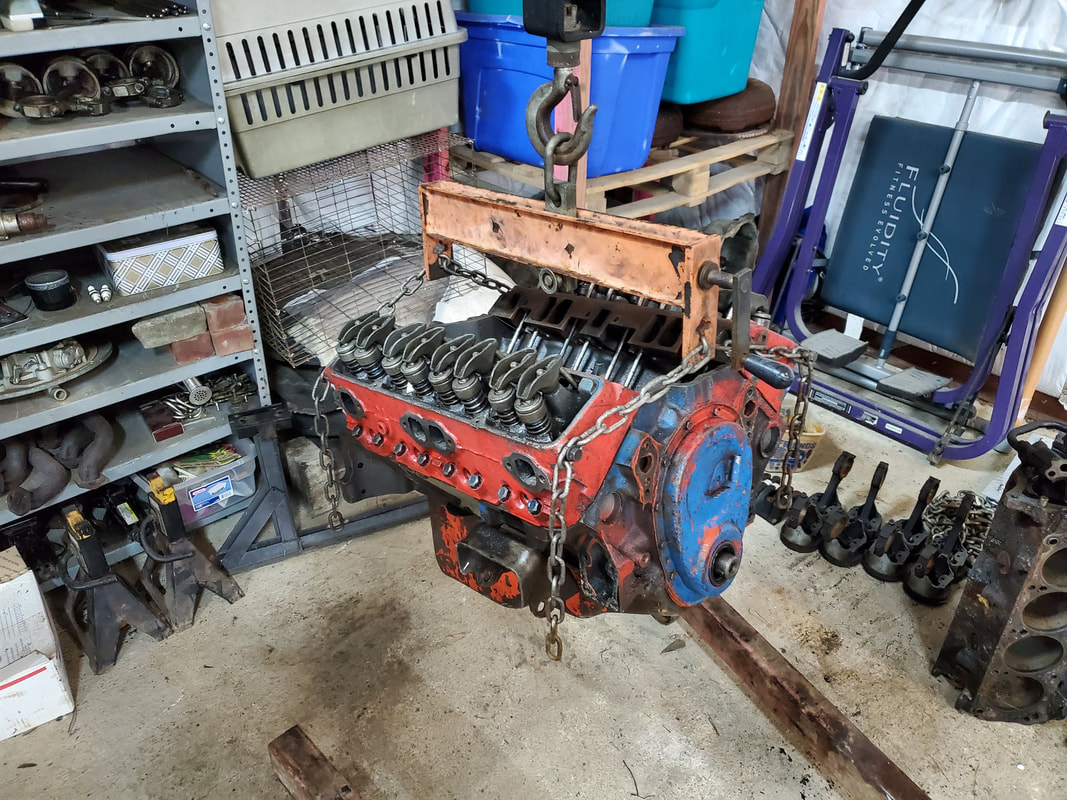
Engine in the air with the help of the balancer and the chains.
The two frames were made with off the shelf angle iron that was welded together with three mounting points to hold the frames at the engine mount holes on the lower sides and two on the bell housing bolt holes. With the frames bolted up to the engine block I can move on to the next step, making the base out of some scrap 2x4's. After looking at the whole works, I decided that I could get away with just attaching two 2x4's, one at the front and one at the back, linking the left and right corners of the frames together. Rather than building a whole frame that would've incorporated four boards, this method allowed me to get away with just two boards. Since the frames are indeed iron, they would support the brunt of the weight while the boards are really just there to help hold the wheels. I had to drill a couple extra holes in each frame to be able to run some wood screws through to hold the boards to the metal frames. There were already a couple of holes in the frames but they were larger, for 5/16" or 3/8" bolts, so I had to use fender washers to be able to secure the narrower wood screws through these larger holes. 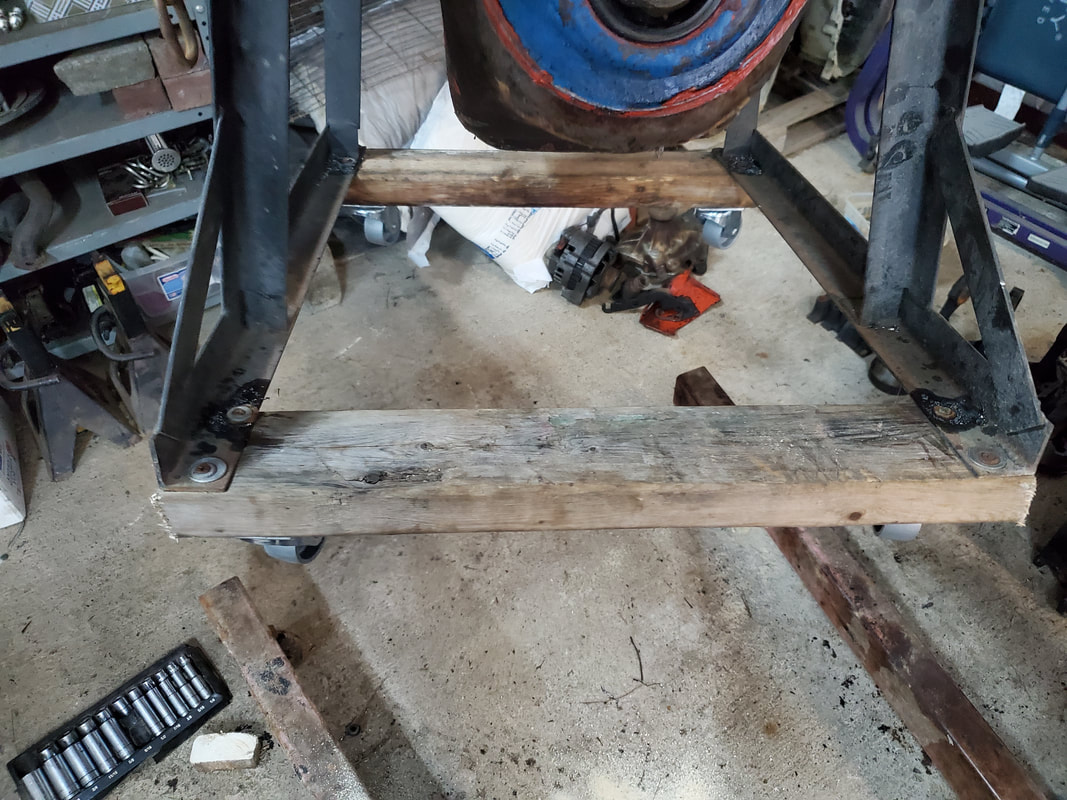
2x4's secured to the frames using wood screws and washers. Note how frames are made.
The last step in this process is installing the caster wheels. I picked up eight casters from the store, all metal, including the wheels themselves, rated at 300 lbs a piece, so they will be more than able to handle the weight of even a complete engine collectively. As with attaching the 2x4's to the frames, the casters were attached to the 2x4's using wood screws with washers as well. Once these were secured the whole unit was pretty much done. 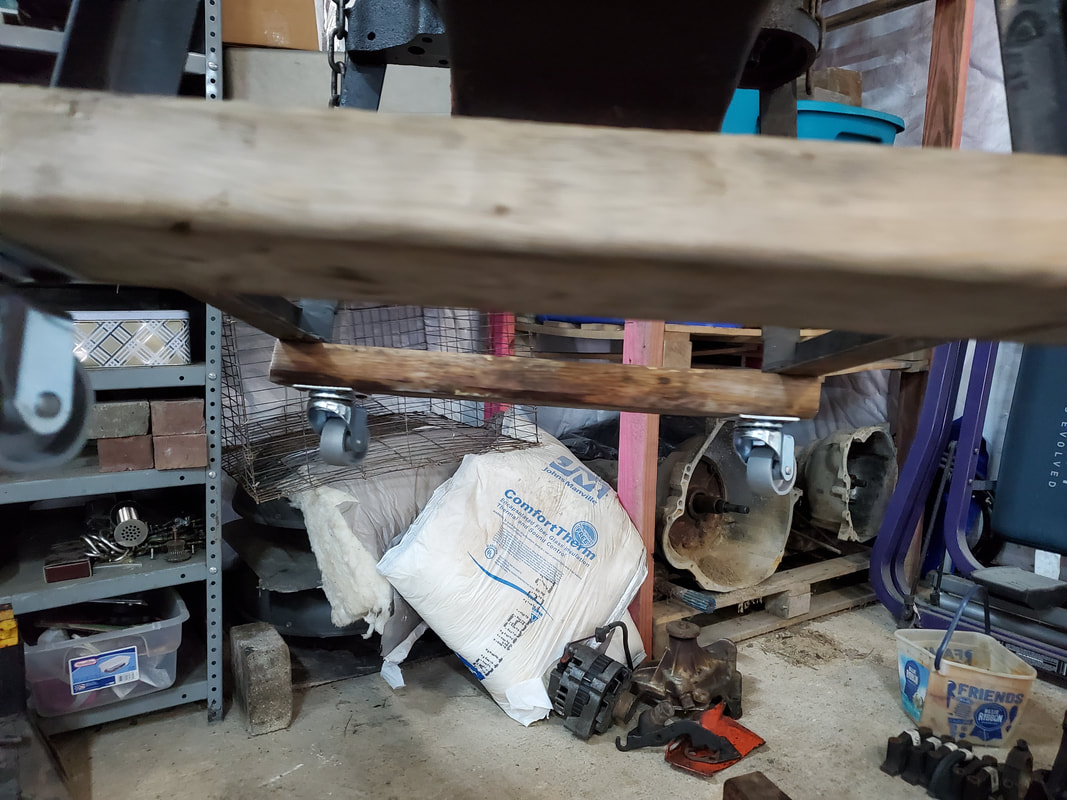
Casters attached on the underside of the 2x4 base of the stand.
With that I lowered the engine on its stand to the floor, taking weight off the chains of the balancer and putting all the weight on the casters. Everything on the structure held just fine and I was able to roll the whole engine on its stand across the garage over to its temporary resting spot in a corner with some other auto parts. 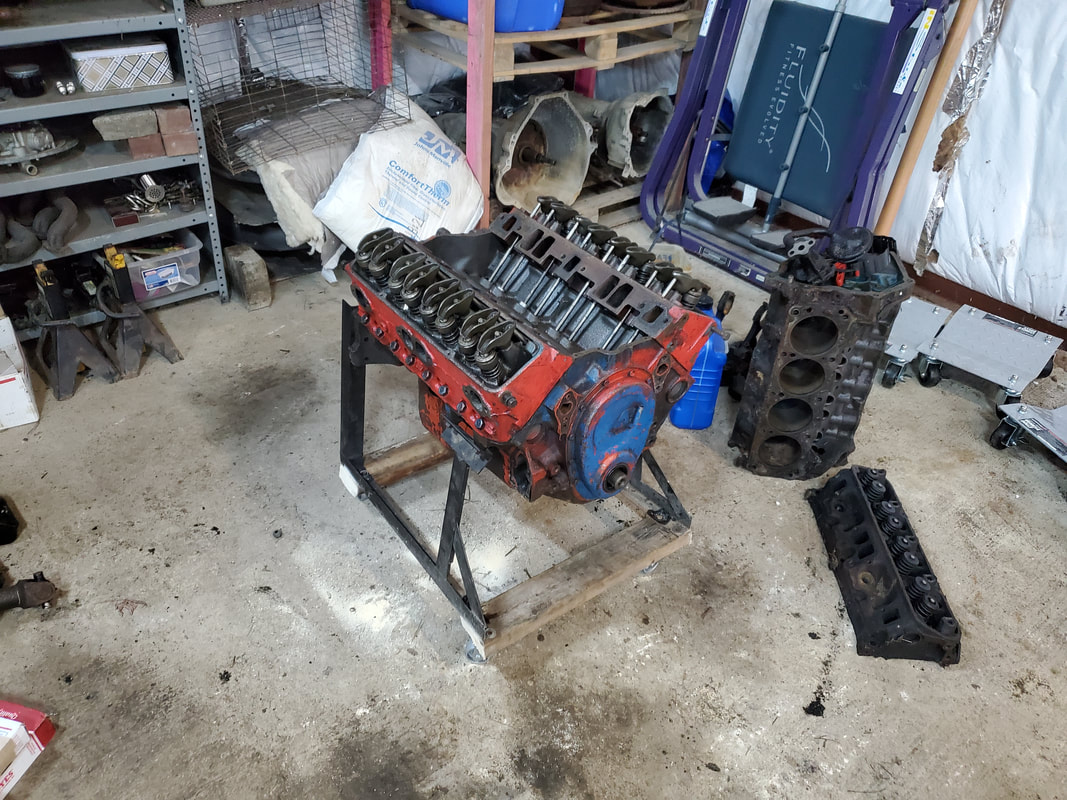
Engine resting on its completed stand, able to be moved around the garage.
As I noted earlier, I had eight casters and used four. This was because I planned on making another stand for a 2nd engine, which at first was going to be the Chrysler 440 BB engine but after thinking about it, I figured that I probably need to invest in more rotating engine stands and just put the remaining engines on these, and maybe make another rolling homemade stand for a SBF or SBM engine so if I happen to get my hands on another engine in the future, I can just stick said engine on one of my homemade stands to roll it in a corner prior to putting it on a commercially made rotating engine stand. I would rather have several rotating engine stands with ready engines that I can put to immediate use. The completion of this little project will go a long way to further organization and efficiency in the garage.
|
