|
On the Mustang I moved on to the trunk area. On these vintage Mustangs the trunk is the fuel tank. When you remove the fuel tank the trunk floor is gone. This is cool since it means you don't have to go under the car to remove the fuel tank, simple design. Well just like with the rest of the car, the trunk area was not spared from the rust demon. The fuel tank was rusted all to hell with a giant hole in the top of it. The trunk lid was rusted so bad that there will be no saving it. The side floors in the trunk are actually pieces of sheet metal that were screwed and welded in since the original flooring metal was rotted all to hell. I started off with pulling the fuel tank. 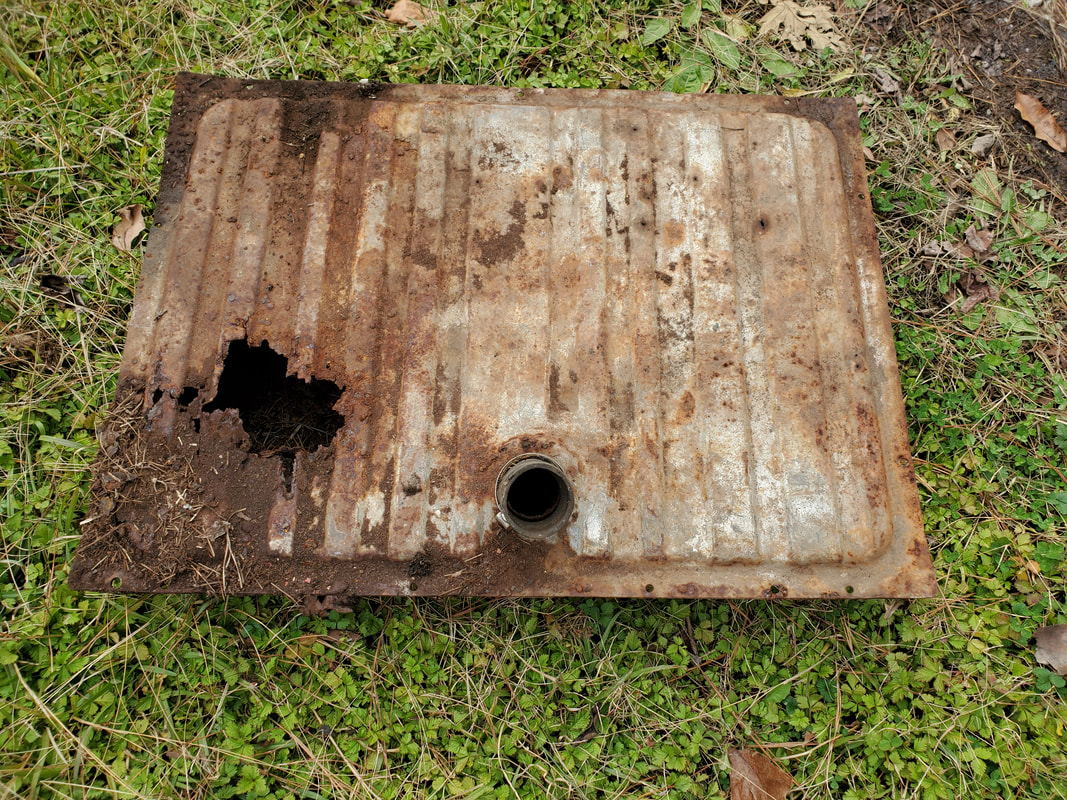 Fuel tank with giant hole in the top. This thing is trashed. Conveniently, the fuel tank wasn't secured to the floor in the trunk. Either I didn't bolt down the tank from the last time I was working on this thing or the screws/bolts rusted out. Either way I didn't have to worry about fighting stuck rusted bolts so that was a win for me. As noted the tank is scrap metal. It's probably just as well, since when I put the body on the truck frame, I will more than likely not be putting a stock tank in the trunk. Depending on where the truck's frame rails sit compared to the sub frame rails in the back of the Mustang body, I might not be able to put a stock tank in due to spacing between the truck frame rails. If that's the case I'll end up getting a fuel cell that's made to fit in the space between the frame rails and I can just add a longer filler tube from the port on taillight panel. If I end up doing that I'll just redo the trunk floor to be a more or less complete solid floor. Maybe I'll add a feature where part of the floor can be removed to pull the fuel cell out from the top.  Trunk with tank removed, showing open space in trunk floor. Note side panels that were patched in. All of this shit needs to be redone. As one can see I pulled the trunk lid next. Also as stated, the trunk lid was hashed due to rust. The inner support of the trunk lid was rusted so bad as to almost be separated from the outer skin of the trunk lid. I could try to do some bullshit patching and welding to try and save the panel so I don't have to buy a new aftermarket piece at an aftermarket price, or worse, finding an original panel from a classic car salvage yard at the price that good condition old stock panels typically go for. We'll see, depends on my full assessment of the panel. I would rather replace the damned thing but sometimes reality comes into play and it ends up being a case where I do have to patch the panel and reuse it for the time being until finances allow me to replace that part/panel with a new replacement. 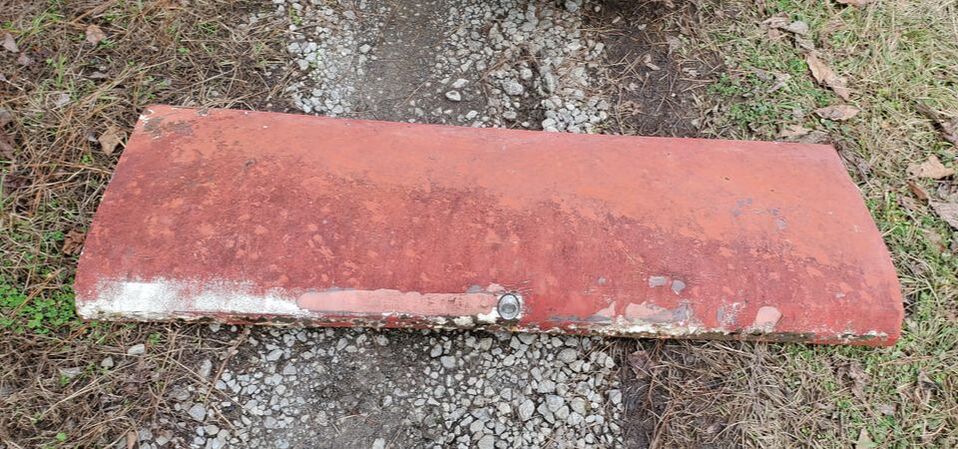 Trunk lid removed from car, just the outside of this panel shows the level of degradation. 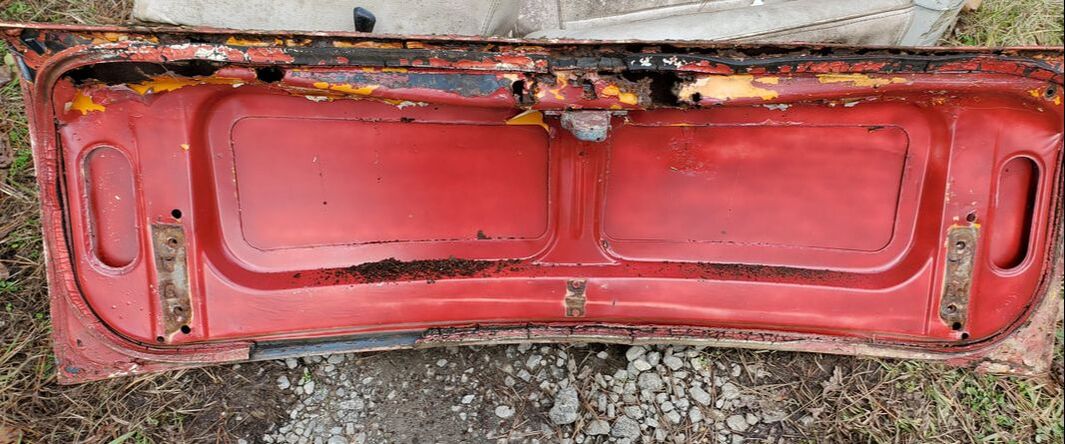 Inside of trunk panel reveals just how bad this thing really in. After taking care of the trunk area on the Mustang the next area was the fender wells at the front of the car. There's two rusty panels that go towards the back of the fender wells, from the way it looks, to act as splash pans to keep the door hinges from getting water from the wheels while driving in the rain. As any panel that takes the brunt of dirty water, these panels were trashed and close to falling out anyway. I decided I may as well just finish them off and chop them the rest of the way out since this shit will need replacing anyway. Even if I don't replace these panels with aftermarket replacements, something will need to go in their place to replace the metal in order to protect the hinges and keep water from intruding between the door and the door jambs and into the cab of the car. I may end up just cutting some scrap sheet metal and welding it in place to serve the same purpose as the old panels. 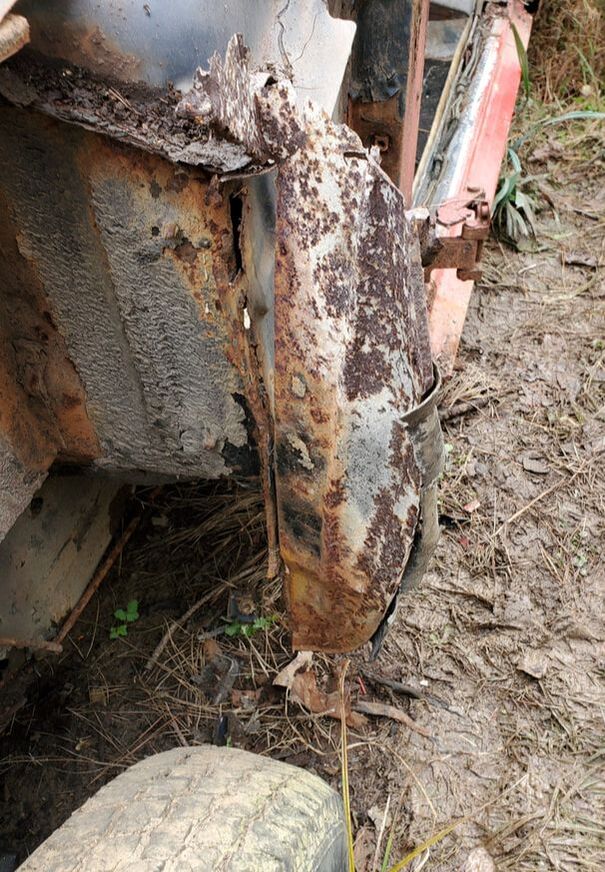 Fender well splash pan panel whatever the hell this thing is called, note the extreme rust on this panel. 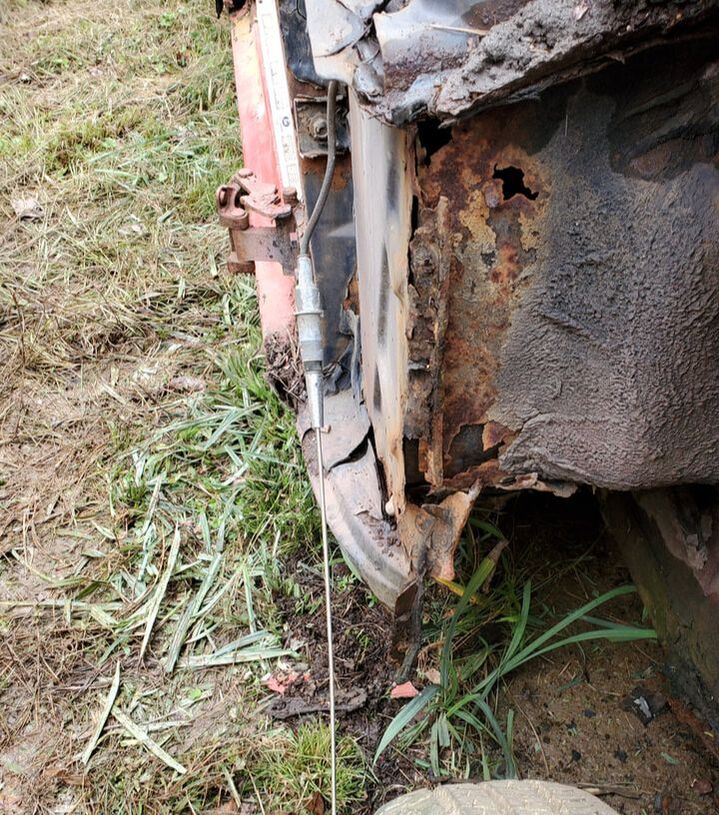 Other side fender well after chopping out the splash panel. Also note the rust on the panel going to the front of the cab. All of this will ideally need to be patched and repaired before putting the body onto the truck frame.
0 Comments
The stripping of the 65 Mustang still continues. As I pull large parts from the car I move on to the cab section of the car. Of course when it comes to the cab, the first thing that one would think of is the doors. These things had to come off in order to really start pulling parts off from the inside without the worry of having to prop a door open or just work around the area filled in by an open door hanging in the way. The cool thing about these doors and the hinges is the idea that the hinges are bolted up from both ends. Unlike some hinges where they are more or less permanently attached or welded to either the door or the body. Because of that I could've pulled the doors with the fenders still on, unlike some cars. Of course after removing the last bolt the heavy ass door had to be lowered to the floor slowly so as to not do any undue damage to the already rotted doors. 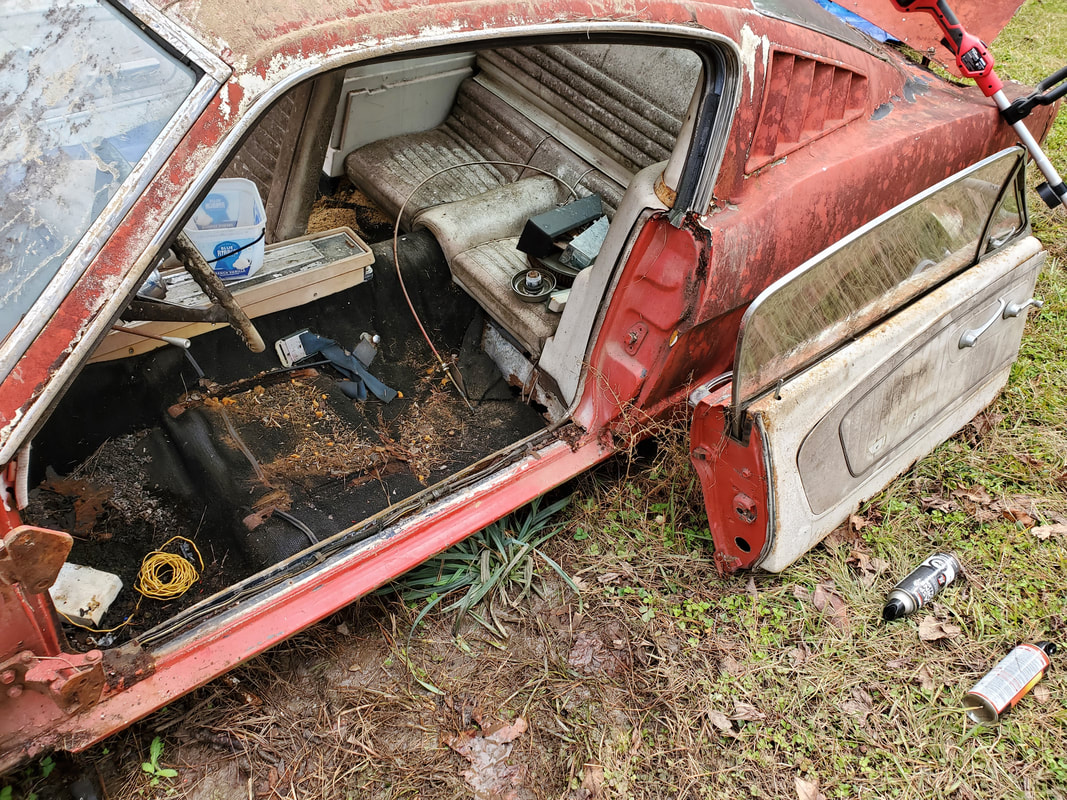 Driver's door removed from body, exposing the ratty interior, emphasis on ratty, due to the rat shit. The next thing that I had to do after pulling the doors from the car was remove the front seats. As with the doors, the seats had to come out to open up the space inside so I can continue to pull stuff out more easily. The only problem is that since the seats sat so long, the studs and their nuts were going to be rusted and most likely seized. Also just like the other years of vintage Mustangs, the floor under the seats is actually two parts - the main floor then a false floor over that where the seat sits. That means there's access holes in the main floor for reaching the nuts with a socket. Well for the most part, the main floor was almost gone on both sides due to rust. I was able to cut out the remainder of the floor that was in the way so I can get directly to the nuts. The first nut I tried to remove on the driver's seat was stuck. The second one was stuck, After a while I said fuck it and just pulled out the angle grinder and chopped through all four nuts and studs. After chopping out the studs I was able to pull out the seat. Of course this means I will most likely have to weld in bolts to serve as studs or grind out the remainder of the old studs then drill out the track where I can put regular bolts through to the floor, then maybe tack weld the bolts to hold them in so I only need to use the socket/ratchet to put nuts in. 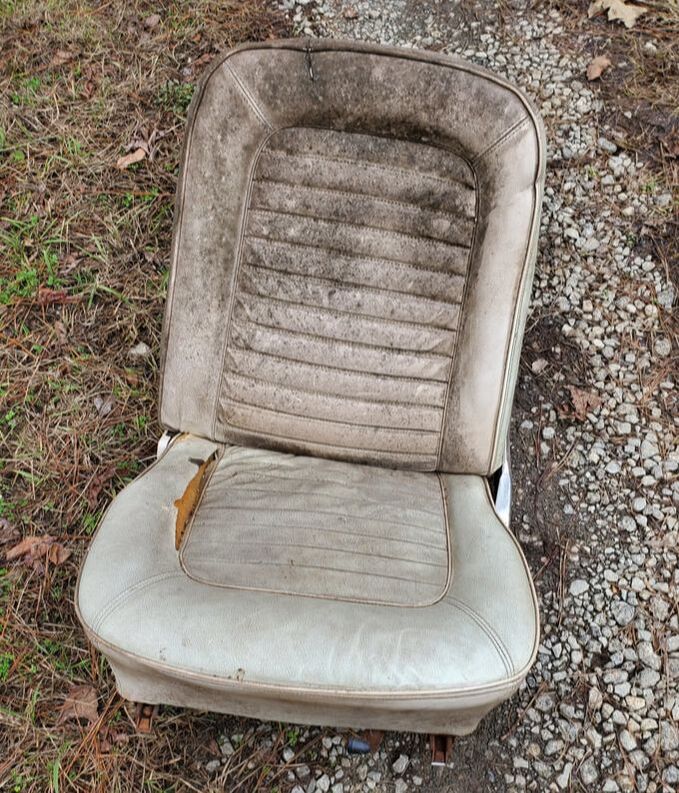 Old ratty drivers seat. This thing will need reupholstering. With the seats out I was able to plan out what I wanted to do in the cab on the next go around. More than likely I will try to remove the carpet completely from the floor in order to expose the sheet metal along with the headliner, to expose the roof metal. The more stuff removed the better. Besides, getting the carpet out will get rid of the rat shit as well. It will also expose the bad areas of the floor that much more so I can give those areas some attention as needed. 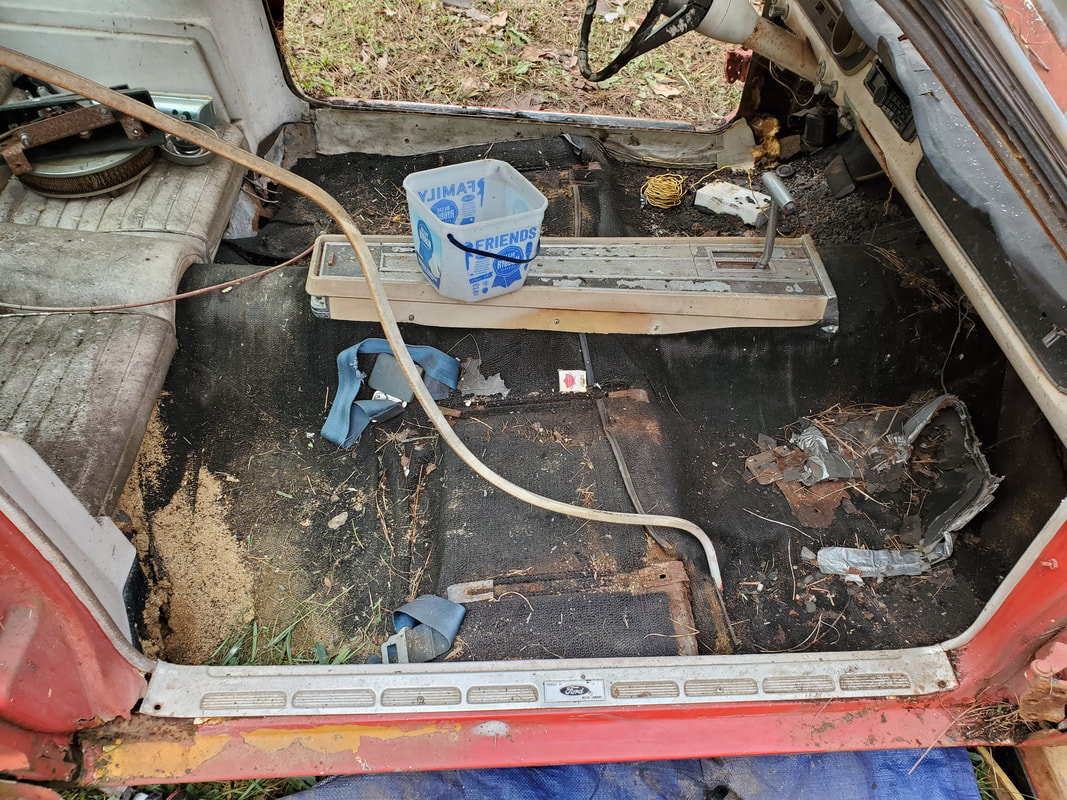 Shot of the floor after removing the seats, note the bad areas at the right side of the back seat as well as all the trash on the carpet.  Closeup of floor rot on right rear side of floor. Note the dirt and grass on the inside of the floor. Grass grew up through the hole in the floor and the dirt was deposited from fire ants bringing dirt up and making an ant hill that extended up through the floor. After starting the preliminary work on the Mustang I was able to get down to business. I started off my approach by stripping the "front clip" of the car. I wanted to remove the fenders, valance, grille, and other associated parts from the front end, trying to get everything down to just the fender aprons and structural support. Really this was a matter of just starting to take bolts off. I did start with the fenders, taking bolts off at the top but even after that there were hidden bolts that had to come out. There was a bolt by the door hinges, a couple of bolts along the rocker panel, and several bolts inside the front of the fender that were holding the headlight bucket assemblies. These headlight bucket assemblies turned out to be connected to the grille making an overall large component that was all connected. When I did manage to get the bolts removed from the front of the fender to detach the headlight buckets, I was finally able to get the fender off. 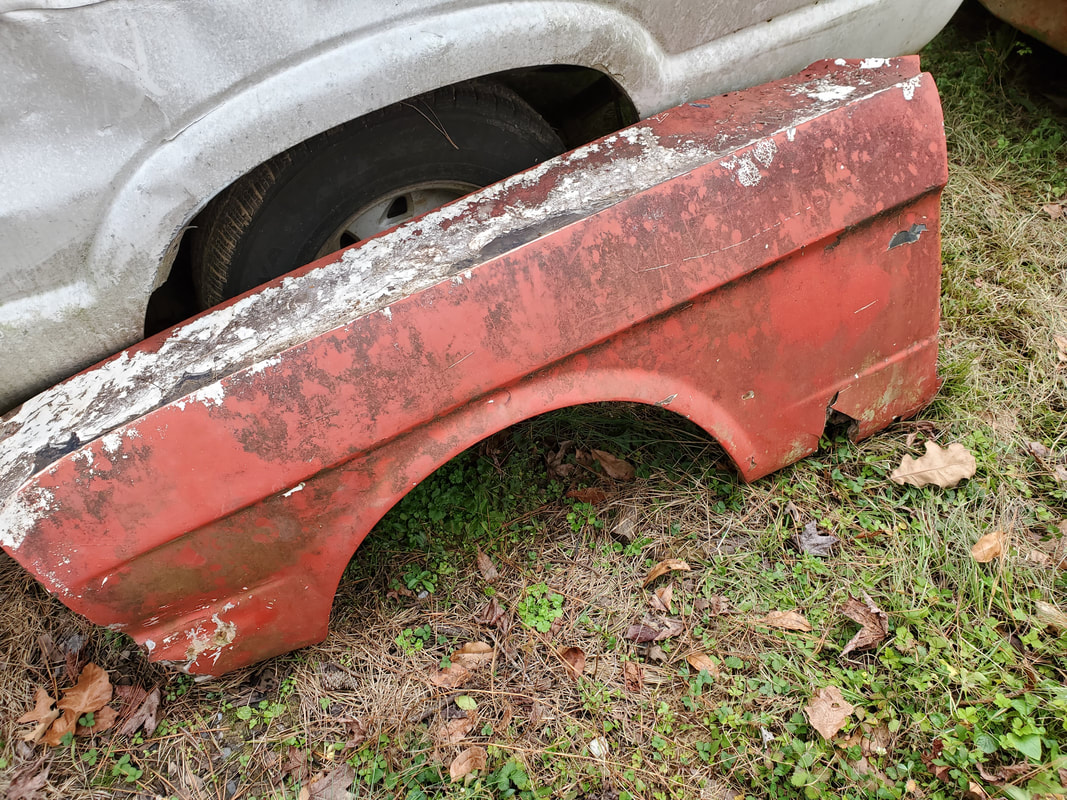
Left fender finally removed from car, note the level of rust and decay especially along the bottom.
Having to repeat the same business on the right side I finally managed to get the right fender removed as well. And just like with the left side, this fender was rotted out just the same. Of course I'll be replacing most of these panels when I do start the reconstruction of the car when its mounted to the truck frame, but for the time being I will need these panels for the sake of lining things up during the mounting process. 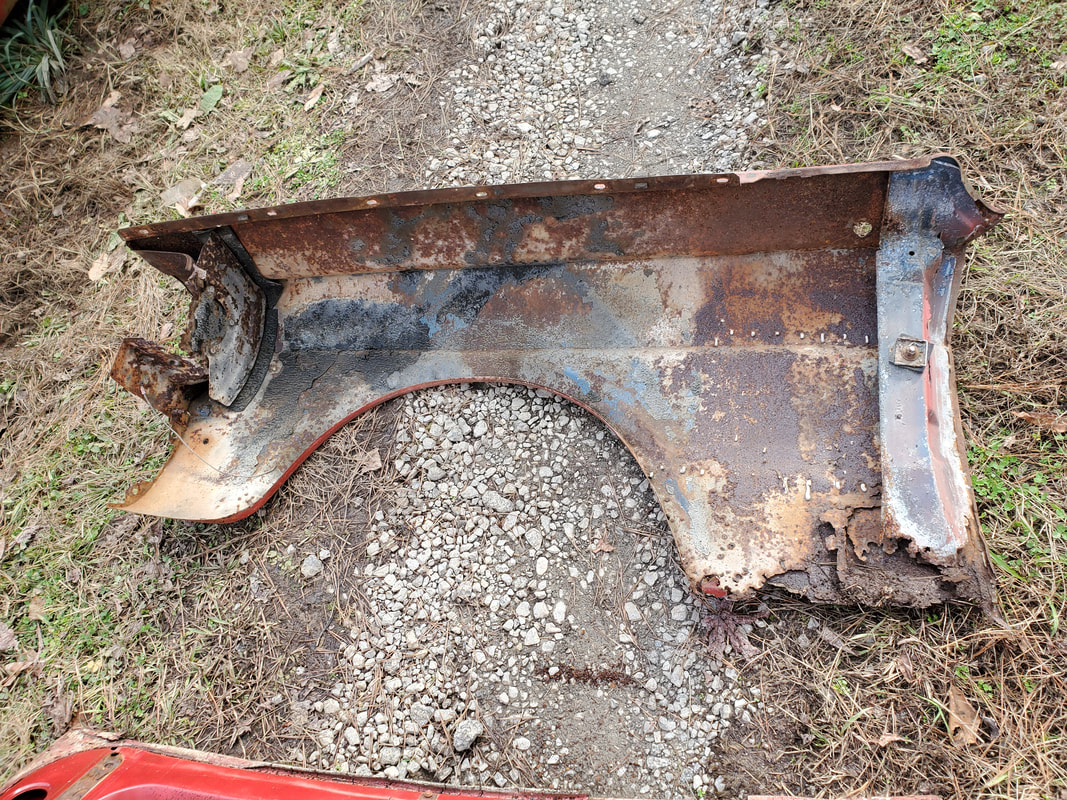
Inside of right fender showing level of rusting all over as well as the extreme rot along bottom of unit.
Since I had the fenders off I went ahead and started pulling off the valance panel and the panel that mounts right under the grille. In the process of going through this area I encountered some bolts that were rusted up enough that I had to put the metal to the grinder and the reciprocating saw to just cut through everything to facilitate their removal. When it comes time to install new panels I will probably end up having to make mounting points out of scrap metal and weld this to the points on the subframes so I can be able to mount the new valance panels and fenders. 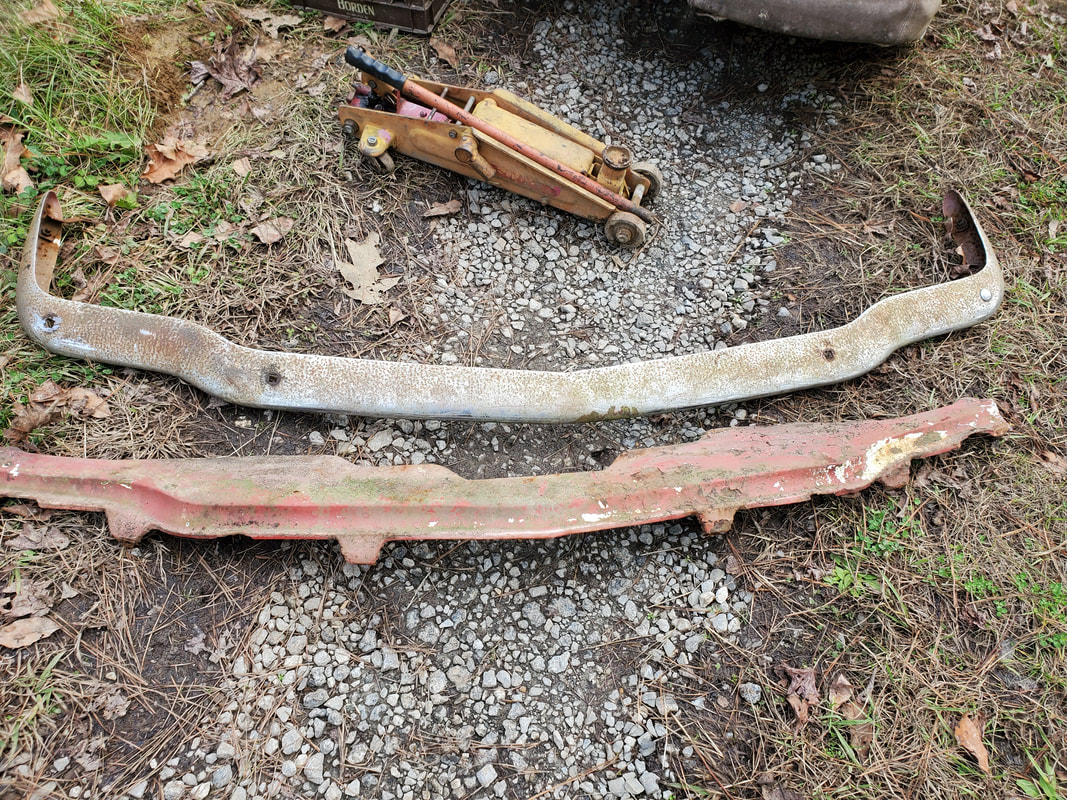
Panel from under the grille along with front bumper removed. Both of these parts aren't in the worst shape that they couldn't be salvaged. They'll just need cleaning up.
With the valance panels removed I figured I might as well go ahead and pull the front bumper just as well and clear the whole front end on the car so I can move on to another area of the car in my break down. I had to fight a little to get the large carriage bolts to turn on the bumper but with a little WD40 and some effort I finally managed to get the bolts loose. There were a couple of end brackets on either side of the fender that connected to smaller bolts on the bumper that were rotted out so much so that I didn't even have to worry about these in the removal of the bumper. I will probably end up fabricating brackets to get these points mounted back up solid just as well during the reconstruction phase of the project. As for the front end, it's pretty much broken down, no fenders, no valance panels, no grille or headlights, no bumper. The hood is just there until I can get the engine and transmission removed and then that panel will be permanently removed just as well. 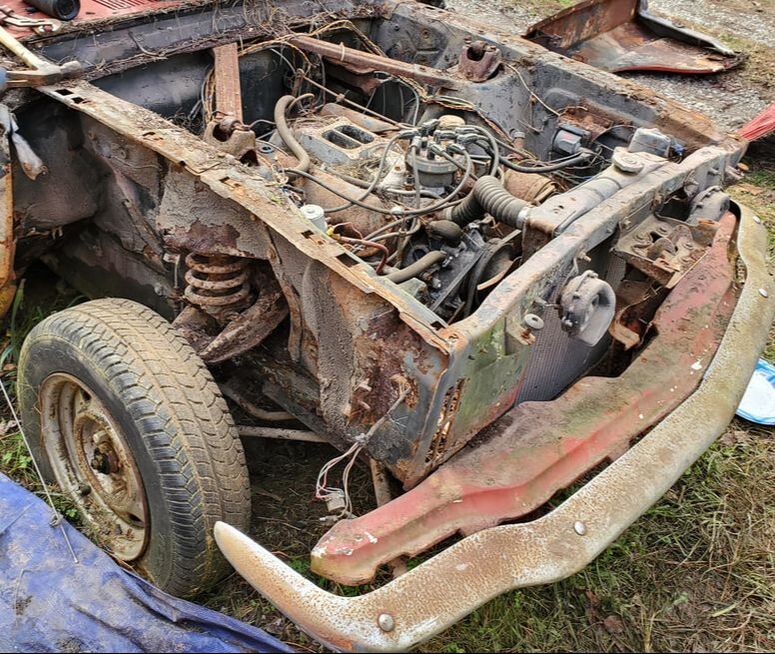
Front end just before the final removal of the valance panels and bumper.
Front end after removal of panels and other components.
With the front end taken care of the next session will be removing stuff from the cab area. I'll be targeting the doors and seats here. I'll also be removing the trunk lid and fuel tank from the rear of the car. As I stated in a previous article, I wanted to get all the larger stuff that can be removed before really digging in and gutting the interior and removing the more minute components of the car in my quest to get this thing stripped down to a bare shell. Stay tuned.
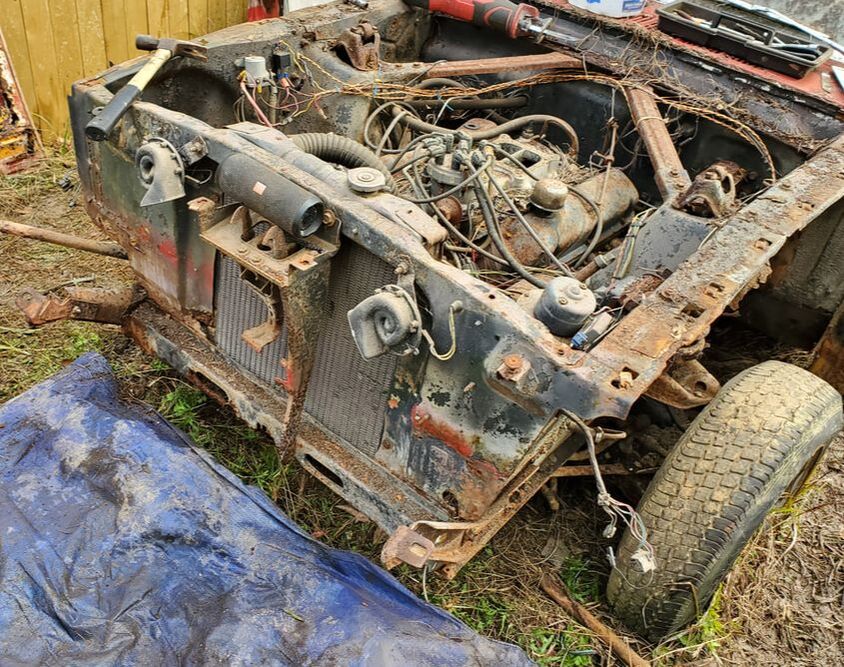
When I had the idea of embracing the idea of multitasking or bouncing from one project to another, or ADD or putting too many irons in the fire, I meant it. In this case, after spreading gravel and cutting up branches from the fallen trees and stacking another brush pile I decided to start work on the 65 Mustang. This car's been sitting in one spot or another for the span of 15 years, rotting away slowly. I did try to do a few things here or there on the car in the earlier days of settling here but all in all the car just sat. Well with the acquisition of the Ranger frame recently which followed with the construction of the S10 Ranger Chicken Coop, I decided to try and start on this project in some form or another. Really the first part of the project is going to be a big part, that is stripping down the car to just a shell to first lighten the weight of the shell and second, to allow me to make whatever sheet metal and structural repairs I need to do prior to mounting the body on the truck frame. When I started looking at the car I realized fully just how decayed this car really was. For all intents and purposes, all of the removable panels will need to be replaced - doors, fenders, hood, trunk. The floors are rotted all to hell and the rear quarters are shot too. The fuel tank is rotted out. The frame rails and other structural members for holding the bumpers and struts are all rotted. With that, accepting the degradation, I started breaking down the car. 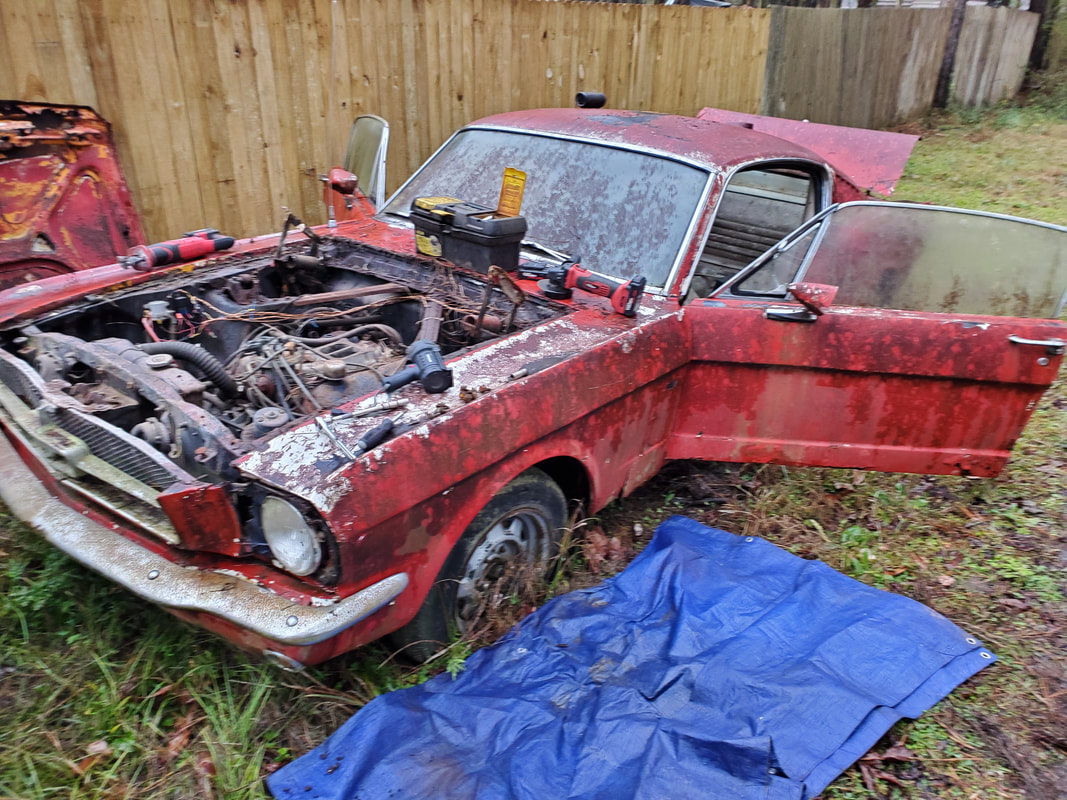 65 Mustang during the disassembly. Hood has already been removed to allow for easier removal of fenders. I started off by removing the hood on the car. The hood was even more rotted than I first thought. Even though the hood was bent from rotted structural members, the front of the hood around the latch was really rotted to the point that metal (or what passed as metal) was hanging down. Of course this thing will never be used in its original way again but for right now it'll be used to cover the engine bay, at least until the engine is removed. 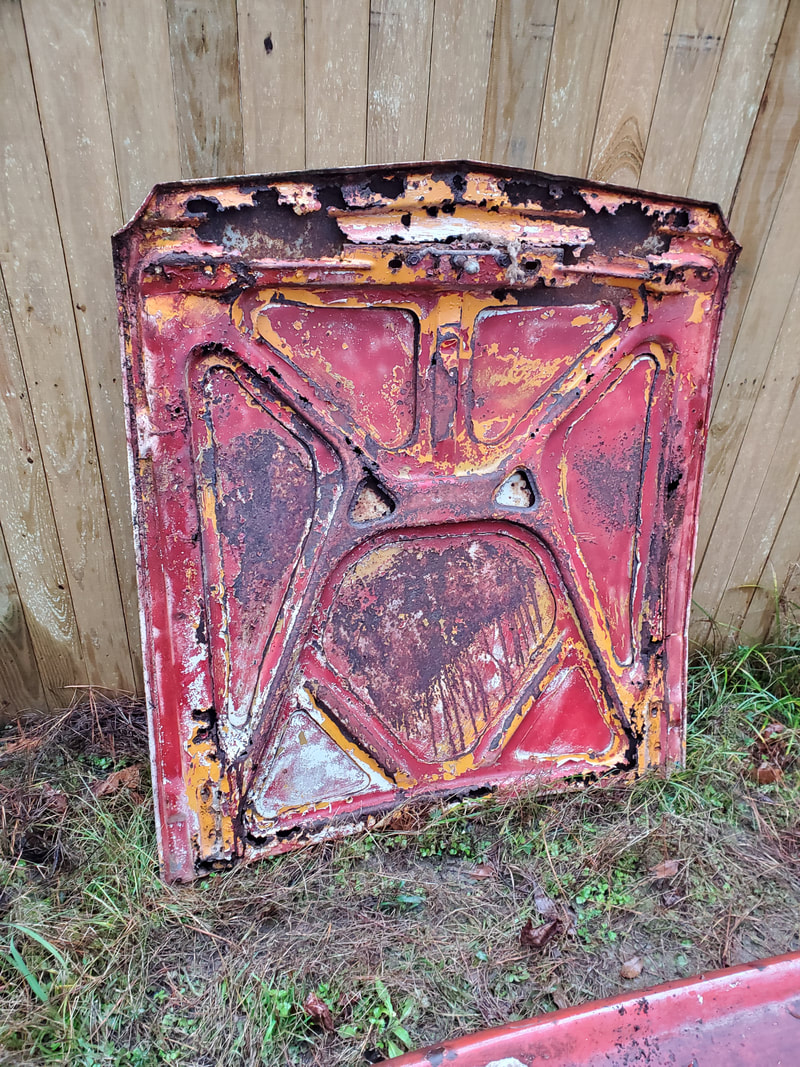 Inside of hood showing the level of rot that's present. The engine was covered in trash from rats moving around chewing on stuff and dumping stuff around. From the way it looks I will probably end up removing the intake to remove the dust and trash that may have ended up in the intake ports. I will also end up probably putting the engine on a stand and removing the oil pan and try to get everything loosened up and moving again. This engine was rebuilt before it was parked so in all reality it is still fresh. As long as no water made its way into the engine in some way As long as no water rusted anything deep inside this thing should be able fire right up and run like a champ. 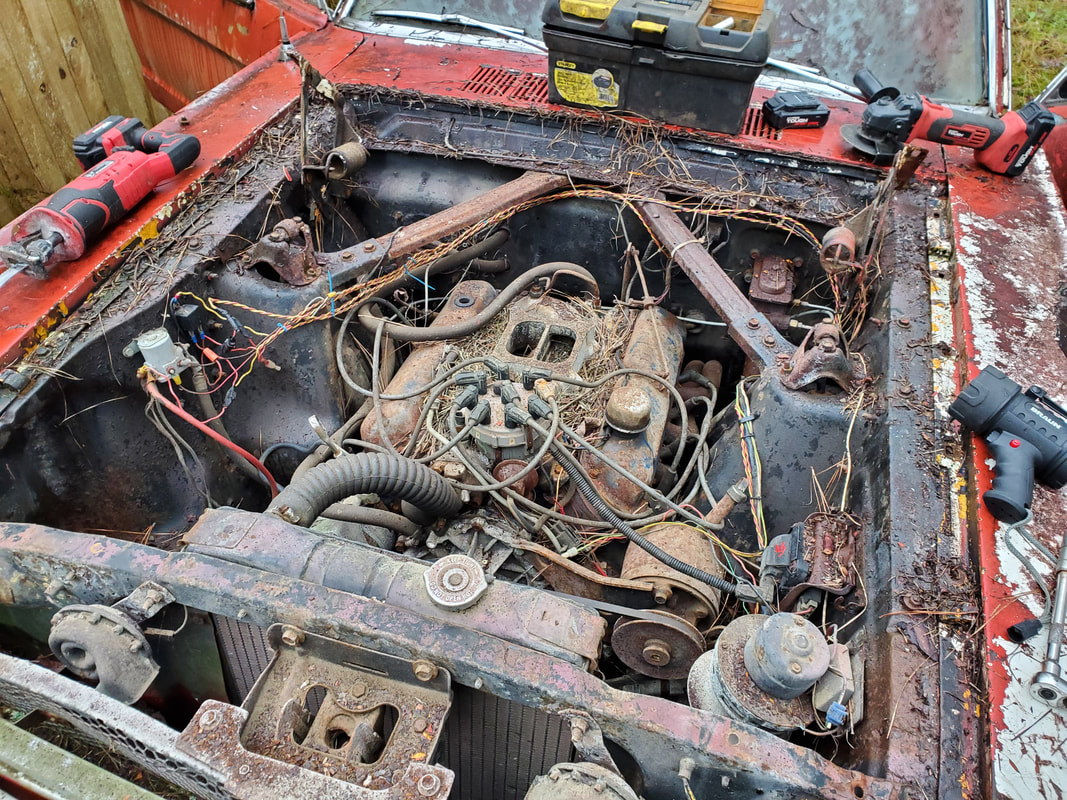 Engine bay with dirt and trash on top of engine. All of this stuff will have to come out. In the trunk the fuel tank had a giant hole in the top of the unit. Of course this component will be scrapped but at the same time I will have to think about what I want to use for a fuel tank on the car. I might just rig up an aftermarket fuel cell and set it up where I can attach a tube from the filler tube on the car in order to maintain the stock appearance versus just putting a tank in the car and making the fuel filler port be fake while I have to fill the tank from another spot. 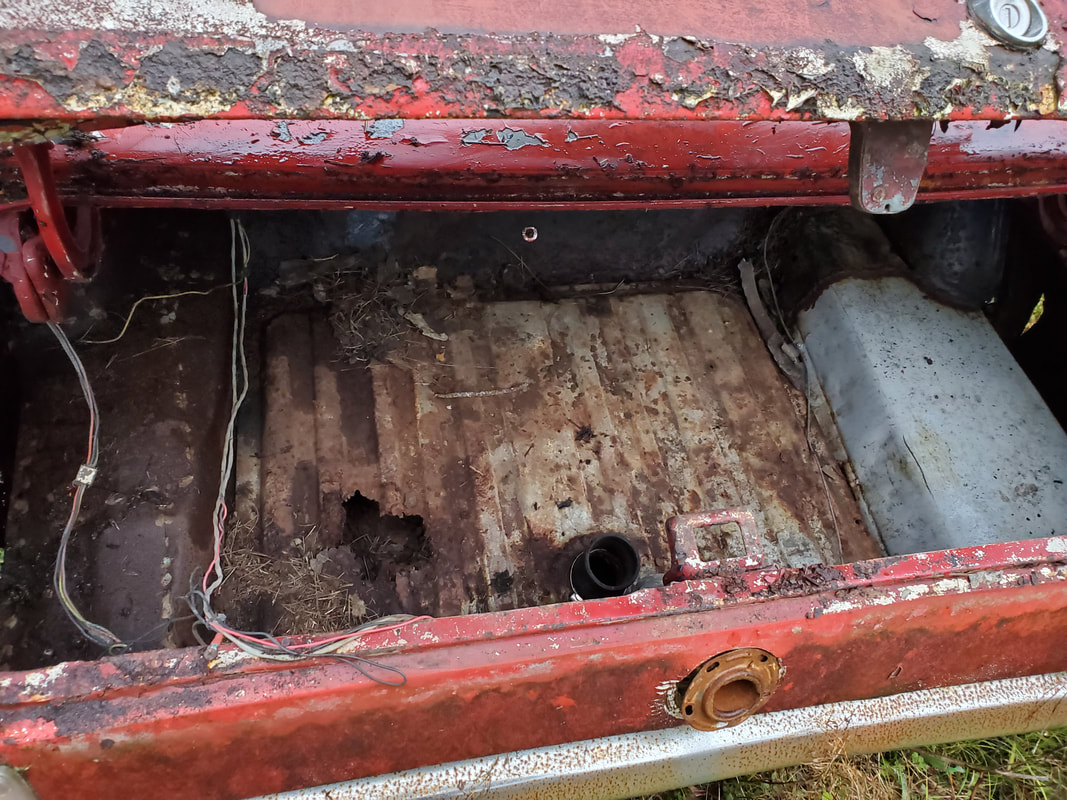 Trunk area showing rotted fuel tank and floors. With the rotted fuel tank there's also the surrounding floors. The floors were already patched once before with sheet metal due to past rot but with the frame swap project I will be able to make changes to the trunk area as well as the fuel tank This will indeed be a unique project that will involve making all sorts of unique changes to the structural aspects of this car since the structural integrity of the car is no longer in the unibody but in a separate frame that the body will be sitting on. The also applies to the floors on the inside. Under normal circumstances one would get the regular floors and weld everything back up to link with the sub frames and the torque boxes at the back as well as the false floors that go under the seats to provide a platform for the seats to sit on as well as mounting holes. This also leads me to the seats. The seats will most likely need to be cut out as the nuts holding the studs are rusted and if they don't fully break the studs I will probably end up having to just cut the nut and stud from the bottom of the floor to pull the seats out. Because of this I will end up probably welding studs back to the seat frames to be able to secure them to the floor. Also at the same time since this body is going on the truck frame, more than likely the sub frames will be cut out and a whole new floor made from sheet metal and possibly other structural support components will be incorporated. If/when I do cut out the subframes (and the torque boxes at the back), this will definitely mean that the floor will be way different, probably a straight run of metal from front to back.  Rotted out interior with the seats still in prior to seat removal. All over the rot is apparent. Prior to me starting this little project I was in the garage rearranging things and moving things out. Putting the LUV back together allowed me to clear a bunch of parts from the garage. Clearing one of the wood shelves was another part of the garage cleanup. Doing this got things set up so when I do start breaking down the Mustang I can move these parts up to the garage to be staged on the shelves in a neat manner so when it comes time to actually start doing the blending of the body and frame together (which will happen in the garage), I can put things back together without having to hunt down specific parts. Order is very important when doing these projects so one doesn't end up wasting time trying to hunt down a single part in the mix of a bunch of random junk. At least now, just like with the LUV, just like with the Dodge, this is another step towards saving one more member of the fleet and getting it running once again. With this unique project its also a step towards building something that isn't a run of the mill routine normal classic restoration or resto-mod. Even if the car's not restored in the traditional sense, just the fact that it's sitting on a newer truck frame makes it unique in and of itself. In my quest to get the chicken yard covered in gravel I managed to get another load of gravel that from what I seen would put me in a position to only need maybe a half a load more before I get the ground fully covered. Well anyway as usual I did my normal routine of dumping gravel along the ground, maintaining a line going across the yard, in front of the car coops and to the opposite side of the yard to the fence line. 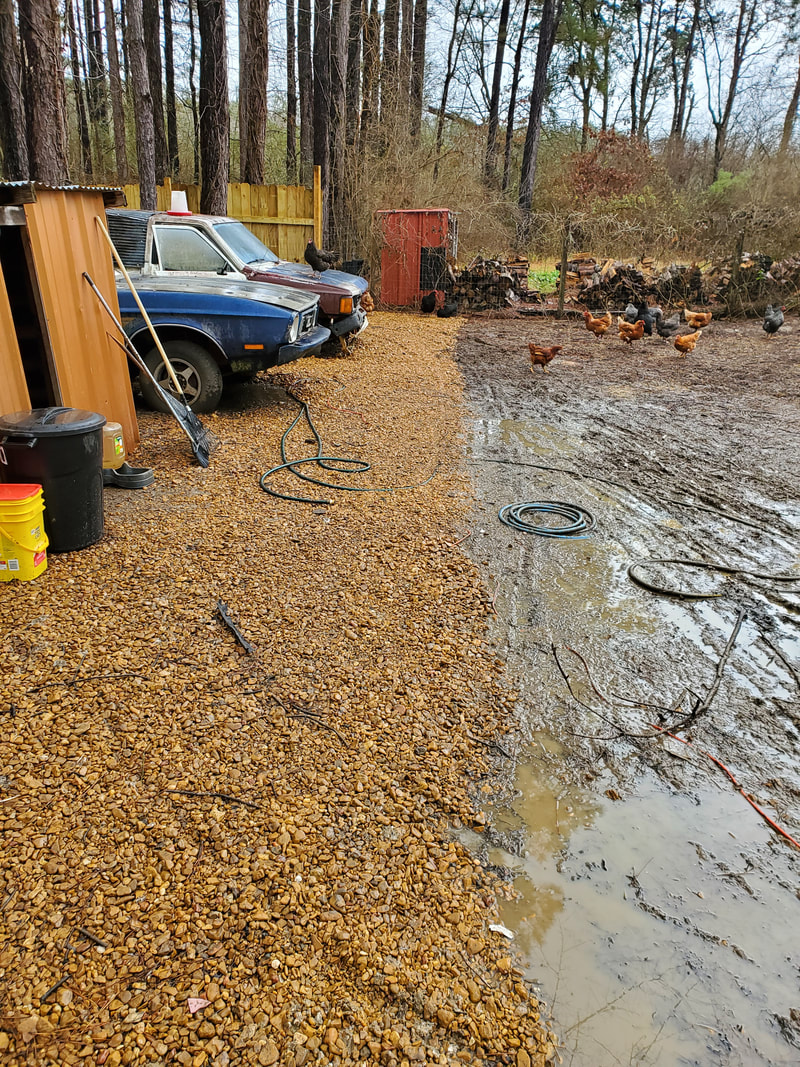 Border line between the gravel and the part of the yard where the grass will go, extending all the way to the fence line. I dropped some gravel around the Toyota Chicken Truck, pushing some under the truck a little then going ahead and working more gravel around one tree near the fence line as well as around some stumps next to said tree. The area remaining extends from the back half of the Toyota Chicken Truck over to the S10 Ranger Coop, probably an area around 8ft x 12ft. This area will probably take only a half a load of gravel. Once I get that remaining area covered I'll start covering the area outside of the chicken yard in front of the gate and extending out into the open area where its muddy as well. I currently have our car trailer parked in this area since the section of yard where I would've parked the trailer (next to the chicken yard fence) is muddy and unable to really handle the F250 or the trailer. 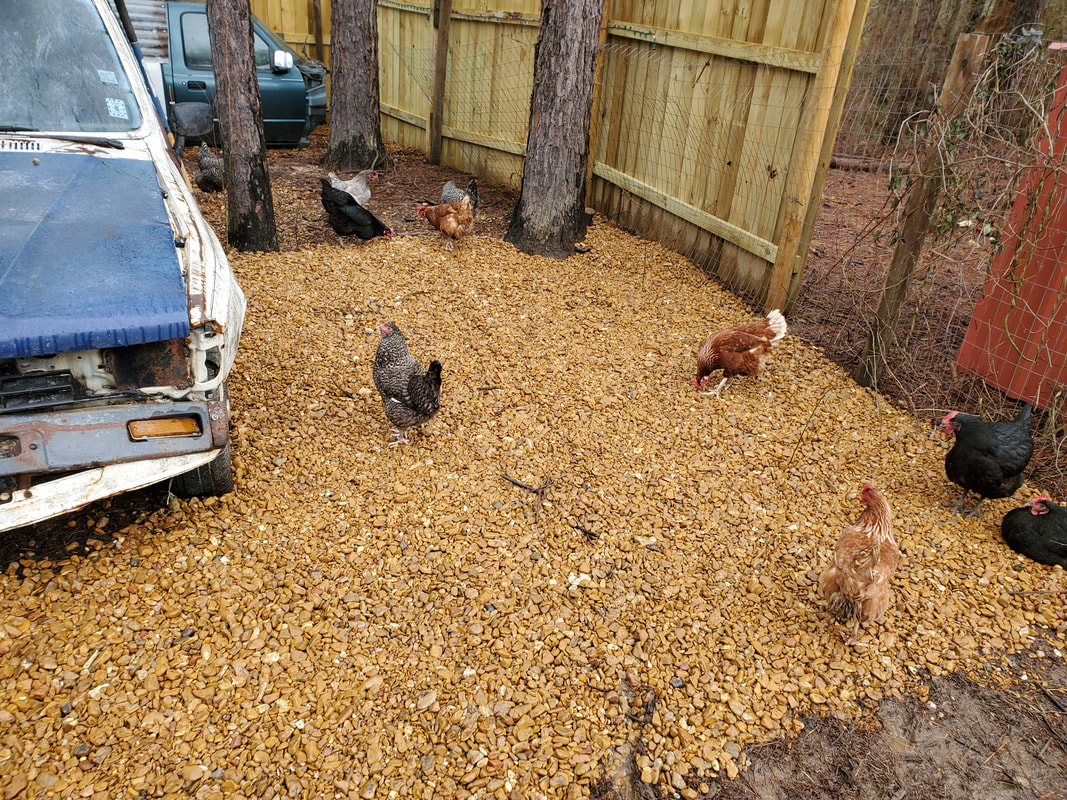 Section of chicken yard between Toyota and fence line extending back towards the S10 Ranger Coop. Area that still needs to get covered is visible in the background. With the chicken yard taken care of I turned my attention over to the continued clearing of the fallen trees at the other end of the homestead. I had already burned the first brush pile I stacked up so another one had to be started so I can get more of that trash disposed of. Instead of trying to focus on cutting larger trunks and branches I focused on the other end of the tree pile where the foliage and branches were laying. Cutting up the branches and other crap at this end allowed me to get a super large pile of trash stacked up in short order as well as clear a sizable amount of crap from the area. 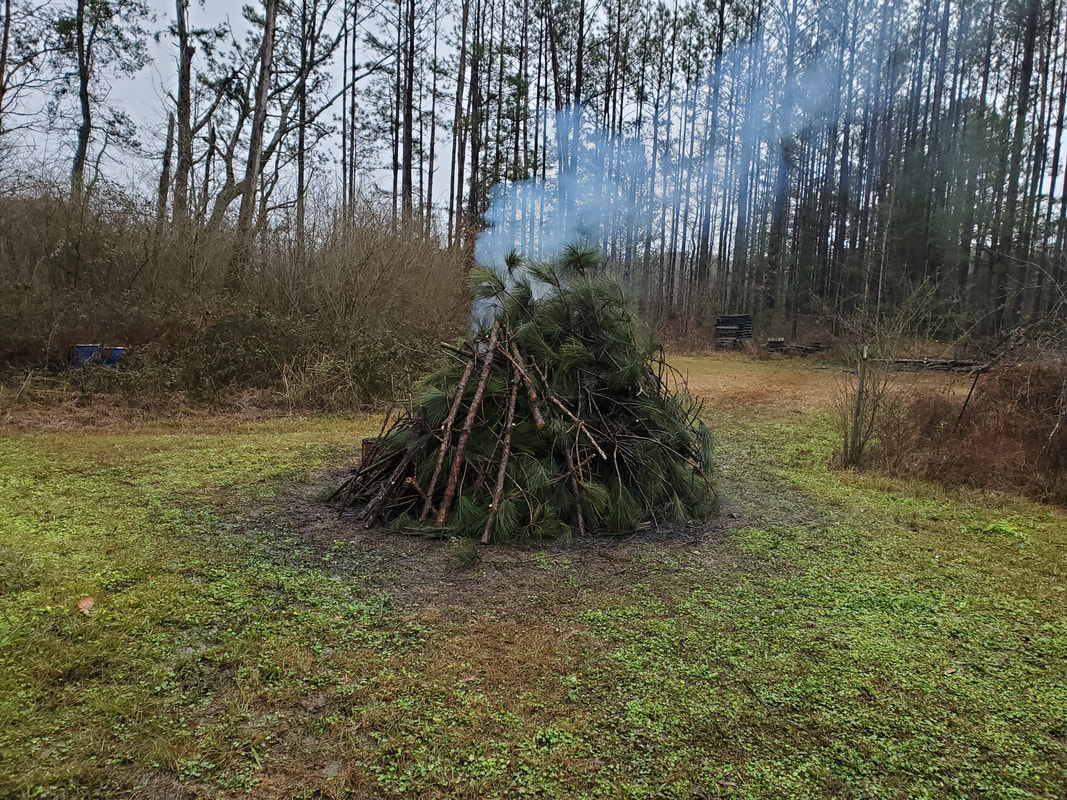 Large brush pile and an attempt at trying to fire the pile as indicated from the smoke.... Even with the moving of cut up branches to the brush pile I was still able to cut up some trunks among this detritus to stack on the soon to be firewood pile. After cutting the pine foliage from some branches, I ended up saving these pieces or sections as they were wide enough and straight enough that I would be able to cut these into short stackable pieces of firewood. I even set up the half drum and got a fire started again so I could burn up small pieces of crap that I picked up among the other branches that I moved to the burn pile. Pieces of pine foliage and other small branch pieces ended up in the burn can versus the brush pile. I was able to keep the incoming flow of tree shit moving in order to keep the can going, sometimes having to let the stuff start burning more before throwing more on top since I didn't want the fire to go out. While letting that stuff catch more, I went back to stacking more stuff onto the brush pile and the firewood pile. 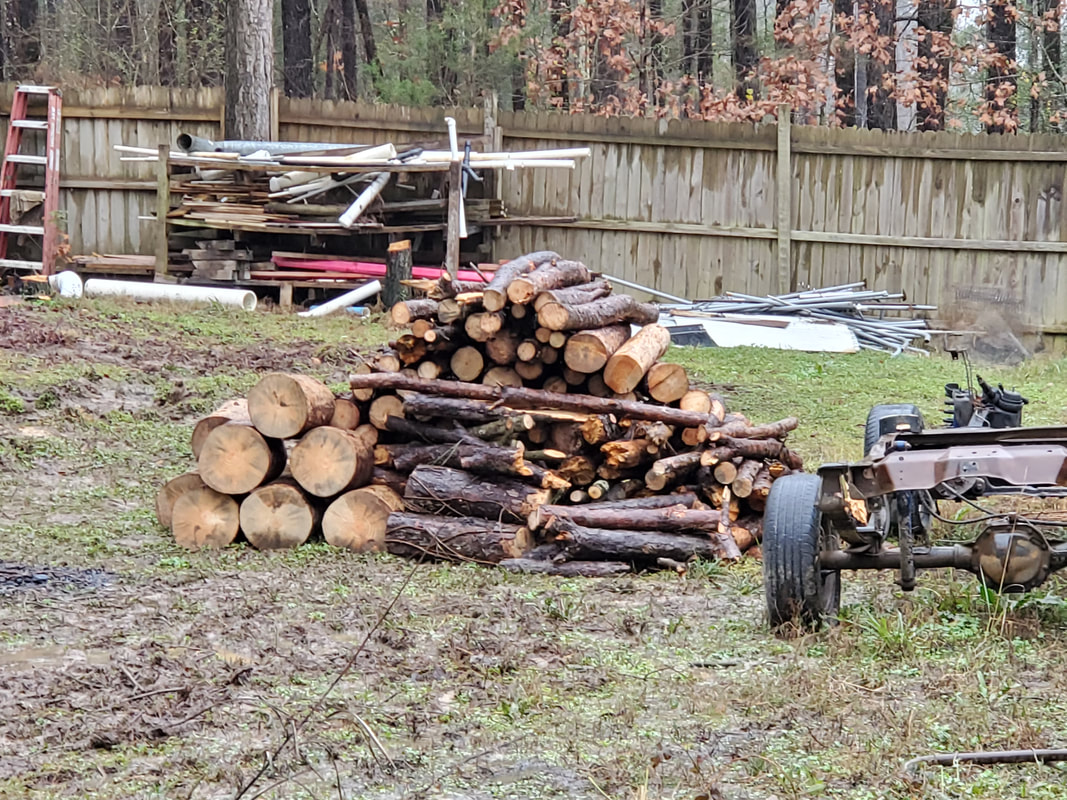 Raw firewood pile growing larger and larger. To make matters worse all of this went on while it was periodically misting outside, which wasn't too serious, but because it had already rained the night before, the ground all through the area that I had to go through was a slop pit. This of course had my pants wet from the ankles to just below the knee and my shitty yard shoes were soaked along with my socks, making for an uncomfortable time while working on this stuff. Because of all this moisture, the brush pile was hard to really catch despite having some garbage under all of the brush and even dumping some oil and gas mixture on the brush. The stuff burned some while the garbage was burning but still didn't fully catch, even with the heat drying things out at the core. I'll just have to let this stuff sit a while to dry out, even with possible rains coming and going. 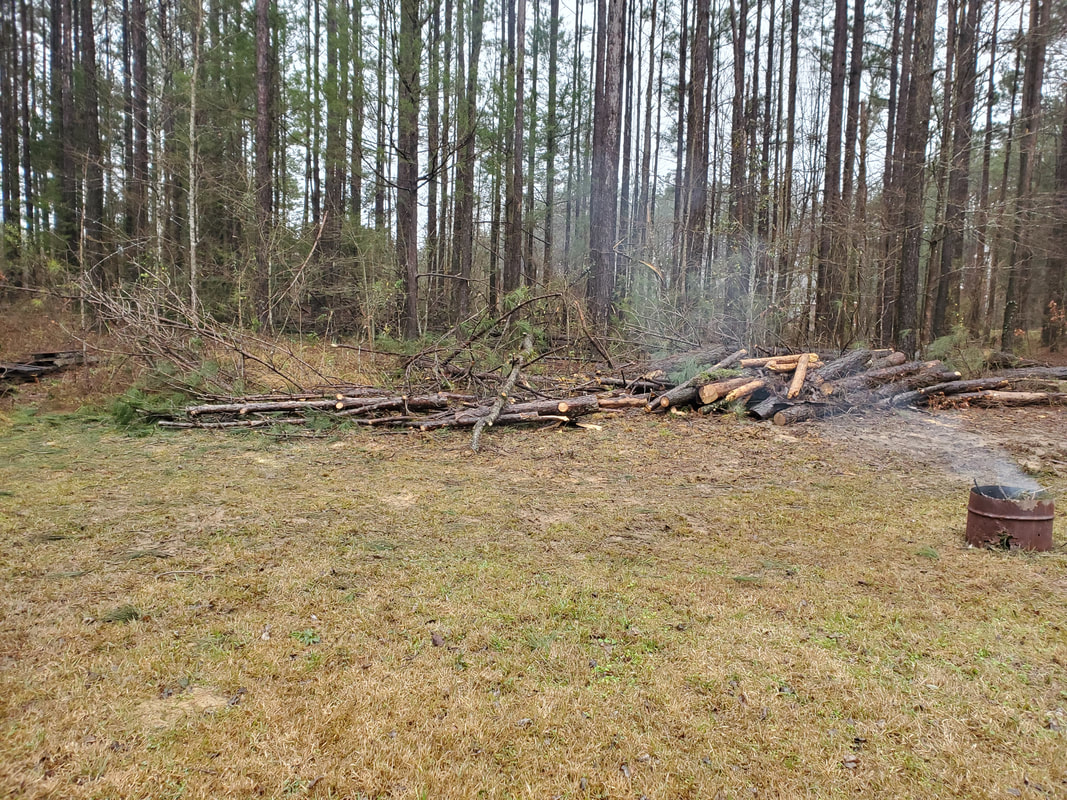 Area cleared of foliage down to about 1/2 to 1/3 of what was there before work continued. As can be seen in the last pic, there are still plenty of tree trunks and large sections of trees that will make for some good cuts of firewood. While waiting for the brush pile to dry out and for us to generate more burnable garbage, I will end up making the cleanup of the fallen trees consist only of cutting up the trunks and maybe even start cutting some of the firewood pile into smaller usable pieces to stack on the main firewood pile behind the house. Of course while the brush is drying out (this includes what still remains on the ground), I will be working on other projects around the homestead. I have a customer's car that I have to work on soon as the parts come in, plus I have plans to start breaking down the 65 Mustang so I can stack parts on the shelves in the garage and get the body ready for moving to an area where I can start working on it to get it ready for mounting on the Ranger frame that is visible in the pics next to the firewood stack. The work continues....
As I continue to work my way through all of the debris that was left after all of the dead and dying pine trees were brought down, I started amassing a large pile of trunks and logs that will be eventually cut up for firewood. These pieces range in size from smaller sections of branches around 2 to 3 inches in diameter all the way to foot wide sections of logs. Even though I started actually making a little headway into the pile, working my way from the storage racks east into the rest of the debris, I ended up finding that my soon to be firewood pile was growing larger and larger. When I compare this firewood pile to what is still out there I already had to come to terms with the fact that I will have so much wood to further cut and split that I will be busy processing firewood well into summer, given the idea that I will be working on other projects along the way.
Needless to say, I still want to try and get as much of the garbage wood and branches and other unusable crap processed out of the pile of refuse before I start focusing on processing firewood. I figured that I will end up cutting up all of the branches and other trash and burn that stuff up long before I ever make any serious dent in the tree trunks. When you're talking about trees ranging in size from 6 inches to 12+ inches and upwards of 100 ft tall, you can only imagine the scope of what I'm dealing with. Either way, I'll be real well off in the firewood department, or whatever other projects I may have on the roster that involve the use of logs or trunks or firewood or whatever. I'm sure I can think of something. 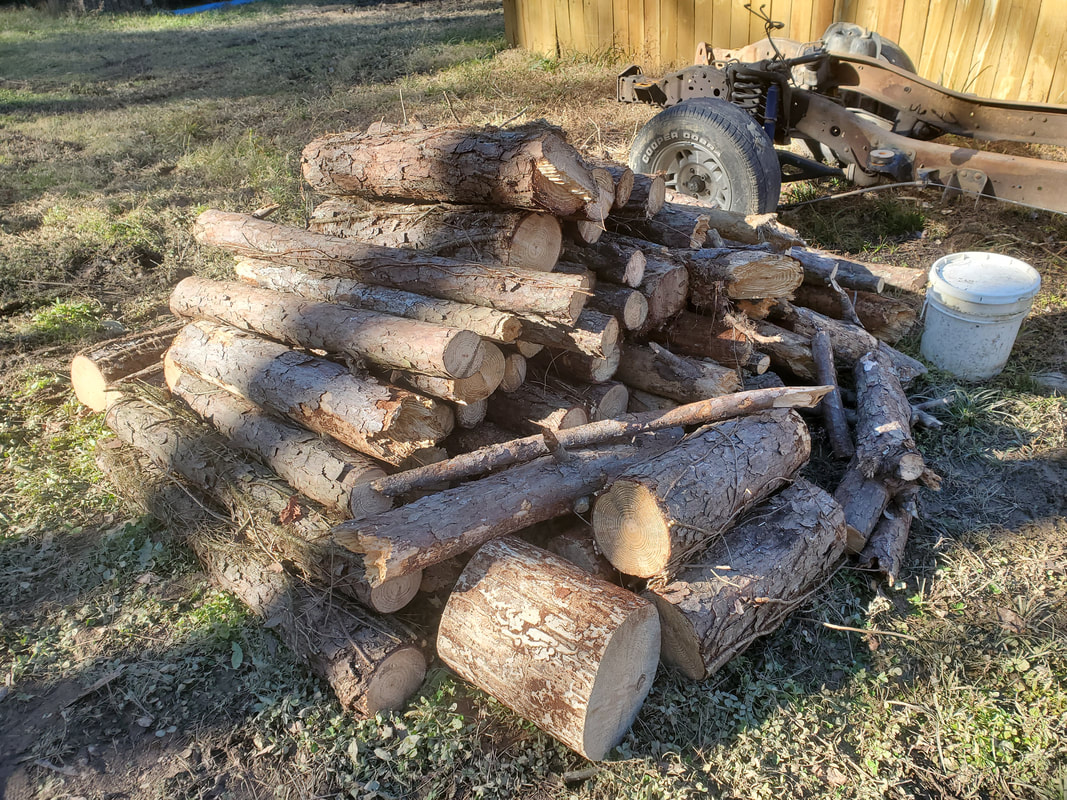
Growing log and trunk pile to be processed into usable firewood in the near future.
By adopting this strategy I managed to start clearing out the area, making my way out from the areas that were used for scrap storage and working my way into the clearing at the Southeast corner of the yard. By moving future firewood to the staging pile while focusing on getting trash over to the burn pile I managed to get a good clearing of area pretty fast. The saws were really putting in some overtime as I had to swap out batteries several times during the whole session of work. When my half drum burn can was getting full due to the fire inside not consuming the contents fast enough I would move over to cutting logs for a while, then move back to cutting and throwing scrap into the burn can and stacking the burn pile. This way I kept a steady flow of product from the area, no matter what the category of product. Some refuse if it was too big to cut up to throw in the burn can it went on the pile so I didn't waste too much time cutting large sections into smaller sections, it just went right on the burn pile. 
Area getting cleared out, slowly but surely.
In the process of cutting all this stuff up I did have to deal with a lot of old poison ivy vines that had grown up the trees thick enough to almost be trees in and of themselves. These vines had to be trimmed up and disposed of as they would be a problem. Common practices warn against burning PI but because of the large amount of the stuff I had to deal with I threw the bits and pieces in the burn can and just stayed downwind from the smoke as the stuff was consumed. Some larger sections went on the burn pile. Either way this stuff was a problem-before, during and definitely after as I've been scratching from the apparent exposure to the urushiol oils from these accursed plants. I still didn't let that stop me from getting the logs cut up and me getting more trash burnt. 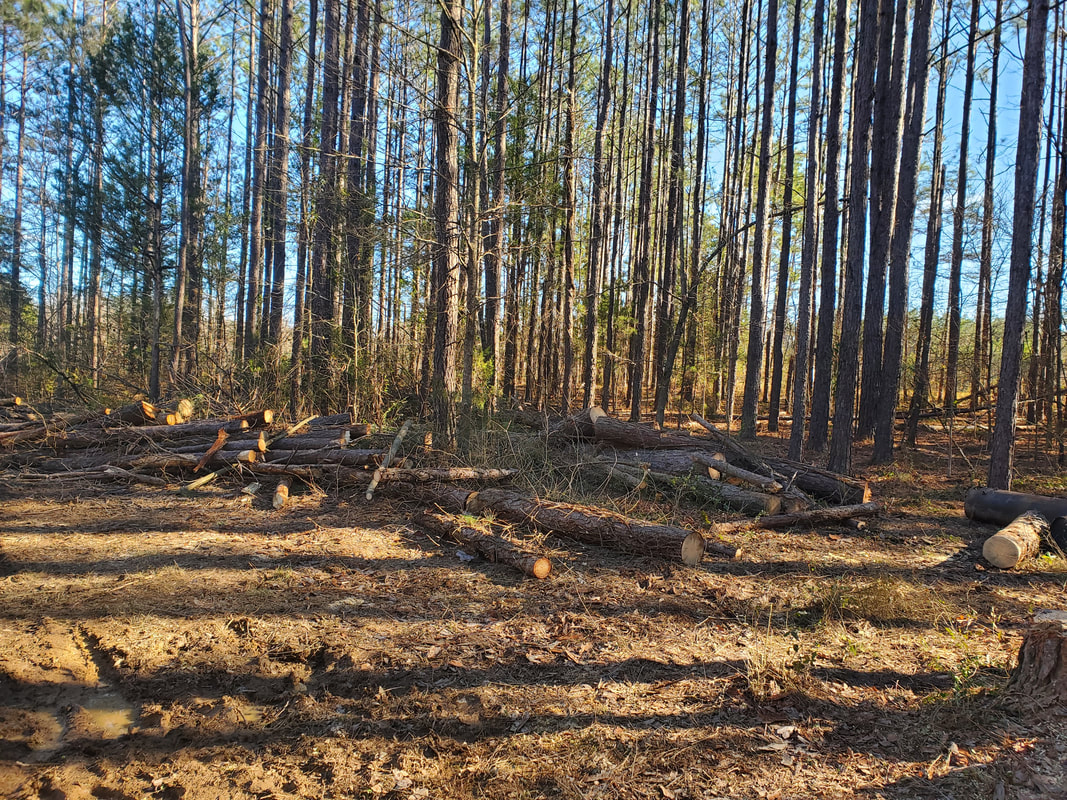
Sections of logs prior to further cut down into smaller more manageable sections before getting stacked on the staging firewood pile.
With this amount of cleanup work going on it didn't take long before the burn pile grew to a point that this crap was going to need to be fired before it got to the point where I'd need other trash and accelerant to get the pile going well enough to fully consume the branches. I was already stacking trash bags of burnable garbage over around and within the burn pile. Of course this will mean taking a break just to burn up the tree trash as well as anything else I have going on. Either way, whatever it takes to ensure all this trash is gone, I will continue to stack more trash on the pile and force that part of me to go out there and fire it before the other side of me is out there bringing that much more crap to toss on the pile. It will get done. 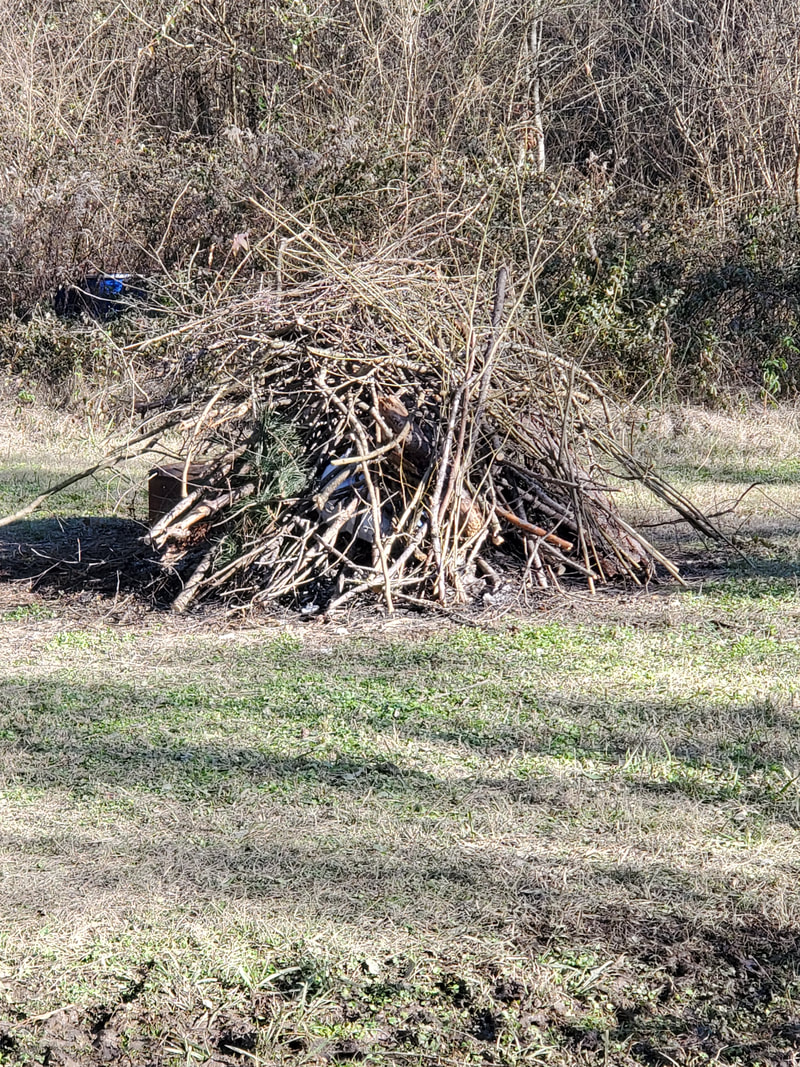
The ever growing burn/brush pile.
On a miscellaneous note I did finally take a few moments to do some general clean up around the chicken yard. One of the bigger things that I finally decided to try and do was move the two railroad ties that I was going to use to set up the S10 Ranger chicken coop on. When it ended up not being necessary to use these, they were pushed aside while I finished the chicken coop project. While some may say, "just move em", one must realize that each railroad tie probably weighs 300 lbs. These things are not going to be moved that easily. This would require the help of the ole lady and the two wheel dolly. Of course even with the both of us this whole job was a pain in the ass. First we had to lift the thing to a vertical position then work the tie onto the dolly then wheel the whole thing out of the chicken yard. My plan for the ties was to use them to set up more permanent raised beds that would probably never rot away like the pressure treated wood. I decided to plant the ties around the raised bed right by the gate where I have a couple of pear trees and some blueberry plants surrounding them with a few strawberries that are still present. The wood has long since rotted into the soil so this would be the perfect bed to set up with ties. The only other raised bed that still remains I planned on disassembling anyway so it wouldn't make sense to put ties around something slated for disassembly.  Railroad ties set up around raised bed. With this heavy mess taken care of I took care of the cutting of the sections of tree trunks I cut up from the small weed trees I cut down in the chicken yard. This little stack of wood will be for outdoor burning, especially after I do use up the pile of scrap wood I had stacked near the fuel shed. For all intents once I burn up that old wood, this wood can be stacked with the general firewood that can be used for both the house stove and for outdoor burning. Of course since this is green wood I won't use it in the house until it's had time to dry out. Burning it outside is no big deal when it comes to smoking and all.  Small stack of cut firewood from weed trees that were cut down a little while back. Speaking of trees, we had to have several cut down due to the trees being dead. After the tree guys brought them down I'm now left with a large pile of trunks and branches and other shit stacked up. It's all good since I did tell them to leave the detritus there, I would clean it up myself since I wanted the firewood from these trees. With the large amount of wood on the ground, we'll be set in firewood for the foreseeable future. The thing is, there's still a matter of cleaning up all this shit. I figured I would take this on from a multi step approach. I would first cut up and burn up all the branches and other refuse that I really don't have any use for. In between that I would be cutting and stacking whatever trunks and large branches that would make good firewood. This wood, being stacked, would be left alone until I manage to get all the smaller branches and other waste wood disposed of. Once all of that is done, then I can get to the task of further cutting up the larger trunks and branches into manageable lengths of logs and pieces that can fit in the wood stove. I always aim for foot long pieces of wood and foot long logs. When the foot long logs are split I will be left with a bunch of foot long pieces that will fit nicely in the stove and provide enough wood per piece for a fairly long burn. Of course it will probably be a while before I manage to clear all the waste wood branches and trash and am left with just trunks and thick branches. At the same time as long as its cold outside I will be still using the other firewood so when I do start rearranging my stockpile of firewood and adding this newly cut wood to the mix, I can get a more organized pile, FILO - first in, last out. I would put the newest wood "in the back", where it will season while I put the oldest wood in the front to be used first. This way I can get the older wood out of play before it rots while giving the green and still fresh wood time to cure before it gets used. In the meantime, to facilitate the clean up I brought out my half drum and got a fire going so I can gradually cut up branches and other refuse and throw it all in the burning can to be consumed. Since this is all fresh pine (despite the trees being dead in most cases, some were alive but were in bad shape), the pine resin content was high. This shit should burn real nice and fast. At the same time as I cut through the branches to get material to burn up, I also took time to cut trunks into the manageable lengths I mentioned, stacking them up. What I was really trying to do was work my way through the pile of downed trees, going from west to east along the pile, clearing everything along the way so as I work I'm left with totally cleared ground behind me. 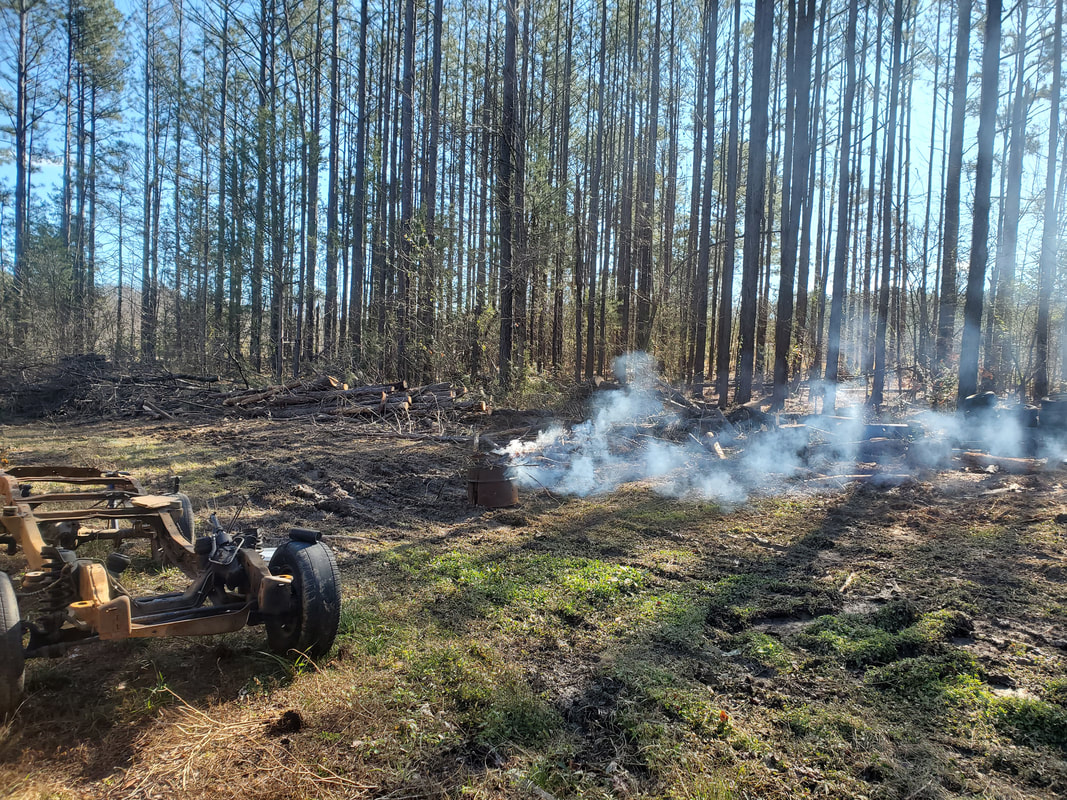 Burn drum burning up waste tree material as I clean up. As can be seen in the previous pic, the ground is pretty roughed up. Once I do get the trees cleared within the area that is to be fenced in, I will more than likely focus my efforts on graveling towards this area just to cover up some of the harder hit spots. Just like the time of completion for the clearing of these fallen trees, getting to this area with the gravel spreading will probably be a good ways off. In the meantime, I'm really trying to just focus on getting the grounds completely cleared of anything related to trees, especially since I will want to eventually start the construction of my storage buildings that I'll be making from the portable garage frames that I still have piled up in pieces along the west fence line. 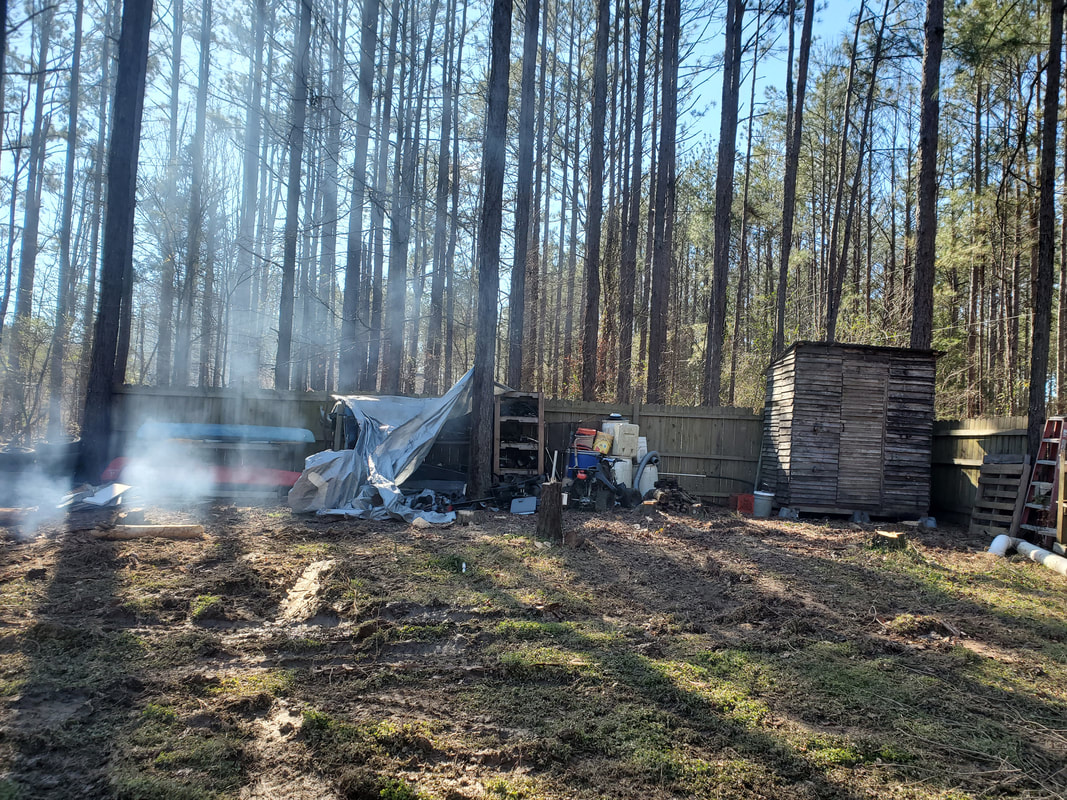 Area where storage racks for kayaks and auto parts is cleared. This area will be the area I plan on erecting the portable garage storage buildings in the near future. Because of the sheer size of the pile of tree trunks and other tree shit, I don't plan on working on the removal of this stuff constantly. I will break off to work on other projects as I see fit since the amount of time it would take to get everything cleaned up would have me putting many important projects on the back burner for far longer than I care to do. I will work on this stuff when I determine that the time's available. Likely this will be during times when I've already used up resources I bought and I'm waiting for the next pay cycle to allow me to buy more materials before I continue work on any project. It is then that I'll spend time cleaning up trees. But if there's something I have to do on one of the cars, or the garden as we inch closer to spring, or something that I may need to do on the house, I won't work on the trees. But as we move further and further along into the future, more of this stuff will get cleaned up.
As usual the weekly cycles have brought me back to getting another load of gravel for the chicken yard. I still have plenty of ground to cover in the chicken yard before I'm satisfied enough to move on to greener pastures. I still had patches of area that I had to fill in as well as area that I wanted to fill in so I can form the straight line that would divide the grassy ground from the gravel ground.
Area at back of chicken yard covered with gravel to fill in small patches.
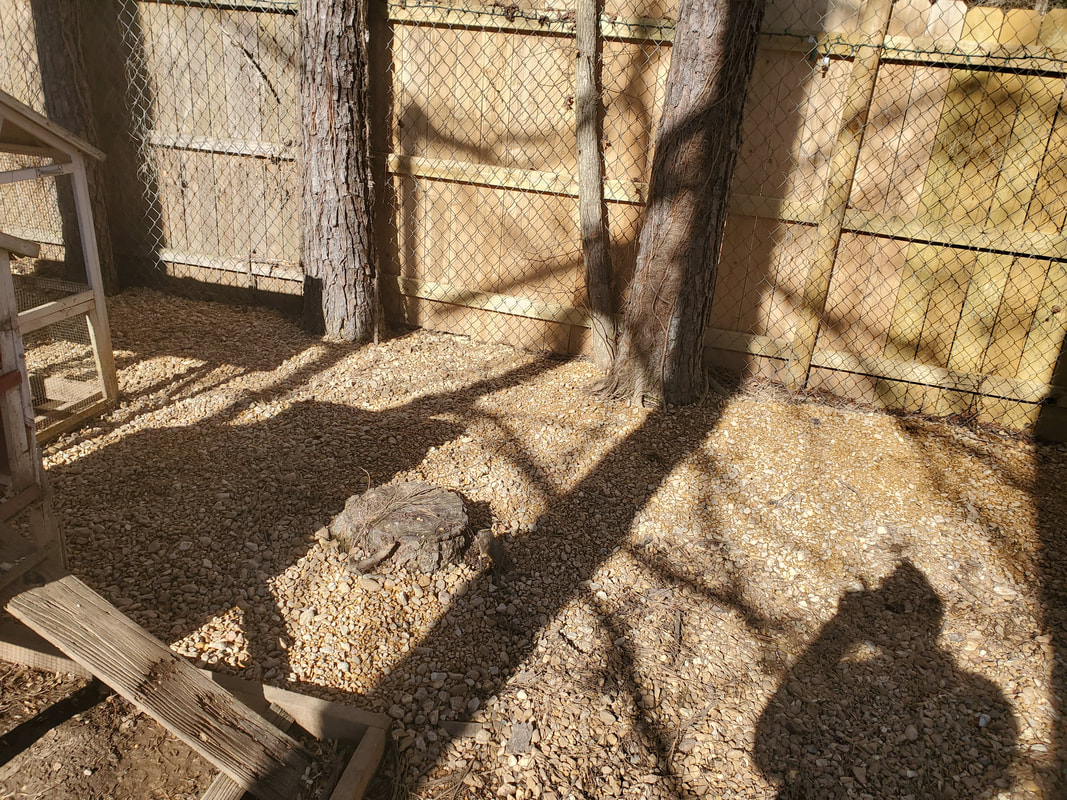
There was a small area at the back of the chicken yard where there were patches that remained uncovered, especially around an old tree stump and around the two old chicken coops. I filled in this area, up to and along the northern fence line to get full coverage over the rest of the area in the back of the chicken yard. 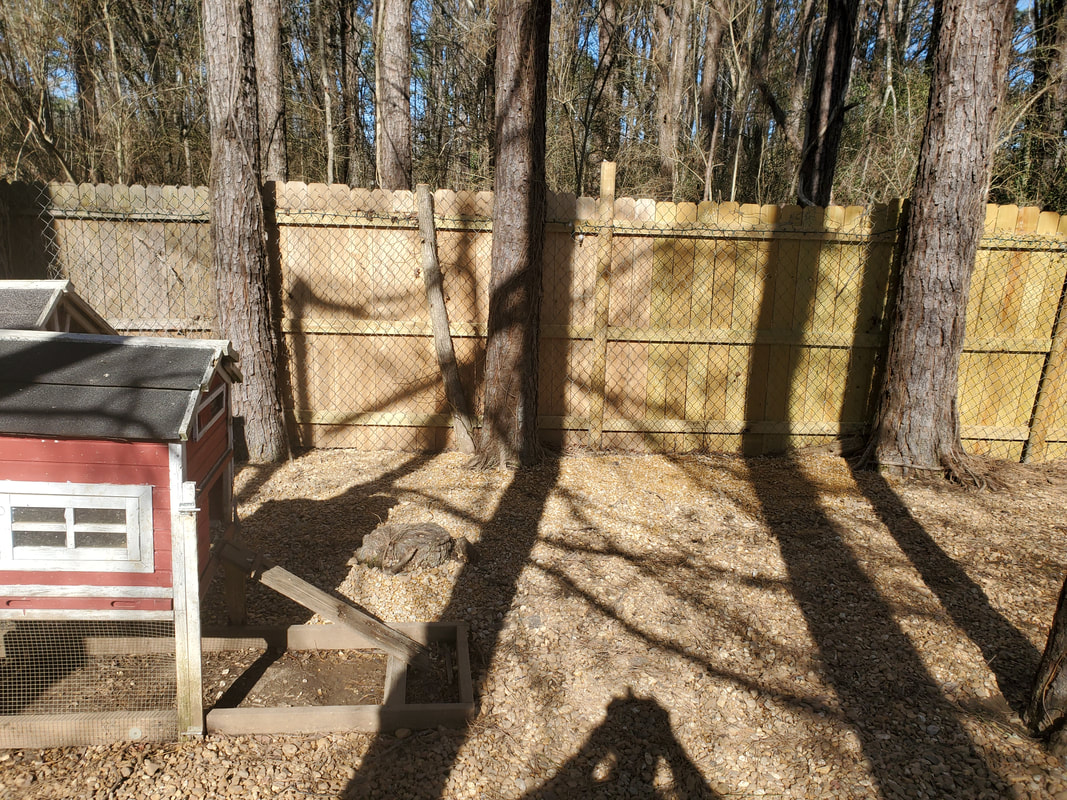
Rear area along fence line covered by gravel.
Of course in the future when I do manage to find another car to turn into a chicken coop, I will eventually dismantle the old chicken coops that are at the back of the chicken yard. That is if the elements don't dismantle them first. Either way, I will then be able to further fill in this ground with more gravel. But that's a little ways off. With this area filled in I moved on to the very middle of the chicken yard, in front of the feed shed turned coop and the car coops. I started spreading a thin line of gravel along the imaginary line I plan on making the border dividing the graveled ground from the grassy area. Of course I do plan on laying landscape timbers along this line to further divide the two areas this way the weather won't cause mud and/or gravel won't be able to mix or spread into the grassy area. 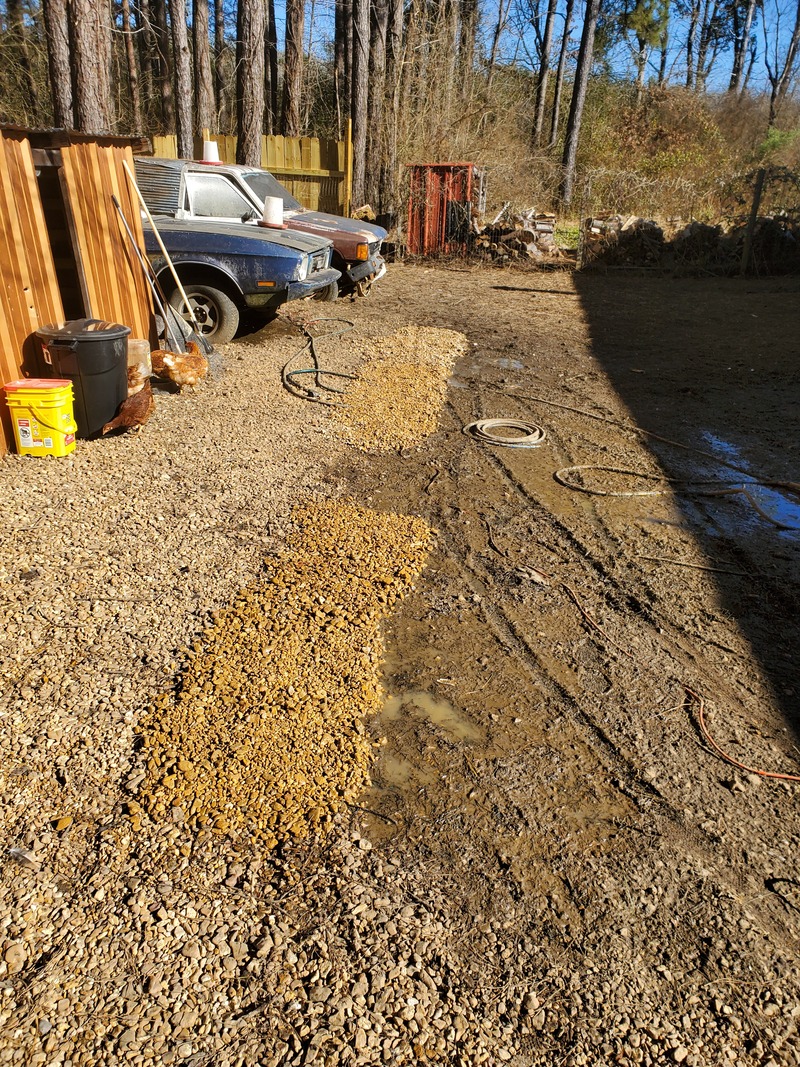
Narrow patch of gravel spread along border line between gravel and soon to be grass area in chicken yard.
With that I exhausted my gravel supply for this session. The work wasn't done in the chicken yard however. The ole lady took it upon herself to do a little rearranging in the feed shed to make it a more viable chicken coop. The first thing was adding a small garbage can to combine the buckets of chicken feed that was stored within the shed. Of course the garbage can would sit outside the shed, so of course it had to be a can that would seal up from the elements. With the chicken feed in this can the only other feed to be concerned with was the baby chicken feed. This is stored in a cat litter bucket but because the baby chickens will eventually mature to where they can eat grown bird feed so its not really a big concern trying store this feed for the long term. 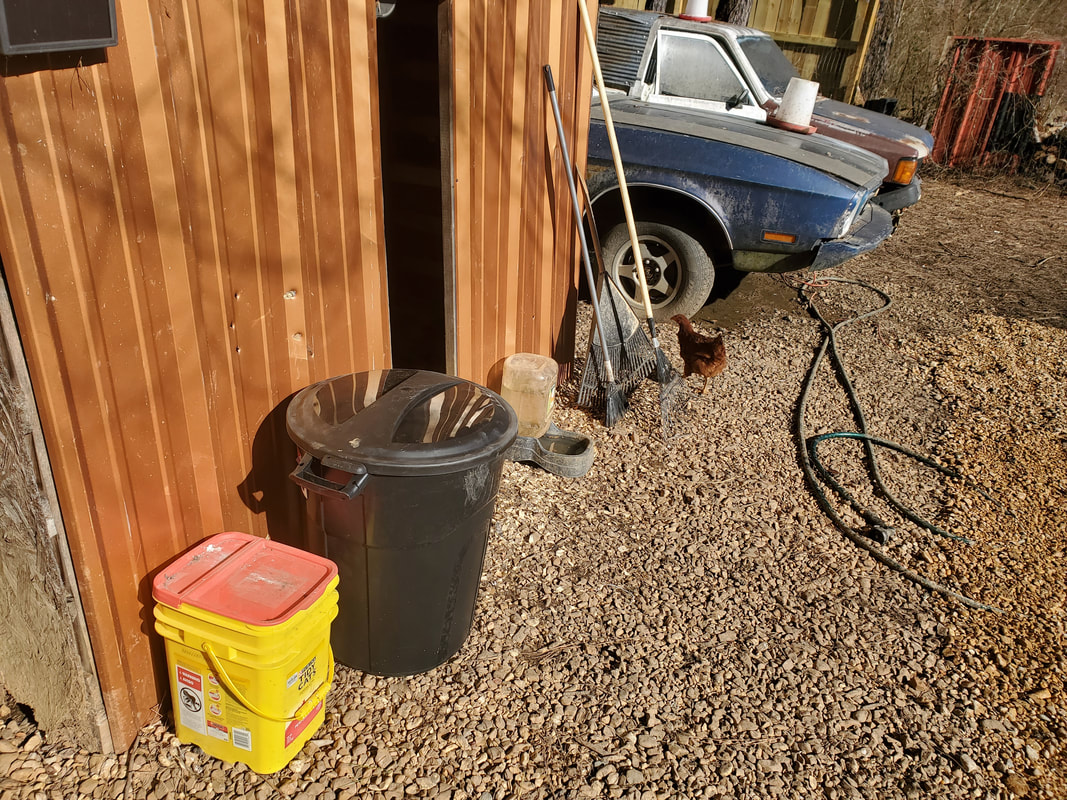
Garbage can and cat litter bucket in front of feed shed turned chicken coop.
With the feed buckets removed from the shed it made for a lot more room within so the birds can be better able to shelter themselves. The only thing that's inside the unit is the bulk feed bucket that was made a while back. This thing allows the chickens to feed for a prolonged period of time before needing to be refilled. More of these feeders will allow for us to be away for a longer period of time without having to worry about the chickens being able to eat. Also the bucket serves double duty as a roosting spot for chickens due to its lid having enough surface area to accommodate one chicken. Wood shavings were placed on the lid to make this area more comfortable. 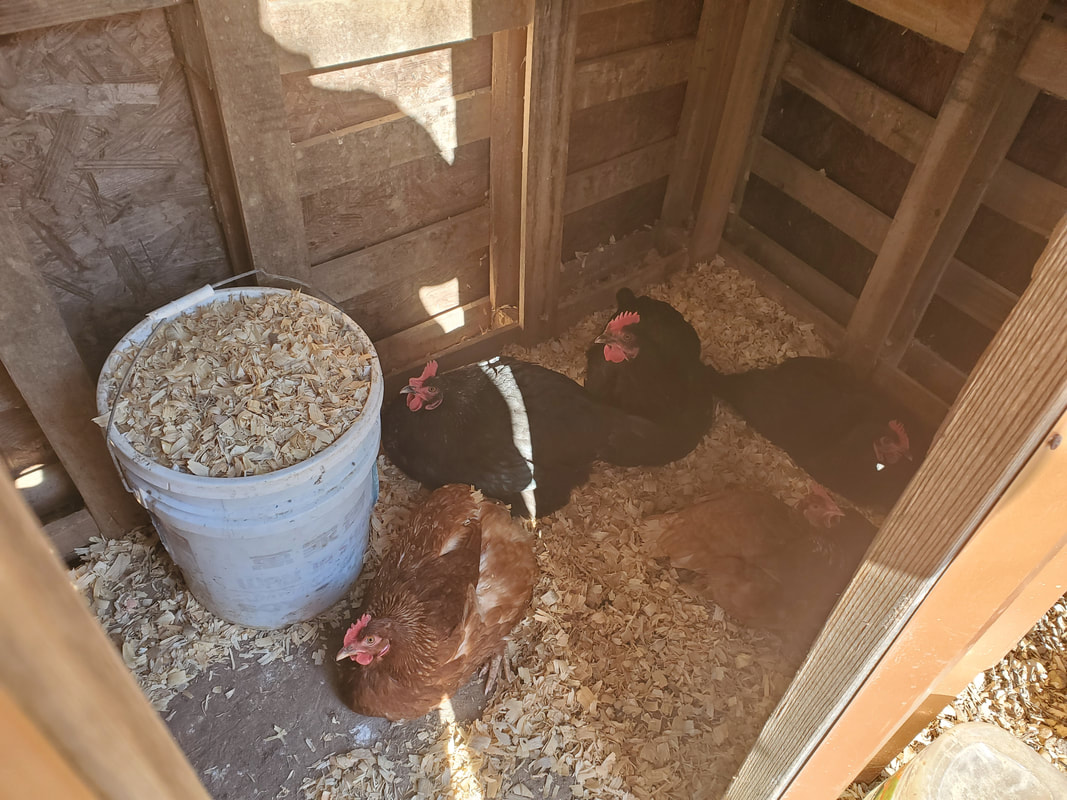
Feed shed/chicken coop with bulk feeder bucket in place with shavings on top for bird to roost.
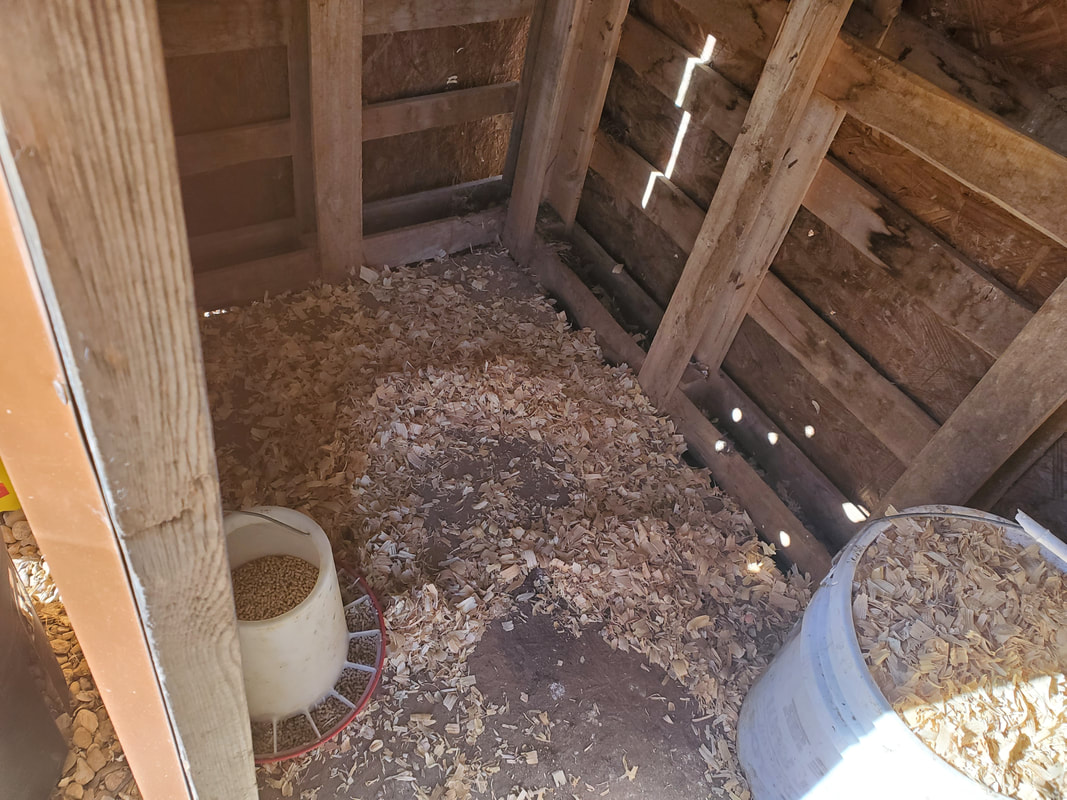
Freed up space within shed with feeders in place.
We did end up putting a regular feeder within the shed along with the bulk feeder since there are a lot of chickens coming and going. Even with this extra feeder there's still plenty of room within that the birds are able to spread out. The only other thing that we need to do with this shed now is add a couple of roosting posts to allow for more resting areas for the birds at night. More roosting areas inside of the coops will allow for the birds to be under the shelter of said coops, putting them at lesser risk of night time attacks by raptors compared to birds that roost outside. There won't be much more to do before I can fully sign off on the chicken yard and can finally move on to other projects without having to worry about this operation.
In my quest to clean up the grounds of errant trees, I continued with the chicken yard. I went ahead and brought down the remaining small "weed" trees that I planned on dropping. One was close enough to the fence that I had to cut the tree above the fence line otherwise the saw would've been hindered by the old chain link fence on the inside of the chicken yard fence. Plus, cutting the tree above the fence line allowed the tree to fall safely over the fence without damaging the pickets. 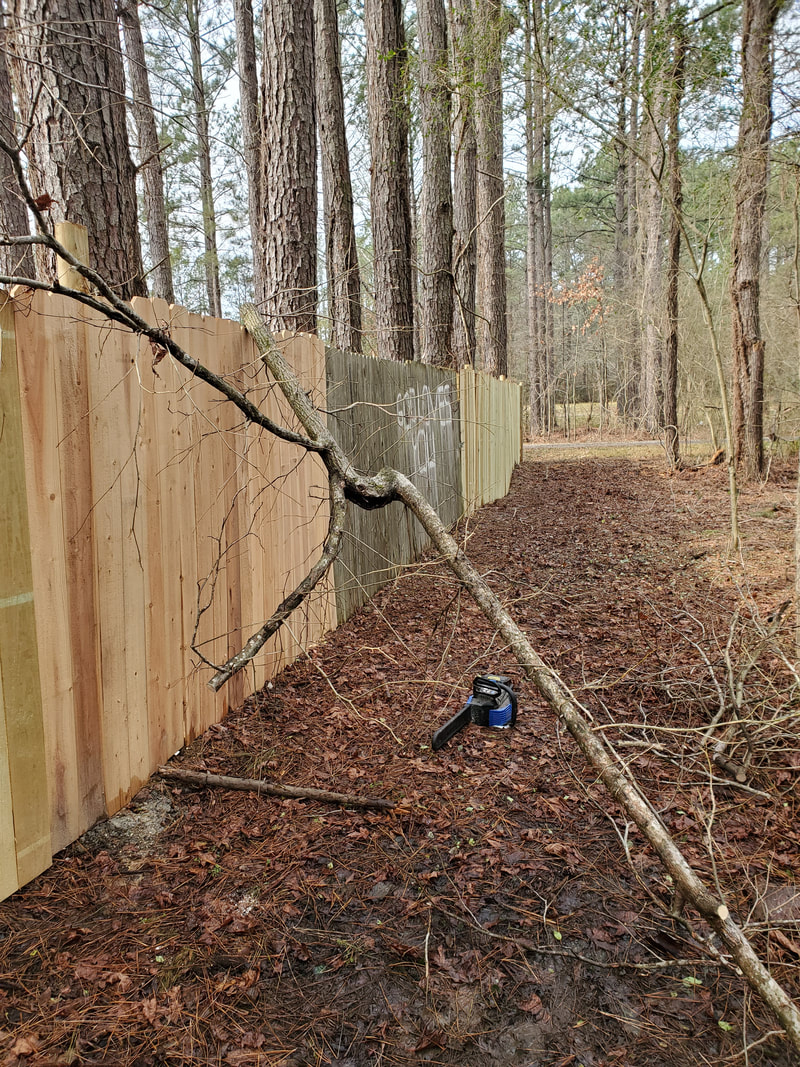 Tree brought down over fence, laying on outside of chicken yard, ready to be further cut up. As with the other tree, I cut the branches from the trunk and cut them in short enough lengths to allow for a neat stacking on the burn pile to ensure even firing. The trunk was cut down into shorter lengths to allow me to easily move them and stage them in the driveway where I planned on cutting any tree wood. This wood is going to be used for any outdoor burns with my half drum as its still relatively green compared to the wood that's stacked in the firewood staging area behind the house. 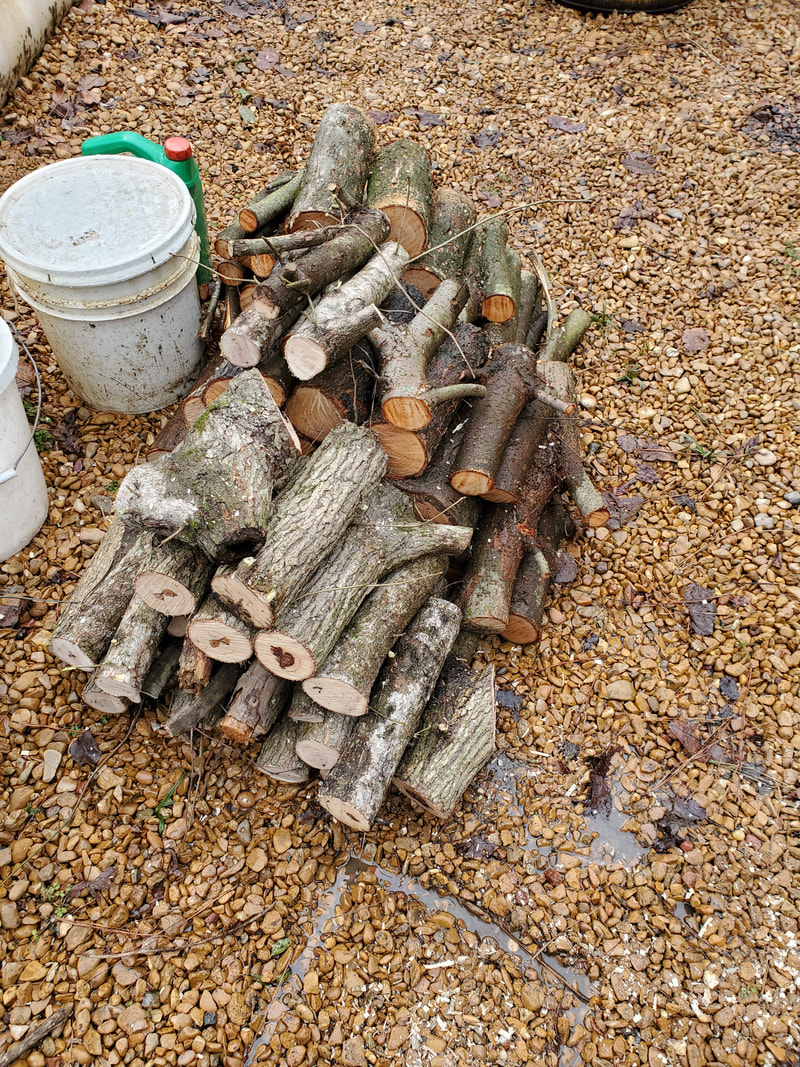 Trunk wood cut up for future use as firewood. At this point the burn pile was pretty large with all of the branches that I managed to stack up. I did take time to add bags of garbage that would've normally been burned in a burn drum. This garbage would help in getting the tree trash to ignite better, along with a little gas/oil mixture for good measure. Another issue that had to be addressed was a bunch of trees at the back of the yard where the fuel shed and the storage racks are set up at. I was able to bring down one smaller pine tree that was just a trunk but the next one was problematic as it did the exact opposite of what I tried to make it do. Because of this I had to call the tree guy that we used the last time to bring down the tree in the chicken yard that was leaning towards the house. When the tree guy came out and looked at the tree he quoted one price then pointed out several other trees that were dead as well and said he could give me a good price to take care of all the trees. He wanted $700 for the one tree I tried to cut down but could take care of the seven other trees all together for $1300. I jumped on this deal since being able to get these dead trees down would clean up the area well enough that I can go ahead and build whatever I need to build back in this area without the risk of a dead tree dropping a heavy branch onto something. In a few hours the tree guy and his two partners brought down all the trees and got the remains stacked up on the far end of the clearing, out of the way but neat enough that I can more easily work on the "processing" of the wood. As with the smaller trees, I'll be working on breaking up branches and other small detritus while getting the larger trunks and branches. 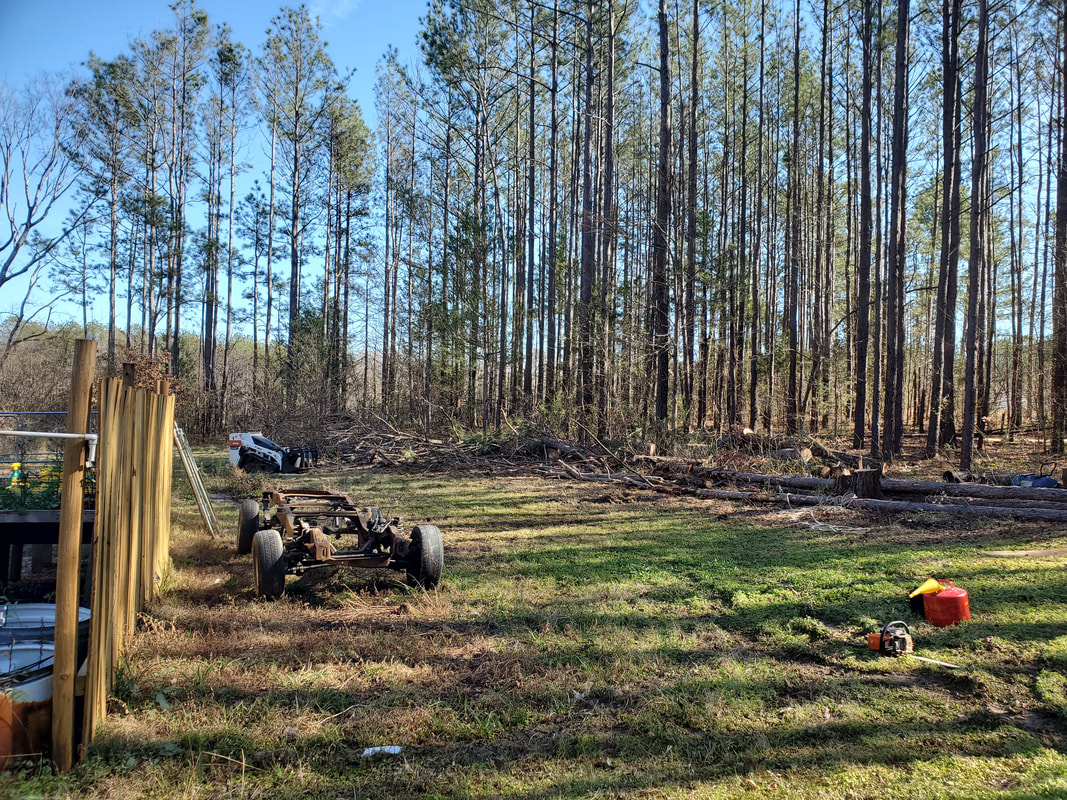 Trees in the process of being cut down at south end of grounds. 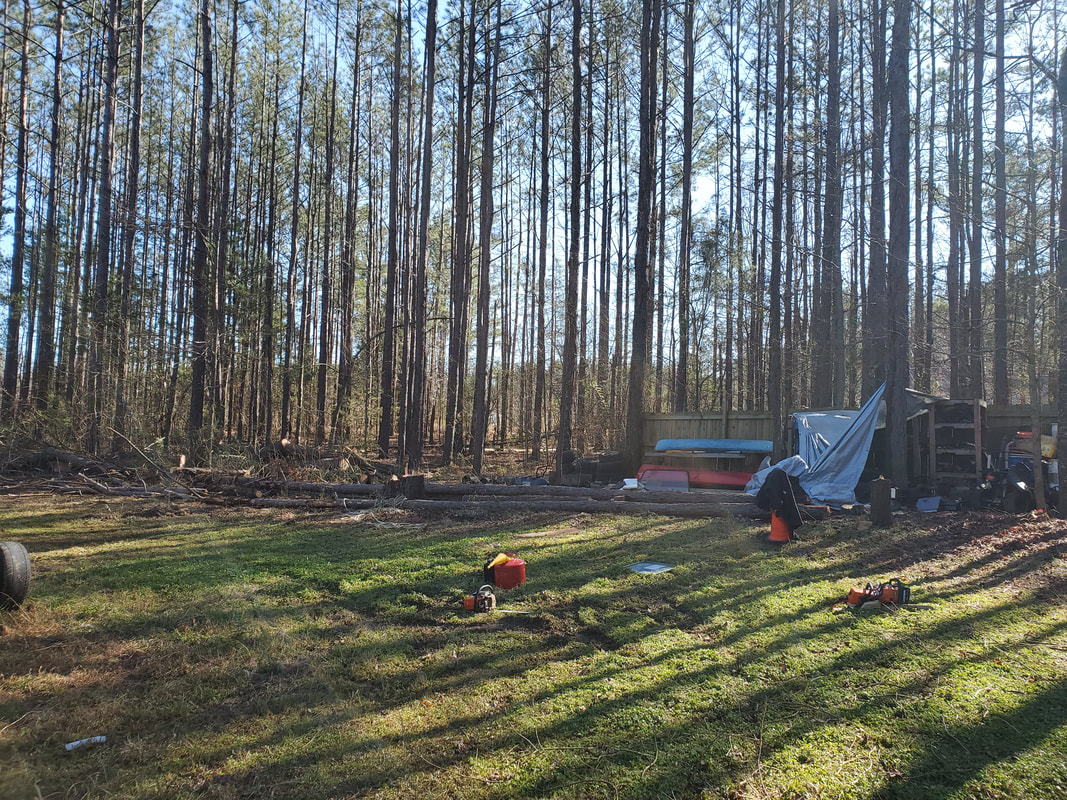 Area around storage racks and fuel shed cleared of dead trees. With the number and size of these trees I will of course have my work cut out for me in getting everything cut up and moved around as I need to in order to facilitate full processing of the material. I will probably have a couple of burn piles going to dispose of all of the branches and other small material and the amount of firewood I'll end up getting from splitting all this wood will probably net me more wood than what the other wood gave me from the last batch of trees from the March 2020 storm. That's fine, between what wood we're using through this winter and the wood I use while outside working on stuff, hopefully I'll be able to put enough of a dent in the current supply that the wood I net from this new batch won't be too overwhelming. The work will continue.
After all of the other exploits around the homestead I decided to do another form of cleanup - removing some nuisance trees. Starting in the chicken yard, I marked three trees for death. Now these trees are what I tend to call "weed trees", mainly because of their quickness to grow big and no real use to them when they are big enough to cut down as trees. Because of their small size compared to the surrounding pine trees, these trees would be easy to drop.
I started with a tree right next to the west fence within the chicken yard. To bring this one down without risking the fence I had to cut the tree higher than the top of the fence so when the tree did come down it would come down and lean over without hitting the fence. After bringing the tree down I would spend some time using the reciprocating saw to cut the branches free from the trunk as well as cut the branches shorter to make stacking on the burn pile that much easier versus trying to stack random long sections of branches. 
Small tree along fence line after cutting trunk high enough to miss the fence. Note tree leaned over at break in trunk.
With the tree down I got to work chopping up the tree into multiple small pieces. I cut the branches free from the trunk first to get them separated then started cutting the trunk into short manageable pieces. Even though I'm saving this wood for use outside in the half drum burn can, I still took the time to cut the trunk into pieces approximately a foot long, maybe more on some occasions. 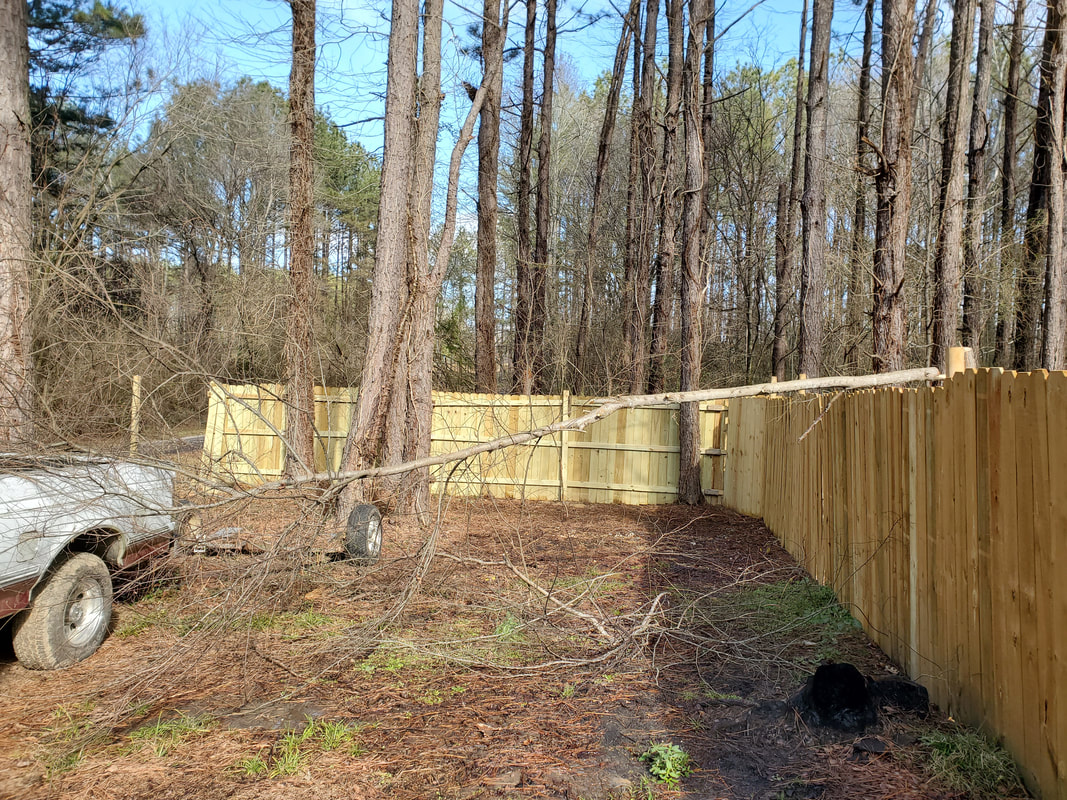
Tree down on other side of chicken yard fence, note branches that have already been cut free from trunk, laying on ground.
It didn't take long with the saws to get this little tree cut up but when done I did have a lot of branches that I had to move to the other end of the yard to the burn pile. I was able to use the wheelbarrow to move the cut up trunk pieces over to a staging area in the driveway where I have the half drum sitting in case I fire up that can again when working outside. Either way this is a good central spot where I can get the wood I need to keep the can going wherever I'm working at around the homestead. I did use the wheelbarrow to pile and stuff the branches within to make moving them over to the burn pile easier as well. Of course some dropped but who cares, the majority of the branches made it to the ever growing burn pile. 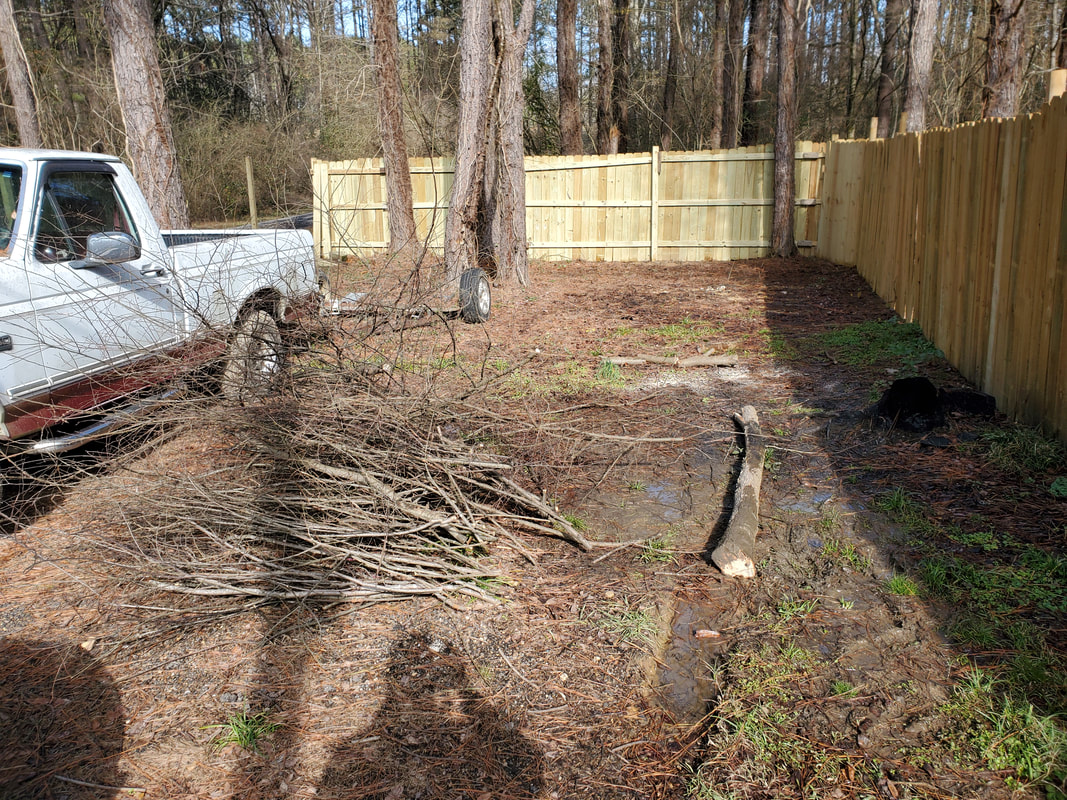
Branches stacked up in pile with only a small section of trunk remaining to be cut up.
With this tree taken care of I will be moving on to the other two trees in the chicken yard, essentially doing the same thing, cutting the branches into small sections while cutting the trunk into usable logs for the burn can. I plan on firing the burn pile after getting all three of these trees taken care of so I can get the biggest bang for the buck since I have a good pile of garbage under the branches to assist in burning up the scrap tree stuff. There are some larger pine trees that are dead in the back of the yard near the fuel shed that I have my eye on bringing down. Of course there are challenges with those since they are indeed much larger than the smaller trees I was working with in the chicken yard. Either way, I'm going to get things tidied up to make room for future construction. 
Spot where tree once sat, cleared up. More are soon to follow.
|
