|
Another casualty of the stormy weather that came through here that I ended up spotting when working in the garden was one of our older apple trees. This tree is situated in a section of the garden that I normally hadn't worked in for a while since my most recent work and apparatus has been on the exact opposite side of the garden. But either way, when I looked at the garden from the right angle I noticed that the large tree was laying completely down. Now while a fallen tree wouldn't have been that big of a deal, especially when it hadn't damaged anything, this tree is one of our producers. Not only that, but being a larger and hence older tree, this tree is an immediate producer. I had to do what I could to get this tree back upright and hopefully save it. The last thing I want to do is cut this tree up, that would be seven years down the toilet if I did that. 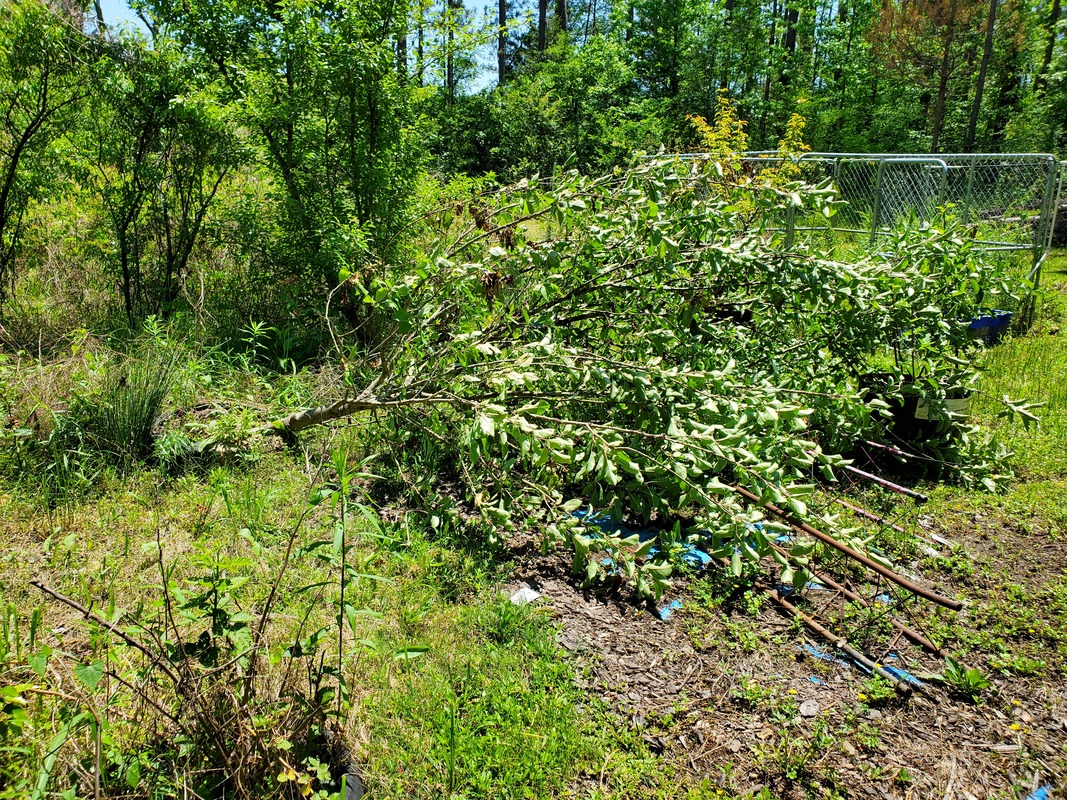 MEDIC!! The problem that I had here with this particular tree was the idea that when I planted it, it was done inside of an old tire that I used as a raised bed to add extra dirt and fertilizer while not having to dig as deep into the ground to anchor the thing. That right there was the main problem since I didn't have deep roots and the dirt was never compacted enough to really anchor the tree down. All it took was some wind to blow this thing over. Also with the tire around the tree trunk, it would be a serious hindrance since I did not want to keep the tire. I also had to figure out a way to secure this tree even after getting back upright. 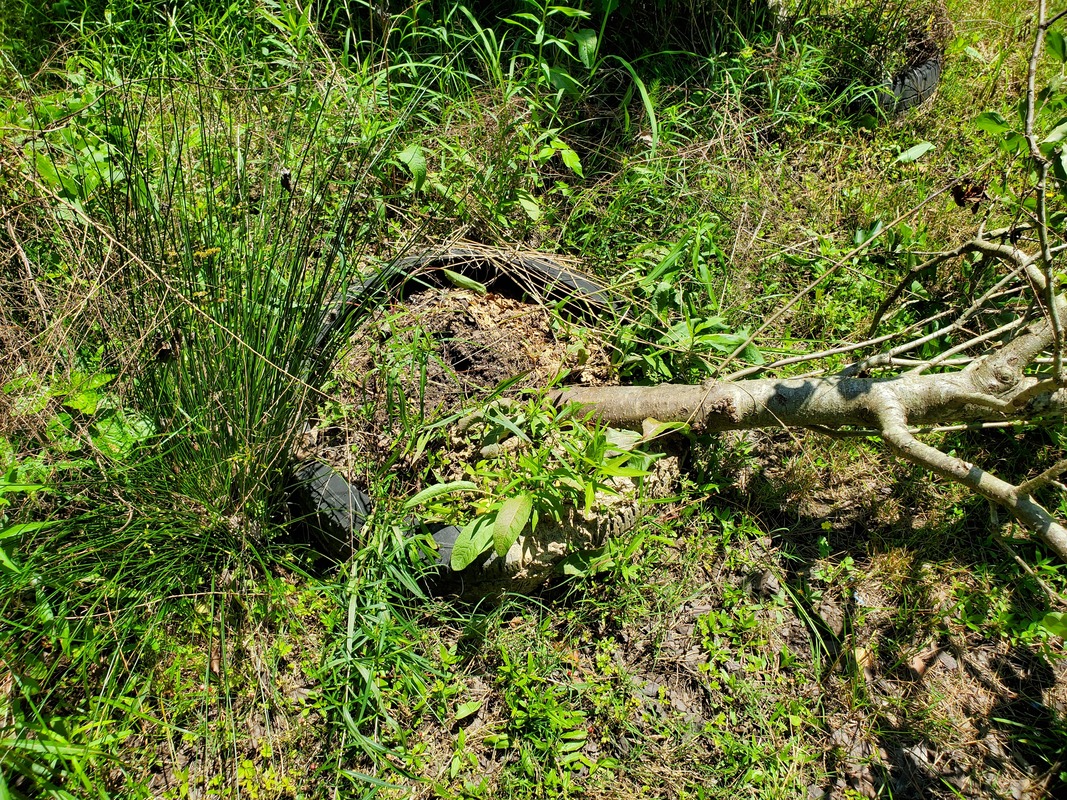 The first thing I had to do was cut the tire at one point so I could pull it from around the tree trunk. The only option here would be to use a metal cutting blade in the reciprocating saw so I can cut through the rubber sidewall of the tire, plus the metal reinforced tread section and the bead on one side of the tire. All of this metal is super heavy duty and would take some effort to cut through. I used a fine enough blade to ensure that I could cut through everything. The next question was how would I secure the tree once I got it upright? The solution had rested on the ground only a few feet away from the tree. I had three lattice cages that I had that were used for supporting tomatoes or other vine plants or hold posts to hang vine plants from. These cages were made from conduit with some stiff 1/4" wire welded between the conduits to form the whole cage. These cages posted in the ground around the tree would provide a protective cage of support around the tree that would ensure that the tree would not move in any direction. I had to use a sledgehammer to pound the cages into the ground deep enough that they would not move while they still rested up against the tree trunk after we lifted it back upright. Once the cages were in place I distributed the dirt that was removed from the tire into cavities around the root base of the tree to ensure everything was completely covered up. I may add some more dirt later on or gravel or something, who knows, in order to keep the root base protected that much more. 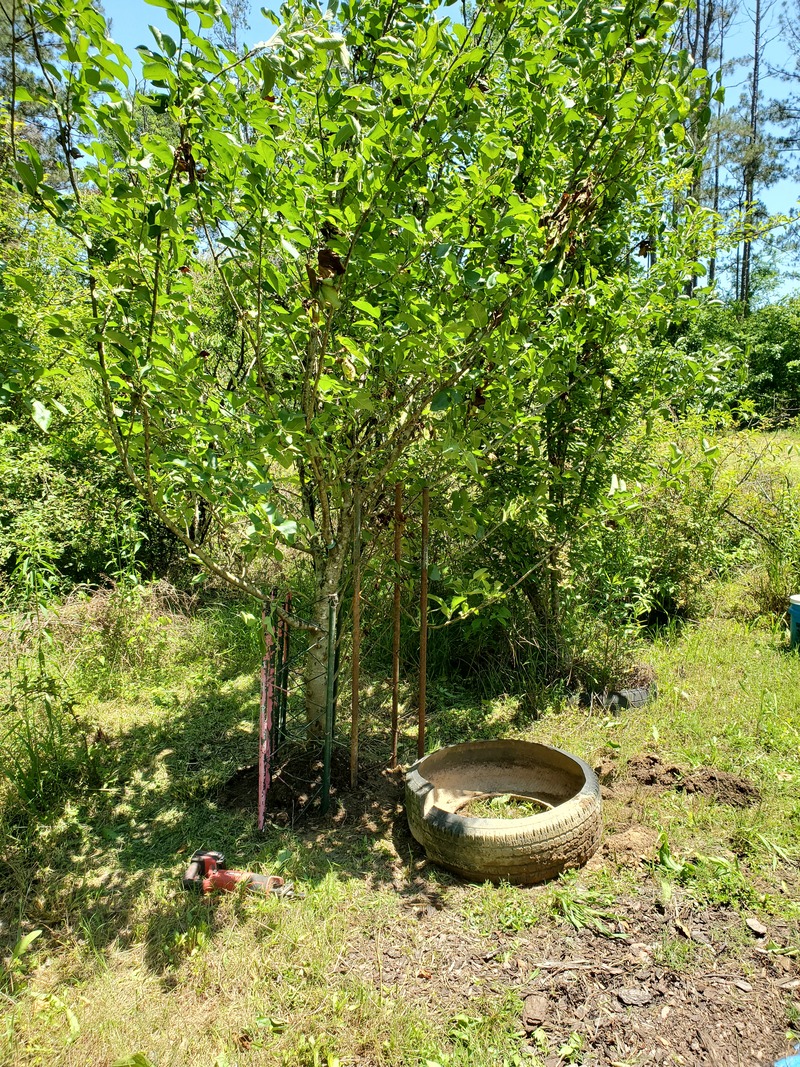 Apple tree back upright with cages in the ground around tree to hold it up. Note cut up tire next to tree. With the tree fixed back up, hopefully the roots weren't damaged any and the tree can continue to flourish since it takes a few years to get an apple tree to the point that it starts producing good. We already have an apple tree that was a good producer just suddenly die out and never come back this year so that was a few years lost in that tree. Other fruit trees have hung around for a few years before crapping out as well over the years and have needed replacing. This by itself is a good reason to have multiple trees planted at different times so while there may be some trees that are freshies, there's also some that have been around for several years. That way any of the old trees that do die will have some younger trees already close to maturity to take their place. That way when I plant new trees to replace the dead ones, the cycle starts all over again. There's plenty more work to do in the garden to keep the dream alive of producing our own food.
0 Comments
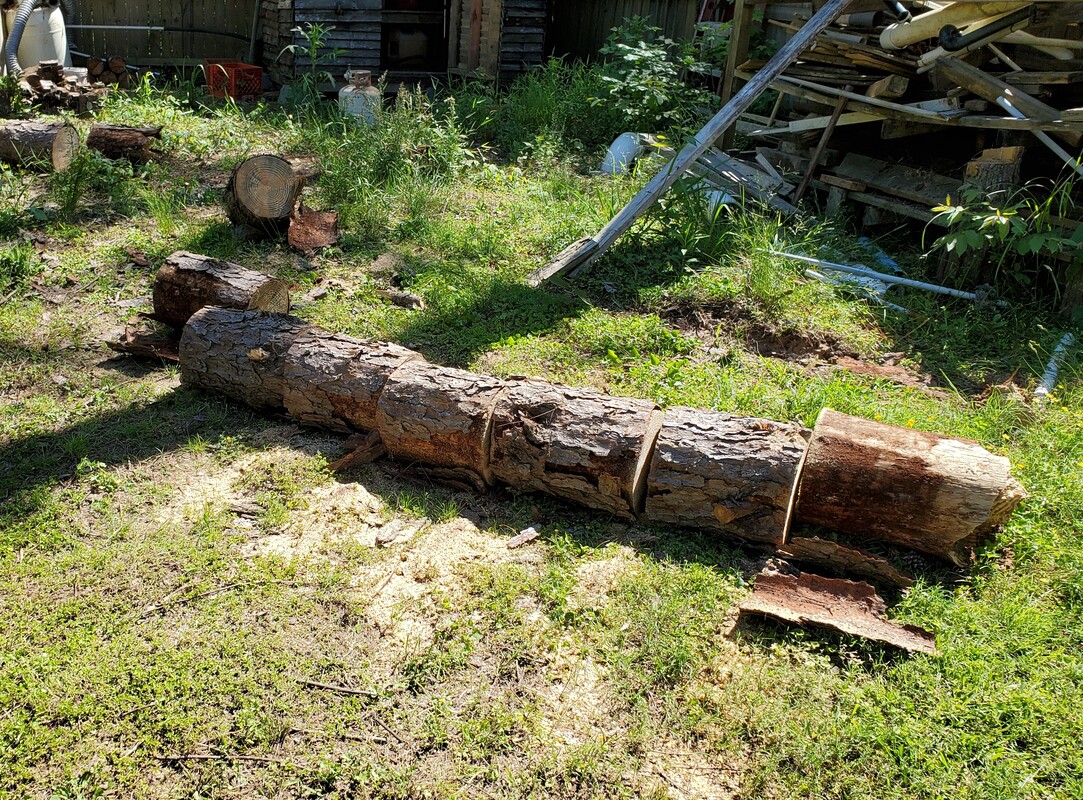
After having cut up the branches from half of the dropped tree in the back yard area last time, I picked up where I left off. I had already burned the brush pile from that last clean up so it was time for another pile up. Since the branches on the other half of the fallen tree were just like before, it wouldn't really take much effort. Of course I did come up with a way to make things go a little quicker for me. Instead of taking time to cut up the branches on site and dragging them over to the burn pile I went ahead and dragged the large sections of broken branches over to the burn site. I only cut branches when it was necessary for me to be able to move the sections better versus trying to drag a whole tree. Also, once I got through cutting up all the branches as stated before, I can then take time to hack up the trunk portions with the chainsaw and move them over to my staging area so I can split the wood.
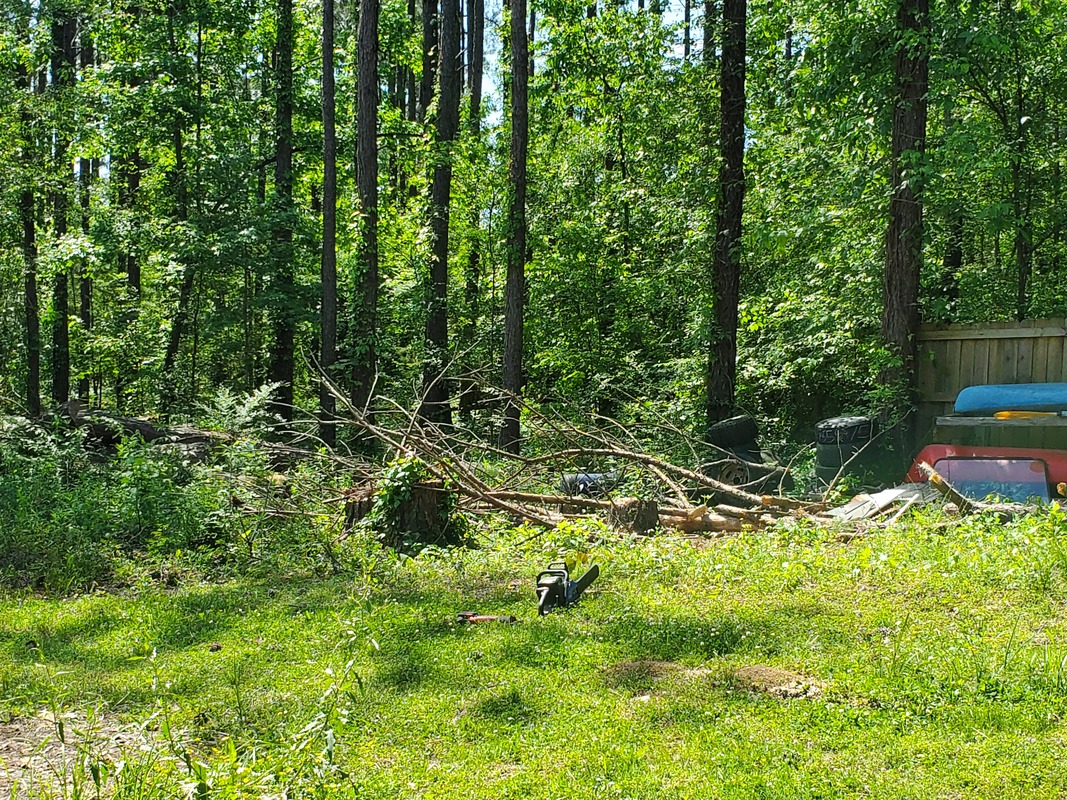
Branches and other crap from the top half of the fallen section of tree that needs to be cut up and disposed of.
After dragging the sections of branches to the burn pile I went ahead and cut everything up where I could quickly stack everything on the ash pile that was still warm somewhat. Just as before I wanted to cut the branches into small enough pieces that I can stack everything and get a good compressed pile that when fired up will burn up completely and quickly. 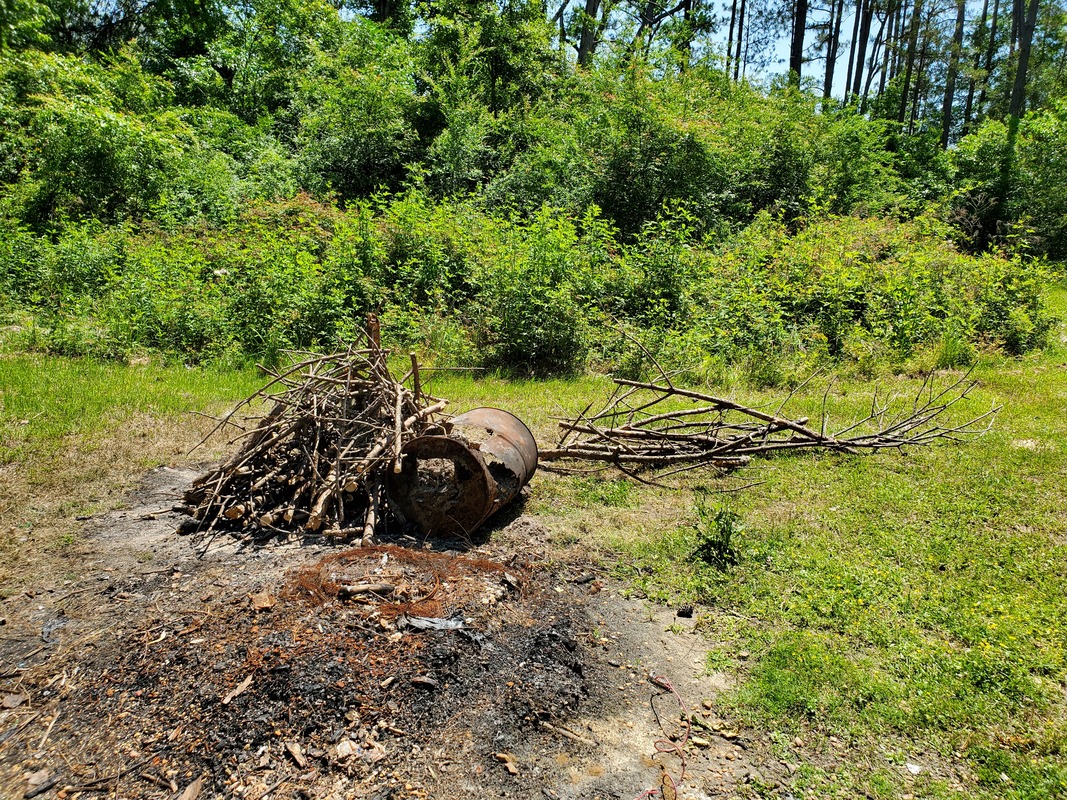
Branches staged by burn pile as I cut them up and stack them on the ash pile.
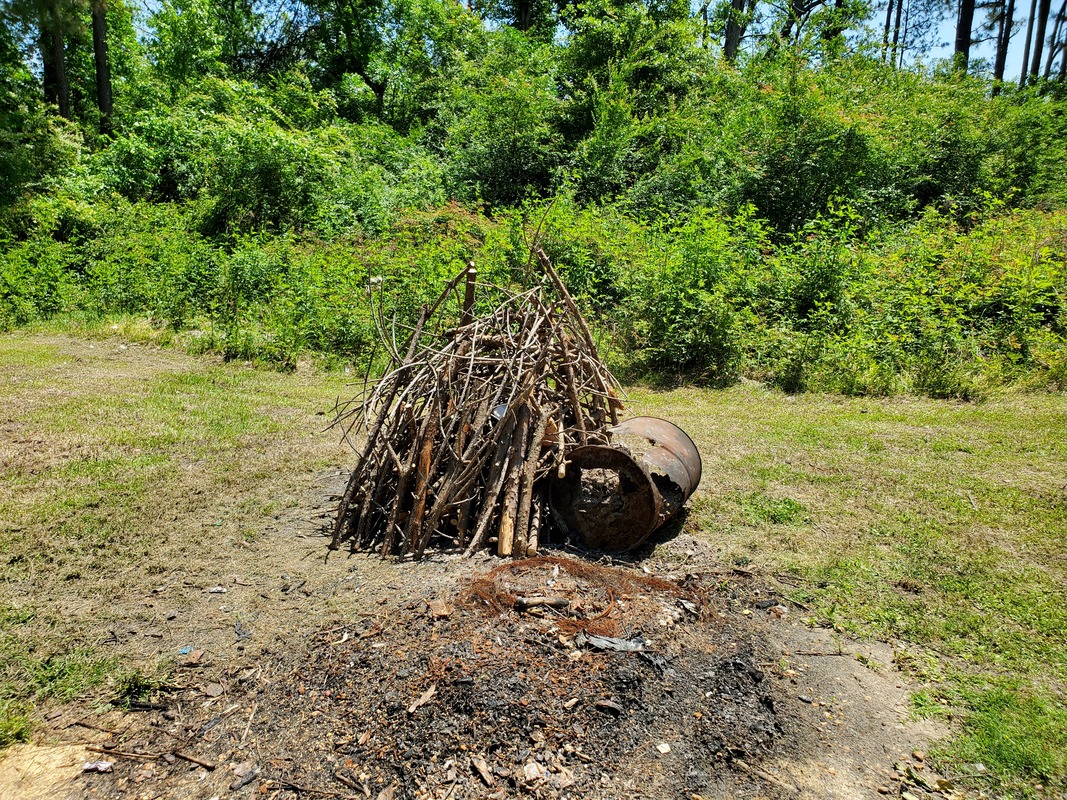
Finished burn pile of cut up branches stacked and ready for fire.
With everything cleared up I was ready to fire the pile. Even though there were hot coals present I still needed to throw a couple small bags of trash into the heart of the pile to help everything fire up quickly. From there I started cutting up the larger portions of tree trunk. I would have to use the wheelbarrow to move all this stuff over to the splitting site since, well, all this crap is huge and heavy. I could've used the S10 again but I didn't want to have to drive past the burning crap plus I would have to go through the hassle of refilling that right front tire that always goes flat and probably charge the battery. One thing that was nice though was being able to see the light at the end of the tunnel with regard to the cleanup work. 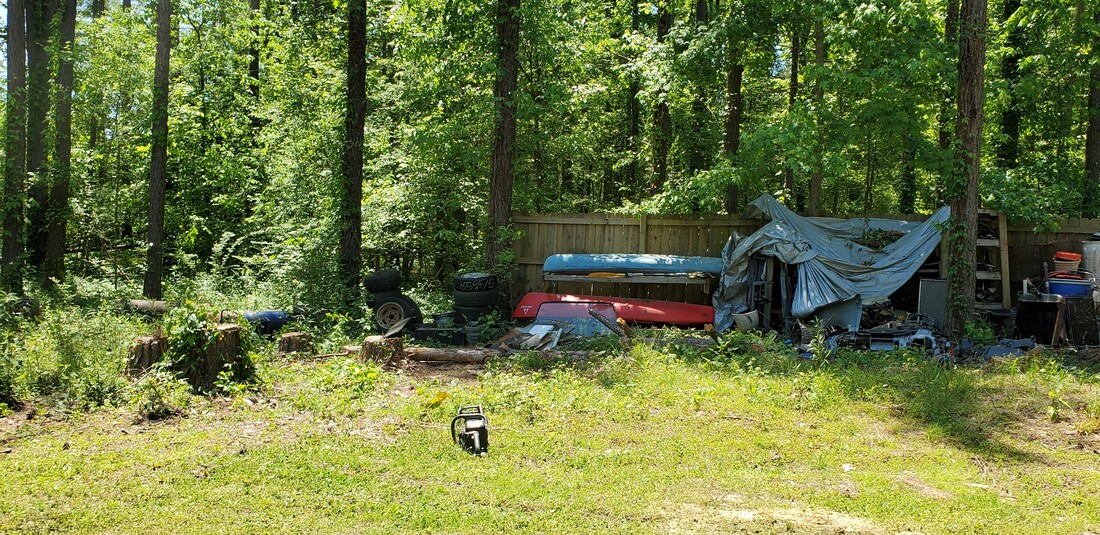
Area cleared of branches, all that's left is the trunk pieces.
By the time I got done cutting up all the trunk sections of the tree I would go through to my third battery on the saw. It's fine since the last section of trunk was over a foot wide and not really dried out enough to be able to cut up easily. The work got done though but there's still a matter of moving this crap to the other side of the yard so I can split this stuff. 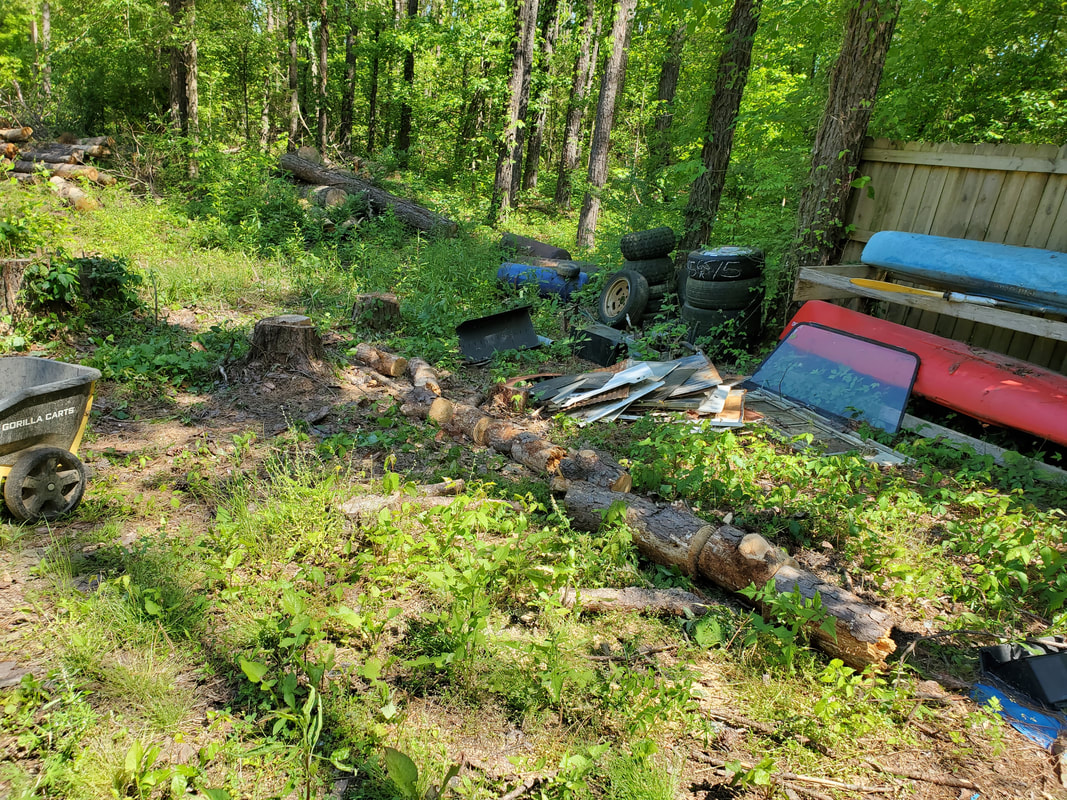
First portion of trunk cut up, this was the smaller diameter section.
Larger section of trunk that really took some time to hack up.
It took five trips to move everything over to the staging area with the wheelbarrow. The smaller diameter section that was cut up first was able to be moved with 1 1/2 wheelbarrows capacity. The 2nd load took the remaining smaller stuff while I piled in a couple of the larger cuts of logs. The rest of the loads would only contain three logs as a time due to the size and weight of each chunk of wood. 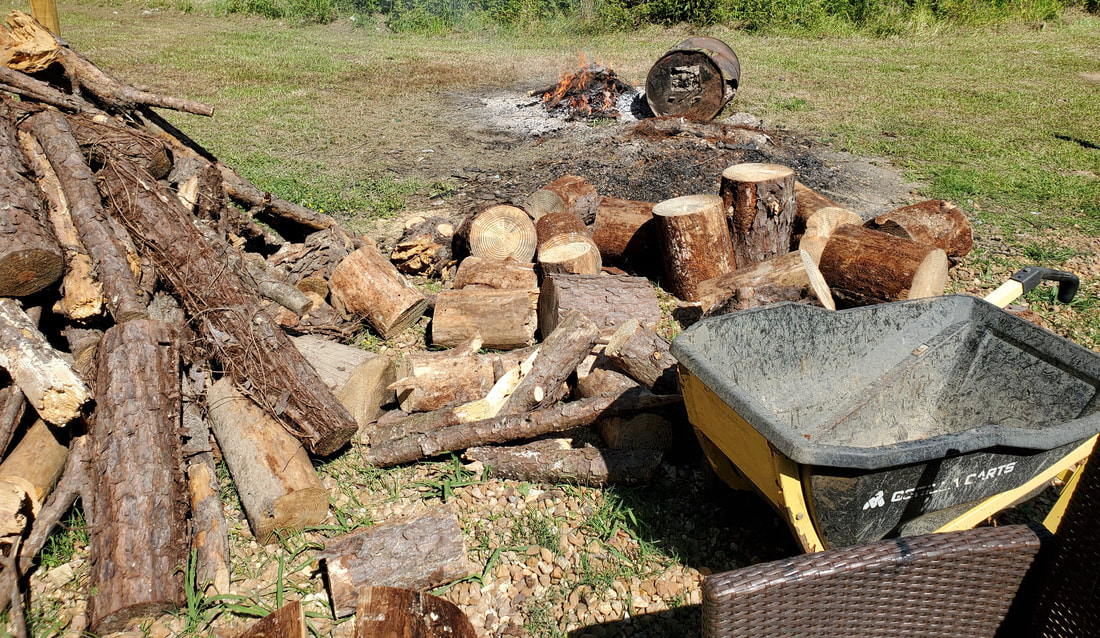
Cut up tree trunks staged with the other pre-cut wood for future splitting and stacking. Note almost burnt down pile in background.
With all this new wood added to the already huge stack of pre-cut wood, I'm going to end up occupying even more space in the dwindling storage space in the firewood staging area. Until I lay more gravel and pallets down to expand my storage capacity, I won't be able to stack all of this wood and clear the area. The most I'll be able to do is just cut and split everything and have it ready to move to the pallet area later in the future. And as I've stated a million times, we'll have firewood for years, and there's still a matter of all of the Fallen Trees that I have to cut and split, that wood by itself will probably double what we already have stacked and staged right now....
After the storms that had passed through just recently brought down some trees and branches around the yard (luckily not damaging anything), it was time to start the cleanup work. Most of this stuff was dried out long dead tree material so it was pretty much seasoned enough that it should light up pretty quickly. We started off in the chicken yard. The ole lady moved the sections of branches from the chicken yard, staging them outside the gate while I grabbed my saws. After all that material was moved out, I started cutting the branches up into shorter pieces so I can stack them tightly on top of one another around the garbage that I already had staged at the burn pile site.  After cutting up the branches into smaller pieces and starting the burn pile stack around the trash I turned my attention to a couple of smaller branches that fell right behind the 51 Chevy. This of course didn't take long since the branches were small so from there I turned my attention to the fallen tree at the back of the yard by the fuel shed. This would of course be a bit of work not just because of the large amount of material that would have to be cut down into smaller pieces for stacking on the burn pile but because I would have to walk all of this crap around the yard over to the burn pile. Basically I'd get a workout in this part of the job. Some of the sections of wood are larger diameter branches, around 2-3 inches diameter, which instead of cutting up and staging on the burn pile I just cut them down enough to make it easy to move and stacked them with the pile of wood that I recently moved for further cutting and splitting and stacking in the future. The larger trunks of the tree that fell haven't been cut up, as I wanted to focus on getting rid of the "garbage" first before I focus exclusively on cutting up the larger material for firewood. Things are being done in stages. 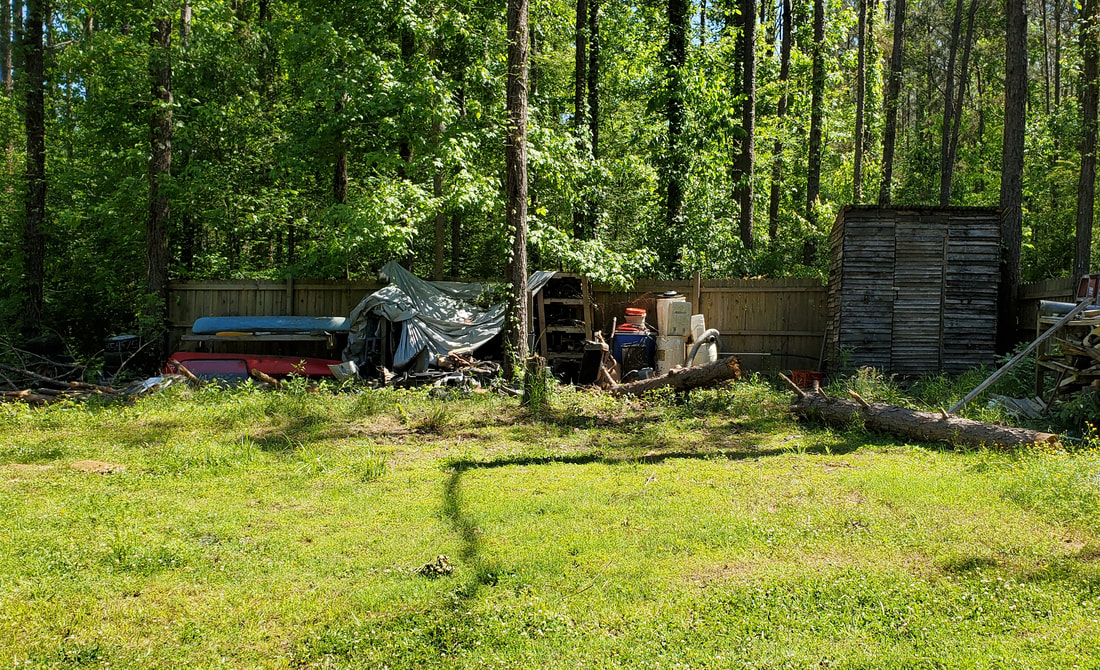 I managed in the day to clear probably half of the branches from the area, making a good sized burn pile. With the pile done and a good section of area cleared, I took time to go ahead and fire the pile. It was coming up to a point in the day that I was about ready to quit but I wanted to get the pile burnt down since I still have more crap to cut up and stack later. Since the burn pile was large I wanted to stick around for a minute while the stuff burned itself down a good ways before walking away. Since my pre-cut wood pile is literally 12 ft away from the burn pile, I had to drag the hose to have it staged to wet down the wood while the fire burned so it didn't cause a possible spontaneous combustion condition. 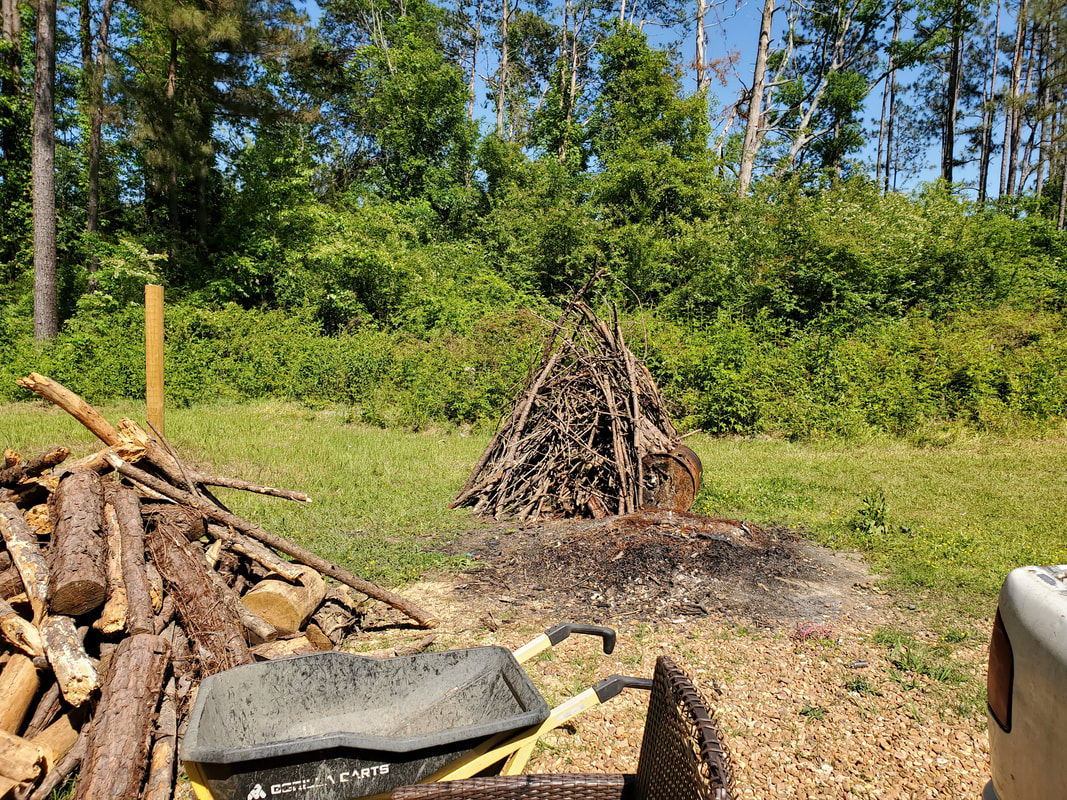 Again since the wood was dry and dead, it took fire really fast once the garbage started really burning. I stacked the wood in a teepee style configuration so as the flames crept up through the sticks and branches everything took to fire in no time and sucked air in, fueling the flames, allowing for fast consumption of the dead wood in probably 30 minutes. In the mean time I did take time to split up another one of the large cut logs that was on the wood pile. I may as well since it would be a waste of time just sitting there watching wood burn. 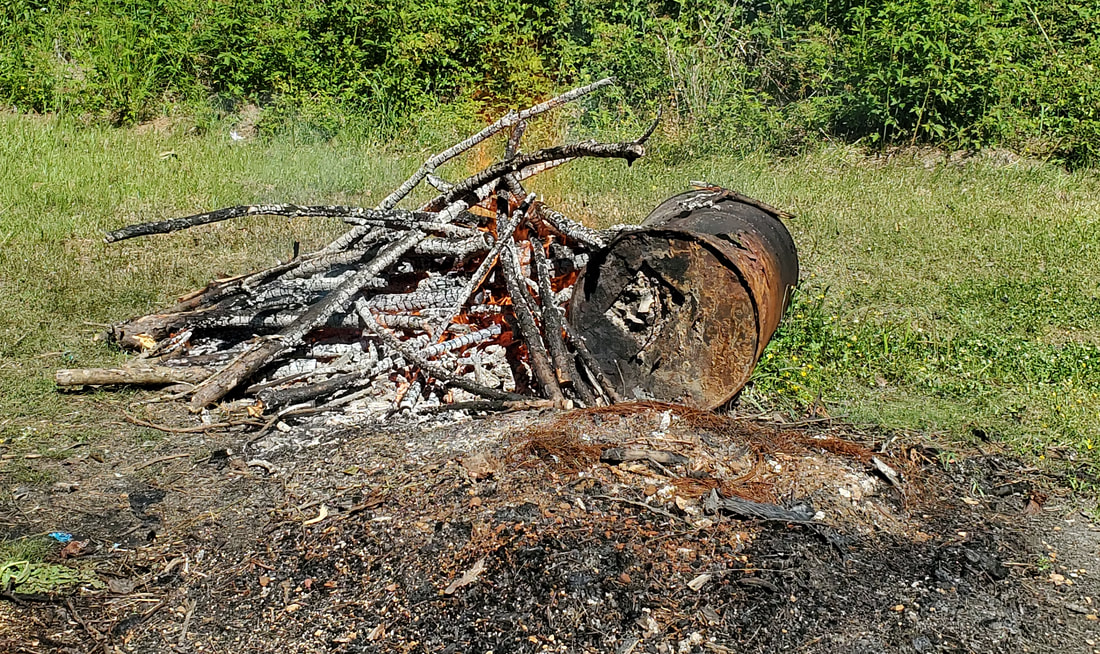 With the wood burnt down, I can now cut and stack another pile of detritus from the back area and finish up clearing the smaller garbage wood before pulling out the big saw to cut the trunks up so I can have the pleasure of splitting some more huge logs along with the rest of the stack of wood. At least from the way things are going I'll have all this mess cleaned up pretty fast unlike the March 2020 storm damage where it took me several months to get all the trees cut up and split and stacked. The work continues... I finally made it to the weekend and had a chance to get another load of gravel in order to cover the area so we can move the 65 Mustang over to the new site where I plan on building the A-frame hoist. As before with these types of spots where I lay gravel, since I was able to back the truck up to the spot, I was able to lay the gravel rather fast, after covering some area, I backed up the truck to the next patch to lay more, repeating until the gravel was gone. I was able to cover a good wide area up to one of the trees within the fenced in yard. With that little bit of business taken care of, it was time to move the 65 Mustang over to the spot. 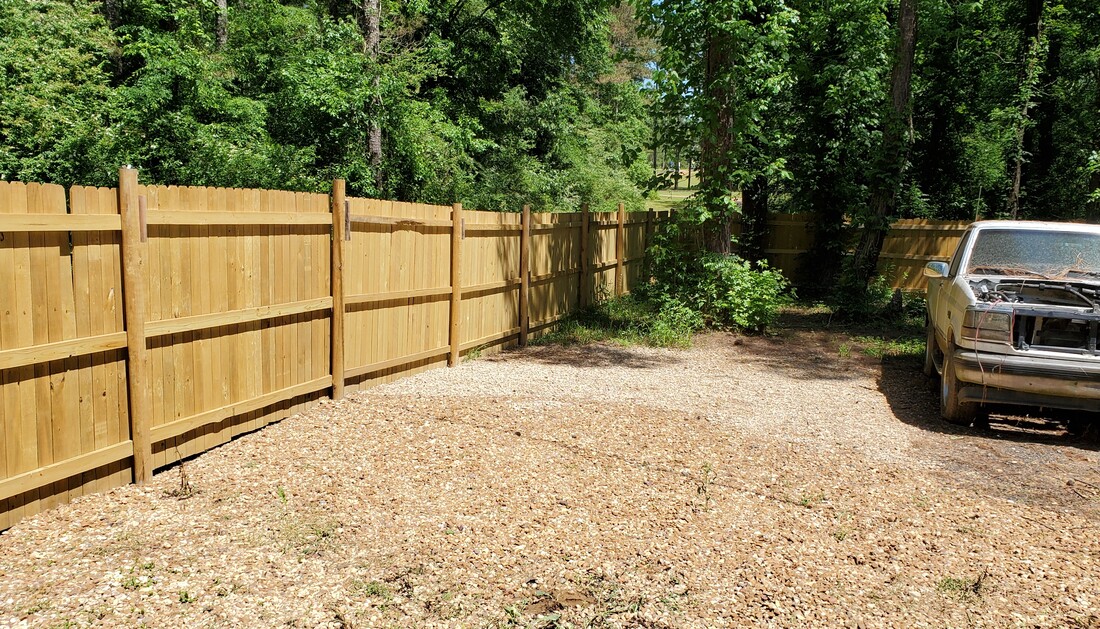 Area fully covered with gravel up to the pine tree at the back of the yard. We used the Tracker and some chain to start dragging the car out from its past resting spot. I had to carefully have the ole lady pull as the rusty car is weak in spots and the last thing I want to do is have a sudden jerk snatch out the rear end or damage the frame. Once the car was out in the main driveway we were able to push the car the rest of the way into the yard and down to the new resting spot. Being on a slight grade helped out with this plus the gravel made the ground "smooth" enough that it didn't take much effort for us to push the body down. With the car resting in its new spot, the next order of business was getting the Ranger frame moved and staged in front of the Mustang. 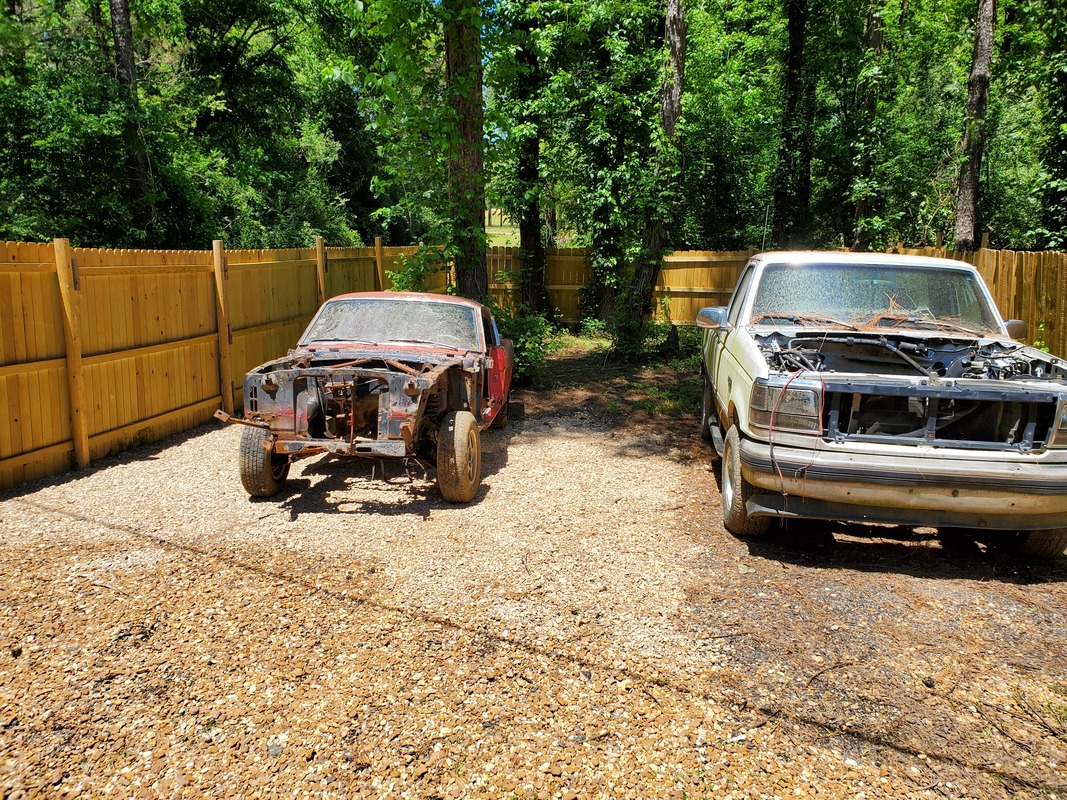 65 Mustang parked in new spot. Moving the Ranger frame in and of itself wasn't really that bad, but I had to move the 69 Mustang out from the side park to open the area up to get the frame through. Of course since the car had been sitting for a while the right front tire (which seems to always be the one to go flat on cars around here) was flat and the battery was dead. After addressing that little inconvenience, I got the 69 Mustang moved out of the way and from there started pushing the frame out from its spot behind the garden fence. I had to steer the frame to get the nose of the frame pointing away from the direction I needed to push the frame. Basically I had to push the frame ass first towards the site by the 65 Mustang. Once the frame was staged ass first we were able to push the frame all the way across the yard and driveway and finally have it come to rest in front of the 65 Mustang. 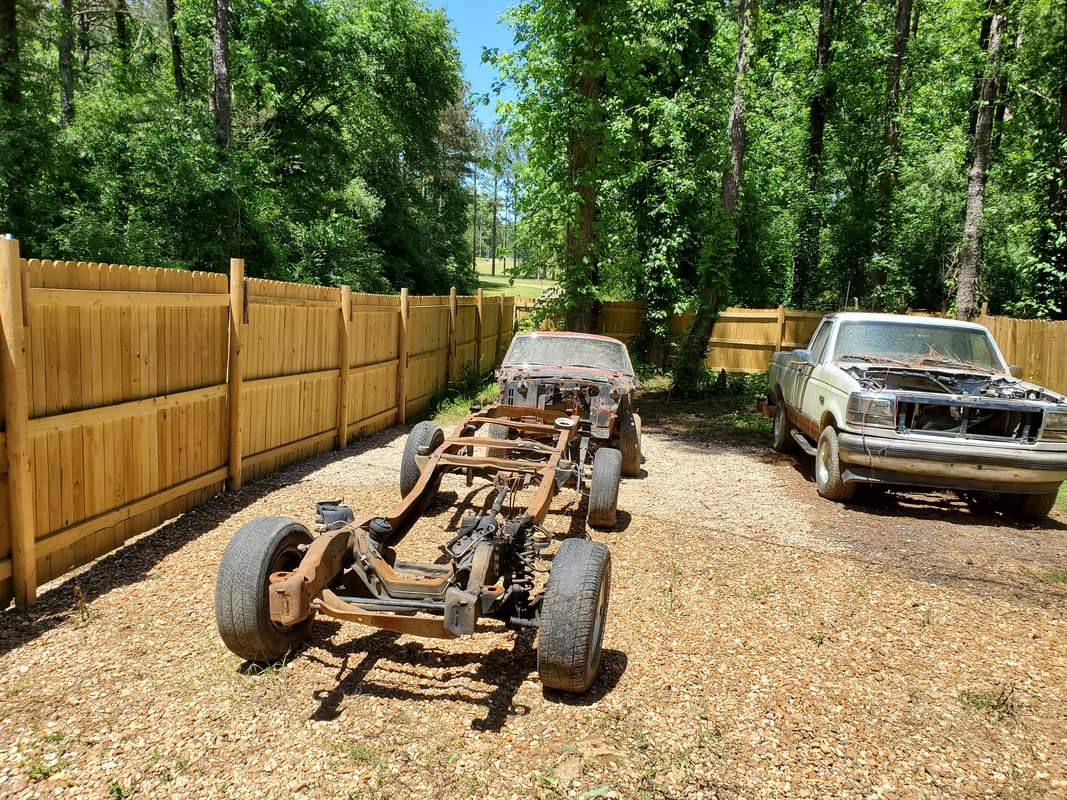 Ranger frame parked/staged in front of Mustang body. Reason for staging the Ranger frame this way in front of the 65 Mustang body is because once I build the A-frame hoist, I can lift the car's body up high enough to be able to roll the truck frame under the car to commence the mating of the two. There is plenty of room in the yard to allow us to stage these cars the way we did so its not that big of a deal. There was plenty of room to even park the F250 in front of the Ranger frame with plenty of room to spare in front of it as well. We can still pull into the midway from the fence opening with both daily use vehicles and not worry about the F250 getting in the way. 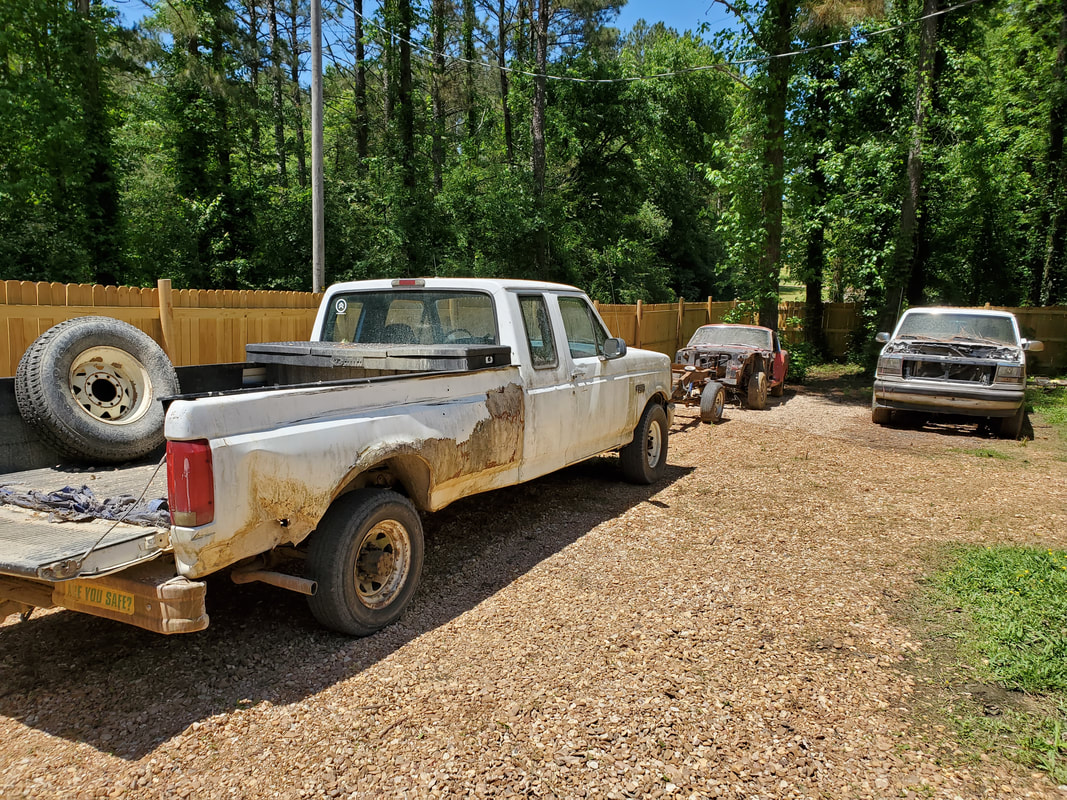 F250 parked in side park in front of Ranger frame. With everything moved where I wanted, I moved the 69 Mustang back to its normal parking spot. With that, everything was moved where I wanted it. The next course of action when it comes to moving things is going to be to move the boat trailer and the small catamaran sailboat that are parked next to where the 69 Mustang has been parked. Of course to do this I will have to lay some gravel down over the area where I want to park the two nautical items before moving so I don't have to worry about dealing with grass growing up around and under and through them when they sit in that new spot. I also have to do some repair work to the trailer axle so I can move the unit without hassle. Even with the makeshift repair I will have to do some more stronger repairs with a stronger welder than what I have available to me to make the trailer be roadworthy. Then after moving the boat and trailer out of the way I can lay gravel down over the old area where the used to be so I can extend the parking area around the 69 Mustang. In this area between the garden fence and the 69 Mustang I'll be parking the El Camino and the 51 Chevy tandem style so I can have all of the vehicles parked and staged within the fenced in compound. The work continues.
After transferring the large stack of pre-cut firewood that I had staged behind the garden fence next to the Ranger frame, it was time to actually start cutting and splitting everything and stacking it on the pallets in the new firewood staging area. I moved the log splitter and my chair over to near the eastern fence line in the midway in order to do this work. I also had to bring out the chainsaw as some of this wood would need to be cut down into smaller lengths for the splitter and for stacking. Some cuts were already short enough to go right on the splitter and hence would be quickly split and stacked but others being several feet long would need to be cut down. Luckily while the pieces were several feet long they were only a few inches wide and so would only require one splitting or two to take them down into manageable sized pieces for use in the stove or in a firepit outside.
Of course by this time the chain on the saw was getting on the dull side so I only had a few cuts before I had to swap out the chain. I'll end up sharpening the old chain to try and get a little more life out of that one but before its all said and done, I'll end up going through some chains. As I continued to cut and split wood and started stacking the stuff, I started to question whether I'll actually have enough room to get all of this wood stacked up. I was making sure to utilize every bit of space to maintain the stack height all across the board so I can get all this wood stacked up. So far it seems like things are going good, I still have a fair amount of space on the pallets available. 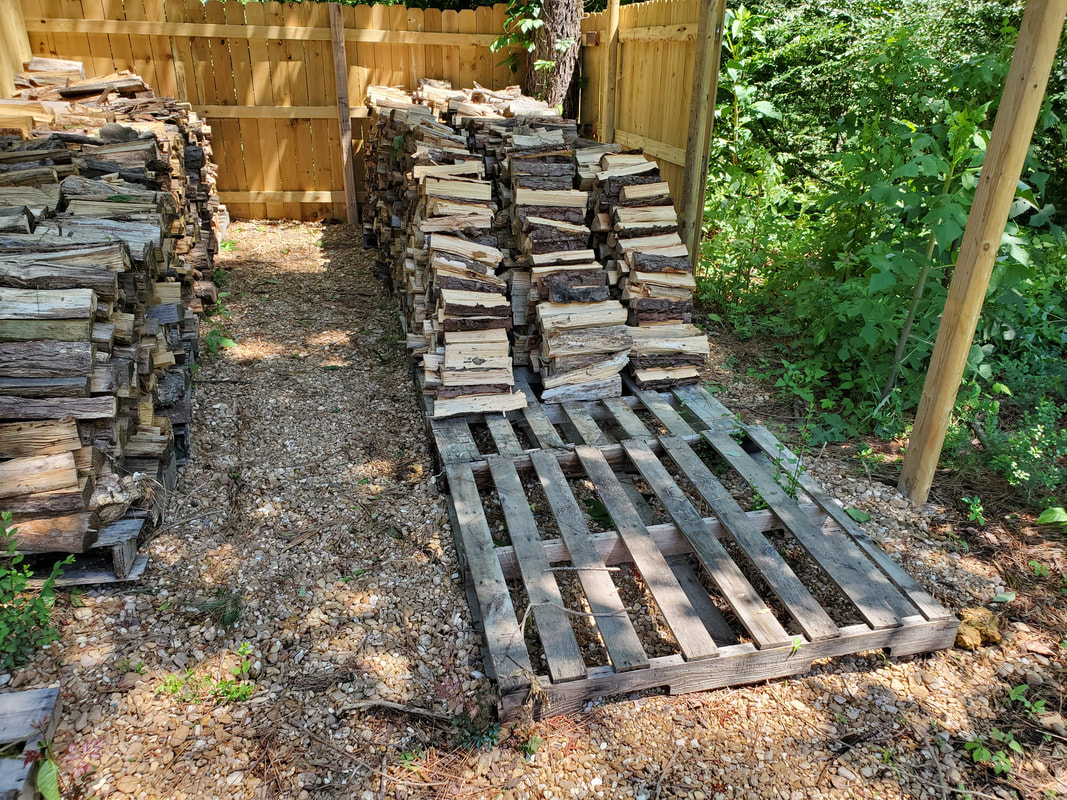
Newly stacked wood on pallet row showing how much space is still left after splitting three wheelbarrows full of wood.
As before, I took the time to split wood to varying degrees. Some splits were split to make pieces that were thick enough to achieve long burns while some pieces were split to be small enough that they would make good intermediate burn pieces. Some pieces were a few inches in width while some were only an inch or two in width. I had to do this as I would have to be able to get the fires started without having to use as much cardboard or wax firestarters as I've had to do in the past. I want to get to the point where my selection of cuts will allow me to be able to get a kindling fire started and gradually fuel it up until I get a good enough burn that will allow the larger several inch thick chunks take fire easily. 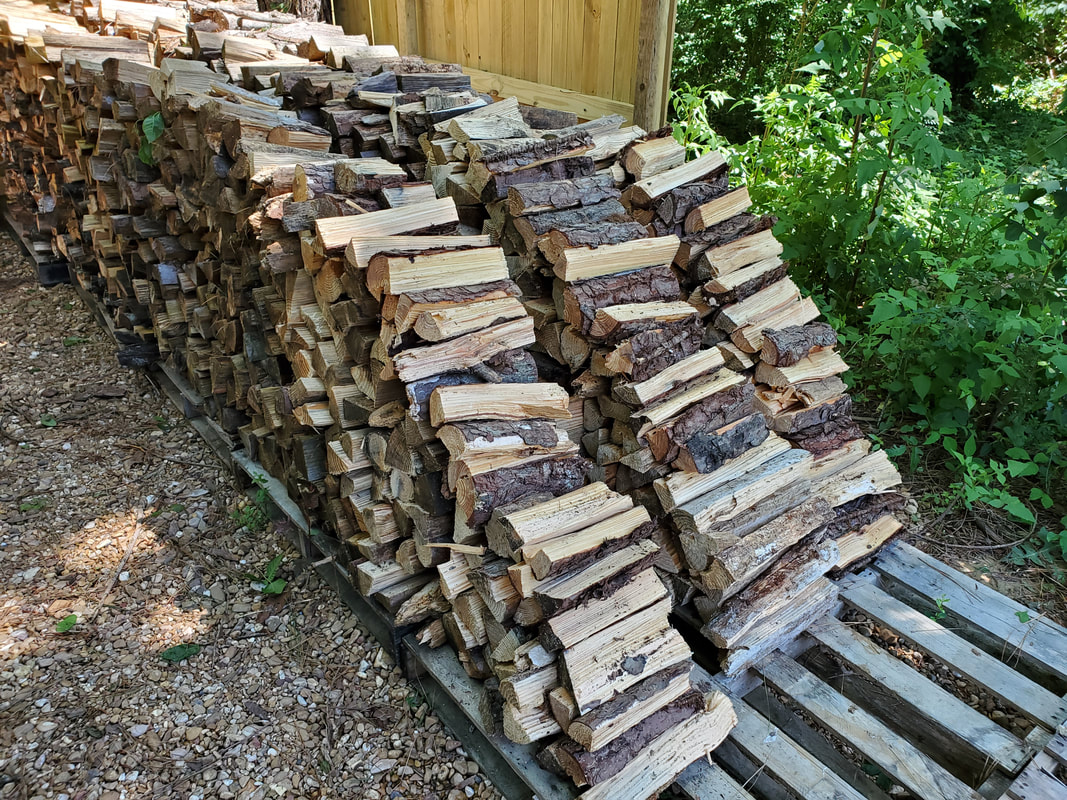
The light colored wood starting from the left third of the picture going to the right is the wood that was stacked after this session of cutting and splitting.
After the session that I did which lasted for about 90 minutes, I managed to get around three full wheelbarrows full of split wood moved to the firewood staging area and stacked up neatly. While I did manage to cut and split some rather large logs and cut down some long narrow logs, from a distance it barely looks like I made a dent in the pile of pre-cut wood on the ground. I wanted to move around through the large logs and the narrow long longs as I wanted to get an even stacking of different woods as well. This is because I didn't want to have a large section of the stacking that only consists of kindling wood or long burn wood. When I gather wood to bring in the house I want to be able to work my way through the stack from one end to another, being able to grab enough kindling wood and long burn wood to allow me to get the fire I want while not having an uneven usage of wood in the stack. It's that uneven usage that would have the stack at risk of falling over plus it would make it harder to be able to stack up fresh wood if I have fresh wood randomly stacked all through the seasoned wood along the length of the stack. 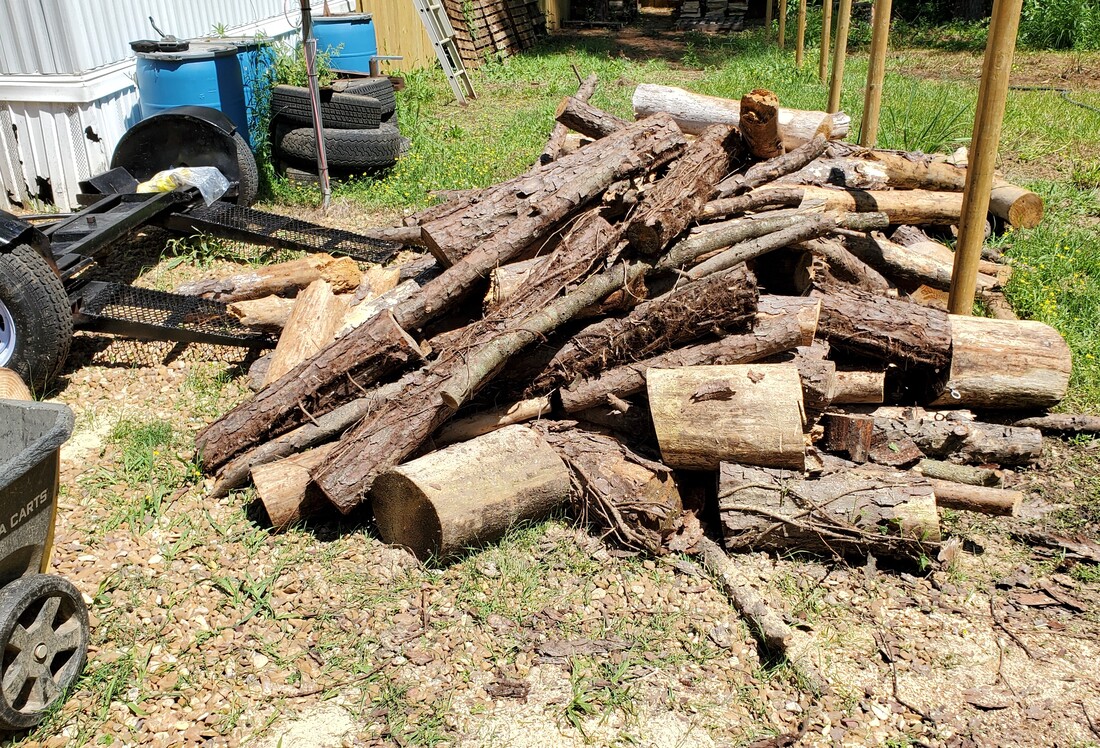
Wood pile is gradually shrinking, not much but it is shrinking, trust me.
One funny thing that one who looks at some of the wood in this picture might notice is how some of this wood, especially the narrow long logs, have old poison ivy vines still attached to the trunks. This stuff was a thorn in my side when I was cutting up the Fallen Trees to make this pre-cut pile since my contact with the PI would have me itching like crazy for the next couple of weeks until I stopped fooling with the wood. Unfortunately I will probably have to deal with this again as I had to take time to peel off the PI vines as much as possible before stacking the wood up. I don't want to burn this wood inside if I can avoid it because unlike burning outside where the smoke and vapors from burning PI can be avoided, inside the walls of a house, the smoke and vapors will linger enough that they could possibly cause respiratory problems for us. Any of the pieces of wood I do encounter that still have PI vines on them will more than likely be set aside to be used in burns outside when I'm working on something so the smoke won't be as much of a problem for us. But as you can see, there is still a lot of cutting and splitting to do here.
Earlier this year we had several trees brought down in the south/south east end of the clearing due to many being dead or dying. These came to be known as the Fallen trees as they were brought down then stacked roughly at the edge of the woods so I can dispose of them as I see fit. Slowly but surely I cut up the detritus, burning up branches and other material that I didn't want to save while stacking small sections I cut up so I can further cut them up later on when I get a free moment.
Now that we're at a point where I'm going to be working on the 65 Mustang and the truck frame swap project, I need to move this huge pile of pre-cut firewood so I can have room to maneuver the Ranger frame in order to bring it over to the spot along the western fence line, along with the 65 Mustang body prior to building the A-frame that will be used to lift the body up to allow me to place it on top of the truck frame. Since there was a lot of wood to be moved and I had already moved several vehicles around, I thought that I could speed things up by using the S10, which was parked right at the eastern fence line, to load up a large batch of the wood then drive it over to the area along the eastern fence, close to where our new firewood staging area is so I can further cut and split the wood and not have to travel too far with the wood via wheelbarrow to get the wood stacked. After having to jump start the S10 and pump up the right front tire that's pretty much shot, I did a quick walk through of the path I would have to take around the eastern and southern ends of the plotted compound to make sure the grounds were hardened enough for me to drive over, especially when the truck's loaded full of wood. After determining everything looked good I drove over to the spot where the wood was piled up and got to work humping the wood, some rather heavy, into the truck until I got a fair amount loaded up before driving back around and parking close enough to the eastern fence and the midway where I can toss off the pieces of wood. 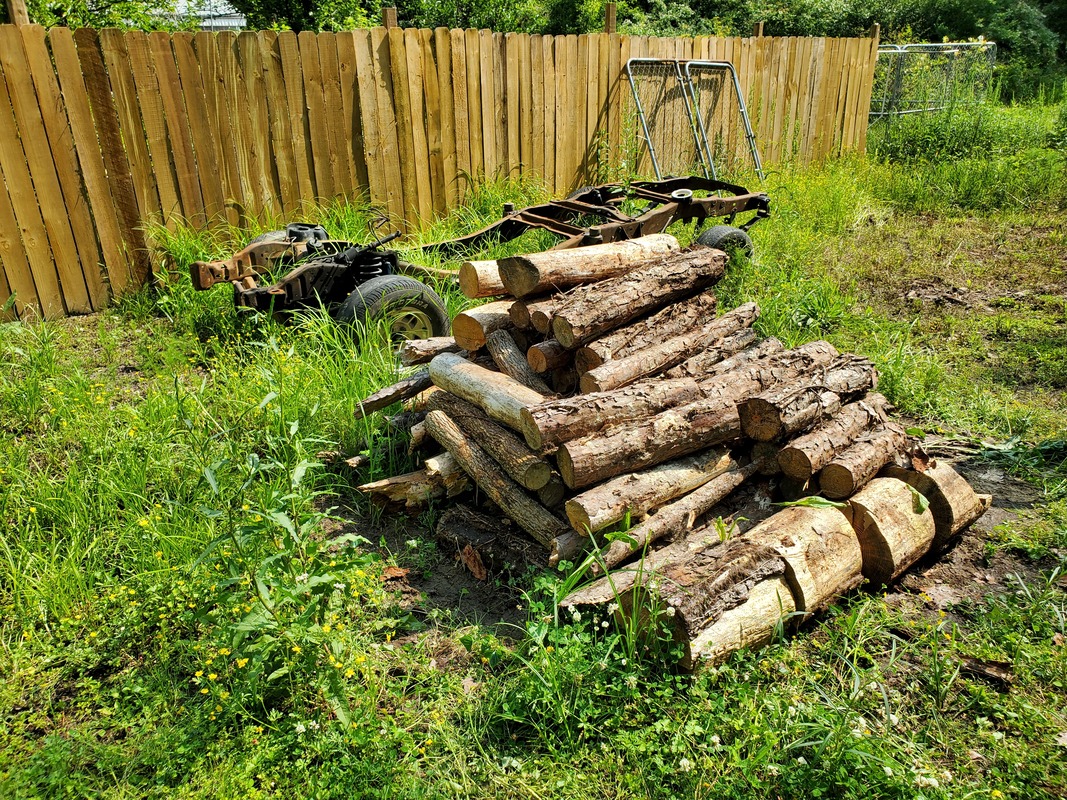
Wood pile staged behind the garden fence along with the Ranger frame, slowly dwindling as I stack the wood into the S10
Because the septic system and the field where the runoff is right in the path along the fence going towards the firewood staging site, I could only go as far as the midway at the fence line. Here I ended up just tossing the wood all over the open area around the fence posts on both graveled and grassy ground. Trying not to get too close to the burn pile spot since I don't need any of this wood to spontaneously ignite when I have a good burn going on. Of course I'll probably work from the burn pile out, clearing that wood away first. Also I'll try to clear the wood from the grassy areas as I want to be able to still cut the grass over these areas as it continues to grow around any wood sitting there. Lastly, I want to clear the wood from the areas that are "outside" the fence because as time progresses, if I hadn't already processed all this wood, it will still be here when I start hanging fence panels once again and with this wood here around the fence posts and in the path of the fence, I will be hindered in my progress.
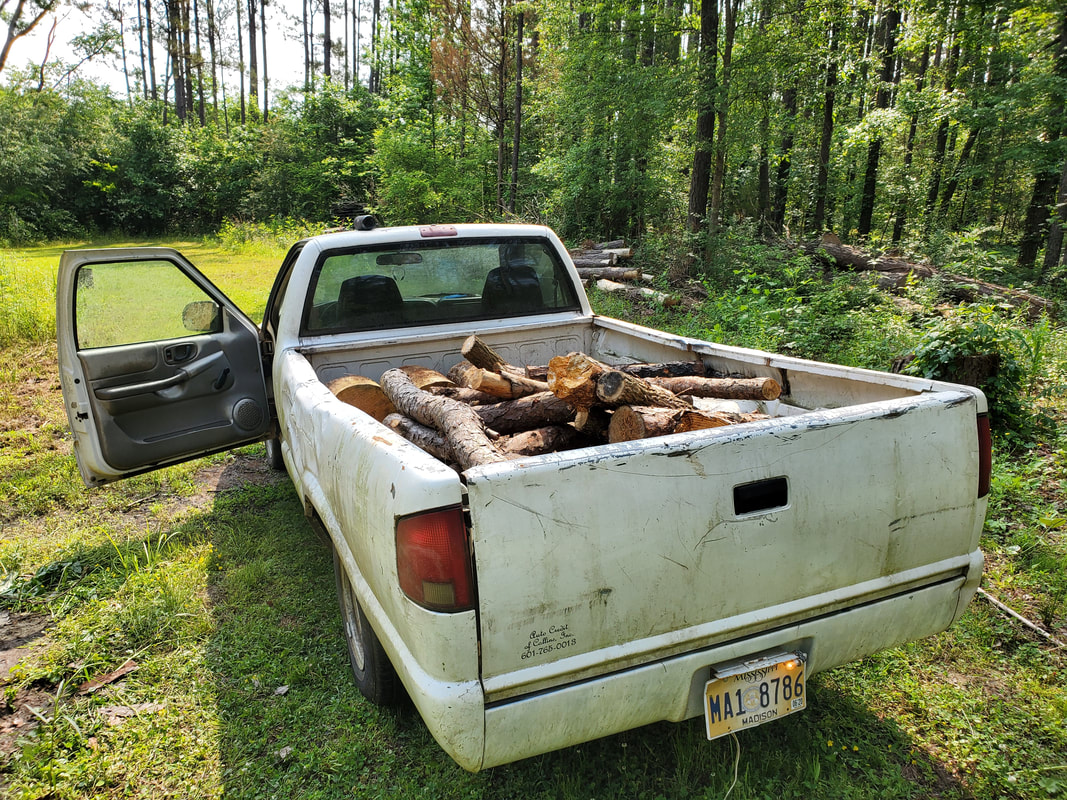
Loading firewood up into the bed of the S10 while truck sits casually on the now hardened ground.
It only took me four runs to get all of the wood transferred to the S10 and moved to the new temporary staging area. As stated its all over the place but still out of the way of the midway so I can still move vehicles around as needed and aside from using the wheelbarrow to move new firewood to the staging area or some gravel, nothing else will really need to be moved back there. Speaking of gravel, I will have to lay some more gravel in order to lay more pallets down as I do stack more wood up since this large stack of wood shall yield a huge amount of wood. I cannot even begin to imagine just how much larger the firewood piles will grow with just this batch of firewood once its processed, even with the new way I've been stacking said wood. 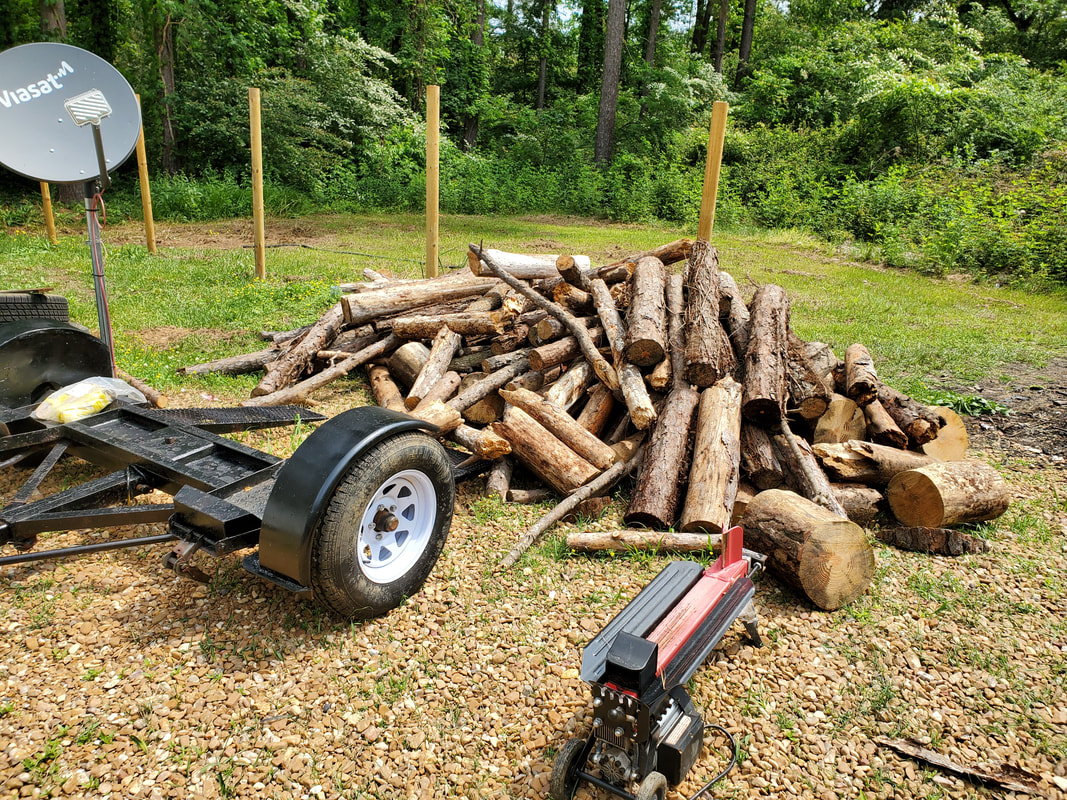
Loose firewood tossed about on the ground along the eastern fence line near the new tow dolly. Note the log splitter also moved into position to get ready for the cutting/splitting work.
Even with all of this wood processed, there is still a matter of the Fallen Trees. There is probably 10x the amount of wood by volume still on the ground in those tree trunks that still need to be further cut and split. The chainsaw will definitely see some work and I'll probably be several chains in before I get all those trees cut up. Not to mention the idea that I will probably run out of room to stack all this wood. I'll probably end up having a whole other staging area for this overflow of wood that I'll be letting dry out as I use the wood from the staging area as it'll be older more seasoned wood. From there I can pick off of the overflow and stack it in the staging area to replace all that's used over the next winter. Either way, I'll have firewood for years. I'll have to possibly take on some other small projects that center around using raw wood, perhaps making charcoal or splitting wood into firestarter sticks or something, who knows. I'll figure out what I want to do and when I do, it'll be posted here for you to see.
After taking a trip to one of the local hardware/home improvement stores, the ole lady came back with some flats of seedlings of tomatoes and peppers. This store always had the best price on the flats compared to the chain stores. With that, I knew that I would need to get to work getting some of these plants in the ground, so to speak, before they either dry out or before we get too ahead in the spring.
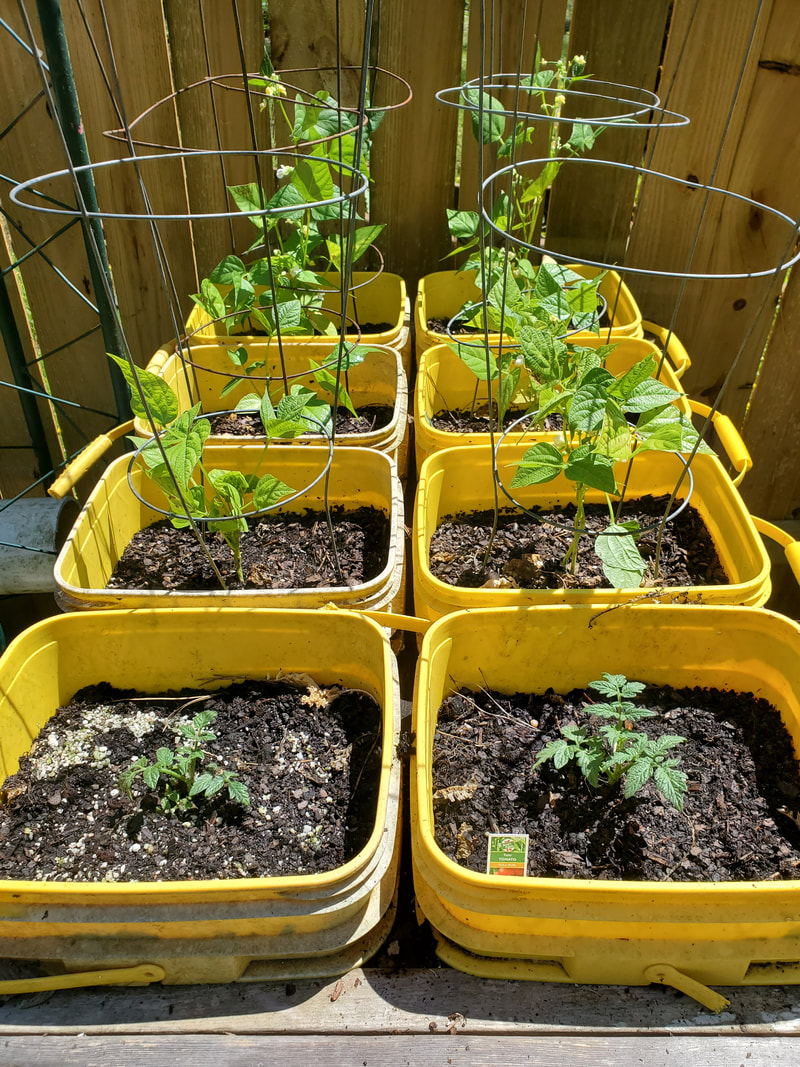
I still had my main hydroponic system that utilized the two 6" sewer pipes with the 12oz cups as planters, with room to accommodate 10 plants. I still had some bucket planters that were open plus one of the older oil drum planters still open. The other older drum planter lost its legs and fell over so it'll be emptied of dirt and staged with the outgoing scrap to go out on the next run. The first thing I did was plant tomatoes. I planted these in the bucket planters and in the old drum planter since they would need the most room compared to the peppers. I was able to get 10 tomatoes planted between all of the locations. I'll be needing to get some more cages for those tomatoes before they grow too big to be encased within. 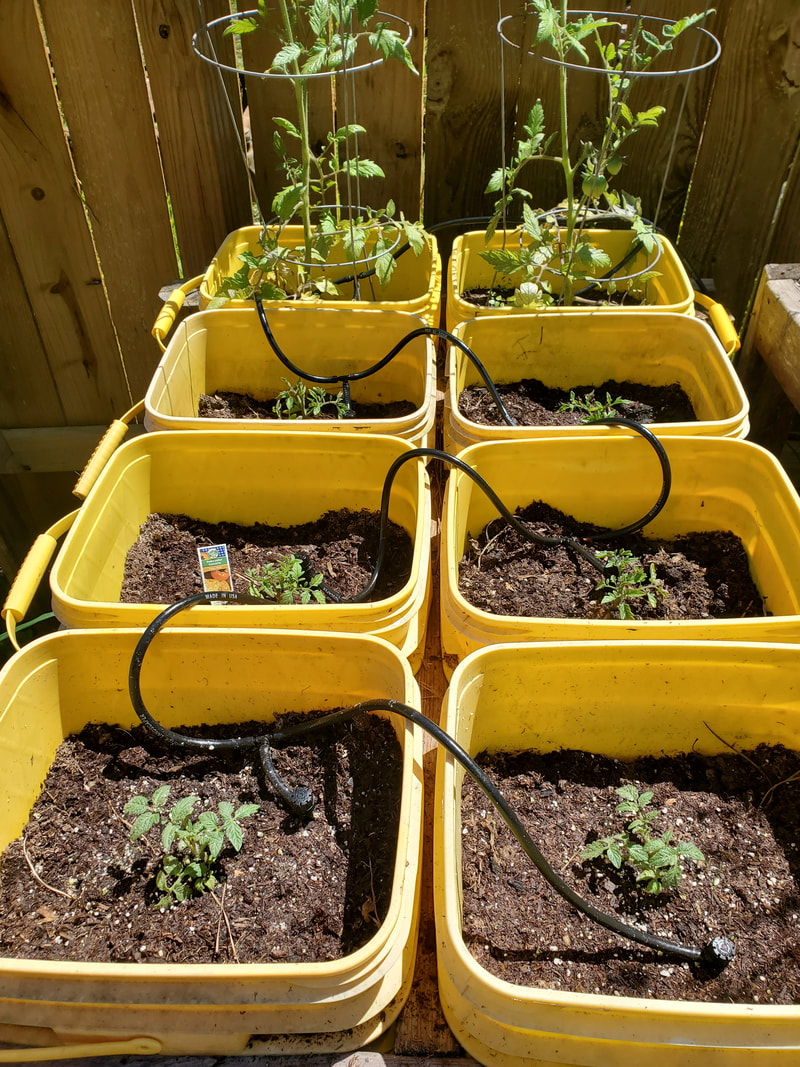
Tomatoes planted in bucket planters with a couple of older tomatoes at the back of the assembly. Note micro irrigation sprinklers still in place.
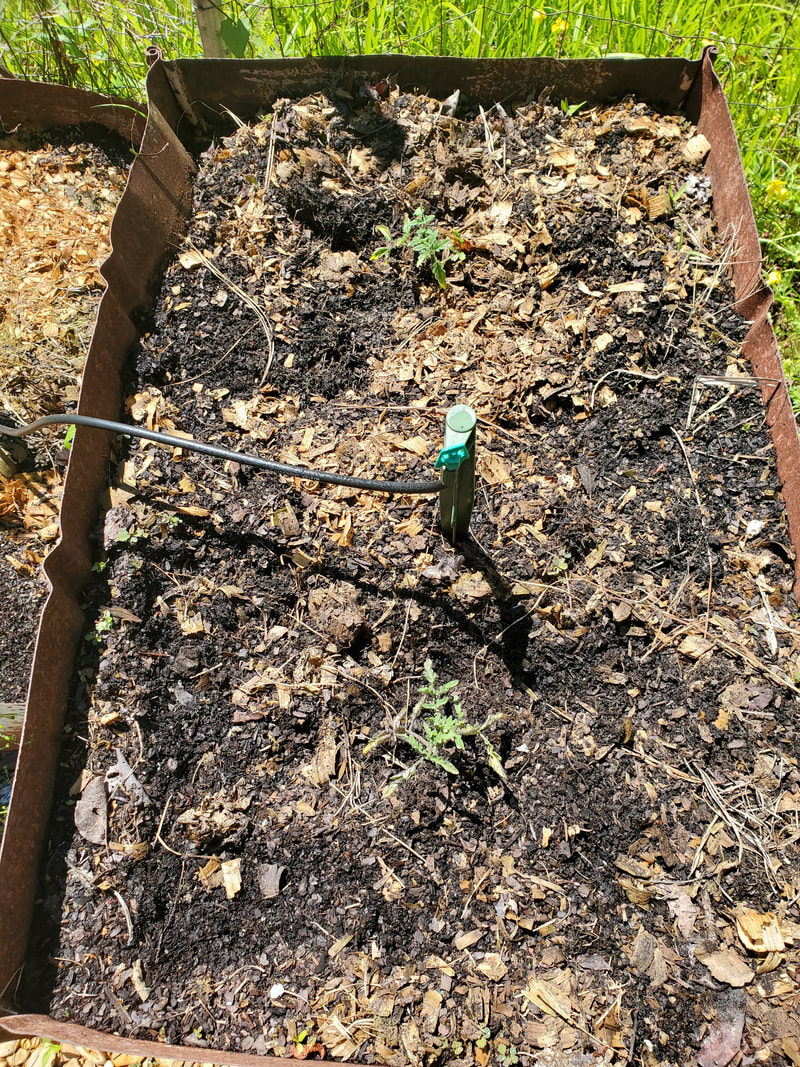
Old oil drum raised bed with two tomato plants within, note micro irrigation sprinkler. This size bed is only able to accommodate two plants.
As for the hydroponic garden, I had to collect the perlite medium from a 5 gallon bucket that I had the stuff sitting in from last year. Of course water filled the bucket to the point that I had to scoop the perlite out by hand and deposit it in the cups then drain the water out and repeat until I filled the cups. For this garden I picked out the jalapeno and a couple of banana peppers to plant within. I put each plant into each cup and scooped enough perlite to fill the cup all around the plant before setting them all in the holes of the assembly. I will still need to mix some fertilizer mix and fill the drum up so it can start running like normal but for right now the tubes had standing water in them that will keep the plants moist until then. 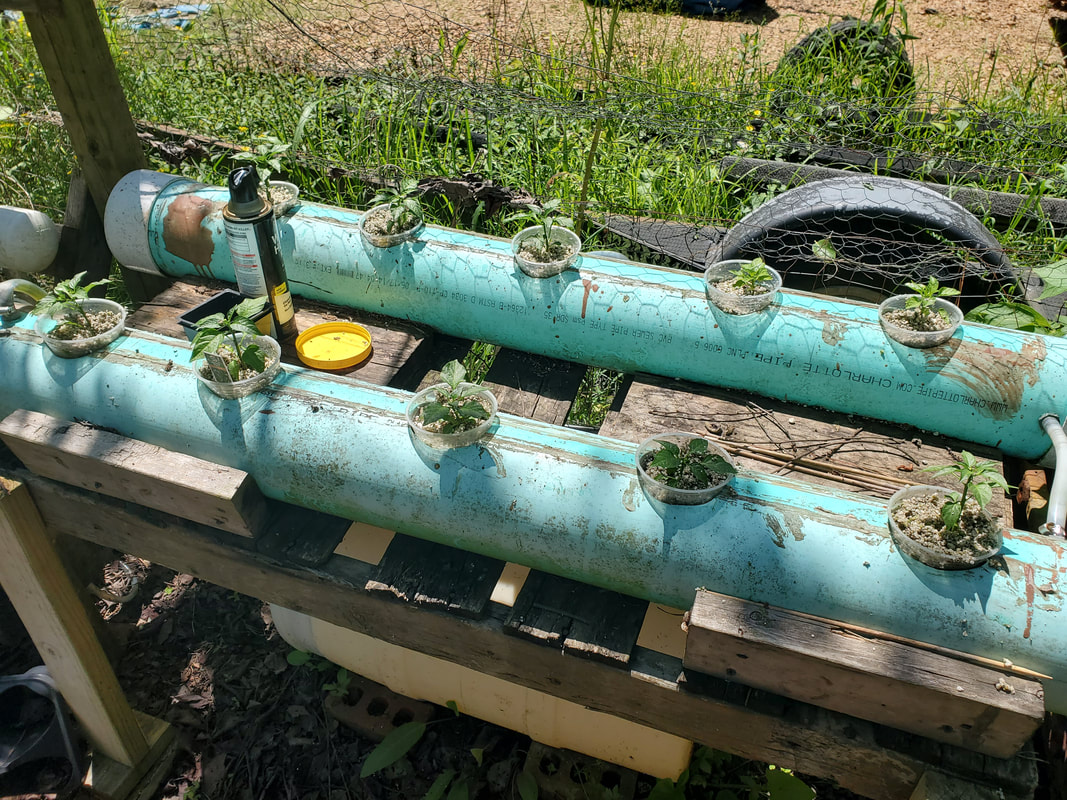
Drain pipe hydroponic garden assembly with pepper plants planted within.
Another thing that I had to make note of were the fruit trees in the half drums in the middle of the garden. Two drums have fruit trees, what appears to be peach trees with a few strawberries within. The trees are starting to form fruits on them while the strawberries in the two drums are actually pretty large, due in part to the chicken litter that had been deposited heavily through the winter before even planting anything. One of the drums had a grape plant in there but it didn't make it and will need to be replaced. I'll end up planting another grape within and some strawberries as supplies allow. The last drum had a fruit tree that looks like it tried to come to life but didn't make it. The few remaining green leaves are wilting away and the bark on the tree is peeling off so the tree is pretty much dead. The blueberry plants within however are doing rather well. I'll end up breaking and cutting that dead tree up and try to carefully remove the remains in the dirt without disturbing the two plants so I can try to plant something else, maybe another fruit tree or something. Also right next to this dead tree is an apple tree that had actually did well the last few years but is now dead. All I could do is start breaking up branches in order to dispose of the tree to get it out of the way to make way for a new set up, perhaps another drum planter. 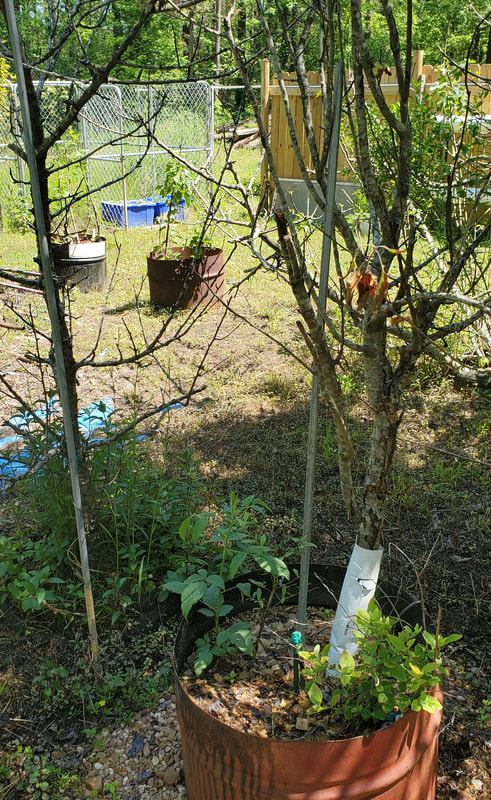
Drum planter with dead fruit tree and live berry plants within. Note dead apple tree to left with conduit pipe that was supporting the tree.
With those developments, I'll be doing even more permanent plantings as supplies allow. I probably won't wait for clearance plants at the end of the season as I want to get things in the garden established as soon as possible so I can move on to other projects. One of the other things I did around the yard was rearrange some cars. After working on the Monte Carlo, which was parked at the back of the midway by the eastern end fence line, I went ahead and moved it out of the way to the side while taking time to charge the battery and fill the one bad tire on the S10 so I can get it started and moved. I moved that truck to the back of the midway where the Monte was sitting. From there I moved the Monte back to an intermediate spot next to the plotted line where the porch will be built at, just in front of and to the right of the S10. This left enough room to be able to park the Tracker and the Scion next to one another far enough into the driveway that I can pull out the F250 or park it off to the side along the western fence line. 
Even though the F250 is staged off to the side, I also plan on moving the FMT/F150 to the side closer to the chicken yard fence, hopefully after selling our old tow dolly, so I can open up the area along the western fence. I plan on laying a bunch of gravel over all of this area, including the area where I want to park the FMT, so I can build up the area. I need to build up the area as I will be building an A frame gantry with which I'll use to hoist up the 65 Mustang body in the process of dropping it on the Ranger frame we have. I will move the 65 Stang to the spot where the FMT currently sits then build the A frame around the car body. From there I'll relocate the Ranger frame just in front of the car's body so soon as I get it stripped of everything that needs to be removed prior to the frame install, I can hoist it up and roll the truck frame right under the body. 
West fence side park where trucks are parked, note tow dolly and FMT in the back and imagine it parked where the dolly is currently staged.
One of my main goals with the moving around of everything is to get to where I have all the vehicles parked within the fenced in areas of the compound. Of course when the 65 Mustang project is in its advanced stages, we will be short one "vehicle" as the frame will be incorporated into the body. Also with the old tow dolly gone, that'll clear some more real estate as well. Now When I implement the plan to use the S10 for the 51 Chevy frame swap, it will yield another frame, but that frame will be built up to serve as a yard truck as noted in a previous post, it could end up parked anywhere based on how it was used. Also with the moving of cars, when I do manage to get the Ranger frame moved and staged by the 65 Mustang at its new parking spot, I also want to move the large stack of pre-cut firewood to the east fence line close to the firewood staging area so I can further cut and split the wood and only have to go a short distance to stack the wood on the pallets. Moving the Ranger frame and this wood from the area behind the garden fence will allow me to move the boat trailer and the catamaran boat that are currently parked on the side next to the storage trailer, close to the west side garden fence. Opening that area up will allow me to move the 51 Chevy and the Elcamino to that area. Of course I'll have to build the area up with gravel but once all that is done I'll have all the vehicles parked within the fenced in areas of the compound, on gravel where hopefully I can curtail invasion by varmints since they seem to prefer grass over gravel. More to come.
After having gone for about a little better than a week without going to the gravel pit it was time to get back to hauling gravel as there is a lot of real estate that needs to get covered. This time however the area that I want to go back over is the area along the western fence line. If you remember, I spent a lot of sessions of gravel hauling to get the grounds between the fence line and the house covered with gravel from where the chicken yard gate ends all the way to the midway driveway in order to be able to move vehicles around without the risk of getting stuck on mushy dirt. This time though I want to extend away from the midway driveway, going deeper into the section of the yard going towards the northern fence line. Reason for this is because I want to use this area as the site for the A-frame crane that I plan on using for hoisting the 65 Mustang body in the air in the process of dropping it on the Ranger truck frame that we have. This set up will also be used for when we do the 51 Chevy and drop it on the S10 frame in the future. Of course I still plan on doing the same thing with the 69 Mustang when I find the right Ranger frame for that job. The good thing with dumping gravel here is that I'm able to back the F250 right up to the spot where I want the gravel, just like I did in the midway towards the eastern fence line, making it super easy to just shovel the rock right from the back of the truck onto the ground. The load of gravel was enough to get a good section of ground covered, even into and over the old crushed asphalt patch we laid a couple years ago. Since the crushed asphalt is still pretty solid I only dusted the surface with gravel versus laying a thick layer over the ground.  Gravel laid over area between previously patched area and front of FMT I was able to get gravel coverage up to the front of the FMT where it was parked at. Now the funny thing is the FMT is sitting just about where I want to set up the A-frame so obviously this means it's gotta move. But conveniently, since the F250 was already there and still running, out came the tow chain. I pulled the truck out into the driveway enough to get it staged so all we had to do was give it a good push and be able to just roll it right into the new spot it needs to be temporarily parked in.  Pulling FMT out of its old parking spot to move it to an adjacent spot. After getting the truck staged, I needed a little help giving the truck a push to get it started since there was a slight grade that I had to hit to get the momentum for it to roll straight home. After turning the wheels we started to push and just before hitting the lip of the grade, the ole lady got in the truck and turned the wheel to help steer it as I finished pushing it into its new spot, closer to the chicken yard fence. We got the truck pushed back enough that its well out of the way even of us building the A-frame and moving the other vehicles into position under and in front of the A-frame. 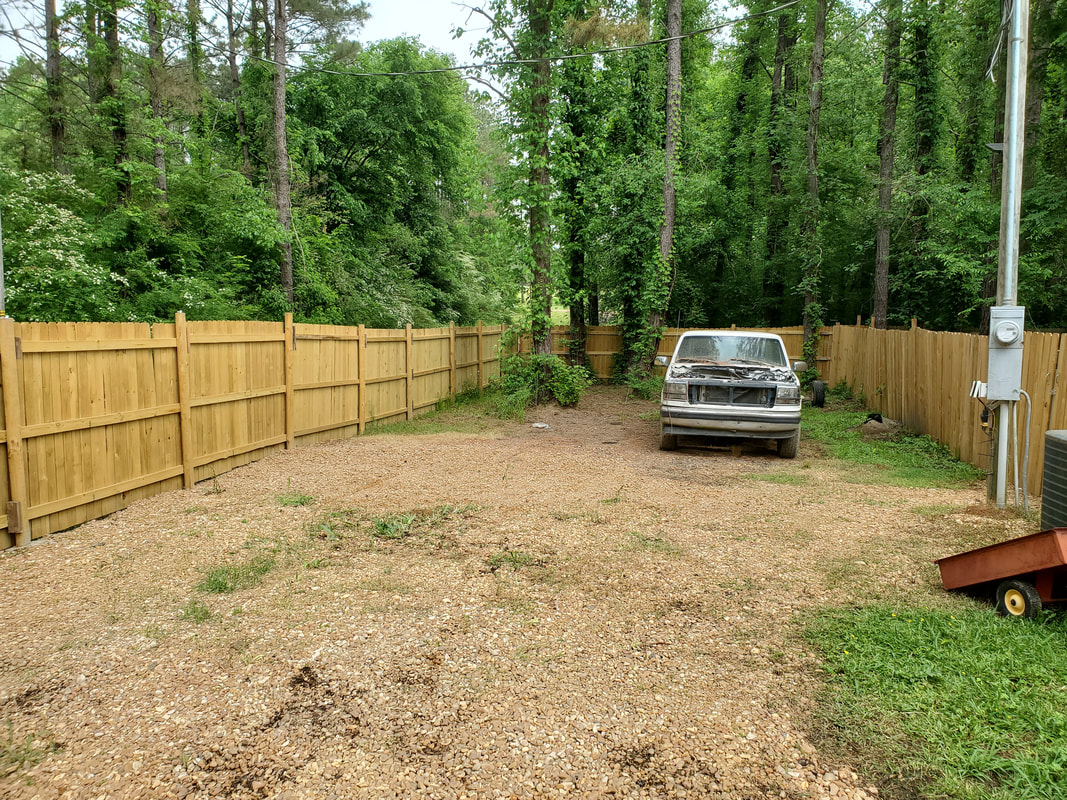 FMT moved into its new parking spot closer to the chicken yard fence. With the FMT moved out of the way the next thing I want to do is move the 65 Mustang body into position where the FMT used to be parked. This is right where the A-frame will be built, over the car's body. Of course I want to dump a little more gravel over the ground but even if I get the car moved before laying gravel, I can still lay it down using the wheelbarrow and a shovel just to get the gravel under the car's body, or just push the body out of the way. Either way I just want to get things moved around where I want them to be so I can get these other projects started in order to make progress. We're going to be taking ADD to the next level as I'll be bouncing from one project to another but having the discipline to keep coming back full circle as supplies and opportunity show up. There will be more to come.
Ever since I had the Vortec 5.0L/305ci V8 in the Monte Carlo, that engine has always had this loping, sluggish lethargic demeanor about it. It would start up real fast but when you accelerate it, it would show just how gutless it really was. In some way it seemed like it was out of tune. In other ways it seemed like there might've been something internal that was failing. Well I had the theory that maybe I need to check the camshaft to see if there's any compromise in the lifters or the camshaft itself as it just seemed like one or more cylinders wasn't cycling properly.
Of course to do this required me to tear the front of the engine completely apart. We're talking about all the accessories, intake manifold, valve covers, timing cover, even the oil pan would have to drop some. This is a job I've done before during a time when it wasn't critical to get the car back on the road because it would take at least a couple of days to get things done. Getting started I pulled the radiator from the car and got all the accessories removed. Since I installed a newer serpentine belt system, the accessories were bundled into two large brackets holding everything. After removing the belt and a few bolts and disconnecting some hoses, I had the front of the engine opened up. The timing cover was quick to remove as it only required the removal of a few small bolts. The harmonic balancer had to come of first but was removed quickly with a puller, all of which I'm thankful to have on hand. 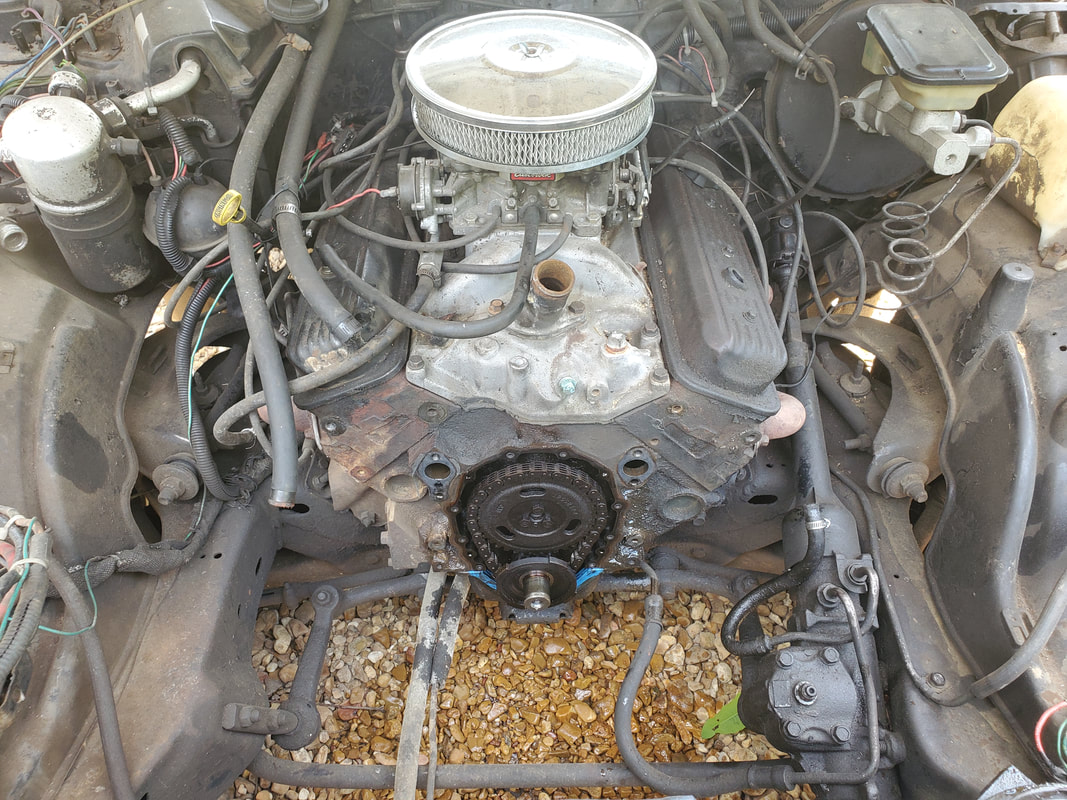
Front of engine voided of accessories, exposing timing chain set.
As I continued to pull things free I was starting to amass a pile of parts. Some of the parts I wasn't too concerned with leaving outside in case it rains as they weren't super critical. Things like the harmonic balancer had to go under cover as I did not want the surfaces of the shaft where they contact the front seal of the timing cover or where the shaft slides over the crank shaft, need not get any surface rust on them otherwise they could make reassembly difficult and could result in premature seal wear. Those items and things like the distributor went in the trunk. 
Batch of parts growing as things are stripped from engine, note harmonic balancer in fore ground with puller still attached.
I pulled the distributor without checking where the rotor was pointing or setting top dead center since I would end up moving things around quite a bit before everything is said and done. Plus I would want to re-seat and re-time the distributor anyway as part of reestablishing the tune of the engine. As stated before, that went in the trunk. I had to pull the dizzy out in order to pull the intake manifold, which needed to come out to access the pushrods and lifters. Valve covers would have to come out to access the rocker arms in order to pull the pushrods to get the lifters out. 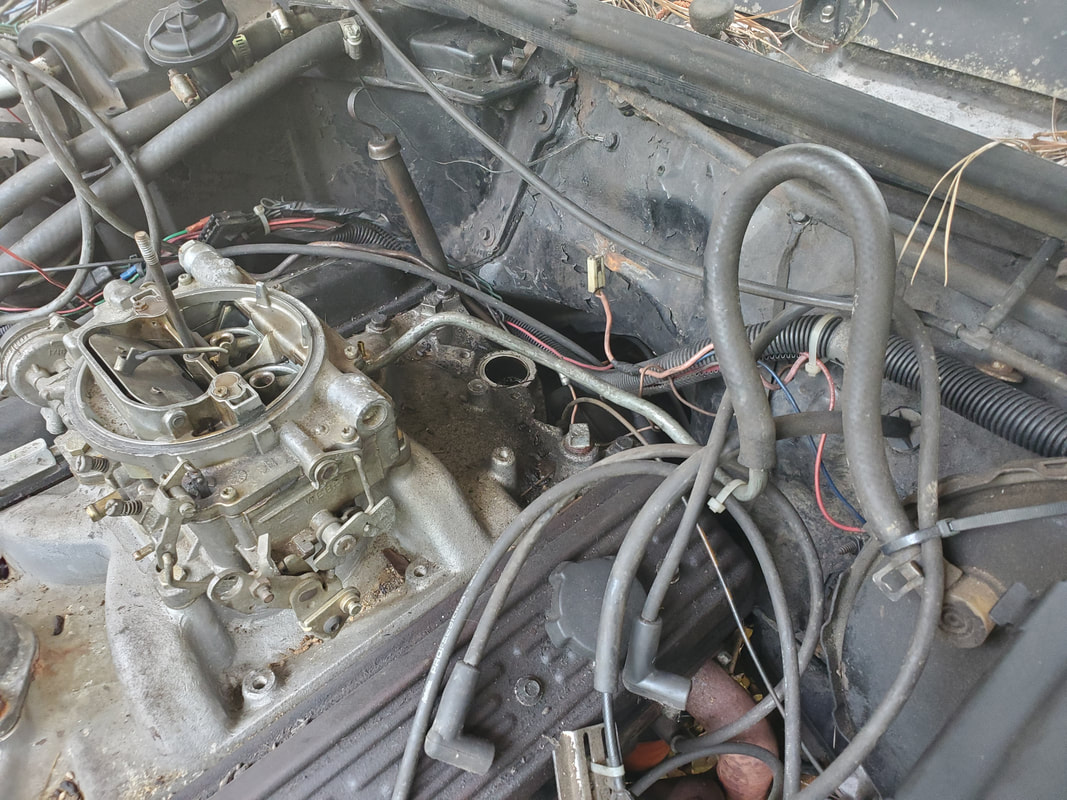

With the intake off and also stored in the trunk, since I didn't want the carburetor to take on water if it rained, I was able to loosen up everything to get out the pushrods and lifters as stated before. Upon pulling everything free, the lifters, which in a Vortec V8, are roller lifters, all looked in good condition. Pushrods were all straight as well. Other than the grime that was present in the tops of the cylinder heads around the rocker arms, everything looked the same as before, which was just old and used but not broken. 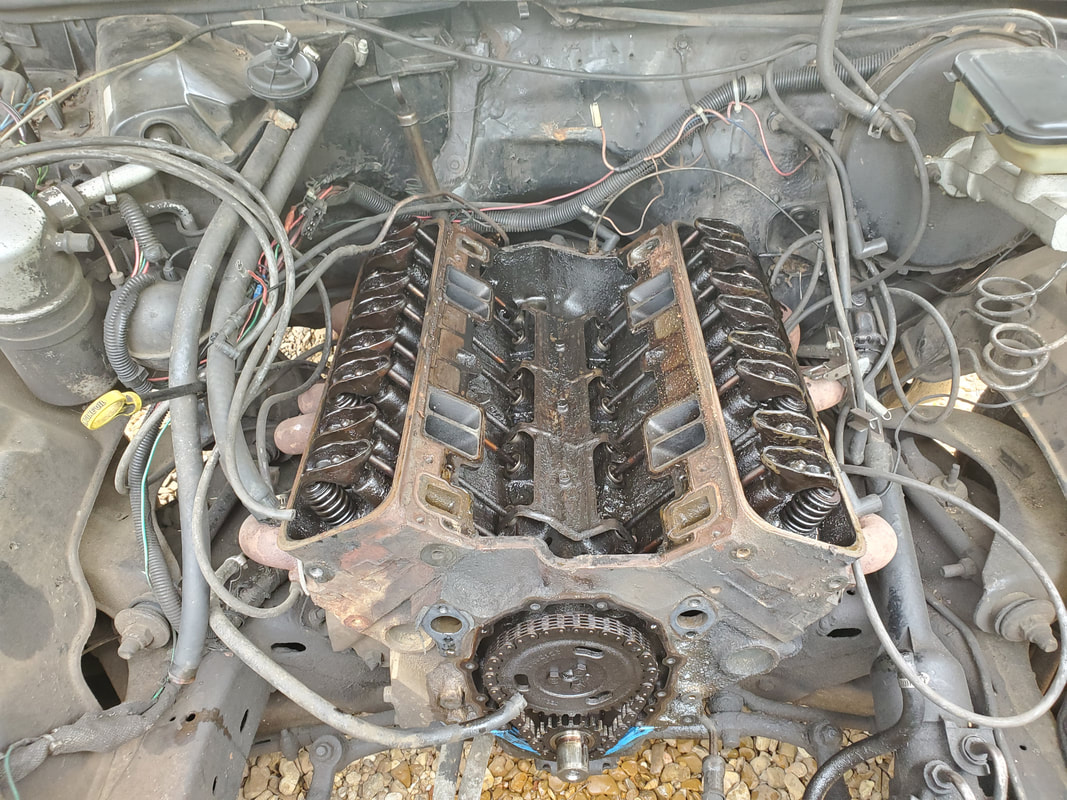
Engine stripped down prior to removing camshaft.
After pulling the timing chain/gear set free I was able to remove the cap holding the camshaft in place. Upon examining it, I found no sign of wear on the lobes that would indicate a worn camshaft causing one or more valves not to open. After comparing it with the non roller cam I had, I found that the curvature of the lobes allowed for a longer duration of opening on the valves while still having about the same amount of maximum opening between the two cams. Obviously from the way it looks the Vortec camshaft should allow for better performance because of these conditions. With that I ended up just reassembling everything without actually replacing anything. In the process I did get to re-time the distributor and check the wires to make sure they were all in order, which they were. I did take time to do a little trick with zip ties for organizing the plug wires to help keep them off the headers or any other compromising surface. A zip tie is looped around every wire in the set on one side, then another zip tie is used to connect the two zip ties between the two wires. Another zip tie connects the other side of the 2nd wire with that of the 3rd wire and another for the other side of the 3rd wire to the 4th wire. After doing this I was able to at least neaten up the wires so they won't get damaged on anything hot. 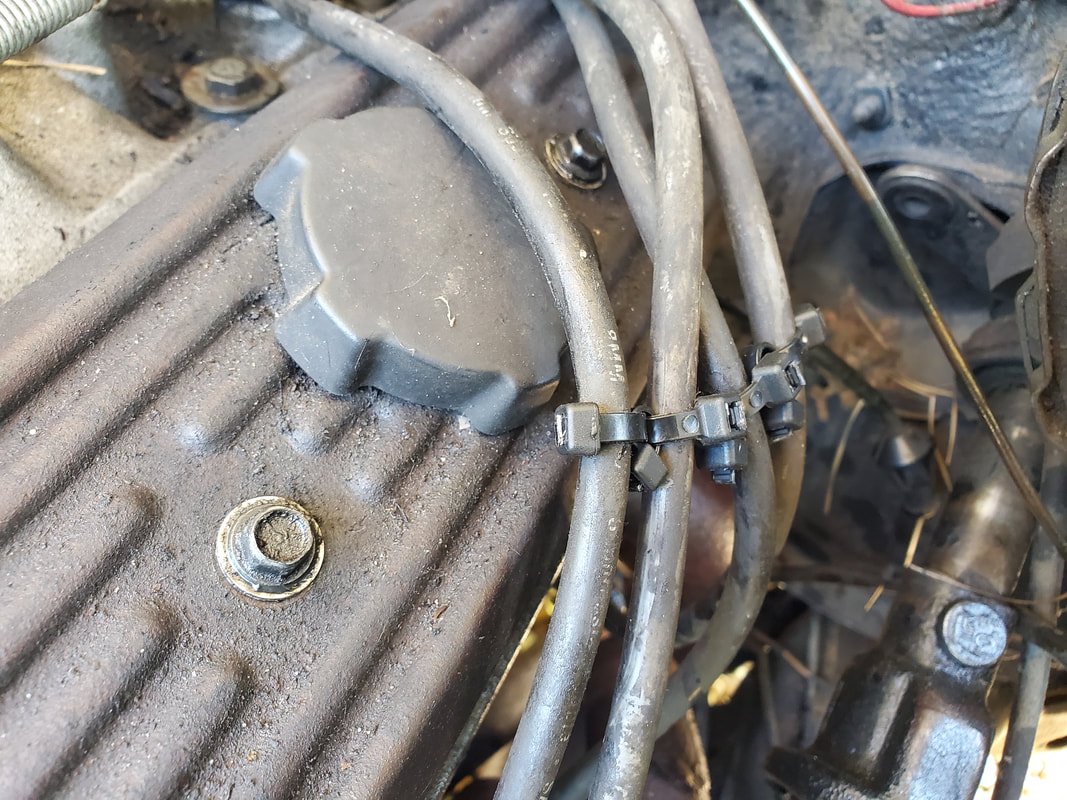
Zip tie spark plug wire organizer.
While this really didn't solve the mystery as to why the engine still runs sluggish, it did eliminate a critical component and part of the system, the valve train. The next move might be to put some more measuring equipment back on the carb to measure vacuum and even check the timing and try to set everything where it should be by the book then go from there. I may even put in a hotter coil and replace the plugs too, see if a hotter spark will do the trick. The carb was a recent rebuild and it doesn't leak or anything so I can't see that being a deciding factor, but it isn't completely off the table as far as something that may need addressing again. But until the next time, I can at least say for right now the Monte should be ready to hit the road again when the need arises.
For a while I had been smelling the smell of oil that was being heated on a hot surface coming from the Tracker while driving. This wasn't a burning smell like the engine was physically burning oil in the combustion chambers with gasoline but oil vaporizing on a hot surface. After doing an examination I determined that the valve cover gasket was leaking and needed replacing. After getting a replacement gasket I took some time to pull everything apart. This wasn't as bad as it sounds as all I had to do was remove the four coil packs, all held in with one bolt, and a few cap nuts that held the valve cover in place. Once all of this was removed I popped the PCV valve hose and another hose from the cover and pulled everything loose. Upon doing this, the gasket, which fits in a groove in the valve cover, broke into a couple of smaller pieces while leaving the bulk of it, still somewhat hardened, in the groove of the cover. Obviously this gasket was shot. 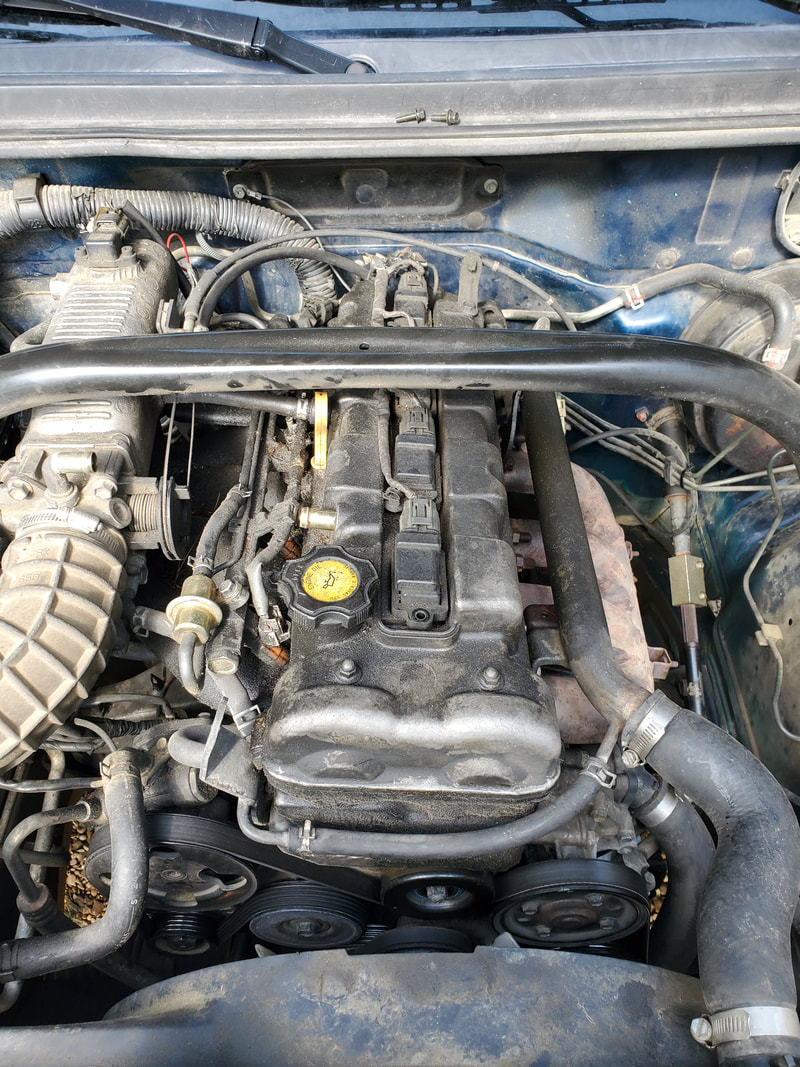 The Tracker's valve cover showing the cap nuts and coil packs that had to be removed prior to removing the cover. 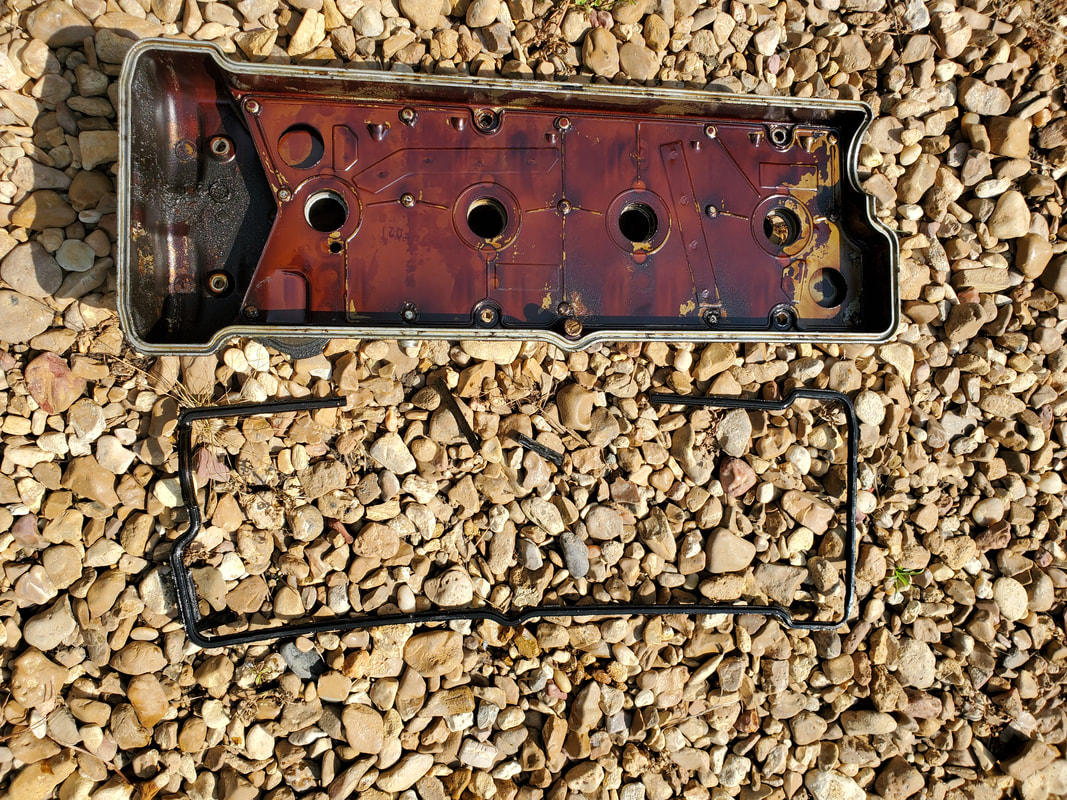 Inside of the valve cover showing the gasket groove as well as the broken old gasket. Replacement was everything in reverse. Other than cleaning a couple of fragments of foreign matter from the groove, the new gasket rested nicely in the groove enough so to allow me to place the valve cover back on the top of the cylinder head After replacing the cap nuts the coil packs and hoses went back on. I did have to replace the PCV valve as it broke when I removed the hose in the beginning. I had to use a pick to pick the pieces of the valve's body from the cavity in the valve cover but once that was gone, greasing up the replacement valve allowed it to slide right in with no problem. Once everything was reassembled I ran the truck for a while just to verify I didn't see any new oil leak out. Of course I'll have to run this engine a while, during normal driving of course, to burn off the remaining oil off of the surface of the engine. The next thing I turned my attention to since I still had time during the day was cleaning up the engine bay on the F150, or what I had to dub the FMT (Ford Muscle Truck). This truck is originally an EFI system with its associated hoses and wires and what not for that particular system. Since the powertrain I plan on putting in this truck is going to be an old school system with a carburetor and an older gen electronic ignition system (probably one of the hybrid HEI systems using a Chevy top with a Ford bottom), I won't need all of the hardware that still remained in the engine bay after removing the old powertrain. One of the first things I pulled free was the wire harness that held the fuel injector plugs and the other plugs for sensors and what not. While I will need the plugs for the temp and oil sensors, I'm not going to retain the bundle of wires just to use two small circuits. I will try to isolate those circuits from the other end of the large plug and tap into those to feed the temp and oil circuits. I might even just bypass the bundle all together and run a whole new circuit for those two sensors, I have to look at everything before I sign off on a plan. 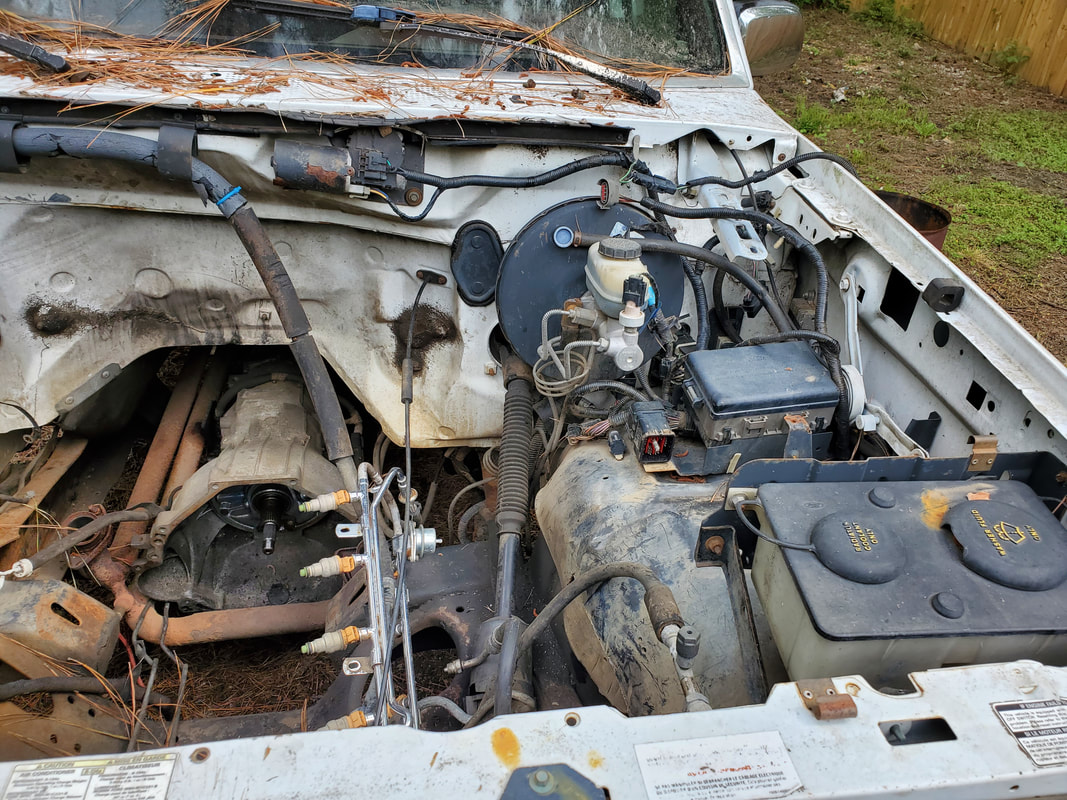 Plug near ABS module, just in front of master cylinder, with red core, near the center of pic, where wire harness for EFI system was plugged up to. The next thing to go was the fuel injector rail, which because this was a V8, had two banks of injectors. Either way, there were two lines feeding the rail, an input and output or return line. This rail uses the common Ford lock ring coupling that requires a special tool that comes in two semi circular inserts that clamp around the fitting then press into the round spring to push it out enough to remove the other half of the coupling. Once I fought and separated the two ends of the two couplings, the fuel rail was out for good. 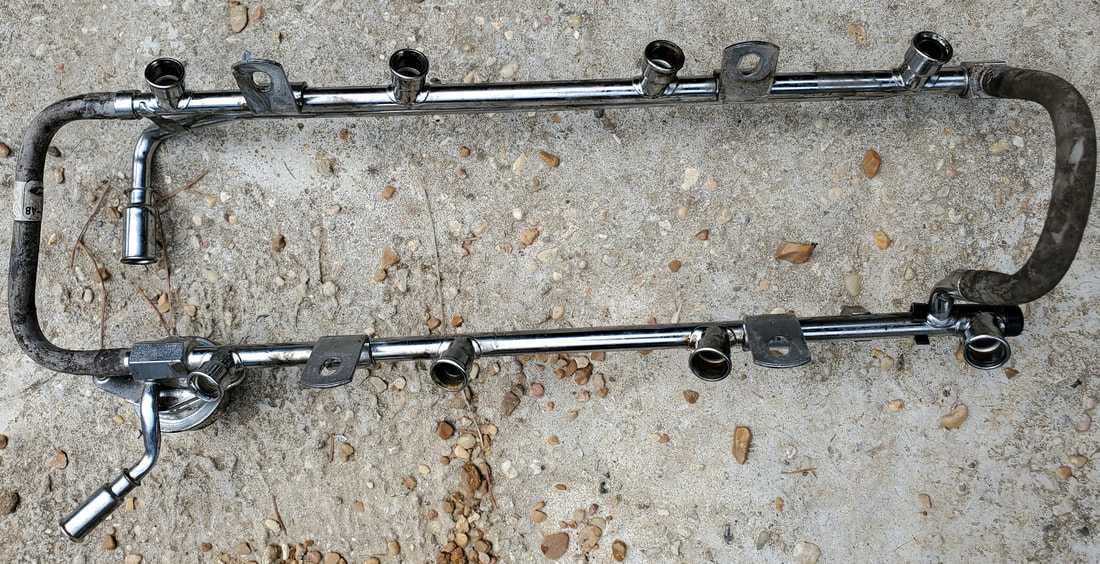 EFI fuel rail, note nipples on both sides where fuel lines connected to in the left of the picture. Moving on to the passenger side of the truck there were a few things that I felt necessary to remove. One was a couple of vacuum lines that fed the EFI system. The other was the charcoal canister for the fuel vapor recirculation system, that takes fuel tank vapors and routes them into the engine to be burned instead of vented into the atmosphere. Some emission control crap. Well since the whole fuel system is going to be changed around, this stuff isn't going to be applied so there was no point in keeping the large and in the way components. By removing these components it'll open up the engine bay some more and make it a little more neater and easier to work inside. 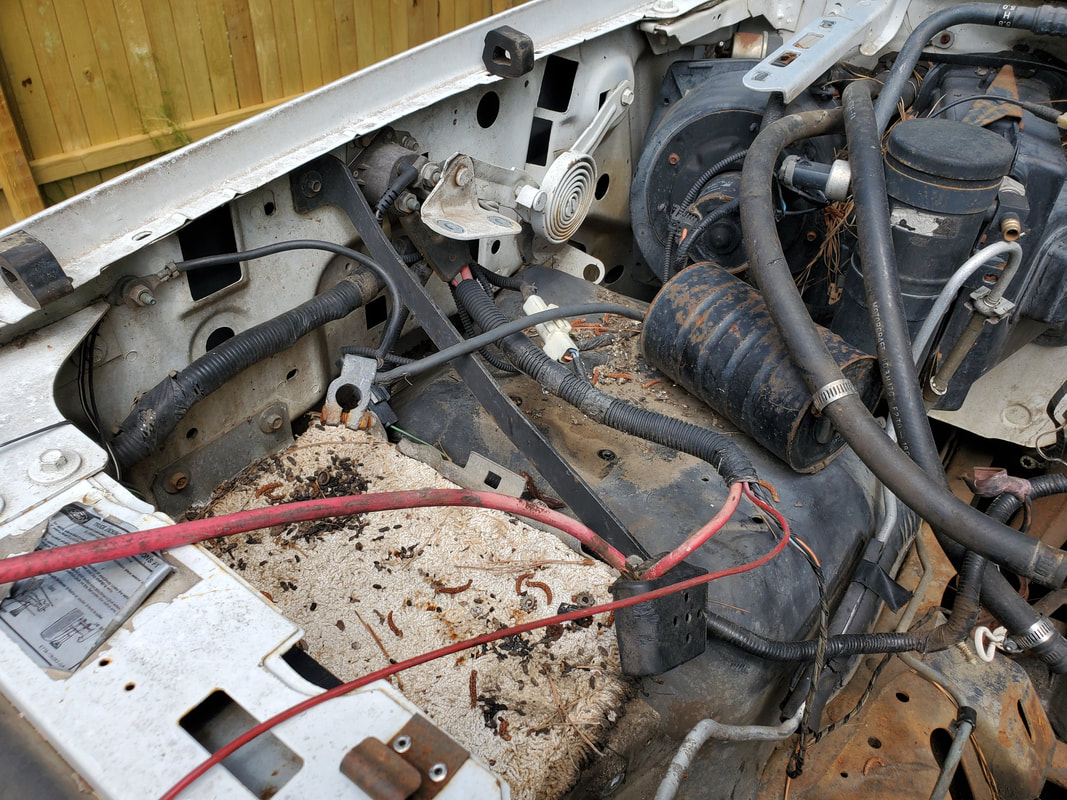 Right side of engine bay with open area next to vacuum canister where charcoal canister used to be mounted. 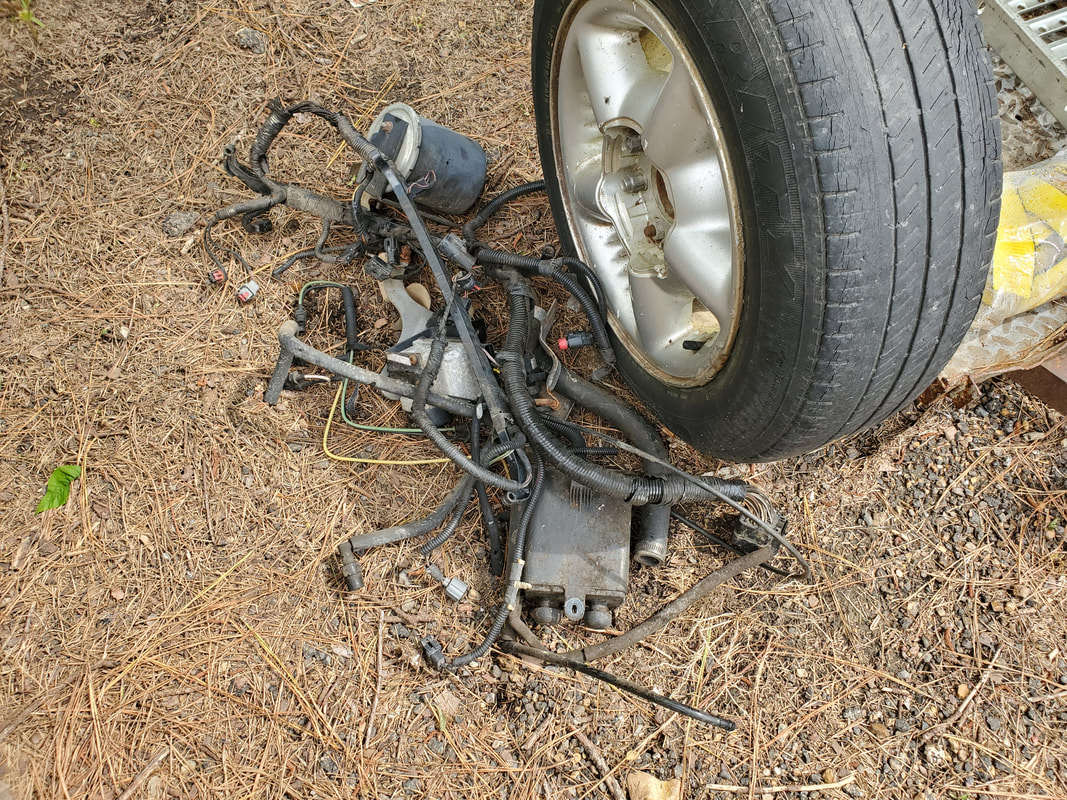 MIscellaneous junk removed from the engine bay of the FMT With everything that really was no longer needed having been removed from the engine bay, I can focus on removing the automatic transmission that's in place. Since this is an E4OD, a computer controlled transmission, there is no way for us to use this transmission without an external controller. Besides I have an M5OD, a 5 spd manual transmission that came as standard equipment in these trucks and that will be going in this truck instead. 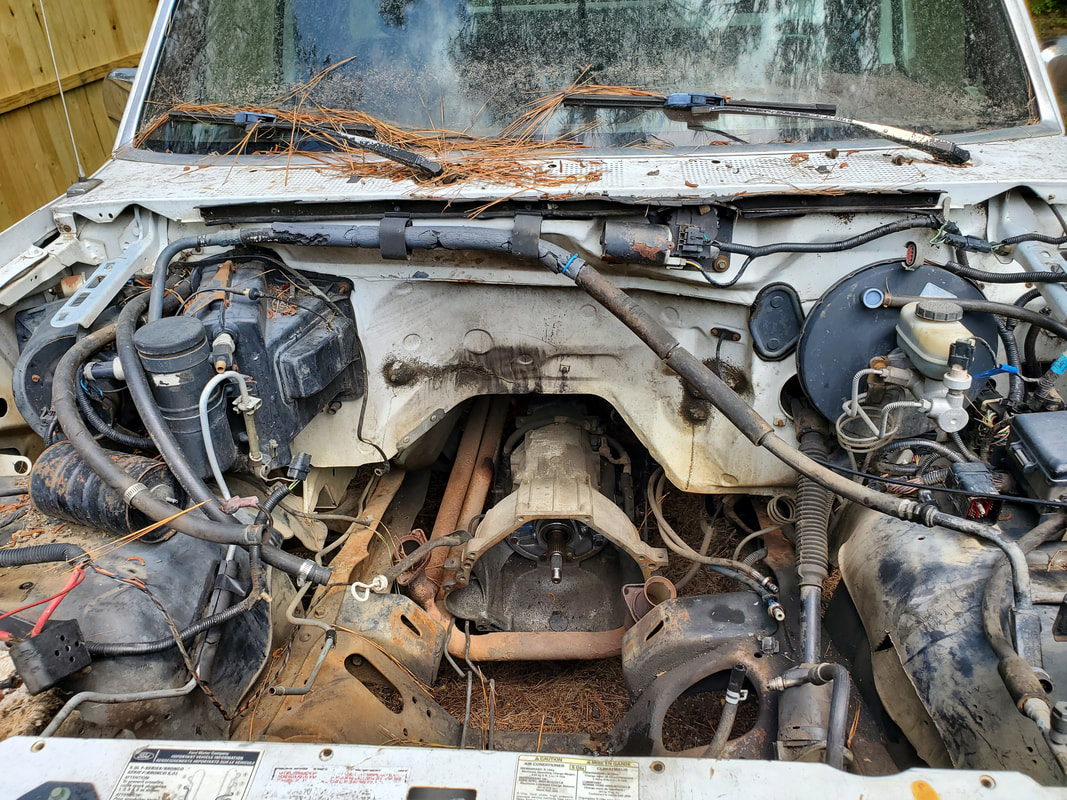 Engine bay, void of extra wiring, hoses and other hardware not related to the new powertrain soon to go into this truck. Also note the E4OD tranny still in the engine bay. From there I will have to slide under the truck and drop the two fuel tanks and the double fuel lines so I can re-do the fuel system to accommodate the simple mechanical fuel pump low pressure system that is used by a carburetor. The engine going into this truck comes with said mechanical fuel pump so other than some metal fuel line and a little modification to the sending unit to delete the in-tank fuel pump, I will have the fuel system taken care of. Now another thing I gave some thought to was the idea of not keeping the twin fuel tank setup. Since this truck does have two tanks, to simplify things I thought about just removing the rear fuel tank all together with its associated lines and sticking with the fore most tank. I may even fill in the body on the quarter panel to remove the rear fuel door as well, I don't know yet. But one thing I did think of was finding the mechanism for winching a spare tire up under the bed and affixing this hardware under the bed in place of the rear fuel tank so as to facilitate carrying a spare tire without having to put it in the bed, like in the F250. This would make things that much neater, especially if this truck is to serve as an interstate hauler where I'll need all the room I can get and still maintain some level of style with this model of truck. Whatever is decided, you will see it posted here and on our YouTube channel. Stay tuned! |
