|
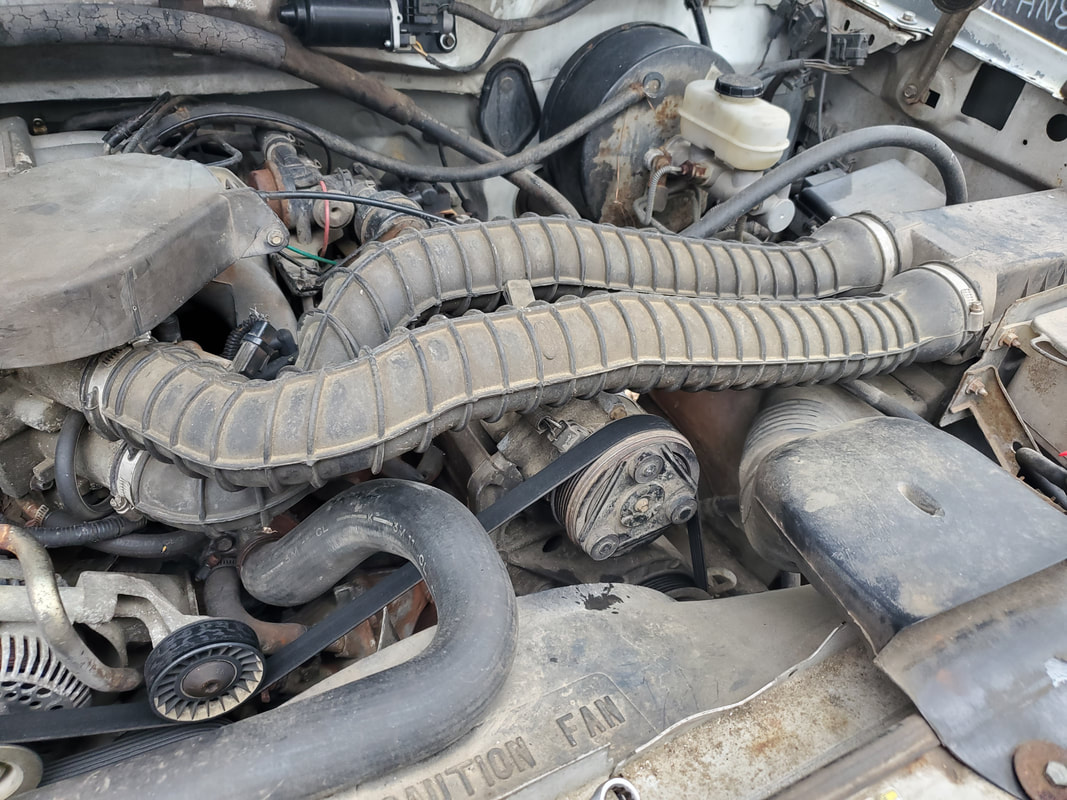
One day while coming back from the cement place in town with a load of gravel, as I was backing into the Midway to stage the F250 to allow me to better remove the gravel to move it to the place I was trying to cover, I started smelling what amounted to a brake burn smell. Recognizing the smell I instantly thought the front brakes might've locked up, since the right front brake caliper has been slowly leaking for some time, needing an oil top off every few weeks, since the amount of drive time over a few days total would be enough to push out enough brake oil to deplete the reservoir. Thing is, this wasn't what was burning. After parking the truck, I noticed smoke coming from under the hood. I quickly opened the hood, ready to see something that may have been on fire. Upon opening the hood I found where the smoke was coming from. The brake burn smell was coming from the clutch on the AC compressor. Apparently the compressor was either dragging or fully seized up and the clutch was dragging and in turn, burning up. After shutting down the truck, it sat for a couple weeks while I took the time to hit the local junkyard to find a replacement compressor to throw in the truck while I wait for the opportunity to get a new replacement unit.
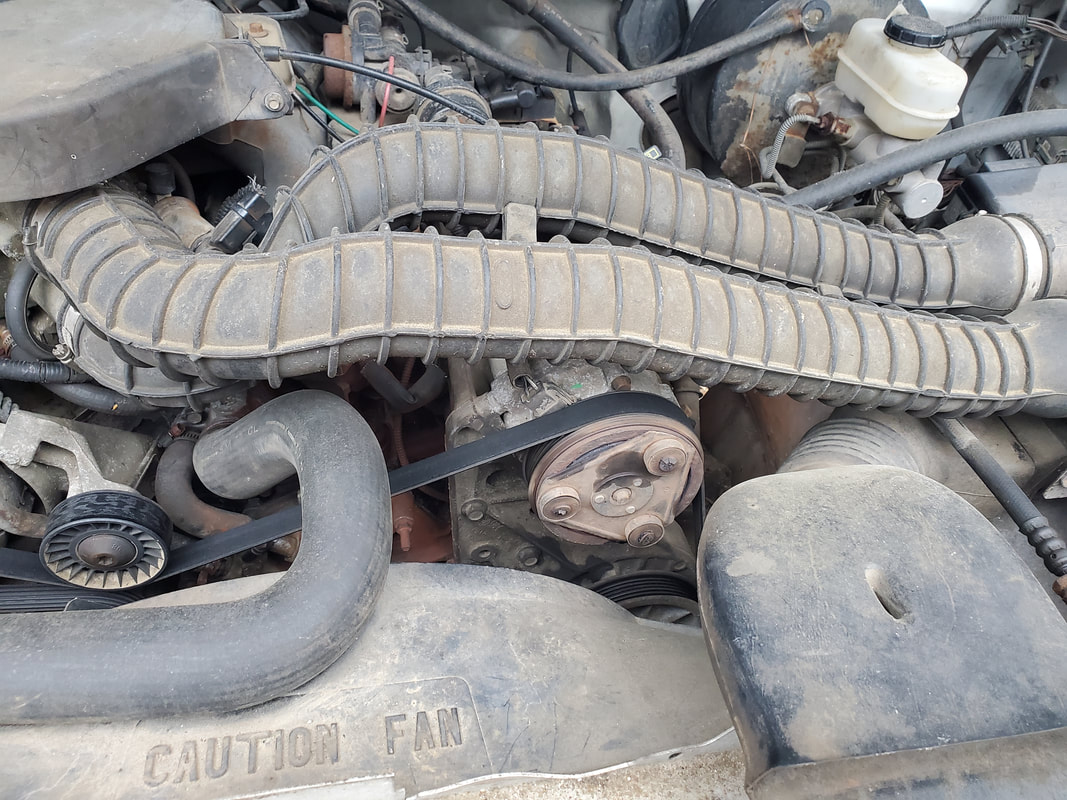
The AC compressor, tucked away under the air intake tubes, but still otherwise easily accessible.
Replacing the compressor is actually rather simple. After removing the air intake tubes, which is nothing more than pulling four worm clamps loose and pulling the twin tubes out, there are only four bolts holding the compressor to the bracket, a single bolt holding the hose base in place, and a single plug for the clutch. First thing that does have to come off is the serpentine belt. This is done by putting a 15mm wrench on the tensioner pulley and taking tension off the belt to remove it from around the compressor's pulley. From there I removed the plug then the hose base from the back, taking care to bleed off the refrigerant before fully removing the hoses. Afterward the four bolts came off quick and dirty, and the compressor was off. 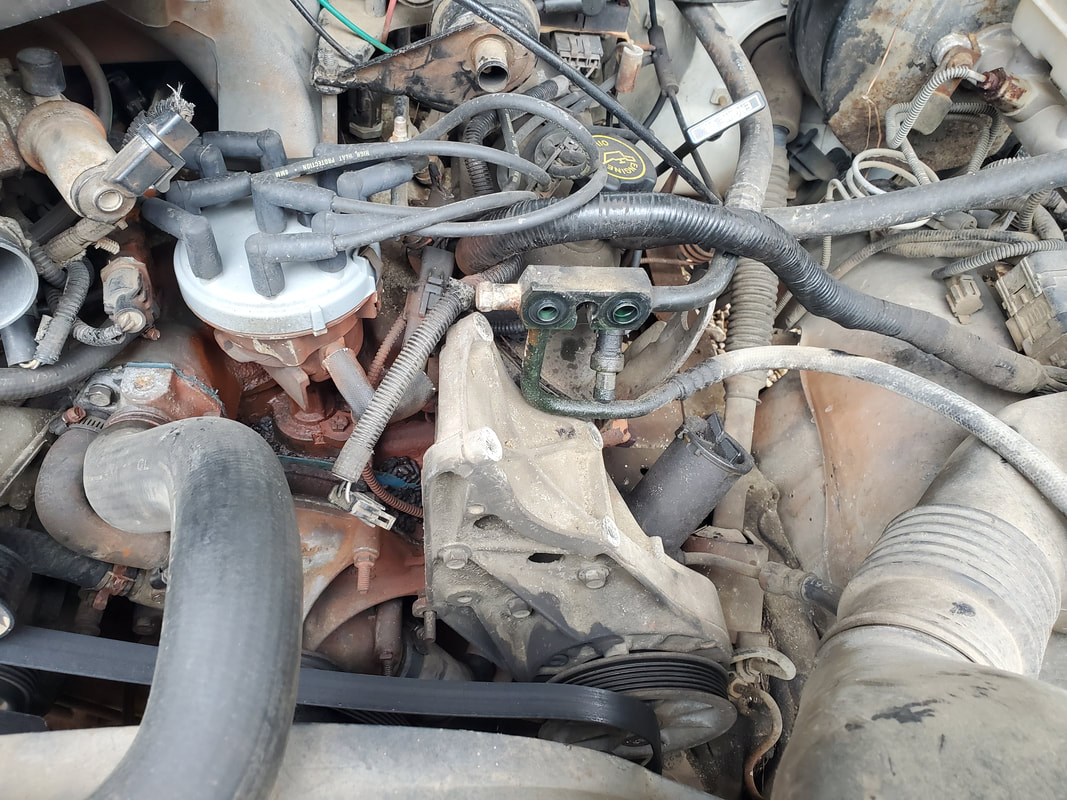
The empty space on the bracket vacated by the compressor, note the twin AC hose base that slides over a single bolt to hold it in place against the back of the compressor.
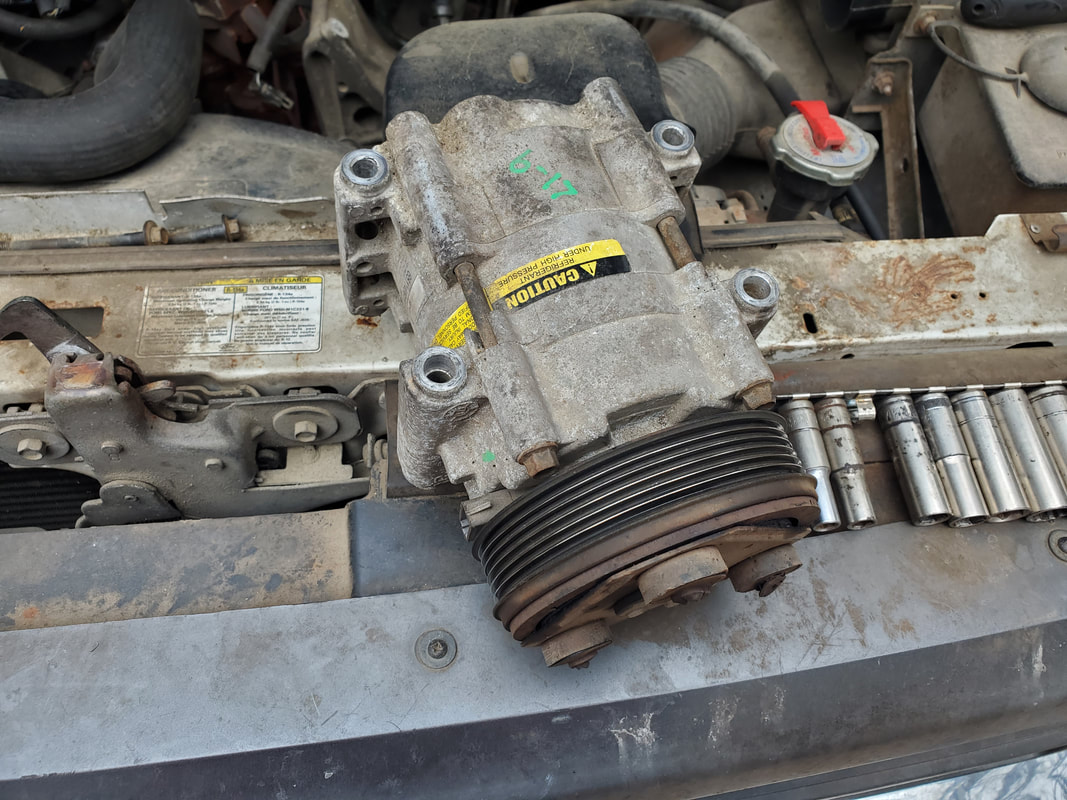
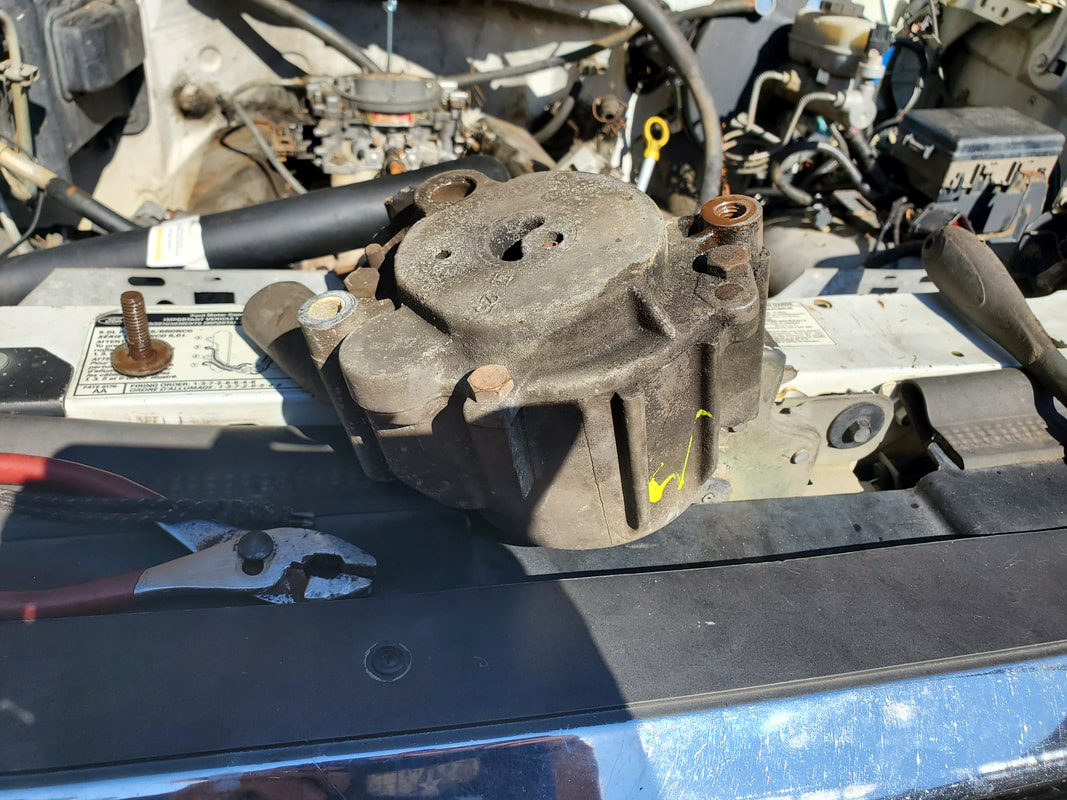
The old compressor after pulling free, this thing was actually picked up on 6/17 of 2019 from the same junkyard, it lasted that long....
Replacing the compressor was the exact opposite, bolting the unit in place on the bracket, putting the hose base back on over the single bolt, and plugging up the clutch plug. The serpentine belt went back on over the pulley after putting tension on the tensioner. Like I said, quick and dirty. The air intake tubes went back on as well. With that I decided to go all the way and recharge the system. Since I have plenty of refrigerant and replacement cans of the stuff are pretty cheap, I figured I'll just get the system back online so I can at least enjoy the perks of AC for however long this compressor works for and when it does die, hopefully by then I'll have a new replacement compressor in stock, ready to install. 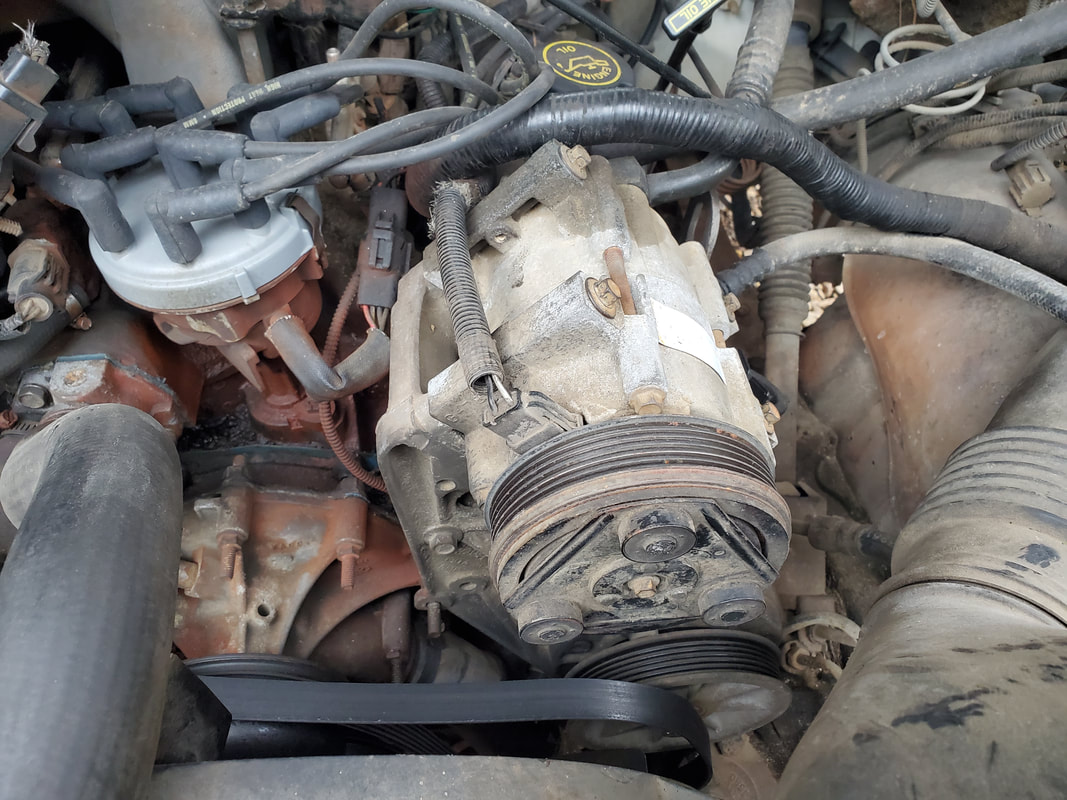
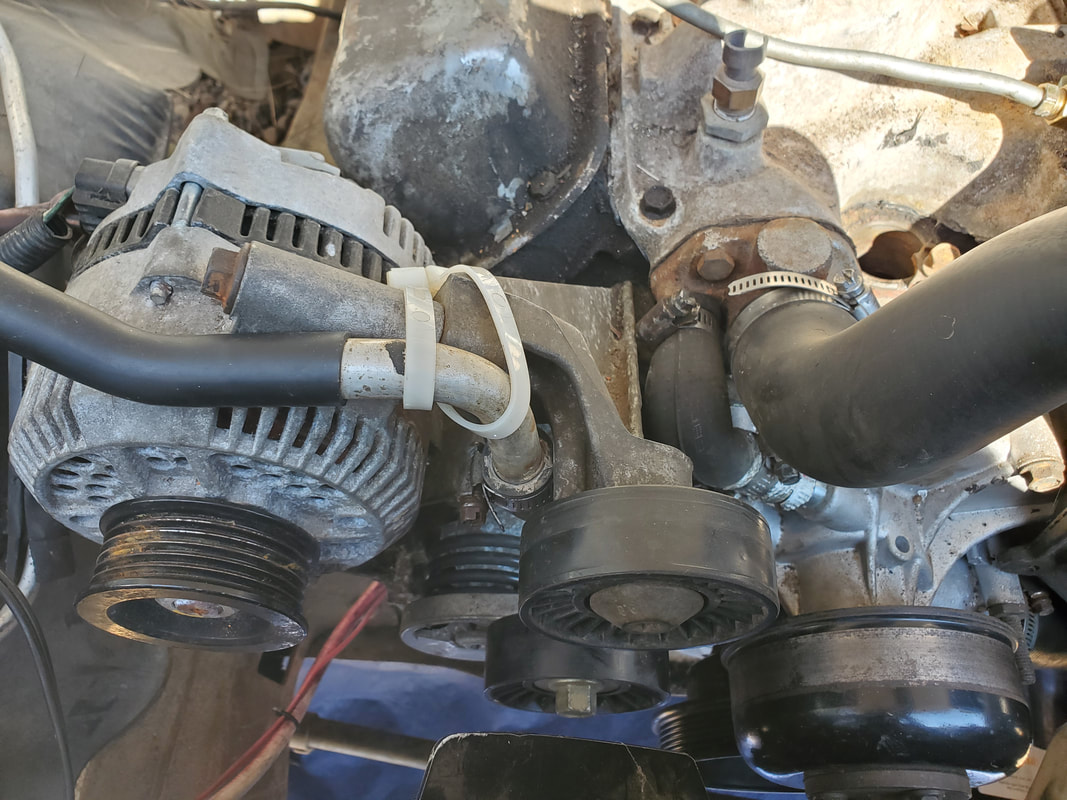
New used compressor mounted in place and hooked up.
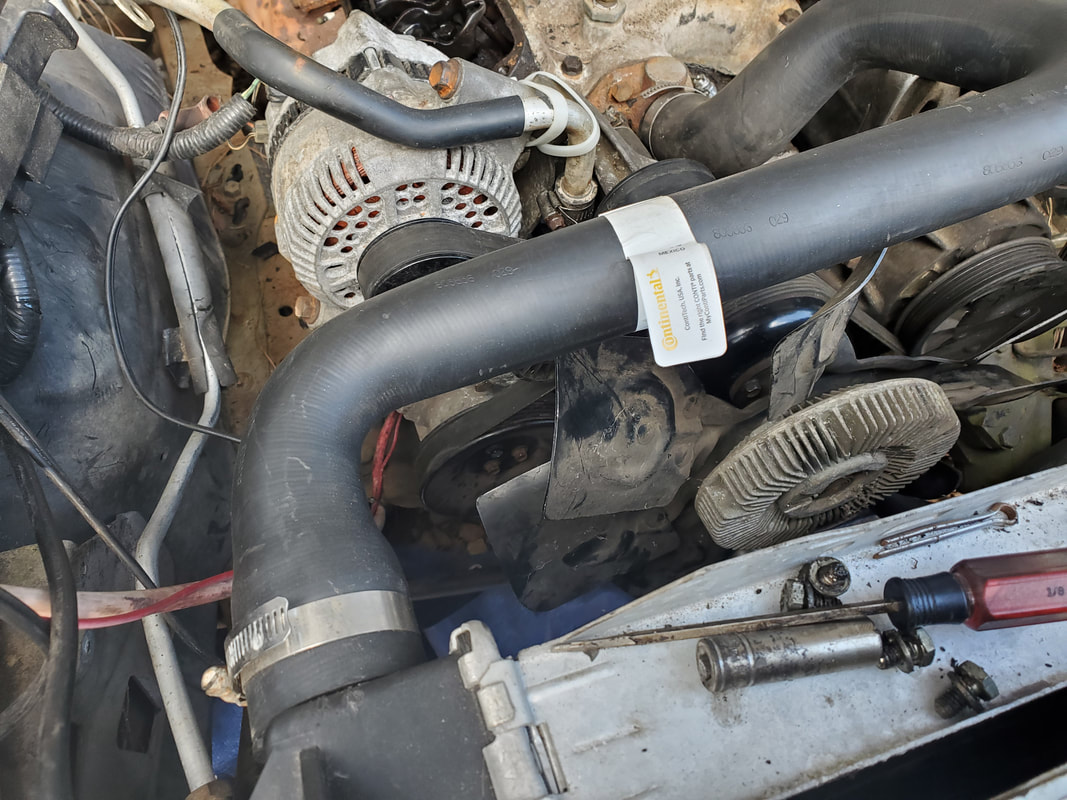
Air intake hoses plugged back up along with belt.
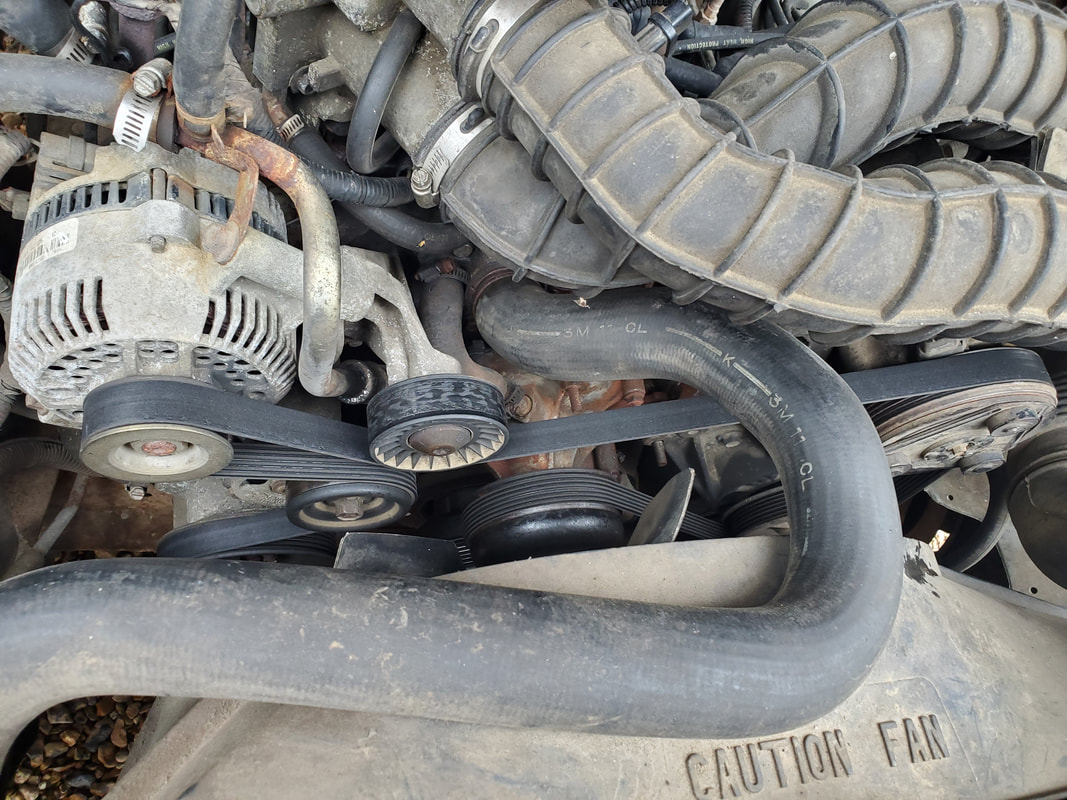
Closeup of routing of serpentine belt around pulleys, same configuration as the FMT's system.
Recharging the AC system involved me setting up the AC manifold which consists of a couple of gauges for the high and low sides of the system, along with three hoses, two for the high and low sides and one for the vacuum pump to pull vacuum on the system. The pump pulls air and moisture from the AC lines as well as creating the vacuum that would help suck the refrigerant into the system more completely so it will be filled only with refrigerant and not outside air. Since the system was opened up for only a brief time, I pulled vacuum for only 15 minutes while I cleaned up things after putting the compressor on. After pulling vacuum I removed the hose from the vacuum pump and hooked it up to a valve that the refrigerant can screws to. I turned on the AC system to cycle on the compressor then opened the valve to administer the refrigerant into the system. As the refrigerant flooded the system, the pressure will go up, causing a pressure switch in the dryer to cycle on the compressor, which would then further push refrigerant through the system. I also took time to put a can of compressor oil in the system as well. Since this is an old school system, it would end up taking two full cans of refrigerant, along with a can of compressor oil. Once I put this in, the pressure on the gauge showed it was operating in the system's sweet spot and of course, the thing was blowing cold air out. Today was actually warm enough that we were able to get an accurate assessment of the AC system's performance compared to if it was cold outside. 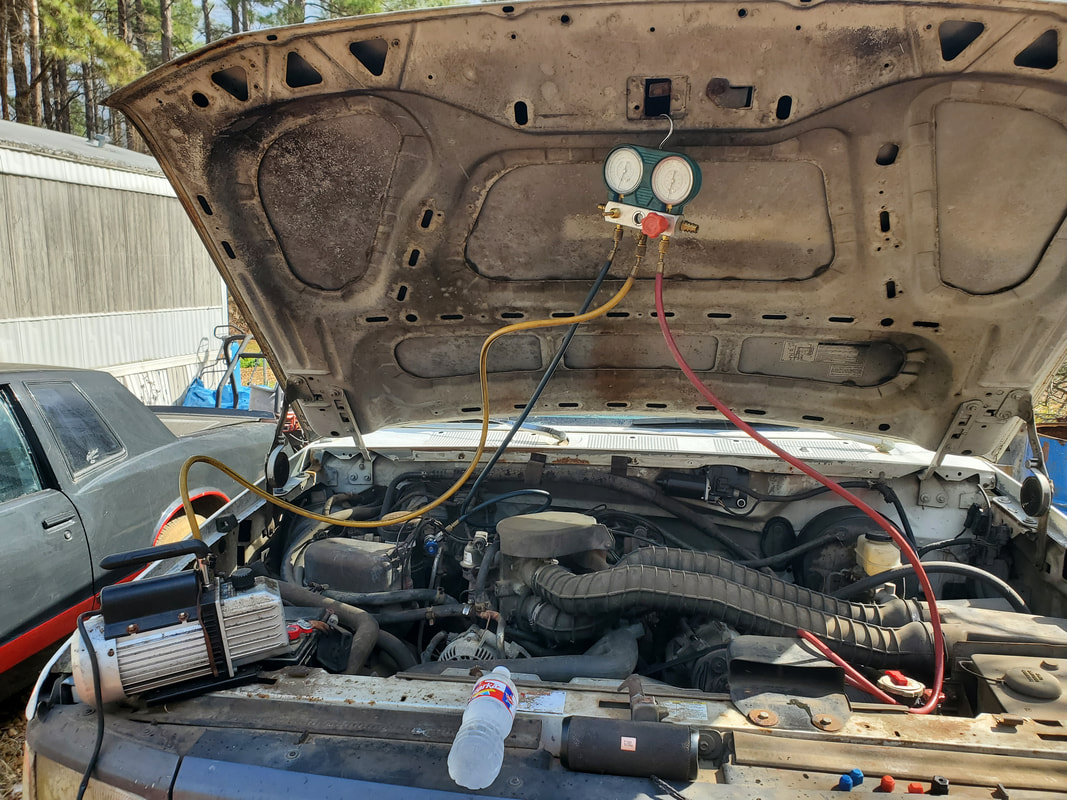
With that, the F250's AC system is back online and of course the truck itself is back online, since without the AC compressor in place, the engine would not be able to run as the serpentine belt would have nowhere to go. That there is the only disadvantage of a serpentine belt system, if you lose one of the accessories in the system, you lose the whole system. In the old days you could sometimes get away with just removing the V belt to that one component and just ride out until you can replace that component (unless that component is the water pump). Either way, the Big Truck is back online and ready to haul another load of gravel.
0 Comments
After some initial testing of the FMT's systems, I had come to find that the starter in the truck that I picked up from the local junkyard when we pulled the 5spd from another truck turned out to be well, bad. I tried three batteries, two from known running vehicles, only to still have the starter turn weakly. Even with the heavy duty jump starter on the battery the thing still turned slowly. So I had to bite the bullet and buy another starter, especially if I had any plans on being able to get this engine started more sooner than later. After getting the replacement starter I commenced to pulling the old starter out. Two bolts and a couple nuts later I had the wires disconnected and the starter out and on the top of the radiator support, out of the way. 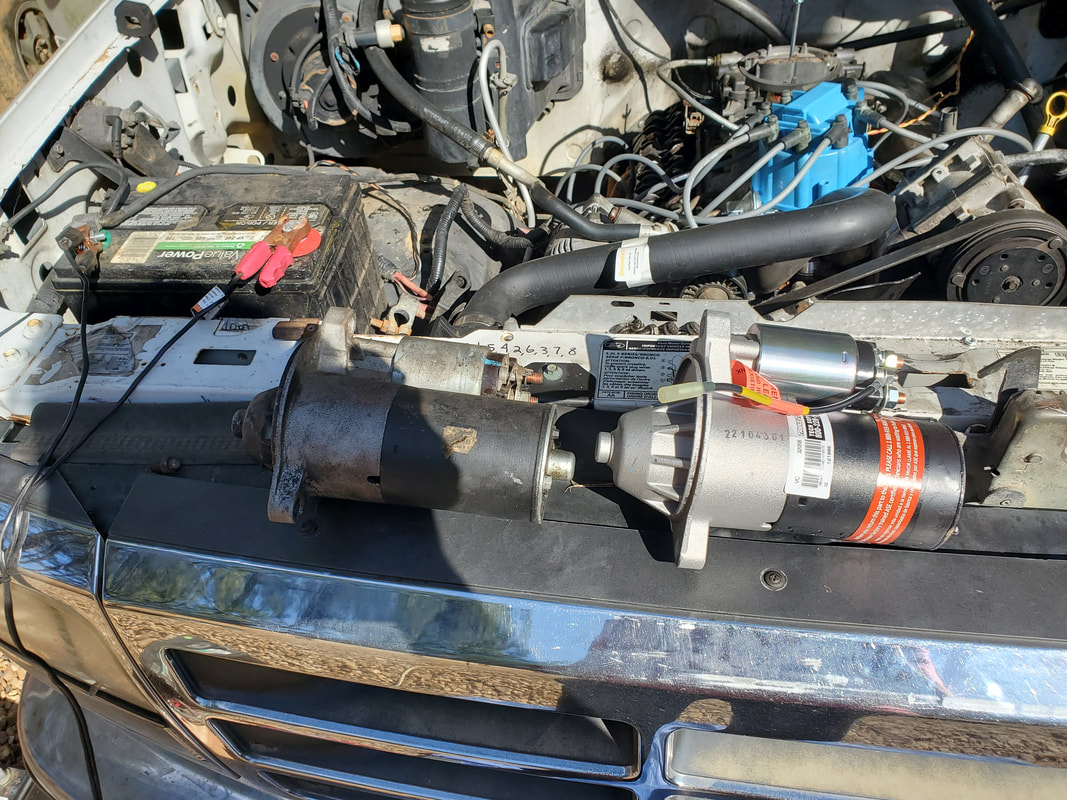 The starters, old and new, from left to right respectively. After doing everything in reverse I had the new starter in just as fast as I had the old starter out. After hitting the key, we had some cranking action on the starter. With me finally able to write off this part of the truck, I took the time to fully lock down a battery so I won't have to worry about hunting batteries afterwards. We had this same problem with the F250 a year ago when the starter would barely crank when the engine was hot. Turned out the starter was a hot starter, drawing too much current during startup and not putting out enough torque to crank the hot engine over. Once the starter was replaced, the engine spins over like a top. 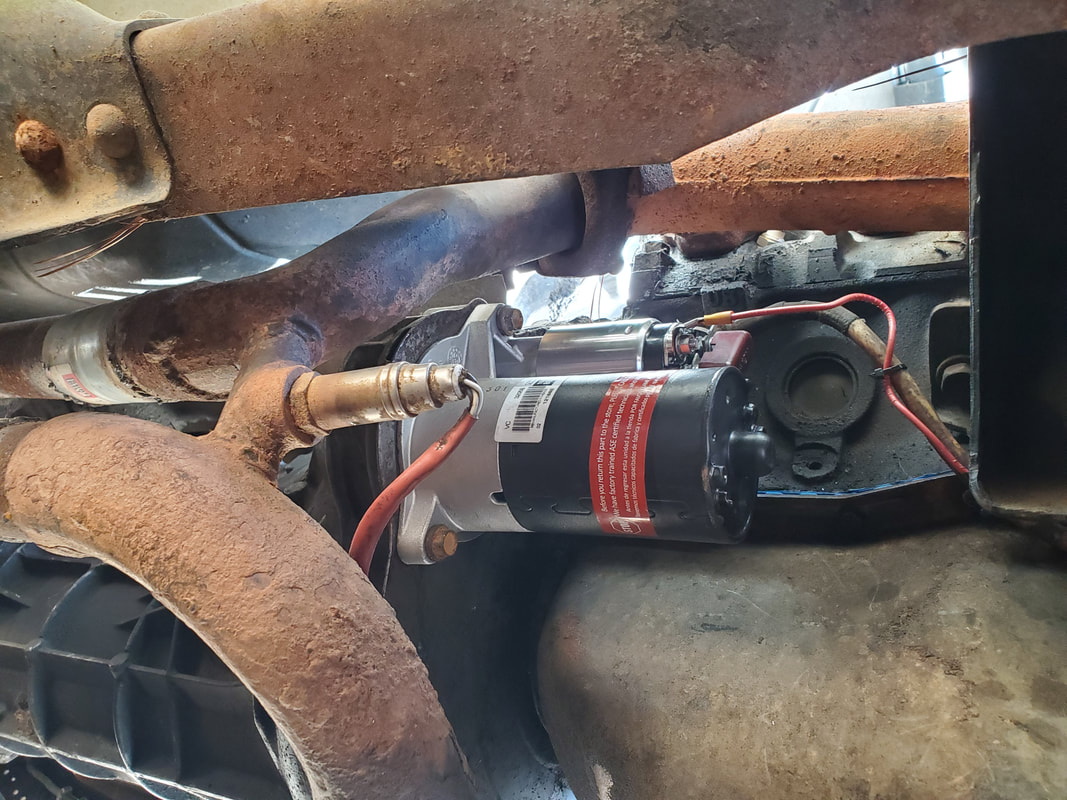 The new starter installed on the transmission bell housing, tucked away between an exhaust manifold flange and the engine. The last thing I had to address was the fuel line. Even though I had the fuel pump running every time I turned the key on, I noticed that no fuel was coming up to the engine. I disconnected the line after the fuel filter and tried again, and in a couple minutes the pump drew enough gas up and out through the fuel filter. For the hell of it I tried to blow on the fuel line as well as draw on it. It was here I found there was a clog in the metal line going from the fuel pump assembly up to the junction. Since I would end up having to get a new length of metal tubing to use for the fuel line, I pulled out the bad line to get ready for my installation of new line. After making the necessary bends to get the metal tube to follow the same path as the old tubing, I was able to get the line to the point where it snaked up to connect to the section of metal tubing coming from the carburetor while still running along the frame rail down to where the fuel pump is at. I ended up doing away with the section of rubber tubing that was used to link up the two sections of metal tubing at the top, right behind the power steering pump. It's straight metal from the fuel pump all the way up to the carburetor.  Metal tube where it bends upwards then right, going over the engine just behind the power steernig pump. With these things done, the truck is in the position to be ready to test fire. With all the vital fluids already in the engine, all we have to do is just try to crank the thing over, taking time out only to make adjustments to the carburetor and distributor as we try to start it. Hopefully we'll get this thing humming with minimal effort.
After having dealt with the electrical issues surrounding the fuel pump and the starting system it was back to the engine bay on the FMT. The first thing that I wanted to address was adding a smog pump. Originally, I was going to get a shorter belt and re-route it according to some testimonies from other people who chose to delete the smog pumps from their powerplants. Along with the belt suggestions also came a few caveats about possible belt throwing so I just said fuck it and decided to hit the junkyard to get another smog pump to replace the frozen unit that was on the FMT's old engine. At least for now this will work until I can get my hands on an idler pulley that is added in place of the smog pump, or even fabricate one from miscellaneous parts. The pump is held on with two bolts and is just a simple air pump that pumps air into the catalytic converter to help it convert unburned fuel and other gases into CO2 and H2O. With the pump in place, I was able to install the serpentine belt and take care of that little bit of business.
The junkyard smog pump ready for installation. The pulley had to be removed to get to one of the bolts off and obviously put the bolt back on.
Smog pump is tucked away under the alternator. Note the serpentine belt that is installed.
The next thing I did was install the heater hoses. One of the hoses was hooked up to a water port at the rear of the intake. Despite this slight relocation of the hose, I had to remove the original hose and replace it with one from our stock that was slightly longer. Luckily, I had some extra hoses in stock. As for the other hose, I had to actually take a piece of metal tubing around 5/8" diameter that was bent in different ways and trim it down so it could be tucked away in the small area between the port on the water pump and the area just above the alternator. I had to install a short piece of heater hose to the water pump to connect the bent metal tube, then hook up the regular heater hose from the HVAC box. I did have to trim that hose down a bit since I had some excess. The metal tube was necessary since the port on the water pump is in such a spot that without the metal tube, a rubber hose would be smashed against the accessory bracket. The hose could possibly be at risk of being cut by the serpentine belt that rides a mere 3/4" from the metal tube. I did use some heavy duty zip ties to hold the metal tube to the accessory bracket for extra measure. 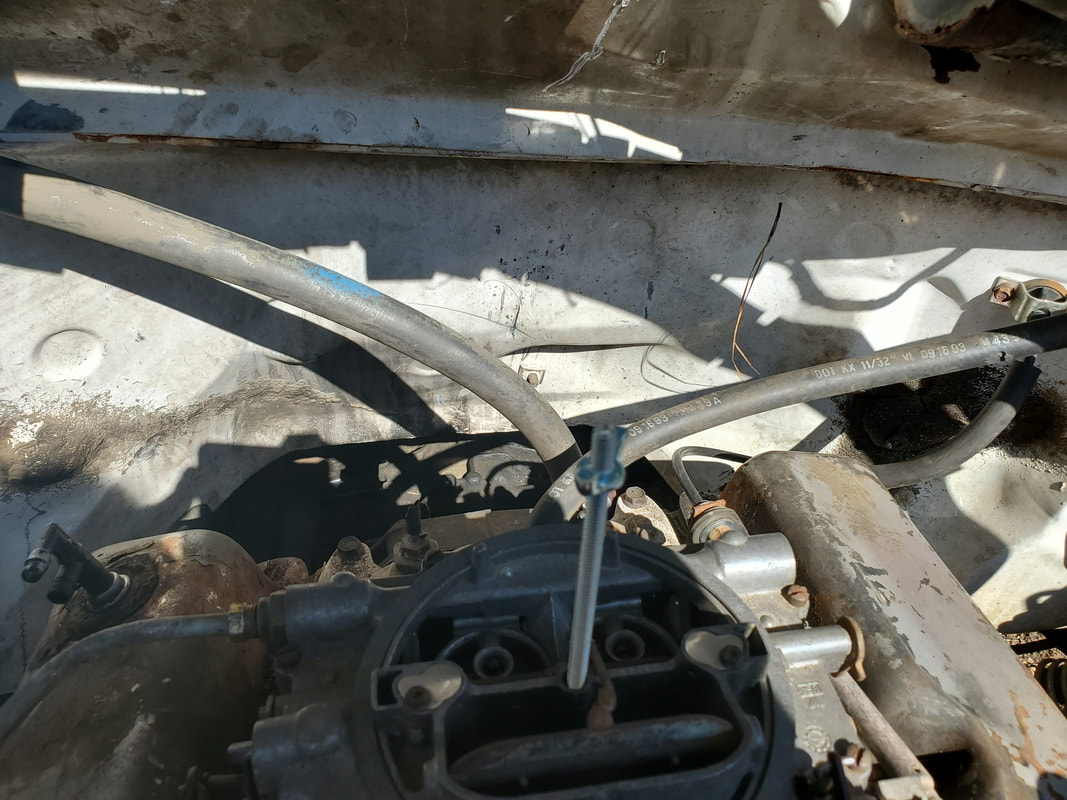
Heater hose hooked up to rear port on intake. Air hose for brake booster also hooked up to port on back of carburetor.
A closeup shot of the heater hose and metal tube along with the zip ties holding it to the accessory bracket. The top heater hose was moved out of the way for this to be put on easily. Also note the small heater hose piece that goes between the thermostat housing and water pump.
The next thing on the list was the removal of the right valve cover in order to expose the rocker arms. Intent here is to look at #1 cylinder so I could manually turn the engine over and get #1 cylinder to TDC in order to know where to set the wire for that cylinder after the distributor is installed. I had to replace the gaskets on the valve covers anyway so there was that, taking care of something that would've needed taking care of eventually. 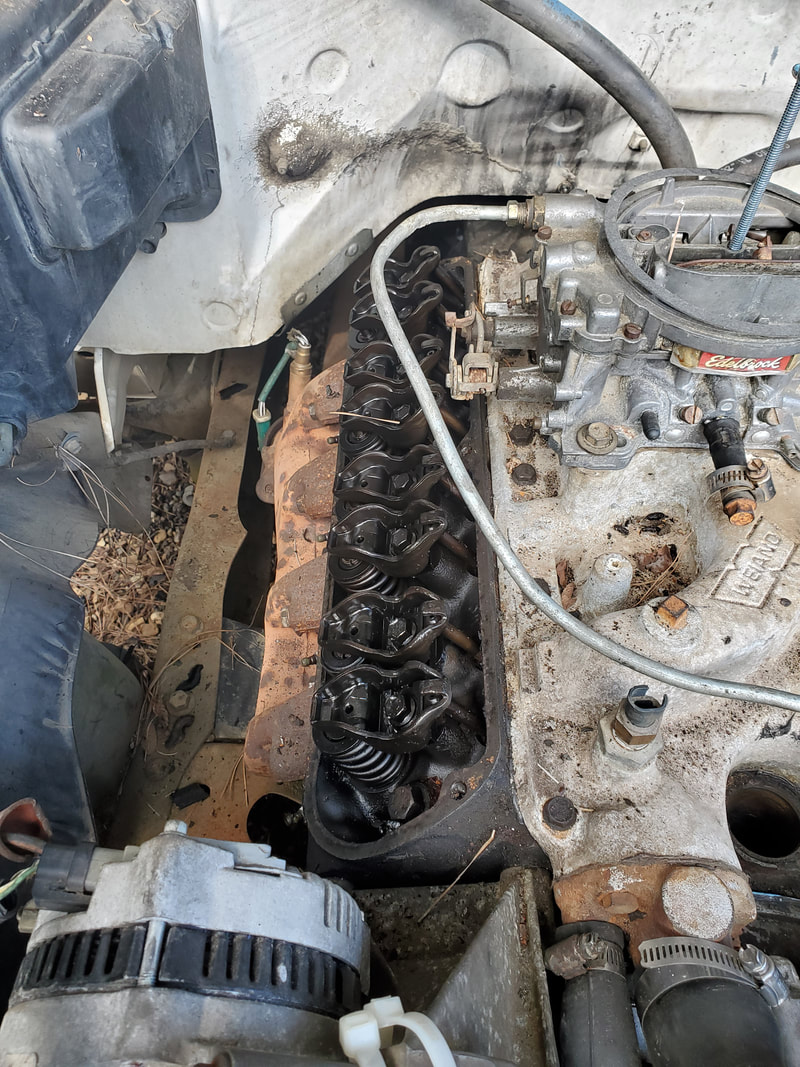
Right valve cover removed to expose rockers prior to setting TDC for #1 cylinder.
Now for the distributor. Since we've ventured way into uncharted territory on this build, we may as well include the choice of distributors in this as well. In this case, instead of using a Duraspark electronic ignition system as we've done in the past, I chose to go with one of the hybrid HEI distributors, just like the one we used on the Dodge's 318 engine. Of course, this distributor has the advantage of only needing one simple power wire going to the cap and if one is equipped, an extra wire for the tach. The Duraspark system needs one wire bundle going from the distributor to the module and another wire for power going to the module. It also needs an external coil with wires for power and ground/tach. An external ballast resistor is also needed and installed in line with the power feed to the coil. Compared to the HEI system, the Duraspark system is a more cluttered installation. 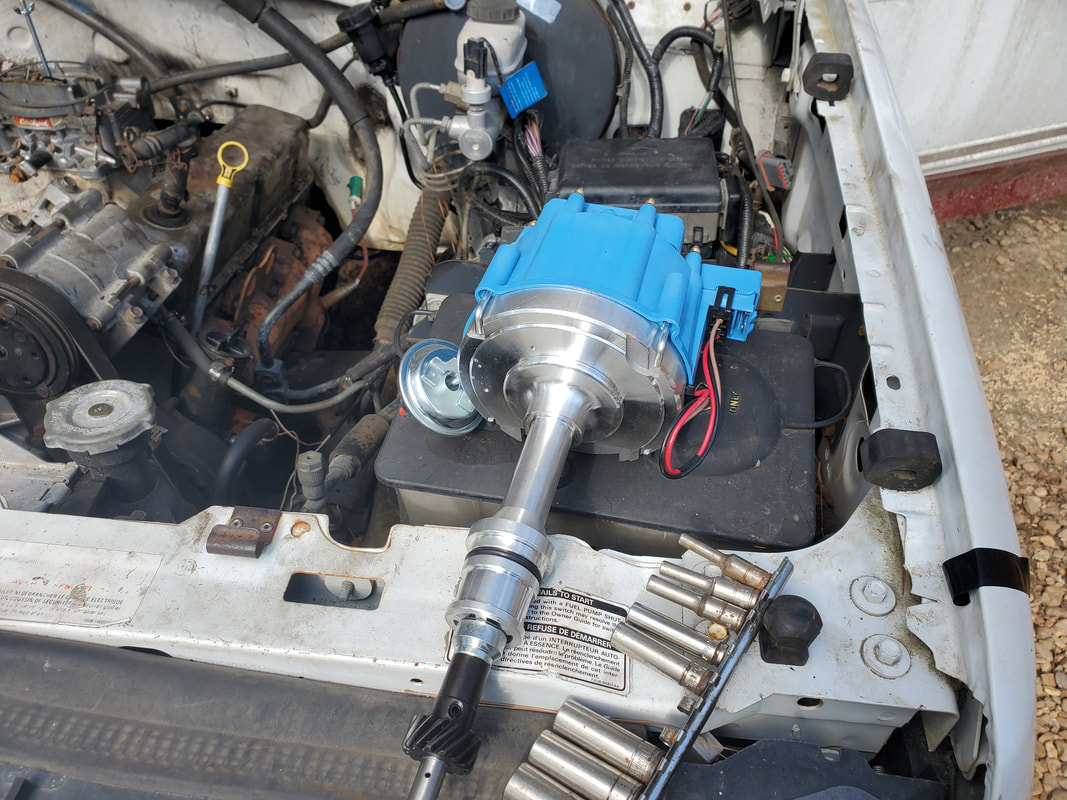
The hybrid HEI/SBF distributor awaiting installation.
There is a little thing that needs to be known about this type of installation. Since the HEI distributor is a wide unit, it is a tight fit. Tight enough, that it can only go in a certain way with only a small range of swing for timing adjustments. If you add an aftermarket intake, one of the intake runners might interfere with the body of the distributor. Conveniently the body is made with an indentation that covers about 45 degrees of the body underneath so when oriented properly, it will clear most things that might get in the way on the intake. In the case of our intake, a port on top of the intake runner got in the way of the distributor, even when properly placed. I took the die grinder and ground some of the metal away, clearing the area enough to seat the distributor all the way. 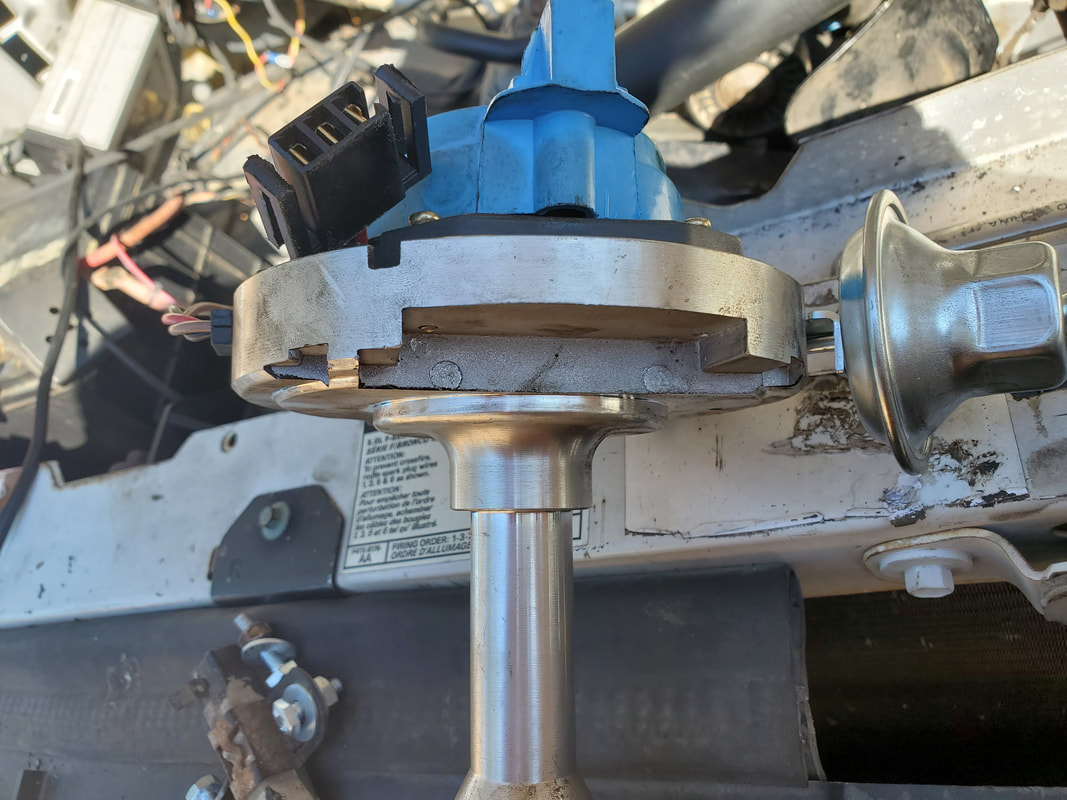
Indentation on bottom of distributor body that allows for clearance issues with things like the intake manifold.
Port on top of intake runner that had to be ground down to help produce more clearance for the distributir.
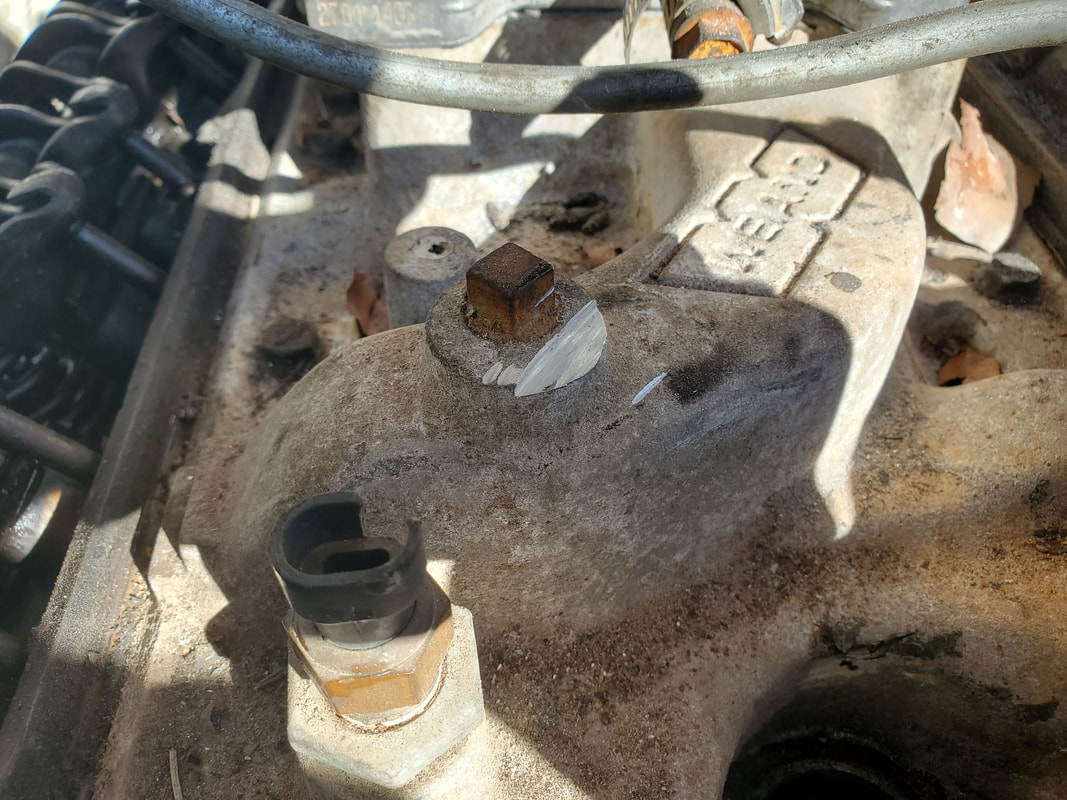
After making the modifications, I was able to set the distributor down all the way. I did have to remove an extra water temperature sensor as it was completely in the way of the vacuum diaphragm on the distributor. I removed it and replaced it with a simple pipe plug. With the dizzy down, I installed the plug wires. As is the case with these commercial wire sets, the wires end up being way longer than is needed. It's fine but what this means is if I want the wires to be neat, I will have to shorten them. 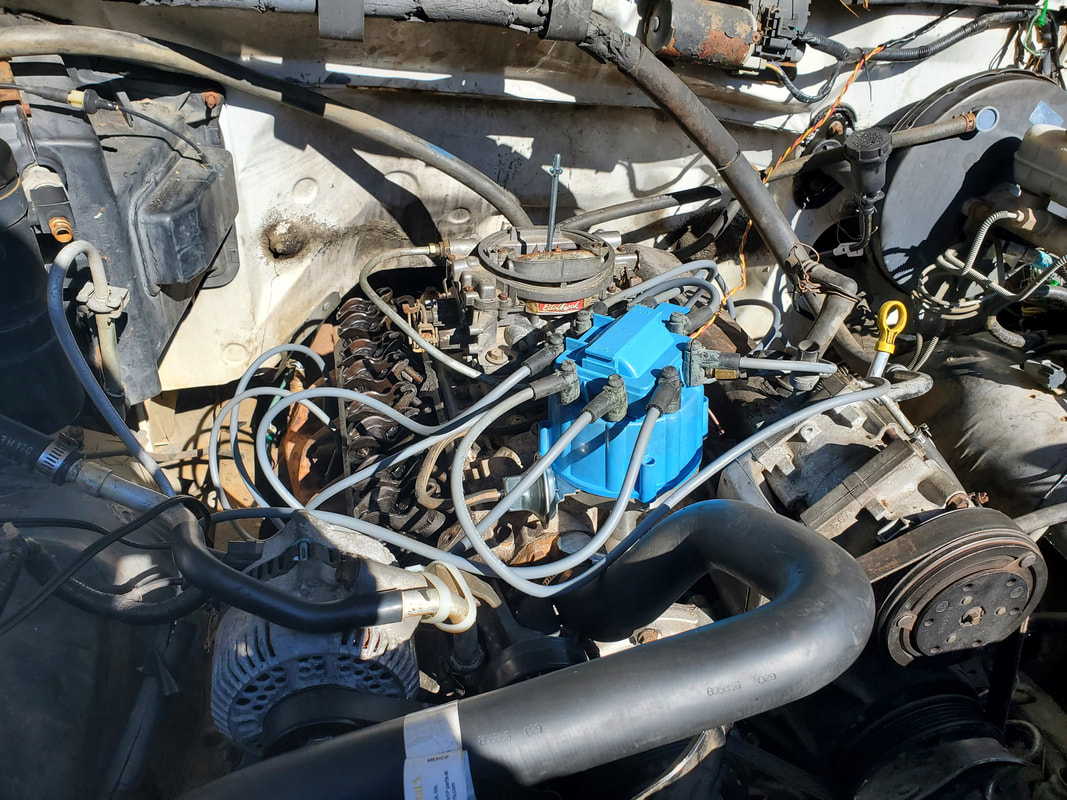
DIstributor in place with plug wires hooked up.
I'll be waiting to make sure everything is straight on the engine, that its running and tuned before I do anything with the plug wires. I would get some extra terminals and just take the wires and shorten them some based on their placement. Once the wires are shortened, I can neaten up with the zip tie wire retainer idea. Until then we will be sticking with the spaghetti bowl. With all this done, the next thing is bleeding the clutch master cylinder and adding fluids. From there, its a fresh battery and start up time!
After getting the fuel system taken care of, there was still a matter of dealing with the missing fuel selector switch. Well, it wasn't missing, just removed. The original plan was to install a jumper that would route the switched 12v power to the line feeding the fuel pump. This concept was fine on paper but when implemented was not too well thought out. After removing the dash/gauge panel, I installed a jumper and tried to get the pump to cycle on. It took me a while to figure out why the pump wasn't coming on. First problem was the idea I had the key on the whole time. This was partly because of the crazy chimes the truck was making when the key was initially turned on, especially when I tried to simulate a start to see if the starter would crank. So, the key was left on. Midways through this I also realized that there was a matter of the fuel gauge as well as the pump. This made me realize that I would have to reinstall the selector switch. At the same time, I took a moment to install a jumper from the fuse box, coming from a switched 12v circuit that was no longer used on the truck to confirm that the pump would come on. Knowing that the pump would come on I plugged up the selector switch. 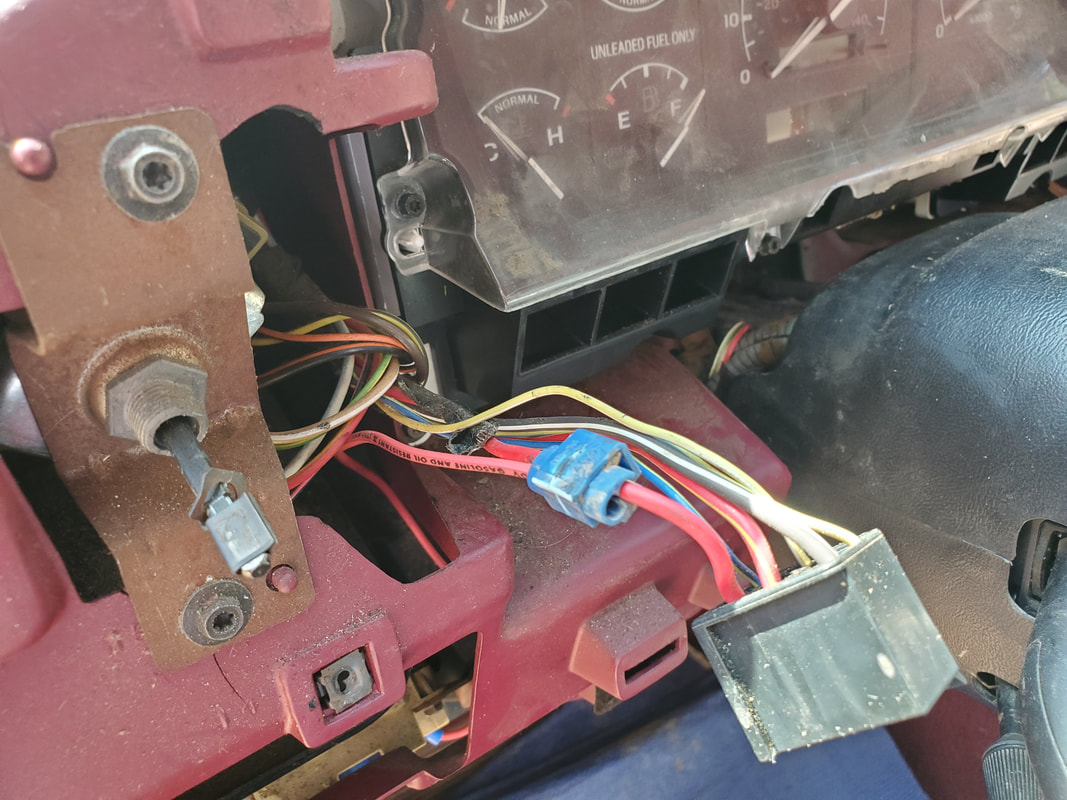 Plug for fuel selector switch, exposed after removing the dash/gauge panel.  Jumper wire plugged up to unused circuit in place of fuse to tap into 12v power at the fuse point. Once the selector switch was plugged back up, I then discovered what was going on. First, the selector switch had to be sending some kind of feedback to the ECU through one or both circuits (pump or gauge) in the fuel system. All the crazy chimes shut off at that point. Second, when I turned the key on, I heard the fuel pump cycle on for a couple seconds. I then realized that what was happening on the power lines for the fuel pump was the idea that when the key is turned on, the ECU cycles the fuel pump for a couple seconds to prime the EFI system prior to starting. Once the truck is cranked the pump will continue to cycle on until the system starts then the ECU will command the pump to stay on. Because this is a low-pressure system, the fuel pump needs to stay on all the time, even during startup. I had to keep the jumper in place that I used for testing the fuel pump and tap into the power line feeding the fuel pump so when the key comes on it will cycle the pump on all the time regardless of the ECU. With that, I had to keep the fuel selector switch. It's just as well anyway, because the switch in place at least looks better and original than the hole that would've been present otherwise. Now if there was any chance that I could've made the pump hold prime in the system, even with this low pressure setup, having the fuel selector switch would've served like a security measure as it would've kept the pump from coming on when switched in the other position. I might be able to put the 12v jumper on the input side of the switch. I'll have to look at that again... 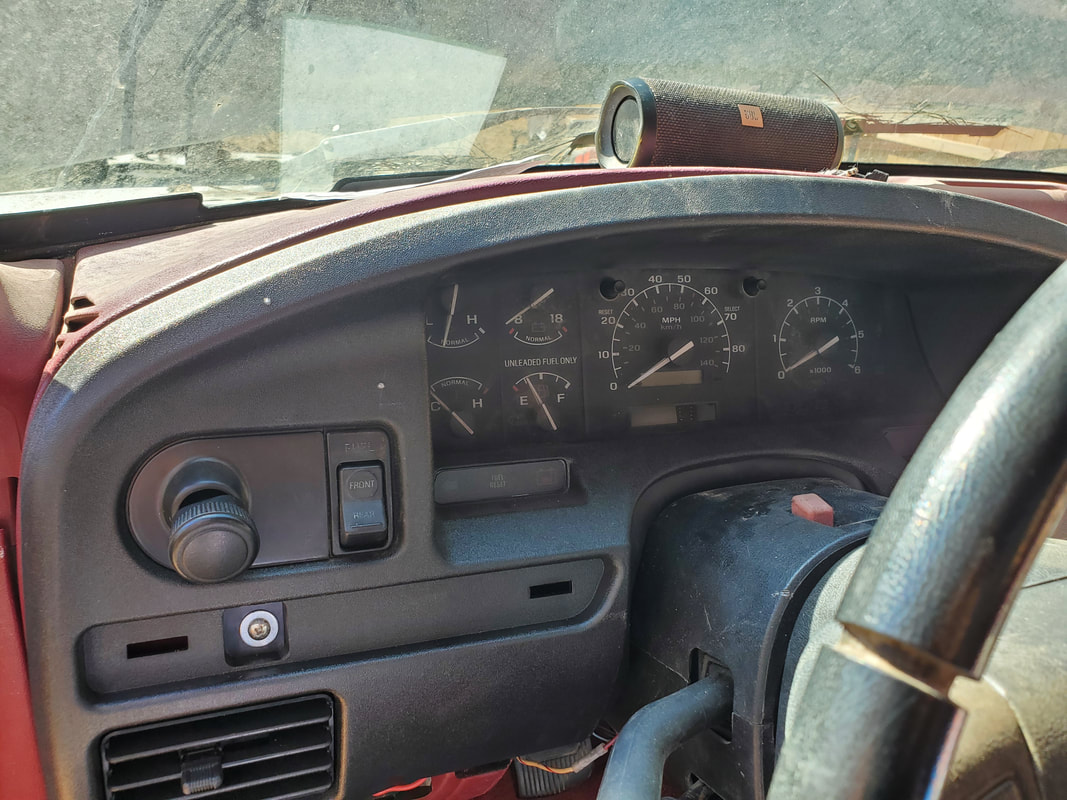 Gauge panel reinstalled with selector switch. The next thing that I had to address was the starter and why it wasn't cycling on. Even after shutting up the chimes, the thing still wouldn't send power to the starter solenoid to crank the starter. I had to go through a step by step process of tapping into the circuit feeding the starter solenoid, ohming out the sections of the circuit to see where I might be losing continuity. After moving in and out of the cab, tracing the circuit from the ignition switch to the junction plug and across the junction plug, I finally found that I was getting a way higher than normal resistance reading at the plug where all the wires went through the firewall. Even after reseating the plug, I still had that odd ass resistance reading. I ended up installing a bypass circuit, basically a wire that bypassed the old circuit, going through the firewall, passing the junction and tapping into the circuit after the engine bay fuse box. 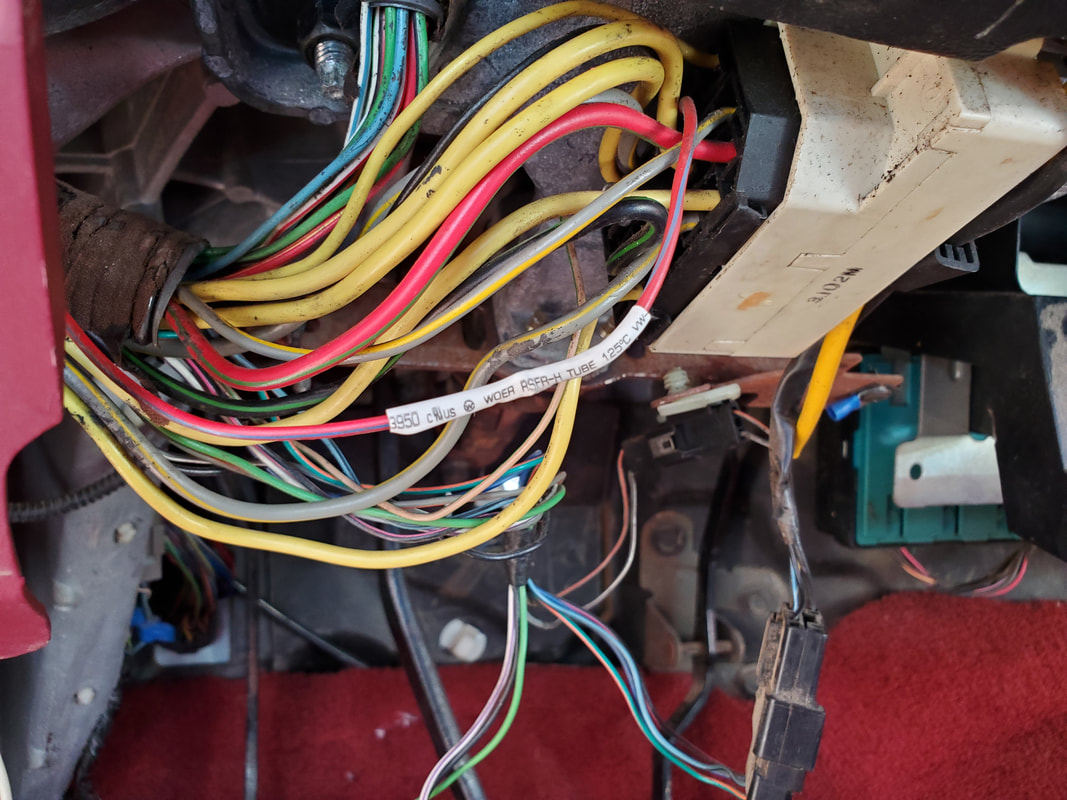 Wire from ignition switch feeding starter solenoid, spliced into bypass wire, that also happens to be the same color combo as the original wire. In order to not complicate things more than they already were with the bypassing and all the other fuckery that was being done in this truck and this newer system, I bypassed the fuse box. Even though I tried tapping before the fuse box, because there is probably a secondary circuit with another smaller relay cycling on the starter solenoid, I just bypassed everything that wasn't really needed. Besides, if I dig into the engine bay fuse box, I might cause one of the other circuits still being used to not act right. It's best not to overcomplicate things in this uncharted territory. 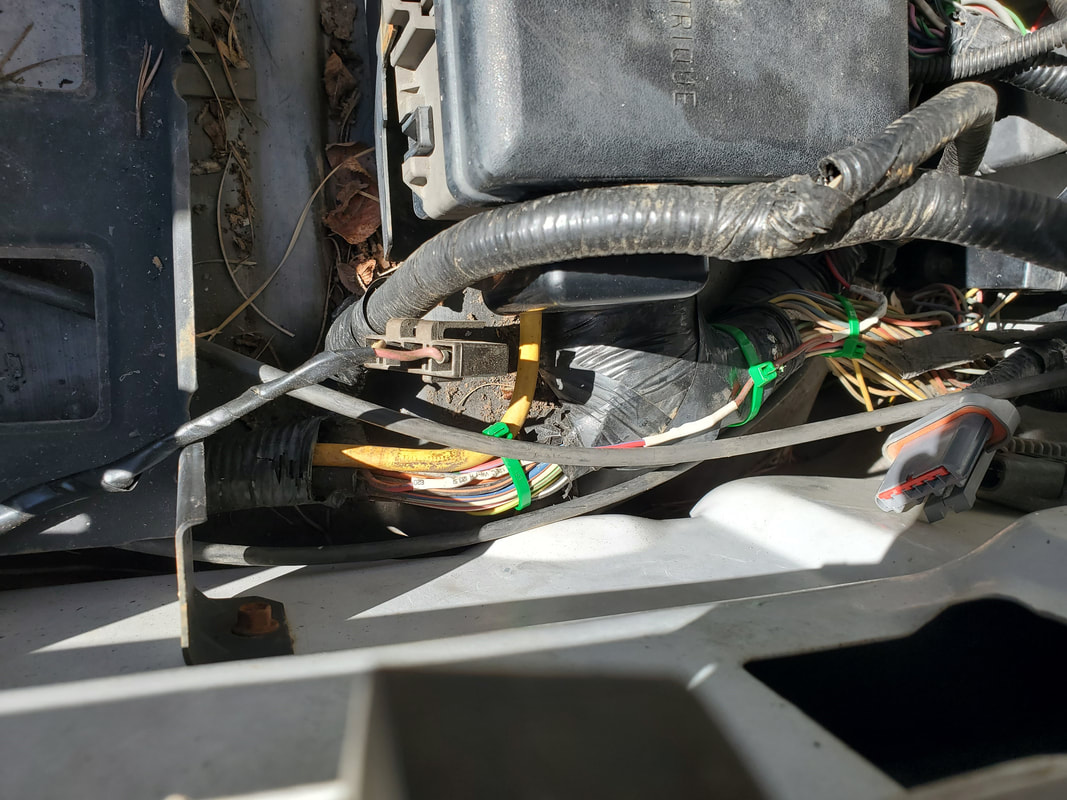 White heat shrink tubing indicates the splice into the original starter solenoid wiring with the bypass wire. After doing this little bit of tomfoolery under the hood I was able to hit the key and make the starter pop as intended. With the couple of minor electrical issues addressed, I can now move back into the engine bay for our final batch of work, which is installing heater hoses, a smog pump so I can put the stock serpentine belt back on, and the distributor and wires. I also still have to bleed the clutch master cylinder. Once that's all done, other than adding fluids and fuel, I should be ready to crank this pile over for the first time.
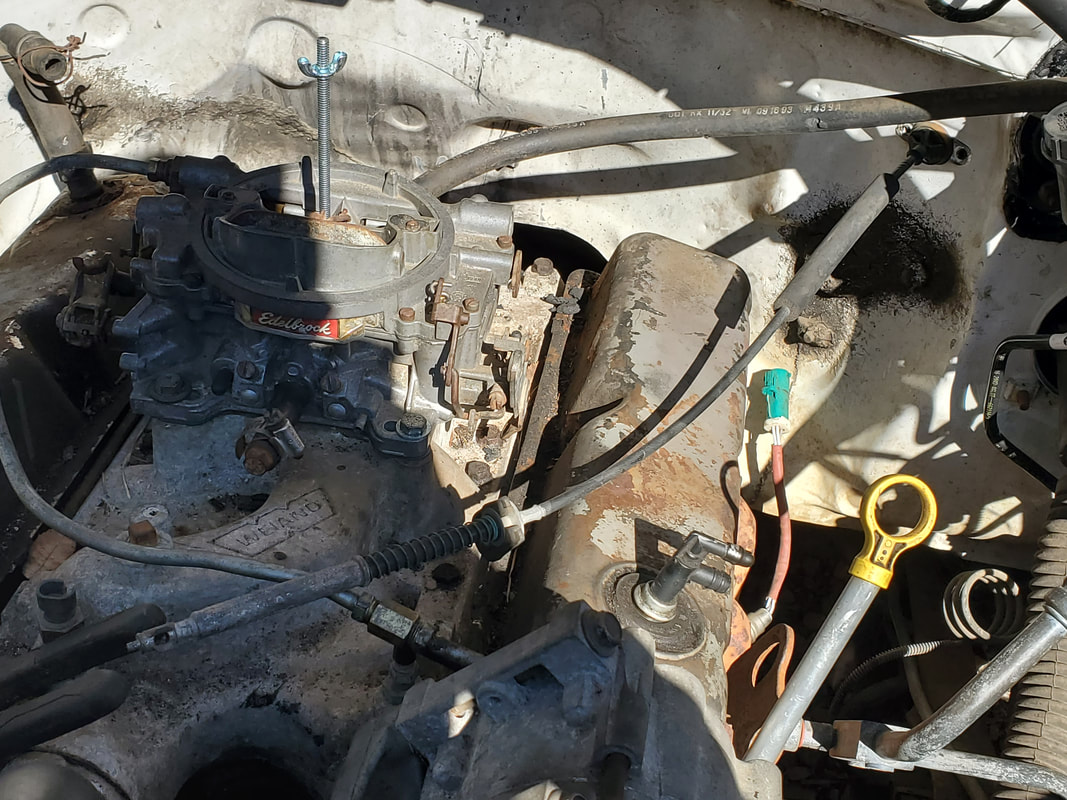
Finally managing to get back to the FMT, I have just a few things left to do on the truck before we can try to crank the thing over. The first thing in the last batch of work that I'm focusing on is the carburetor. Besides bolting the piece down to the intake, there's still a matter of getting everything hooked up, and hooked up properly that it'll all work good and hopefully not give me any trouble for a long while. As for the bolts on the carb, I had to trim down some longer bolts I had in stock as the smaller ones I had were just a little too short. I had a 4bbl gasket on hand along with the carb (since I done a number of rebuilds) so I was able to bolt the unit down securely in order to move on to the next phase, which is getting a fuel line established between the carb and the line that had already been set up on the truck's frame rail.
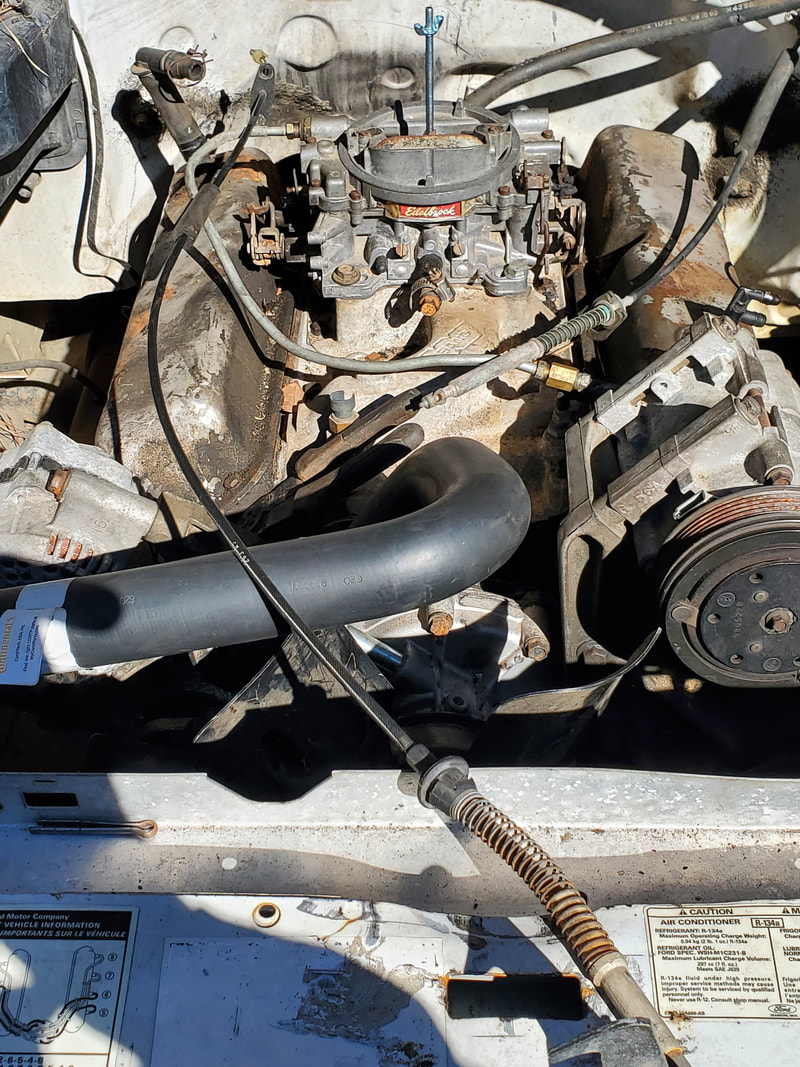
Edelbrock 4bbl carburetor bolted to intake with fuel line hooked up.
Since the carburetor already had a female compression fitting, I decided to stick with it and produce a fuel line using a male compression fitting versus trying to just install a hose barb on the carb and setting up the metal hose with extra pieces of rubber hose. I found a length of 5/16" tubing and had the right male compression fitting in stock with my tube bending/flaring tool set to make the fuel line. I set the line in place, hooking up the compression fittings together then manipulating the tubing to route its way around the back of the AC compressor and down past the power steering pump towards the main fuel line. I had to bend the main fuel line to have it be almost in line with the end of the new tubing set up. I was able to connect the two metal tubing ends with a short piece of rubber fuel line. With that part of the fuel line done I then moved on to the throttle cable. Since the truck's original throttle cable was extra-long due to the position of the original throttle body with the EFI system, I had to remove this and replace it with another shorter throttle cable. Luckily, I found a short cable that I most likely removed from the 73 Mustang or the Toyota truck that were both turned into chicken coops. The unit was short enough to fit well enough in the position of the carburetor and the truck's firewall. Only thing different I had to do was enlarge the hole where the old cable was located. After placing the new cable in the hole I had to retain the unit against the firewall. To do this I took a conduit bracket and trimmed out the middle to a U shape, allowing me to slip the bracket over the end of the cable where it plugs into the firewall. I was even able to shape the thing where the two bolt holes lined up with the bolt holes on the firewall. After bolting everything together, the throttle cable was in place solidly. 
Bracket modified to fit around throttle cable where it plugs into the firewall.
Throttle cable as it sits, plugged into the firewall.
The next thing in line was a bracket to hold the throttle cable in line with the carburetor's throttle lever so when the cable end moves in and out, it will move in line with the lever, ensuring smooth operation. Here, another angle brace came to the rescue. I drilled a hole close to the corner bend in the brace then trimmed the excess metal after the hole. This left an L piece that I was able to secure to a stud on the intake just behind the carburetor on the left side. Using a single nut, I had the brace in place. The throttle cable had a mounting piece that allowed me to secure it to the brace with a single nut/bolt. 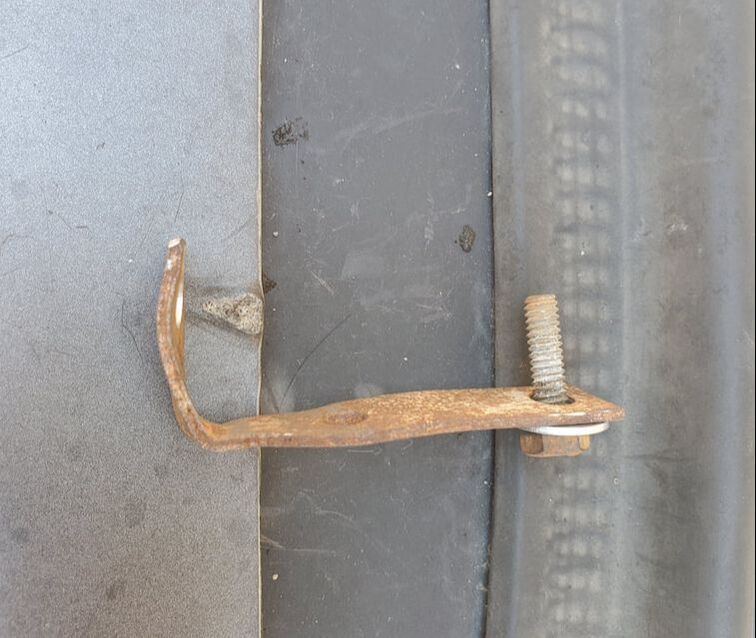
Angle brace trimmed down and set up to be used as anchor for throttle cable on intake.
Throttle cable secured to modified brace bolted to intake behind carburetor.
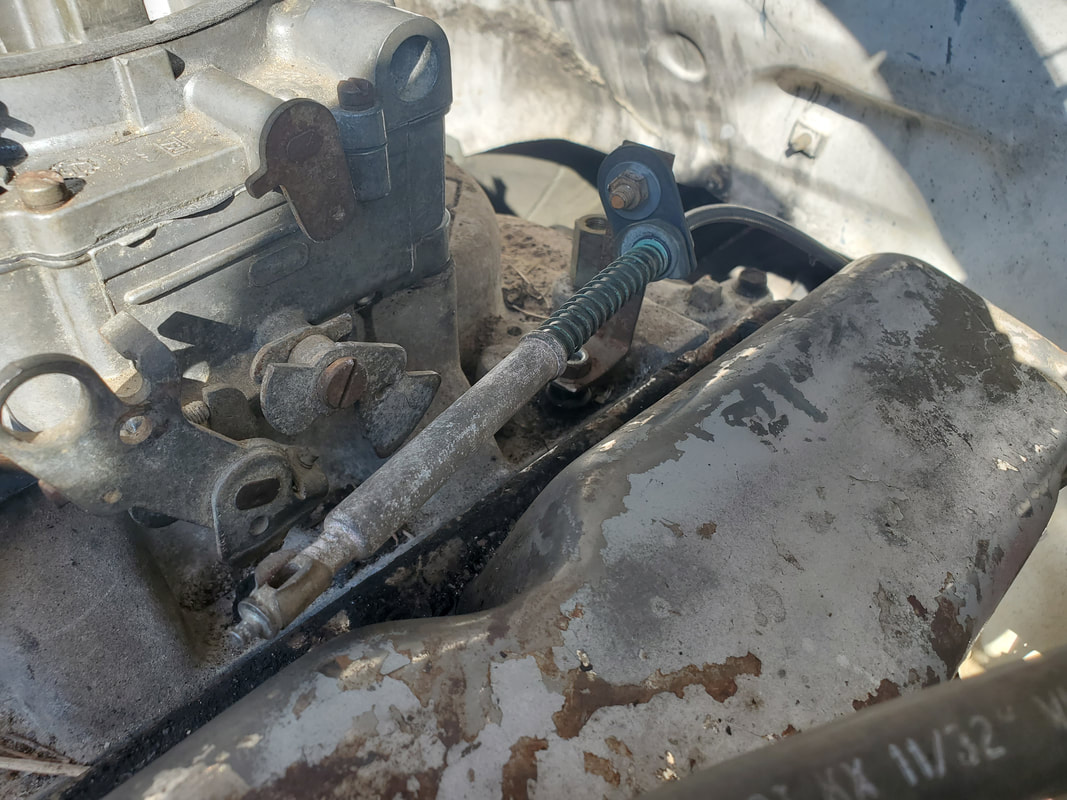
With the cable in place secured, there was still the matter of attaching it to the carb. On the end of the cable was a clip that would normally go around a ball tip on a carb's throttle. Since there is no ball tip, I had to figure out another way to attach the end of the cable. I ended up removing the snap clip on the cable end and drilling a hole through the hard shaft of the cable end. I then took a small bolt/nut and secured it through the carb's lever. I then took another nut and washer and slipped the cable end over the rest of the bolt's thread and secured it in place against the carb's lever. This negated the need for the ball tip or the snap clip on the end of the throttle cable. Lastly, I hooked up a spring to the bottom of the carb lever and the bottom of the angle brace that's bolted to the intake. 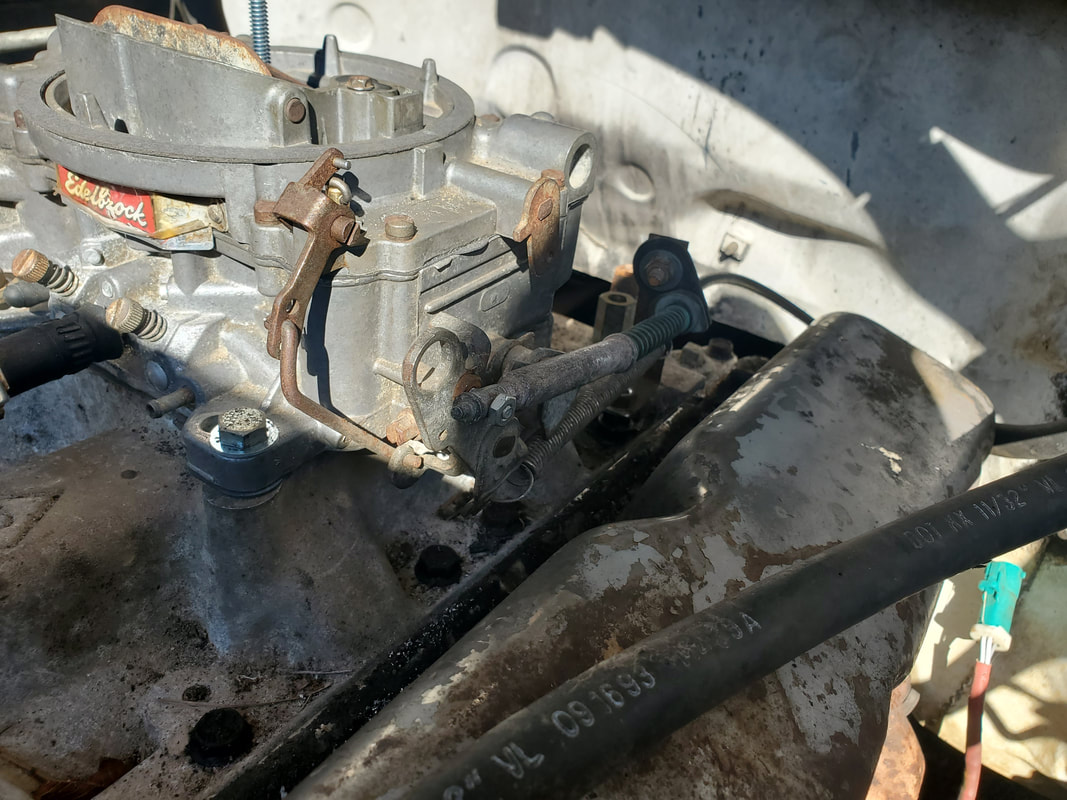
Cable end hooked up to the carburetor lever and angle brace on intake.
The last thing I did on this session was make a small addition to the fuel line to ensure proper operation of the fuel system. Since the metal line running up to the carburetor only has a break that is hovering over the exhaust manifold, putting a plastic filter at this point would be highly dangerous. If the exhaust heat melts the filter and gasoline hits that hot point, well it's obvious what could happen. Again, the rubber fuel hose is better suited to withstanding some heat than a thin plastic fuel filter. Because of this I chose to put a plastic fuel filter right after the fuel pump, on the line along the fuel rail. This was pretty easy as all I had to do was disconnect the fuel line from the output side of the fuel pump then slide the section of fuel line forward a few inches. Afterward I installed the filter with a short piece of hose, securing everything with clamps and extra zip ties to ensure the metal line didn't move any more than what would be necessary. A couple of small bends at the front end of the fuel line to make up for the new location of the bend going up to the carburetor were all that's left to finish the whole fuel circuit. 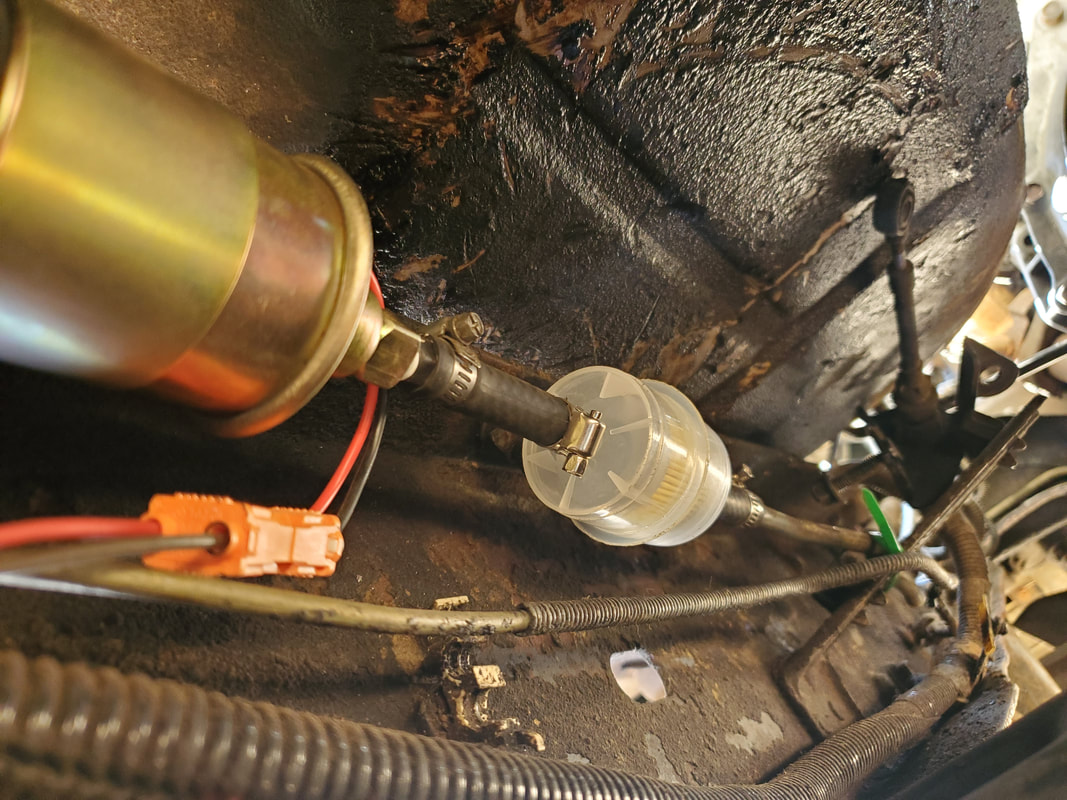
Plastic fuel filter hooked up to the fuel pump and forward section of fuel line to provide the extra protection of the fuel circuit.
With the fuel system pretty much done, there's some electrical stuff I had to tend to. One of them is the plug where the fuel selector switch was located. I still have to figure out what to do about that. After thinking about it, putting a jumper in the circuit may not be the best option. I could put jumpers in place for the pump and the sending unit for the gauge but I'll have to verify the pinout of the plug before doing this, so I don't get any circuits crossed. Of course, I could just put the selector switch back, knowing that I have to keep it on the front tank and as an added security measure, switch the thing to the rear, so if someone did try to steal the truck, they'll have no luck as the pump will never come on unless they know to switch the thing over to the front tank. There is also a matter of figuring out how to bypass the whole idea that the truck's ECU will try to cycle things as if the EFI system were still in place. This includes the fuel pump. and maybe even the starting circuit. We'll have to take our time and get things sorted out to ensure that everything is set up properly and working as intended.
Even though I made a gravel run a day before, I had taken the time in the day to work on the finishing touches of the minivan chop, so the gravel was left to sit until spreading it today. Ironically the overnight freezing temps caused the wet sand in the gravel to freeze, making for a fun workout in our shoveling exercise. In the end we did manage to almost finish covering the firewood staging area grounds. We'll probably need a couple more wheelbarrows full of gravel to finish up the area. Now while I'd be looking forward to that in the next week, a little problem arose with the F250. Apparently, the AC clutch decided to seize up just as I was pulling in the driveway, causing the clutch material to burn up, making for a stinky environment until I shut the truck down. Only problem here is the simple fact I'll have to replace the AC clutch. I can't be 100% sure that I could get away with just disconnecting the AC clutch so it isn't trying to engage in its normal on/off cycle when the heat's on, and it would be anticlimactic to do so and have the thing completely crap out on me when I'm away from the house with a load of gravel, which will have to be hauled with the dead truck. In this case, I'll just wait to fix the problem with a new AC compressor before putting the truck back on the road. 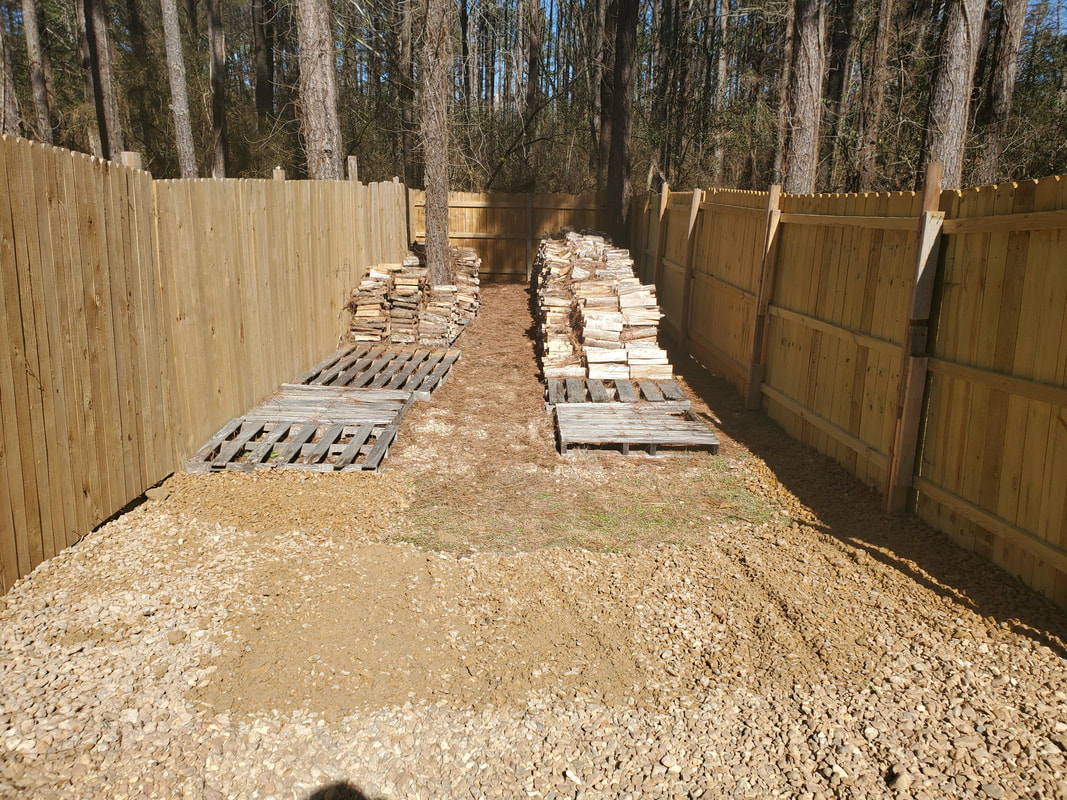 Firewood staging area covered in gravel short of a small area dead center of the picture, in front of the right row of pallets. Now back to the minivan. Even though I thought I was done with the chop, I started thinking. I thought about the idea that I was planning on using the brake system hardware from the van on the 46 Ford build, meaning that I will have to make brake lines to fit with the master cylinder and hook up to the S10 brake hardware. The solace I can take from this is the idea that the S10 more than likely shares many things with the minivan, even the size of the brake lines, meaning, I would do good to remove the brake lines from the minivan and set that hardware aside for when I start the 46 Ford build, I can at least say I have all the brake lines on hand, even if I have to shorten and re-flare the tubing with the fittings to fit the S10 chassis. After spending several moments under the van popping retainers and cutting some more wires that I didn't bother with before, I managed to pull out the entire brake line array from the fittings at the front wheels where the metal tubing attaches to the rubber hoses all the way to the back where it attaches to the rubber hose for the rear wheels. 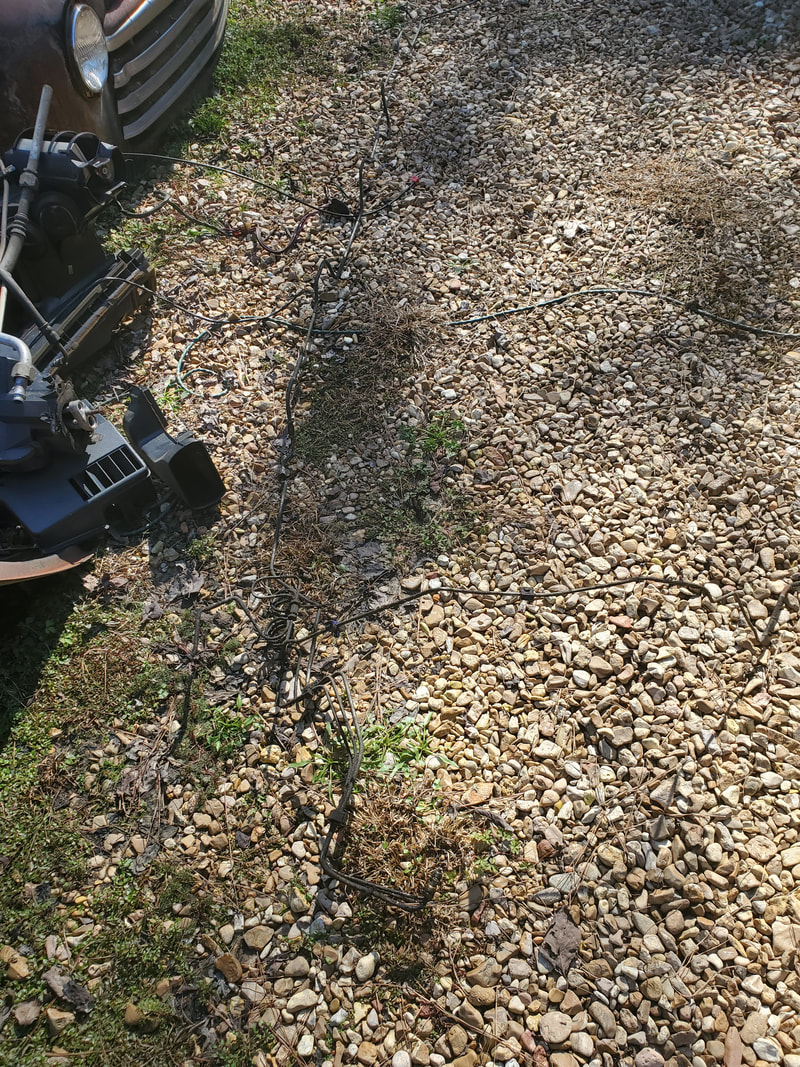 Kind of hard to see but there is an entire set of brake lines laid on the ground, stretching the entire length of the picture from top to bottom. The next thing on the minivan was the actual start of the doghouse build. That is the reattaching of the front doors. Since I cut the welded hinges earlier, I will have to weld the doors back if I want them to stay in place. I could've done something a little tackier like drive long bolts through the doors or something of that nature, but I don't need these doors to open since I have the sliding door and the rear doors for entry into the van. So as to save on welding wire, time, and making for tackier work, I chose to just weld the door in the corners and let the latch help hold the door in place. After grinding the paint away along the seams, I ran beads of a couple inches at the bottom corners and at the top end of the A-pillar for both doors, getting them in place permanently. 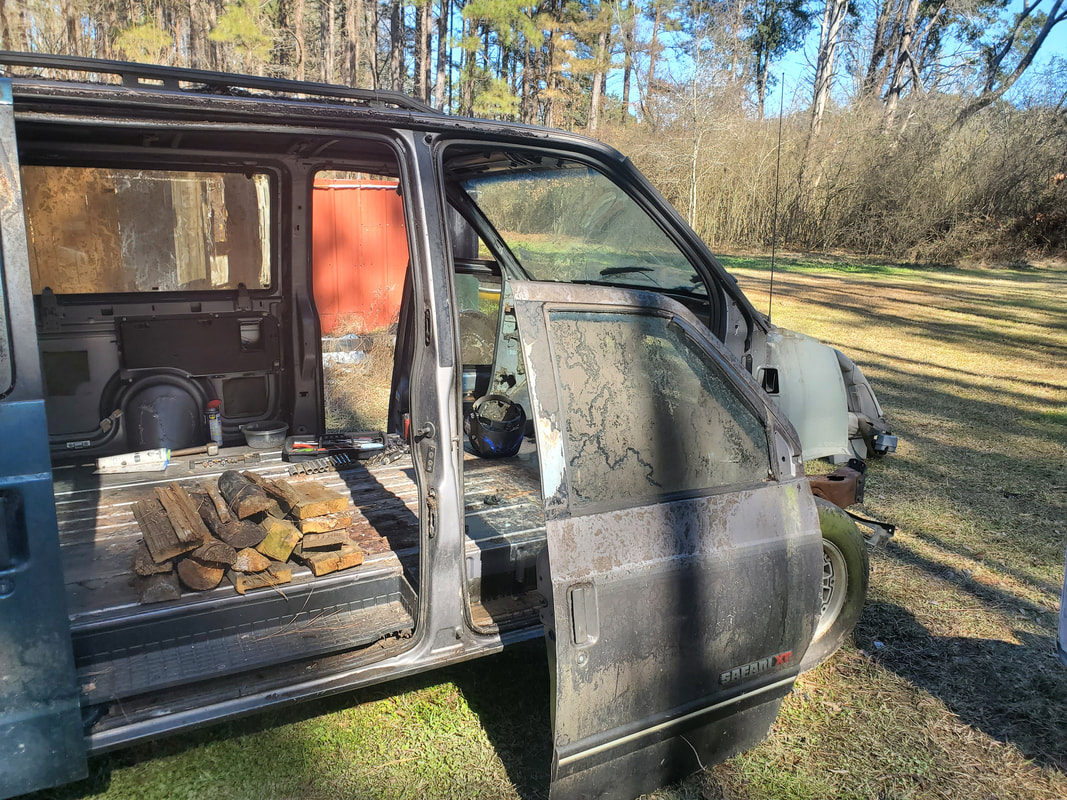 Staging passenger side door prior to mounting and welding. 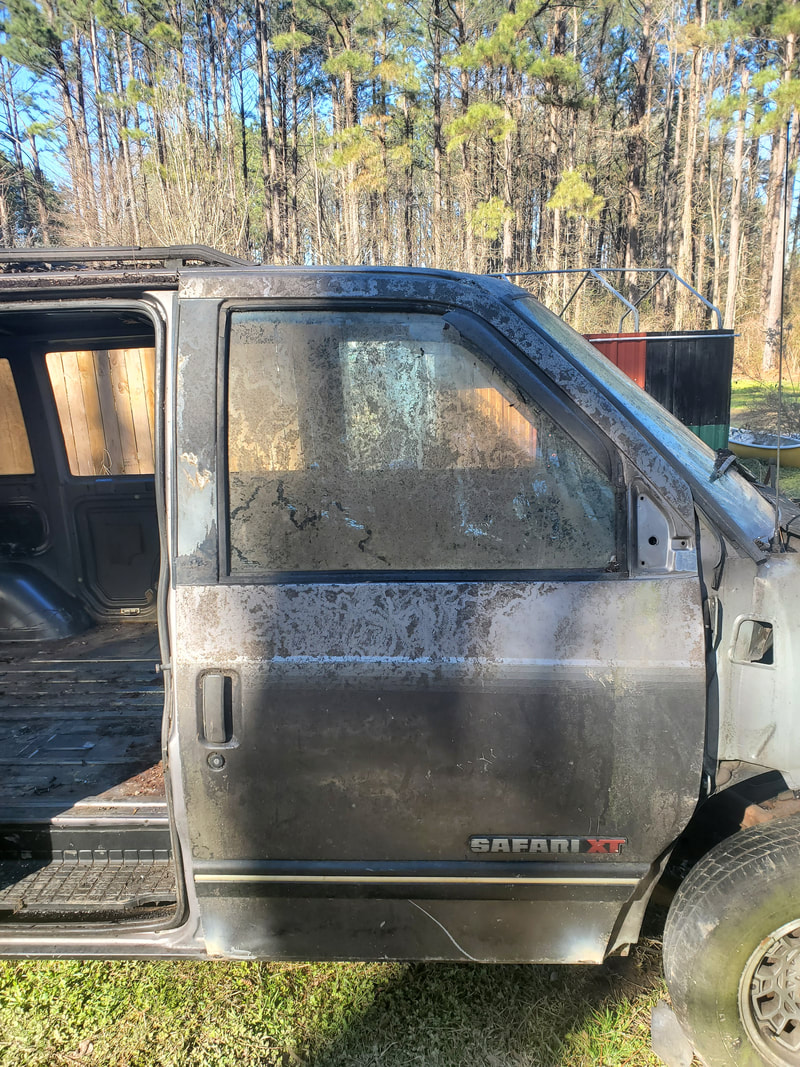 Passenger door mounted and welded in place at the bottom corners and top A-pillar corner. 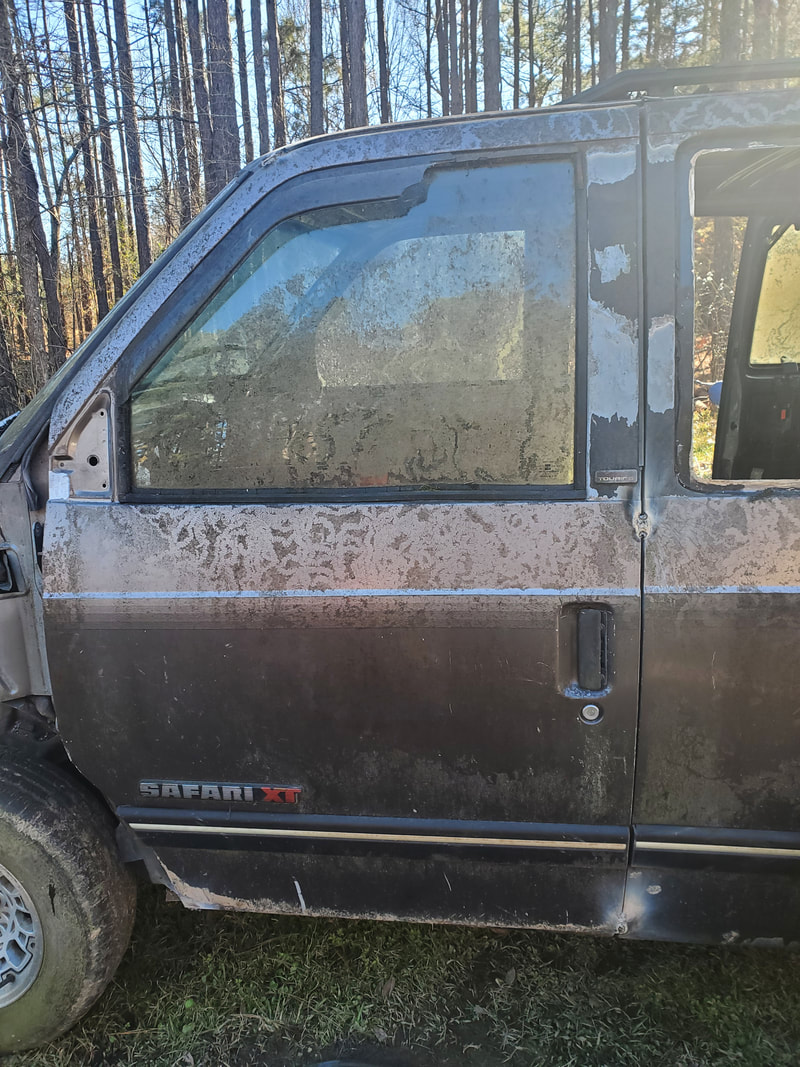 Driver's side door mounted and welded in the same manner, note the light burn spots at the corners where the welds were made. The last thing that I had to do on the van to kickstart the doghouse build was remove the middle window on the driver's side. This is one of those windows that snap open at the bottom them angle out for extra ventilation. I removed the bolts to the clamps at the bottom but the screws for the hinges at the top were so stripped that the only other option was to chop the hinges, or flexible metal brackets. The screws will have to be carefully drilled out so the brackets can be removed, and the glass reinstalled in another van. Of course, if my brain works a little harder it may come up with something that can utilize this glass outside of being installed in a minivan. 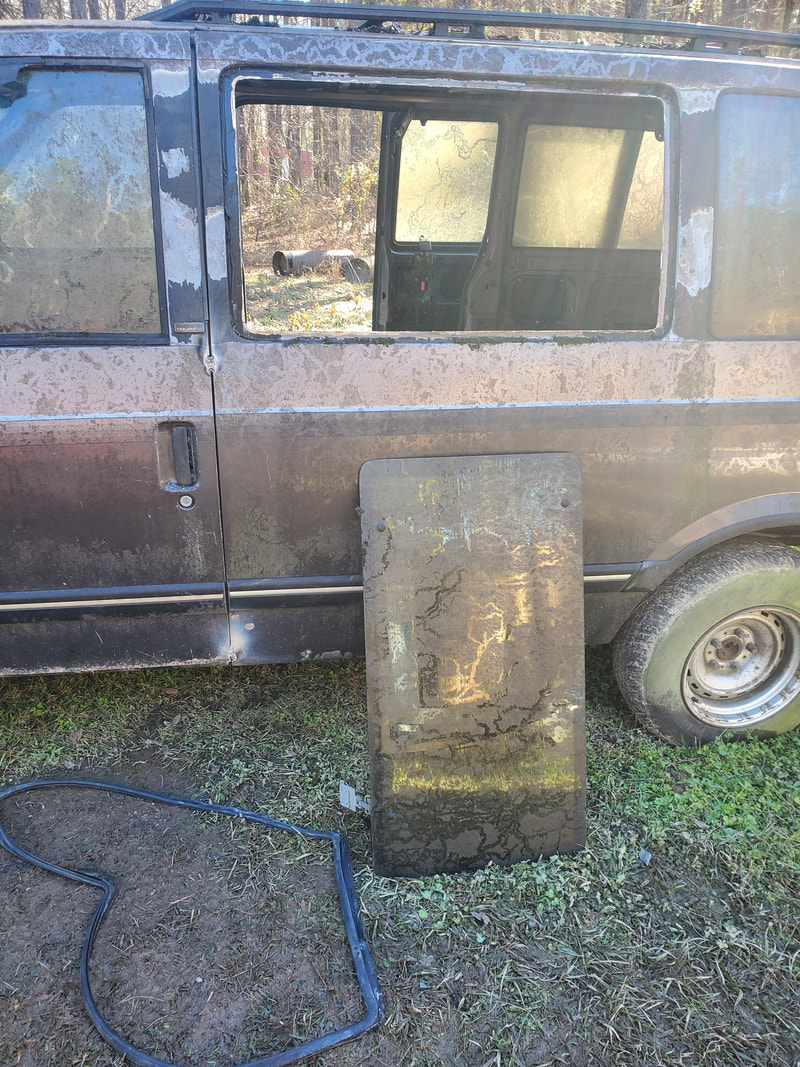 Middle glass after chopping the top hinge/brackets to remove the glass. Weatherstripping is also removed as its not needed. The first thing I'll do on the van will be to make a window frame that will accommodate a window AC unit we have stored in the garage. This will incorporate the use of some metal and scrap wood to frame out the area so it can hold the weight of the AC unit and still be able to be sealed up from the weather. Reason I'd wanna do this is because being a major step in the build, it will utilize a lot of the materials I have laying around that I'm trying to use up and it will clear a large item from the garage, namely the AC unit itself. Of course, to a lesser extent I'll use up the many small items like electrical boxes, a light fixture, outlet covers, and the like, along with some wiring, in the fitting out of the van for the power and water. I'll also need to clean out the floor and figure out what I want to do about the floor. More than likely, I'll end up just cutting a large piece of carpet, which we happen to have in the garage as well. I will also have to construct a ramp in the front to serve as an entrance into the van through the engine bay and the access portal in the firewall. I will have to remove the sway bar as it's in the way of making a ramp that will reach to the ground without extending out too far from the firewall. At this point I'm just about done with the chop job on the minivan, having removed everything of value that could be easily removed. There's always going to be small items that could be removed, going even deeper into the chop job but the amount of work required outweighs the benefits. Things like brake lines and fuel lines could be removed for later use but the difficulty involved with removing brackets and snaking the lines around things like frame rails and axles doesn't really exceeds the gains of a few feet of metal tubing. Anyway, in this session, the first thing that I had to address is the opening of the sliding door. Just like with the other doors I had to remove the interior panel to access the linkages in order to "manually" work the latch to open the door. Several screws and a few trim pieces later I was able to pull the entirety of the interior panel off. After working the linkages and pushing outward, I finally got the door open. Studying how the door opened I figured that I had to pull outward on the back of the door to get the sliding action started. The linkages were just fine, it was just this one little discrepancy keeping me from getting the sliding door open. Of course, I'll have to clean the tracks really good if I want to be able to open the door like normal. 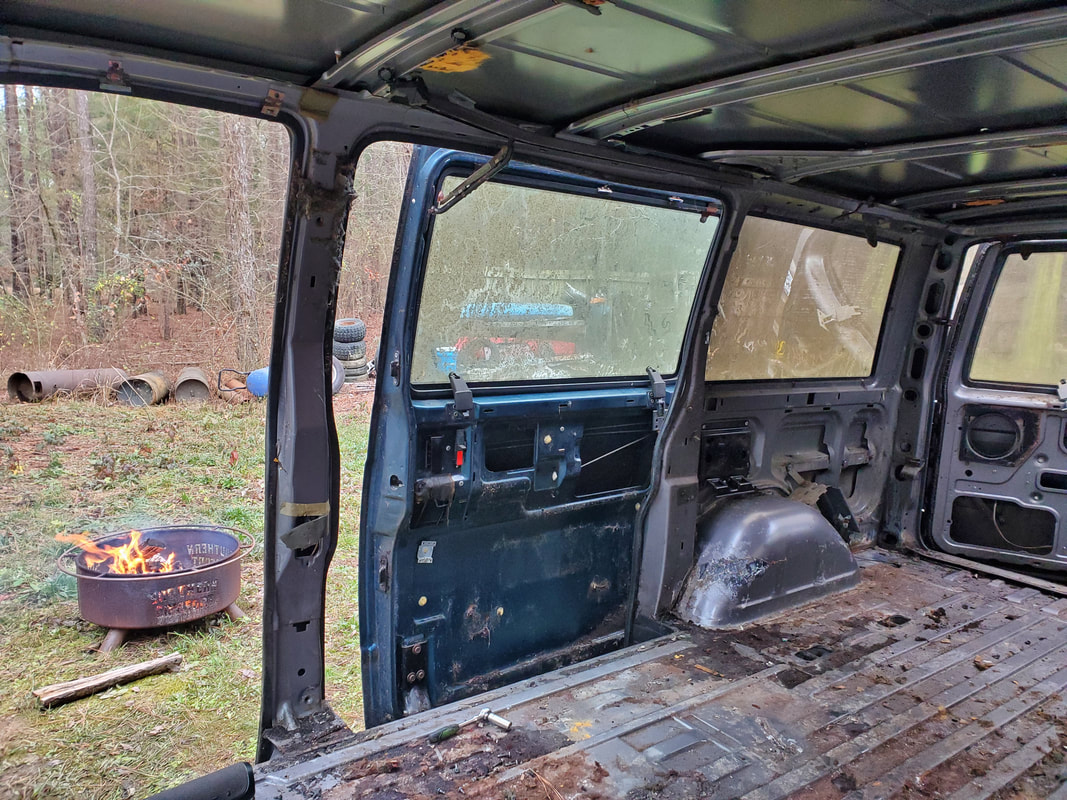 Sliding door after removing interior panel and getting the door opened. 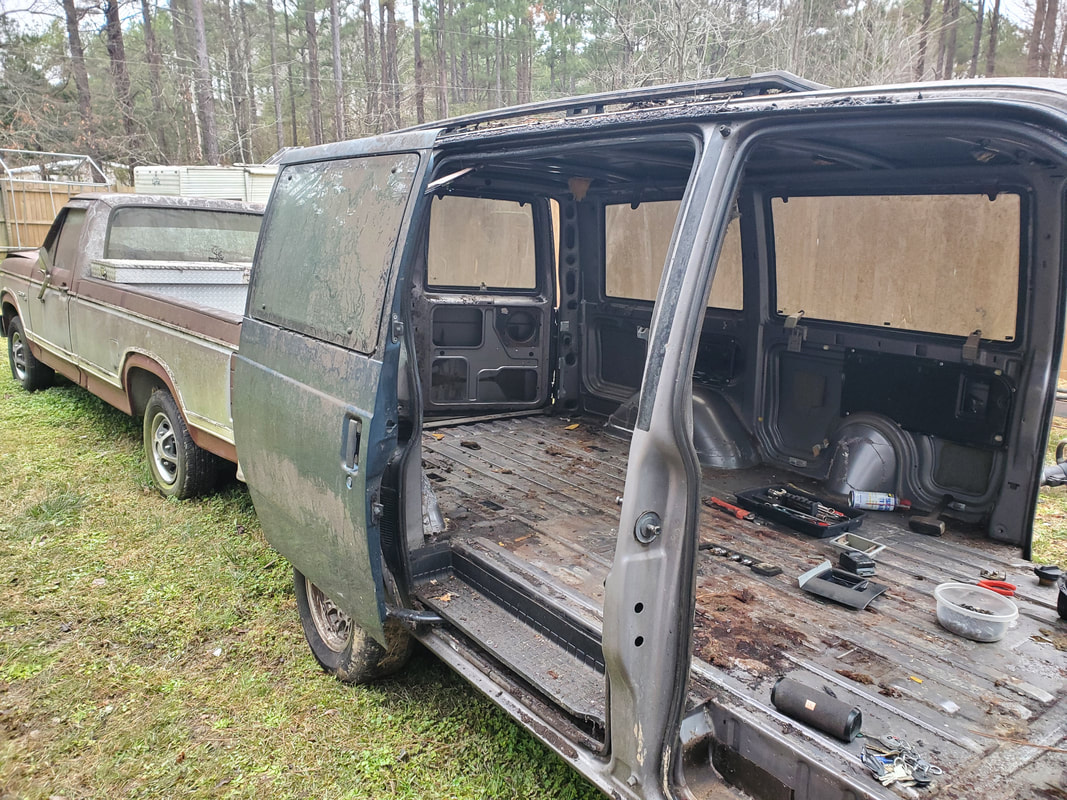 Outside shot of the sliding door in the open position, a lot of shit is in the tracks, explaining why the door was difficult to open. The next big thing I had left to do was remove the fuel tank. As is always the case with these damned things, the tank ALWAYS has fuel in it. I propped a jack under the tank and removed one of the brackets in its entirety, but the second bracket had one of the bolts break the thread clip. I had to bend the bracket out of the way in order to be able to move the tank down to the ground. I would later cut the bracket to get it out of the way completely. 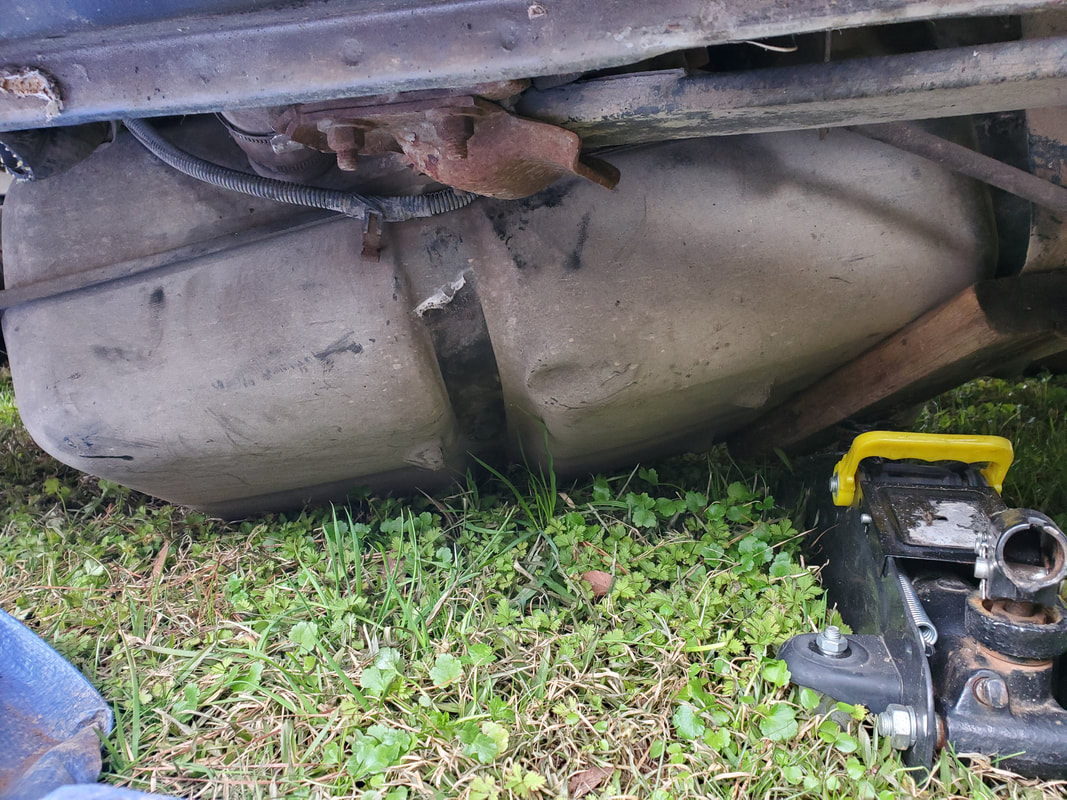 Working the fuel tank to the ground off the jack after releasing the brackets from the frame. 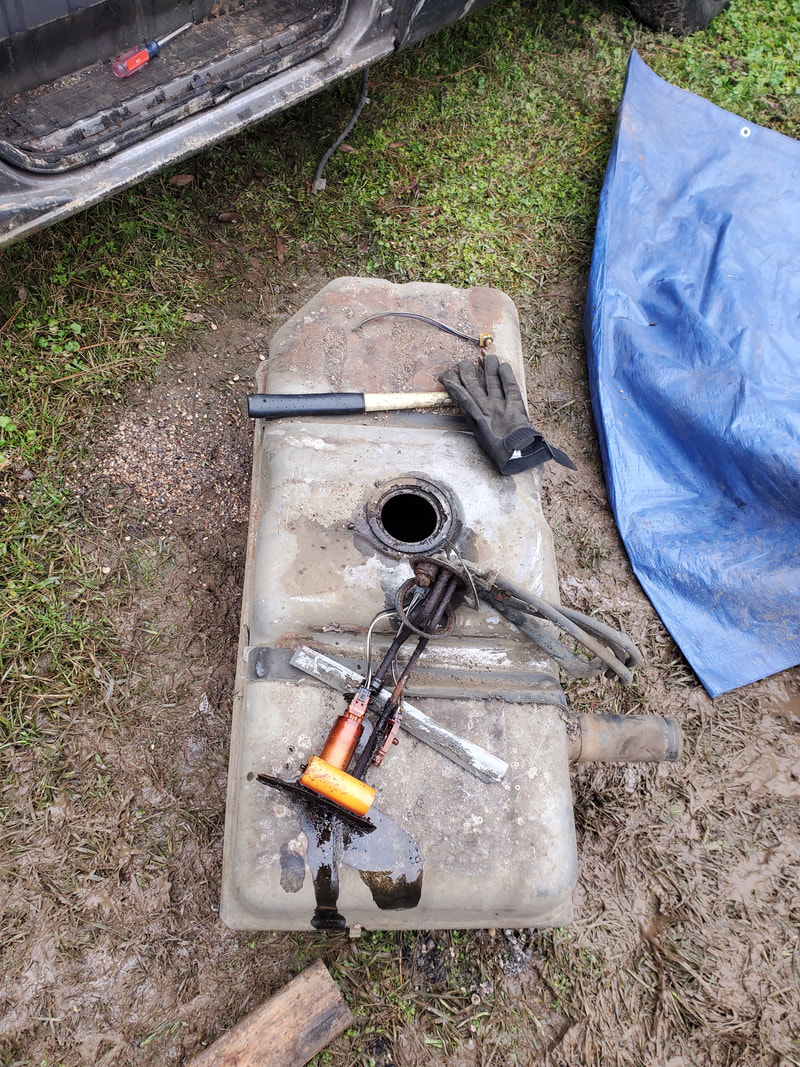 The fuel tank removed from the bottom of the van, with the sending unit/fuel pump also removed. After getting the fuel tank on the ground I had to move the jack to the front and jack up the van at the lower control arm to raise it high enough to be able to pull the tank out from under the body. I cut the hoses going to the sending unit since they were attached with worm clamps anyway. As for the wire plug, after trying to trace where the male/female plug was at on the wire harness and not finding it after going down range for a couple feet, I tried to see if the plug was detachable at the sending unit. After that vain attempt resulting in the head breaking off in the sending unit, I went ahead and removed the sending unit completely. I found that it was just as well that the head was broken, as the sending unit was rusted all to shit anyway. The sending unit/pump ended up in the scrap can. As for the fuel tank, I still had the fuel to deal with. I gathered up some bottles with old motor oil and a couple old diesel cans and funnels so I could empty the old gas into these vessels. I started off with filling up the oil bottles, making sure to split the oil evenly between the couple vessels, so each bottle was half full of oil before filling the two with old fuel. A third bottle was filled completely with old fuel. With where the filler port was located, I was able to tip the tank to empty a large amount of old gas into a bucket before transferring it to the bottles and fuel cans with the funnels. With the majority of the old fuel emptied into the fuel cans and oil bottles, I relocated the tank to the staging area with the rest of the parts, especially since I had a fire pit going on the other side of the van. Last thing I need lingering near an open fire is an open gas tank full of old vapors. While I was under the van, I did take time to work the remainder of the exhaust system from the couple of hangers then work the pipe over the axle so I could remove the whole unit. At least I could cut out and sell the catalytic converter with the rest of the scrap and use the rest of the exhaust system in one of the other builds. 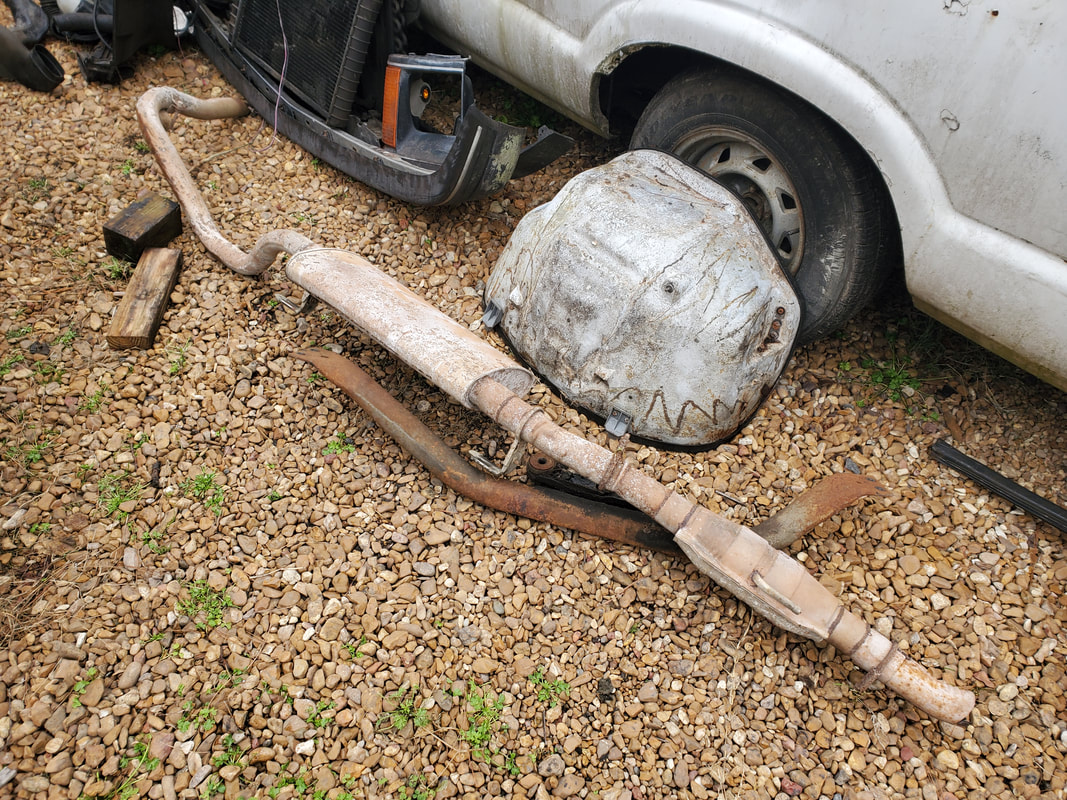 The rest of the exhaust sytem removed from under the van and staged with the rest of the removed van parts. With all this taken care of, the next move was to dismantle the front doors. Originally I planned on selling these doors with the rest of the salvaged removed parts but after finding out that I couldn't remove the body from the frame, I figured that I'll just reattach the doors and use them as walls, especially since they really can't be used as doors anymore. Funny thing, because I went ahead and chopped the bullshit welded door hinges. At this rate all I can do is hang the doors back up then weld them in place, never to open them again. It's just as well since I'll have access through the sliding door and the rear doors. With the front doors back on I won't have to worry about trying to make walls to fill those openings. Hell, I probably won't get enough selling them anyway to justify their removal and the hassle of making the replacement walls. I removed the already broken panel on the driver's side door, along with the switch panel. I ended up just tossing all this shit out since I don't even want to try and sell the switches on the hope they work. The interior panel and their associated pieces were all trashed as well so all that stuff went on the burn pile where all the other ratty interior pieces have been stacked. I removed the mirror, which was held with three nuts to the studs on the unit. Simple removal and mirrors are needed all the time. I cut out the wiring as well since the wire harness was routed around the window regulator and lock solenoids, both of which are riveted in place. Since the difficulty of removing these parts won't net me any real benefit, all this shit will remain in the door. Replacement regulators and solenoids can be had new for cheap anyway so I can't expect to be able to sell this shit for any real money. 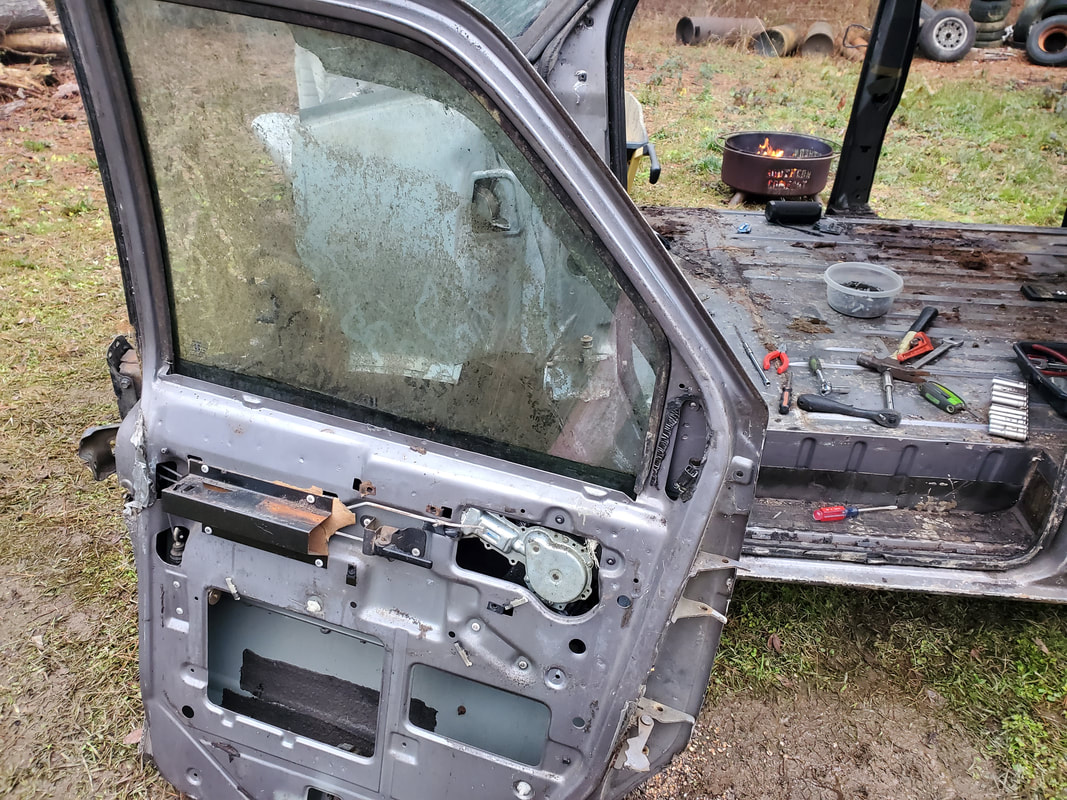 At this point the work to be conducted on the minivan is moving from what was labeled the minivan chop job to the doghouse construction job, as the very beginning of the doghouse build will be the reattachment of the front doors. The next thing will be cleaning the tracks for the sliding door so it can be opened more easily. I will also start gathering up components like electrical boxes and outlets and wiring along with some PVC pipe and fittings in order to start fitting out the body to be a doghouse. The same way I set up the car chicken coops will essentially be the same way this van gets set up. The obvious exceptions will be the removal of one of the side windows to make a mount for a window AC unit and automatic feeder apparatus. These obvious fixtures will be for long term use when we go out of town, allowing the dogs to be able to feed and drink on their own for a number of days. I will probably have the van completely fitted out as a doghouse before it gets moved to its new home next to the chicken yard. I have to get the FMT running first so it can be driven off its parking spot, then I have to lay gravel over the area. I also have to dig a trench and run a water line and a power line over to the site, just like I did with the car coops. Once this is done, then all I have to do is move the van to the spot, hook the water and power plugs up and we're in business, or more accurately, the dogs are in business. One of the things that held me back on really proceeding on the finishing out of the Elco's engine was the idea that the intake I had was for the newer generation cylinder heads with the center bolt valve covers. Our engine has the older gen heads with the side bolt valve covers. Also, there was a matter of sourcing the accessories and the brackets for them. This would've meant hitting the junkyards trying to find everything to do a serpentine belt setup then spending more money for a new intake. But there was an alternative. We happened to have another 305 engine up in the garage we traded for a transmission a couple years back. This engine is an older gen engine, complete with accessories and brackets and of course heads. Even though it has the intake its got a Rochester and spread bore pattern, not desirable. What I thought about was removing all this hardware, sans intake, and installing it on the Elco's engine, removing the newer heads in the process. Of course as is always the case with these jobs, its never straightforward, there's always something to get in the way. 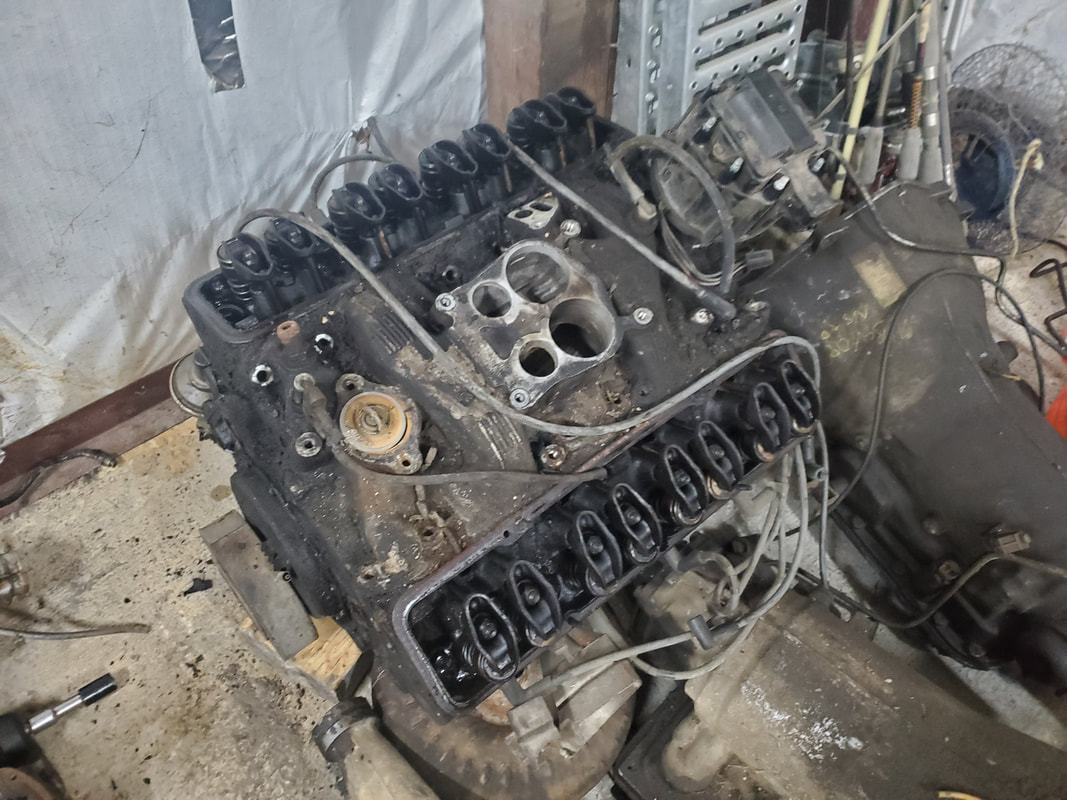 305 engine with accessories removed along with carb and valve covers. The impact wrench helped out immensely in removing all the bolts for the accessories so they came off rather fast. All the other mentioned items in the pic came off fast nonetheless even with manual tools. Moving along I removed the middle bolts for the intake, getting it off and out of the way along with the distributor, pulling both pieces free. With that, it was time for the impact wrench to meet the cylinder heads. 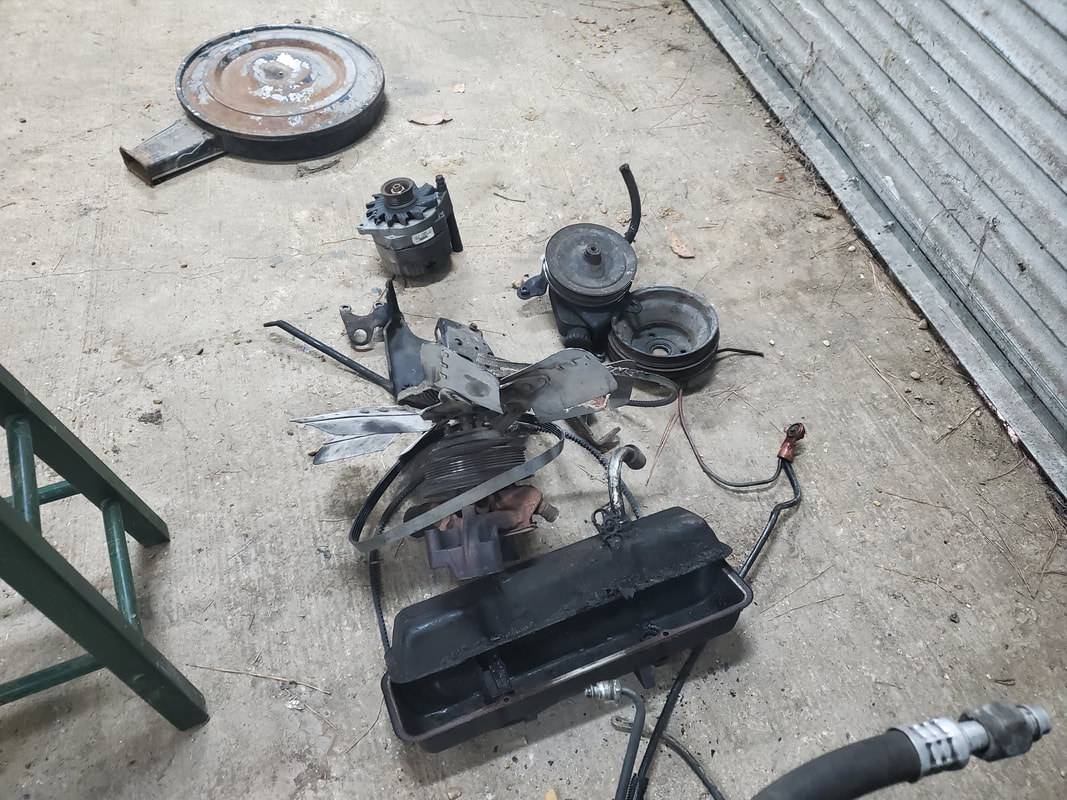 Batch of parts pulled from the 305 during the disassembly. I had to loosen up the rocker arms in order to get them to spread apart enough in order to reach the head bolts that were situated between the rockers. Once those were all loose, it was a quick job to loosen up all the head bolts. On the first cylinder head I had to tap it some in order to get it to pop free as it seemed like this engine was never apart in all its life. The second head came free pretty fast and easy at least. The head gaskets looked super worn so more than likely that was the issue with this engine, the head gaskets were probably shot and im sure the rod bearings were worn pretty good too. 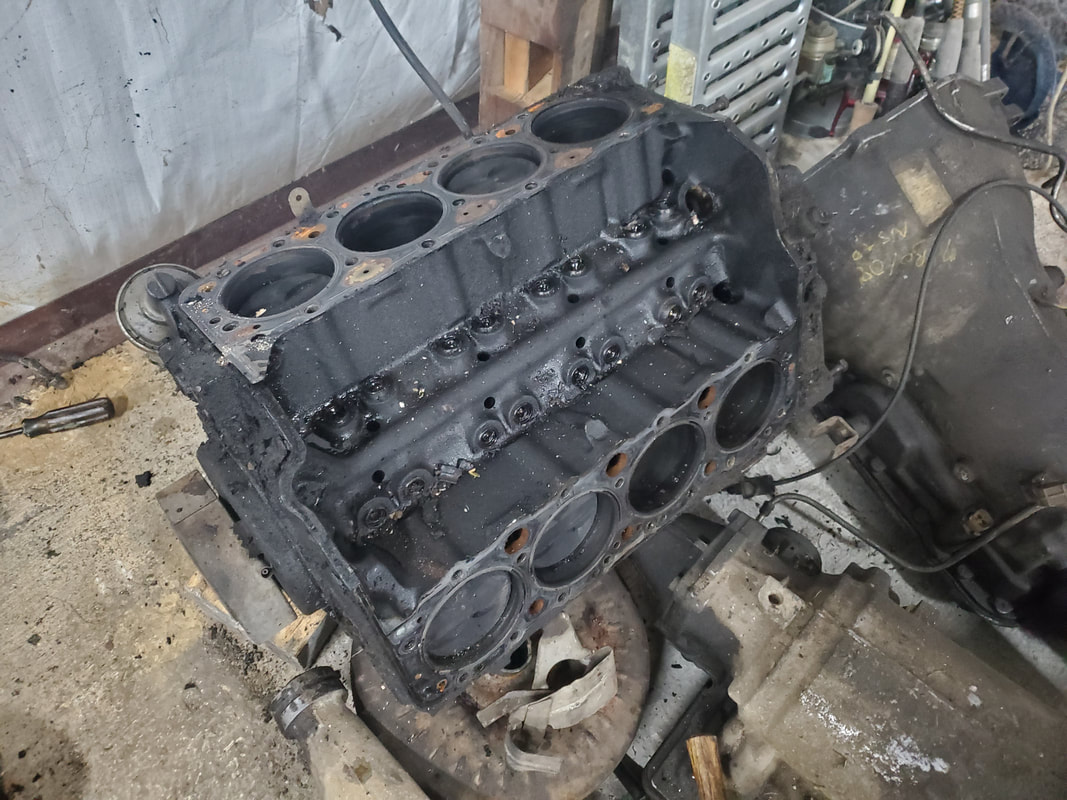 Short block after pulling the heads free. Cylinder walls look pretty good so at least I can say this block won't need any special work to resurrect it in a backyard fashion. 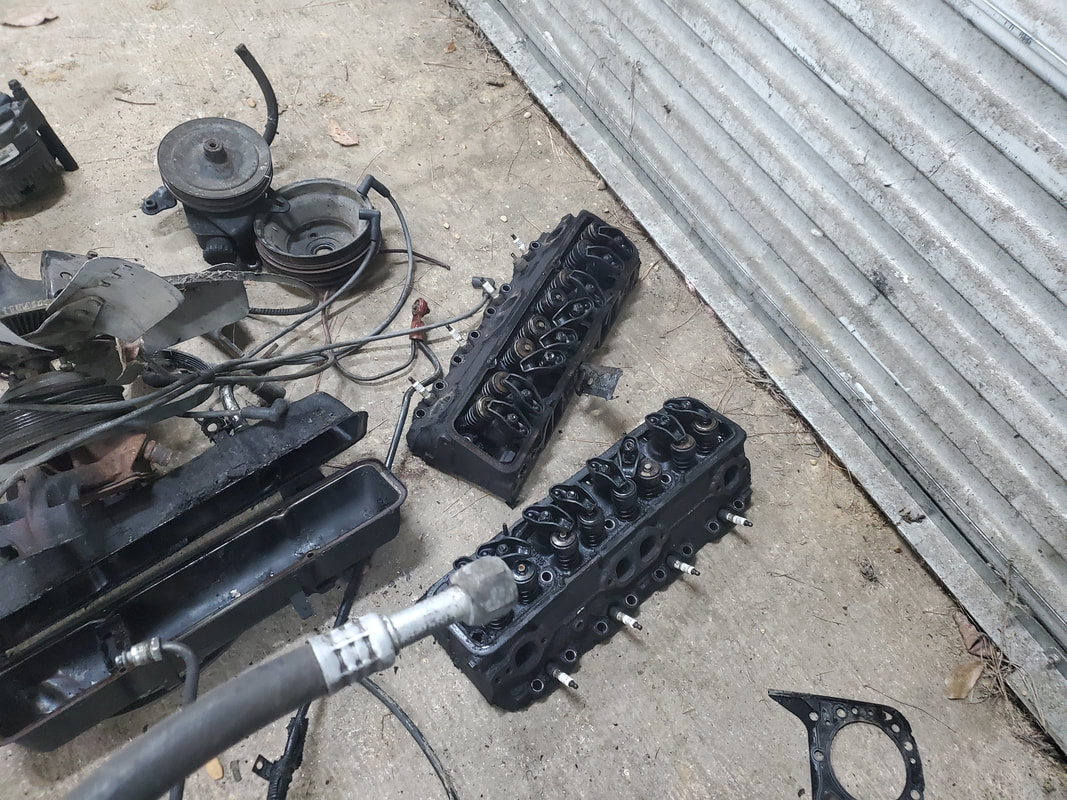 Heads and other parts pulled from engine. Even though I don't need the distributor due to having one for the Elco, I'll definitely be keeping this unit as it's a standard HEI dizzy for SBC engines. We have another engine in the garage that is a long block, needing an intake and as such could use the distributor. In fact, I could use the spread bore intake I just pulled off this engine and an adapter to allow me to use the square bore Edelbrock carburetor that I typically use for that engine as well. I just need to pull the harmonic balancer and I'll have everything I need to change over the Elco's engine and get it closer to completion, even if the rest of the car is not complete yet. At this point there isn't much left in the interior of the van to remove before I can consider this thing empty. I just had to remove the rear HVAC box and the trim panel on the sliding door. In order to remove the HVAC box I had to slide under the van at the left rear corner to disconnect the bolt that held the double AC line. Since the box was already disconnected, once the tube connection was free, the HVAC box was free. Looking at the assembly, I'll have to try and remove the entire HVAC line in order to be able to use this assembly on the 46 Ford, much less any other HVAC system. We'll see. There are aftermarket systems out there that may very well end up being the better solution than to try and make this stuff fit and spend more time, and probably just as much money, to do so. I could just buy the aftermarket shit and just make the AC lines from kit to connect this hardware and still spend the same amount of money and lesser time. We'll see.  Rear interior of van after removal of rear HVAC box. Nothing else is left but the sliding door's panel. 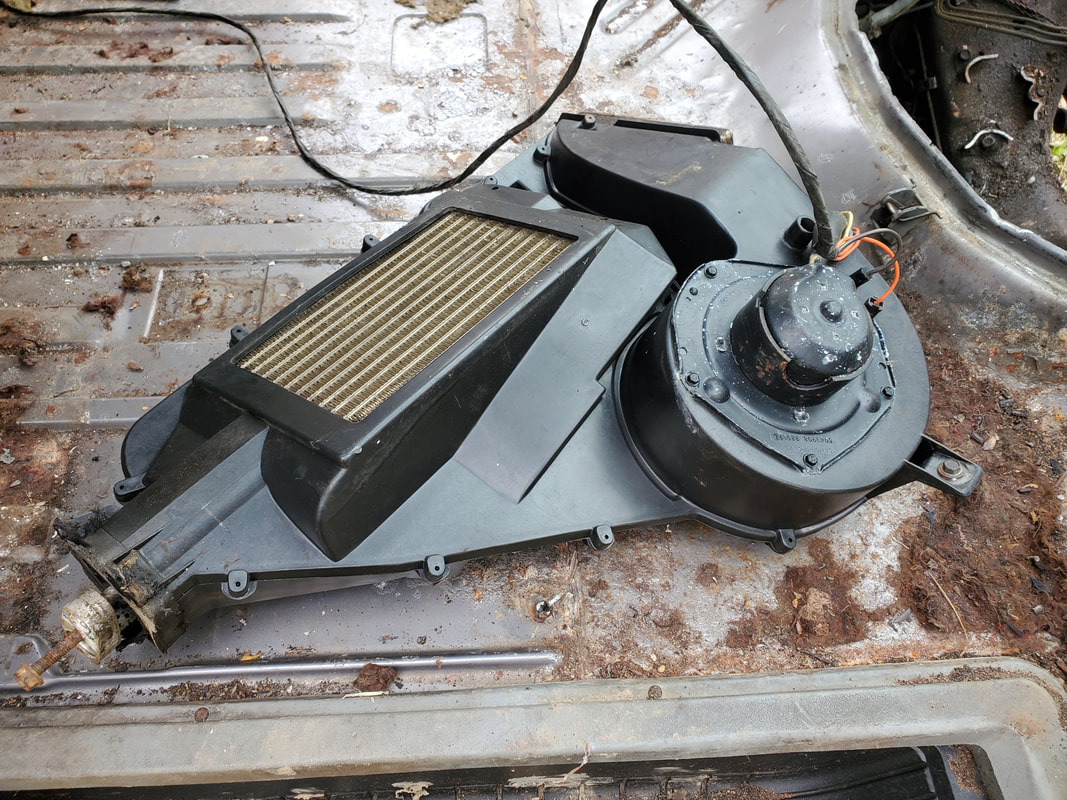 Rear HVAC box after removing from the mount and the AC line. With the sliding door being the only thing left to work on, I decided to turn my attention to a few other things, just to try and clear up other loose ends on the body since my plan was to remove the body from the frame. I pulled the running boards on both sides since I had already disconnected the front portion of each running board when I pulled the fenders off. The running boards were held in place with simple 7/16" bolts in a more "makeshift" manner so it wasn't like it was a super professional installation. I most likely won't even try to sell this stuff versus just scrapping this shit. 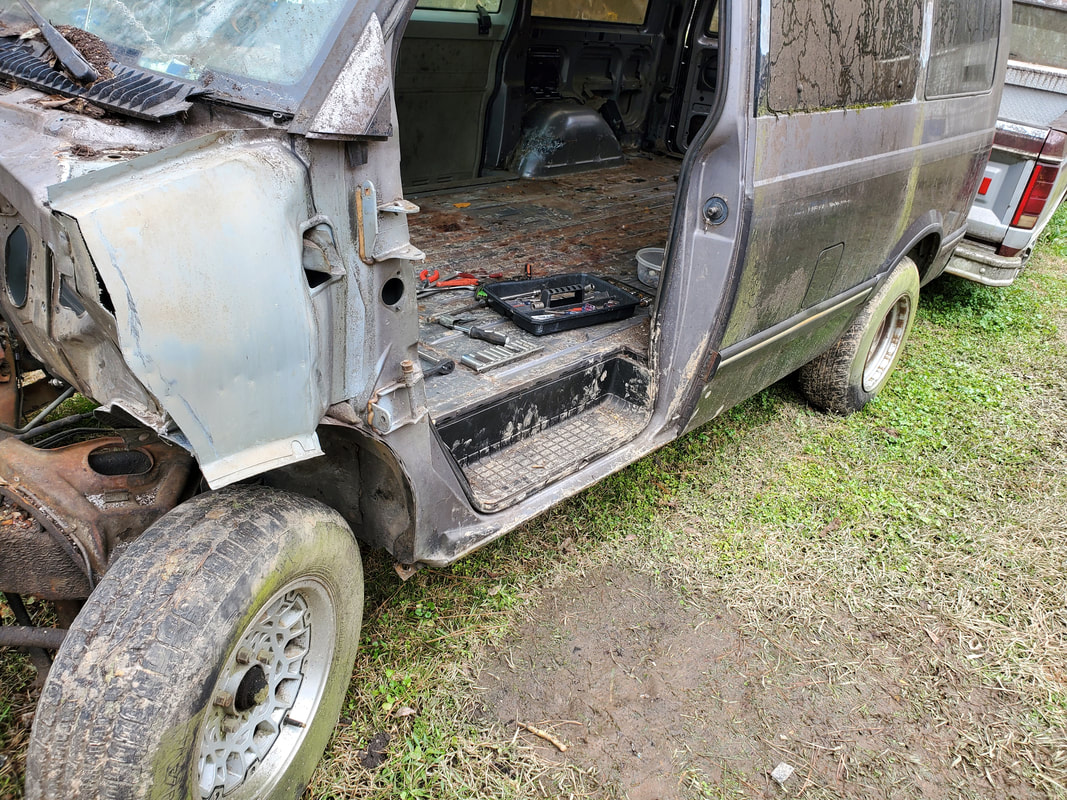 Driver's side of the van after removing running board. 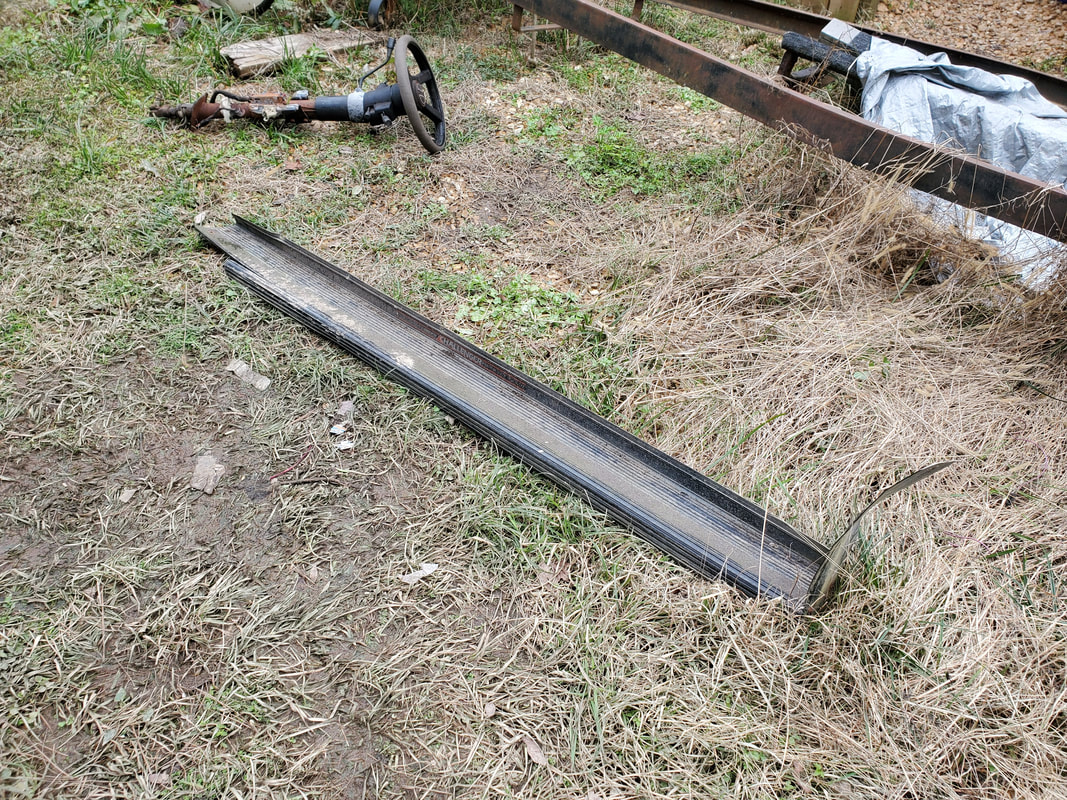 Driver's side running board is too ragged to save anyway. 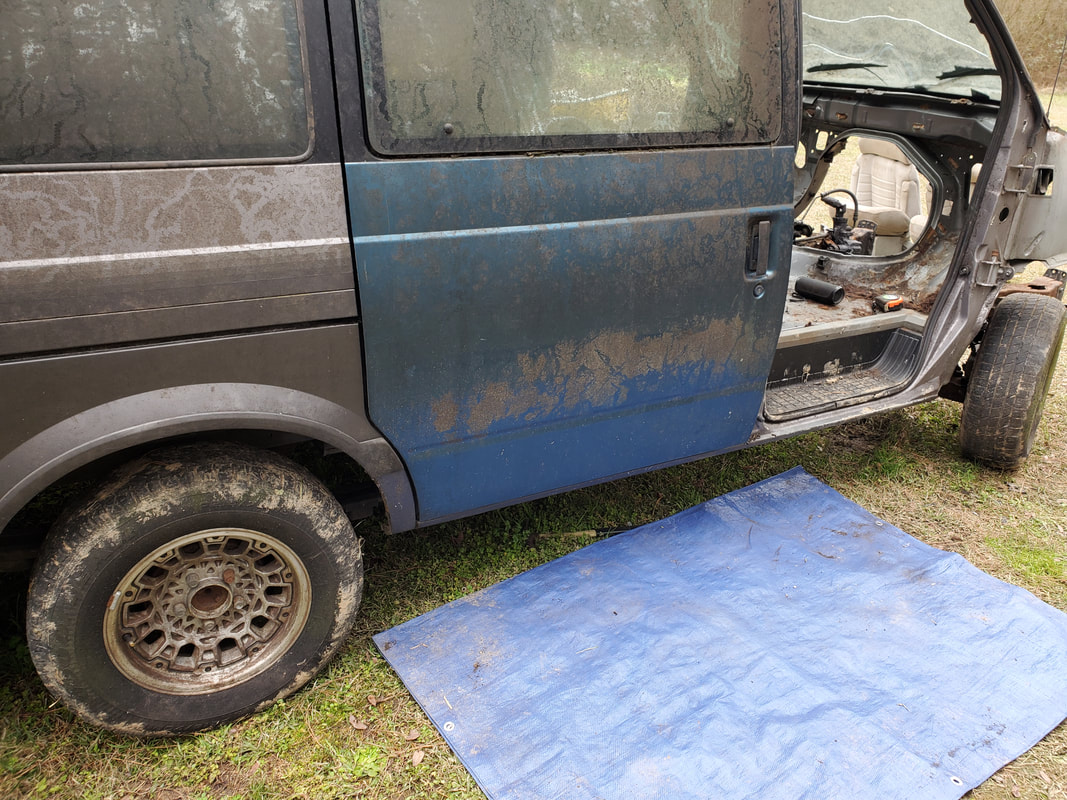 And there's the passenger side of the van after removing the running board. 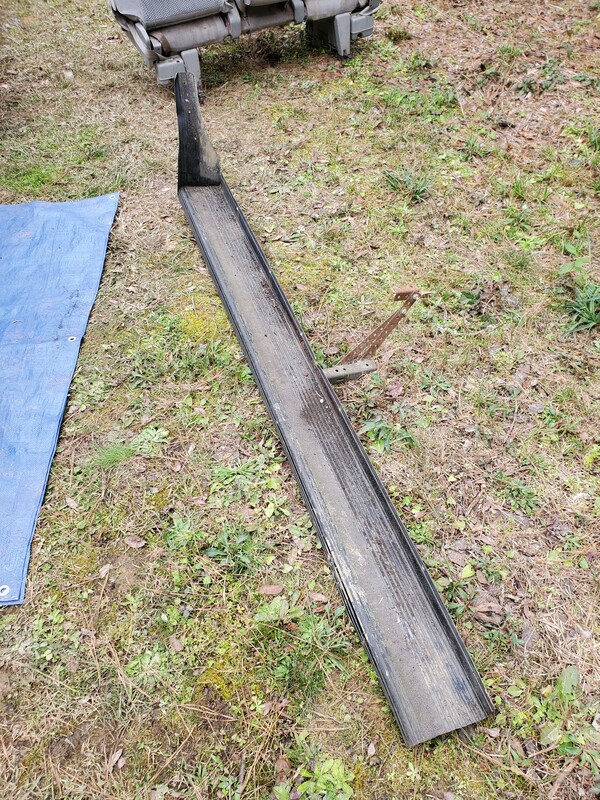 Even though the passenger side isn't as bad, one running board is pretty much useless, it's got to be a matched set to be of value. Now here's where things get sticky. My original plan was to pull the van body from the frame and use the frame for the 51 Chevy panel truck build. I wanted to look at the frame to see where the body mounts were in preparation to pull the body or at least get the bolts free so the body can be pulled later. At the same time I wanted to look at the AC line to see what it would take to get it removed as well, if I want to be able to use the rear HVAC box. After looking at everything I found that the van is a semi-unibody. The front suspension and K-member are part of a subframe that is bolted to the van's body, which from the firewall back, is a unibody. Even if I removed the front subframe, the van would still be a complete body/frame setup with the rear suspension and rear end attached. What this means is the body is going to be permanently rolling. I even visited the idea of using the front subframe on the 51 Chevy but the dimensions of the 51's frame and the dimensions of the van's subframe are way off. It would take too much fab work to attach the van's subframe to the 51's frame. 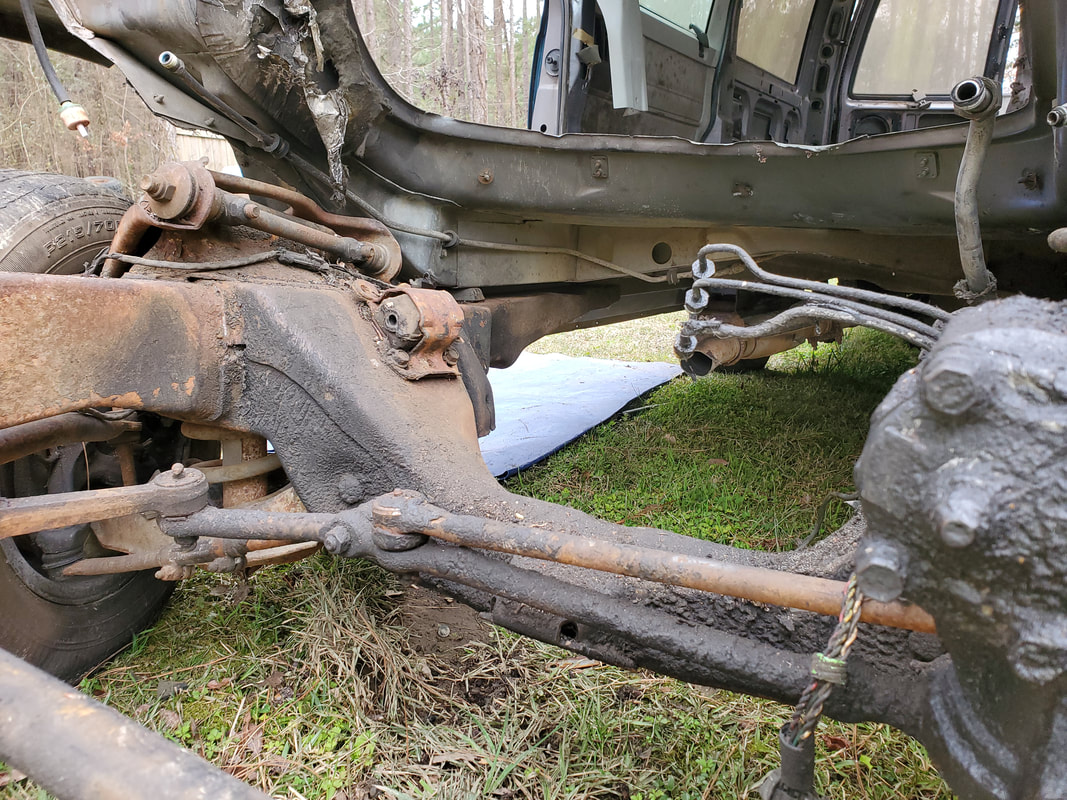 Shot of the front subframe/K-member showing how it's attached to the front of the van body just rear of the firewall. 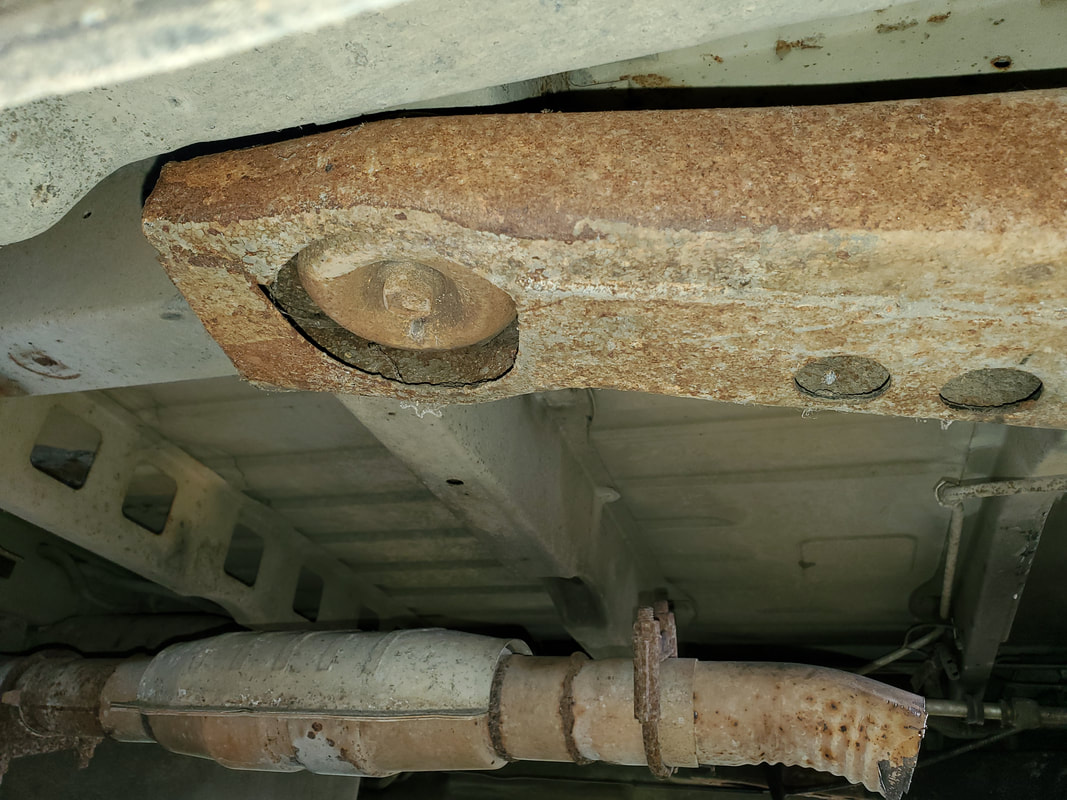 The rear most part of the front subframe where it bolts up to the van's unibody. 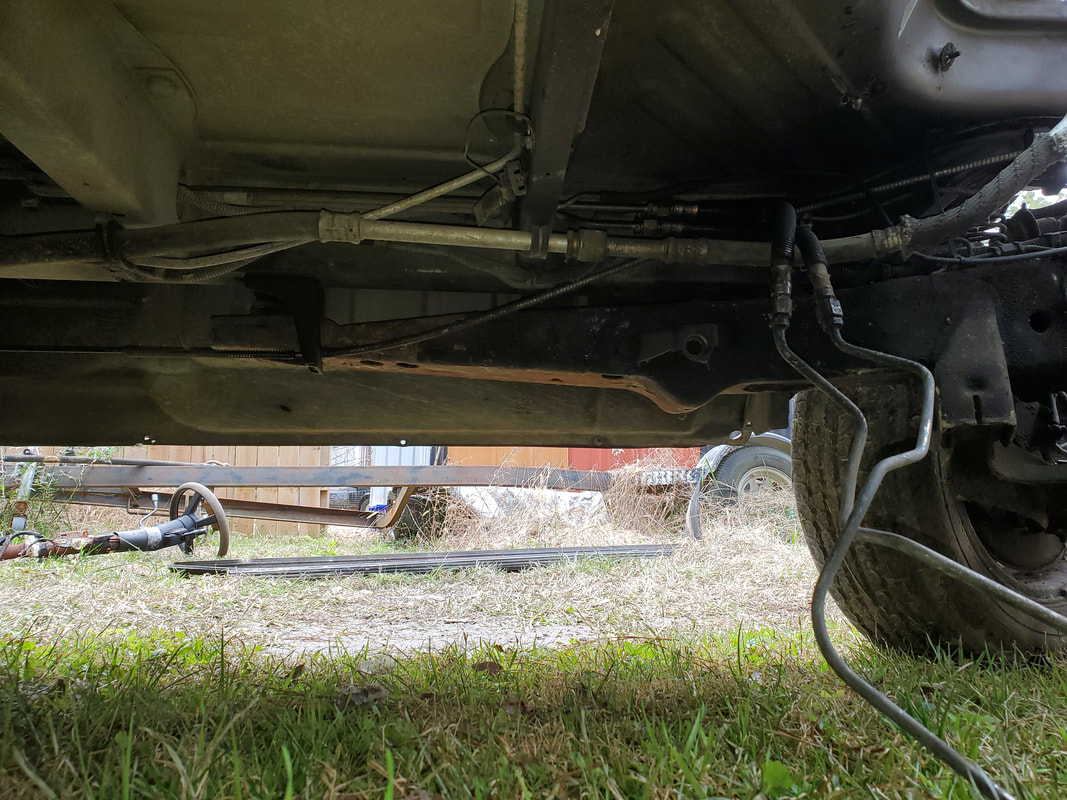 Another angle to the rear most points of the front subframe showing how its attached to the van's subframe. While this might seem like a major setback, it really isn't. What it means is I won't have to worry about trying to build a foundation to set the van's body on for the doghouse build. It means all I have to do is just roll the body over to the build site where I want to set the doghouse up and just build the thing out, it will sit on all four wheels just like the car chicken coops. It also means that this unit can be easily moved if we ever decided upon relocating elsewhere and wanted to be able to take this "outbuilding" with us. As for the 51 Chevy build, this puts me back at one of the old plans I had before, which was to use the S10 as a donor chassis for that build, all the way up to even using the S10's powertrain (after modification of course) to power the truck. This would obviously mean I'd have to remove major parts of the S10 like the bed and cab, along with the front clip. I could technically leave the powertrain and exhaust in place and just drop the 51 Chevy body on the frame and secure everything then remove the other hardware like unnecessary wiring and hoses. With the way I've been chopping cars, I could probably get such a chop done pretty fast. I'd hate to chop this truck as it's a perfectly good running truck. The only way I'd refrain from this is to find another S10 rolling chassis and use it for the build. I do have another V8 engine and a transmission that can be donated to the build, so this is an option. I would also have to come up with a viable application for the S10 as well that would warrant me saving this truck. There are several ways these builds can go but we won't know until we get close to that point. In the meantime, the minivan doghouse needs to get built. With the removal of the interior trim panels and other miscellaneous components I finally made my way to the twin rear doors. For unknown reasons I was unable to open the rear doors even with the key. I figured that if I could remove the interior panels on the doors I could reach inside and work the linkages to open the doors that way. The panels on these two doors were actually two parts, with the plastic trim panel that covers the outer edges of the door and around the window while the main section of the door (where the linkages are) is covered by an upholstery panel that's separate. After removing the plastic panel, the middle panel was easily pulled off. With the internals of the door exposed I was able to work the linkages and get the right door open. The left door was actually fine, as I was able to open it like normal.  Rear doors opened after removing trim panels and center upholstery to access the linkages for the door. I continued around, removing pieces of the right rear section of interior trim. The panel on the right side is actually two pieces unlike the left side which was one piece. This is due to the sliding door and the panel covering just the door section. The rear most panel came off separately. The arm rests and other small panels came off first, then the trim panel. I also removed the panel next to the door holding the speaker. As an extra, I pulled the speakers from the rear doors, adding all three speakers to the batch of speakers in the storage trailer.  Arm rests removed, among the center panel from the right rear door.  Trim panel pulled free from side of van. With the panels removed, it was time for another cleanup of all the panels and pieces that were disassembled. Other things like the myriad bolts and screws were gathered up as well. I won't be able to remove the intermediate panel around the sliding door until I survey how the door goes together. I do want to remove the door, even temporarily, to facilitate an easy removal of the shell from the frame. Worst case will have to cut the panel where it wraps around the top of the slide. Either way I will remove the upholstery panel from the sliding door in order to reach the linkage to open that door. Even with me keeping the door, the upholstery needs to come off since upholstery will do nothing but catch odors and end up being disgusting after a while with dogs bouncing around inside. 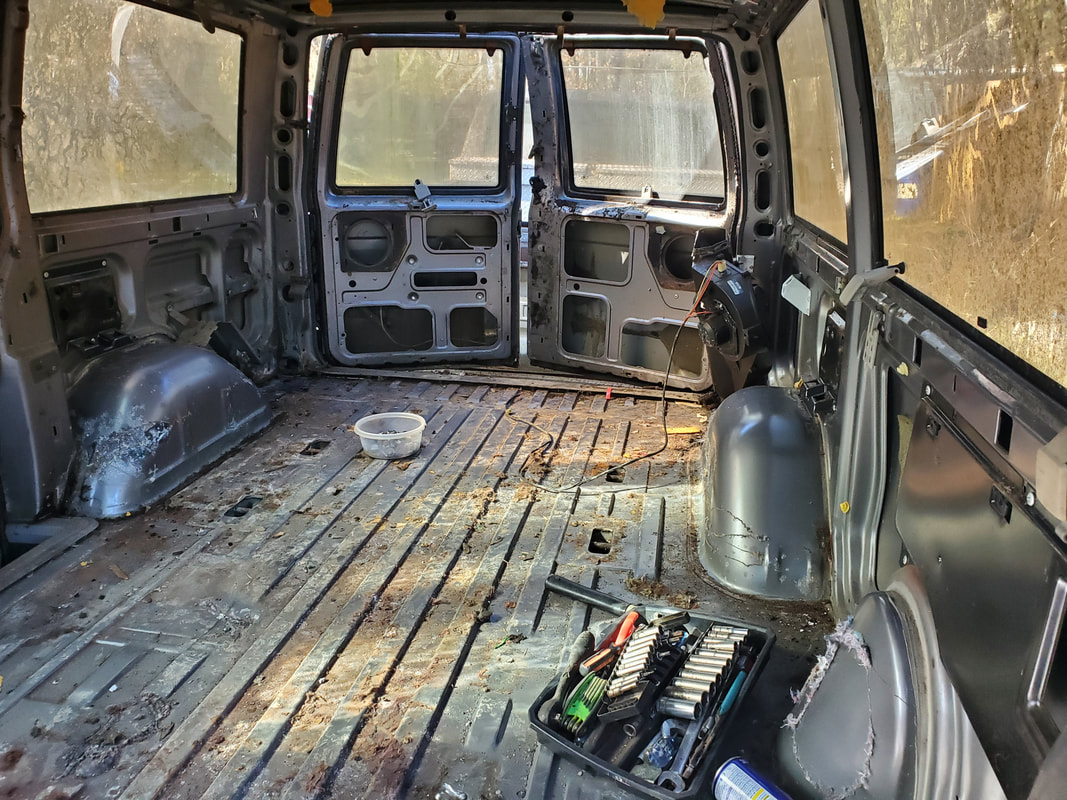 Most of the rear is gutted.  All that's left is the sliding door and its associated paneling. I really want to wrap up the chop of this van since I need to sort through the parts I removed in order to get those smaller parts listed on EBay while sorting through the larger parts that would be listed on FB Marketplace. Whatever is left would be scrapped of disposed of. I would definitely want to part with the larger and more sensitive stuff like the seats since letting these things get rained on continuously, or even sit under cover in the moist outdoors will eventually compromise these items. Once I get the sliding door taken care of the last things to address are the removal of the rear HVAC box and the body bolts holding the shell to the frame. I do want to try and remove the rear doors but if the hinges are like the front doors, I'll have to leave them be as I don't want to destroy the hinges trying to remove the doors. The rear bumper will come off as well but since its attached to the frame, is not necessary to remove in order to pull the body from the frame. |
