|
As we get into the advanced stages of the chop job on the minivan, I focus my energies on the upholstery and other accents in the van's interior. This includes the headliner, carpet, underlayment and the spare material that was stored in the van with the intent on replacing the old material. The overhead light assembly, along with the rest of the seats will have to come out. But right now, the overhead light panel assembly. This piece is held in by a couple bolts then slid forward to release the assembly from its mountings in the van's ceiling. With the removal of the wires for the loads, this panel was out pretty fast. 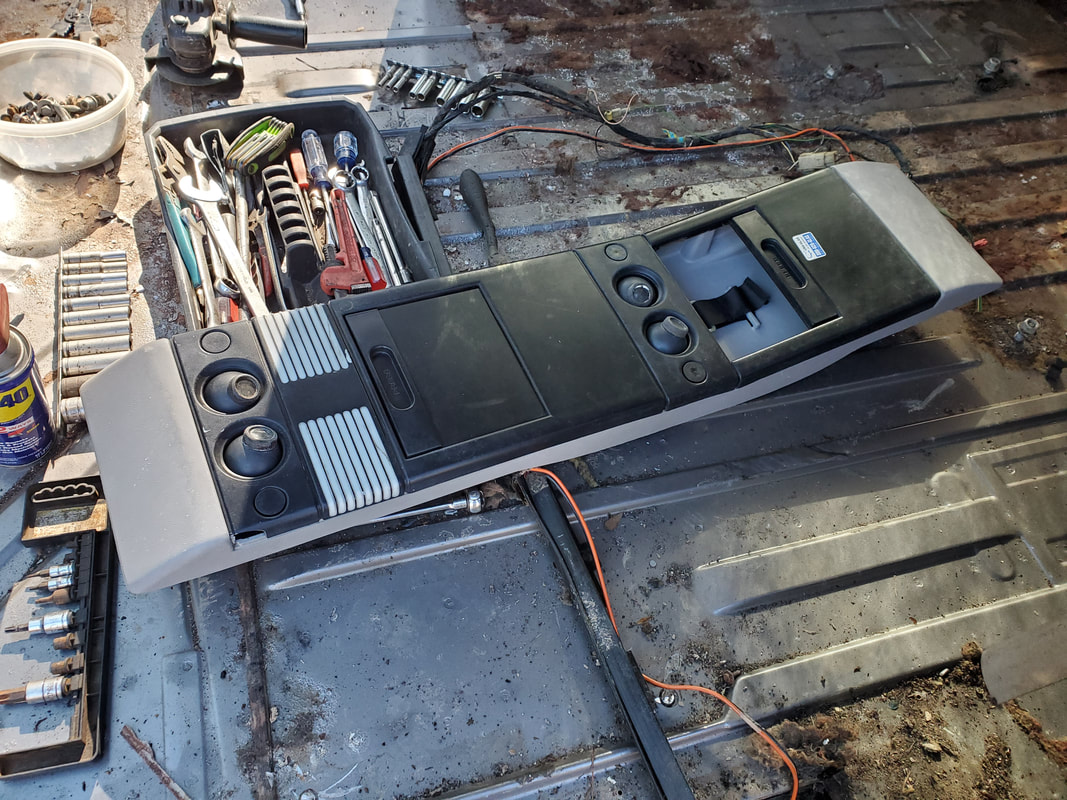 Overhead light assembly removed from ceiling. 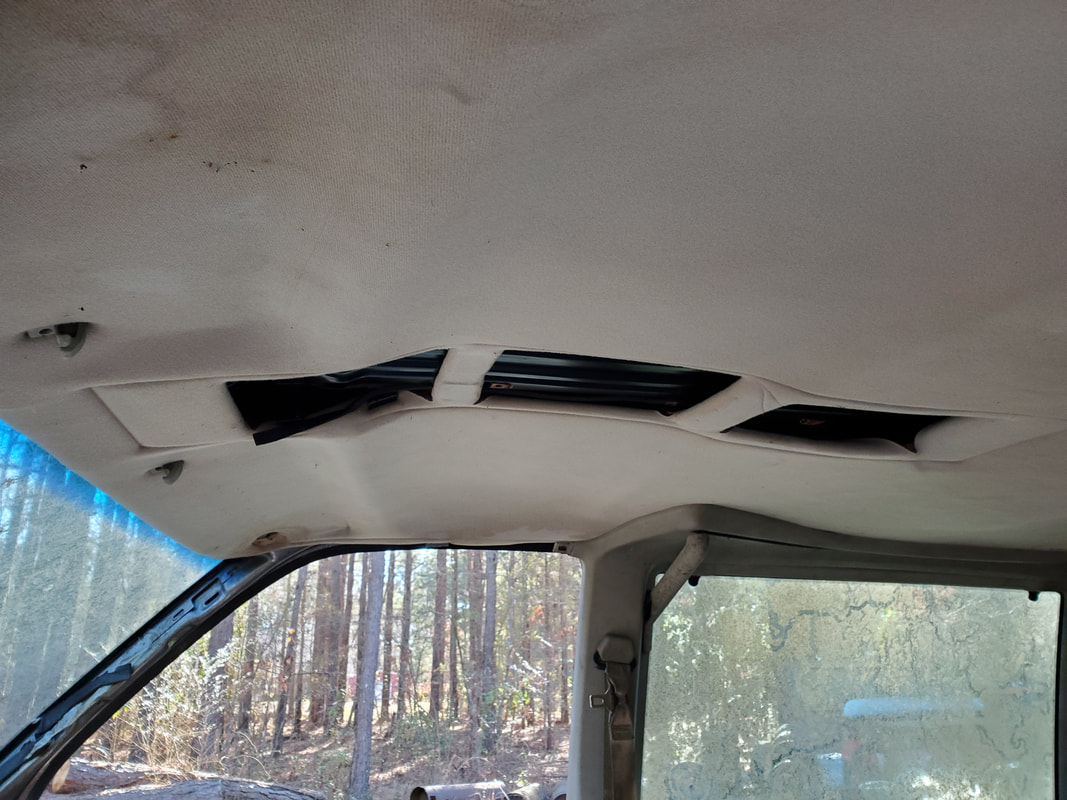 The area vacated by the light assembly. Other than the sun visors and associated clips, I can start pulling the headliner free as well. With the overhead light assembly freed, I pulled the sun visors and their associated clips. I also started pulling the bolts out for the moldings on the sides going towards the back of the van. I needed to move these panels out of the way in order to be able to pull the headliner free without having to just destroy everything. Don't forget, some of this stuff we are trying to resell. I also removed the captain's chairs from the interior as they were in the way. I will start on the driver's side trim panels next. 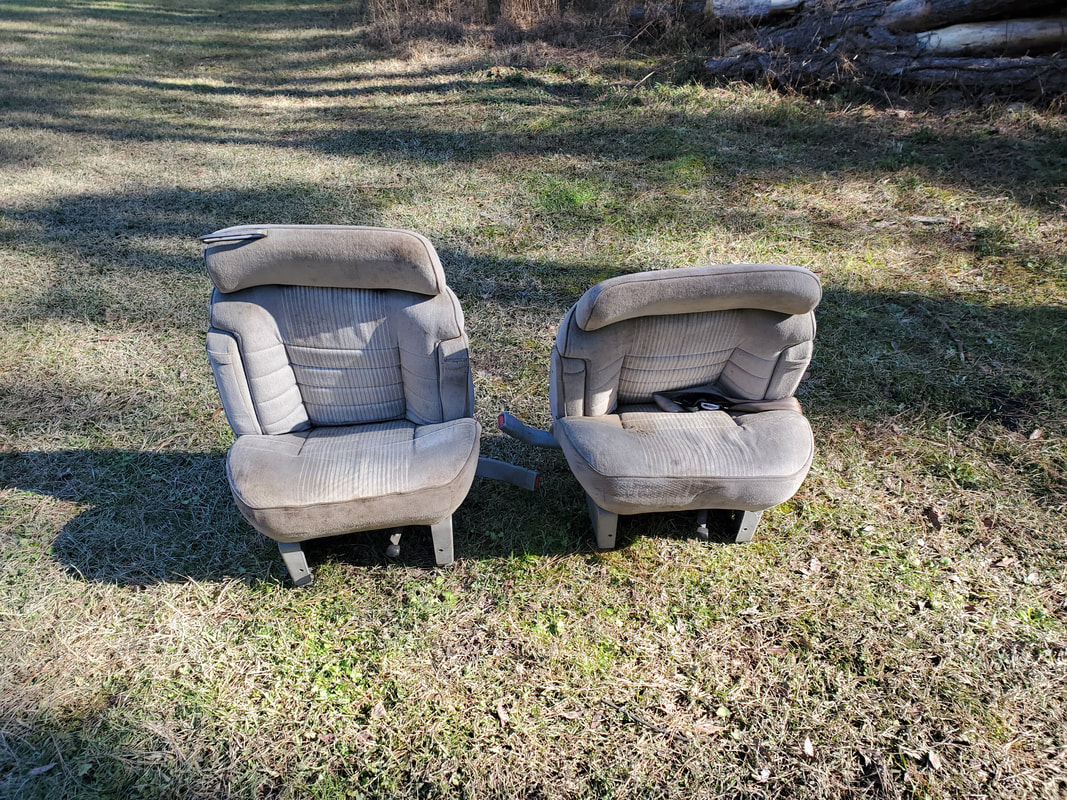 The pair of captain's chairs removed from the van. 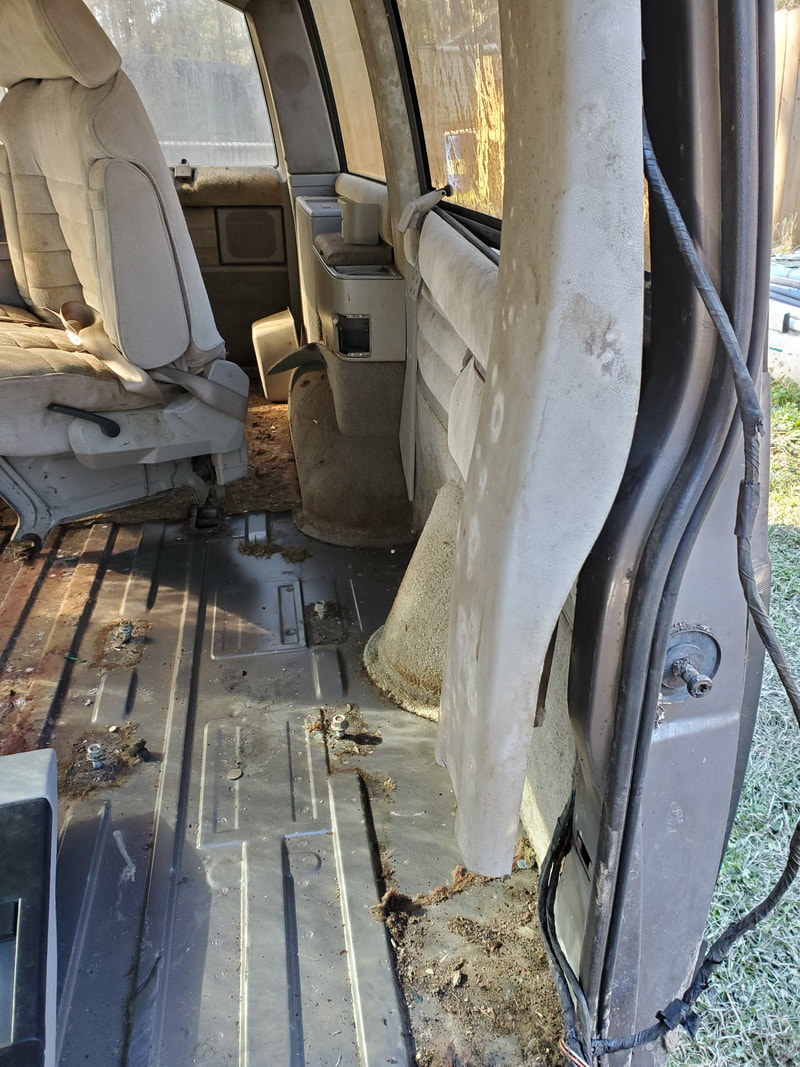 Pulling driver's side trim panel away. This panel will extend all the way to the back of the van. 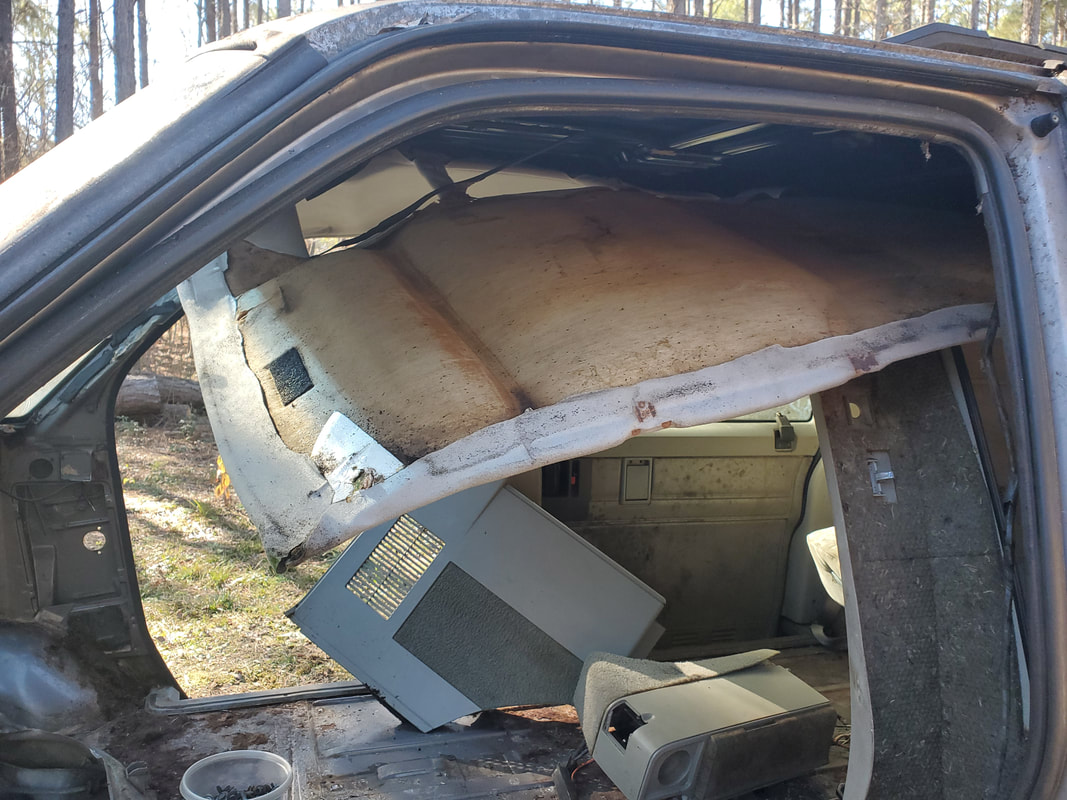 Pulling the headliner own after freeing up the areas by pulling away some of the trim panels on the sides. 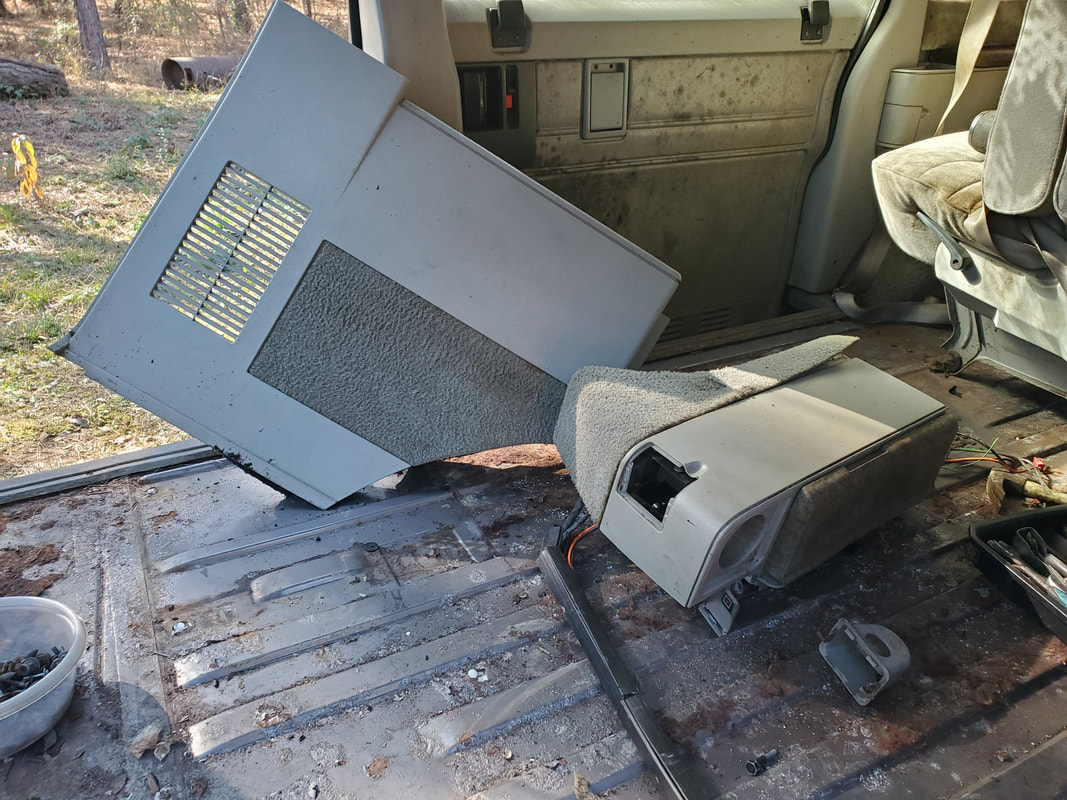 Center console and trim panels pulled free for removal. 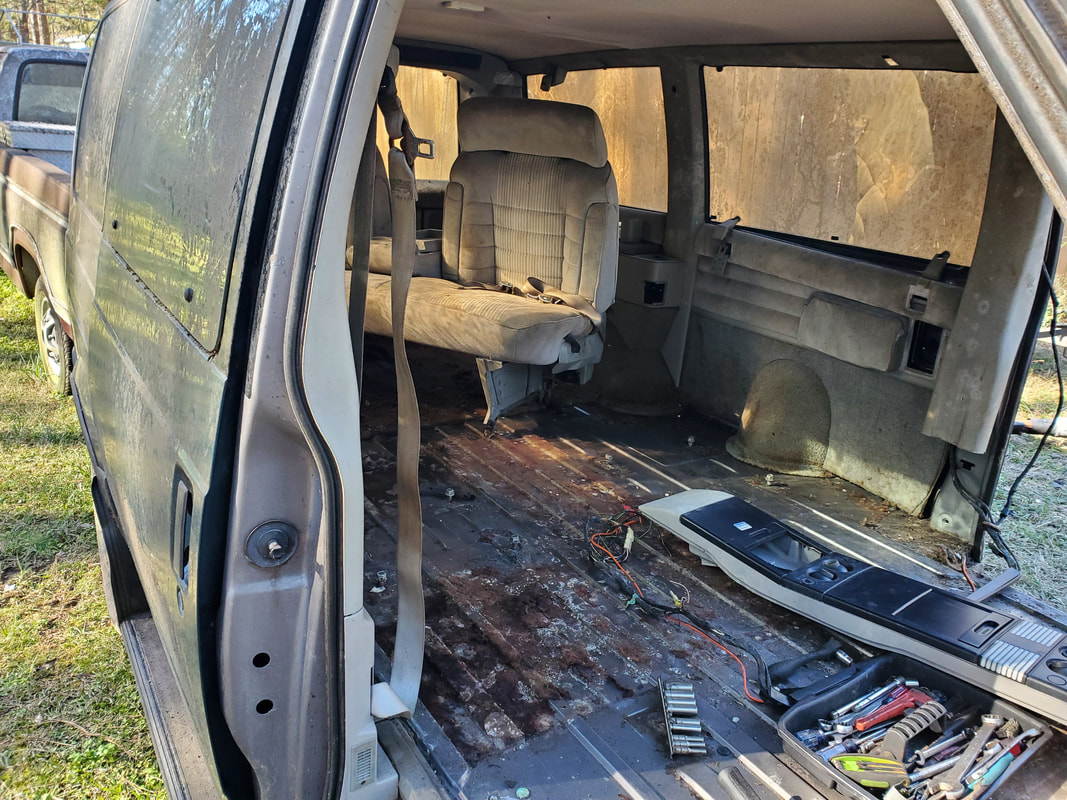 Another angle to the interior of the van after removing multiple items. After pulling away the trim panels, I was able to remove the entire headliner panel from front to back. I did have to rip the panel about halfway, taking time to remove the rear interior light fixture. This panel will be recycled for use in the 46 Ford as it's a small fixture that will fit nicely in the Ford's interior, and still be able to be converted to LED with an aftermarket bulb or COB LED. After removing the headliner I also managed to get the trim panels pulled away all the way to the back, including the rear HVAC vent panel and ductwork, which also held the left rear speaker. I saved the speaker, putting it in with our stash of speakers for future use, probably in the 46 Ford. I won't be using the vent panel assembly but will need to look at the HVAC assembly again. Until I pull the AC lines free underneath, the HVAC box will have to remain in place. The driver's side trim panel did come out though. Along with the rear bench and the rest of the carpet/underlayment, the interior is almost cleared. 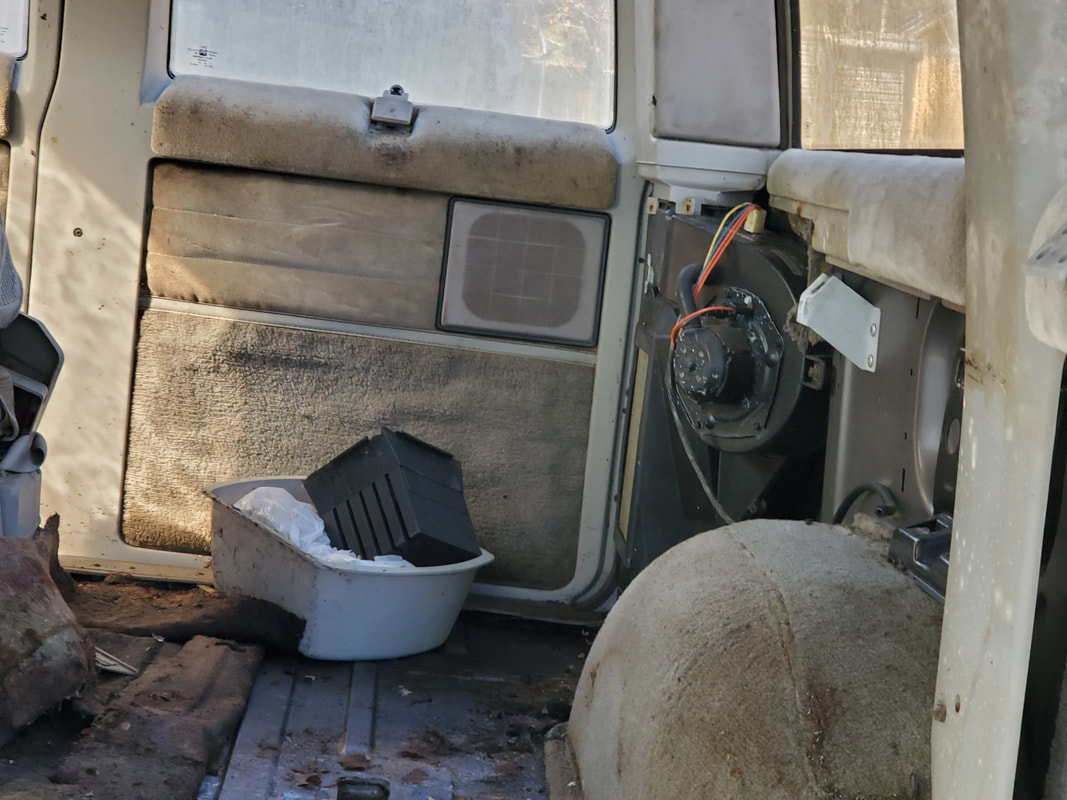 Rear section exposing the rear HVAC box, note to the far left the underlayment on the floor and the edge of the rear bench seat. 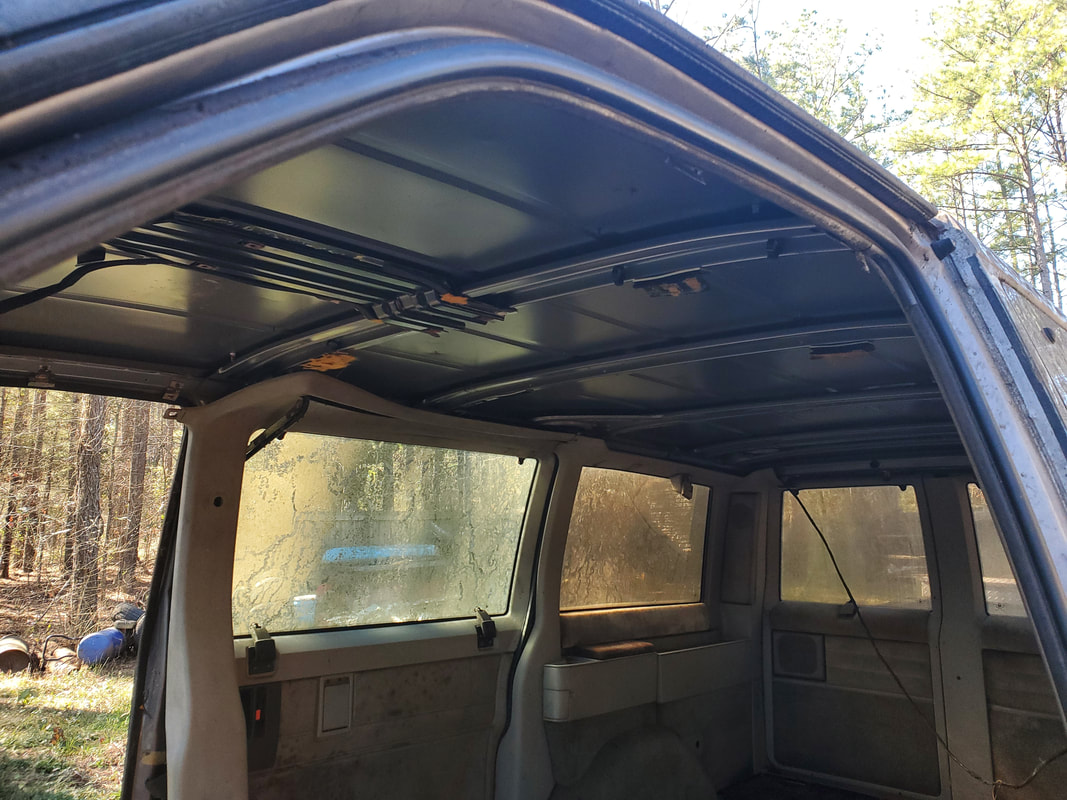 Interior with cleared ceiling, not much left... 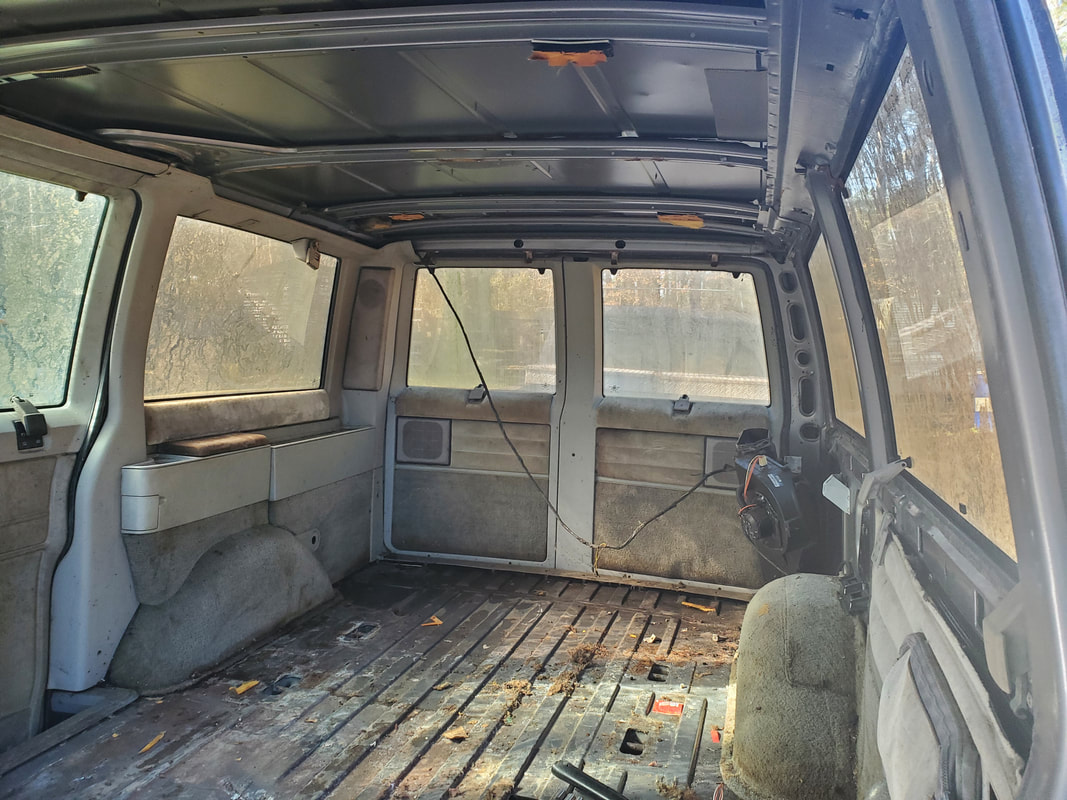 Complete view of interior after removing all loose materials, including the driver's side trim panel. As stated before, I will need to go under the van to disconnect the AC lines in order to get the rear HVAC box removed. All other mountings are removed as are the wire connections. After getting the HVAC box out, I have to try and get the rear doors and sliding door open, mainly because I want to get them removed in order to lighten the overall weight of the shell. I did plan on more than likely putting the two front doors back on, after gutting them of everything other than the glass. I may even remove the glass if I can bring out some sheet metal that's large enough to cover the openings. Since the hinges are cut, I'd just weld the doors shut. Reason for this is because as much as I would love to try and sell these doors to make a couple bucks, reusing the doors as walls for the doghouse would be a lot easier than trying to fabricate all new walls from whatever other material on hand. If I do anything, I'll remove one of the middle side windows that is able to be pushed open slightly. It would be here that I would make a wall mount that would accommodate a window AC unit for the doghouse. As for the window regulators, lock solenoids and linkages and interior panels. all these components will be removed, leaving just shells. The two rear doors are the only doors that will be allowed to open and latch as normal.
0 Comments
In our advanced stages of the gutting of the minivan, I moved forward by getting the doors removed. This involved having to cut part of the hinge assembly on the bottom hinges of both doors. An odd design, GM welded both sides of each hinge to the door and the door jamb, with only a pin holding the doors together. The position of the pins makes it difficult to tap out for the bottom hinges, giving the reason for cutting the hinge half that's welded to the door jamb. By doing this, the door is still salable as the new user would just pop a pin into the door's hinge half and the hinge half on their vehicle. The top hinge I was able to cut the pin itself to get it to where it can be removed. Since the wire harnesses were pulled from the door jambs already, once the hinges were taken care of, the doors were on the ground and of site with the rest of the parts removed from the van.  Van with doors removed from both sides. 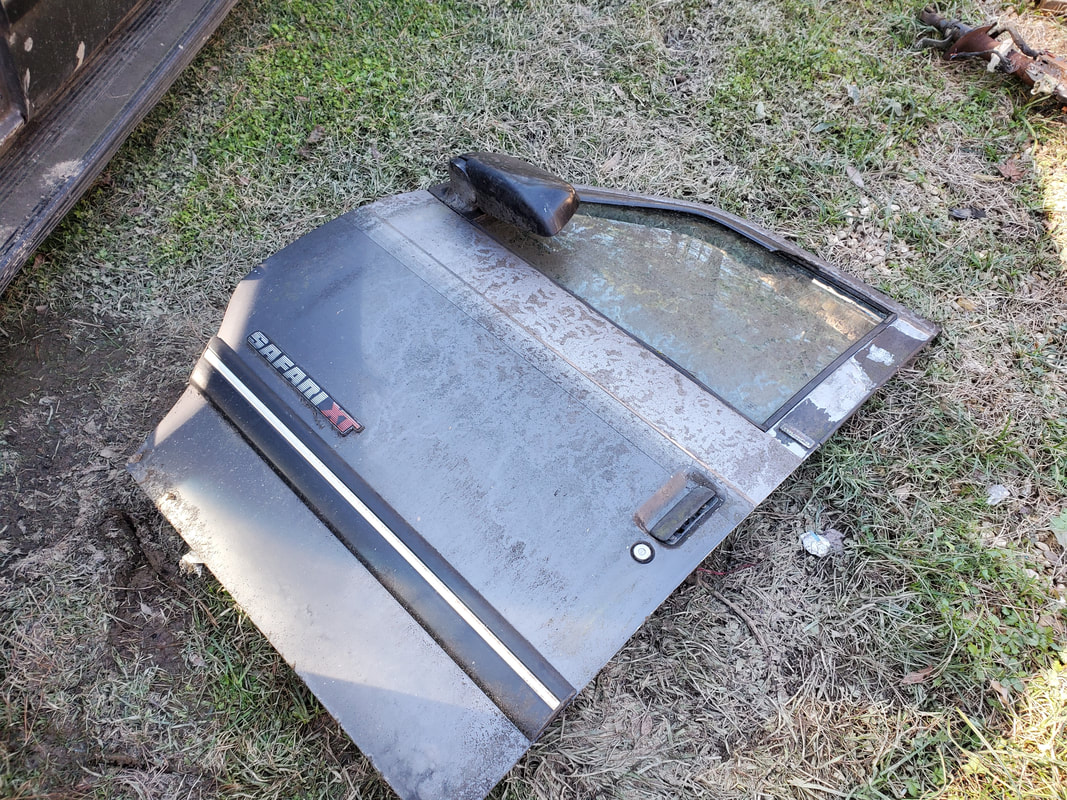 Driver's side door on the ground after cutting the hinges. 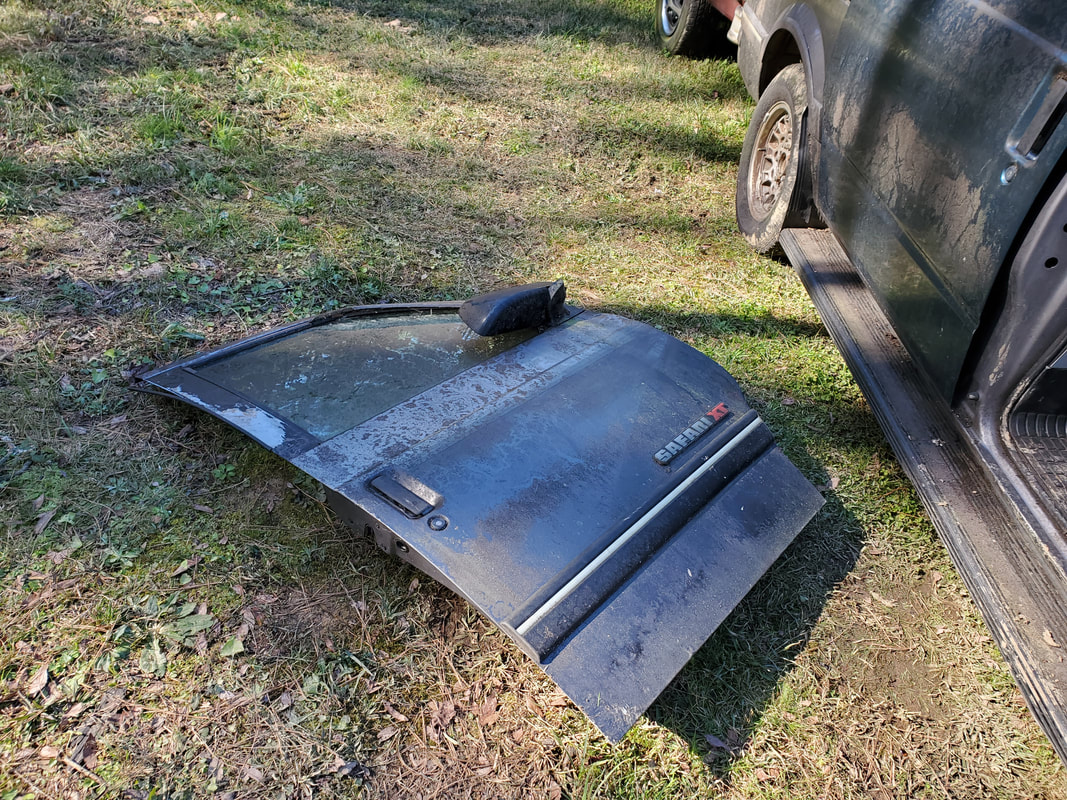 As well as the passenger side door. The next thing I attacked was the inner fender on the passenger side. With the HVAC box gone, I could safely cut into the sheet metal without risk of damaging the assembly. As with the left side, I cut as close to the firewall as possible, and also removed the frame mount so all this metal would be removed in one whole piece. With it gone it lessens the footprint of the van's shell for when it's placed on the foundation in our plans to turn this shell into a doghouse. 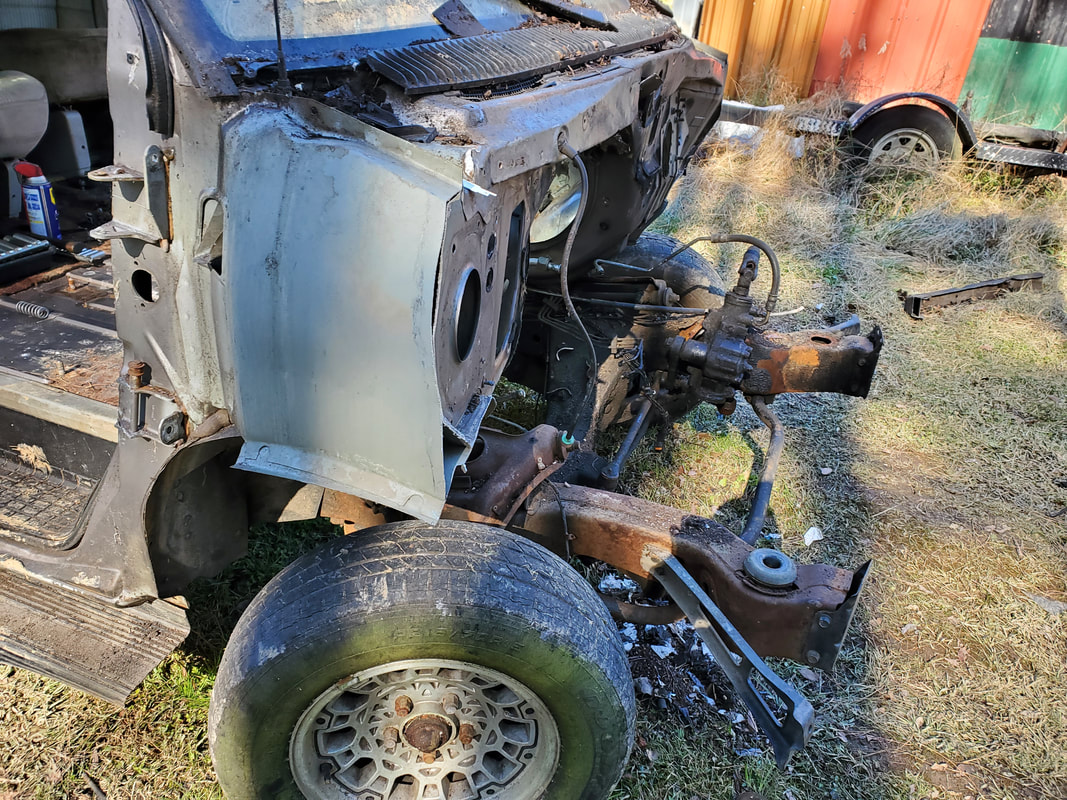 Front of van with inner fenders cut off, exposing the front section of frame rail where the engine bay was. 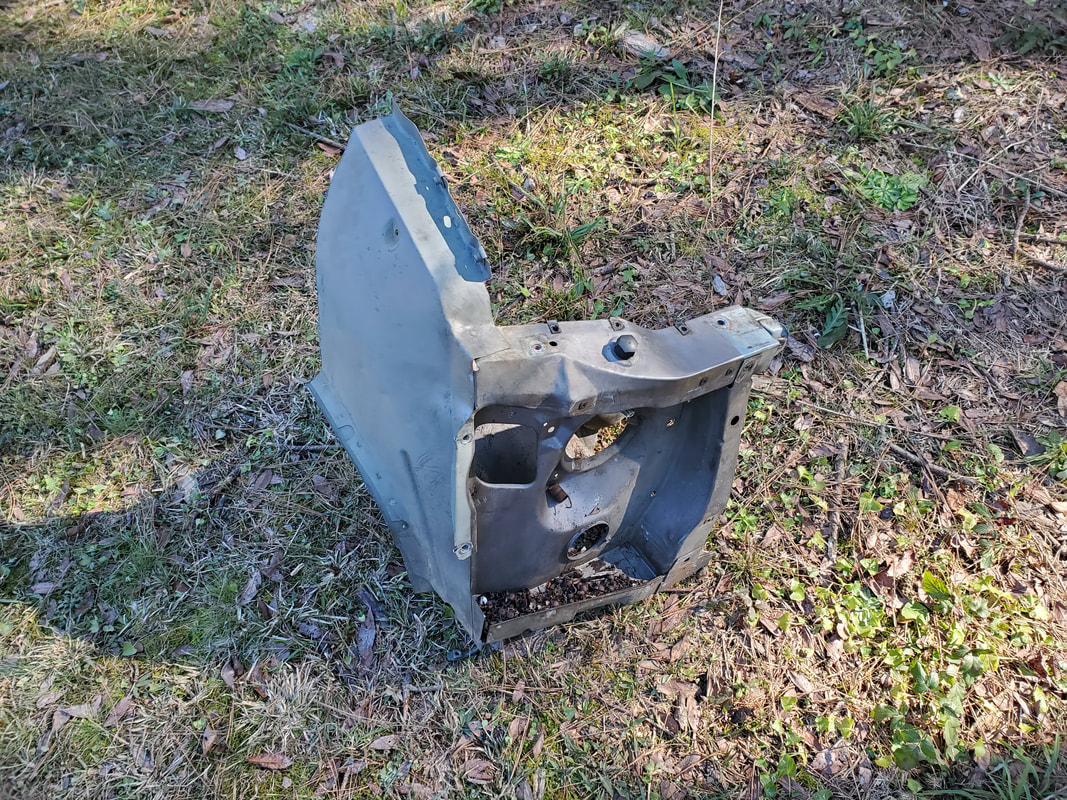 Moving back inside the cab of the van, I continued the work by cutting free any mounting tabs and other protrusions that won't be needed on the inside. This includes the steering column mount. I had to remove a couple bolts that held the assembly together with a bracket that held the brake pedal assembly but after that the saw had to come into play to cut the majority of the metal to free it from the inner firewall panel. Once this metal was out, I then cut the studs where the two front seats were mounted, as these aren't needed either and would get in the way of placing anything directly on the floor of the cab. 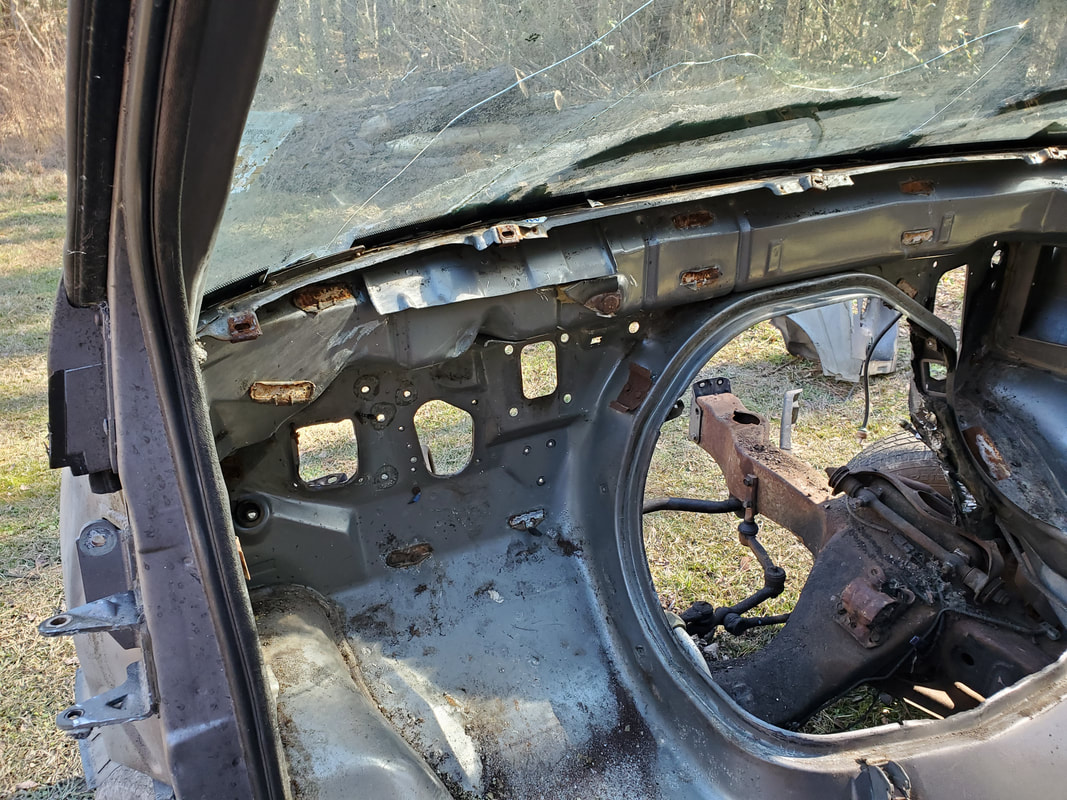 Driver's side inner firewall sans steering column mounting panel. 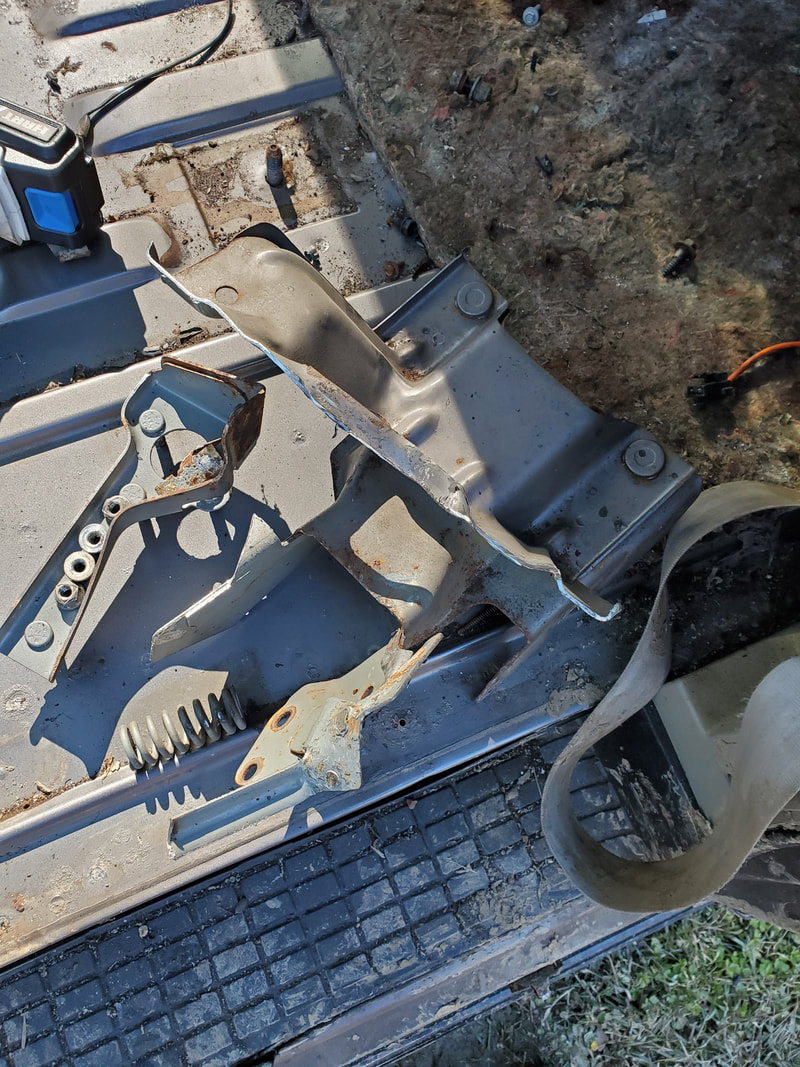 The remains of the steering column mounting panel after cutting free. With the engine bay area and the outer body in the front taken care of, the next session of work on the chopping of the van will be inside. There's a matter of cleaning up the inside, removing the old carpet and underlayment, as well as the "new" replacement carpet and underlayment, that is now mildewy and useless. The headliner will also come down as it too is icky and will need to go. Other assemblies like the overhead light/fan assemblies and center consoles and the captain's seats and rear bench seats will also have to come out. The end goal will be the complete removal of the interior panels and upholstery, along with the rear HVAC hardware, which I may most likely look at using for the 46 Ford build, depending on the fitment, as the front HVAC hardware is rather large and would most likely not fit anywhere in the car's body without taking up room otherwise needed for passenger space within. After getting the garden covered completely I turned my attention to the area by the firewood staging area, with the intent on covering the grounds from the Midway back to the actual firewood staging area. This area is important as of now since we periodically roll over this area with the wheelbarrow to collect firewood. Until we hit Spring, we'll be burning plenty of wood. Getting the area covered with gravel will make travel over the area easier and cleaner. Clean enough that we would be able to do it in slippers versus boots. 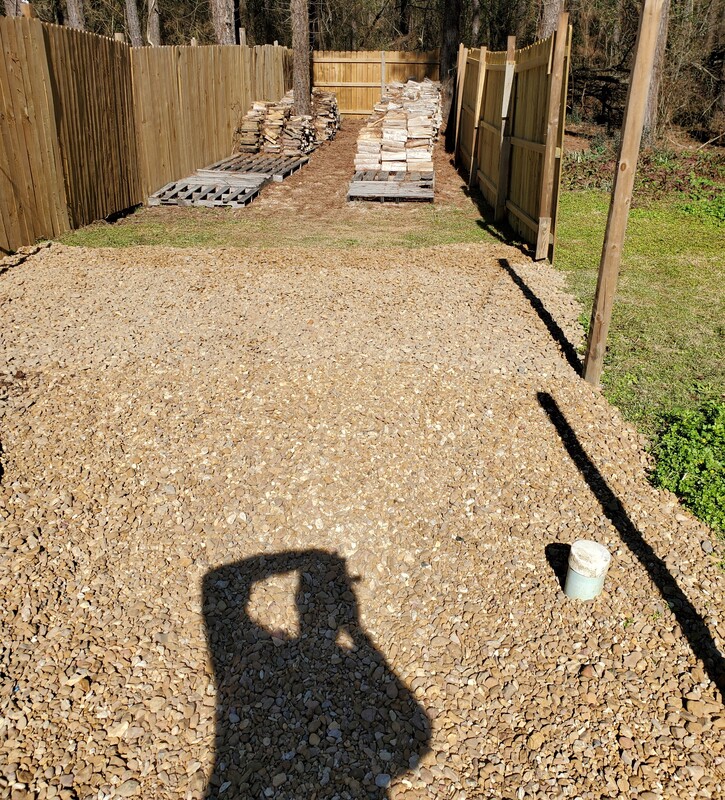 Area leading to firewood staging area covered in fresh gravel. Another good piece of news is the idea that we managed to get a settlement from the insurance from the dump truck whose rock killed the Scion's sunroof. Even though it wasn't enough to cover the cost of a replacement glass and labor to fix it, luckily replacing the piece isn't that hard and we managed to find a replacement on Ebay for slightly less than the settlement money provided. With that we had a new used glass in hand, ready to install. 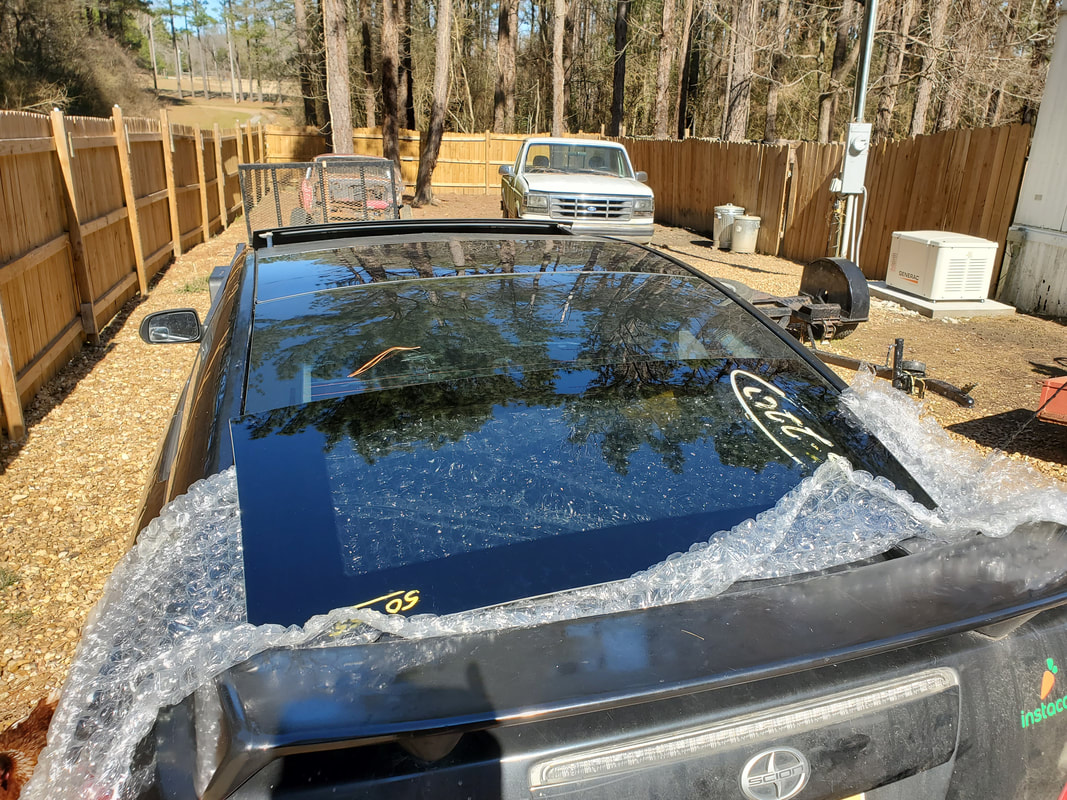 New used sunroof bought from a distant scrapyard, luckily it made it here in one piece. Replacement of the glass was pretty easy as the new glass had the frame still attached. The frame was secured with six bolts, three on each side. It didn't take long at all to open the bootleg sunroof to the spot that allowed me to remove the six bolts. I made sure to find a replacement sunroof that still had the frame on the glass since I wanted to keep our bootleg sunroof, just in case this same thing happens again. After removing the bootleg sunroof, I set down the replacement sunroof and started putting bolts in, taking time to line everything up to have the bolts centered in the holes. With all six bolts back in I cycled the sunroof slowly, making sure the glass fully closed properly, lining up all around, as well as opened up properly. With that, our sunroof replacement was complete. 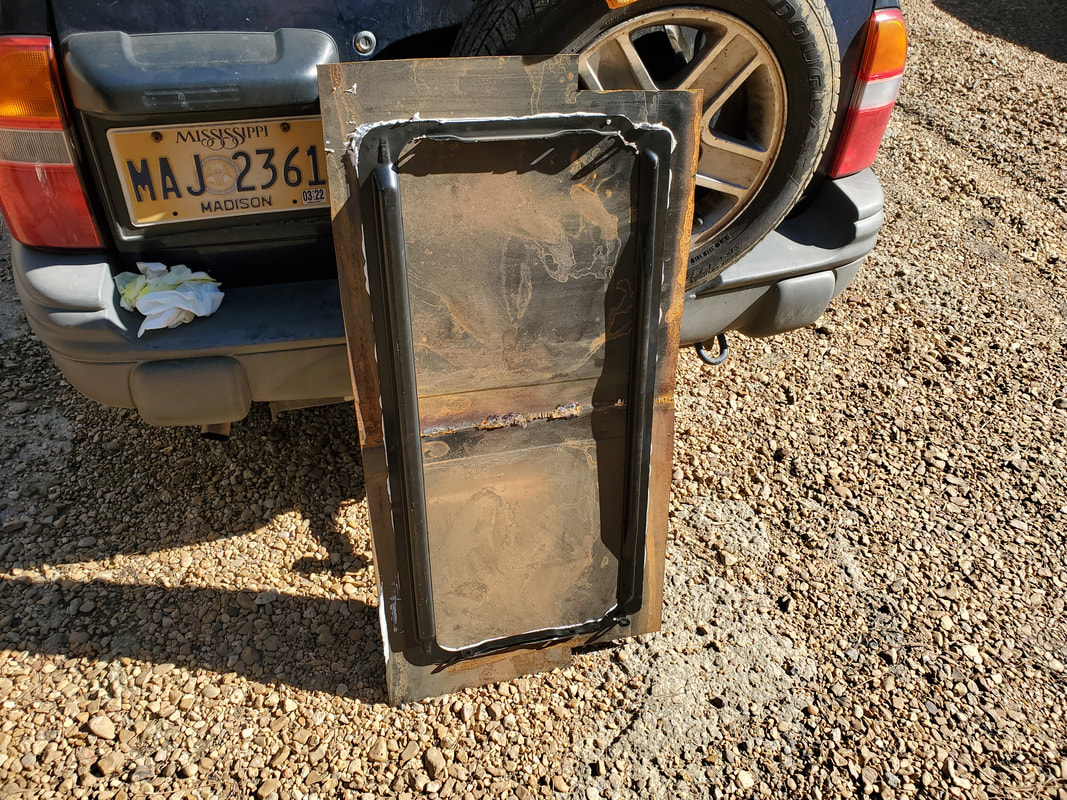 Our bootleg sunroof made from sheet metal, removed from the car's roof. This will be saved. 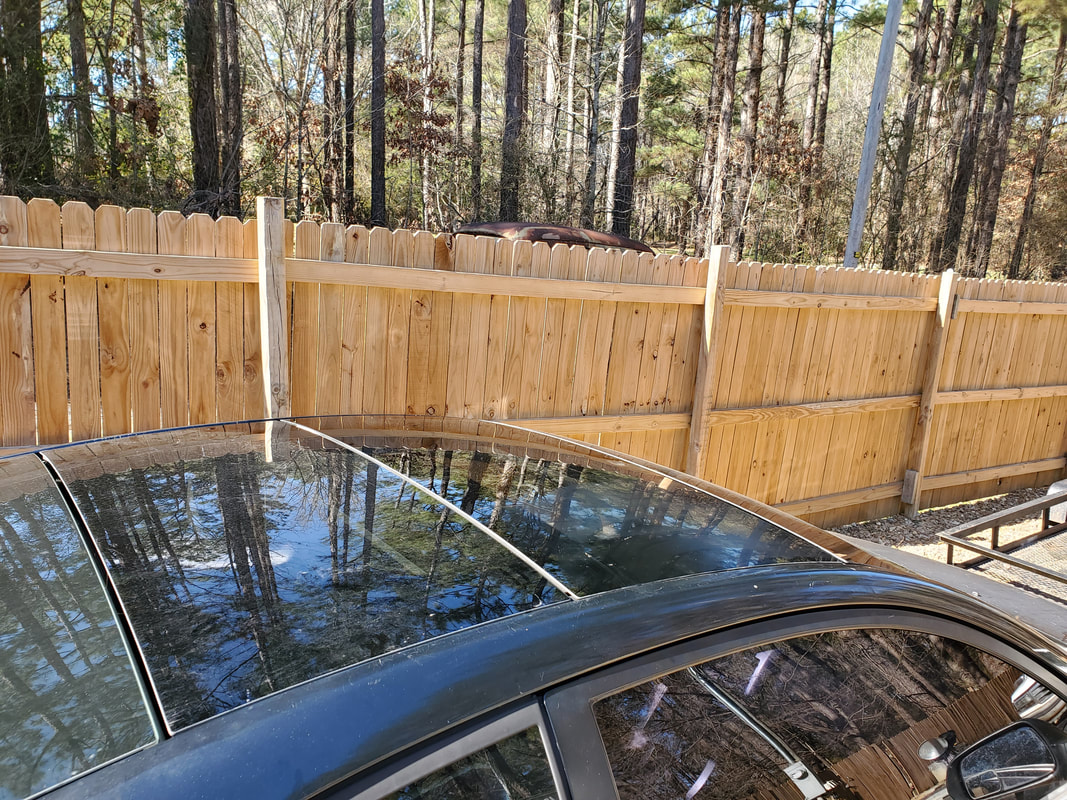 New used sunroof installed on the roof of the Scion, car's now restored back to its former glory. With those little tasks taken care of it was time to get back to the minivan stripping. I was already in the process of trying to get the dash removed from the interior. I had to remove many small screws and bolts around the dash which resulted in many other small items coming free while at the same time making the dash freer from the body. I did take time to get the gauge cluster out, along with the control panel around the radio. The radio was also removed without much fanfare. My main thing was trying to just get things off the dash as I didn't know how much stuff would need to be removed to expose the key bolts that were holding the dash in. 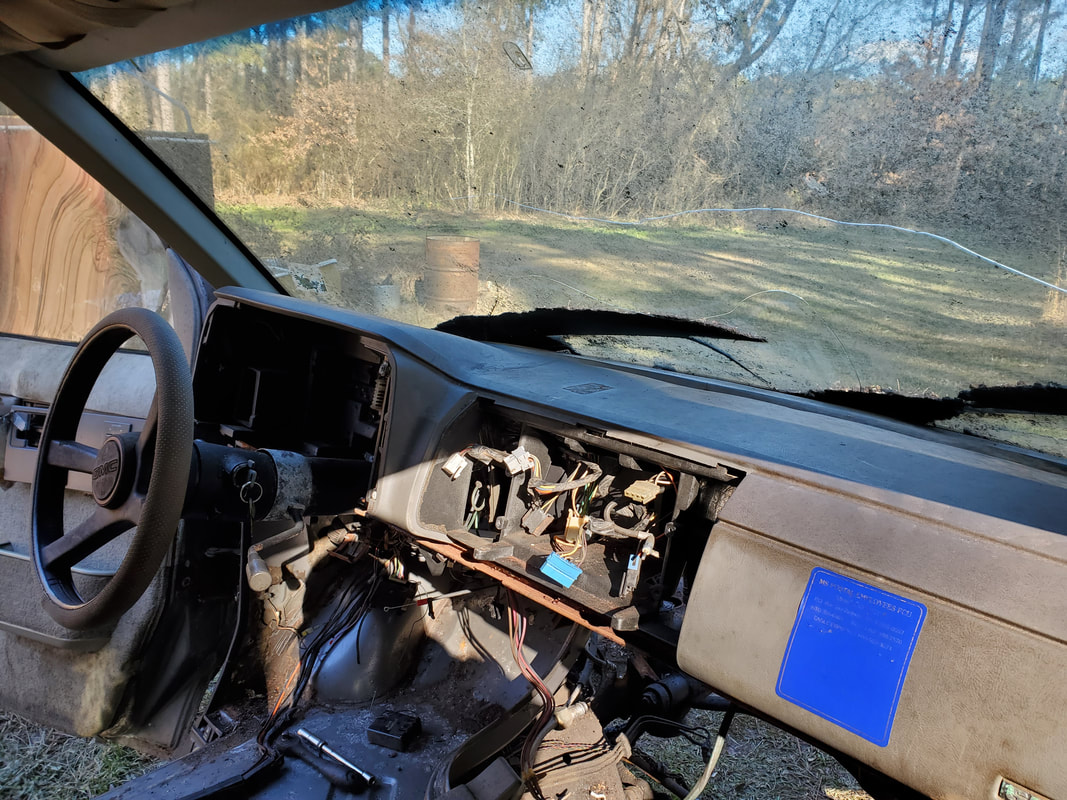 Radio and surrounding control panel removed from center dash. 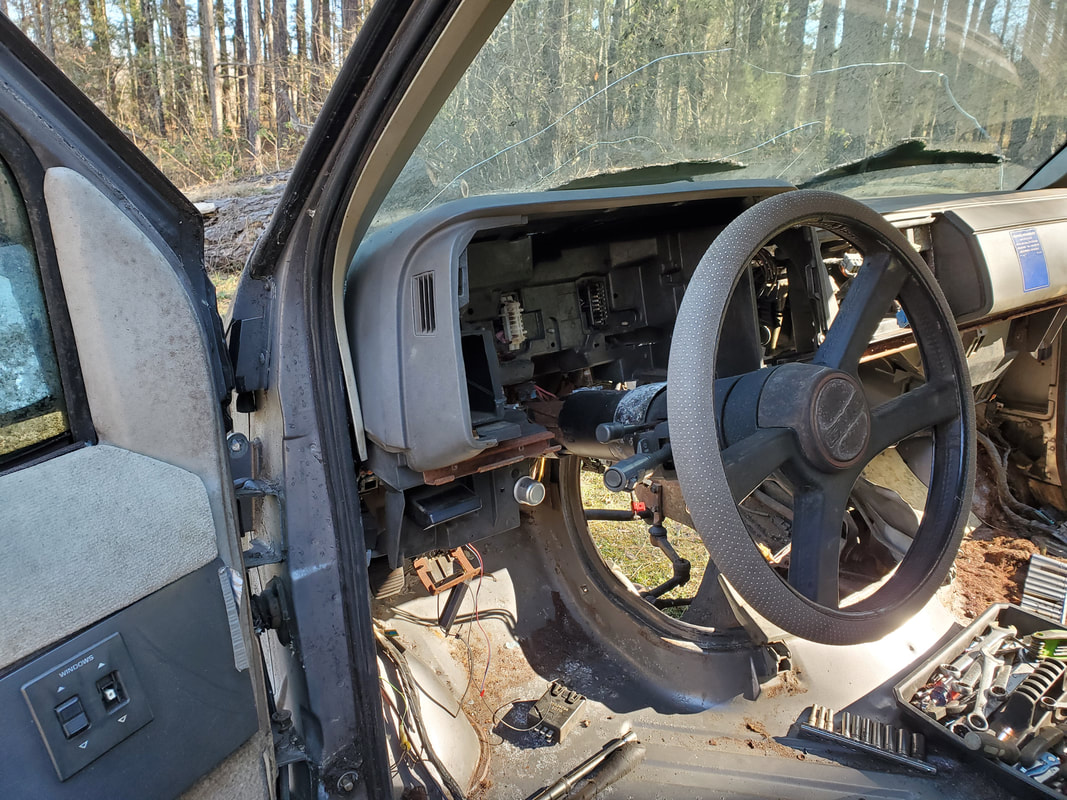 Gauge cluster removed from dash. 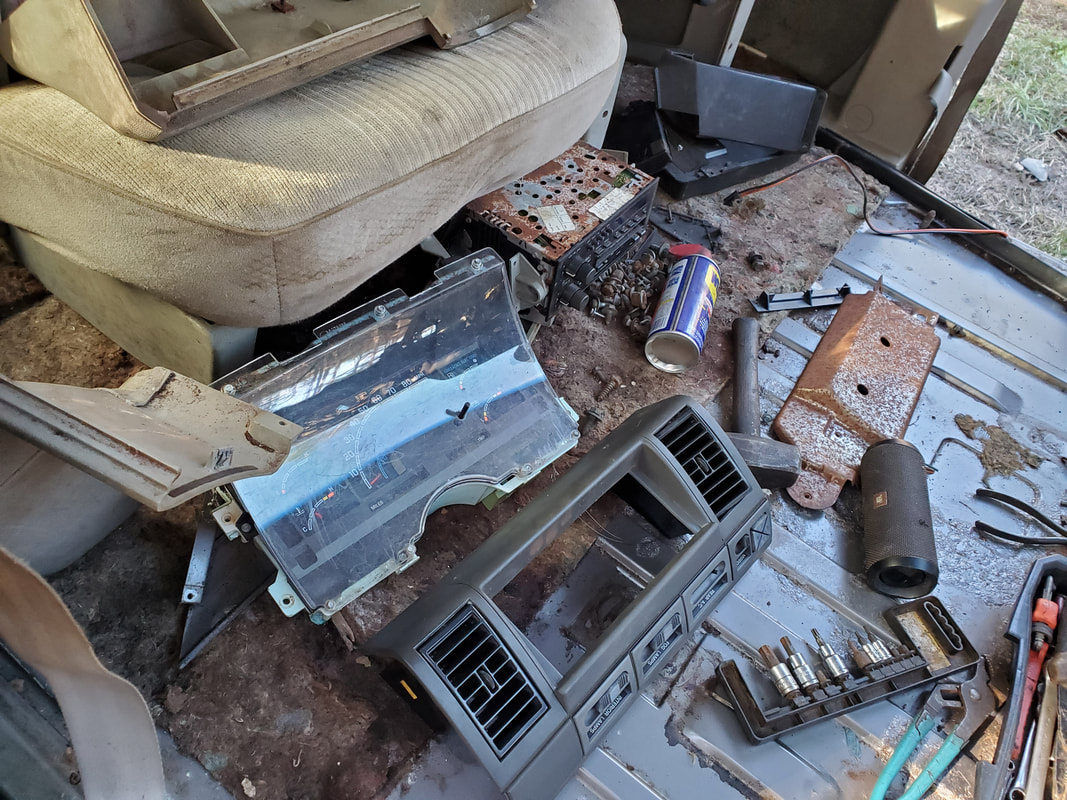 Dash trim and gauge cluster removed from dash panel. At the same time, I salvaged more small items from around and under the dash, like the speakers, a bunch of fuses, even a couple of male/female plug sets with multiple wires. Those will be used for future wiring, like what we did with the Elco. At the same time, I also took a few moments to hack away at items like mounts with the saw since these metal sections will not be needed in what will soon be a doghouse. I had to free up sections of wiring in and around the dash in order to allow the dash to pull completely free. When I got to the main wiring right at the fuse box, I ended up just hacking through the whole bundle of wiring since the fuse box was being problematic with coming loose. It seemed like everything with this van has been problematic from screws stripping to studs spinning in their mounts. I finally said fuck it and started hacking things at multiple points. Either way I finally got the dash out. 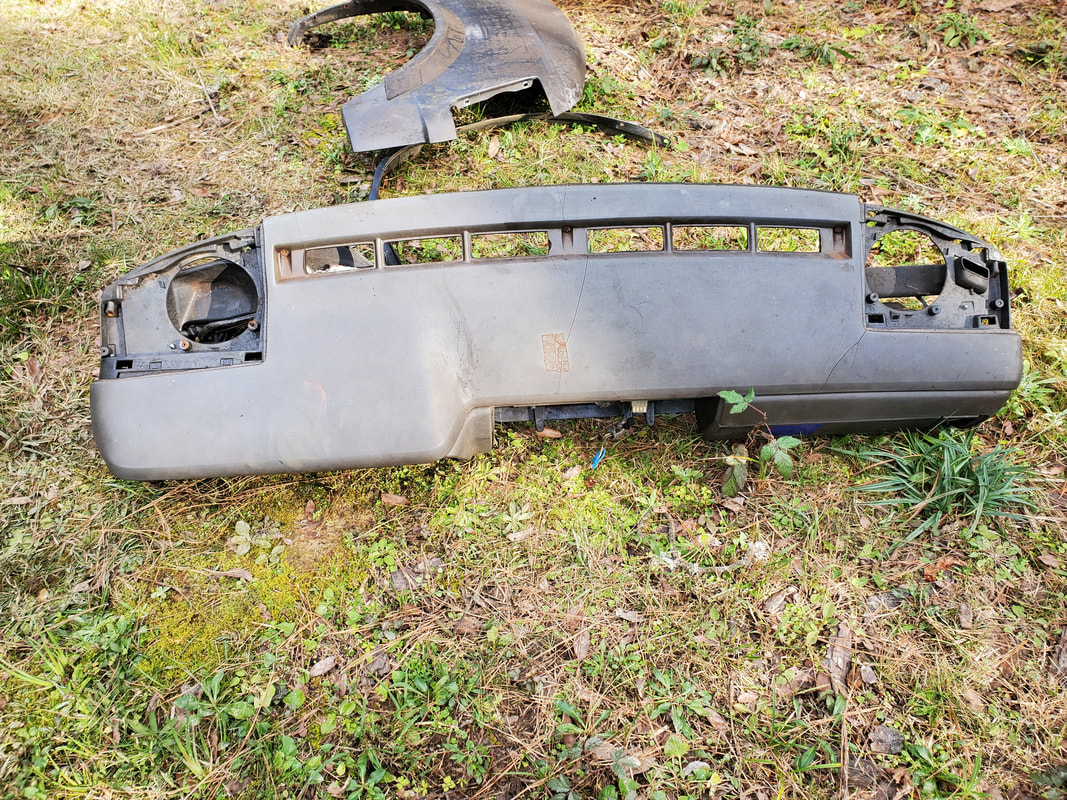 Dash panel removed from van.  Backside of dash showing the extra wiring that was cut from the fuse box in order to free the dash. 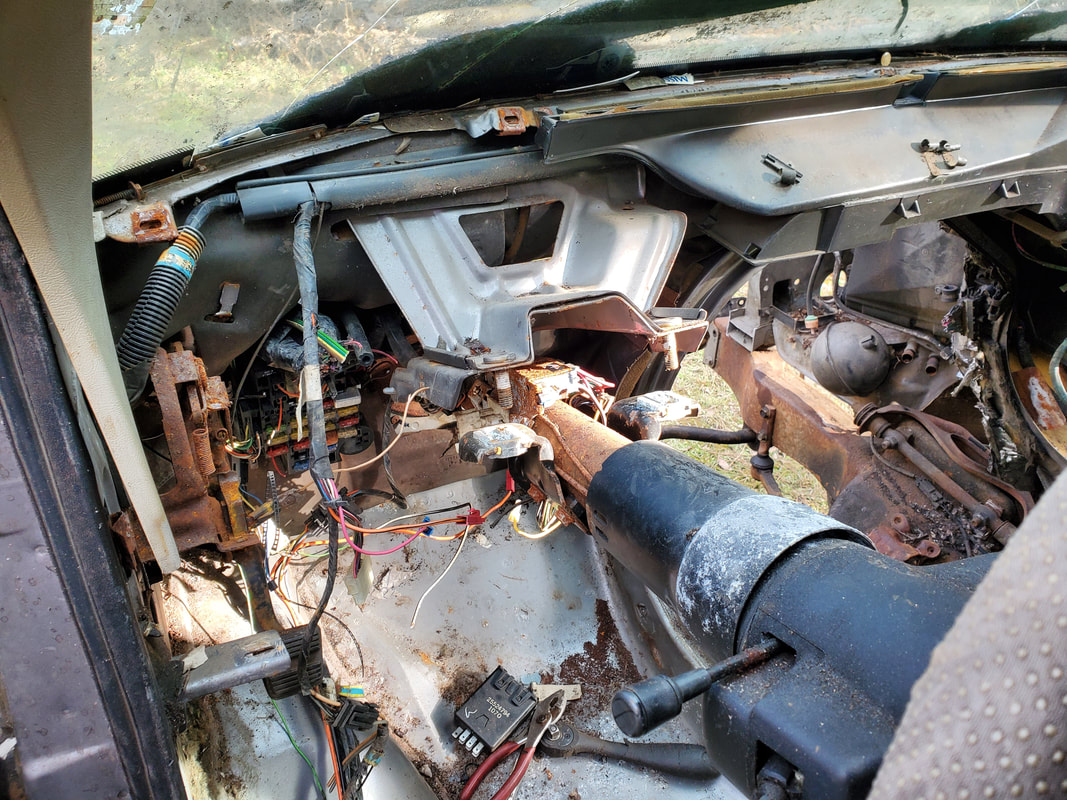 Inner firewall/dash area sans dash panel, showing all the other crap that has to be removed to clean up the cab of the van. With the inside of the dash area exposed I was able to remove even more crap, such as wiring, and the fuse box, which had to be beaten out due to the bolts that did not want to come free. Besides I don't reuse these fuse boxes anyway when rewiring a car so it was no big deal for me to beat this thing out knowing it would possibly be irreversibly damaged. Another thing i also started removing were the sections of ductwork and insulation panels. Everything must go. 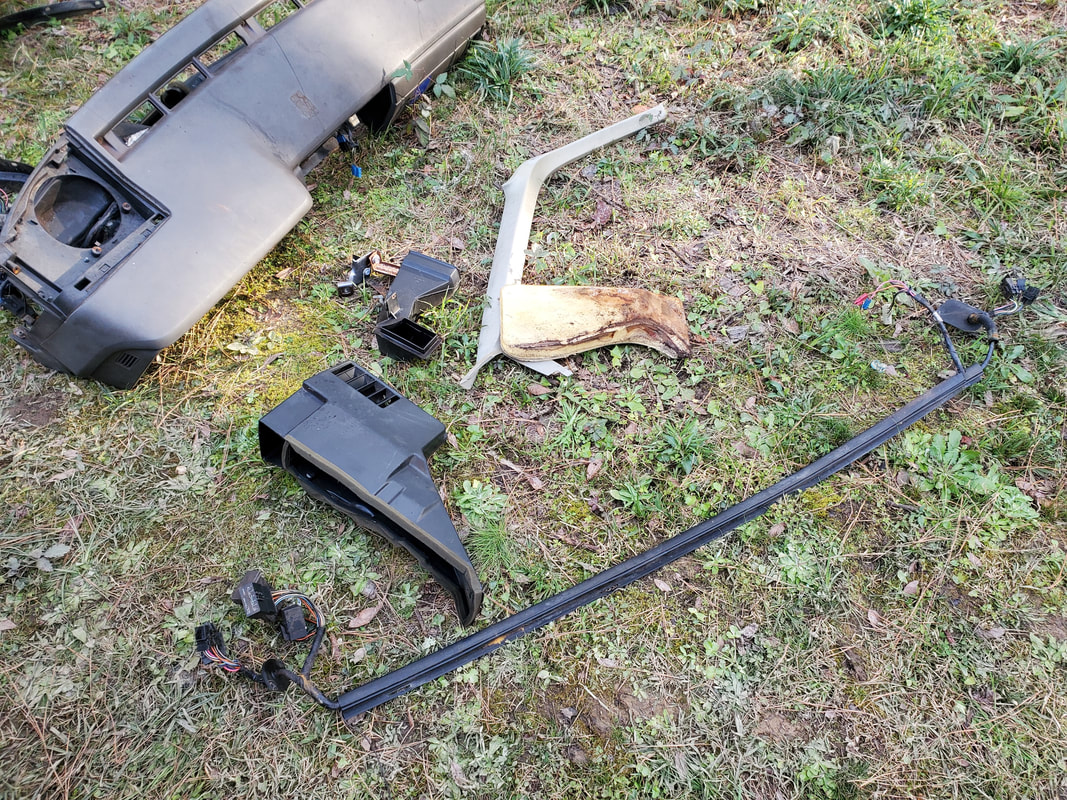 Wiring, pieces of insulation and ductwork removed from the inside of the firewall, now exposed by the removal of the dash. 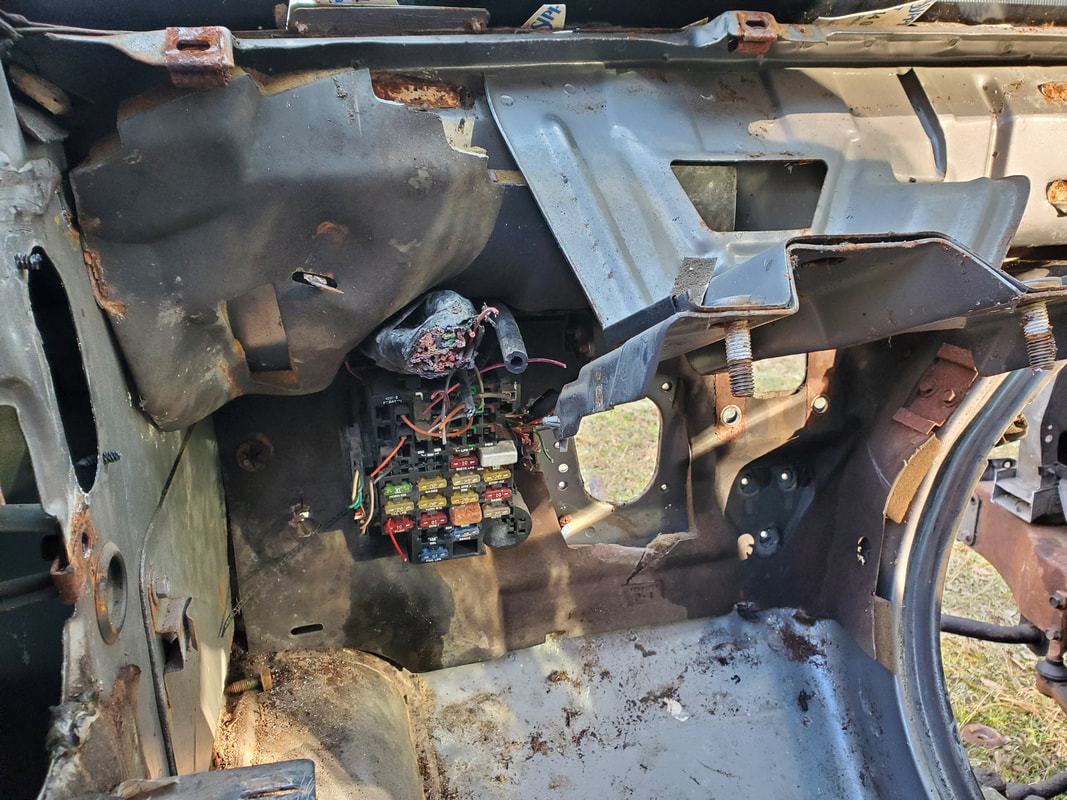 Firewall insulation on driver's side that will need to come out. 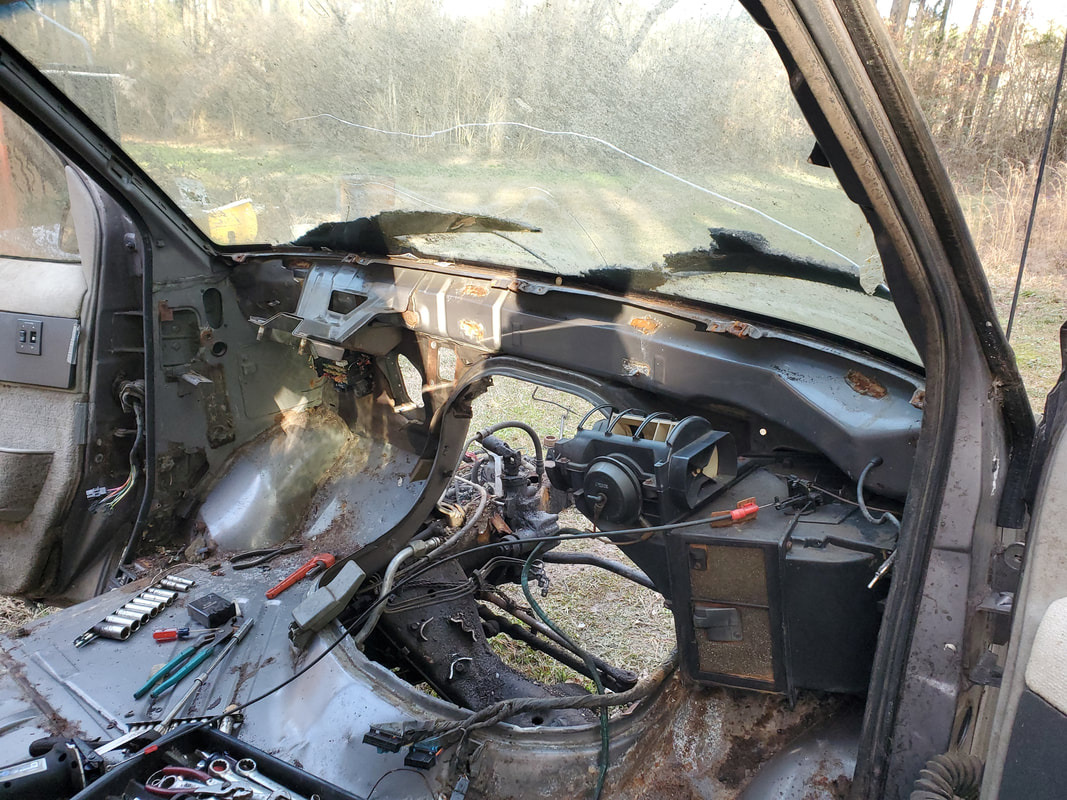 Inner dash/firewall area as more components vacate the area. The inner HVAC box is almost ready to come out. 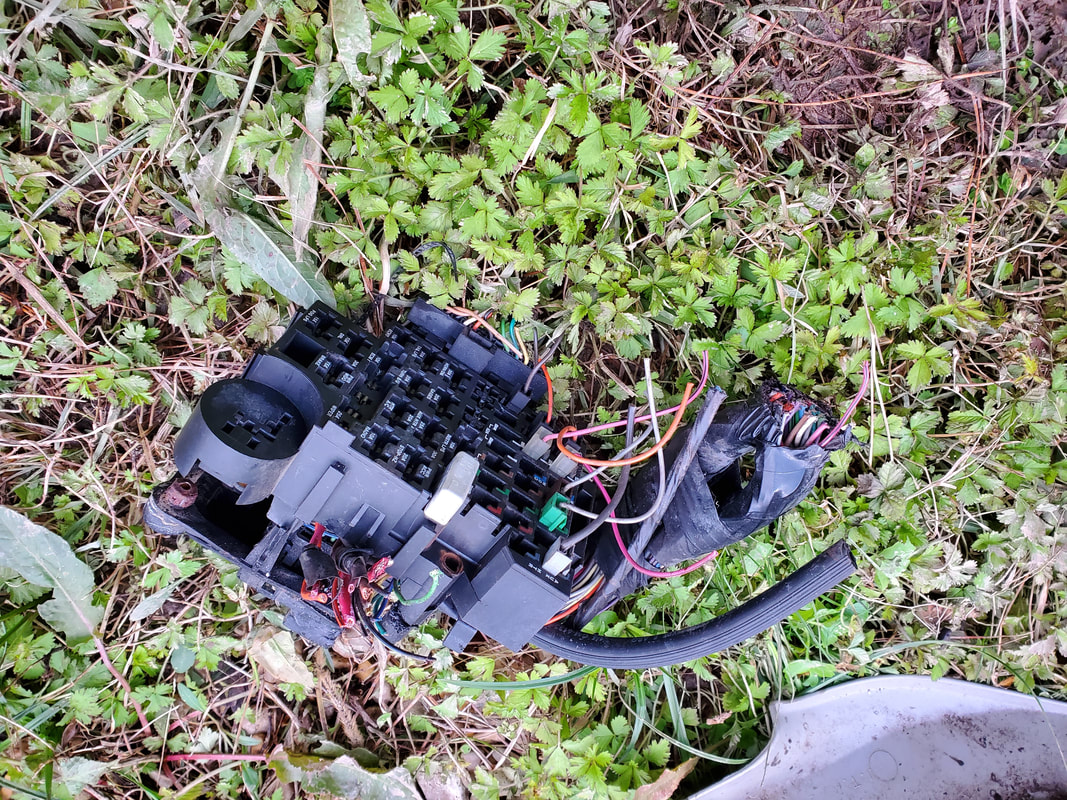 Fuse box after beating it out of the interior, literally. At this time I did move forward and pull the steering column as it would need to come out just as well prior to pulling the body off the frame. I also wanted to pull the unit because I want to get the coupling from the end of the shaft since it would be needed to couple with whatever steering column I may use in a future build to couple it to the steering gearbox on the van's frame. The steering column itself is trash as its floppy and full of extra wiring that would not be needed in a simple car build. 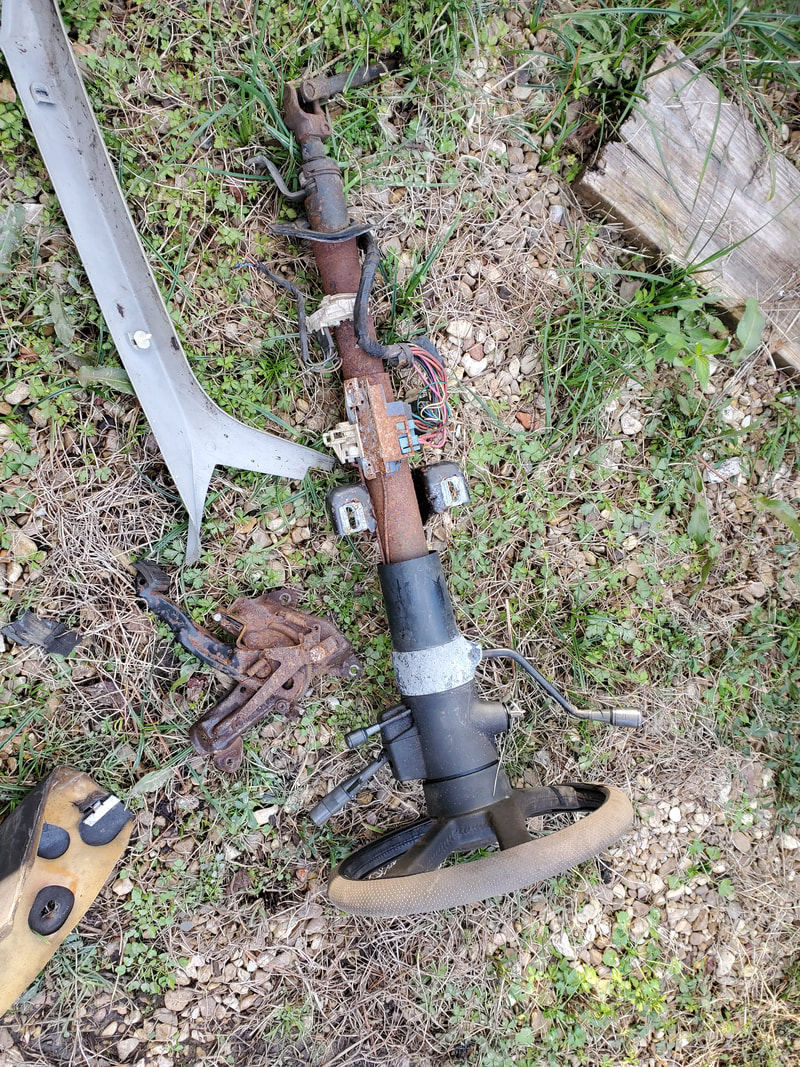 Steering column removed from the van along with some more insulation and molding trim pieces. At this point I finally made it to where I wanted to be, removing the HVAC boxes. I had to remove the inner box in order to access the bolts that held the outer box in. But as has been the case with this van, the bolt removal was not easy. I had the same issues with bolts spinning out in their mountings. This of course called for some roughhousing to get things free enough to remove the inner HVAC box. It was just one bolt, as it typically is. Once that problem bolt was free, I had the inner box out then it was a matter of busting one problem bolt for the outer box as well before being able to free it up. With all the ductwork and HVAC boxes out, all that was left were a few little pieces here and there to either unbolt or cut free to clean up the inner firewall/dash area. 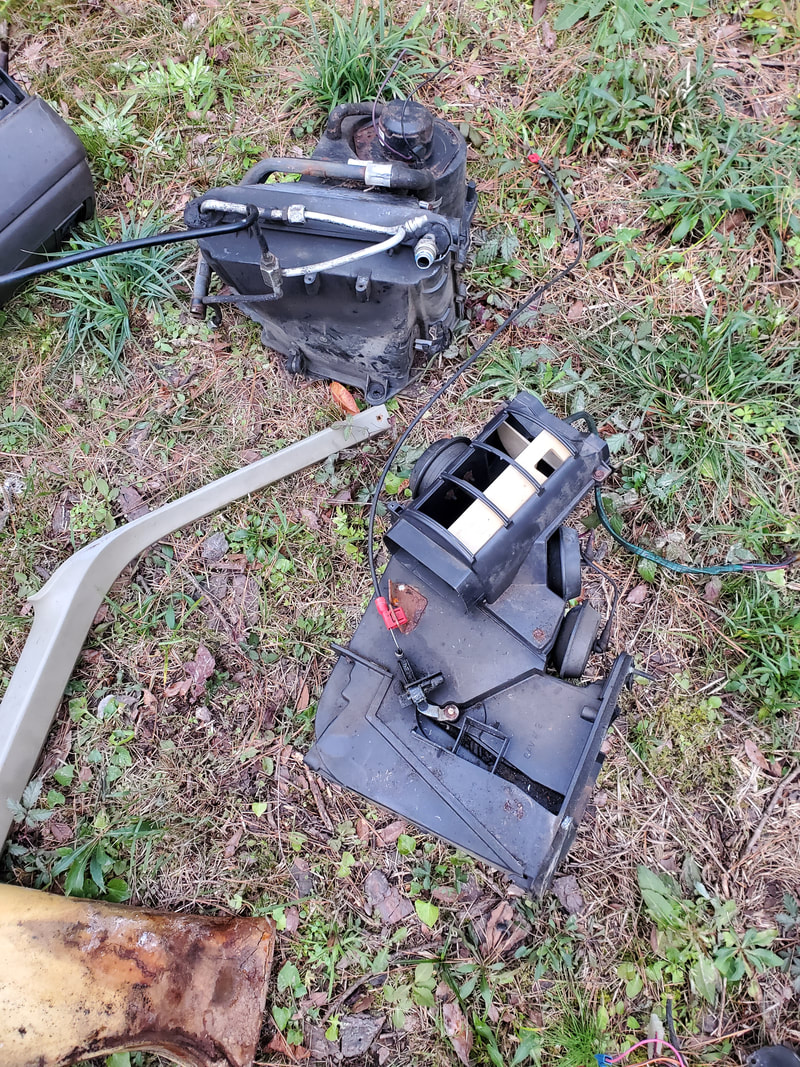 Both HVAC boxes and other miscellaneous pieces removed from the van. 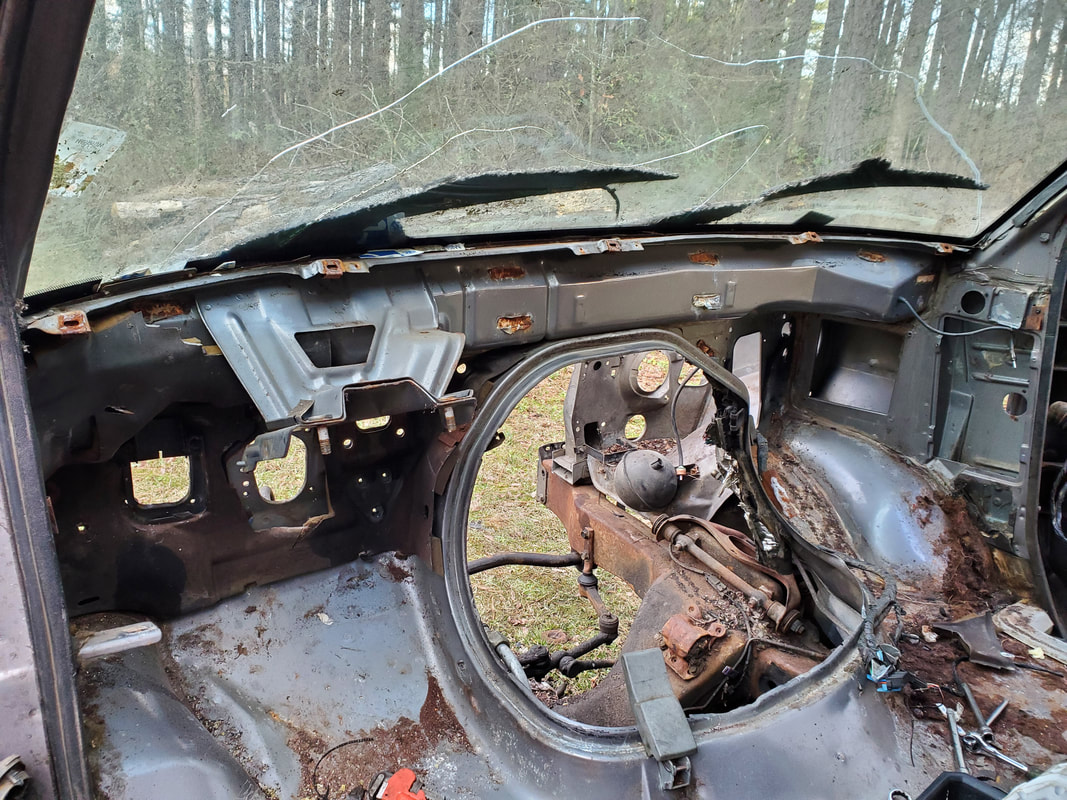 Interior void of just about everything except some mounting points, and those too will be removed soon. At this point the front of the van is just about done. Other than some protruding studs and mounts from the dash that need to be cut away on the inside, there's still the matter of cutting away the inner fender on the passenger side so the right front frame mount is eliminated, and the sheet metal attached to the front of the body is removed since that won't be needed in the conversion to a doghouse. Once this metal is out of the picture, I'll be removing the front doors then the seats that are just loosely sitting in the back. I can then figure out how to open the side door and rear doors so they too can be removed. I may make my way underneath and even try to put my eyes on the other frame mounts to see about getting them removed as well. At this point my main goal is to get the engine bay of the minivan cleared of everything prior to making it to the HVAC box. I do want to start with the permanent alterations by cutting off the inner fender panel right at the firewall as well as getting the front body mounts removed. This will go a long ways towards getting the body ready for removal from the frame, which we still haven't really figured out yet as to how we would go about doing that. There were still a few things that had to be removed before I can really move on to the bigger parts of the job, one of which was removing the rest of the wire harness. Since all of this stuff isn't going to be reused, I just went ahead and cut the wires right at the junction box since I couldn't fully see how to separate the engine bay wire harness from the firewall. I cut all the wires, including the ground straps, and pulled everything free tossing it aside. 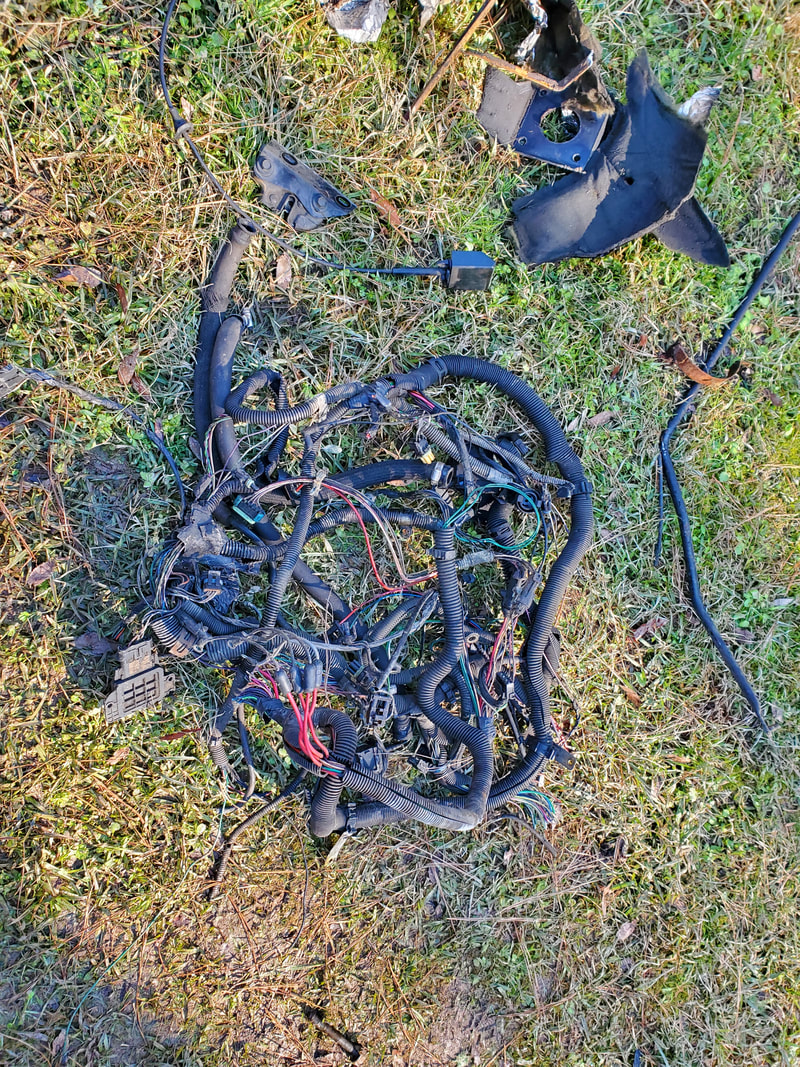 Engine bay wire harness after cutting free from the firewall prior to removal. While I was at it, I took the time to disconnect the hookups for the hood latch and cable assembly so I could pull the two components free. I had to remove the cable from the latch then pull the cable through the firewall with its rubber bushing. I also pulled the shifter linkage that was hooked up to the steering column, getting that out of the way. Some insulation that was hanging also came free. 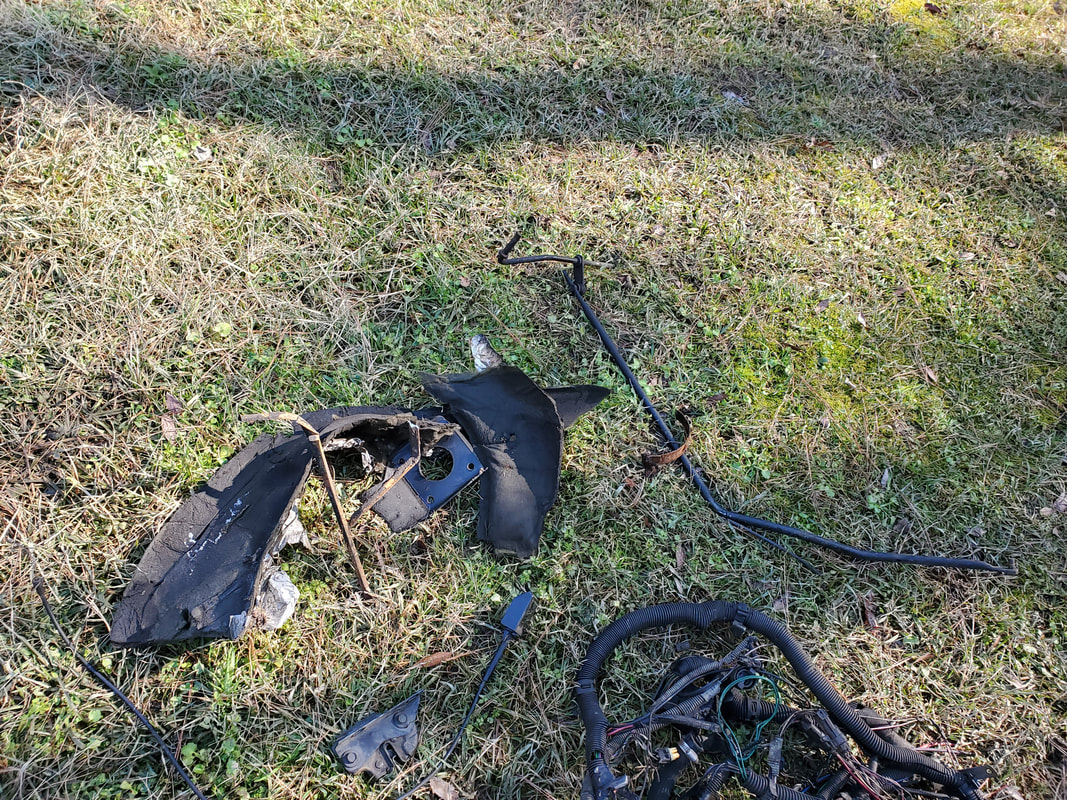 Shifter linkage and hood latch assembly along with some loose insulation removed from the van. With those components out of the van it was time for the reciprocating saw. But first, I used the impact wrench to get the two long bolts from the two front body mounts. Once those were gone I go to work with the saw. After a short time passed I had the left inner fender cut free from the firewall along with the left side of the radiator support member. With that section of body removed, I cut the rest of the radiator support member off from the right side to clear that metal from the van as well. With that large amount of metal pulled from the vehicle, I turned my attention to the inside. 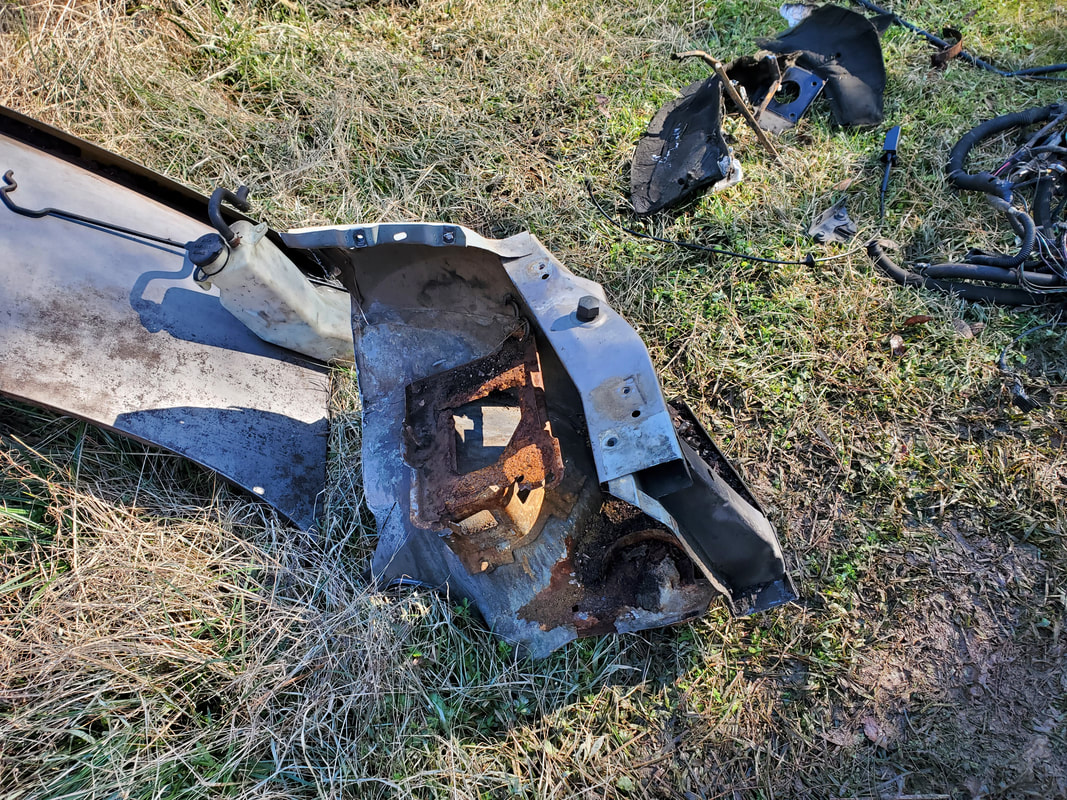 Left side inner fender structure cut free from the rest of the van. 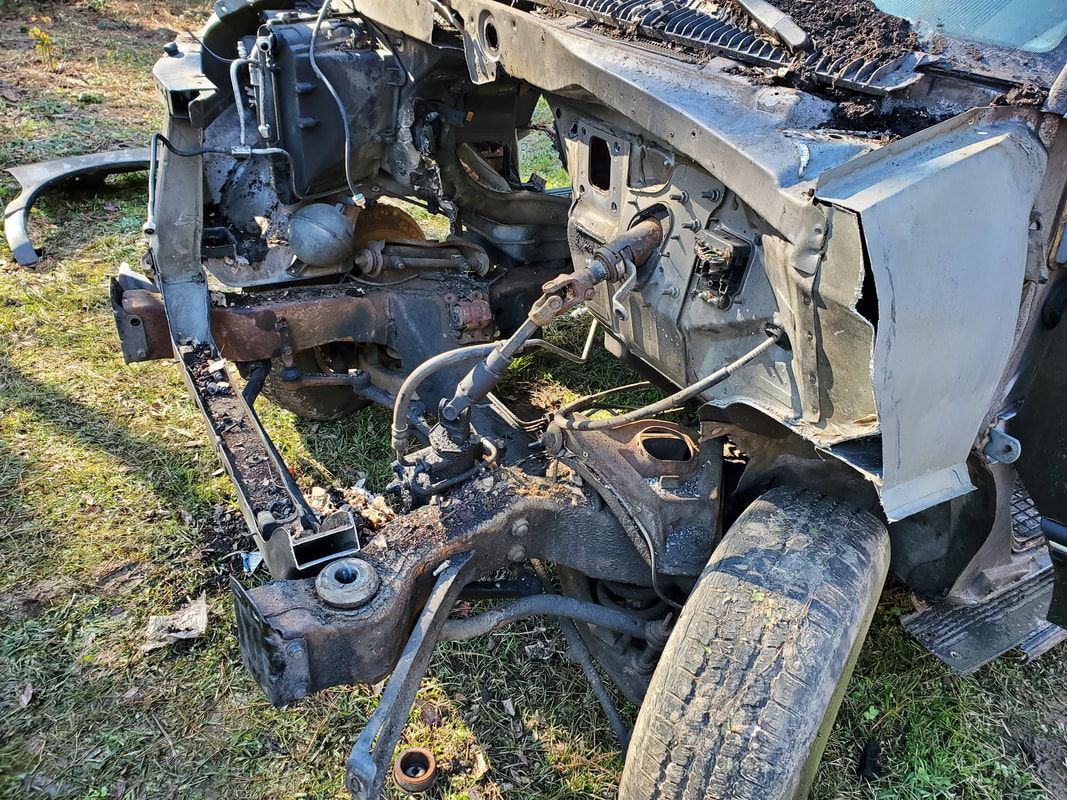 Front of the van after removing the left inner fender section. In the cab of the van, I took time to remove the dash trim panel as well as the side panel on the floor I had to remove the HVAC control panel from the trim panel so I could disconnect the cable for the blend door and be able to fully remove the trim panels and expose the gauge cluster and the associated wiring under the dash. 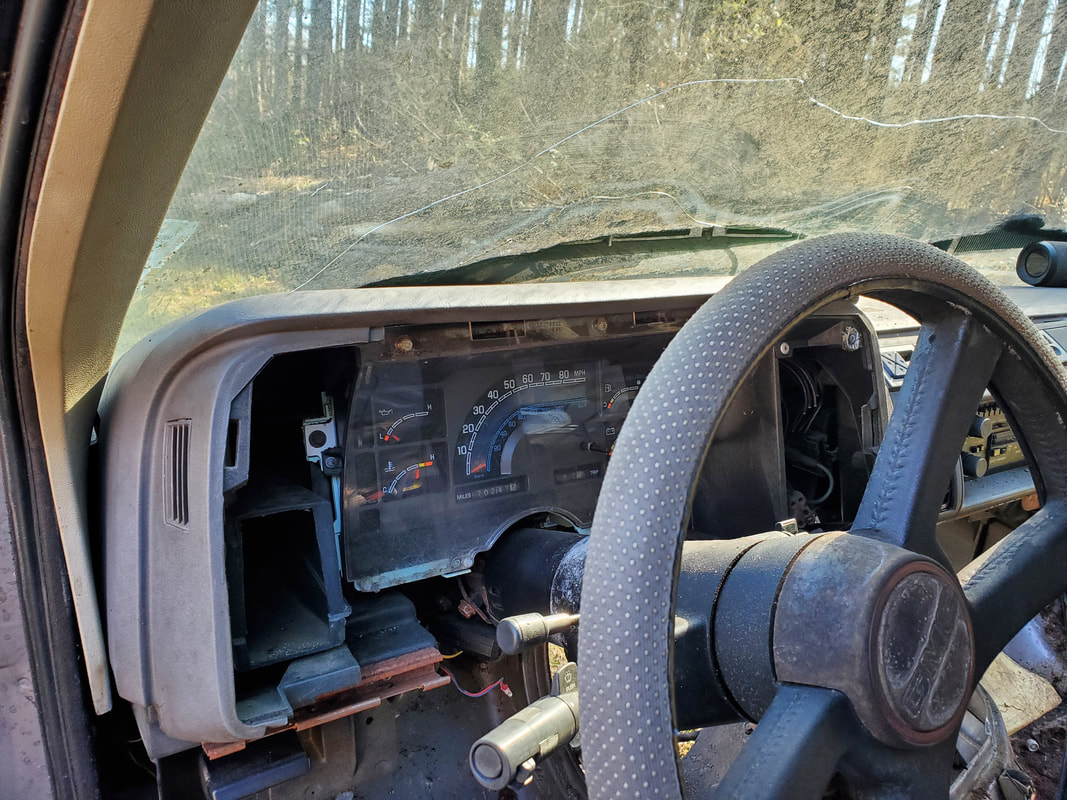 Dash/gauge panel with trim panel removed, esposing everything else that needs to come out. 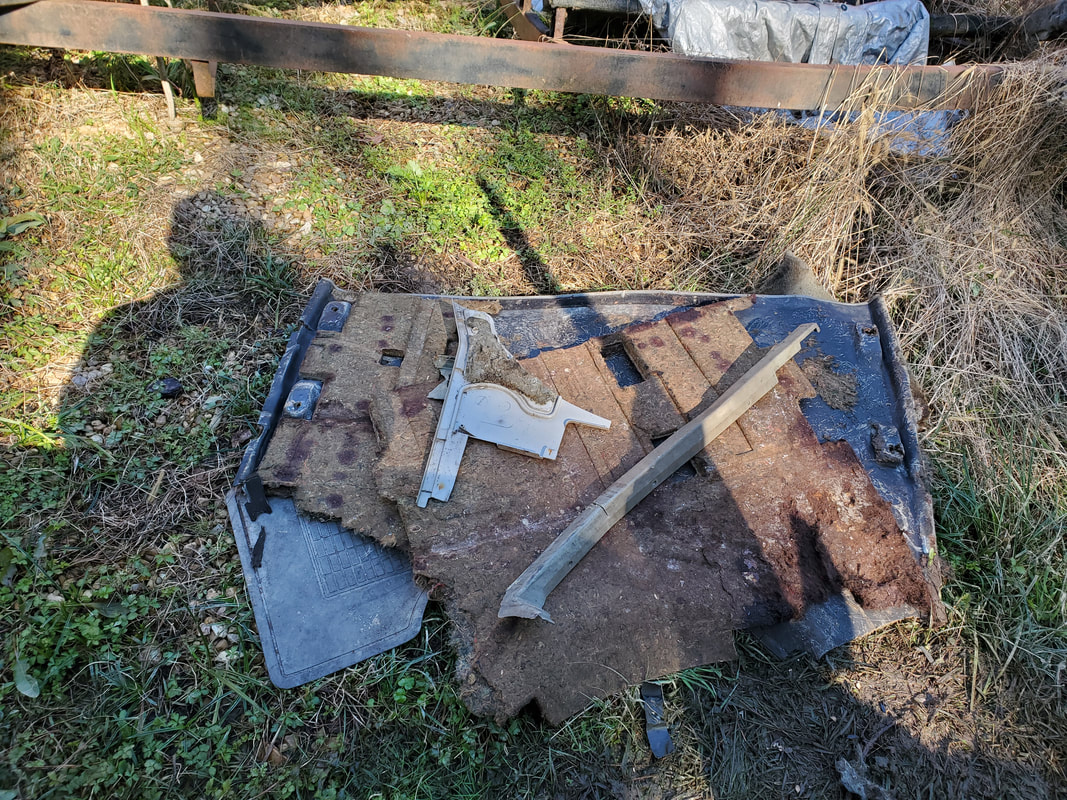 Trim pieces and some of the carpet underlayment removed from the van. The last thing that I wanted to do in this session was remove the front section of carpet where the front seats were mounted. Since I removed the side panel, I also removed the rocker trim panel to make things a little easier to pull the carpet. I still cut the section of carpet into three smaller sections to make it easier to remove, especially since there was the matter of the underlayment. With the front section of carpet removed, I can move forward and cut the seat studs flush with the floor as part of the conversion to a doghouse since we don't need studs sticking up through the floor. I will continue with the dash on the next go around, with the goal of getting the whole dash removed from the van.  With the dash removed I will be able to completely remove the entire HVAC box, in much the same way as it was with the Elco. I'd have to remove the inner box first then be able to access the nuts that are holding the outside HVAC box in place. Once all that is gone I can finish things up by the removal of the fuse box and remaining wiring. I may leave the steering column in, since it will already be hanging free after disconnecting from the dash prior to its removal. I'll only want the steering column in so I can more easily steer the stripped body as we move it to the staging area where I want to set up the doghouse. As one can figure, stripping a vehicle can be a painstaking process, involving a shitload of bolts and different little parts, sometimes sucking up a bunch of time just to get one small component freed up. Of course, I could just go in like a bull in a China shop and start cutting and tearing parts out in order to get everything freed up, but I would like to be able to save some of these parts for resale later. In this case, I started off with some of the larger body panels in the front of the van. The hood came loose, freeing it up and getting it out of the way. I did have to break a panel that fits just in front of the wiper area in order to open up the area where the bolts holding the hood are located. The panel that was broken wasn't really that important and appeared to be difficult to remove either way so busting it up wasn't that big a deal anyway. With the hood off, I moved on to removing the right fender, since I wanted to be able to start pulling the HVAC box off. 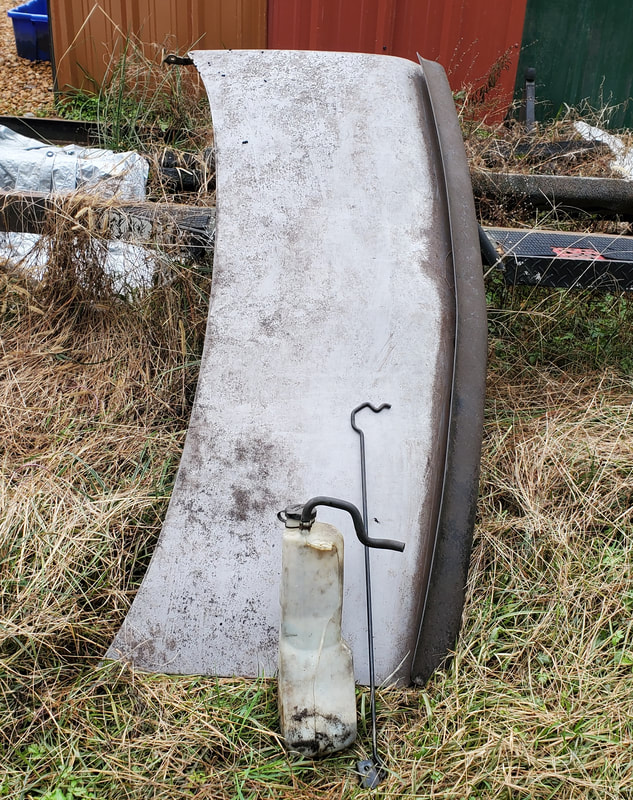 Hood and hood latch removed from van. As this van has proven a few times, removing the fender was not exactly a cake walk. Even after pulling all the visible bolts around the fender and behind the door, I found even more hidden bolts under the splash pan under the fender. After some roughhousing, I broke the fender free and had it out, only to be disappointed at the idea there was a whole other fender panel underneath that blocked the HVAC box and enclosed the engine bay from the outside world. All this means is that I'll be doing some extra cutting with the power tools to remove this extra metal from the van. 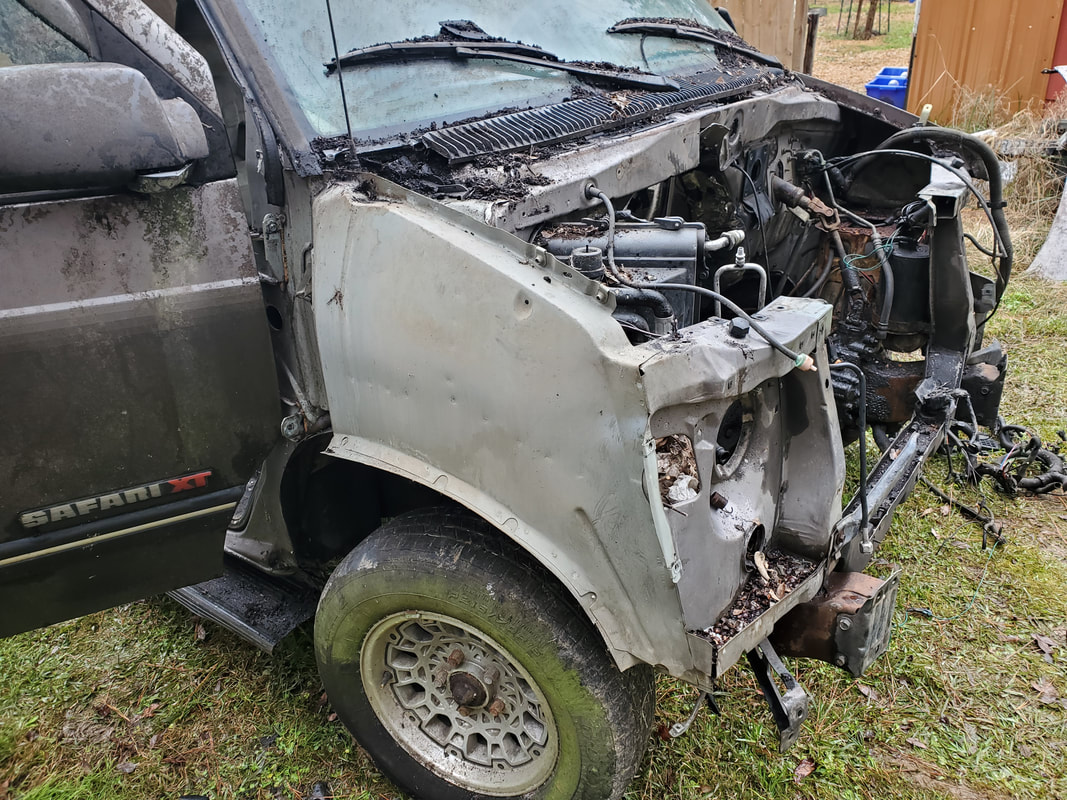 Inner fender that revealed itself after removing the outer fender. 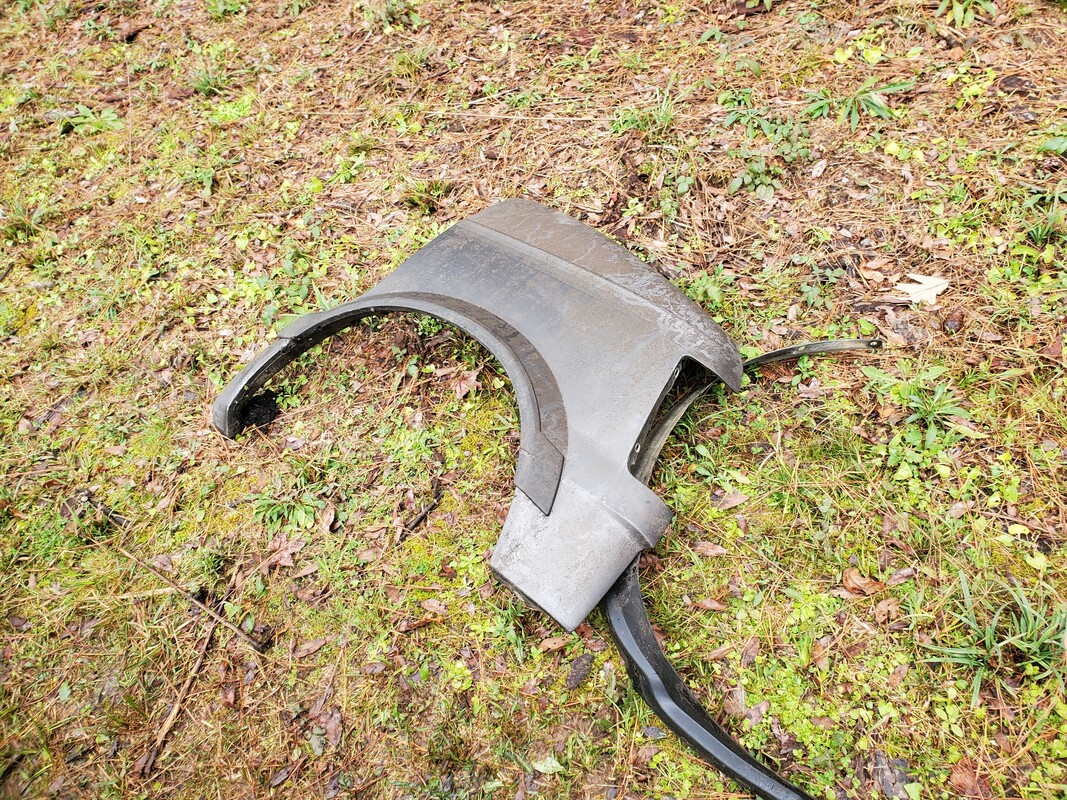 Fender and part splash panel removed form van. Another area I looked at was prepping the passenger door for removal. The hinges on the door are welded to both sides with just a pin holding the two halves together. I would have to pop the pin but there's also the matter of the wire harness passing through the door jamb. I didn't want to cut this as it would pretty much destroy the full function of the door with the power door locks and windows. I had to unplug the wire harness where it hooks up inside the door jamb. I had to remove the ECU in order to remove the plastic bowl that held the unit before I could get to the wire harnesses for the door. Once the plugs were out, I moved the cables out from the door jamb. Of course I'll need some help holding the door while I hammer tap out the pins to free the door up for removal. That will come at a later time. 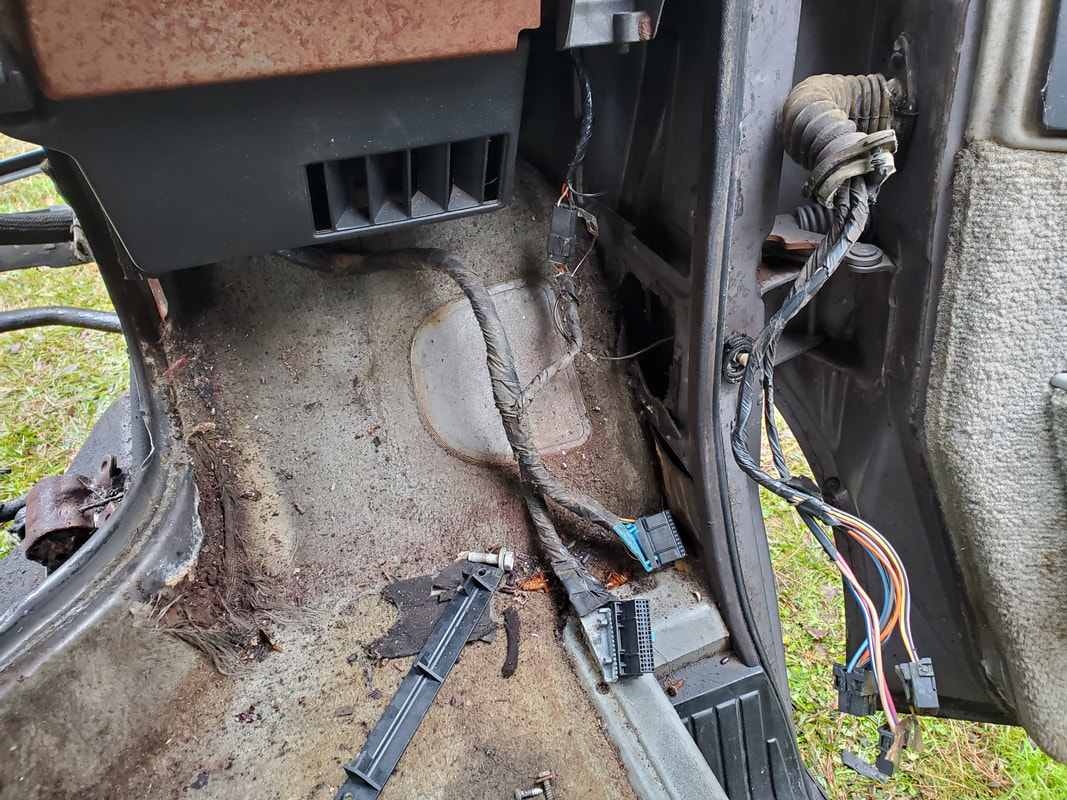 Wire harnesses for ECU and door disconnected. 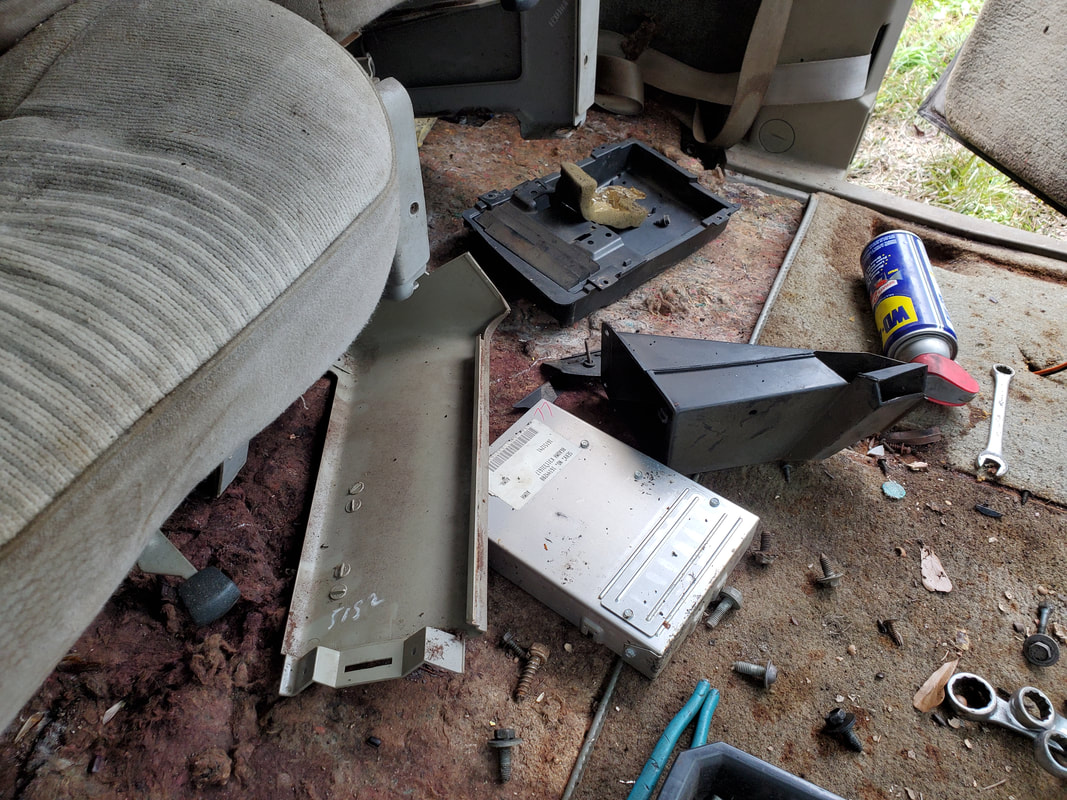 ECU and other trim pieces removed prior to accessing the wire harnesses for the door. On a side note, I did remove the washer bottle and radiator overflow bottles since they weren't hooked up to anything. I do want to save the washer bottle as it could be reused in another vehicle to provide it with window washing capability. I will probably roll it over to the 46 Ford, since I'm reusing a lot of other parts on that build. Hell, I could reuse the overflow bottle as well, it would be nice to have the ability to catch overflow from the radiator for once on these old cars. 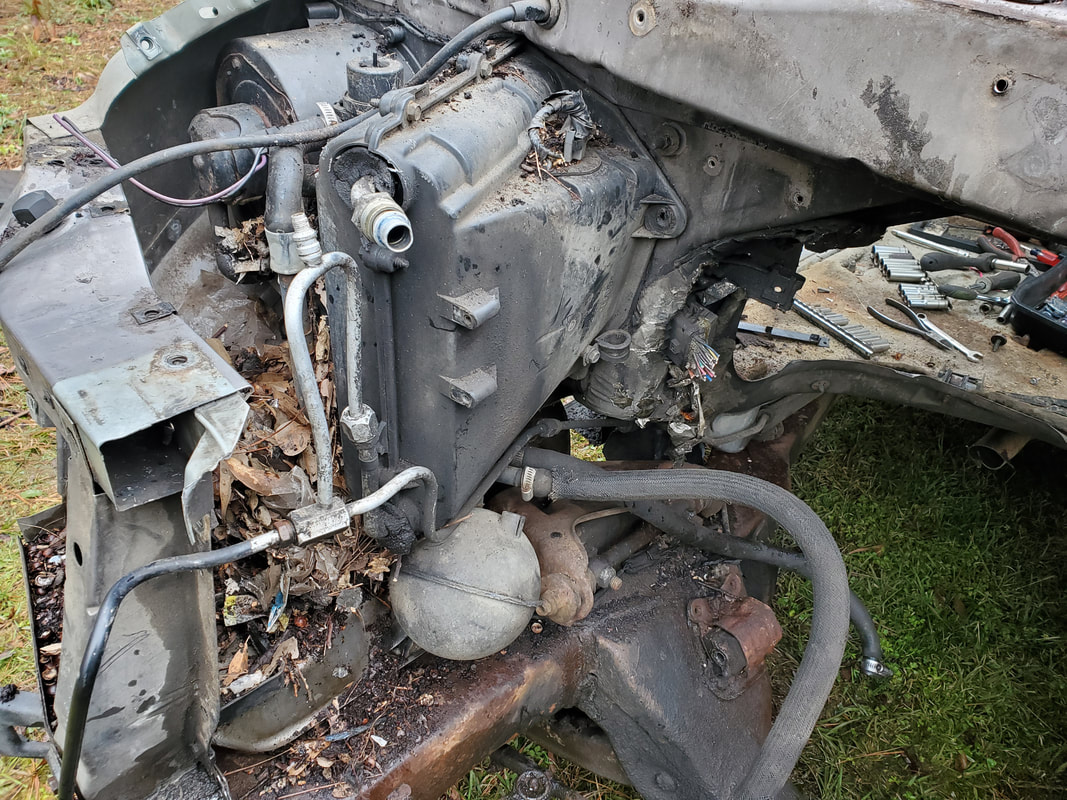 Area opened up by the removal of the overflow bottle and washer bottle. Still need to remove the metal around the HVAC box though... Last couple of things I took care of in this session was the removal of the sealed beam headlight bulbs, headlight buckets and retainer trim pieces. At the same time I also cut the headlight sockets since they are the same terminal as the H4 bulbs we've been using so upon rewiring the headlights, again, on the 46 Ford, I can use these plugs for the two headlights. As for the buckets and trim pieces, these will obviously go up for sale. Lastly I cut some of the engine bay wire harness from a plug on the right side behind the HVAC box and pulled the majority of the wiring out from the engine bay, leaving just the connection to the plug on the driver's side. Once this wiring is separated, the engine bay will be free of all the bulk wiring. 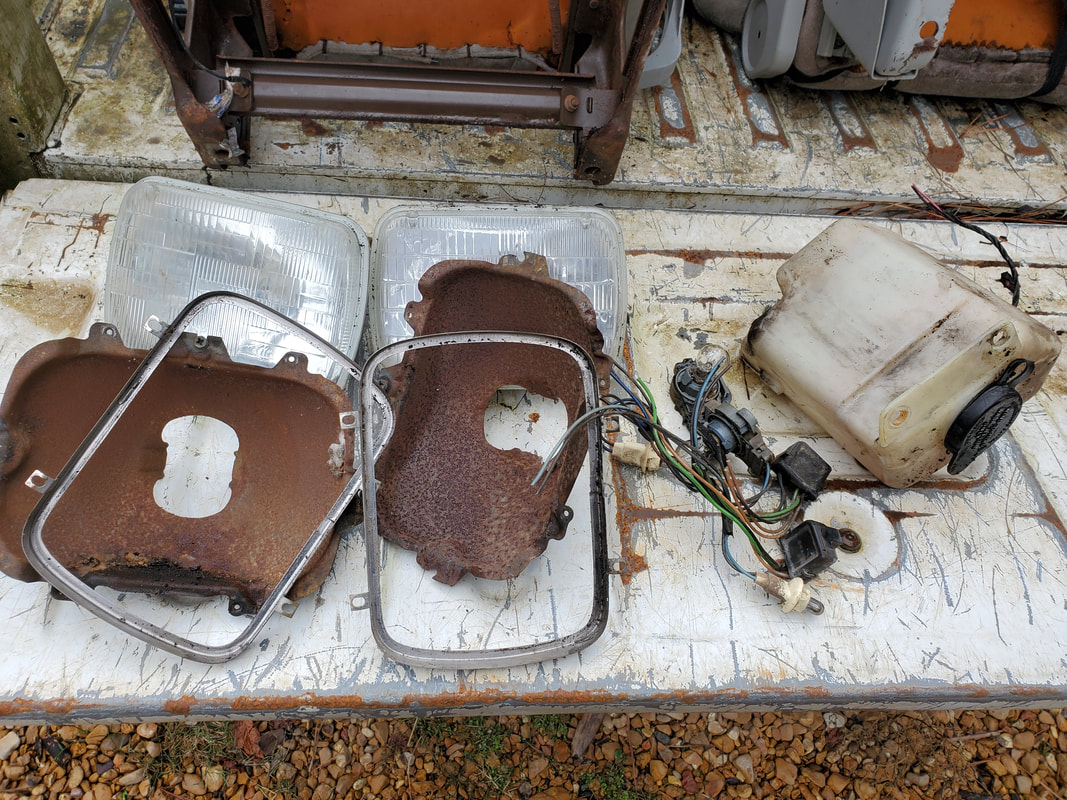 Headlight bulbs, buckets, trim pieces, H4 plugs, and bottles removed from the engine bay. In the next go around I'm probably going to take the gloves off and put the saws to those metal panel sections so I can open up the area and stage a full frontal attack on the HVAC box so I can get that removed from the engine bay. From there I'll mop up the remaining components in the engine bay before removing the driver's side fender and inner panel. The work continues. After pulling the powertrain from the minivan and moving the vehicle over to an area in the back of the compound, behind the DOB F100, I was able to begin the greater teardown of the van body. I started off with the removal of the items that I would reuse on the 46 Ford project, such as the hydraulic power brake system and the associated brake pedal bracket. I also pulled the accelerator pedal and throttle cable since these items can be used on the build. There's other little odds and ends that I'm discovering such as added automotive relays and the horns along with an aftermarket security siren. I did start off though with the removal of the driver's seat, since that was the only seat that was still bolted to the floor. 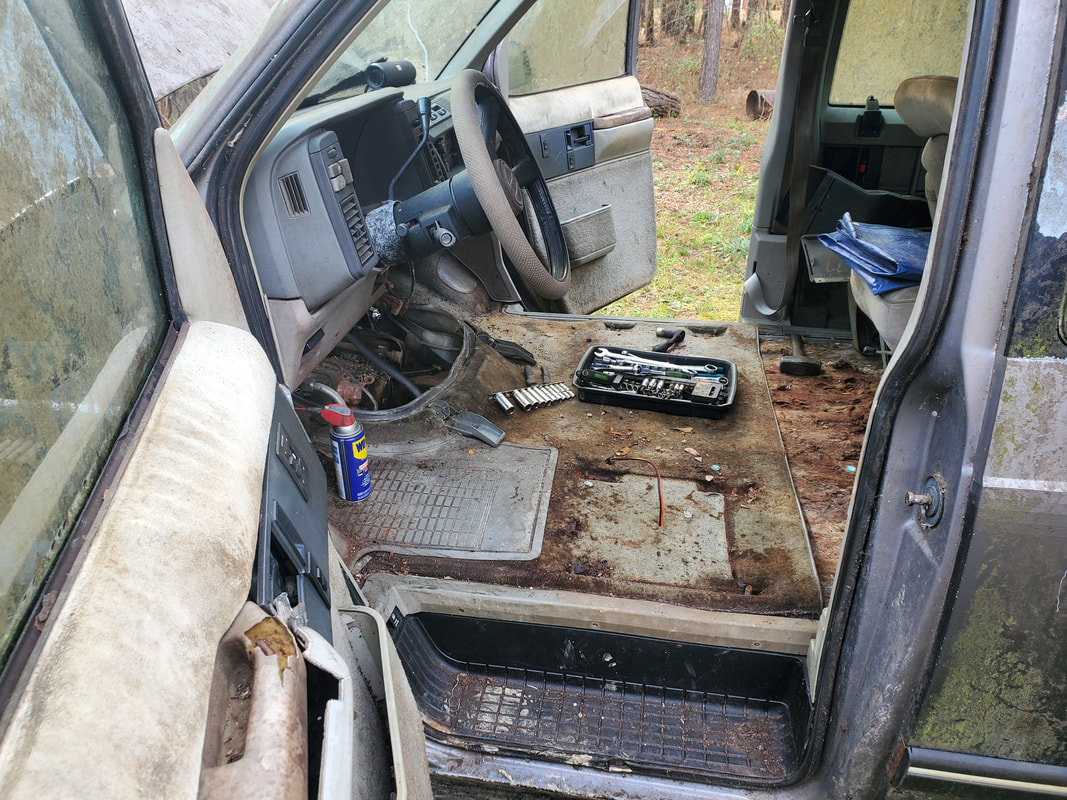 One can see just how disgusting the carpet is in this van, especially under where the driver's seat was mounted. I wanted to get the seat out for two reasons. One, if someone turns out to want these seats, I can immediately turn them over, rather than trying to rush to get the last seat removed. Secondly, by getting this seat out of the way, it opens up the area in the front of the cab so I can more comfortably rest on the floor when I have to work under the dash disconnecting things. Third, it will allow me to more easily and completely remove the carpet and underlayment, which is part of my plan for using the body as a dog house. Plus, the interior reeks from mold and mildew, which is hardly healthy for me to be laying on when I'm removing things from under the dash. With both front seats out, I got to work removing the brake pedal bracket, which would then free up the brake booster and master cylinder. After removing the four nuts holding the brake pedal assembly to the master cylinder/brake booster mount, I still had to deal with one stud holding the brake pedal bracket to the firewall. This tab with the stud extended into the channel where the wiper arms are mounted. Because of this, I ended up using the reciprocating saw to cut the tab free from the greater bracket. The whole four bolt mount and the brake booster will be more than enough to hold the whole braking system to the tough firewall of the 46 Ford's body. In addition to the brake pedal assembly and booster/master cylinder. I removed the accelerator pedal and cable as well. All of this was relocated to the 46 Ford. 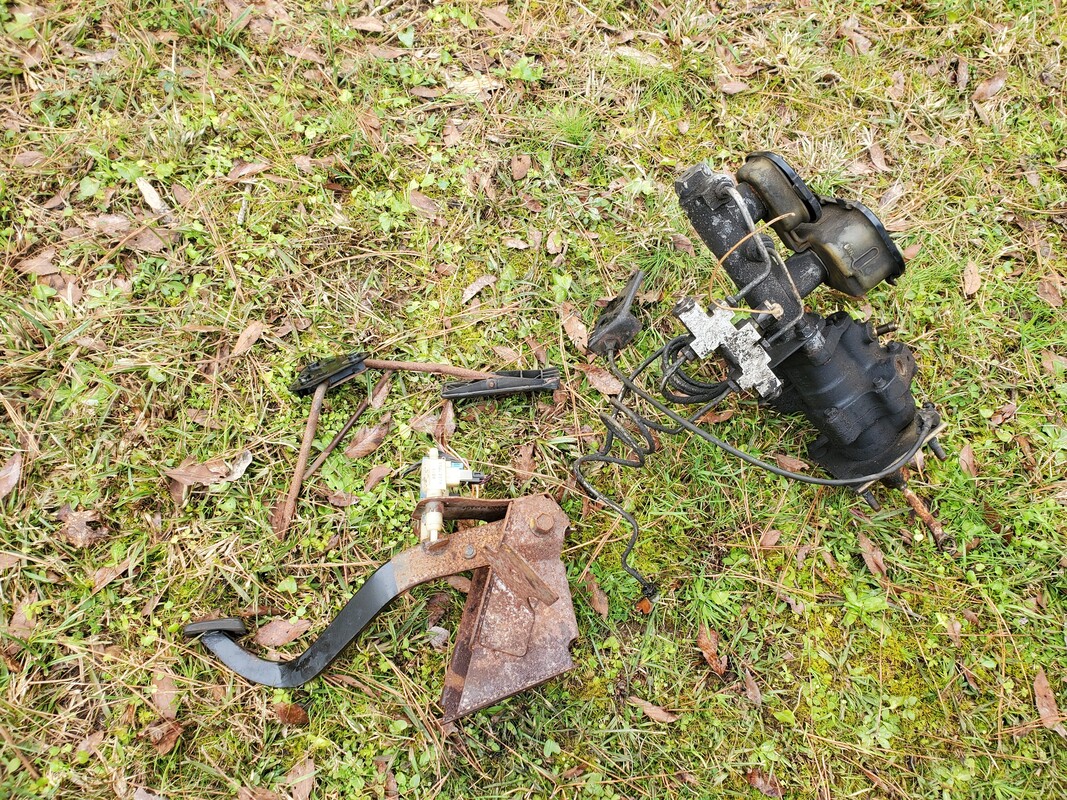 Brake booster/master cylinder and accelerator pedal/cable assemblies removed from van. With the brake system broken down and partially removed I moved to the ABS module. This unit is rather large, almost like a motorcycle battery. Rather than fully butcher things, I did take time to remove the brake lines from the module, versus just cutting the lines. I may very well need to reuse these lines in the 46 Ford build as the frame is an S10 frame and the brake system may very well share the same components as far as the sizes of brake lines so it would benefit me to try and save even these components. Even though I did cut the bracket holding the ABS module to the firewall, I did pull the other bolt holding the bracket on. I just left the rest of the bracket on the module since it was low profile, but I will probably end up removing it later when I take pictures to list all this shit. 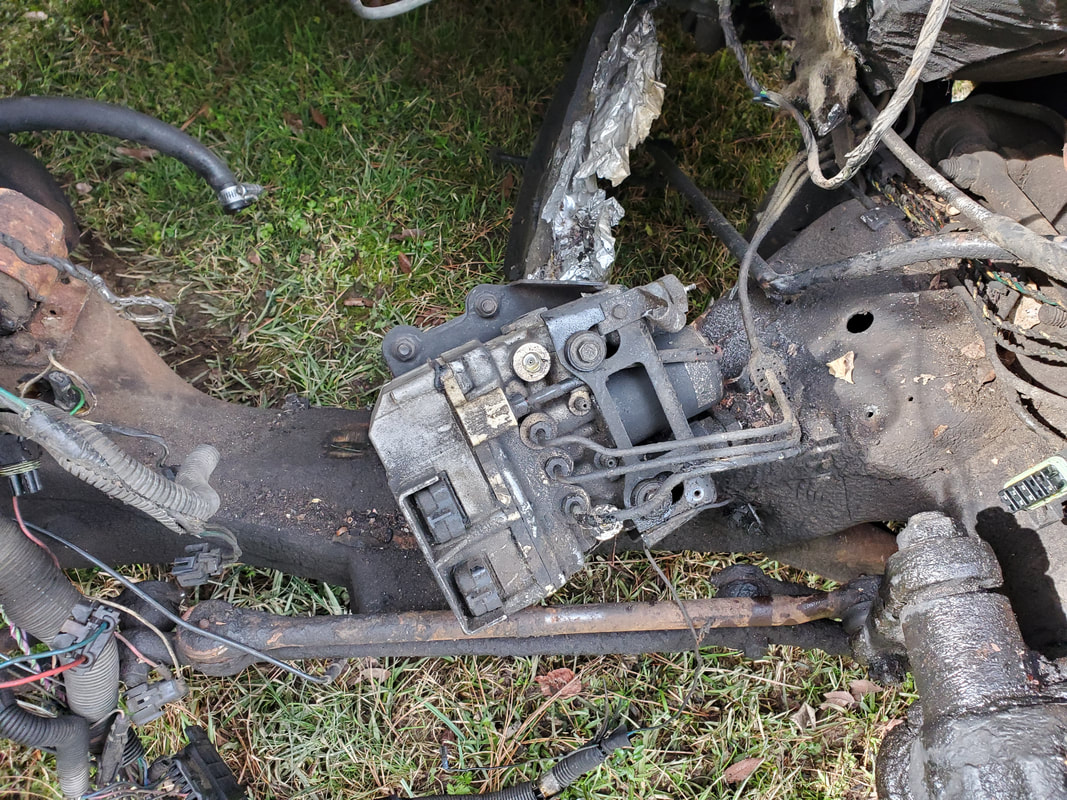 With the ABS module out, I turned my attention to the wiper motor since it was the next closest thing on the firewall by the ABS module. A couple bolts later and an easy access port for a wrench to reach the nut holding the wiper arm linkage to the motor and a couple plugs and the wiper motor was removed from the firewall. 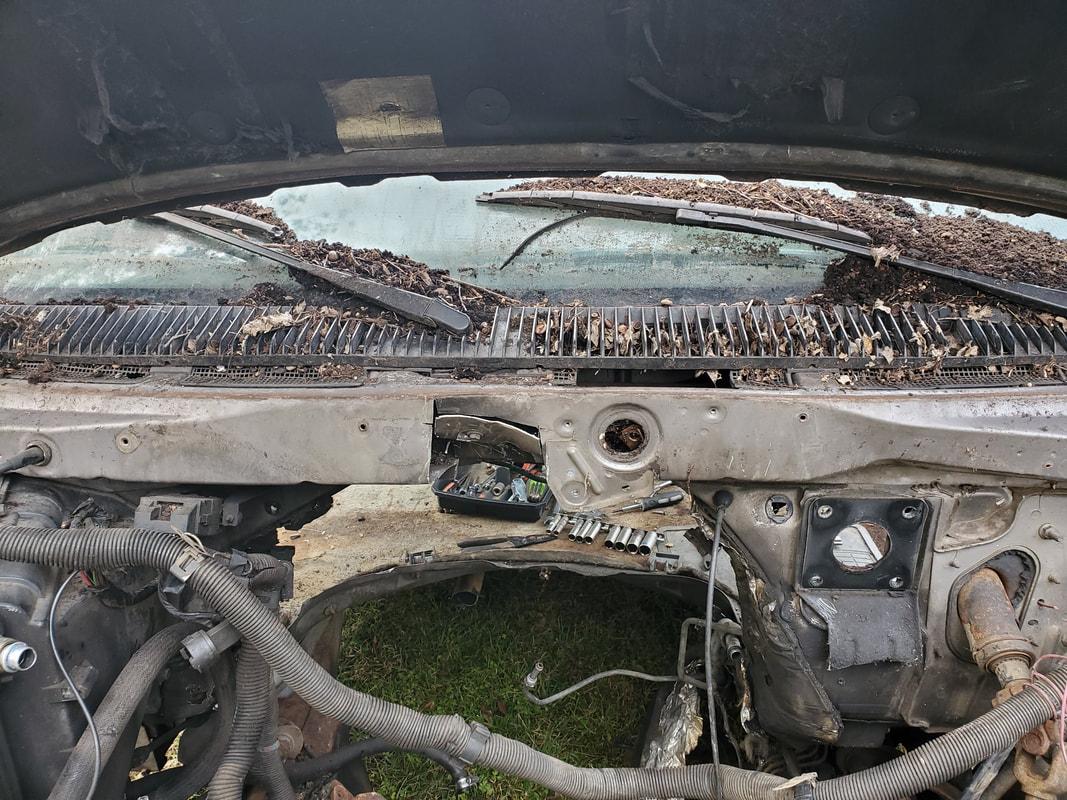 Open spot on top of the firewall where the wiper motor was mounted. 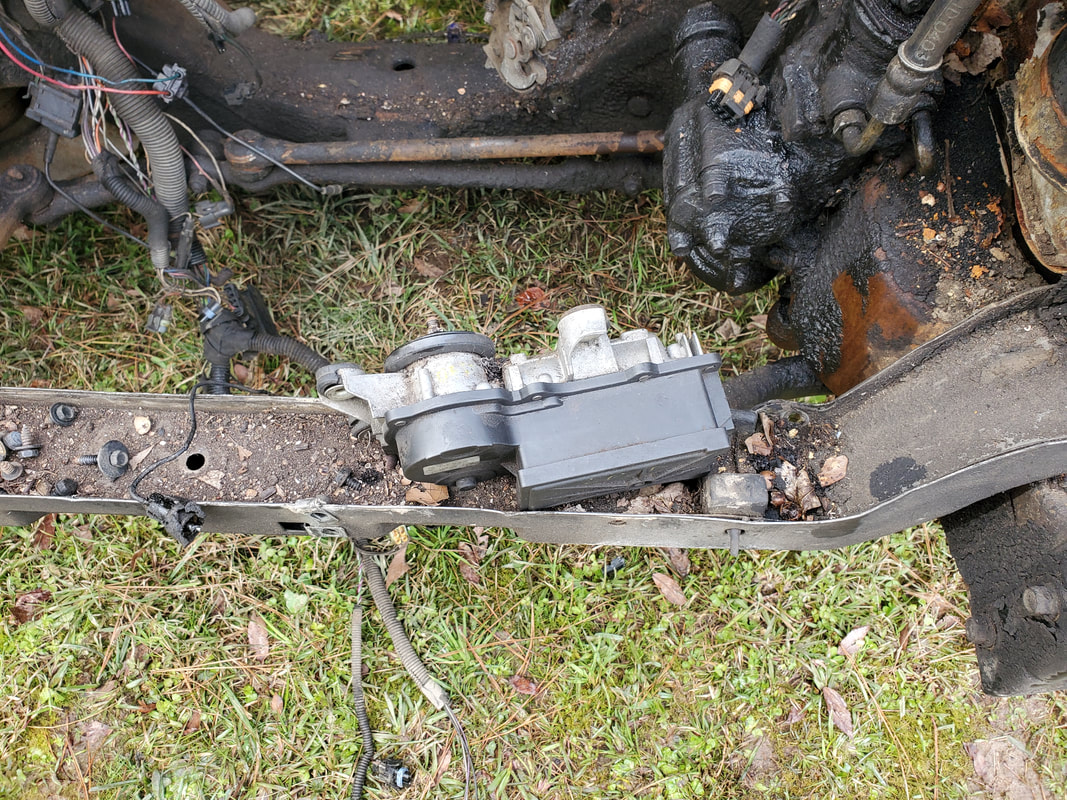 Wiper motor, freed from its bondage on the van's firewall. With those components removed my next target area will be the removal of the outer HVAC box. This large fixture will clear up a large amount of space in what was once the engine bay. To be able to remove the box I'll have to remove the right fender as well, which is just as well since those body parts need to come off anyway. I intend on getting the engine bay cleared of everything then putting the saw to the side walls of the engine bay, cutting the sheet metal free at the firewall, in the same way I did the ranger body when I converted it to a chicken coop. This will also lessen the amount of weight on the body even more than when I remove the other shit from the body. Cutting everything free like this will also allow me to remove the front frame mounts, which will bring me that much closer to getting the body divorced from the frame. The sooner I get this whole shitshow of a vehicle processed, the happier I'll be.
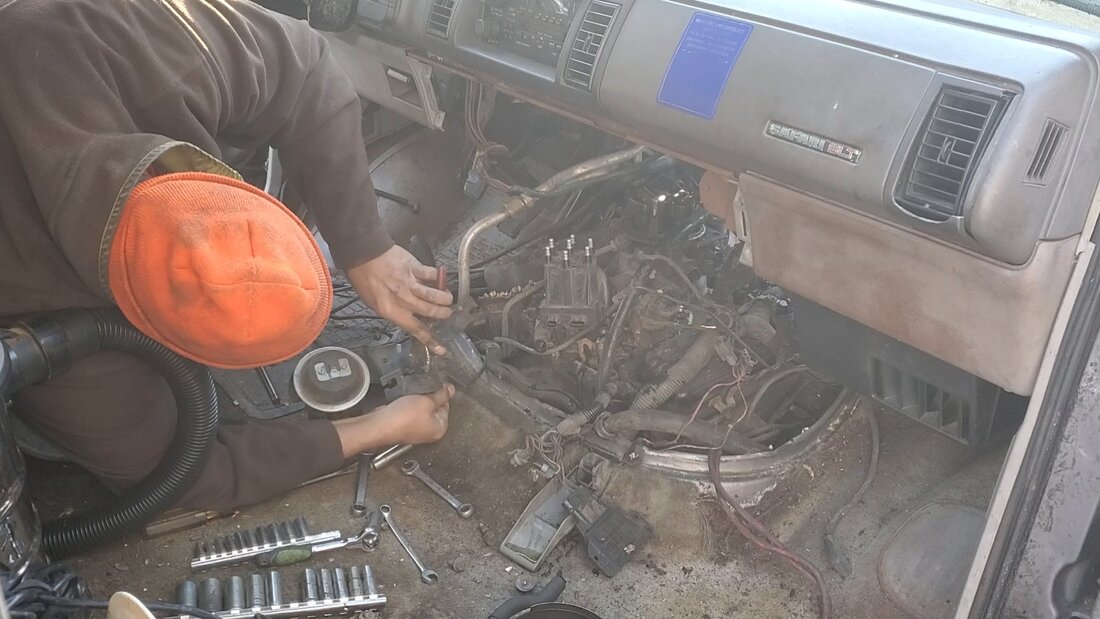
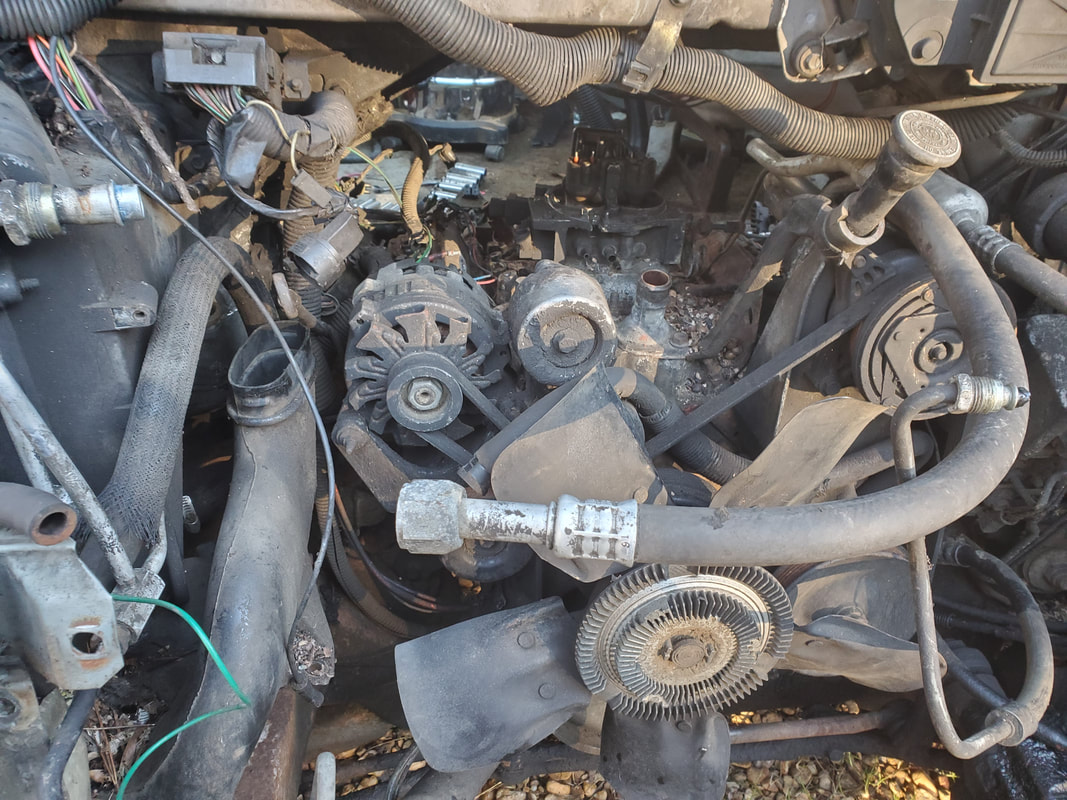
As I move along in the preparation for the removal of the minivan's powertrain, I find myself having to spend a little time inside the mildew infested interior, having removed the hump from the back of the engine. With the hump removed I can get to the deep end of the engine bay, disconnecting wires and hoses, and even removing some components that presented the opportunity as the removal of some fasteners allowed me to remove components that were connected to other brackets that needed to come free. It's amazingly sick how tight the area is in the engine bay of this vehicle, making me wonder how anyone can even work on one of these things.
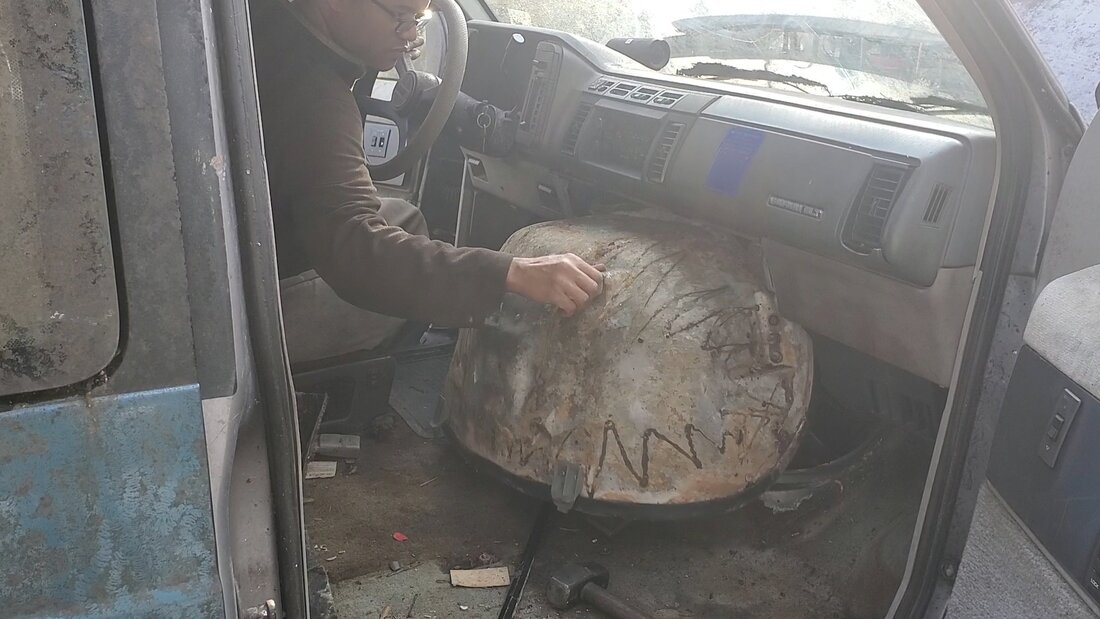
Hump removed from the rear of the engine, exposing everything so I can remove the wires and hoses from the top of the engine.
Removing a bracket holding a component on the top of the engine as I disconnect different wires and hoses from said components.
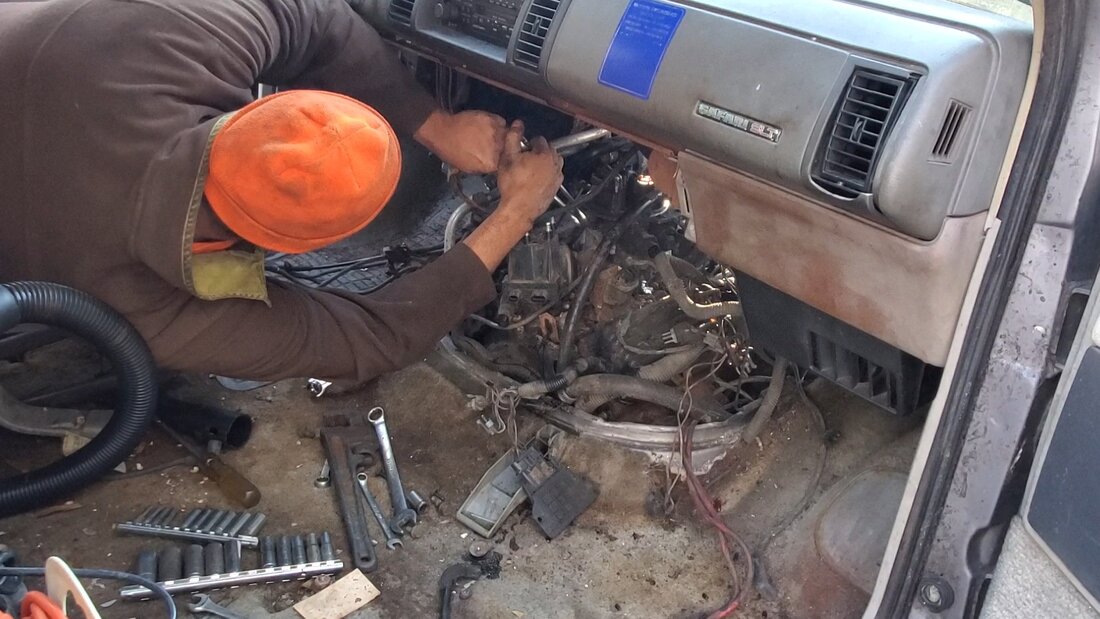
Separating AC hose from compressor leading to the rearmost portion of the HVAC system in the van.
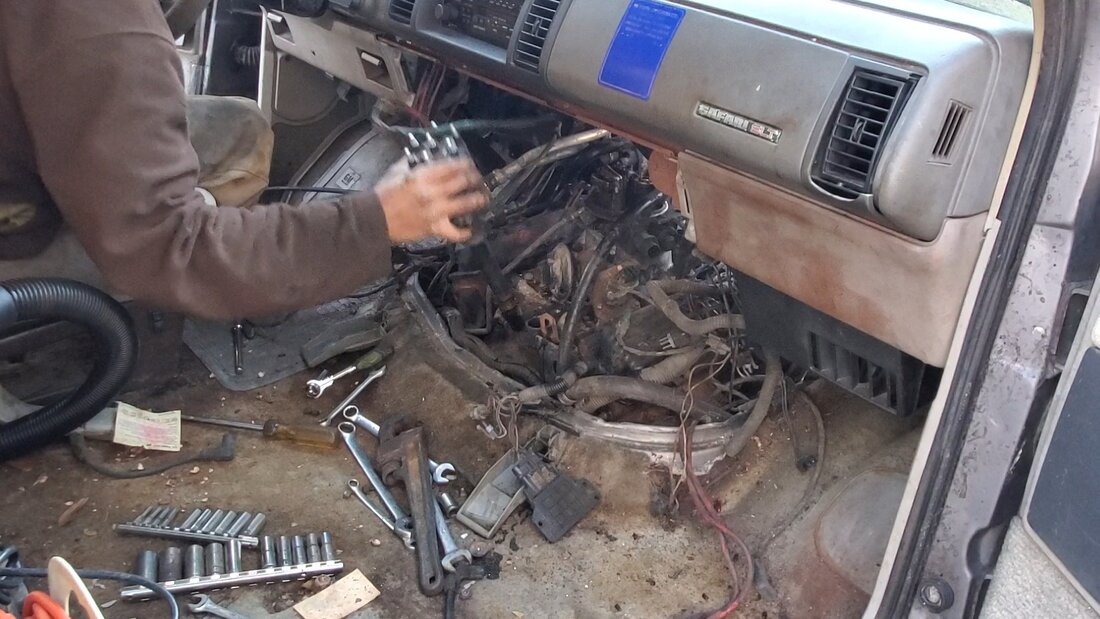
Removing the distributor from the engine.
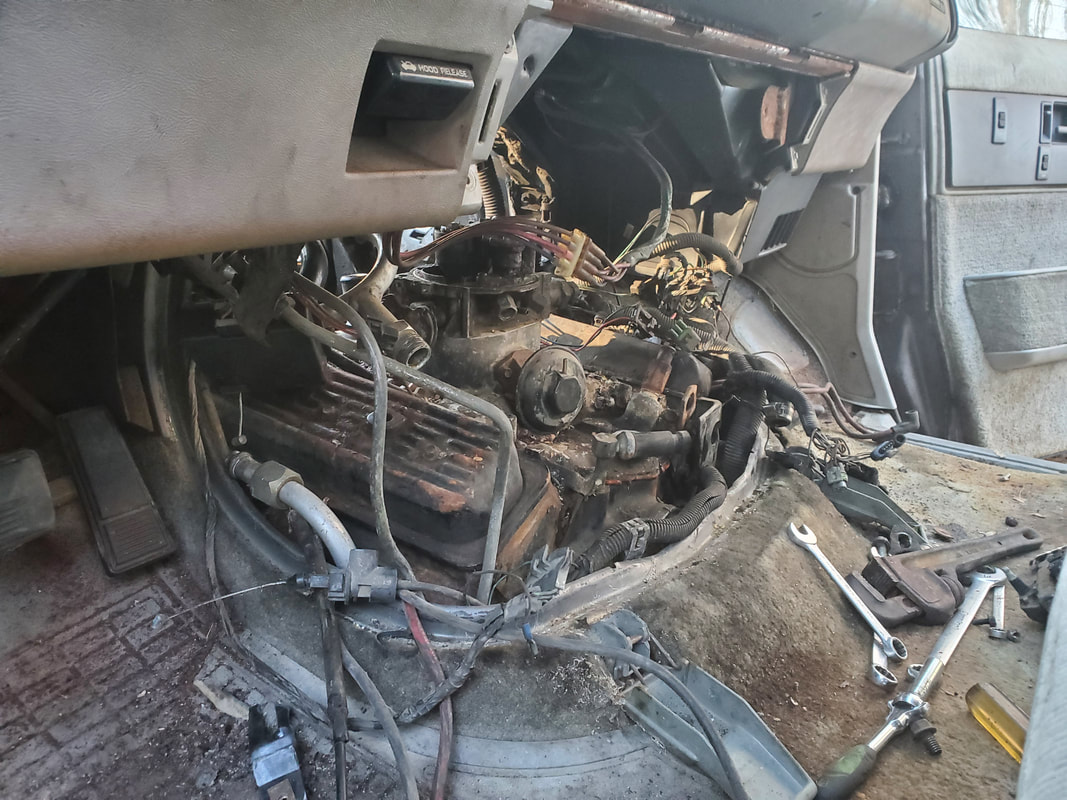
Top of engine with a lot of hoses and other components removed or disconnected. Throttle body is the only holdout, but not for long.
Wire harnesses and hoses moved from the top of the engine as seen from the front of the engine.
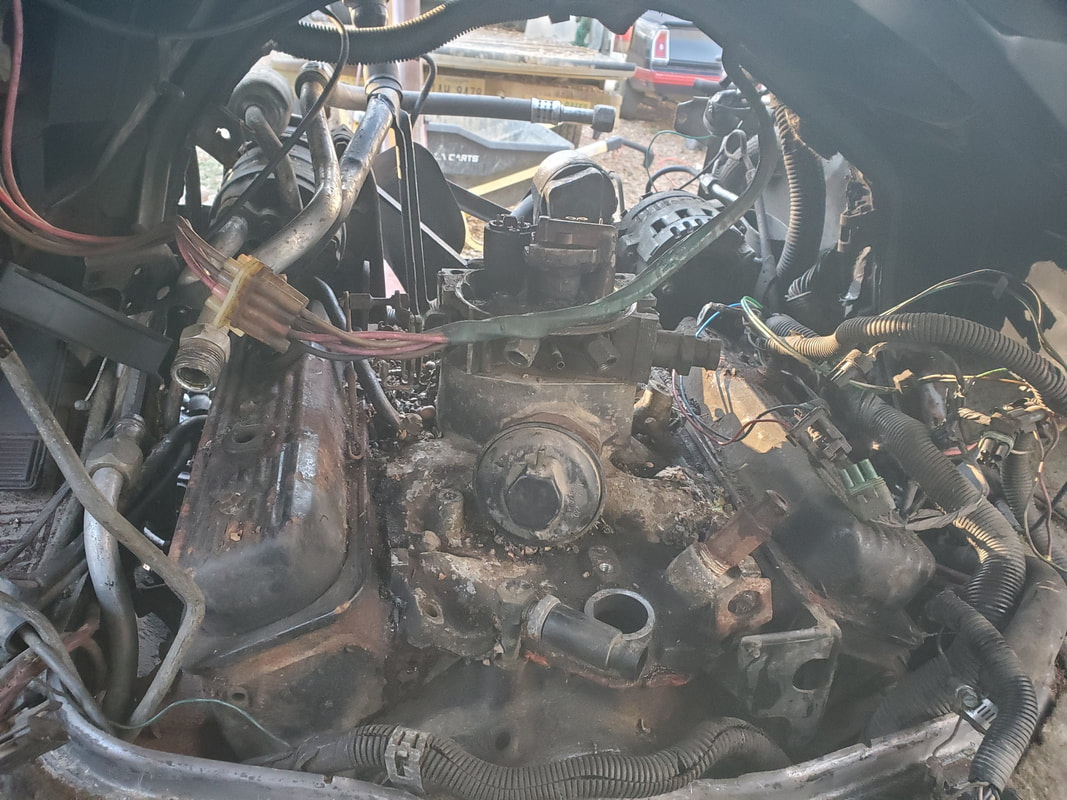
Adding to the already removed components from the body and the front of the engine, I add the smaller parts from the top of the engine, like the air cleaner assembly, throttle body, distributor, coil, etc. A lot of these smaller components will be put up for sale as part of my effort to come up with funds to purchase other components for other projects. Of course, parts like the distributor and throttle body won't be needed as this engine will be de-converted to a carbureted, HEI fired powerplant. 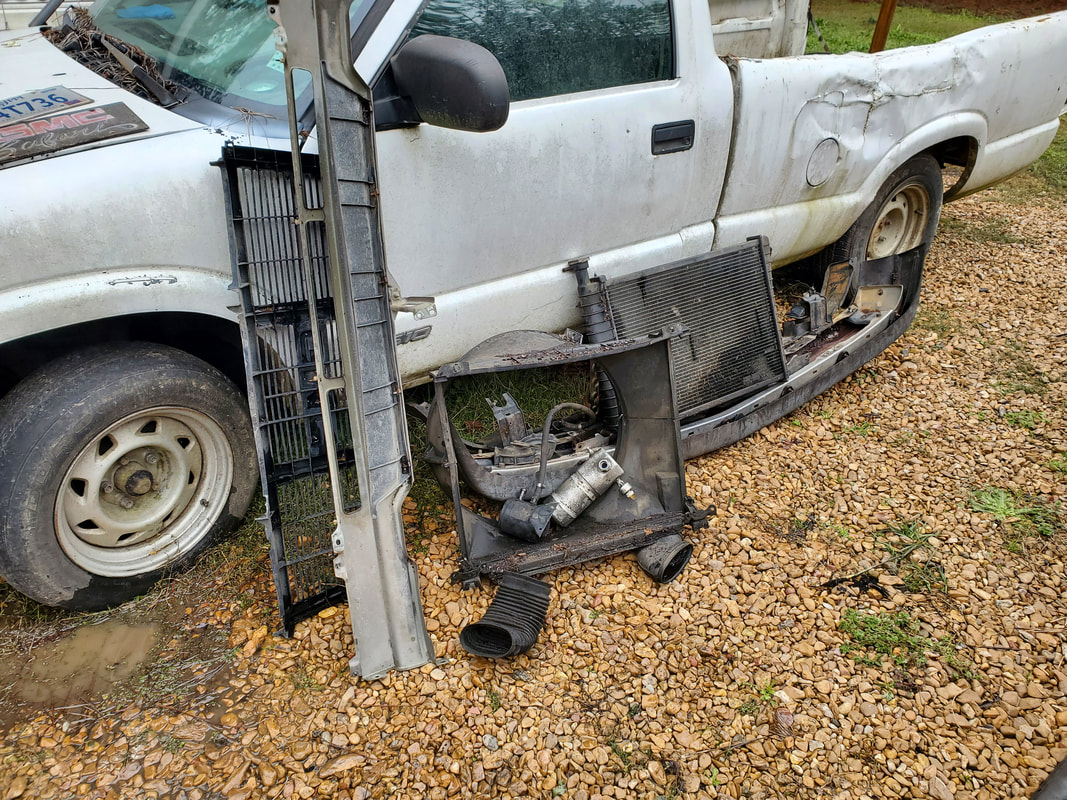
Miscellaneous parts removed from the front of the engine and body as I open up everything around the powertrain.
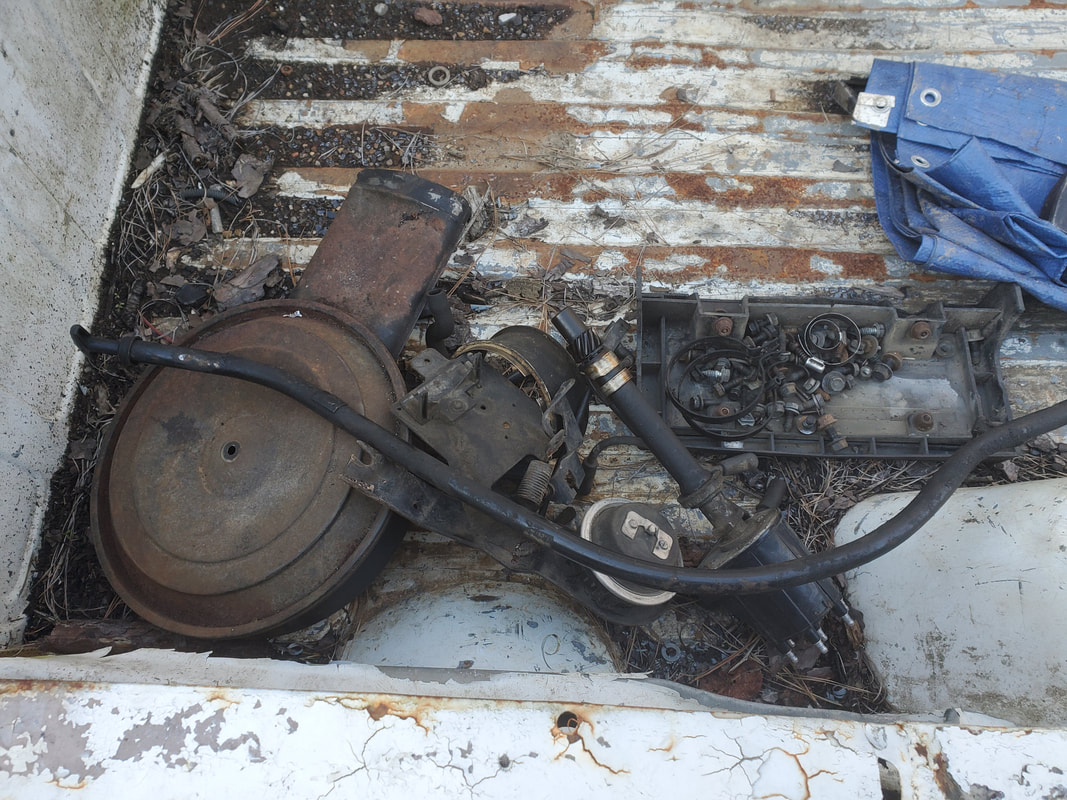
Components removed from the top of the engine after gaining access to the rear of said engine.
Another thing that I took care of was the pulling of the bolts from the motor mounts. There is a high possibility that I will have to further remove the motor mount brackets and mounts to completely clear them from between the engine block and K-member due to the idea that I may not be able to get the engine lifted up high enough to separate the two portions of the motor mount assembly, whether with the crane or even by jacking up the engine with a jack under the oil pan. We'll cross that bridge when we get to it. 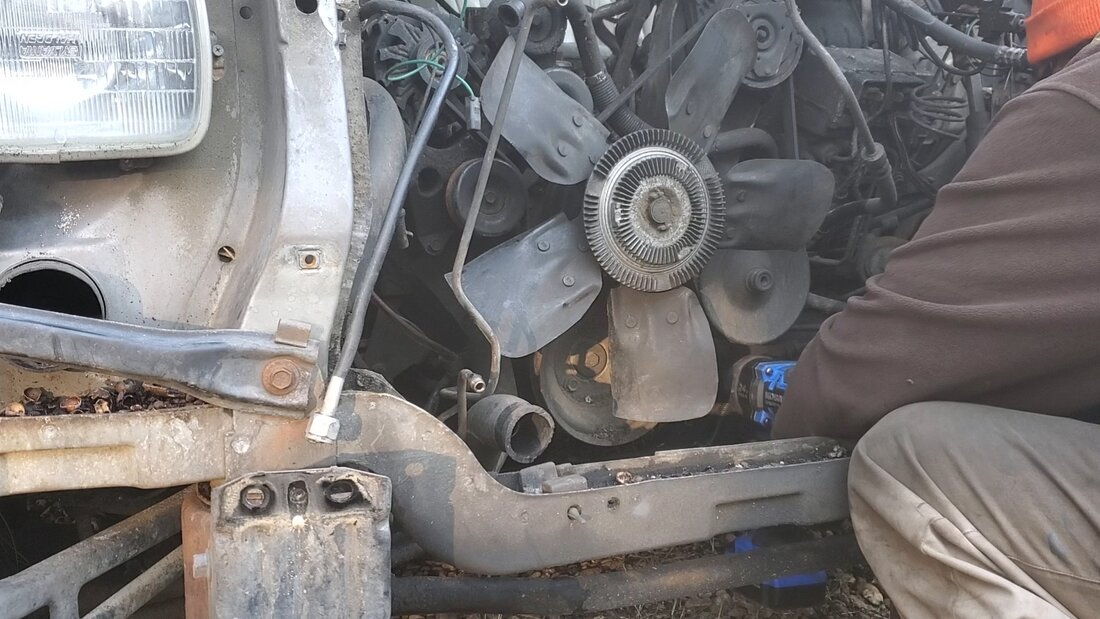
Using the impact wrench to pull the bolt from the left motor mount.
Pulling right side motor mount bolt.
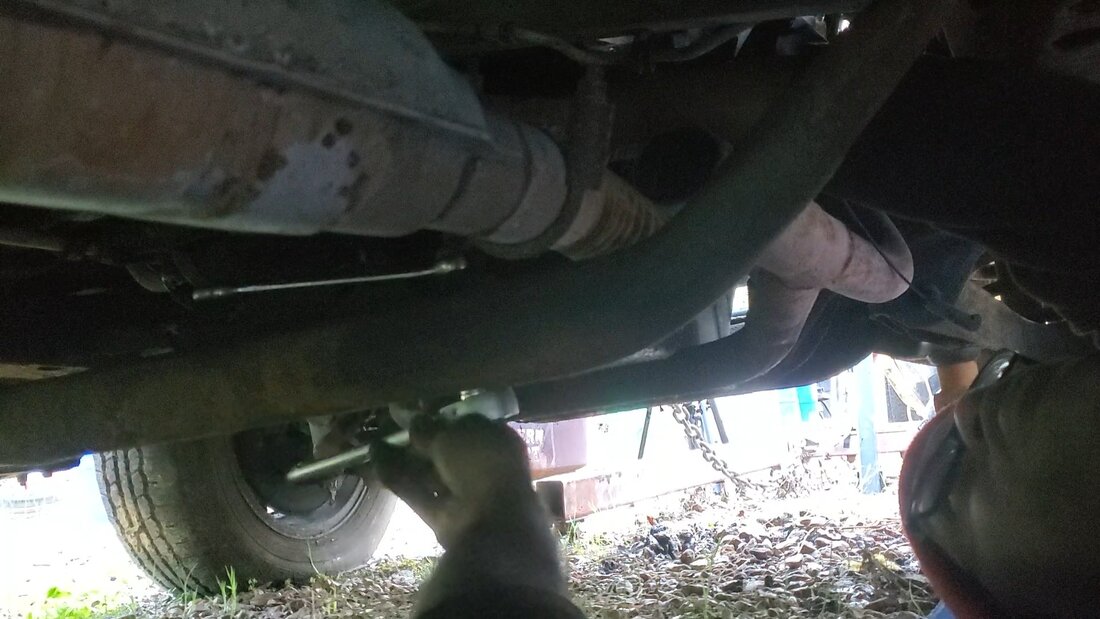
After getting everything done on the top of the engine and the van, it was time to go under the van. I had to cut the exhaust pipe, disconnect the transmission crossmember and mount, and the shifter linkage and wiring going to the transmission. Rather than try to remove the flange connections from the exhaust manifolds I just cut the pipe just after the Y, leaving all the pipe from the flanges intact. This whole setup can be used as is, out the box, or the pipes can be cut just before the merge of the Y and connected to separate pipes and mufflers. The shifter linkage was no problem, just a cotter pin pulled. The crossmember was a bit of a pain as I had to get wrenches in the area between the top of the frame and the underside of the body to hold the bolts while wrenching the nuts free from the bottom. The mount was just two nuts and bolts to free it up. Now when I went to remove the wire harnesses from the transmission I discovered something. This transmission is not a 4L60 as is usual for this year range vehicle. This transmission turned out to be a 700R4, the older non-computer-controlled overdrive transmission that is highly sought after for street/strip builds. This transmission can be bolted to SBC V8's as well if desired but will be retained for our 4.3L V6 for the foreseeable future until I source a 5spd manual. This awesome turn of events makes things even nicer for me as I won't have to add a standalone controller for a 4L60, I can hook everything up as a regular automatic transmission, making the car this powertrain is going into be a comfortable to drive long distance hot rod as well as an economical street rod. 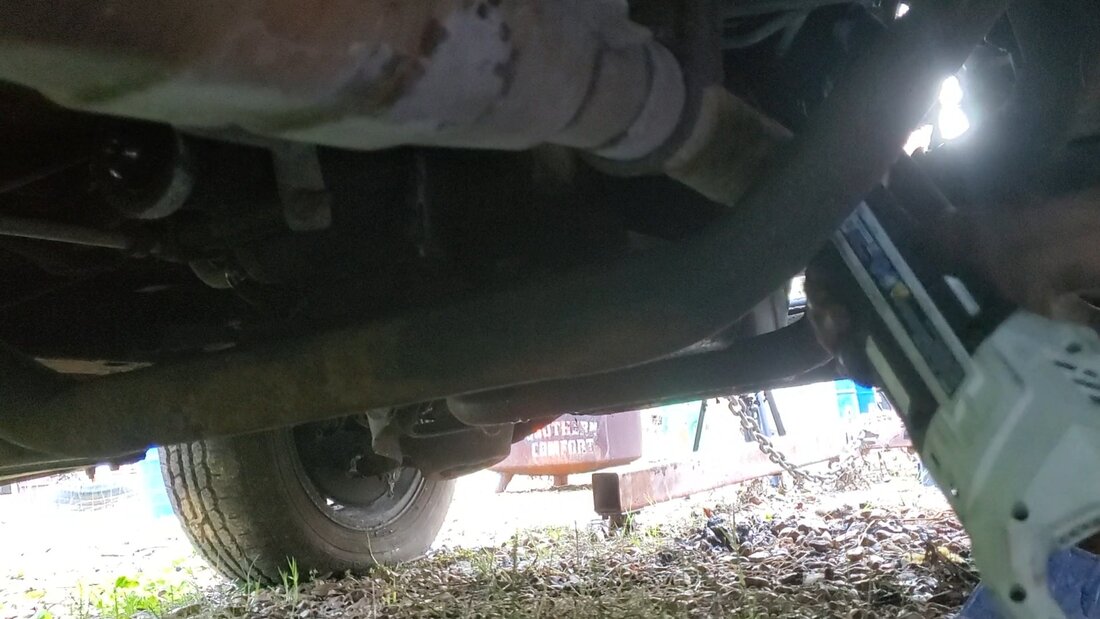
Using our new Hart reciprocating saw to cut the exhaust pipe just after the merge in the Y pipe.
Removing the transmission mount bolts.
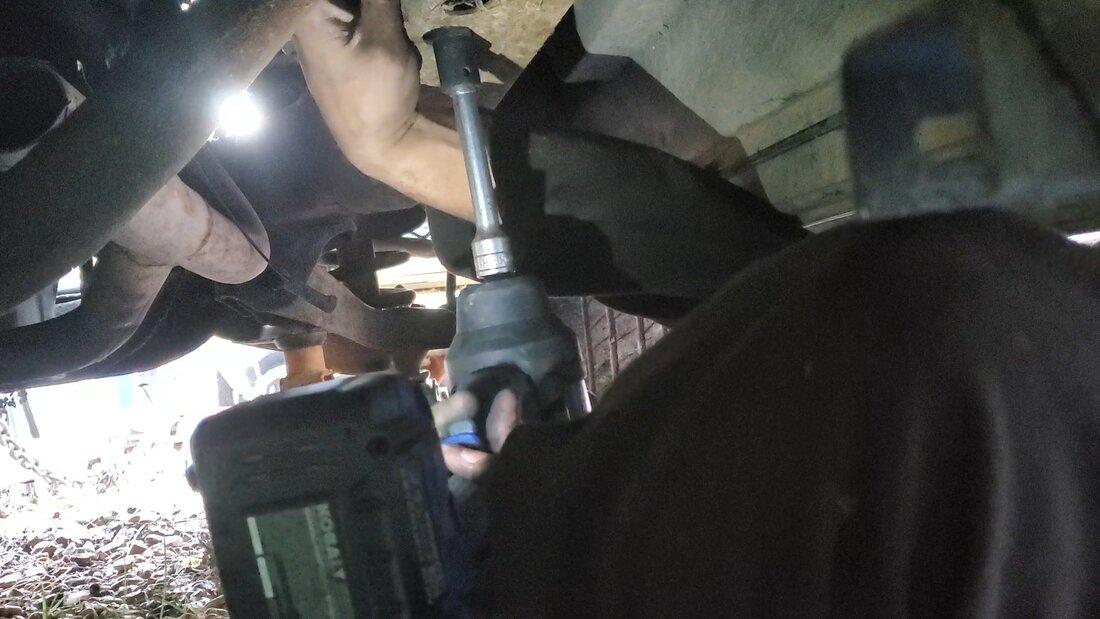
Using the impact wrench to remove the bolts holding the crossmember to the frame.
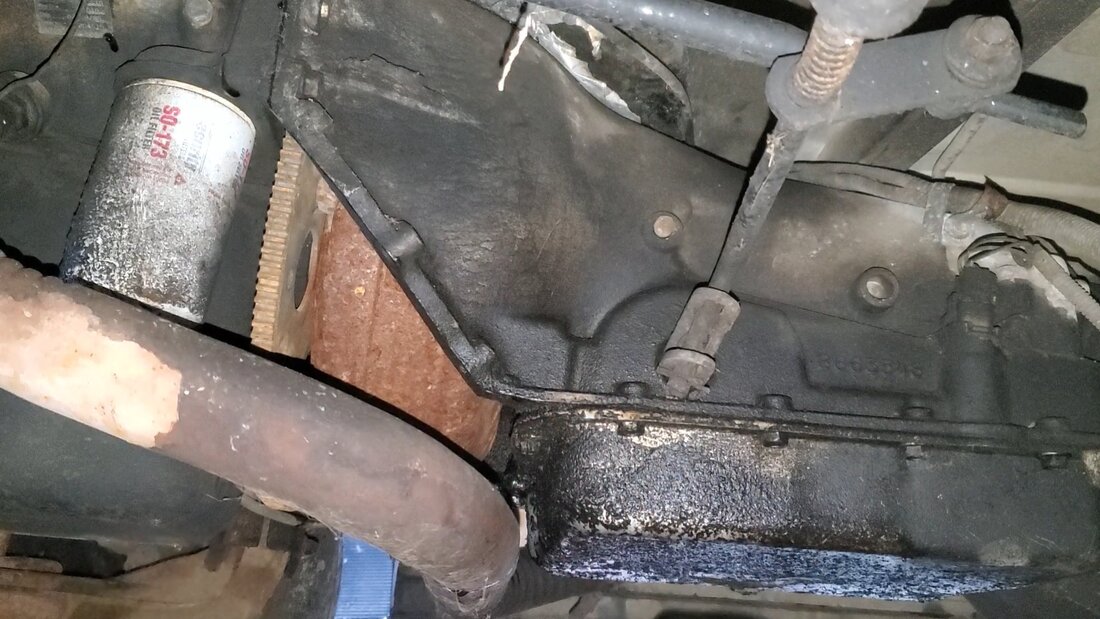
Side of 700R4 transmission with shifter prior to disconnection. Note the plug to the right side of the transmission, one of the indicators of the type of transmission.
With everything disconnected all around, we are pretty much ready for the removal of this powertrain and the hardest part of this shitshow of a vehicle. Once the powertrain is free I plan on moving the van to the back of the compound, where the DOB F100 is parked at, in order to finish the teardown of the rest of the van. Future plans from there are to separate the body from the frame and later on move the body to the other side of the compound, next to the chicken yard where it will be set up to serve as a dog house. I plan on building this structure with a window AC unit and a plug in electric heater to provide the resident dogs with full HVAC. A water line will be run to feed an automatic water dish and of course a dog bed will be placed inside. I'll also build a bulk feeder apparatus that can be reloaded from the outside, allowing the dog to eat for the long term, making this setup be able to serve us for longer terms like vacations, etc. This will also be another unique fixture on the homestead, just like the car chicken coops, and for all intents, an appropriate use of another annoying vehicle such as a minivan. As for the frame, I had a few ideas for it, especially being a wide wheelbase frame. The best one is to find an older pickup truck cab and forward body section and mount it on the frame then construct a short flatbed or even take a regular bed and shorten it to fit on the frame, making a unique stubby single cab classic truck hybrid.
After spending so much time on the FMT getting it in the home stretch to being done and ready to start up and hopefully drive, I turned my attention to the GMC Safari minivan that we picked up from our friend who also owns the F100 truck. I wanted to get the powertrain out of the van so I can take it up to the garage and remove the components from the engine that won't be used, in order to replace them with the components that will effectively convert the engine to a carbureted, HEI fired engine. Also, I plan on moving the van body to another location on the homestead, out of the way where it can sit while I take my time further stripping the body down to remove parts from it. 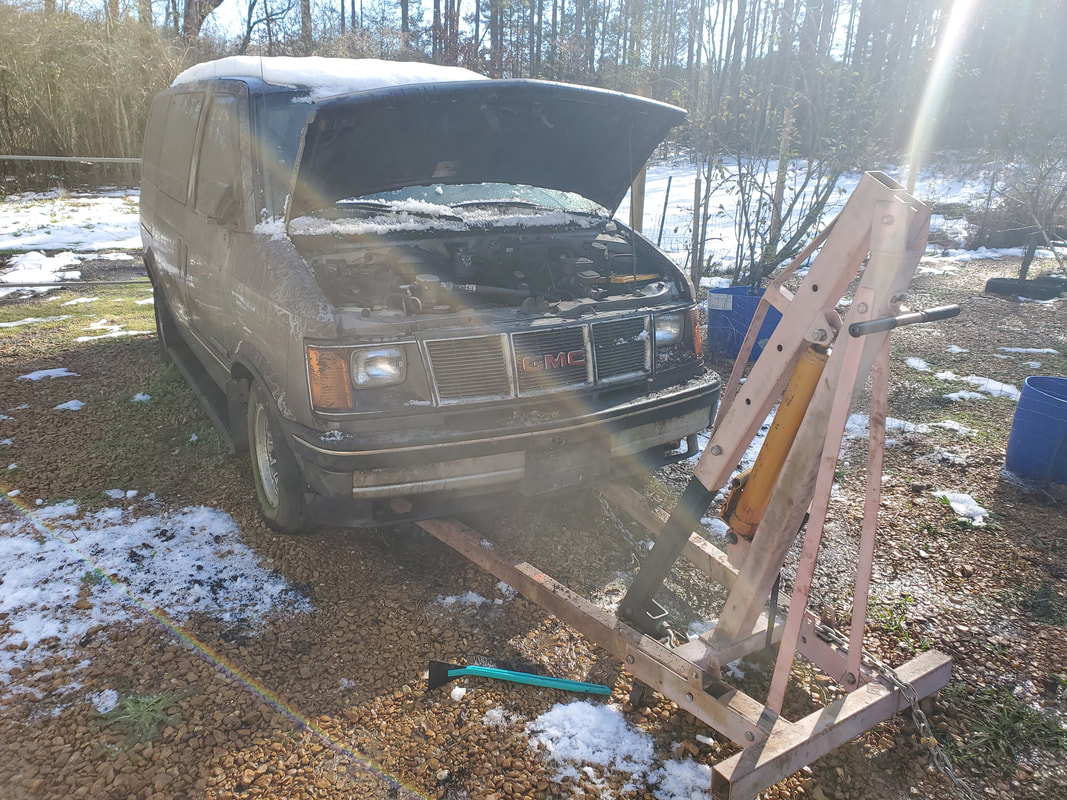 The minivan with the engine crane staged in front of it. I already took the time to move the engine crane from the FMT site over to the minivan to have it ready. The main thing I would have to do to prepare for the removal is to remove the whole nose from the van. Since the engine is shoehorned in the engine bay, the van is designed where the bumper, some other panels and everything directly in front of the radiator/condenser have to come out so the powertrain can be removed straight out, instead of up and forward like in most vehicles. While this is no big deal, there is a matter of knowing where all the bolts are that connect everything together so we don't waste too much time trying to hunt down that one elusive bolt that keeps everything together. 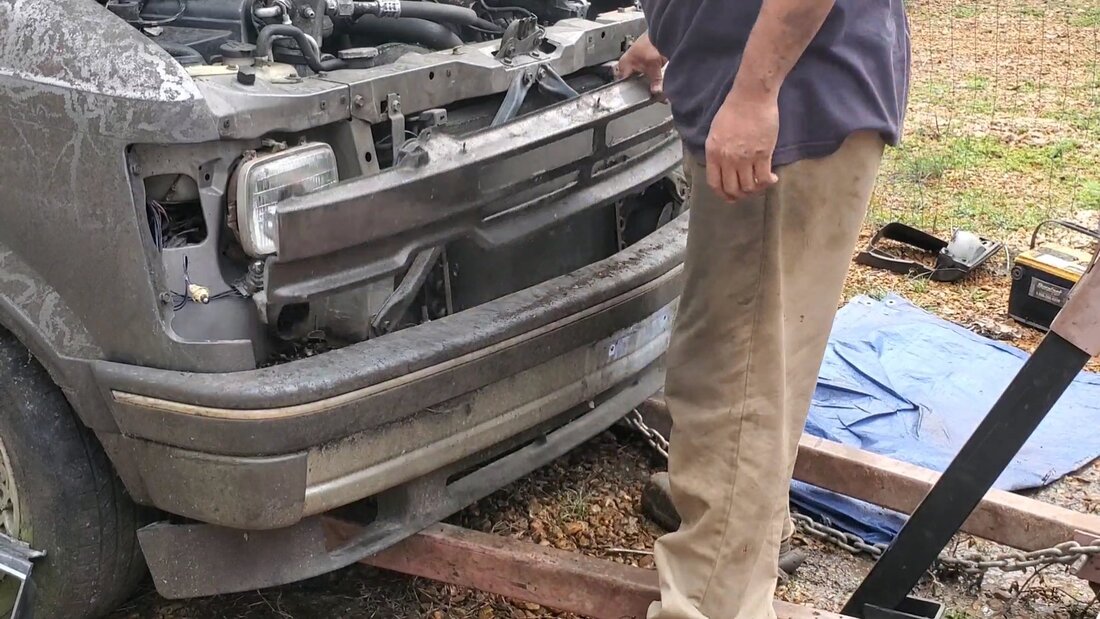 Pulling a body panel out from above the bumper after pulling the grille and headlight trim pieces. Next was the bumper. At first, I was going to take the bumper off with the mounting brackets, but one bolt had other plans. The thread clip that held the bolt snapped so the threaded portion spun around, meaning I ended up having to go to the bolts that hold the mounting bracket directly to the bumper. Of course, this took a little more effort due to the locations of the bolts in question. Eventually I did get the bolts off and the bumper on the ground. Some wires and a couple light sockets and the bunper was free and clear. 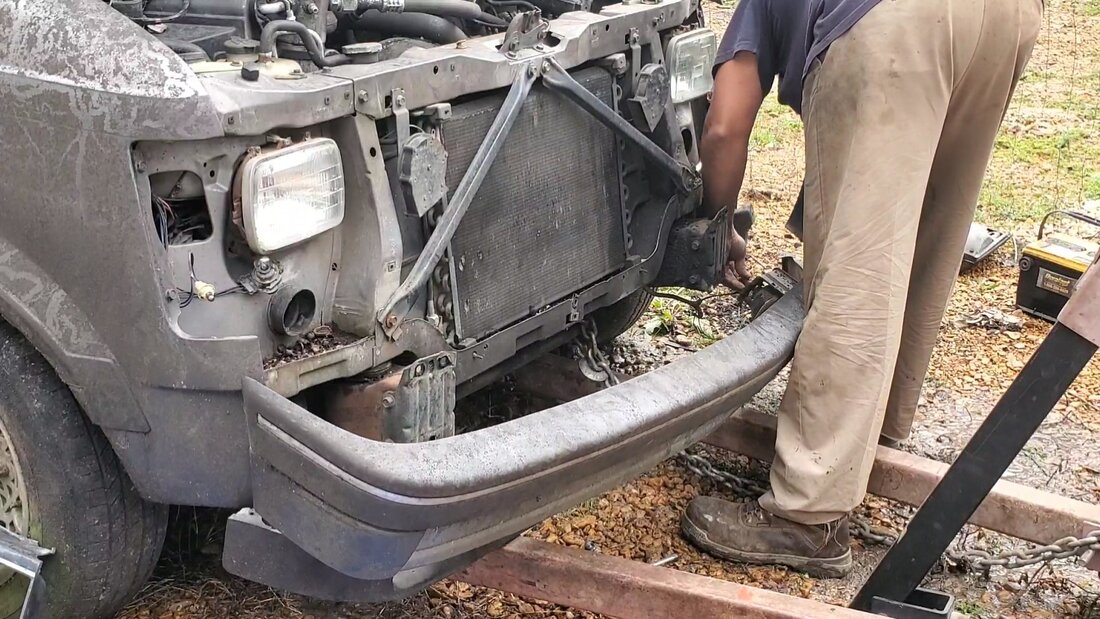 Removing the bumper from the frame. With the bumper out of the way it was time to remove the core support at the top. This was at least a simple endeavor, with three bolts on each side. With the support out of the way, I could focus on removing the condenser and radiator, along with the associated hoses. Well, some hoses, since some would still be connected to different spots on the engine accessories. That's neither here nor there. With more components removed, I finally had the front area opened up. 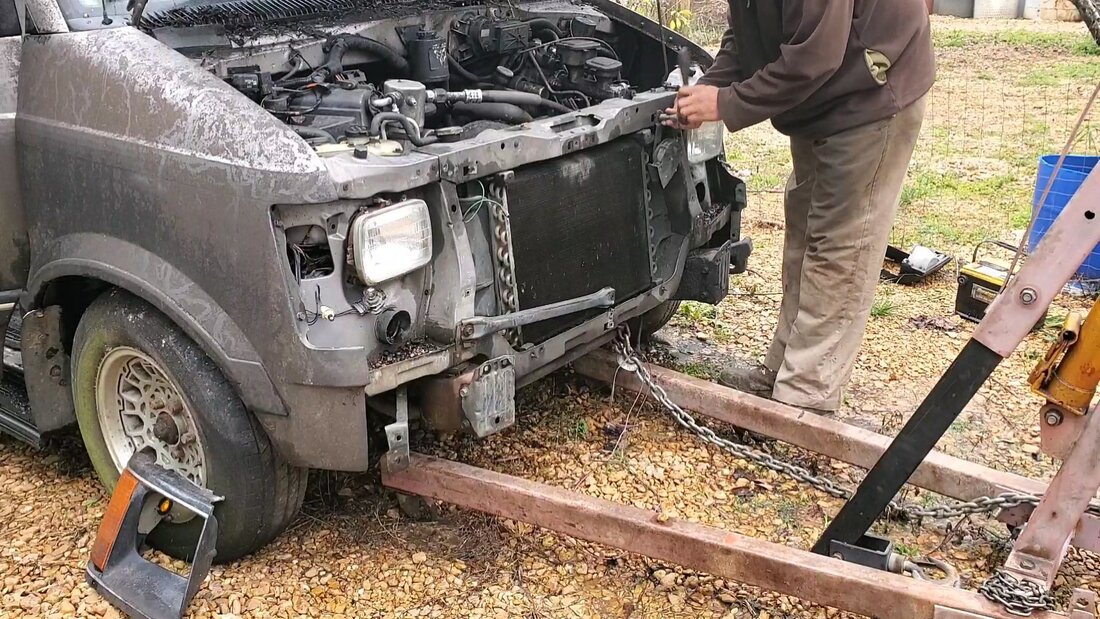 Removing core support. 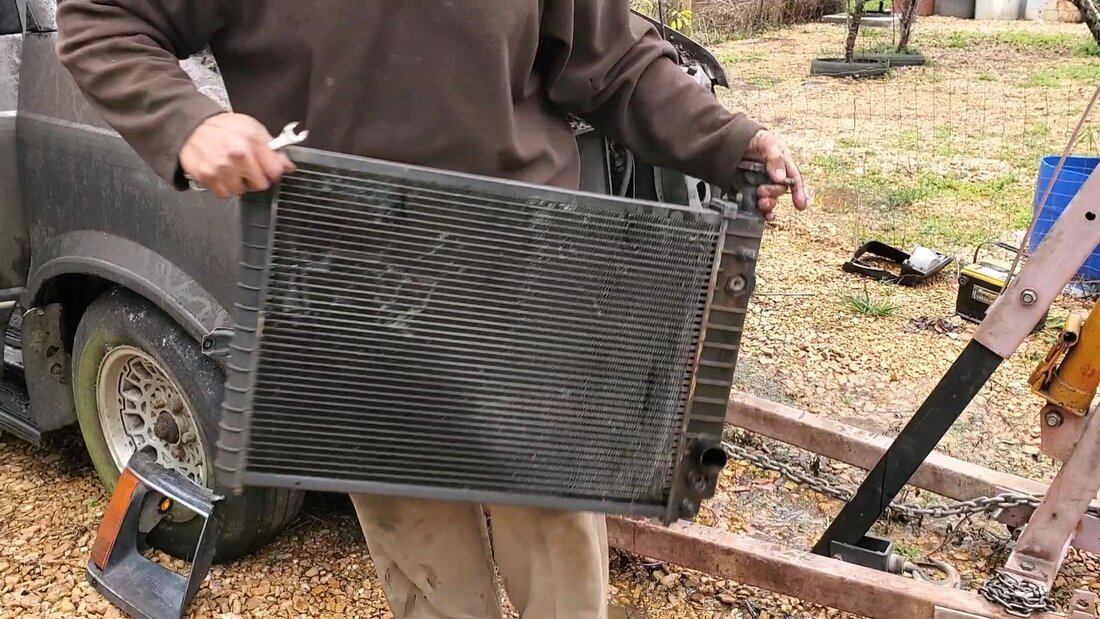 Removing the radiator. 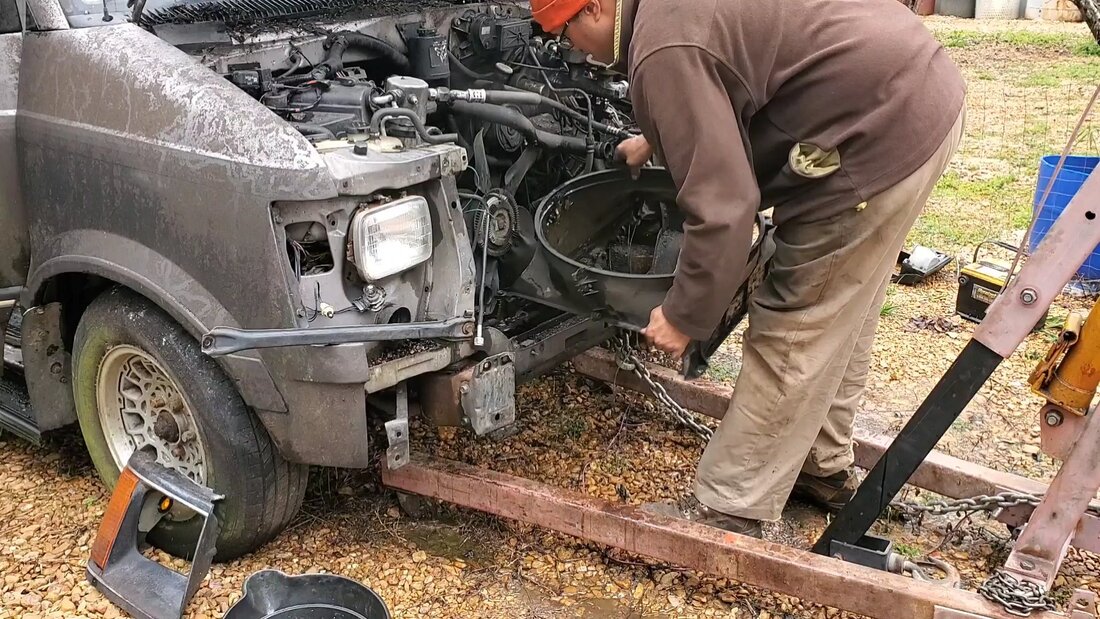 Removing fan shroud. The next move will be to remove the hump in the cab in order to access the rear of the engine and disconnect the wire plugs and hoses and other shit. I'll also have to go under the van to remove the exhaust pipe, transmission mount/crossmember, and motor mounts. At the same time I can also take time to remove other small odds and ends like different hoses and brackets, the things on top of the engine that either can get in the way or are not needed anyway and will be getting removed. Kind of like getting an early start to the "reconstruction" of this engine.  The front end of the van opened up with a few odds and ends removed. 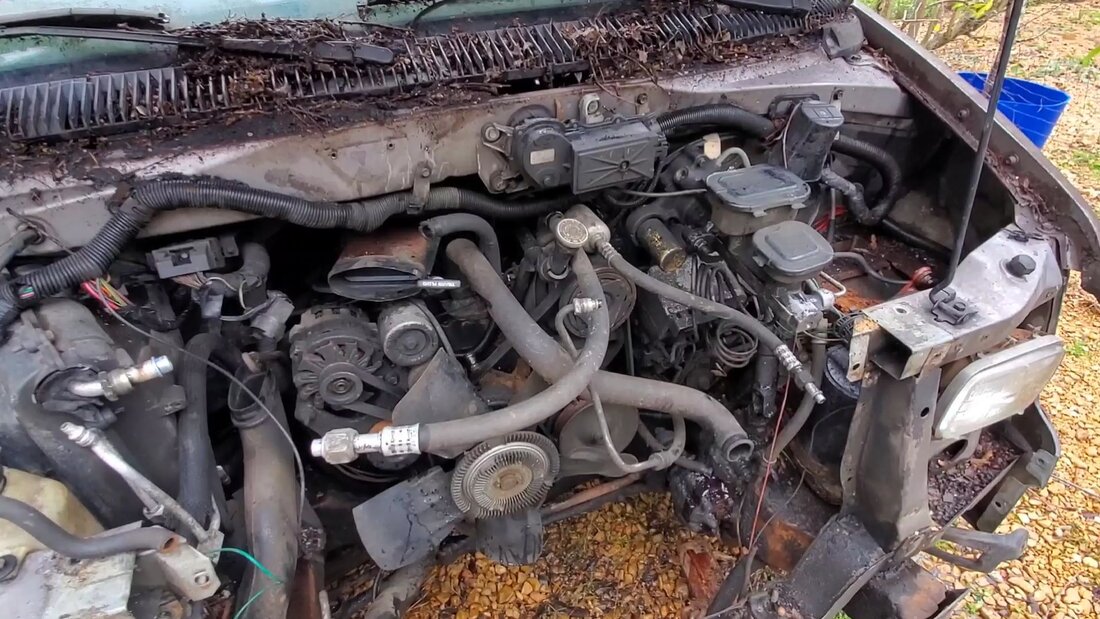 Another angle showing how everything is laid out, especially the braking system, more on that.... At first, I had the thought of trying to save this van with the idea of converting it to an LS V8 powerplant but as I looked through the hardware on this thing, I come to find that there's things on this van that I can actually roll over to the 46 Ford build. Things like the braking system. This braking system is actually a hydraulic system, using pressurized power steering oil from the PS pump to power the brake booster, versus a pneumatic brake booster like most cars. This would make for a more consistent braking system that will definitely stop any car that this hardware is hooked up to. With a light car like the 46 Ford, this heavy-duty braking system should stop this fucker under any circumstance. Another thing that I can recycle from this van is the HVAC system. I will have to look at the placement to see how things might fit to determine if I can place the HVAC box in the car body or resort to an aftermarket setup with custom made hoses.  The hydraulic power brake booster system that I plan on reusing on the 46 Ford build. Another thing that I also know on this van is the idea that the HVAC system has a satellite HVAC box to feed air to the rear of the van. I may be able to just use this for the HVAC on the car, in much the same way as the aftermarket AC systems are for classic cars. Another thing that I even thought about is the frame. Since this is a wide track wheelbase frame, I could use the frame for another build, or like an idea I had, which is taking an old pickup cab and front clip and dropping it on the frame, adding either a homemade flat bed or even a shortened bed to create a stubby single cab truck that is a literal Frankenstein classic. Who knows, main thing is getting this powertrain out and in the garage, then getting the rest of the van body scrapped/parted out so I can free up the frame.
That's a helluva mouth full for a title for such a small amount of work performed. With all the work done on the FMT, it was time to do some cleanup around the worksite, up to and including the removal of the engine crane. The crane has been on site for over a couple months while we worked on installing the engine and transmission into the truck as well as having to lift the engine multiple times when fitting the oil pan. With the engine back down on the K-member and bolted down, the crane's services are no longer required. It is however required by the GMC Safari minivan. My next project plan is to work on removing the 4.3L V6 and 4L60 transmission from the van for future use in the 46 Ford Coupe build. I will have to remove the front of the truck, including the bumper and grille section along with the radiator and other hardware to open things up so the engine and transmission can be pulled straight out from the van. I'll have to use a truck or maybe the neighbor's tractor to pull the van back as we remove the engine. Of course, if we go the tractor route, I'll make sure everything is ready for removal so when the tractor is there to pull, all we have to do is jack the engine up off the K-member and pull the van free from the powertrain to make things go quick since we obviously can't hold on to the tractor for longer than a few moments.
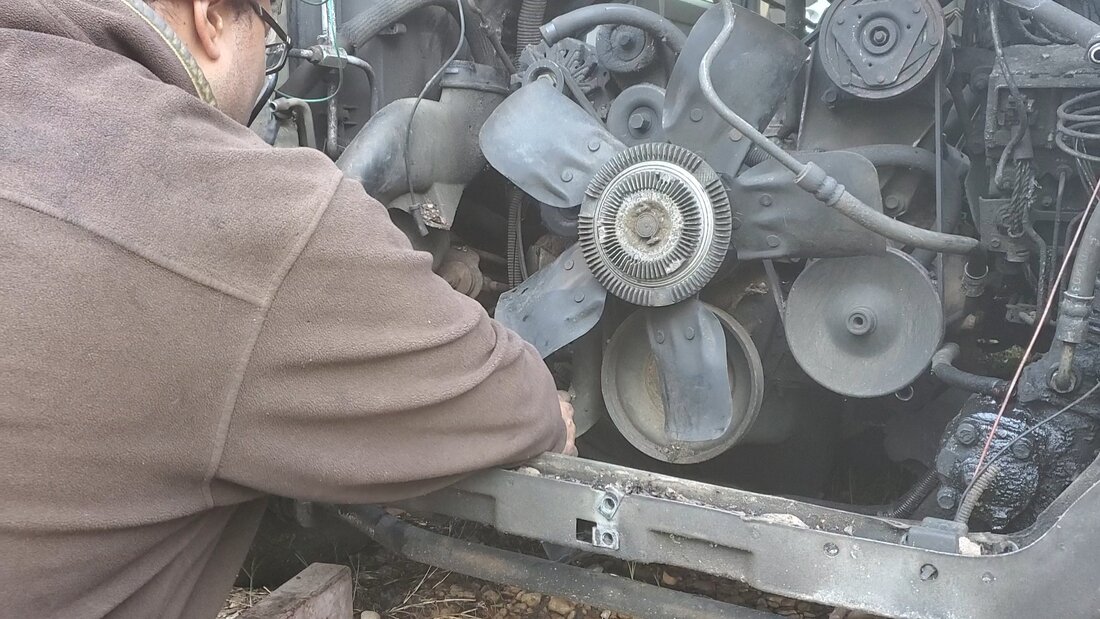
Along with the crane I also removed other things from the worksite, like the old oil pan and pickup, along with the dipstick. Other small odds and ends were cleaned up as well, a psychological feel-good sign that the project is almost done. Aside from that, the next thing that was taken care of to further reach the completion finish line was install the cooling fan. After dragging this piece from the garage, I removed the bolts from the water pump and carefully placed the fan in place to avoid any sudden slipups that might cause the fan to hit the radiator. I installed the bolts then spun the fan to make sure the fan and upper rad hose had plenty of spacing, so they won't make contact with one another during normal operation. 
Cooling fan installed on water pump with plenty of spacing between it and the upper hose.
With the fan in I pulled one of the 4bbl Edelbrock carburetors from the garage, along with a gasket and an air cleaner stud so I can get them ready for installation. I'll still have to source some bolts as well as a hose nipple for the carburetor as it has a fitting in place for a flared tube fitting. I may go ahead and get the metal fuel line that connects to this fitting so it can place the rubber hose connection point closer to the fuel line that is routed up to the front of the engine. I still have to get an air cleaner element for the air cleaner housing so I can put all that together and complete that part as well. 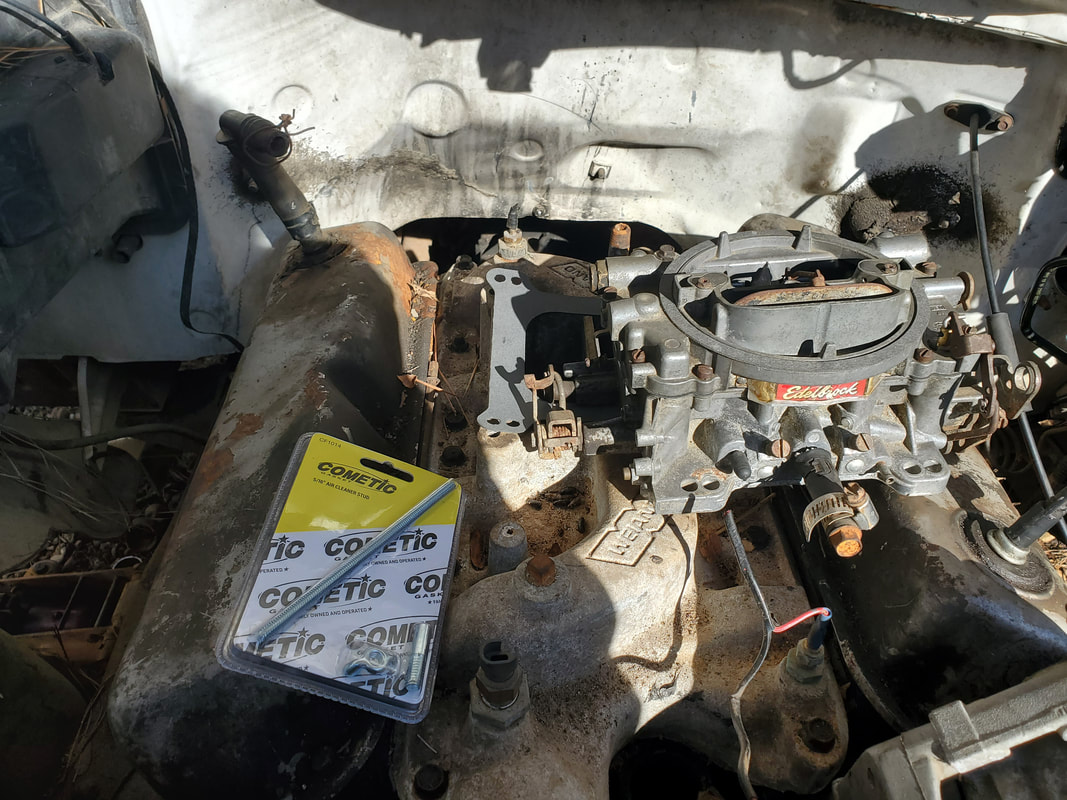
Edelbrock 4bbl carb and air cleaner stud along with gasket staged on intake for installation in my next session.
In the next session I'll get the carb bolted down along with the throttle cable. I'll have to make another shopping trip to get the air cleaner element and fuel line so I can get the rest of the hardware hooked up as well. If there's time in the session, I'll bleed the clutch master cylinder and knock that out too. Every little thing at this point brings us ever so closer to completion.
At this point in the FMT project I managed to get to a point where we're winding up on the things that need to be done before we can crank the engine over and hopefully see this thing roll under its own power for the first time since the truck came in our possession. There were several things that had to be done in this session with some key areas being addressed. The first thing that was taken care of was the dipstick. Instead of trying to use a ready-made dipstick, I sourced a length of aluminum tubing from the hardware store to make a customized dipstick. This would involve heating and bending the tube with a blowtorch, then fitting the tube and bending, repeating until I have a finished product that will attach to the dipstick bung on the side of the oil pan. To help in making the dipstick, I took the time to secure the oil pan to the engine, which already has the oil pickup in place. Putting the oil pan on was not going to happen with the pickup in place. I ended up removing the pickup to slide the oil pan in place, then to make sure I could, reinstalled the pickup with the oil pan already hanging in place, low enough to allow me to get my hands and a ratchet wrench inside to reach the bolts. 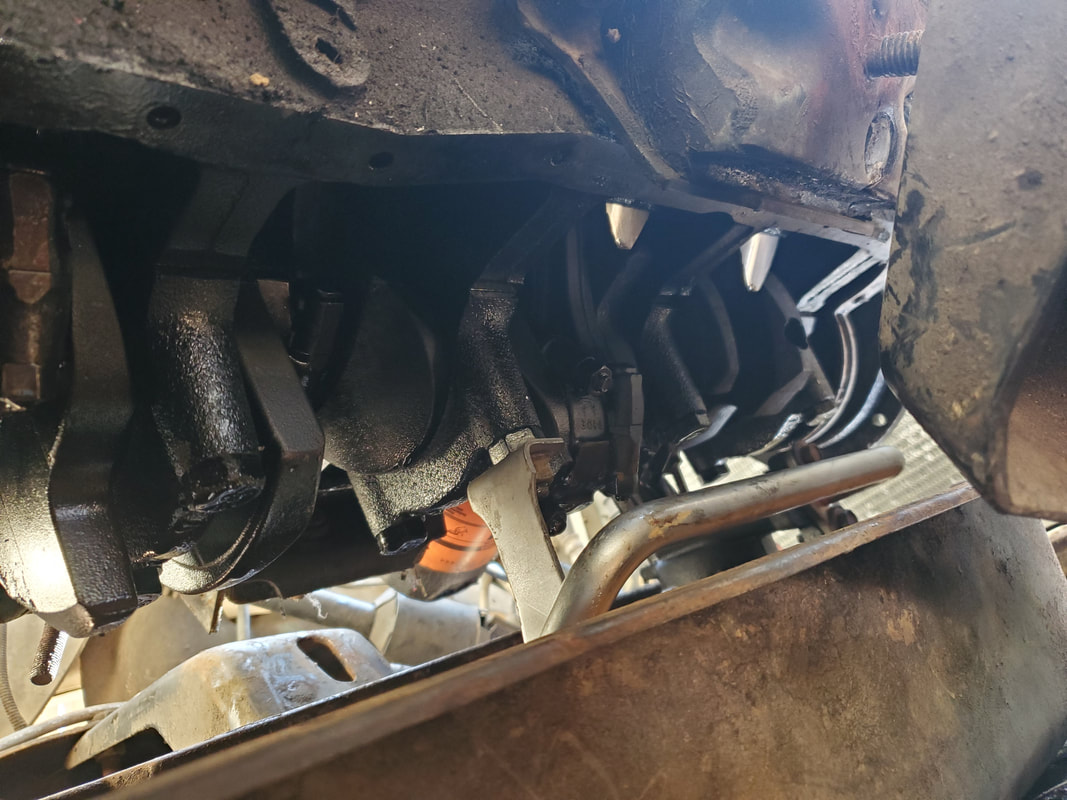 Oil pickup after reinstalling from inside the oil pan which had to be installed first before the pickup could be installed. With the oil pan in place, I took the time to drop the engine onto the K-member so when I test fit the pipe, bending and test fitting it again and again, making small tweaks as I went along, I wouldn't have to worry about interference surprises once I did lower the engine down. Everything was done as it would be in the final placement of the whole assembly. I took time to get the tube to come out from the bung at a 10-degree upward angle, then make approximately a 90-degree bend upward, coming up just behind the power steering pump. I had to have some small bends to make up for the slight outward angle that the tube took as it came out from the bung, as well as trying to get the tube to pass by points to make it easier to secure the tube with a bracket later. 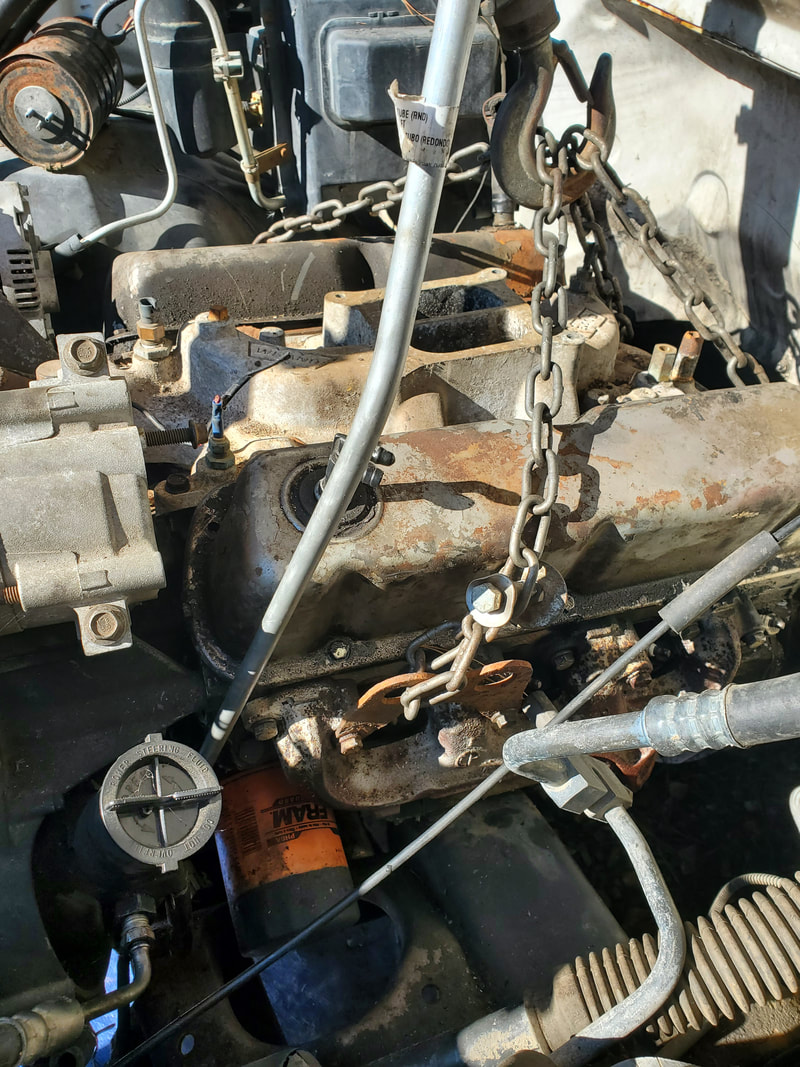 Aluminum tube coming up just behind the power steering pump after making the appropriate bends. 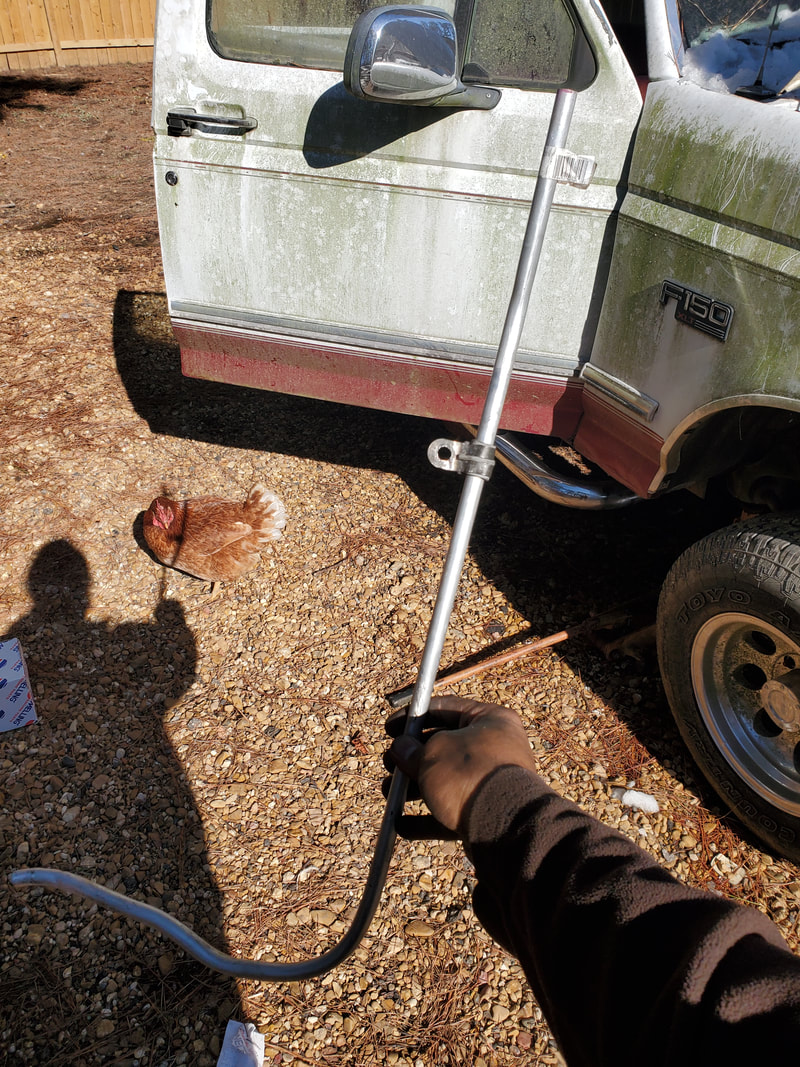 Tube after making the different bends using a propane torch to heat the tubing to ease the bending. 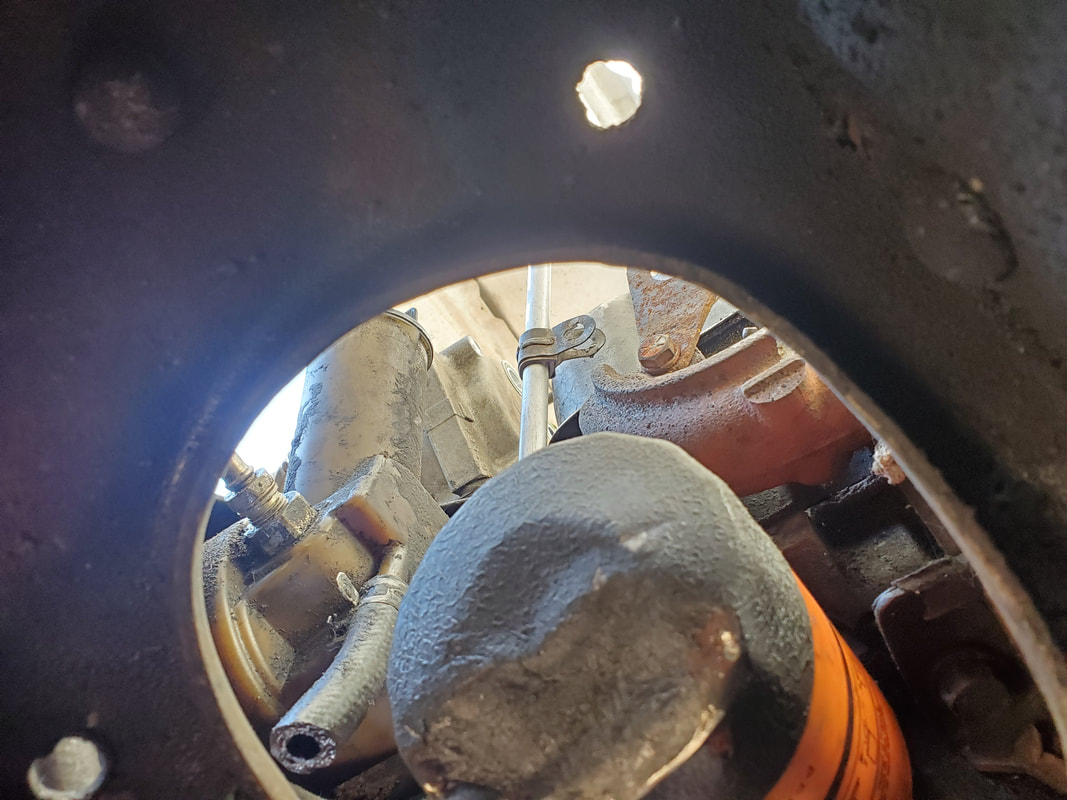 Tube with retention bracket/brace that will help hold the tube to one of the exhaust manifold bolts to keep the whole works stationary. 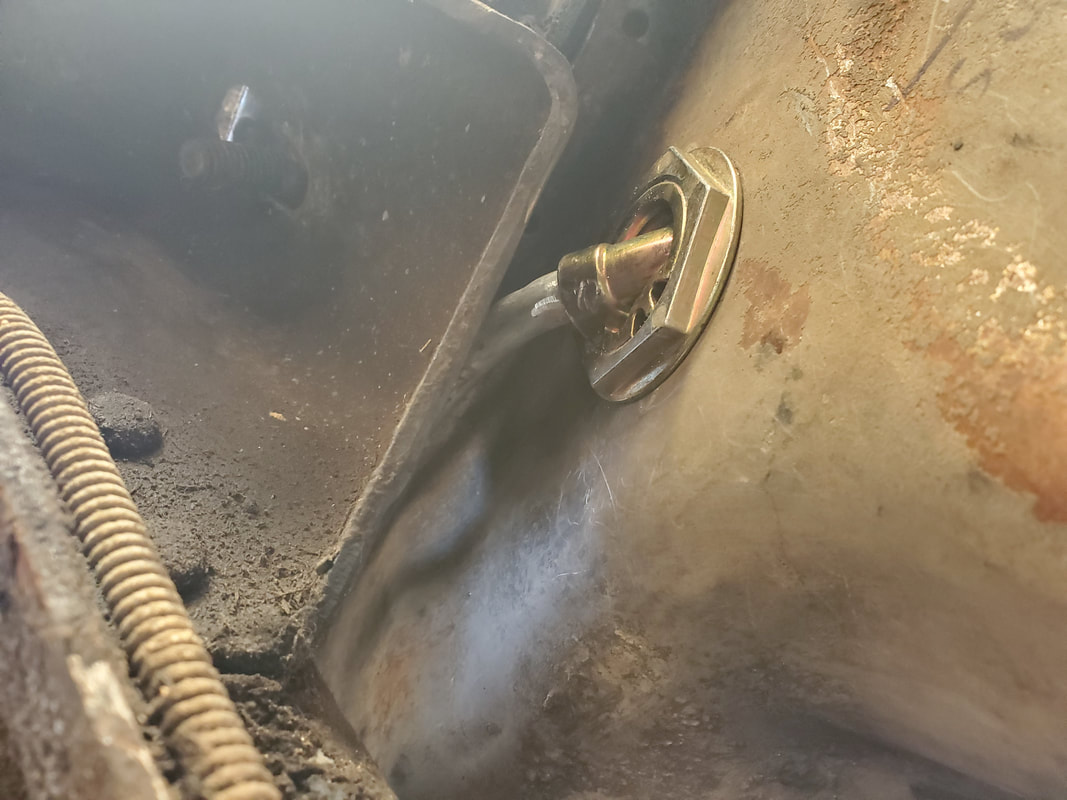 Slight bend on tube to allow the tube to reach at the right angle to insert into the hole on the dipstick bung. With the new dipstick tube completed, there was a matter of the dipstick. First thing I had to do was remove the oil pan one more time, along with the pickup tube so I could insert the tube in the pan and do the final fitting of the tube and dipstick. Obviously, I couldn't use the dipstick from the test unit I originally played with as it was far too short. I looked through my stash and found nothing that would work, other than a couple of transmission dipsticks. That would be tacky, having a dipstick with markings for a transmission in the tube for oil. Looking around for a quick fix, I ended up stealing the dipstick from the Elco as it was plenty long enough to fill the length of the tube with only about 6 inches cut from the top of the tube to allow the tip of the dipstick to reach below the level line on the oil pan. The tube was even the right diameter to allow the cap on the dipstick handle to snugly fit over the tube to keep it covered. That worked out perfectly, one because it allowed me to provide a dipstick for the FMT, and two it was a dipstick that is easily replaced due to the piece coming from a SBC engine. If I didn't find a new one at the auto parts store, I'm plenty sure I could find one at the junkyard. 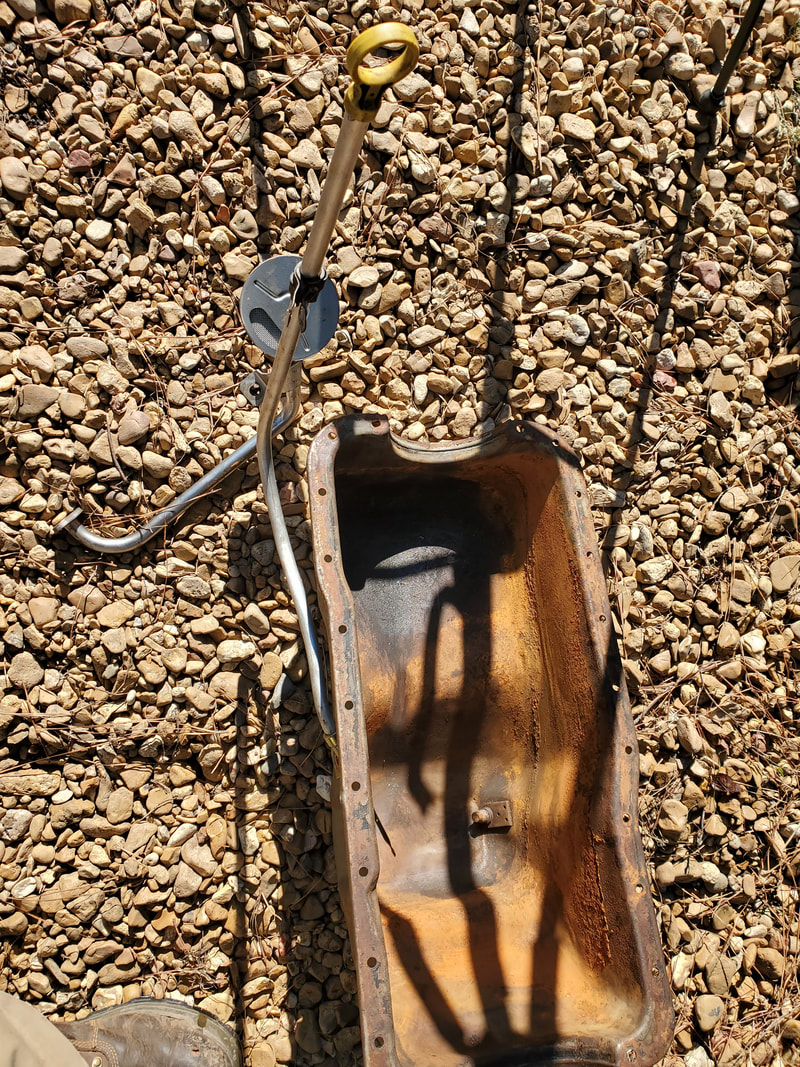 Dipstick tube fitted into oil pan after removing for final fitment of the dipstick, which is currently inserted in the tube. 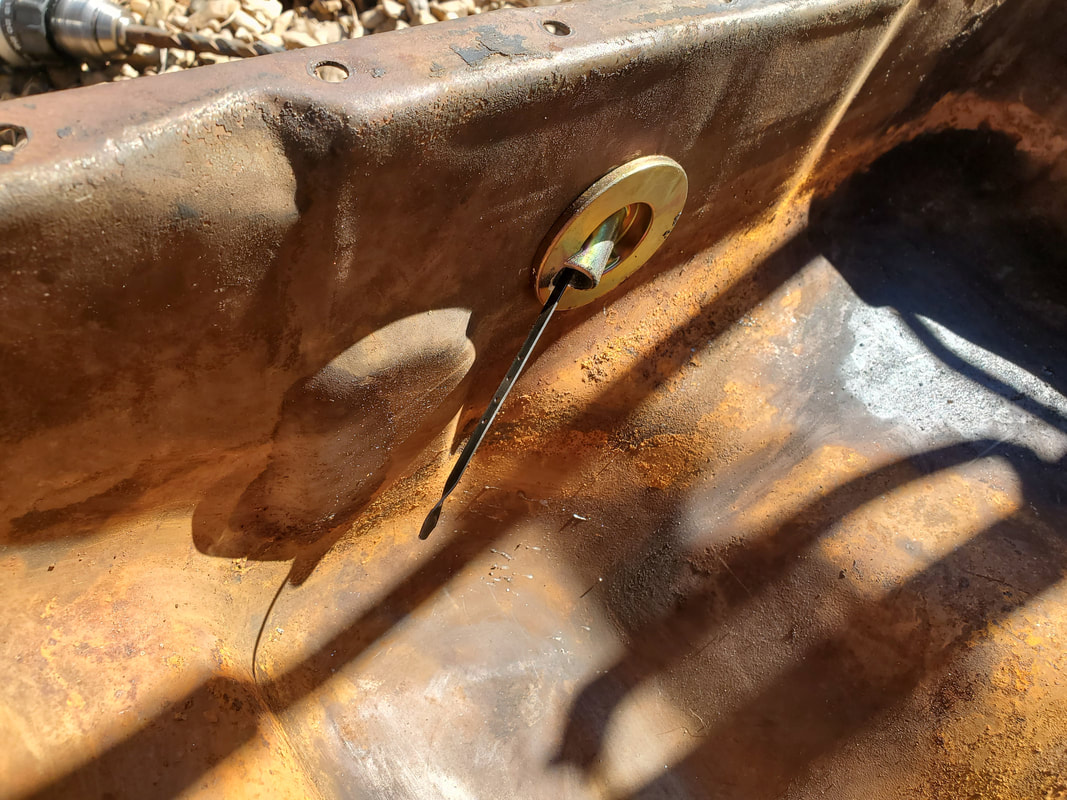 Inside of the oil pan with the tip of the dipstick pointing downward to a point that will place it below the oil line when the pan is full. With the final fitment of everything done I went ahead and installed the pan and oil pickup for one last time, taking time to put the oil pan gasket in as well. Since I had a one-piece gasket, installation was much easier than with the old school four-piece gasket sets. I then inserted the dipstick tube into the bung, but before fully seating the tip of the tube, I smeared gasket maker around the last inch of tube so when it's inserted, the gasket maker will fill the spacing between the tube and the bung, sealing everything up. Of course, I did install the bracket on the exhaust manifold bolt as intended to hold the top part of the tube, but for added security, I added one more bracket along the length of tube running horizontally along the lip of the oil pan. Just like I did with the test dipstick tube, I used a longer bolt and a washer as a spacer to hold the bracket as well as the oil pan to the bottom of the engine block. Doing this effectively secured the dipstick tube in its entirety so when the gasket maker does cure, the tube won't be able to move and compromise the seal. 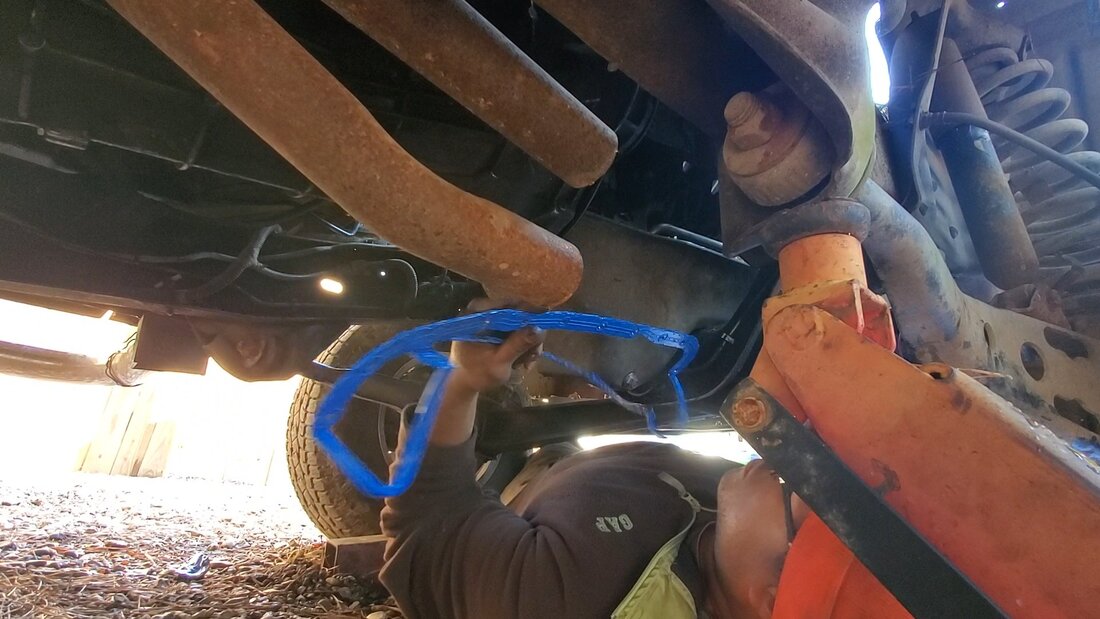 Installing the one-piece oil pan gasket on the oil pan. 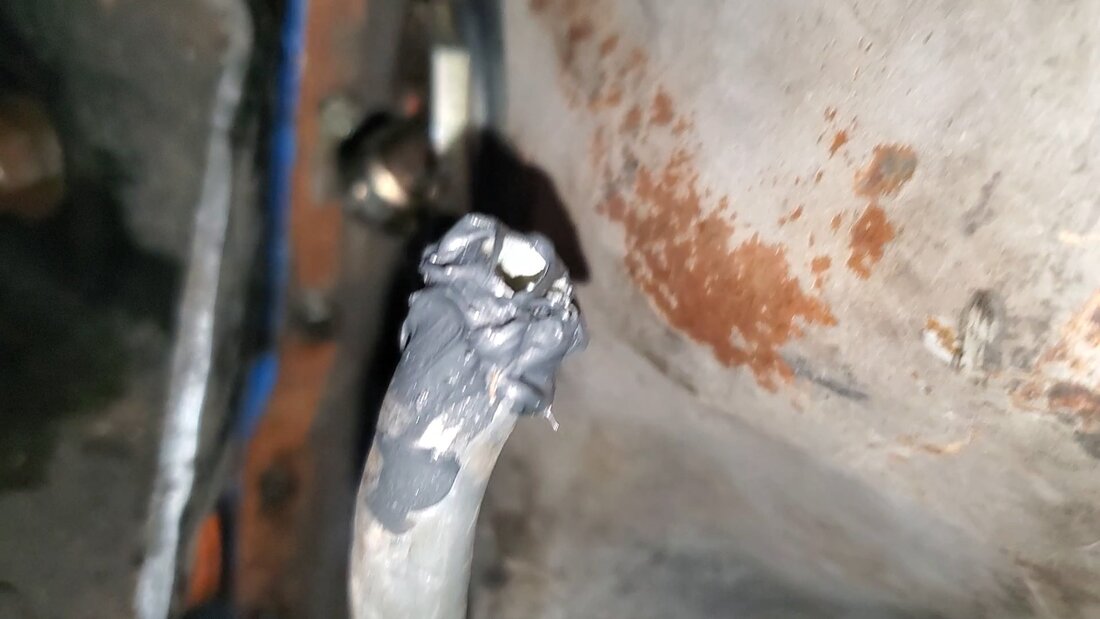 Tip of dipstick tube caked with gasket maker prior to final insertion into dipstick bung. 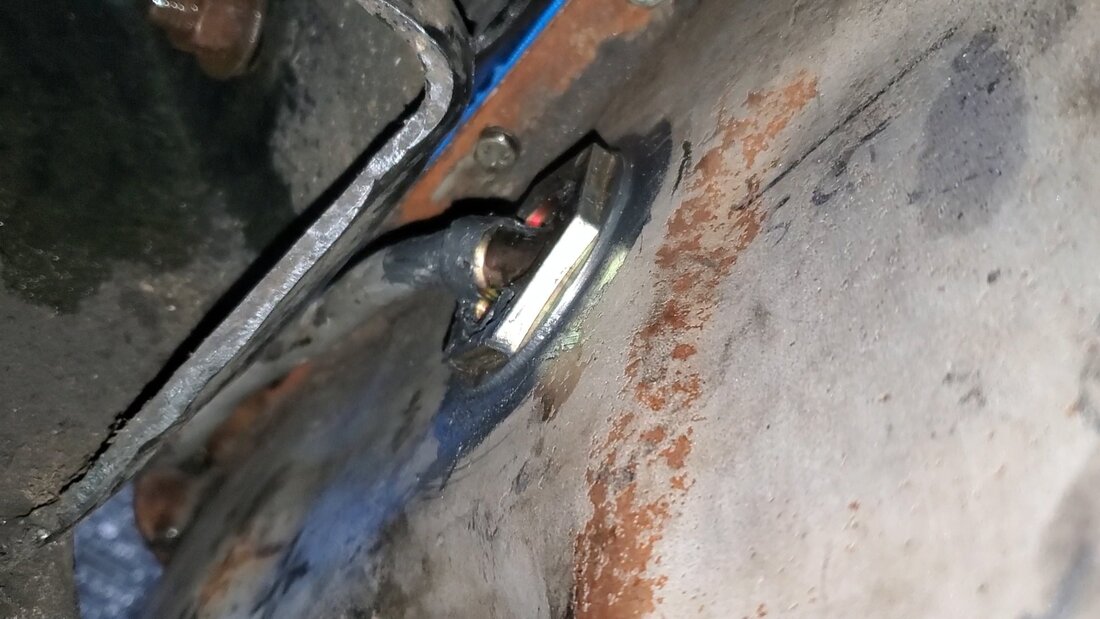 Gasket maker covered dipstick inserted into dipstick bung with extra gasket maker smeared around the bung hole to ensure a proper seal. 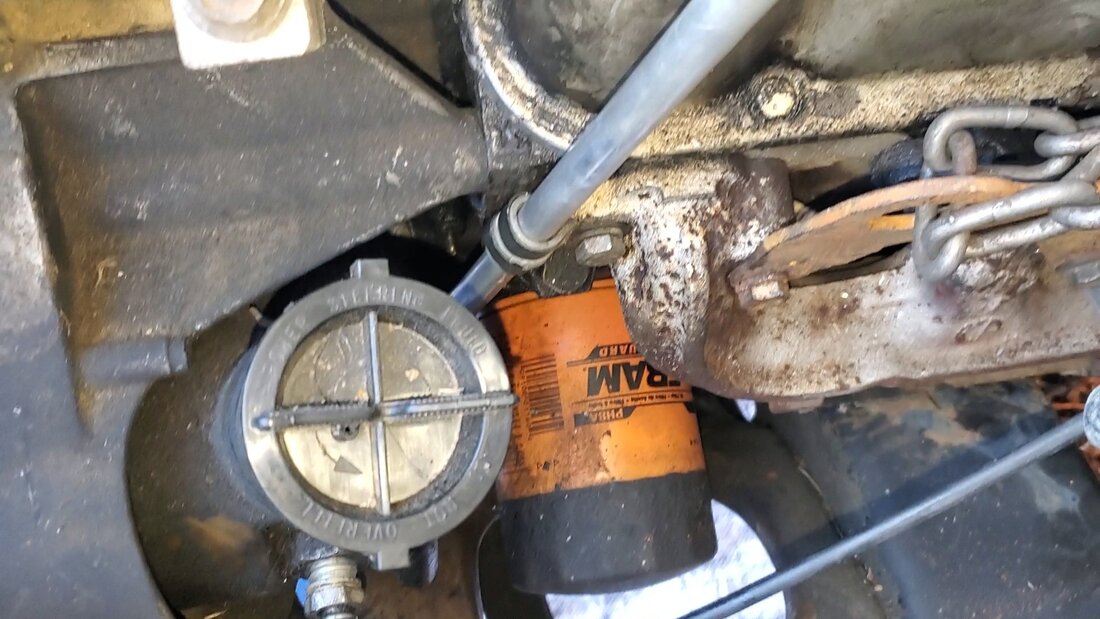 Bracket securing dipstick tube to exhaust manifold bolt near front of engine. 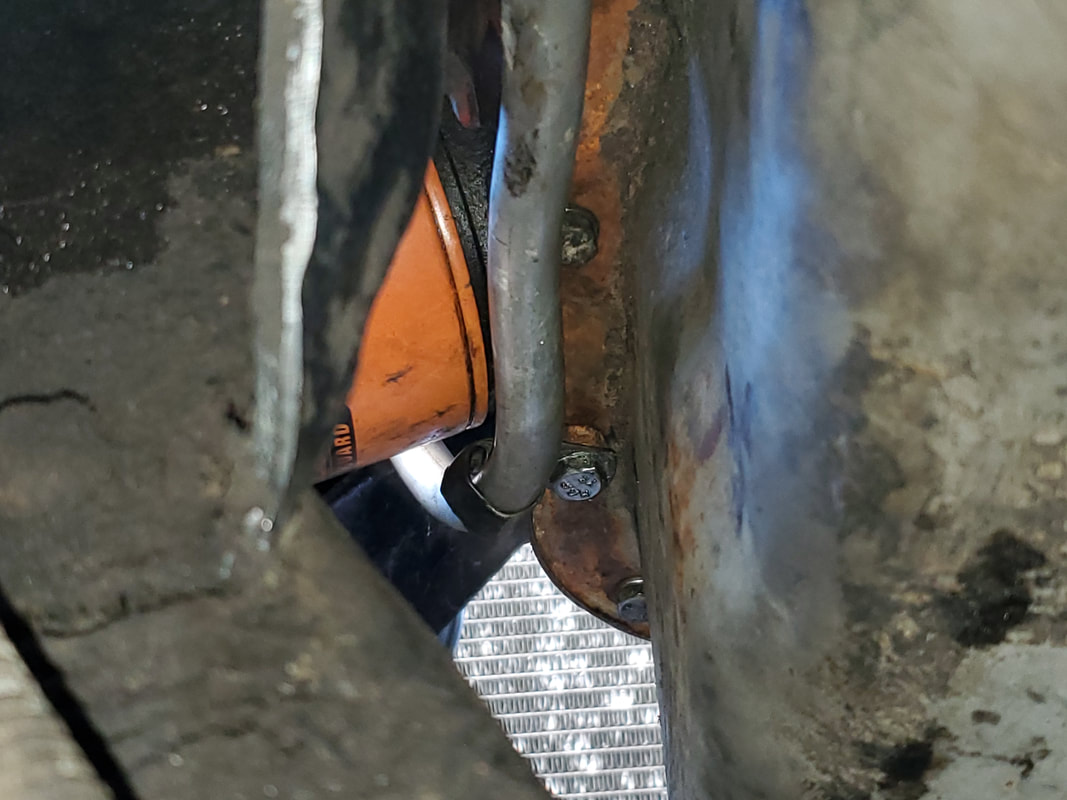 Extra bracket used to hold dipstick tube along oil pan lip using washer for spacer and longer bolt to hold everything together. At this point with the oil pan done I took a moment to get the starter installed and wired up. This of course was a pretty fast install, with two bolts holding the unit in place. I was able to connect the main power cable from the battery to the starter but had to add a short length of wire to the run of wire that would go to the solenoid on the starter. I soldered and covered with heat shrink tubing the joint between the wires before capping off with a female crimp terminal and zip tying the wires together to make things nice and neat. 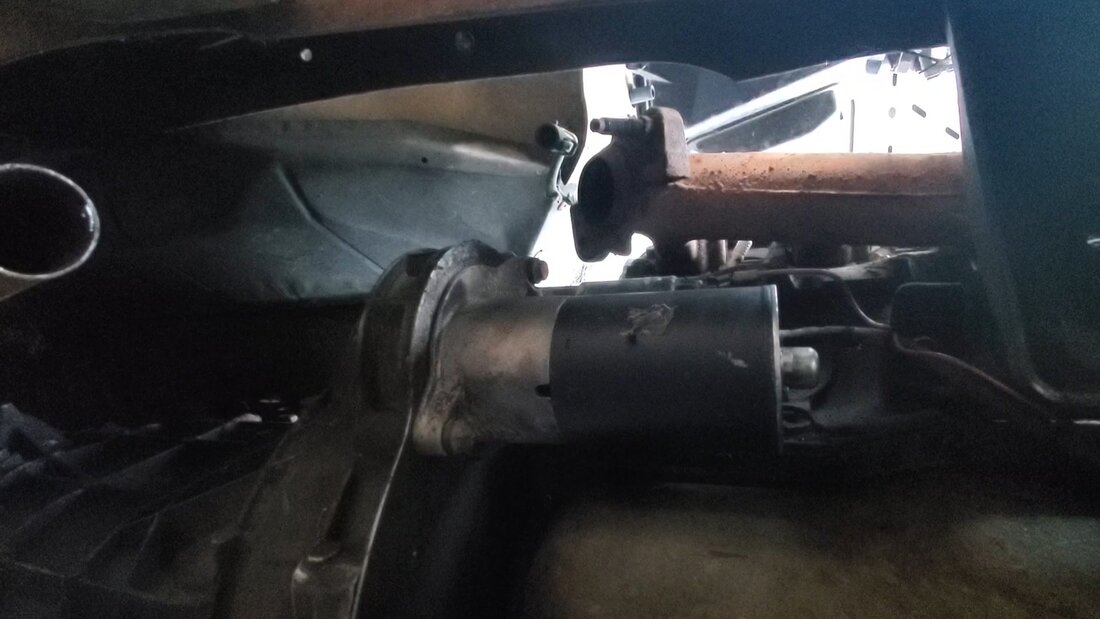 Starter installed on engine and wired up. The next thing to be done was reinstall the exhaust pipes after cutting them to aid in the work that was being done under the truck at an earlier time. This involved using a couple of couplings on the ends of the pipes. I welded the couplings on the flange/pipe assembly that was cut free then slid everything together to the greater exhaust system, using some shitty tack welds since I wasn't able to grind the rest of the pipe to make for cleaner welds. I'll probably use some U-bolts to secure the couplings more so to the greater exhaust system so even if the light tack welds do crack, there won't be any breakage, or leakage in the exhaust system. After reattaching the flange pipe setup to the rest of the exhaust system I bolted the flanges to the exhaust manifolds, completing the exhaust system from the engine back. 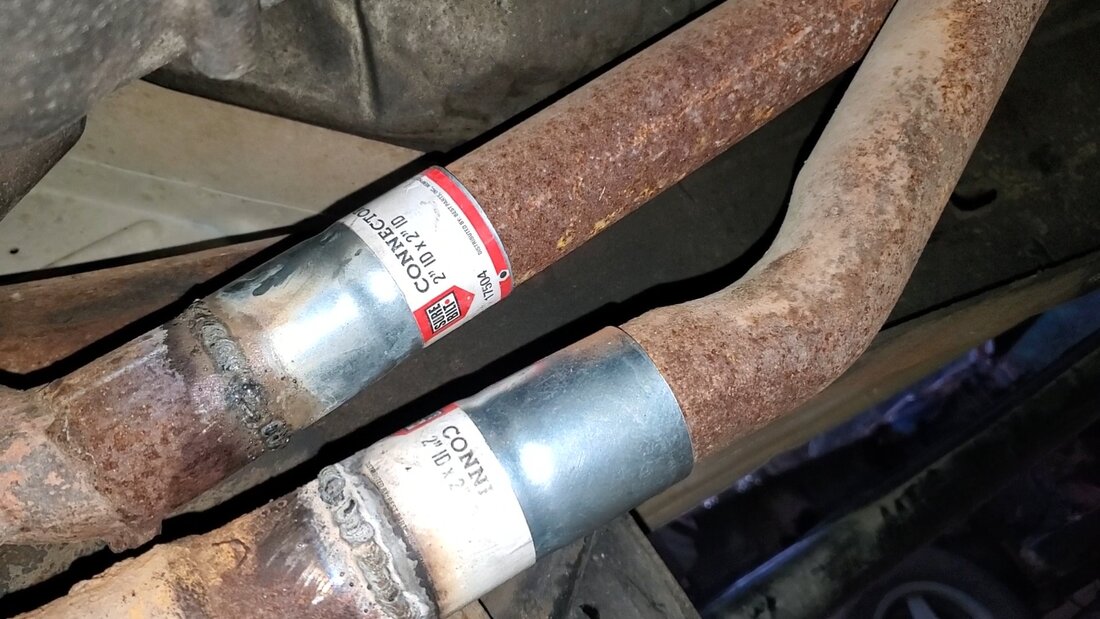 Pipe couplings welded to flange pipe side that was cut off earlier. Pipe assembly is slid back onto the rest of the exhaust system. 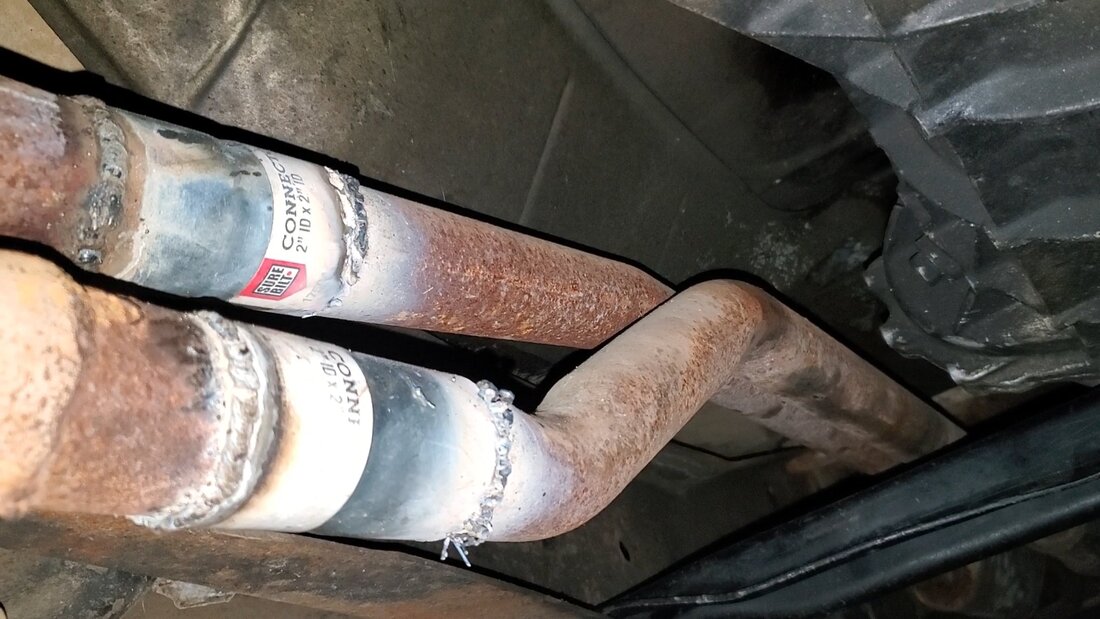 Shitty tack welds around other end of couplings to secure the flange pipe assembly to the rest of the exhaust system. 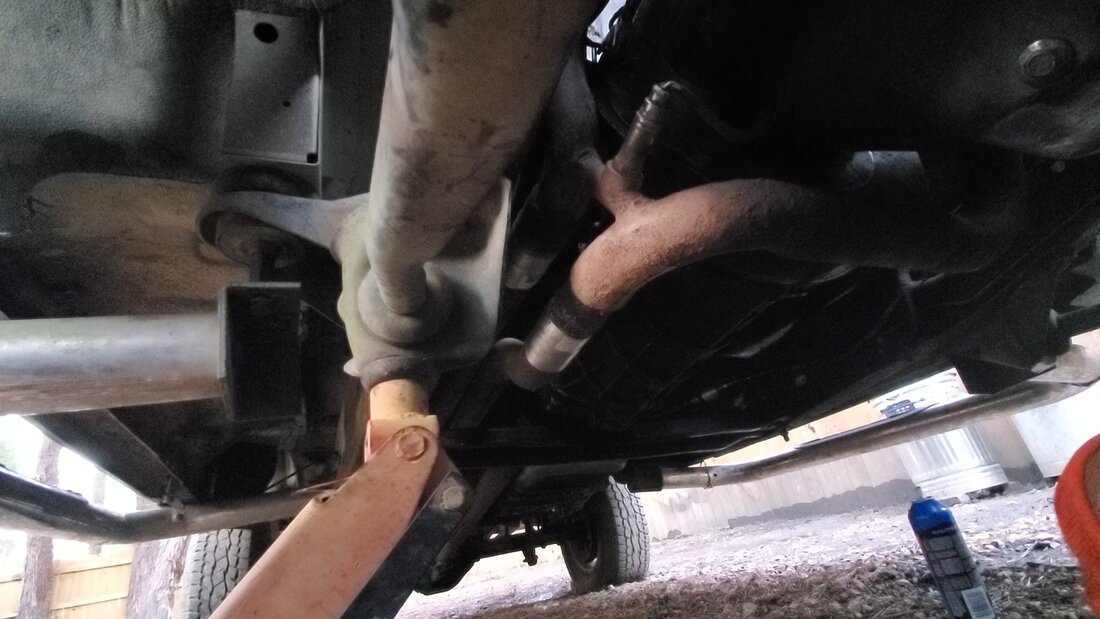 Flange pipe setup fully attached to engine and greater exhaust system. The last thing on the list was the pair of radiator hoses that we picked up new from the store. The old rad hoses were chewed up by some varmint and hence were useless. This little job was also easy as it was just a matter of sliding the hoses to their respective ports and clamping down the worm clamps to hold everything together. On the top hose I had to orient the hose to be as high as possible since I have to have proper clearance for the cooling fan that will be spinning just under the hose. 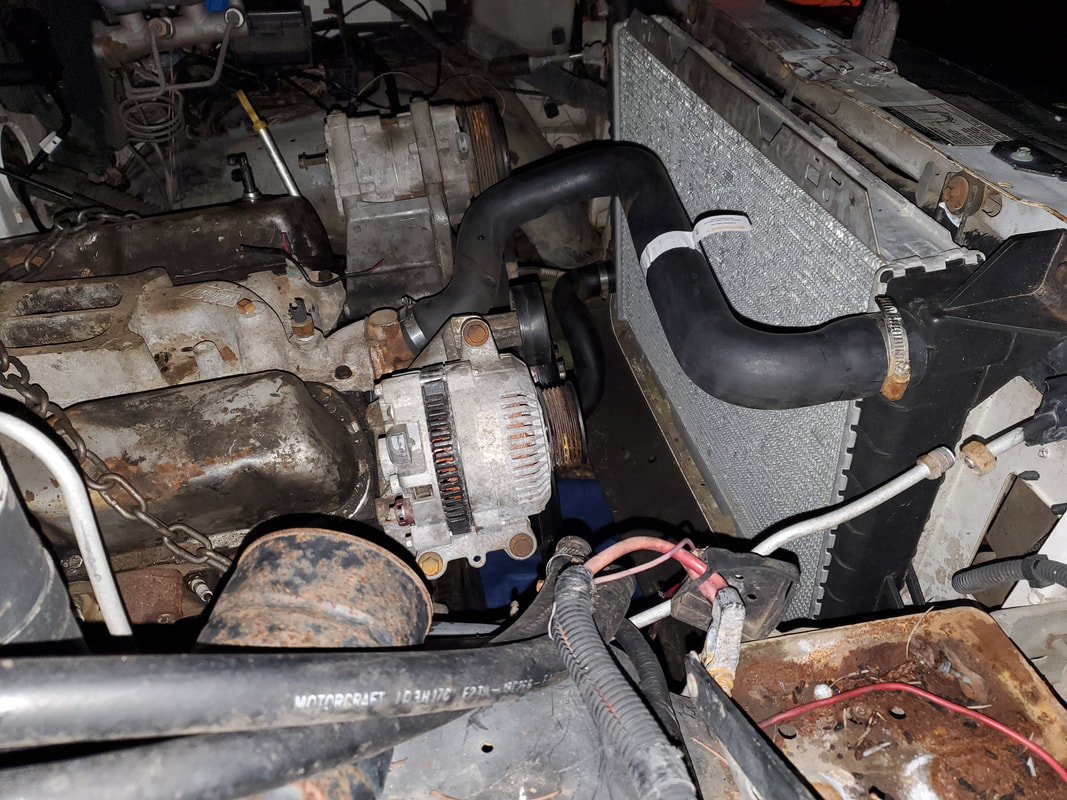 With all this done, and the daylight gone, I was able to retire for the night. As previously stated, I still have the cooling fan to install, which is just a matter of four bolts on the water pump pulley. Once this is done, I have a few other things I have to do while waiting for the last batch of parts I need to get this truck done. I have to install a carburetor on the intake along with an air cleaner, both of which I have in storage. I still have to hook up the fuel line to the carb along with the throttle cable. Once that's done, I have to bleed the clutch master cylinder so the clutch system will be ready to rock and roll. From there I should be getting the distributor in the mail, along with a set of wires, which of course can be had locally. I'll check the plugs to see what their condition is like and replace if necessary. Other than fluids and fuel, I can drop a battery in the truck from around the shop and give this thing a whirl! |
