|
After unearthing some plastic drums from a far off area of the greater yard, I had decided to use some of these drums for planters in the garden. Even though these are plastic drums with removable lids, I can cut them in half the short way to make regular standalone planters for trees or bushes and the like. Even the half of the drum with the removable lid can still be used by just putting the locking ring on the lid to hold it in place on the drum.
Another thing that I had to take care of is removing a couple of old tire planters I had right in the middle of the garden. One still had some blackberry plants in it while the other was just weeds. The weedy one was trimmed down and I pulled that tire up and flattened the rooty dirt into the ground to even it out. From there I pulled up the blackberries then the tire and flattened that dirt as well. 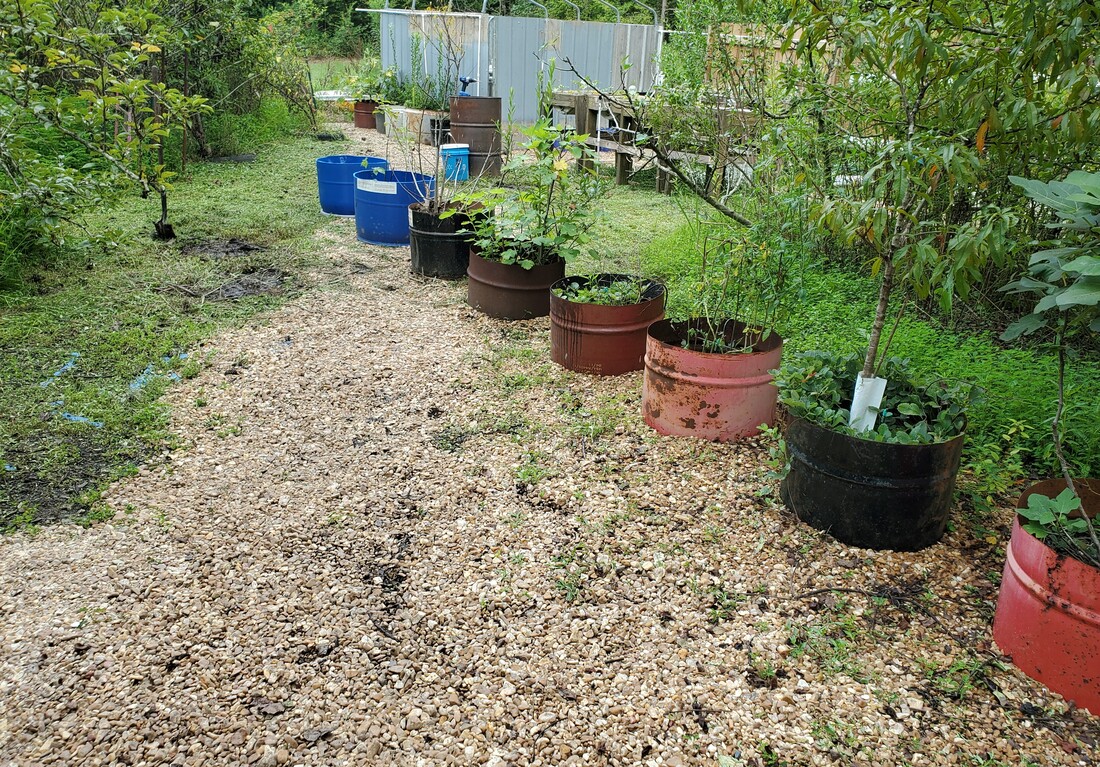
Gravel path where tire beds were located. Rough area to left of gravel is where tires were at. Also note the two blue drum halves added.
After removing the blackberries from the 2nd tire, I had some leftover dirt from our previous episodes of filling raised beds so I used that to fill one of the plastic drum halves in order to plant the blackberries. I even had one small blackberry plant in another tire planter that has a fruit tree within it as well. I figured I may as well uproot that plant and add it to the plastic drum so that planter will be strictly a blackberry planter. I'll take care of the fruit tree later when we get more dirt. As for the two drum planters, I figured I'd locate them along the line of drum planters where I had already been adding drums to. I even moved another solitary drum planter that was still situated by the newly added drum raised beds. When I start making another set of raised beds I'll start a new row that will run parallel to that most recent set of beds. Just like with the raised beds, the drum planters will run in a row that's parallel to the raised beds. The whole concept is to have the garden arranged in a grid style layout to simplify things when it comes to maintenance of the garden, as well as aesthetics. 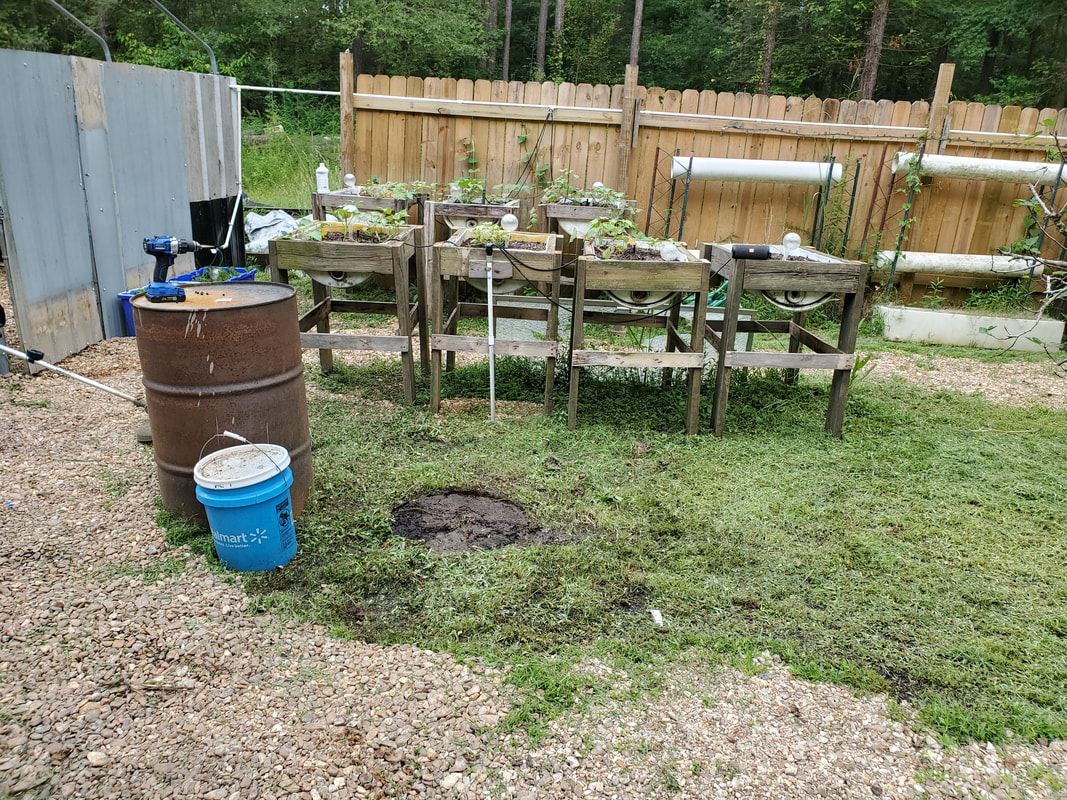
Spot where drum planter was situated next to raised bed row. Note that there's plenty of room to add another row of raised beds with space to move between the rows.
As I was adding dirt I even took time to grab some compost from our tumbler composter (which we still haven't mounted yet in all this time) to fill the drum to help feed the blackberries. I set the blackberries on top of the compost then added a full bag of dirt over and around the roots of the plants to finish things up. I'll end up adding more dirt in the future as we get some more but for right now there's enough dirt in the drum to cover the roots of the plants. 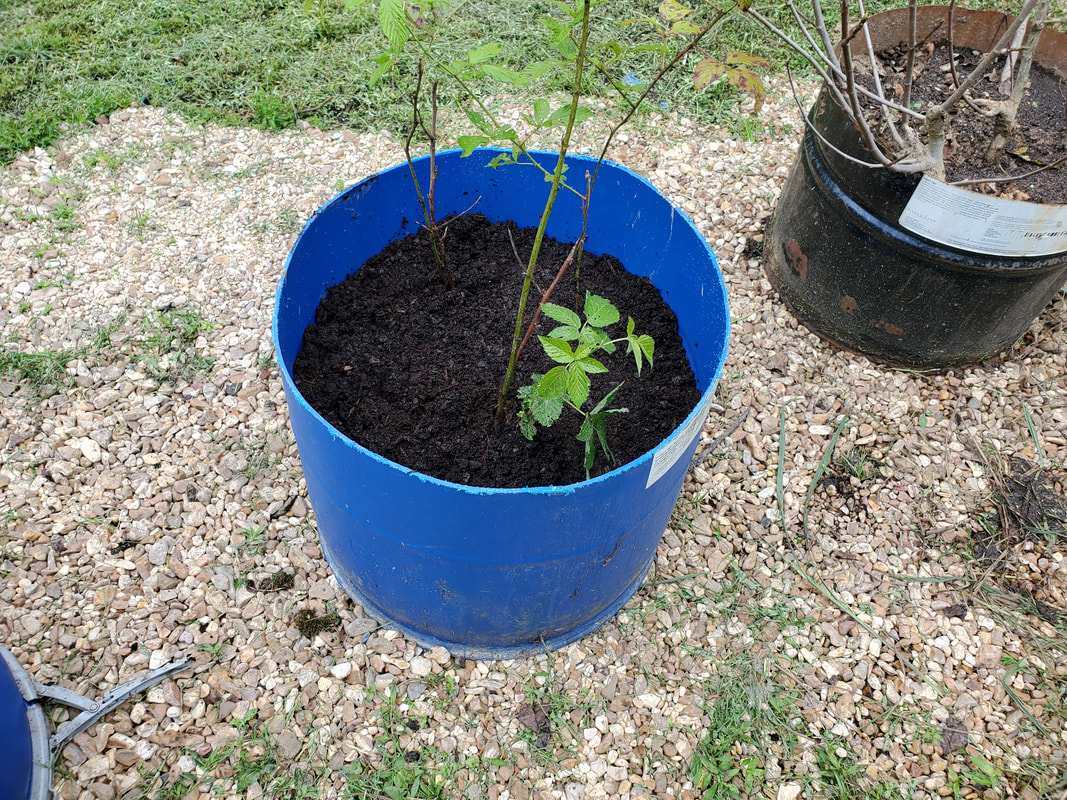
Blackberry plants in drum with fresh dirt.
On the drum halves, the half with the removable lid was easy to address as far as drainage is concerned because all I had to do was remove the caps from the lid, problem solved. As for the bottom half, I drilled several holes with a step bit to that planter will have plenty of drainage. This is the planter that has the blackberries inside. As for the other drum, more than likely I'll plant that one fruit tree that is still in the other tire planter so I can get rid of that tire as well. 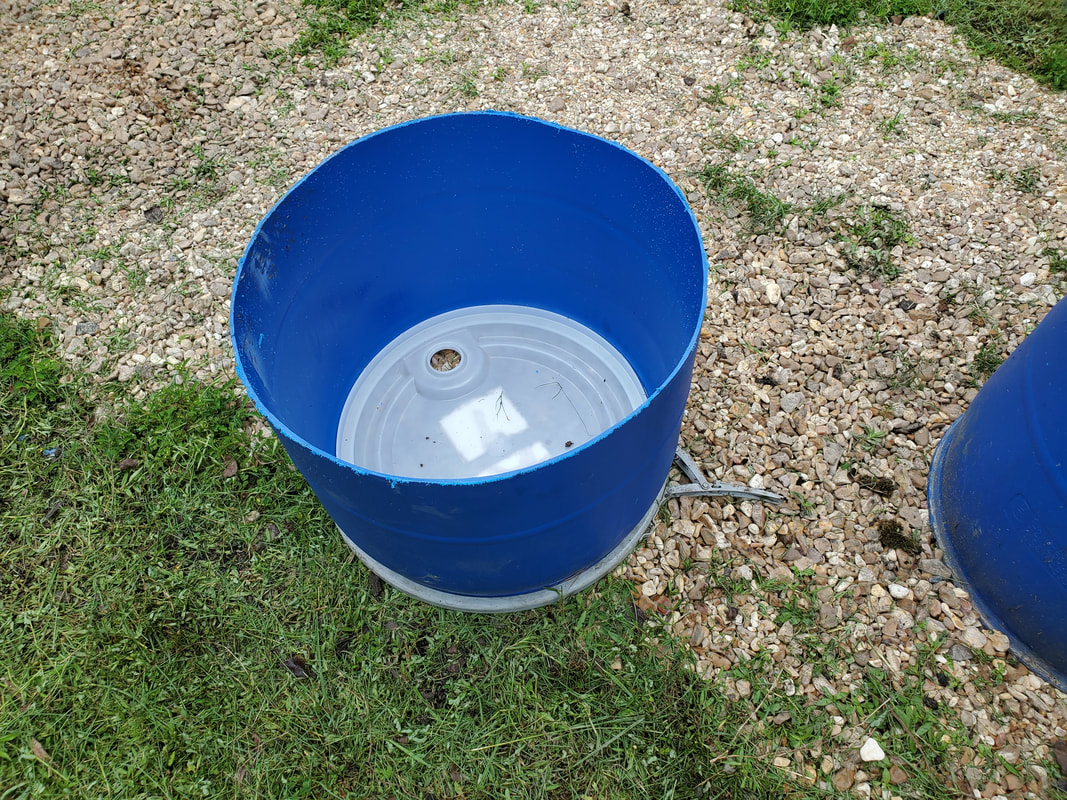
Top half of drum with lid sans caps for drainage.
Other things that I still need to do in the garden is trim some of the larger trees to help make things a little neater as well as make the pathways more accessible for us so we're not having to duck and bob and weave to go around branches. Also trimming the trees is healthy for them as it rids the trees of dead and dying branches. Of course I'll have to add more gravel, especially around where I previously laid a path since the path now has drum planters over it. I'll also have to lay gravel down over the patch of ground next to the row of raised beds where I removed the one drum so I can have the area ready to set the raised beds on. As time progresses the garden will evolve into a better version than anything we could've envisioned in the years past.
0 Comments
It's been a while since I last worked on the FMT but where I left off was with the removal of both fuel tanks, with the plan to retain the front fuel tank on the trunk and replace the rear tank with a spare tire mechanism to hold said spare tire under the truck versus in the bed, like on the F250. Another thing that I had to address was the idea that since I'm converting back to a carbureted powertrain, there was no need for the high pressure EFI system that the fuel tank/system centered around.
This meant having to modify the fuel pump/sending unit to omit the pump motor and keep the sending unit portion to be able to read the fuel gauge. I originally planned on adding a short piece of hose inside the housing that would connect the top cap with the output/input metal tubes with the plastic tube in the housing that connected to the strainer at the bottom of the housing. In the process of trying to do this I broke off the inner piece of plastic holding the nipple, So I ended up just drilling out the hole where the strainer plugged up to and just installing a longer length of hose to connect the metal cap's tube with the bottom of the housing so the hose can pick up fuel from the bottom of the tank. I would have to install a fuel filter before the pump to keep the pump from sucking up shit that can ruin the pump, along with the carburetor. It's enough that I had to vacuum out a lot of rust dust and crud from the tank prior to installing the sending unit and the tank. 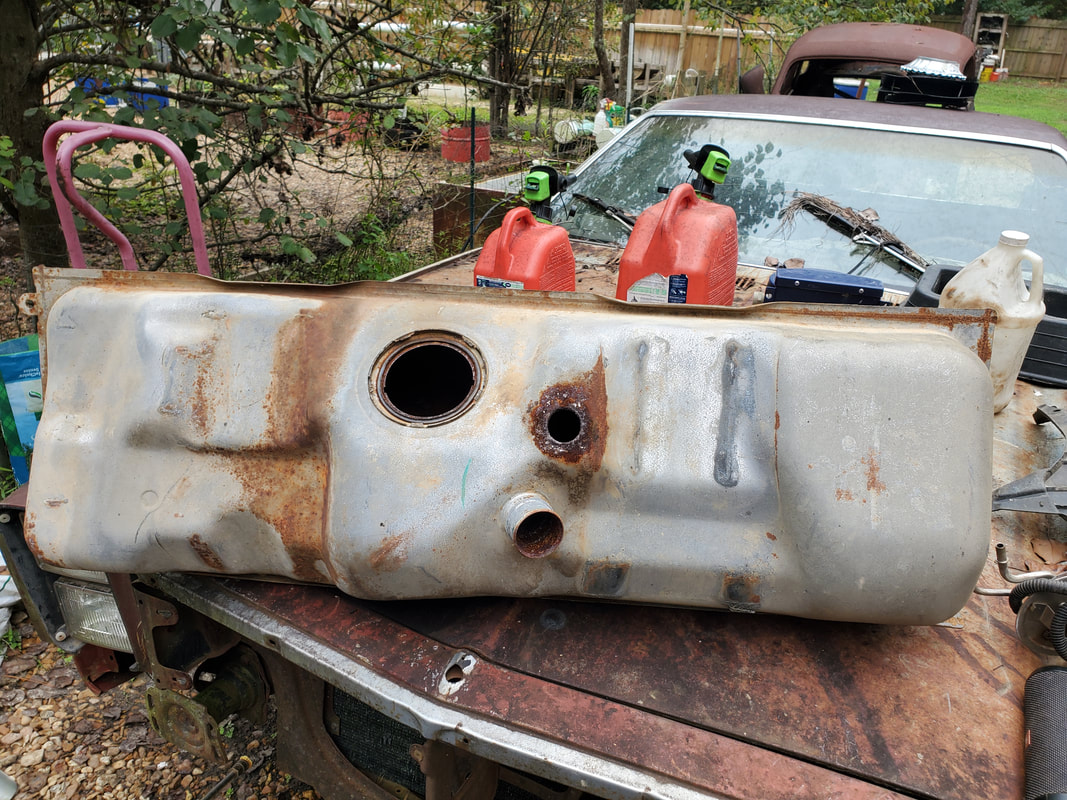
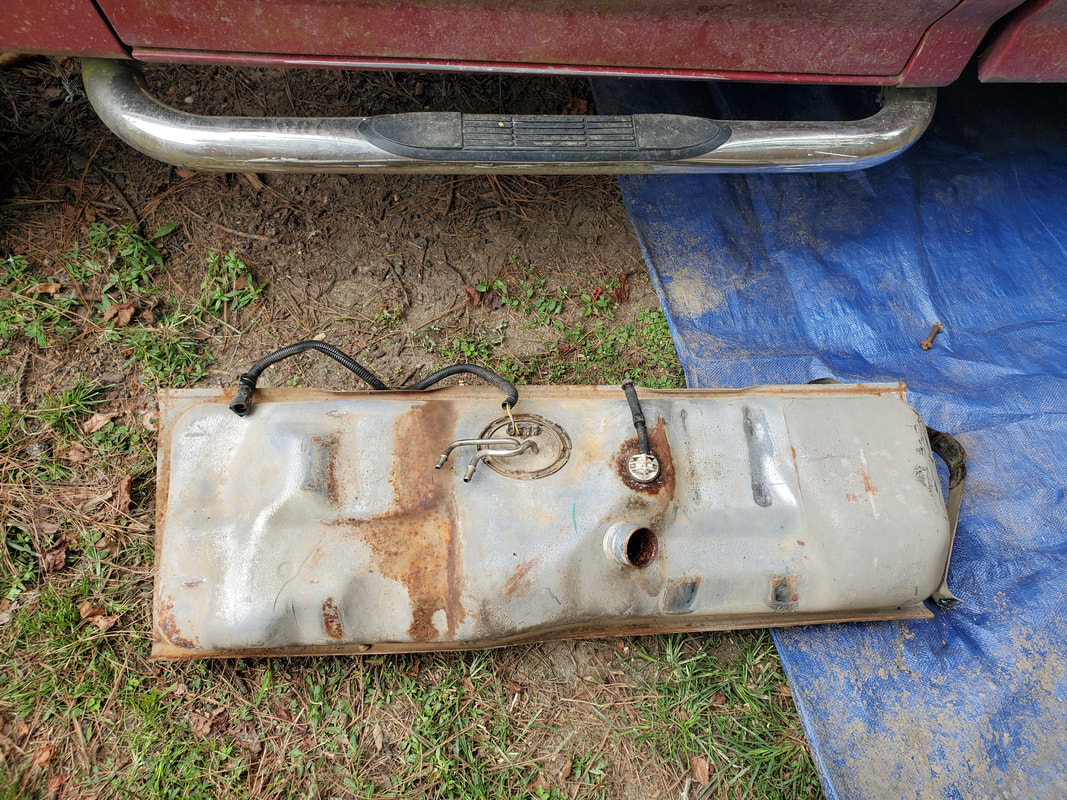
Rear fuel tank to be installed in truck.
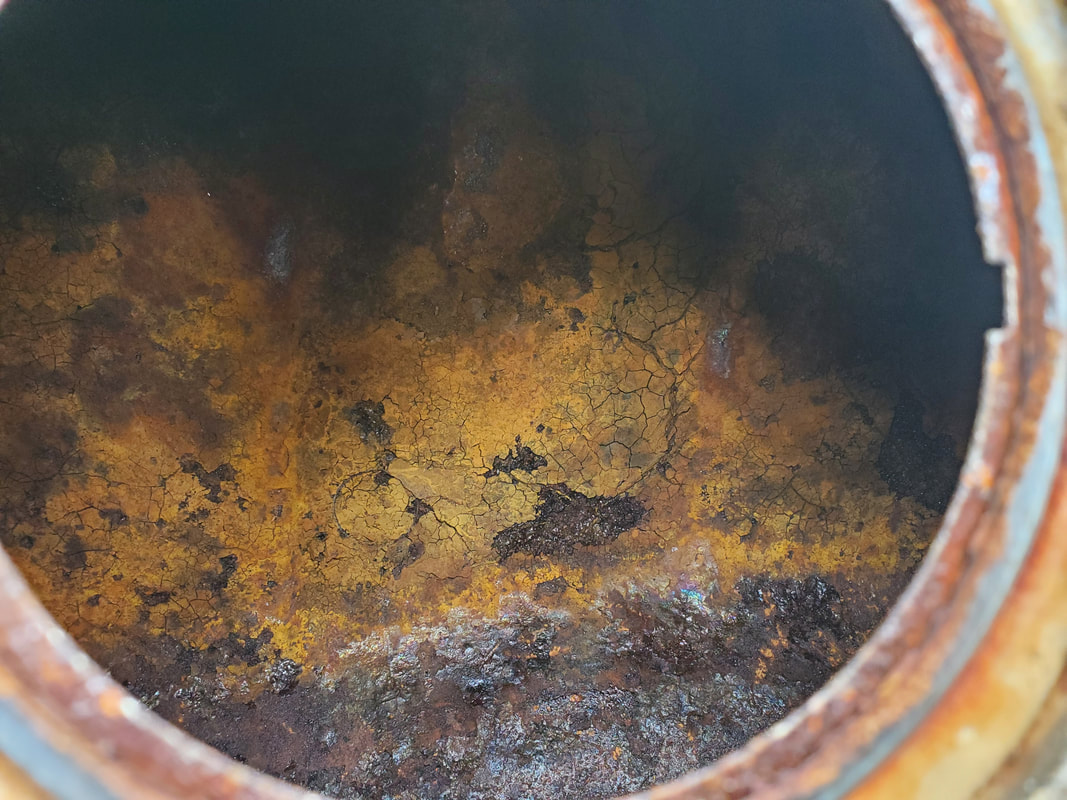
Inside showing rust inside the tank, even after vacuuming the crud from the tank. This future rust will be a problem as it breaks away and possibly risks blocking the fuel lines.
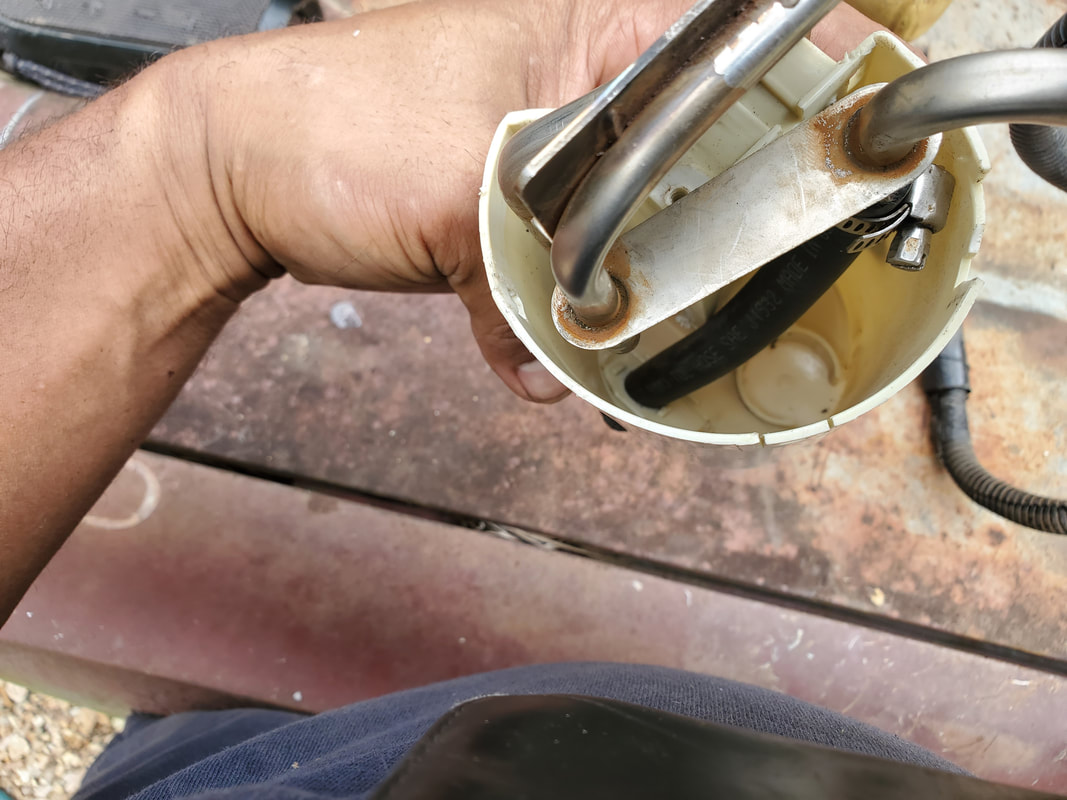
Sending unit/pump minus pump motor. Note fuel hose running from nipple on cap down to bottom of housing.
With the sending unit ready to go I reinstalled this piece into the fuel tank. I had to borrow a rubber bushing and a vent hose from the other fuel tank since the front tank didn't have either of these. Of course after I put the hose back on I cut it short and capped off the hose with a bolt so this won't be a problem at all when it comes to losing gasoline from evaporation. 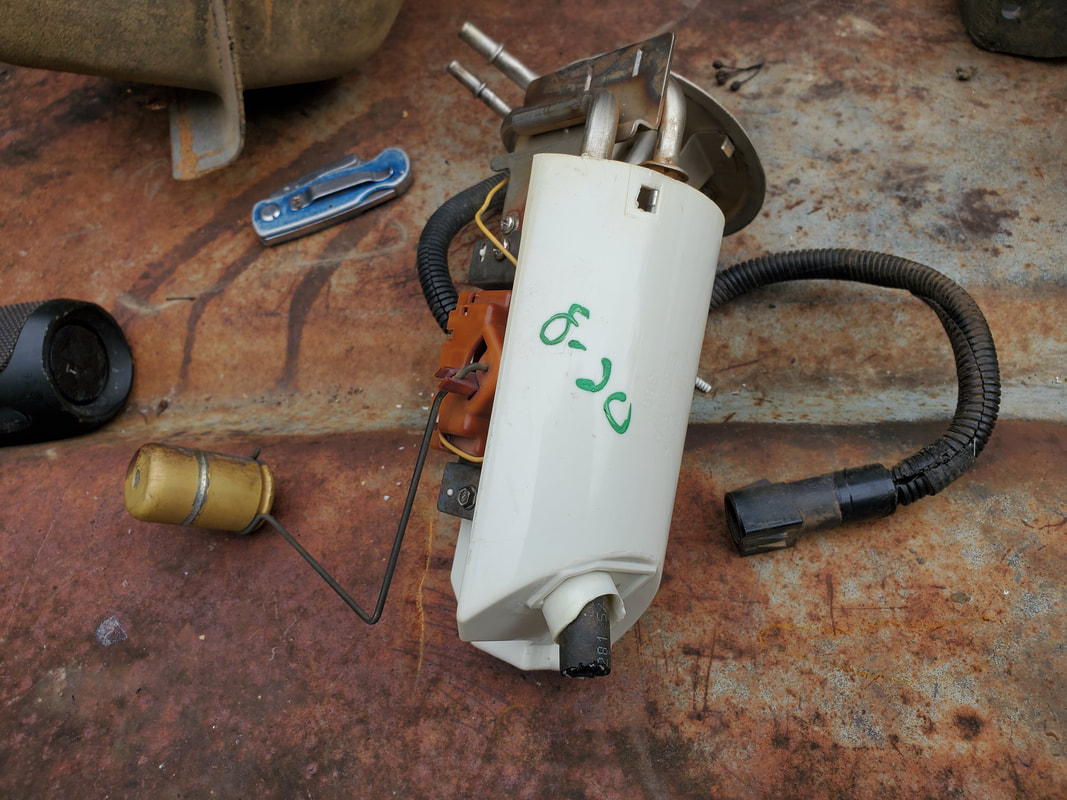
Modified sending unit/fuel pump, minus fuel pump, all set up and ready to use.
Fuel tank staged by truck with sending unit and vent hose in place.
The fuel tank is held in by two straps that lock in place on one end and are held up by a single nut and bolt on the other end. I had to get the tank staged on a jack to hold it up while I worked the fuel filler tube onto the port on the tank. Once I had this tube clamped down I was able to get the fuel line connected to the output nipple on the sending unit. A short piece of rubber fuel hose connected the sending unit nipple to the end of the main fuel line I ran under the truck. Once I had all this connected I was able to get the straps in place and clamped so I can tighten everything down. With the bolts tightened down I plugged the sending unit up to the plug from the truck, completing the whole installation. At least now one of the major components of the FMT is taken care of. 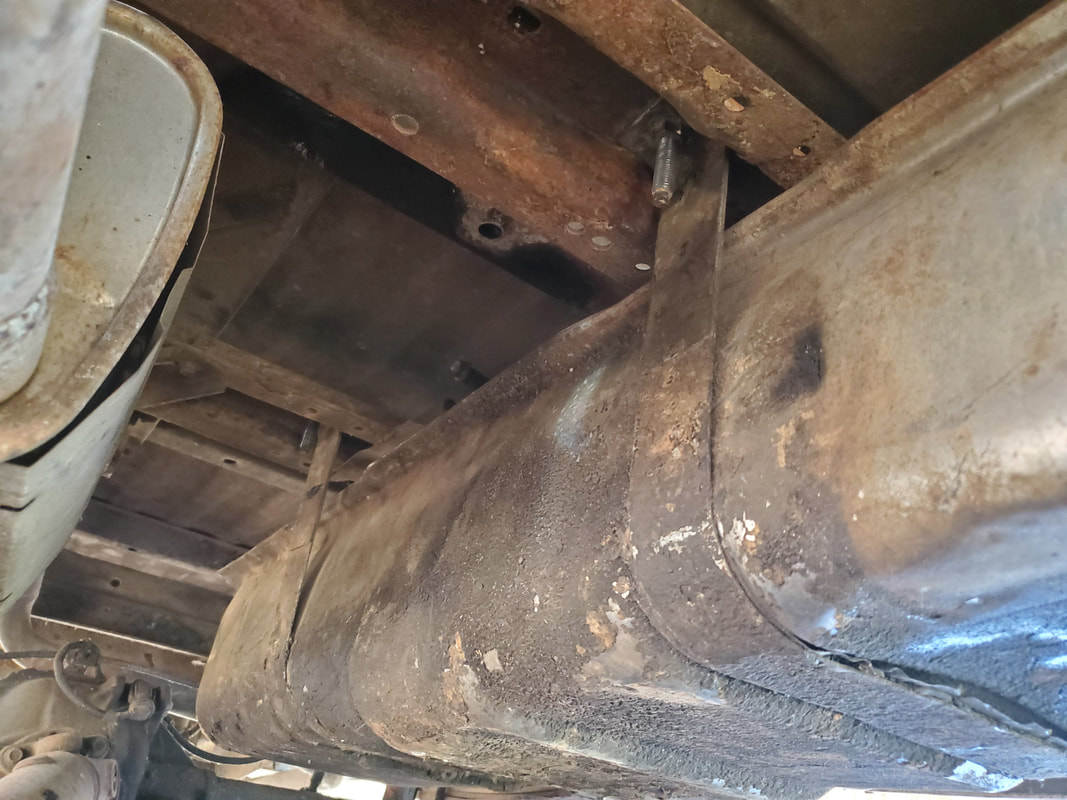
Fuel tank installed under truck, note straps holding tank in place.
The next thing that I want to do on the FMT is install the new ignition switch that I got since I had to mutilate the old one trying to remove it from the steering column. Afterward I have to do some circuit tracing to isolate the lines that will feed the different gauges on the gauge cluster so I can mark them for hooking up to the engine once its installed. I don't want to have to install aftermarket gauges when the original units are plenty good. Besides, I want to try and retain the originality of the truck so using the old gauges is an important task I have to do on this build.
After having set up the expanded micro irrigation system in the garden all the way up to the Dog Kennel Greenhouse, the grounds have been getting a little mushy due to the extra water being sprayed in the different raised beds. As a result I decided to spread more gravel, trying to make a path going from the central area of the garden all the way over to the Greenhouse. I had already spread a lot of gravel at the central point of the garden where it's been mushy for the longest time. I also managed to get gravel spread around the five drum planters along the Greenhouse, as well as the other planters near the greenhouse and the fence. With this load of gravel I wanted to finish the path going over to the Greenhouse so we won't have to worry about slopping in mud as we walk through the main corridors of the garden. The path that I was laying was a few feet wide so I decided to continue with this same diameter path all the way to the Greenhouse area. 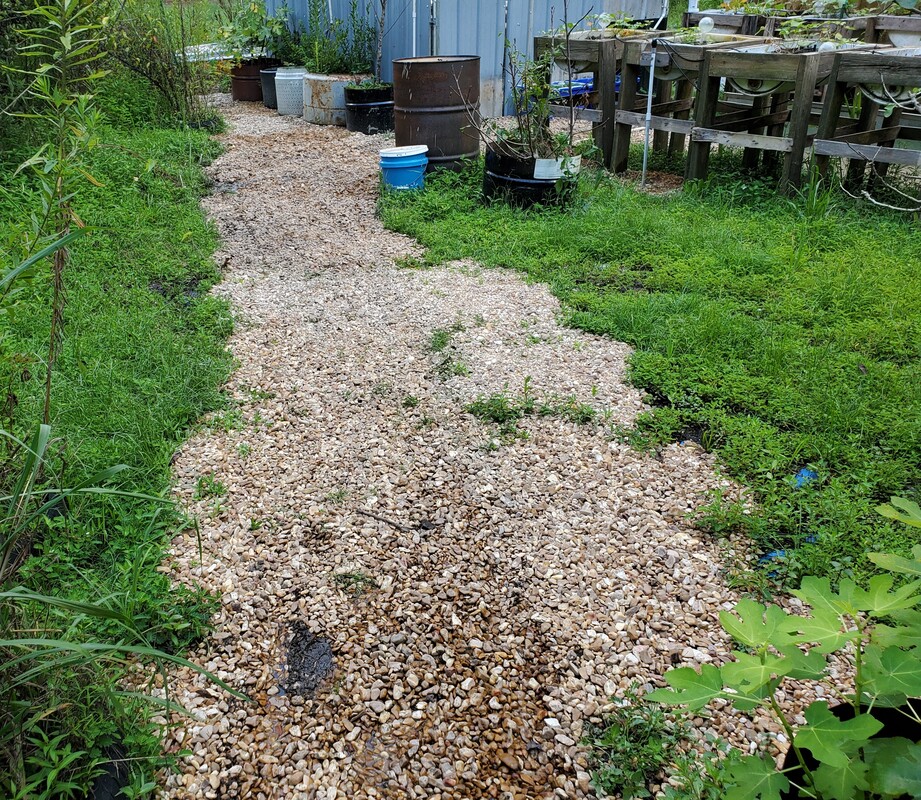 Gravel path laid from central point in garden over to Greenhouse area. Even after reaching the gravel patch that was laid along the drum planters, I was able to lay some more gravel to connect to the other gravel patches that were laid to cover the grounds going in front of the Greenhouse gate and the path that was laid between the rows of raised beds. At least now the areas that we frequently walk through are covered in gravel. I'll of course continue to expand the paths to try and cover the grounds up to and around the raised beds. 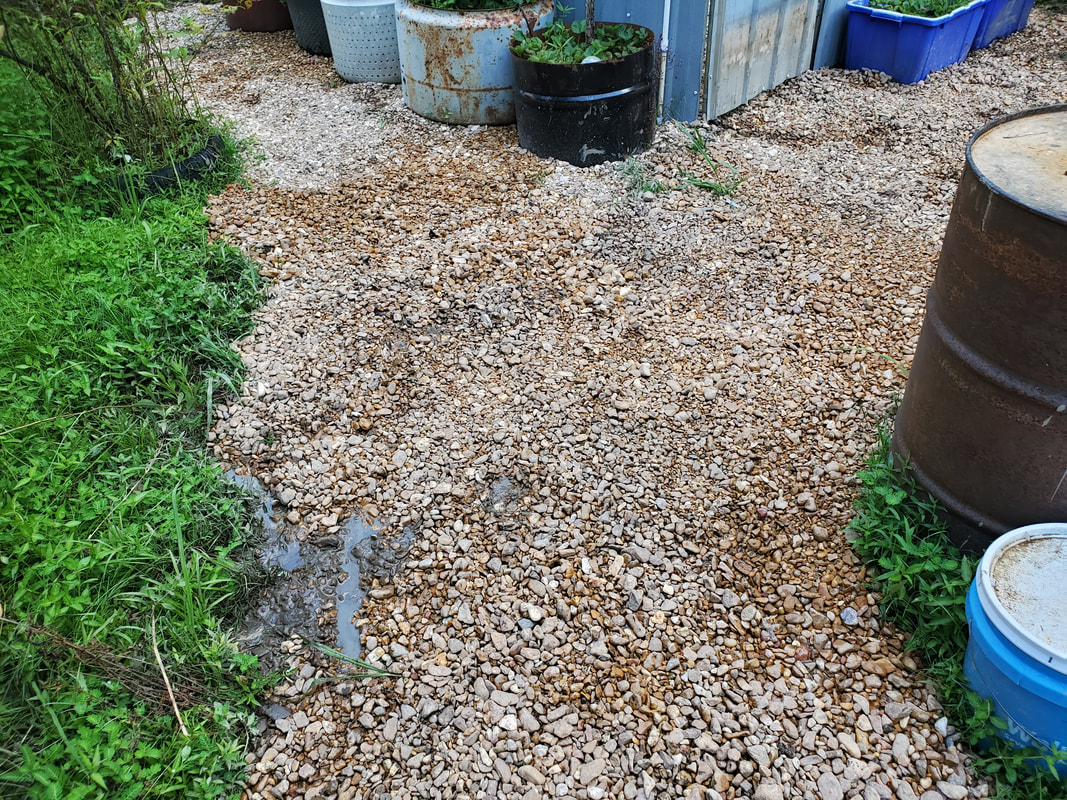 Connecting of the paths from the drum planters and the older paths to our new central path. Now with the gravel done it was time to finish up the last thing that I had to do on the John Deere Utility Tractor. I had to replace the fuel pump and do some tweaking on the carb after getting the machine running previously for a short time. The tractor ran long enough to get the thing down to the house before it started sputtering due to fuel starvation. Well after putting the new fuel pump on and firing the thing up again, the machine ran, but it had a bit of a hunting idle issue. Even when I tried to manually manipulate the engine governor lever, it would not act right. Sometimes it would run pretty good, sometimes not. 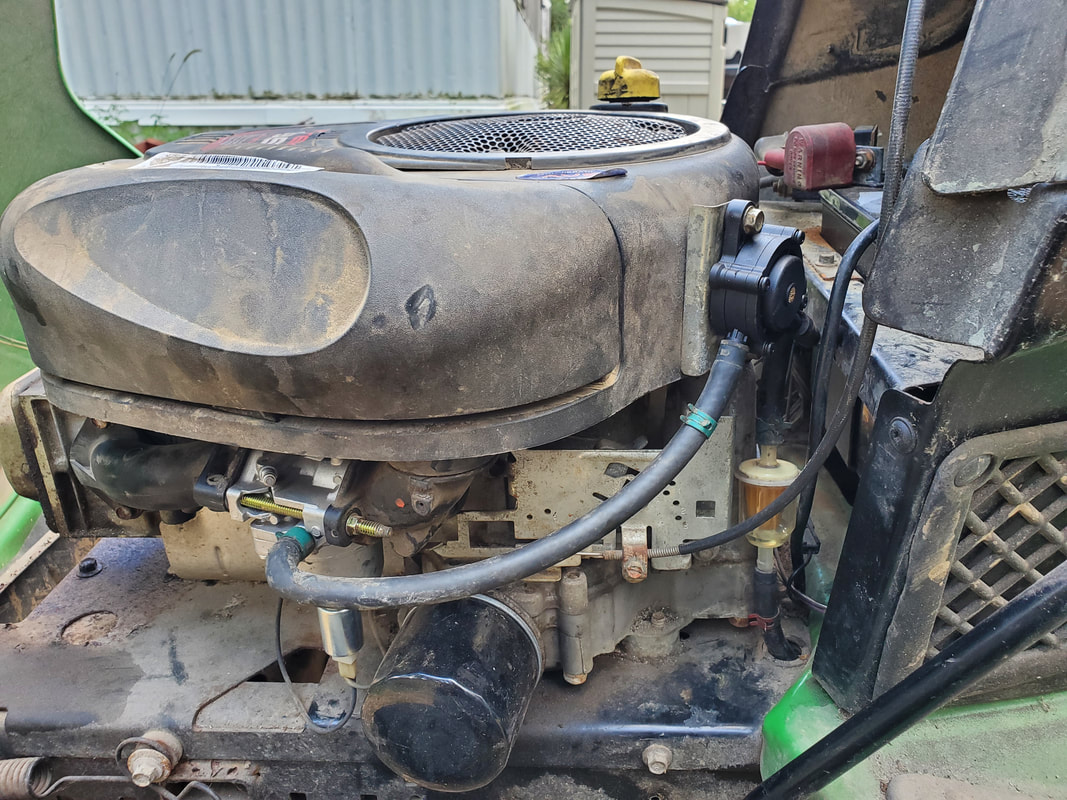 Deere's engine with new fuel pump. Pump is the hockey puck looking unit to the upper right with the hoses going to it from the carburetor and the filter just underneath it. To help remedy this problem a little bit I adjusted the idle screw all the way in, basically turning the idle "up", where the throttle won't be able to close up too much. Now while under normal circumstances this should have an engine racing, these small engines with the integrated/internal governor actually control the RPM's via the governor lever with a minimum of influence from the actual carb throttle. Well after doing this bootleg "fix" the engine really doesn't have much of a hunting idle anymore and I can still throttle down if I so desire. However the engine runs shittier when the throttle is down so for all intents, its best to run this engine at full throttle. Besides, vehicle speed is controlled by the pedal on fluid drive transmission, not the engine throttle. This way the engine can be kept at a fixed RPM whether the tractor is driven slow or fast (which isn't really fast). So for all intents and purposes, the John Deere Utility Tractor is ready for utility use around the compound and grounds.
We managed to find a little deal on some corrugated sheet metal that was salvaged from a chicken farm that was installing new panels on their chicken houses so they were awash with these panels for cheap. After doing a little math on the length of the panels that were listed, I determined I would need two 20ft panels. After sealing the deal with the guy, on our way there the guy told us that he actually had several 6ft panels that were not listed but were available. I had told him that I would be cutting the 20ft panels down to 6ft lengths for our project so that's why he mentioned about the already cut 6ft panels.
This worked out perfectly for us as I would not have to take time to cut the panels down on site, just load them up. The guy gave us a deal on the panels where we were able to get seven 6ft panels for the same price as two of the 20ft panels, which was $50. These panels were only a few inches narrower than the 20ft panels but with my calculations, I would still be able to get the job done with only six panels. I got an extra just in case. 
I started off with the north wall of the greenhouse, which was completely bare. Also because of the PVC pipes being routed along this wall as well as having a branch off going through the wall, this would be the hardest wall to do. The first panel was no big deal. Now even though I have 6ft panels, the actual height needed would be slightly less than that, more like 5' 9. After measuring and cutting the excess, I was able to secure the first panel with the self tapping screws that I used on the previous panels of the greenhouse. The second panel would be a little more difficult due to the the PVC pipe passing through the wall. I would have to move a couple of drum planters so I can angle the sheet metal out at the bottom to slide it up into position to secure it. I also had to cut a small square out at the top to accommodate the pipe that was going through the wall. Once in place I was able to apply the screws for both the panel and for a conduit strap to hold the PVC pipe water line in place. I also put the drum planters back into their respective places at the base of the wall. 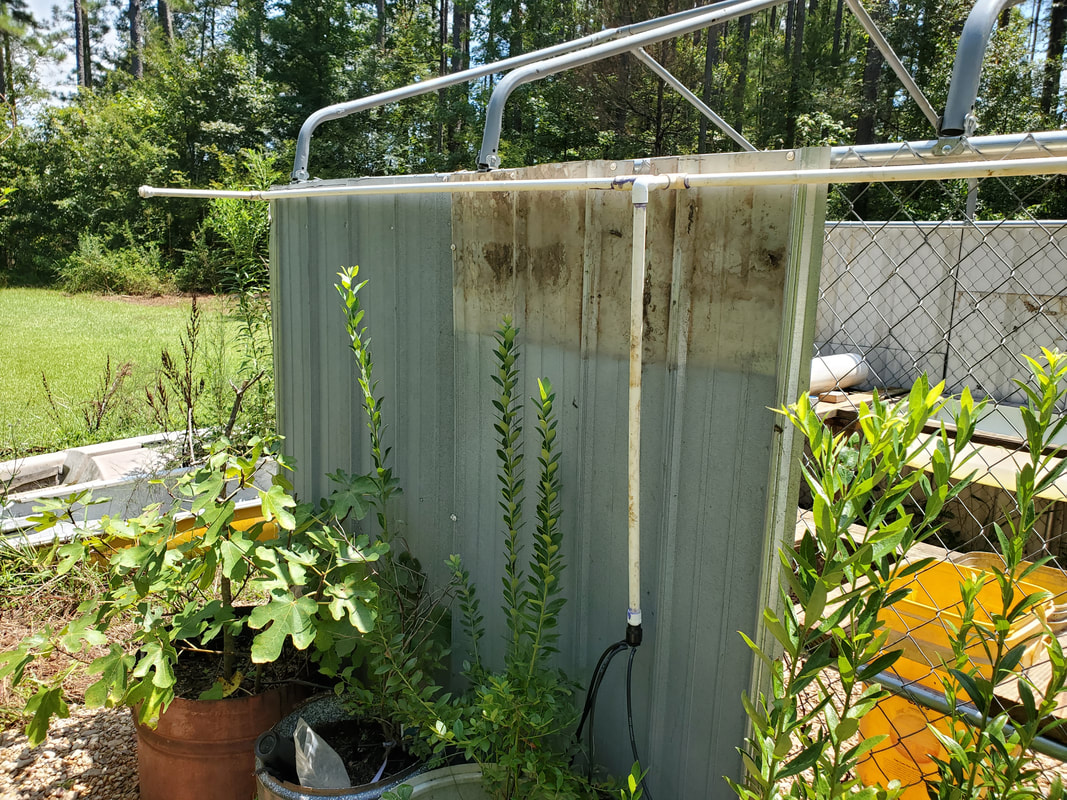
First two panels installed on north wall of greenhouse. Note notch cut at top of 2nd panel to accommodate the pipe going through the wall.
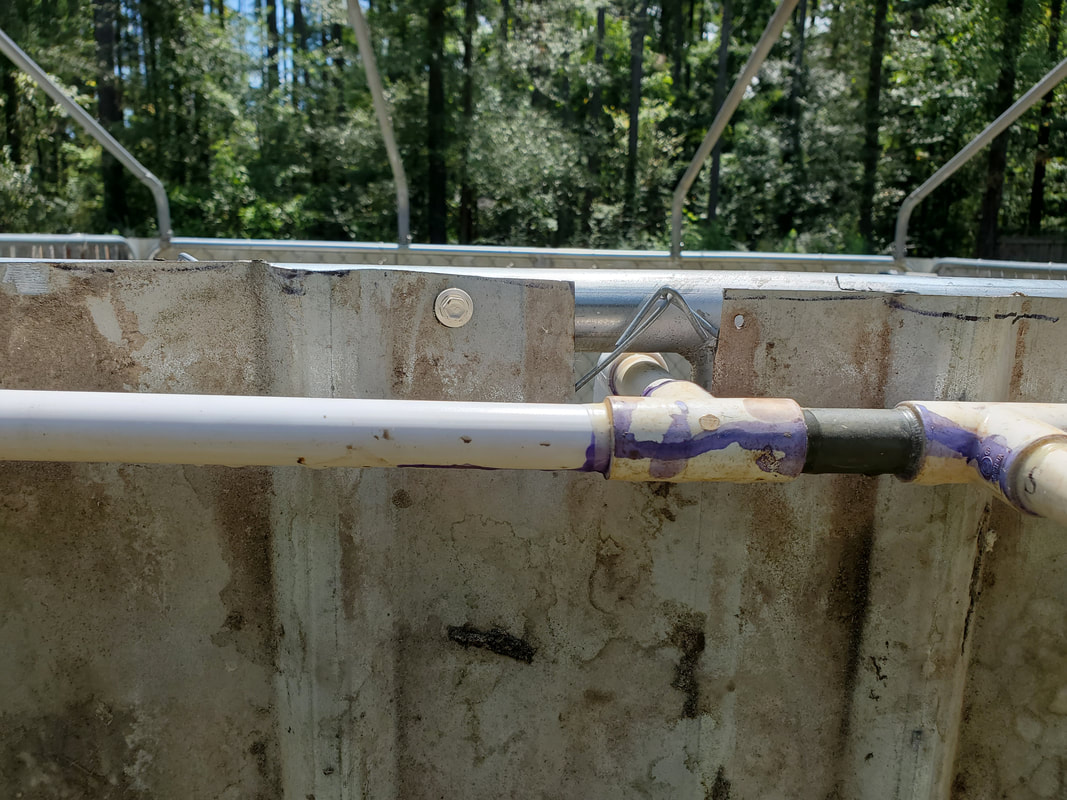
Closeup of notch cut into top of panel to accommodate PVC pipe running through wall.
The third panel was no big deal as there was nothing unique here other than just installing it and applying the screws. From here I decided to move on to the west wall as I would have to rip a panel to get the narrow section needed to cover the remaining space on the north wall. I trimmed the top and secured the panel in place on the west wall before moving on to the door. 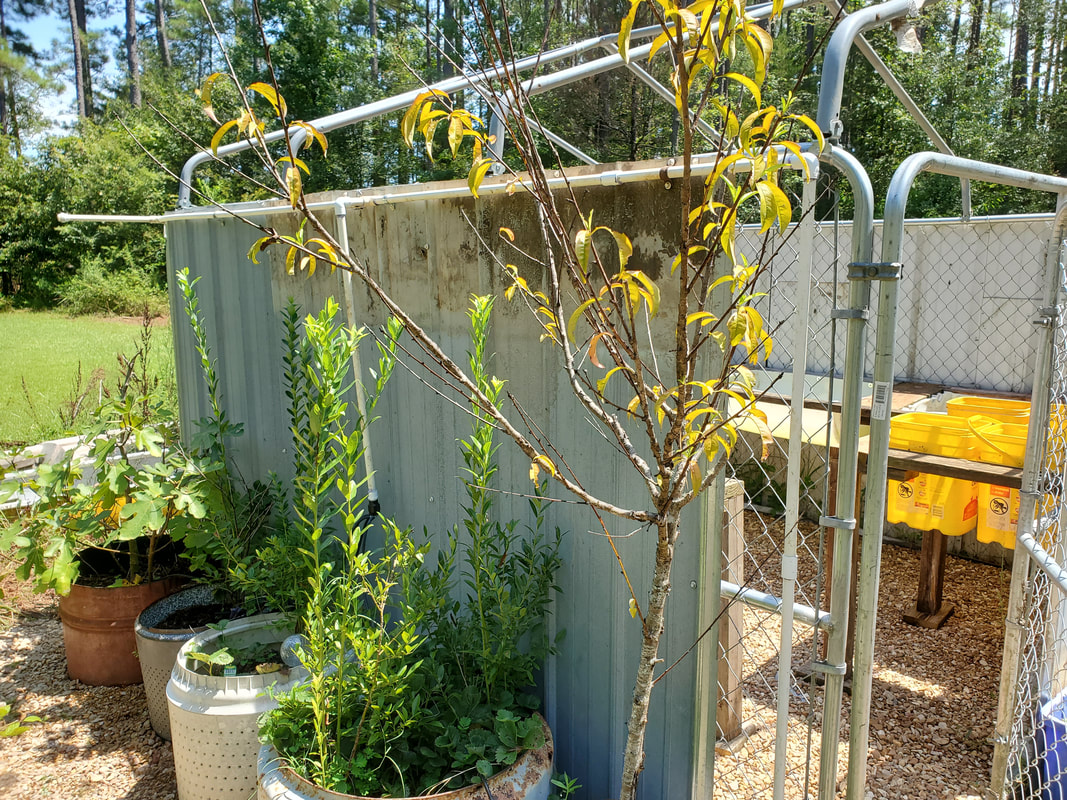
Third panel installed on north wall along with conduit straps for PVC pipe.
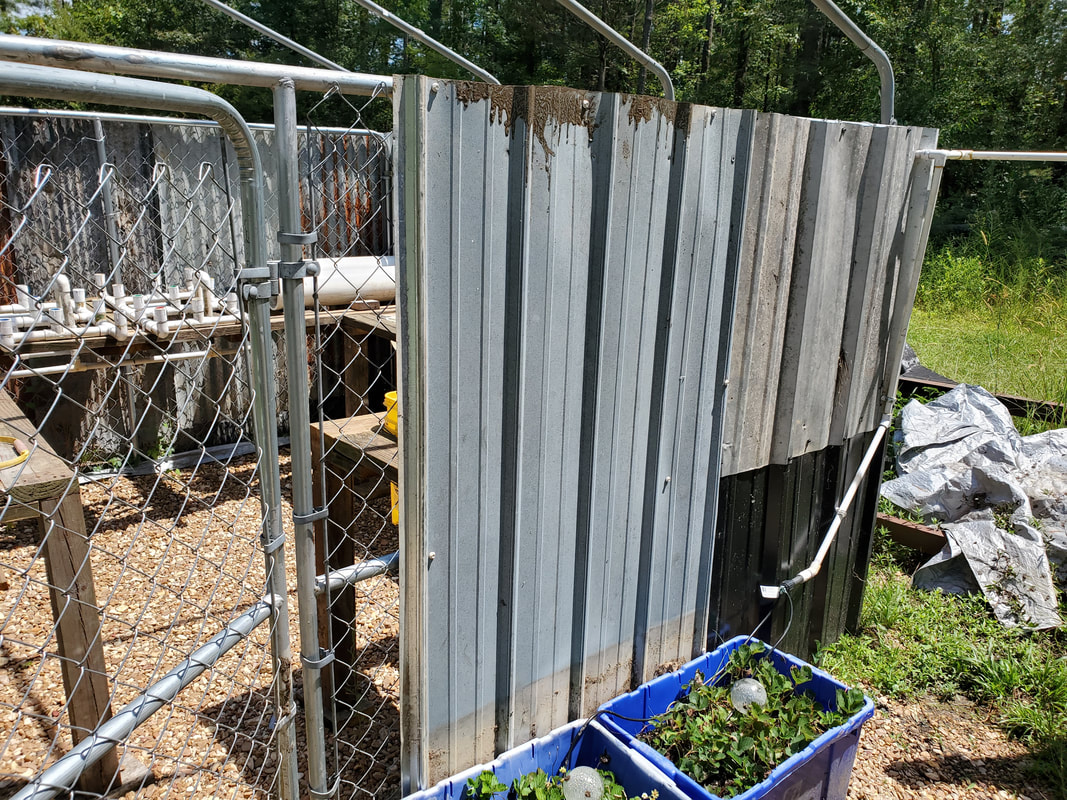
Whole panel installed on west wall, leaving small open section before getting to door/gate.
At this point I would have to start ripping panels. I started with the door by cutting the top and after measuring the width, I ripped the excess from a panel and secured it in place. I also had to cut a notch from around the latch on the door so it can be operated freely with the panel in place. There's only a small gap between the door and the wall frame but this is negligible as the greenhouse will have a heater in place to keep the temperature reasonable on even the coldest winter days/nights here. With the door done I measured and trimmed the small portion of metal I would need to cover the two gaps remaining on the west and north walls. After tacking these pieces up that left the two small gaps around the door as stated before. My calculations were correct as I only needed the six panels, leaving me with one whole panel for whatever use I may come up with. 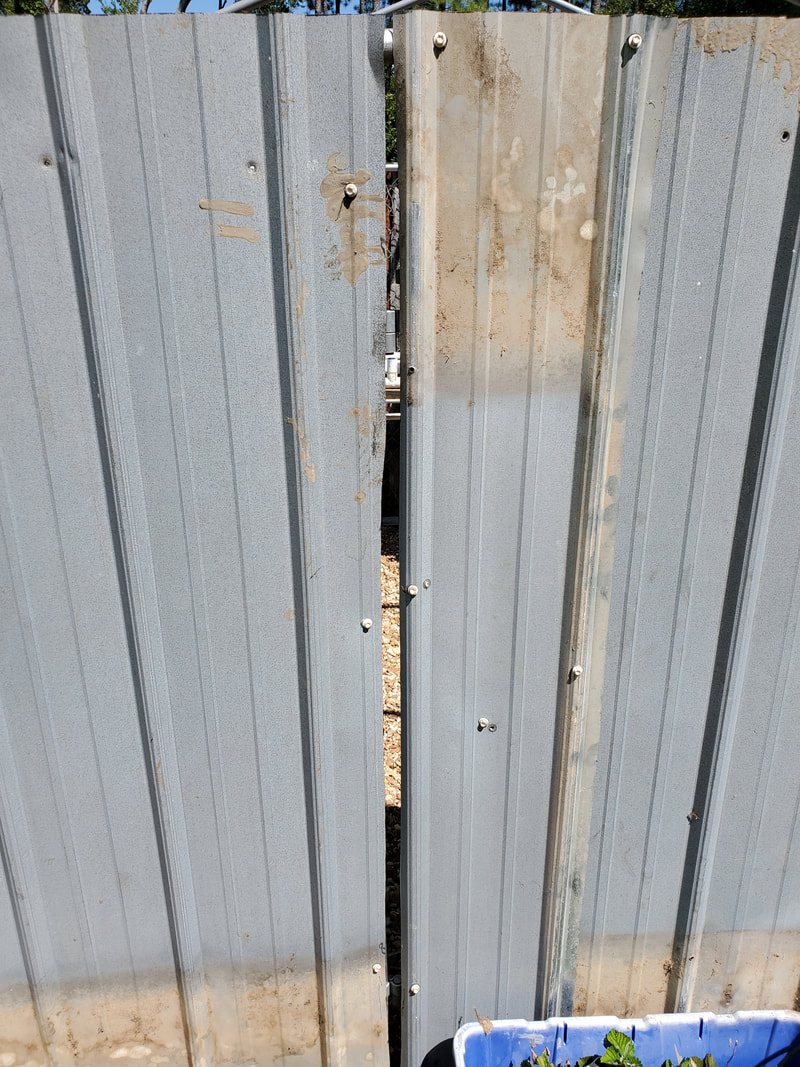
Closeup of west wall and door (to the left of gap) showing the gap between the two sections.
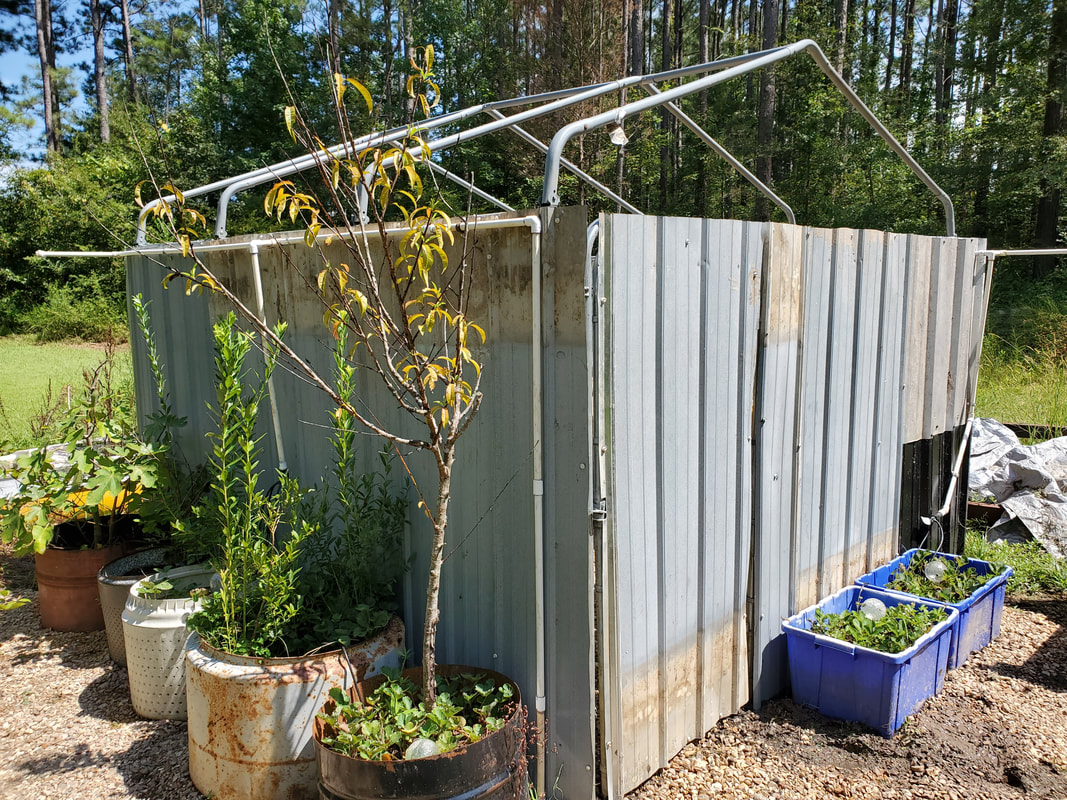
Completed greenhouse corrugated sheet metal wall paneling all around.
With that all that remains of the Dog Kennel Greenhouse project is running a power line to the structure to supply power for the hydroponic pump as well as an auxiliary outlet for the previously mentioned heater, as well as some removeable grow lights for use in the winter when we may try to grow plants that need more sunlight. From there we're looking at making and installing the clear plastic skin that would go on the roof to complete the actual greenhouse for winter use. Outside of filling the raised bucket beds and drum planters with dirt and completing the hydroponic garden assemblies, there really isn't much left for the greenhouse project.
At this stage all that was left of the old pig yard was the camper shell and the crude 2x4 frame that we set up to hold the shell off the ground a couple of feet. There was still some remaining sections of OSB plywood that we used for walls on the frame portion so the combination of that and the camper shell would make what amounts to a mini barn for the pigs that were out here. All of this would have to go. Frist thing I would have to do is remove a few wood screws that were used to hold the camper shell to the wood frame. Once that was done I was able to slide the shell down and onto the ground. I would still have to move this thing across the yard to a staging area so when I do sell it we won't have to worry about trying to move the thing from the area over to the main driveway. 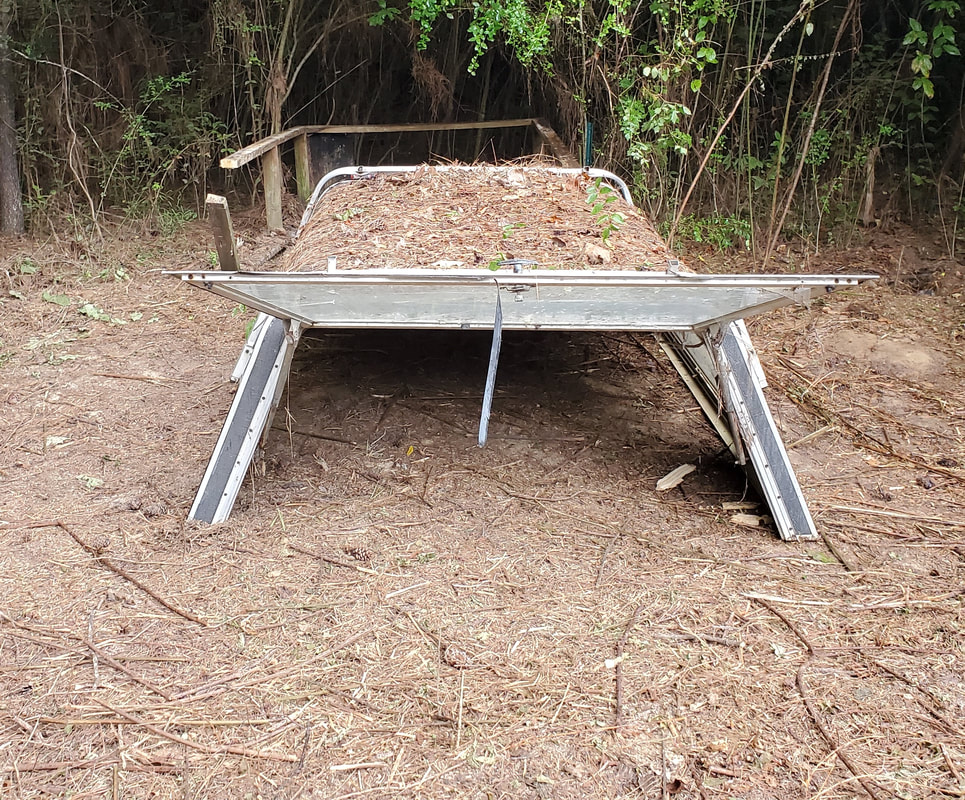 Camper shell on the ground after removing retaining screws from wood frame. As for the 2x4 frame, I removed the few wood screws I was able to pull out as some were rusty enough to strip out when I applied the impact driver to them. Afterward I used the metal cutting blade with the reciprocating saw to cut through the other screws holding the boards together. I did cut through a couple of boards to separate the framework. After pulling the boards up from out of the ground as the structure settled some, I was better able to continue to separate the boards, setting aside the good from the bad. 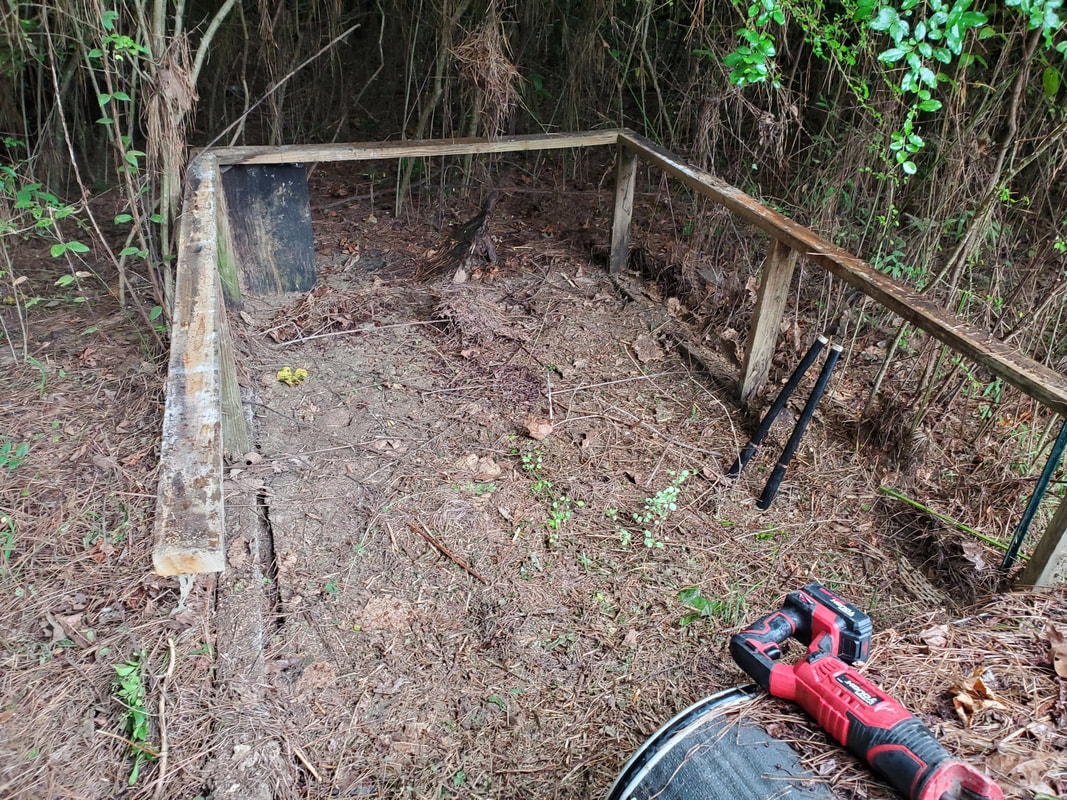 Wood frame in the middle of being broken down. Note how bottom boards are partially buried. Since these boards were pressure treated boards, a number of the boards that were off the ground were still good. Obviously the boards that were partially buried were no good and a couple of the boards had holes bored from carpenter bees so they too were no good. These boards went onto the brush pile, which was already burning as it managed to ignite after firing a small pile of garbage in the half drum which was right next to the brush pile. The good boards went onto the wood rack for future use, most likely to make a couple of drum raised beds from the drums we pulled from this area. With the boards cleared, I brought the two wheel dolly over and cleared the top of the camper shell of the humus that settled on top of the shell and tipped the thing on its front panel, so I could lay it on the dolly. From here I carefully wheeled the thing across the yard and staged it in front of an old tow dolly we're trying to sell. With the camper shell out of the way along with the drums and wood and fence posts, the whole area where the old pig yard was built is cleared.  Even though this area is cleared of the components of the old pig yard, the work is far from done. As stated, I still need to sell the stuff such as the T-posts and the camper shell since I have no use for these items and it would be nice to be able to recover some working capital for future projects. The drums will help expand the garden productivity. Taking care of these things will put a closure to the items that were recovered from this once buried area of the yard. 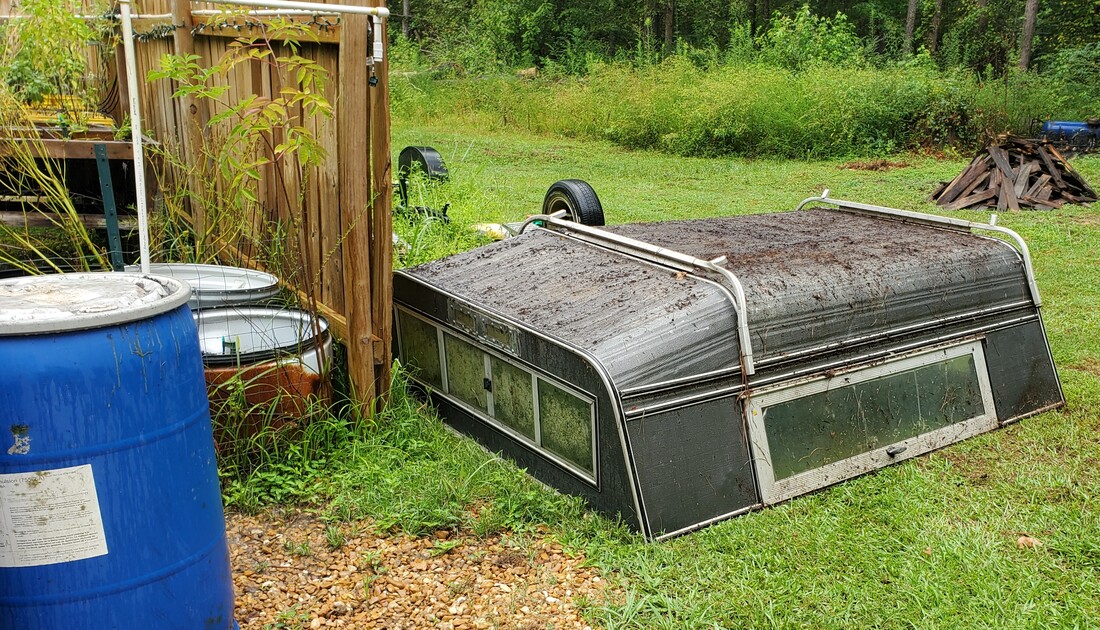 Camper shell staged in front of old tow dolly near garden fence, out of the way but close enough to main driveway to facilitate quick loading. 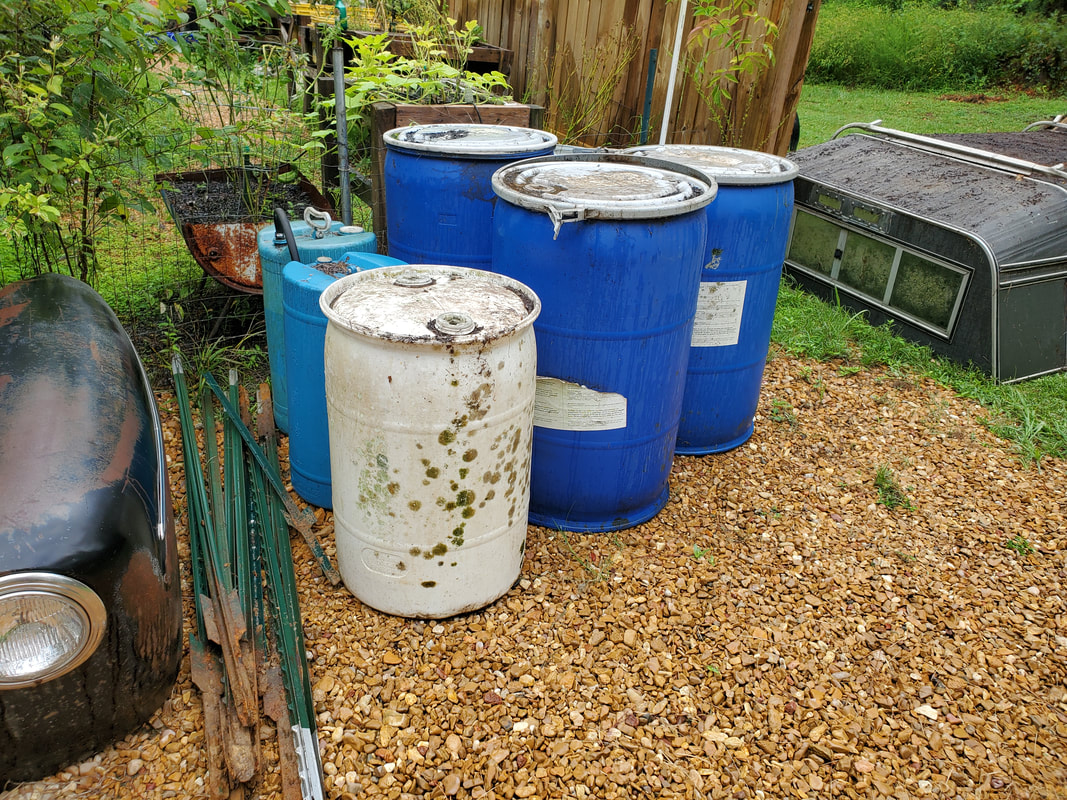 Drums and T-posts staged behind 46 Ford and associated parts, next to camper shell. Even in the process of using the mentioned items in future projects and getting rid of those items we have no use for, there's still a matter of clearing the brush from the area. As stated before I want to cut a straight line across the yard, creating a new tree line that will allow me to retain the rectangular layout of the clearing outside of the fenced in compound, which will help make things a little easier when it comes to landscaping. Other than some tree trimming to knock off any errant branches that may overhang into our clearing area, we will end up having a living wall set up that will almost be like a whole other fence, concealing everything going on within this area.
In the previous post we started doing some landscaping in an area of the greater yard that is east of the fence line of the compound. This area has an old pig yard that we set up over five years ago, along with some barrels we had stored in the area for future use. Over time blackberries and other weed trees grew up and over grew and took over the area to the point that the pig yard and the barrels were completely covered up by foliage. Well I wanted to be able recover the camper shell that we used in the pig yard for a shelter so I can sell it to get a few bucks since this item isn't even doing any good sitting in the middle of the woods. Also the drums that are there can be put to use making more raised beds or drum planters for the garden since there are some trees that need to be transplanted to drums from the tire beds they're currently in and more drum raised beds need to be set up so I can further do away with the remaining ground level raised bed, among other things.
Well anyway we did get the process started by clipping stuff from the edge of the brush line as well as running over and through a lot of this with the zero turn mower to just knock a lot of this down. Hedge trimmers were brought in later on to really knock a lot of brush. I had to drag the generator over to this site to power the trimmers. Of course the mower did way more to clear a lot of this ground than just snipping the brush with shears. In the last session we managed to get the ground cleared up to the fence of the pig yard and enough to just about expose the drums. In this current session we started pushing into the pig yard. This involved cutting the overhead brush with hedge trimmers. and clearing a lot of the rotted pallet wood that remained from the pallets that were used to make up the fence. I had to really put some work in with the hedge trimmers chopping away at the super grown blackberry briars that were well over my head and intertwined with other viney plants. After working my way around to the inner edges of the fence line the ole lady ran through everything on the ground with the zero turn. 
Pig pen yard cleared up to fence and inside of yard cleared of detritus after zero turn did its work.
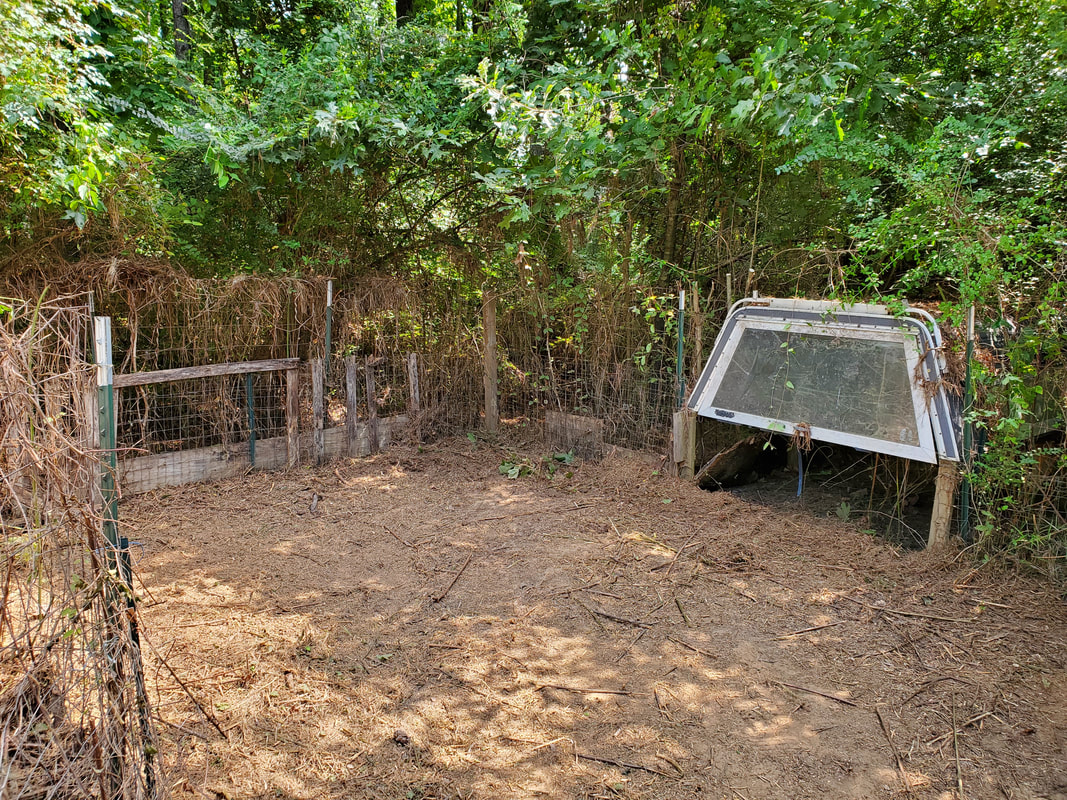
Another angle showing inside of the pig yard showing the inside of the fence line and the camper shell that was used for the pigs shelter.
As time progressed we managed to make a nice pile of brush and crap for the burn pile. Between the plant material and the old pallet wood and even a couple of old fence posts, we had a nice pile growing. Now we did manage to salvage several larger T-posts while only salvaging one of the smaller posts as the smaller ones bent up too easily and ended up getting cut below the ground with the reciprocating saw. 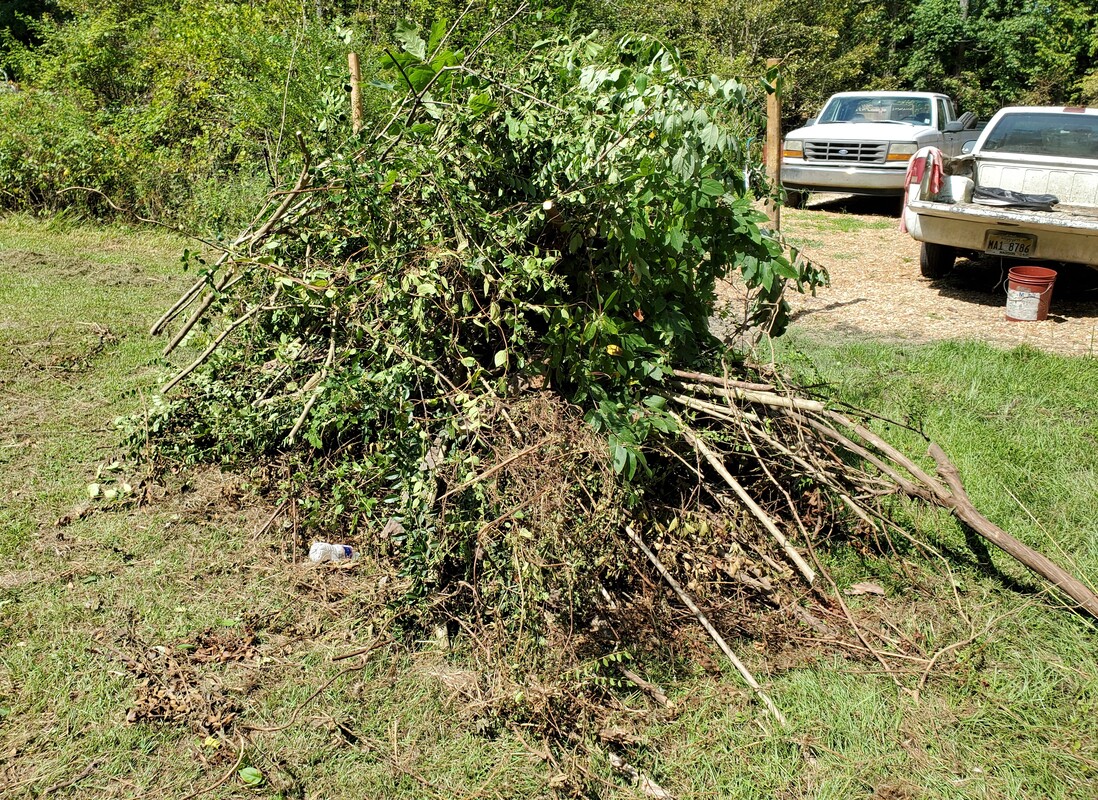
Growing brush pile from pig yard and surrounding area.
The next move of course was removing the fence from the pig yard. As stated before, we removed the T-posts and wood fence posts from the yard. This involved having to cut multiple ties from the chicken wire and large gauge wire fencing to get the stuff separated from the posts. On a couple of occasions we used the zero turn and a tow strap to hook and drag sections of fencing from their place since the bottom of the fencing had sunk into the dirt some. I had to cut the fence at the corners of the fence line to make things easier for removing the fencing, taking time to fold/roll up the sections of fencing for staging in the outgoing scrap area. With perseverance we managed to get all of the wire fencing removed and staged for scrap, along with the fence posts. All that's left now is the camper shell and the supporting posts. Of course we'll have to cut some more weed trees and other brush around this structure to open up some space to allow for working around it more easily, but the main thing is getting it separated from the posts its setting on and moved to another staging area so we can get the remaining posts out. 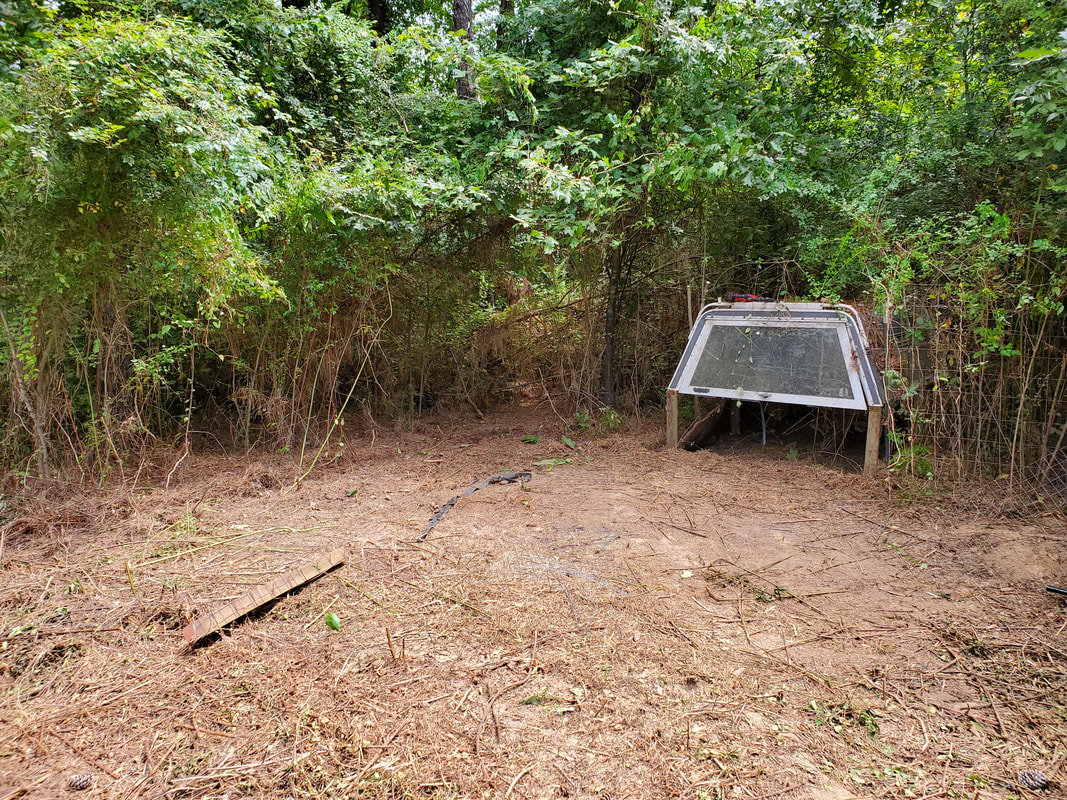
Pig yard voided of fencing except for area immediately to right of camper shell. Note cut wood post in left foreground.
When the camper shell and the remaining vestiges of the old pig yard are gone, my plan will be to continue to cut the plant growth further back to where the rear of the camper shell was at then cut a straight line across, creating a new tree line for the clearing that will be where the rear of the pig yard once was. 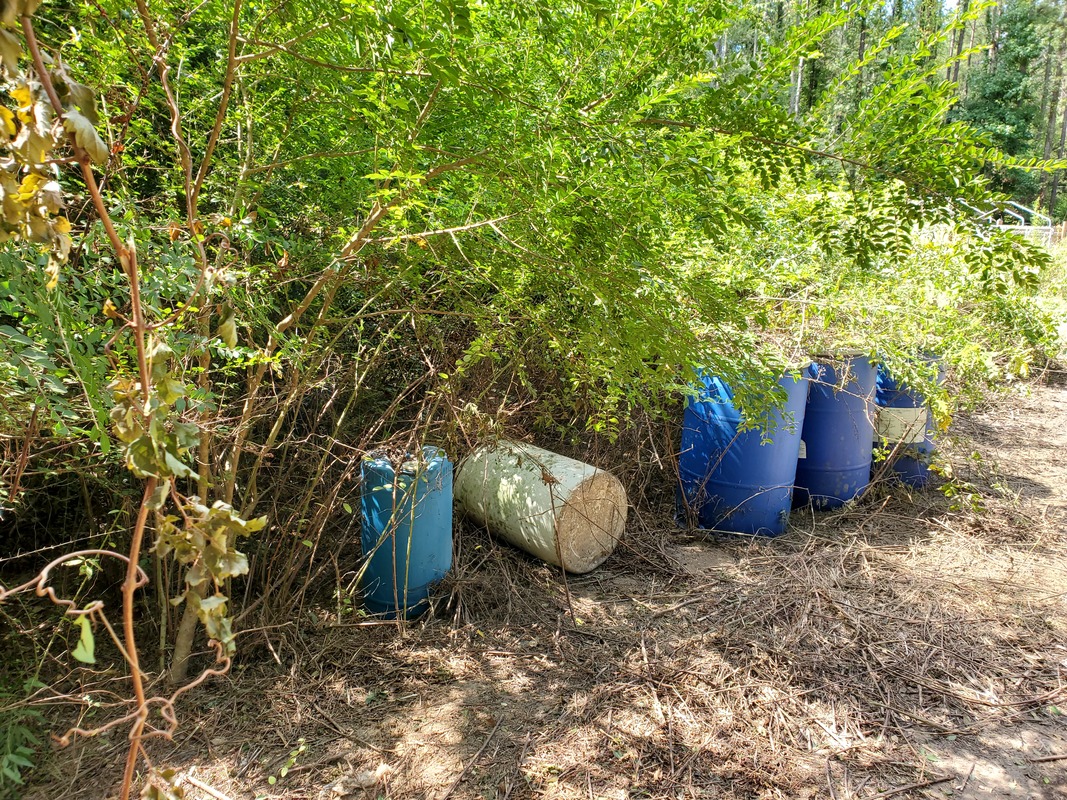
Barrels after trimming extra growth from around them in order to get them tipped over to clear water out prior to moving.
We still had to get the drums removed from the area as well. Even though we did manage to get the drums exposed, there was still some crap remaining around the drums and on top of them, mostly blackberries, which of course would've made removal painful at best. So with the hedge trimmer, more brush was cleared from around the drums so they could be rolled out and tipped over to empty the water from them, where they were then moved with the dolly to a staging area pending their use in the garden. With the grounds cleared, and continuing to be cleared, we will be making an effort to keep these grounds cleared. I took time to cut a few small stumps from some of the cut down weed trees so these won't be a problem when the zero turn runs over this area as this will be what's used to keep the grounds cleared. By clearing everything from the grounds and cutting a straight tree line, it'll make it that much easier as there won't be any maneuvering around, just straight passes up along the clearing. 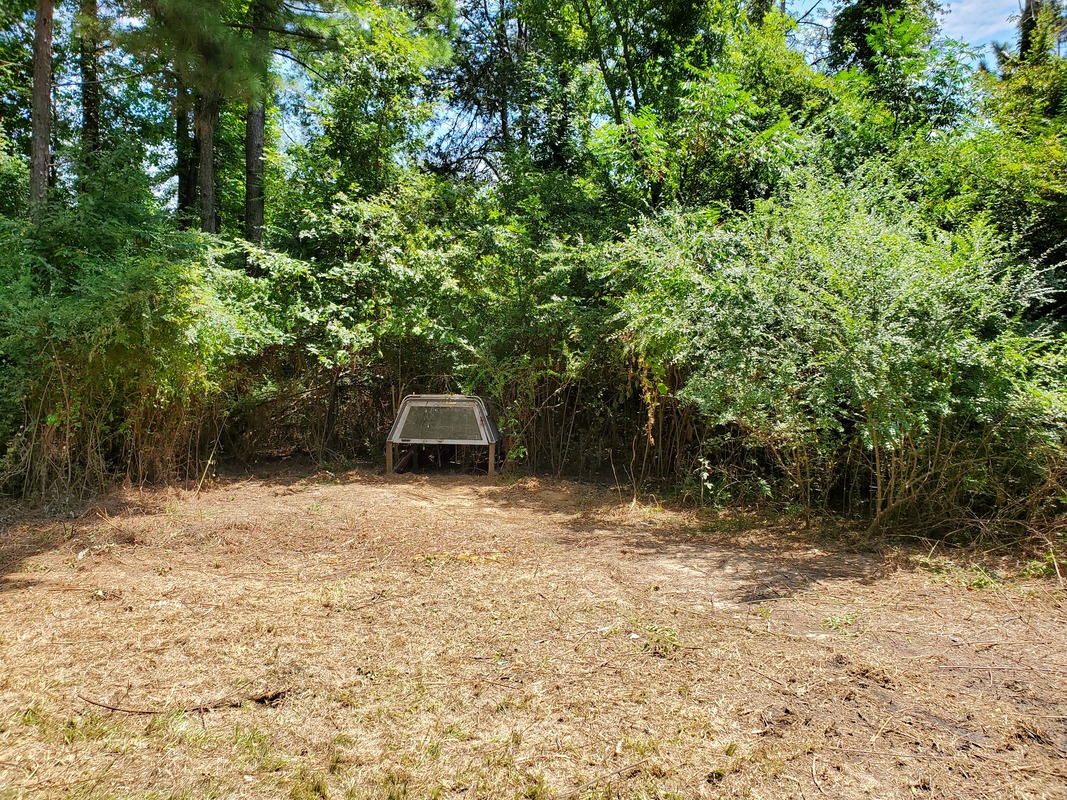
Overall area as it stands with all fencing gone, including the barrels.
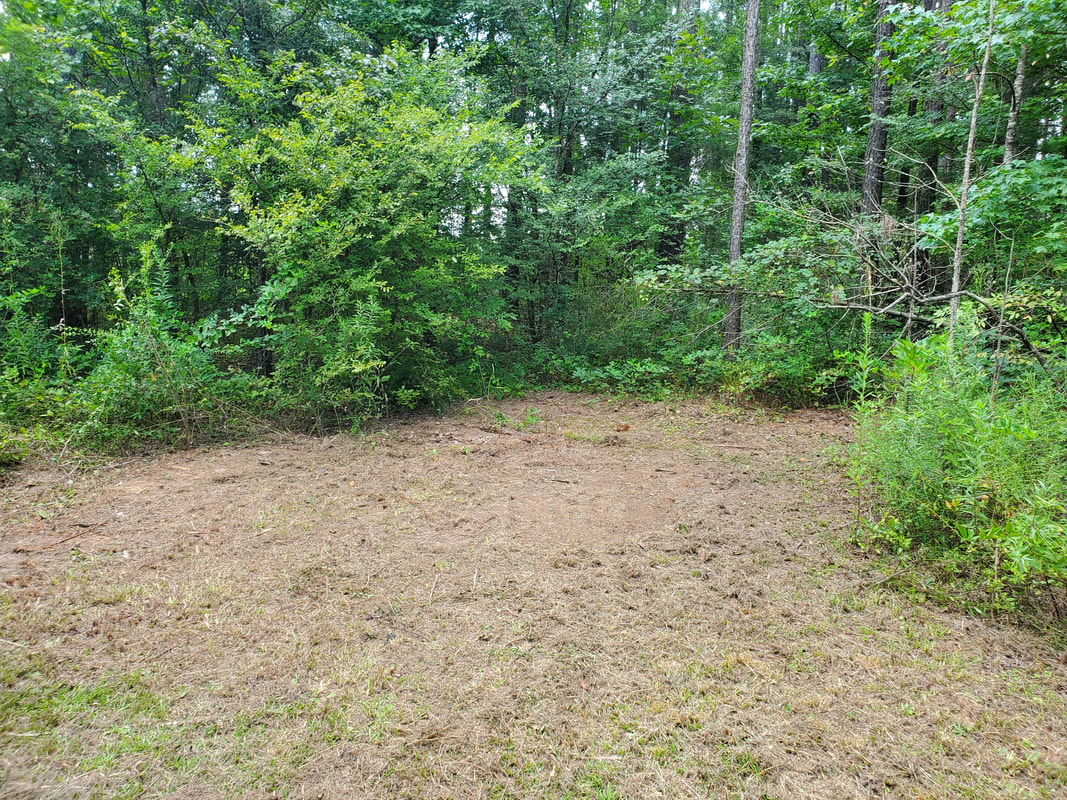
With these grounds cleared, it'll make it a lot easier to turn vehicles and trailers around as we will end up having 3x the space available as we had prior. Also having all this ground cleared will allow us to perform other actions such as target shooting, testing small vehicles like go karts or what not. With this area opened up this area will probably end up becoming known as the proving grounds for any future projects we complete, which of course you'll see here.
As of lately there's been a more or less general cleanup vibe going on around here with us doing things that revolve around getting more order to the compound by getting rid of more stuff and putting things in their place as well as setting things aside that can go out for scrap. Some things are slated to be sold on ebay or other online outlets as well. But what does this have to do with firewood storage? Or gravel in the garden or the 51 Chevy? Well if you remember we took some time recently to clean up an area where I had some old pallets stored, breaking many pallets up for firewood to burn up some stumps. Some of the pallets were still in good shape and would be perfect to expand the firewood staging area to provide more storage when I produce more firewood from the Fallen Trees in the future. This is some general cleanup here because of clearing the old pallet storage area as well as setting up the firewood storage area. After getting some gravel I laid some rock down in this area so I could lay down the four pallets I set aside. This allowed me to lay the pallets down so the whole job is completed versus just having pallets stacked against the fence doing nothing. A place for everything and everything in its place. 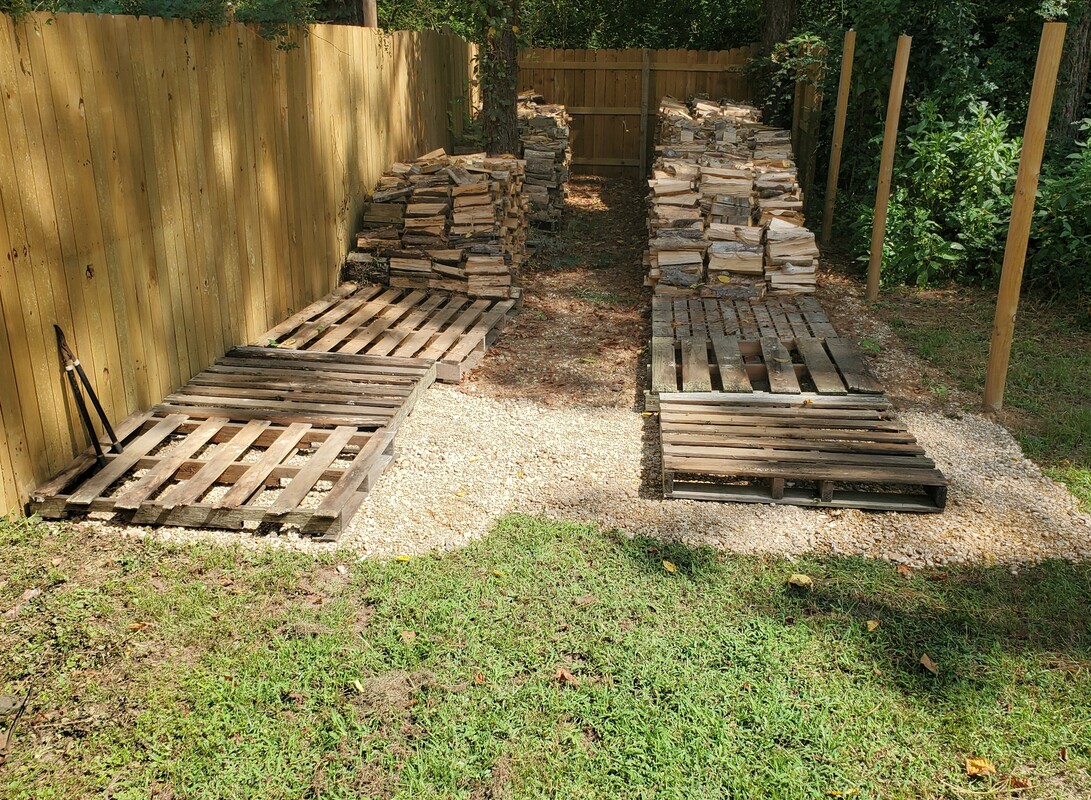 Now for the garden. With the batch of gravel I had in the truck I still had to spread gravel around the five drum planters I had around the north side of the Dog Kennel Greenhouse. After putting a section of tarp down to put the drums on, I had to spread gravel over this area to cover the tarp and make things look nice. With the gravel spread and used up I cleared the truck to be ready for the next gravel load, which will continue to be spread in the garden to cover more ground to make these grounds look better and be more convenient to walk over since the ground tends to get mushy making for a pleasant feet soaking experience when moving through the garden. Making things more complete around here. 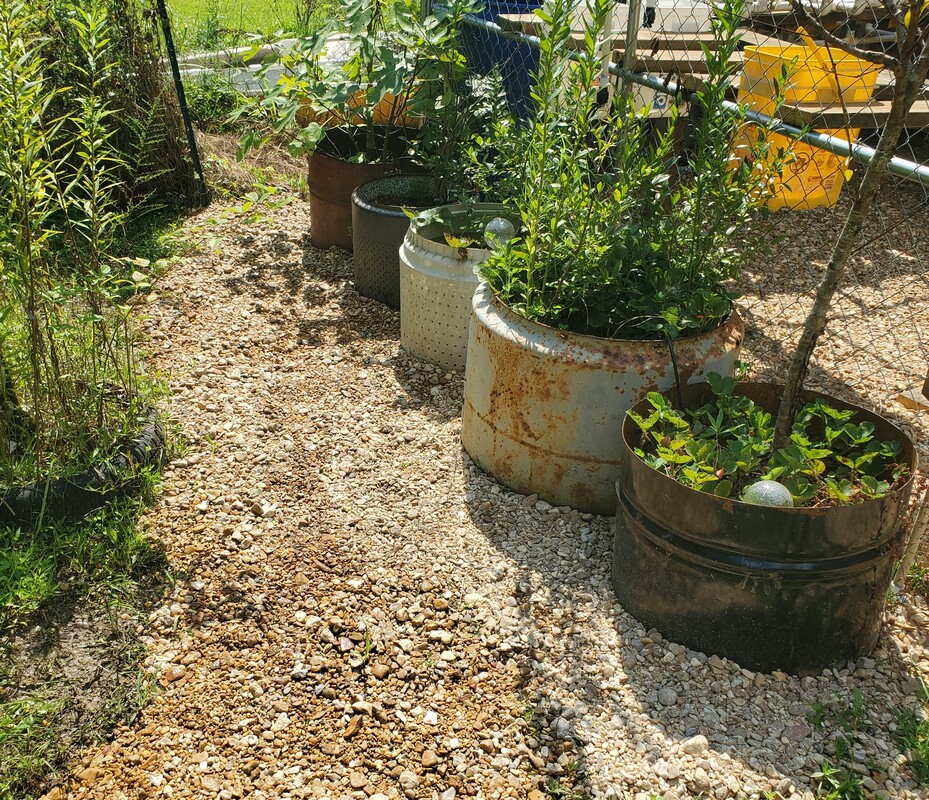 Gravel spread around drum planters and along pathway in front of planters. 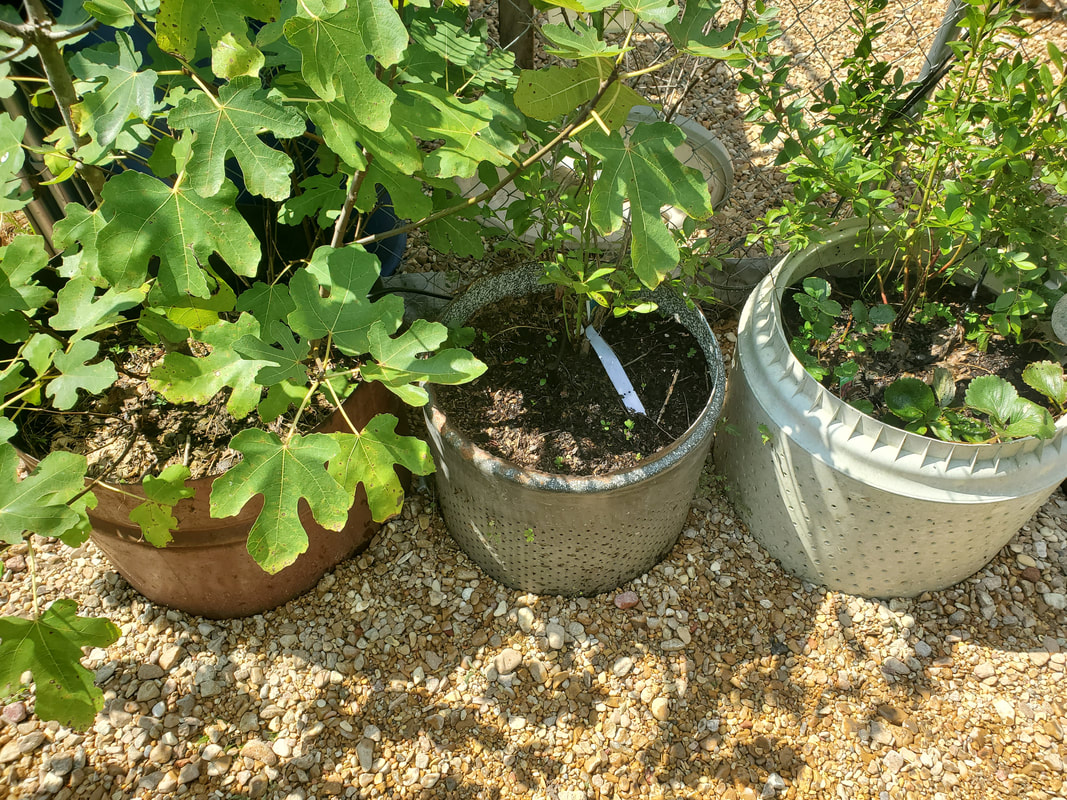 Gravel spread around the drum planters and behind them against the greenhouse fence. Now another thing that needed to get done to further get ahead on some things was put two tires on the 51 Chevy. We managed to get a couple of truck rims from a friend that had the same bolt pattern but had a different hub spacing or offset so the third rim we had would not fit on the front hub as the rim interfered with the steering of the truck. So with that I had to put the truck on some ramps placed under the truck's frame rails to hold the truck up while I got some tires put on a couple of rims. We ended up using one of the LUV's spare rims and one of the original rims from the 51 Chevy since they were the same size. One of the 51's old rims was a size smaller. With tires on the rims the truck is now able to be rolled from its resting spot to wherever we need to put the truck to work on it in the future. I can also put the other spare rim in storage temporarily with the other spare rims we have in the scrapyard, if I don't just scrap the rim since it's rusty anyway. Either way, getting wheels on the truck puts the truck in the position where it can be moved if need be. 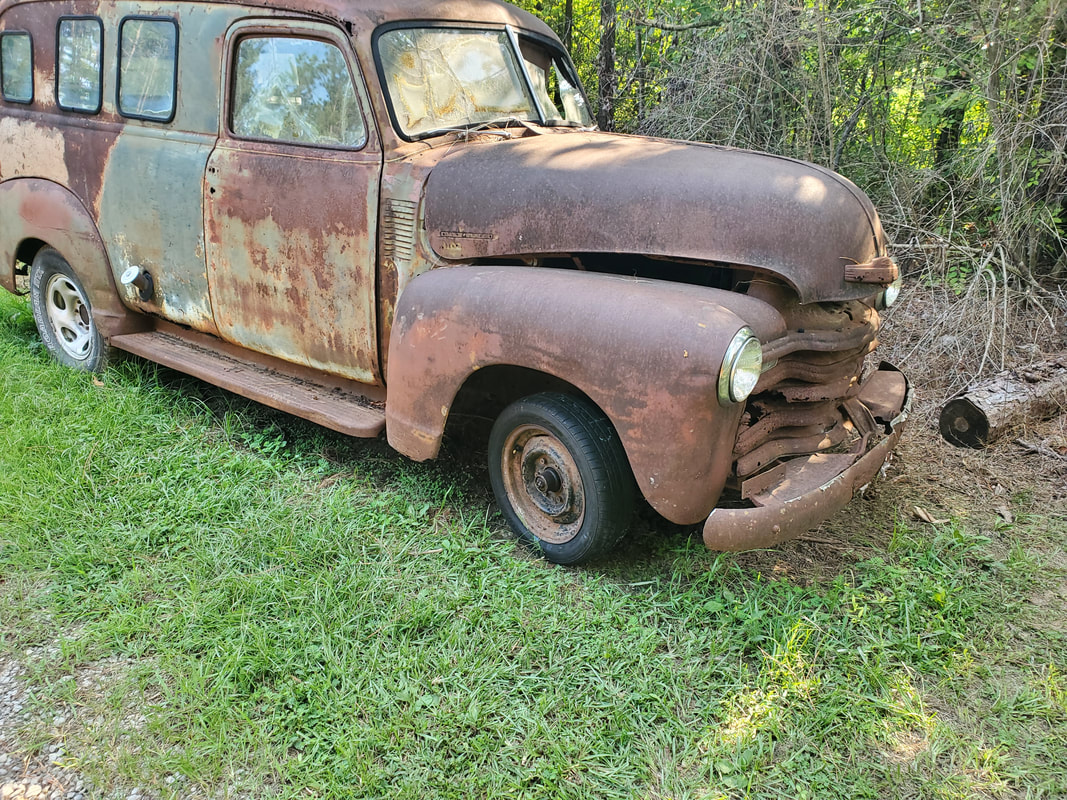 Right front tire put on the truck, note smaller size of tire compared to rear tires. 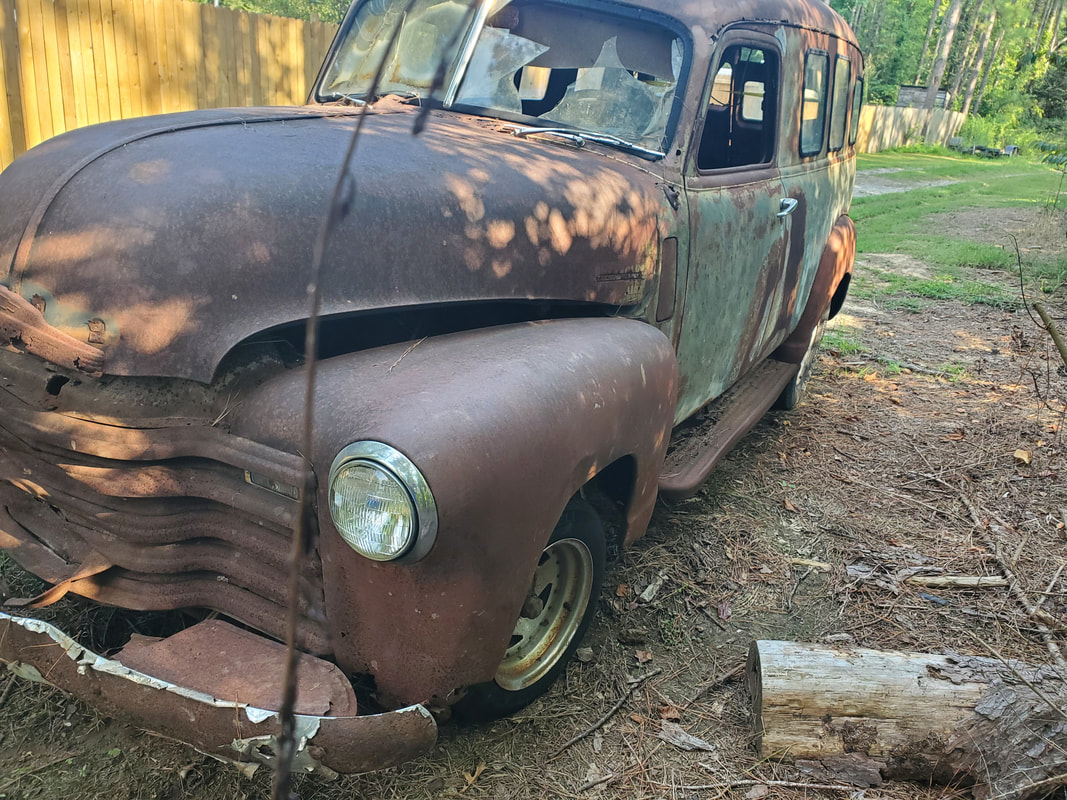 LUV rim with fresh used tire, also smaller than rear tires. As weird as it sounds, having these vehicles able to roll kind of shines a different light on the truck as it makes it appear more "complete". It really wouldn't take much to rebuild the brake system and even the suspension of this truck with reproduction stock parts for this year of vehicle then swap out the old power train with a run of the mill SBC V8 and auto transmission that can be typically had for relatively cheap since a lot of people are upgrading to LS power trains. Barring the cosmetics, it really wouldn't take much to put this truck back on the road even in a minimalist sense. But when we do things like this, it puts things into their final use places, rims, tires, etc, versus having these same items laying around the yard doing nothing but being in the way. There's still plenty of crap around the grounds that needs to be applied to their end uses so the stuff isn't just laying around. Again, a place for everything and everything in its place. Even with the ongoing projects, we will continue to try to beautify and organize the compound so this place will be a better place to work and bring more projects to completion.
In this post we're going to go off on a tangent from what you've normally seen here. This little side project is the restoration and customization of a Crosman 2240 air pistol. This is the newer generation version of this gun but this gun is still several years old nonetheless. The seal on the power valve where the CO2 cartridge was degraded to the point that it would not allow for gas to come out, its like it turned into mush.
The Crosman 2240 is a .22 caliber CO2 pistol that is a single shot bolt action gun that shoots around 450 fps give or take. This gun is also one of the platforms that's more customized than other guns you may be familiar with. Well since I had one I figured, why not, I'll customize this gun to make it something that's more entertaining. One of the first things I wanted to add to this gun was a suppressor made specifically for this gun. I picked up a unit off Amazon that's carbon fiber and approximately 8" long. Contrary to what people think, airgun suppressors are legal as long as they can't be made to work on a firearm. This suppressor is made specifically to fit over the barrel of the 2240 and uses a set screw to hold the unit to the flat point on the muzzle of the gun, again, not easily adaptable to a firearm. 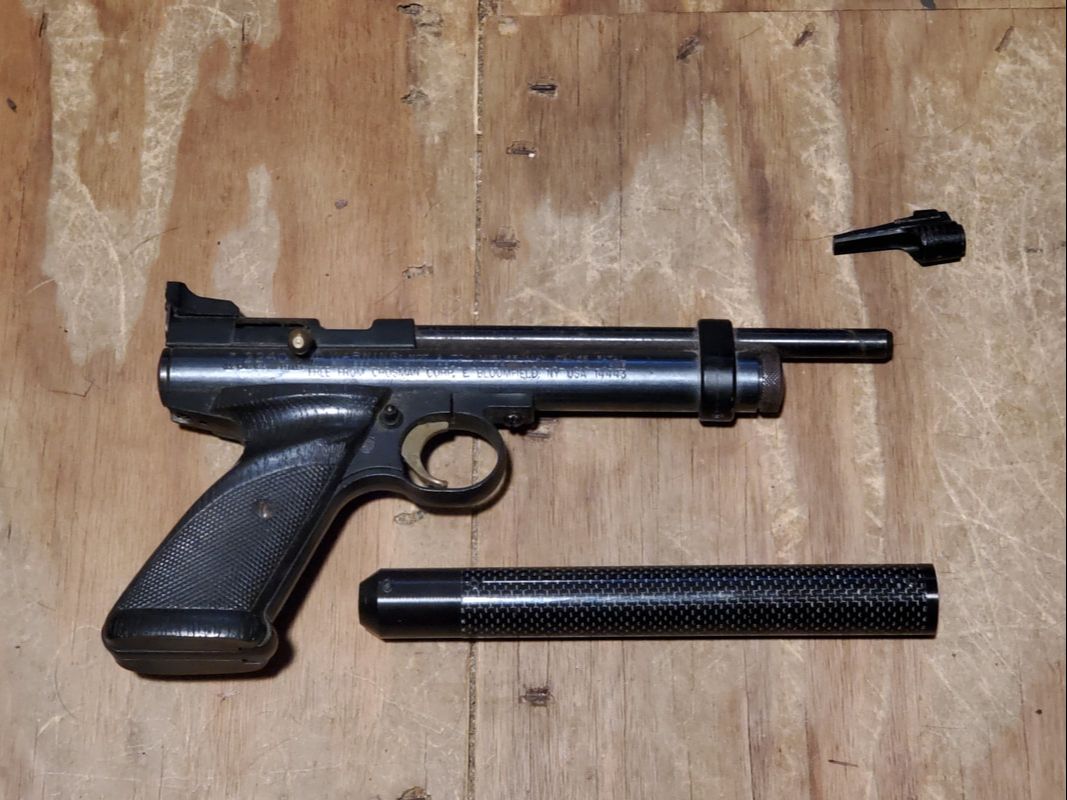
Crosman 2240 with aftermarket suppressor and front sight removed in order to install unit.
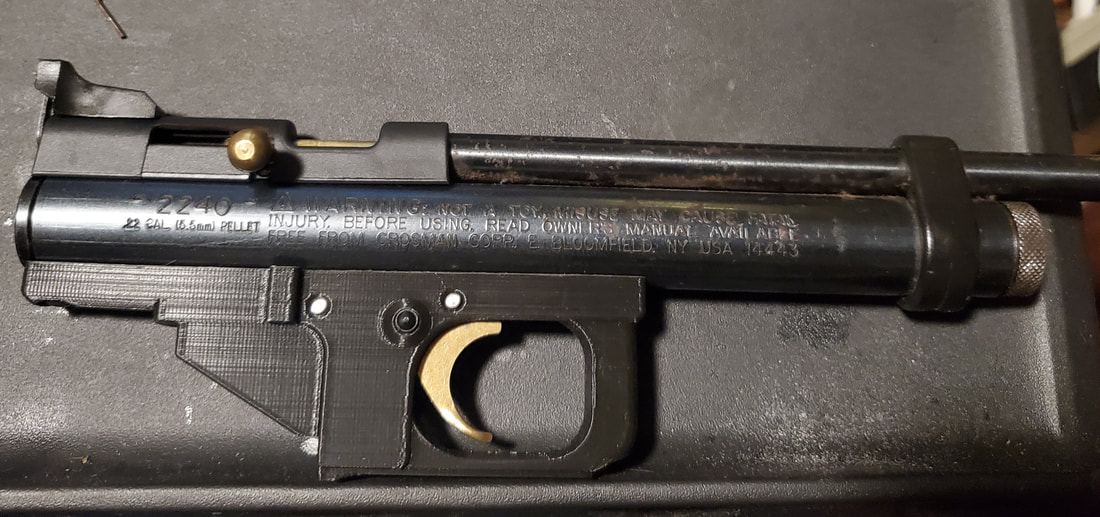
Another modification I wanted to do was change the lower receiver of the gun around to accommodate an AR15 pistol grip. This is mainly a cosmetic modification but I do like guns that look cool as well as shoot cool. The lower receiver I picked up was an aftermarket plastic piece made on a 3D printer by a customizer. It was made heavy duty enough that it will be able to take normal use. Of course you can't throw it around or drop it on the ground but it's pretty stout. 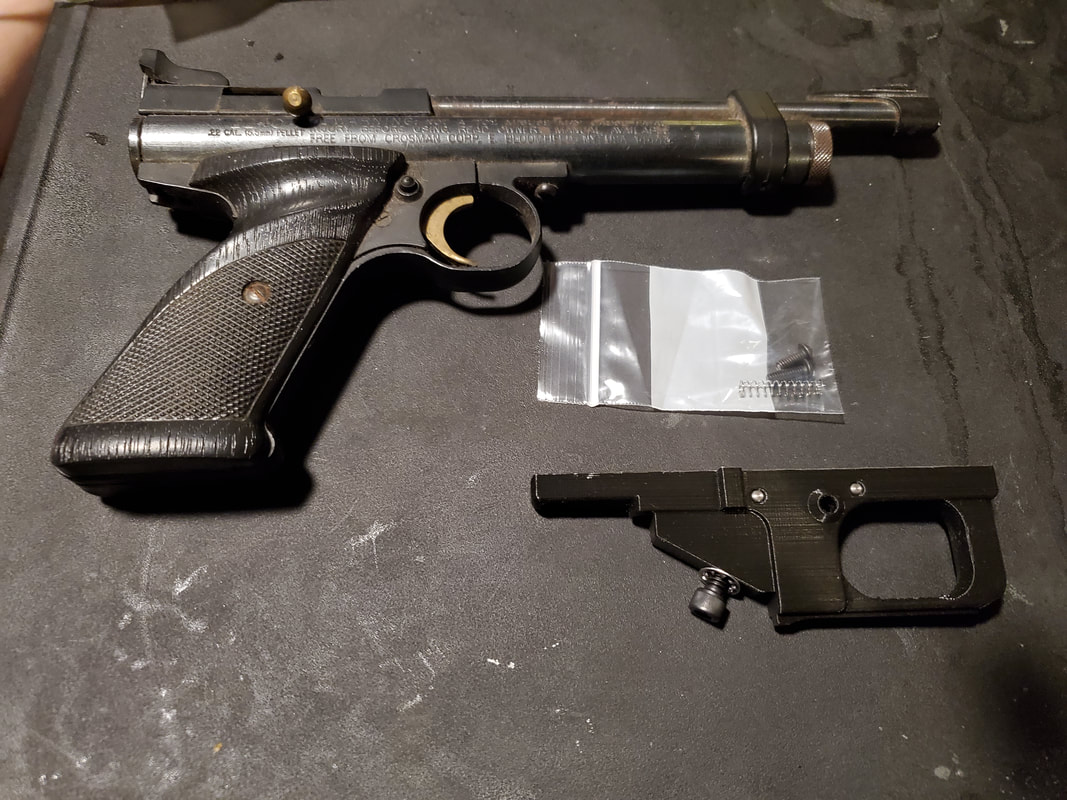
2240 pistol with aftermarket lower receiver for comparison.
Well in the process of making these mods, I tried to take the gun out for one last shootout before pulling it apart only to find the problems that I had with the power valve. This meant I had to replace the seal on the CO2 cartridge seat but after doing some searching online I found that there were some modified power valves (Again thanks to the customization world) that besides being completely fresh, also put out a little more juice to up the velocity. The power valve I settled on was actually part of a kit that included the power valve, a stronger hammer spring and a bigger port that will allow more gas to transition from the power valve output up into the barrel breech. I'm definitely liking the idea of more power with little real modification. I ordered this kit and waited. Once it showed up, it was time to get to work. 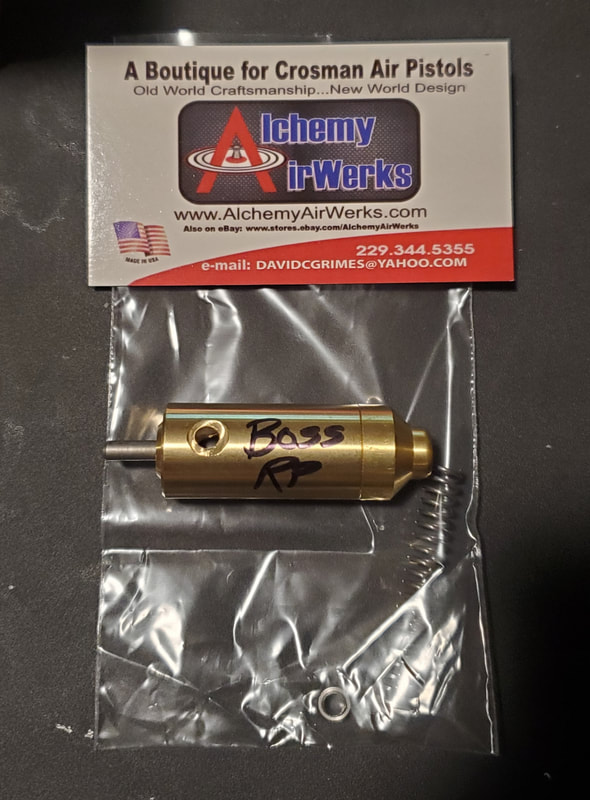
Power valve kit for 2240.
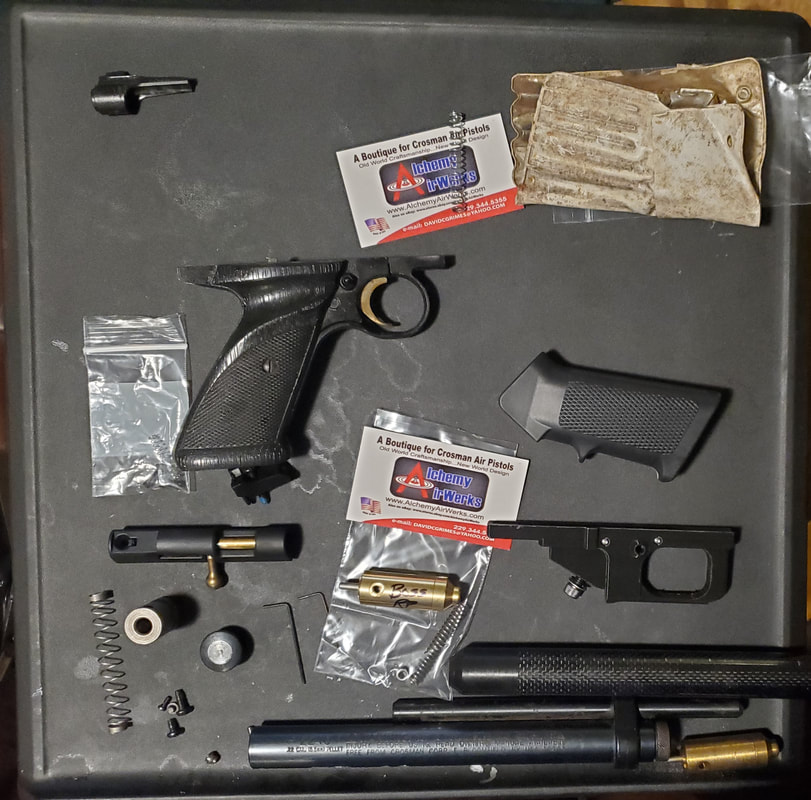
The workspace with the gun disassembled and the new parts laid out ready for assembly.
I disassembled the gun, getting the old power valve out and having everything ready to reassemble with the new parts. The first place I started was with the lower receiver. I would have remove the old lower and disassemble the small parts from the assembly to transplant into the new lower. The new lower did come with a sear spring specifically for this lower so I didn't have to reuse the original sear spring. Everything else got reused. 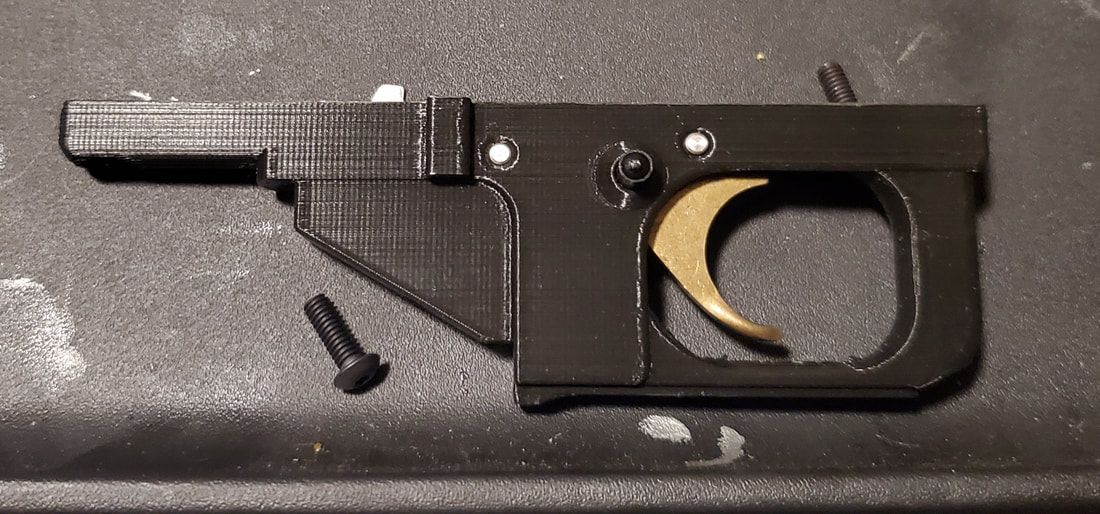
New lower receiver with old parts assembled which include the trigger, sear, sear spring, retaining pins and safety pin.
The next area of attack was the power valve itself. This was a pretty simple assembly as it just needed to be pushed into the main receiver tube then locked in place with a single bolt. From there I took the bushing and placed it in the O-ring in the receiver tube over the power valve. From there I took the bolt assembly and lined the breech of the barrel with the assembly so the port at the bottom of the bolt assembly and the barrel would line up in order to place the whole works on top of the bushing on the receiver. Now before I could bolt down the bolt assembly I had to insert the hammer into the receiver tube and insert the peg on top of the hammer that the bolt will catch when the bolt is used to cock the hammer back. Once the peg was placed in the hammer, the bolt assembly could go on. After bolting the bolt assembly down to the top of the receiver and tightening the set screw holding the barrel near the muzzle I then bolted the lower receiver onto the bottom of the receiver tube. 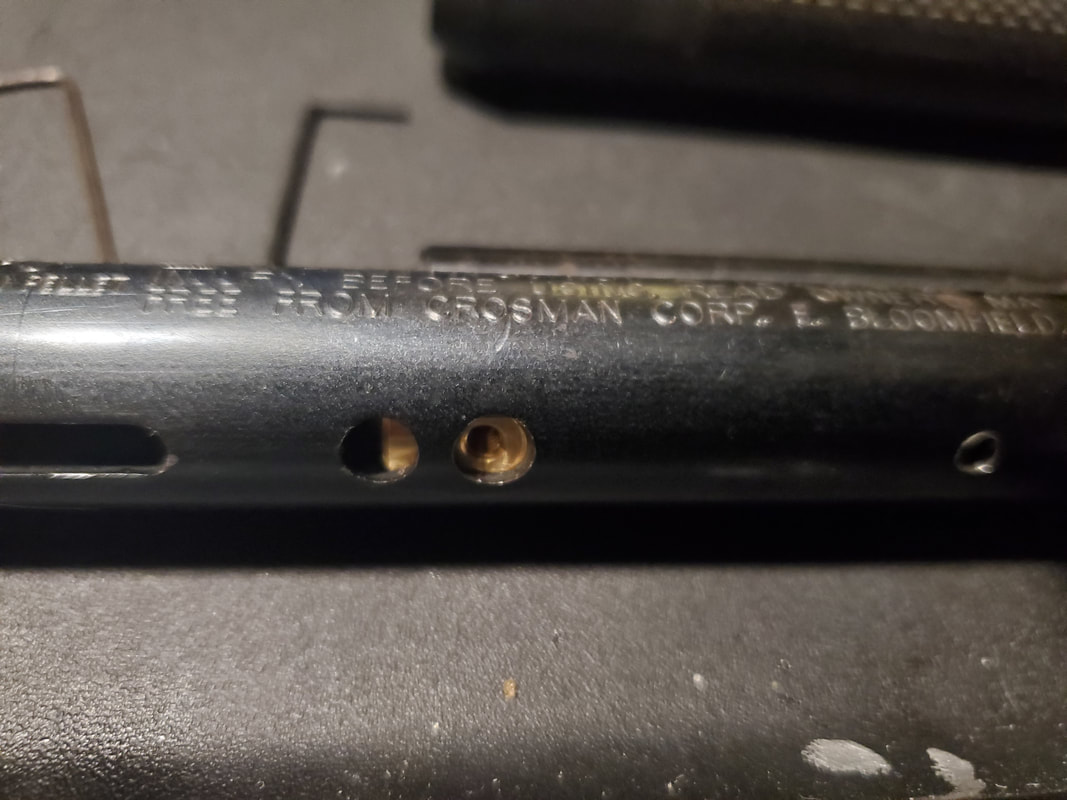
Bottom of power valve showing where retaining screw goes to hold the unit in place.
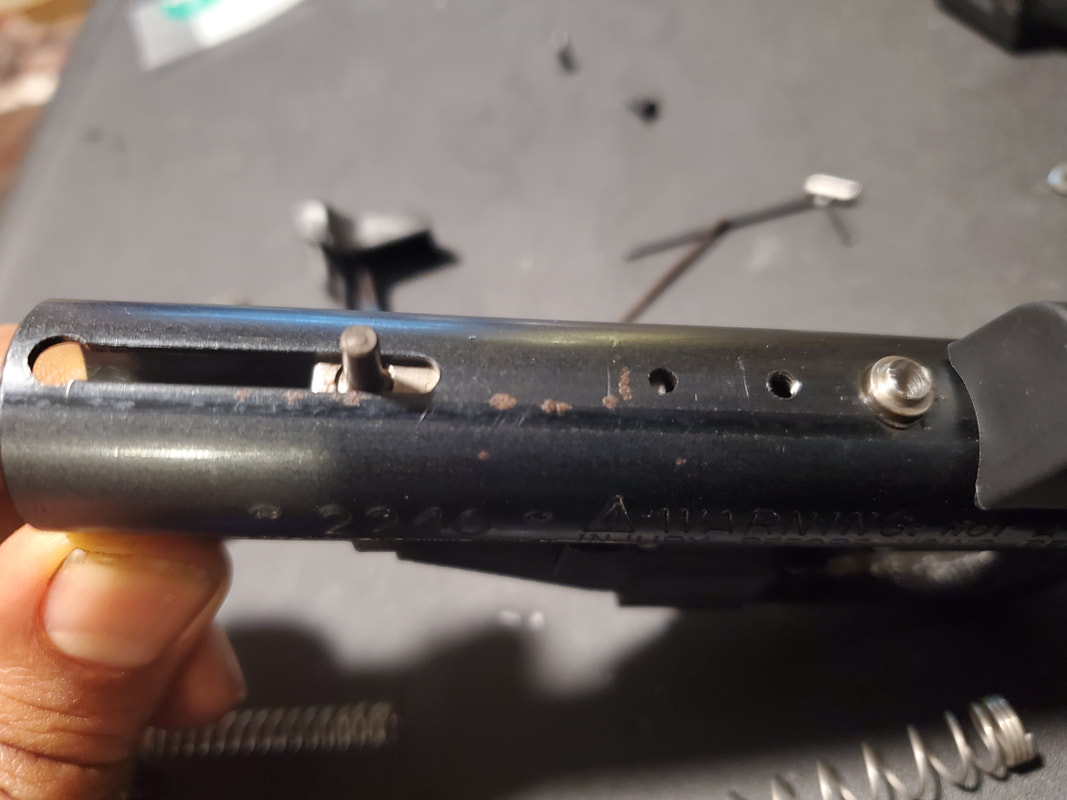
Peg on top of hammer that bolt pushes against to lock hammer back. Note power valve bushing to right of opening.
Lower receiver and bolt assembly bolted to receiver with barrel.
The last things to go on the gun is the AR15 pistol grip and the suppressor. The pistol grip is held in place with a single bolt as it is on the AR rifle so this was pretty quick. The suppressor again is held in place with a set screw that holds the unit to the flat spot on the muzzle of the gun. With that, the modified 2240 is completed. 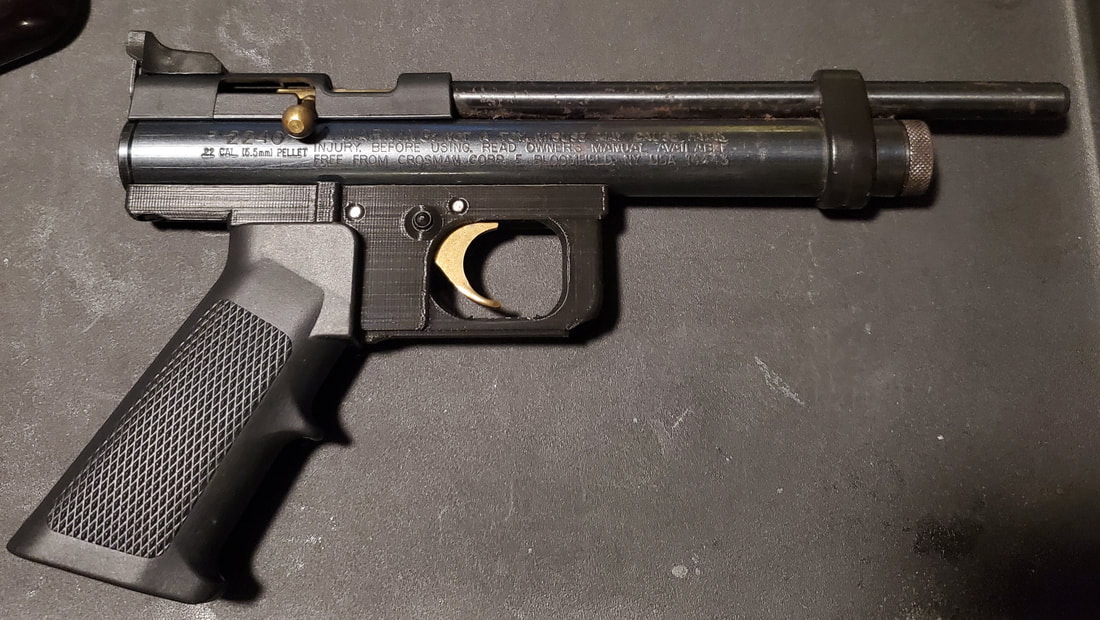
AR15 pistol grip attached to new lower receiver on 2240.

Finished gun with suppressor and other new parts, ready for shooting.
Since I finished this gun at night, I just took a soda can and chucked it out in the main driveway and charged the gun with a CO2 cartridge and grabbed a tin of pellets. Now since the gun doesn't have a front sight you would think that being able to get accurate shots would be hard. It wasn't. Knowing where the old sight was situated, and referencing it to where the suppressor sits allowed me to just line the suppressor with the target to take my shots. Most of my shots hit home nicely. The way the pellets hit sounded like they were hitting harder than before. Of course without a chronograph I won't be able to tell what the velocity of the projectiles are in this gun. That will be something for a later date, getting a crony to use for future gun tests as I play around with air guns some more. Other mods I want to do to this gun are adding a folding stock that I seen that would give this gun carbine capability as well as be used as a pistol. There's a magazine mod that allows me to turn this gun into a true repeater for fast follow up shots. Of course since there's no full open sights I'll have to add some rails for a red dot sight or laser or both for more accurate shots. As stated, the modding of this gun is not complete, not by a long shot.
Continuing with the grounds cleanup that I had started earlier with the moving of a bunch of old pallets, I had also been preparing pyres around several stumps that needed to be disposed of. The wood from the pallets made for the fuel for these pyres but some of the pallets still needed to be cut up further. In this next session I was able to get the rest of the pallets moved from the old area where they were stored. The ole lady was able to further cut the grass around this old pallet storage area to help open the area some more.
I was able to separate a few pallets that were actually still good due to the wood being heavy duty and probably made of pressure treated wood. These pallets were moved over to the firewood staging area to lay down more surfaces for stacking more firewood, especially when I start processing the rest of the Fallen Trees from their resting place. Of course I'll have to lay some more gravel to provide the surfaces for these pallets to be laid upon but that's neither here or there. 
Good pallets set aside at firewood staging area for laying down to be beds for more firewood.
Old pallet storage area after removing pallets and cutting grounds further.
With the pallets moved and stacked up near the stump burning area and the good pallets set aside I decided to go ahead and fire the pyres and let them start burning while I took the battery reciprocating saw to cut the pallets up into individual boards. From there I was going to separate the decent boards from the rotted trash. 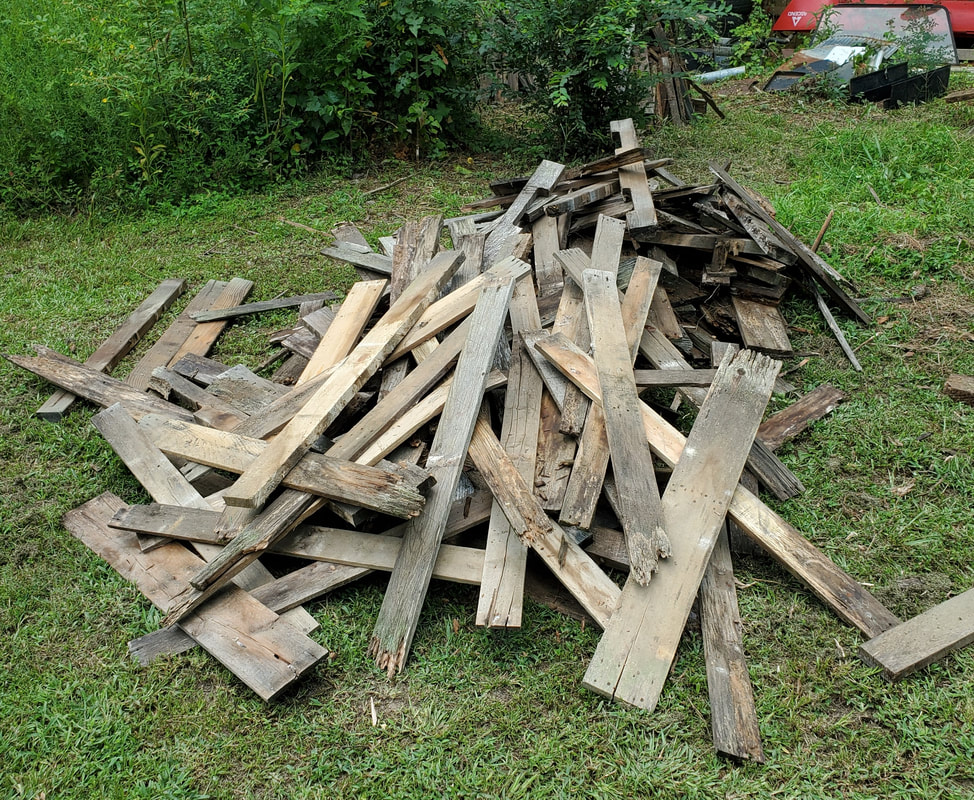
Pallet boards cut from whole pallets after cutting through nails holding the pallets together.
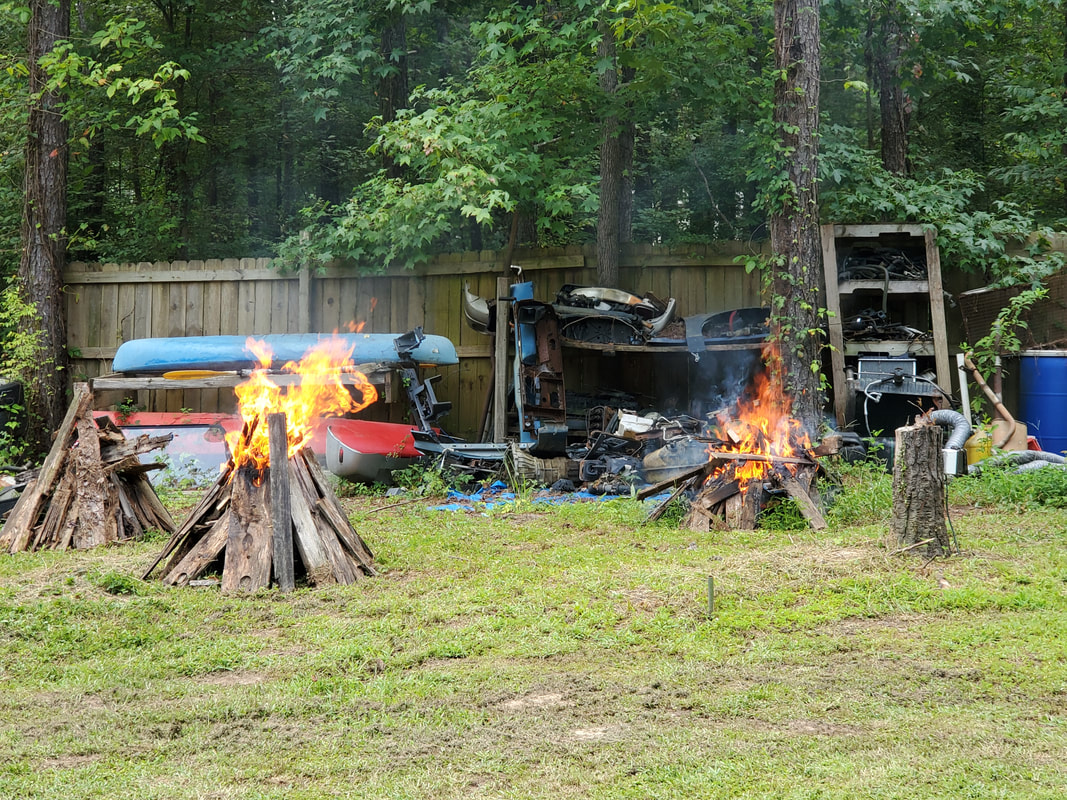
Stump pyres lit and starting to blaze up.
Cutting up the pallets started off with using a metal blade to cut through the nails holding the pallets together. After breaking the pallets down completely, I then switched to a wood cutting blade so I could further cut the boards down into pieces small enough to periodically refuel the stump fires. I did separate a lot of decent pallet boards that I was able to restock my rack some with boards for future projects. I did keep the fires going a while in the process but didn't want to just exhaust all of the pallet/fire wood since I will more than likely have to do more to these stumps to get them in a state where they would burn better. 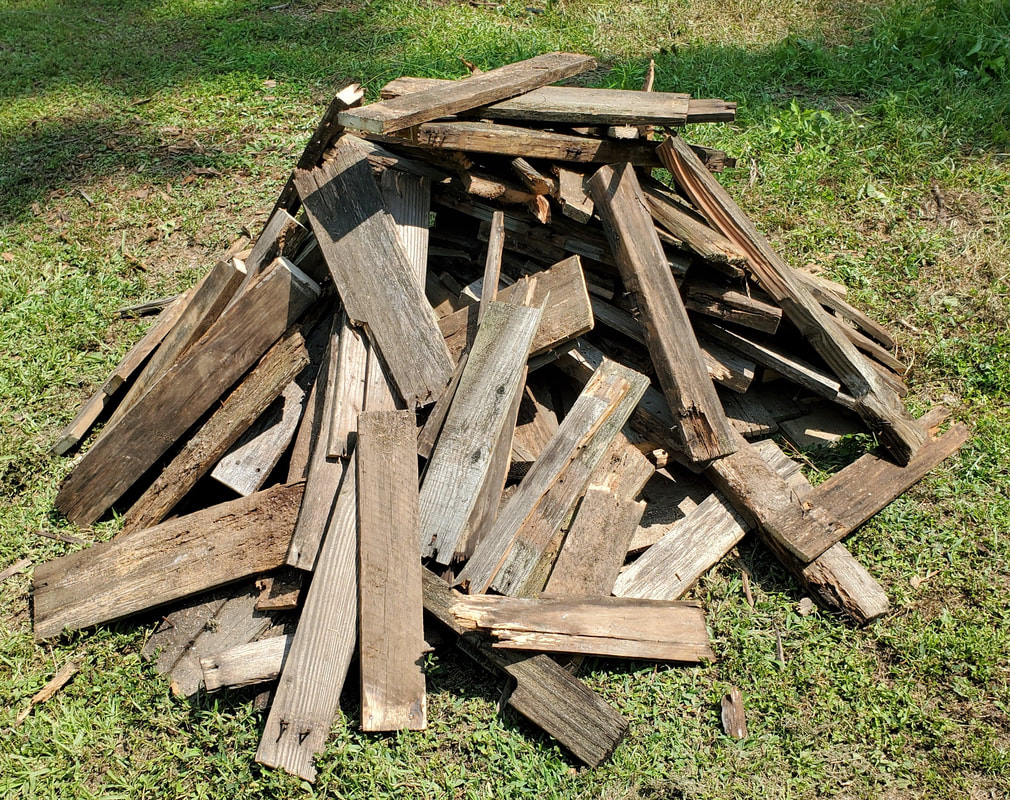
Pallet boards set aside for use as firewood for future stump burns. Note the smaller size of this pile compared to the size of the wood pile in the beginning.
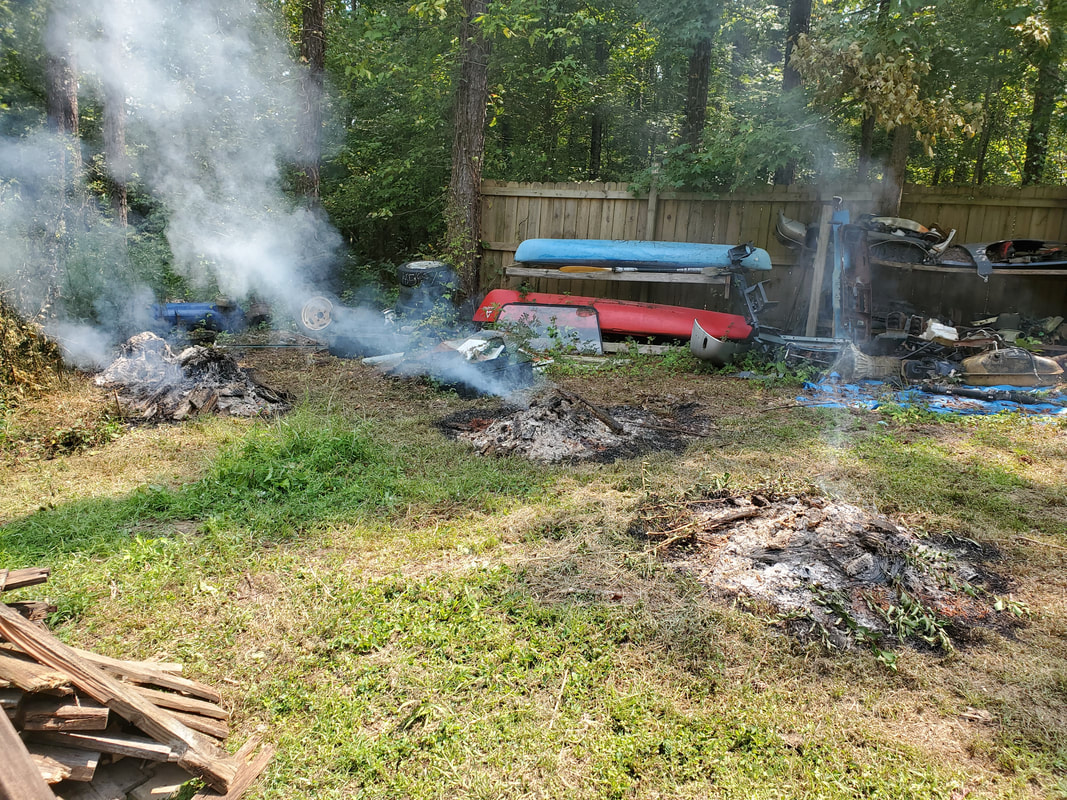
Stump piles after burning down.
After the fires went out, I noticed that I did some damage to the stumps, with the larger ones being somewhat dented. The smaller ones were hit pretty good but these things were not fully consumed by any stretch. More than likely I'm going to have to do some extra stuff, like maybe taking the chainsaw to cut slits through the stump to create more surface area for the fire to touch to help get the wood to burn better at the core. I did drill holes through some of the stumps to put stump remover powder inside but even after letting the stuff sit for a month it still wasn't enough to allow for the stumps to burn down significantly. I'll have to do more to get these stumps to burn more with the next burn. Worst case will be after a couple of burns I'll probably end up putting the saw to the stump right at ground level to try and chop the things down flush with the ground so I can be better able to work around the area, build on them, or set something up on them. Of course these few stumps that I fired are not all of the stumps that need to be taken care of. Since there were so many trees brought down, there will be even more that have to be dealt with. In the end I want to get all of this detritus removed from the area pending any future construction.
The time had finally come after putting so many miles on the Scion to replace the motor mounts. After seeing the engine/transmission move more and more especially when put into gear it was obvious the mounts were shot. On most front wheel drive cars, there are four mounts all together, one on the passenger and driver's side, hooking the "front" of the engine where the belts are to the passenger side frame and one on the transmission holding the assembly to the driver's side frame. One mount holds the front of the engine/transmission to an anchor point on the front of the sub frame while another holds the rear of the assembly at the transmission to another anchor point on the sub frame. Little would I realize how much of a Charlie Foxtrot this job would be.
I started with the mount holding the powertrain to the front of the sub frame assembly as this one was the easiest to get to. I had to remove the plastic splash pan to expose the underside of the engine in order to get to the bolts holding the old mount to the car. After removing these and the single larger bolt that held the mount to the bracket that's bolted to the engine, I was quickly able to get the mount out. Of course it was completely shot, having separated inside and for all intents useless. Out with the old and in with the new. 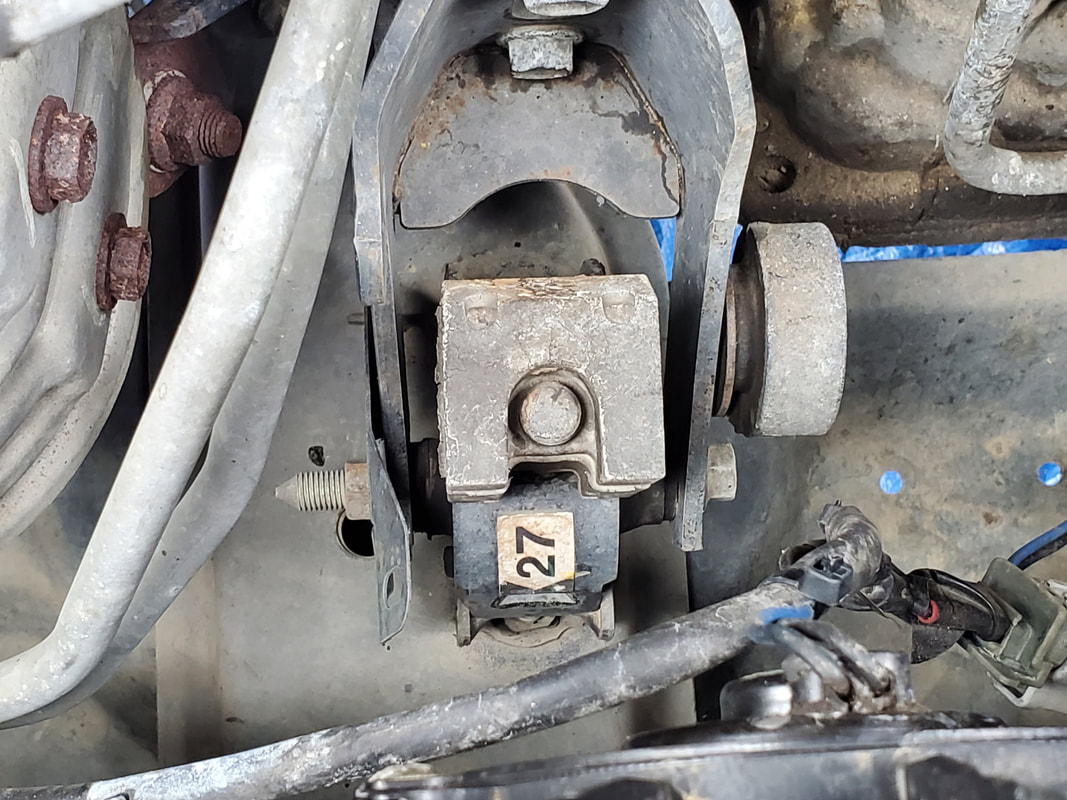
Old front motor mount prior to removal.
Old motor mount after removal, note the rips in the rubber.
New motor mount in place.
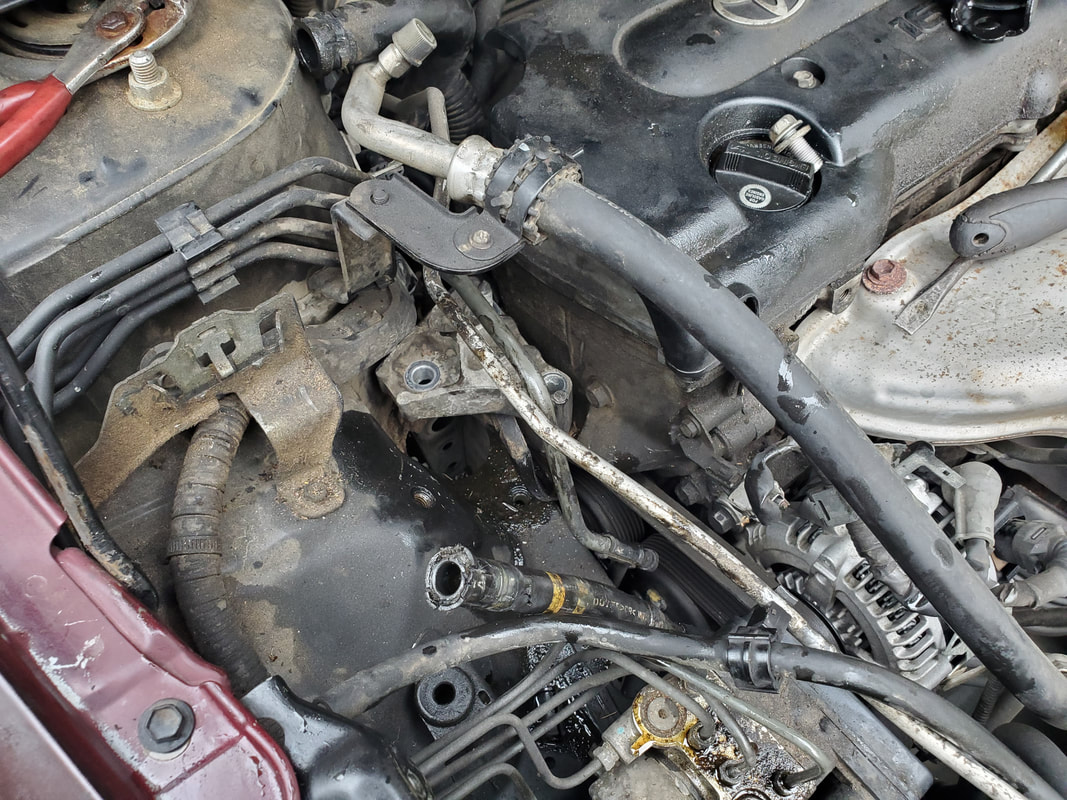
Now here's where the fun begins. The next motor mount I attacked was the one on the passenger side attached to the "front" of the engine. After an examination I found I had to remove the power steering oil reservoir and the coolant overflow bottle from the fender well in order to open up the area for me to be able to get to the bolts to remove the mount. Simple? Nope. The hoses on the PS reservoir were stuck and the spring hose clamps were a PITA to get off. I ended up having to cut them with my battery rotary tool and cut off wheel (I would later have to replace the short length of rubber hose due to it being damaged from this) in order to get the hoses separated from the reservoir bottle. Once the bottles were free I then pulled the bolts from the bracket in order to remove it so I could get the old mount out. I had a jack under the engine to hold it up while doing this. As for the bracket I ended up having to put two feet of extensions onto my ratchet to be able to reach a nut that was holding the bracket to the block from underneath. Once I did this I still wasn't able to fully get the bracket free because of the tightness of the space in this area so I just said screw it and moved it up on the long studs enough to allow me to free the old motor mount from its old home. 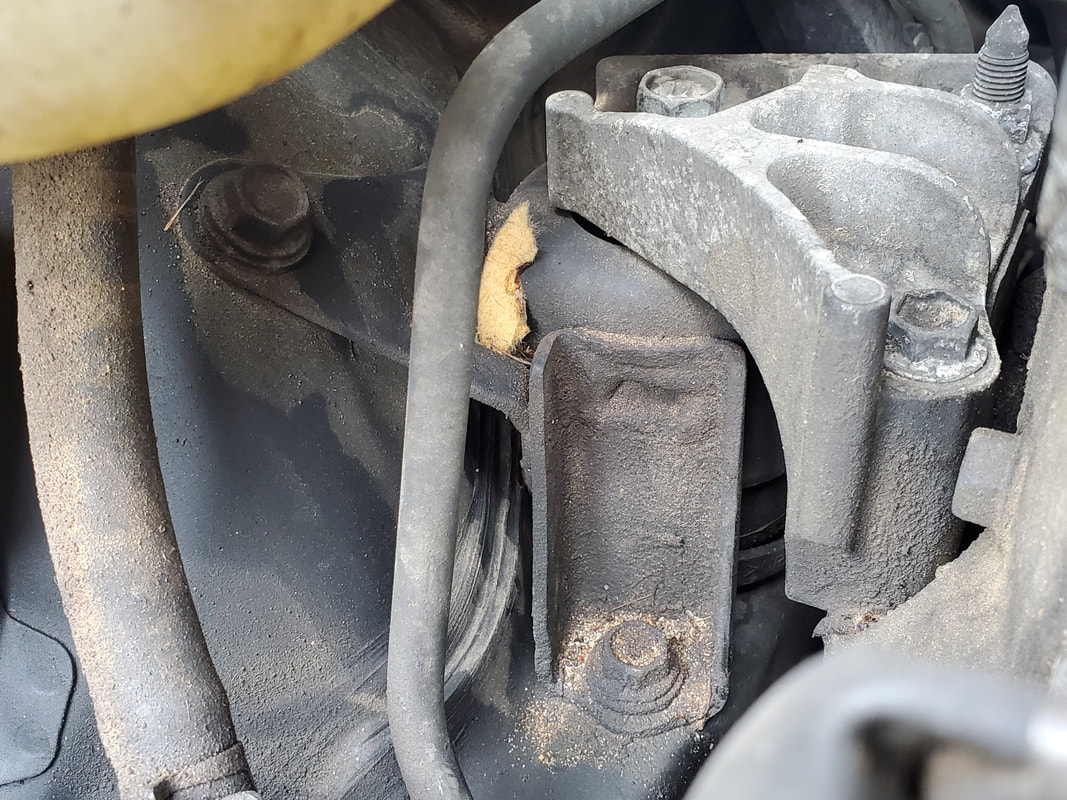
Old motor mount in place with bracket holding it to engine.
Area after removing old motor mount, note the oil from removing the power steering reservoir.
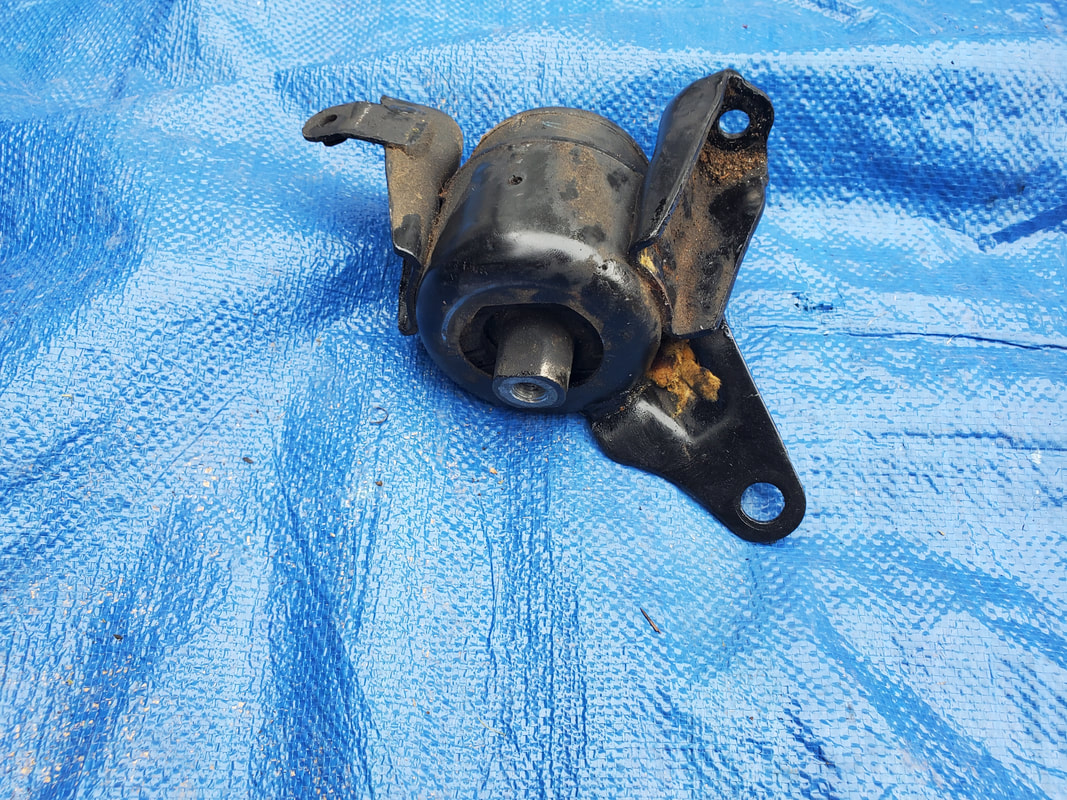
Old motor mount pulled from its old home. Note how core is off center indicating the rubber is shot within.
After removing the old mount I found that it too was shot. After chucking it into the scrap can I put the new mount in place and reassembled everything, taking time to clean up some of the spilled oil from the power steering reservoir. Things only got worse as I advanced. 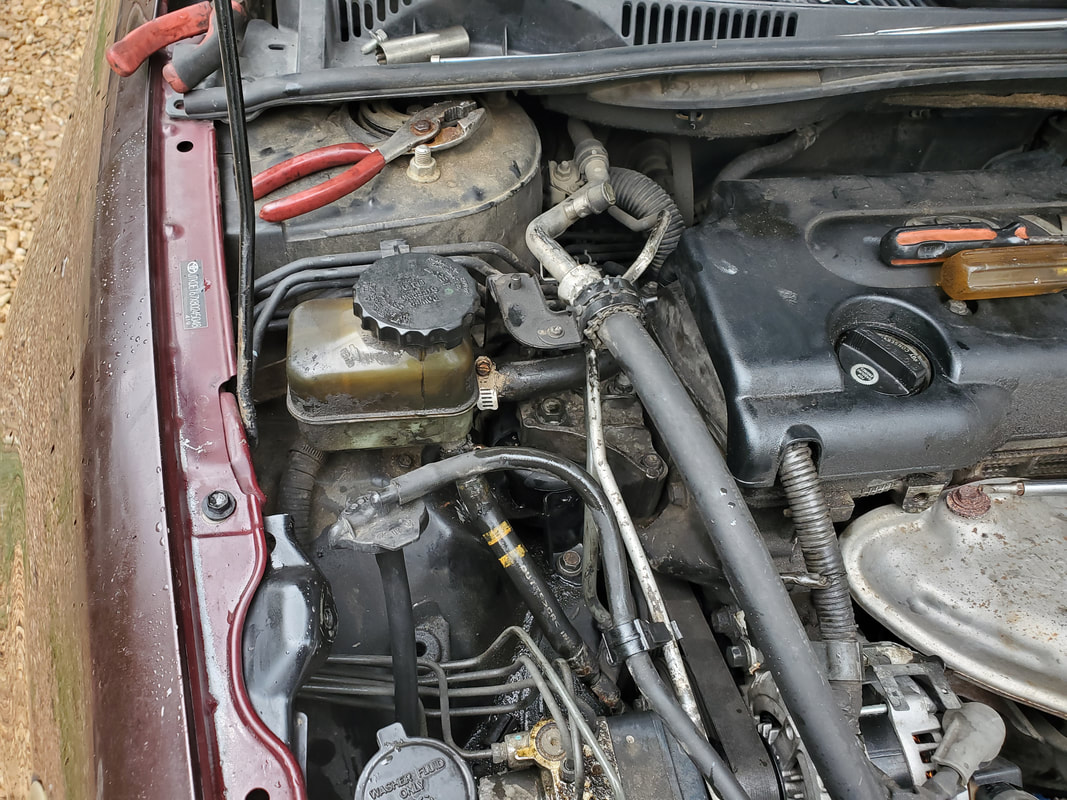
New motor mount in place with everything reassembled afterward.
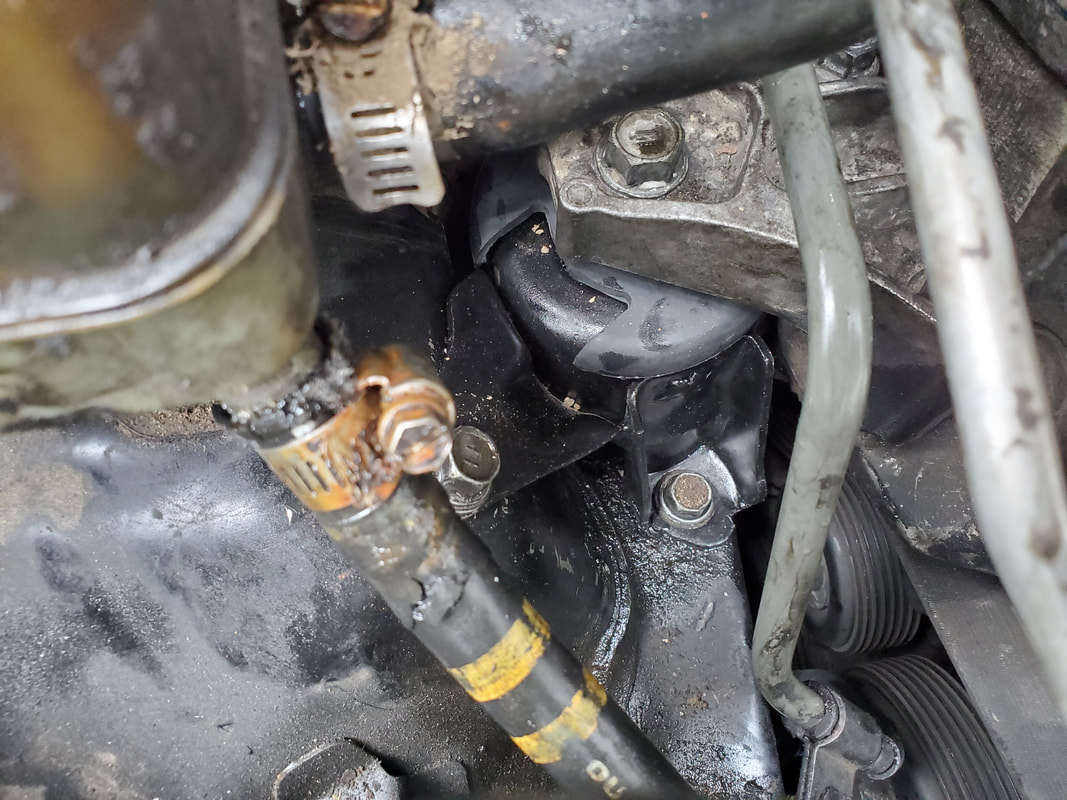
Closeup of new motor mount in place.
Now for the piece de resistance. The rear transmission mount. This scourge of satan was tucked away underneath the powertrain at the back, in a spot where access was horrible at any angle. Even a quick search on Youtube found nothing of any help regarding how to get this mount out. Closest bit of info I got was the idea of trying to "squirrel" it out from the side behind the spindle. Nothing more. WTF??? After pulling the bolts free from under the mount where the piece was bolted to the K member, I had to jack up the car and remove the tire then put a socket with a long extension on the impact wrench to remove the large bolt holding the old mount to the bracket on the back of the engine. Once the mount was free now the fun began. Prior to looking on line I tried to see if there was a way to remove the piece from underneath by the exhaust pipe. I even went so far as to pull the pipe from the flange to see if it was possible. Nope, it wasn't so I put the pipe back up then after finding out that the only bit of advice was to remove it from the side through the fender well, that's where I focused on. After wiggling and fighting the unnecessarily large mount to get it to the point where it was in the fender well, I found that it was still unable to get free. 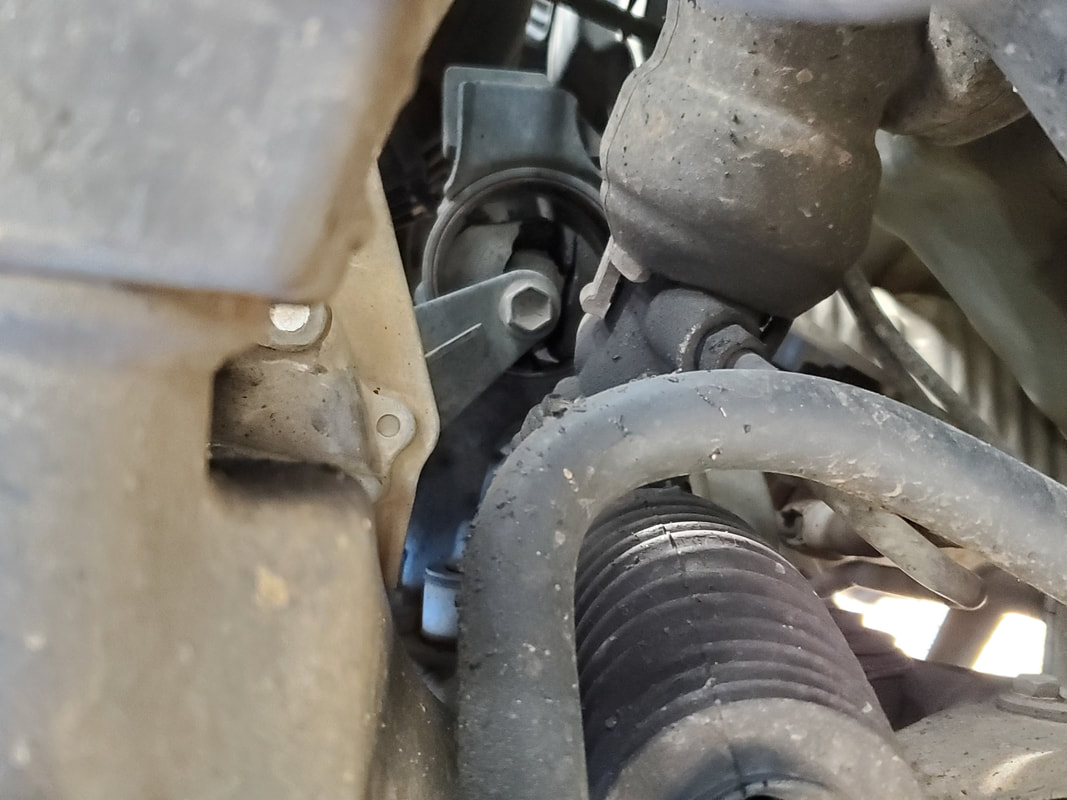
Shot from side through fender well at rear transmission mount.
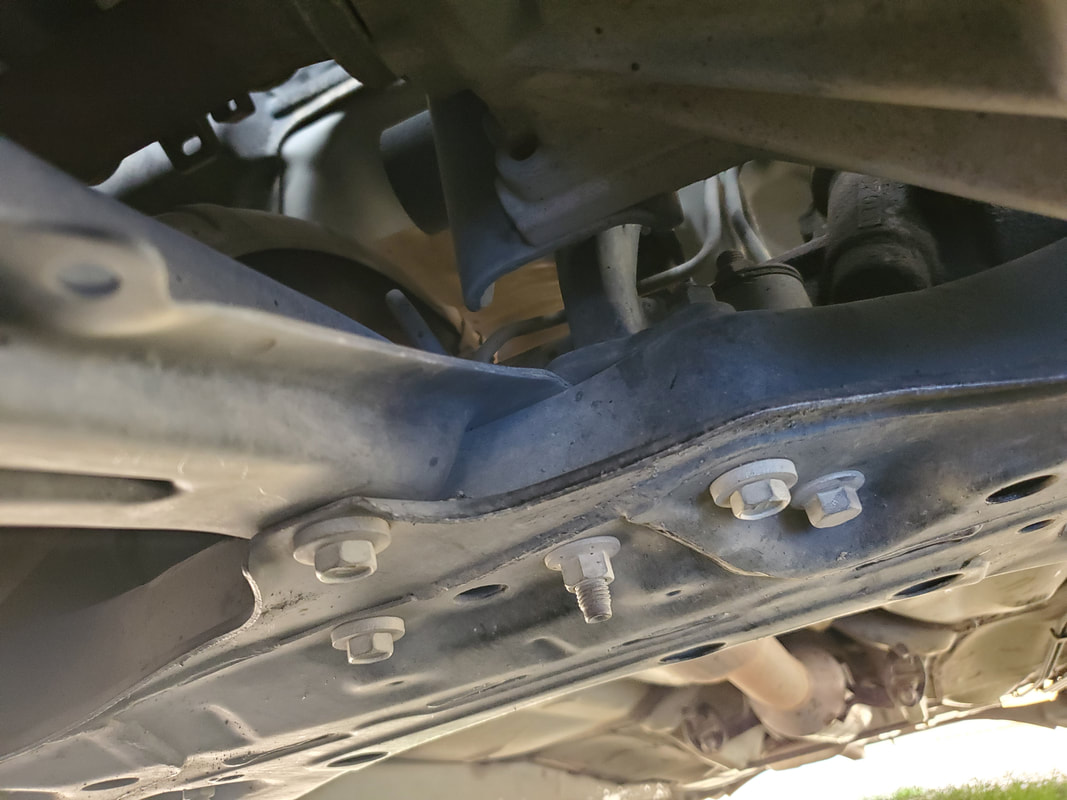
Shot from underneath car showing where mount is situated, note some of the bolts/nuts holding bottom of mount in place.
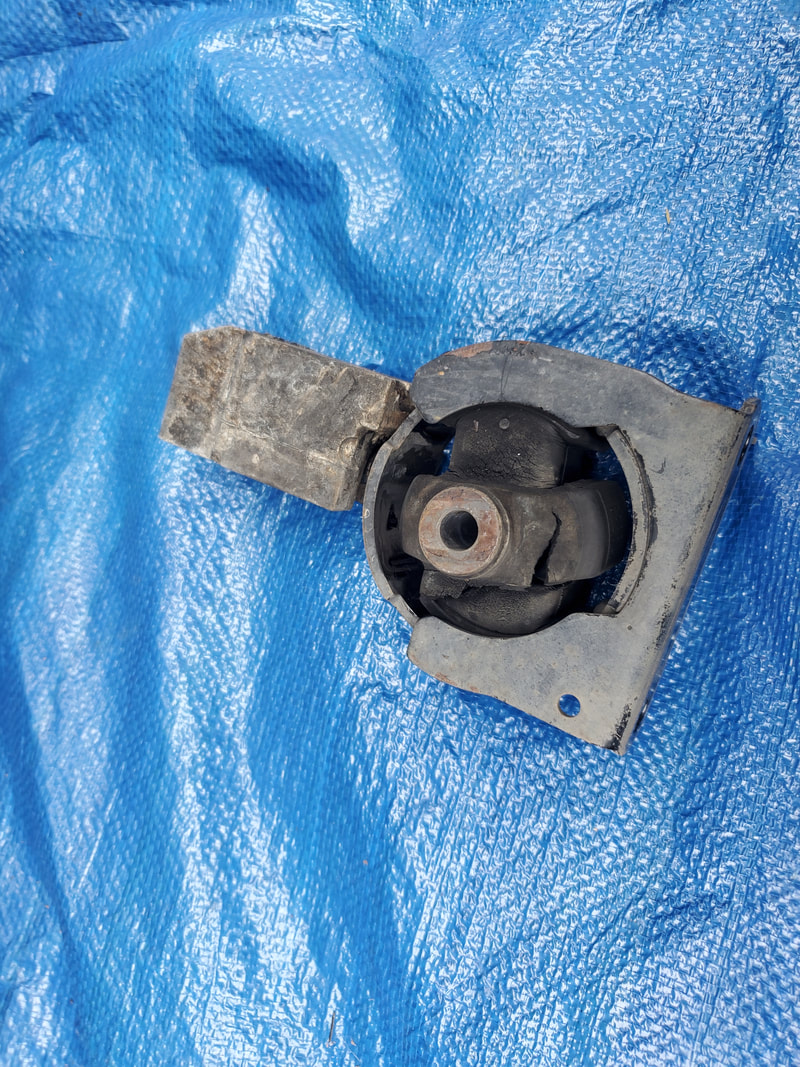
The secret to removing this POS from its tomb? I ended up disconnecting the sway bar from both sides in order to swing it down to get the extra clearance, which wasn't much, but still enough that after some more finessing I was able to get the piece fully removed from the car. Even putting the new mount in was the same BS just in reverse. After getting the mount in and all the bolts replaced, I reassembled the sway bars and moved on to the final mount. It couldn't be this bad could it? 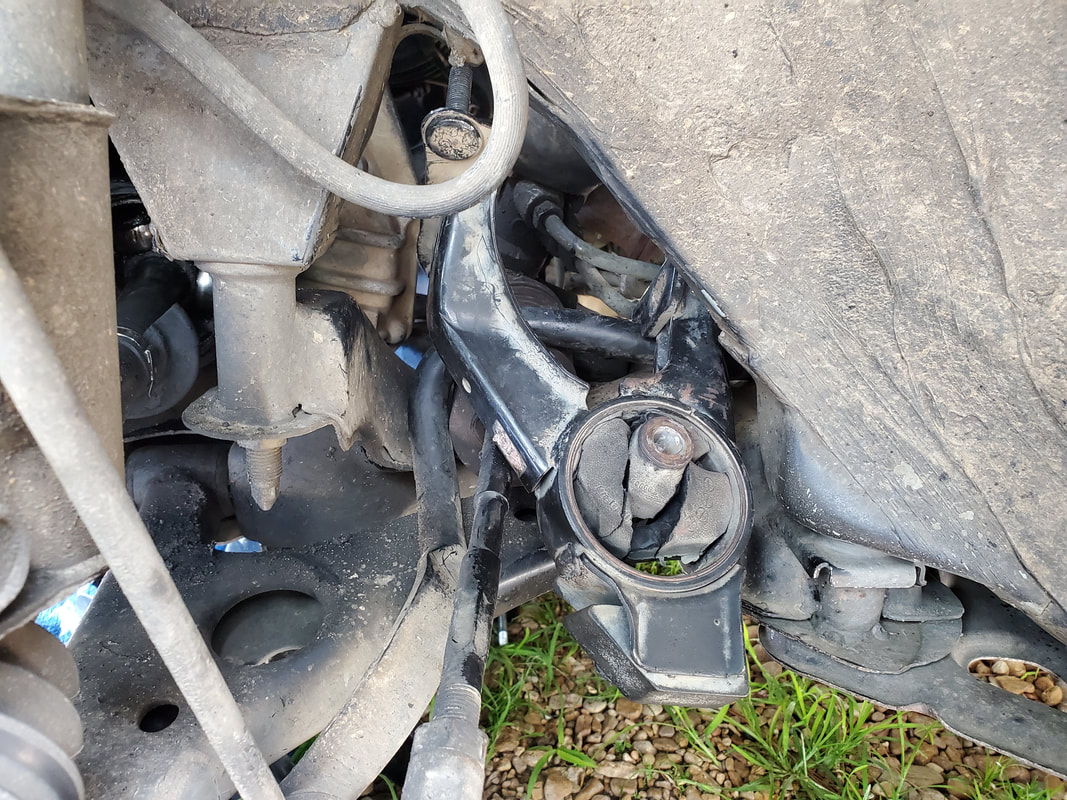
Removing the bad transmission mount from under the fender well. Note the cracking of the rubber in the mount. Also note the sway bar mount moved out of the way to open the space up some more for the mount's removal.
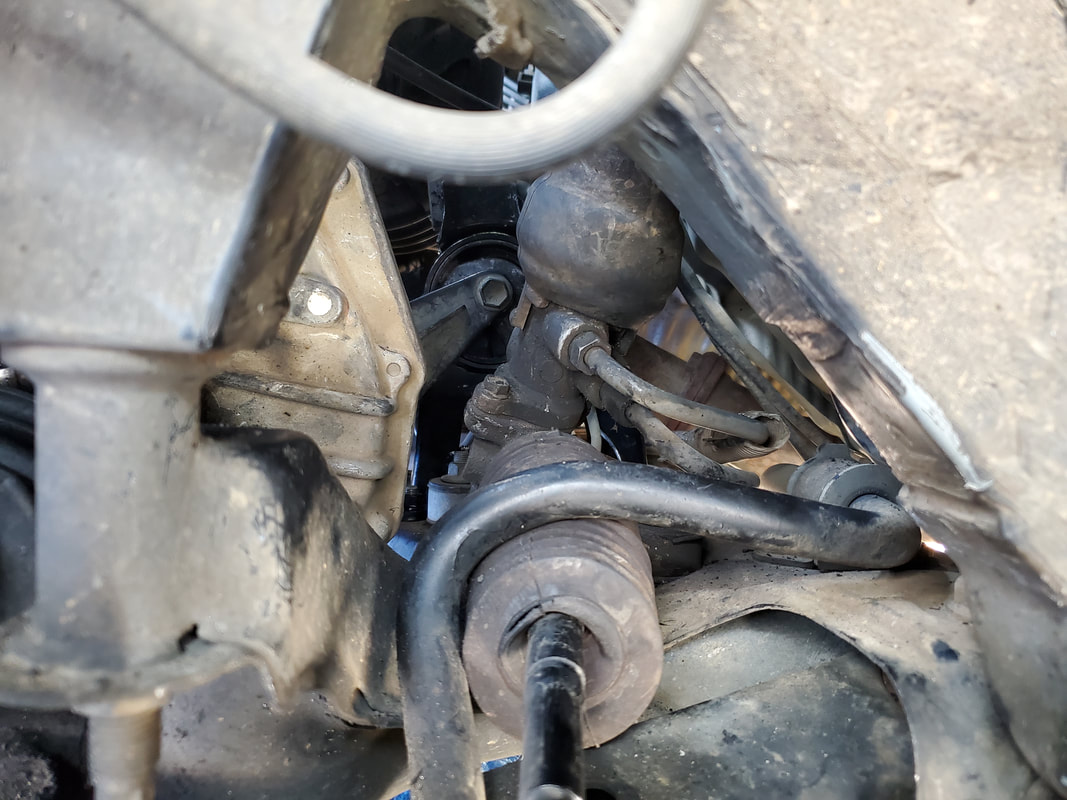
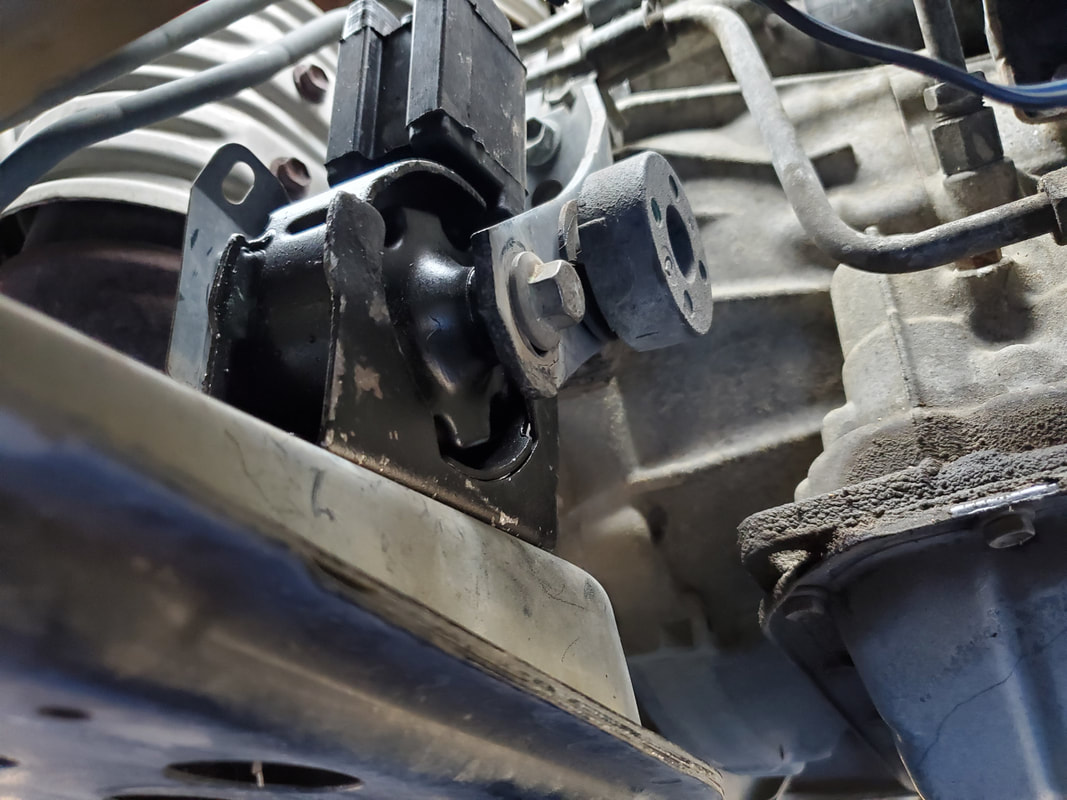
New transmission mount in place back in the tomb.
Surprisingly, the last mount, the one holding the transmission to the driver's side frame was actually not that bad, all things considered. I did still have to remove the battery and its tray, along with the whole air cleaner box to gain access to the mount. While this might sound like a lot, in reality it wasn't. The bolts that held these parts in were easy to get to, allowing me to remove everything quickly. Once opened up the four bolts holding the mount to the frame were quickly removed and the one large bolt was also quickly moved. With the powertrain on a jack, I was able to get the mount completely out without any struggle or hassle. 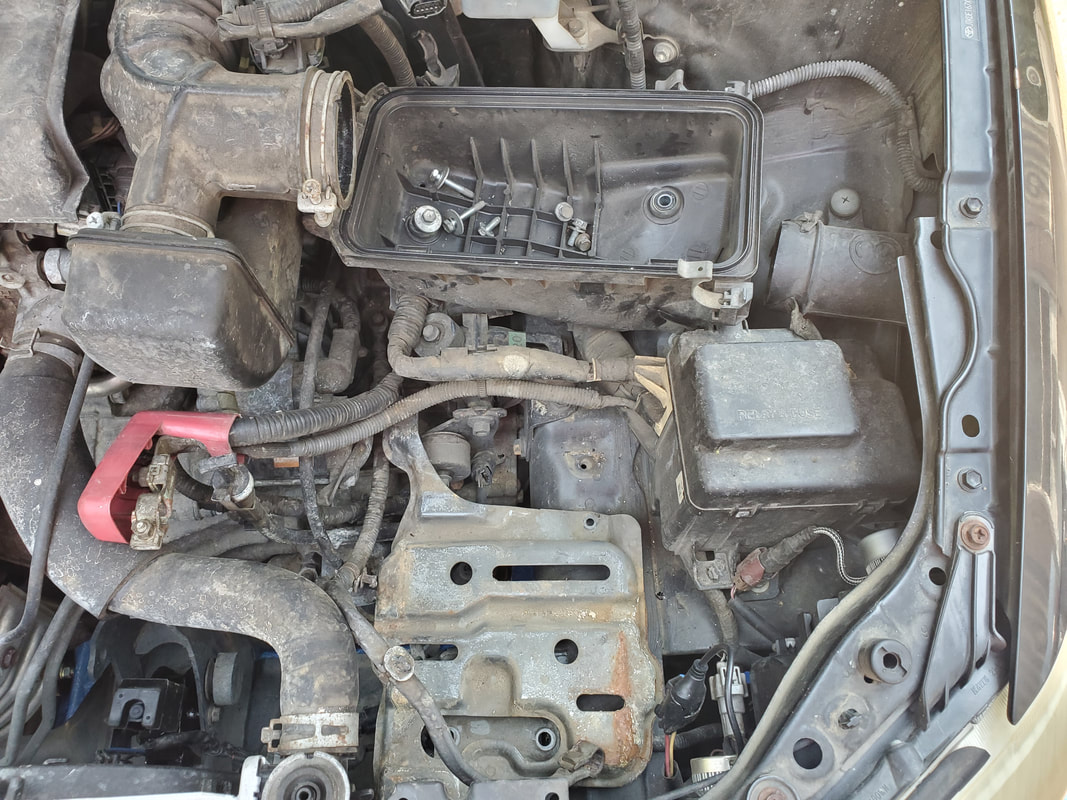
Disassembling the battery tray and air cleaner to gain access to the last mount.

Old transmission mount removed from its cradle.

New transmission mount secured in place, under cables that are folded back. Went in fast, no problem.
After getting everything put back together I was able to finally rest easy with the idea that I was finally done with this Charlie Foxtrot of a job. After running the car and finding that the mounts were good and replacing the steering hose after finding it to be damaged, we can finally put the car back into service with the comfort that the engine isn't going to jump out of the engine bay.
|
