|
With everything pretty much done on the Scion, the engine crane was moved over to the 84 F150 in order to get things staged for the engine pull on that vehicle. I had already disconnected everything from the powertrain so I was pretty much ready to pull the rig out, just needed to get the crane hooked up, which is where we stand today. I needed to fetch the carb base plate to bolt it down, but my concern was the studs used on the stock intake to hold the carb in place. I was putting all my faith in the idea that these studs are of a strength that would support the 1000lbs of weight from the engine and transmission. After putting the plate in place, I had to use a couple large nuts per stud to cover the shaft of the stud up to the threads in order to put the small nuts and washers in place to hold everything down. I used a couple chains to hook the main hook from the crane to the plate. The next thing that had to be done was remove the hood as it is always in the way on an engine pull. 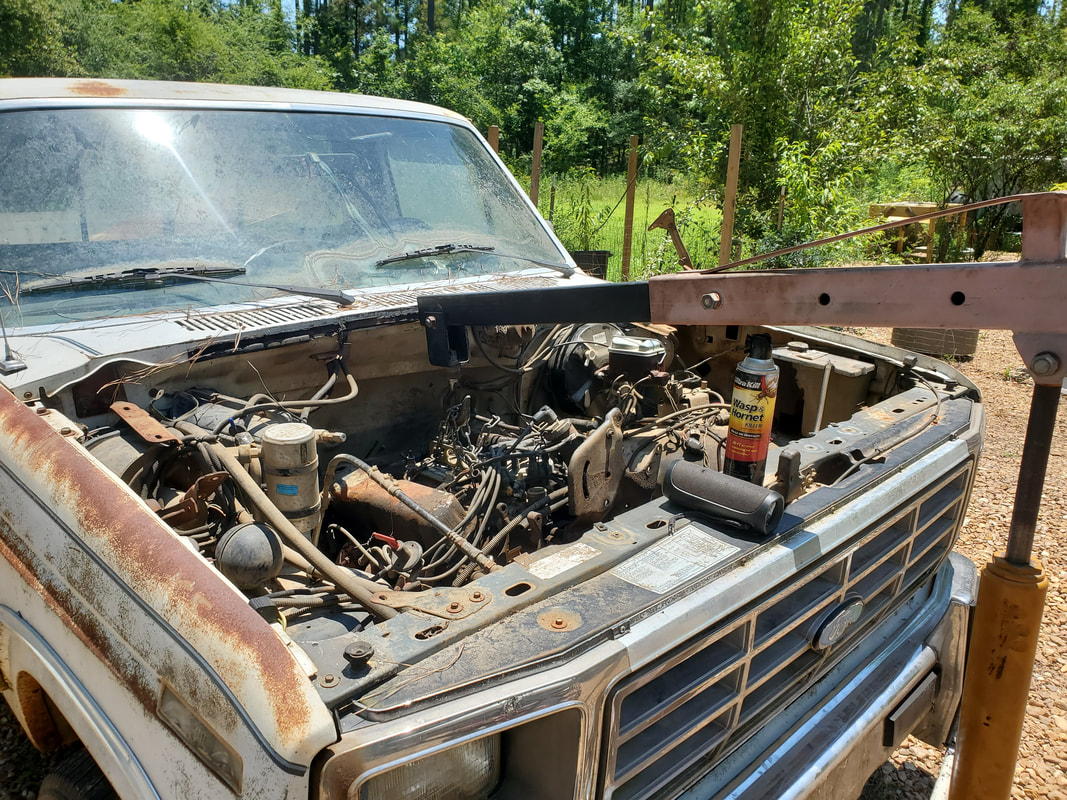 Engine crane hooked up to engine with carb plate. Hood is removed in preparation for extraction. In preparation to clean things up I placed all the loose parts in the bed of the truck, including the hood. Since this truck will be put up for sale after the engine extraction, it only made sense to get the parts out of the way of the yard and with the truck. With that little bit of housekeeping done, along with some occasional wasp control, I had one more thing to do before I was completely ready to pull the rig out. 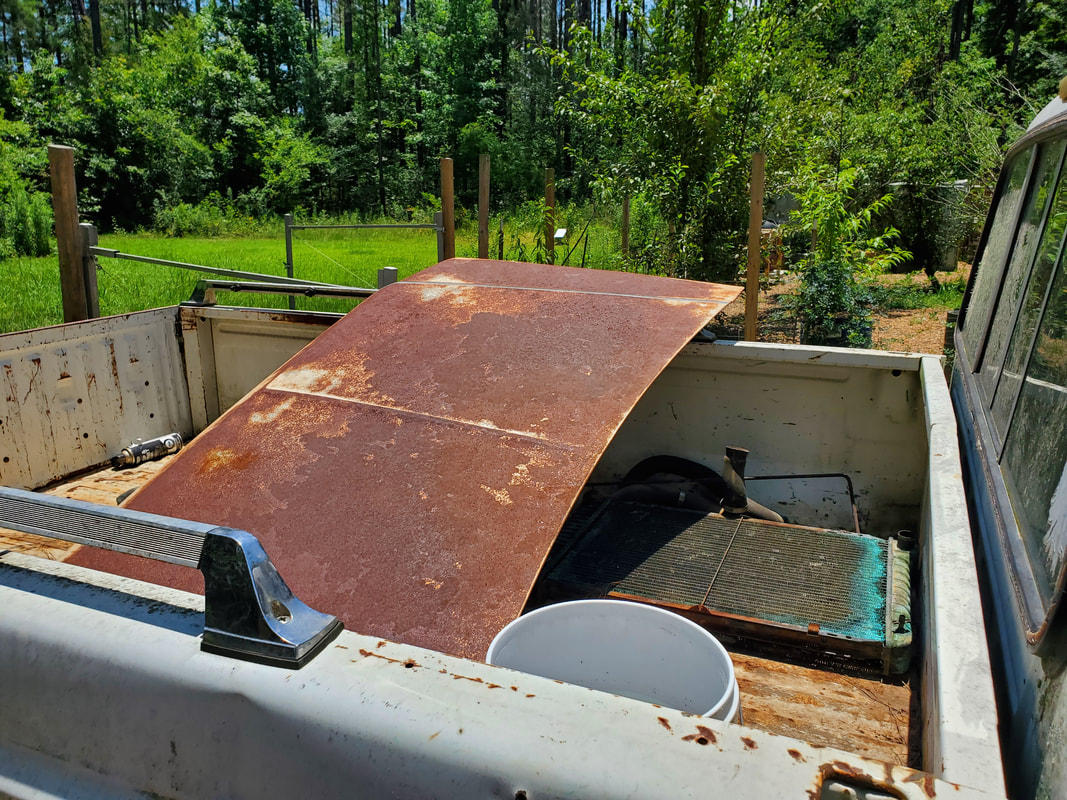 Parts stashed in bed of truck since the truck will be put up for sale as a truck ready for a powertrain to make it drivable. Since this field extraction is of the type where the engine crane stays stationary while the vehicle is pulled back as the rig is lifted up and out, I needed an anchor vehicle for our pulling. Of course, the vehicle wouldn't be doing the pulling in this case, courtesy of the power winch that we've been using for just this type of work. I just needed to stage the vehicle, in this case, the S10, behind the truck so I can attach the winch and some chain to the back of the F150. With that little business out of the way we were ready for the pull. 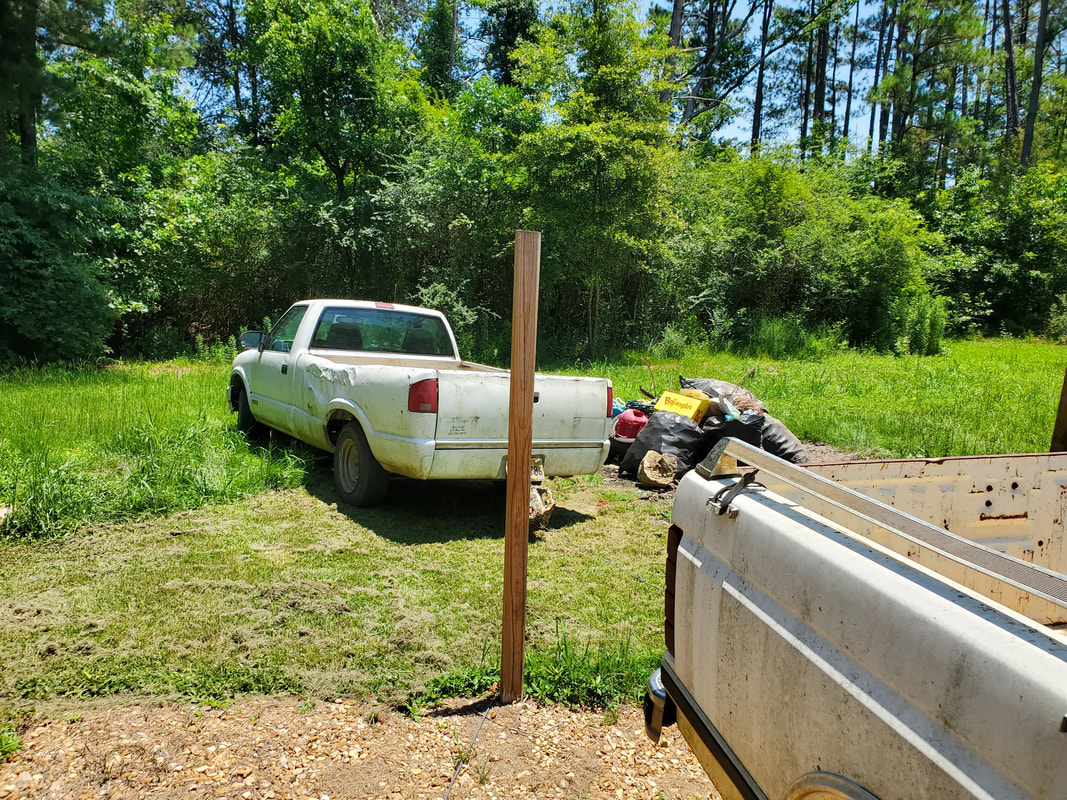 S10 staged behind F150 with winch and chain hooked up between the rears of both trucks. The S10 had to be staged off to the side to clear the trash pile while still allowing me to pull the F150 straight back between fence posts. Unfortunately, the ground, even with the gravel, was still soft enough that as I pulled the engine up and the weight was completely on the crane, the legs started sinking into the soft ground. Luckily I was able to still jack the engine up without the crane moving too much. I had to go under the truck to pluck the tail of the transmission off of different lips of the underside that seemed to want to hook into the transmission's tail. As I pulled the truck back with the increased elevation of the powertrain, I finally got the oil pan cleared from the top of the radiator support. Once the oil pan was cleared, it was just a matter of twisting the transmission tail around to get it to rest on the radiator support so I could continue to pull the truck all the way back so the powertrain would be fully cleared of the truck. With the swinging rig cleared of the truck, hanging sideways, I was able to lay the rig on the ground and get the truck the rest of the way back, fully cleared of the crane and powertrain. 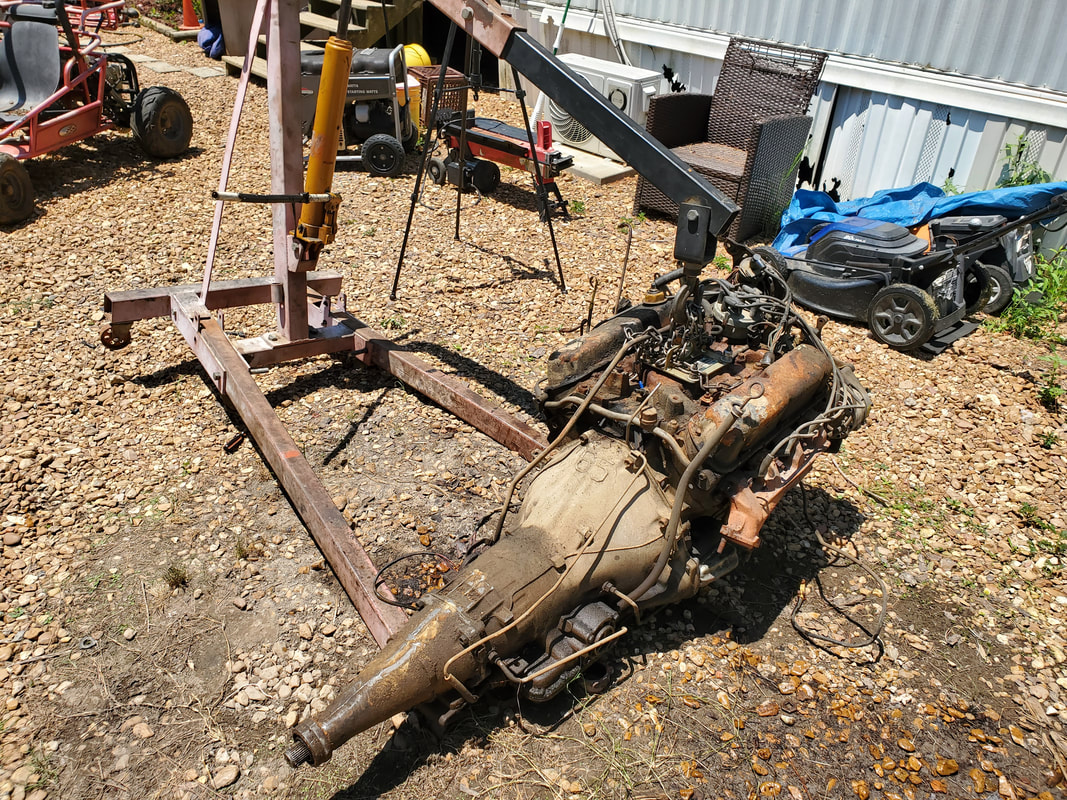 The engine/transmission on the ground, pending transfer into the S10 for transport up to the garage. With the engine/transmission out, I pulled the F150 back into the field enough to allow me to back the S10 up between the fence posts and up to the engine/transmission on the ground so I could jack it up and back the truck under the rig. Once it was lowered down onto the S10's bed, putting a shit ton of weight on the rear suspension, I dismantled the crane and stowed it in the S10's bed as well, taking everything up to the garage. I set the crane back up and got the powertrain out of the truck, pulling it to the back of the garage to have it out of the way of other work going on in the garage, as well as keeping the main door clear for when we need to pull the lawn tractor out. The next order of business will be moving the truck to a new spot.
0 Comments
With the success of the engine swap, I had to move on with some other routine maintenance on the car. The front tires, being drive tires, wear out quicker than the rear tires, and hence need replacement more often. This was the case just before the old engine crapped out. We even got the new tires delivered, just as I was disassembling the old engine to remove it. With that little issue resolved, I had to get jacks in position to jack both sides of the car up to pull both rims off to load them up with the new tires so they can be swapped out. The biggest concern was pulling the inner half of the CV axle, that was a pain in the ass the first time I did it. 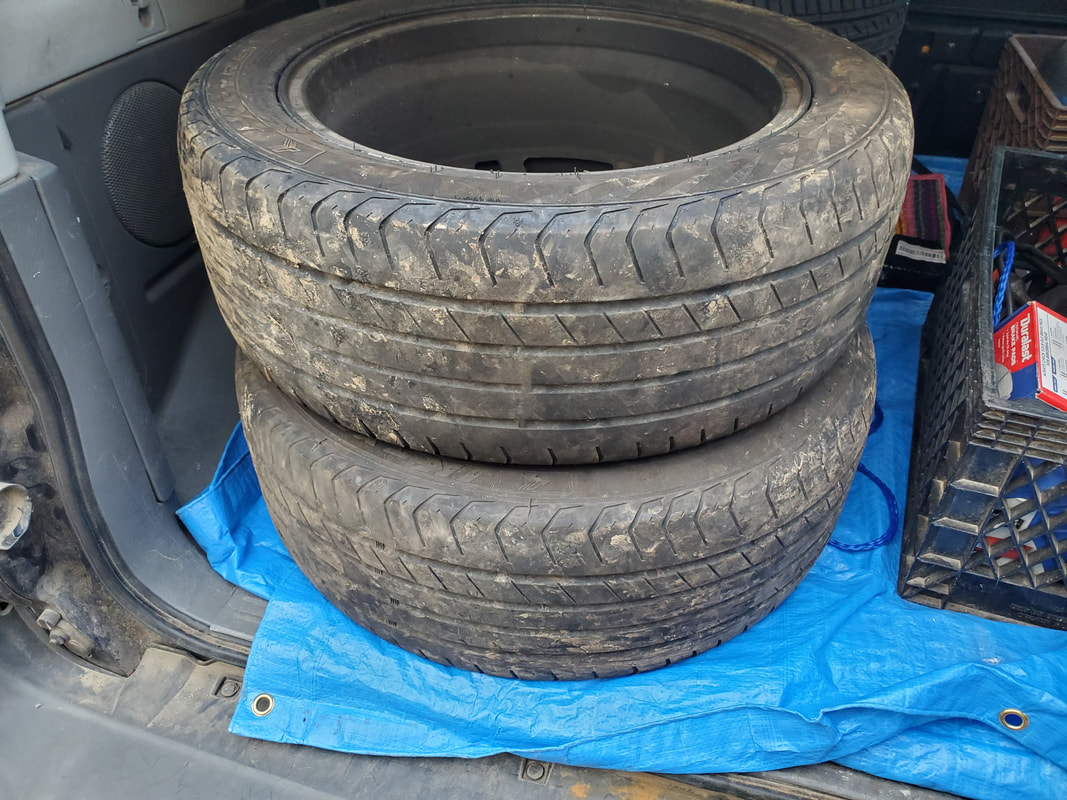 The last time I replaced the CV axle I had picked up an axle removal tool, which looks like a horseshoe. Unfortunately, the inner gap of the tool was too narrow for the wide base of the Scion's CV axle. I ended up having to cut out the inner gap to widen it to allow it to fit around the back of the inner body of the axle so I could use my slide hammer to knock the axle out. Even then this task was a PITA due to the fact that the thing was locked in pretty good and I couldn't just have a straight shot out with the slide hammer. I had to hurt my hand to work the slide hammer enough to eventually knock out the inner half of the CV axle. The same was the case now as well. After hurting my hand with the slide hammer, the inner half eventually popped out. With that, I made a big mess with transmission oil leaking all over under the car. Of course, with the sucess I had today, I really didn't care about a little spilled oil. 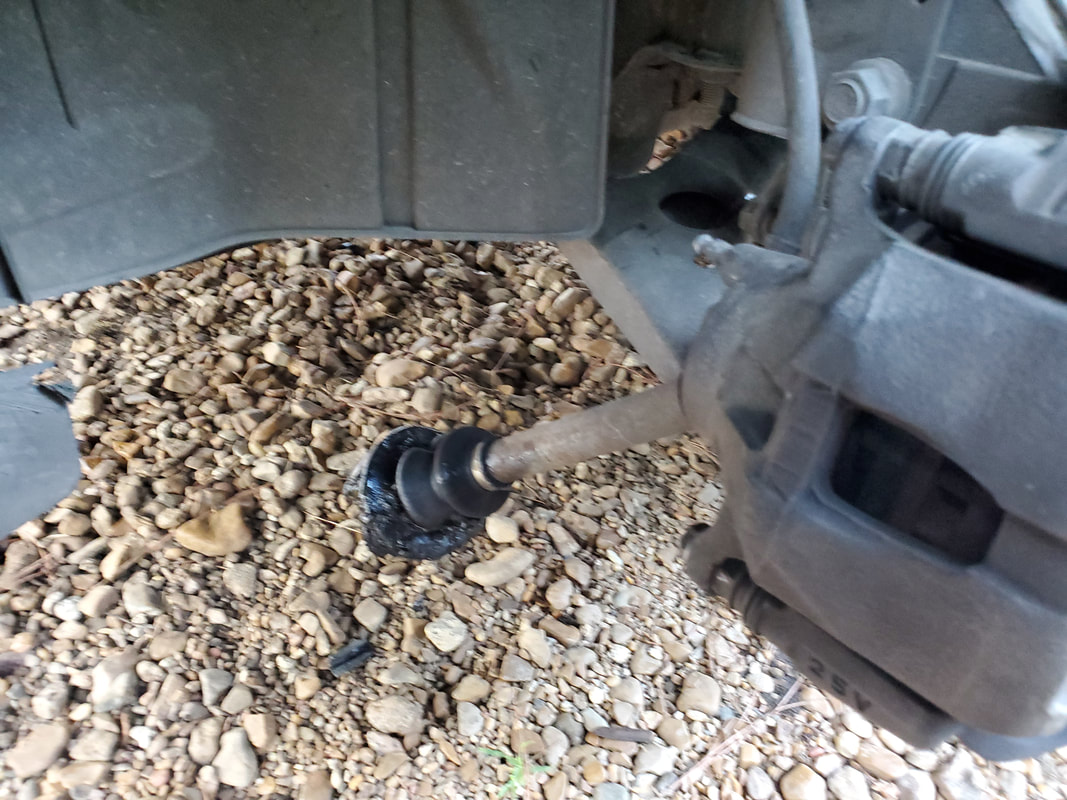 At least now all the pieces are set where they need to be to finish up this whole fiasco with the Scion. With the tires taken care of and the new CV axle in hand, I got every thing taken care of on the car. The next move is a test drive. Of course after these kinds of episodes, the paranoia is always high enough that one wants to make sure that every single thing conceivable is covered so this type of BS doesn't happen again. With the Scion back in service the ole lady can now get back into the normal swing with her vehicle and I can get back to the normal swing driving the Tracker, even though the S10 is going to remain in active service as we need to be able to use a light truck for episodes where we need to get supplies and not have to drag the trailer around. Sometimes the load to be carried is not quite enough to warrant a trailer but still too much to put in the Tracker, such as an 8ft corrugated metal/plastic panel or a couple long boards. Besides, it would suck to mothball the S10 only to have something happen again to either the Tracker or the Scion where I would have to press the S10 back into service, so its just better to keep the truck active. Of course that will also mean that I have to get ready to replace the transmission since I can't really tell how long the old tranny has before it dies. Unlike the Scion, the S10's transmission should be way easier to replace. With the engine bolted up and partially hooked up, it was all downhill from here. Of course, as nice as that sounds, there was still plenty of stuff to do to get the engine ready to start up. There were still the matter of the torque converter bolts and the crossmember that links the rear and the front of the engine bay, along with the front transmission mount. There were several plugs that still needed to be mated to their respective sensors, as well as some sensors that needed to be swapped out since the JDM engine came from a different vehicle. That is where I started, getting the remaining stuff from the old engine to put on our JDM engine. 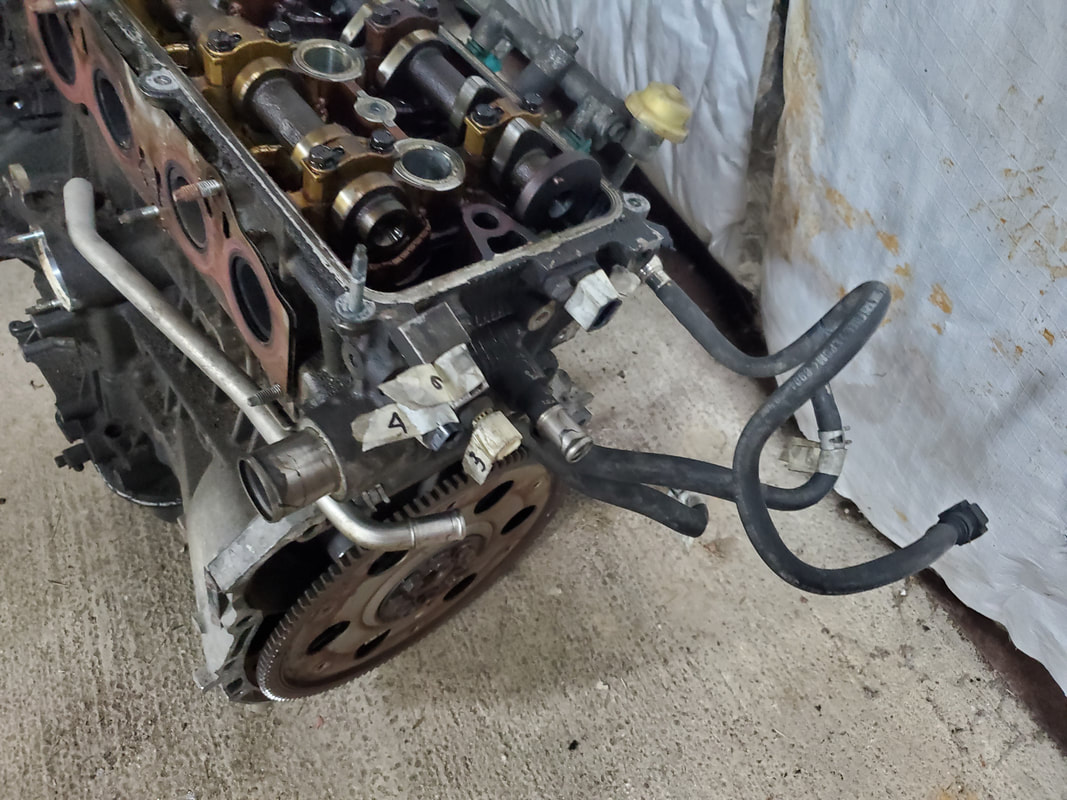 The numbered tags of the sensors that I will need to remove to install on the new engine. Surprisingly it turned out there were only two sensors that were different on the engines so that was cool. The next thing was the fuel tube going to the injector rail. The connector on the rail that had a short cut piece of tube on it was utilized the same shitty lock ring that Ford uses to lock their fuel injector and AC lines together. Crazy thing is this tube setup plugs up to the pressure regulator, and good thing, because unlike the Ford tubes, Toyota in their infinite wisdom put some kind of lip or ridge on the tube just before the lock ring so I couldn't even use regular lock ring release tools to pop the tube off. I just had to remove the fuel pressure regulator from the old engine, which included the junction that was easily able to be disconnected from the main fuel line going back to the fuel tank. This setup at least made it easier to resolve the issue, makes me wonder if there's either a special tool Toyota uses or if the pressure regulator includes the short piece of lock ring linked hose that connects to the car's fuel lines. I have no idea... 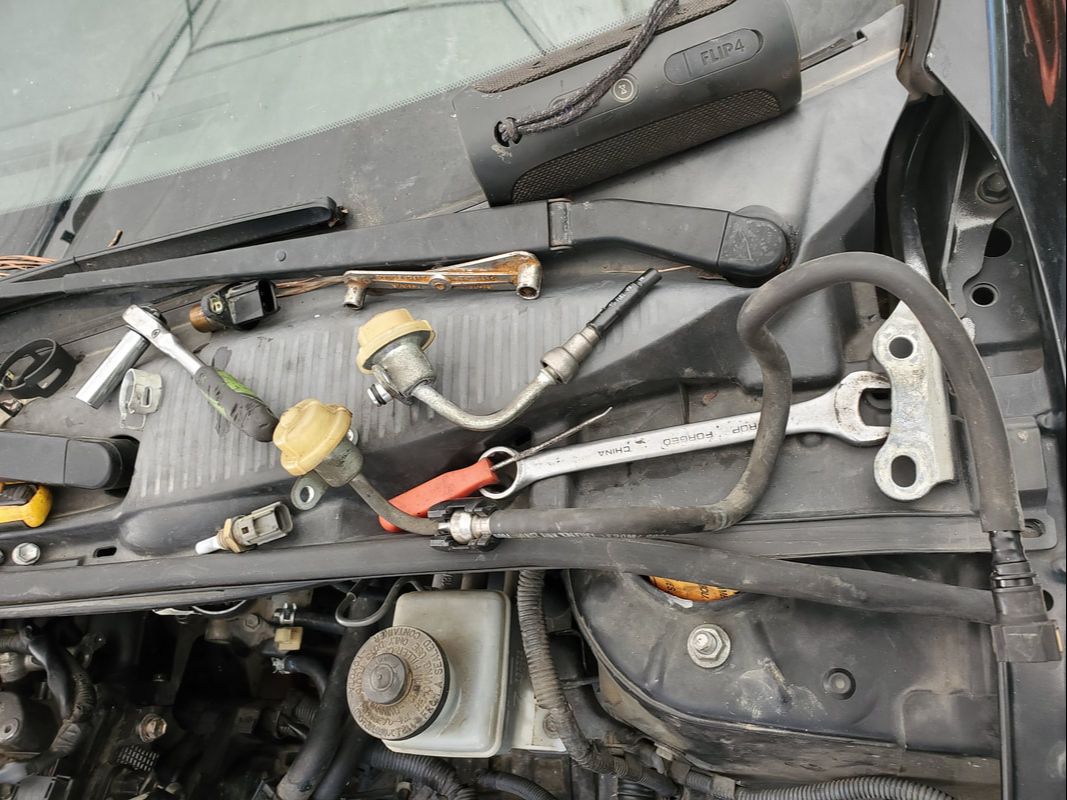 The two fuel lines and regulators, the one from the JDM engine with the cut end of the fuel tube and the old unit that has the entire hose that snaps in place on the car's fuel line. The next move is the torque converter bolts. At first I thought about the idea that to access the torque converter itself to spin it around to line up the bolt holes with the holes on the flywheel, I would have to remove the starter, which did work, but unless I had another party on top spinning the TC while I was underneath to make sure things were lined up, getting that first hole lined up might be a PITA. But luckily, the flywheel has open spots on the middle of the piece that allowed me to use my finger to reach the TC to spin it around and line up the first bolt hole with the flywheel hole. Once I got the first hole lined up and a bolt installed, the rest was simple, just spin the crank around and keep installing bolts until I had all of them in. 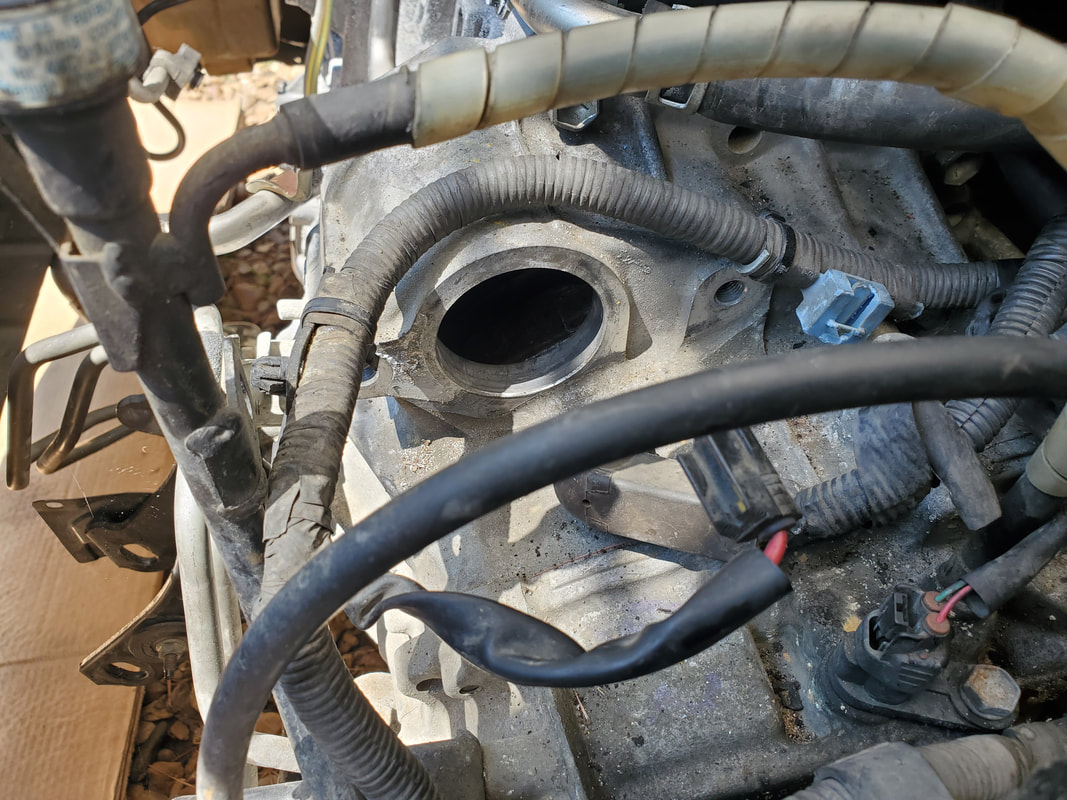 Access hole after removing the starter that allowed me to spin the torque converter around. Of course I couldn't be in two places at once, so this idea wasn't really the best idea... 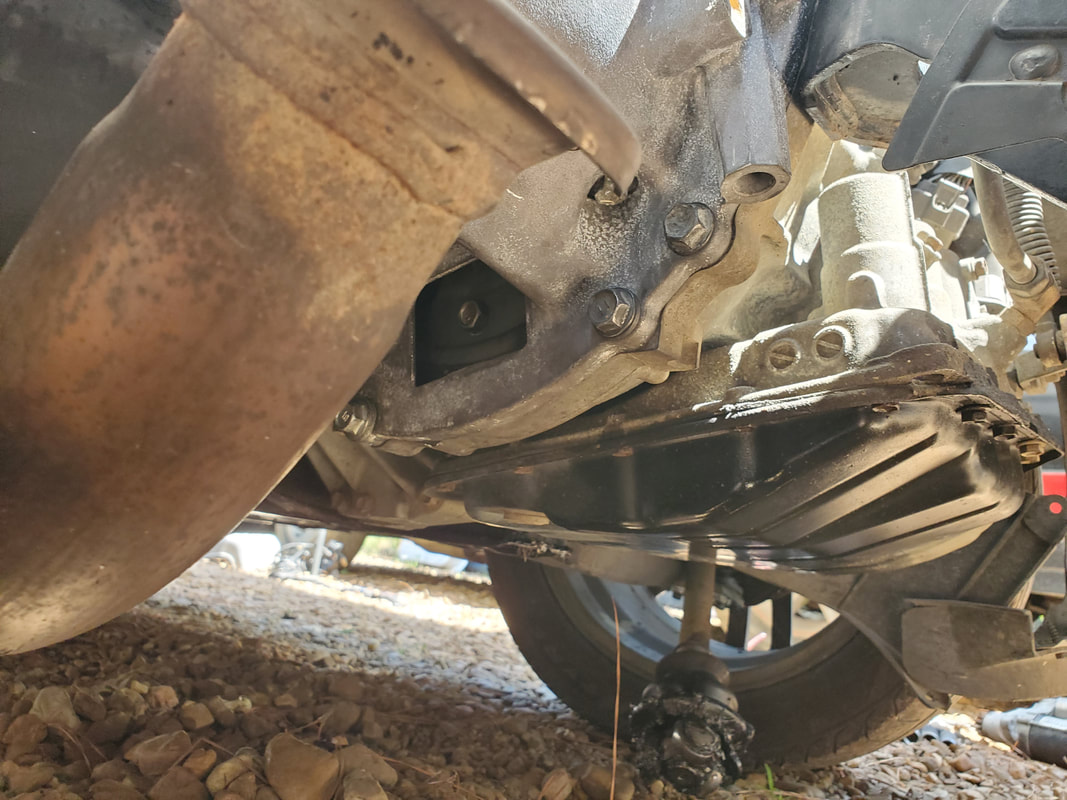 Access hole in engine back which is bolted against bellhousing. First torque converter bolt is installed through flywheel. The rest was easy. With the torque converter taken care of, I was able to install the crossmember which blocks access to the back of the engine and the flywheel. With the crossmember in place the front transmission mount in place, furthermore, locking down the support of the whole powertrain. Now things were definitely in the home stretch. I installed the AC compressor, the exhaust manifold, air cleaner/intake assembly, thermostat housing tube and serpentine belt. Once all that stuff was in, the radiator went in, along with the hoses. AC hoses also went in, and the overflow bottle went in. At this point we were just about ready to start things up. 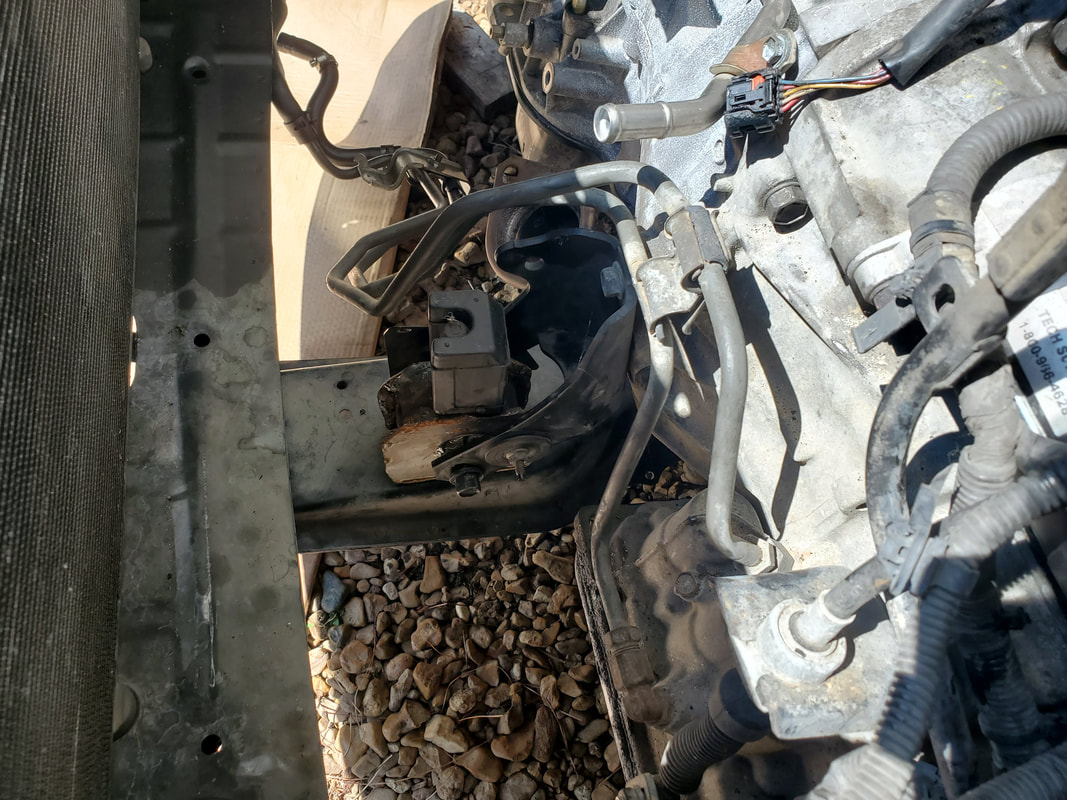 Crossmember and front transmission mount installed on the powertrain. 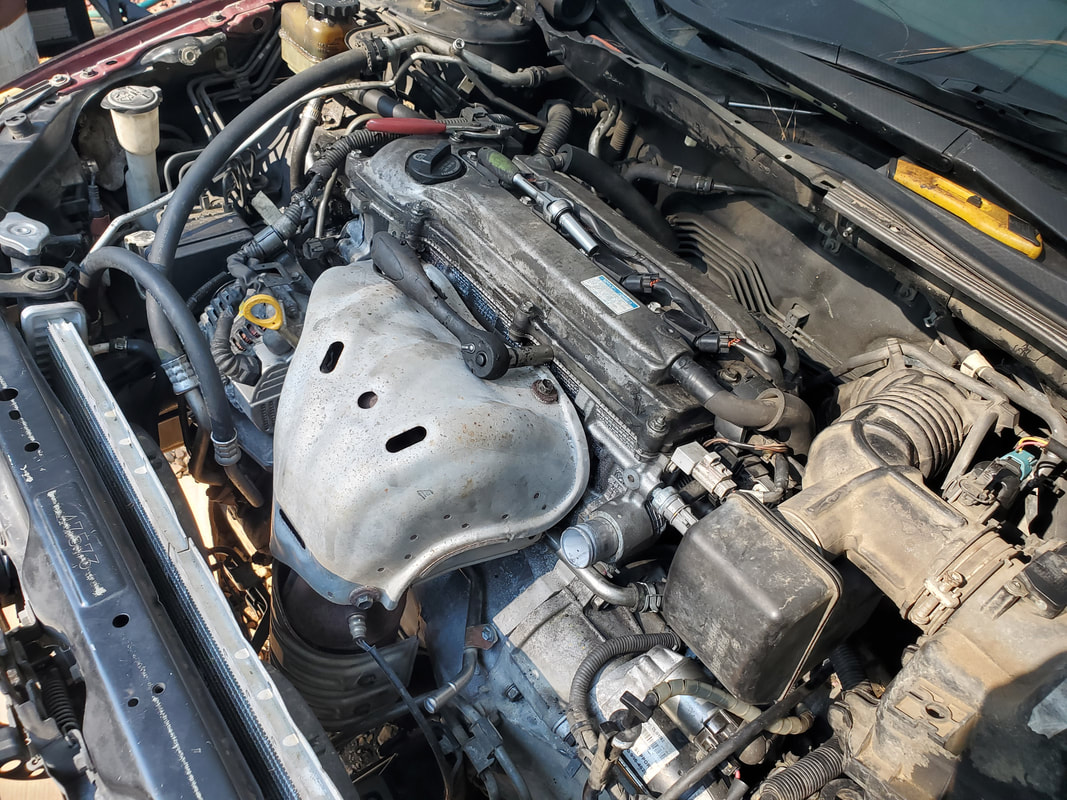 Exhaust mainfold, AC compressor, radiator, hoses and other crap all installed on the engine. Almost there. 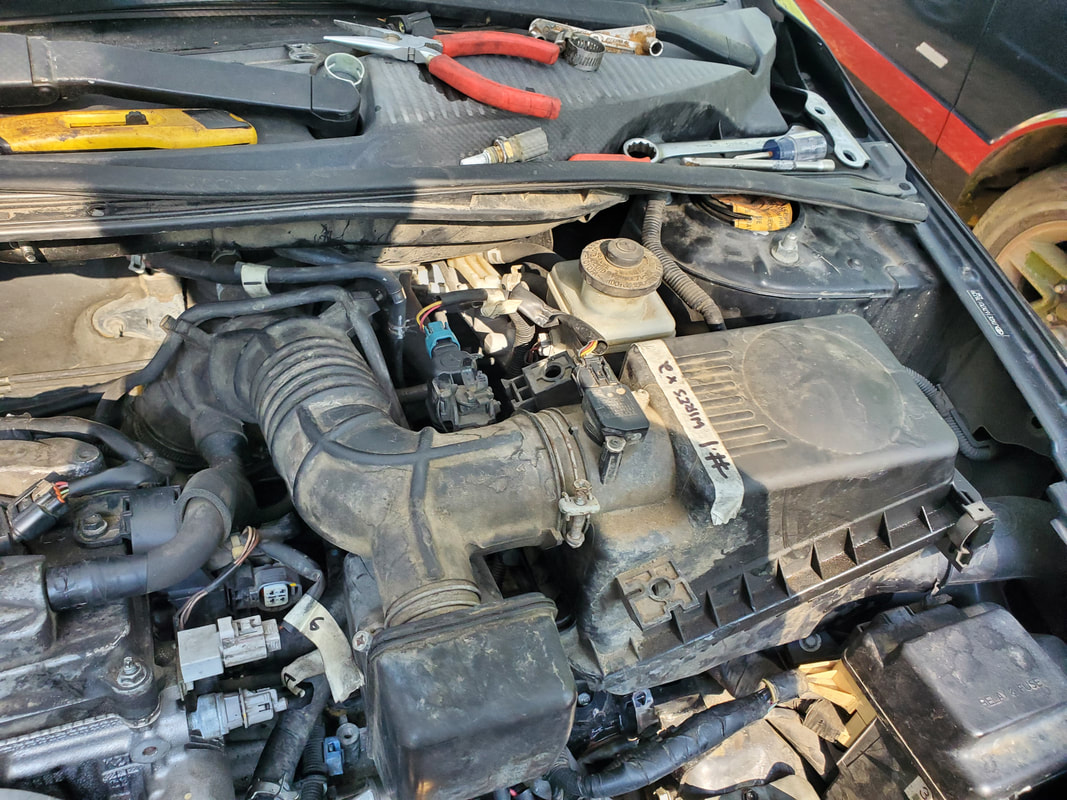 Air intake assembly installed on engine and hooked up, sensors and all. With everything checked and cross checked a couple times, I added fluids where needed. The engine still had oil in it to the top so I just needed power steering oil and coolant. All I needed was the battery, which was in the FMT at the time since I had used it to test run the truck while I was waiting for the JDM engine to show up. With the battery in place I was able to get a test crank in. Of course I had to crank the thing and even when I did get an initial sputter and weak run, it stalled out and needed to be cranked again, since the fuel system needed to prime itself and bleed the air out. Once fuel was in place, the engine started right up and ran like a sewing machine. I ran the thing for a few minutes, listening to everything to make sure all was well. Satisfied that the engine was good, rather than run the thing too long where everything was hot, I shut it down since I had some other stuff to do and was actually in the mind to put some oil treatment in the engine just because I'm now paranoid about ensuring the long life of this engine. The oil that's in the engine is actually very clean, like it was just installed, but I still want to give this engine a chance to have a long healthy life. 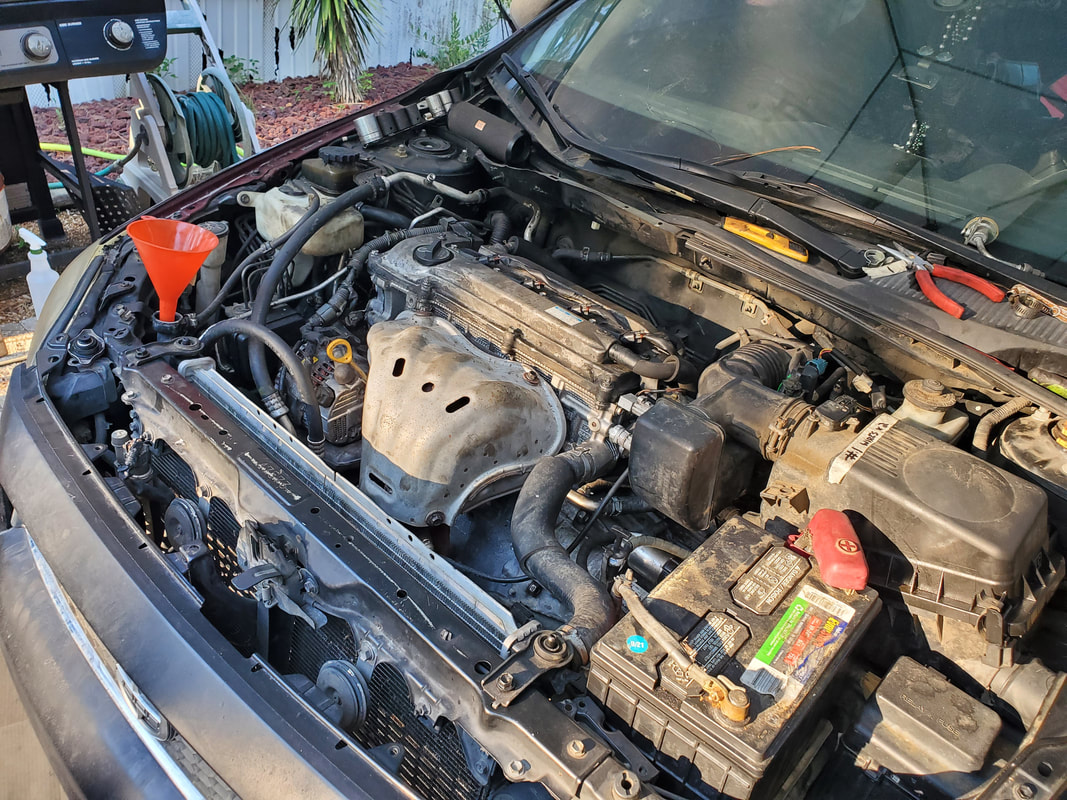 Battery installed and funnel in radiator to allow me to add more coolant as air is burped from the cooling system. There are still a couple other things I have to do to the car even with the engine good. As stated, I want to put some engine treatment in the car. I also have a couple of new tires that we just got when the old engine started dying, these tires need to be installed on the front rims to replace the worn meat that's currently in place. I also have to pull the driver's side CV axle since the boot was destroyed and during the old engine extraction that resulted in the transmission being moved all over, the CV axle separated. With that, it needs to be replaced before I can test drive the car and ultimately put the car back in service. After getting the engine bolted up to the bellhousing on the Scion, the road ahead is paved with a bunch of wires, hoses and other small hardware that was hooked up to the engine initially. Some things were more problematic than others, such as the intake manifold, but in the end, things started going together pretty fast. I had to make sure of the placement of the wire harness before I placed the intake against the engine, so I didn't miss anything. Once the intake is bolted up, any plugs or ground straps won't be accessible.  Intake bolted up behind the engine, barely visible, with the coils plugged up along with a couple hoses. With the wire harness in place, I was able to plug up some of the other loads like the coils and a couple other devices on the passenger side of the engine I did find that some of the sensors on this engine were different from the plugs, which would go along with the idea that the engine did come from a different car. Far be it for me to think that Toyota/Scion should use standardized sensors/plugs for all of their cars to keep things simple. Seems like all these car makers overcomplicate things now to where the same engine can have multiple devices with different plugs, making for no interchangeability versus how engines were 50 years ago when the same engine would work in 20 different cars/trucks/vans. Whatever. Well with the intake done, the next problematic area was the belt tensioner. I had to remove one of the studs since it was interfering with the placement of the engine. The stud kept hitting the frame, so it had to come out. Of course, once the engine was in, I had to drop the engine low enough to clear the bottom of the frame to place the stud back in. With that done, it was time for the engine/transmission mounts, starting with the passenger side unit, right by the belt tensioner.  Passenger side engine mount bolted in place despite the mount being bad with the core spinning around within the body. Unfortunately, the passenger engine mount, the only actual engine mount, is actually bad as well. When I tried to ratchet the bolt down, the core spun around within the mount body. I had to use the impact wrench along with the force of the mount bracket pushing down on the center section to be able to force drive the bolt in place. Of course, this will have to be done to remove the bolt as the core will spin around when trying to extract the bolt. For right now I have to get the engine suspended so I can be able to run the thing once everything is hooked up. I moved on and got the engine/transmission lined up enough using the jacks under the pair to be able to get the rear transmission mount bolted down. With things opened up I was able to access the mount from the top of the car versus from the side and under like when I had to replace the mount in the recent past. 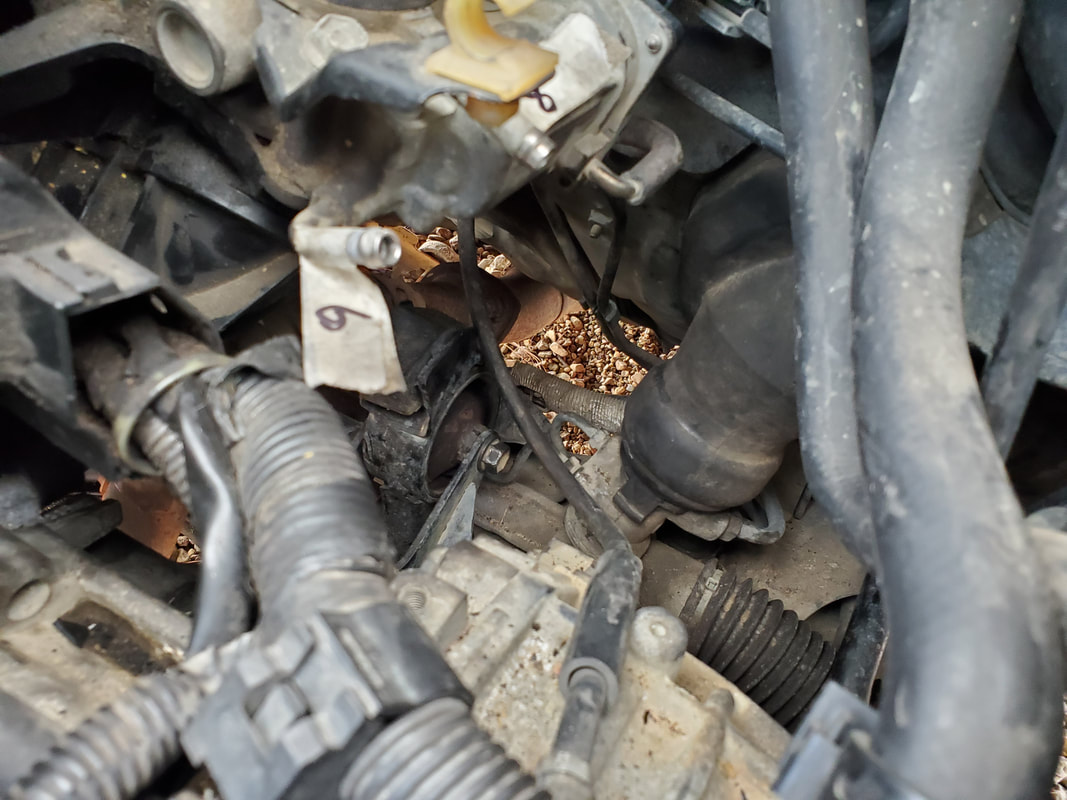 Rear transmission mount bolted up. Luckily, I was able to easily access this from the top. The last mount for now was the left side transmission mount. After bolting the mount to the frame I was able to jack the transmission straight up to line the bolt holes up and secure the transmission in place. With everything bolted up minus the front transmission mount, I was able to remove the jacks from under the powertrain as well as the engine crane and its chains. I won't be able to mount the front mount until I get the torque converter bolts in place since there is the crossmember that bolts up from the rear mount to the front, holding the front mount itself, as well as blocking access to the access hole for the torque converter. Once the TC is secured I can put the crossmember and mount up, finalizing the full securing of the powertrain to the car. From there all that's left is hooking up the remaining bits and pieces to the engine. 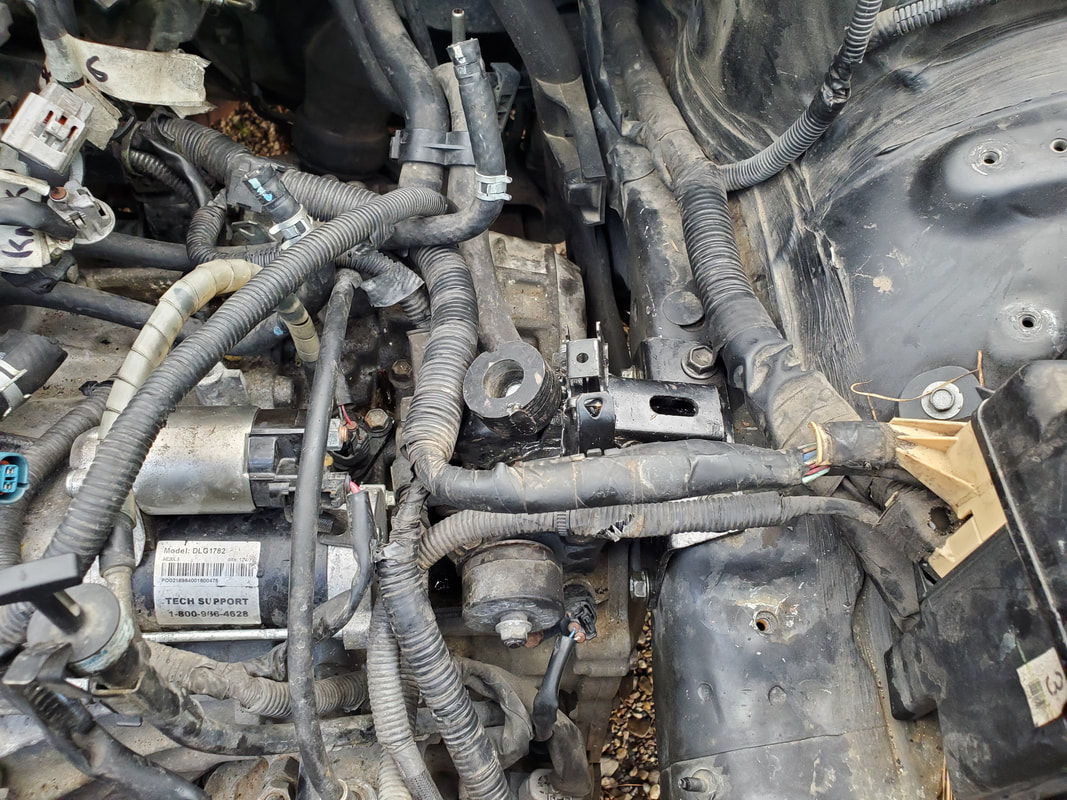 Driver's side transmission mount bolted up to the unit to hold the powertrain in place. The main reason for trying to get the mounts in and the engine crane free from the car is to be able to place the hood back on the car, even temporarily. I didn't bolt it down on the count of needing to remove it to make access easier without having to duck under the hood while its open. But being able to place the hood down will at least protect the engine from the rain if we happen to get any sudden downpours. There's also the matter of keeping chickens out from the engine bay, last thing I need is chicken shit on any of the hardware on the engine. 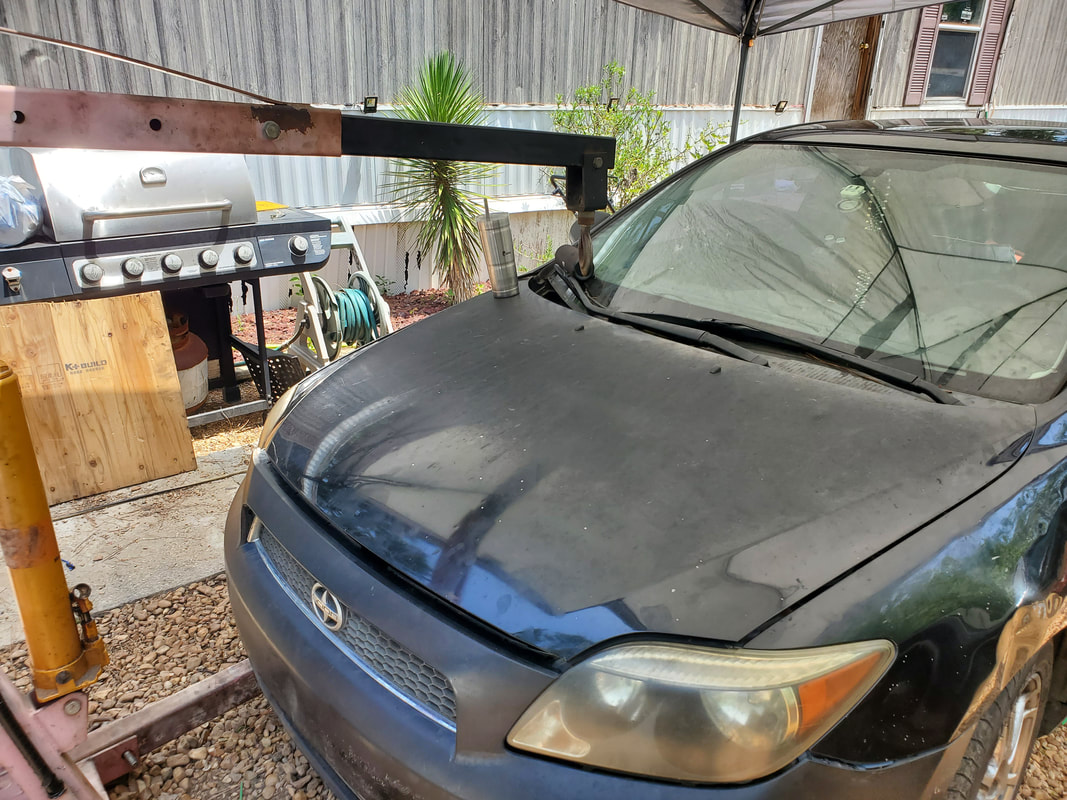 Hood placed back over car with engine crane disconnected from everything and jacks pulled away, its all downhill from here. At least now, we can say we're almost done. I'll have to remove the starter to make it easier to rotate the torque converter to line up the first bolt hole then I'll have to use the crank with a socket/breaker bar to rotate the engine to get to the other bolt holes. After replacing the starter, I do want to test crank the engine without trying to start it just to verify that everything is kosher and not going to bind or otherwise tear itself up. I'll probably ratchet turn the engine manually first to verify everything turns, then try a test crank with the starter as well. If all is well I can then finish hooking the remaining sensors/wires and hoses, install the exhaust manifold, AC compressor, etc to complete the reinstallation. With other things addressed, it was finally time to hoist up the engine and start the installation. This of course required use of the electric winch once again to pull the car forward while the engine swung in the air. With things hooked up, I got the engine in place, staged, and started lowering the thing down into the engine bay. I had to take care to move the different hoses and tubes and the wire harness so none of this stuff gets damaged. The first thing was to try and get the engine mounted to the bellhousing on the transmission. I had to make sure that the torque converter was seated completely, otherwise the engine would never seat itself. 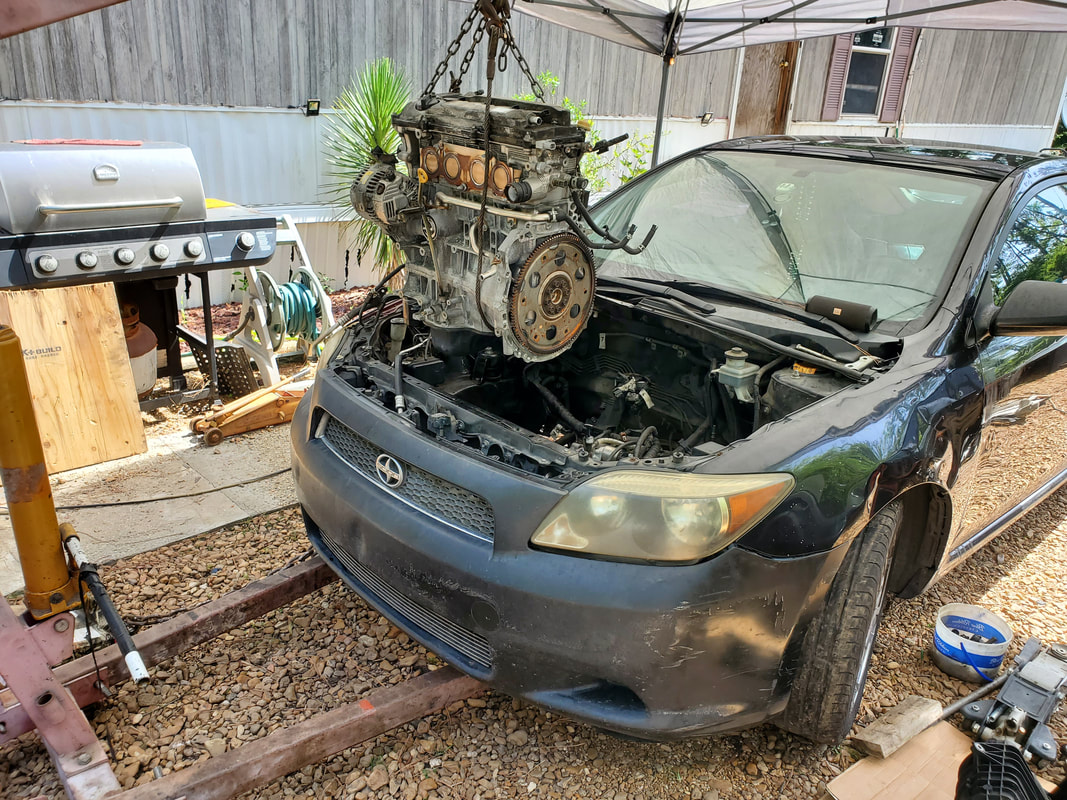 Hoisting the engine over the car as its being pulled in place prior to lowering the engine down. As usual, I ran into multiple obstacles during this installation. The first thing was the idea that mounting the transmission via its rear and driver's side mounts was a bad idea. Not being able to move the transmission around in any real way hindered my ability to secure the engine in place. In the end, I ended up disconnecting both mounts and supporting the transmission on a jack. The right side CV axle was still in place, helping to hold the transmission from just falling over. The next thing I had to do was remove the stud holding the belt tensioner, since this stud was protruding out just enough to hit the frame on the right side. The next big thing I ran into was the idea that there was an alignment pin in both the engine and the transmission in the same spot. My not double checking this very little yet very important thing had me have to pull the engine up again to get a set of vice grips on one of the pins to extract it so there would be a spot for the other one to press into. With those things addressed, I was finally able to get the engine in place and move the transmission like I needed to, with the help of jacks, and finally get the thing mounted up to the bellhousing.  Engine down in engine bay, bolted up to bell housing, still suspended by engine crane. After getting the engine about 3/4 of the way against the transmission, I had to use the bolts to draw in the two units together to make them completely mate against each other. I had to be careful so as to not risk cracking or breaking any part of the aluminum bodies of either machine. The torque converter had to be in place in order to allow me to mate the two machines together. I also took time to stage the intake manifold behind the engine, so I can get it mounted up before I finish securing the engine and transmission to the frame of the car. I had to bolt up the wire harness in a couple spots on the back end of the engine as well as plug up some of the devices that were able to be plugged up. I also had to swap out the knock sensor since the JDM engine's sensor was different. With that taken care of, I can finalize the intake's mounting along with the wire harness. Another thing I had to address is the bad transmission mount on the front of the engine. Since I need to get everything together before I can run or drive the car, I had to address this bad mount. I did some old school bootlegging with the old mount by making a repair using a couple pieces of thick sheet metal cut to fit on either side of the mount. I drilled a large hole through both pieces to allow the central mounting point to protrude through on both sides. I then hot glued the broken rubber all around on the inside of the mount, just before welding the two plates to the sides of the mount body. With the two plates welded on, I used more hot glue to fill in more cracks and crevices around the central hub. After everything cured, the hub was firmly secured, while still having a little movement, to coincide with the movement of the engine. The holes I drilled in the plates were oversized to allow the hub to have some movement. The way it appears, the repaired mount is about as good, maybe better than the factory mount. 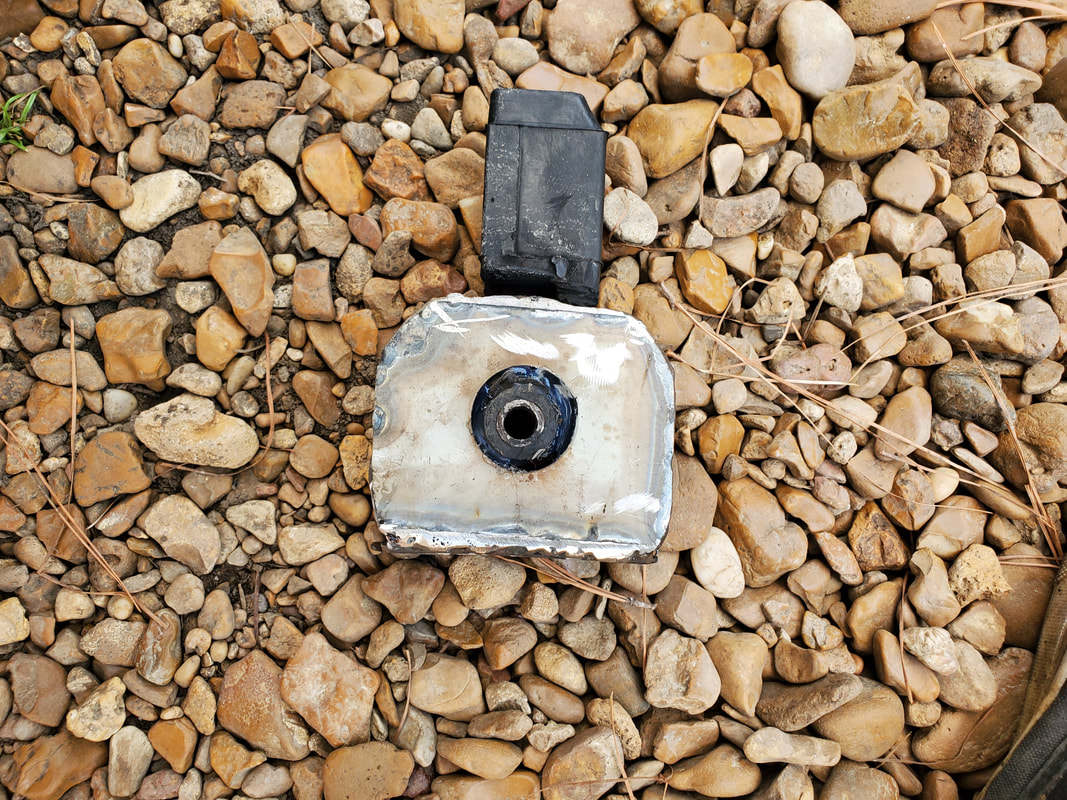 Makeshift repaired front transmission mount, just as sturdy as it originally was. In my next session, I'll get the intake secured, along with the wire harness, the biggest concern I had about this whole car. With that done, I can then fully focus on getting the powertrain mounted fully. The three transmission mounts and one motor mount along with a crossmember are all that is needed to get the engine/transmission fully secured. I do have to make sure the torque converter bolts are in place and that everything can freely move before fully securing everything, just in case I have to pull something apart again. Once I get past this point, it's just about putting all the little things back together to finish this job. With the summer in full swing, the temperatures have gotten to a point where its oppressive. The temps will be in the high 80s/low 90s and feel like its over 100, especially if you're in the sun. This is where the Scion falls. Since the car's sitting right dead in the sun, the first day I started doing work on the car with the steering correction, I was suffering. With that one time, I said screw it and we took time to set up our collapsible tent awning thingy over the worksite. With this thing, it will shade the car and the wider work area from the sun. While it won't do anything about the heat, it will at least stop the sun from sun baking me while I work on the car.  Tent set up over work area to shade the area in hot summer sun. With the tent set up over the work area, I pulled out the power winch to hook up to the Scion and to the S10 which was parked behind the engine crane, which is staged over the engine, and pulled the car up to the engine to get things ready. Of course, the tent was set up with it being centered over the engine so pulling the car pulled it under the tent where I needed it to be in the end. With the car staged, my next move was to get the transmission remounted on two of the mounts so I can at least keep it stationary while trying to get the engine seated to its bellhousing. In its current state, the transmission is flopping around and even with the thing on jacks, trying to get the engine bolted up would be troublesome. And who knows, even if I did get the engine bolted up, trying to get things lined up to secure the mounts might be problematic then. I don't know, I just figured that getting the transmission secured would be one less thing to worry about while trying to work with the engine.  Winching the car up to the engine and the crane to get it staged. 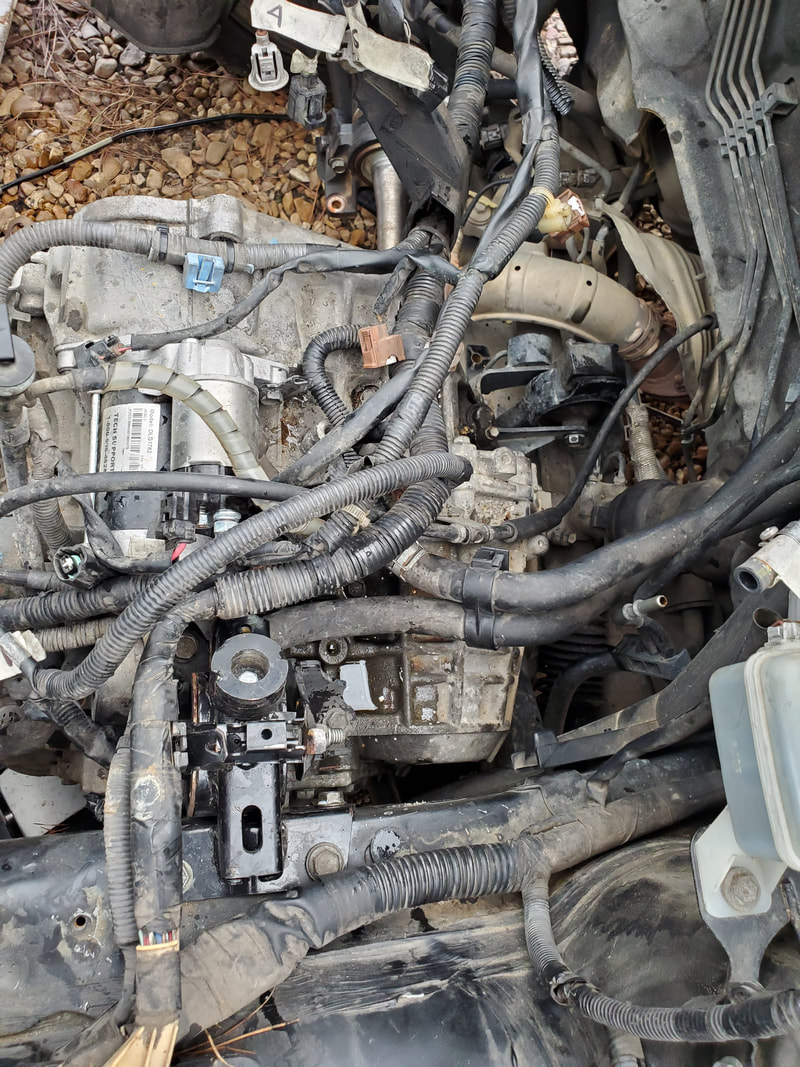 Transmission mounted to rear and driver's side mounts. Front mount will need to be replaced. One of the things that I discovered while moving the transmission around is the idea that in the process of rolling the car back and forth and moving the transmission around, the driver's side CV axle twisted the boot and the axle separated from the half mounted in the transmission. All this means is that after I do get everything back together, I'll have to go ahead and pull the remnants of that CV axle out and replace the unit (luckily its under warrantee). Of course this was a bit of a problem as it involved using a modified axle removal tool that may or may not hold up to another beating with the slide hammer. Hopefully with this axle having just been replaced the removal won't be as bad as it is with something that hadn't been out in 15 years.  Separated CV axle showing the exposed joint after it pulled free from the boot being torn up. At this point the front mount for the transmission is the only thing left but it needs replacing. Now, I could just temporarily weld up the mount to make it solid in order to just get the thing mounted, then replace it after everything is back together, or leave it be and just not drive the car until the mount is replaced. There's pros and cons to both approaches. Making a solid mount will take away the dampening effect at that point, putting undue stress on the transmission body, which could risk cracking the transmission body since its aluminum. Obviously driving w/o a mount will put undue stress on the other mounts, facilitating a replacement for everything even sooner. Obviously, welding the thing will just allow me to get things back together and running just long enough to be satisfied all is well before I replace the unit with the right piece. Either way, next course of action will be getting the engine in place and mounted to the transmission. For a good while after replacing the steering/suspension parts on the Scion, we've been dealing with an issue with said steering. The problem was after two different shops had their hands on the alignment trying to get things right, we still have the issue where the car will steer all the way to the left just fine but only about 2/3 the way to the right. This is aggravating when we have to make maneuvers in parking lots and the like and either have to back up to re-stage ourselves to park or have to swing out to make the approach while taking into account the incomplete steering angle. Well, since the engine is completely out, I decided this was the perfect opportunity to address this issue.  The rubber boot covering the steering knuckle and the rack and pinion steering assembly, which as can be seen would've been almost inaccessible with the engine in place. The first thing that I figured I'd have to do to address this issue is disconnect the steering column from the rack and pinion assembly so it can be free to make adjustments without affecting the angle of the steering wheel. After all adjustments are made, I can then reseat the knuckle onto the rack and pinion shaft. The next thing I would have to do is loosen up the tie rod end nuts on both sides in order to equally turn both sides to angle the wheels more to the right. Since we're starting off with the wheels straight, I would turn the tie rod ends, drawing in the right side and bringing out the left side so the wheels would turn more to the right. What this would do is when the steering is turned all the way to the right to the stop point, the wheels will then be at more of a right angle with our adjustment. To safely do this with minimum risk of messing up the alignment, I marked the tie rods with a permanent marker in order to know just how many full turns I'm turning the tie rod ends so I can equally turn both sides. 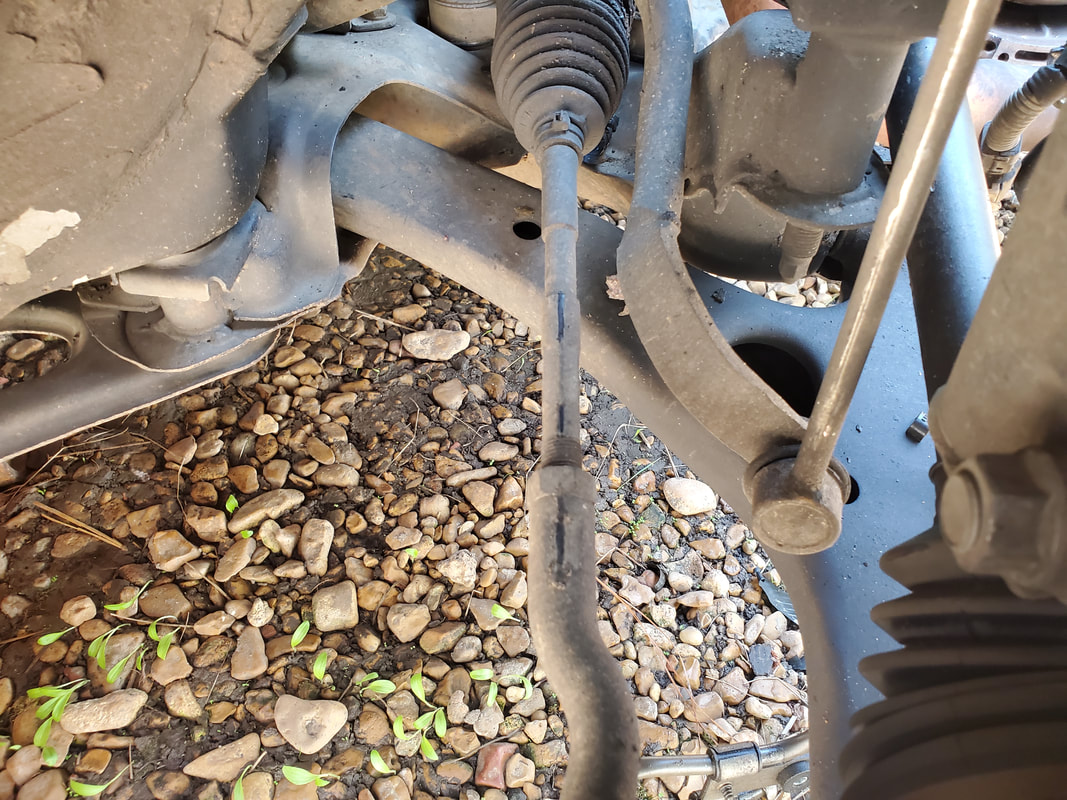 The tie rod ends with the marks placed in order to get the adjustments made as accurately as possible on both sides. After jacking the car up and pulling the tires and marking the tie rod ends and disconnecting the steering knuckle from the rack and pinion, I made my adjustments. I gave both sides three complete turns to turn the wheels more to the right, enough for me to be able to see the movement of the wheels. From there I reseated the steering knuckle in order to turn the wheels back straight again, then pulled the knuckle and placed the steering wheel in the amidships position then reseated the knuckle again, with the wheels straight. I replaced the bolts for the knuckle then test turned the wheel to make sure I still had good left turning ability while seeing what progress I had on the right turning angle. 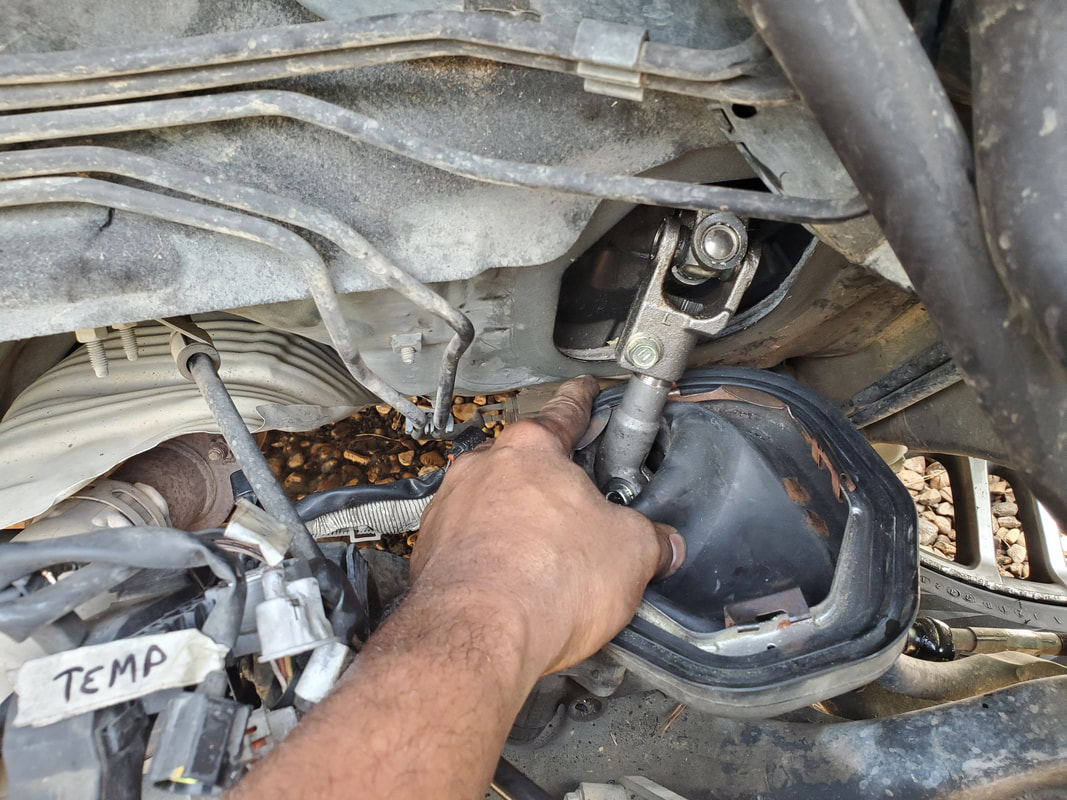 The steering knuckle where it connects to the rack and pinion. The assembly is covered with a rubber boot, which got in the way the whole time when working with this thing. From what I could see, there were good improvements on the right turn angle. When I turned the steering wheel amidships again, the wheels were also straight, making me feel comfortable with the idea that I didn't mess up the alignment on the car. It would suck if I had to take the car back to the alignment shop, only to have them mess up the alignment yet again where I'd be right back at square one. Hopefully with this taken care of, I can go back to getting the engine back in, knowing that once everything is running, the car will have complete steering left and right. We were pleasantly surprised when we received a call from the freight terminal that our new JDM engine would be coming through, about a week earlier than posted, that the piece had arrived. I quickly made my way to the terminal with the S10 to pick up the engine on its pallet. After getting back home, the first thing I had to do was disassemble and move the engine crane from the 84 F150 and set it up over the S10 where I parked it, in front of the Scion. I was in the process of getting ready to pull the 351/C6 from the F150 when we got the word the engine was here. With the crane staged, I removed the plastic to survey the engine and see what I was working with. 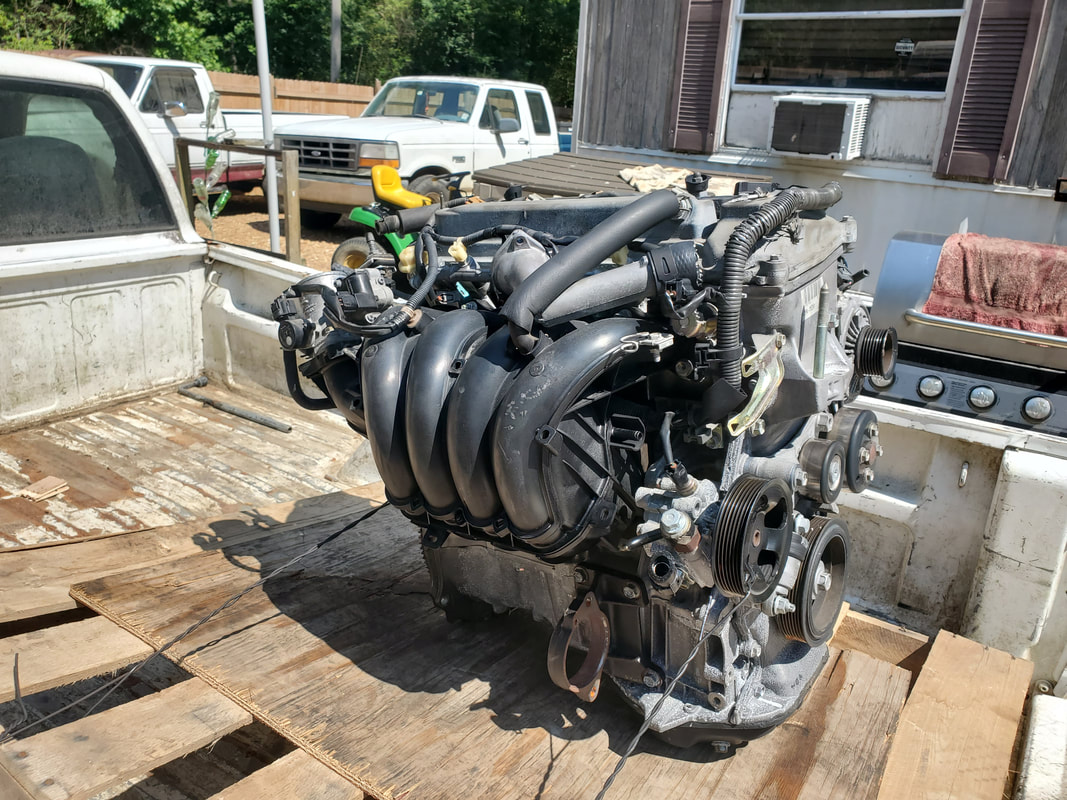 The new JDM engine after unwrapping it like a Christmas present. 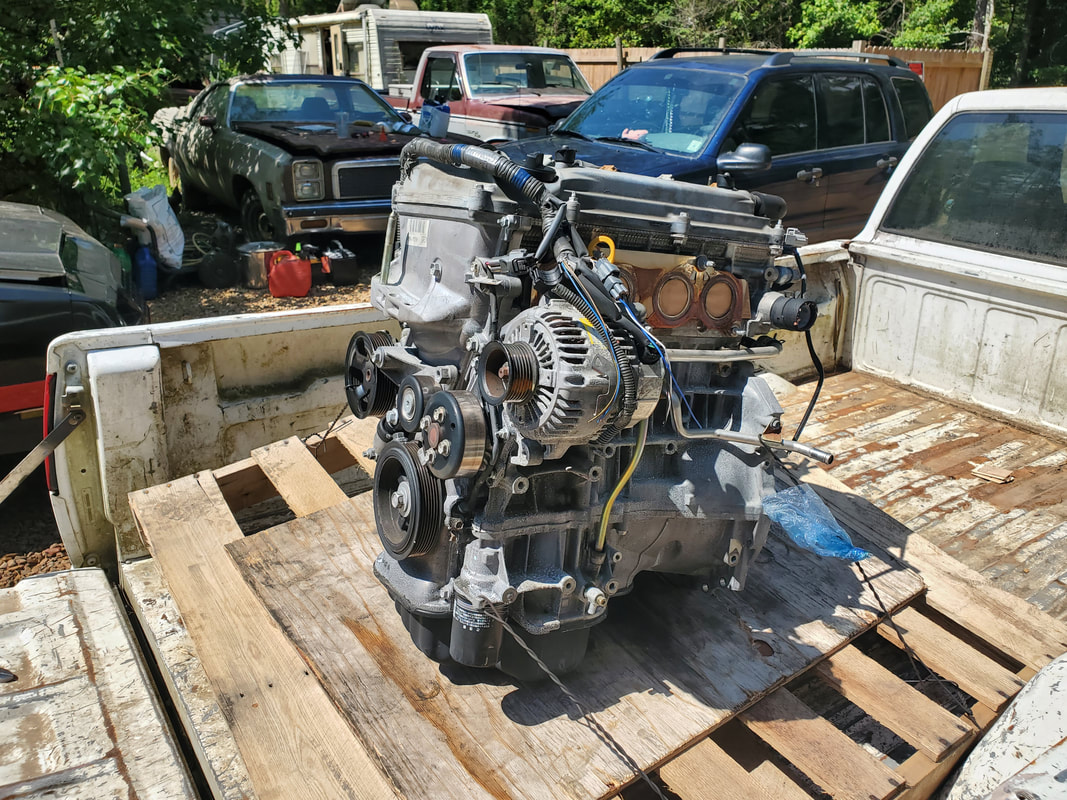 As can be seen, most everything we need is on the engine, accessory-wise. 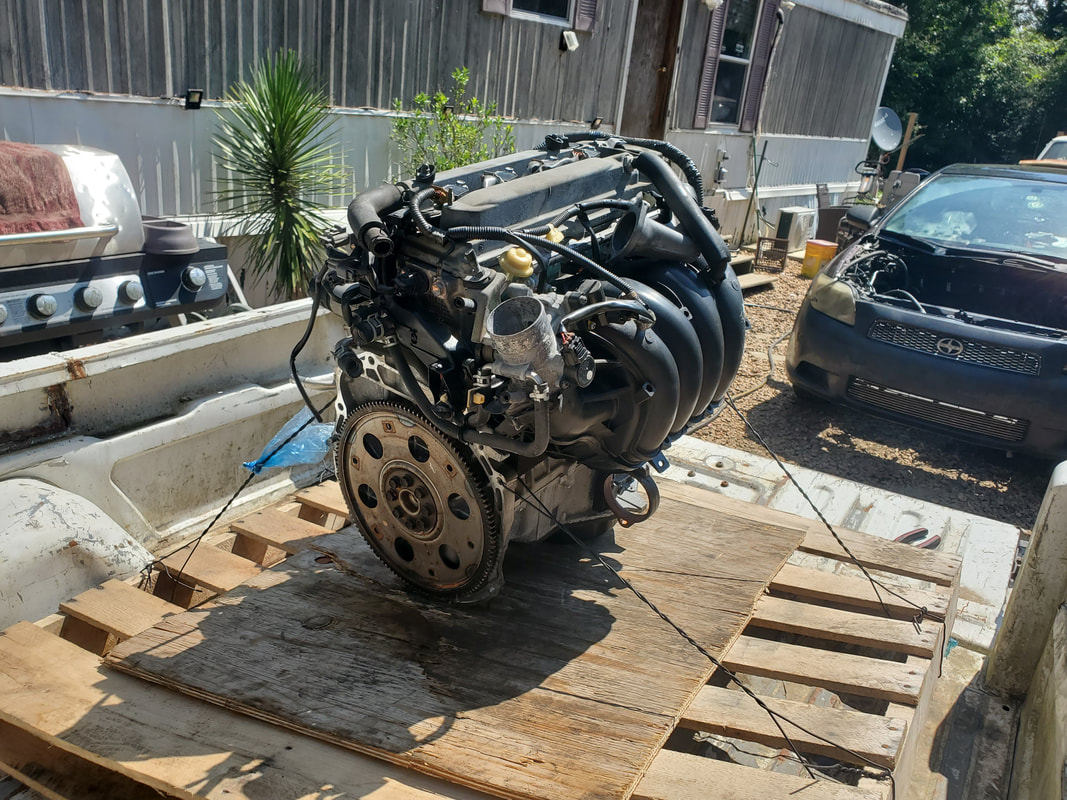 Only thing that was different was the throttle body on the intake, we'll have to switch those out. To make things easier I'll just replace the whole intake, since its gotta come off anyway to get the wire harness placed properly. 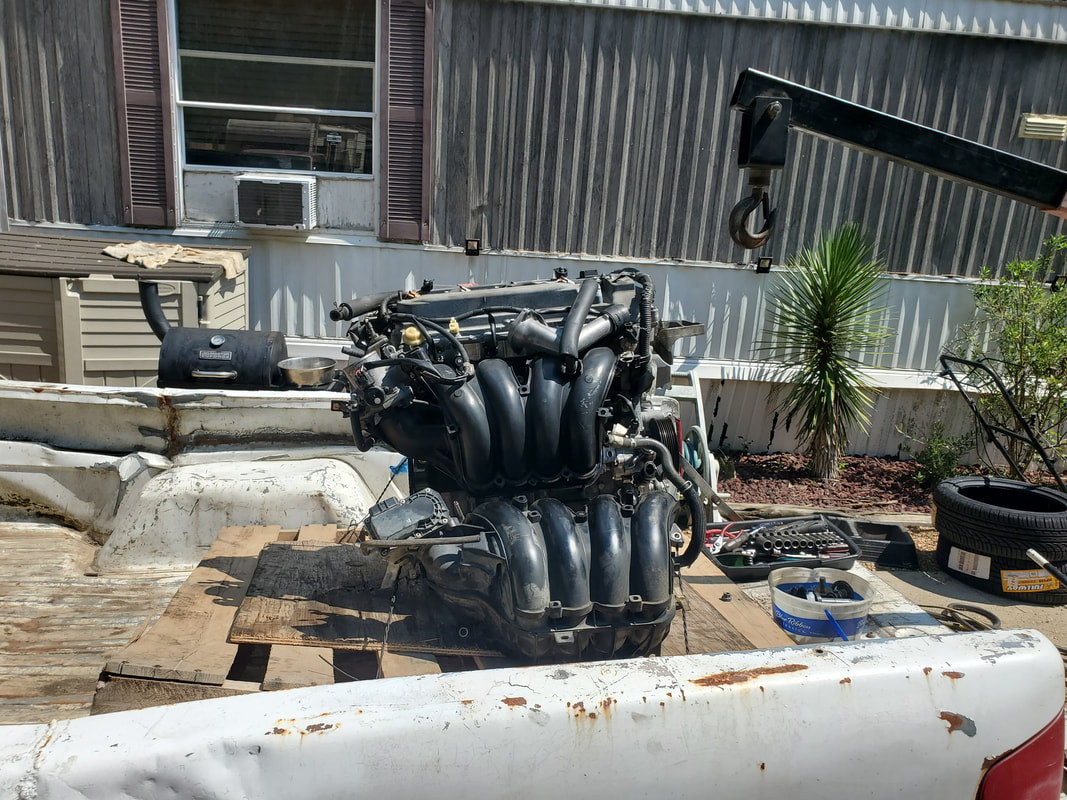 Engine crane staged over engine at back of S10. Just need to loop chains around engine and the engine mount bracket, which I have to reinstall prior to hooking the chain up. Surprisingly, most of everything that we were concerned with being missing were in place. The timing cover was there, the water tube for the thermostat was there, the power steering pump (and that broken sensor) are there. Even the intake manifold was in place, even though the throttle body was different. Apparently when the engine was removed, instead of removing the intake to remove the wire harness, the scrappers cut the whole wire harness and left everything plugged up. So of course, since I have to swap throttle bodies, I figured it would just be easier to remove the whole intake, which would have to be removed anyway to place the Scion's wire harness. I was able to remove the cut wire harness and toss it aside, I'll probably save this just in case something happens to the Scion's wiring at any point where the sensor and other component plugs are located. This will allow me to make repairs using the plugs on this scrap harness instead of trying to source replacement electrical plugs from a junkyard car. The two intakes by one another, showing the throttle bodies and their differences. No big deal, even when I do plan on building the old engine I just need to replace the throttle body with a junkyard unit on the extra intake. Another thing that I had to do before I can lift the engine out of the truck was install the "front" engine mount bracket, as I used this as an anchor point for one of the chains. Since the timing cover was the exact same as what we had, this was all I had to do, lucky me. I bolted the bracket back on and got the chain looped around this as well as the double chain on the other end to hook up to the engine crane. With that, I cut the suspension wires holding the engine to the pallet and jacked the engine up off the pallet. After pulling the truck forward, I had the engine on the ground. Now, one thing that I did have to replace was the valve cover. It had a small piece of the top broken off, probably during transport, or maybe even when the engine was initially pulled. Luckily we had the valve cover from the other engine so this was no big deal to replace.  Front engine mount bracket bolted back on so I can have somewhere to loop the chain around to lift it off the truck. Of course because the valve cover was damaged, I had to make sure I pulled all the fragments from the lifter valley so these do not pose a problem later when the engine is started. After removing all that, I installed the old valve cover and the coils. I left the intake off since that can't be installed until after the engine is 2/3 the way in and I can secure the wire harness to the side of the block behind the intake. 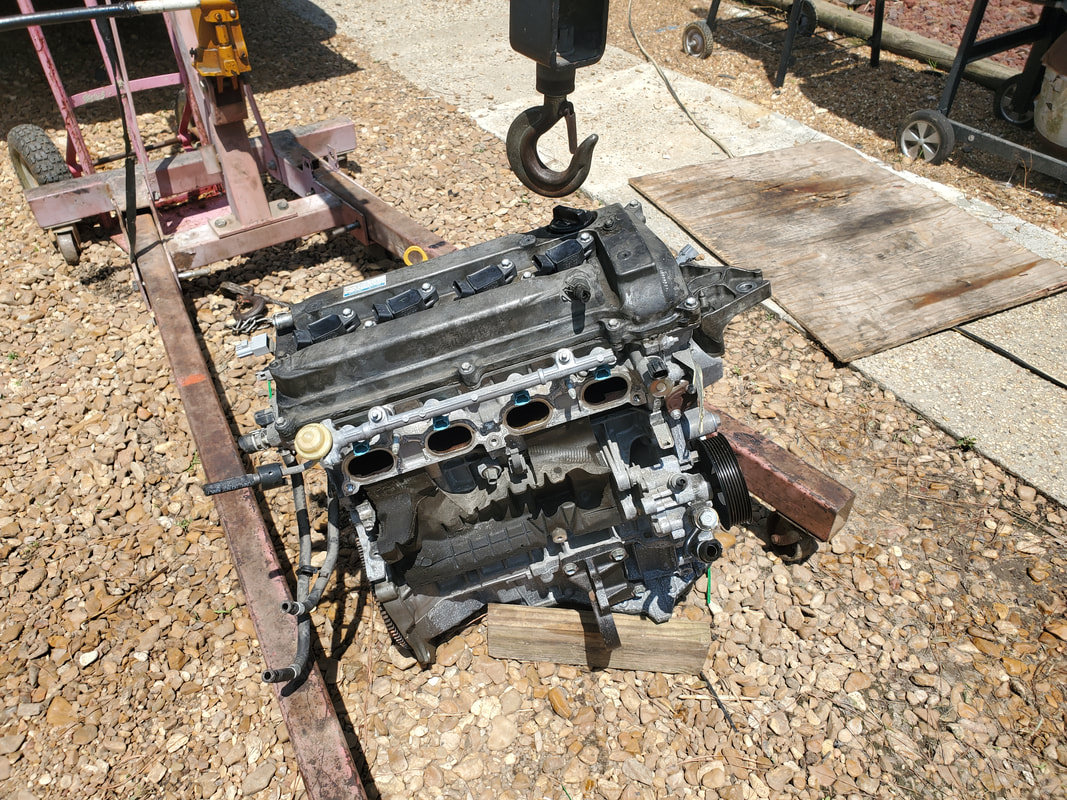 The JDM engine on the ground, propped up with a board to keep it upright pending installation. With the engine more or less ready for reinstall, the next move will be to get the car staged just in front of the engine. I already turned the crane around so it will be ready. I just have to reattach the chains so I can get the thing lifted up, as I winch the car forward under the swinging engine. Hopefully with the experience gained from removing the engine, I'll be able to reinstall everything, knowing just what I have to do to get things put back together in sequence to make the reinstallation go much faster than the extraction.
As I continue to grow the garden in its improvements with things like raised beds and hydroponics as well as the micro irrigation hardware that I've adopted to take care of the watering, I've had to try and stay neck and neck between the addition of more growing space and the expansion of the micro irrigation. I did manage to add extra plumbing going to the Dog Kennel Greenhouse to keep up with the addition of the bucket and drum raised beds, but as I continued to add raised beds, and drum beds, I will have to start adding more plumbing, even outside of the normal growing areas.
I have some drum planters with fruit trees and strawberries that are on the opposite end of the garden that will need irrigation just as well as the raised beds in the greenhouse or at the back of the garden where the highest concentration of raised beds sit. In order to reach these drum planters I'll have to run a lot of PVC pipe along the fence line, some of which has no wood fence established, to reach the area. That will be for another day, but in the meantime there is the matter of getting the beds in the greenhouse and one of the external units, hooked up for watering as they currently have plants growing. 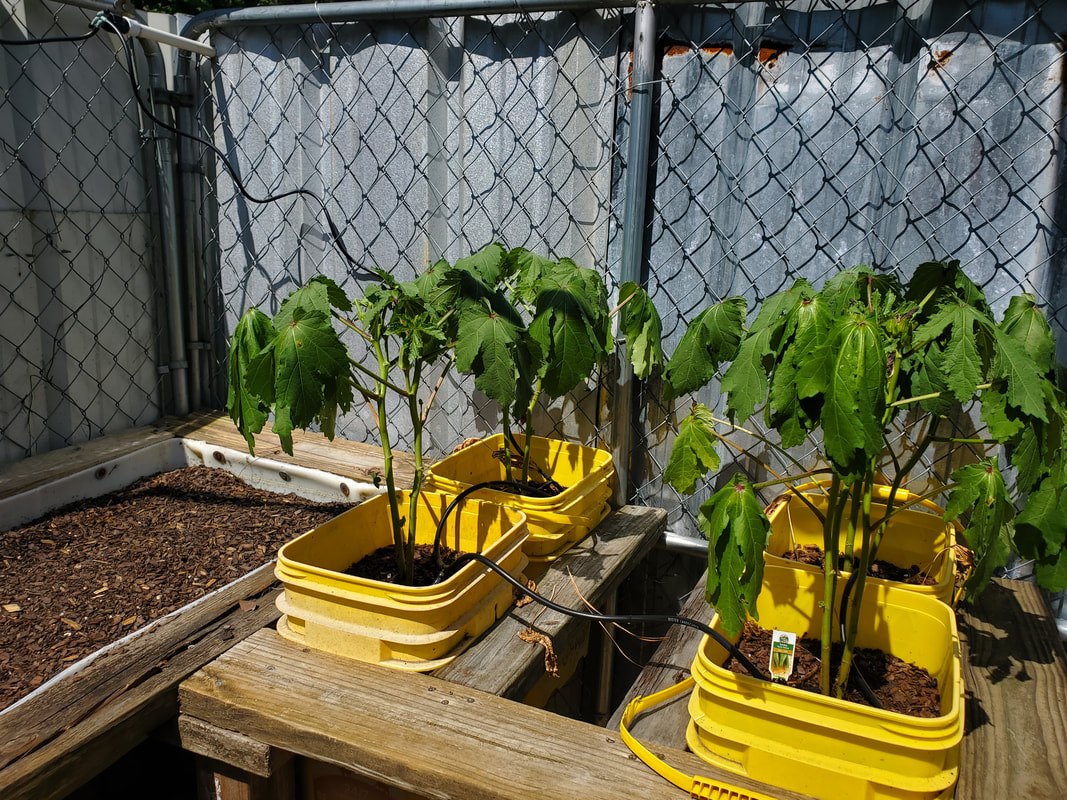
These okra plants are struggling in the heat and will need a good steady flow of water so they can continue to flourish in the hot summer sun. Note the rubber hose routed up through the chain link fencing that makes up the walls of the greenhouse, to connect to one of the 4 way junctions for the main conduits.
Since I already had plumbing routed to the greenhouse, it was just the matter of installing the sprayers and the rubber tubing that would connect them to the main plumbing conduits. This was rather easy, as the micro irrigation hardware allows for. I used the lower flow stake sprayers that spray a few little streams of water for the bucket beds while using a single high flow sprayer for the one drum bed that currently contains cucumbers. 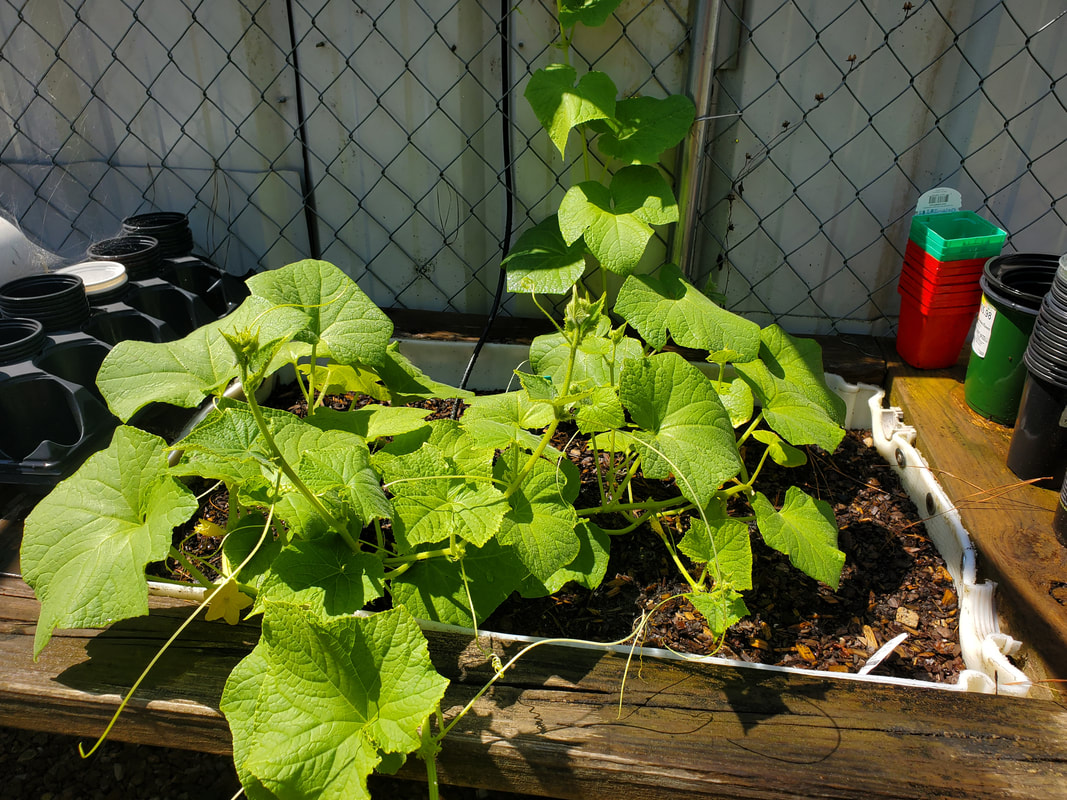
The cucumber bed with the single high flow sprayer installed. Note the rubber hoses routed up through the chain link fencing that makes up the walls of the greenhouse.
With the plumbing all set up, all the active beds in the greenhouse are set and ready to go as far as getting the timed watering that the rest of the beds have experienced in the last year. I still have one more drum bed in the greenhouse that I have to plant, but when I do, I will be able to connect to one of the fittings on the 4 way junction to feed a single high flow sprayer to that bed as well. 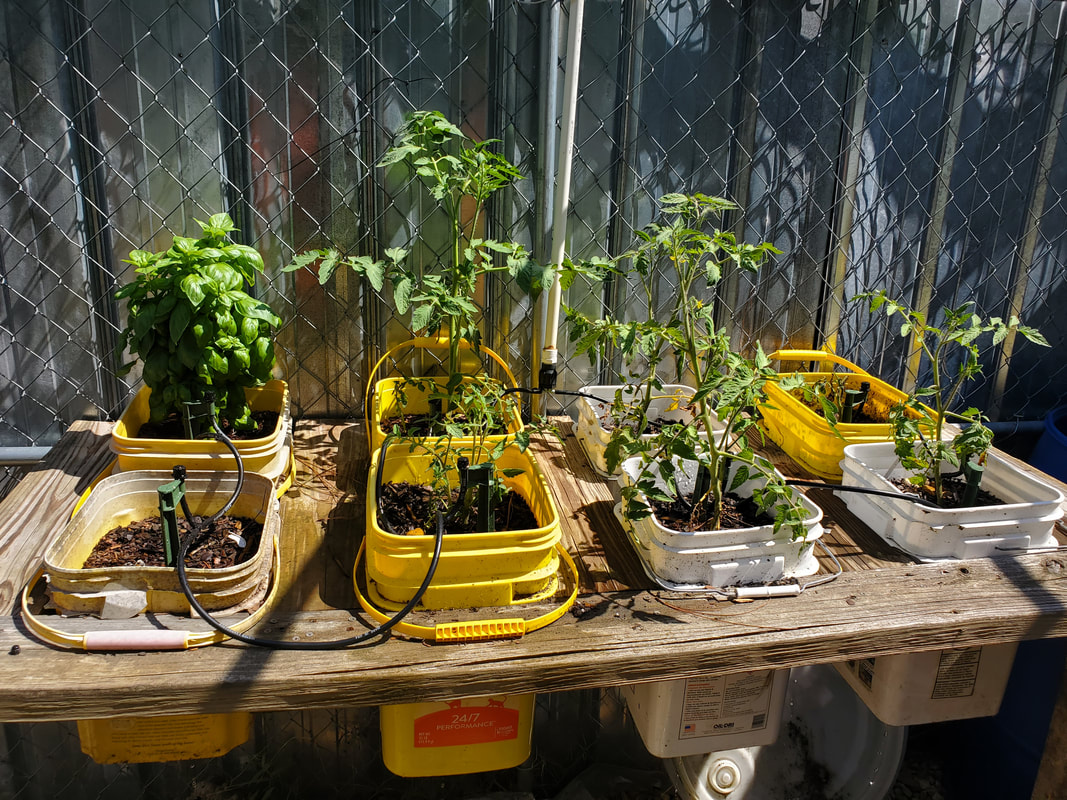
Greenhouse bucket beds planted and linked up with micro irrigation lines and drip sprinklers.
Going outside the greenhouse there was the matter of getting water to one of the double drum raised beds. This single table was made with two drum halves serving as planters, currently containing four spaghetti squash plants that are vining out, but are struggling in the heat. In order to get water to this bed, and a future double bed that I plan to build and set up next to this one, I will have to connect to the one line that is feeding a row of drum beds. I'll have to dig up the pipe to cut and splice new fittings to this line and get another spur over to the next row of raised beds, also adding another 4 way fitting to feed the hoses going to the sprayers. Since I don't have any of the fittings to do this, I had to do a temporary setup, where I spliced a tee into the last sprayer on the first row of beds, then strung a length of hose across to the squash bed to feed the sprayers installed within. Kind of crude, but effective enough to ensure this bed gets watered just as well. 
Temporary link from old row of raised beds, connecting to new row with single pair of drum beds, feeding water to the plants within.
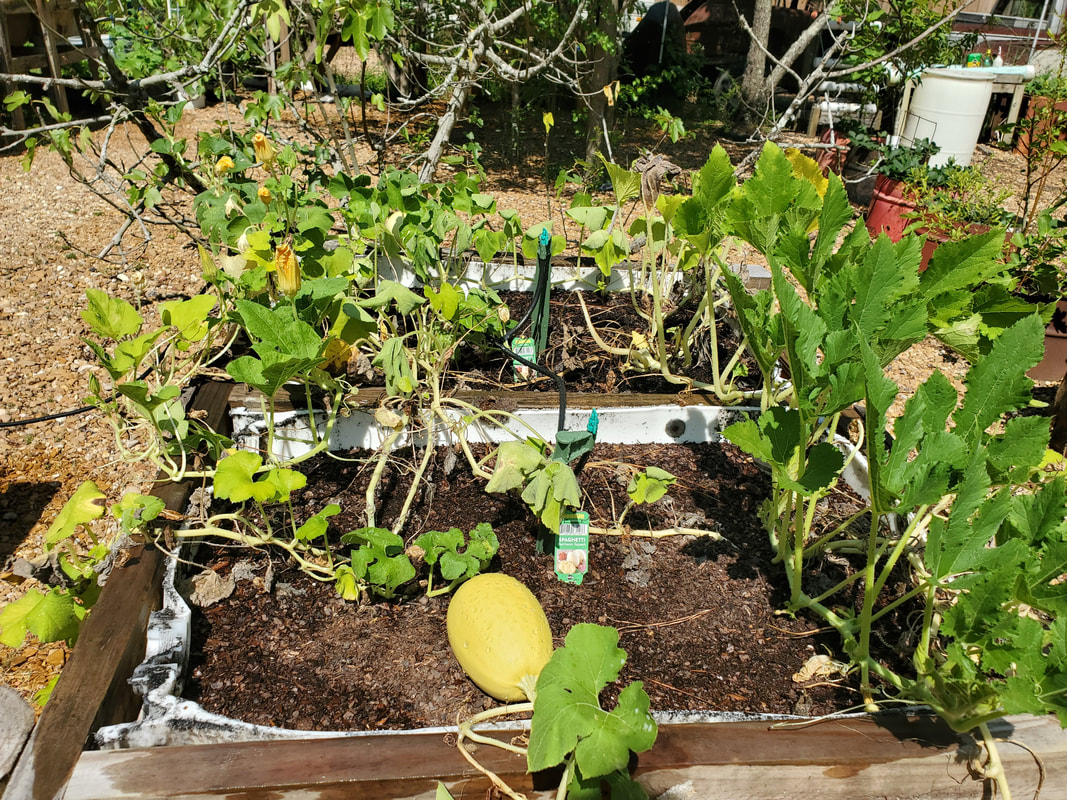
The squash bed with the two high flow sprayers staked down and ready to go.
I also have a row of drum planters that are used for different fruit trees as well as a muscadine plant that is supported on a PVC trellis. Of these multiple planters, three of the drums are not supported on the irrigation system that currently feeds the older drums. I can expand the setup but will still need a simple fitting to allow me to replace the threaded plug with a coupling to add more 1/2" flex tube with which I can tap into in order to run the extra sprinklers for these final three drum planters. Once I get that simple fitting, I can get this whole row of tree planters set up. 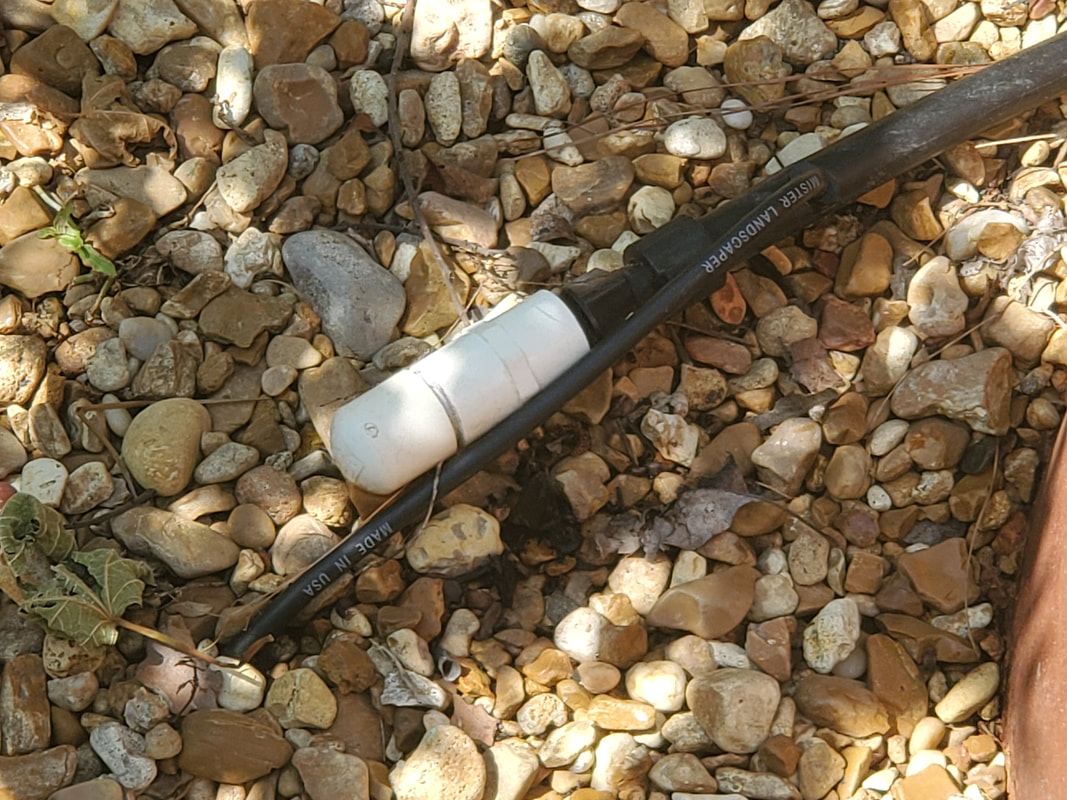
The end of the 1/2" water line that is feeding multiple 1/4" hoses hooked up to sprayers for each drum bed. A different fitting needs to be used in place of this terminating fitting to expand the water line to the last three drum planters.
At this point most of the planters that I was concerned with are hooked up for automatic watering. All I have to worry about watering by hand are six drum planters for fruit trees. Once I get the fitting that number drops to three. As I do manage to get more fencing put up to enclose the garden, I can add to the plumbing to reach around to these farther drum planters, as well as the newer drum raised beds I've been setting up along the eastern fence line. As I expand the water system, I'll need to expand the raised beds to keep up, further completing the garden. And then there's the hydroponics systems.
After having pulled the engine from the Scion and stripping it of the parts I may need to get the JDM engine set up for installation back into the Scion, I still had the engine crane on site. I decided to keep the train moving and get ready to pull the engine and transmission from the 84 F150, which is parked behind the Scion. I did have to move the Scion back forward from the F150 since I used a winch to pull the car backwards towards the F150 in the process of getting the car clear of the engine as it swung in the air. With the Scion out of the way, I got started disconnecting everything from the F150's engine. 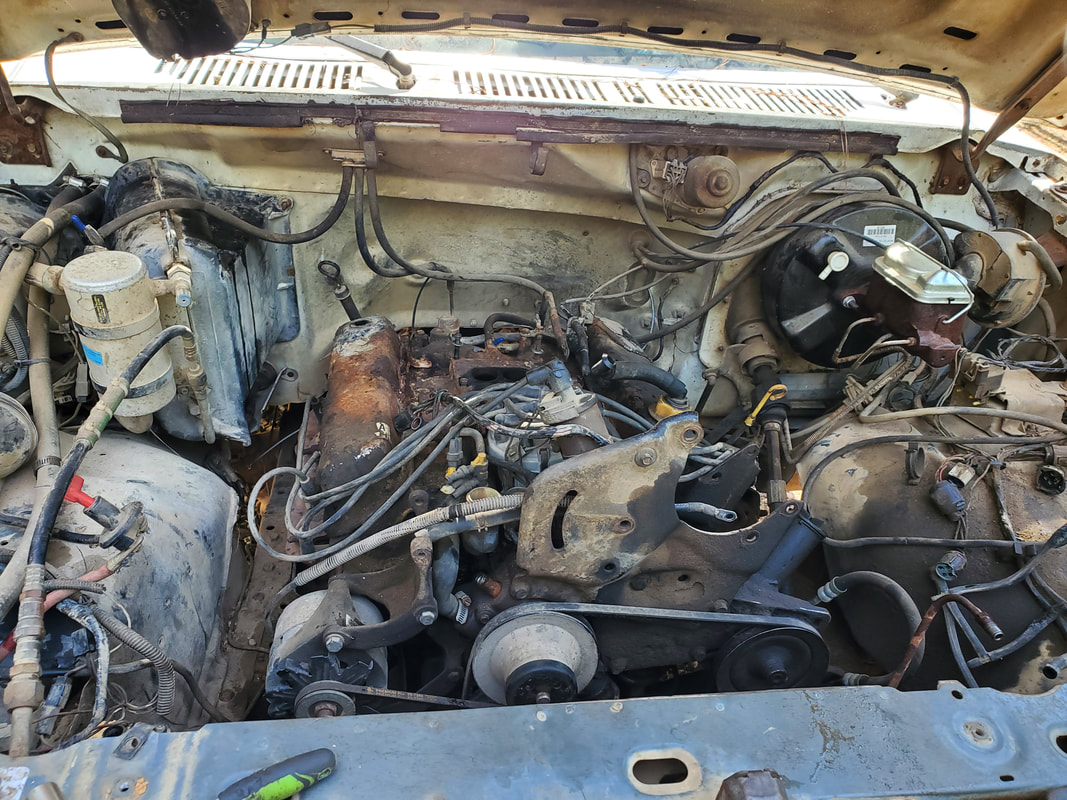 The F150's 351W engine with some items already disconnected and the radiator and its associated hoses removed. I drained the radiator then started pulling the hoses, fan shroud and fan itself from the water pump. From there I removed the different hoses that were still connected to the intake, along with part of the truck's throttle cable setup. The alternator and distributor wiring were both unplugged and placed out of the way, since preserving all these connections will make the truck able to be brought back to life easily with the placement of another engine and transmission. With the few items disconnected from the top of the engine, it was time to get on the ground and start pulling everything loose on the lower end. 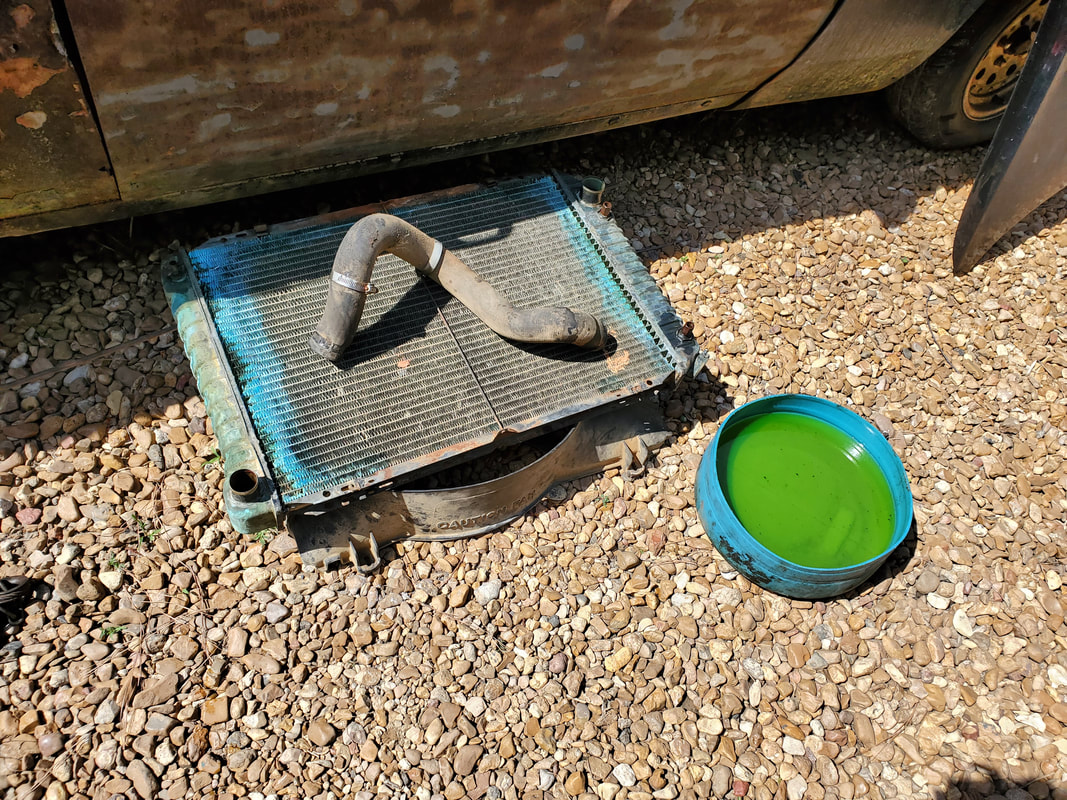 The radiator and hoses along with the fan shroud (underneath) and a pan full of salvaged coolant set aside. I started off with the engine mounts, both of which were held in with a single nut, similar to the FMT's engine mounts. With those free, I moved back to the transmission crossmember. I pulled all the bolts free that held the main crossmember piece, ignoring the secondary braces. Hopefully things are free enough that I'll be able to force the crossmember from under the braces as well as the transmission itself. I'll have to jack up the transmission to take the weight from the crossmember, which is where the mount comes into play. The two nuts holding it in place to the crossmember were also disconnected. From there I pulled the U bolts free from the rear U-joint on the driveshaft so I could get it pulled free. I placed my homemade oil catch pan under the transmission tail to catch the fluid, no need wasting usable fluids. 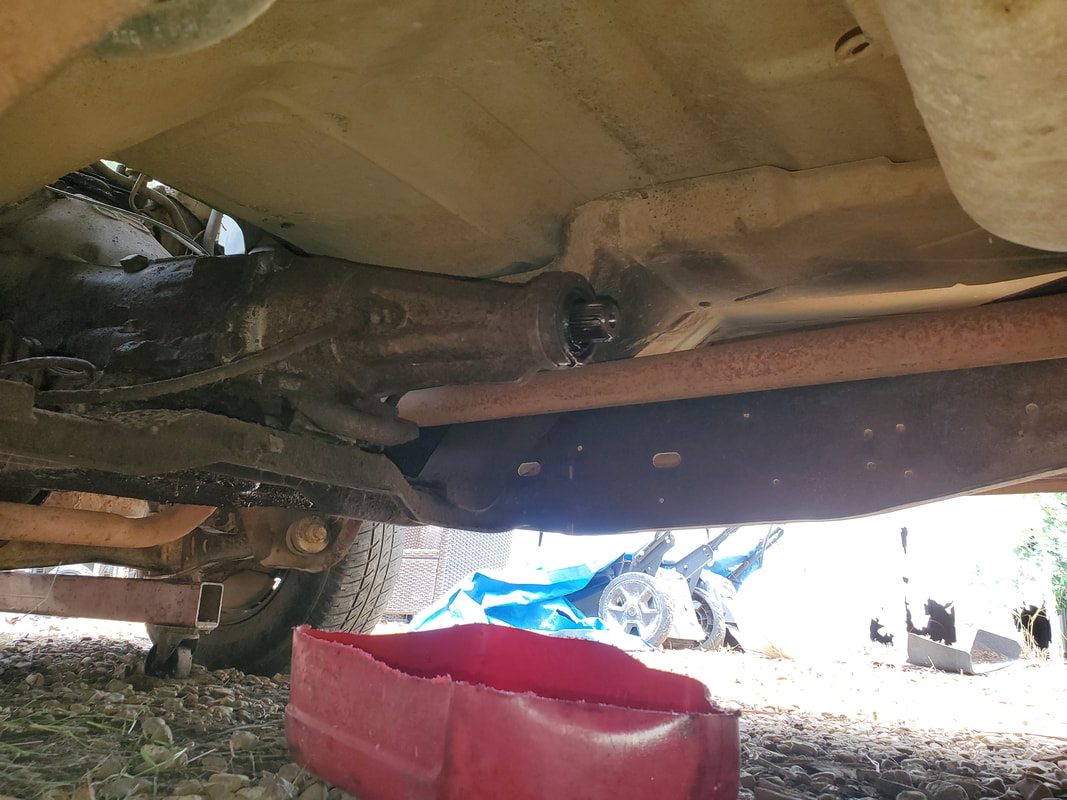 Oil catch pan catching transmission fluid from transmission tail after the driveshaft removal. 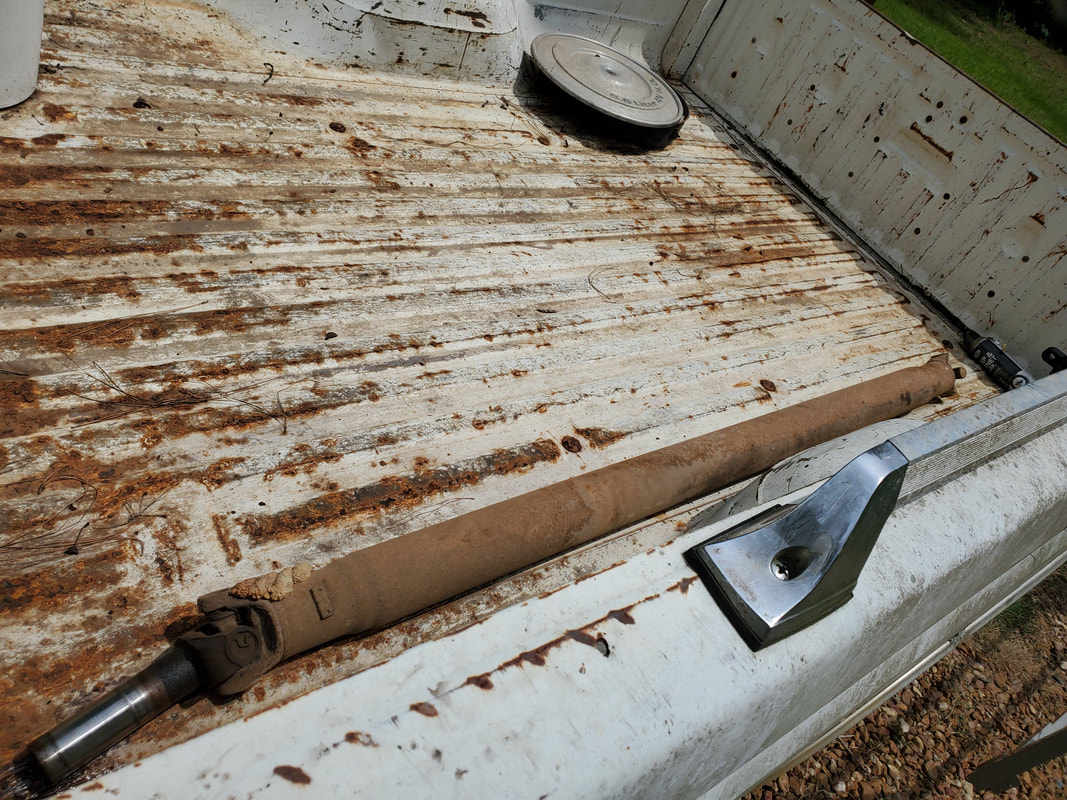 The driveshaft staged in the bed of the truck. Other components will be stored in the bed as well, since those parts go with the truck. Moving back forward, I disconnected the shifter linkage from the side of the transmission along with the speedometer cable and oil lines. I used the impact driver to pull the nuts free from the exhaust manifolds, concluding the disconnection of the powertrain from the truck as a whole. We're pretty much ready to come out now, so I staged the crane over the engine bay. I'll just need to bolt the carb base plate down and hook the chains up, and get a vehicle staged behind the truck to hook the winch to in order to pull the body back as I lift the setup from the truck. 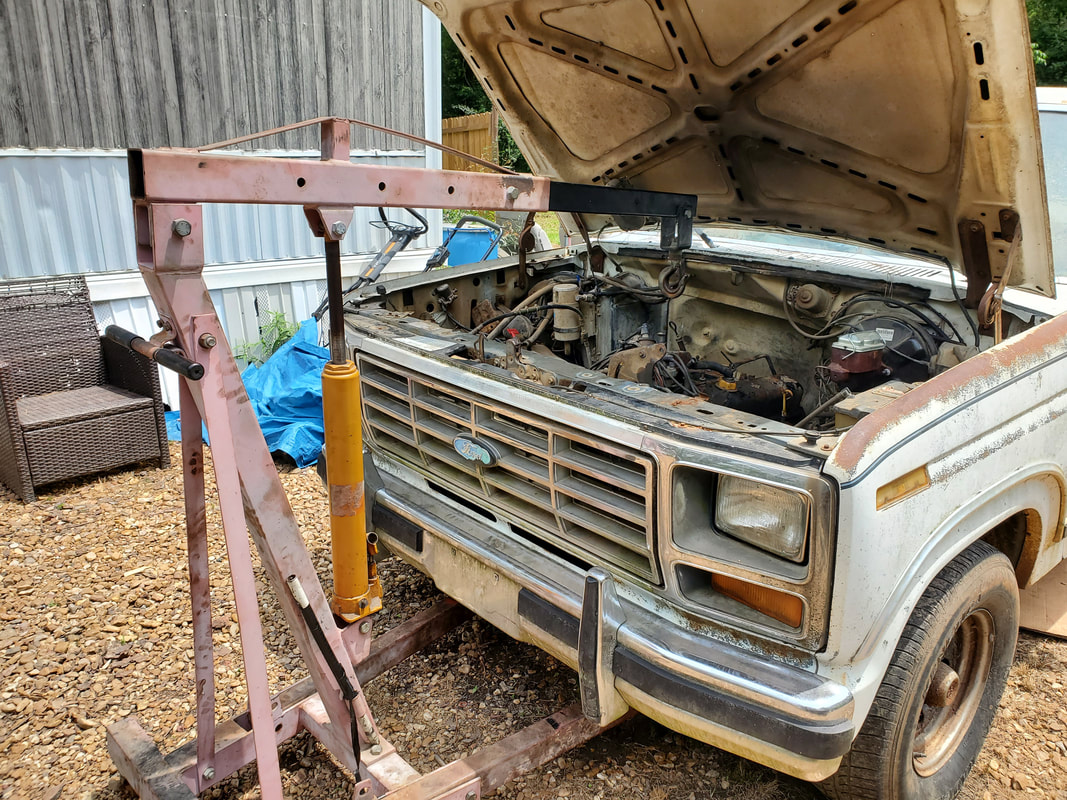 Engine crane staged over engine bay, ready to be hooked up. Once I do get the powerplant out from the truck I'll get it laid on the ground but will have to have the truck body pulled back enough to be able to turn the crane around in order to lift the rig back into the S10 in order to take it up to the garage. Of course I can then pull the truck body back in place since I'll be clear of the fence line by the time I pull the truck back enough to get the engine out. I figured I'll just take the rig up to the garage to pull things apart and make whatever necessary repairs before I do go forward with the placement of the powerplant in the Rustang. Of course I still have some parts to get for that car to facilitate that installation, but that's another story for another time. |
