|
I had decided to get back to work on the Dodge once again. Previously, we managed to pick up a short block from an individual that had supposedly rebuilt the unit with fresh rings and bearings. We got the unit pretty cheap so I figured why not. Of course after getting the engine back and giving it some checks, I found that the damned thing wouldn't turn over. It wasn't because the engine was seized up, the thing was bound up after it was reassembled. I did go ahead and loosen the main bearing caps and rod bearing caps and managed to be able to turn the crank over. I did pull the pistons and cover them with trans oil and reassembled everything with the slicker thinner oil to see if that would help. They used what almost seemed like bearing grease when they put the engine together so I figured maybe this was interfering with the free movement of the crank. When I tried to torque down the bearings, the damned thing seized up again. The only conclusion I could come up with is that the bearings used in this engine are of a thicker variety, perhaps used on turned cranks where the tolerances have been opened up. 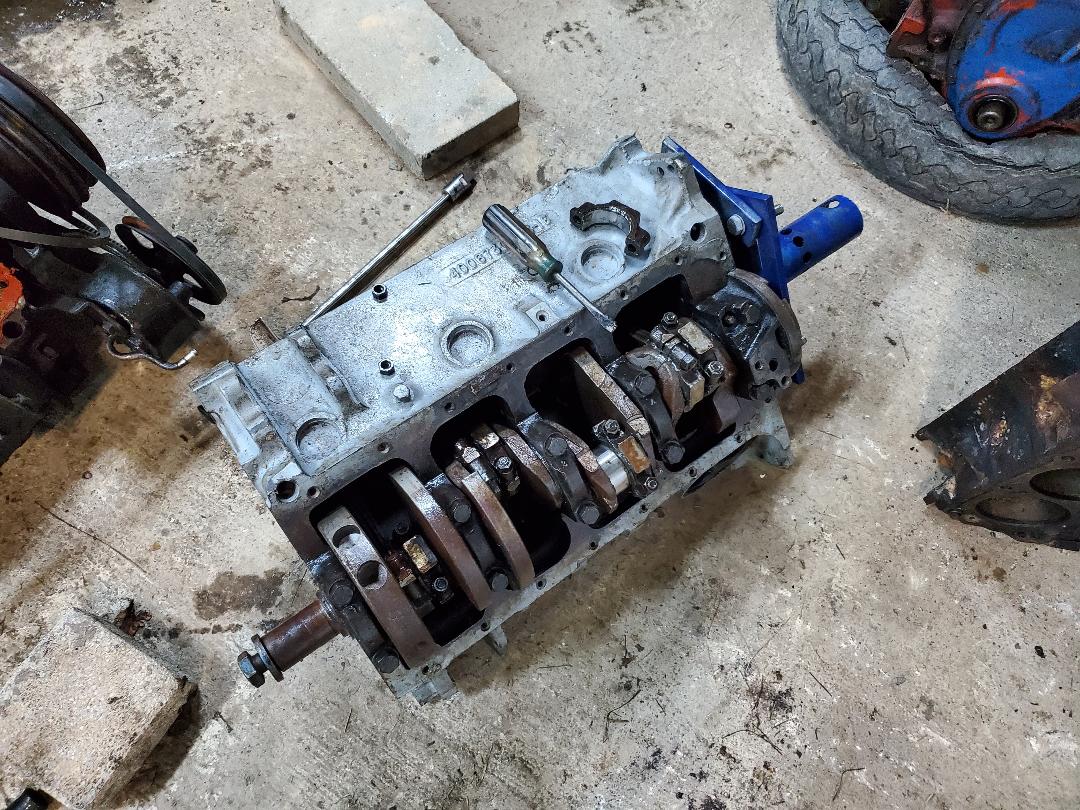 Spare engine that was rebuilt wrong. The next course of action then was to pull the heads from the 318 in the Dodge and just replace the head gaskets. This of course meant taking apart a bunch of shit to get the heads removed. The first area was pulling the exhaust manifolds from the heads. I pulled the bolts freeing the exhaust manifolds free. I then turned my attention to the intake manifold. From here I had to disconnect the hoses and wires from everything including plug wires. They were marked prior and the distributor was marked so everything can go back together as it was. After getting everything disconnected and bolts removed I was able to get the intake pulled free, of course with the start of making a mess with coolant spilling on the ground. 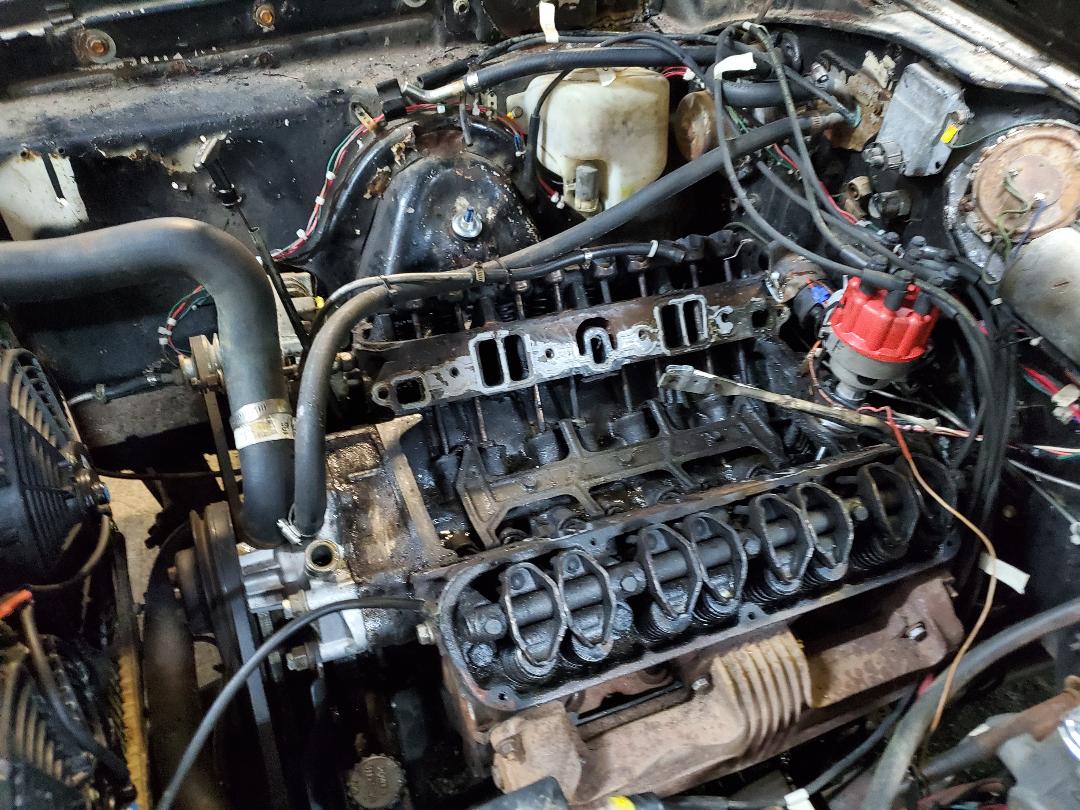 Intake pulled from engine. In order to get to the lower head bolts the exhaust manifolds needed to come completely out. A couple of rounds under the car allowed me to pull the two bolts from each flange for each exhaust pipe in order to free the exhaust manifolds for their removal. 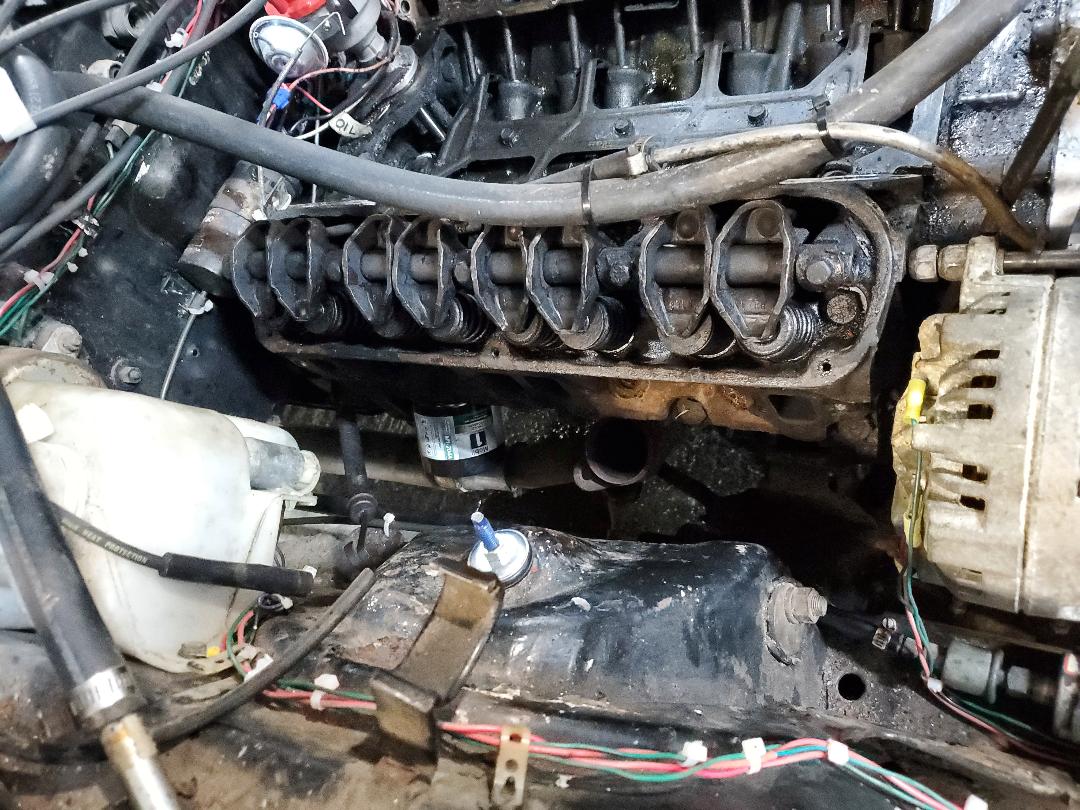 Right head sans exhaust manifold 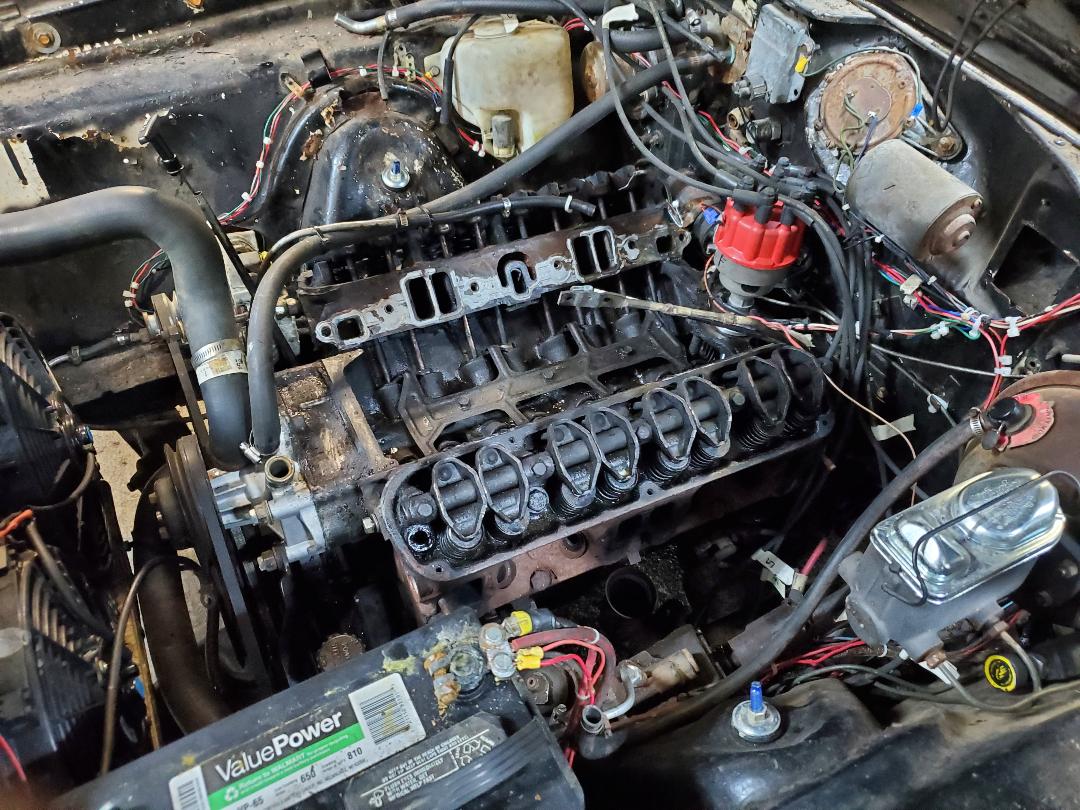 Left head free of its exhaust manifold. With this I was able to get to work removing the heads. Of course these hefty tight bolts needed a breaker bar on them to get them out and after putting in that work I managed to get the left head off since this was the side that had the problems with the smoking and blow by. When I did pull the head I was horribly surprised to see just how fucked up things were on this side of the engine. 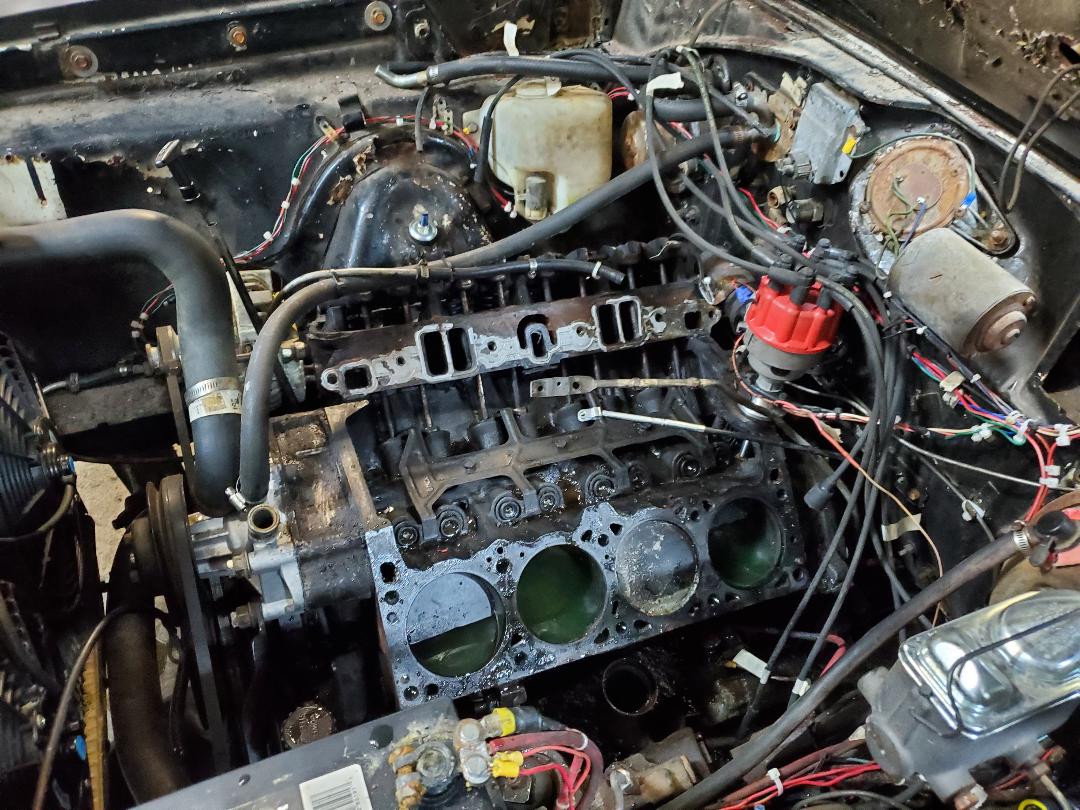 Left cylinder head pulled from engine, still needing to remove coolant from the tops of the pistons. First the head gasket. This thing looked like pure shit. Of course I figured there was a break at the #1 cylinder due to the blow by I got when the engine was running. With the incomplete sealing of the exhaust gasket, when the cylinder exhausted its gases, coolant steam came out as well as liquid. Along with the break at #1 cylinder, the overall condition of the gasket was piss poor. It was just brittle and broken looking all over the gasket. 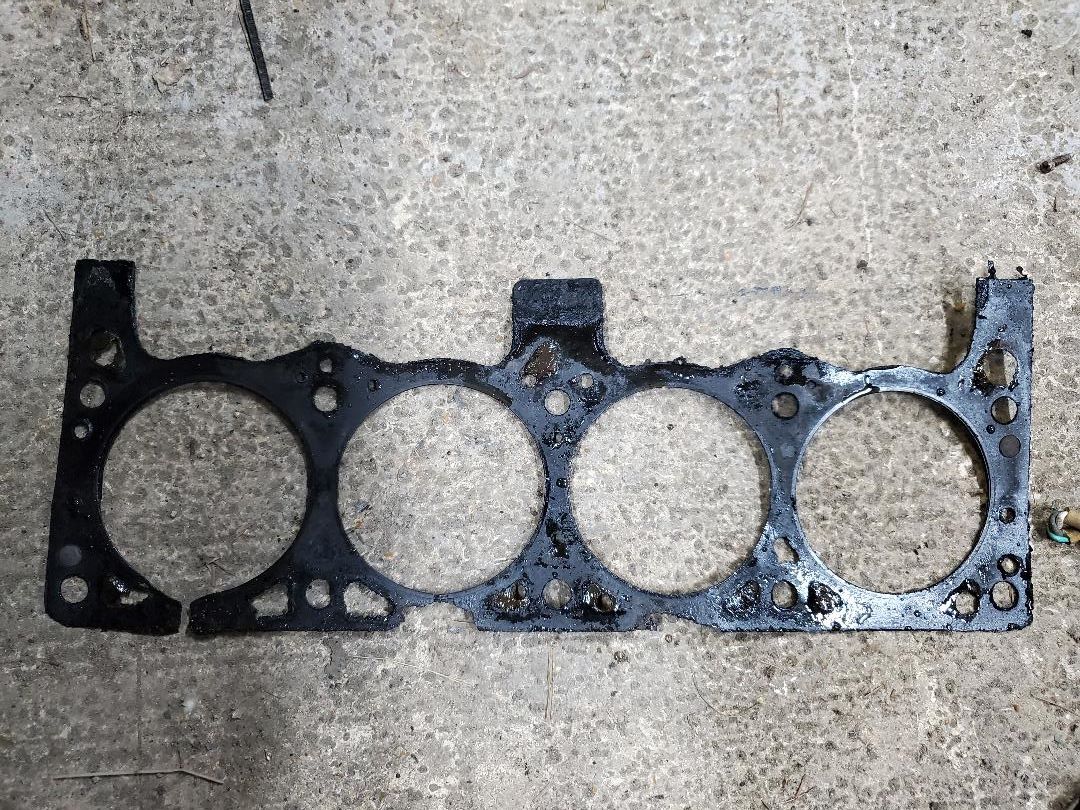 Left head gasket, note break on left/#1 cylinder. Also note overall degradation of gasket. Left head gasket, note break on left/#1 cylinder. Also note overall degradation of gasket. The next thing I saw was what really fucked me up. The #5 piston looked like it rotted inside the engine. A portion of the edge of the piston was just gone, broken out in apparently large shards. The overall surface of the piston was not level due to the degradation of the metal at the top of the piston, like this thing was burning away metal over its lifetime. There was a large crack that was present around the middle of the piston top. While it didn't look like it was broken all the way through, this piston had to go. If I did try to reuse this thing it wouldn't be long before the thing did break through that crack and allow fiery combustion gases into the crankcase, further destroying the engine. Even if this didn't happen the fragments would surely destroy the cylinder walls, which surprisingly were intact. This is why I figured that the engine was probably running lean enough to burn the aluminum away slowly through its time. 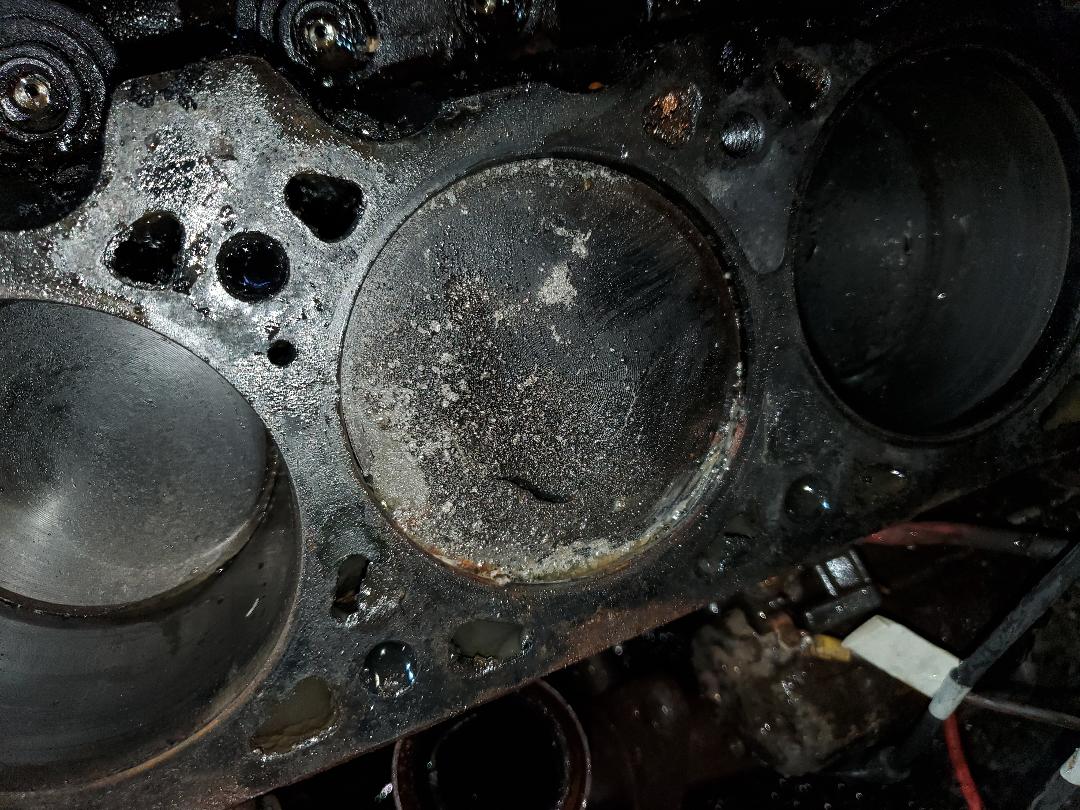 Bad piston in #5 cylinder. Note damage to top of piston. Compared to other pistons note missing material and large crack in top. From here I pulled the right cylinder head with little fanfare. At least this one wasn't hiding a shit show underneath. Other than the worn head gasket everything else was in pretty good shape. The gasket wasn't broken but it was surely degraded. Unfortunately with the bad piston on the left side, this meant that the engine would have to come out in order to remove the bad piston. 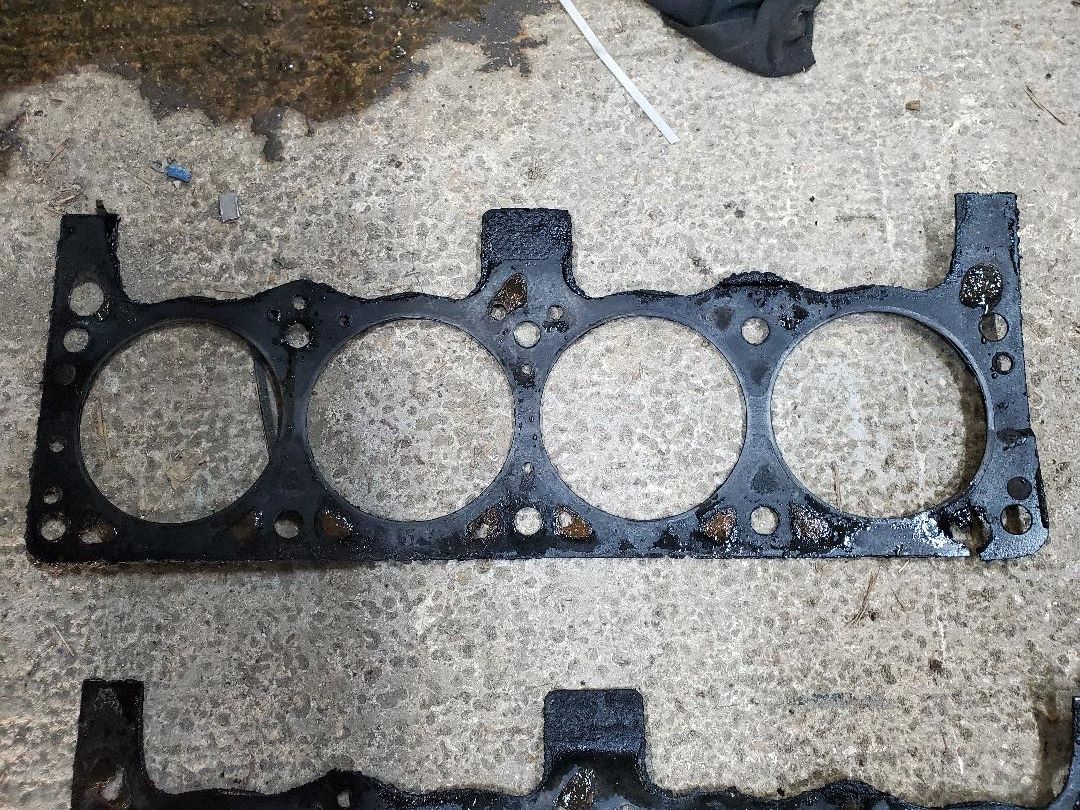 Right head gasket after head removal. Note how its not as bad as the left gasket was. 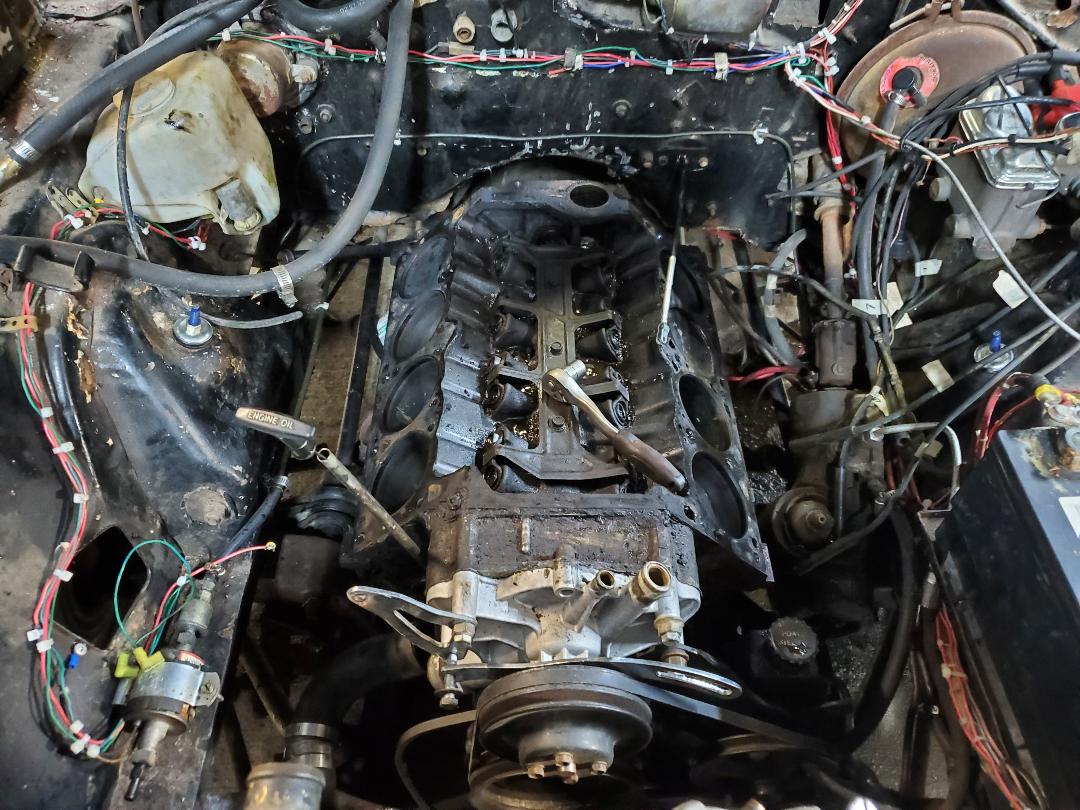 Engine with cylinder heads removed along with alternator and other small peripherals. At this rate I got the engine crane out and got it staged over the short block. Using a couple of head bolts and a short piece of large chain, I got the crane hooked up and everything disconnected from the transmission and frame. The short block was ready to come out. 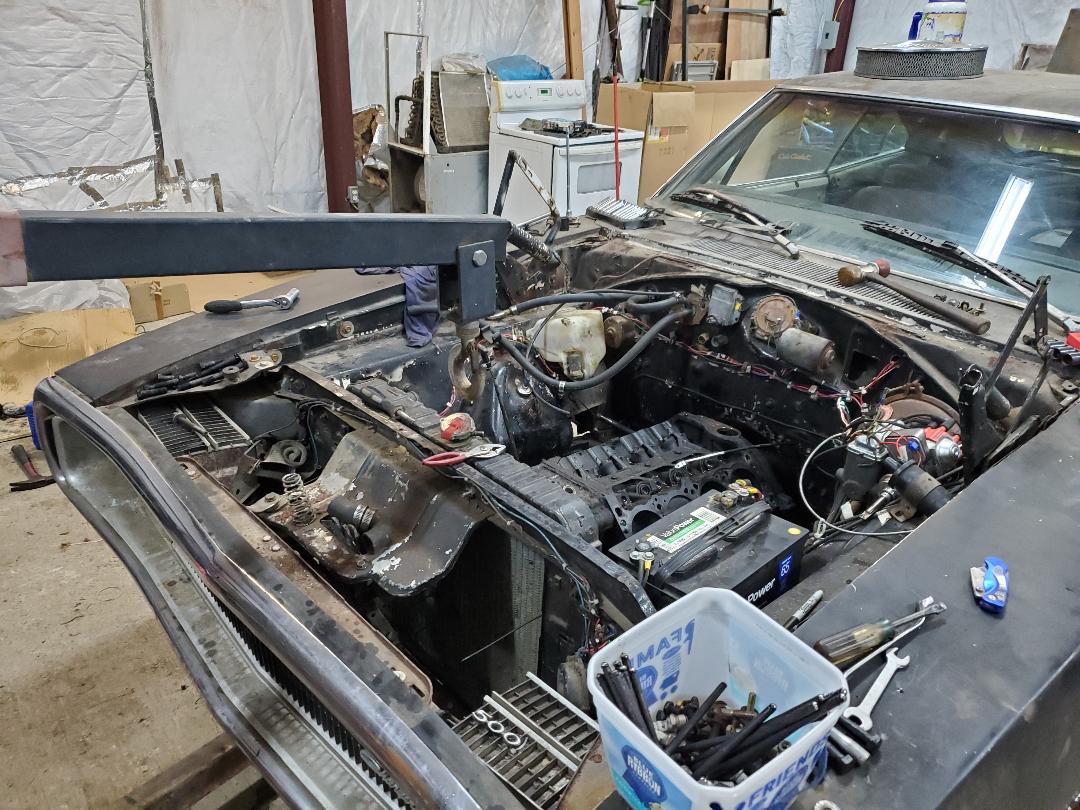 Engine crane staged over short block awaiting hookup. Removing the engine was pretty fast after getting everything hooked up and disconnected where applicable. I got the engine on the ground and disconnected from the crane, then tipped it over to get it upside down to remove the oil pan, but not before draining the oil pan. 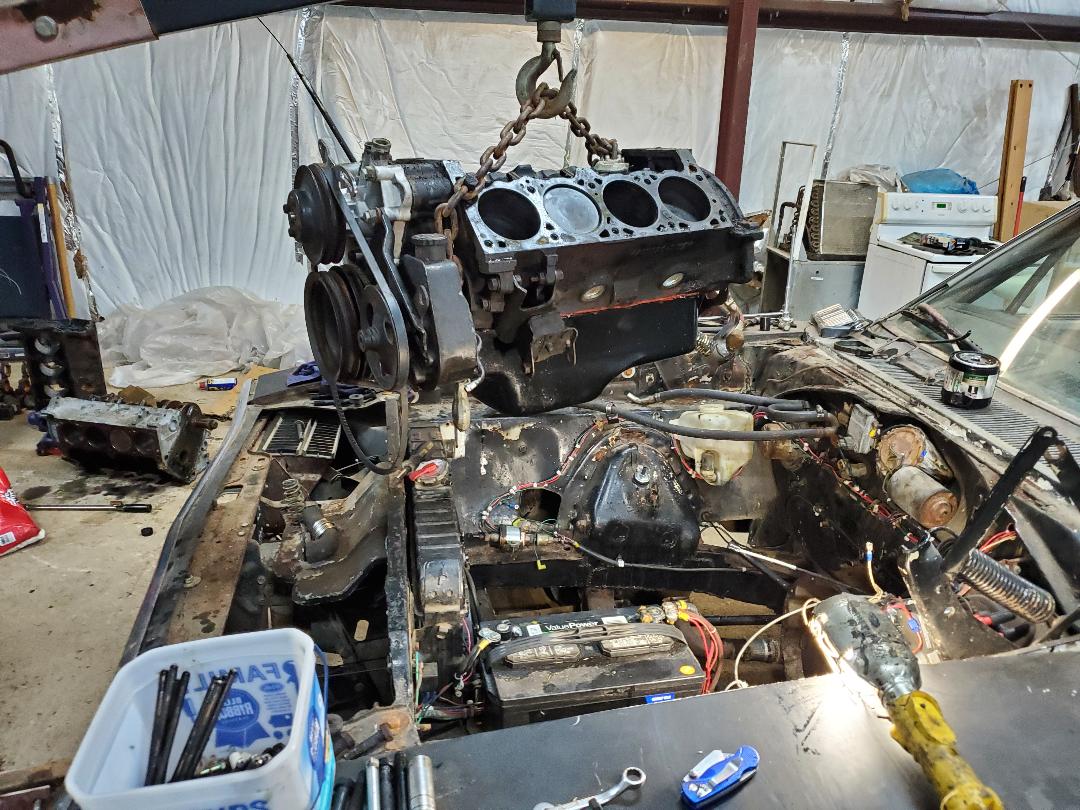 Short block being removed from engine bay of car. With the engine on the ground the oil pan came off quickly. I did take time to carefully cut the gasket glue around the gasket to try and remove the pan without damaging the pan gasket so I can reuse the gaskets upon reassembly. Everything came apart intact. I was lucky enough for the crank to be in a position where all I had to do was remove the connecting rod nuts and cap and knock the piston straight out. 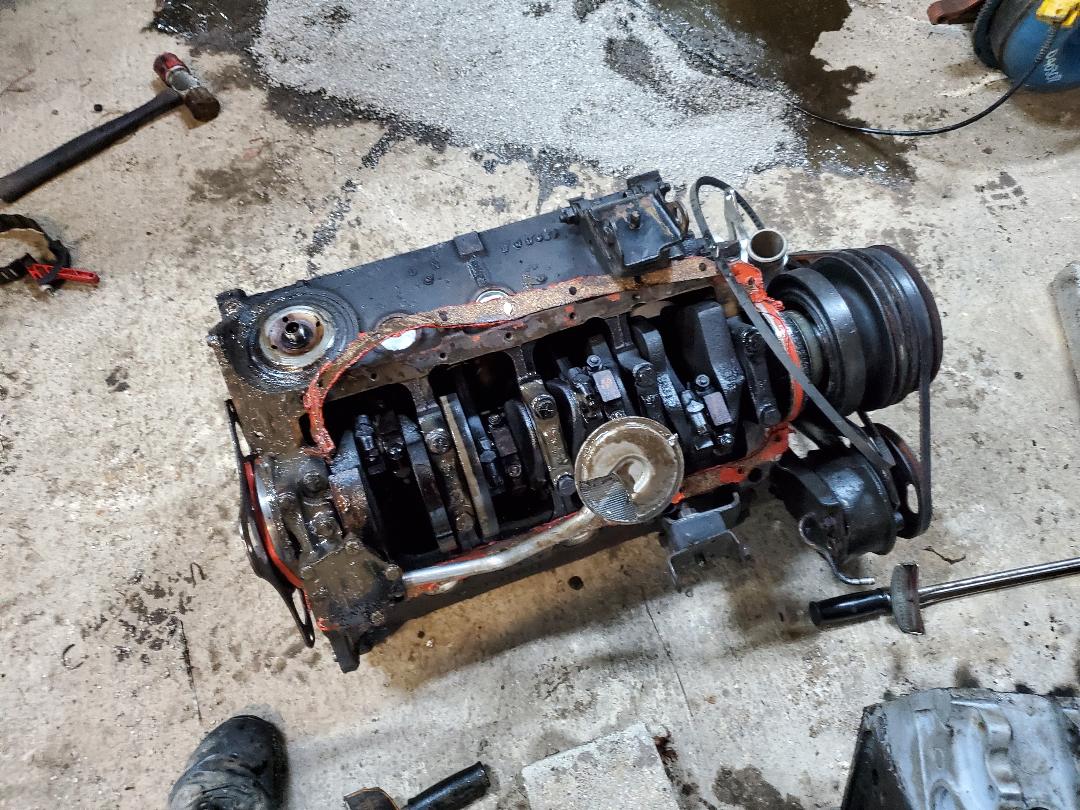 Engine on ground with oil pan removed. With the bad piston out, the question was now what. Of course I "borrowed" a piston from that spare engine that I couldn't get to spin due to the thing being seized up when things were torqued to spec. I pulled a piston free from the other engine and checked the bearings to compare. Surprisingly the bearings on the bad piston were still in good shape, not showing copper or scoring that would be common with a well worn engine. When I compared the bearings my suspicions were apparently correct. The bearings on the "rebuilt" engine were almost 2x as thick as the bearings on the bad piston. With proper torqueing there was no bloody way anything would be able to spin freely with these extra thick bearings all through the engine. I ended up reusing the old bearings with the new piston and reassembled that piston/rod set to the crank. I spun the engine over just for shits and giggles and found that the engine turned just fine so all is good. 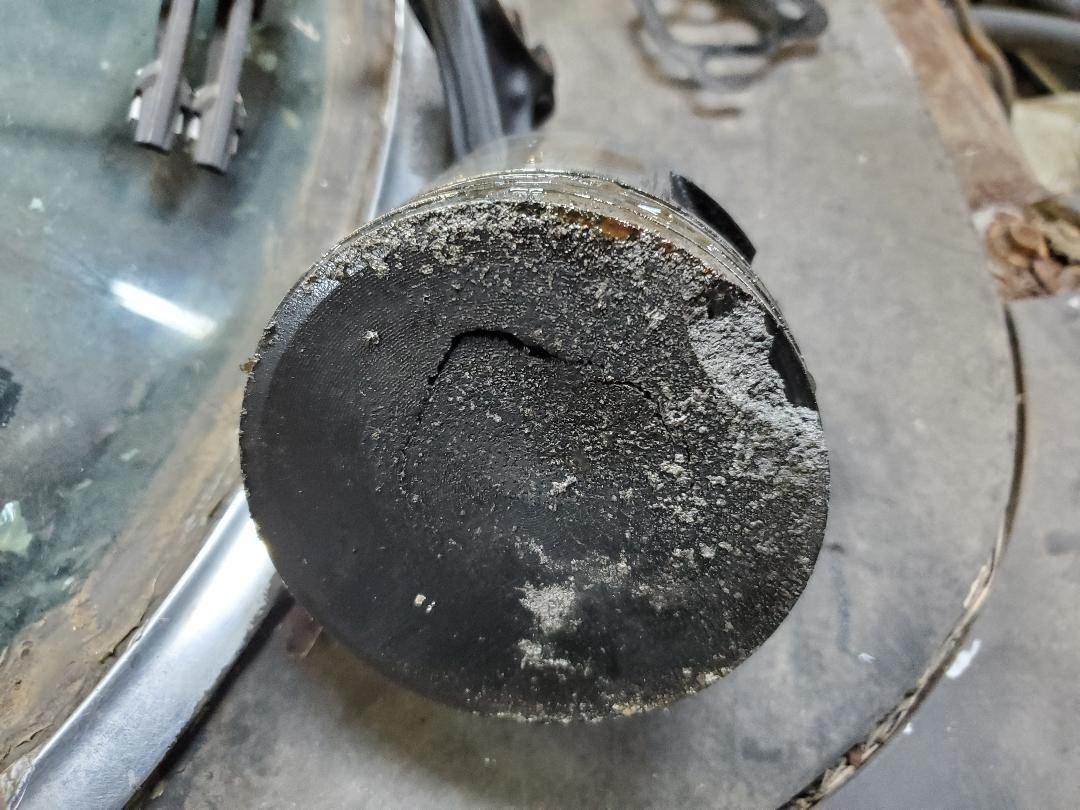 A better shot of the bad piston, note damage to piston, this thing is fucked up!
0 Comments
A few years ago I picked up a gas powered auger from Harbor Freight that has a 6" auger bit and is obviously used for drilling large holes in dirt, mainly for things like sinking fence posts in the ground. Since I've been working on setting up fences and with that, fence posts, it was high time to bring this tool out and put it to work in drilling post holes in order to make my life easier with regard to the amount of elbow grease expended in the process of installing the fencing. The auger is powered off of a 2 cycle engine, probably of a grade used on larger trimmers but is able to be handled by one person.
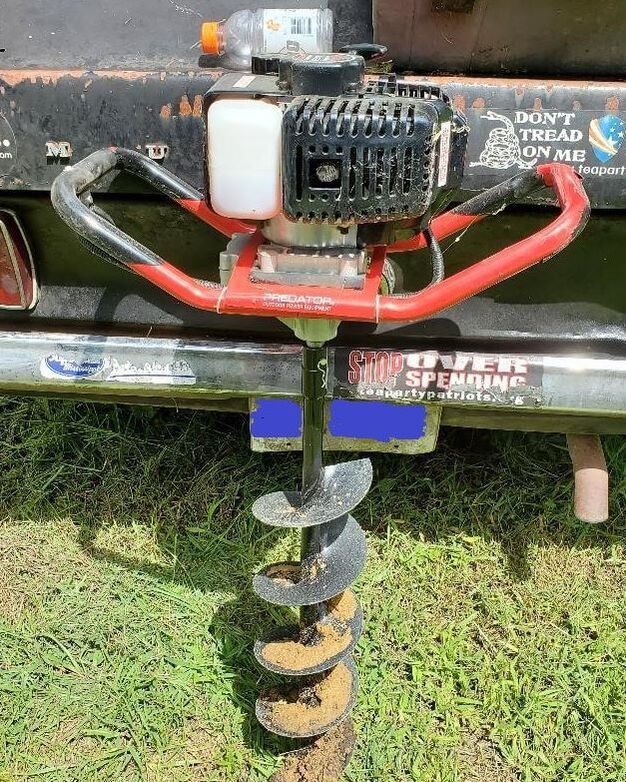
Gas powered auger after use
After using some premixed 2 cycle fuel I had laying around I fired the auger up and went to work drilling the first hole, in the corner of the garden where the dog kennel greenhouse initially sat but now is the new fence line to the garden, behind the drum planters that I set up earlier this year. The auger made fast work of the dirt, drilling well over a foot into the dirt before I was satisfied with the hole enough to go ahead and clear the dirt away enough to be able to put the post in the ground. I didn't want any dirt falling back into the hole since I was going to fill it with concrete. 
Post hole drilled out by auger, note the amount of dirt deposited around the hole after auger was pulled free from hole.
As with other posts, after setting the post in the ground I poured raw concrete powder around the post, then making sure post was vertical and concrete was tamped down before slowly pouring water all around the concrete and letting it soak in. After I was satisfied that the concrete soaked up an adequate amount of water I tamped the wet concrete down then made sure one last time that the post was vertical before measuring out where to drill the next post hole. 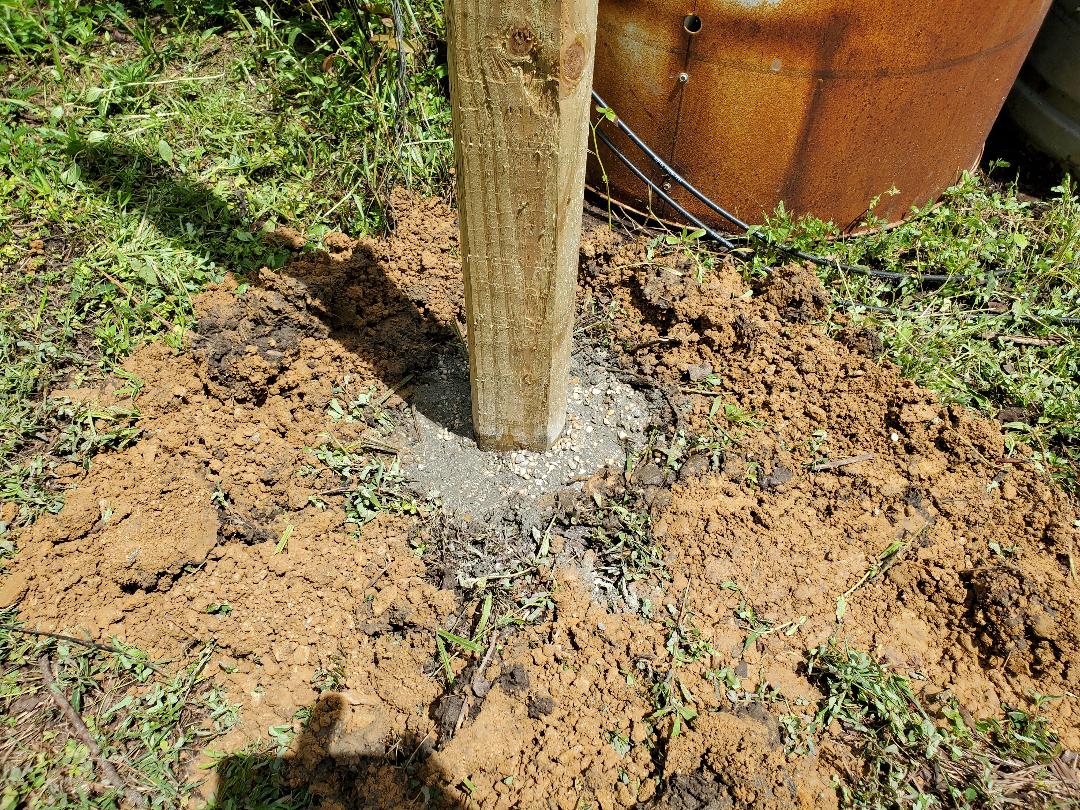
First post sunk in the ground at the new corner of the garden fence. This was a fast and thorough process.
After seeing how fast this went I took the other post, which was 8' in length and laid it on the ground, with the end centered with the first post. Where the other end of the post was I marked as the center for the next post hole. I moved the post then put the auger to work again drilling the hole. After clearing the dirt from around the hole I set the post and poured the concrete powder in and soaked it with water. Making sure the post was vertical I measured out another 8' by walking the distance between the first two posts and walking the same distance to where the third hole needed to be. I drilled it out then repeated this process with a fourth hole. I really just wanted to play with the auger some more. If the holes fill in with mud or anything because of rain I'll just auger them out again before sinking new posts. 
Second post sunk still behind drum planters and first raised bed set up next to drum planter. Again note the clean look of the whole setup. Gotta love the auger.
After seeing how nice this tool worked I had to kick myself for not pulling this tool out sooner to get post holes dug out. This was one of the main reasons I stalled with getting things set up for putting up fence panels, the idea that I didn't want to hand dig post holes since that is some back breaking work with this hard ass soil. Another thing this auger would be good for is drilling holes for sinking burial tubes for survival supplies or "tools". Since the auger bit is 6" and with some wobbling the holes are more than 6", a typical PVC sewer pipe will easily fit vertically in the hole, allowing one to sink a myriad of supplies all over a property with a low profile as far as someone trying to use a metal detector to find them. If the pipes were laid horizontally in the ground they would be more easily found compared to a vertical tube that has a mere 6" footprint. Plus since it is a gas auger, this operation can be performed anywhere you need to bury tubes, just be sure to make note of where you do put the tubes otherwise they may be lost forever.
With this final installment I was able to finally finish clearing the northwest corner of the area, the area by the chicken yard fence, the area where the tow dolly and car trailer are situated. Using the push mower as well as cutting down weed trees I was able to get things cleared up good. I wanted to keep going over the grounds with the push mower in order to grind up the mulch and any errant grass as much as possible. I'll probably end up trying to cover all of this ground with gravel and will probably put weed killer down to keep anything especially poison ivy from popping back up. 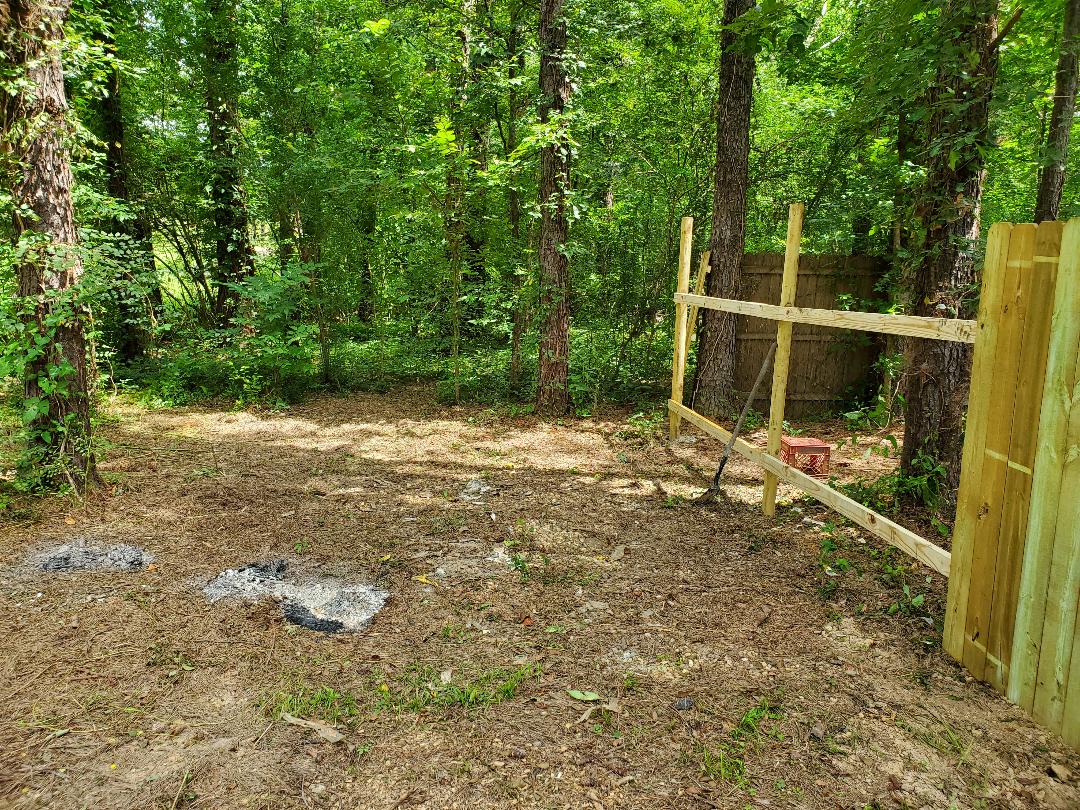 Cleared area by chicken yard fence, note how nothing remains on the ground other than what amounts to mulch. I took the time to make sure everything was cleared all the way to the main driveway, especially weed trees since all of this trash will interfere with my drilling post holes as well as just trying to drag and nail up fence panels to said posts. I want all of this area cleared of everything since I do not want to have to deal with any more weeds and especially don't want to have to deal with any damned poison ivy, especially if I find myself doing something that involves me having to kneel or lay on the ground, such as changing a tire on one of the trailers. 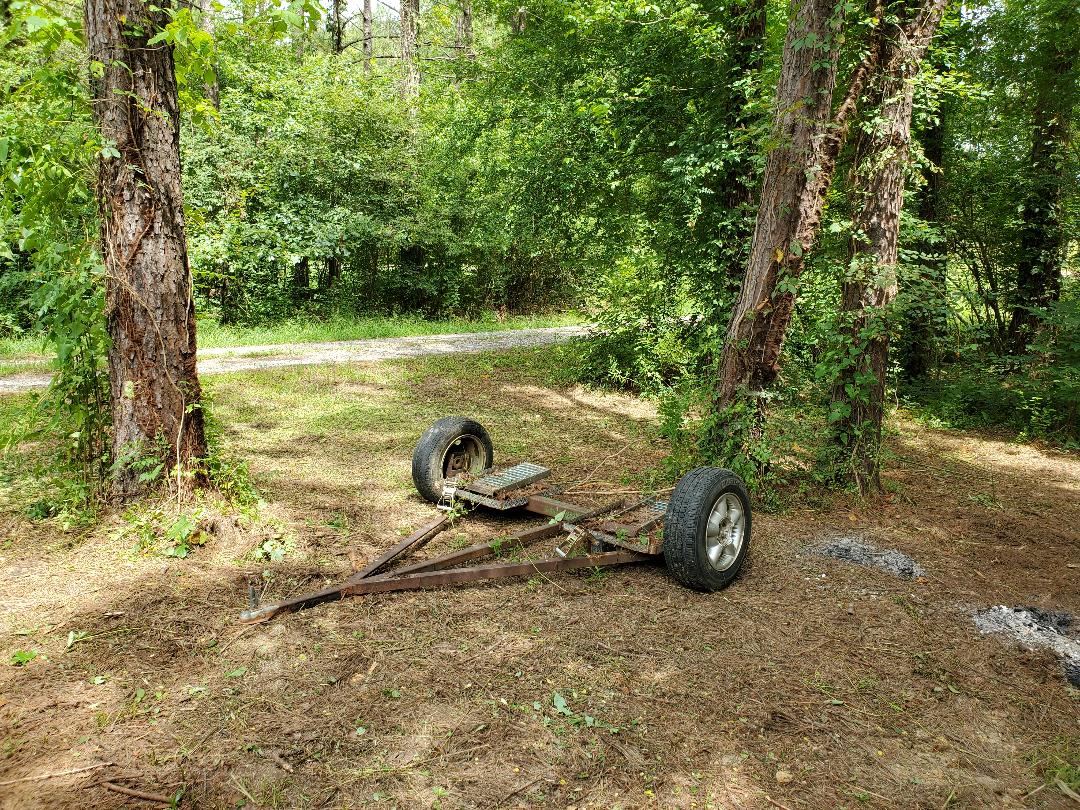 Cleared area going over to driveway. Note tow dolly staged in area prior to staging car trailer. After staging the tow dolly in its new spot in the yard I cleared as much as possible going back into the woods for the same reason as I did with clearing the grounds up to the driveway. When I have to drag fence panels into the woods to nail them up the last thing I wanna deal with is ground weeds and poison ivy getting in my way, let alone the trash that might interfere with my setting the panels up properly. 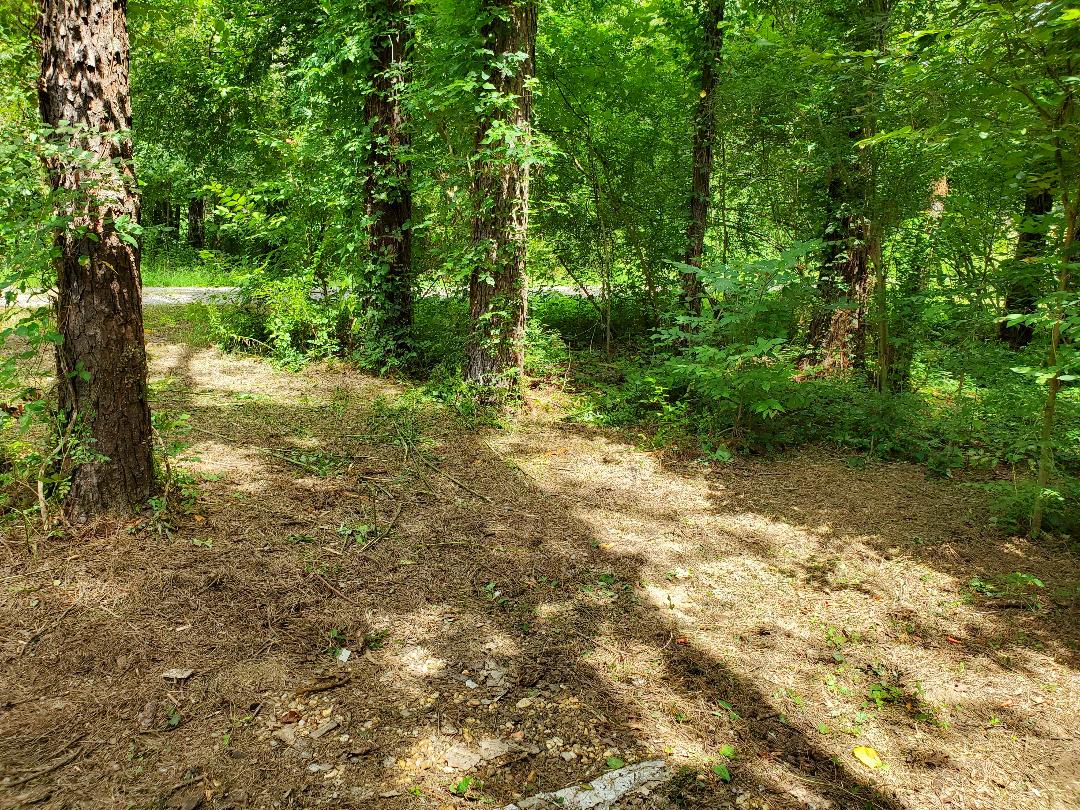 Cleared grounds going into woods to the north of the yard. The edge of the clearing is not where the fence line will be. The fence line is a few feet away from the edge of the clearing.
After getting the fence panels put up along the run going from the dog yard up to the car park I decided to start cleaning up the area by the chicken yard fence where I had put the portable garage. The portable garage has long since been stripped of its skin due to it degrading from the sun and the area had become overgrown with poison ivy and other weeds. My plan was to disassemble the portable garage frame and clean up the other stuff that is in this area, along with cutting up all the foliage and plant shit that is present in this area.
The goal of course is to get the area stripped of anything that doesn't belong there, in order to stage the car trailer and tow dolly in a way where they will be pulled from this area up to the car park area and out to the main driveway. This will be necessary as I won't be able to pull these trailers straight out into the driveway after I put the fence up along the driveway. 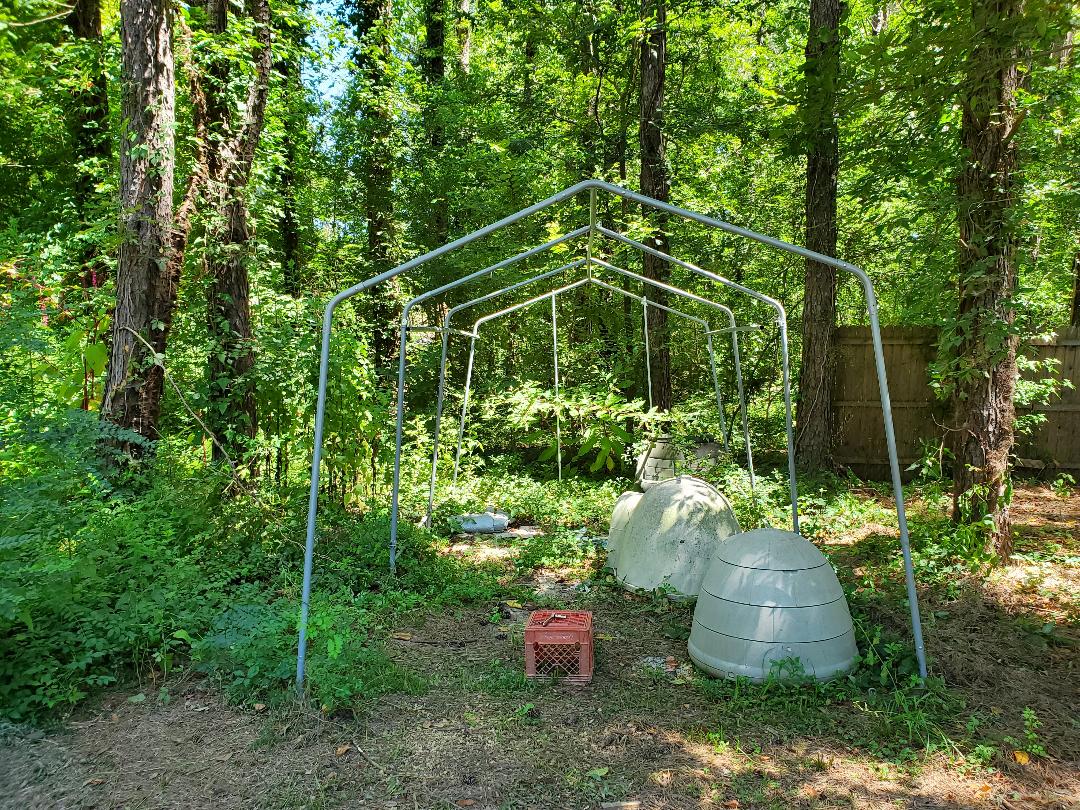
Portable garage frame and other stuff that was under the unit when it was covered. Note weeds and other brush around the area.
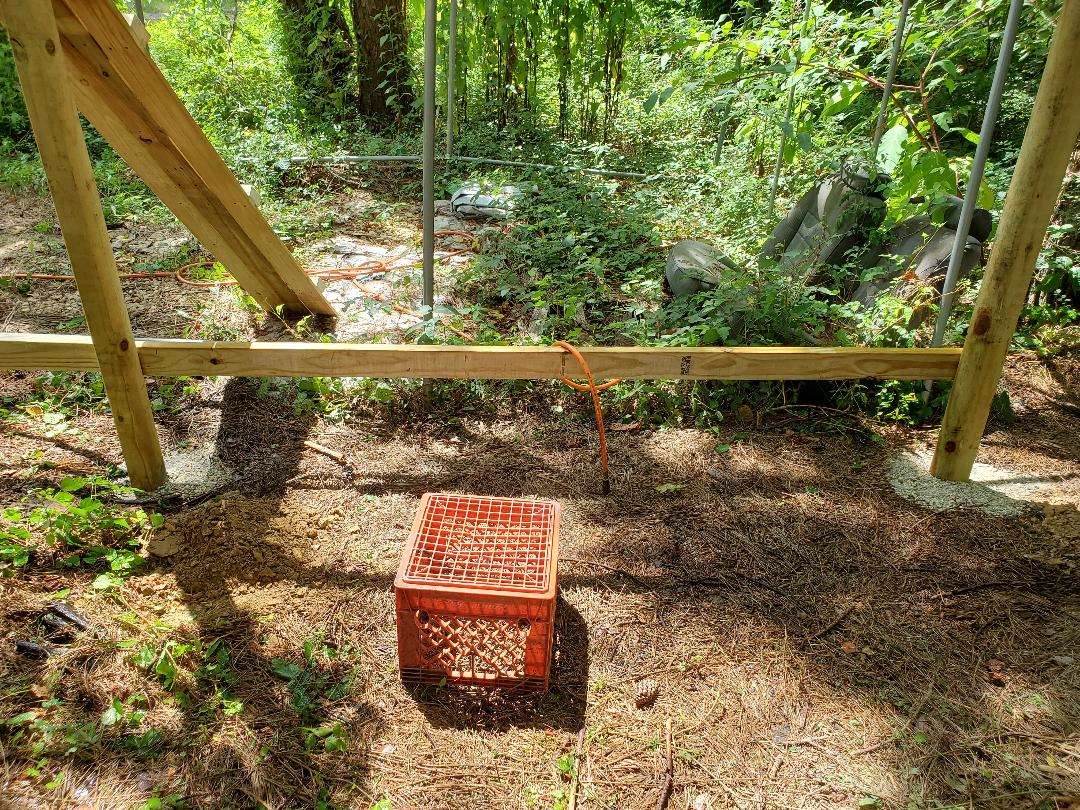
After clearing the garage frame and the associated stuff from the area where the frame sat, I then brought out the push mower to start going over the grounds cutting up the poison ivy and other ground weeds along with some of the pine mulch, trying to grind up as much as possible to help clean the grounds up. I also had to cut some weed trees and other shrubs to help in making the area cleaner. 
Mowing grounds to help clear area of unwanted foliage and other ground trash. Note burning can for sticks and other wood trash that was also uncovered under the mulch.
As can be seen in the last pic, the other thing I did was drag one of the half drum burn cans over to the site to stuff full of sticks and other wood scrap that was uncovered during the mowing. I wanted all these branches and large sticks gone since they would be a problem at any time mowing needs to be done in this area or when trying to do things like moving trailers around. Branches and the like would act as speed bumps or other obstacles if allowed to remain. So ashes to ashes dust to dust. 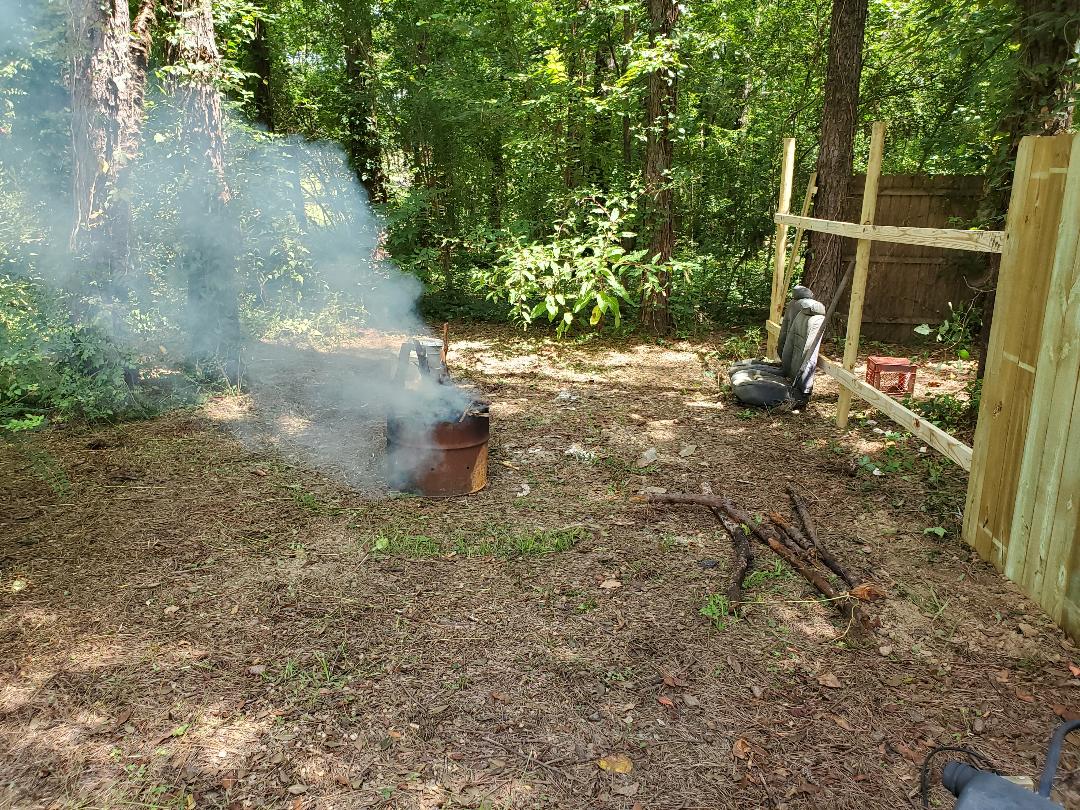
Can burning, note large branches uncovered to the lower right near fence line.
I managed to start making my way through the woods towards the main driveway as well. The tow dolly would have to be moved to facilitate the cutting of the ground brush and more weed trees would be cut down and removed to the burn pile in this process. 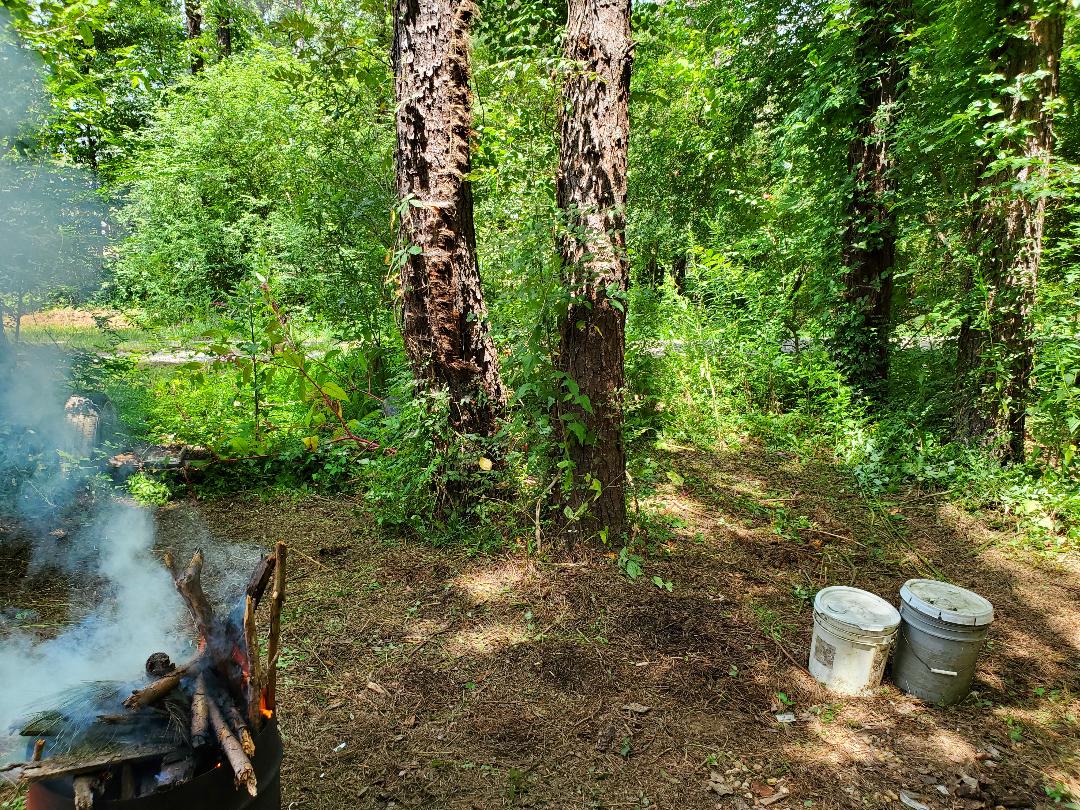
More cutting of the grounds moving towards the driveway. Note burning can in left foreground.
With the car trailer and tow dolly moved into their new places next to the chicken yard fence will I be able to start sinking posts and nailing up fence panels along the perimeter along the driveway to continue enclosing everything in. If I get a line run along the driveway to meet up with the car park area, then cover the length of run from the driveway to the chicken yard fence, I will have another area enclosed more, leaving the east side of the yard to fence in, going from the chicken yard fence in the woods, past the firewood shed and to the garden fence on that same end, and along the open ground to the woods only to double back a short distance to intercept the back of the old dog yard area fence, which makes up the perimeter fence on the south end of the yard. It will get done, supplies permitting.
Around this time I finally was able to get my hands on some whole fence panels as these things were in short supply. I needed four panels to finish covering the posts that will cover the section of fence going all the way up to the driveway. After hauling the four panels back, I was able to get to work. We moved the first panel into place and began nailing it up. Because things didn't line up as intended I had to use the "tie boards" to provide anchor points at the end of the last fence panel to secure the new fence panel. After getting this panel up the next couple of panels would follow the same route. 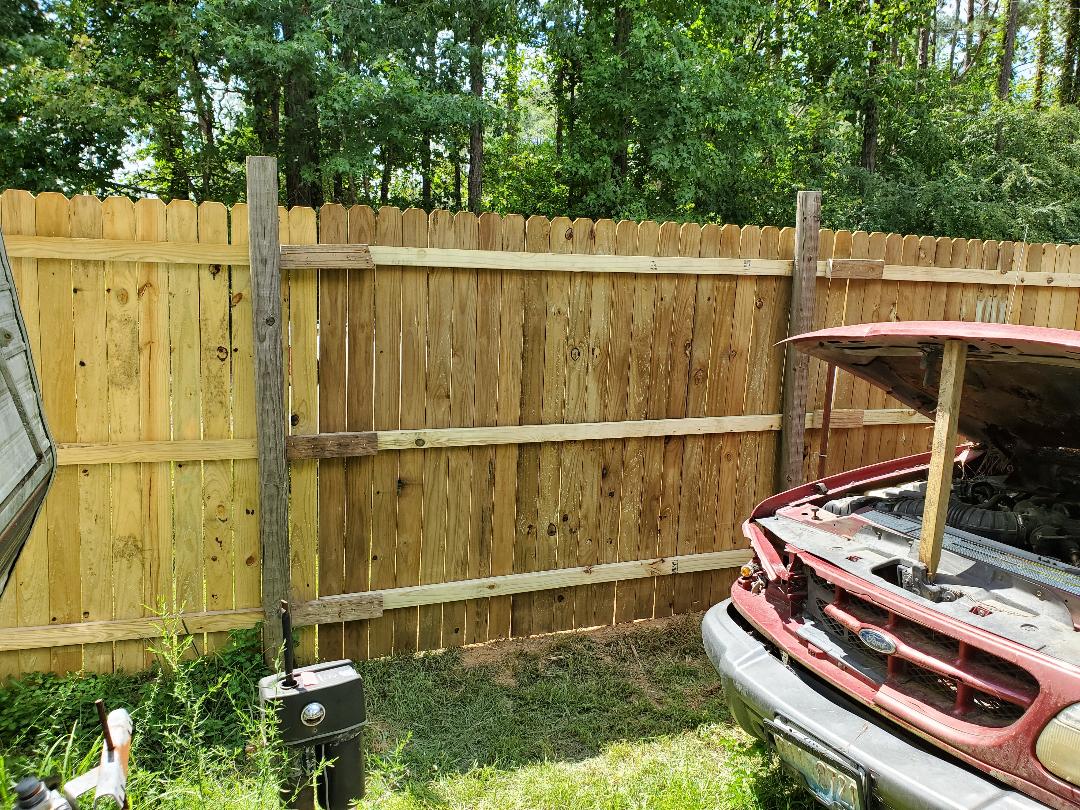 Two new fence panels put up, note the small 2x4 boards used to connect the ends of the panels to the other panels. On the third panel that would be at the end of the line before doing a 90 degree turn for the final section, I ended up having to trim a little more than a foot of the panel since they weren't perfectly lined up with the fence posts. Having to use the tie boards to secure the panels, I ended up having a little more than a foot of panel over hanging. Having cut this free I was able to get the panel lined up the way I needed so I can attach the final panel at the 90 degree angle to finish things up. 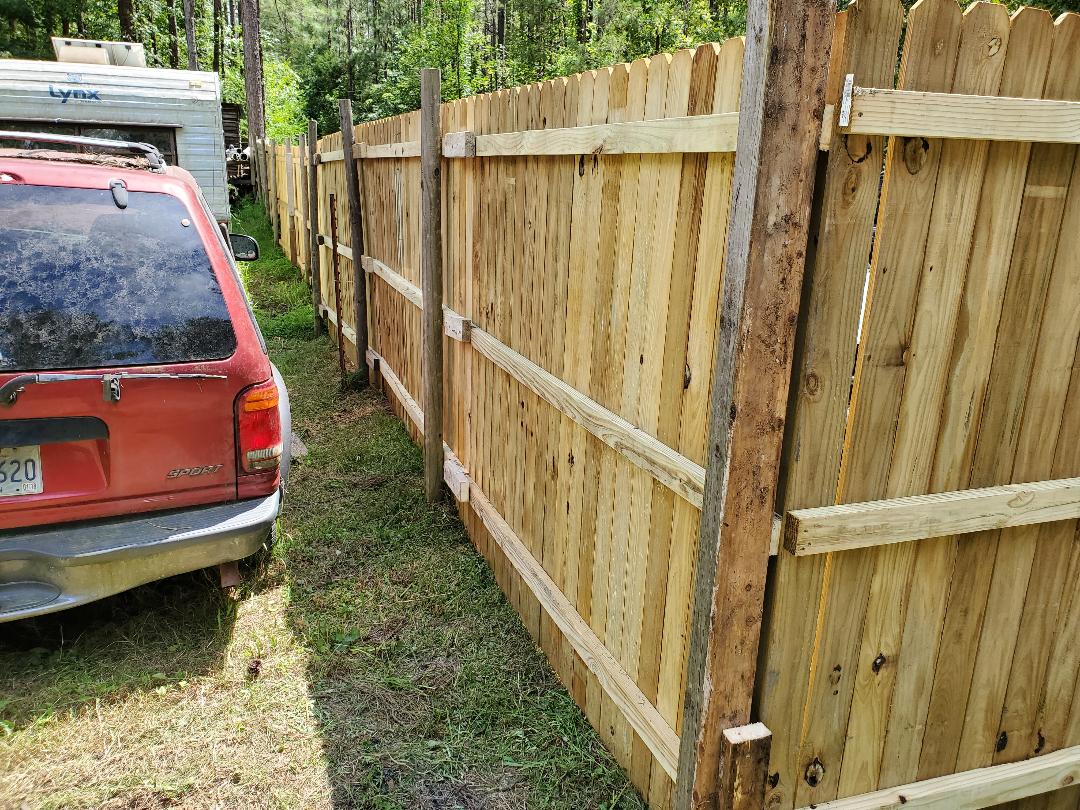 Fence panels up to the end of the straight line before angling 90 degrees for the final panel. As can be seen in the last picture, at the corner of the fence panels I had to add some 2x4's to act as filler boards for where the ends met at. This aided in supporting and attaching the ends of the panels together, much in the same way the tie boards helped attach the ends of the boards along the rest of the fence. With everything secured like this, the last panel was attached and the gaps filled in at the corner so as to complete this section of fence. 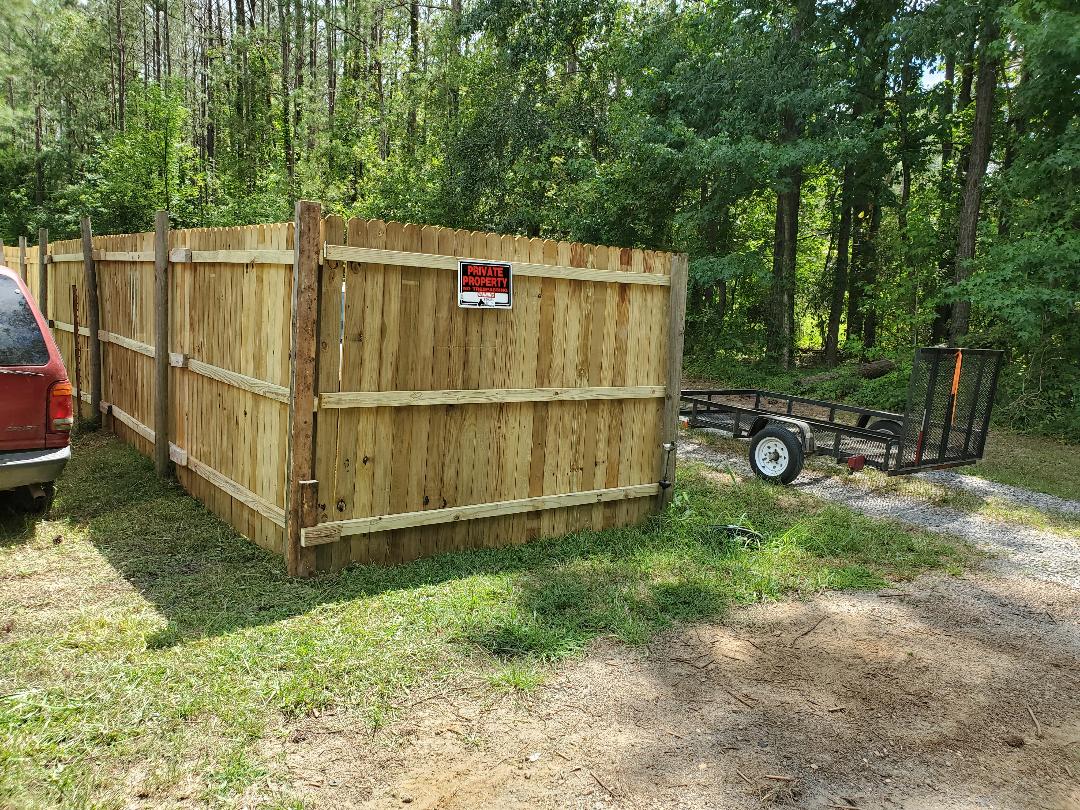 Last section of panel attached and completing the length of fencing up to the driveway.
With the materials in hand I can now continue to assemble the chicken yard fence almost to the end where the perimeter fence. I had to sink a couple more posts after I put the one in by the tree stump since the imaginary line for the fence to be straight took it over a foot away from the trees that were originally supposed to be "posts". This is no big deal, I did get extra posts just for this type of situation.
After sinking the posts I was able to nail up the 2x4s to help in keeping the posts steady and straight while the concrete cured. On one post I did use a section of fence panel that was cut from a larger panel to act as a brace to hold the works straight up. 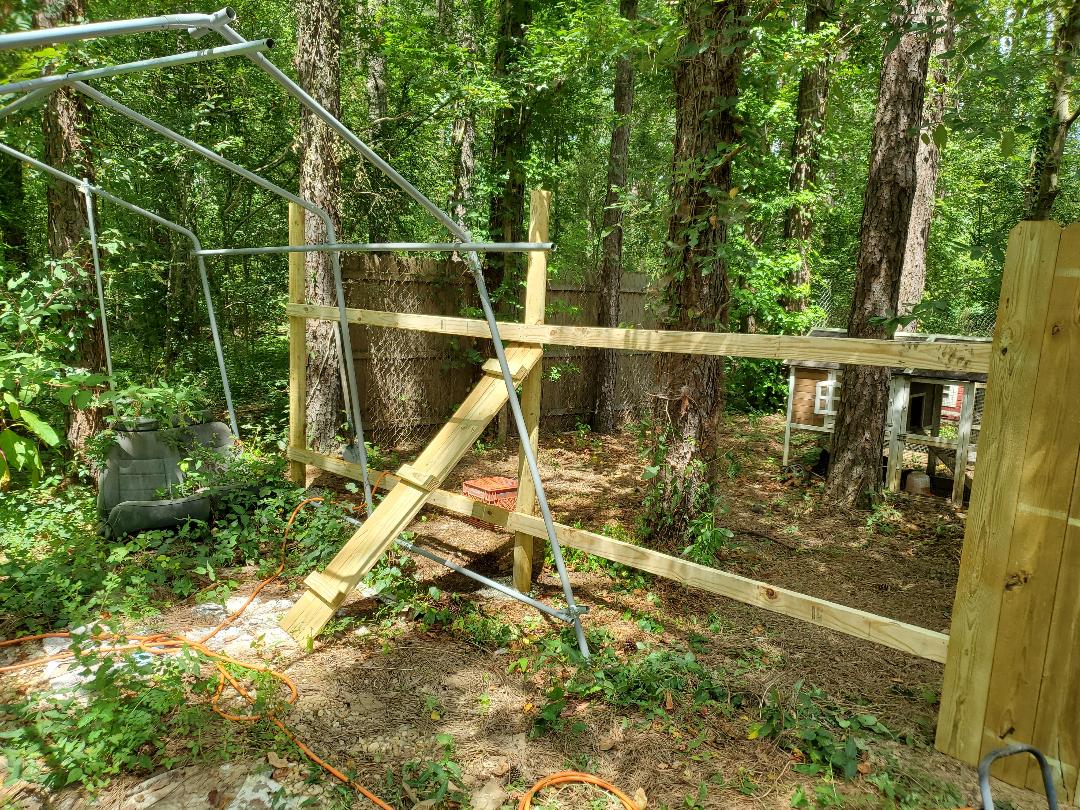
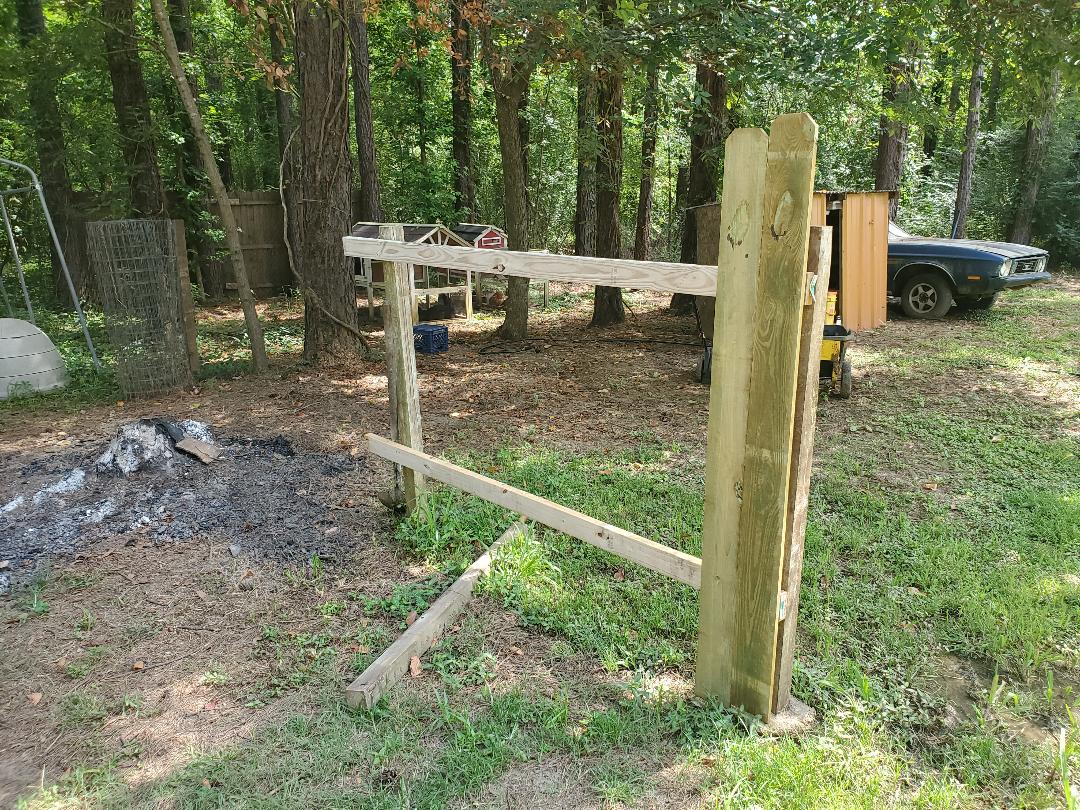
Posts sunk in ground with 2x4's nailed in place and support panel holding things upright.
Closeup of posts in ground with 2x4s nailed up, note concrete around bases of posts.
With the boards up I went back to tacking up fence panels to exhaust my supply of units. Running through brad nails I got all the panels up, leaving the two sections remaining as can be seen in the previous picture. 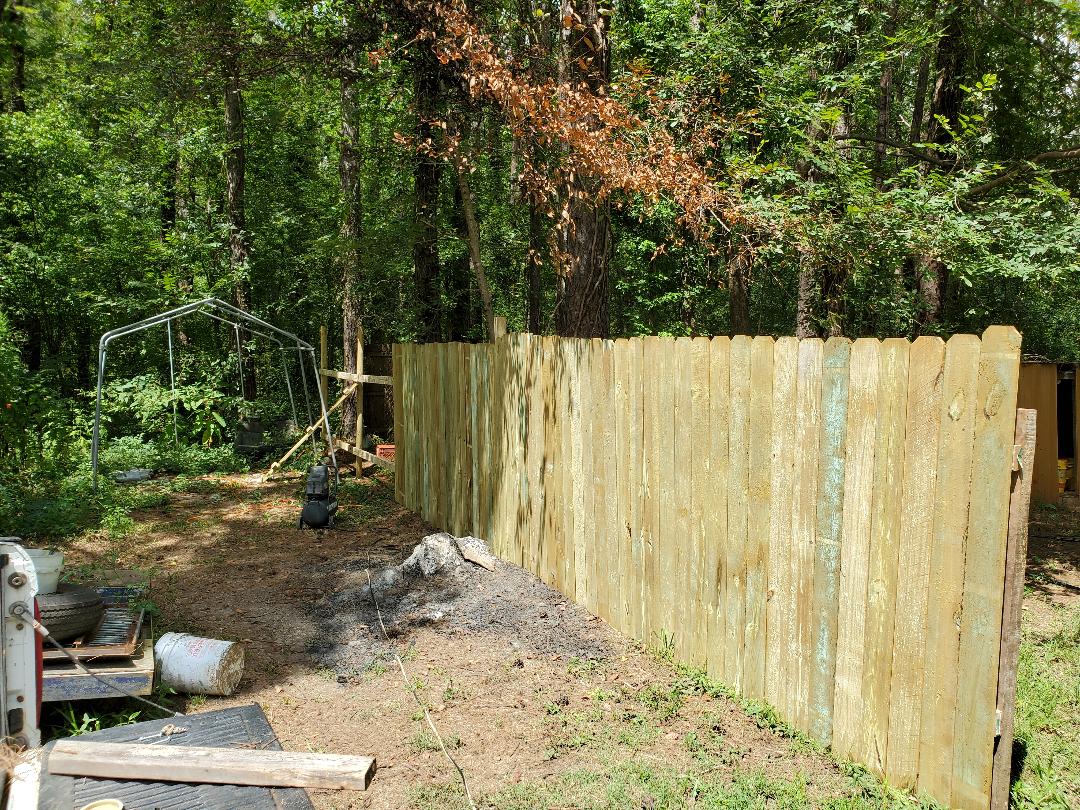
Line of pickets nailed up along chicken yard fence.
With the fence almost done up to the last post I sunk in the ground I did run across another problem. Since I wasn't using the trees as posts, the last post is in a position where it is a few feet from the perimeter fence line while also being a few feet from the last tree that is serving as both the end of the old chicken yard fence and the perimeter fence. What this will end up meaning is I would have to put a whole panel up against that tree and against another post sunk in the ground along the perimeter fence line then fill the few feet gap between the end of the new chicken yard fence and the back of the perimeter fence. Its either that or a newer idea, adding a small gate to this zone right here. While this will mean still adding a post in the ground near the tree, I can make a bit of a channel with some more wood and fencing so access can be gained to the chicken yard without having to go through the rest of the fenced in area or through the house. The reason behind this is that when we're out of town we have our neighbor watch the house and tend to the chickens and since our plan is to let the dog roam free within the confines of the yard after the fences are closed down, without the fence idea implemented, he would have to go through the fenced in yard, with the dog. Rather than trying to get the dog used to him to that degree, it would just be better to add an outside access gate to the chicken yard that can be locked at any other time but opened to allow access for the neighbor when he's tending to the birds. This gate would be in the woods and would require a corridor going from the driveway through the woods leading up to the gate. That will mean some more brush clearing and finishing of the grounds so weeds and other shit don't grow back over the area. That'll mean gravel for the walkway and complete clearing of brush and other weed trees from the area several feet on either side. Routine maintenance would also be required but once everything is established, keeping things trimmed up wouldn't be too bad. I would probably even go as far as to add some light to the corridor from the driveway for guidance if the yard is to be accessed in the evening such as when he gets home from work during the winter hours when it gets dark much earlier. Rather than trying to half ass these things I would rather take the time to actually make the end product be nice and worth looking at and worthy of praise because time was put into actually making it something nice versus just throwing it together just to have something done, regardless of quality. Until the next time.
After getting the extra stuff to continue with the fence I was able to get my nailing on. Using the trusty nail gun I was able to nail up a bunch of pickets from the batch I had to pick up. I had already been able to nail a couple of the first batch of pickets to the 2nd section of fence so now with this batch I finished the 2nd section and had extra left over. 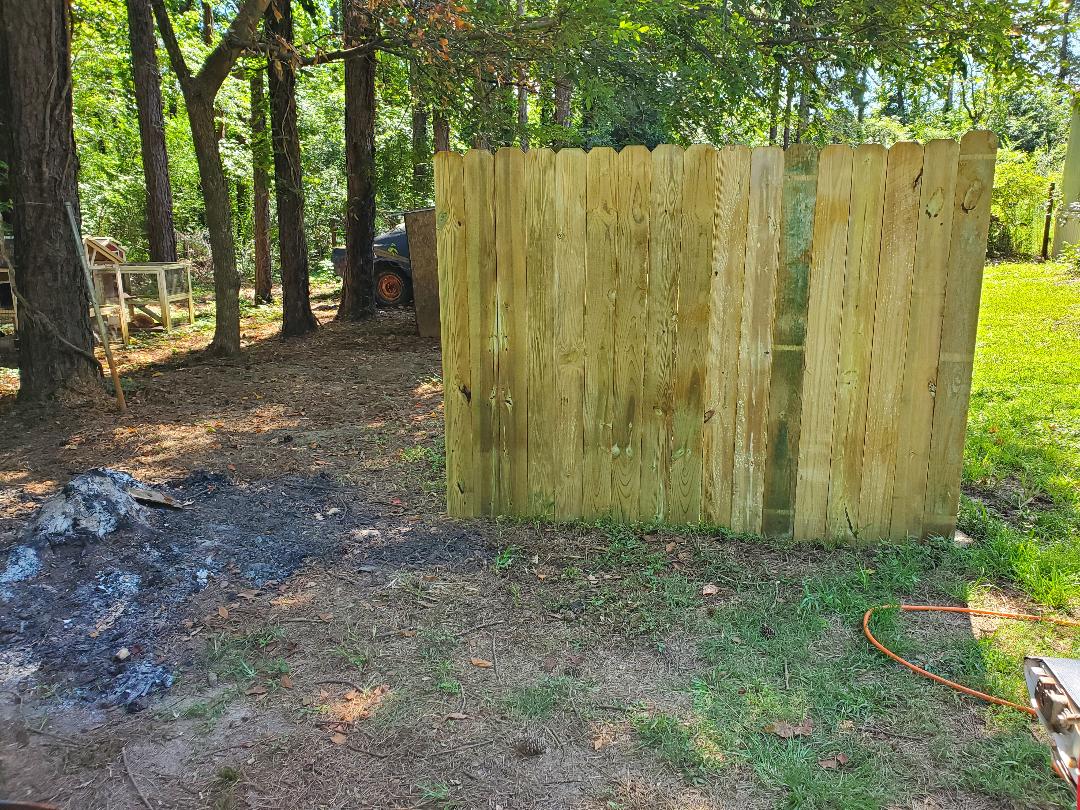 2nd section of fence pickets installed. I couldn't go any farther with the fence even with the 2x4's since I had to replace the missing fence post. In this instance I had to dig out the hole to prep it for the post and concrete. After the tree came down it pretty much messed up the ground enough that the hole was pretty much fucked up. 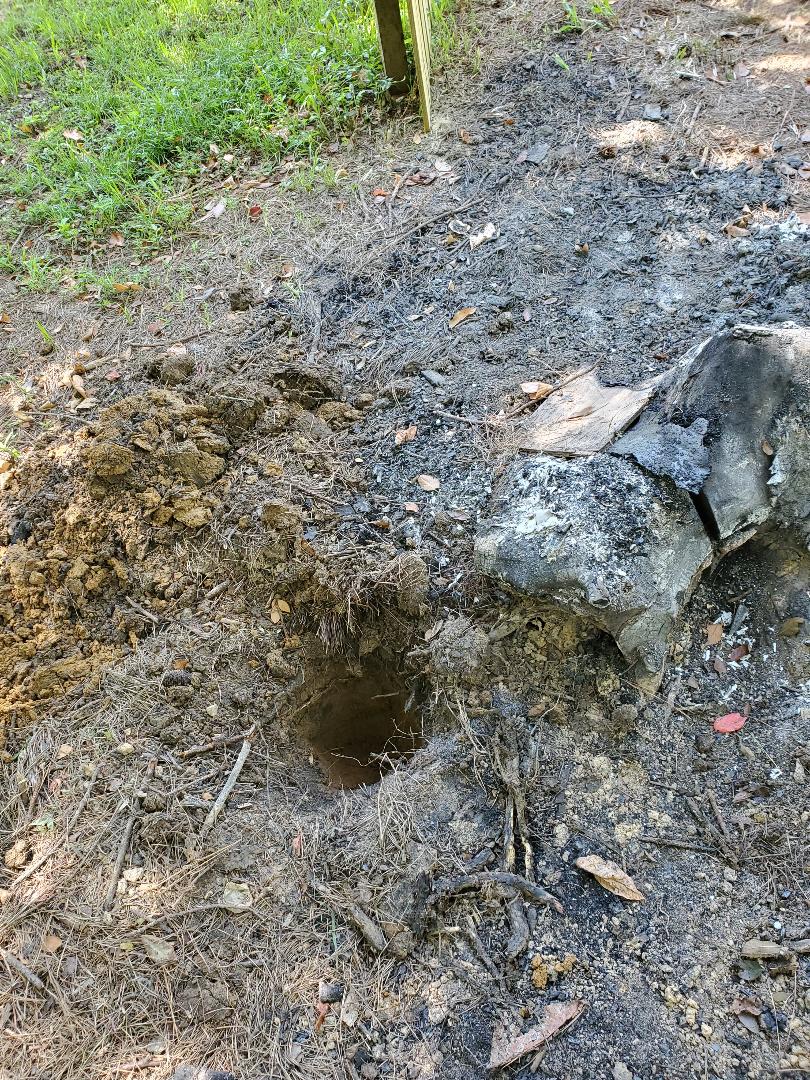 Hole dug out for fence post, note burnt tree stump from the culprit tree that messed up the hole and the old fence post that was right here. After getting the hole dug out I moved on to a side job in this area since I couldn't go any further without the fence post. I started disassembling the portable garage frame that was standing in the area right along side the fence line to the chicken yard. Since the skin has long since been removed due to being sun-rotted and the garage isn't needed in this spot anyway, it needed to come down. Besides, my plan is to back the car trailer into this very area since the perimeter fence will prevent me being able to just tow the trailer straight out into the driveway. Along with the tow dolly, they will both be parked in this little area between the chicken yard fence and the perimeter fence. Of course I do have to clear the ground cover and other brush, mostly poison ivy with some weed trees. That will of course be fun and I shall enjoy plenty of itchy days afterwards. Portable garage and miscellaneous crap that was stored in this area that will all need to be removed prior to parking car trailer here.
The next large scale project on the list is the fencing around here. While we've already been putting up panels along the perimeter fence line along the driveway, there is a matter of the length of fence that is dividing the chicken yard from the rest of the yard where cars are frequently parked and/or worked on. Regardless of what's done with the "car park" area, the chicken yard needs to be fenced off within the fenced in yard so the birds can be allowed to roam free within the large area that makes up the chicken yard without having them all over the rest of the area that will also be fenced in.
Now there was a fence that was up in the past, made of 5ft high wood posts with chicken wire fencing stapled to them. The gate that we made a long time ago has long since been dismantled due to degradation and the chicken wire fencing has been removed. My plan was to nail up 2x4's, two at a time per section and tack on fence pickets. Since the posts are only sticking up 5ft from the ground versus the normal 6ft, using regular fence panels would've been hard without some super tacky fabrication since the top board in each fence panel would not have been able to be tacked up to the fence posts. Besides, since this is technically an interior fence, it doesn't need to be super strong compared to a perimeter fence. So with that I already had started nailing up some 2x4's I already had on hand. We managed to find some cheap pickets at Lowe's (they've been in very short supply along with complete panels) so we grabbed 60 of them for the fence. The ole lady was able to put 20 pickets in her car while I had to go to Lowe's the following afternoon to retrieve the remaining boards. At the same time I also planned to grab some 2x4's for the following sections of fence and some more landscape timbers and concrete for when I had to replace one of the old fence posts due to it being rotted out. It didn't take long to tack up the first section of fence. The smaller brad/stapler/nailer made fast work of the fence pickets, getting them nailed up in no time. Since there is a grade to the land at this spot, the top of the fence clearly shows its angling downwards away from the house. With the 20 pickets I was able to get the first span of fence done and get a couple of boards on the 2nd span after nailing up a couple more 2x4s I was able to fish out from our stock. 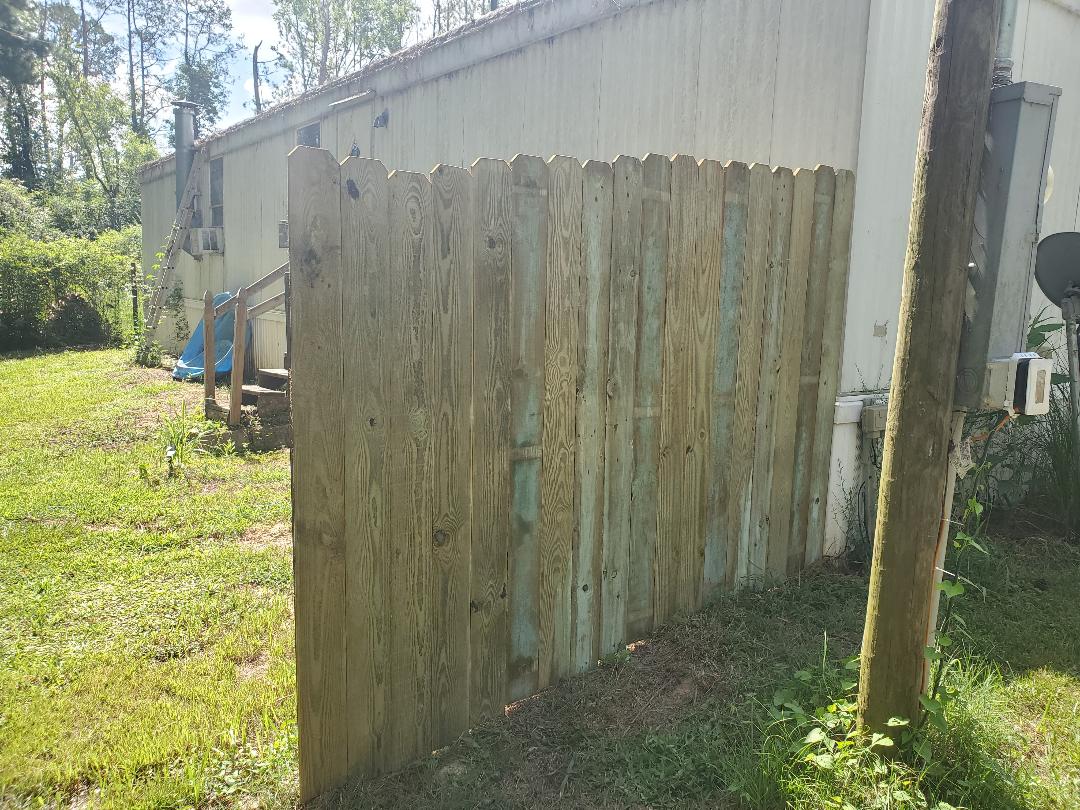
First span of fence installed, note downward grade from right to left, following the angle of the ground
Remaining pickets nailed to boards on second span/section of fence. Note mismeasurement of where posts needed to be.
Because the old fence was using chicken wire for the fencing, it was not critical to get the spacing perfect. Most of the posts were not spaced at 8ft intervals like they would've needed to be for pre-made fence panels. Because of this, the 2x4s on the 2nd section overshot the post by almost a foot. This will mean having to use some short pieces of 2x4s to act as tie boards for nailing the next pair of 8ft 2x4's to the following posts as the fence comes together more. This is no biggie, we're looking for functionality on this fence and the aesthetic side will be what's visible from the outside anyway. All one will see is pickets, not the 2x4s or posts. Another thing that I added were some reinforcement boards to the end of the first section of fence, mainly because when we do make a pair of gates for the open section, I wanted to make sure that the section and its post have good support and a surface with which to mount the hinges to the gate. This was done by taking a couple of 2x4s from our stock and nailing them up along the post that comprised the first section of fencing. This way the hinges will have a nice solid mounting point where the gate won't sag or come loose due to inferior mounting. 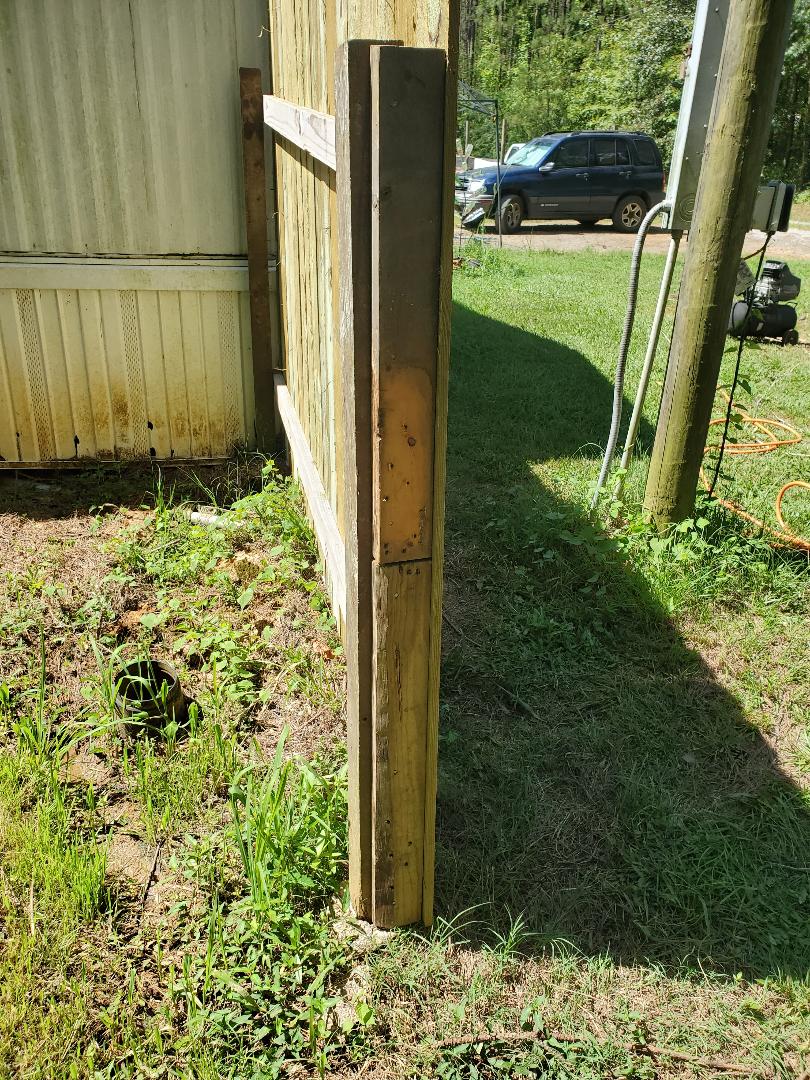
Reinforcement boards nailed to fence post to add support and provide a solid surface to attach hinges when the gates are hung.
Once the rest of the building materials are picked up I will be able to finish the 2nd section of fence as well as replace the bad post and start on the following sections of fence. The fencing around the homestead is coming together nicely, so far.
After using the zero turn mower a couple of times earlier in the year we determined that the blades were long overdue for replacement. After pulling the deck free to remove the blades I went to pull the retaining nuts from the blade end of the spindle shafts. All three shafts ended up having to come out in their entirety since the nut on the blade end wouldn't come free. Only the nut on the pulley end would come off so I just removed the blade with the spindle shaft on each spindle. Two of the spindles were ok but the third one fell completely apart so that meant what I suspected, the spindles would need replacing. Since these things are expensive if purchased locally I went online to source the replacement spindles. I had a couple of new blades but would have to pick the best of the three and sharpen the edges with the die grinder. 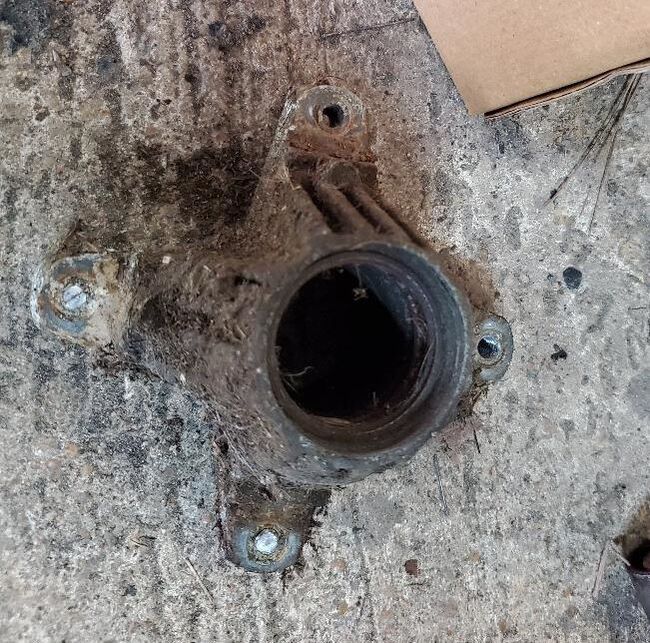 Busted blade spindle that fell apart from the inside out. 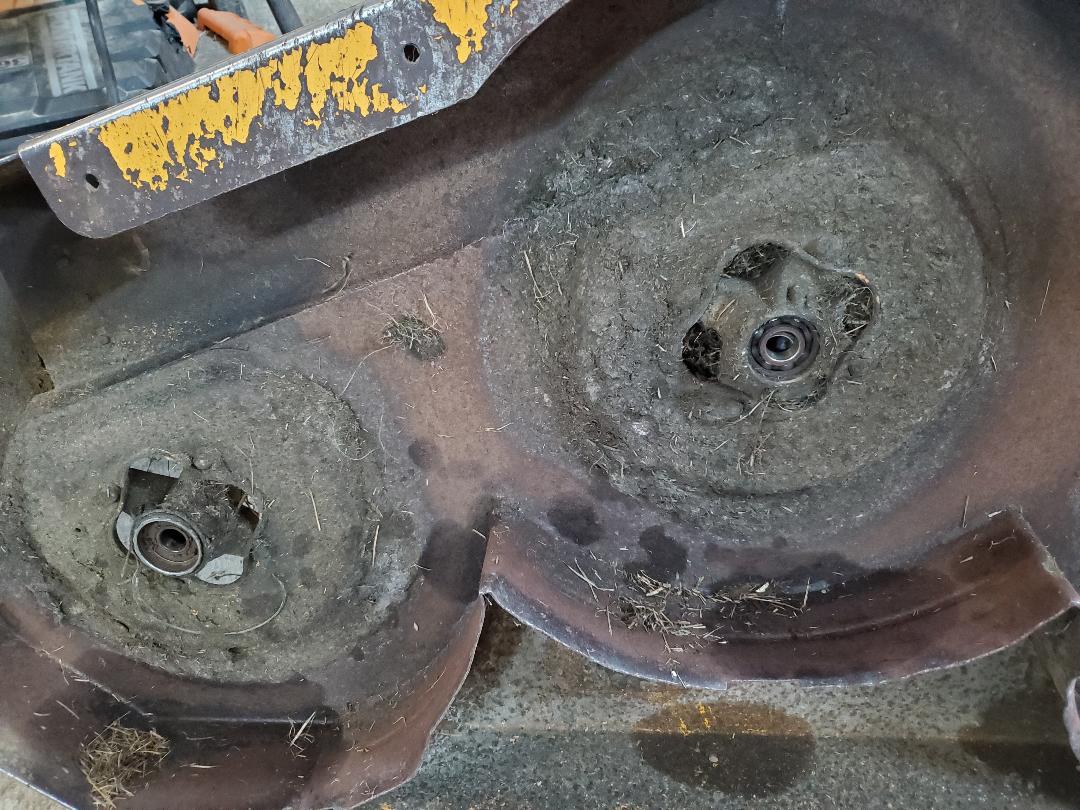 Old spindles in deck After getting the new spindles I commenced to pulling things apart. I installed the new blades and sharpened the one old blade I chose to save. Everything wen together pretty fast, no big deal. Only thing was I ran out of time prior to being able to reinstall the deck and hooking everything up. 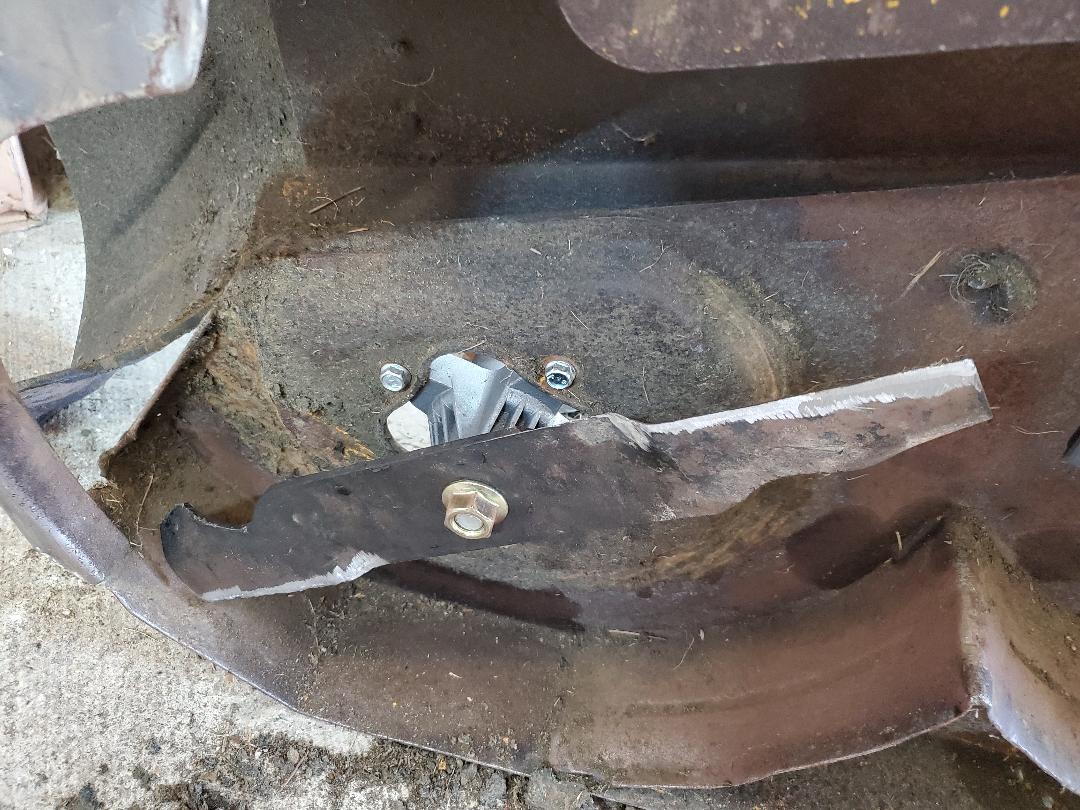 Old blade sharpened and mounted on new spindle. 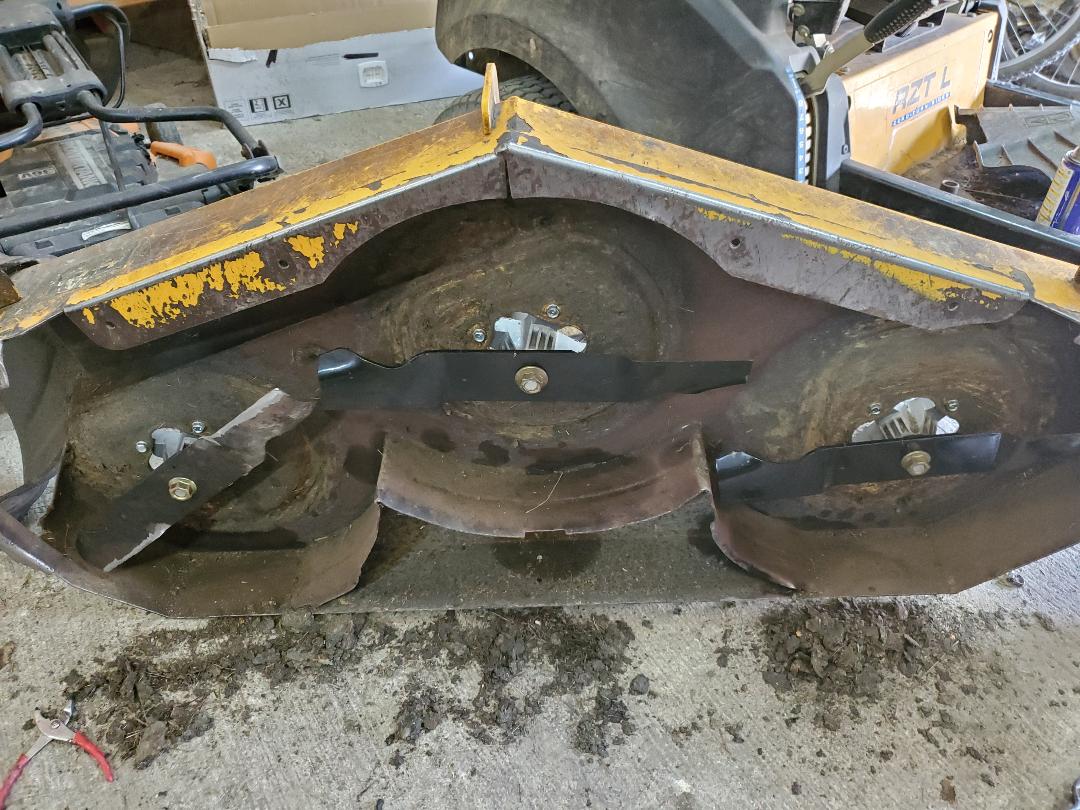 Blades and spindles installed and deck ready for reinstallation. You would think all was well and I can install the deck right? Wrong. After laying the deck down I noticed that the pulleys on the new spindles were setting higher than the tensioner pulleys on the deck that engage the drive belt for the blades. After doing an examination I came to the obvious conclusion that the new pulleys were wrong for this particular model and/or sub-model of mower. Fuck. After looking at my options, which were very, very few, I came to the conclusion that I would have to remove the blades, pulleys and entire spindle shafts and relocate the bushings that spaced the pulleys and had them riding higher than the tensioners. I would end up putting the spacers on the blade end of the shaft, which would bring the blades lower to the ground as the shaft would be lower as it sits in the spindle. 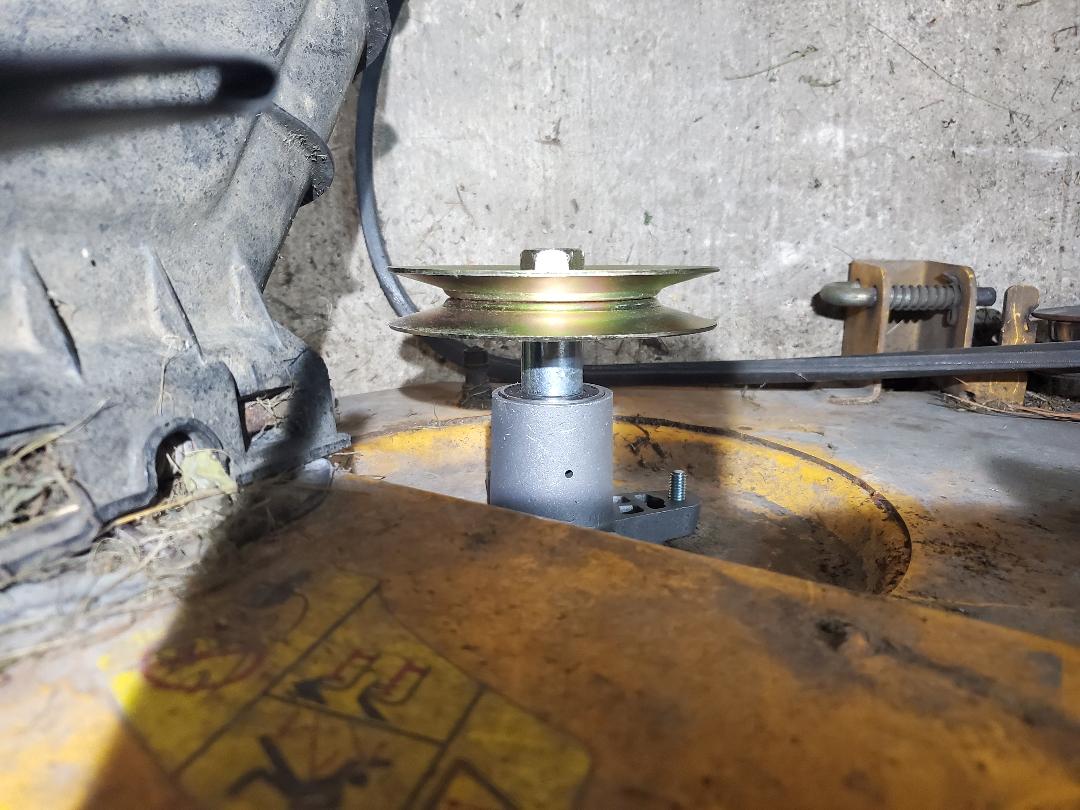 Pulley mounted too high on the new spindle, note spacer under pulley that had it higher due to a longer shaft. This wasn't straightforward though. I had to measure the gaps to determine how big of a spacer would be needed to bring the shaft down low enough that the spline for the pulley would be at the same level as the tensioners. After doing this I was able to use the die grinder to cut pieces from the spacer bushings so I could install these new spacers on the shaft then reinstall the blades. The new position that the shafts sat in brought the pulley splines in line with the tensioners, allowing me to put on some small spacers on the top for the pulleys to rest on while on their splines so as to lessen any wobble that may be present. 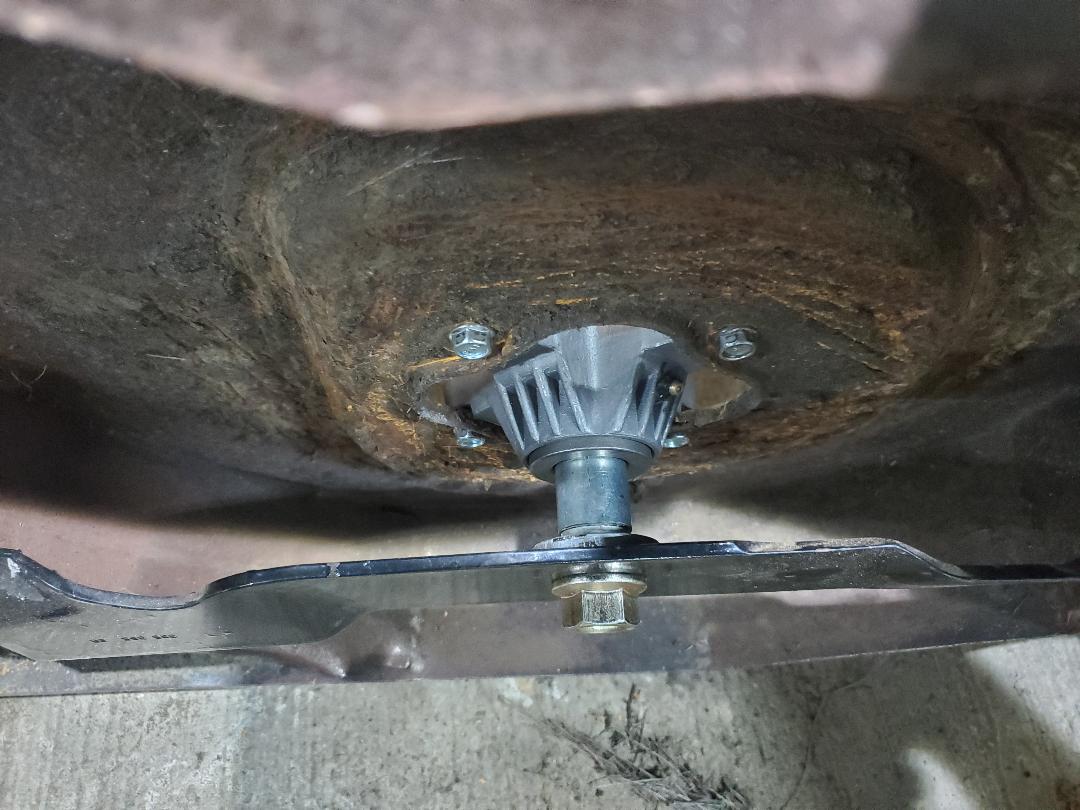 Blade mounted lower due to whole spindle shaft being brought lower due to putting spacer on blade end versus the pulley end as originally configured. 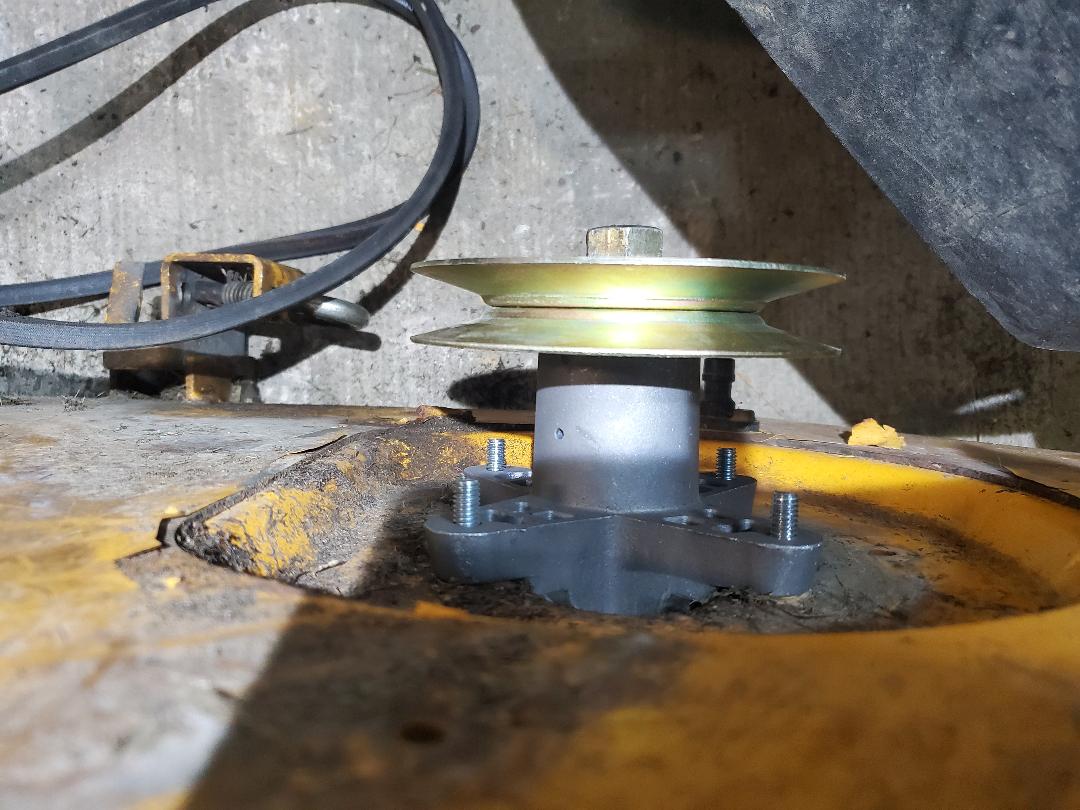 Pulley remounted lower on spindle due to spindle shaft being brought lower relative to spindle body. After finally getting the front struts for the Tracker, I took time over the weekend to get some work done. Obviously the first thing was the struts. Starting with the driver's side, things were pretty easy going as far as disassembly minus the idea that two of the wheel lugs were stuck and after putting a breaker bar on the lugs, I ended up snapping the studs off with the lugs. The lug nuts were obviously trash but the worst part is the idea that I would have to knock out the broken studs and replace them with fresh ones, which I did not have any in house. This meant sending the ole lady to Auto Zone to pick up some fresh ones along with lug nuts. While waiting for the new studs I just went ahead and pulled the old strut off. I was able to replace the unit with the new one but to replace the studs I had to pull the bracket for the brake pads and caliper so I could pull the rotor free to expose the wheel bearing assembly. With the baby sledgehammer the old studs came out easy. I went ahead and put the rotor and wheel back on without putting the brake hardware back on since I would have to pull the wheel and rotor off again to replace the studs. This was so I could move to the other side and jack it up, allowing the weight to sit on the wheel instead of a jack stand. Moving to the passenger side, I was able to pull everything apart without breaking any studs. The strut here was swapped out fast and everything reassembled with no resistance. With that, I just had to wait for the studs. Despite the rear shocks still being somewhat good, the front strut/shocks were shot. 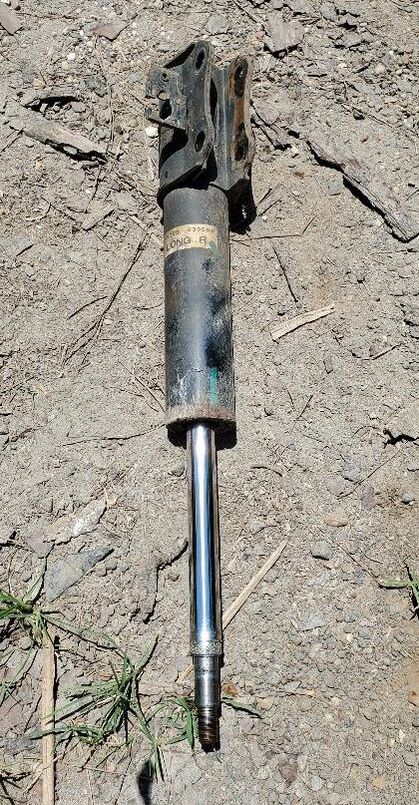 Old shock after removal. Shaft was easy to push in and would not push back out, ie: Dead. With the new studs finally in hand I went back to the driver's side and jacked everything up and pulled the wheel free. I had to hammer the stud in with the baby sledgehammer until I got the stud almost all the way in. Same for the 2nd stud. Once that was done I reassembled the brake hardware. When I put the wheel back on and used the impact wrench to drive the lug nuts, the two new studs were pulled all the way home from the screwing down of the lug nuts. With that I was finally done with the strut job on the Tracker. 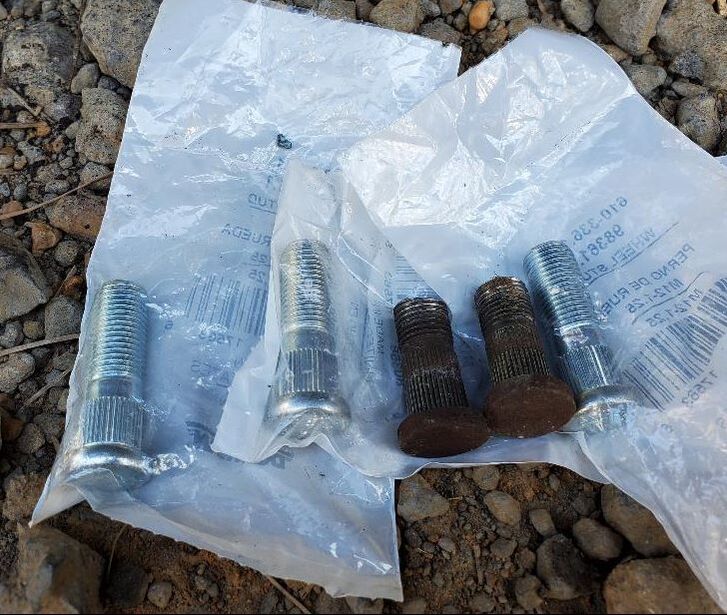 New studs with old studs among them for comparison. 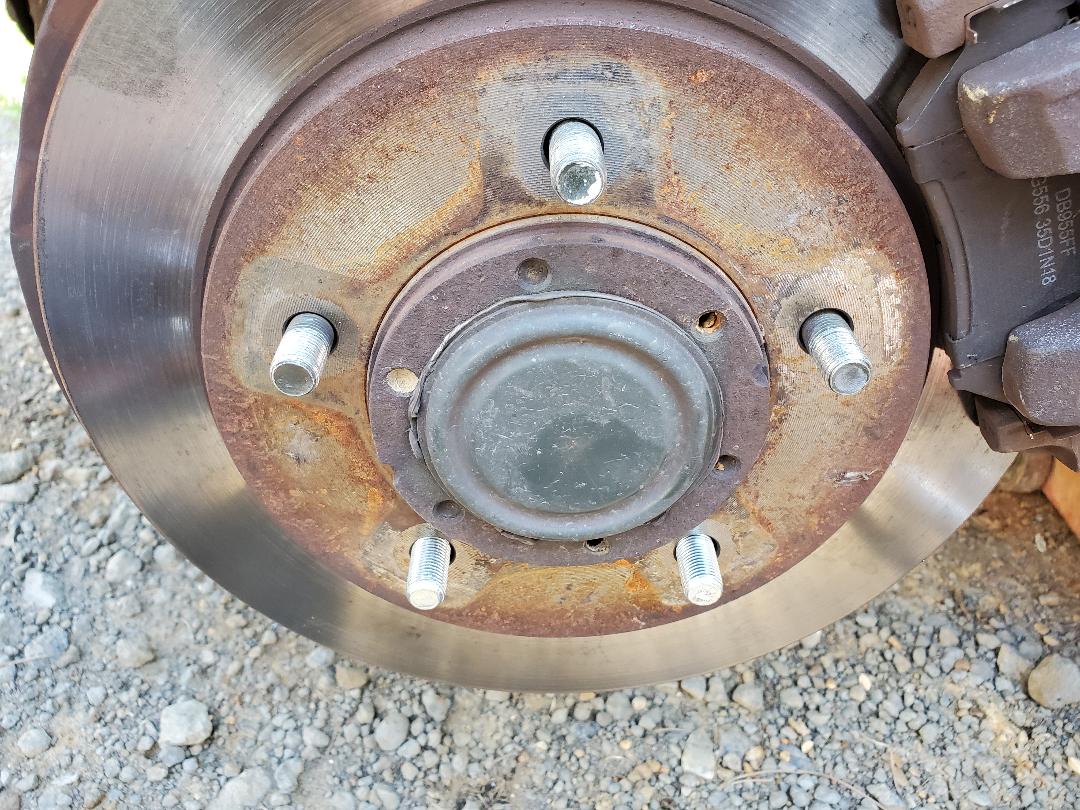 Brake assembly put back together with new studs. New studs are the two bottom ones, which appear shinier than the other units.  New strut installed with brake hardware and studs. Another side job I did among other things was install the new carburetor I had to order for the gas push mower. I had replaced this thing a few months ago but for one reason or another this thing started acting stupid on me even when the choke was closed so I figured I'd just get another carb to try and resurrect this mower. The carb was only $15 online so it wasn't like it was a big hit. I installed the unit on the mower and even took the time to use the Dremel with a cutting disc to cut out a corner section of the plastic cover in order to expose the choke mechanism to make it easier to set the choke. I was able to get the mower started pretty fast and commenced to cutting a bunch of grass all around the grounds. Even though most of this area would've been cut with the zero turn mower, that machine is down due to its needing blade bearing spindles. After running the mower for a while, the machine tried to act stupid again until I figured out how to manipulate the choke to keep the machine running. 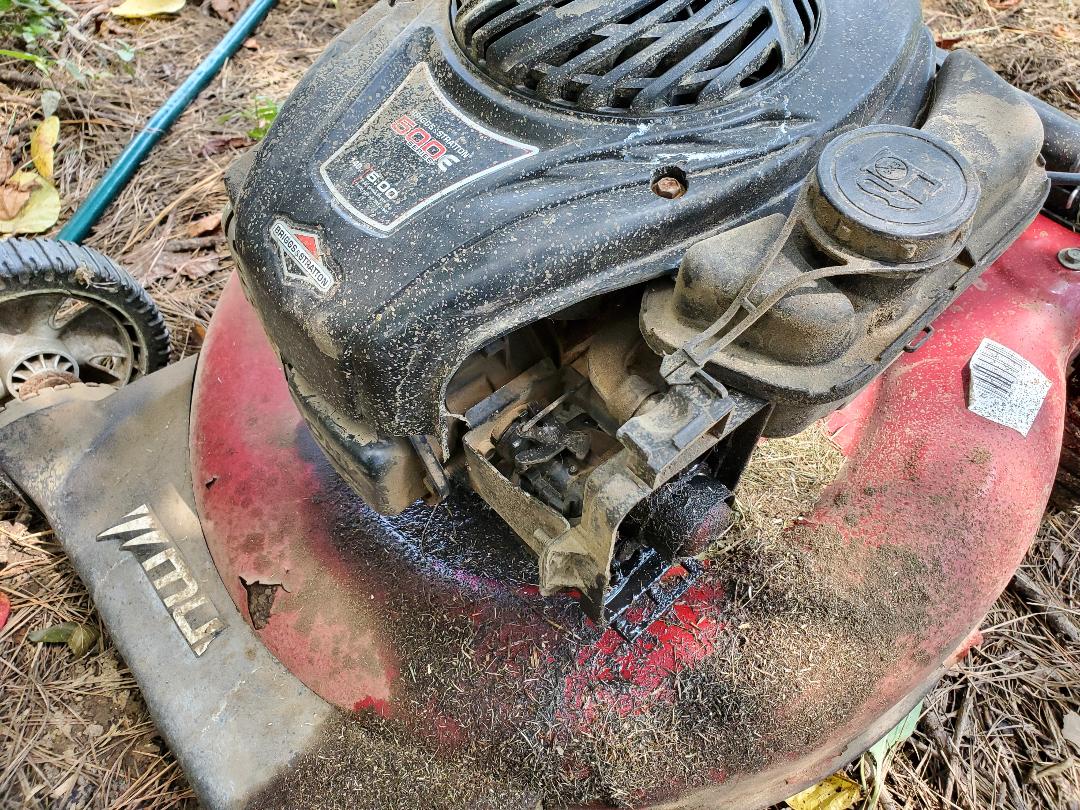 Mower with new carb in place and corner of plastic cover cut free to expose choke linkage. |
