|
Picking up from where I left off in the previous installment, I continued with the clearing of the rest of the back fence in the garden. The problem with this last leg of the journey was the fact that the area was thick with blackberries, making it difficult to just run through there pulling up weeds. There would be no pulling up of anything other than a few weed plants that did manage to pop up between stalks of blackberry plants.
The only real way for me to do this without renting a bushhog was to use the shears to just start snipping plants multiple times to break them up into small sections and pieces where I can then run them over with the push mower to try and grind them up more. Only problem here was that some of these stalks were pretty thick making it difficult to do much of anything to them. There were also old tires that were used as planters along with one dryer drum. The tires will have to be disposed of but the drum will be reused for a new raised bed planter later on. 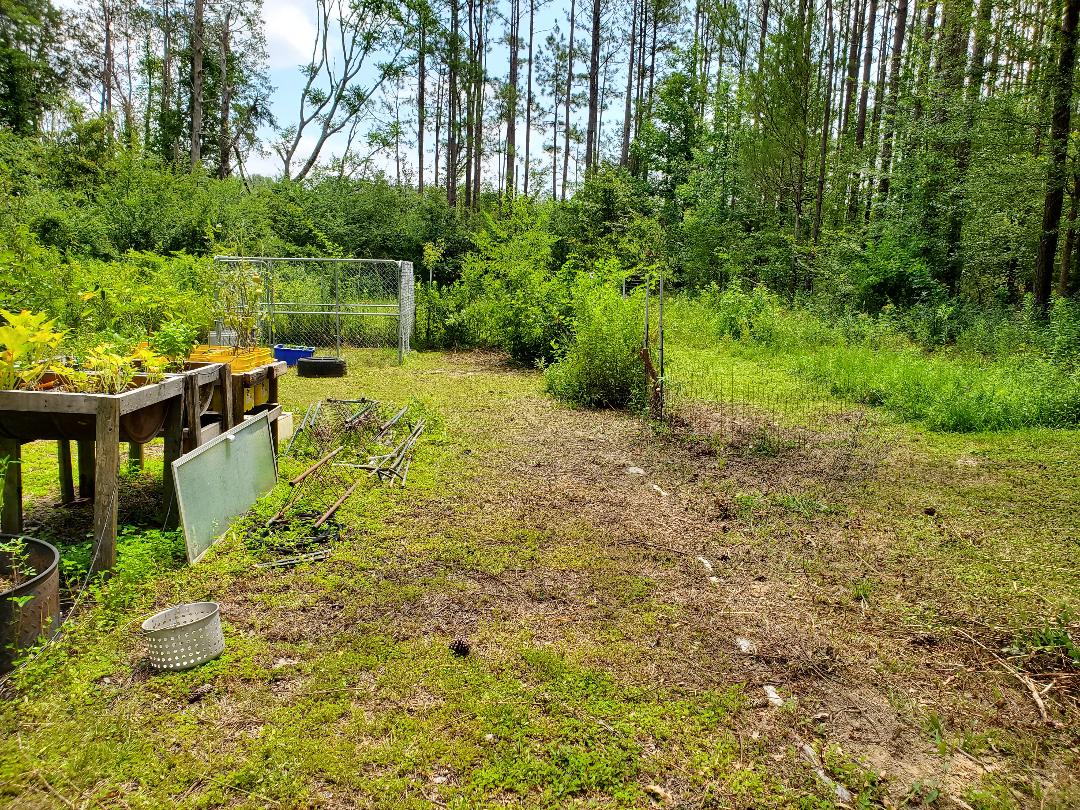
The last section of fence and garden area prior to finishing the job. Note thick foliage along fence line: blackberries.
Now on a side note, some of you may wonder, why destroy all these blackberry plants? Answer to that question is these things are literally weeds. Those plants were never there before, but know what happened? A few errant plants popped up one season, probably from some berries that fell from other plants and were dropped off by some animal snacking on them then they took root. Then before I knew it these plants started growing more. By the next season these things were taller than me and wider than me but they were producing. So you know what that means right? More berries falling to the ground and sprouting more plants, and the cycle continues until we have what we have today, a briar full of blackberry plants. Fuck these plants, they will grow back elsewhere, not even counting the thick patches of blackberries in other places around the yard. Hell I can easily uproot some smaller plants and transplant them to planter pots to grow them in a more controlled manner. These things are like mint; they're beneficial but left uncontrolled, they are very invasive. So yep, these plants had to go. Now, as I cut my way into the plants and removed some larger pieces little at a time to a small burn pile I started, I ran across a few smaller weed trees hidden in the mix. These came down in short order and went into the larger burn pile staging area. The few fence posts that were remaining also came up, usually by breaking them off at ground level since they were rusty. Only one post came out but it was too twisted to reuse. So off to the scrap they go. I also slowly started rolling up sections of the chicken wire fence and flattening that so it too can go to the outgoing scrap pile staging area. Once I cleared the section of fence that was moving to the corner I started on the last section. This one had another large weed tree intertwined in the fence along with some more blackberry plants. I cut away as much as possible and pulled the fence up as much as possible. I then made note of the idea that the stalks of the other blackberries did not grind up all too well and some of the plantlife was so intertwined that it would be too labor intensive to try and cut the shit out. I ended up piling the stalks and other plant material in a small pile and dumped a bunch of stale gasoline onto everything including the weed tree and fence and chucked a match onto it all and stood back. After doing this a couple of times I managed to get the stuff burned up enough that all I had left was the weed tree and one smaller plant that was twisted in the fence. I ended up just cutting the fence at the ground level since there was a small section partially in the dirt and pulling it all out was not an option. I also put the recip saw to the tree to cut it up as well, throwing the contents on the burn pile. 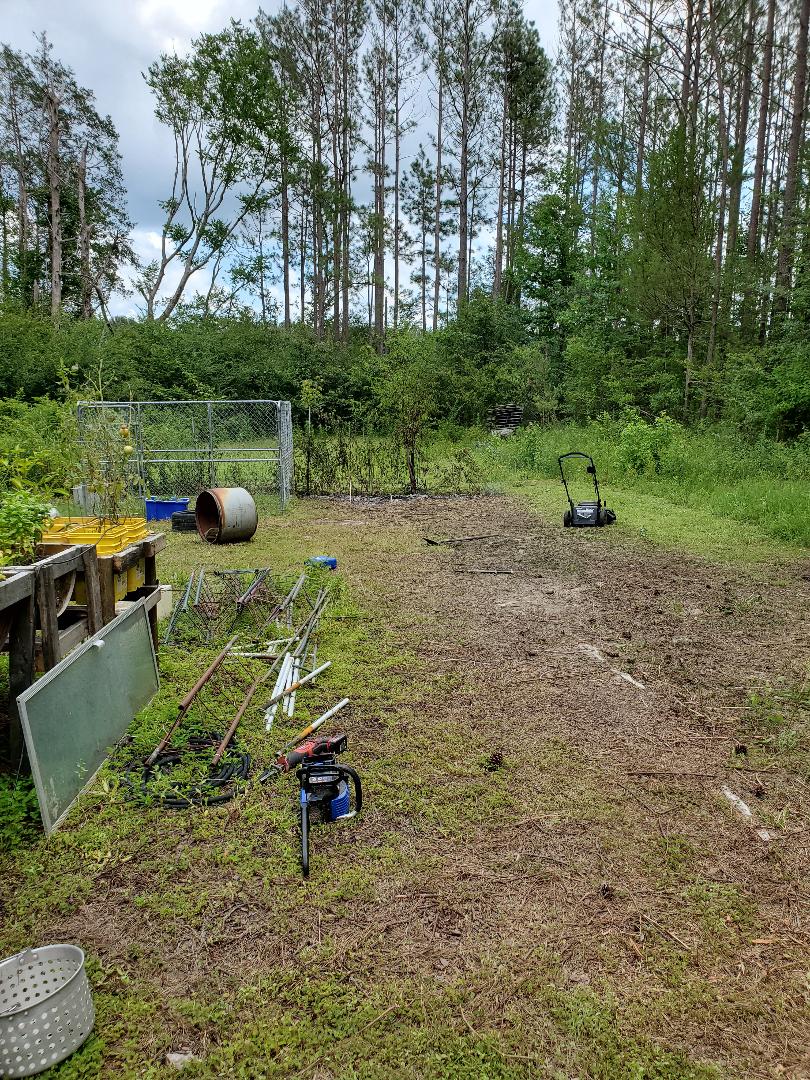
Burning up plants along last section of fence, note large tree in the middle of fence and tools scattered all along the area.
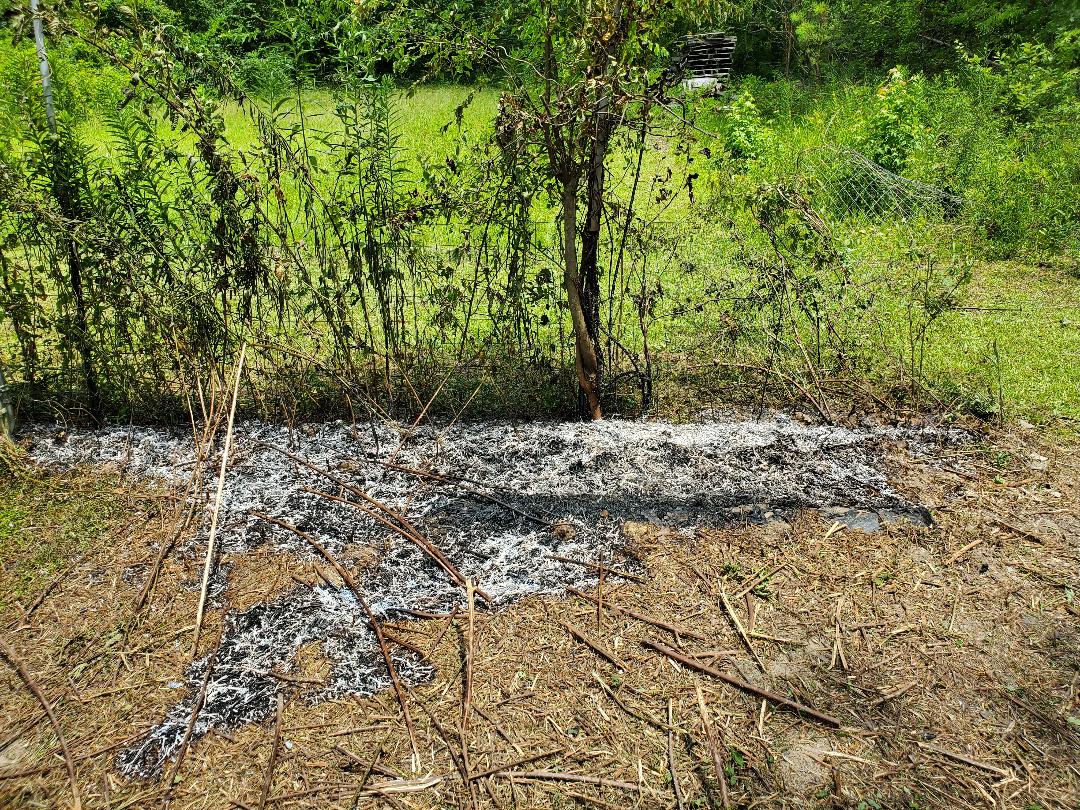
Closeup of burn area, note stalks and other material still present.
With a little more work I managed to get the remaining plant material cut up and out of the fence minus a few stalks. These stalks ended up being rolled up with the section of fence and tossed on the scrap pile. It's no big deal anyway. A couple more posts came up as well. Of the posts in this last batch of fencing to be removed, two of them were tube posts that I was able to fully salvage for future use. Once I got the fencing removed and the posts pulled and the weed tree cut down, I ran the mower back over the area as best as I can to grind up as much as I can to level everything off. With that the area is now cleared. I will end up going back over the area to make sure I didn't miss any baby stumps from the super narrow weed trees I cut down in past installments of this job, along with firing that other small pile of trash that came from this job. With that the last thing I need to do is figure out what to do with those lattices and other shit that I used for supporting past plants. Once all of that is gone then I can start sinking posts so I can start putting up a new fence along the new border for the garden, and move some stuff into this newfound area. 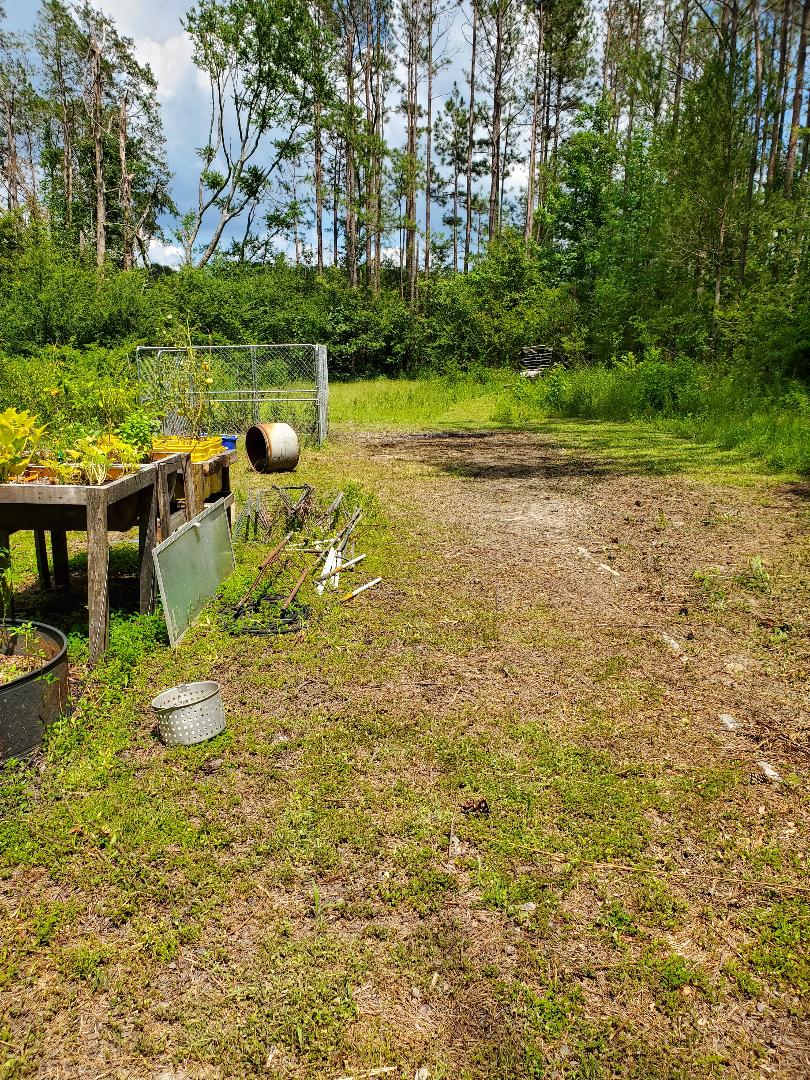
Area cleared, note lattices and other tubing sitting on the ground behind raised beds.
I have a boat trailer with a canoe sitting on it plus two other small boats next to that that I planned on moving over into this new area to get them out of the way of the driveway spur that currently has the LUV and 69 Mustang parked there. If I get the boats and trailer cleared that will open that area up enough for me to start another project. That one will be taking the portable garage frame I have along with a duplicate frame and erecting them in this area then widening the frame with extra metal to essentially build a larger workshop garage. Instead of plastic sheeting or tarp I will add enough tubing to the structure to attach corrugated metal roofing panels on the sides and roof. I may also pour a slab here to have a solid foundation to use when I erect the structure too. Only time will tell.
0 Comments
With the acquisition of the battery mower and moving the dog kennel into its new spot in the garden I decided to start working on pulling down the old fence running along the back of the garden, along with the weeds that grew along and through the fence. This is in preparation to re-establish the fence line closer in, shrinking the square footage of the garden, but also to help me concentrate on building up on the alternative gardening methods I've been using so far. With the use of hydroponics and different raised beds, I figured I can get the same kind of production on a smaller footprint in the garden versus having the traditional ground level garden with plants directly in the ground or in ground level raised beds that need way more attention than anything that I've been building lately. First things first, I have to pull this fence down along with any unwanted flora present. With the kennel moved it already opened up a spot in the old fence line at the corner where it once sat. I immediately cut as much grass with the mower as I could. The next thing was to start pulling back the chicken wire fence, having to cut it from the posts and folding it up for scrapping later on. As I pulled fencing back I pulled the T-posts from the ground and removed the various small but tough stemmed weeds and weed trees that had grown up through the fence over the years. I started getting a pile of old foliage going for future burning. 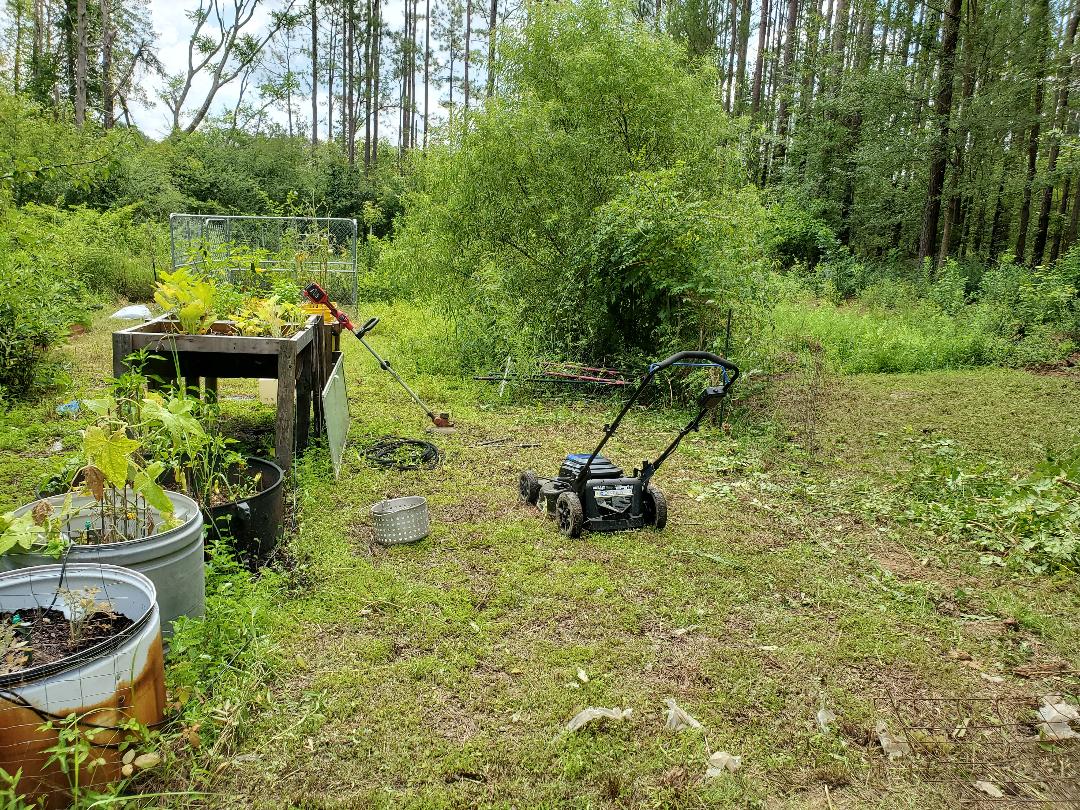 Clearing area using battery equipment to cut grass and weeds as fence is being pulled back. Another thing I had to address is the pieces of hardware that I was using in the past to hold up posts for supporting cucumbers and tomatoes. These metal poles and lattices were stacked in the back of the garden with the hope of putting them into use again soon but that hasn't happened. These items needed to be moved from the area where I was cutting the grass as well as pulling back the fence. With those things out of the way I was able to quickly mow over a lot of shit as I worked my way back more to the southeast corner of the fence line. 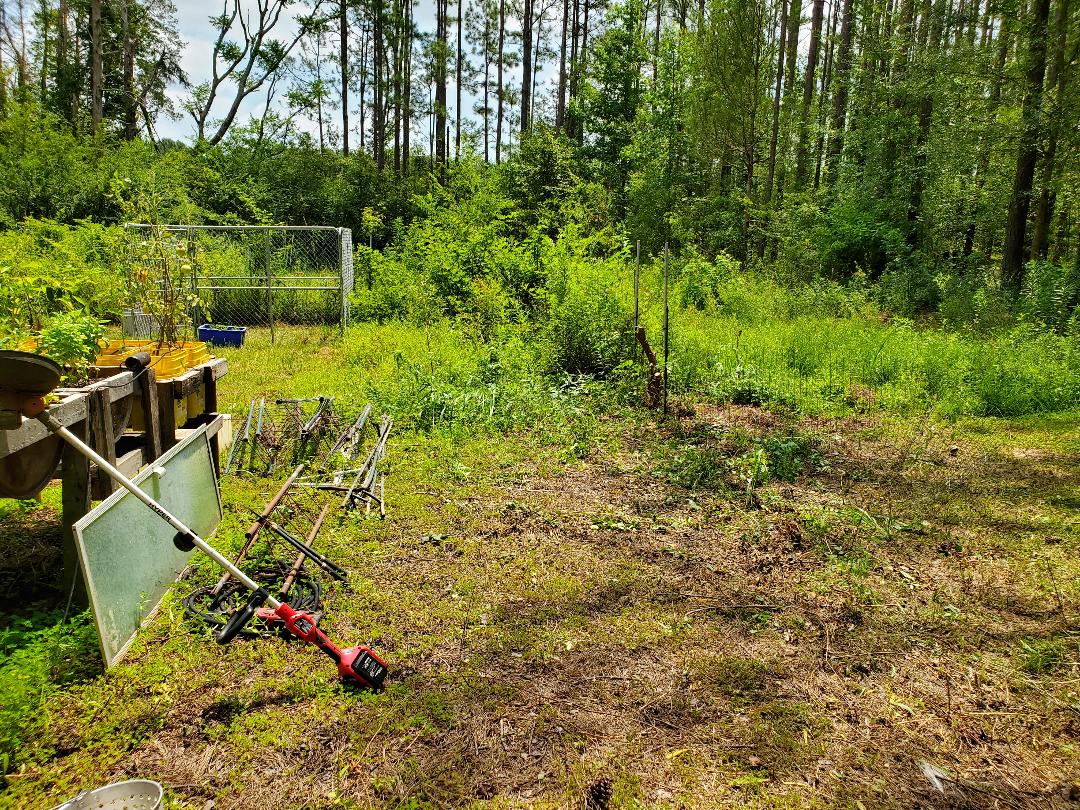 Area as more fence is removed and more grass and other foliage cut. Note pipes and lattice frames on the ground behind the raised beds to the center left. With a few good sessions I was able to chop grass and weeds all the way up to the thickest points in the blackberry briars plus I'm not at the old tire raised beds I planted along the old fence line for potatoes. All of this shit will have to go. I did recall seeing another washer drum or two so I will have to grab that for use as a tall ground level growing medium. The fence has also been pulled back more, removing another T-post along with a number of weed trees and other smaller weed foliage. At this moment the grass all around the area inside and outside of the garden border has been cut to aid in making things easy when it comes to moving stuff around or just being able to catch the bugs and stop them from hiding in the grass waiting to nibble on anybody. Area after having cut the grass and weeds from the area along with pulling the old fence back. Note grass cut on the right side which is the outside of the fence line. 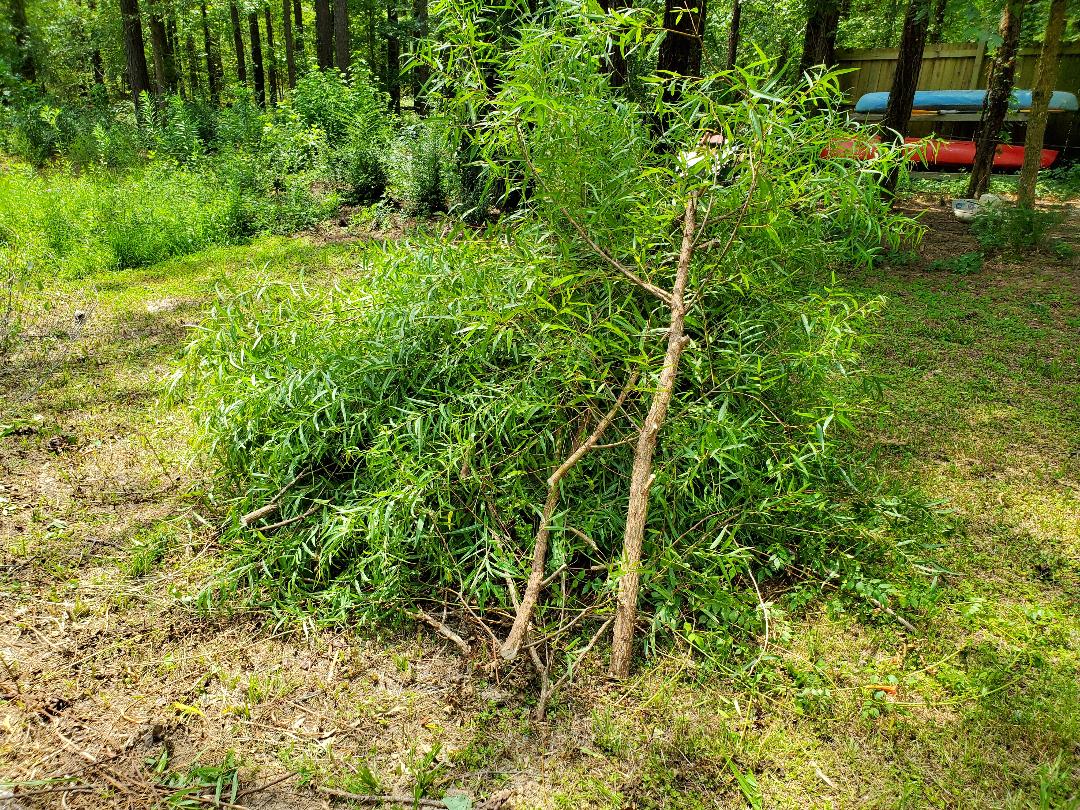 Pile of weed trees and other foliage stacked and ready for relocating to the burn pile. Now that I'm at the point where there is a thick briar of blackberry plants, I will be having to exercise some caution, taking my time using the shears to cut the individual plants and more than likely leaving the smaller shit on the ground to be ground up by the mower. The larger stuff will go out to the burn pile. I'm getting rid of all that shit as I need the area wide open for my future land development goals.
After getting the Kobalt lithium battery chainsaw from Lowes I seen that they also had a lawnmower that uses the same battery. Only thing is, this thing was around $500 with the one battery and charger. Its up there but I figured with it and two batteries (since the saw has a battery), I could manage to actually get some grass cut within the parameters of what I would normally use a push mower for. Now I wasn't necessarily ready to get one of these things just yet (even though I'm in dire need of a mower since the gas powered one needs another carburetor), but then an opportunity presented itself on facebook.
After doing a simple search through marketplace just to see what was out there for sale this time, I ended up running across one of these very lawnmowers, with the charger and TWO batteries. The extra batteries are almost $100 by themselves. The unit was slightly used The seller had the thing listed for $400, already a steal as it is. They were willing to drop the price another $20 and meet in a spot that was a little closer to our normal route of travel. So this was a no brainer, I'm getting this shit. After meeting with the guy and checking the unit out, the batteries were topped off, the unit came on with no problem, and everything was there. So obviously this thing left in the back of our vehicle. After getting home I put this thing to work cutting grass in areas that needed to get cut due to the idea that they are high traffic areas (for me). I also took the time to cut into areas I wasn't really too concerned about normally. Of course the initial thrill of this new purchase got the best of me so I went through all three batteries cutting grass all over the place. I was impressed with the performance of this mower. I still ordered another carb for the gas mower but I'll probably find myself using this unit a lot more since there is no need to pull cords or fidget with chokes or any other shit associated with gas machines. 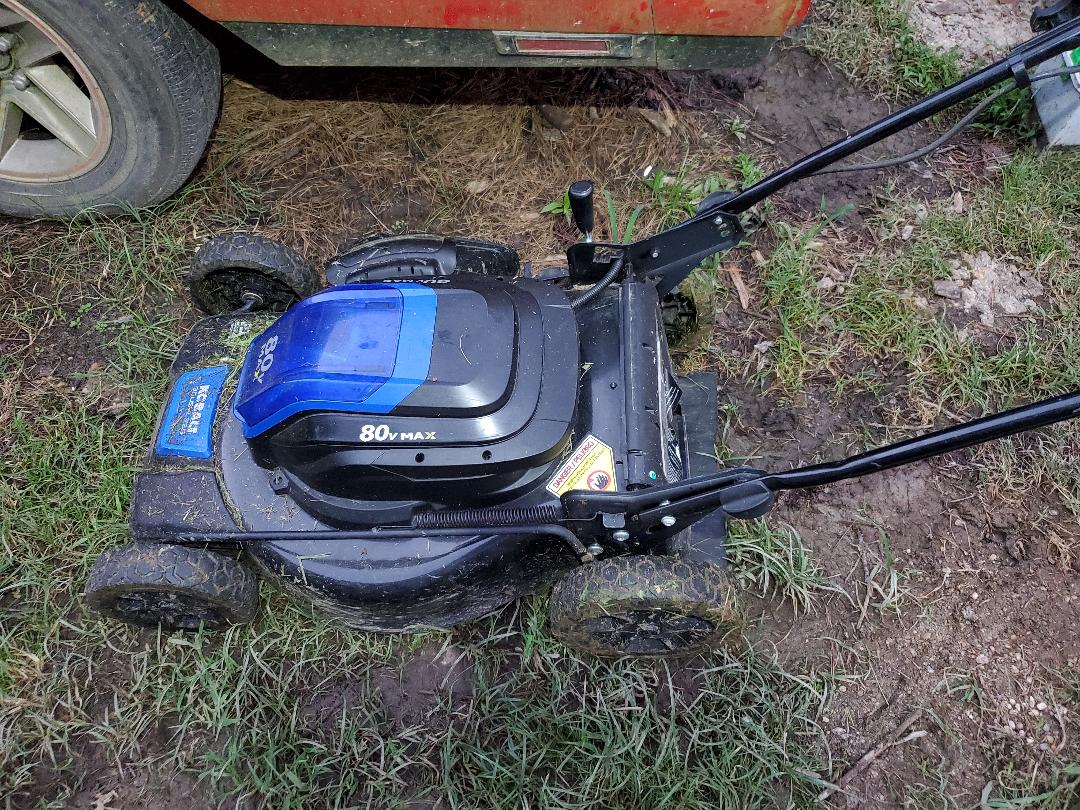
Kobalt 80v lithium battery powered lawn mower after being put to use.
Another thing that I wanted to get to was installing one of the old radar detectors I had laying around in the Tracker. I don't mean just setting the thing on the dash or sticking it to the windshield I mean permanently installing the unit. I wanted to run wires up to the top of the A pillar near the sun visor from the dash to deliver power to the cable that will be spliced in to hook up to the radar detector. I ended up removing the A pillar cover and the radio so I can run the wire along the A pillar down to the accessory 12v receptacle under the radio. This socket is switched on via the key switch, which is perfect as I can keep everything hooked up, the radar detector will come on automatically. I ran my pair of wires down through the A pillar channel into the dash then went under the dash to route the wire over to the 12v receptacle. I wired everything up to the receptacle's wiring then reinstalled the radio. Up near the sun visor I spliced in the short piece of cable that was plugged up to the radar detector so all I had to do is plug the cable up to the unit to get power to it. Of course I tested this before fully buttoning up everything to make sure all was well, which it was. I then installed the A pillar cover making sure to keep the plug up where I wanted to be and protruding from under the cover as I wanted it to be. The next thing I did was pull a screw from the sun visor mount and took a longer sheet metal screw and hung the radar detector mount to the same spot as the sun visor mount, putting the longer screw through both mounting brackets to hold everything together. With that I got everything sealed up and verified working. With that, the Tracker now has an automatically activated radar detector that is up out of the way with the wiring installed in a clean covert manner and using hard wired power versus a plug up power supply. 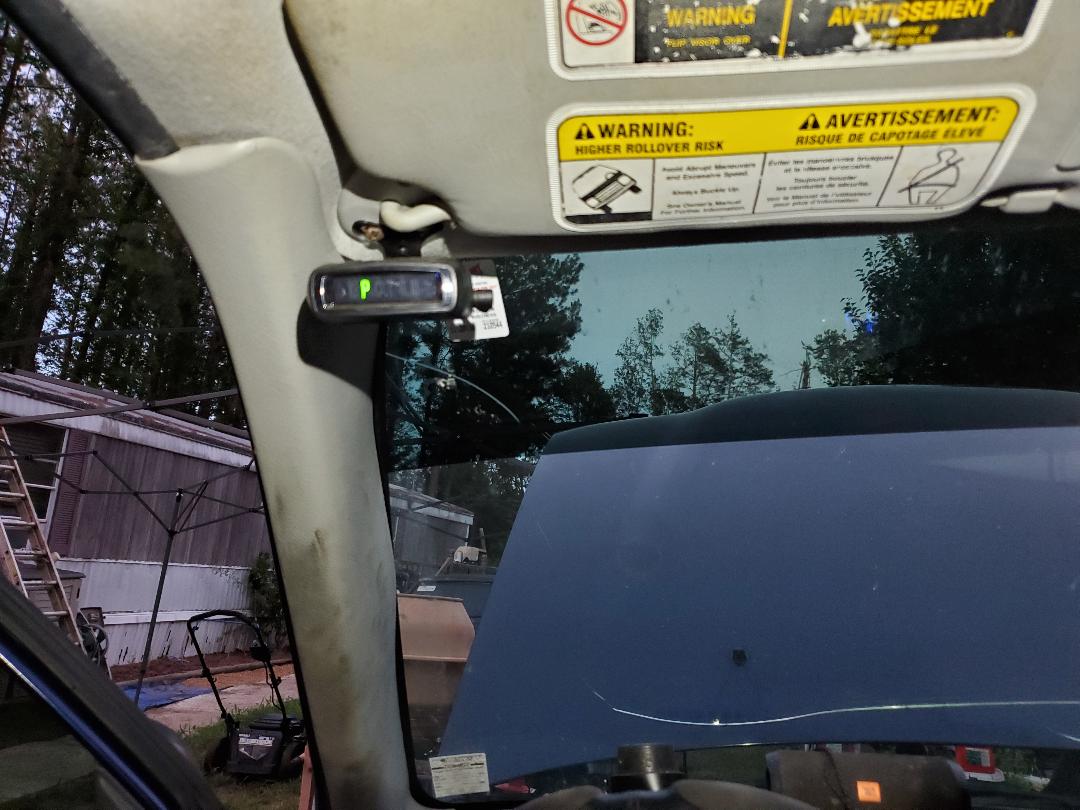
Radar detector hung up by sun visor and A pillar, hooked up and working.
Now, the next thing will be to figure out what I will wanna do for the Scion as far as installing a radar detector. The A pillar covers are airbags so there really isn't any way to remove those to install wiring behind them. Also I hadn't seen any suitable spots to hang the unit just yet. I'll have to sit back and think about how I wanna approach that.
As planned in my head, I had to do some rearranging in the garden in order to do some other tasks that I wanted to do that would help in the organizing of the homestead. I had planned on moving three planters from the porch so I can accommodate the dog's house for when she wants to come on the porch. Since I'll have the fencing up soon enough, the dog will be able to roam the yard free of the chain. The thing is in order to accommodate these planters I will have to find a suitable spot in the garden to put them. I didn't want to put them just anywhere so I had planned on placing them around the dog kennel that will become a greenhouse in the future. Of course to make that happen I have to move the kennel to the new spot I had intended to set it up at when I bring in the fencing for the garden in the overall downsizing of the square footage of the garden. In order to do THAT I had to cut the grass over the area where I wanted to put the kennel cage at. The battery trimmer came in handy, again, to help in cutting grass while the push mower was down. I was able to clear a plenty large enough are to accommodate the kennel cage, along with some of the other areas of the garden I frequently walk through. I had to swap over to the 2nd set of batteries but I didn't even use them much before I was done with what I wanted to do in the garden as far as trimming. With that I moved on to disassembling the kennel and moving it. 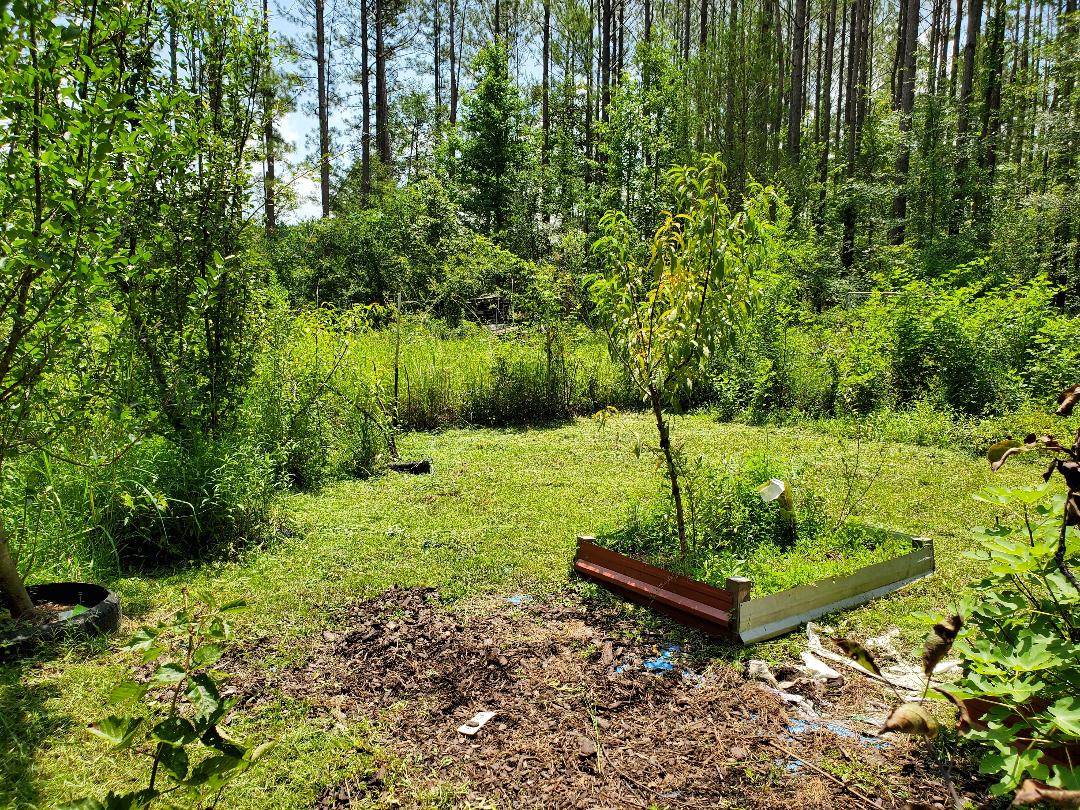 Cleared spot in garden to accommodate kennel cage, note extra area that was trimmed down since these areas are walked through more often while in the garden. Using a ratchet and a 1/2" socket I was able to loosen up the brackets holding the four chain link walls of the kennel together. One by one I moved the panels to the new spot and secured them with the brackets. I managed to get the kennel set up and eyeballed its lining up with the back of the raised bed gardens that make up part of the soon to be new back wall of the garden. This way when I do sink posts in the ground and start hanging fence panels everything will be lined up as needed. 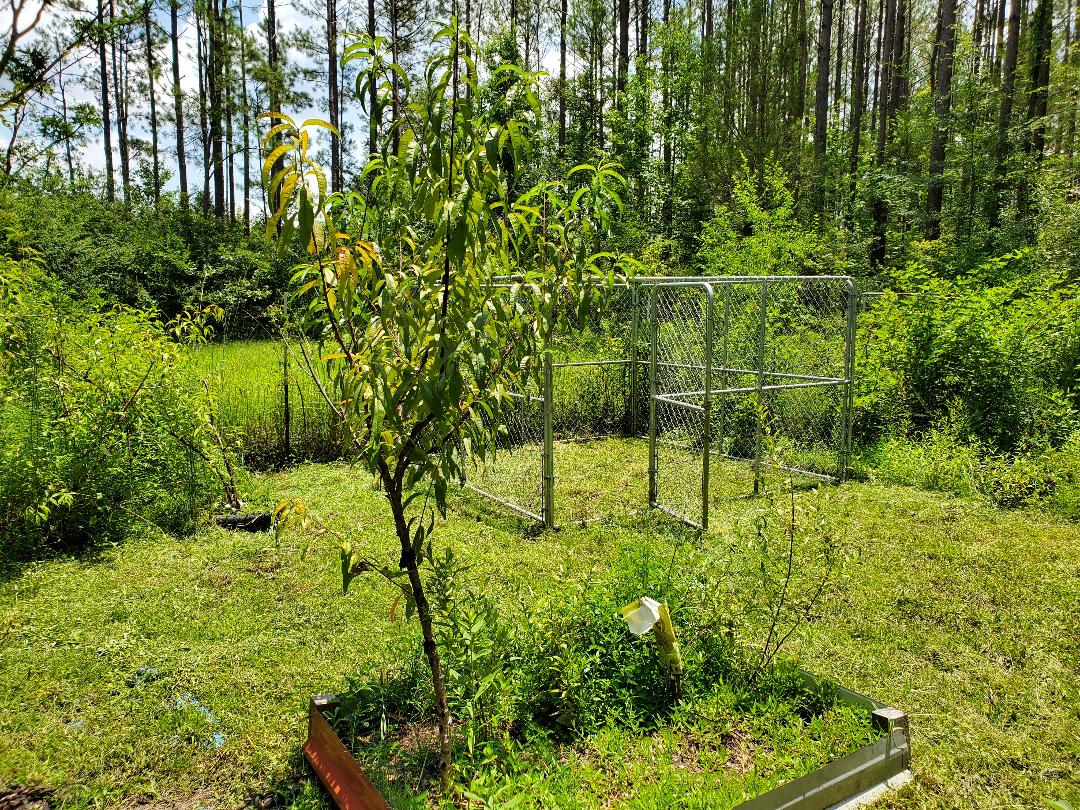 Kennel cage set up in new spot in garden. With the kennel cage set up I was able to go ahead and move the three planters. Two of them have blueberry plants in them that at the moment are a little sad looking and need a boost. I put some old chicken mulch in the planter and covered it with fresh dirt to help it along. The other blueberry just got some fresh dirt. I put these next to one another on one side of the kennel cage, the side wall where the door is. The third planter contains strawberries and was set up by itself along the front wall of the kennel where the gate is. Lastly I still had a half drum planter with a small fig tree in it. This was moved to the side of the wall with the blueberries since they were all of a similar class - large planter accommodating a plant or tow. With that I have the three larger planter pots along one side of the kennel and the strawberry along the front of the kennel, and the porch cleared. 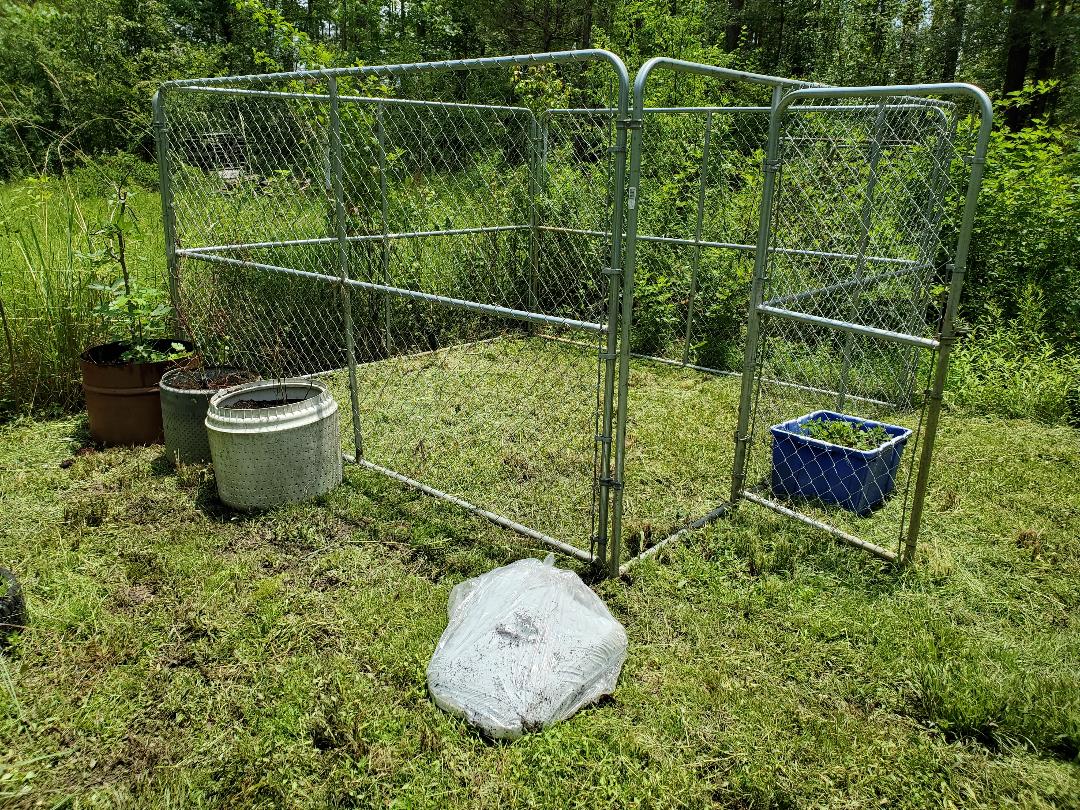 Kennel cage with planter pots set up around outside of cage. With the planters gone from the porch the next order of business was sweeping and hosing down the porch. I managed to get the corner to be used for the dog house completely cleaned off down to the old boards. I will be needing to rebuild this deck very soon... 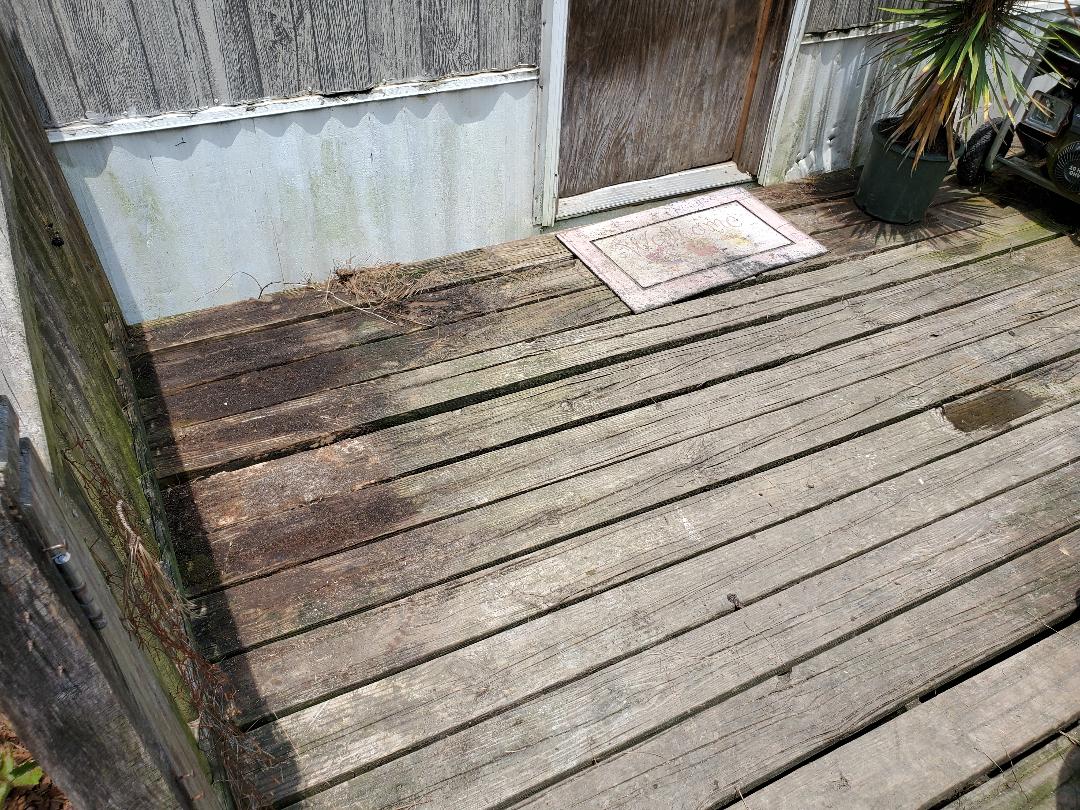 Corner of porch cleared of everything to make way for the dog house. Note how wood looks old and decayed. I used the 2 wheel dolly to retrieve the dog house from the back of the area where the dog area was initially set up. I unplugged the cord for the doghouse from the outlet I placed on the tree just to serve power to the structure. I scooped up the doghouse and carted it over to the porch. This was much easier than moving fence panels. When the cool weather does come all I have to do is use an extension cord to plug the doghouse up to a more remote outlet, then plug the wall heater back in place and the doghouse will be toasty for the dog. Until then the dog dish was placed by the dog house. 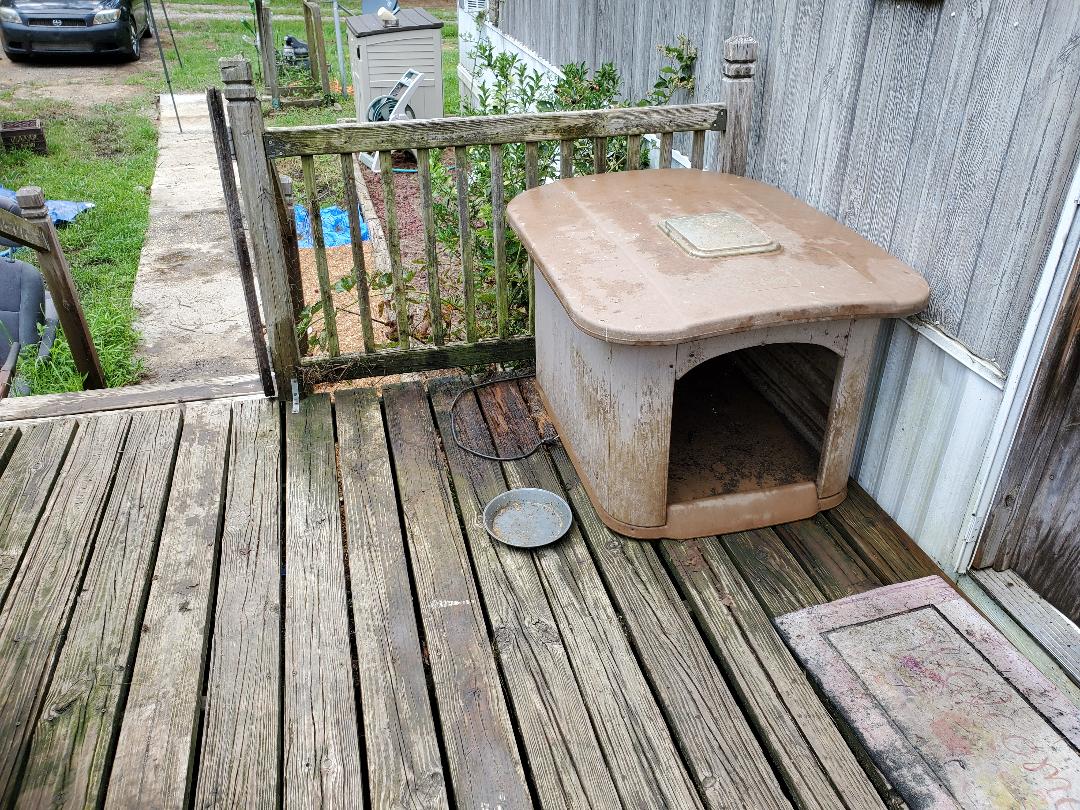 Dog house and dish placed in corner of porch against house.
In this installment I installed some more fence panels on the section of fence line where I had some posts in the ground for a few years now. Last week I put up two panels and this week two more panels. Oddly enough despite making sure the posts were sunk in the ground with 8ft spacing, I still have an issue with the lining up of the panels with the posts. To fix this I ended up having to nail a couple of 2x4s to the post to act as an extension so I had something to rest the end of the panel on for securing. Using the nail gun and a couple of lengths of wood I made quick work of this.
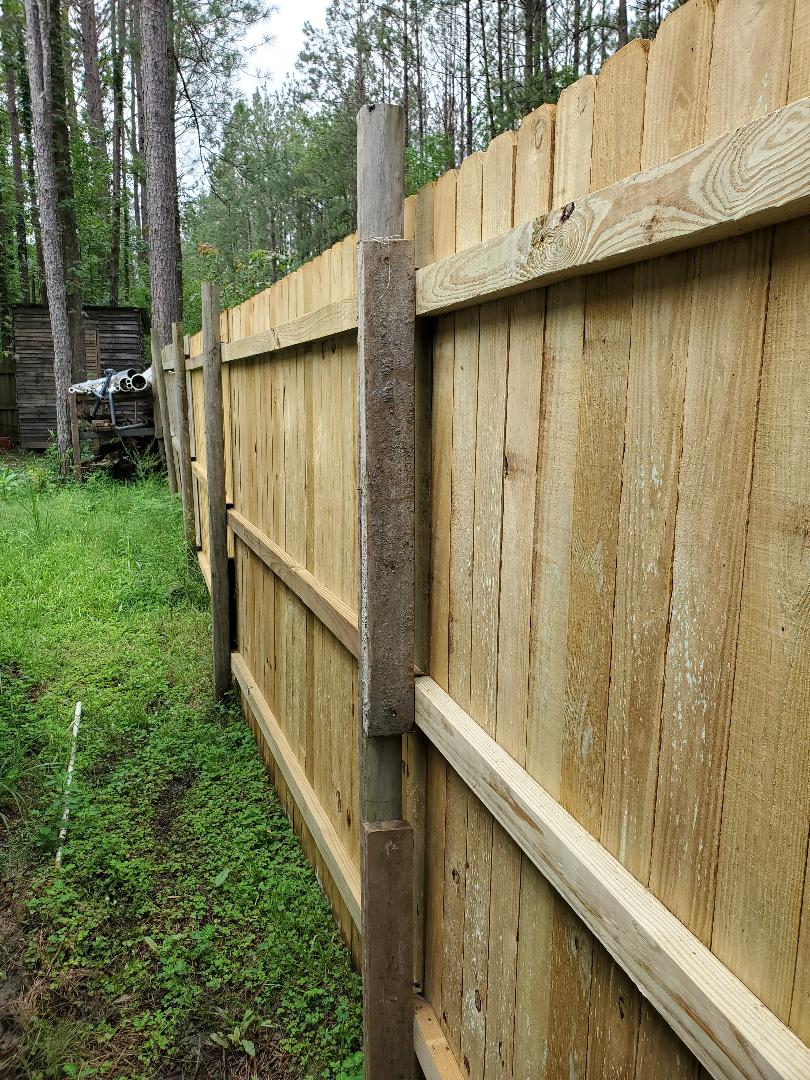
2x4s used as extensions to fence post to give extra area to be able to nail end of panel to.
With the first of the two panels hung it was time for the next one. Now I will go on the record saying that these things are heavy as shit. With the pressure treatment chemicals soaked into the wood, these things are ridiculously heavy, enough so I had to have help moving these things, even when using the 2 wheel dolly to move them from the trailer over to the fence posts. After getting the other fence panel into position I found that I had to use short pieces of 2x4's to act as ties to couple the fence panels together at the three tie boards that make the fence panel. Of course this was pretty quick, just cutting three foot long pieces of 2x4s and nailing them to the ends of the tie boards on each fence panel. Once that was done then I was able to nail the other end of the fence to the post like normal. 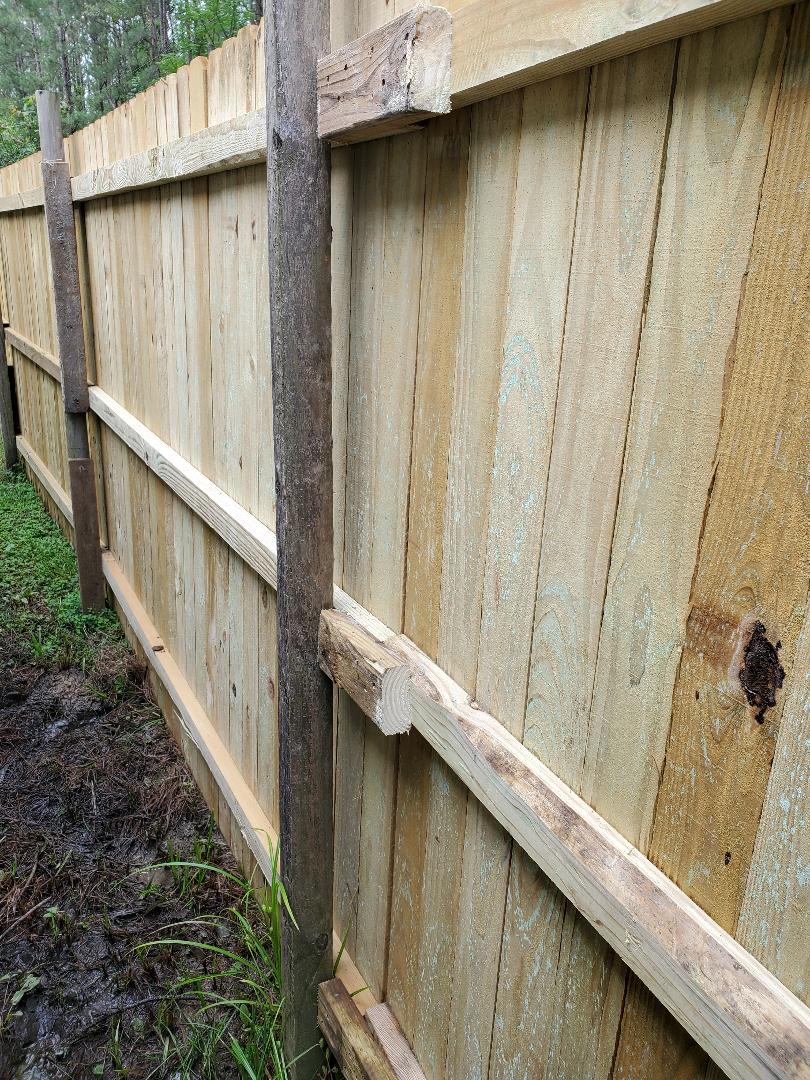
2x4s used to connect fence panels together via tie boards that make up fence panels.
With these fence panels up that leaves just four more panels to finish the run of fence up to the driveway. I do need to find a sale on posts so I can gather up a bulk batch of posts to allow me to sink enough posts in the ground to cover the span from the other side of the driveway to the tree line where the fence will turn into the woods to meet up with the back of the chicken yard fence. I will be using some of the trees as posts to attach panels or 2x4s for making custom fence panels, depending on the length of the spans between posts. Long as I keep doing things the way I'm doing I'll have this whole perimeter fence done in no time. 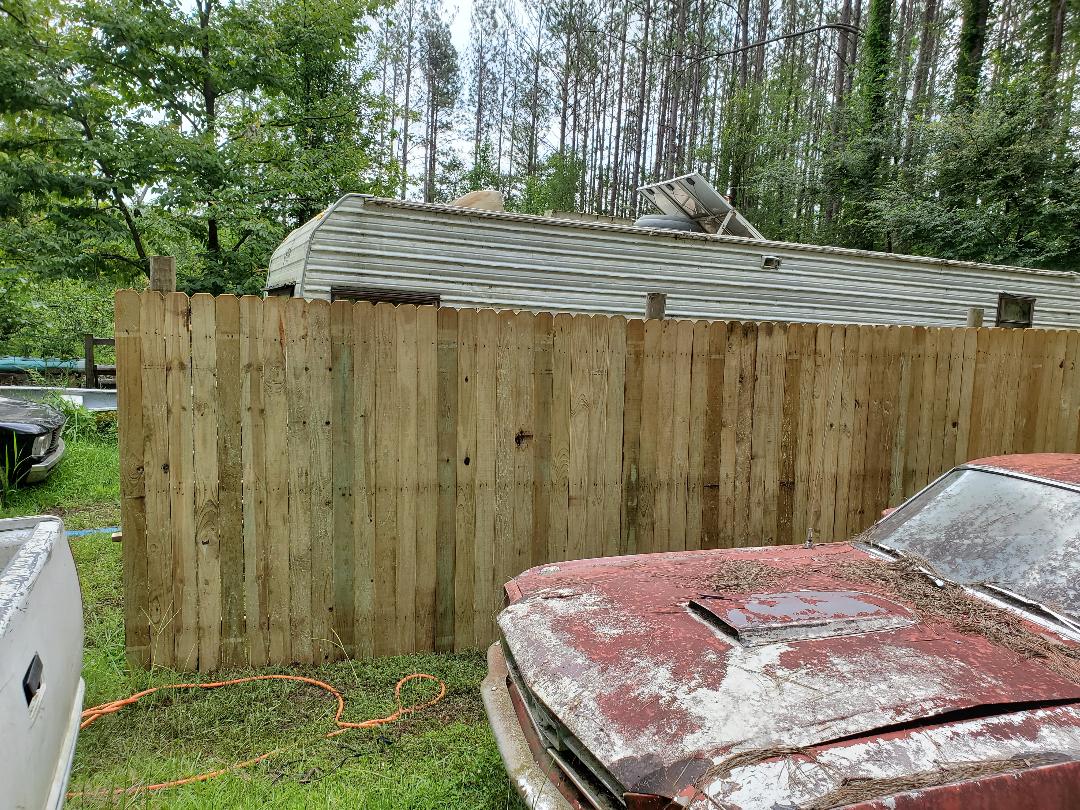
Two more fence panels erected, blocking most of view of storage trailer from main driveway.
After finishing the walkway the next thing I had my eye on was some landscaping which will help me in lessening the need to trim grass in these areas. The area between the walkway and rock garden has a patch of grass that if left untrimmed, will grow over into the rock garden and make a mess when it is trimmed. My plan was to lay plastic down over the trimmed grass and cover it with pea gravel to make a decorative ground cover. Since I dismantled the solar light the tarp that I used to cover the container that contained the electronics was repurposed for the ground cover for this grassy area. I was able to cut two plastic sheets from the tarp so I was able to get a good length of the area covered up. The next thing I did was cut openings in the plastic to insert the ground lights into the dirt through the plastic along side the walkway. I wanted to be able to add ground lights along the walkway for decoration as well as safety as a guiding light for anyone walking the walkway in the dark, including us. After that I spread out some pea gravel over the area to start off the covering of the ground.  Laying plastic down on grass between walkway and rock garden. 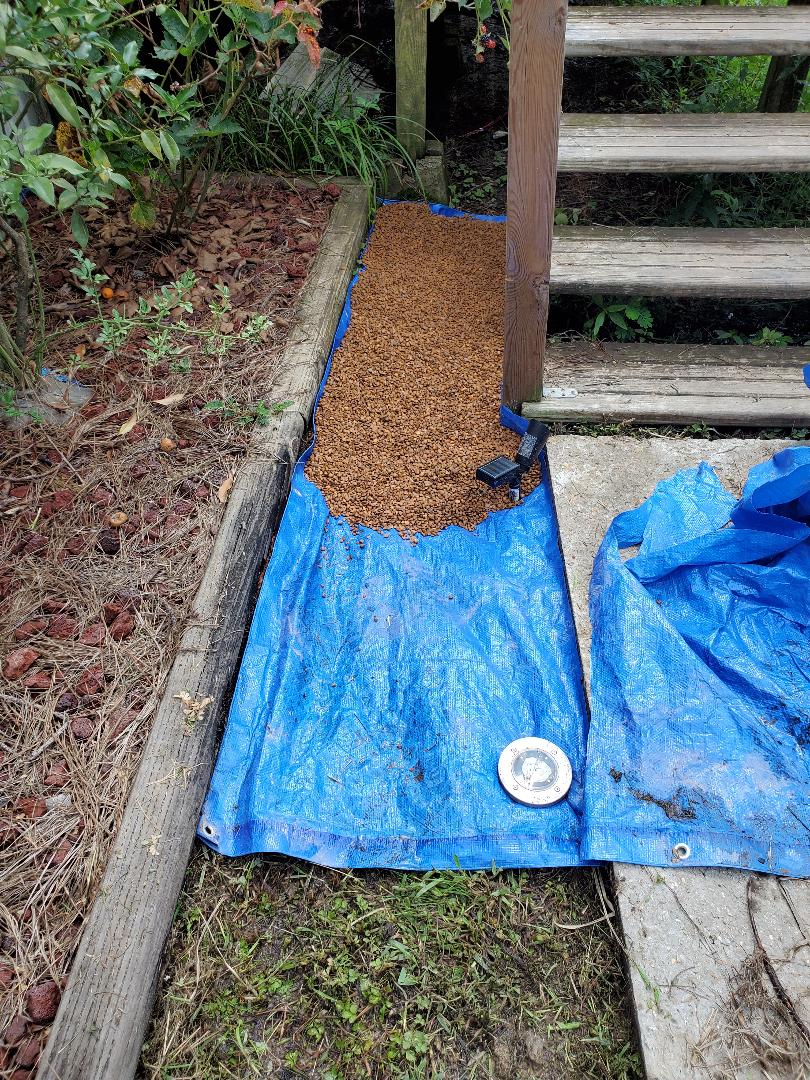 Spreading of gravel on plastic, note ground light in place in ground through plastic 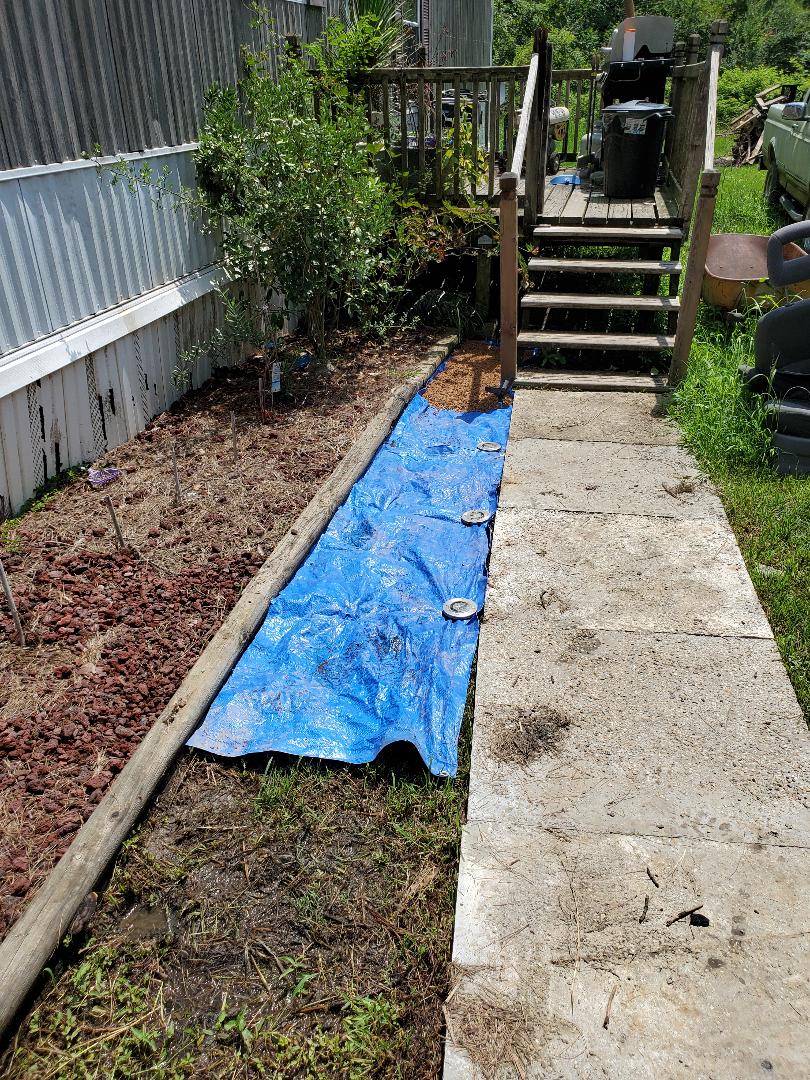 Plastic laid down on grass along with ground lights I only had enough gravel to get a small area started right by the stairs, as the pictures show. I'll be acquiring a lot more pea gravel, preferably through recovery bags to save some money in the process of covering the grounds. In the meantime, I moved on to the solar panel array I pulled from the solar light assembly. This needed to get on the roof of the storage trailer. This was a fun endeavor as I had to hoist this whole frame with the three panels up a ladder to the roof. I didn't want to go through the hassle of separating the individual panels from the frame and hoisting everything up separately then reassembling it all on the roof. It was getting late and I was ready to be done with this little task. So after a couple of attempts I managed to get the solar panel array on the roof and moved into position. I used some wood screws to screw the frame through the roof sheet metal and into a roof truss. In a couple of spots I had to drill an extra hole on both sides of the frame to accommodate some self tapping screws to further hold the frame in place on the roof. I had to make sure to go into the roof trusses to ensure proper attachment. The next thing was drill a hole in the roof under the panel to run the cables into the trailer. I made sure to mount the panel array partially hanging over the exhaust fan so everything can be close together for this purpose. 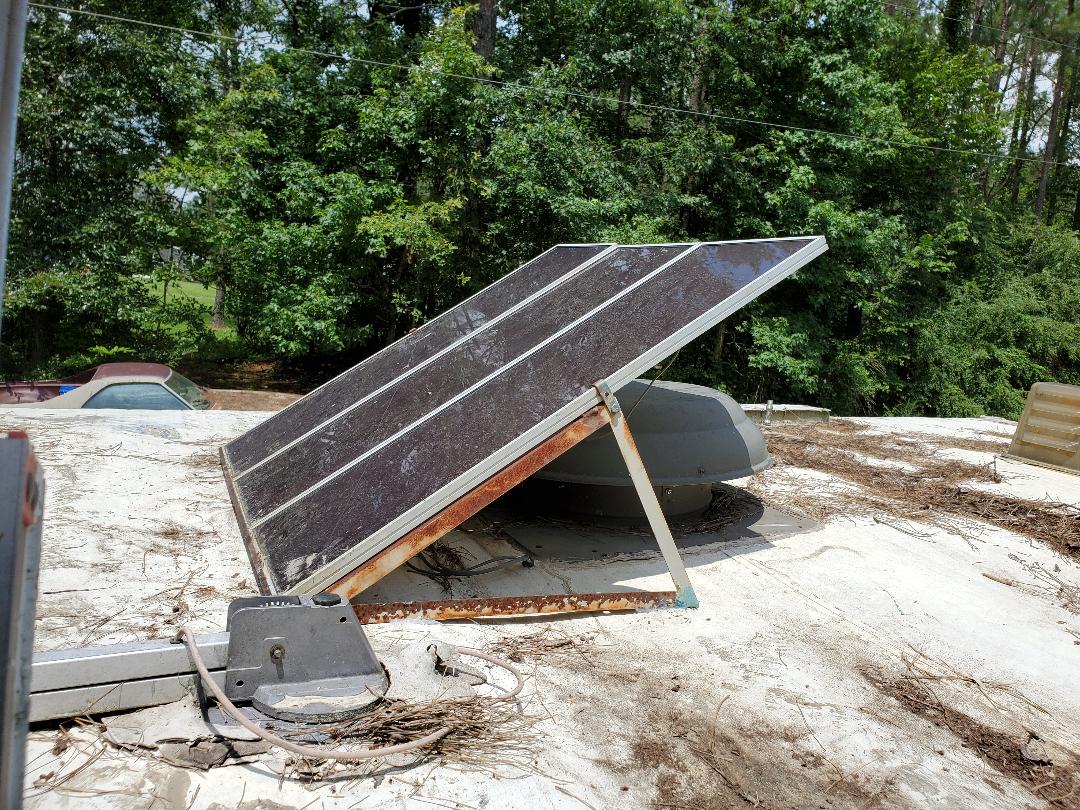 Solar panel array mounted on roof of trailer partially over exhaust fan With the cables routed into the trailer the next move was to parallel all the wires together and connect them to a single pair of wires which have crimp terminals attached. This was because the two wires coming from the fan had crimp terminals on them as well so rather than hardwire everything I just utilized the terminals to aid in quick disconnection if necessary. I got all the wires tied together with a couple of wire nuts and pugged up to the fan. The fan instantly came on with the sunlight that was already present. With everything working the last thing was to make everything nice and neat with good ole wire ties so the wiring wouldn't be in the way. This was taken care of rather fast. With that the storage trailer finally as its ventilation fan set up exactly as I had intended a year ago. 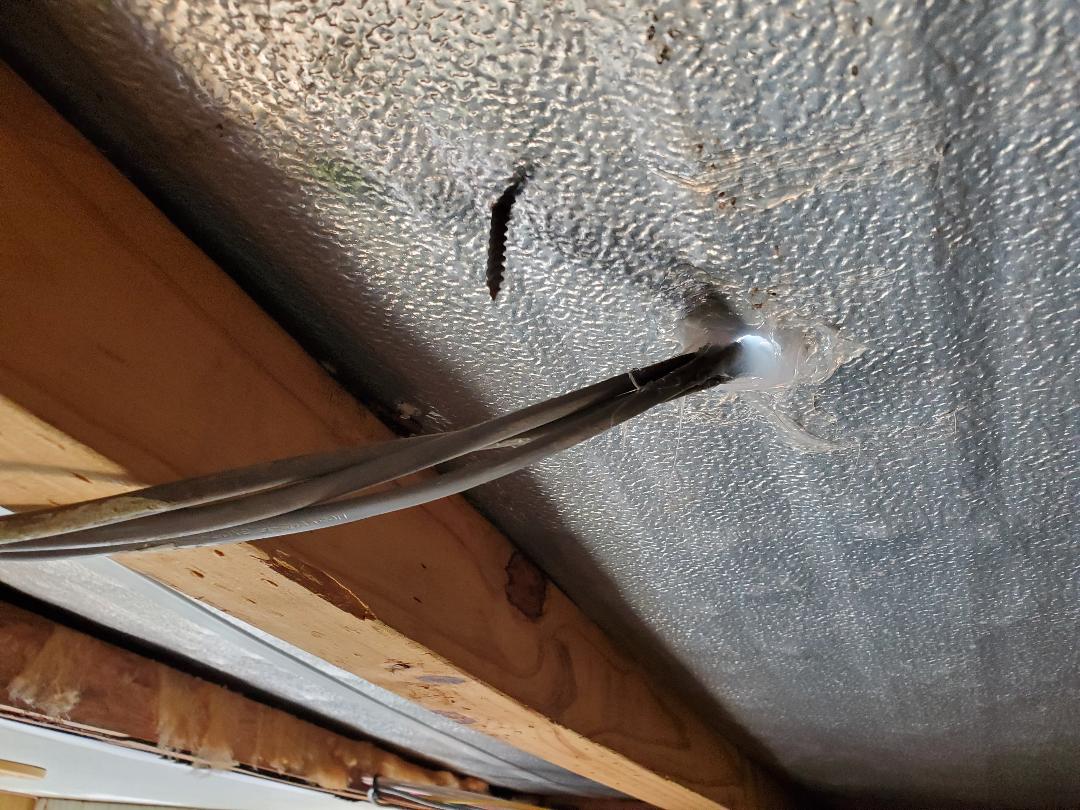 Panel wires coming through trailer roof. Note caulk over hole. 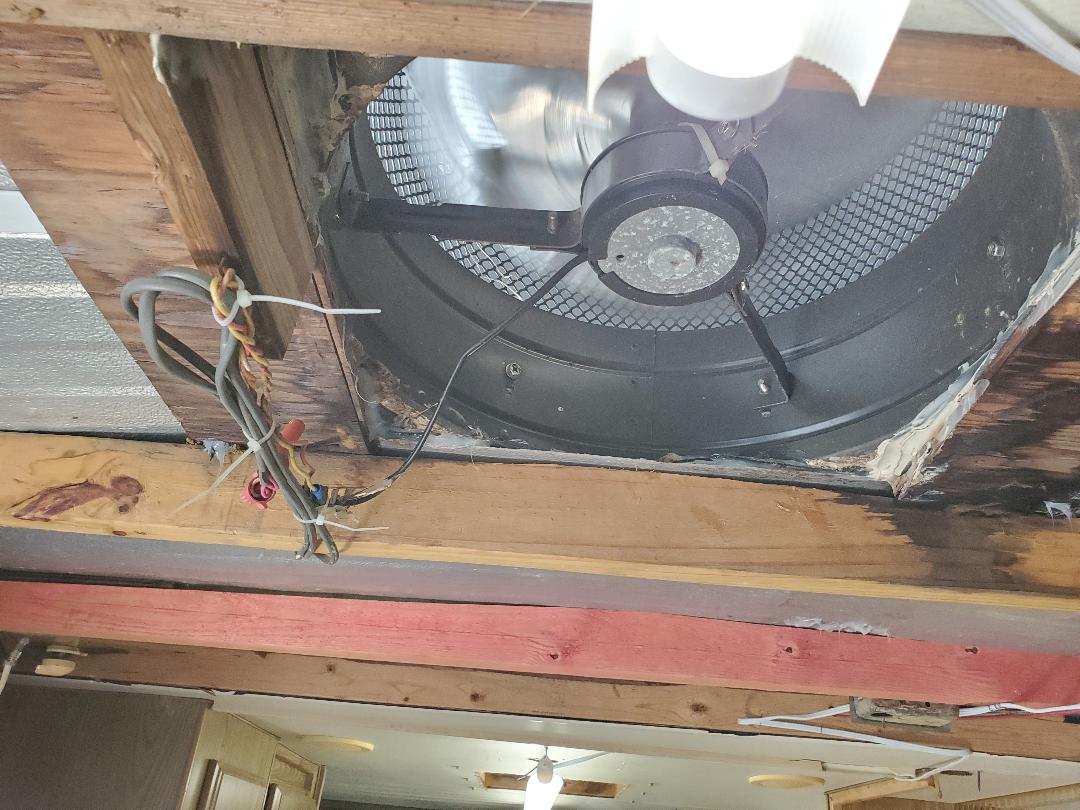 Wires tied together and hooked to fan. I did have to caulk the wiring where it came through the roof as well as where oops drillings of screws left extra holes in the roof. I caulked around the solar panel frame to help in sealing the holes that had to go through the roof. It got done rather fast, all things considered. With this taken care of its time to move on to the fencing. Even though I did plan on pouring one giant slab for the last section I looked at the area and compared its leveling to the rest of the ground and seen that I won't have to make any kind of slant in the leveling of the concrete. Because of this I just went ahead and prepped another section like the others and just planned on making the last small section be a mini slab to finish things up. As with the other slabs I moved the 2x4 frame out from the last slab to get things prepared as with the other slabs. I had another bag of paver gravel available so that was spread out to make the base for the concrete. The good ole cement mixer made quick work of the concrete which was poured using the shovel to help guide the bulk of the concrete into the mold area versus right under the mixer (which is a sort of design flaw in my opinion). With the slab done I had to sit back and wait for the concrete to dry before I could move the mold out for the last section. 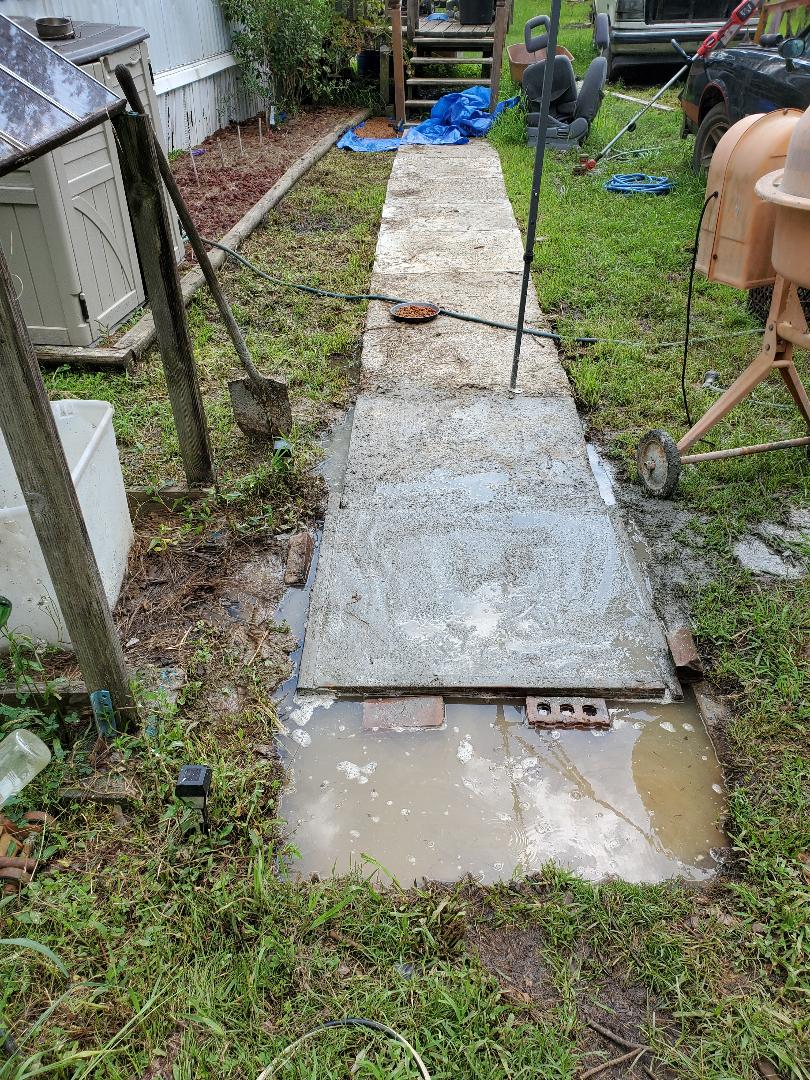 Concrete poured and awaiting curing. Yes, it rained. Yes it rained here, its been raining here for the last week or so, fucking rain. Every day, rain. But I still got the concrete poured and am awaiting its curing. In the meantime I did turn my attention to another project, which is dismantling the solar light. Reason being is the assembly has been nonfunctional for a while now due to the battery being dead. I didn't want to spend another $80 on a battery since I've been seeing these new solar area lights that can be mounted on the sides of buildings or their own standalone posts, much like streetlights. The tech is improving fast out there where stuff like this is getting smaller and more powerful at the same time. Lithium battery tech is advancing enough along side the LED tech that one can have the same thing as what I set up in a way smaller package. These area lights are supposed to put out a high lumen light intensity, comparable to the older LEDs I have set up on the solar light and be able to run for a good while with its internal battery. The solar panel is supposed to keep the unit juiced up for the next round. The units I had my eye on were in the $60-$80 range. What this means is for the same price as a replacement battery I can get one of these new self contained solar lights and have a more streamlined and obviously more efficient units than to keep up the more outdated solar light setup I currently have now. Plus I have another plan for the solar panel array that makes up one of the main components of this setup. The other plan is to use the solar array to power the exhaust fan in the storage trailer, as I had intended to do when I first set up the trailer. The thought crossed my mind to use this solar array but I was up in the air about the fate of the solar light so I never followed through with using this setup. That has now changed. 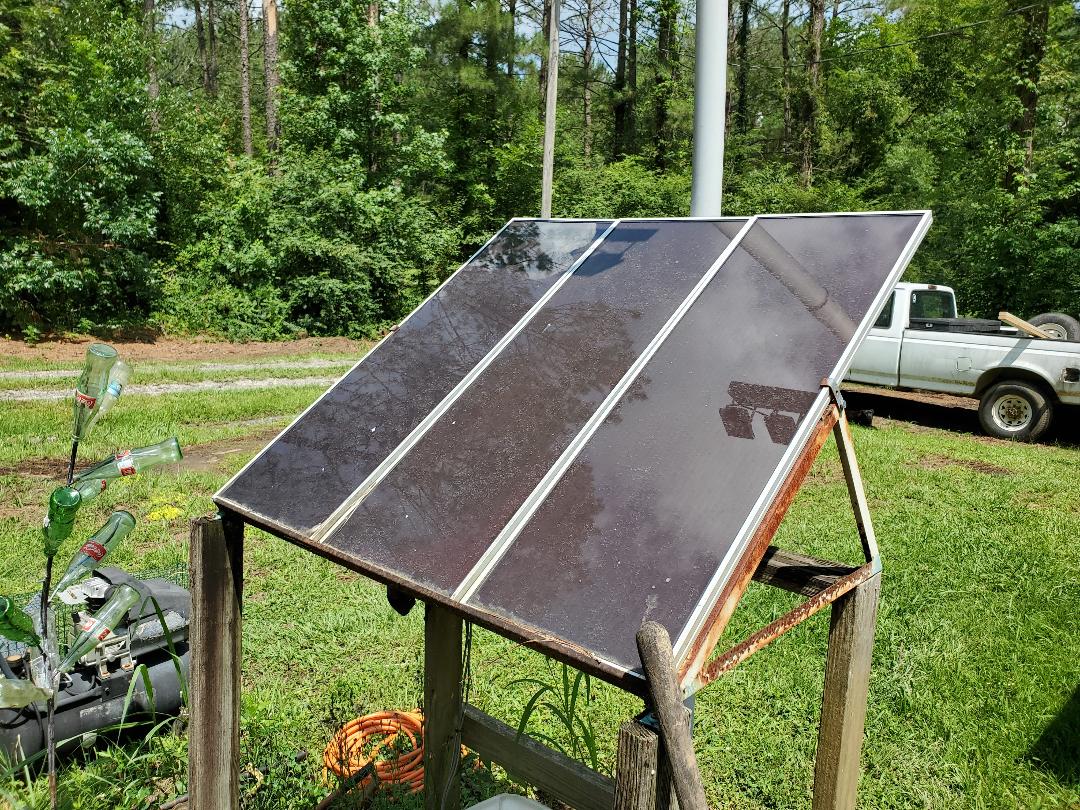 Old 45watt solar array that was recharging the battery of the solar light assembly. Another thing is the idea that if I remove the solar array I may as well continue with the disassembly of the other components of the whole unit. This includes the solar charge controller and timer that were used along with the dead battery and the wiring. The plastic container that was used to contain everything lost its top long ago to solar degradation so I had a tarp over the thing to protect the electronics, but I had a plan for that tarp as well, which is to cover the ground between the walkway and rock garden for my upcoming plan to cover the grassy patch with gravel as another decorative touch. So along with removing the solar array and staging it by the storage trailer for later mounting on the roof of said trailer, I also pulled the electronics and other stuff from the plastic container. The battery is going to go to a battery recycler, the wiring was rolled up and stowed in the box I have in the storage trailer that contains salvaged lengths of wire for use in other projects, and the two electronic components are stored for future use in other projects. The plastic container went on the burn pile as it's no longer needed and was already suffering from solar degradation anyway. 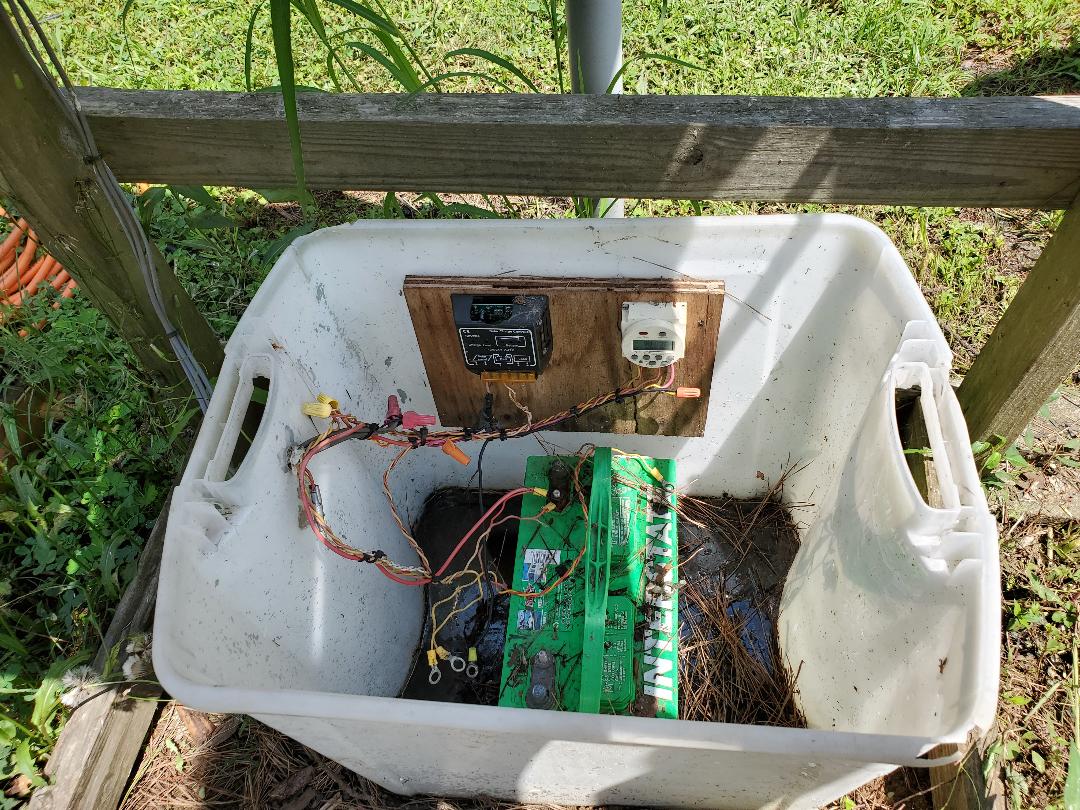 Solar charge controller, timer, battery and wiring contained in plastic container for solar light assembly. With the time elapse the concrete finally dried up enough for me to remove the 2x4's from around the slab. Since the last section is only half the size of the normal slabs I didn't even bother to use the whole set of boards, I just used the two side boards to act as a guide to keep the concrete straight along the sides while allowing it to just lay as it may at the very end. I wedged the boards in the mud along side the slab to keep them straight while adding more paver gravel to the base to get it all ready for the concrete that I'll be getting so I can make the final mix and pour and finally complete this walkway!  Boards set up along side slab to stage for the final pouring of concrete. Yes that's still water from rains in the pit. With the few bags of concrete that we picked up the other day I was able to get my slab poured for the walkway. This of course was a fast endeavor as I had the cement mixer staged right by the slab pour site. I mixed the concrete one bag at a time so the concrete can be thoroughly mixed prior to pouring. Pouring all three bags and trying to mix them would be a pain in the ass. With the slab poured I moved on to some finer weeding around the area between the rock garden and the walkway for the upcoming project I have planned. I plan on laying a sheet of plastic down over the grass and taking the walkway lights and poking them through the plastic prior to pouring some finer gravel down over the plastic. Doing that will get rid of one more area that I would have to weed in the future. 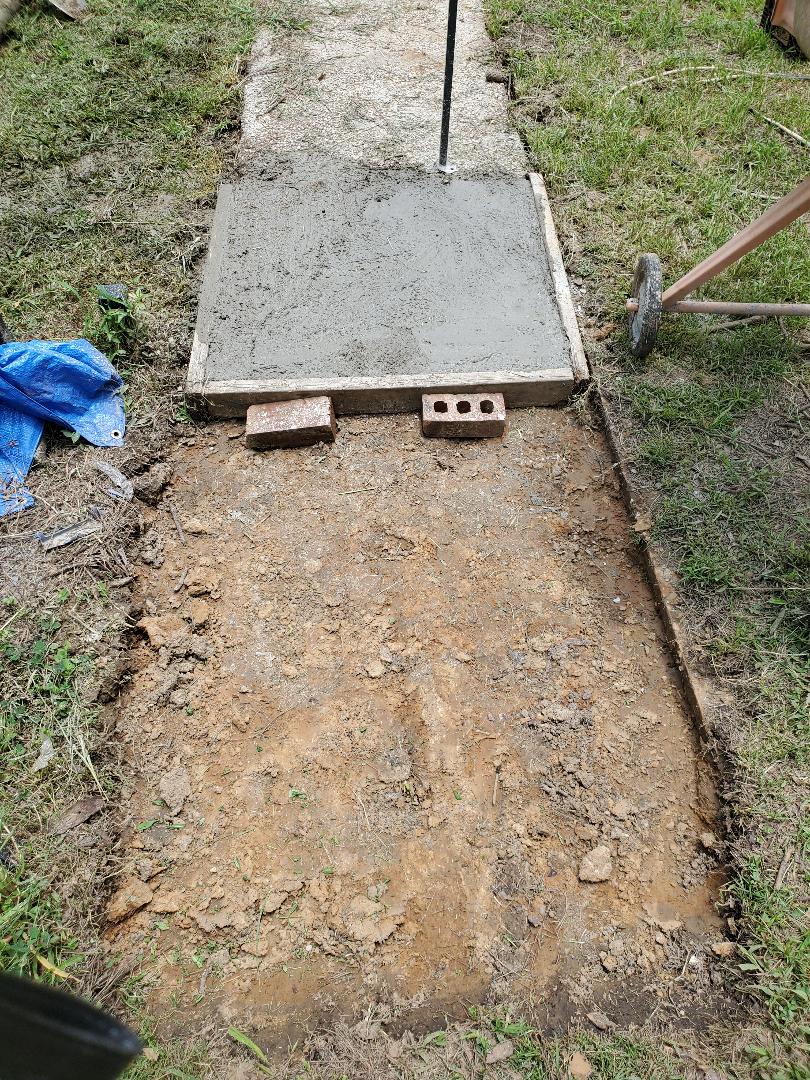 Walkway slab poured and curing With the slab done and the grassy area between the walkway and rock garden cleared, the next order of business was to start making preps on the chicken yard fence. Really the preparation is for the building of a whole new fence line to take place of the chicken wire setup we previously had. There is a single span of two posts that go from the house to where I had the twin gate set up. This span had a piece of chicken wire hung that was already pretty twisted up and shitty so there was no issue with pulling this down. My plan was to pull the fencing down and nail a couple of 8' 2x4's across the posts to get ready for the fence pickets I wanted to hang for the fence. I found the pickets I've been looking for at Lowe's for a cheap enough price that with the two 2x4's the 8' span of fencing would be much cheaper than the ready made fence panels I picked up for the last session of fence hanging. Also since the fence posts are only 5' from the ground to the top, putting 6' panels up would be kind of cumbersome. It would be better to just hang pickets on 2x4's that are hung at the heights I determined and be done with it. I removed the chicken wire and folded it up to be stashed with the scrap. Then I took the nail gun and nailed one end of a bottom 2x4 to one post then eyeballed where it needed to go on the other post. I took a tape measure to measure a distance from the bottom board up to where I wanted to nail the top board and nailed it up on one post. I then measured the same distance on the other post and nailed the top board on to the other post, ensuring proper spacing between the boards from post to post.  Cleared fence posts from side of house.  2x4's hung between the two posts, note angle of posts to coincide with angle of landscape After having taken care of the first span of the fence, I pulled down the gates as these were completely falling apart and even if they weren't, they wouldn't really fit with regard to how this fence is going to be when its done. I had to use the good ole power tools to remove the screws where I could to get the salvageable hardware from the gates. I was able to salvage a hinge and a bunch of screws but one of the hinges was a little too fucked up to salvage so to the scrap can it went. That gate went right to the burn pile for future disposal. I'll salvage the chicken wire from the fence afterward. The same was done with the other gate but at least I was able to salvage both hinges. On both gates I had to use the die grinder to cut through some screws that were too stripped to remove as well. 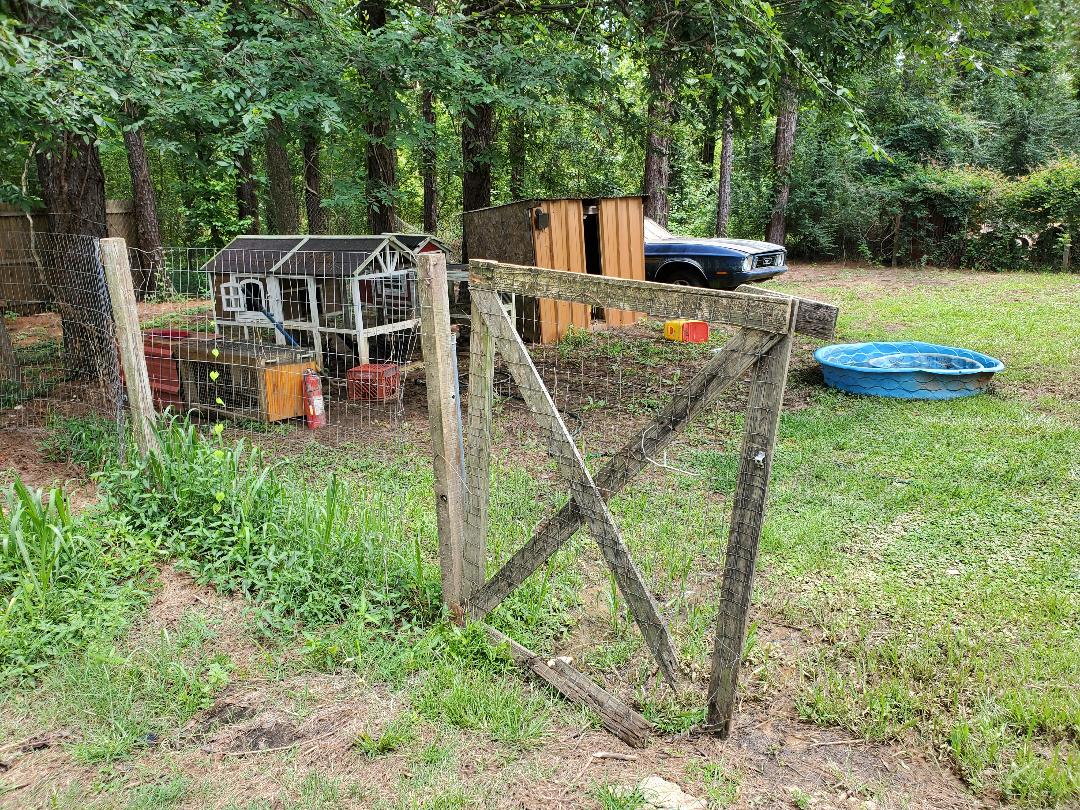 Old fence gate still up by one hinge, just prior to removal After removing the gates I started pulling some of the chicken wire fencing back from the first couple of posts, getting ready for when I continue the construction of the fence, as I still have a couple more 2x4's that I can tack up. I will have to replace one of the fence posts as it was rotted at the ground and I had previously propped it up with a metal pipe hammered into the ground. I'll have to dig all this shit up and sink a whole new post in the ground to replace it. Once that's done I can nail up the other two 2x4s so I can start carting in pickets and tacking them up to get this fence done. 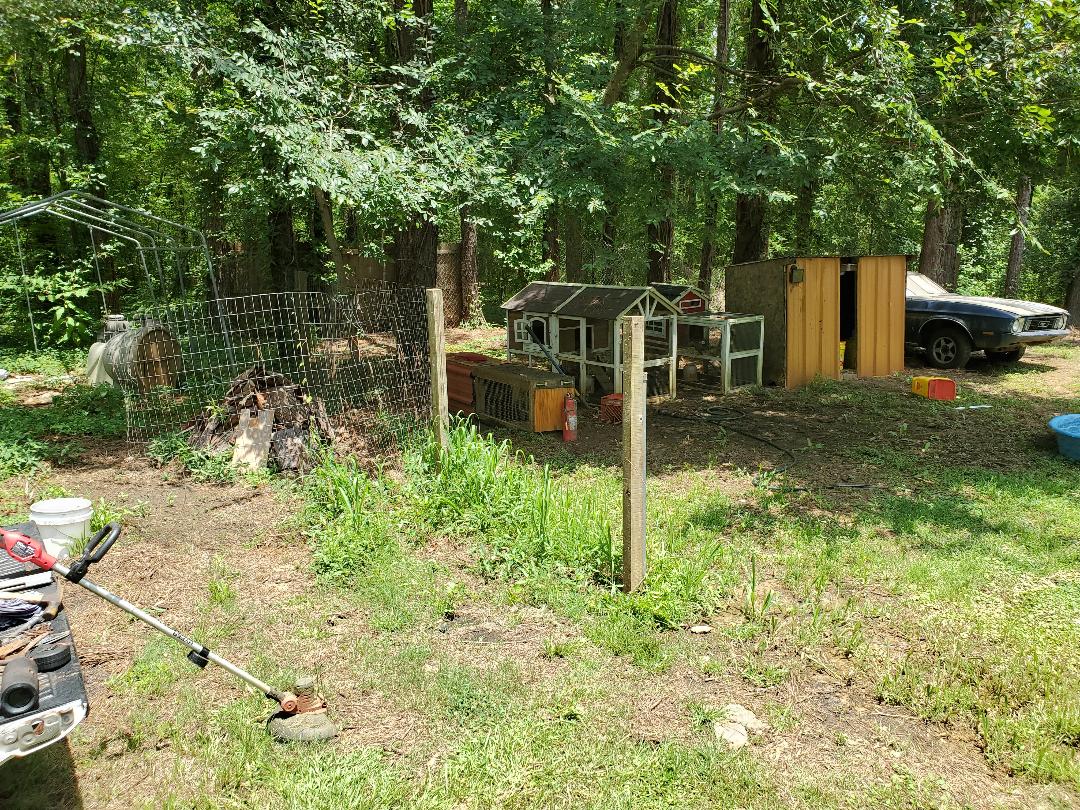 Pulling back chicken wire fencing from fence posts. Since the last tree fell a while ago, it pulled up one of the fence posts along this fence line. I still have to try and "dispose" of the stump but barring that, I will have to sink another post, or try to re-anchor the post with its concrete plug back into the ground. With that I'll be able to continue with the fence line, all the way to where the chicken wire terminates at the perimeter. In the process I will have to cut into the woods to clear the area better so I can work more comfortably with my fence building endeavors. This means there will be a lot more plant trash getting cut and stacked on the burn pile, or many burn piles, to be disposed of in the future as my landscaping and homestead improvements continue. 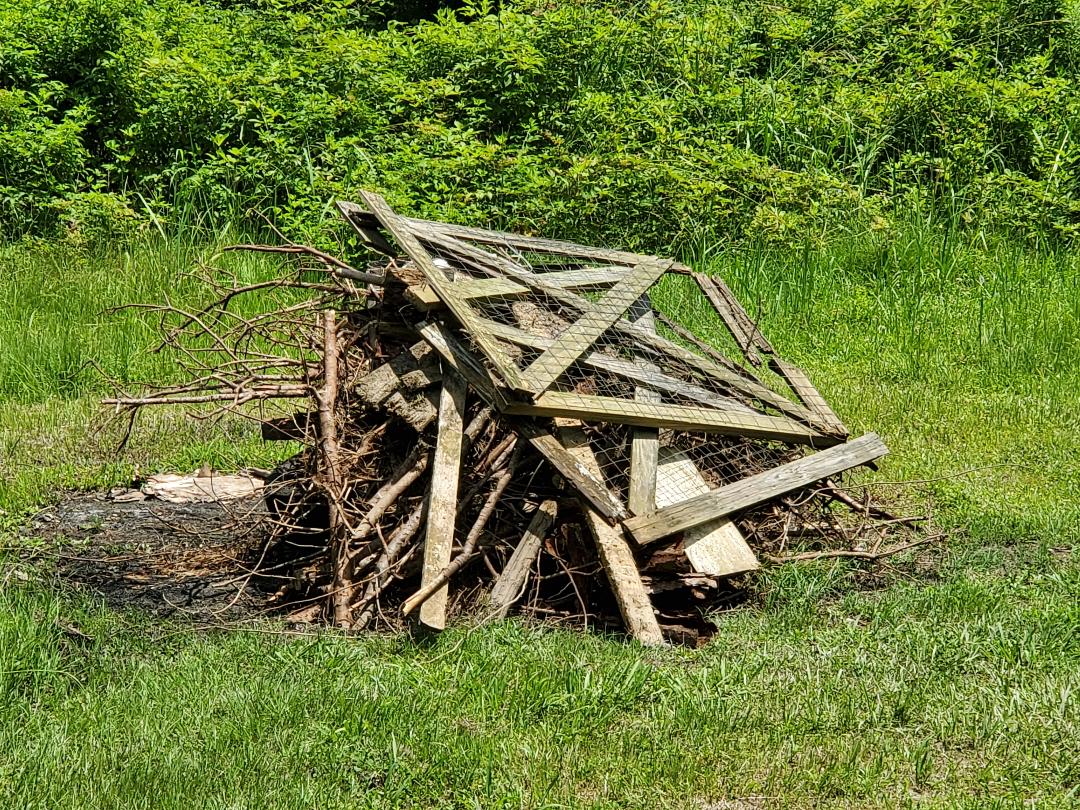 Growing burn pile with old gates stacked on top, soon to grow more.
I was in the home stretch with the firewood, having only the few logs remaining. With the daytime temps getting a little oppressive I had to do something to help me out when I'm sitting there in the driveway splitting firewood. I had thought of the idea of acquiring a take down canopy that would allow me to cover the work area during the day so I can at least work without being turned into a raisin under the noontime sun.
We ended up getting a 12x12 canopy from Walmart that has a collapsible frame. It does turn out the cover still needs to be put on after expanding the frame. It takes a little getting used to but with two people it can be put up pretty quickly. I managed to use this thing a couple of times already to my satisfaction. With a good long day I was able to set the canopy up for the long haul. 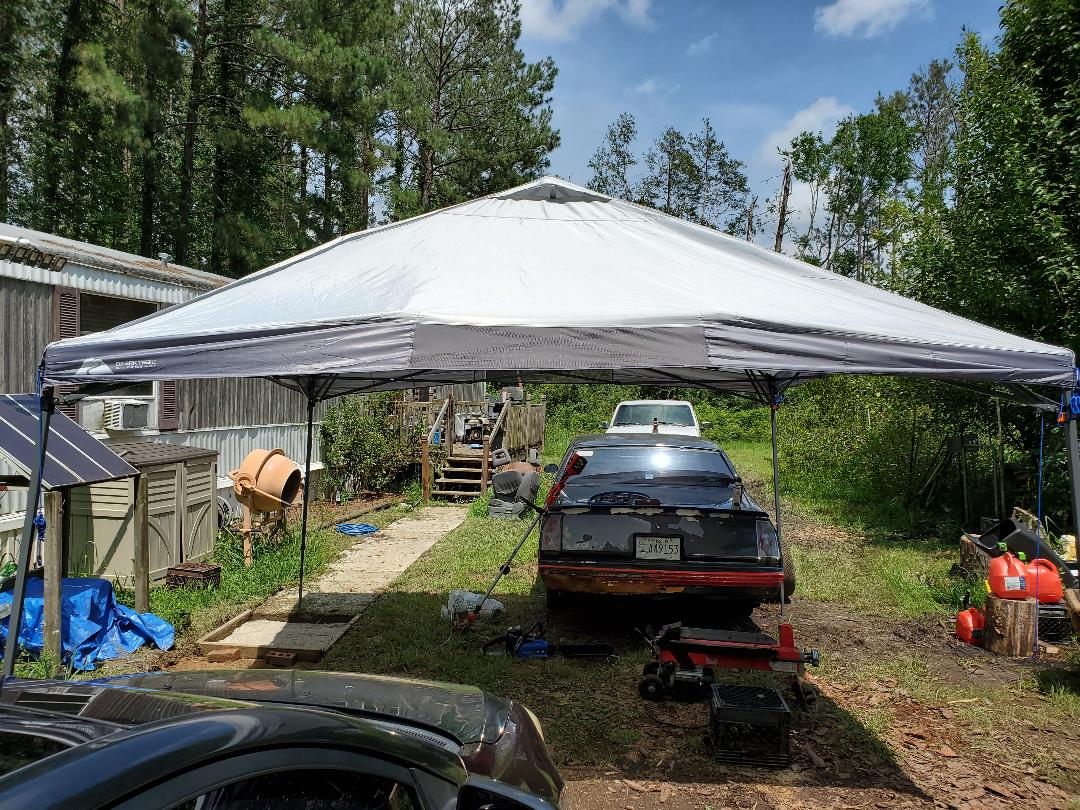
Canopy set up over work area where logs are getting split.
As usual I put the log splitter and along side of it, the chainsaw, to serious work. In the process I also cleaned up the area of all the branches and other small shit that came with the tree during its cutting down. I managed to get a good little burn pile started with all of this crap along with some other miscellaneous crap that needs disposal. Once all of the trash was disposed of it was back to business. With a recharge I was able to cut all the logs up. With the splitting I ended up producing so much firewood I ended up having to fish out another pallet to accommodate the wood. Luckily after finishing the wood I was able to stack everything with just a few spots to spare on the piles for the remaining pieces. With that I managed to finally get all of the wood cut and split from the driveway and stacked in neat piles on the pallets by the firewood shed. 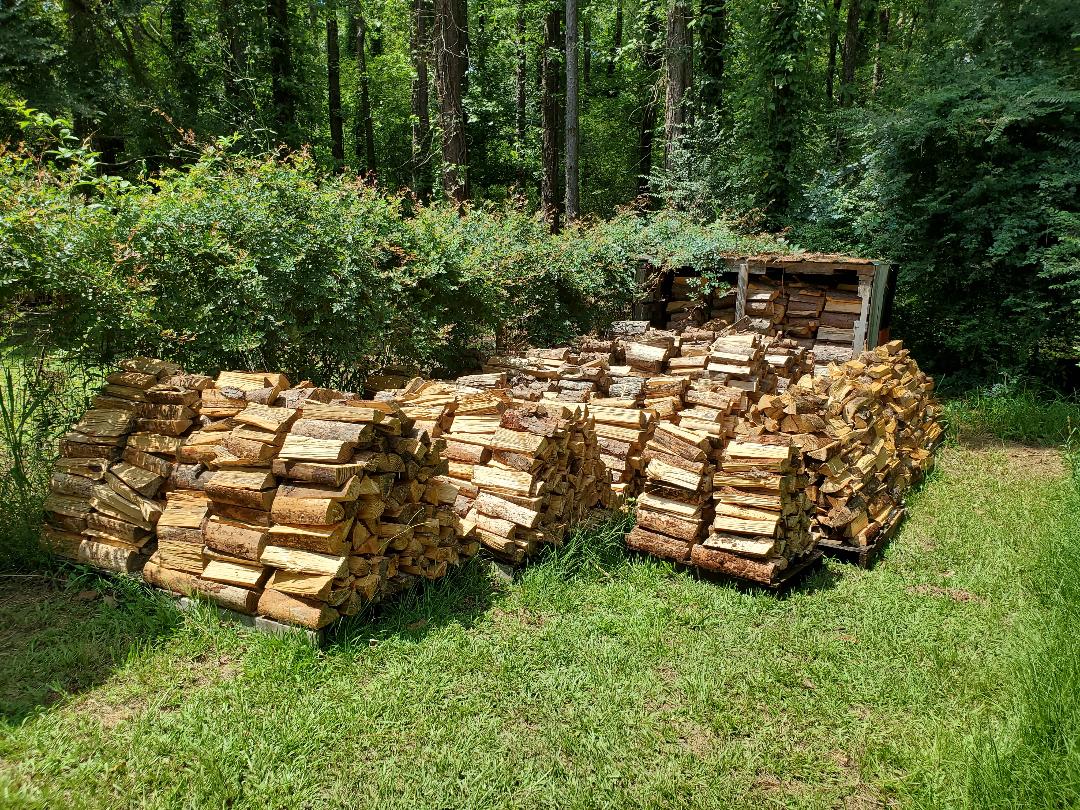
Finished stacks of firewood.
After getting the wood out of the area I went to cut the grass over that area. That ended up being a mess. The lawn mower normally needed a shot of starting fluid to get it started so I did the routine to get going and started cutting the grass. After a couple of minutes the damned thing conked out. I checked everything, tried it again, and it started up for a second and stopped again. I checked the oil and added some to make sure that wasn't causing the problem. I checked the fuel and it was good too but I topped it off anyway. I checked the throttle linkages and choke and kept trying. The damned thing kept doing the same shit, starting after some effort then stopping after a fast second. After doing this a few times I said fuck this damn mower. I had to stop and walk away from it because I was close to just picking up the thing and chucking it across the yard with the hopes of breaking the damned thing so I can have reason to beat it with a sledgehammer and toss it in the scrap can. In actuality the damned thing just needs another carburetor so I didn't want to just destroy the thing when I can just replace the bad part (which was actually a new part anyway). In the end I just pulled the battery trimmer and cut the grass in the area. It took a few minutes but I still got it done pretty fast in my opinion. 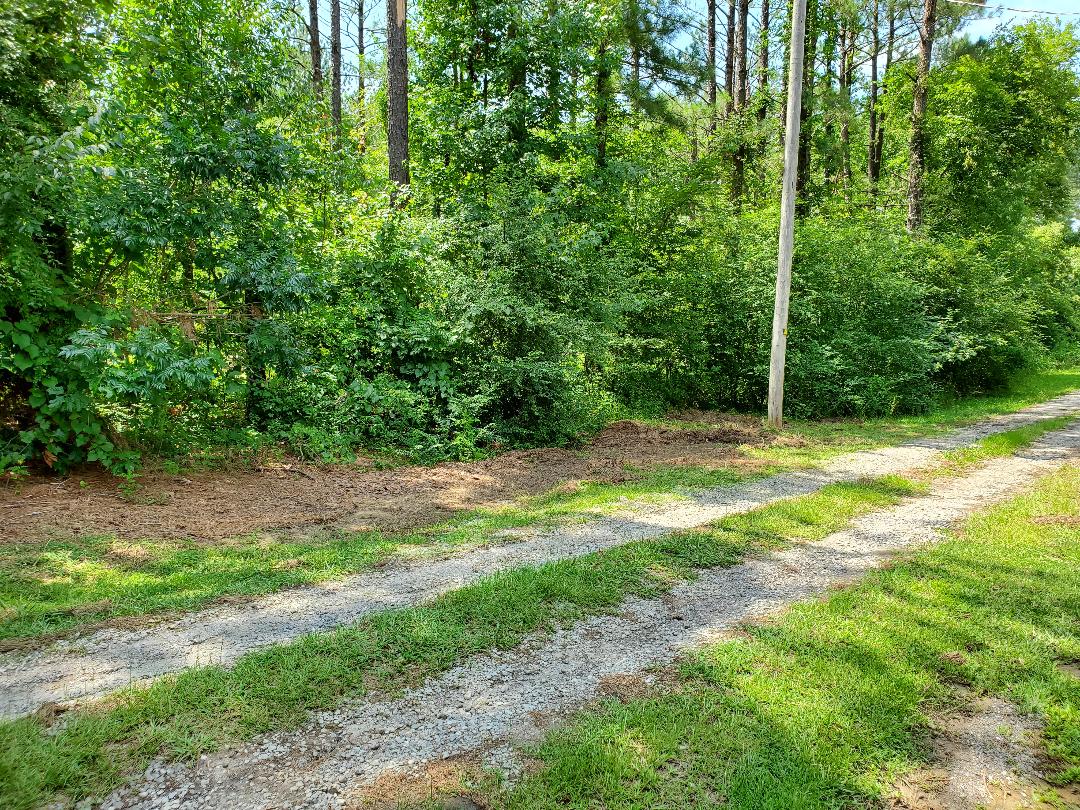
The cleared driveway after cutting the grass over the area.
After taking care of the wood the next thing I moved on to was digging up the old wood that used to be the walkway so I can prep the remaining area for the last couple of slabs. I made a walkway using 2x4's and some 2x8 boards for the actual steps. All of this eventually sunk into the dirt over the years so it had to be dug up. After removing the old wood I had to dig up the dirt in the area so I can make a good base to lay the mold boards and paver gravel. As for the dirt I ended up using it to fill some washed out areas along the back side of the house in the chicken yard. Over the years the foundation of the house has been slowly washing away and is in grave need of attention before it washes away so much that the house shifts off its mounts. I at least got a start by using the dirt to fill the ruts that were present at the base of the house skirting. With the old wood dug up and the dirt dug up I took the boards I used for the mold and set them back up to accommodate the next section of slab. Some bricks were placed to hold the boards in place. I took a bag of paver gravel and laid it out within the boards so I can get a good layer down prior to pouring the concrete. With that, I just need one more slab afterward and I'll be done with the walkway, once and for all. 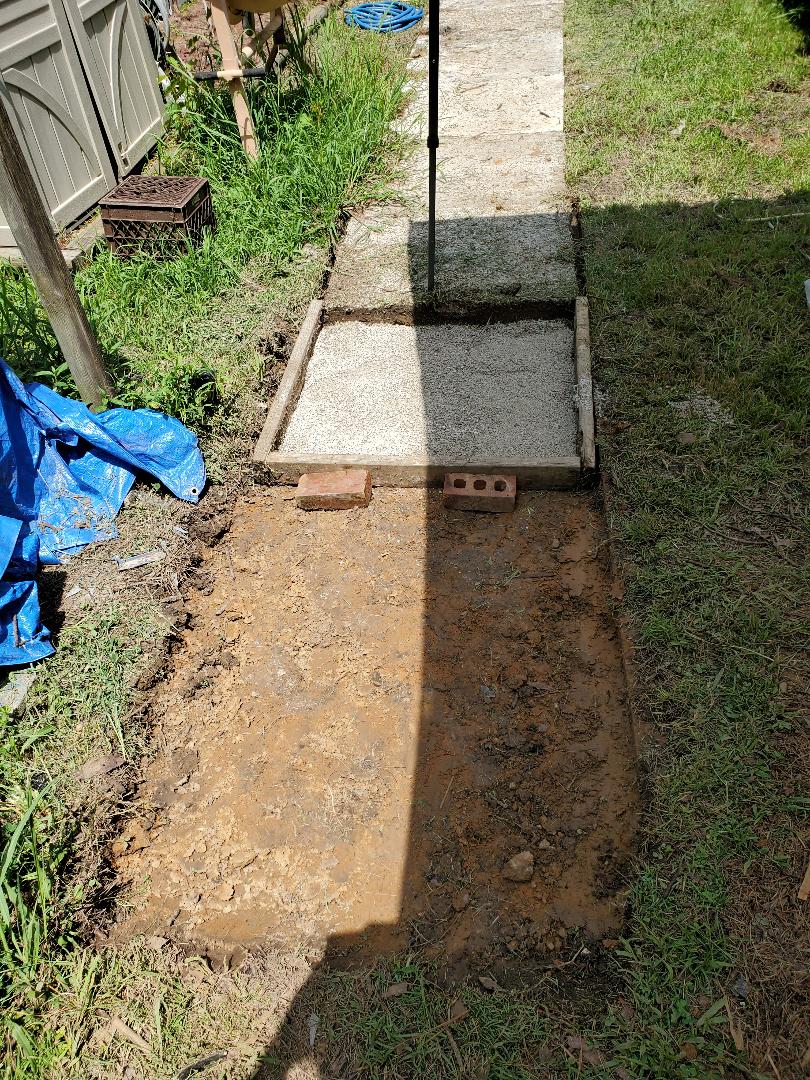
Walkway dug up and frame laid out with gravel down.
Even though it appears that the area outside of the slab frame is much bigger, I will still do just one slab, reason being is the last slab will have a slant to it to bring it somewhat level with the ground. This will be for when we have to use a dolly to move heavy items, we won't have to worry about trying to climb up over the edge of the walkway anywhere. By making this last slab longer I can make a better ramp that is longer and not as steep as it would have to be if the slab was of the same dimensions as the other slabs. Soon enough I will have another big project completed.
As time has progressed, the potato plants I had planted finally died back, indicating that the potatoes were ready for harvesting. I went ahead and pulled the dead plants up then made my way through the raised beds digging through the dirt to find every spud I can. Some of them were starting to rot, which was expected. Some of the spuds are gonna be subjected to moisture in the dirt, as well as bugs. All in all, I did get a decent harvest of potatoes, given the number of seed potatoes I initially planted.

Batch of potatoes harvested from raised beds.
One of the other things I did was make sure to harvest the undeveloped spuds that were too small for eating. The purpose was to use these as the next generation of seed potatoes, or at least try to. If I can get these mini spuds to sprout, then I can go full circle, keeping the potato train running. 
Batch of mini potatoes to be used as new seed potatoes.
The next order of business is my continued interest in getting the perimeter fence put up. I chose to continue where I had left off at the end of where the old dog yard fence used to be. I did start off nailing 2x4's to a span between two posts with the intent of making my own fence panel if pickets came up for sale cheap. Unfortunately that didn't happen so I ended up popping those boards off and installing two complete 6x8 fence panels to cover two spans of posts, taking the fence part way along side the storage trailer. 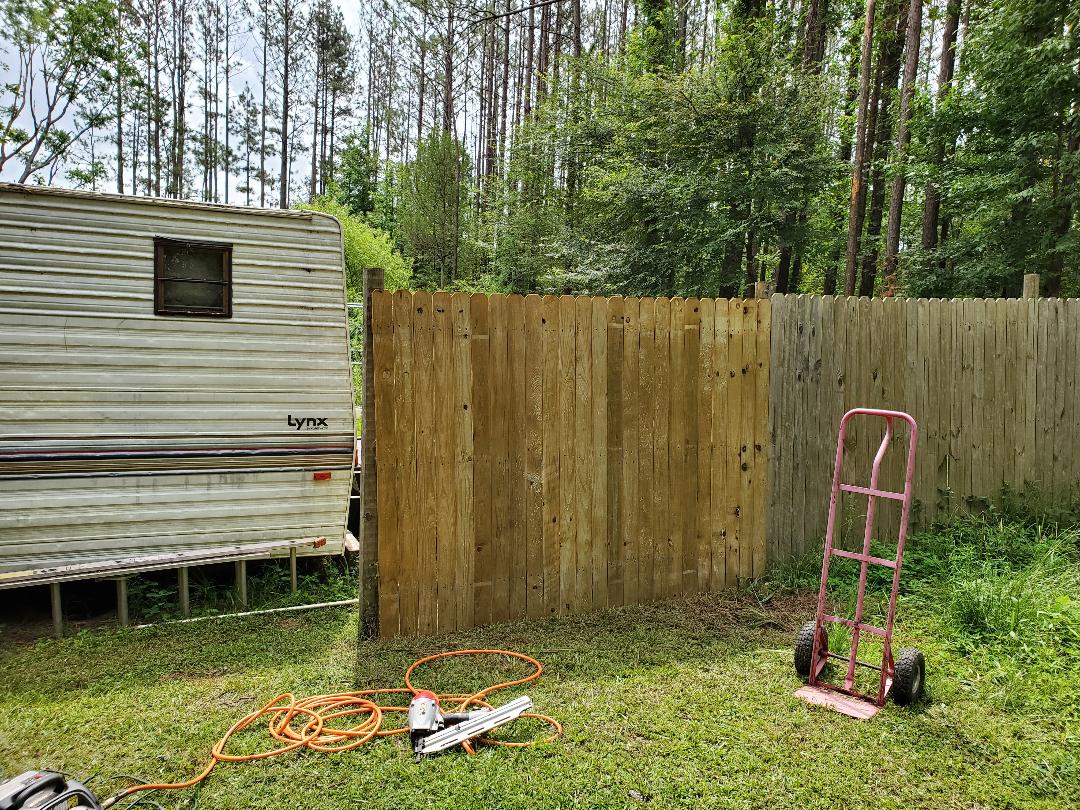
One fence panel installed across first span of posts. Note different shades of panels to indicate where dog yard fence ended and new fence continues.
With these first two panels up, I need to install six more panels to cover the whole length of fence up to the driveway. If I continue to get two panels a week I'll have the section of fence done by the end of the month. Unless pickets come up for sale at a low enough price to allow me to make fence panels for cheaper than the ready made panels, I will be going this route. Under better circumstances I may be able to up the ante to three or four panels at one time to be able to finish things up that much sooner so I can move on to other areas that will need fencing, such as the chicken yard. 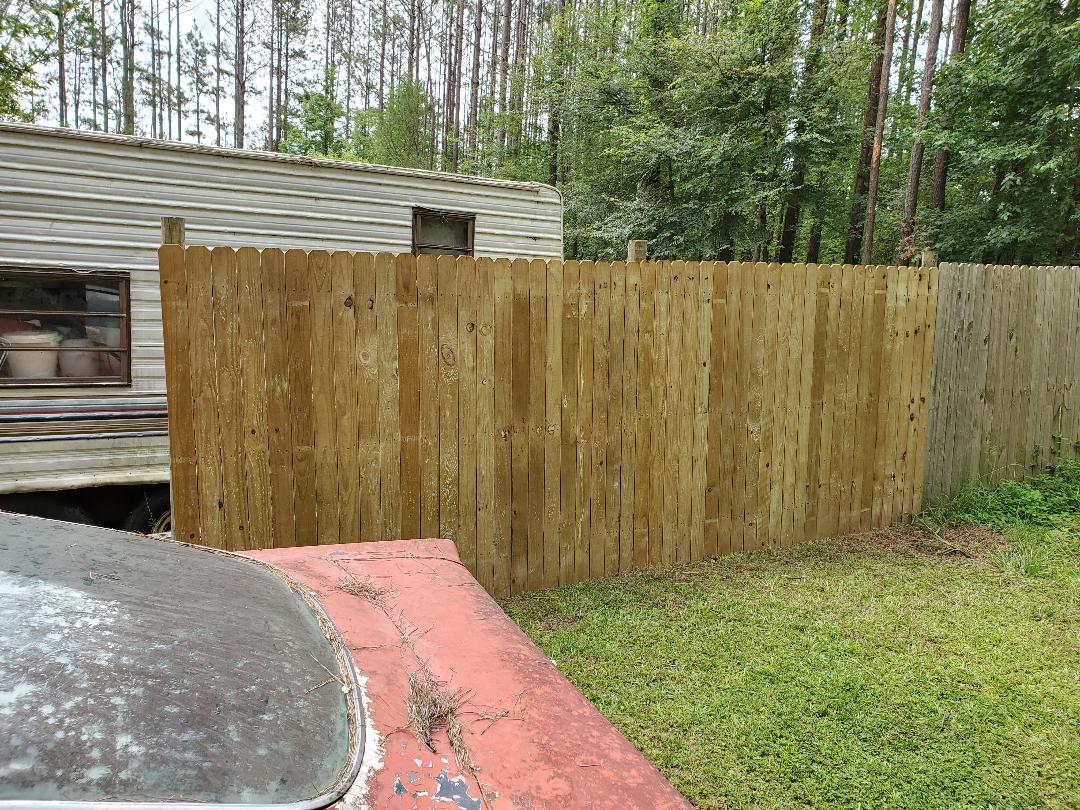
Two fence panels nailed in place covering the spans of posts going along side the storage trailer.
Another thing that is in the advanced/final stages is the processing of the cut logs that were staged along side the driveway after trees were cut up. After getting the chain for the saw sharpened I was able to chop through more logs before the battery died, allowing me to get a good stack of short logs cut and ready for splitting later on. 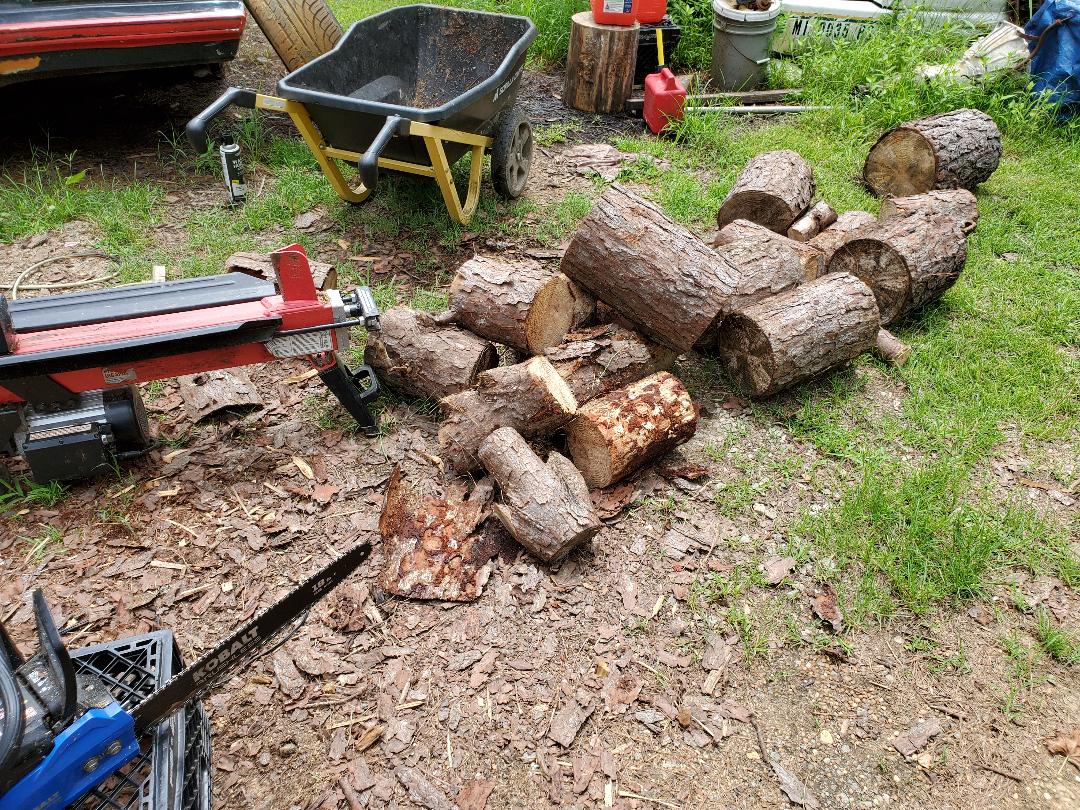
Good stack of logs staged by splitter ready for further processing.
At this point all that remains along the driveway are a few long lengths of logs, approximately 5 ft long give or take. These logs when further cut will probably yield 4 short logs a piece. Again, as long as the chain stays sharp I should be able to get these cut down quick, and further split just as quickly, concluding the processing of the logs along the driveway. There are some more in the woods that were left there as they were too big to move out so I'll probably be getting to those later on in the year, probably in the winter when the plant life has died back enough to allow me to further cut paths into the woods to reach these logs and cut them up where they lay and wheelbarrow them out as well. All of this will go on at the same time I'm working on the perimeter fence that spans the back of the chicken yard since I will need to be able to open up the woods along the outside of the fence to be better able to work and especially move ready made panels in place.
|
