|
As is always the case every year, we tend to get away from the homestead for a brief spell just to relax some and play tourist. This time our destination is the areas of Orange Beach, AL and Pensacola, FL. We stayed at a Vrbo condo in OBA and rode over to the naval station in Pensacola to visit the aviation museum that just reopened to the public. There's also a lighthouse we can visit and one can also stick around to catch the practicing of the Blue Angels. The aviation museum takes up two large hangar sized buildings, with planes clustered together and hung from the high ceilings. We spent a good few hours going through this museum, reading the different placards and recording video while enjoying the exhibits of the different aircraft, models, and displays that were built. Check out the video of this museum tour as well.  Outside in front of the Aviation Museum  F14 Tomcat  Blue Angels F/A18 Hornet 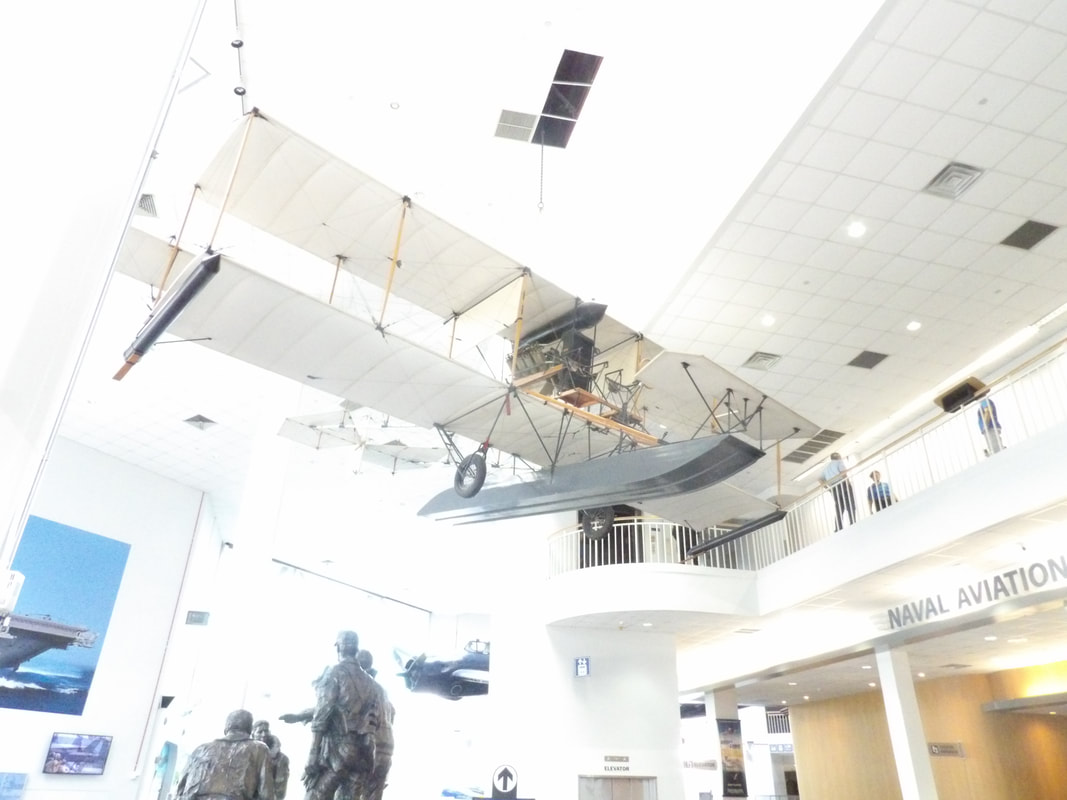 A-1 Triad seaplane 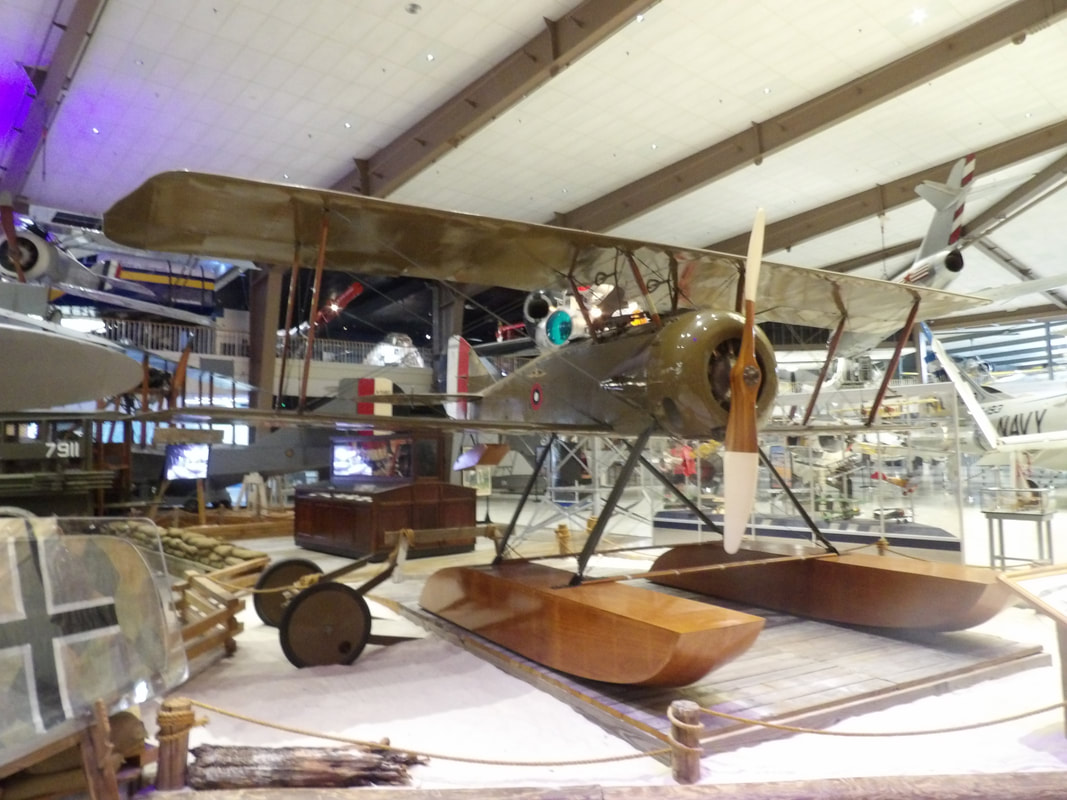 S-4C "Tommy" seaplane  F11F  F3H-2 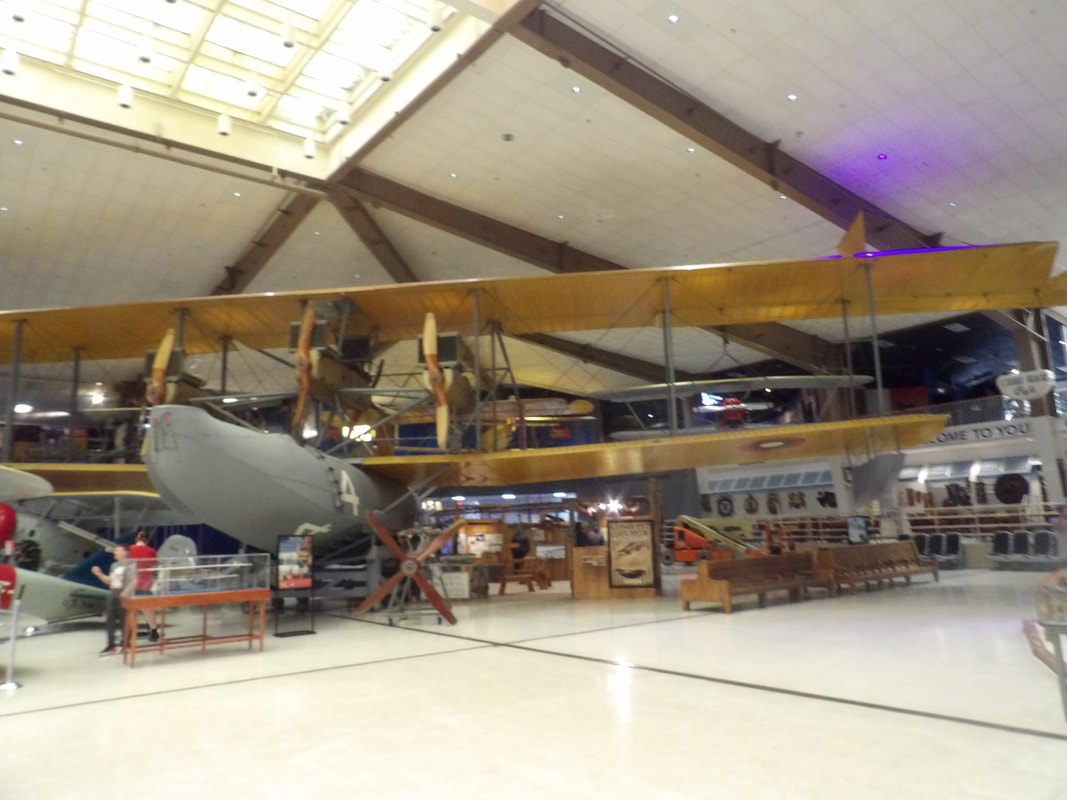 Navy Curtis flying boat NC-4  RR-5 Ford "Trimotor"  P40 Warhawk  SB2U Vindicator  Mig-15  F9F-6 Cougar 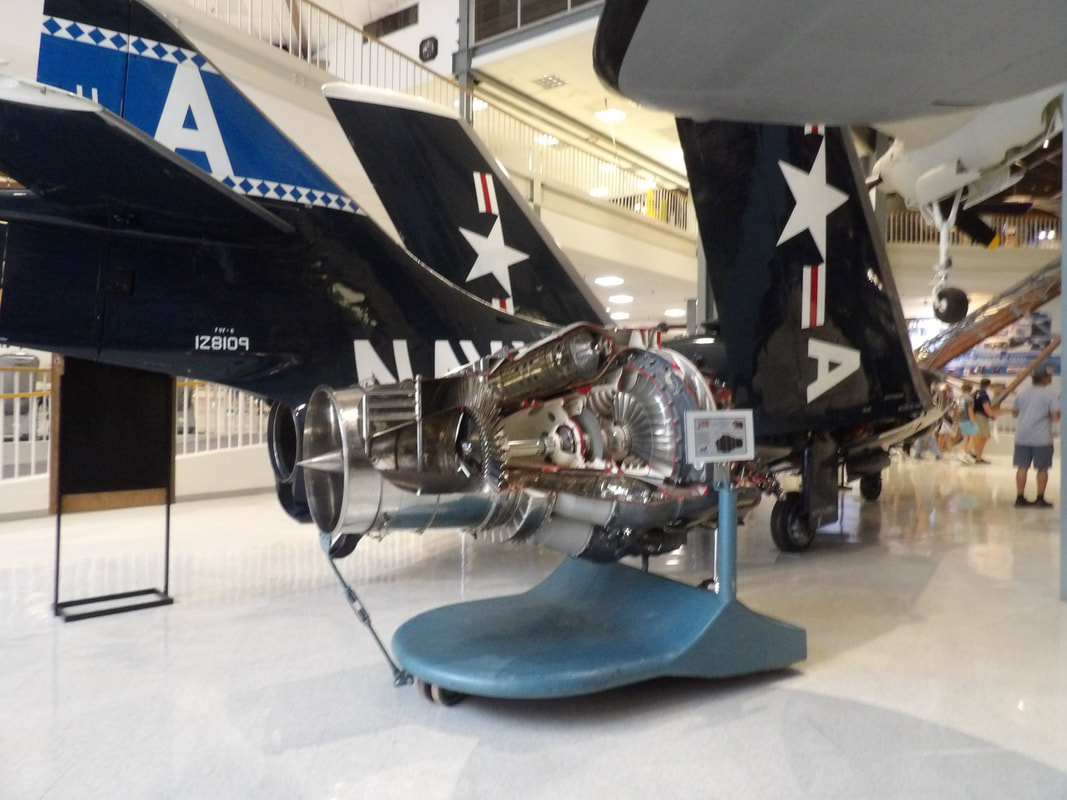 The Cougar's powerplant  Piasecki HUP Retriever twin rotor helicopter 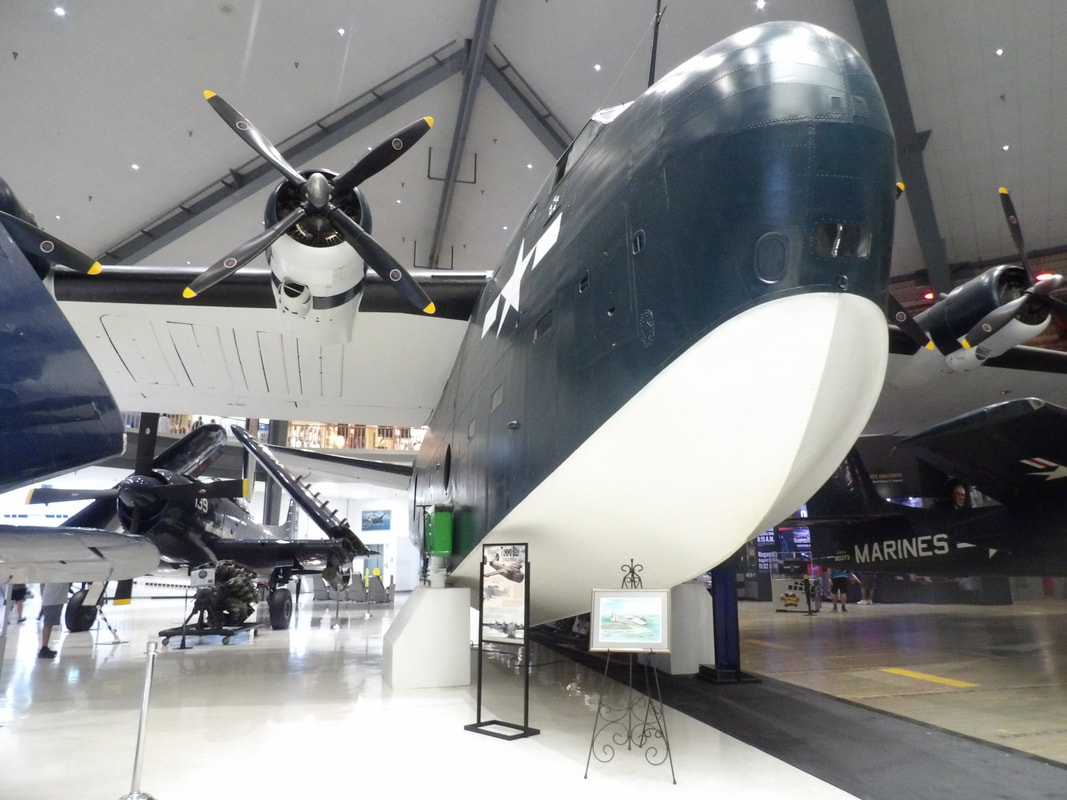 PB2Y/5R heavy seaplane  Another view of the PB2Y seaplane.  SB2A Buccaneer  Vought F4 Corsair  B-25 Mitchell light bomber  Me-262 German jet fighter from WW2  A 2nd floor view of the the aircraft laid out on the floor below.  Another 2nd floor view of the floor full of aircraft below.  Blue Angels A-4 Skyhawks  R4D-5L Skytrain  SH-60 Seahawk  VH-3 Sea King "Marine One"  NU-1B Otter  EA-6B  E2 Hawkeye 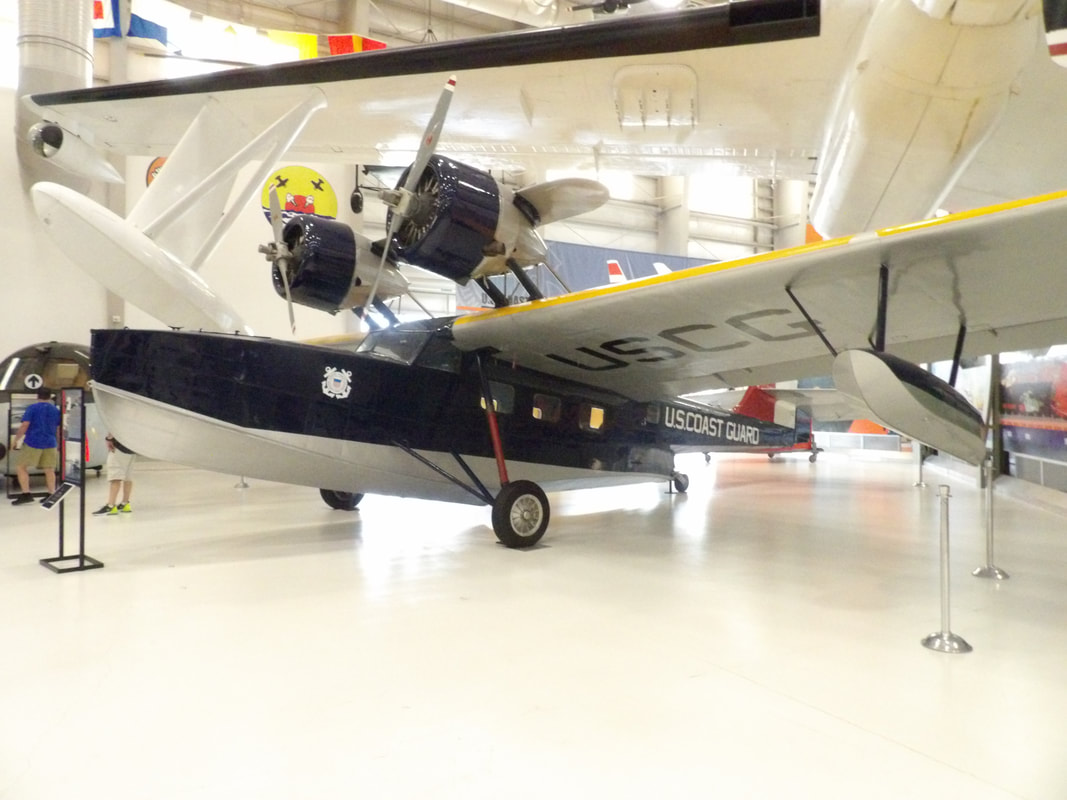 RD Dolphin seaplane  SP-5B Marlin seaplane  HH-52 Helicopter  A6 Intruder  SH-2F Seasprite With the aviation museum tour completed, we continued on with our day, taking time to get something to eat and find something else to do in the area. Tomorrow the plan is to come back to the naval station to visit the lighthouse which is off the main road we took to get to the aviation museum. Not only are we going to go in the lighthouse but we're also going to watch the Blue Angels practicing from the top of the lighthouse. That will be cool.
0 Comments
When I last left off, I had a minor issue with the last of the bucket raised beds when the center board broke completely, causing the buckets to fall in on themselves. At least when they fell in, they kind of fell against themselves where they didn't just hit the ground and break and dump dirt everywhere. So, after removing the buckets with their plants, I sourced another 2x4 to make the repair. After measuring and trimming the board down, I had to cut the protruding nails from the frame that were used to hold the 2x4 in place. From there, instead of just driving deck screws through the frame and into the 2x4, I took some surplus framing brackets that were used for holding our old porch together. These brackets are made to fit around the end of the board and hold it against another board. With two brackets and a few shorter wood screws, I had the middle board hung back up. 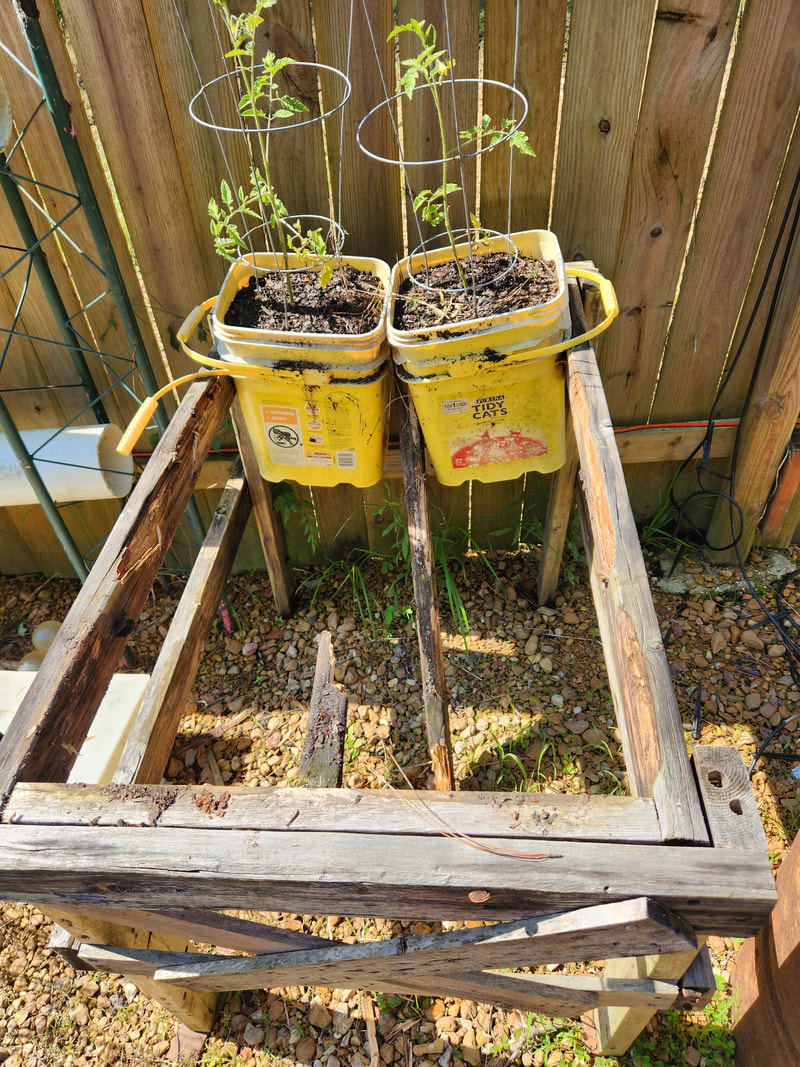 The old center 2x4 on this raised bed rotted and broke, dumping the bucket planters halfway to the ground. Luckily they broke each other's fall and didn't spill everywhere. I didn't finish the repairs here however. Since this frame was held together with nails secured with a nail gun, eventually the structure began to weaken in spots. To remedy this, I used some longer deck screws in certain spots around the frame to reinforce the frame/table and make everything sturdier so the frame won't have any sway, especially under the weight of eight full buckets of wet dirt. The end 2x4's on this frame have some degradation just as well but for now are still solid enough to hold the buckets up. In time this structure will need to be replaced as the wood continues to rot away. 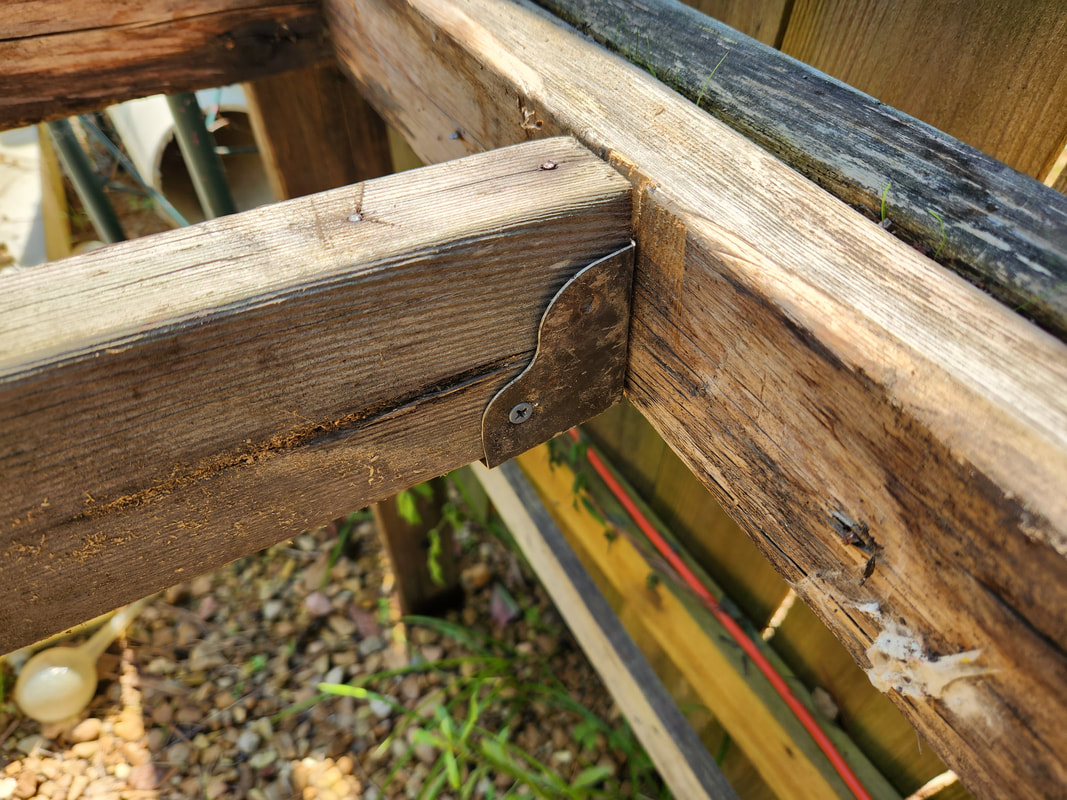 The framing bracket used to hold the center 2x4 on the raised bed frame. Also note the rot on the other 2x4. The next thing I did in the garden was address a couple fig trees that for some reason or another, seemed to completely die, except for a few small branches at the base of the tree. The larger branches on the tree just died, and died to the core. I ended up cutting all these dead branches and pulling up some weeds from around the base of the tree to hopefully give the living branches and pieces a chance to grow and hopefully recover the tree. Our oldest fig tree suffered some of the same issues, just not as bad, so I only had to trim a few dead branches from it. I would imagine that these trees would probably do good to be trimmed at times just to rid the greater tree of weak and dead branches before any issues migrate throughout the entire tree. 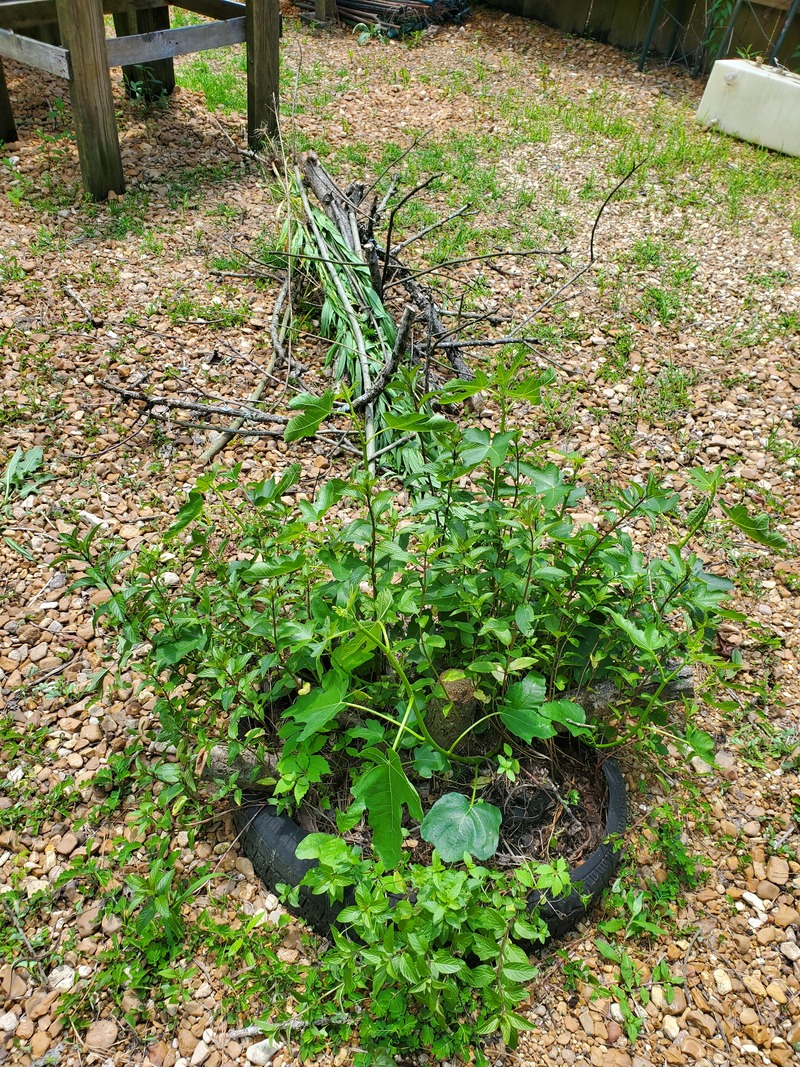 This fig tree was almost completely dead save for a few small new growth branches at the base. Some mint sprigs popped up around the base of the tree as well as some weeds. I pulled up the weeds, but the mint may remain as we can harvest this stuff later. Mint is almost worse than weeds, due to the fact that this mint plant was planted over 10 ft away in another spot several years ago. Note the cut branches in the background, some of which has already been moved to a brush pile. Along with this trimming and cleanup, I took a moment to get some base measurements in order to get some new wood in order to build another bucket raised bed, as well as a double half drum raised bed, since I have these planting components currently laying on the ground. I would like to get the new beds built in order to clean up the garden that much more of the planter buckets and drums. The garden is another area of the compound that continues to need things done to make it better and more complete. Hopefully more sooner than later I'll get the raised beds and hydroponics built that I want to do to fill up the garden area enough that I won't have to worry about building anything else, just maintain. When I last left off, I had spent a little time using our neighbor's tractor to spread the two huge piles of pine mulch over three separate areas that I wanted to cover, at least before I can get around to spreading gravel down over those same areas. Trying to use the front end loader on the tractor or even the grader on the back to level off the mulch piles was more difficult than just using a heavy rake to do the work. I went ahead and spent the time just dumping pile after pile with the front end loader over the areas, spacing the piles out so when I do spread them out, I will get a uniform coverage of the area. One of the biggest areas I focused on was the area around the Shooting Range, as well as the area behind the trees that support the Range. 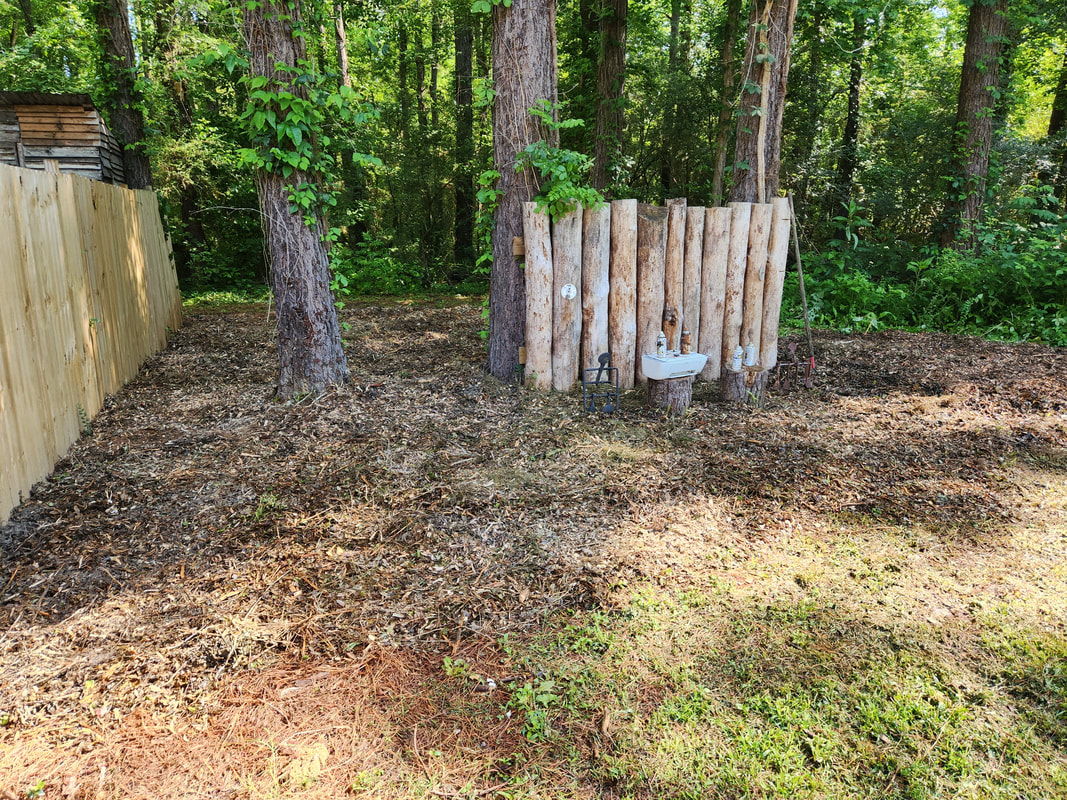 The area around the Shooting Range and the east fence, uniformly covered in mulch after spreading the stuff out from the fence line out around everything. In the dumping of the piles of mulch, I took time to make sure I dumped some along the fence line, so I can get a full coverage from the fence line all the way out around the Shooting Range and the surrounding area, eventually connecting to the path running along the north fence. With the piles situated, I was able to spread them out, getting a coverage reaching out more than six feet from the Range, all the way from the fence line. Even the area that serves as a path going around the back of the Shooting Range to the rear area just before getting to the north fence path was also covered well. This intermediate area has a complete coverage, allowing me to use the area for whatever I may deem necessary. I don't expect to use this area for any kind of building project, but it might serve as a staging area for other things, like surplus truck frames or the like. 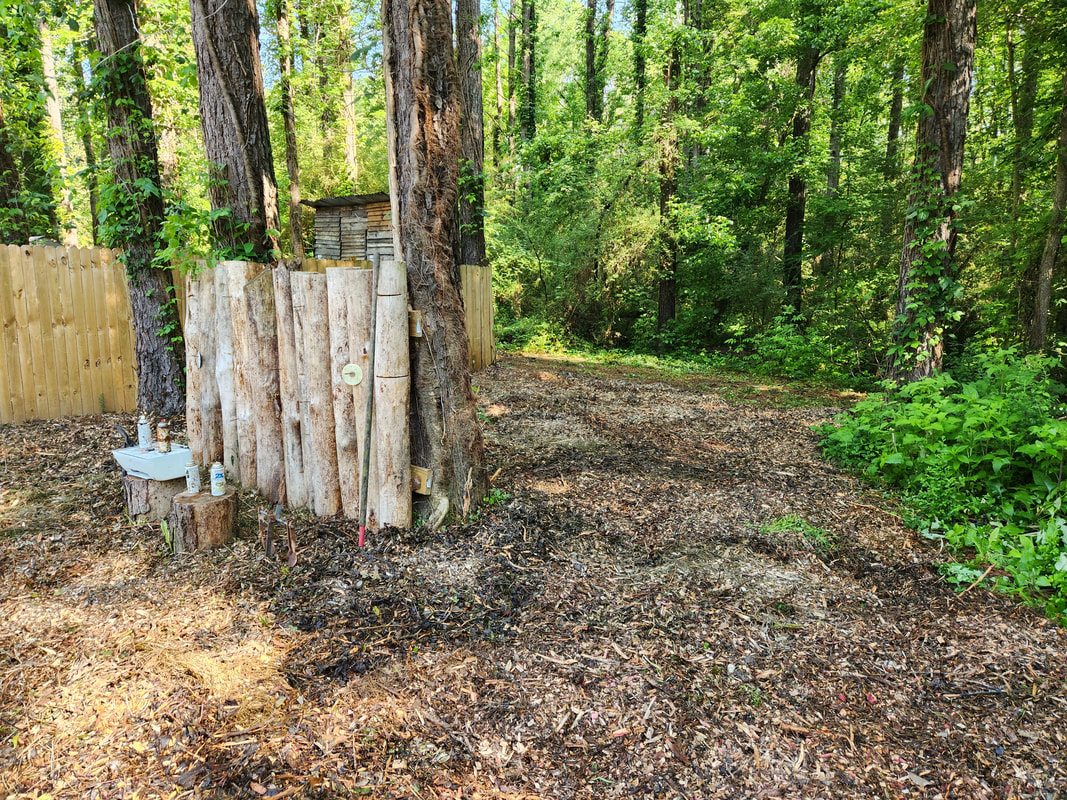 The pathway going from the greater backyard area around the Shooting Range to the intermediate area just before getting to the north fence pathway. Note how the large area is uniformly covered with mulch. Now speaking of the north fence area. This area has been and will probably continue to be a problem for us due to its water retention issue. I will probably find myself dumping the remaining mulch over this area and spreading it out by hand carefully, versus using the tractor to drive into the area. Since the ground is so soupy, trying to drive in to dump the mulch will just further dig out the ruts that were previously created, causing me to have to work on moving mud as well as mulch. The mulch will really be a weak temporary solution to the greater problem that would end up requiring something heavy like large rocks or even concrete in unison with gravel to bind this damned mud up enough to make it even be capable of handling anything more than foot traffic. 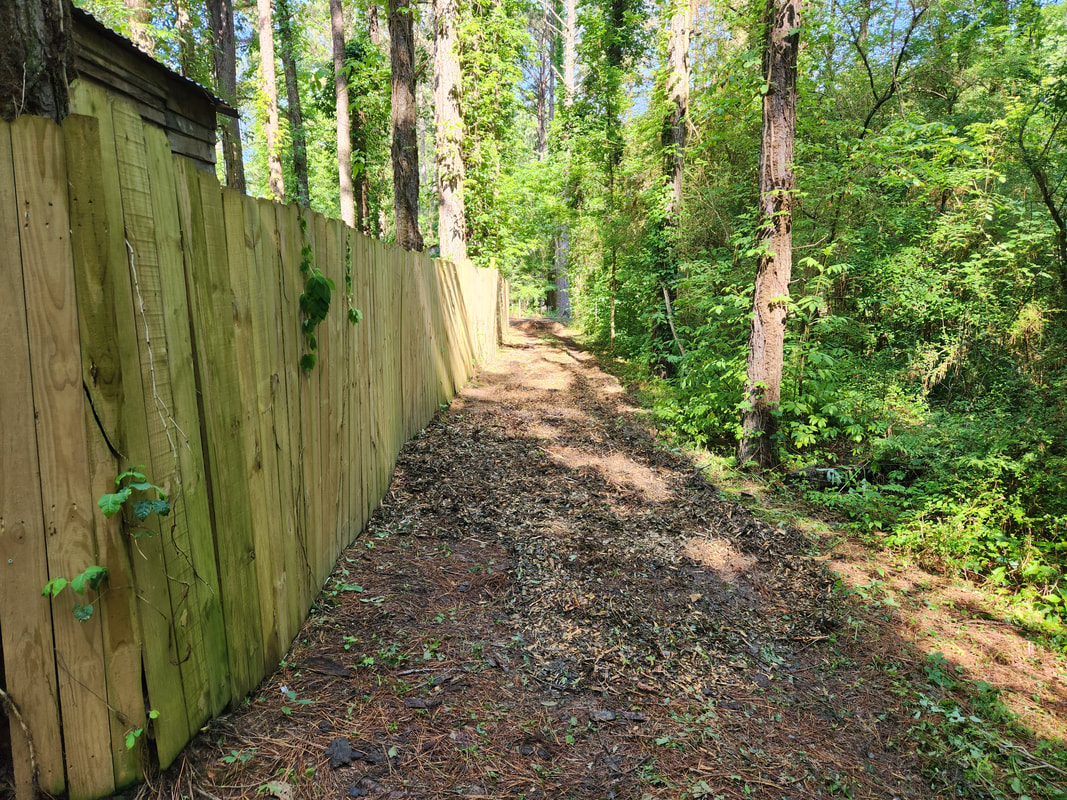 The north fence pathway, after spreading the mulch and displaced mud to fill in the ruts created by the tractor. This area will need a lot of work. While the arrival of this huge amount of mulch was an unexpected blessing and curse, it will go a long way to improving things around the compound, especially when it comes to "infrastructure". Pathways for different traffic will make normal operations easier, especially as we continue to pick up the pace with automotive projects, among other things. Everything we do around here is a means to an end, and that end may change at any moment, based on new ideas or greater plans. In the recent days a local tree trimming company came through our area, tasked by the power company, to trim tree limbs that were around all the power lines that are strung across the landscape. They even came down the long driveways on the different rural properties, also trimming. A tree branches, which was even better, so we wouldn't have to deal with the risk of an errant branch falling on our power lines, even on our properties. Afterward, the men would come back with shredders and claw crane attached trucks to grab the piles of limbs to run them through the shredders. This resulted in a lot of mulch. We asked one of the shredder crews if it was possible to dump a truckload of mulch by our place for use around here. They were more than happy to oblige. Instead of one truckload, they came back a couple times, dumping what looked like two more loads, piled together, yielding us a humongous pile of pine mulch with some other trees ground in for a little body. 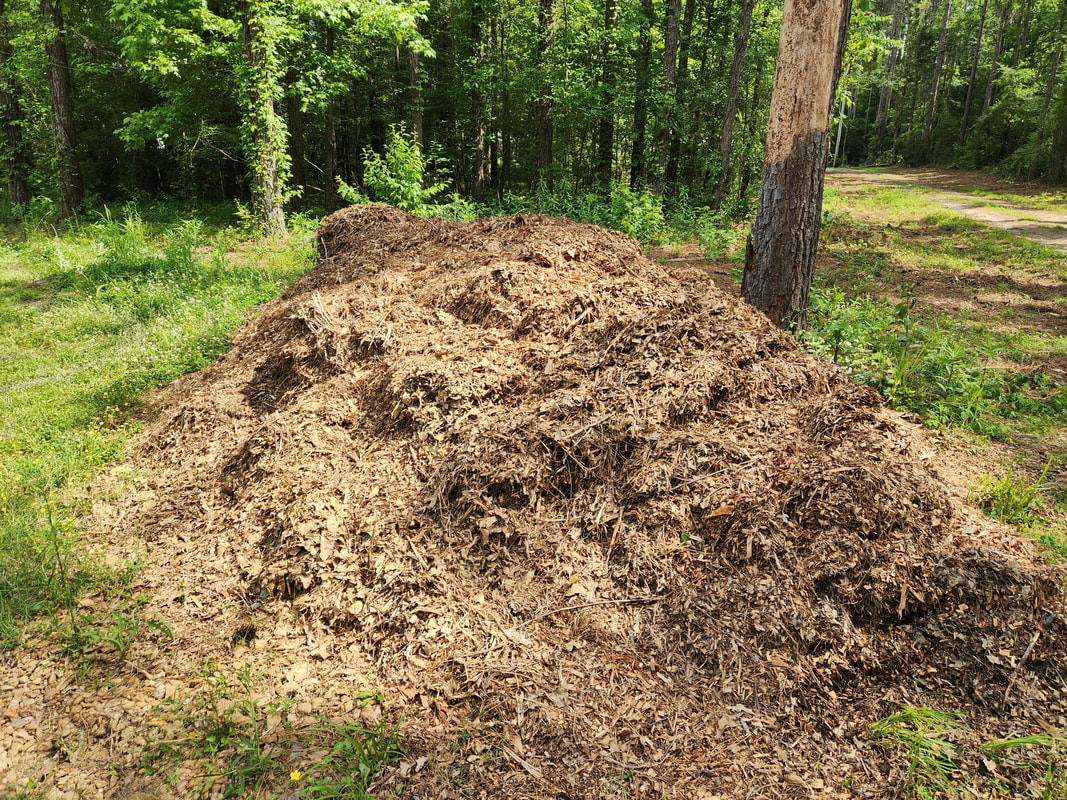 The large pile of mulch dumped on the south side of the compound fence line, next to our gravel path, which has its own issues when it comes to soft ground. 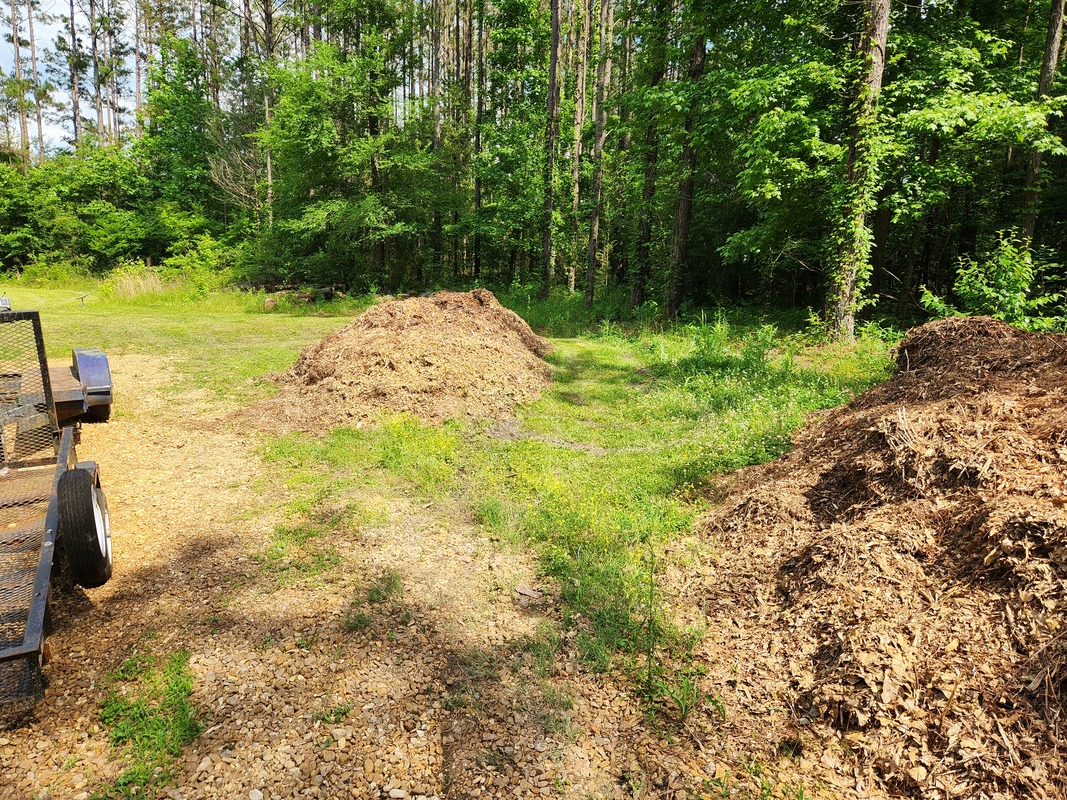 The other large pile of mulch, dumped further back, with the humongous pile to the far right. Now the next question was what the hell were we going to do with all this mulch? The only logical thing I could think of was to use the stuff to lay some pathways and ground coverings in places where there's grass, since it would take a lot of gravel to achieve the same goal. I had an idea of some areas I'd like to cover. With the aid of the neighbor's tractor, which has a front end loader, I was able to scoop up large amounts of the mulch to lay it in my intended areas, starting with the pathway between us and said neighbor friend. 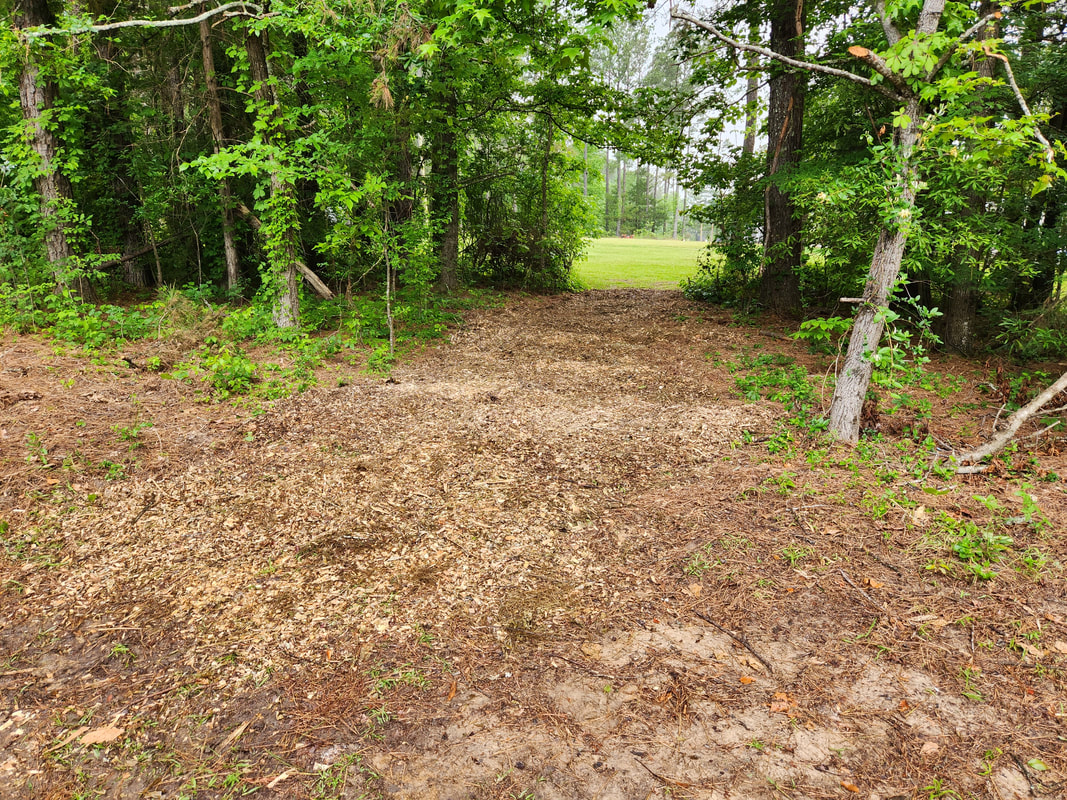 The neighbor pathway, the area cut through the buffer of woods dividing us from the neighbor's property. At least the mulch helps make this walkway a little neater and nicer than the grungy looking pine needle and ground detritus bed that normally covers this area. The next area was the pathway along the north fence, going through the woods. The unfortunate reality here was the idea that this was at the lower point in the grade of the land, so this area stays mushy year around. Dumping mulch on the ground was not enough to keep the tractor from tearing up the ground trying to go through here, so this will be one of those problem areas that will take a lot of work to build up before it could ever be capable of handling even small vehicular traffic like an ATV or even go kart. 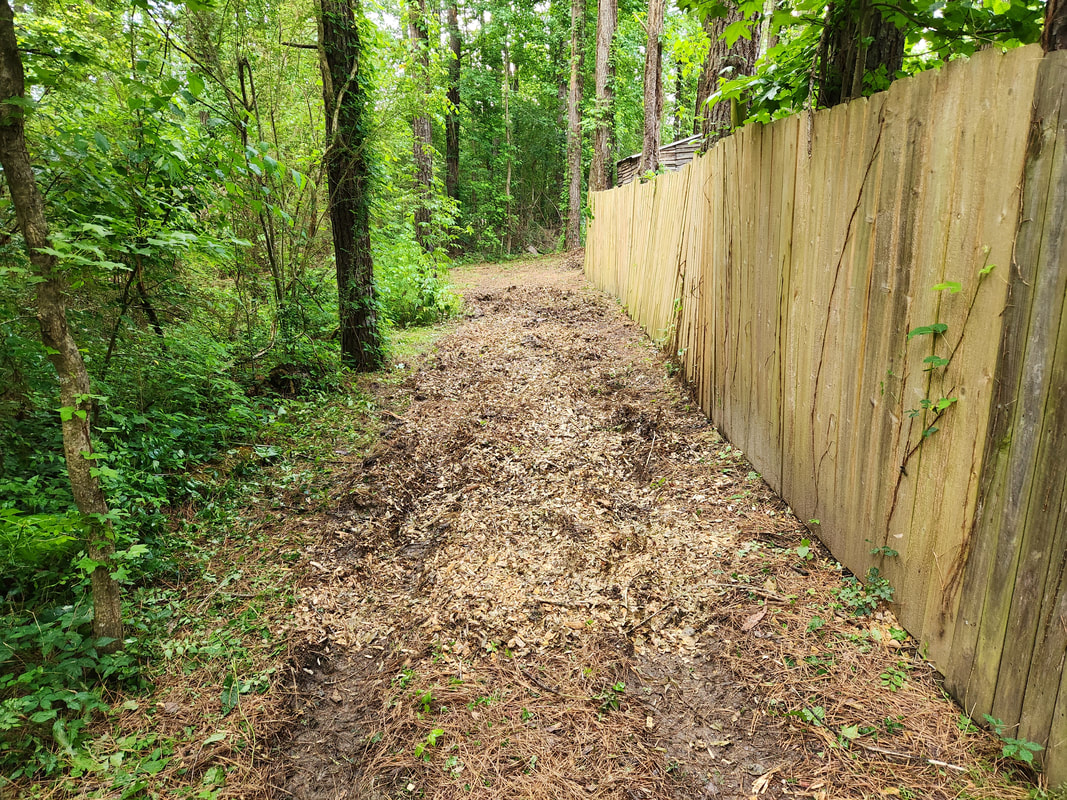 The path along the north fence, with a good amount of mulch spread out. Note the deep tire tracks gouged out from the tractor as I passed through the area in the dumping of the mulch. The next area was around the Shooting Range. My plan here was to lay a bed of mulch extending out from the Shooting Range into the yard, as well as behind the Range going into the woods where the area connects with the north fence pathway. I had already cleared the grounds through here of weeds and other trash so I could dump piles of mulch on the ground. The intent here was to get a sizeable amount of mulch staged around the area. I would come back over this stuff and spread it out by hand, since it's more of a pain trying to use the tractor to spread the stuff. 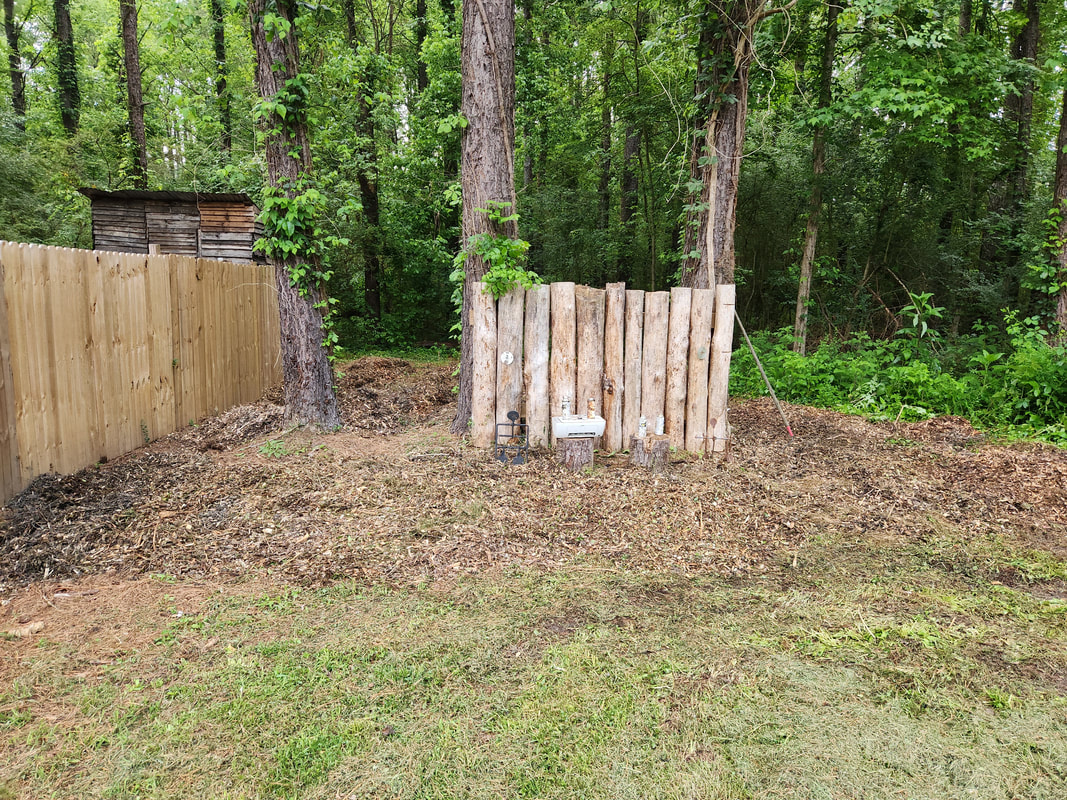 The piles of mulch that have been dumped in front of the Shooting Range, awaiting spreading. Note the piles behind the Range. 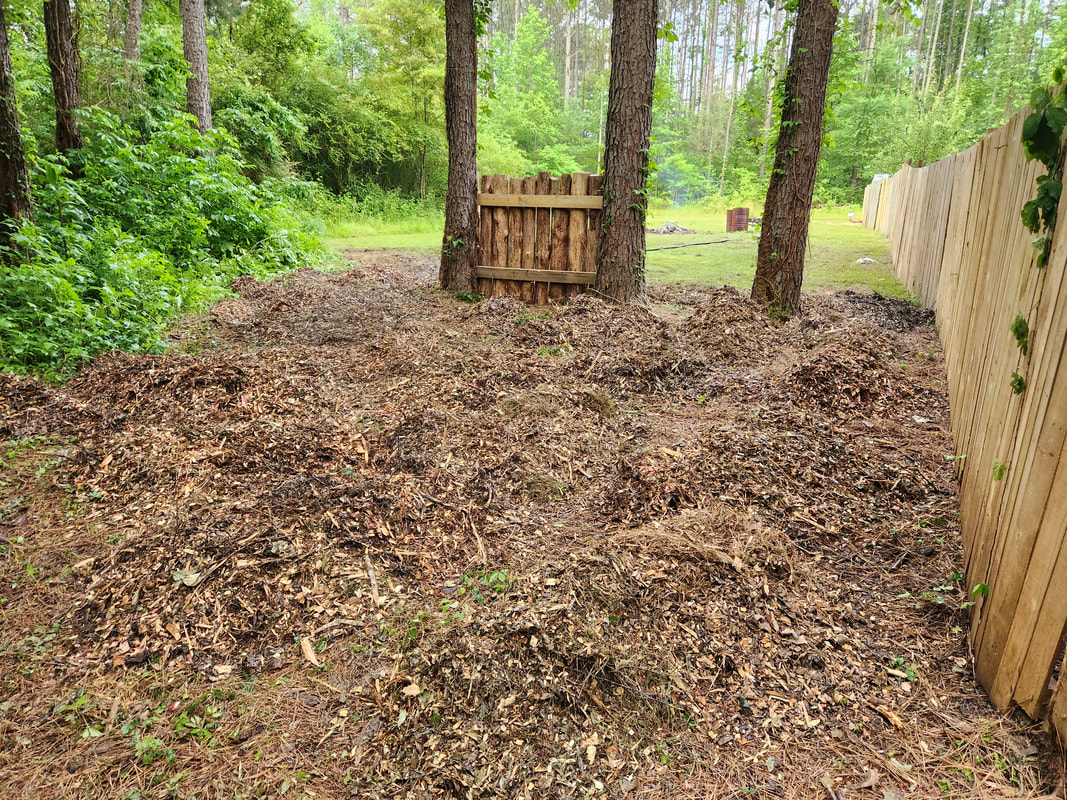 The piles of mulch dumped in the area behind the Shooting Range, awaiting spreading later to make an even and uniform bed of mulch in front and behind the Range. Just like along the north fence, the ground here collects a little water, causing the ground to be soft here. It wasn't as bad as the north fence, but still bad enough that with repeated passings with the tractor, the ground did start getting torn up. At least I did dump a good number of mulch piles all around the area so I could spread them out and blend the piles together to create one large mulch bed. 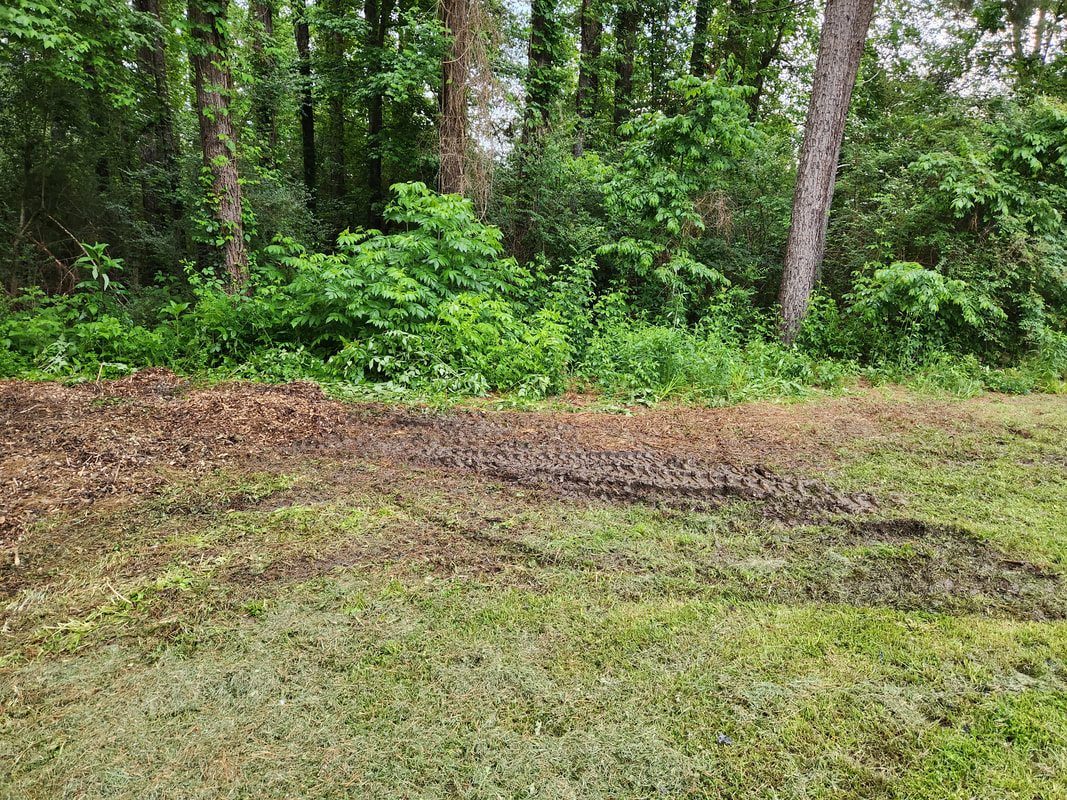 The tractor tracks in the soft part of the yard just next to the Shooting Range, in front of the path going into the woods behind the Range and towards the north fence. After this session of moving the mulch with the tractor, I did manage to make a decent dent in the removal of the mulch. I probably knocked about 1/3 to 1/2 of the total load from the piles, and I've already covered the shooting range area as well as the neighbor path. The north fence still needs a good amount of covering so that'll be the next area I'll finish up with. I'll probably start laying some mulch down along the east fence just as well, with the intent of trying to create some kind of barrier to the soft ground underneath. 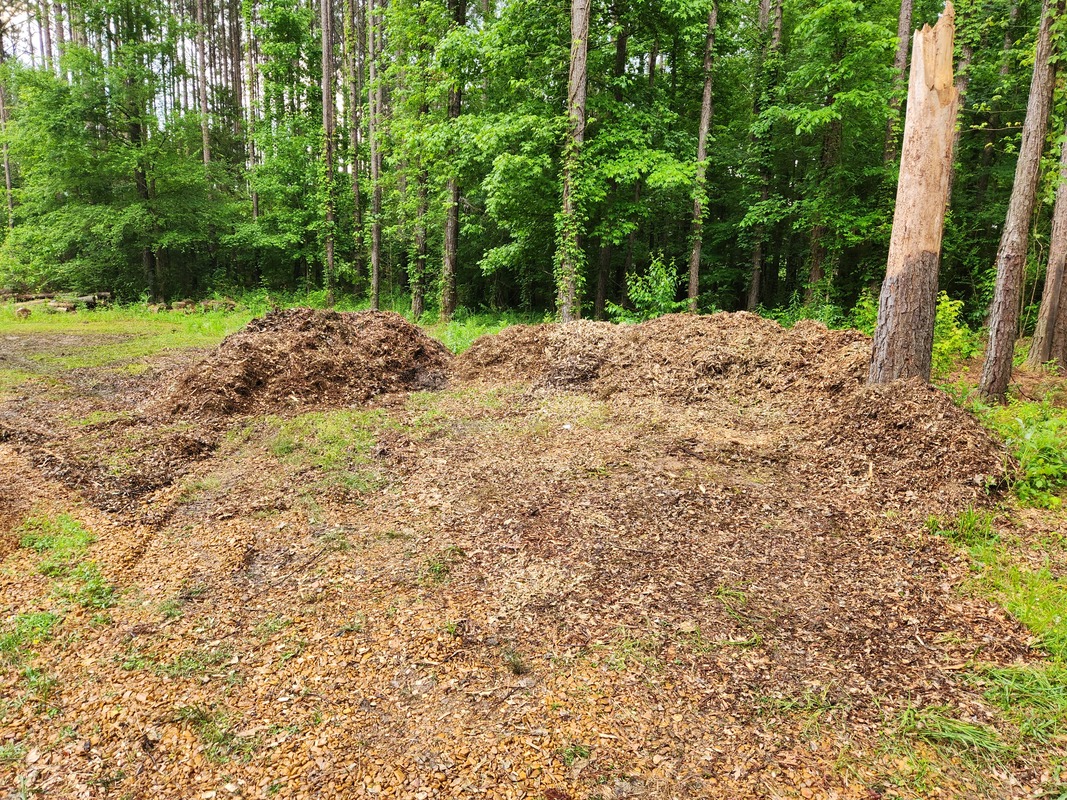 The two huge mulch piles, cleared down to almost half of their original size. What this means is I'll be using the tractor yet again to clear the remainder of the mulch piles for the coverage of the mentioned areas. I do need to get this done, not only for aesthetics, but because this stuff is starting to ferment and give off steam, which would indicate its generating lot of heat within the piles. Even though it has rained over the area a couple times, the stuff is still composting, and the last thing I'd want to have to deal with is mulch/compost piles spontaneously combusting on us. These piles are pretty big so that type of accident would be a disaster. The sooner I get the mulch spread out, the sooner I can hopefully eliminate the risk of any kind of spontaneous combustion.
In the middle of working on larger projects there is always going to be those small things that need to be addressed, or even opportunities that pop up that have to be capitalized on to make things better around a shop or homestead or both. This is the case with a simple area light that we had hanging on the power pole that overlooks the Chicken Yard gate and the back parking area where all the trucks are located. This is one of those solar powered lights with the two arrays of LED's and a motion sensor that triggers the light when someone walks into the area. The LED's bathe the area in a decent amount of light, either illuminating the way for a person passing through the area or illuminating an individual who doesn't belong. Well this light stopped working for us not even a few months after hanging the thing. We went for a while without even bothering with this thing until we recently stumbled across a clearance/return item at Walmart that was actually the next size up from the bad unit.
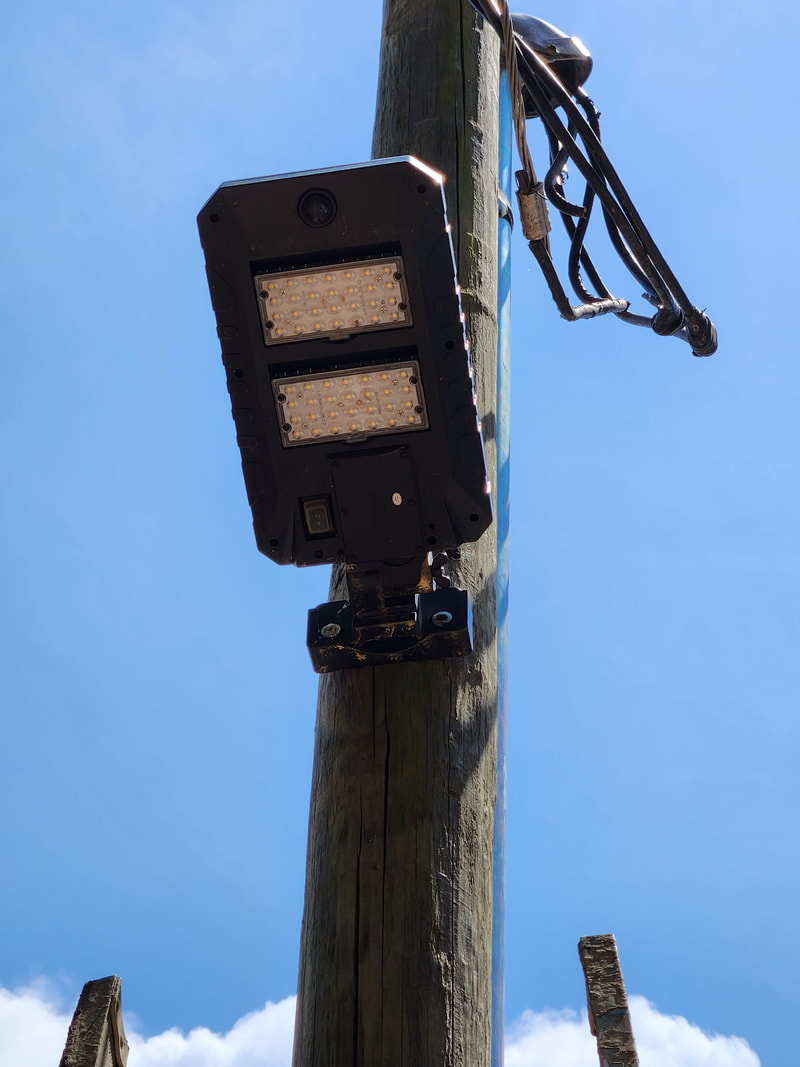
The old LED area light hung on the power pole, this thing will need to come down, at least the bases are the same between this unit and the new one.
After pulling down the bad unit, leaving the base mount in place, all I had to do was slide the replacement larger unit onto the base as it's the same size. It sat in the sun long enough that it was plenty charged by the time nightfall came. Just like the old unit, walking in the area tripped the motion sensor, illuminating the area with extra LED light. I didn't know why this light was returned, but hey, it works for us so its a win as we got the thing for half off. 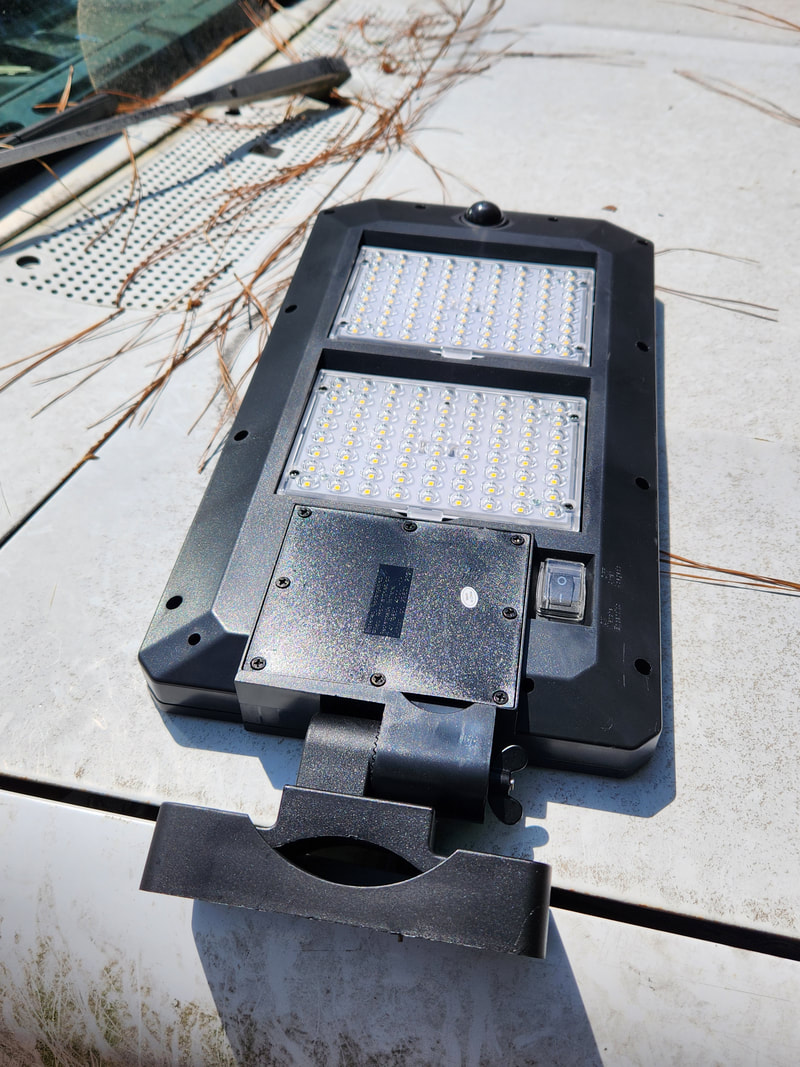
The new LED area light, note how the LED cards are 2x the size of the cards on the old unit.
The next thing that I wanted to address was an old tiller that we had sitting in one of the other storage sheds. This unit had a Predator engine on it that didn't have a carburetor but still freely spun around. Since we really don't need a tiller anymore, and this thing didn't have the original engine on it, it didn't make sense for me to keep this thing. Even fixing it back up to sell didn't make sense as I would have to buy a carb for it and what I would've ended up getting for it wouldn't even offset the cost of the Predator engine. The sensible thing was to remove the engine for use later on some other project. 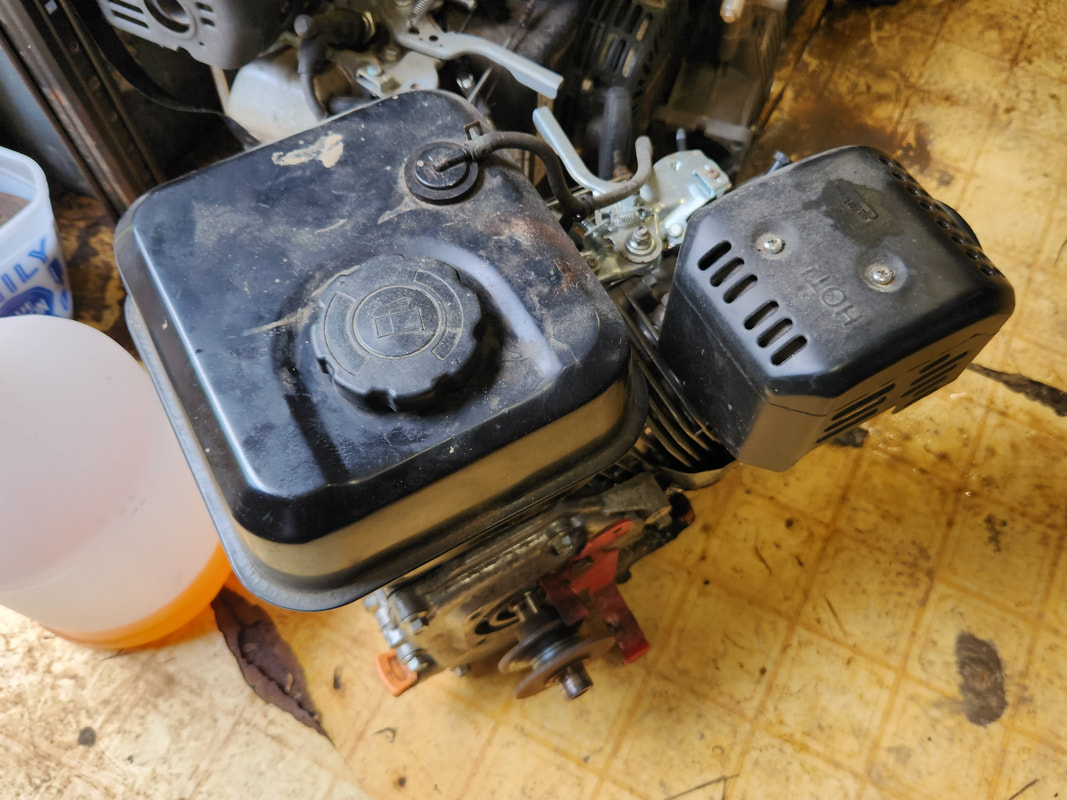
The Predator engine staged in the Storage Trailer pending use on a future project.
The Predator engine is a 6.5HP engine that is a common replacement on go karts and just about any powered equipment that uses a horizontal shaft engine. Also at the same time, this engine being common means there is an aftermarket for this engine as far as performance parts. This engine could be used in a go kart with some mods to make it more powerful. Another option is to use this engine as the basis for a steam engine conversion, which has been done in many different instances and would be cool to do. As for the tiller body, I could just sell the thing to someone for $25 just to get it out of the way as someone else might want to put together a tiller if they have an engine on hand. The only other option would be to save this thing for the few useable parts this thing does have, like the clutch cable for engaging the belt drive for the tines, as well as the pulleys. If I pull these parts off the tiller body, the rest would go to the scrap yard, which is fine, as the parts pulled from the unit would be more valuable than the couple bucks I'd get selling this thing sans engine. 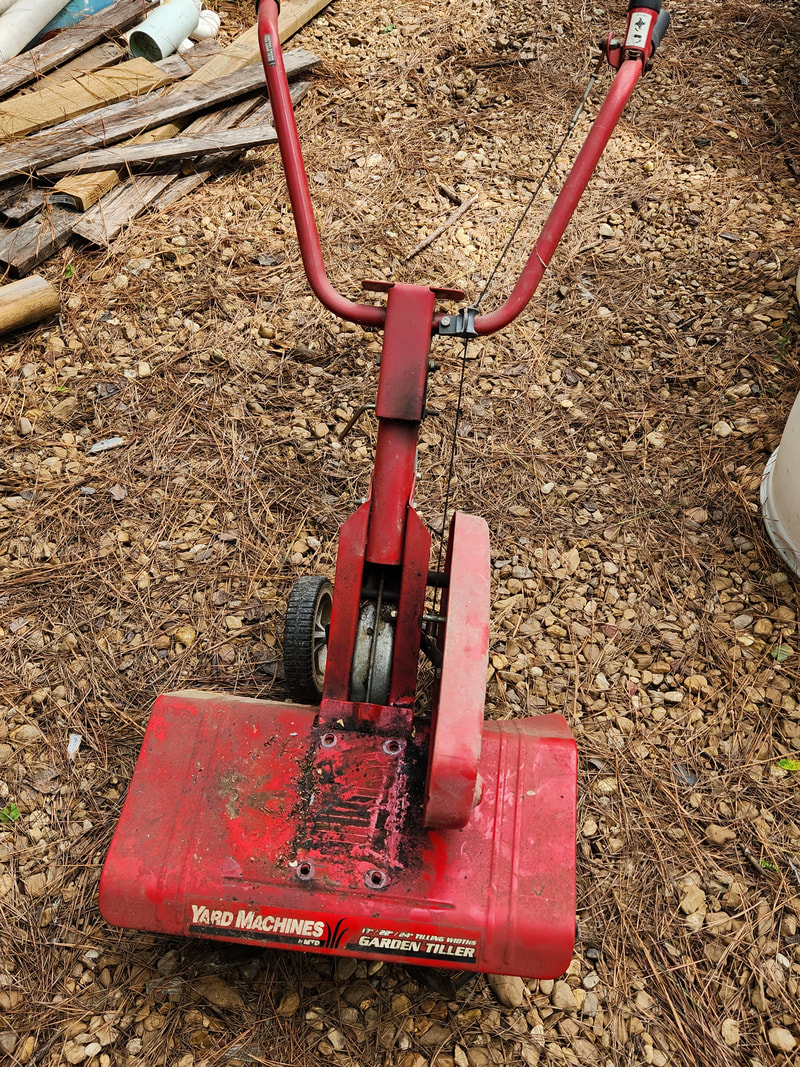
The old garden tiller body, staged by the general scrap pile, awaiting its fate.
I'll more than likely strip the parts from the tiller body more sooner than later just to clear this large item from the scrap pile. I'm in the process of trying to clear stuff from the inventory of junk so adding this large thing is the antithesis of cleaning up the area. At the same time, I do want to do something with these parts for the same exact reason - not wanting stuff to pile up.
One of the bags in the batch turned out to be paving repair tar/coal, similar to the stuff we see used for patching holes in the street. This stuff is a mixture of sticky tar with bits of coal. Since this stuff couldn't be used with concrete, I had to find a suitable spot to use this stuff. The most suitable spot I found was around the stairs to the Storage Trailer. After moving a few things from around the stairs, some of which was stored in the Shed, I spread the tar coal around the base and under the stairs. At least this stuff will help keep any grass or weeds from growing around the stairs. 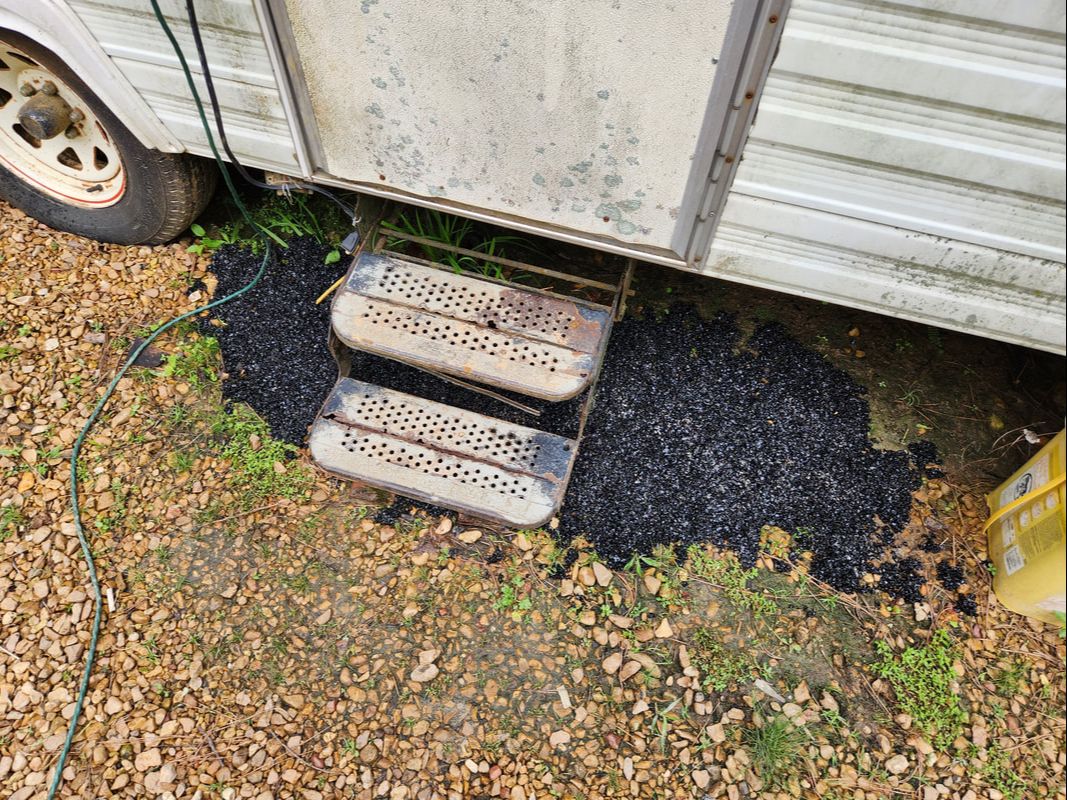 The tar/coal patch laid out around the stairs to the Storage Trailer, creating a barrier that will hopefully keep any kind of weeds from growing up around these stairs. At least this little session of work allowed us to take care of some small tasks around the yard/compound that will go a long way towards the completion of other projects. We will need more concrete to fully fill in the trench around the driveway to make it fully ready for us being able to swing wide to enter the gate area. The shed still needs caulk and even the leftover sheet metal has some plans. I plan on starting the construction of a car port/awning sort of structure that would be based against the fence line, creating a cover to allow for the parking of small vehicles like the John Deere Utility Tractor or the go karts. Rather than clutter the Shed with any one of these vehicles, much less two or more, they can be parked like cars under this makeshift garage structure. This will of course go a long way to organizing the yard since these vehicles will be staged in a centra spot versus all over the yard. I will more than likely get rid of some more of the scrap items that currently inhabit the area I plan to build this structure. As stated before, these things go a long way towards the completion of other greater projects, one of which is cleaning up the grounds by organizing things, using things up and getting rid of things. Stay tuned for more on these tasks and projects. 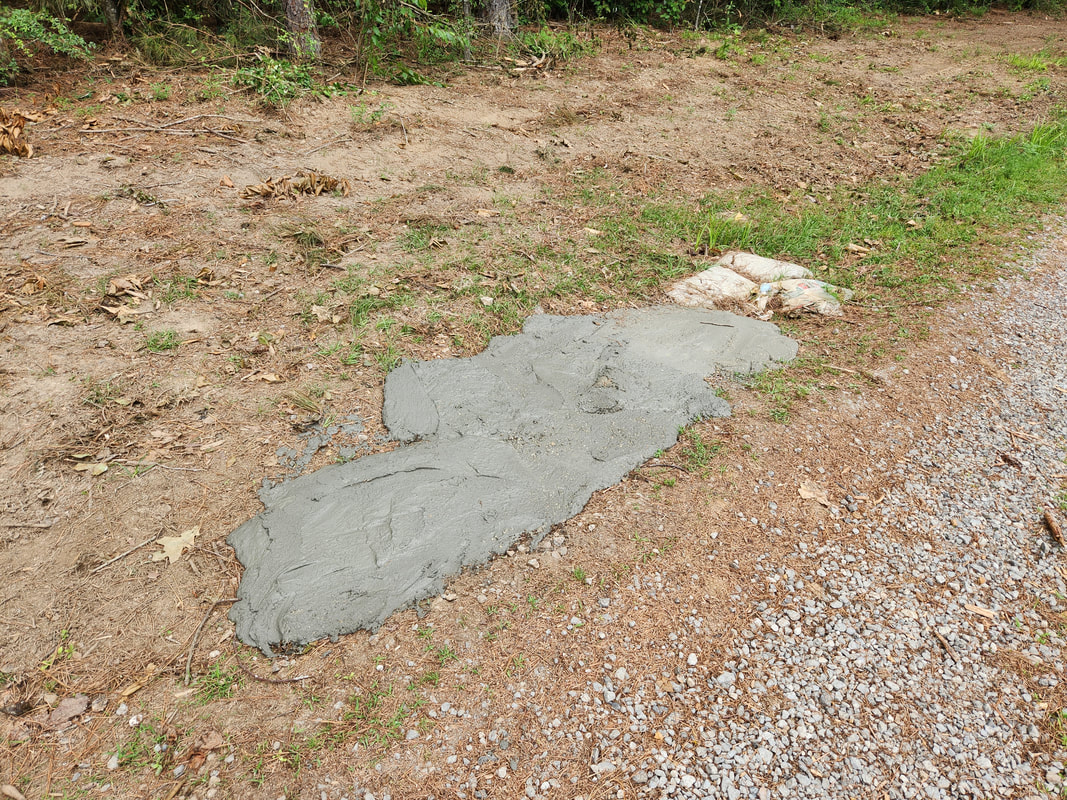 The large amount of concrete poured in the trench on the opposite side of the driveway from the fence line to help level off the area relative to the driveway. This is to allow us to be able to drive over this area and swing wide to pull into the soon to be narrower gate opening. With this little bit of cleanup work taken care of around the shed, it was time to use one of the tools in the shed. The cement mixer that we stored within was pulled out to mix up a batch of "recovery bags" of concrete that was purchased from Lowe's. These bags were busted open and a little lighter due to the loss of some of the bag's contents, so they mark down the cost just to get something back from the damaged product. The plan that we had for this concrete was to start filling in the trench on the main driveway on the opposite side of the driveway from the fence line. This is to widen the usable area of the main driveway, letting us be able to swing out away from the fence to turn straight into the gate. When we do build a sliding gate, it will be narrow compared to the opening currently in place so to be able to turn into the narrower opening, the driveway needs to be wider, and this is where the concrete comes in. After mixing up the stuff and pouring it into a bucket to move it to the spot several times, we poured a decent amount of concrete into the trench, getting a head start on that little project. 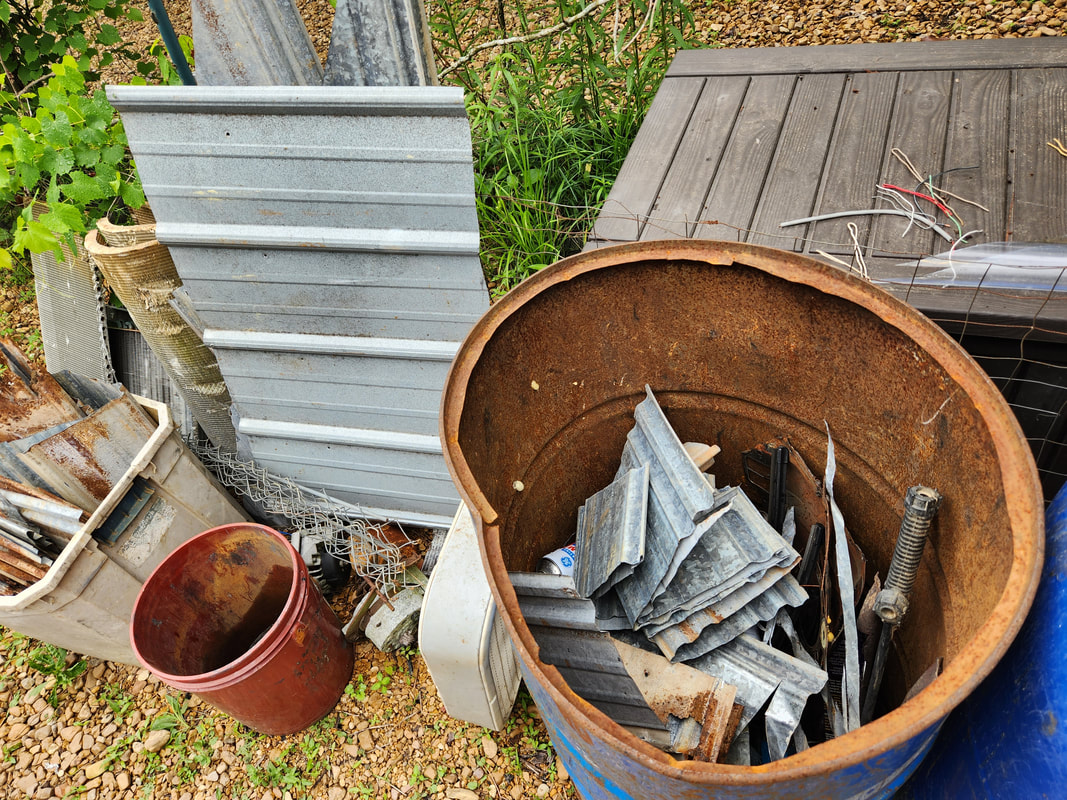 The smaller pieces of cut scrap metal folded up and stashed in the drum and a plastic container to the far left. A couple larger odd cuts are stacked behind the drum, destined to go out with the scrap as well. With the latest large project pretty much done, save for some small bits and pieces, there are still other things to take care of around the compound that are small but still important. On the Storage Shed, I still have to do some caulking to make sure I have all the small areas and seams sealed up. Even after using up the caulk I had on hand, there was still the matter of some cleanup work around the shed. I had a large pile of scrap sheet metal pieces that were left over from the cuts made to the panels. Some of these cuts were large enough to warrant saving them for other uses later on, while others were straight scrap. 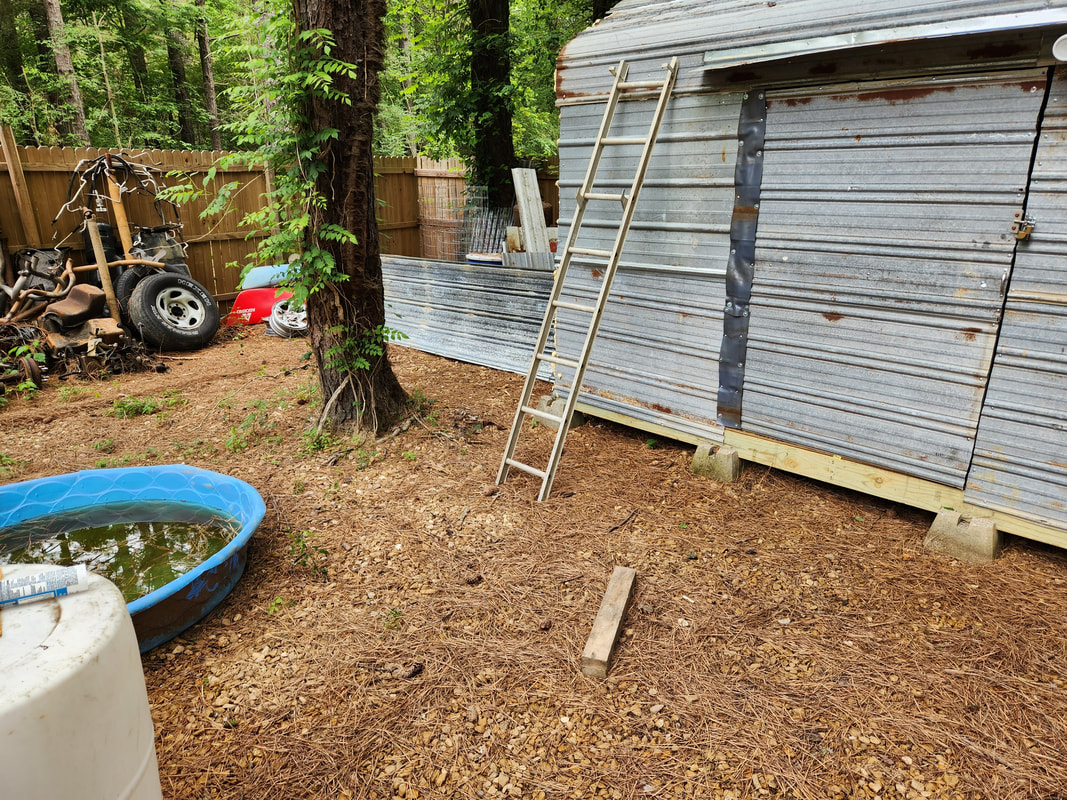 The area in front of the shed is cleared out of the dangerous cuts of sheet metal. Also note the larger panels and smaller sections of sheet metal staged to the left of the shed towards the back. After separating the still usable pieces of sheet metal and moving them over to a pile with other even larger sections and even four full panels, I had to fold up the smaller pieces so they could be stored in the scrap metal drum. With the smaller pieces stored in the drum and the larger pieces staged out of the way, the area in front of the shed was cleared, which was necessary since the pile of scrap was actually dangerous. Chickens and even the dogs running through the area could've cut themselves if they ran across the edges of the metal pile so this stuff had to go. With the shed pretty much done, I started with the job of loading up the structure with stuff. I did get some more caulk and foam to continue to seal things up some more. I had already started loading things up earlier, but this time I want to make things a little neater, specifically with things like the power tools we planned on loading up to begin with. 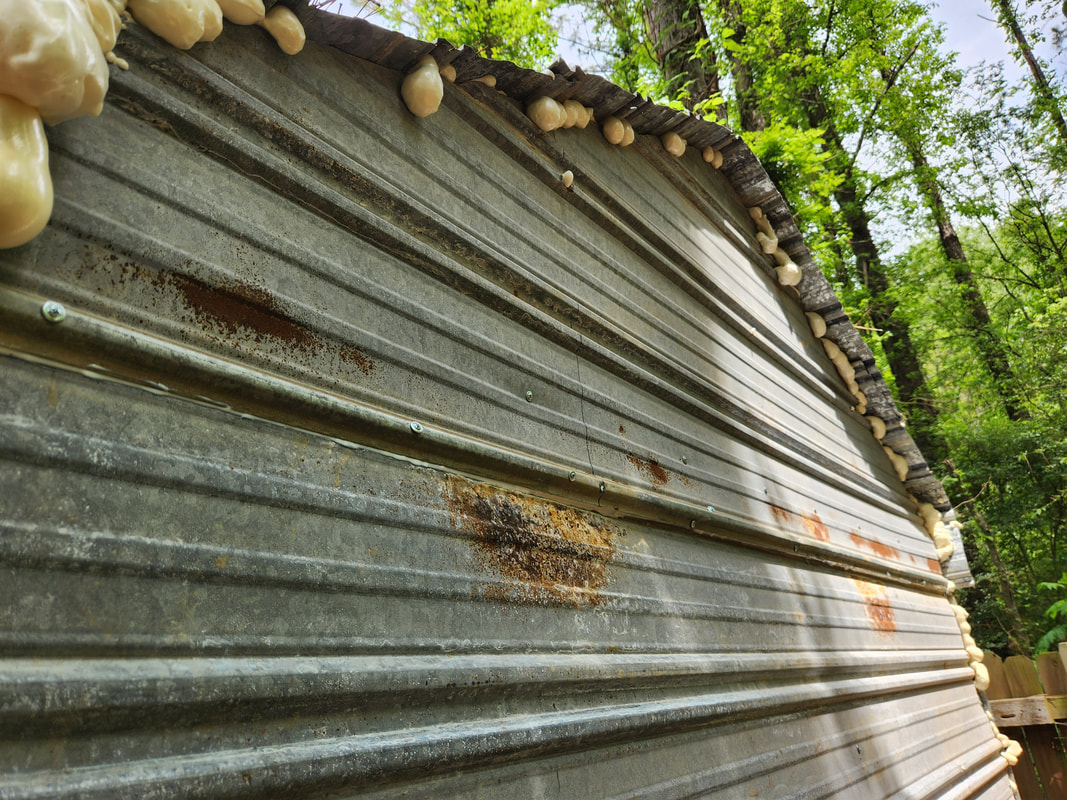 Caulking is done on this bookend at the different seams and pinholes. Note the foam that oozed out from the gaps after spraying the stuff from the inside. I did have to climb up on the roof to get some of the more "open" spots where the sheet metal met, but at least I was able to get the foaming done. I will still need more caulk to get all the other seams around the shed, along with extra pinholes that I may have missed. So far even with a couple of rains that came through the area, it doesn't appear that the shed leaks any, so for all intents the structure appears to be staying dry. I will still caulk where I can see spots that warrant caulking since I would rather overdo something like this than to skimp on it and have water seeping in where it could rust out the sheet metal or start rotting the wood. 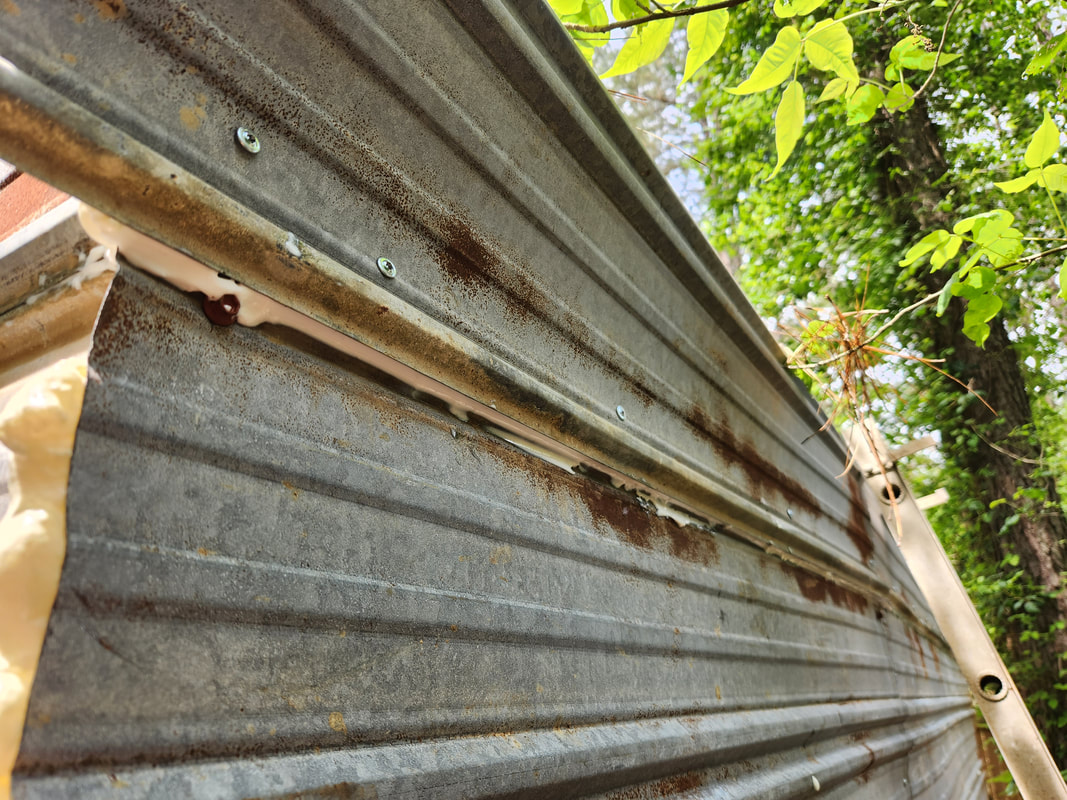 Sealing more seams and pinholes on one of the bookends of the shed. I did have another idea for when I do finish fully caulking the seams outside of the shed. I planned on getting several cans of clear coat and just spraying down the metal skin of the shed. I could even just get some decent quality white paint, which might be a better bet and would actually make the shed appear more fitting with the house and Storage Trailer which are mostly white, versus having this silver colored "scrapyard" structure. Either way, the purpose of spraying any kind of paint or clearcoat on the structure is to protect the sheet metal so the structure will last a long time. 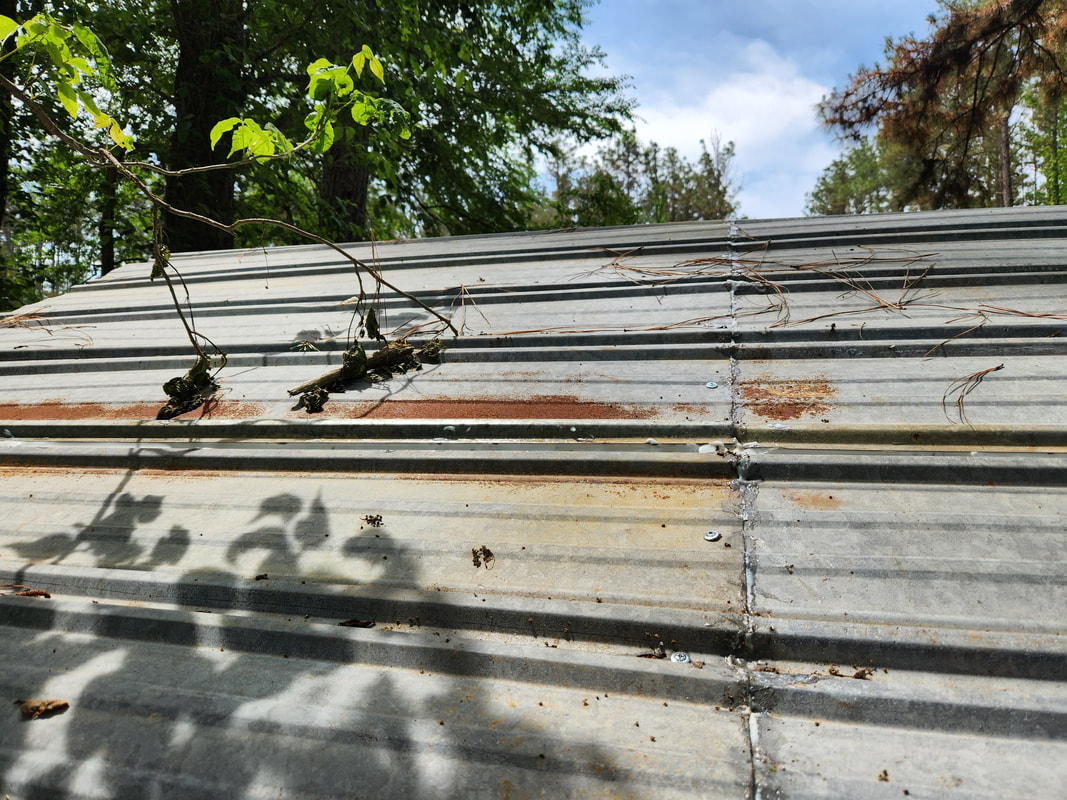 Up on the roof of the shed, more caulking was done to seal the seams where the sheet metal pieces meet each other. Now for the inside. The main thing I wanted to do was hang power tools. To do this, I acquired a bunch of rubber hook straps with the plan of using these to hold the tools to eyebolts screwed into a long board suspended between two of the horizontal tubes in the shed. I cut a board I pulled from the scrap pile and drilled a couple holes to drive a couple wood screws through and into the board. From there I drilled six larger holes to screw the eyebolts into, spacing them evenly enough to allow the tools to hang without them sitting cluttered amongst each other. The rubber hook strap would be hooked to the eyebolt, looped through the handle of the tool, then back to the eyebolt. The rubber straps are plenty strong enough to hold the tools to the large eyebolts so there's no issue with any of this stuff breaking free. 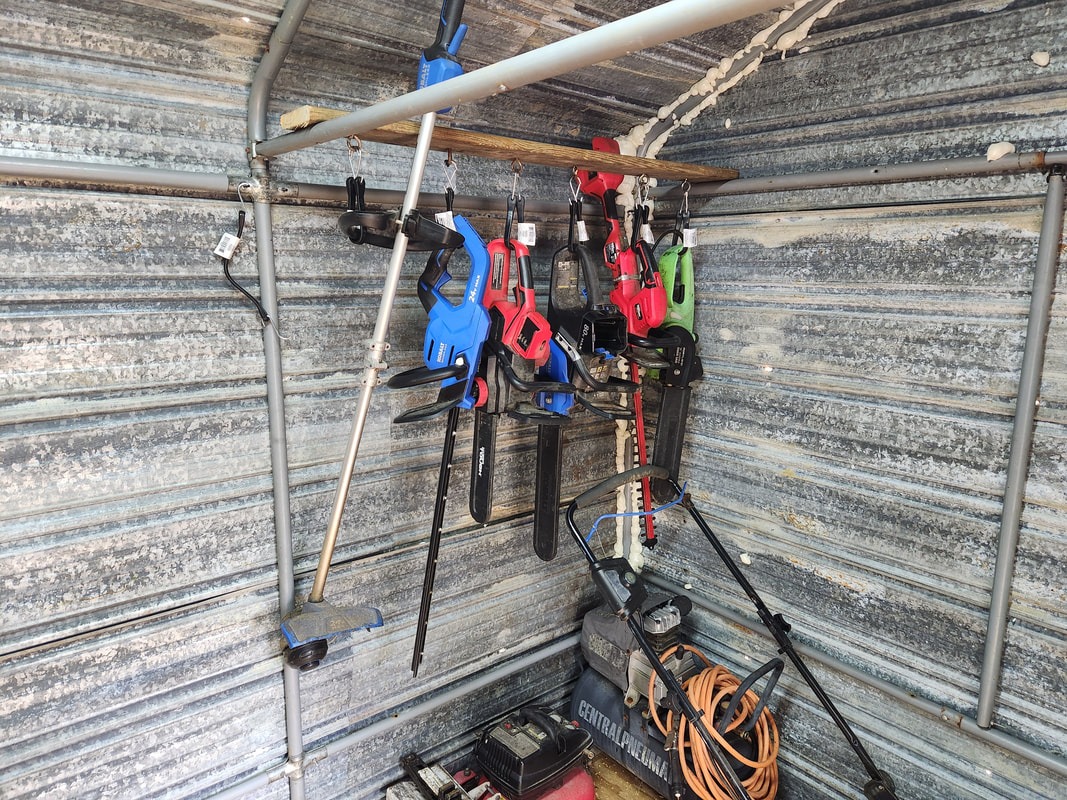 The wood board with the eyebolts and rubber straps used to hold up the power tools we intended to store in this shed. Underneath are other tools, saving space. I did take a minute to move some other stuff into the shed from the Storage Trailer, even moved a couple buckets with plumbing hardware into the shed, stacking them up to save space. The Storage Trailer is a little neater inside without the clutter of the larger items stored within. At least now we can better regroup with all our junk in the Storage Trailer, along with the surrounding grounds so we can work towards the greater goal of using up and/or getting rid of stuff. At least things are coming together that much more around the compound. With the completion of the New Storage Shed, there's the matter of getting ready to utilize the structure. Things like figuring out how to hang power tools as well as getting ready to move certain larger equipment into the structure are all on the table. I did take a moment to move our cement mixer into the shed, placing it in a corner, as well as the larger power tools which were sitting in the house on the floor. 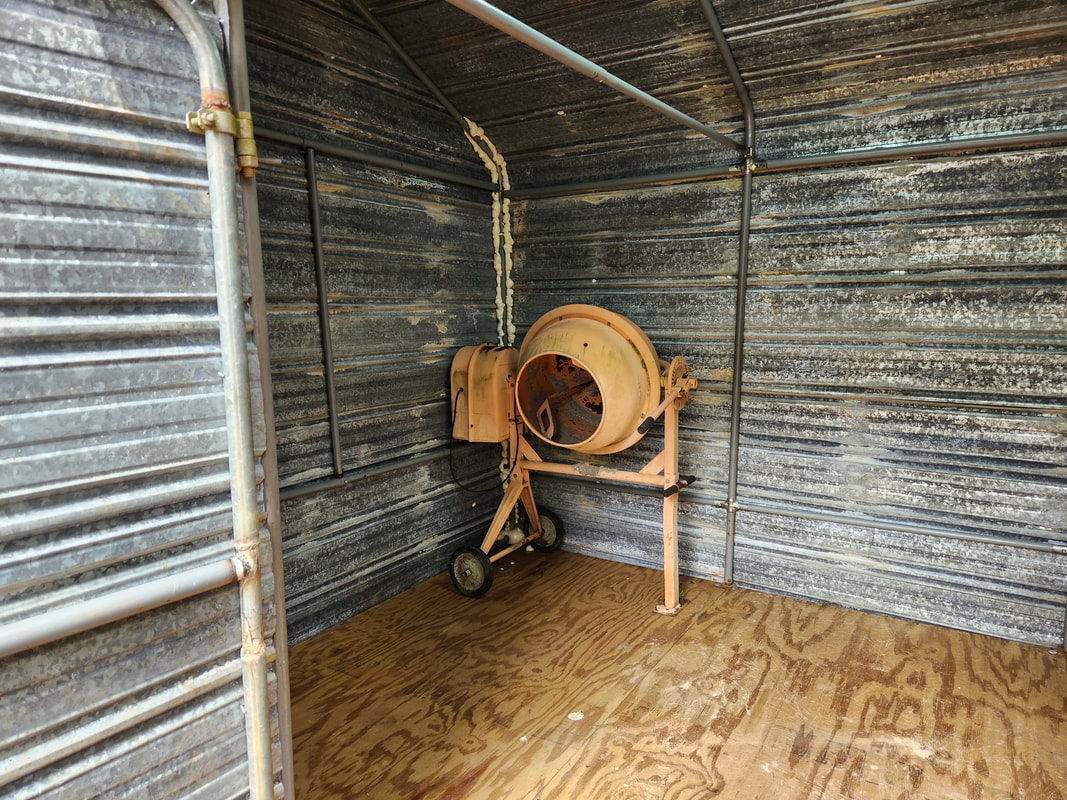 The cement mixer was one of the first items to be moved into the new shed immediately. The power tools for right now are just placed on the floor until I can figure out some kind of hanging apparatus for them. Simple hooks won't work as these tools are heavy and would bend any regular hooks. I want to get the tools hung first so I can determine what other equipment can be placed underneath the hanging tools in the process of storing everything. The thought of fabricating some other racks on the upper portion of the shed, in order to capitalize on the space in the roof section is also on the table. 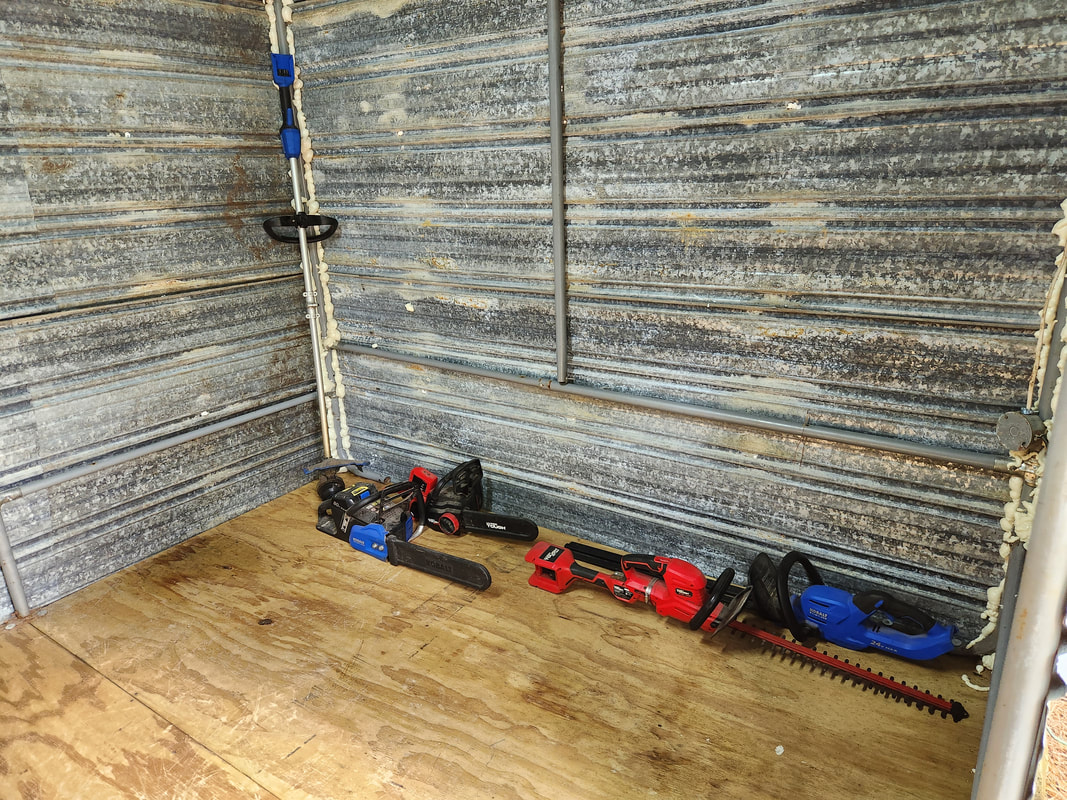 The larger battery power tools for garden use were also moved into the shed from off our floor in the house. Since we're already putting tools inside this shed, the thought of locking down the structure now became important. Even though some of the stuff that'll be stored in here was sitting outside for the longest time, the power tools like saws and weed trimmers are now stored within, so being able to lock down the shed needs to be addressed. We found a lock with a small enough loop to fit in the latch so that was taken care of. 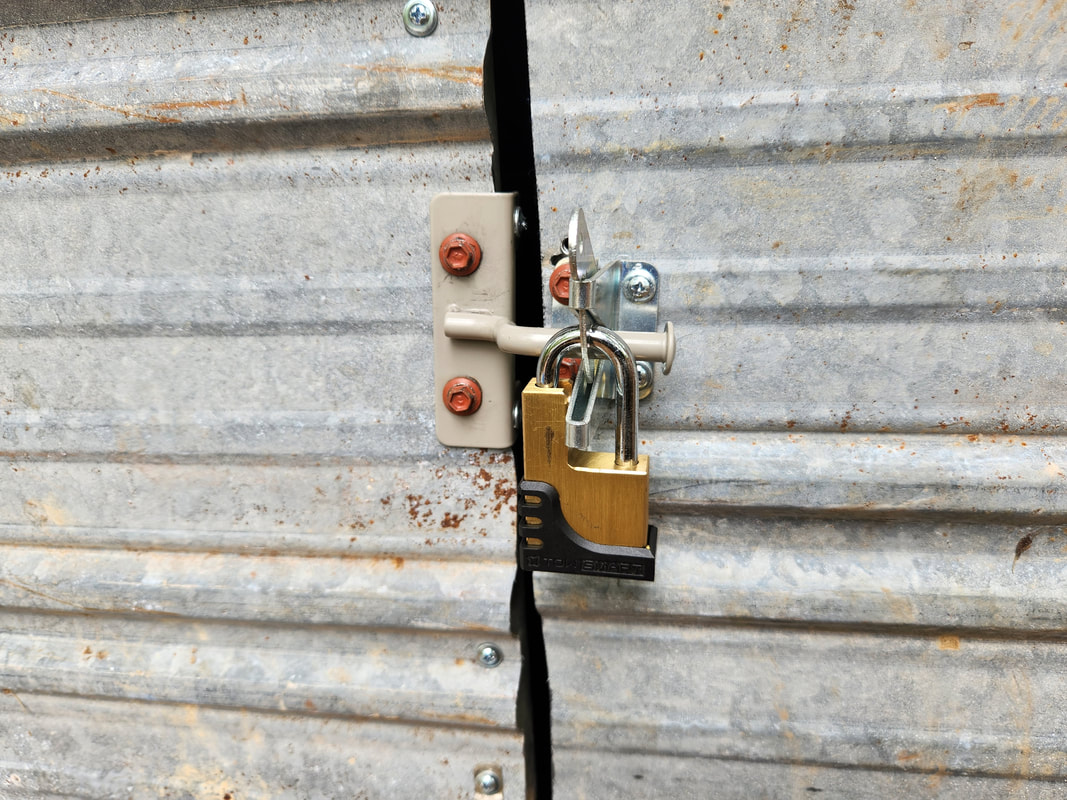 An extra latch from one of the gate kits we installed was installed on the shed's door to allow us to lock the shed down. From the shed, we moved on to the greenhouse. Not much went on in here other than the planting of a batch of plants that we picked up earlier. Luckily we had enough Perlite to fill all but one soda bottle planter on the hydroponics systems. There's a mixture of okra, tomatoes, and peppers in the planters so we're pretty much complete in the greenhouse as far as planters are concerned. We even took a moment to add another hanging planter since we still had a couple more catnip plants to plant. With that little bit of business done, I moved on to Stubby. 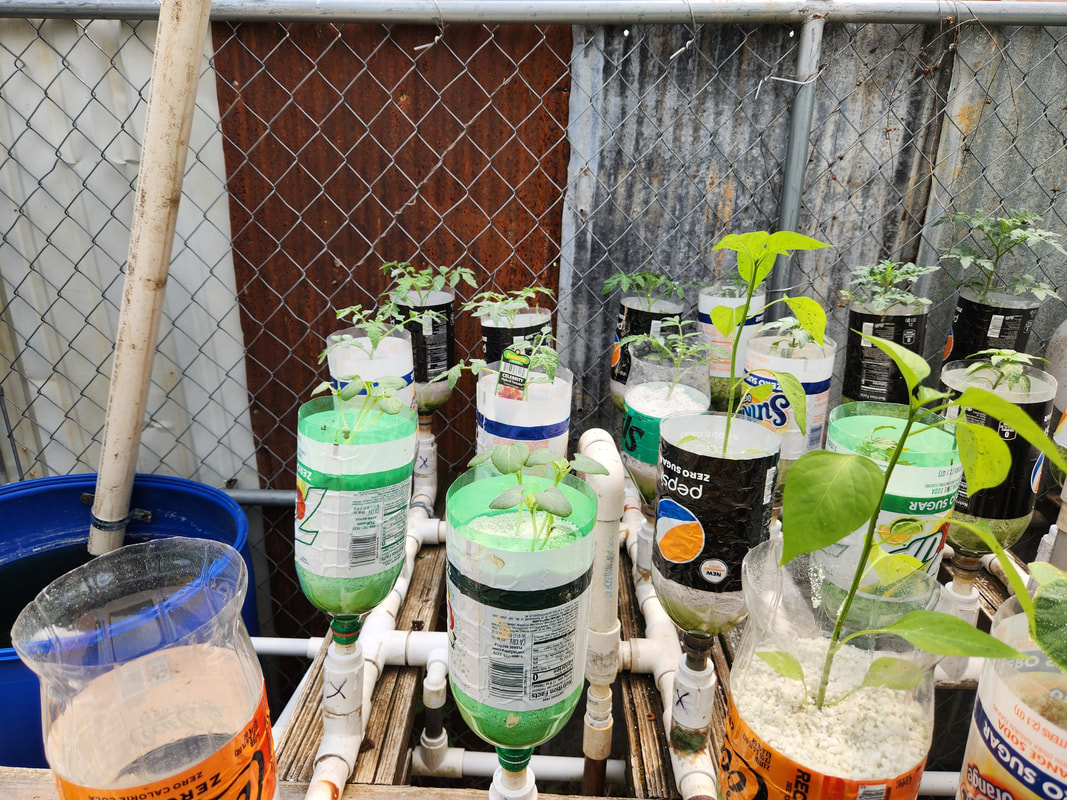 The soda bottle hydroponic gardens are planted with seedlings. 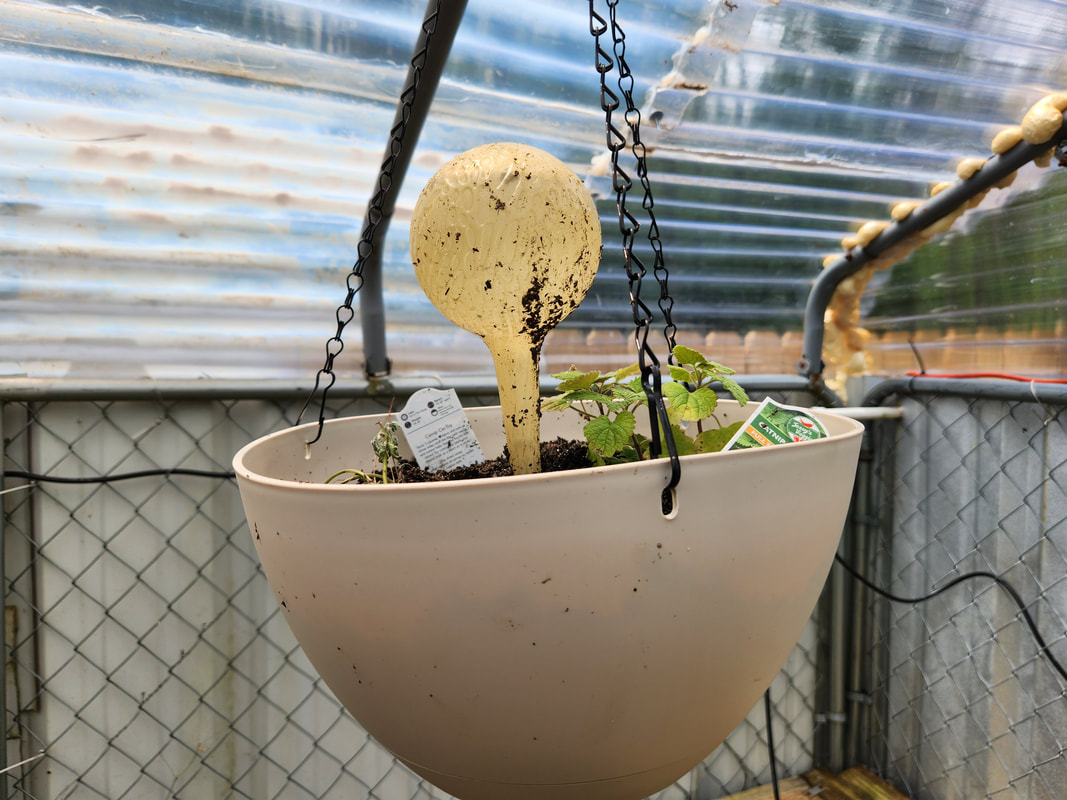 Another hanging basket is installed in the Greenhouse to contain another catnip plant. The only thing I had to do to Stubby was install a set of speakers we picked up recently. I did install one fairly good speaker on the driver's side door just to get some sound within, but this speaker wasn't in the best shape so I wanted to get some fresh speakers in the vehicle more sooner than later. At least it was simple to do, just like when I installed the locks. Removing the window crank and lock knob along with the screws for the opening lever and armrest allowed me to remove the interior panel so I can get to the speaker base. I had to use the wiring that came with the speakers and cut the old plugs from the wiring harness on the vehicle so I could splice in the wiring from the speakers and plug the ends up. 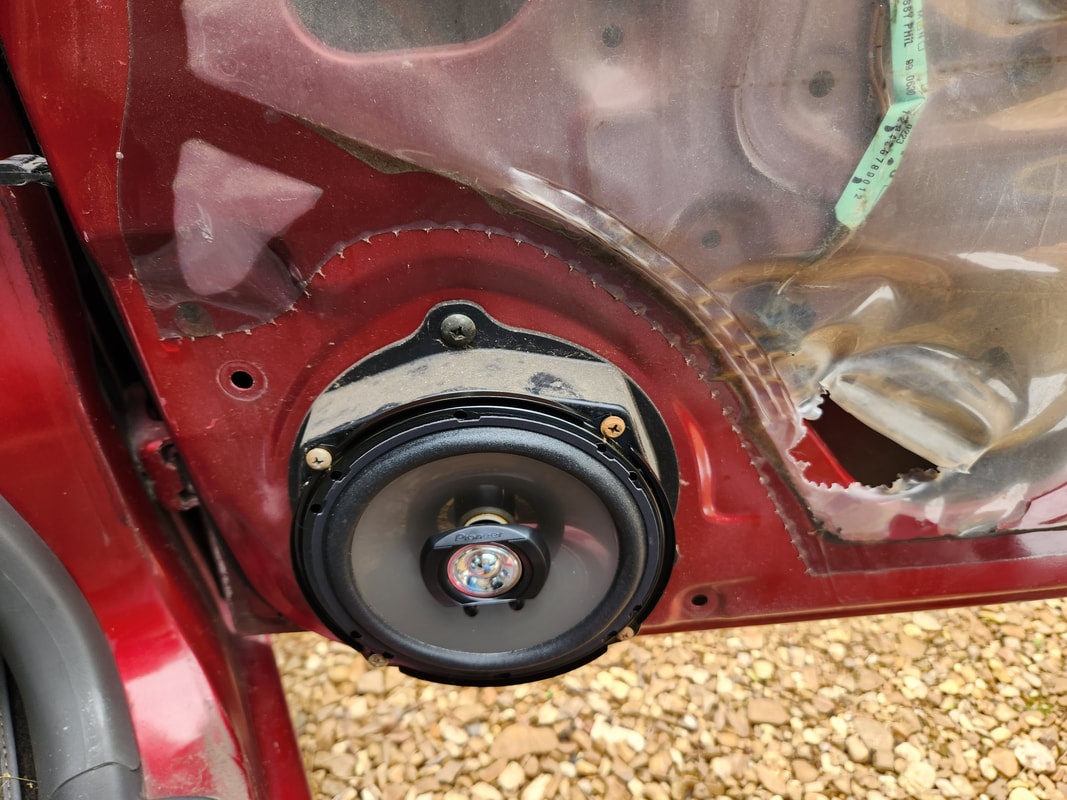 A new speaker is installed on the passenger side door on Stubby to replace the old speakers that went out. Replacing the speakers didn't take any time at all to finish, so I at least got two sided sound back into Stubby. At some point I will pull the rear interior panels to replace those speakers just as well, but not right away, since we have the front speakers online. There's still other things I have to address on the greenhouse and shed. I still have to finish caulking and foaming up all the different joints and seams to fully seal the shed, along with the previously mentioned hanging racks. The greenhouse still needs grow lights installed to fully complete the setup there so it will be ready for use. At least we're getting more things done, little by little. When one comes into the home stretch of a race, it seems like they get a second wind or a little turbo boost that makes them run a little harder to try and finish, whether they're in first place or not. Such is the case with the shed. Coming so close to the end, we step it up a notch to try and get things finished so we can log in another finished project. With the door done, I had to figure out a way to help seal the door. The way I came up with was to use rubberized PVC sheeting for shower pads. I cut this into two strips and secured it in place over the hinged side of the door so when the door opens or closes, the sheet would fold and stretch as the door moves but ensure a covering over that side of the door to help in shedding water. As an added bonus, along the top, I took a length of sheet metal about a foot wide and secured it over the door like a mini awning, which will also help in shedding water over the door, so it won't run in between the door and the door opening.  Rubberized PVC strips are attached to the hinged side of the door to help in sealing that side from water intrusion.  The awning made from a scrap piece of corrugated sheet metal is hung above the door for the same purpose as the rubberized PVC strips. 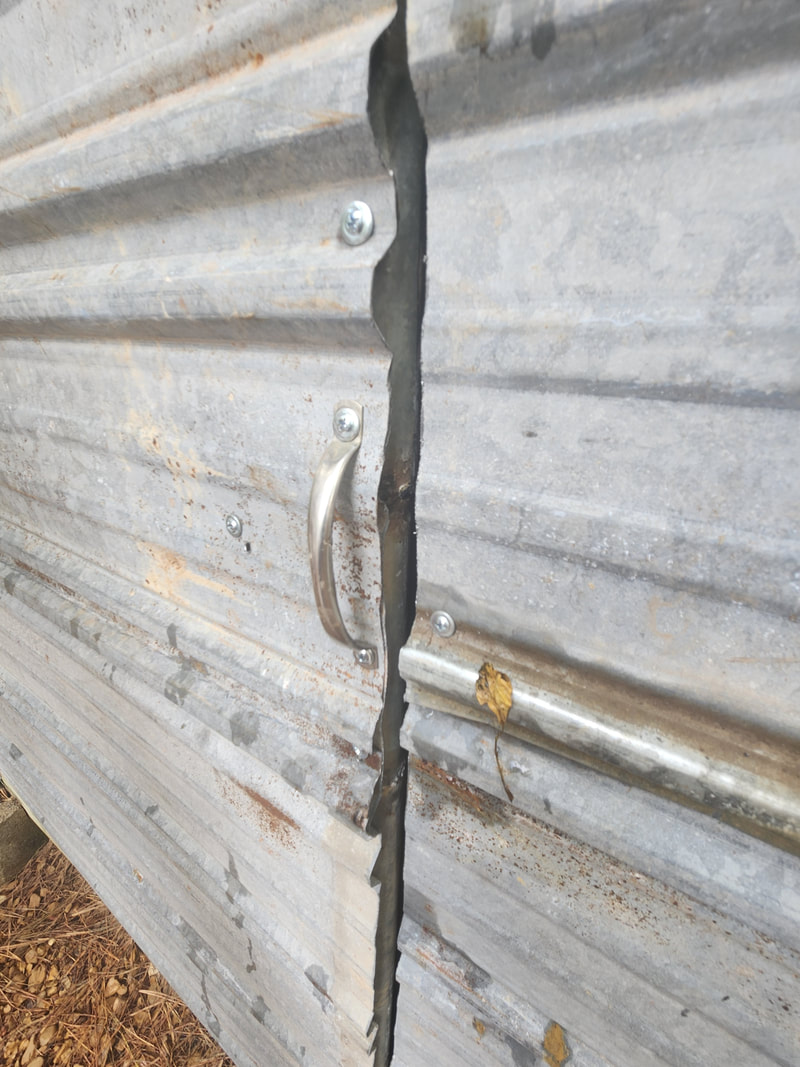 As an added bonus, a hinge I found in stock is attached to the door so we can safely open the door. 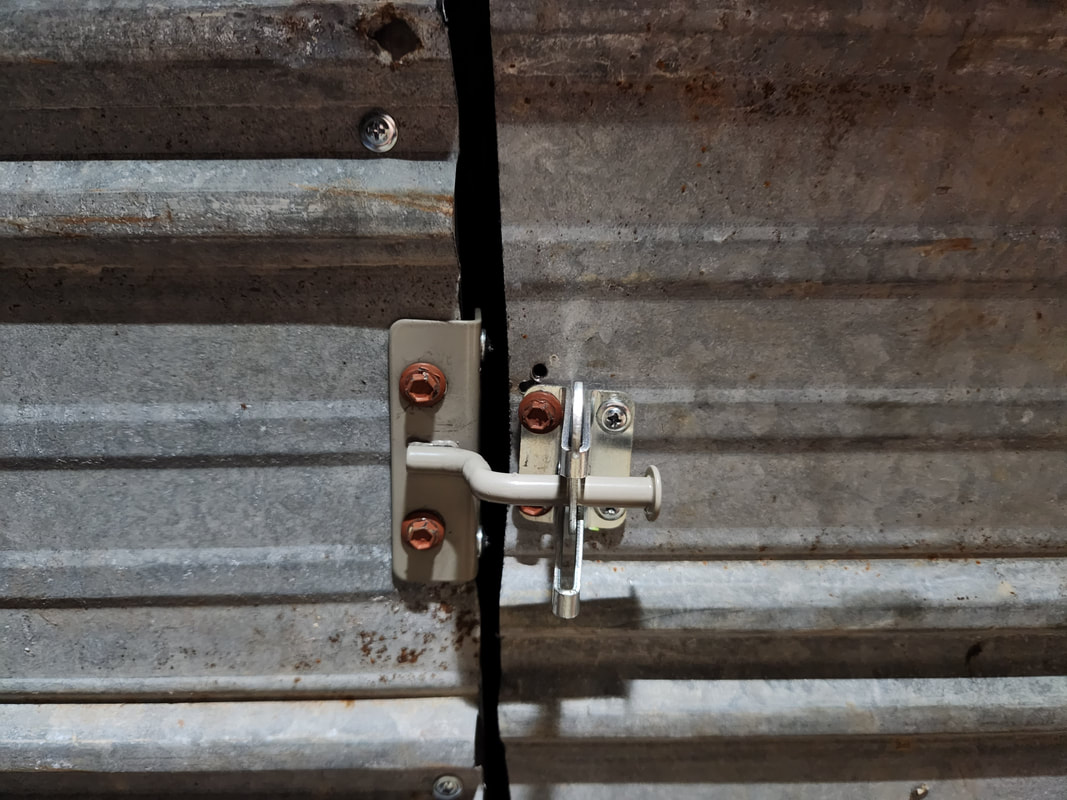 Another added bonus is a latch added to the door. This latch set is actually from the gate kits used for the perimeter and chicken yard fences, as we only needed one set of locks for each gate pair. The latch is attached with hex head self tapping screws versus the phillips screws we were using. Hex bolts are just a little bit of security as everyone isn't walking around with a hex driver compared to a screwdriver. This latch is able to be locked with a padlock for added security. With the door sealing issue more or less addressed, there was the sealing of everything else. This involved applying more can foam around the inside corners, then applying caulk around the seams where the short and long pieces of sheet metal meet, as well as the multiple pinholes from old nails that held these panels up a long time ago. I exhausted two cans of foam and tubes of caulk and am only about half way done with the sealing of the shed. There's still plenty more to seal up that I'll get to, but in the meantime there's the matter of the electrical system. 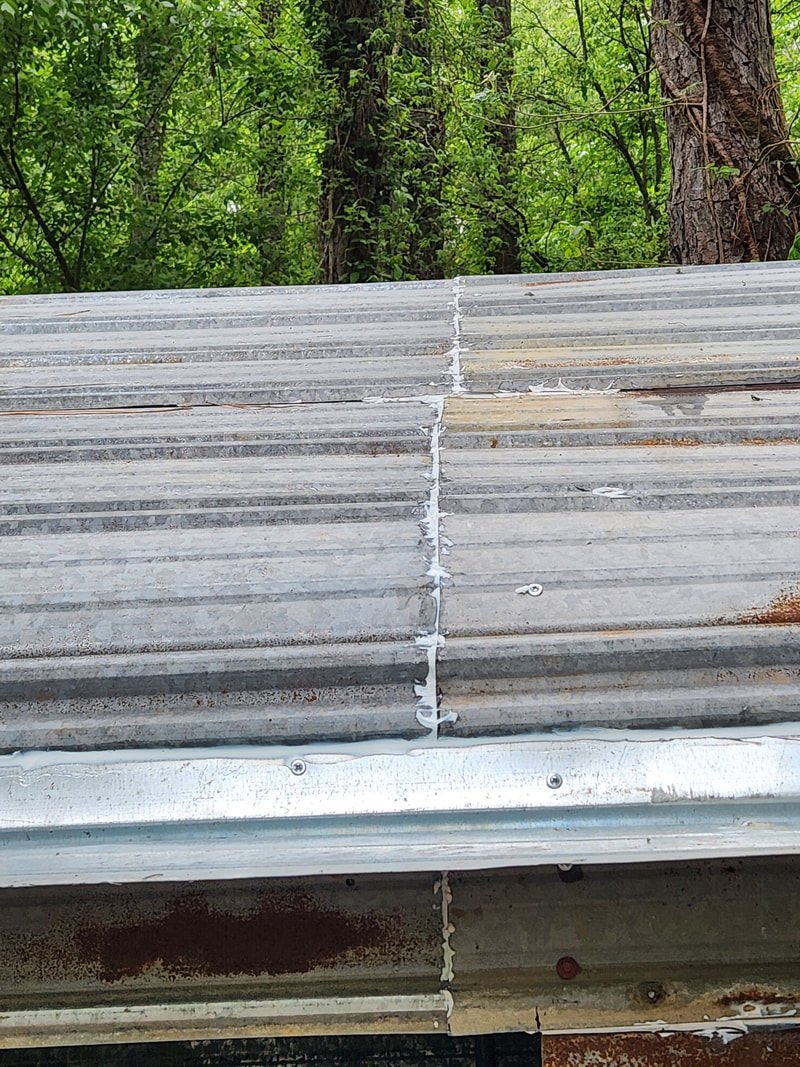 Caulk is applied to the seam where the long and short panels meet at, along with the other seams that could allow water intrusion. All the pinholes are sealed with caulk as well. 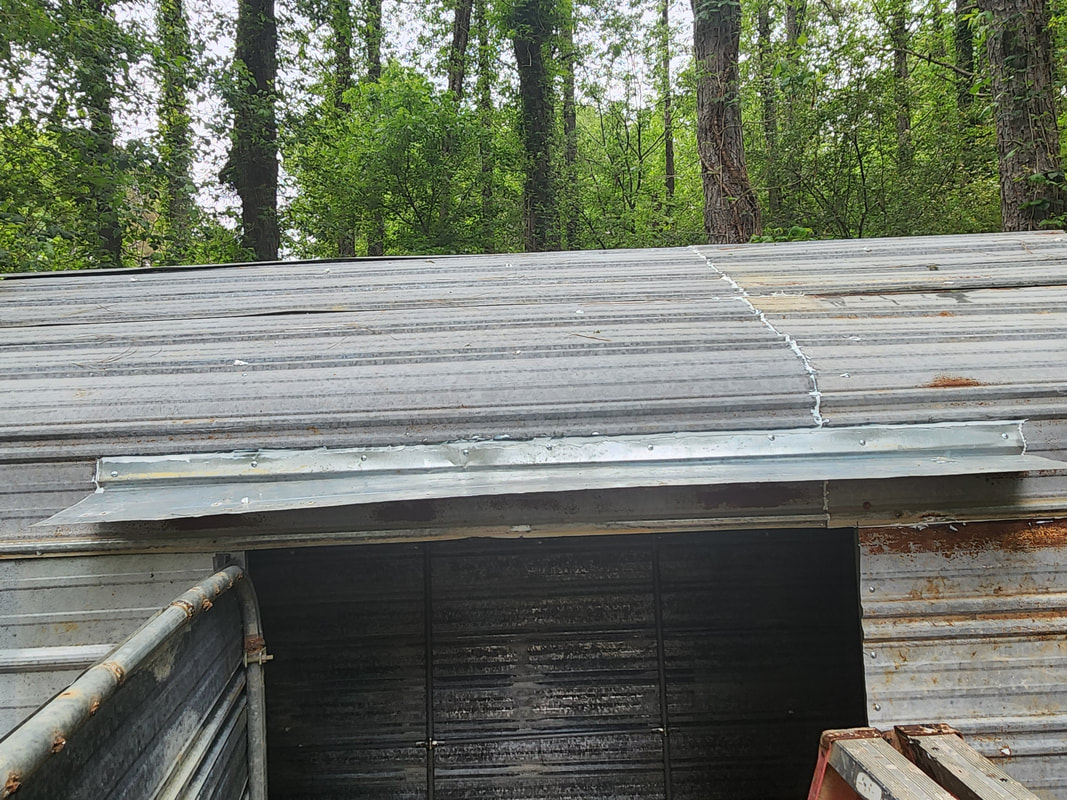 Some caulk is applied along the top of the makeshift awning to help in better sealing the shed where water could intrude through any gaps. The start of the electrical system is a salvaged extension cord with both ends chopped off. This was hardwired into the outlet box at the power pole by the chicken yard gate, then buried in a shallow trench as the cable goes across the gate, alongside the cable feeding one of the chicken yard circuits. Afterward the cable runs above ground along the bottom of the chicken yard fence over to the corner of the shed, where it goes up and into the corner of the shed, through the foam. At this point a square junction box is installed where the cable goes into. A length of Romex cable is routed from the junction box, after the ends are tied together, up the corner frame and along the horizontal tube of the frame over to a spot just above and to the left of the doorway, if one was looking from the inside out. This square box is used to hold a switch, which controls an outlet. The cover used had to have extra holes drilled to secure the lid to the box since the box was not matched up with the cover. In addition to this, another length of wire was connected to the power input and routed through a hole going just outside of the wall. Where this cable comes out a base is anchored in place for a dusk/dawn/motion LED light fixture, mounted just under the awning next to the top corner of the door. A standard T8 shop light with LED bulbs is hung at the middle of the roof from the frame and plugged to the outlet, to be switched on and off as needed. 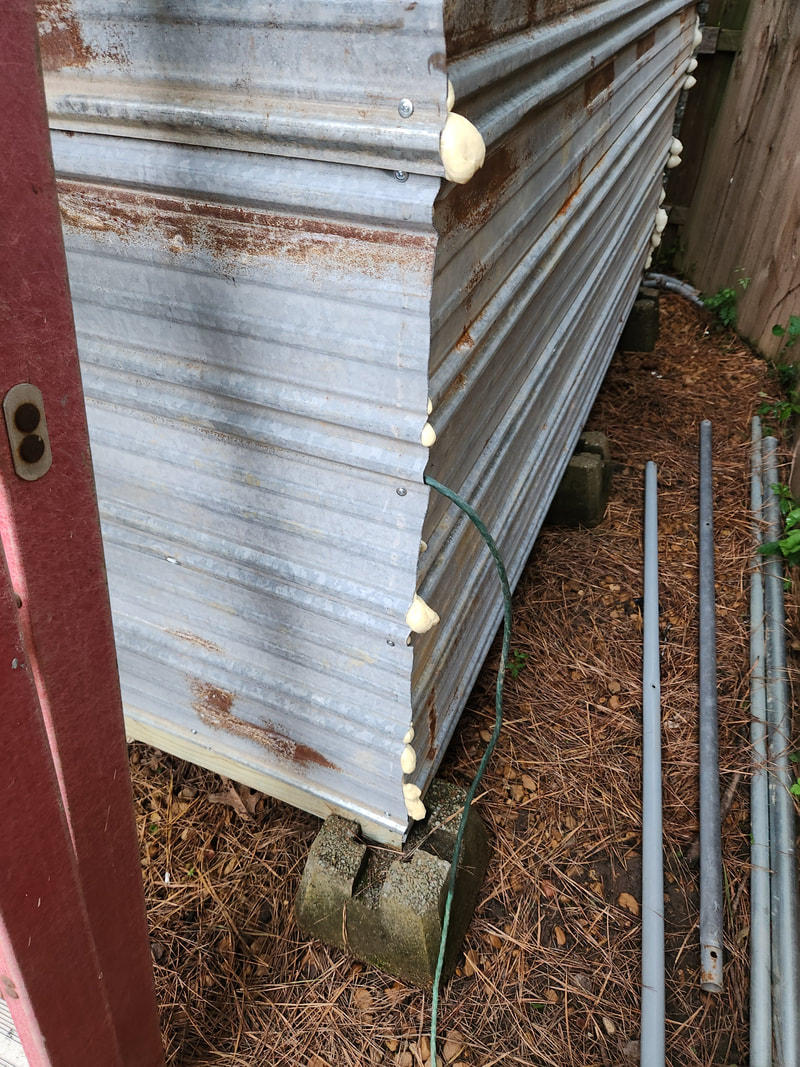 The salvaged extension cord cable is routed along the fence and up to the corner of the shed where the cable is pressed through the foam in a gap between the sheet metal panels. 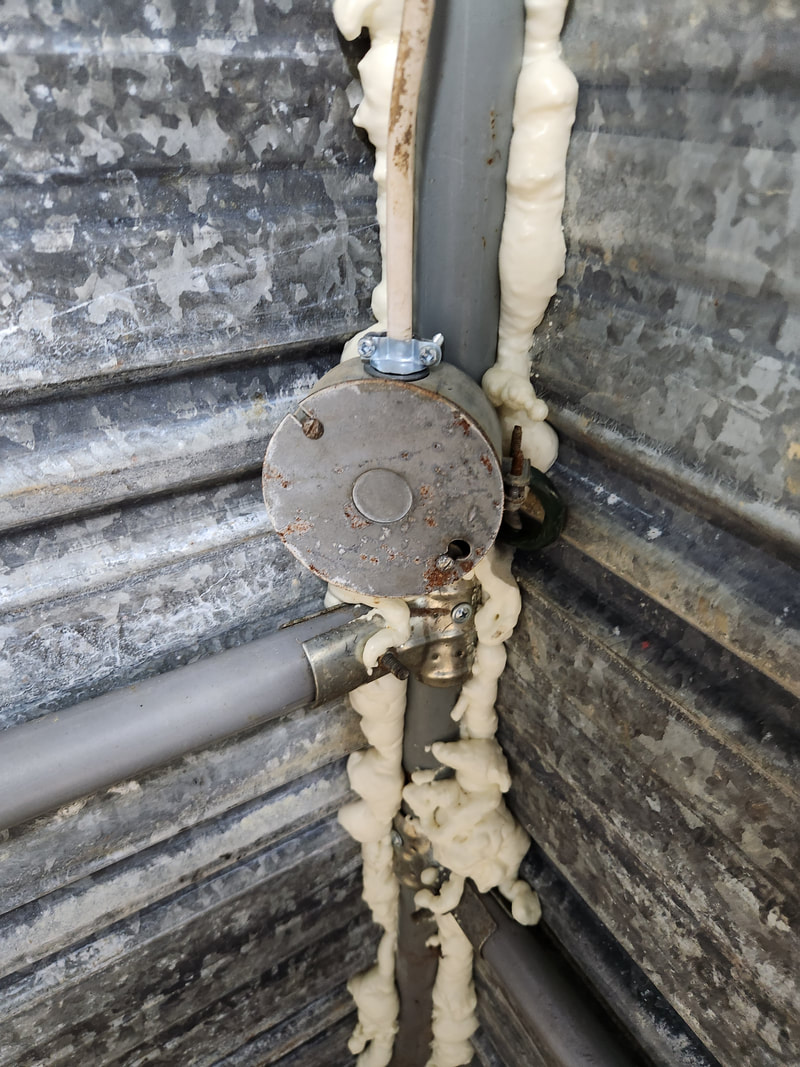 The small square junction box secured in place where the power cable comes through the wall. The Romex cable coming from the top of the box is secured to the ends of the power cable with wire nuts. 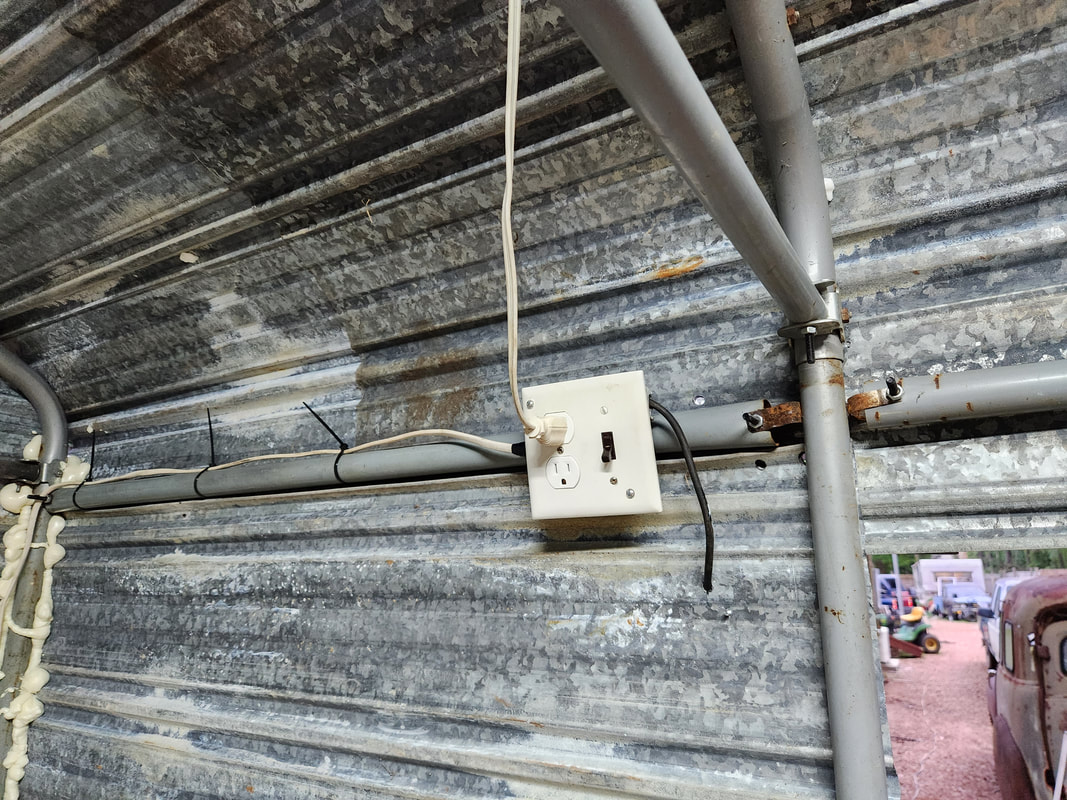 The outlet/switch box with everything hooked up. note the plug in place for the shop light and the black cable coming from the box going through the wall for the flood light. Also note the two screws applied through the corners of the cover to hold it in place on the box due to the mismatching of the available components. 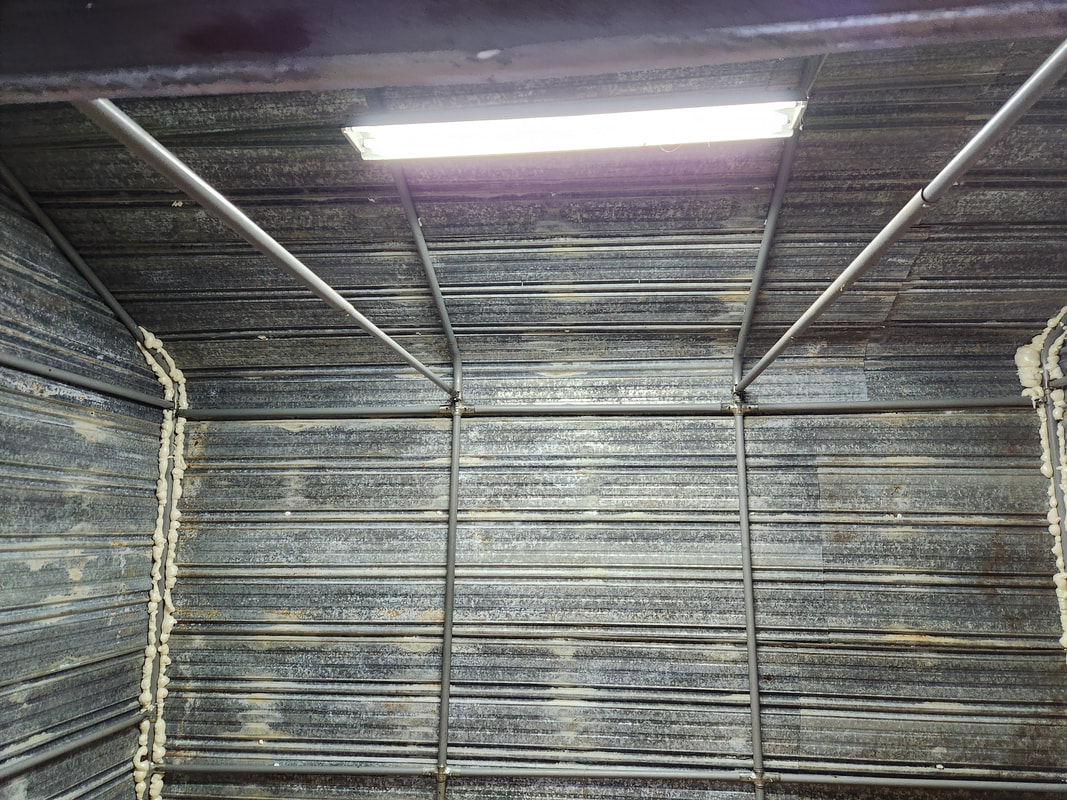 The T8 shop light with LED bulbs in place and illuminated during testing. 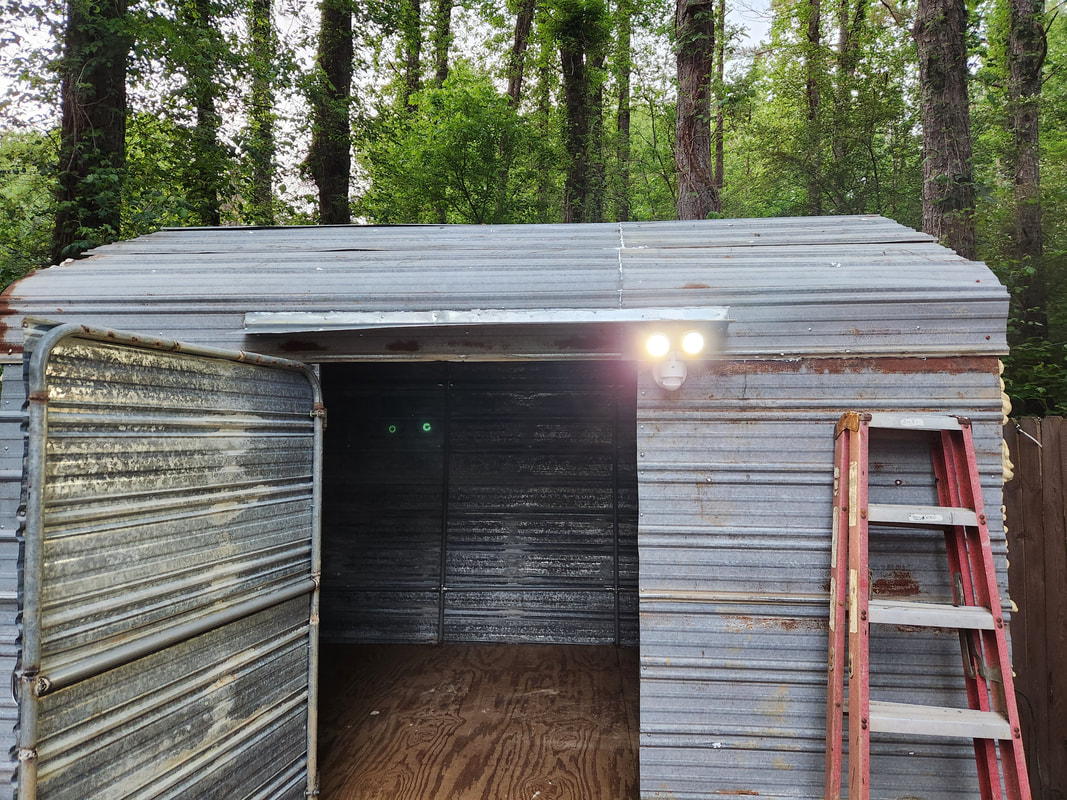 The LED flood light fixture illuminated after turning the power on to the shed. With everything technically done, we can start placing stuff inside the structure. There is still plenty to caulk up and foam up, and there is the matter of figuring out a ramp for when we have any kind of rolling stock to place inside, but for all intents and purposes this project is complete. There might be other little extras I may decide to do to this shed to make it better in the future, but the main thing at this point is to start using the thing for its intended purpose. We're now in the home stretch with the shed project, with the idea that we're now hanging a door. If you remember, the door frame was made from an old chain link gate that was widened and heightened with extra tubing. I had to salvage a pair of gate hinges from the old garden gate, which consisted of two female sections, which are for the narrow tubing, while the male section of the hinge set is for a 2 3/8" tube, which the gate would be hanging on. The two female sections are held together with a large 5/8 nut and bolt. With the hinges done, I was able to hang the frame in place. I did have to do a bunch of tweaking to get the hinges in a position I was happy with prior to hanging the sheet metal on the frame. 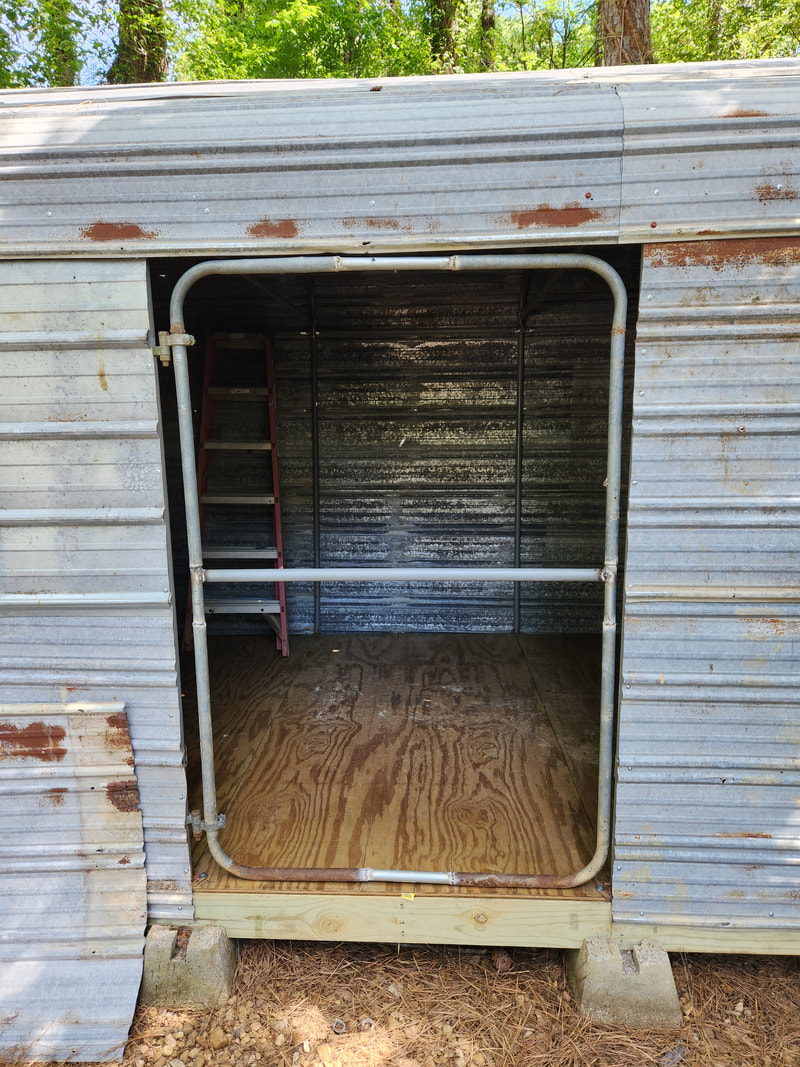 The initial hanging of the door frame, after a quick fitting of the hinges to ensure the frame will open and close properly. 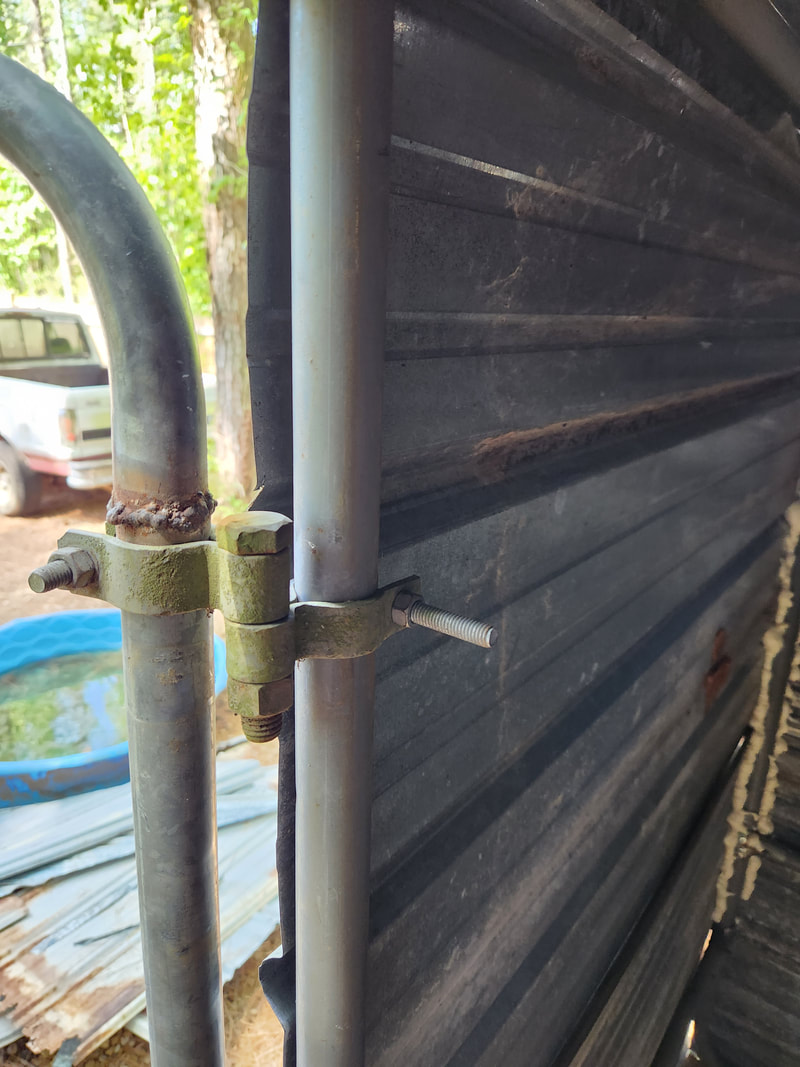 A closeup to the hinges after getting them positioned where the door will be able to open properly. With the gate in place, I took a piece of sheet metal I had left over from the roofing, which measures 4ft in length. I wouldn't need the entire 4ft as there will need to be gaps to ensure the gate can open and close smoothly. After hanging the first panel, I was able to start dialing in the gate, testing the opening and closing and trimming the edges of the panel along with the edges of the wall to ensure everything operated smoothly, with no hangups. After getting things where I was satisfied, I hung another piece of sheet metal, after measuring and cutting that from an intermediate length piece I had. With the two panels in place, I did more dialing in with the second panel in place, trimming on the second panel. After a lot of opening and closing, I finally got the door situated where it will close properly and open all the way to 90 degrees relative to the wall. 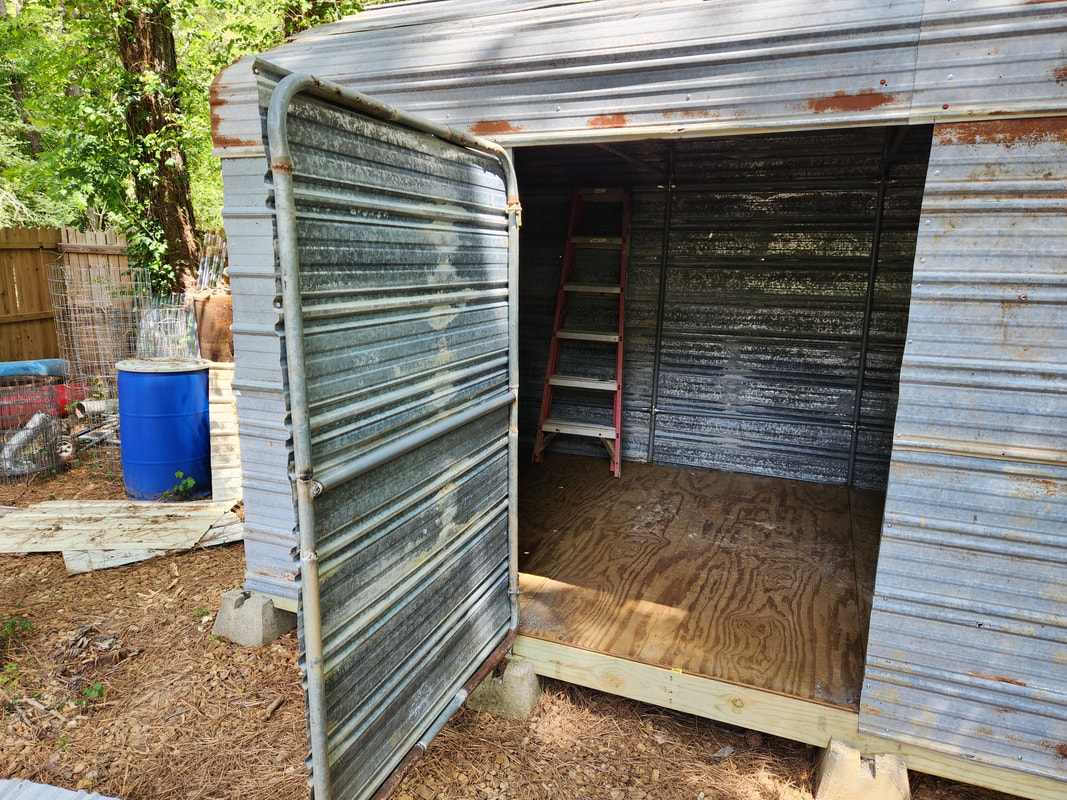 After dialing in everything and making multiple trims on the edges of the sheet metal, the door is able to open to 90 degrees relative to the wall to allow us full use of the doorway. There will be a large gap around the edges of the door that will need to be addressed. I have a couple of ideas on how to address this. One is to use some rubberized PVC cut into strips and attached to both the door and wall, made to flex as the door opens and closes, allowing for the folding of the material when the door is closed. This would hopefully allow for proper shedding of water. The other idea is to make a mini awning for the top that will help shed water around the top of the door, maybe extending that to the sides to make what amounts to the little window shield things on a car that help shed rain while allowing you to open the window slightly for venting. 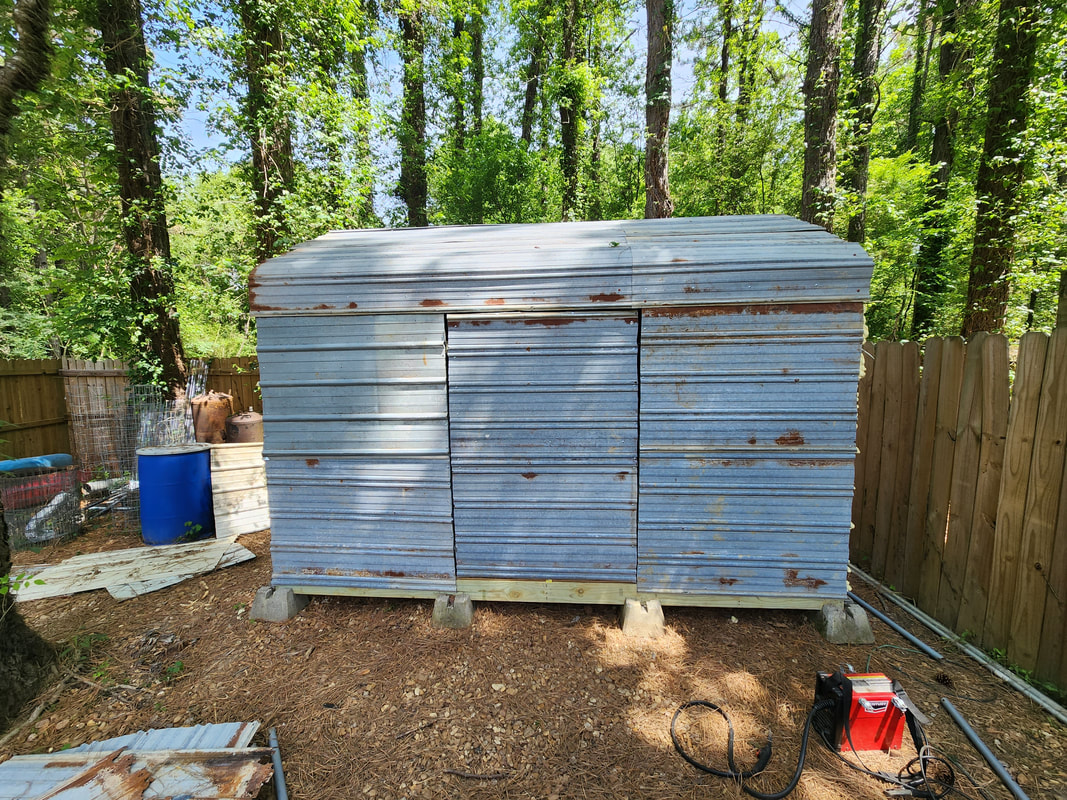 The shed door in the closed position, note the gaps around the edges of the door that we'll need to address to keep water out. I will probably go with the first idea since this is more easily achievable. I still need to put a handle and hasp on the door to be able to lock the door. There's still the matter of caulk and foam, and running the electrical system, all of which are easy, they'll just take a little time to accomplish. Hopefully in the next day or so we'll have all this done and the shed will be complete and ready for use. |
