|
After getting one of the bookend walls done at the top third, I had to replicate the same procedure to get the other side done. Measuring the length of the panel, along with the three points and the heights at those three points, including the peak at the middle of the panel. Once that was done I was able to begin hanging the raw panel, with the subsequent trimming of the edges that would follow.
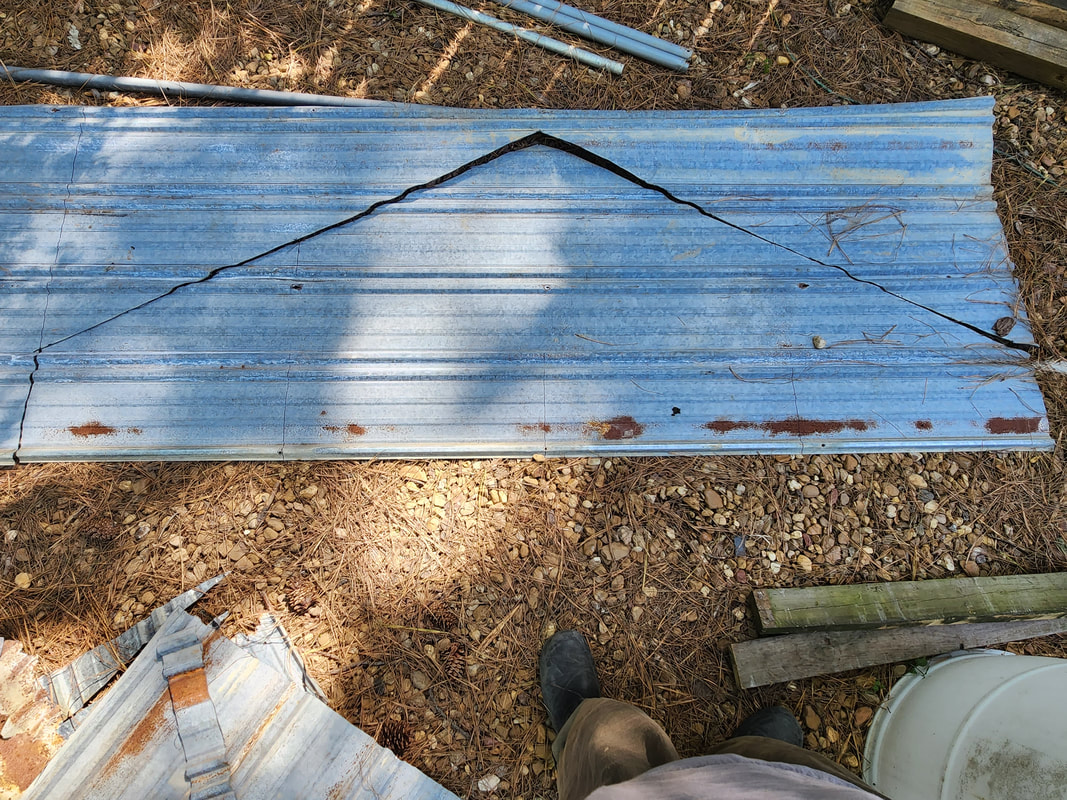
Cutting the triangular panel from a piece of metal after making all the measurements the same way as we did with the first panel.
After getting a couple screws in, I trimmed where needed until I could get the panel to fully sit against the frame of the wall. With the rest of the self tapping screws in place, I can finally rest easy with the fact that the shed's skin is fully installed. There are a lot of pinholes on the panels from where old screw or nail holes are located from the old building these panels were attached to. I'll have to caulk all of these to ensure no leaks occur during heavy rains. 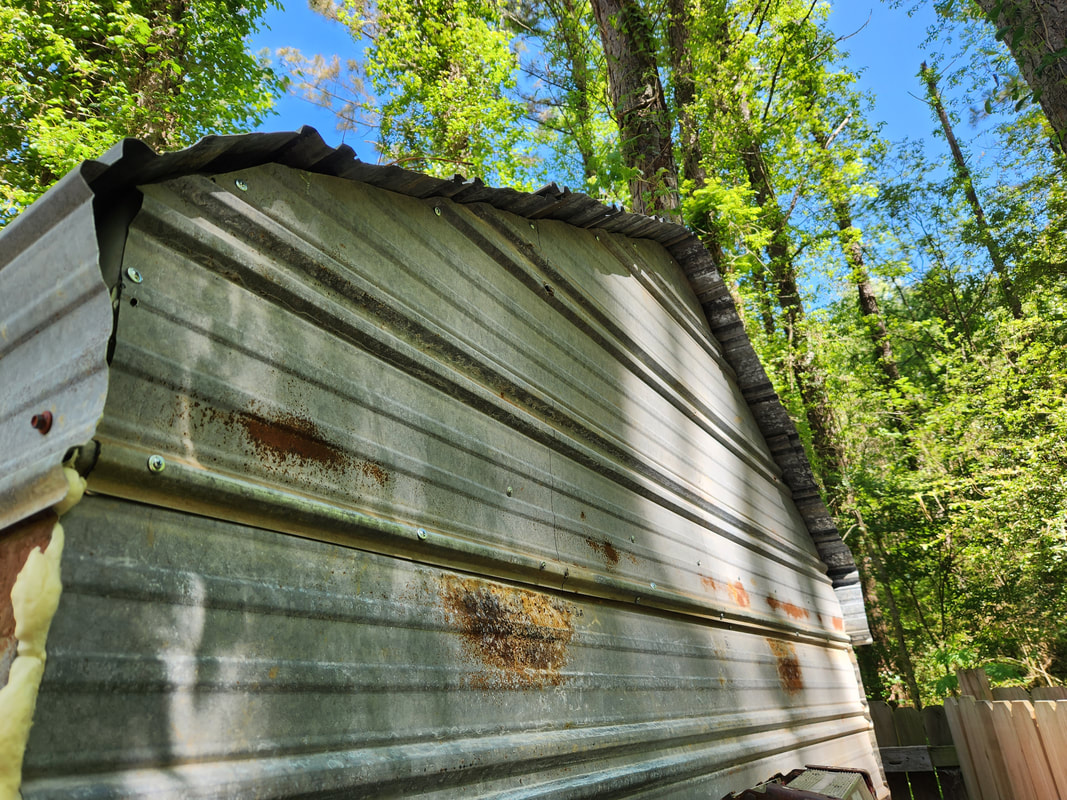
The second triangular side panel hung in place fully, concluding the construction of the shell of the shed.
The next order of business is the door. My option here is to use an old chain link fence gate that measures around 36" wide x 60" high. Obviously, this gate is too small to make a good door, so it would have to be widened and heightened. First thing I had to do was remove the chain link middle section and straps, along with the decorative crown on the top. I then cut the frame at four points. I used some scrap tubing as pieces to widen the frame pieces to make everything meet the dimensions needed for the door. I will use the gate hinges that are on this thing to hang the gate/door in place. After I added the pieces of pipe to widen and heighten the frame, I added another piece of tubing in the middle of the frame to add reinforcement to the frame for hanging the sheet metal. I'll have to use a couple 4ft cuts in the same way the front walls were done. 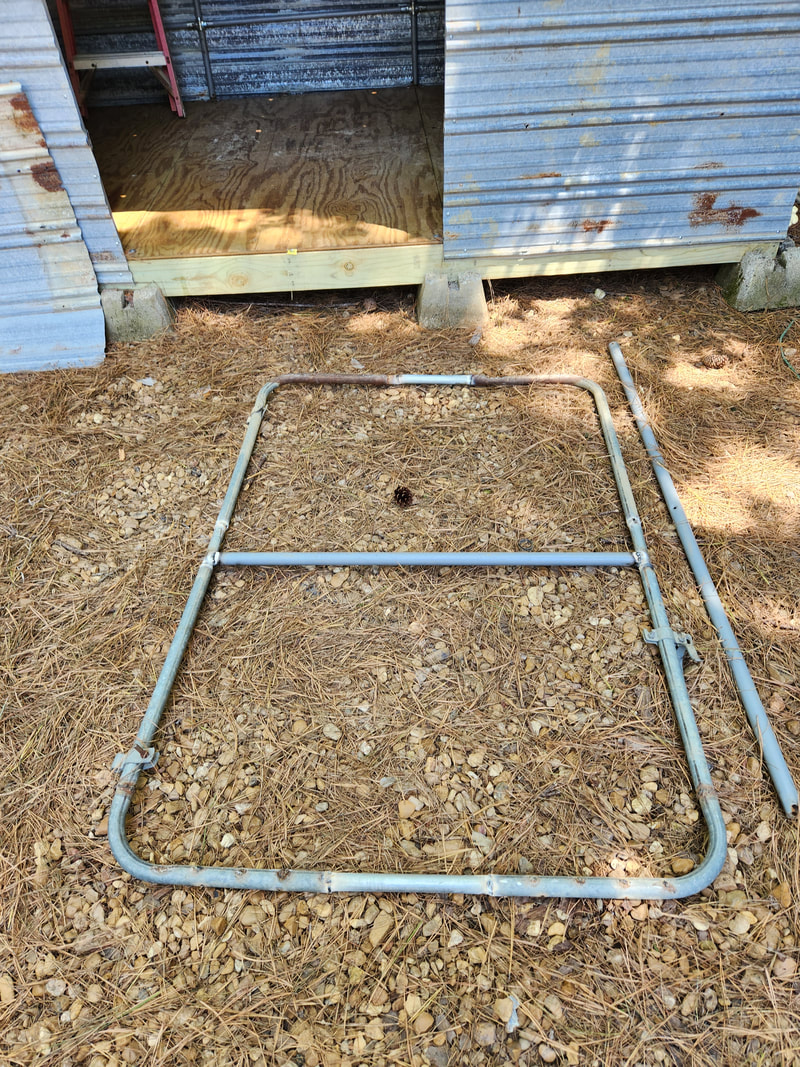
The door frame, made from an old gate, cut up and welded with extra tubing to make it meet the dimensions of the opening on the shed.
Once the door is hung and dialed in for smooth opening/closing, I can add a latch of some sort, or maybe just a padlock hasp to secure the door. A handle will need to be added just as well for safe opening/closing. I'm trying to think of some way to seal the door where water won't run in through the gaps around the door, maybe with the use of some rubberized PVC sheets cut into strips to overlap the door on the outside to hopefully shed water. I'll move on to sealing everything after the door is hung.
0 Comments
Picking back up from the last round with the shed covering, we left off with covering half of the roof. After getting some more self-tapping screws, we picked back up, getting the rest of the roof covered in the same way as with the first half. There was some roof action, climbing on the roof to be in a better position to drive the screws home. With the panels being as long as they were, we had some serious overlapping, which was just fine as the roof will be extra strong. 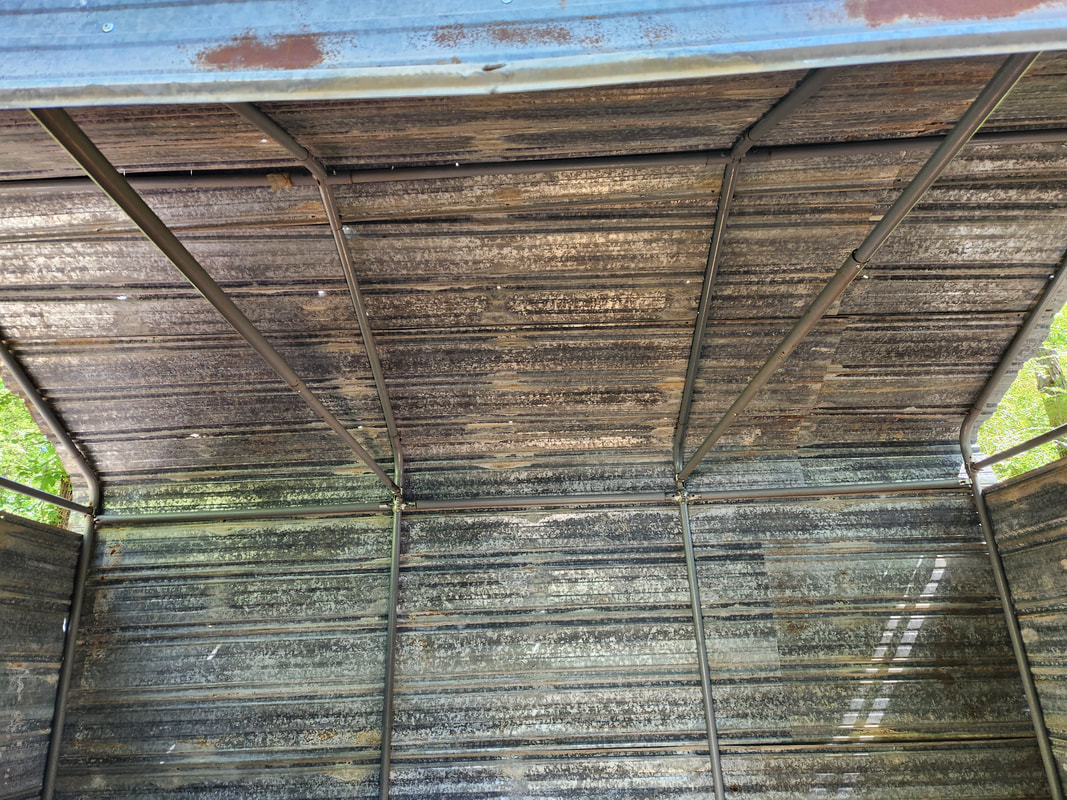 A shot inside the shed showing the other half of the roof after installation. At the same time, with the extra overlapping, I was able to add many more screws through the sheet metal to give even more adhesion, even past the attachment to the roof frame tubes. Of course this was necessary to keep the sheet metal from potentially flapping around if a strong wind manages to get under the edges of the sheet metal. With the roof itself completely done, the last part is the top third of the end walls, the triangular section that makes up the roof section of the end walls. 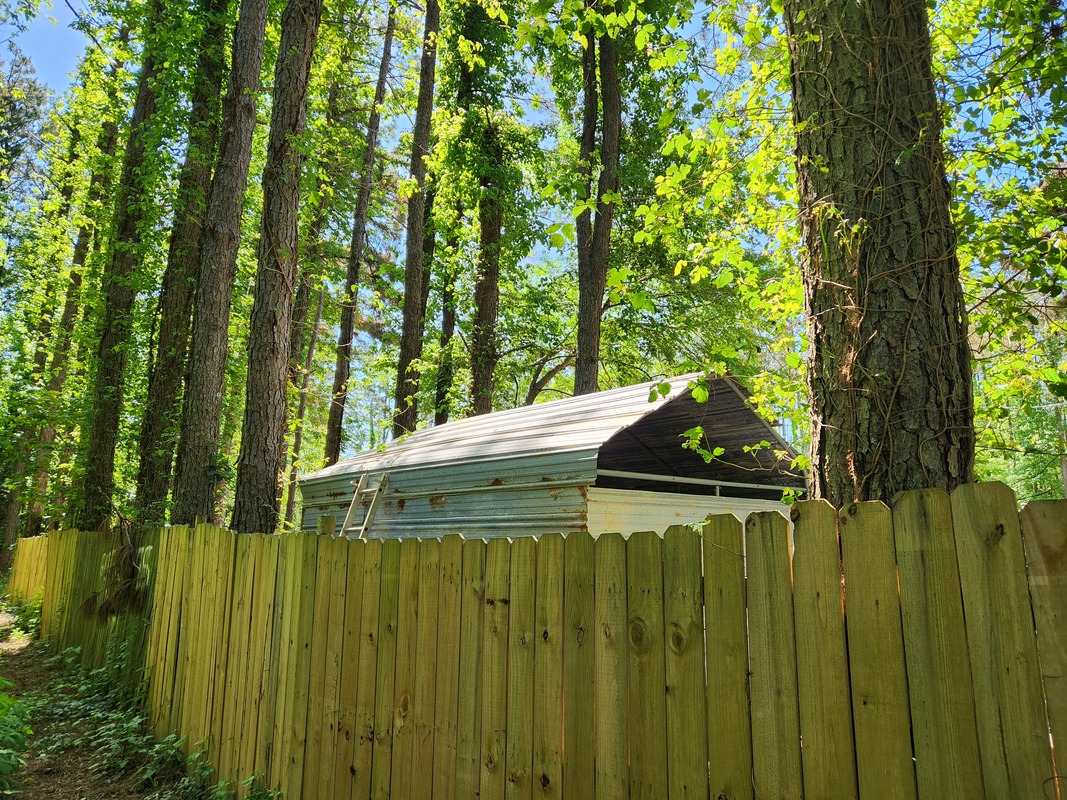 A shot from outside the perimeter fence at the other half of the roof after the final installation. At first I was going to use cardboard to make templates to cut the sheet metal but decided against it. I took several measurements, measuring at the bottom, then marking three points, at 2ft, 4ft and 6ft. I then measured from those three points straight up to the roof, making note of those numbers. On the sheet metal, I measured 8ft to cover the length of the panel needed to cover the end wall. I then measured and marked the points on that piece of metal, then used a board to draw a line to line up the peak with the other points and the outer edges of the panel. After cutting this, I went on the ladder and got a couple screws hung to hold the panel. I then used the angle grinder to trim the excess from the roof edges so I could get the panel completely seated against the wall for final securing. 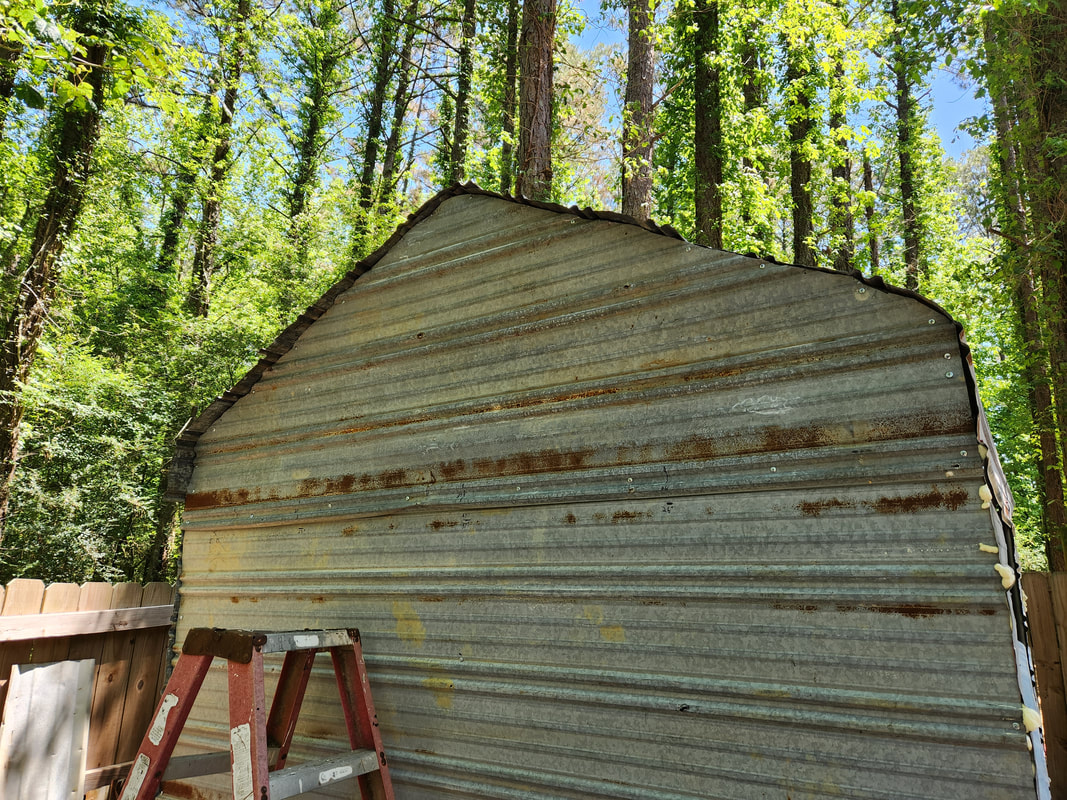 The end wall panel after the final hanging when the edges were trimmed down to allow the panel to fully fit in place. Of course, with this end wall, I will have to add plenty of can foam to fill the gaps to seal everything. This is in addition to the caulk that I'll have to add to the seams and overlap points on the roof and wall metal. I still have to do the same thing with the other end wall to get that panel done before I can fully concentrate on sealing everything. 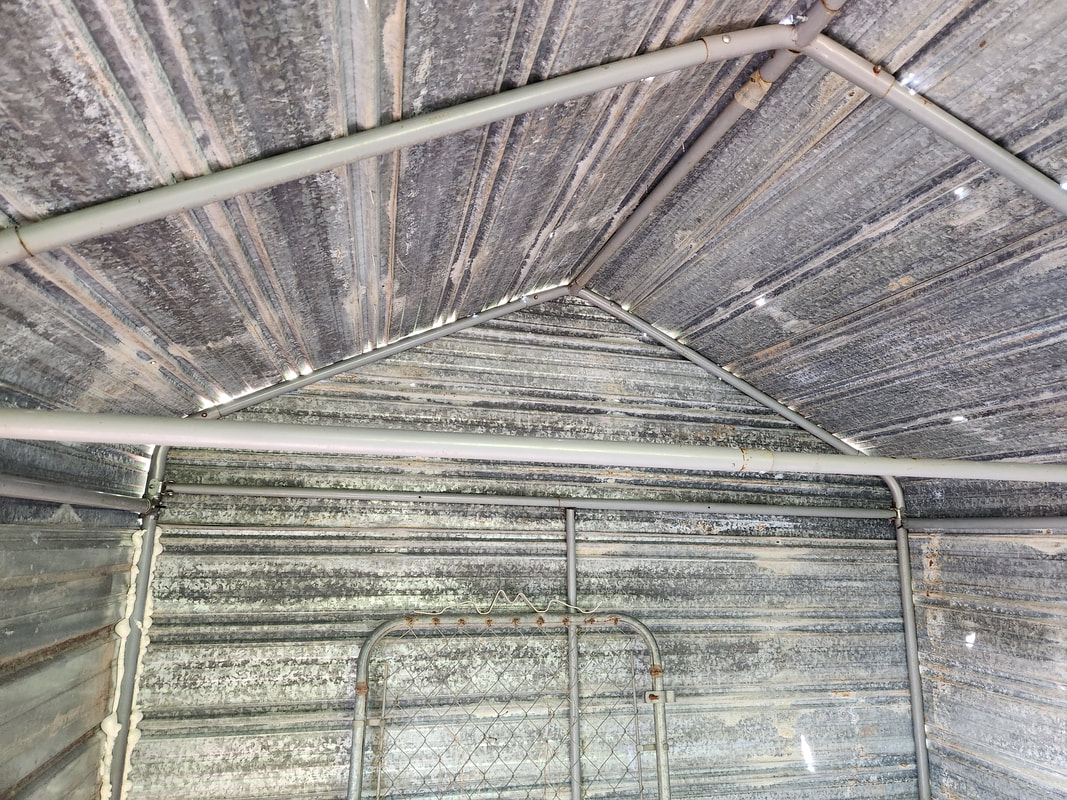 A shot from the inside at the end wall looking at how the triangular wall panel sits after the installation. Things are pretty closed in and just need sealing around the edges. The last big thing on this structure will be the construction of the door. As stated many times already, this will be made from a chain link gate and some extra metal tubing. Once that's done then the electrical installation will get done, which will be rather fast as there's not much to this other than three boxes and a light fixture. I still have to figure out a ramp and I might even install a dusk/dawn porch light on the outside to help light up the area in front of the shed. Once that's all done, the shed will be done and open for business. After running out of screws during the first session of hanging sheet metal panels on the shed frame, I took a minute to measure and cut some panels for the remainder of the rear wall as well as the walls. There was only part measuring, due to the idea that the longer panel didn't need to be precise, just enough to ensure coverage over 2/3 of the roof. Same with the shorter section, even though I measured the long panel to get a half/half cut from one panel, there wasn't a precise measurement to cover the remaining 1/3 of the roof. The panels just need to overlap one another properly and have a little overhang on the edges. 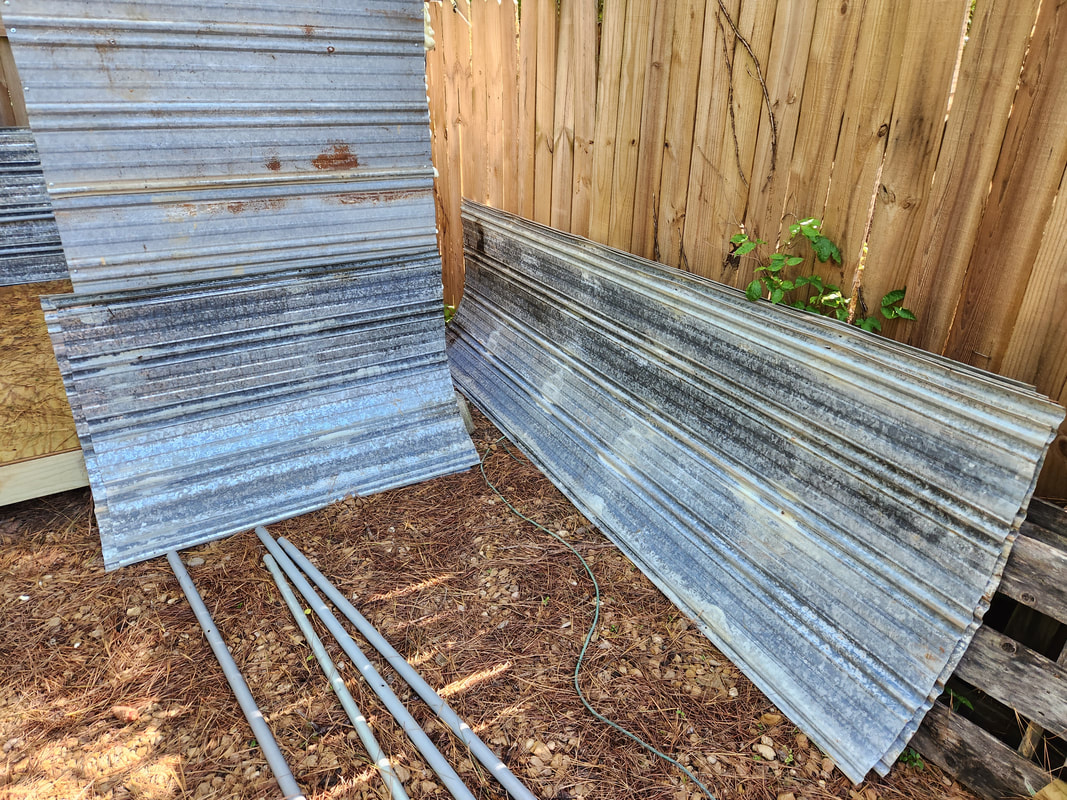 The pre-cut short and long panels staged prior to hanging. The short panels are 52 inches long, more than the 48 inches required for coverage of the last third of the roof. The longer panels range from 9 to 10 ft in length, also more than enough to ensure coverage over the first 2/3 of the roof/wall. We went ahead and got the remaining rear panels hung, ensuring alignment with the edge of the rear corner and the obvious overlap that was present because these panels were well over 8ft in length. At least by cutting the panels ahead of time I didn't have to worry about cutting the excess from the already hung panels, which had the habit of vibrating the screws out from the frame, requiring me snug them down again. The roof now was the fun part. Since this would involve some ladder time, it took a little more careful precision to ensure everything was lined up, while holding everything in place to get a couple screws started at different points. Once the panels were started, I could work my way up the line on the frame, setting screws to get the panel fully secured. Once I got to the short panel, I didn't add screws to the last section of the larger panel, waiting to get the shorter one in place so I could tack down the edges of both the larger and shorter panel at the same time to the frame. 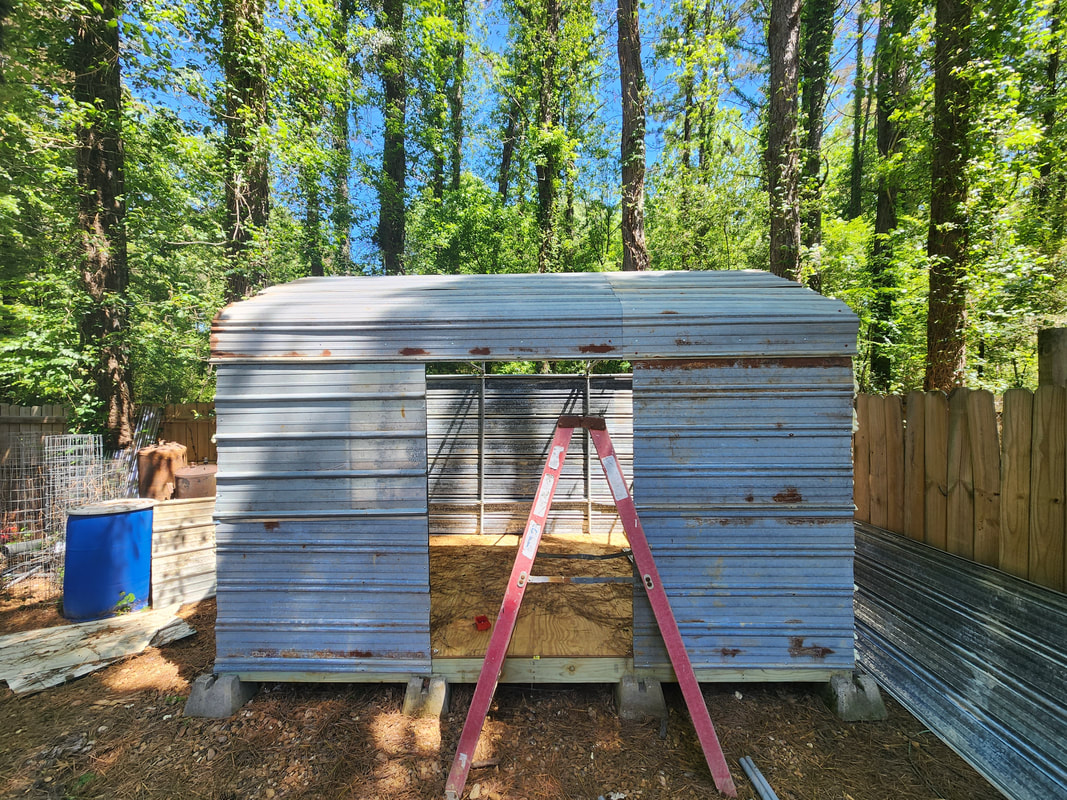 A shot of the front of the shed showing the roof panels in place on the front half of the roof. Note also the rear wall that's fully covered up to the bottom of the roof frame section. Now there was a positive turn of events with the hanging of these panels. With only two rows of panels being hung, I had already hit the peak of the roof and overshot by six inches give or take. What this means is two rows will be all that's needed on the other side to ensure full coverage to the peak of the roof, instead of the fifth row I thought I might need. This is good in the sense that I won't be using as many panels as first thought, and even with the long and short panels I already have, these can be pressed to use for the remaining end walls where I have to cut triangular pieces to fill in those spaces. 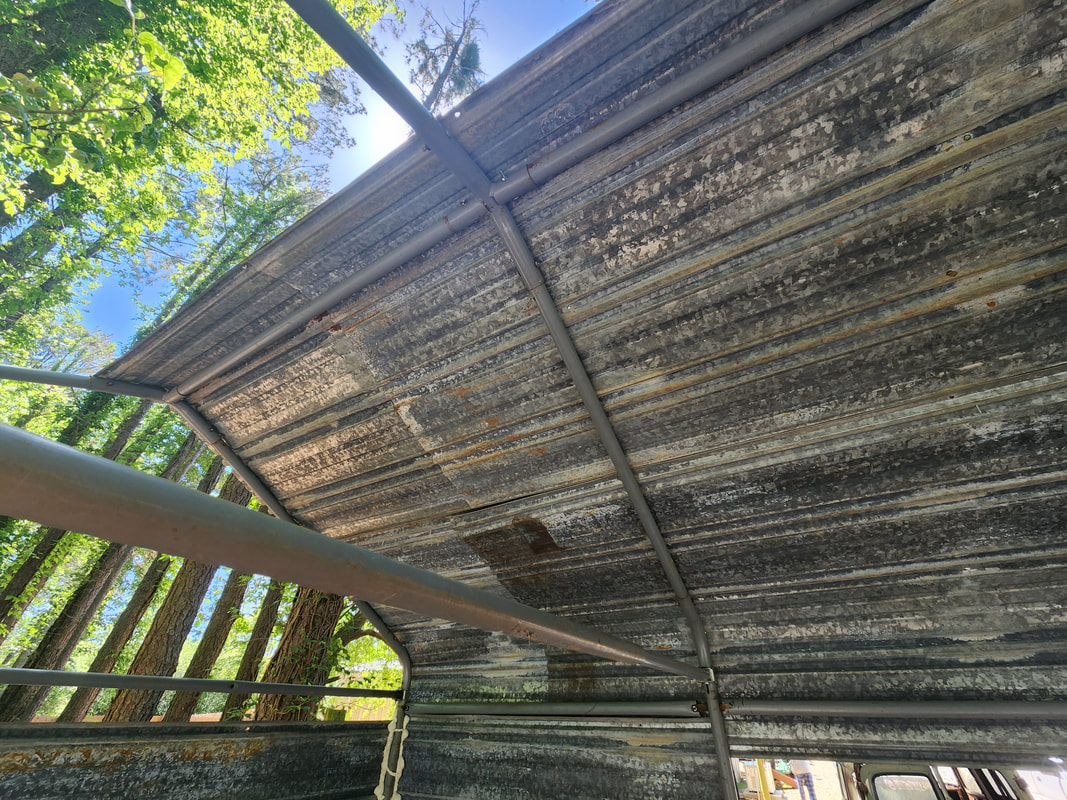 A shot from inside the shed showing the overlapping of the longer and shorter panels, with the longer panels being around 9-10ft in length, plenty to ensure proper coverage, and the shorter panels being a couple inches longer than the 48 inches required for the last third of the roof. Speaking on the remaining section of end wall, my plan for that will be to cut some cardboard to make templates. I'll trim the cardboard to ensure a proper fit over the triangular opening, then use this template to cut a sheet metal panel that will fit the first time. Once I get these remaining panels hung, I can caulk and foam up all the joints. I still have to build the gate as well, which is going to be made from an old chain link fence gate, which will get cut up and rewelded with extra tubing to make it taller and wider to fit the opening on the shed. I'll clad that frame with more sheet metal and hang it up, ensuring everything seats properly to have a good fit around the edges. More on that later.
We managed to get a nice load of recycled corrugated sheet metal from a guy about 45 minutes away from us for a helluva deal. We got over 20 pieces, most being between 8 and 10 ft long x 3ft wide for $100, which would've never happened with anything retail. With this metal we will have more than enough to cover the frame, with some to spare. I started off with the ends of the structure, starting at the bottom, since the top piece has to overlap the bottom piece in order to shed water. Since the pieces were longer than 8ft, I had to cut off the excess. I chose the shortest pieces for the ends since there would be some waste here. The shorter pieces would yield less waste.
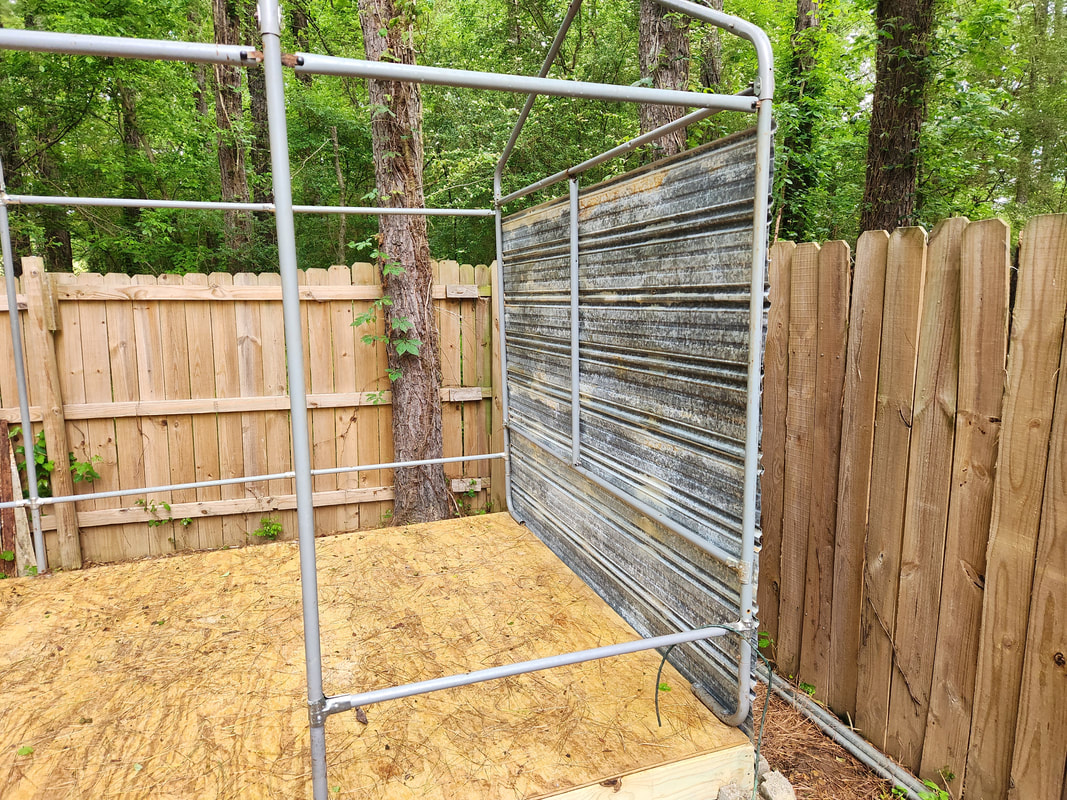
One of the ends with two panels hung up, covering the wall almost completely. Excess material was trimmed off to be even with the corners of the frame.
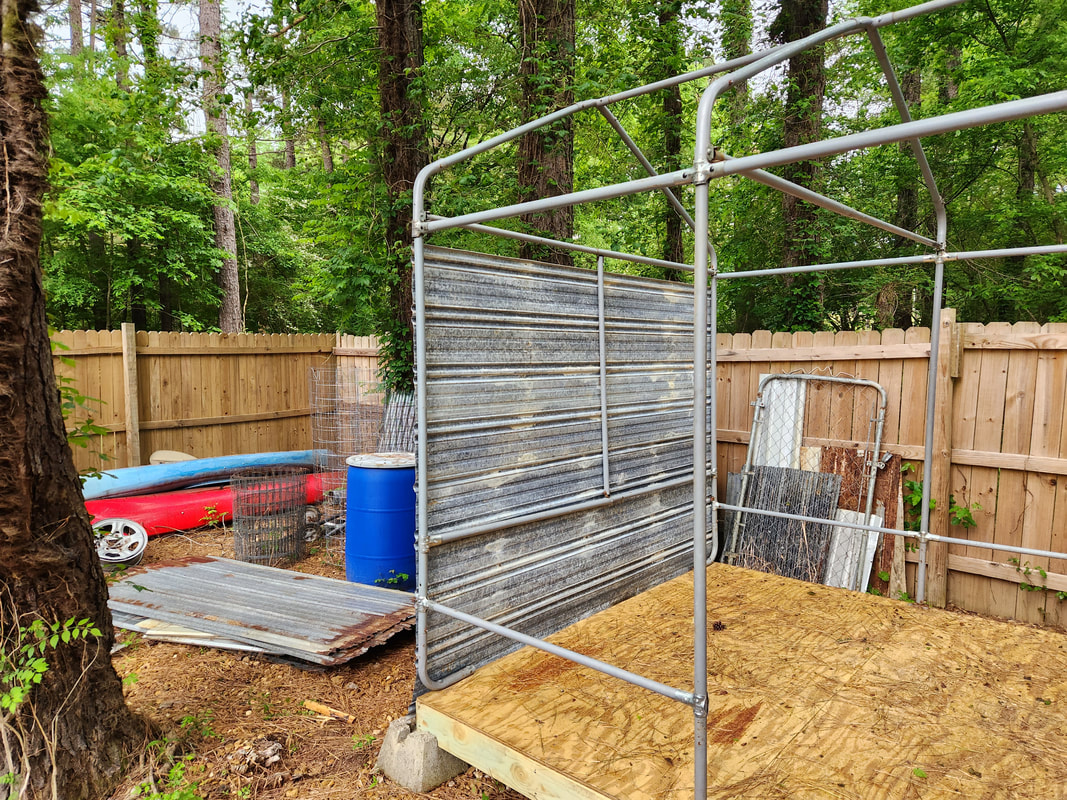
The other end of the shed frame with the two panels hung up to the top of the wall and trimmed down of excess material.
I moved on to the front of the structure, which would be two rows of 4ft panels, since the doorway takes up a third of the wall. Again, using the shorter pieces, I secured these in place using self tapping screws through the sheet metal and into the tubing of the frame. After working my way up to the top of the walls, using two 3ft panels, I moved on to the rear. 
The front walls are going up, with one side done and the other side coming together, two panels on each side.
Moving to the back, I can now use the longer pieces. However, since these pieces are around 10ft in length, other than trimming off any rusty edges or the odd angled end so I can have straight ends, there will be a large overlap between the 10ft panels and the short 4ft sections that will need to be cut to cover the remainder of the back wall, which is fine. 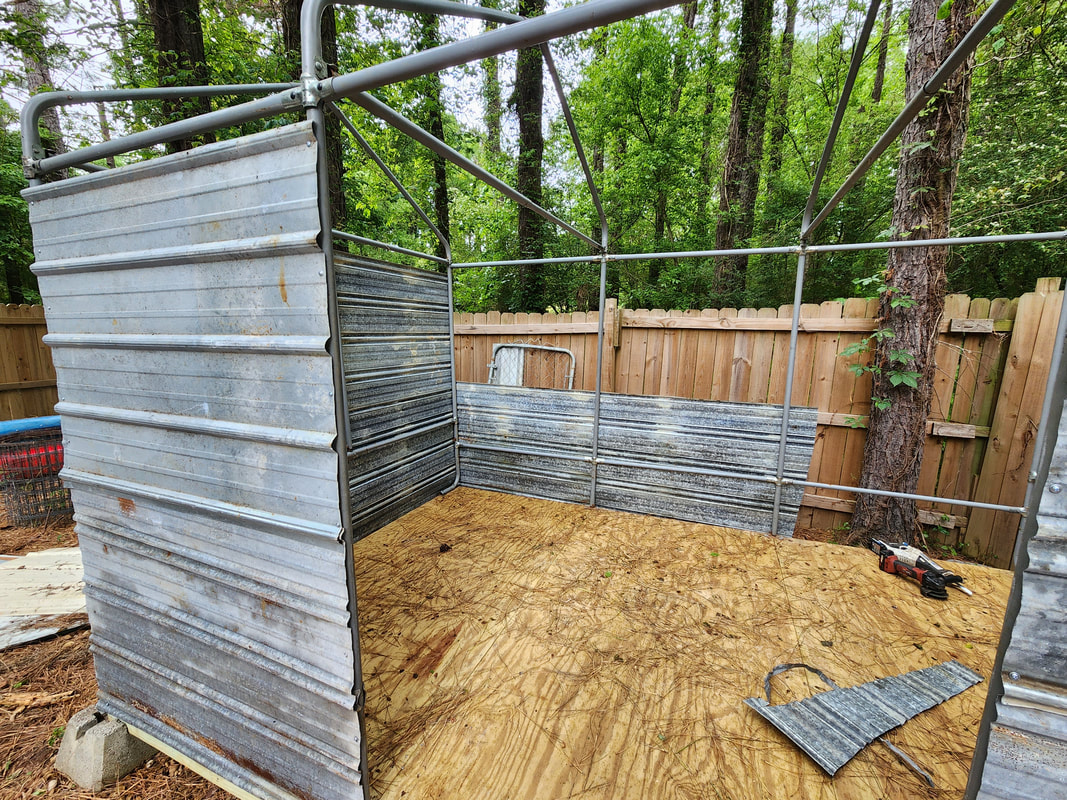
A shot from the front of the shed to the back, showing the 9ft length of panel hung in place, after trimming the edges. Note the cut piece on the floor.
Unfortunately, I ran out of self-tapping screws, as well as battery power for my reciprocating saw, so with the hanging of panels effectively halted, I took care of one little thing that was a leftover from the Kennel Greenhouse, which was spraying expandable foam on two of the corners that were fully hung up. The two front corners got the remainder of the foam in the can. I will continue to hang more metal before spraying in any more foam. Once that's done, I can run power to the structure. 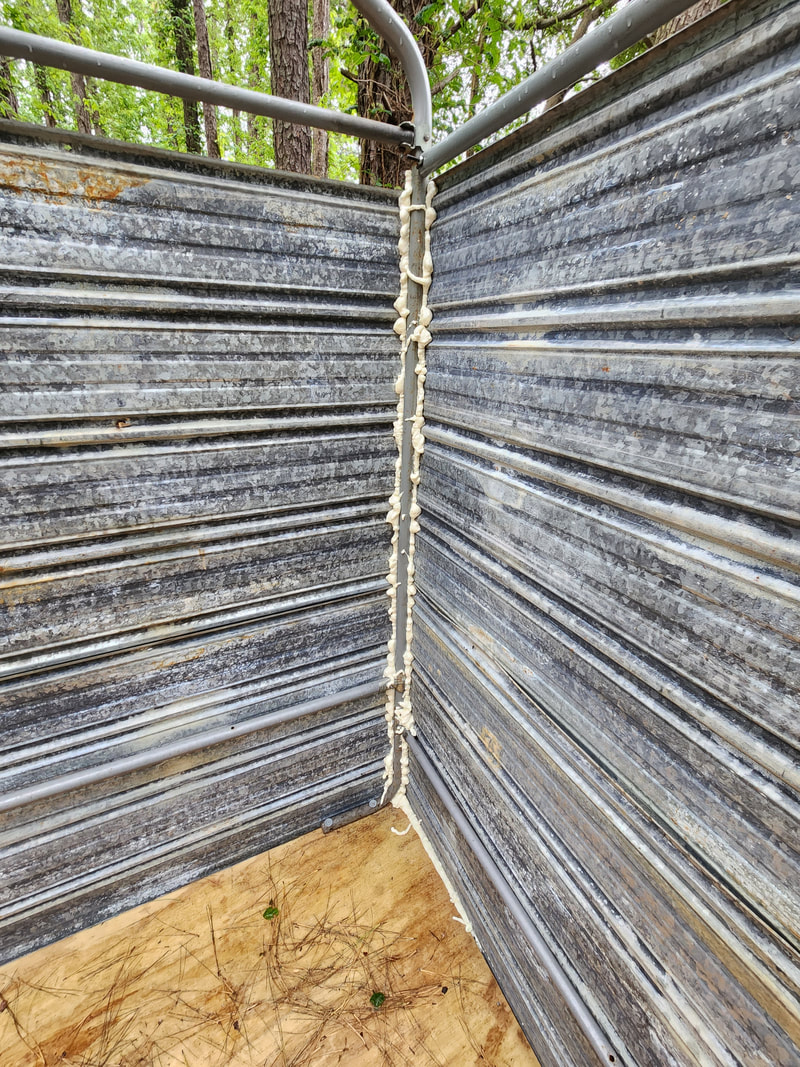
One of the front corners with foam sprayed around the tube and gaps, filling in all I could, even a short run of the gap between the wood floor and the edge of the sheet metal.

The other front corner of the shed with foam in a can sprayed in place. I almost finished the run before running out of foam.
One of the biggest obstacles I will have to deal with short of climbing up on a ladder to hang the panels is making the door for the shed. For this, I will be cutting up an old chain link gate and adding to it to make it large enough to fit over the opening. I have plenty of leftover tubing to use to widen the frame and make it longer. I'll just need the chain link hinges to hang the gate/door. I won't even need the chain link material on the gate, just the frame. Once that's done, the shed will be closed in. I might have to add something like rubber strips to seal the door around the edges, I'll figure that out when I get to it. But other than that, with the power cable routed to the shed, I just need to hang another junction box, switch box, and outlet box along with a shop light or two so the structure can have ample lighting. I may even add a dusk/dawn sensor and porch light for the front of the shed so the area can be somewhat lighted for the instance when we might have to go to the shed at night. This is another large building project that is coming together quickly.
After a couple years of this structure just sitting incomplete, we are almost done with the Dog Kennel Greenhouse. I had established a power run to the structure with the use of a 100ft long extension cord, hardwired into the outlet box in the greenhouse. The cord was routed over to the spot along the west side of the garden where the old power junction was located. The next thing I had to do was set up an outlet/junction box that would take the power from the cord plugged up to the Storage Trailer and distribute it to the extension cord feeding the Greenhouse, as well as another timer that would cycle on the sprinkler valves for the irrigation system, which are also established in the greenhouse.
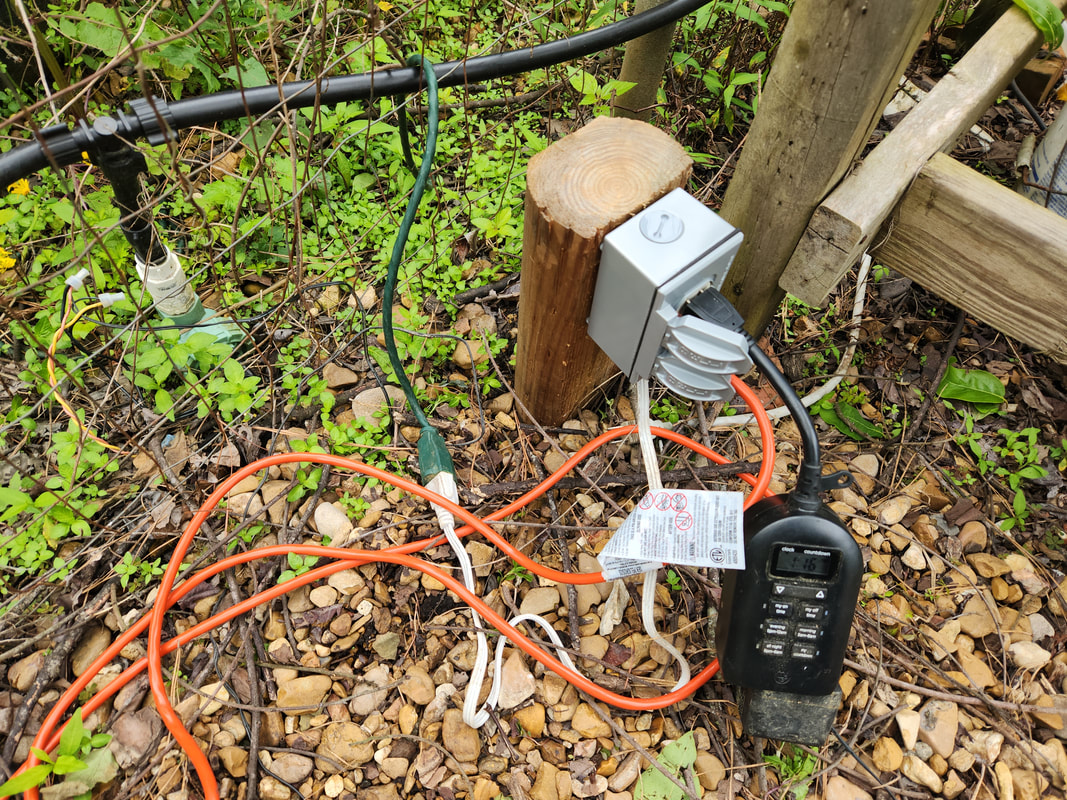
The outlet/junction box attached to a landscape timber piece that is hammered into the ground. The orange cord goes back to the greenhouse and the green cord goes back to the Storage Trailer. The white cord is hardwired into the outlet box to plug to the green cord. The timer that's plugged in was for testing purposes.
I originally wanted to hardwire a cable at the Storage Trailer outlet box as well as at the junction box in the garden, but unfortunately I didn't have any long lengths of 3-conductor cable to use. All I had was the extension cord that has been used for the last couple of years. Rather than cut up another extension cord, I chose to just hardwire in a short male plug end cord from the outlet box. This would be plugged up to the extension cord going back to the Storage Trailer. The extension cord going to the Greenhouse was plugged up to the outlet like a regular load. While this is pretty temporary, it will more than likely be pretty permanent until I feel compelled to cut up the remaining cords and dig trenches to bury the remaining exposed ends of cords. 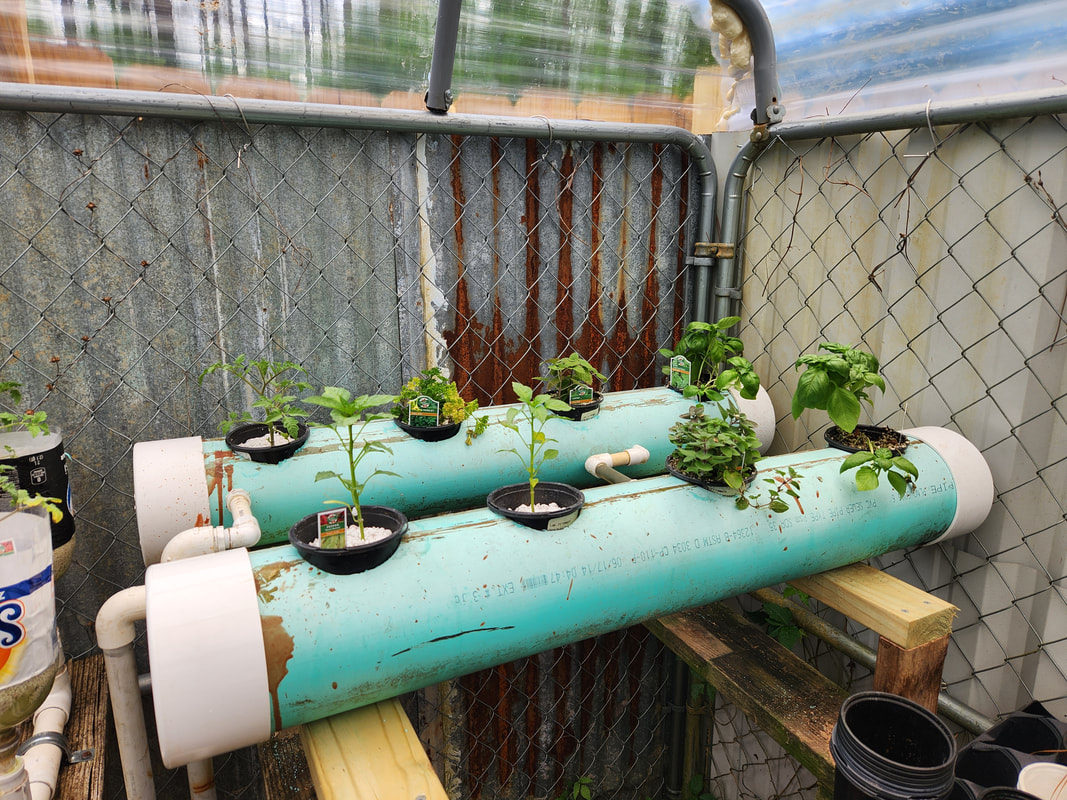
The Double Barrel Hydroponic Garden assembly fully planted with a mixture of veggies and herbs.
With power established in the Greenhouse, I was able to plant a lot of plants, especially in the hydroponic gardens. I only had so much Perlite to use, so I started off with the Double Barrel HPG setup, planting a mixture of herbs and veggies. I planted a couple peppers and a tomato, along with some basil, oregano, and catnip. This little mixture would grant us some of the common veggies we typically use along with culinary herbs and a treat for the feline bastards of the compound. I also took a moment to plant the two drum beds and the remainder of the bucket beds. I had enough Perlite to plant a few of the soda bottle planters, which took more tomatoes and peppers. With the plants in a number of the hydroponic planters, I set up the timer so the system would turn on in the morning and in the early evening. For test purposes I turned on the timer to run the system. 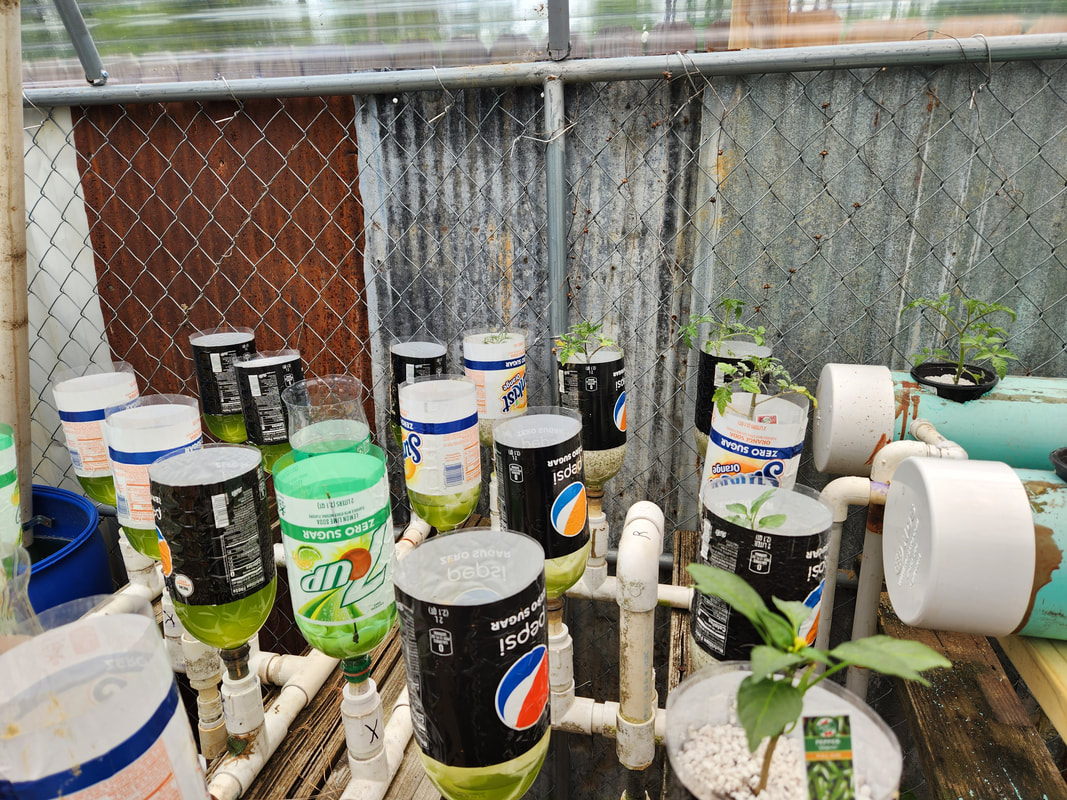
A few of the soda bottle planters to the far right of the assemblies are planted with peppers and tomatoes.
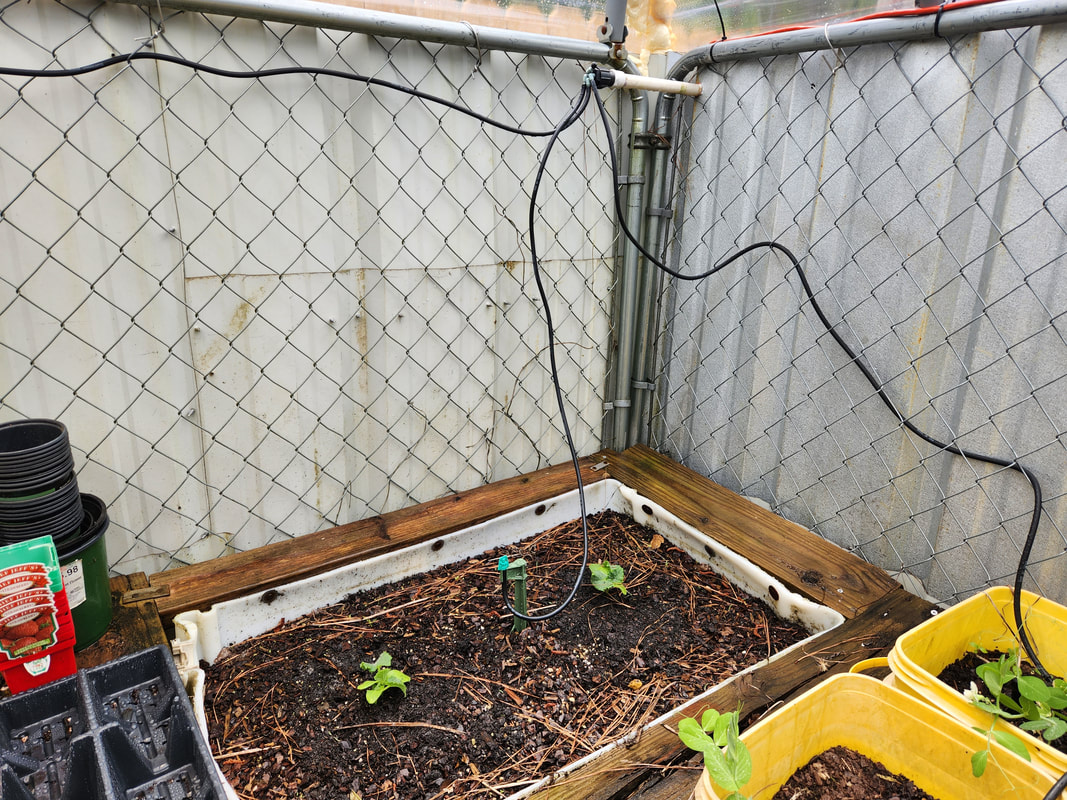
A shot of one of the half drum raised beds with a couple cucumber plants in place.
While I was at it I also planted the upside down planter with one tomato and put another catnip in the hanging basket planter. These two planters got a watering globe to at least space the watering intervals so I don't have to water these things every day. 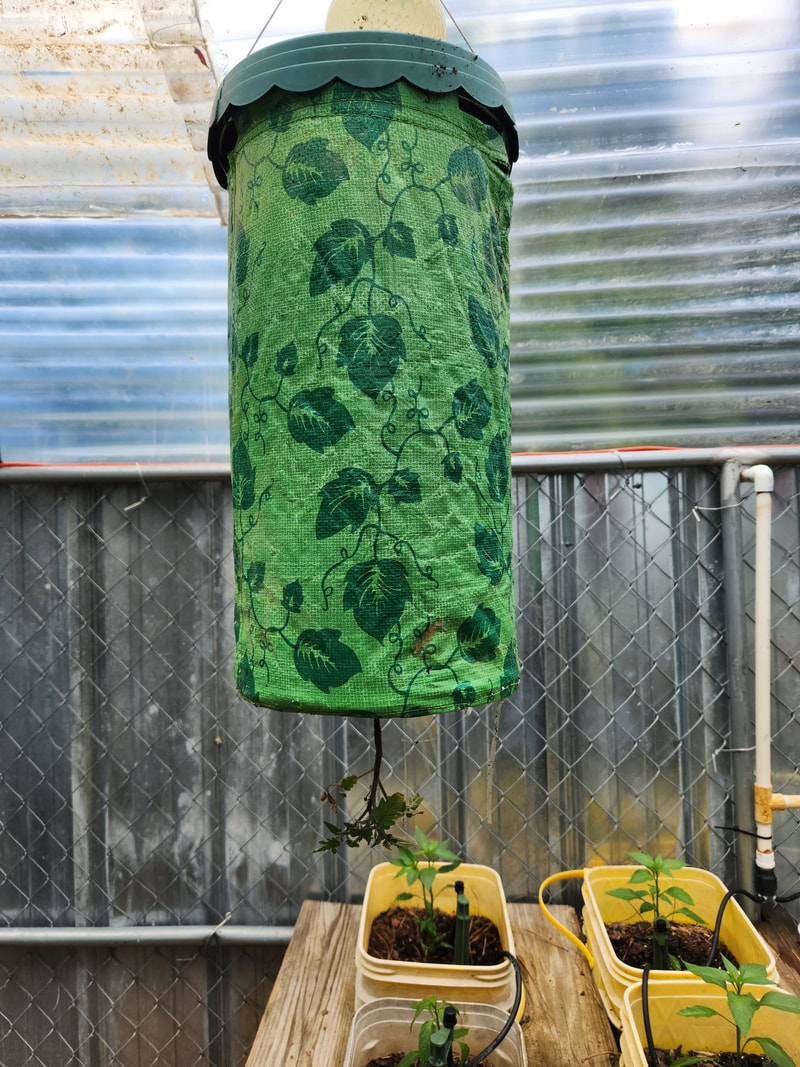
The upside down planter with a tomato in place. Note the water globe at the very top of the planter.
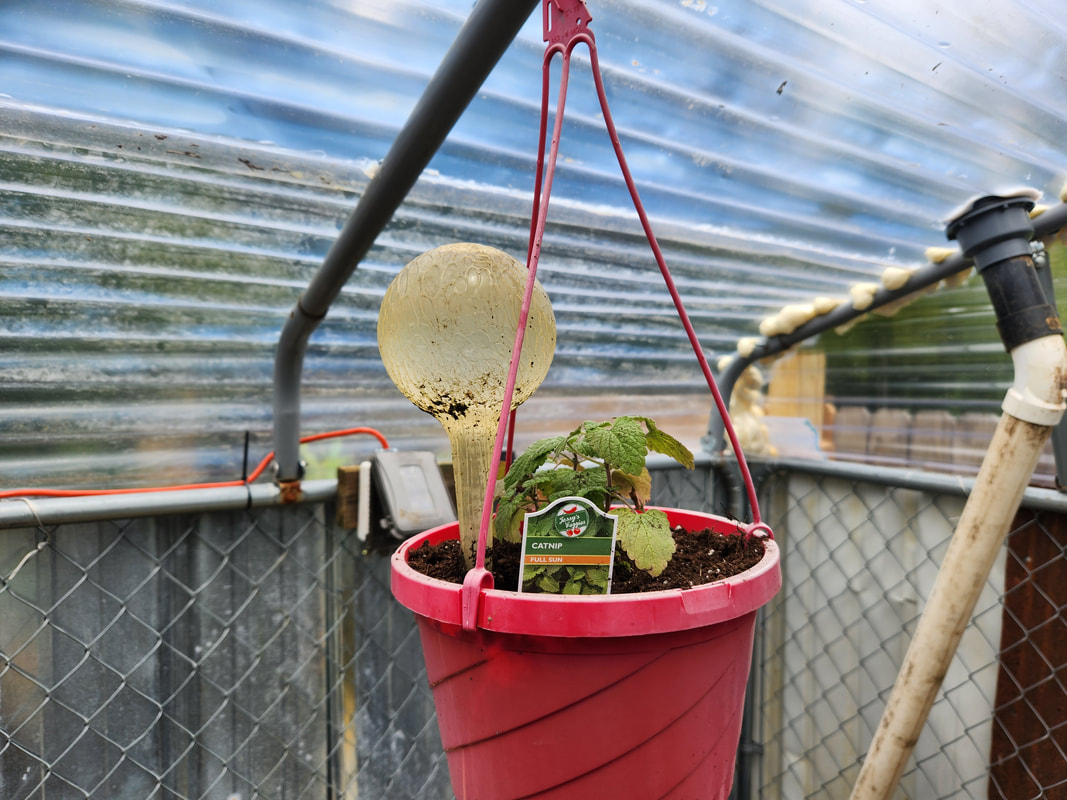
The hanging basket planter with a catnip plant and water globe in place.
With that, the Dog Kennel Greenhouse is technically online. The only thing left at this point is the growing lights. While these aren't needed until next fall when the sunlight will be far less than what we get in the summer. I'll still try to get the lights in place, even before summer officially starts so I can at least say the work is completely done in the Greenhouse. I still have plenty of soda bottle planters to fill in, so once I get some more Perlite and plants, I can fill these in so the hydroponics system is completely filled. From there the work will continue in the garden with more raised beds.
The plan for getting power to the greenhouse involved using a regular 100ft extension cord. This option is actually cheaper than getting a 100ft length of 3-conductor cable cut. I had two plans for this: Either I would route the cable around the walls of the greenhouse and out to the fence, then along the fence and around the west fence over to where the power cord going to the Storage Trailer is located. The other option would be to dig a trench to lay the cable in and run the trench over to the power point going back to the Storage Trailer.  The extension cord is routed from where the outlet box is located, zip tied to the top of the kennel panels all the way around the greenhouse and over to the corner where the cord will be routed outside.  The cord is routed under the edge of the corrugated plastic panel and zip tied to the PVC irrigation pipe going down to the strawberry planters. From here the cord is tacked along the bottom 2x4's of the fence panels. I luckily had enough cord in the 100ft length to follow the run around the greenhouse structure and the fence line all the way over to the cord going back to the Storage Trailer, with plenty to spare. I zip tied the cable along the top of the kennel frame and had the cord slip under the corrugated plastic panel to the outside. I then had the cable zip tied to the PVC irrigation pipe going down to the strawberry planters alongside the greenhouse. At this point the cord is routed along the back fence, tacked to the bottom 2x4 and routed around the back of every post. From here the cord is laid on the ground to follow the path along the west fence of the garden.  Note along the bottom 2x4 on the fence line the orange extension cord that is tacked in place with U-tacks to hold it in place. The cable is routed around the backs of the fence posts as well. The cord is laid on the ground just behind the raised beds that are posted along the west fence of the garden, but inside the fence. This doesn't matter as this rickety chicken wire fence will be replaced with a regular chain link fence in the near future. Anyway, the cord terminates where I had a power setup where the power supply for the sprinkler valves and the old timer hookup for the irrigation and the old Double Barrel Hydroponic Garden set up was located. 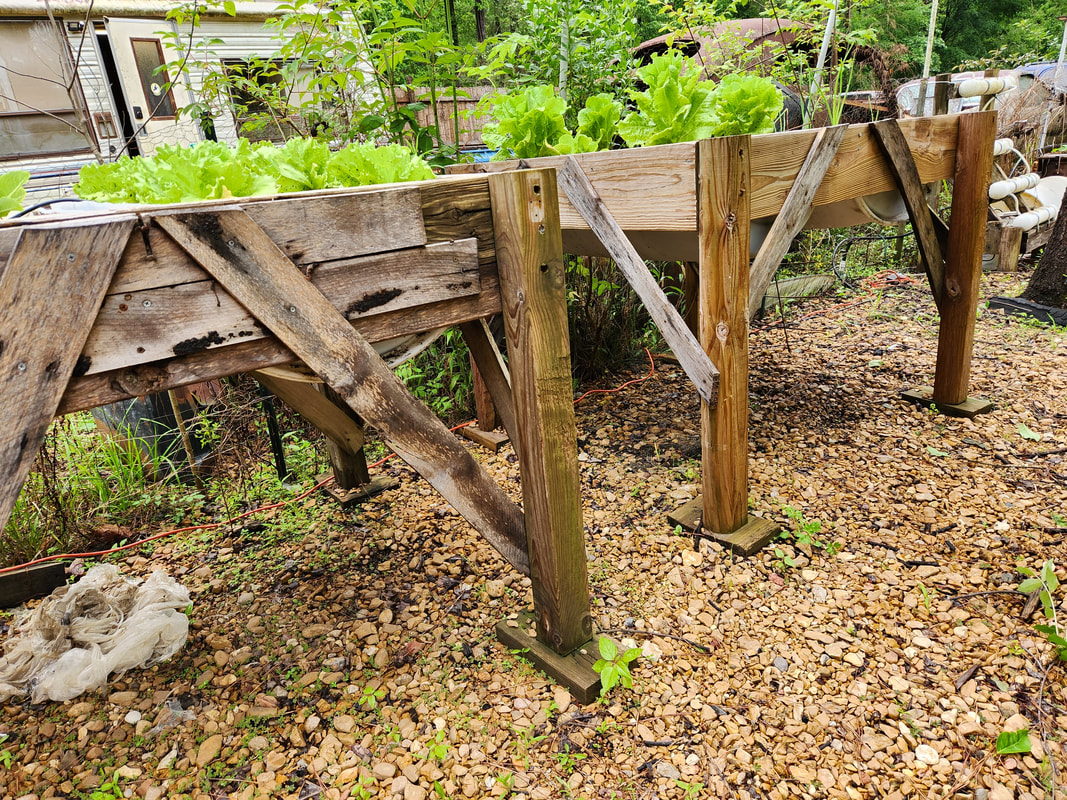 The cord is routed along the rear of the raised beds and along the inside of the chicken wire fence that makes up the west end of the garden.  The extension cord was plenty long enough to reach over to the old spot where the power connections were made. Note the power supply for the sprinkler valves along with the plug ends for the Storage Trailer power cord and the power strip that supplied power to the two hydroponic gardens that were situated here. Once the power run was completed, I went ahead and cut the plug off the cord at the greenhouse so I can do the power hookup to the outlet box. The wire end was routed through the outlet box port and hooked up to the outlet. With the outlet and cover secured, I plugged up the timer, completing that part of the power setup. 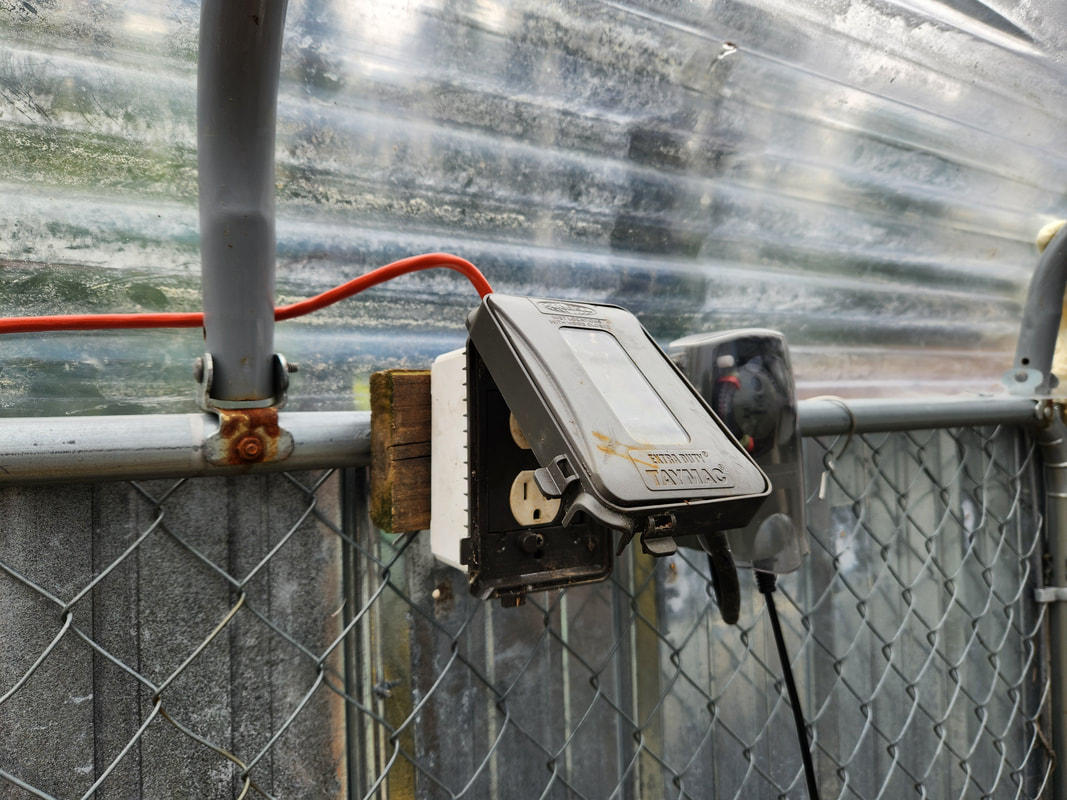 The end of the extension cord with the plug removed and hard wired into the outlet box, with the outlet in place. Note the timer is plugged into the outlet. I will still have to set up another outlet box at the old power connection point in order to plug in the sprinkler valve power supply as well as hard wire in the other end of our extension cord going to the greenhouse. That will involve cutting off the excess cord and plug in order to wire the cord end in for the outlet. I'll also end up doing a permanent cable hookup from the Storage Trailer's outlet box over to this outlet box so I can remove the extension cord that is currently strung between the two points. All these things need to be of a more permanent setup and not the temporary way things were done. As with any project, there's large parts that get done that hold the spotlight, but behind the scenes, there's a lot of little things that many don't pay attention to. These little tasks are the glue that hold the project together. Such is the case with the Dog Kennel Greenhouse. In this case, there was a matter of the water line that needed to be installed to refill the hydroponics drum. I didn't have any float valves available at the moment, but I did have a section of pipe with a valve, salvaged from some old project. I used this little setup, along with some other pipe and fittings, to throw together the assembly that would tap into the irrigation water line, almost right at the end where the manifold is located. This little setup empties into the drum via a drilled hole at the top of the drum. Until I can source another float valve, the regular ball valve will be opened maybe a quarter of the way to allow a low-pressure flow of water into the drum. 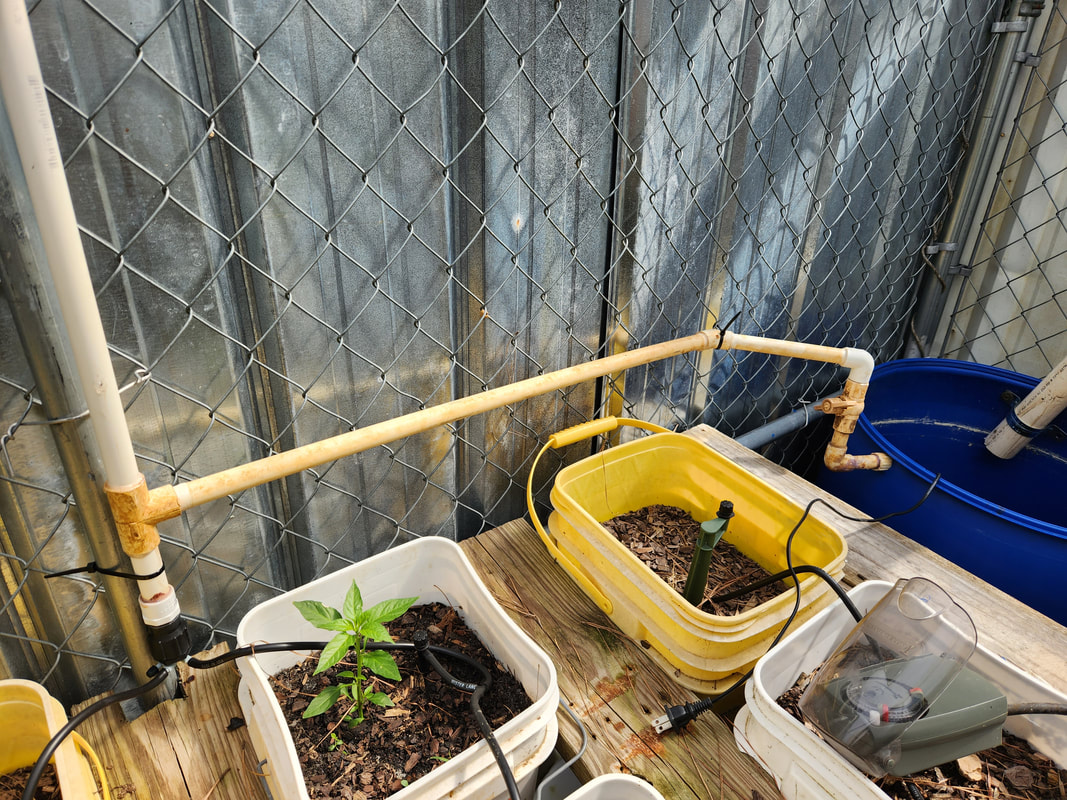 The PVC pipe assembly, tapped into the irrigation line and terminating at the drum. The valve will allow for a "regulated" flow of water into the drum.  A closeup of the threaded output of the PVC pipe assembly where it inserts into the hole in the drum. When I get a float valve, it can be screwed right into the threaded end. The next order of business on the little task list is installing some of the electrical hardware for the greenhouse. This started off with the attachment of a short piece of 2x4 to hold the outlet box and timer for the hydroponic garden. I drilled a couple holes through the board and horizontal section of the chain link kennel wall in order to attach the board with short deck screws. I used self-tapping screws to hold the outlet box in place and a couple wood screws with their heads maybe 1/8" out so the slots on the back of the timer can hook over them to hold the timer in place on the board. The pump cord gets plugged into the timer and the timer gets plugged into the outlet, when it gets installed. I just need to get the 100ft extension cord to run the power line to the greenhouse in order to complete that particular task. 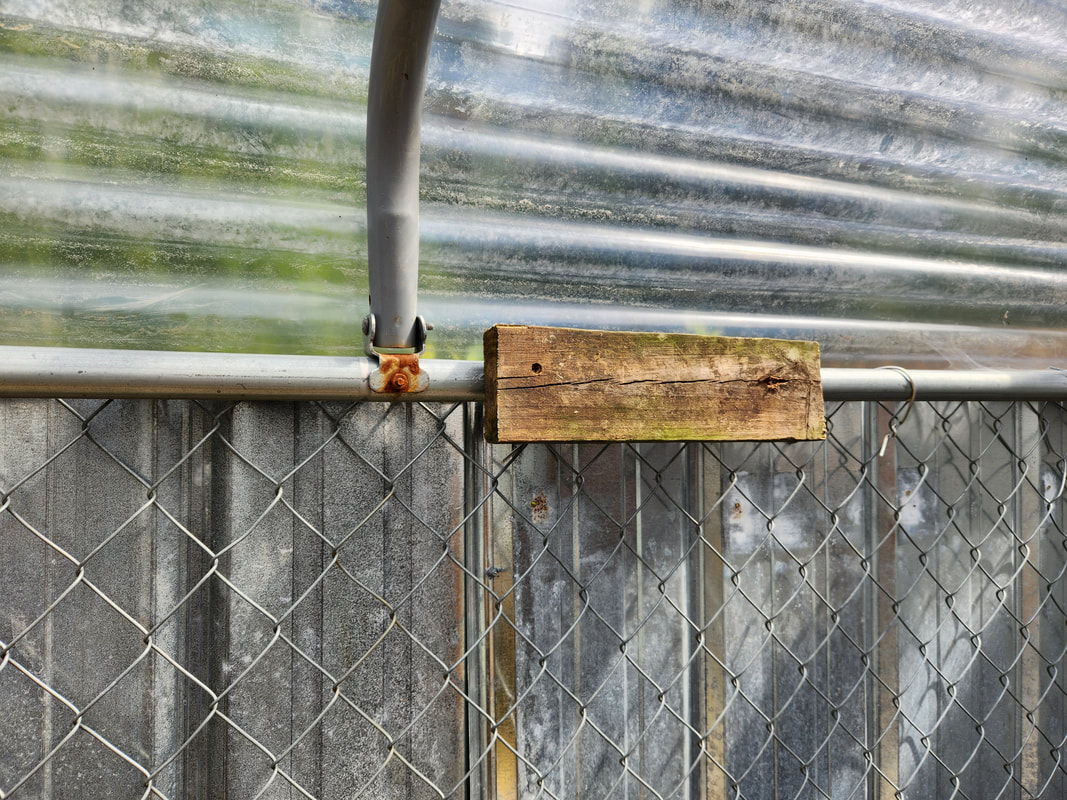 The short 2x4 piece secured in place via deck screws placed through two holes in the board and horizontal section of tubing on the kennel frame. 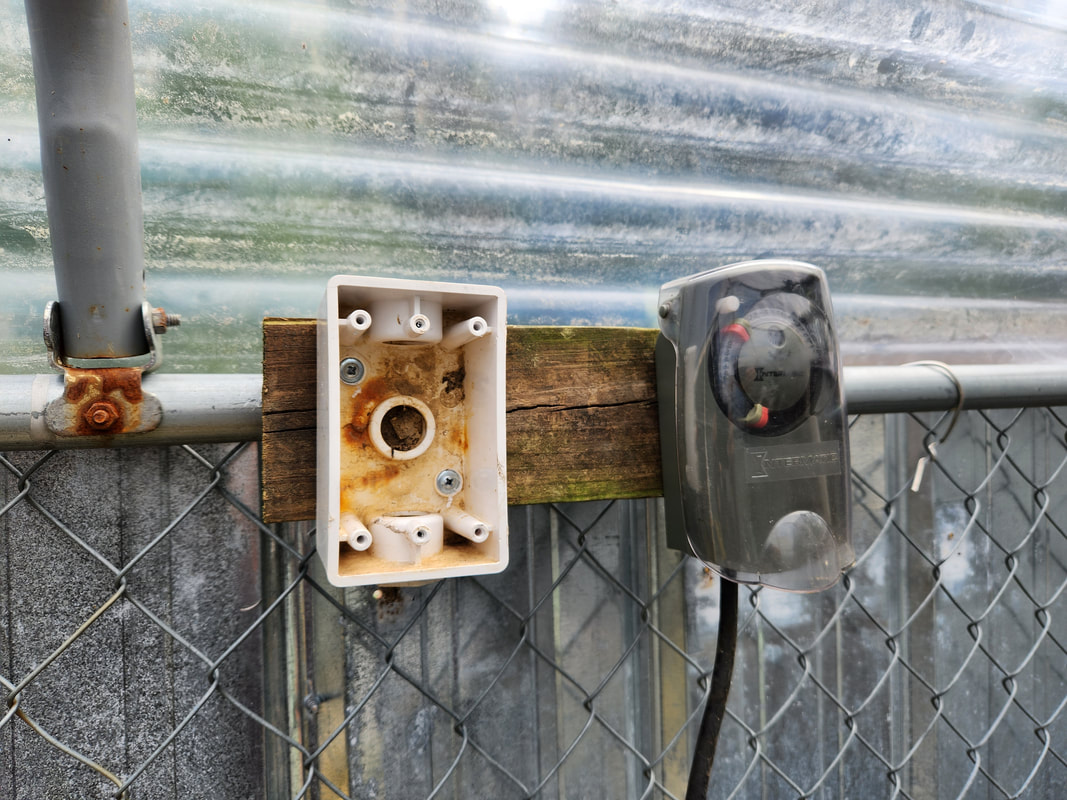 The outlet box and hydroponic timer hung on the 2x4. I still need a power line routed to the outlet box to install the outlet so I can plug the timer in. With these things done, and my no longer being able to move forward on the completion of the greenhouse, I took a second to add a couple extras to the greenhouse. I had a couple hanging upside down planter baskets, one of them unfortunately was rotted in the plastic material and had to be disposed of. The other one, the tomato planter, was able to be hung from one of the roof frame tubes. I drilled a hole to secure the hook bolt in order to hang the basket, above and aside the edge of one of the litter bucket planter frames. I drilled another hole for another hook bolt to hang a regular basket, which will be used for a strawberry basket, with the intent to allow the vines to hang down as the plant grows, especially since the plant would be able to grow year around within the greenhouse. 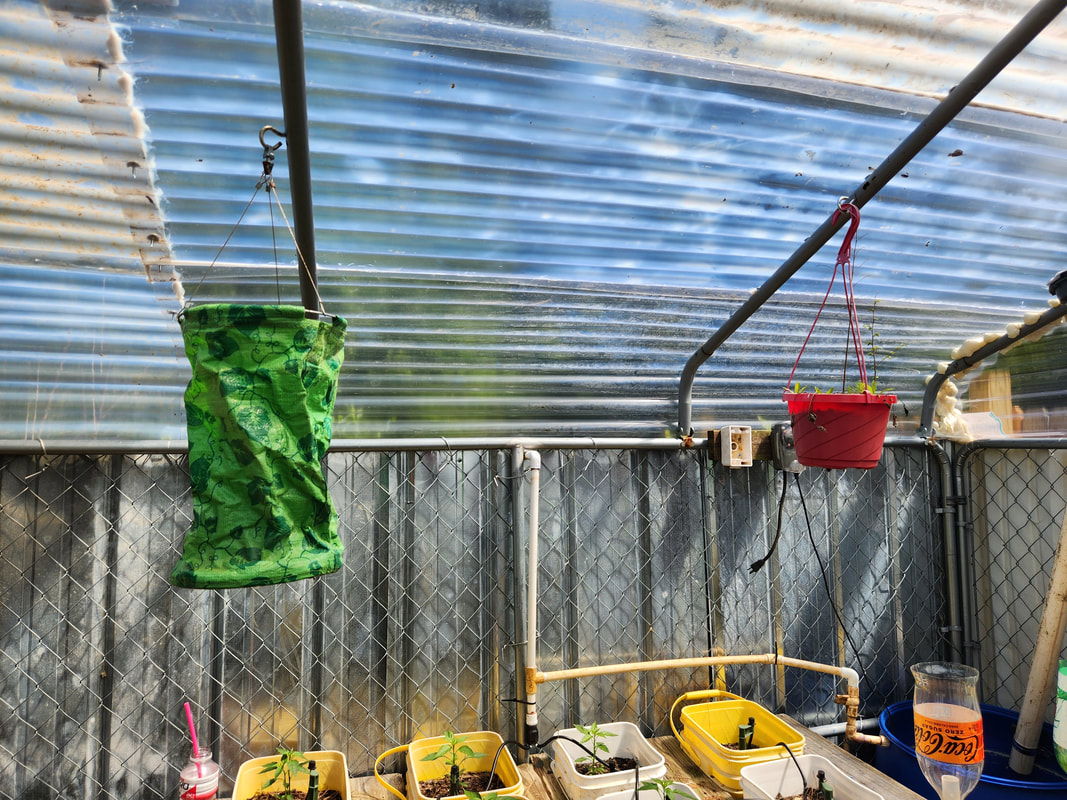 The upside down tomato hanging basket and regular hanging basket hung over one of the litter bucket tables. On a lighter note, I did take a moment to dismantle a couple old raised bed frames that were falling in on themselves. These two frames were half drum frames. Surprisingly, the drum halves are still in decent shape and as such, can be reused in another raised bed build. In the meantime, the wood scrap from these old frames will be cut up into manageable firewood pieces for use in the future. 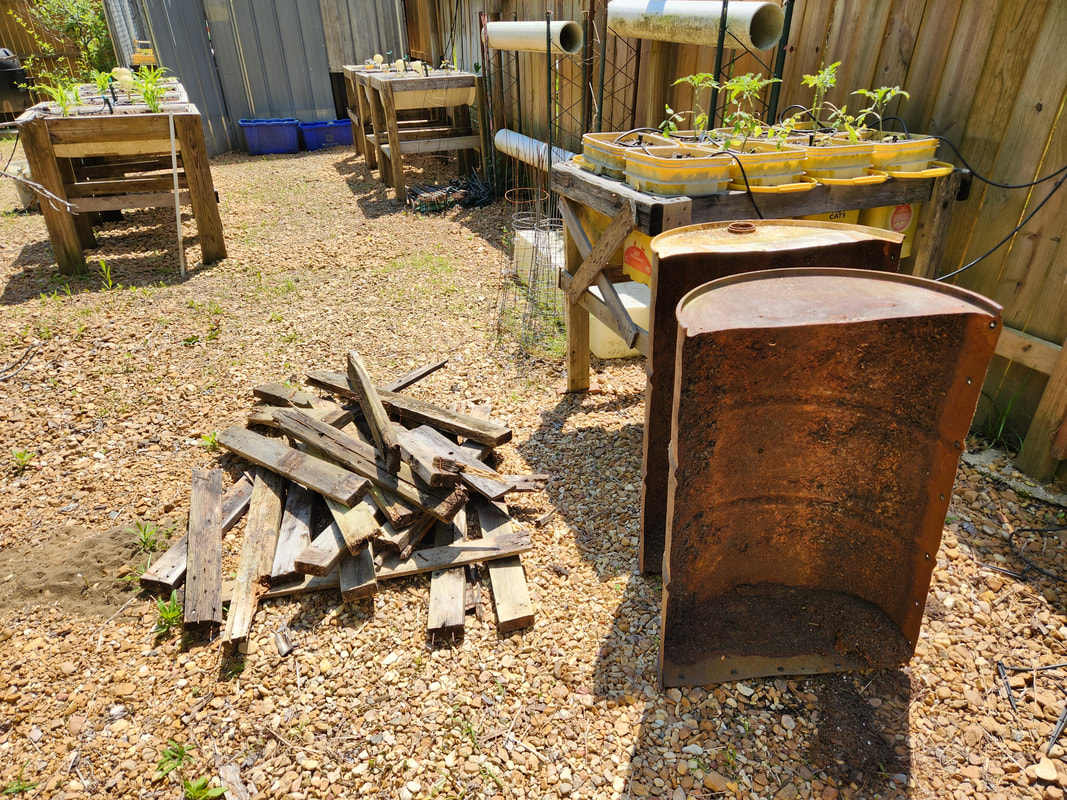 The dismantled raised bed frames, rendered to a stack of scrap wood, soon to be cut into firewood, with only the drum halves rolling over to new bed frames in the future. I'll rebuild two litter bucket raised beds next to the current litter bucket bed in the near future, with spacing between all three. I'll still have to get more buckets for the third bed frame but in the end, that little section will be its own set of bucket beds. The half drums will be built into a double bed that would be set up, maybe next to the latest double drum bed on the east fence line of the garden. As can be seen in the picture, I also have some new hydroponic garden frames set up that I have to complete just as well. When all is said and done, the garden will be capable of producing a lot of veggies for our consumption pleasure. With the hydroponic gardens ready to go, there is a matter of how to keep the drum filled up. The drum is 55 gallons but would eventually run dry over time, just because of normal evaporation and absorption from the plants. One of the ideas I had was to install a tap in the PVC line feeding the micro irrigation manifold, routing a PVC pipe over to the drum and down to a float valve, similar to what we used on the chicken coops. When the irrigation system comes on, the water would flow, but when the drum is full, the float valve will stop the further flow of water into the drum. The next idea was to install a drain tube coming from the roof and leading down into the drum, for rainwater runoff. I found just the thing for this. 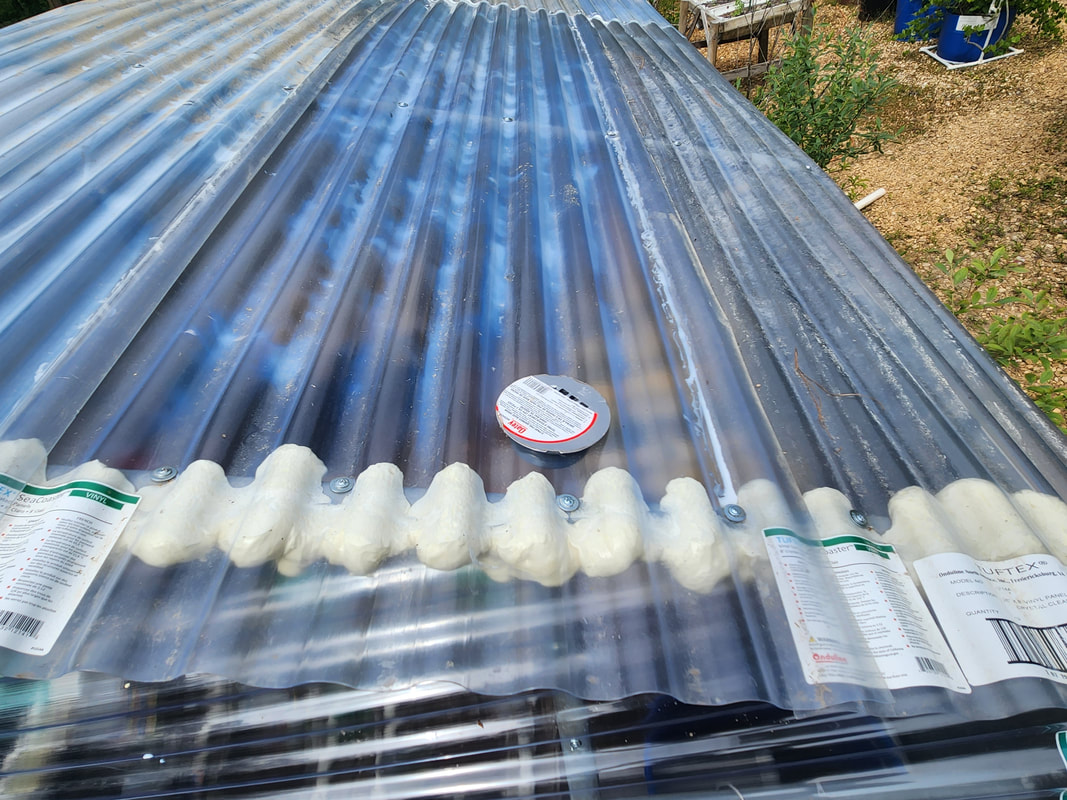 The shower drain inserted into the hole cut into the corrugated roof. 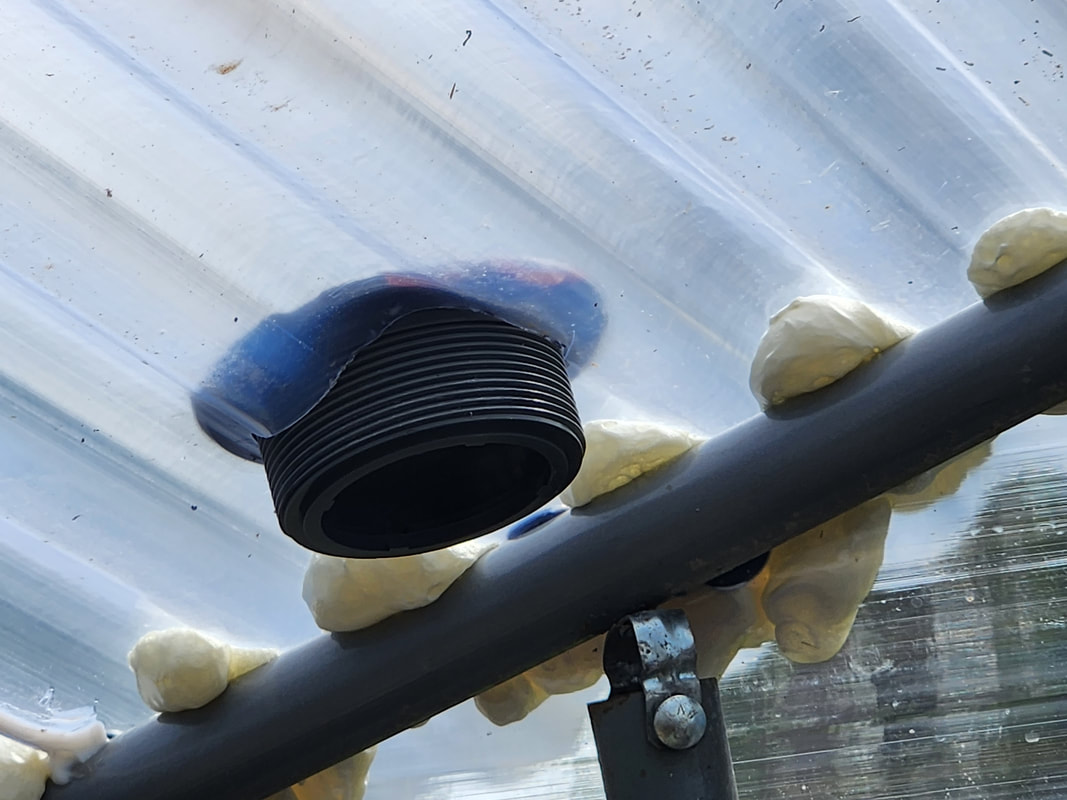 The inside of the roof where the shower drain is inserted through the cut hole, showing the threads of the drain where the retaining cap will screw in place. The drain in question is a shower drain with a screw down cap that would hold the drain in place. I cut a hole in the corrugated plastic roof to install the drain, then installed the rubber washer (which really doesn't do anything on the corrugated surface) and the hard washer then retaining cap on the inside. Holding the drain assembly in place, I then installed some PVC fittings along with a 45 degree elbow then a 4ft length of 2" pipe, leading down into the drum. The 4ft pipe is at an angle, due to the angle of the roof relative to the 45 degree elbow, none of this will sit perfectly. 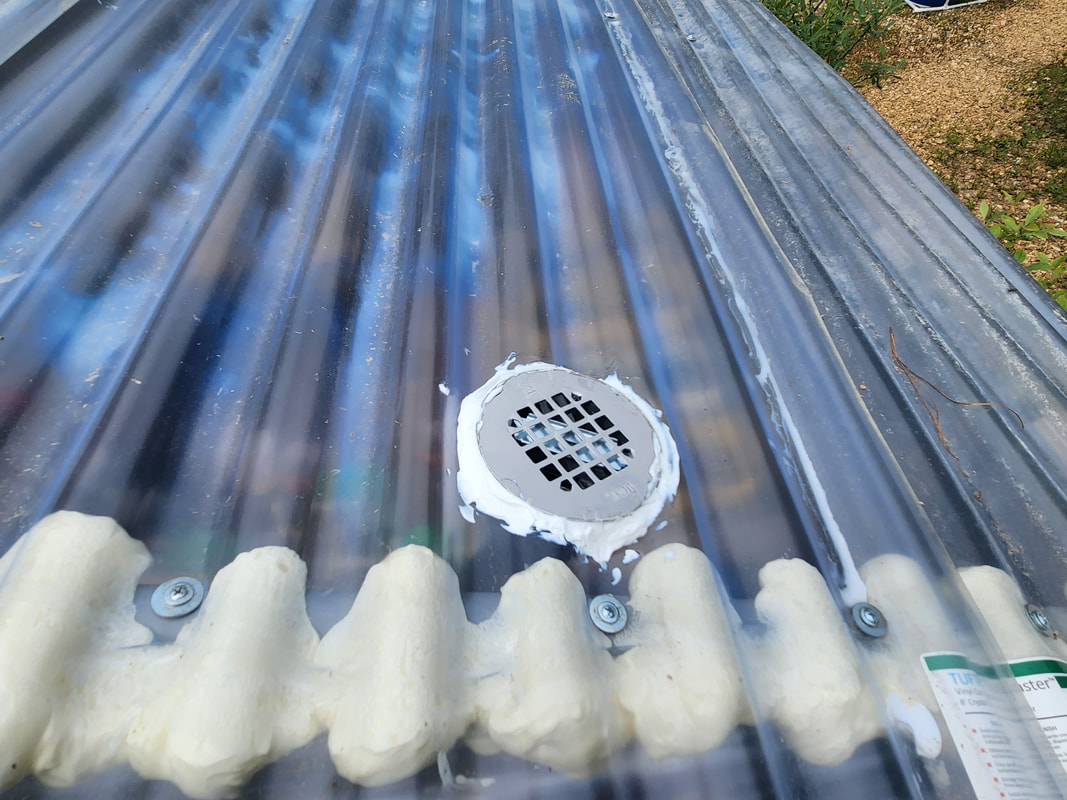 The shower drain after securing, is caked with caulk all around to fully seal the roof, save for the drain itself. With the pipe leading down into the drum, I had to secure the end of the pipe so it doesn't swing around and put undue stress on the drain piece or the corrugated plastic roof. I used a 2" conduit strap/bracket to hold the end of the pipe against the inside of the drum via one lag bolt. I tried to install the 2nd lag bolt but the bracket had outward tension that didn't allow the lag bolt to hold in the plastic of the drum. The one bolt was enough to hold the end of the pipe in place, all I needed was to keep the pipe from swinging around, this was accomplished. Lastly, I caulked all around the outside of the drain assembly. While a little dripping around the joint just over the drum would be fine, the reality is the water would probably drain down the inside of the roof and all over everything else, so caulking the drain will control the flow of water into the drum. 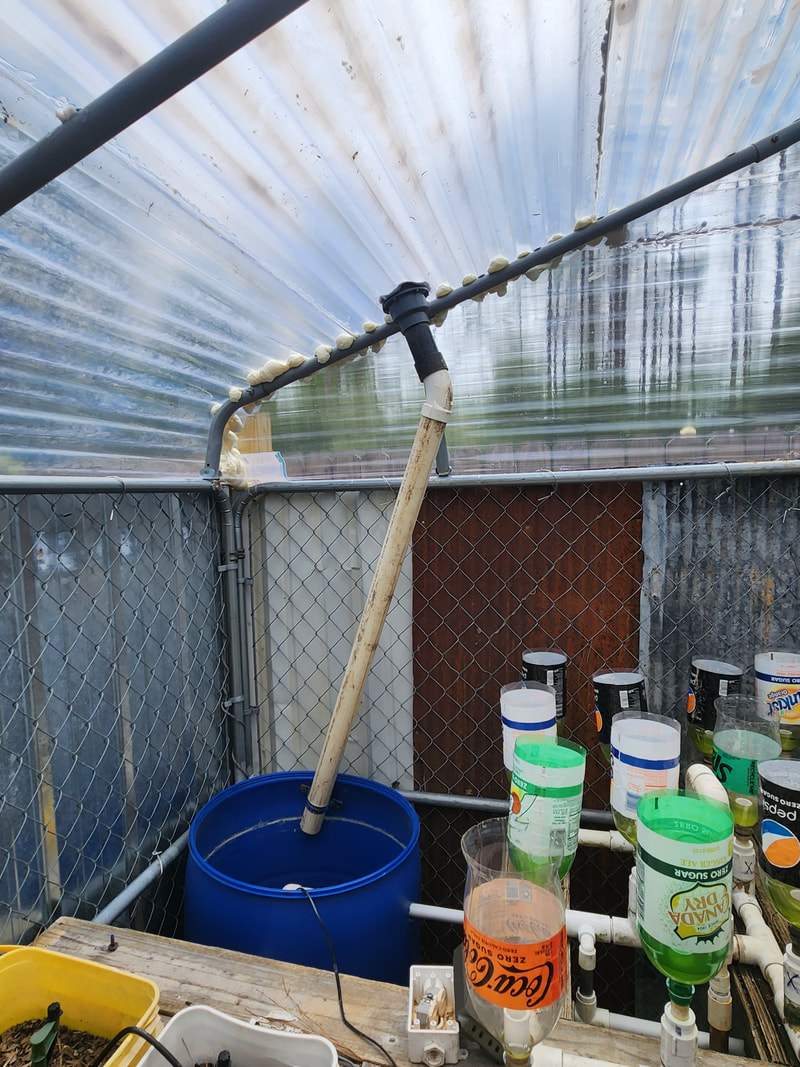 The entire drain assembly from the bottom of the shower drain, through the PVC fittings, 45 degree elbow and 4ft straight pipe leading into the drum. 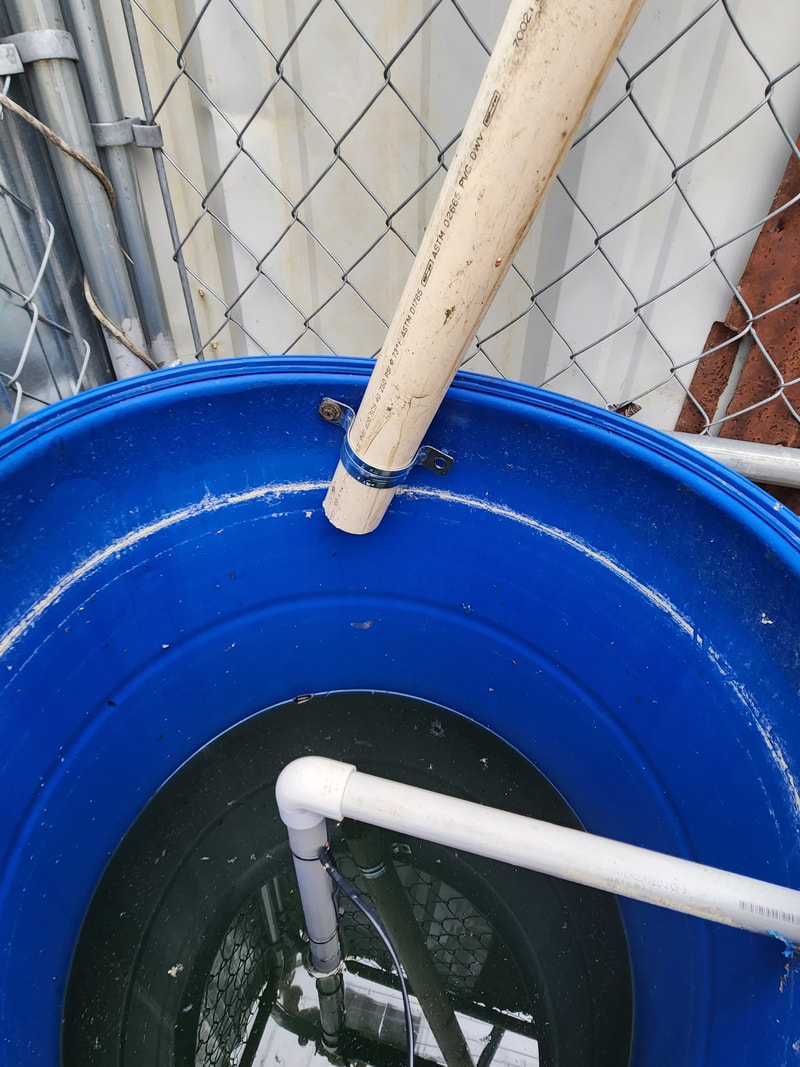 Closeup of the conduit bracket holding the end of the pipe to the inside of the drum. With this drain line done, I can move on to the PVC line with the float valve, as well as the outlet and timer platforms I need to install to hold those items. I also brought in some collapsible hanging plant baskets I want to install. I also have to get a 100ft extension cord to use for house power, and some grow lights. Not much left now...
Last time we left off with the hydroponics, I had to remove the soda bottle PVC manifolds to reseal everything since the old glue joints on the fittings started to degrade since the 20 years the system has been in existence. Well, the smearing of PVC glue did its job of resealing everything on the soda bottle setup, that was fine, but now there was the matter of another issue with the soda bottle setup. Since I redid how the soda bottles were situated, they were now higher up than the drain overflow on each manifold. This keeps the water from raising high enough to flood the bottles. I ended up cutting the 1" pipe from the drain overflow, then taking a 3/4" coupling and some extra pipe to extend that side of the overflow where it connects to the main drain line. As for the 1" pipe, since I didn't have any 1" couplings, much less some 1" pipe, I took some 3/4" pipe, and using a grinding wheel on the rotary tool, I sanded the ends of the pieces of 3/4" pipe to make them just a little bit narrower than the inside of the 1" pipe. This allowed me to insert the 3/4" pipe into the ends of the 1" pipe where it was cut, effectively extending the length of that section of the drain overflow.
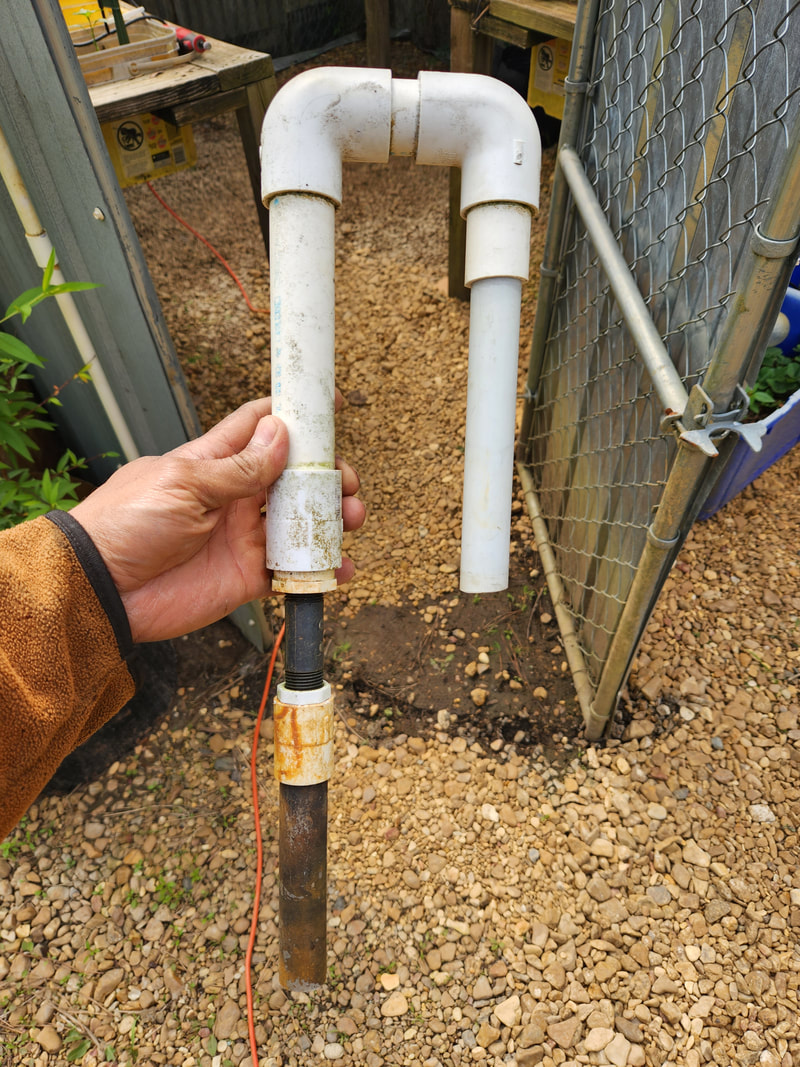
The drain overflow line from the soda bottle HPG's, cut and mended with extra pipe and a coupling on one end and a 3/4" pipe ground down and inserted into the 1" pipe on the other end.
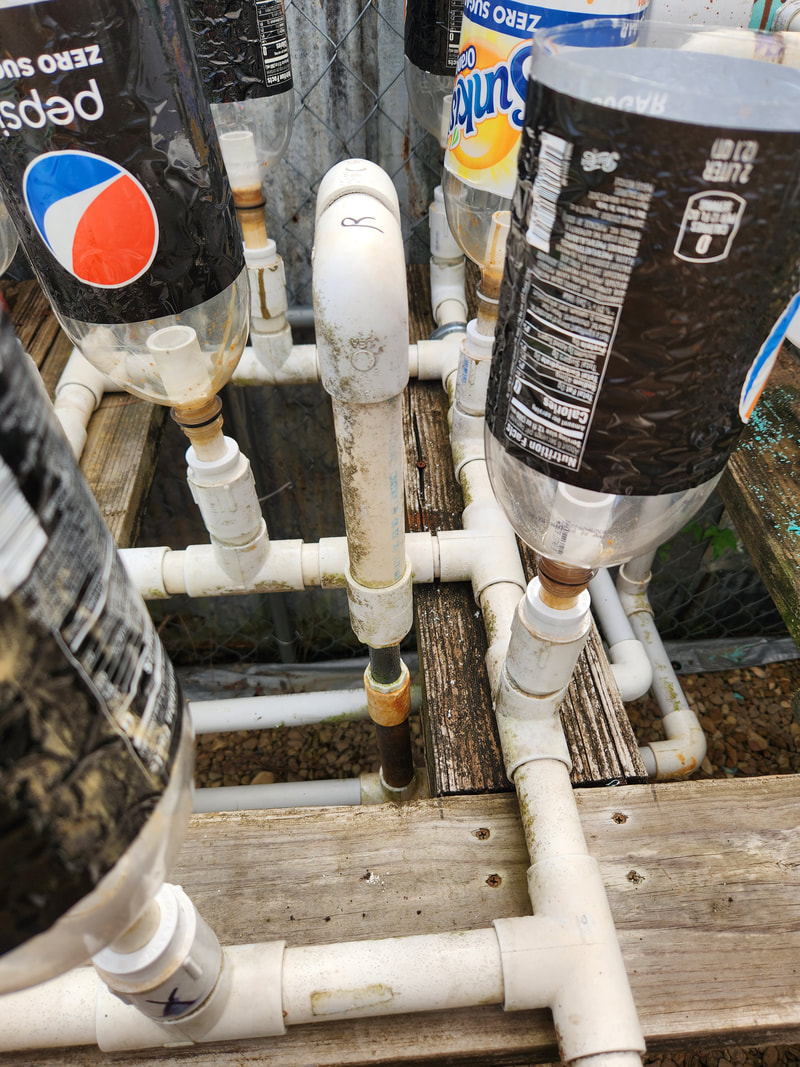
The modified drain overflow installed back on the soda bottle HPG assembly.
Another angle showing how the modified drain overflow pipe setup is plugged in.
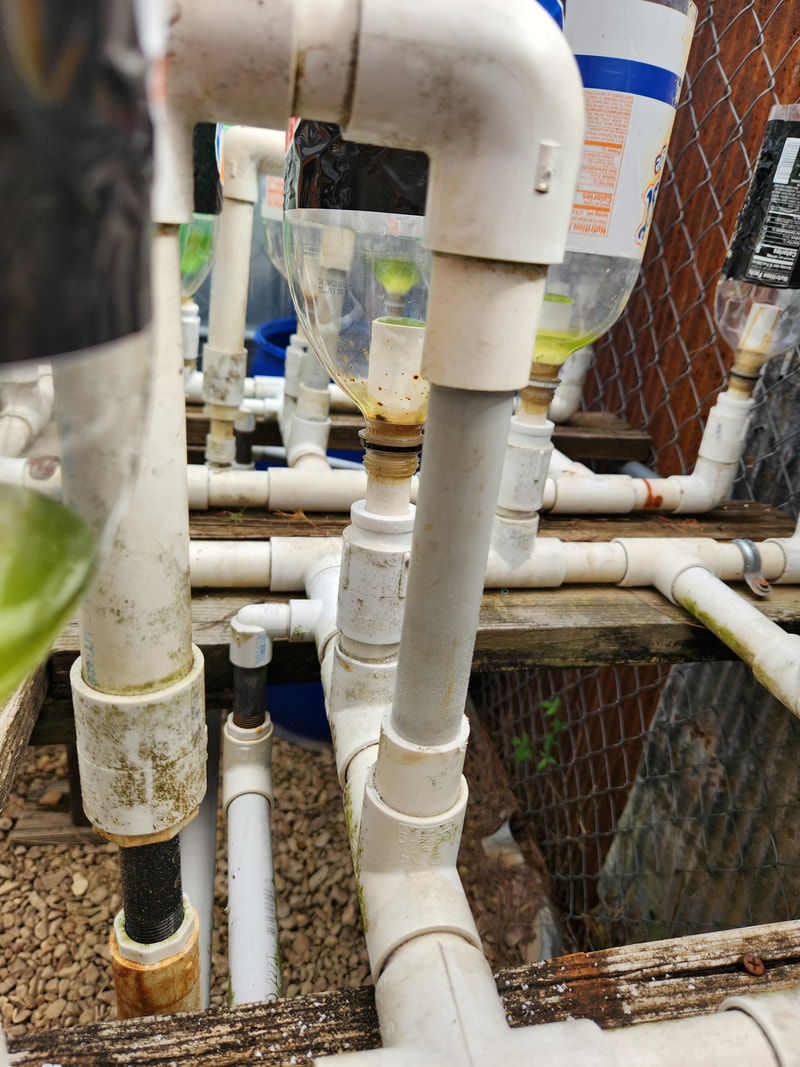
With the drain overflow fittings modified, a quick test determined that the soda bottle hydroponic assemblies worked as intended. The water levels rose high enough to fill the bottles halfway before overflowing into the drain tube and back to the drum. Now, the next problem has to do with the DBHPG. I previously built a 2x4 platform for both sides to raise the pipes high enough so the water level would be able to still raise up in the soda bottles without draining through the Double Barrel prematurely. Everything has to be in sync with one another for the entire system to work. Now, while the DBHPG was high enough to allow for water levels to rise properly, the input and output lines were not in sync. The input was higher than the output, and in fact just a bit too high compared to the drain overflow on the soda bottle setup. I had to trim the 2x4's on the platforms by a half inch to bring the Double Barrels down a bit. I ended up having to switch the input and output pipes around, so the drain line, which was actually in line with the soda bottle drain setup, is the input, and will fill up the two 6" pipes up to a level higher than the input where it will overflow into the old input, now output line, to drain back into the main plumbing. 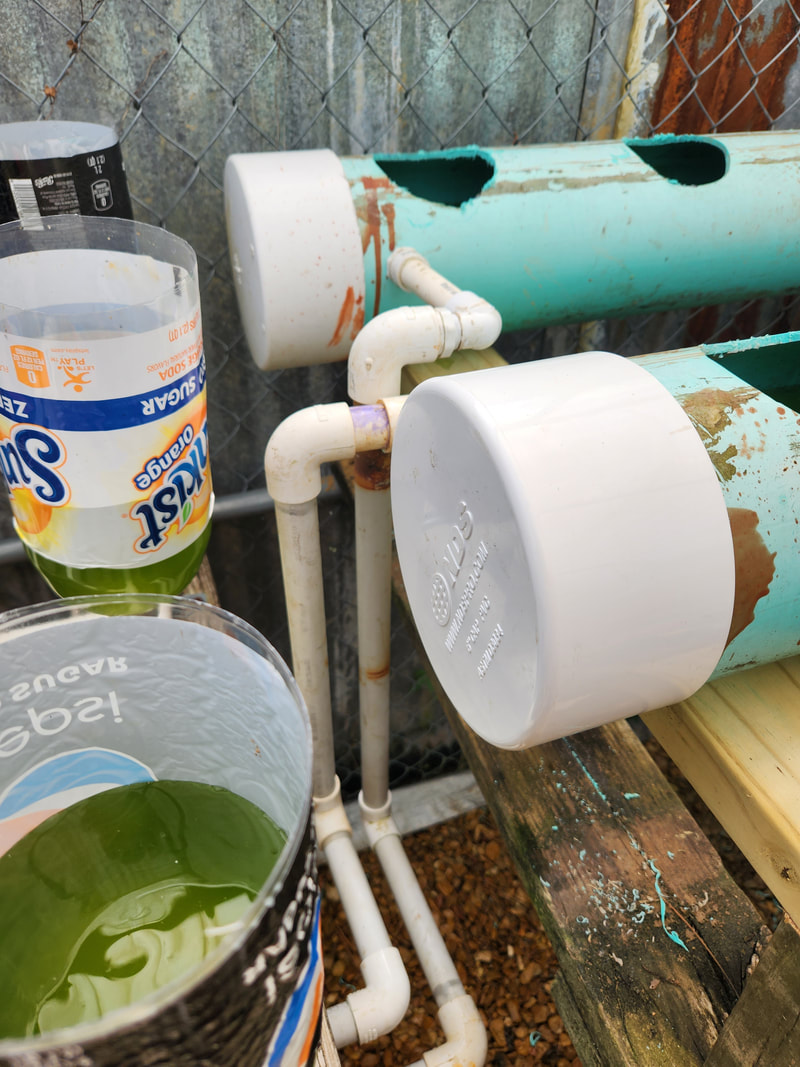
The input and output pipes switched around on the DBHPG assembly so water will fill in through the lower input and fill up high enough in both pipes to reach the higher output pipe where the water will drain back out.
With all these modifications made on both systems, I plugged up the pump and let it run. It slowly filled up the soda bottles first, then after the water levels rose high enough in the soda bottles to where it overflowed through the drain line, the water levels also rose high enough to flow into the first 6" pipe. Water levels slowly rose in the first pipe until it covered the input port, then drained into the second pipe, slowly raising the water level in that pipe. After that water level rose high enough, it too drained into the drain line, finally flowing back into the main plumbing and back to the drum. I let the system run for a while to verify that no leaks were present on the soda bottle assemblies. The Double Barrel setup just needed the end caps on one side tapped in to better seal the connection between the cap and pipe. 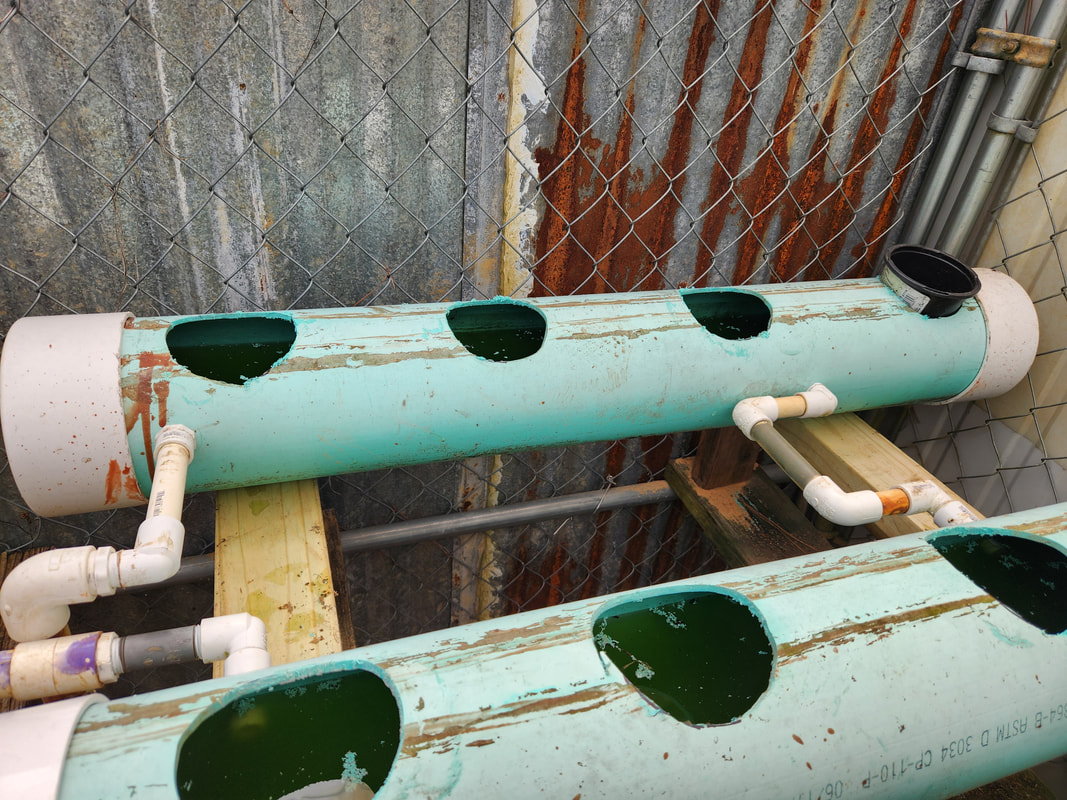
The Double Barrel setup, filled with water after cycling on the pump to test the entire system.
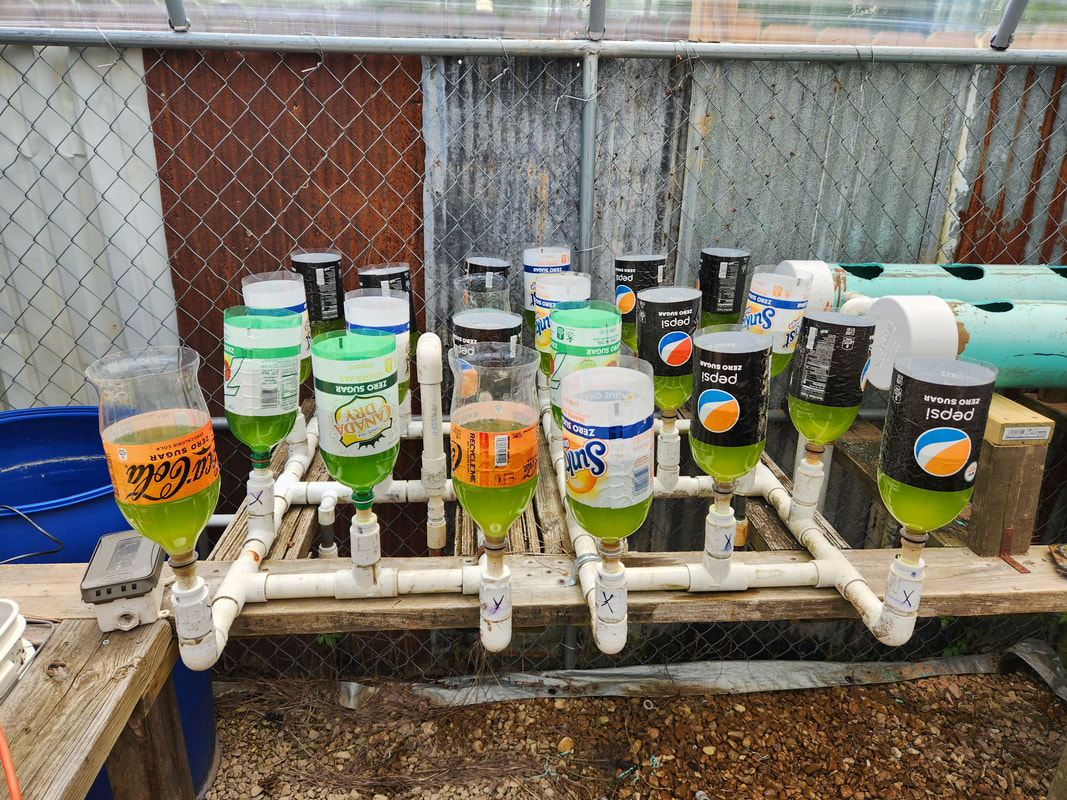
The green water from the drum, filling the soda bottles on the old PVC manifolds as the pump runs. The hydroponic system appears to be ready for planting.
With the hydroponics system cleared for takeoff, I can turn my attention back to caulking the seams where the corrugated plastic met on the roof. I used up another tube of caulk sealing the joints from the inside where the long pieces overlap one another, working their way down. I did the caulking from the inside this time, since the overlapping is done to allow water runoff to flow over and down without actually going inside the roof. The caulking on the inside just keeps moisture from seeping in through these joints. 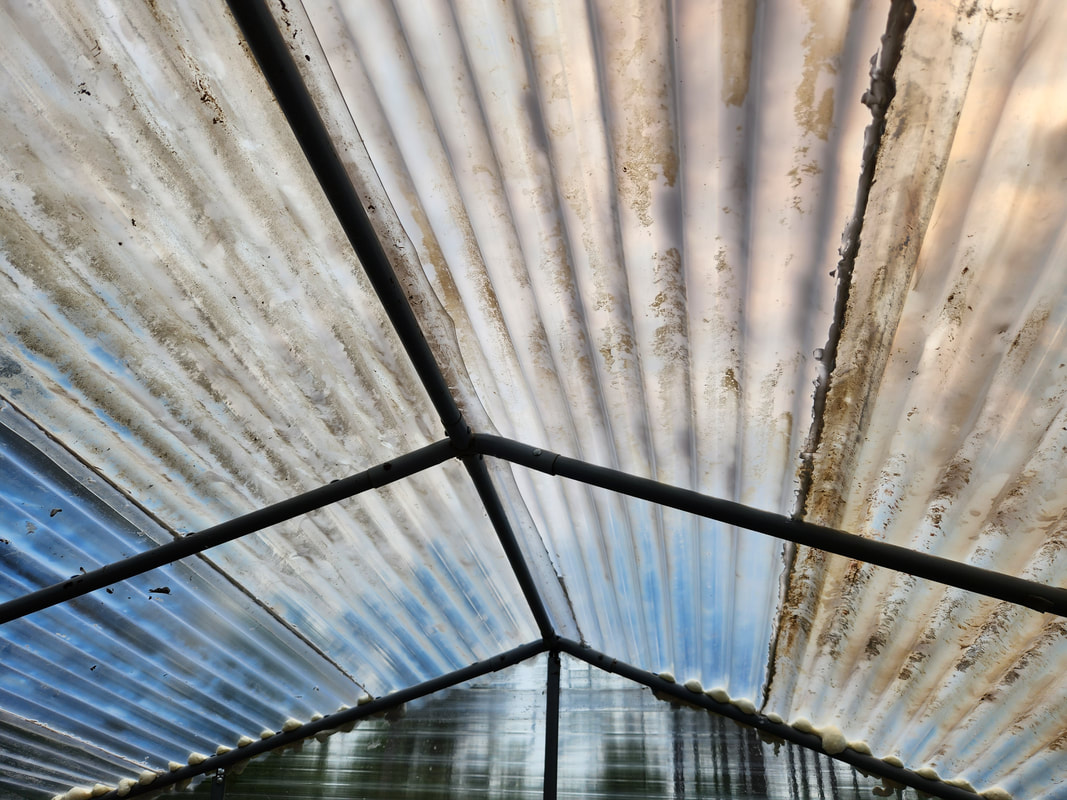
Lengthwise runs of caulk on the inside of the roof, sealing the joints where the ends of the panels meet one another on the roof.
There's still a little caulking left to do to finish up that part of the job. Afterward, I still need to mount the outlet box that will accommodate the timer for the hydroponic pump, which I also still need to relocate from its place outside where it was originally operating the micro irrigation system. The next order of business after that will be to install the float valve and pipe that will tap into the irrigation line that currently runs through the greenhouse. From there I'll get a long extension cord to run the power line to the greenhouse. We're getting closer and closer to the completion of this greenhouse.
After receiving the pump for the hydroponic garden setup and installing it, I did a quick test. This is where I found out that the soda bottle garden assemblies leaked like crazy, so they would have to come out in order to be covered in glue around all the joints on the assemblies to hopefully seal any pinhole leaks where glue may have degraded. Another thing that was noted was the idea that the Double Barrel Hydroponic Gardens needed to be mounted at a higher level than it was due to the fact that as long as the DBHPG was at the level it was at, the water levels would never rise high enough to fill the soda bottles on those assemblies. The drain line on the DBHPG were far too low. This would mean that I would have to build a wood platform to raise the DBHPG to that higher level required to allow the soda bottles to fill up. This was done with some simple cuts of 2x4's and deck screws. 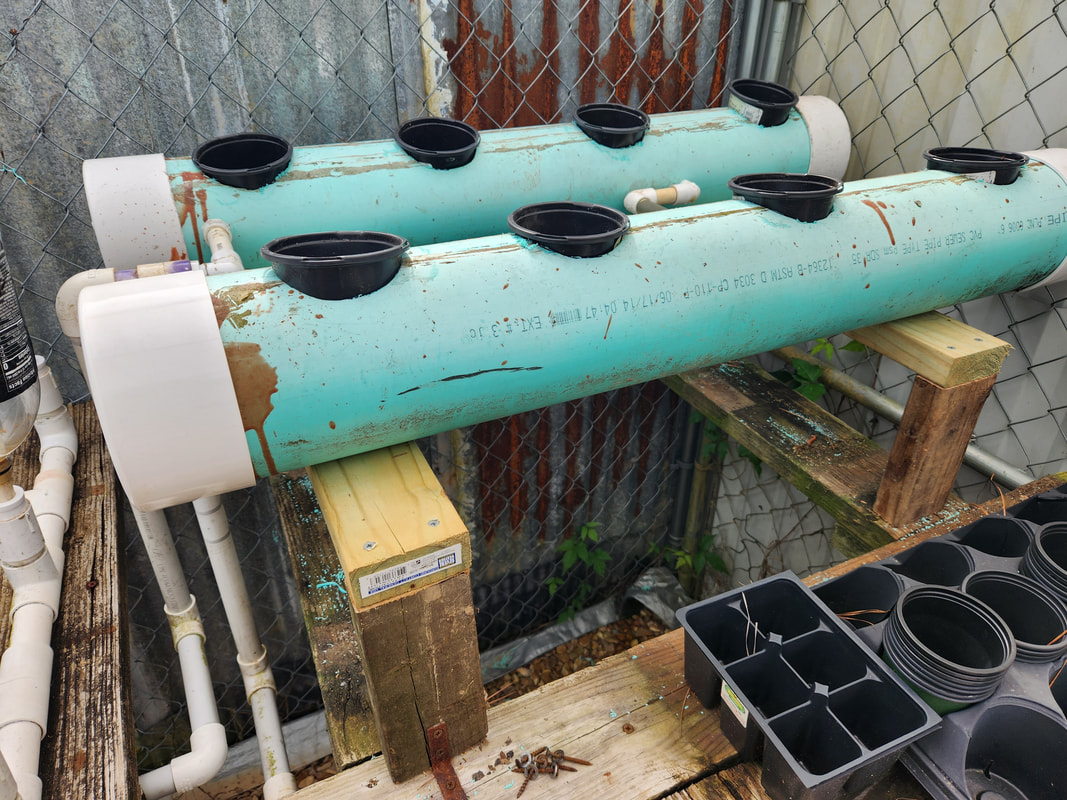 The 2x4 wood platforms built to raise the Double Barrel Hydroponic Garden pipes high enough to allow the drain line to be about halfway up alongside the soda bottles on the soda bottle HPG's. With the platforms constructed and the DBHPG in place, I had to cut new lengths of 3/4" PVC to reconnect the lines from the main plumbing up to the DBHPG lines. Since everything is pressed together, this little task went pretty fast, reconnecting the DBHPG to the main plumbing and ensuring that the water levels will rise high enough to allow all the soda bottles to get at least half full with water. 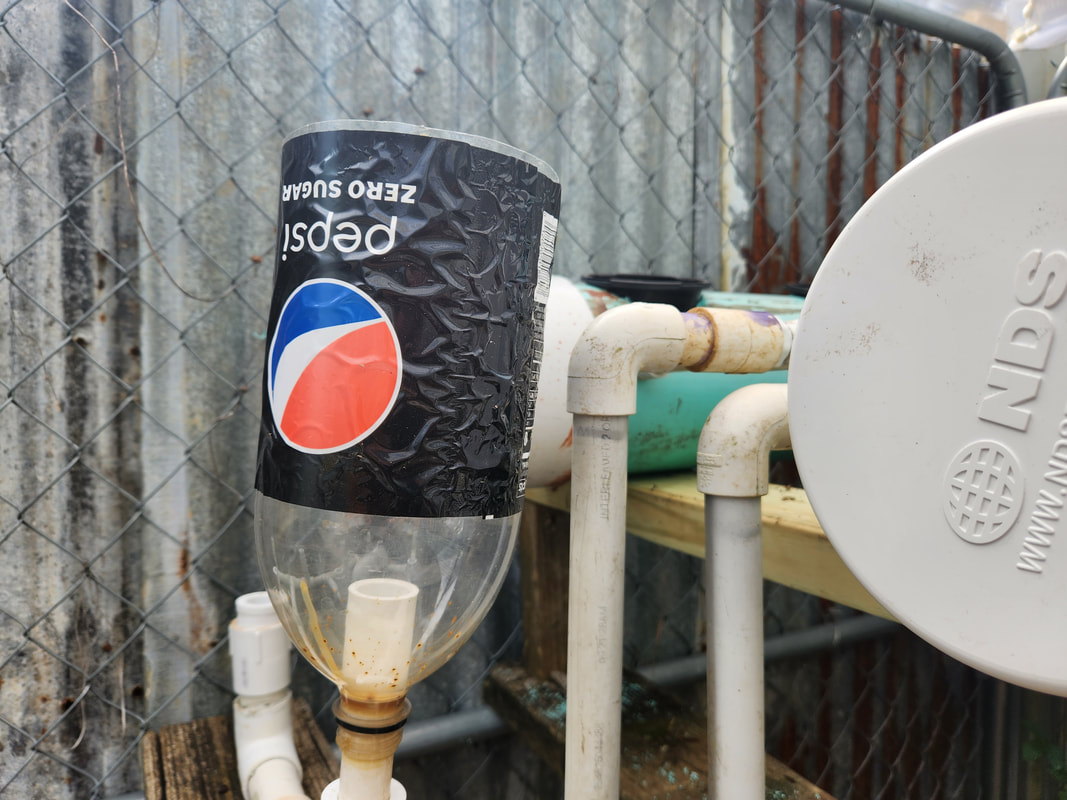 A soda bottle planter is in place to verify that the DBHPG is at a good level to ensure the water level within the 6" tubes will be at least halfway up in the soda bottles, as can be seen here with the drain line (the right vertical grey pipe) being in line about halfway up on this soda bottle. In the meantime, with the hydroponic gardens all set, minus the idea that I still have to seal the soda bottle PVC manifolds, I turned my attention to the roof of the greenhouse. I still have to apply caulk around the seams where the ends of the corrugated plastic sheets meet. I used up a tube of caulk sealing the joints where the 8ft sections met with the 2ft sections. I still have to seal the seams where the 8ft sections meet each other. This might eat up another tube or more of caulk before its all done, but that's the price to pay to ensure the job is done properly. 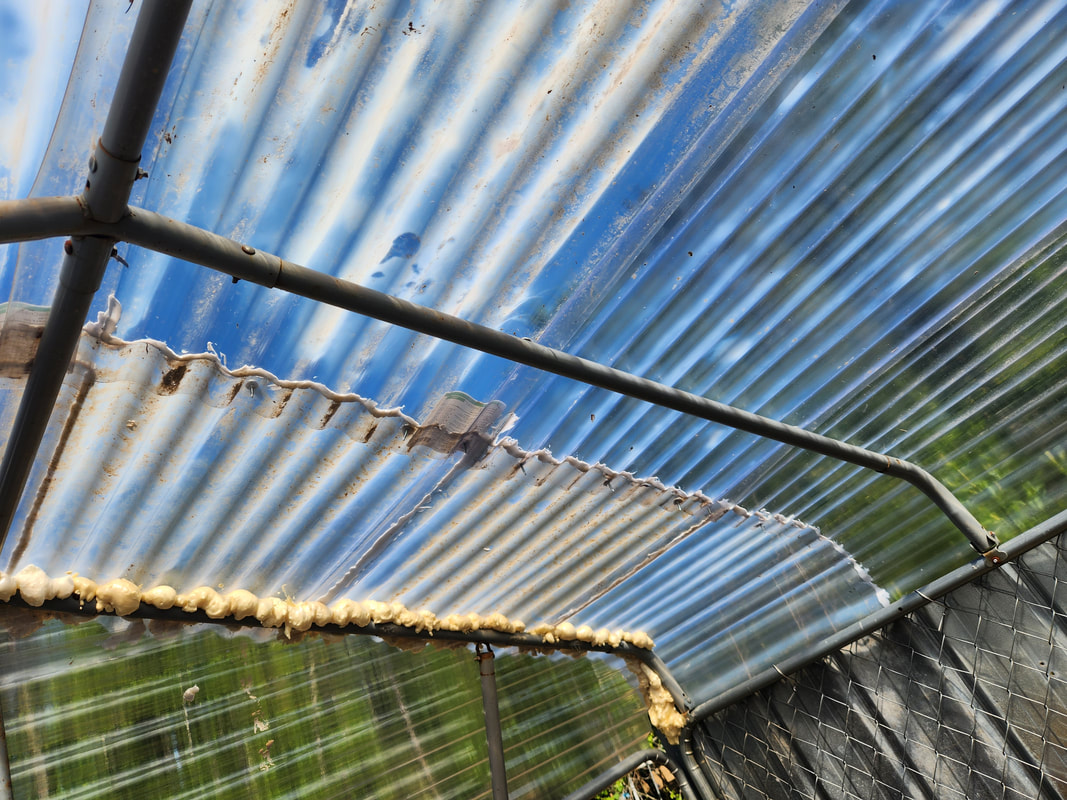 The joints where the corrugated plastic meet are sealed with caulk to ensure rain runoff won't leak through and into the greenhouse, especially with grow lights in place. Hopefully once the soda bottle HPG's are sealed, everything will no longer leak and once reassembled, I will be able to bring the entire hydroponic system online. The timer that I used for the micro irrigation system in the past year will be pressed into service to cycle power on the submersible pump, as the 2 cycle on/off operation of this pump is better suited for the hydroponic gardens. The micro irrigation system is pretty specific in that most of the sprinklers only need to run for 5 minutes at best, and this timer has a minimum cycle time of 30 minutes. This was an extreme waste of water, so this timing cycle would be better suited for the hydroponic gardens where the system can pump and cycle fertilizer water through the planters for 30 minutes without wasting water, and ensuring enough time to soak all the planters, provided nothing leaks. We'll see. |
