|
Among the other big projects around the yard there were a couple of other little things I decided to take care of. Really these things are the beginning of a couple of side projects I suddenly thought about. The first thing was setting up a permanent whole house generator setup, using one of the regular generators I have on hand. The generator has a bad carb on it so I'll have to remedy that problem first but the generator is the larger of the two that I have and would more than handle the loads I plan on running off of the unit. I would run a parallel system that is fed from the genny and hook up a transfer switch for the circuits that I want to run. The first thing is finding a place for the genny. That perfect spot is the slab where the old house AC unit was sitting. Operative word is was. Since I already removed the furnace and A coil, the condenser/compressor unit was essentially useless. So rather than leave it on the slab in the chicken yard, I just severed the remaining hook ups to the unit and wheeled it from the slab out into the main yard so I can try to sell it as surplus and get it out of my way. I'd hate to scrap it as its still a usable unit. 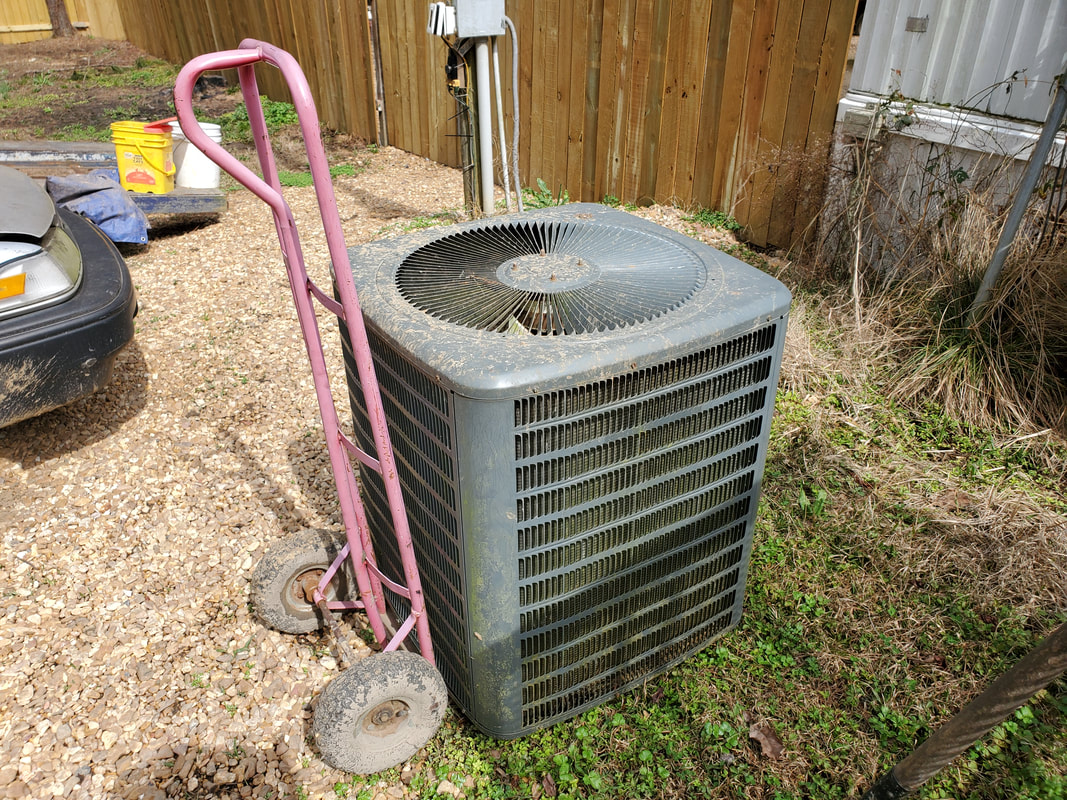 AC unit on two wheel dolly after removal from slab in chicken yard 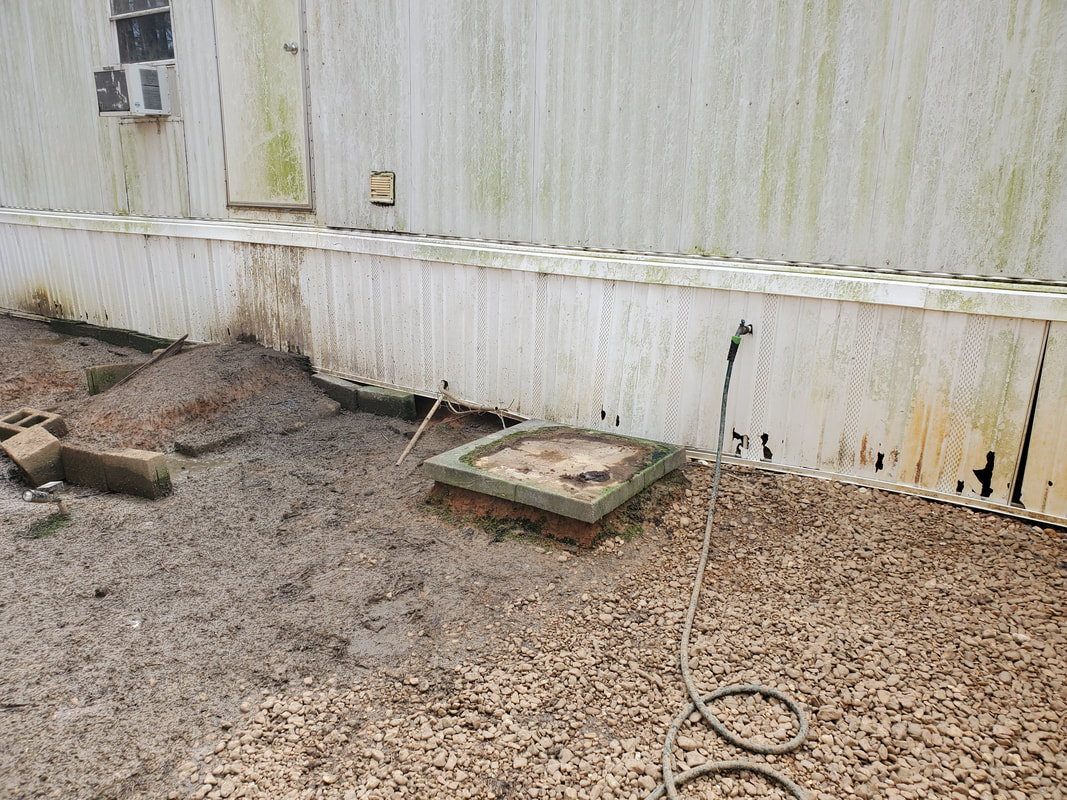 Exposed slab in chicken yard after removing AC unit. The other little side project I decided to take on was converting this old gas powered ATV to electric. This is one of those cheap Chinese ATV's that uses an engine similar to a go kart engine except its a little more complex since the powerplant uses electric start, has a stator coil and all the other components that you'd normally see on a street bike of this caliber. I got the machine from a friend who was trying to clean out their shop and they didn't want to work on it anymore to try and get it up and running. It needed engine work that I tried to take on and even threw some parts at it but in the end I had no luck in getting the machine running. I ended up parking the ATV in the back of the yard near where I store the auto parts, not to even give it a second glance until just recently. I seen conversion kits online to build electric vehicles that involved a 3 phase electric motor, a motor controller and other associated hardware, minus the battery. The kits came in different voltages depending on what you wanted to build. There are 24, 36, and 48v kits for smaller vehicles and if you're trying to build something that would be more of a street legal vehicle there are kits that go up to higher voltages. From what I priced I could get the kit and a battery pack for a 48v build for around $200 give or take. This would be perfect for the ATV. 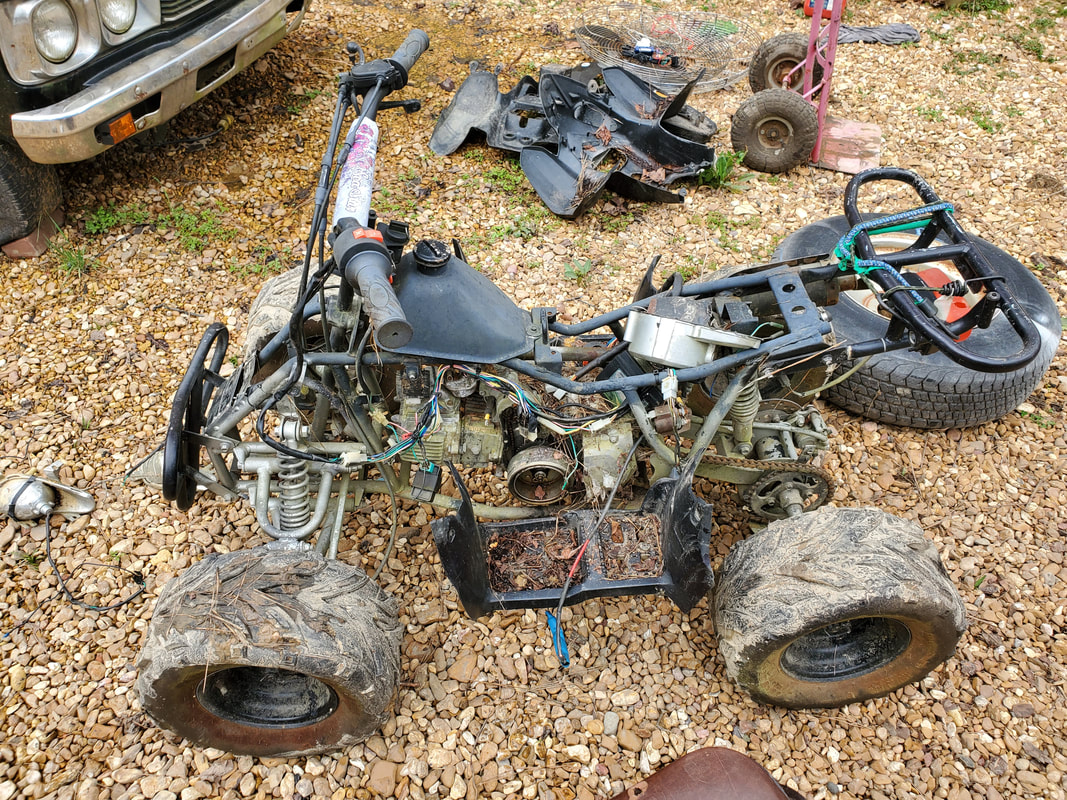 ATV with old engine and other associated hardware. First thing that had to be done was strip the old dead engine from the ATV and clear any other unnecessary hardware and wiring from the frame. After sitting outside the engine pretty much seized up from rust inside but I figured it was scrap anyway so who cares. A few bolts came loose and I was able to get the engine completely removed. Without the more complicated system I didn't need most of the old wiring, with the exception of the headlights and power switch. With the engine gone I was able to remove as much of the old wiring as I could. I will resurrect the headlights, but install LED's instead of sticking with the halogen bulbs. After more pulling I got the frame cleaned of any parts associated with the engine. I even took time to remove the starter, chain and drive gear from the bad engine since I had an idea of trying to incorporate the use of an electric starter on the generator's engine, which does not come with nor have an option of an aftermarket electric starting system. 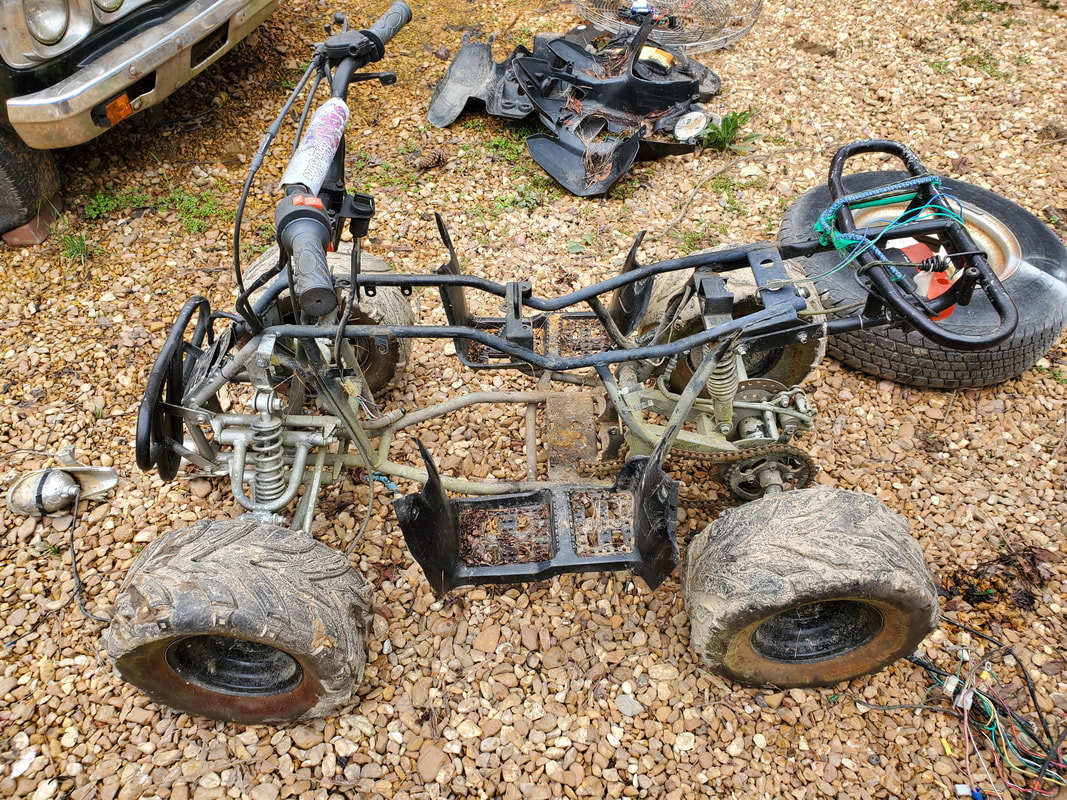 ATV with engine and other hardware removed. From what it looks like the electric power kit won't be that large or problematic to install. The rear axle still has the chain which can be hooked right up to the electric motor with the proper drive gear. The whole kit doesn't even look that big to be worried about it when it comes to finding space to install the hardware on the frame. I'll more than likely complete this build over the weekend with a minimum of issues and will be riding around under electric power in no time.
0 Comments
For a while I was laying gravel down in the general area directly to the west of the house, where I park cars, trailers or whatever based on what's going on. This is the area that is surrounded by the house on one side, the main driveway on the other, the main car park on the other and a little cavity in the yard on the last side. The laying of the gravel has managed to get the area covered all the way up to the main car park, blending in the grounds into one large graveled ground. I had to leave some areas uncovered since the areas are going to be used for other purposes that will either involve digging up dirt or will require the moving of larger items (ie: vehicles/trailers) before more gravel can be laid in these areas. With the main areas of the general car park area covered I decided to turn my attention to the midway going between the house and garden. 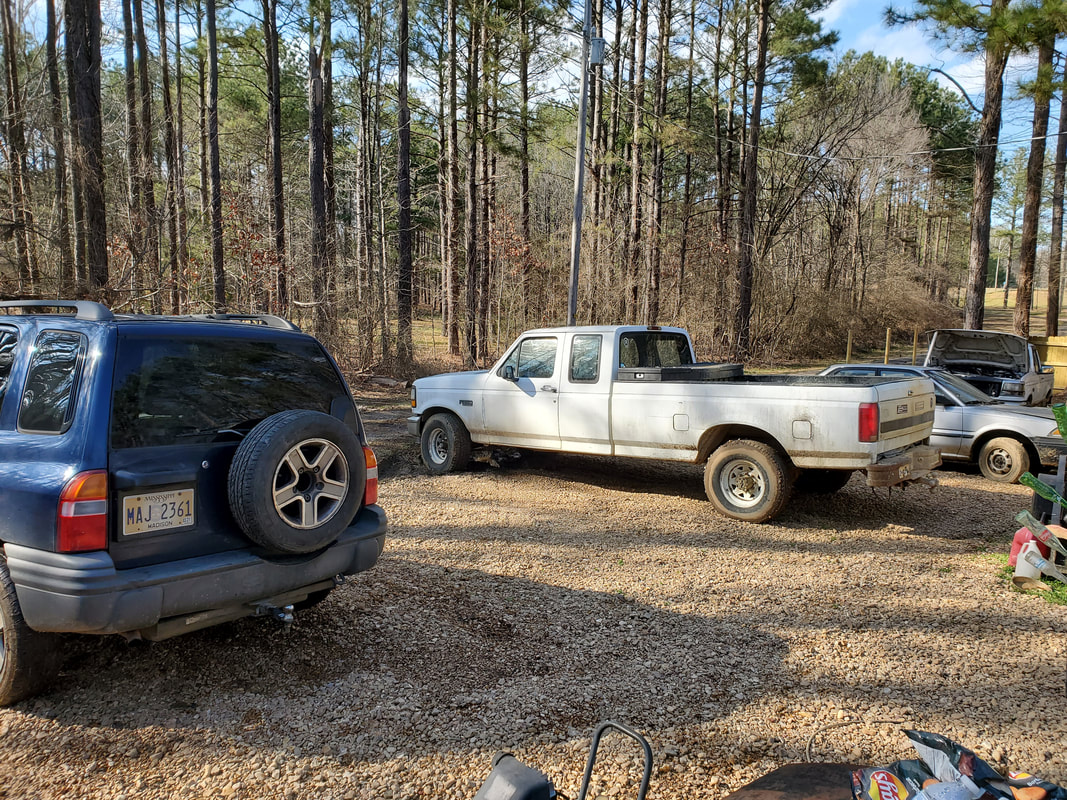 General car park area covered with gravel up to the main car park area. The boundaries between the two cannot be distinguished now. I've already laid some gravel down over this area in the beginning of my gravel project in order to get these grounds covered enough to allow for the moving of vehicles over these areas without the risk of getting stuck in mud. Since the ground was rather muddy, I already accepted the fact that it would take several layers of gravel to get the ground stable enough that I can drive any vehicle over the ground without distorting the gravel bed to the point that it'll expose the mud underneath. Also with the heavy foot traffic on our part, some of the gravel was already starting to mush into the mud to the point that mud was surfacing more and more. I might as well start planning on getting this main area covered thoroughly enough that I won't have to worry about it, especially after combining this work with other work like laying barriers to slow down the movement of water or the washing away of dirt over these areas.  Area around solar light and sidewalk showing blending of the general car park with the rest of the grounds. For a while now I had the Monte Carlo parked well into the midway with the 69 Mustang in front of it with the main car park in front of the Mustang. I would've had to move the Mustang to get the Monte out if I decided to drive it. Either way, both of these vehicles would have to move in order for me to be able to get the F250 in here to lay gravel down. While I could've just used the wheelbarrow to transport gravel from the truck over to the midway, it would be a LOT easier and faster to just stage the truck right in front of the area to be covered and just shovel the gravel from the bed of the truck right onto the ground. I had to rearrange some of the other vehicles on the lot to place the Monte and Mustang in their temporary spots to keep the midway opened up. I ended up moving the Monte Carlo over to where I was staging the F250 when I was dumping gravel onto the general car park grounds. There was plenty of ground over here to allow me to park this smaller vehicle so this was no problem. Now while I could've tried to squeeze both the Mustang and the Monte in this area, I figured it wouldn't make much sense trying to do this since any little mishap would not give me much wiggle room when it comes to avoiding hitting another vehicle. Besides I had other options.  General car park area with F250 and Monte staged and room to spare between the Monte and the Tracker in the left foreground. I still had access to the side park that runs parallel to the storage trailer. This area is plenty big enough to park another vehicle and in fact was intended to be an area where I could park a car for prolonged work sessions where I needed to keep a car without it being in the way of the movements of other vehicles. I had to move some things out of the way but the LUV which is also parked in this area, is right next to the fence and the boat trailer and catamaran boat is right next to the garden fence, leaving plenty of room for a full sized vehicle to pass through with room to spare on either side. I was more than able to park the little Mustang in this opening for the time being while I work on the laying of gravel in the midway. 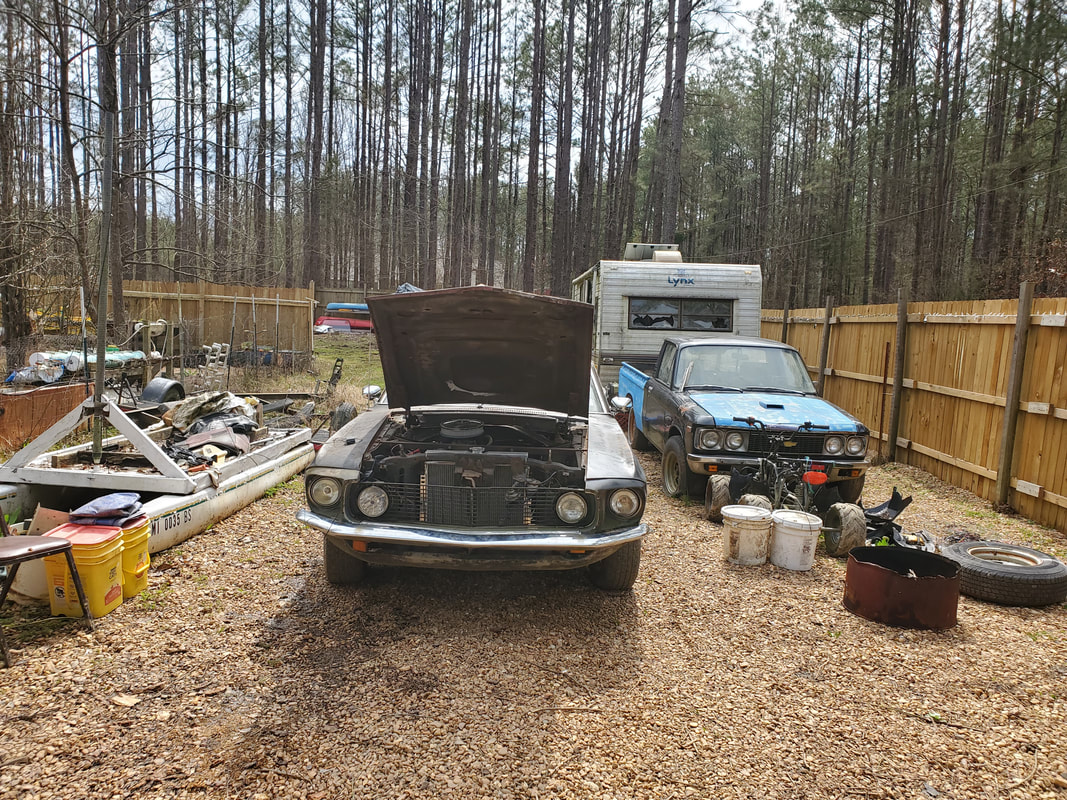 Mustang parked in side park between LUV and catamaran boat With the area exposed I took the time to walk the area to check the hardness/softness of the ground, especially after moving the two cars from the grounds. There was plenty of surface area that was mushy enough for me to want to come back over these areas a second time to ensure that the heavy F250 would be able to roll over this ground as I work my way back deeper into the midway to spread more gravel. I would be starting about where the open space was between the Mustang and the Monte when they were parked back to nose in the midway. I will also be taking time to lay gravel all the way over to the garden fence as well, ensuring full coverage of all the bare dirt so when I do start building the wooden fence for the garden, there will be no exposed muddy area remaining of the grounds in the midway. 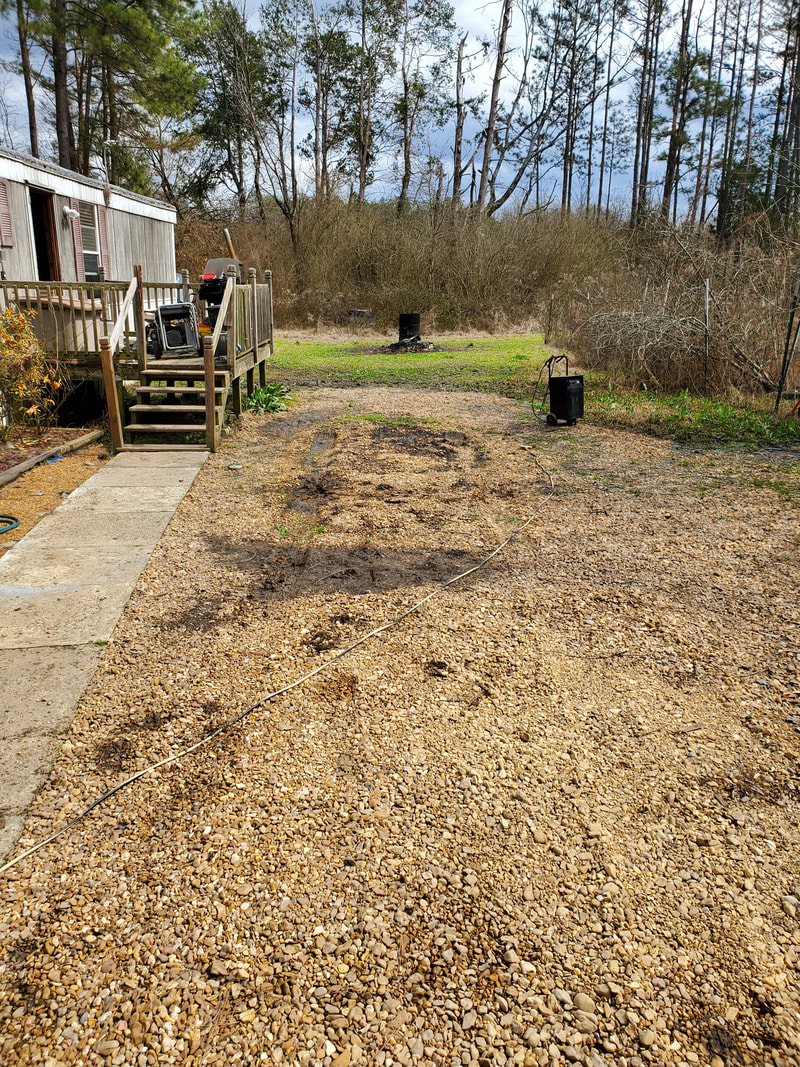 Exposed midway showing how old gravel has been getting pushed into the mud, forcing mud to the surface. Just like with the other areas that I focused on when it came to spreading gravel for full coverage, this area is one that I will probably be working on for some time, even with my 2x a week of bringing in and spreading gravel. In the end it will pay off as I will have an important area that will be covered and finally free from the inconvenience of getting stuck in mud either with shoes or tires. Plus this is just one of the steps in allowing me to work on controlling the movement of water and dirt that is causing erosion under the house that will eventually cause the foundation posts to move and fall. I will have to rebuild the porch as well, which will involve me laying more gravel heavily in this area under the porch prior to the reconstruction of the porch. I can then move on to underneath the house to do whatever I determine is necessary to build the ground back up and stop the erosion problem. The work continues....
After hitting the junkyard to find the stuff for the Tracker repair project, we also managed to find some parts for the Scion. One of the things that was found that was more of a necessity was a full size rim/tire. Even though we already have a tire, its not the same size/style rim that is on the car. The only other tire that shared the same bolt pattern of the Scion was that of a Toyota Prius, which is ironic. The Prius rim is a 15" rim while the Scion rim is a 17" with a low profile tire.
Well we got another full size stock style/size rim with a tire on it which will make using a spare more convenient since a swap out won't be like using a donut. Same tire, same characteristics, same performance. Now the only problem with the tire is that it was on a car that some punk kid was trying to dress up to look like some ricer race car, had painted the gauge panel moldings red to contrast with the charcoal dash, stuck red cloth on the door panels where there was charcoal cloth against the vinyl panel material. Also he/she, spray painted the silver/aluminum rims white to contrast the car's color, which I already forgot about after seeing this ridiculousness. Anyway, white or not, we grabbed the rim. Funny thing is, they even took the time to paint primer on the rim before spraying the white coat on it. Well I would have to strip all this shit off as much as I can, which later on turned out to be a mistake as I was unable to get every bit of the paint off the rim. I would've done better just spraying aluminum color paint on top of the white paint. But hey whatever. Now, the tire on the rim wasn't exactly the best tire, it had minimal meat but for all intents was garbage. Luckily we saved an old tire that was left after we replaced two of the tires on the Scion with two fresh tires. The tire was still in decent shape so I kept it just in case. Good thing I did, because this newly acquired rim needed a tire. At this time I had the opportunity to try out the manual tire changer on these low profile tires. Now after doing all of the steps to prep the tire, breaking the bead, setting the tire up and spraying lubrication around the rim, in this case, soapy water. Now, because the old tire on the rim was old enough that the small sidewall was pliable, I was able to peel the old tire from the rim. This way I could work on the rim without having to worry about the tire itself. 
Old tire removed from rim.

New used rim after peeling old tire from said rim and stripping as much paint as possible with some aircraft stripper. The job was messy and not at all successful like I hoped.
I got a can of aircraft stripper, a corrosive substance that peels paint off any surface. Now the messed up thing was this can of stuff was from auto zone and apparently this shit has a finite shelf life since the stuff was so thick that even with vigorous shaking the stuff was still too thick to spray out heavily enough to ensure complete even coverage. I did get enough eventually to be able to start working the paint free but I was only able to do so much with the abrasive wheels I had available. The cavities between the spokes were next to impossible to clean completely. The most I could do is sit there with a wire brush and small scrapers trying to work as much of the paint out as possible. Funny thing is you almost have to keep the peeled paint wet with the stripper to help in removing it. Well in the end I got the loose paint from the rim but there was still a lot of primer and paint in spots that couldn't be fully reached (read: between the spokes). So in the end the rim looked even worse than it did when it was just white. Since there really wasn't much I could do other than just spray the rim with the aluminum paint I had, that's what I did. Now the fun part was trying to put the replacement tire back on the rim. That my friends, was a clusterfuck. Because of the still solid structure of the rubber in this tire, the material was not stretching like I needed to for the manual tire changing operation. I would get the leverage tool probably 1/4 of the way around before the sidewall rubber would finally stop stretching and have me dead in my tracks. After trying every conceivable way of doing this, I finally said fuck it and just took the rim and tire to the tire shop to have it installed on the rim. Surprisingly the guy put the tire on the rim for free and balanced it at cost since we wanted the tire balanced as well. That was cool. But this also meant having to touch up the rim since the paint was all scuffed up from me trying to work the tire onto the rim. 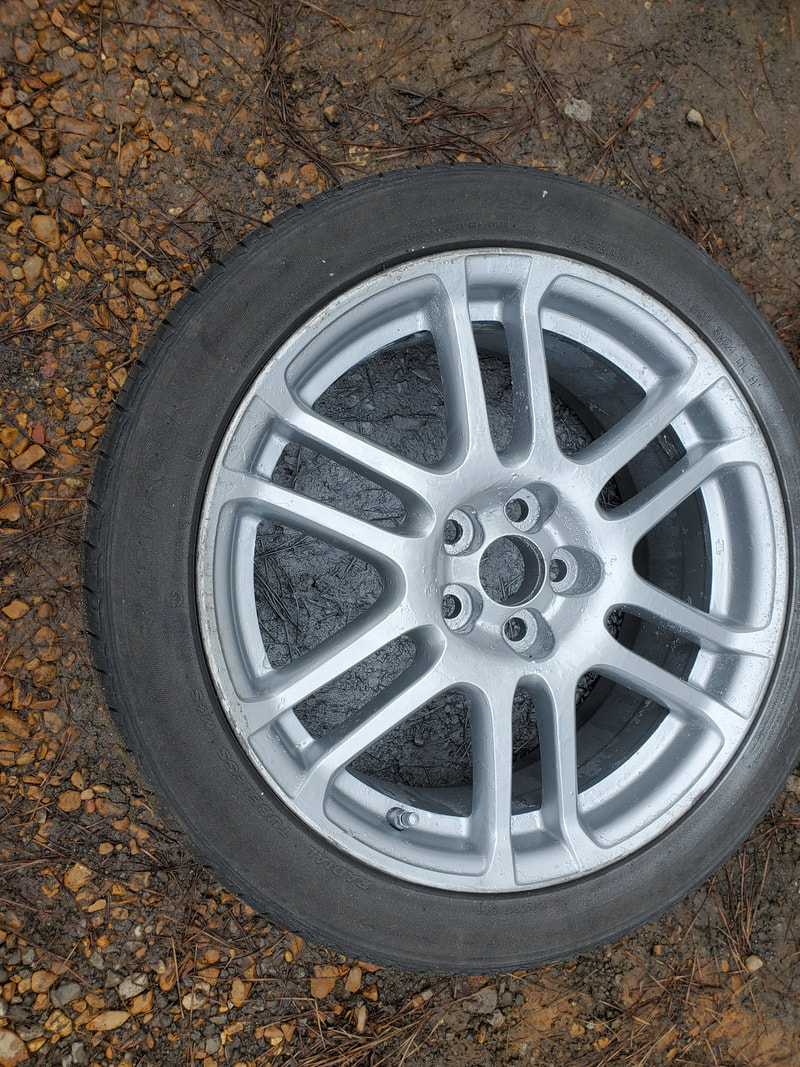
Rim after new used tire was installed and paint touched up. In the end it didn't turn out half bad.
After that debacle, it just showed me that I really need to get a powered tire changer. I know these things are pricey, even for used units, but if I'm going to be playing with cars and aftermarket rims and all that good stuff I'm going to need to get my hands on one of these tools to help me get things done that much faster. It's very disheartening when you need to do a tire repair on a Saturday night and the tire shops are closed until Monday. Hell even when I have a problem that allowed me to get home that night but would be risky to try and go out in the morning, having that tool available puts more autonomy back in my hands when it comes to car work. And besides, I might be able to make a few bucks changing tires or making repairs. The other parts that I managed to get from the yard was a third brake light that goes in the hatch, and a cosmetic item, a spoiler for the hatch. We had to grab this just because. Well the third brake light went in pretty fast, just a couple of nuts and some mounting brackets. I did have to remove the cover that holds the hatch release button and the inside hatch cover before I could pull the light fixture free. I also had to add some sealing goop around the fixture to seal it against the metal since the foam rubber gasket was kinda jacked up after it was removed from the other car. As for the spoiler, things wouldn't be quite so easy. 
Installing the third brake light after pulling the hatch release button cover.
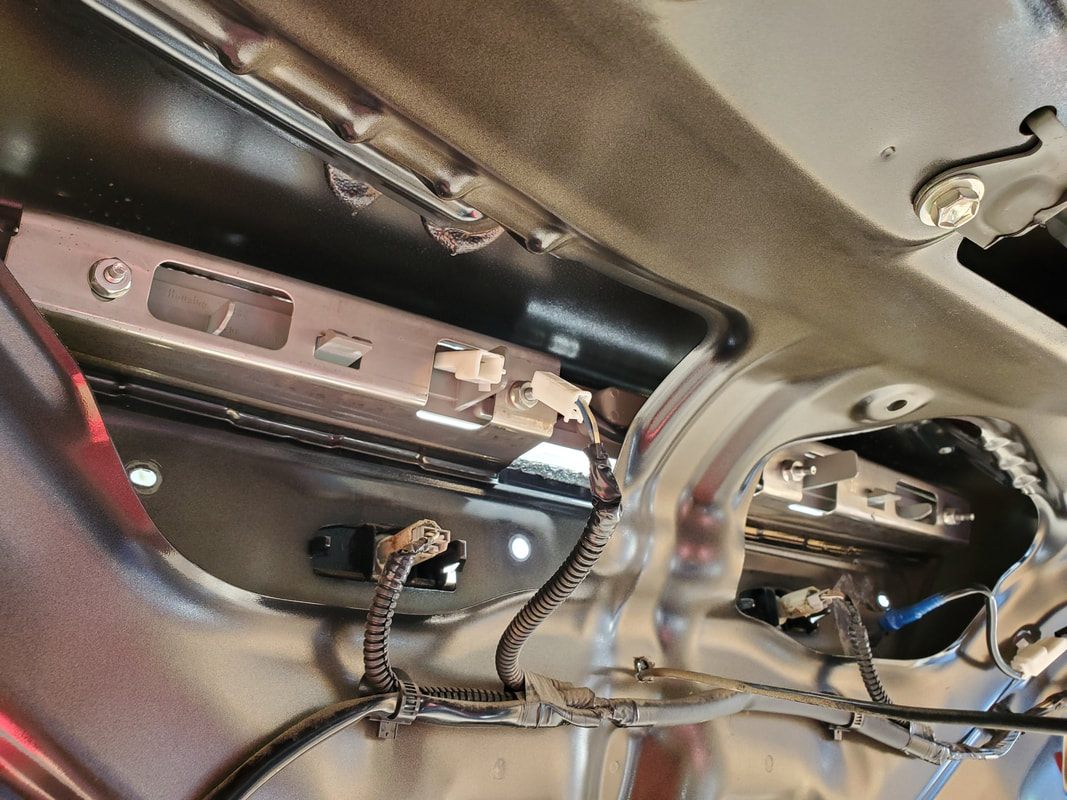
Brackets and plug for third brake light fixture behind hatch panel.

Third brake light fixture installed and ready to go.
On the spoiler, since the body was silver, I had to spray the thing black to match up to the Scion's body. I got some primer/paint combo stuff to spray the spoiler prior to installing since once its installed it'll be impossible to get paint on the surfaces between the bottom of the spoiler and the hatch surface. 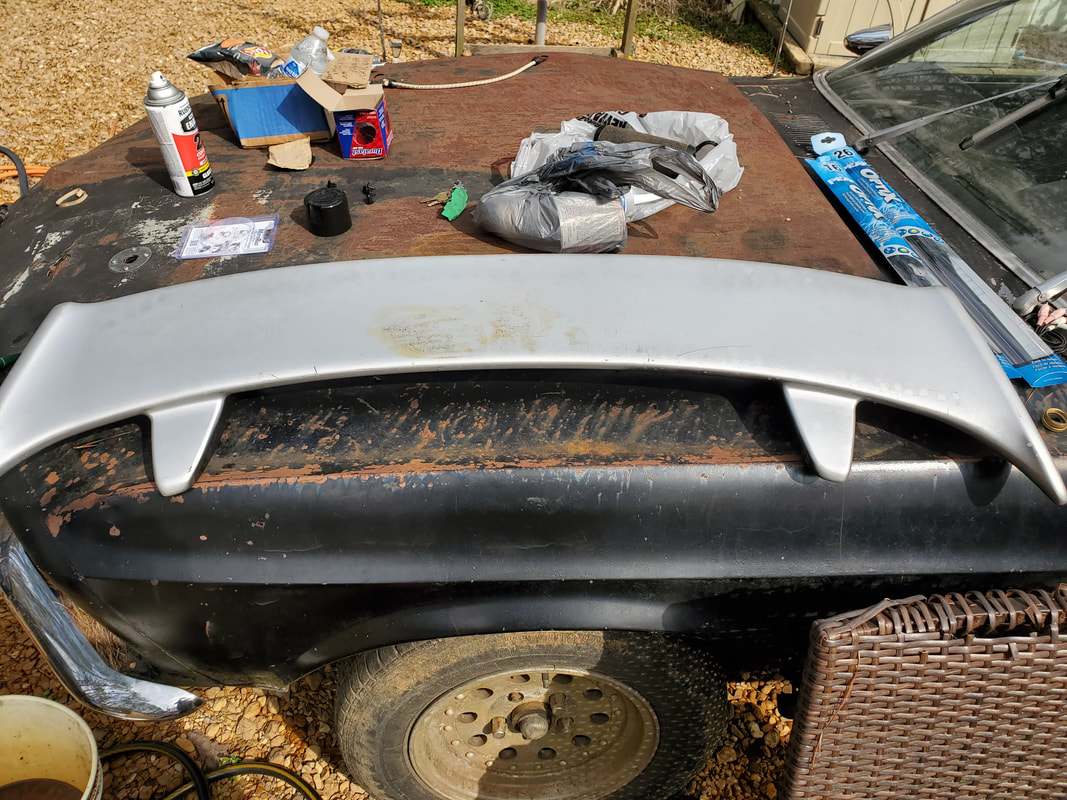
Spoiler staged for painting after giving it a scrub down to clean it up.

Spoiler after spray painting.
As for the spoiler, I had to line up the spoiler to the factory holes on the inside and get the unit lined up on the surface of the hatch so it was the same distance-wise from the window and the sides and the back of the body. This took a little time to get it in the right spot before finally drilling a couple of starter holes for the studs in the spoiler. 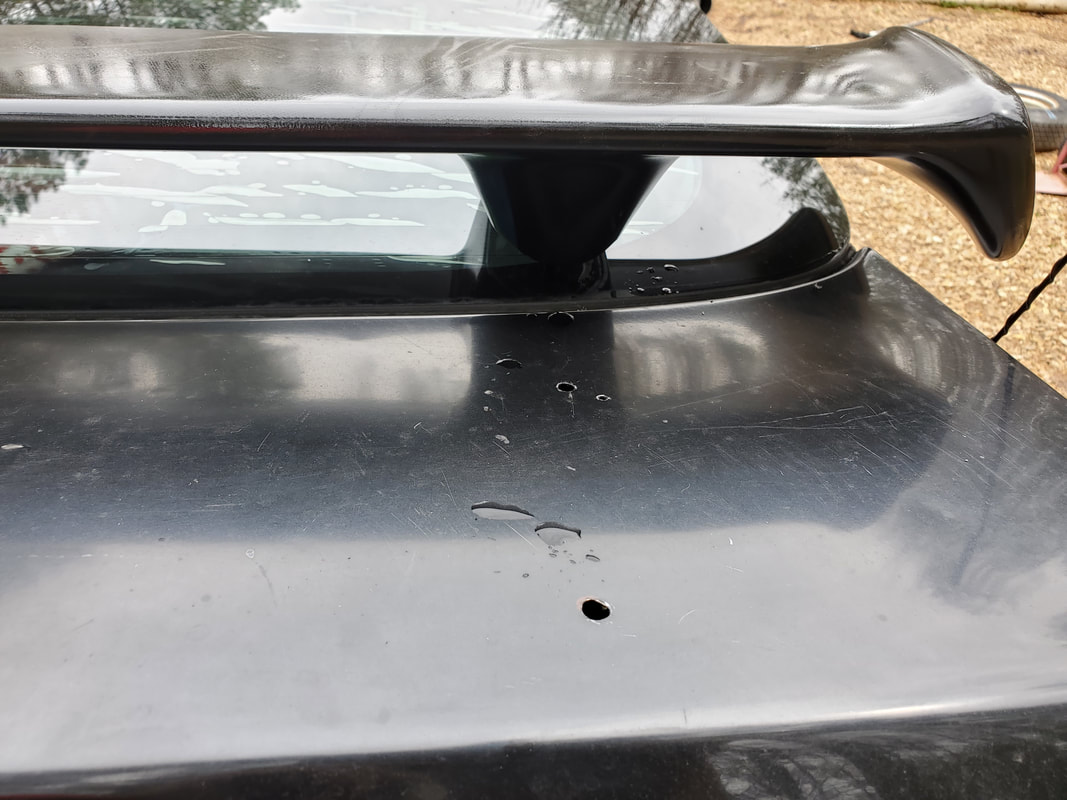
Starter holes drilled in hatch skin on right side.
And holes on the left side....
Just like the third brake light, I also had to put something on the bottom of the base mounts of the spoiler in order to help seal the thing so water doesn't work its way under the bases and into the holes. I had some two sided tape that I ended up cutting in order to cover the bottoms of the bases all the way around. After installing that stuff I was ready to go ahead and install the thing. 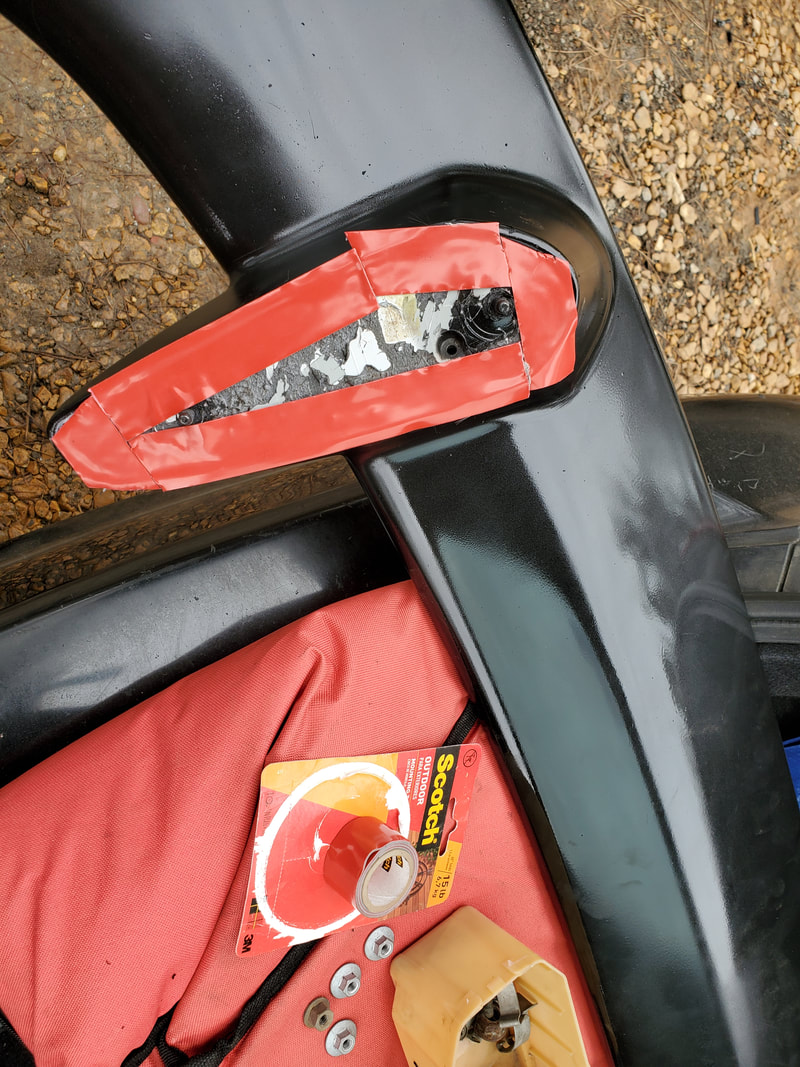
Two sided tape covering the bottom of the base on the spoiler.
Now the holes that I drilled on the top of the hatch, even though they were in the spots that would allow me to mount the spoiler in a way where it was pretty much centered all around, did not line up with the factory holes on the inside of the hatch (of course!). Of course it would've been helpful if there was some kind of gauging to show how many inches from the edges of the hatch all around the bases need to be in order to line up with the factory holes but I didn't have time to really find info like that so yep, I had to do the next best thing, drill more holes! I ended up eyeballing where the studs passed through the hatch and where they stood relative to the factory holes so I can see where I needed to drill the new holes that would allow me to put the nuts on a socket and just insert them straight up into the hatch body and onto the studs. It turned out that I was just a half inch off from the factory holes. The new holes that I had to drill were literally right next to the factory holes. With that I was good to go. 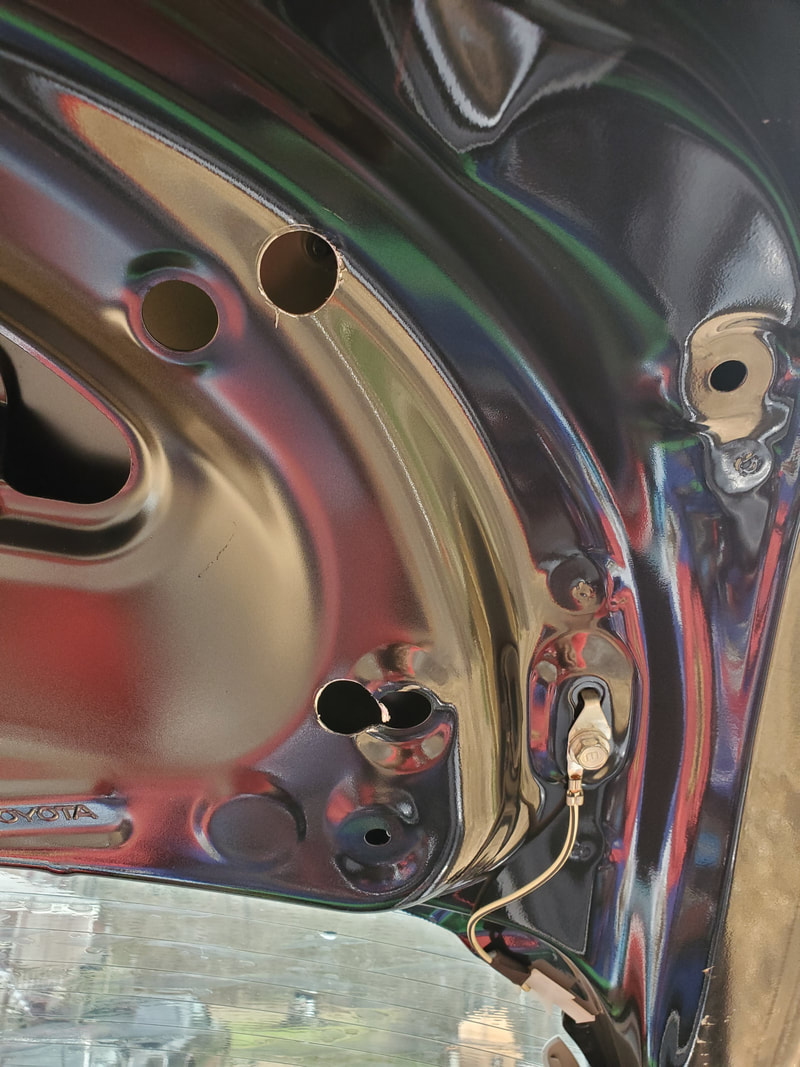
New holes drilled in metal, top hole is next to old hole and bottom hole is overlapping the old hole.
The new holes on the left side are both evenly spaced from the factory holes.
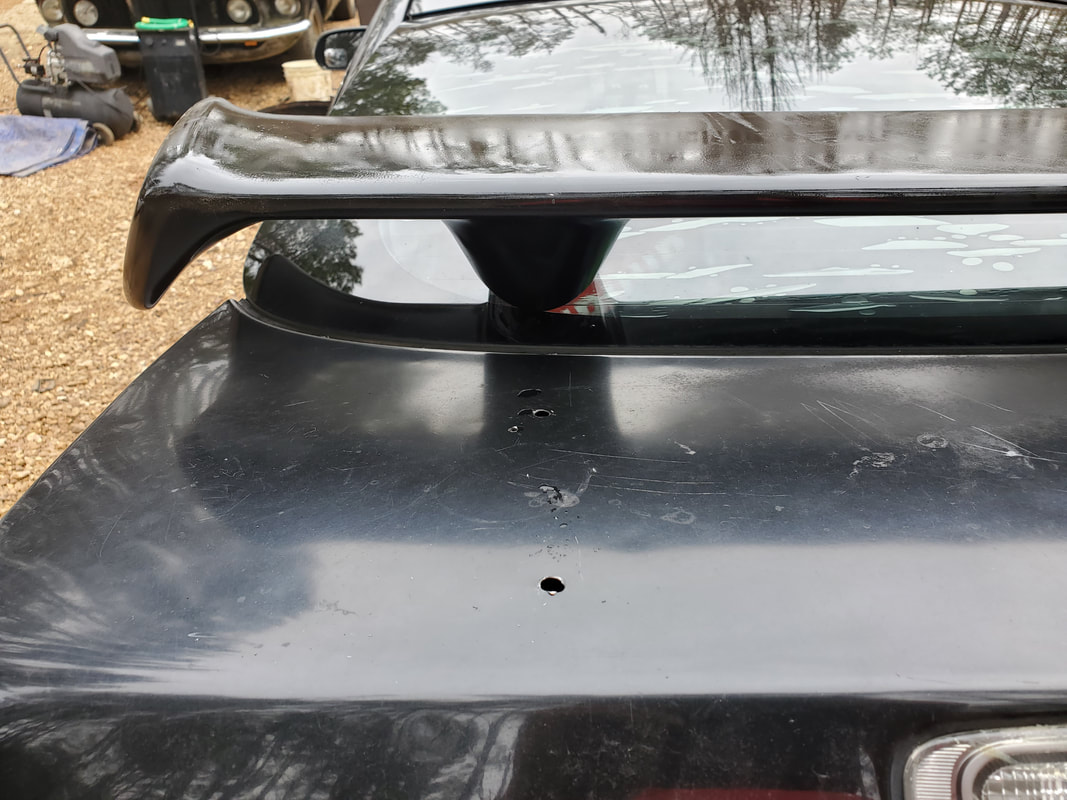
Now some purists would scoff and say that doing this job like this was half assed, unprofessional, blah blah blah. WTF ever. Reason this isn't that big of a deal is because when the job's done the interior panel will go back on and no one would ever know that extra holes had to be drilled from the inside to facilitate installation of the spoiler. With the new holes in place I was able to get the retaining nuts in place to hold the spoiler down. After getting everything tightened down to ensure that the two sided tape was making good contact with the hatch skin, I added a very very small amount of sealing goop around spots where the base had minor gaps between the spoiler base and the hatch skin. I took some leftover spray paint and shot some over the base mounts of the spoiler to cover up the small area where the base meets the hatch surface. Since the paint on the hatch was already scuffed and sorta shitty, spraying canned paint over this small area wasn't going to really hurt much of anything. 
Spoiler installed on Scion's hatch, ready to run.
With all that, my fun time with the Scion was complete. We have a full size matching spare, a working third brake light, and a cute little spoiler to make the car look even cooler. With that I can move on to something else around here, and there is plenty of something else all over this place for me to work on....
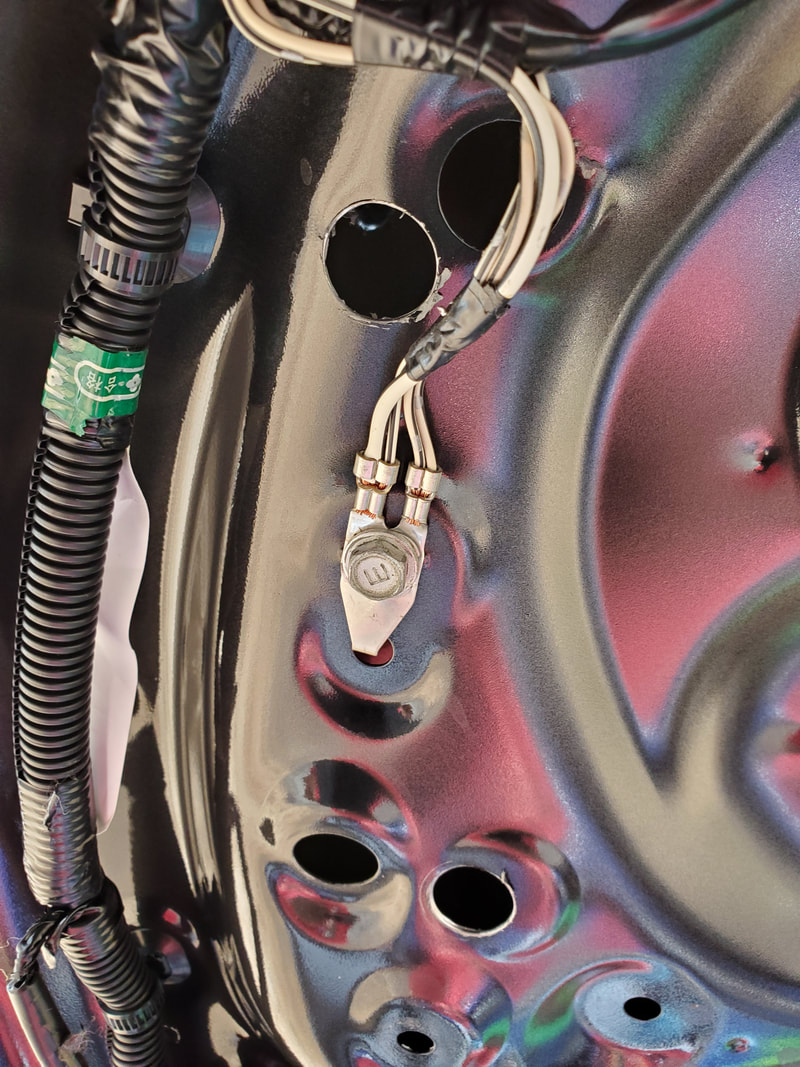
After getting some cleanup work done in the garage I had finally decided to take a moment to drag the 65 Mustang up to the garage so we can remove the engine/transmission from the car. To do this we enlisted the help of the Chevy Tracker. Despite its small size and gutless powerplant, the gearbox is actually set up right to allow for doing just this type of work, slowly dragging heavy weight around. Using a couple lengths of tow chain we hooked the Tracker up to the rear end on the Mustang and slowly started dragging the car up to the garage. Of course I had to use the ole lady to assist, mainly by periodically turning the steering wheel in the Mustang as needed to keep the car straight on the driveway as I slowly pulled it up the gravel path. Once up at the garage we had to really work out some muscles by pushing the car up the small driveway ramp into the garage. This was super fun since the car had to go up an ever so slight grade up the driveway into the garage. Also I discovered that the aftermarket rims that I used were actually not compatible with the front suspension on the car. The offset was a little too far to the outside of the rim where when installed, it would rub against the upper ball joint. It wasn't serious but it was enough that it created some resistance to free movement. Eventually we got the car into the garage part way, which I was happy with. I changed by plans where I'll just pull the powertrain and drag the car back down to the yard to continue work later on. In the mean time with the front of the car poking well into the garage we got the engine crane and commenced to hooking everything up to the engine. Really it was a matter of bolting down the carb plate adapter that allowed for me hooking the engine crane to the engine to pull it out. I still had to disconnect the transmission crossmember and a couple of nuts and bolts holding the unit in place and to the transmission. 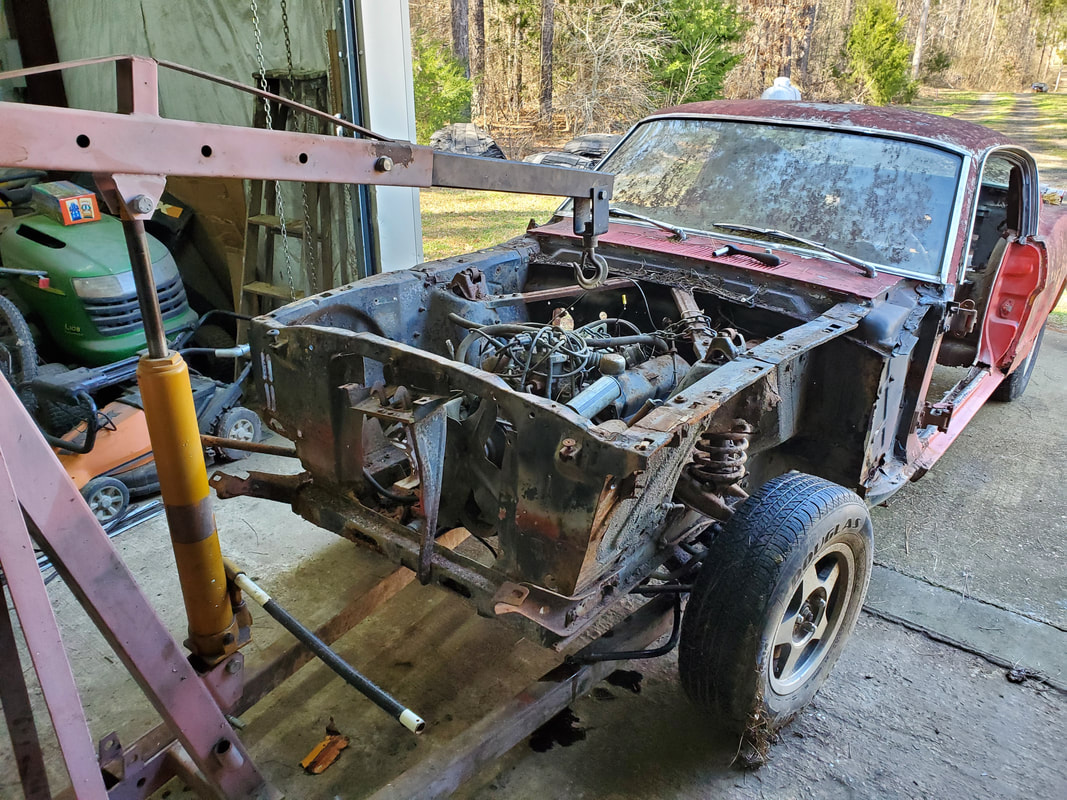 Engine crane staged over the open engine bay of the Mustang. With the crane in place and the carb mount adapter placed on the top of the engine I went ahead and hooked up the crane to said plate and commented to lifting. I ended up having to put a short length of tow cable with two industrial strength hooks on either side. This was hooked up to the two mount holes on the carb adapter plate. After lifting all the way out, I was able to get the powertrain clear of the car and able to be lowered to the ground. 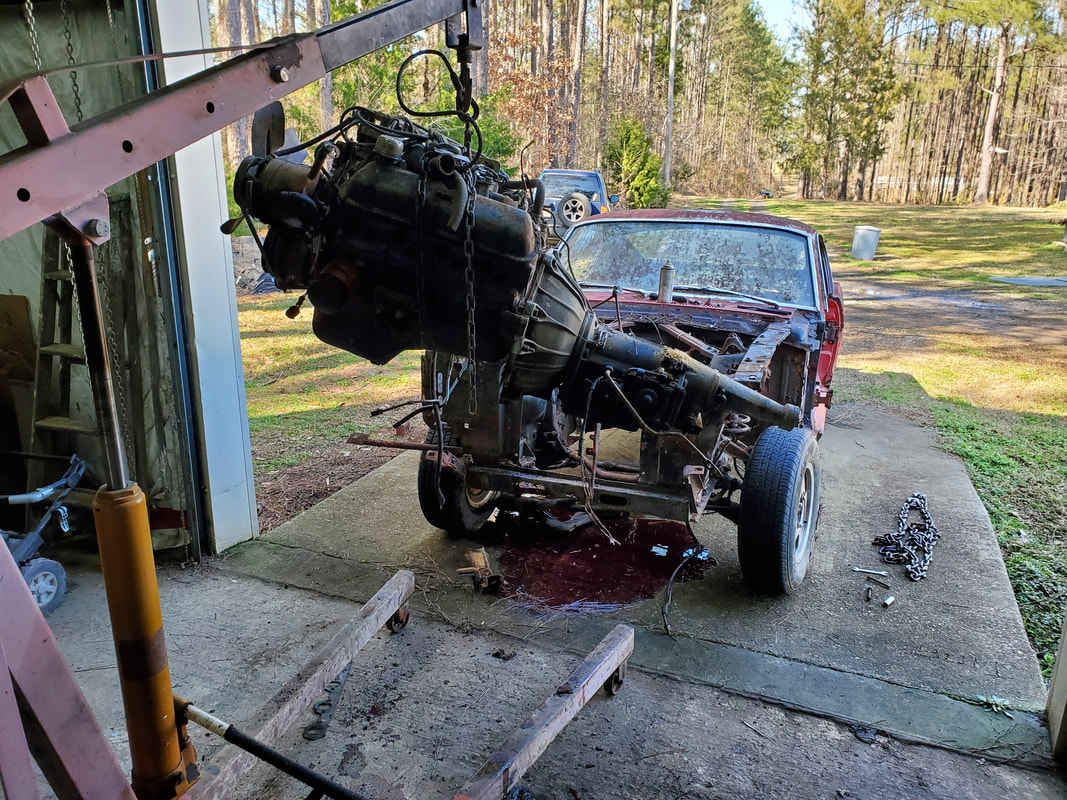 Engine/transmission swinging from engine crane after removal of the unit. After pulling the powertrain out the next question was going to be what to do with this stuff. Since everything was still good it'll just be a matter of moving this thing into an area where it won't be in the way when the time comes to work on it. I ended up wheeling the engine crane back into the garage, away from the entry door and past the Dodge only to find a suitable spot to lower the works on to the ground. It's in the way but its not, compared to what else is on to floor so I ended up dropping it on the ground almost next to the Dodge. I figured that if I pull the transmission from the engine, half the batter has been done. 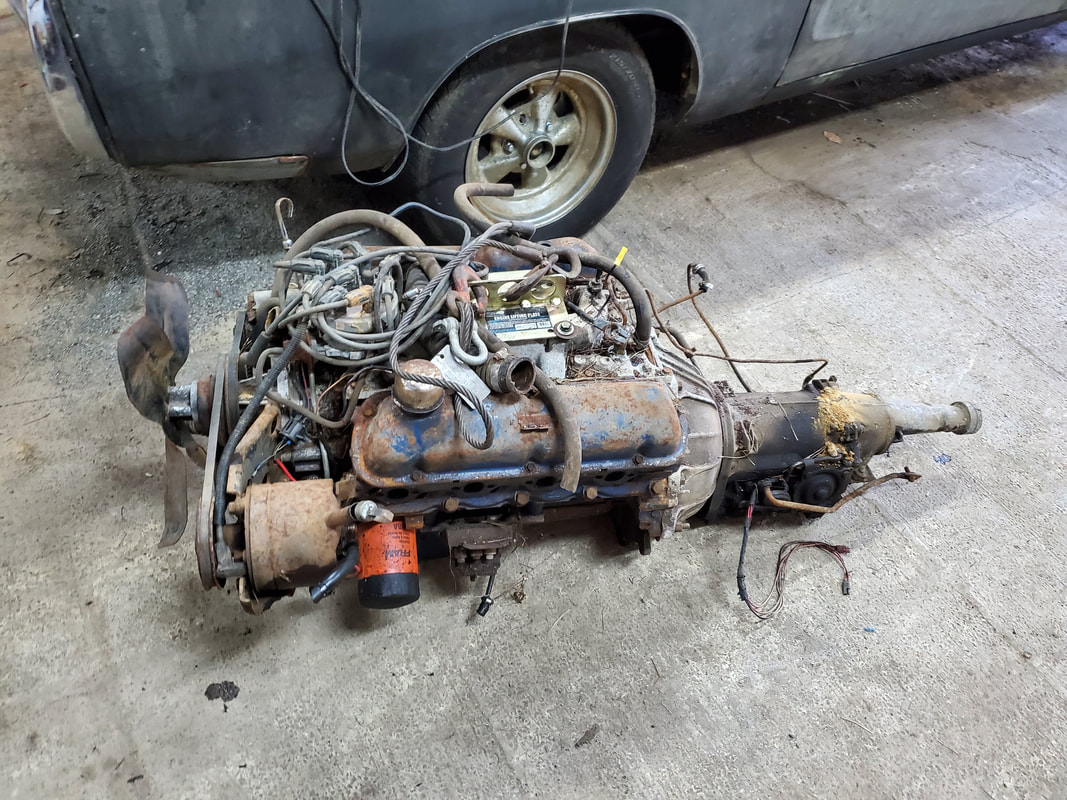 Powertrain resting on ground next to Dodge until the time comes to reinstall this unit. In the meantime while up in the garage, since I had the engine crane in play, I decided to take care of a little task I've been putting off. I have another 318 that I had posted saying the previous owners rebuilt engine all wrong so I'll have to come back over this work. Thing is, I have a rotating engine stand and this engine still has the plate bolted to it that allows it to be installed right onto the unit, exactly what I was hoping for. So with the engine crane I moved into position and bolted the lift chains to the block so I can lift it up on a level keel. With the engine swinging in the air I went ahead and lined up the engine stand while the ole lady slowly moved the lift down so I can be able to see what's going on without running the risk of a sudden abrupt release of the bleeder knob by someone who's overzealous. Moving the 318 engine back onto its engine stand was uneventful at least. 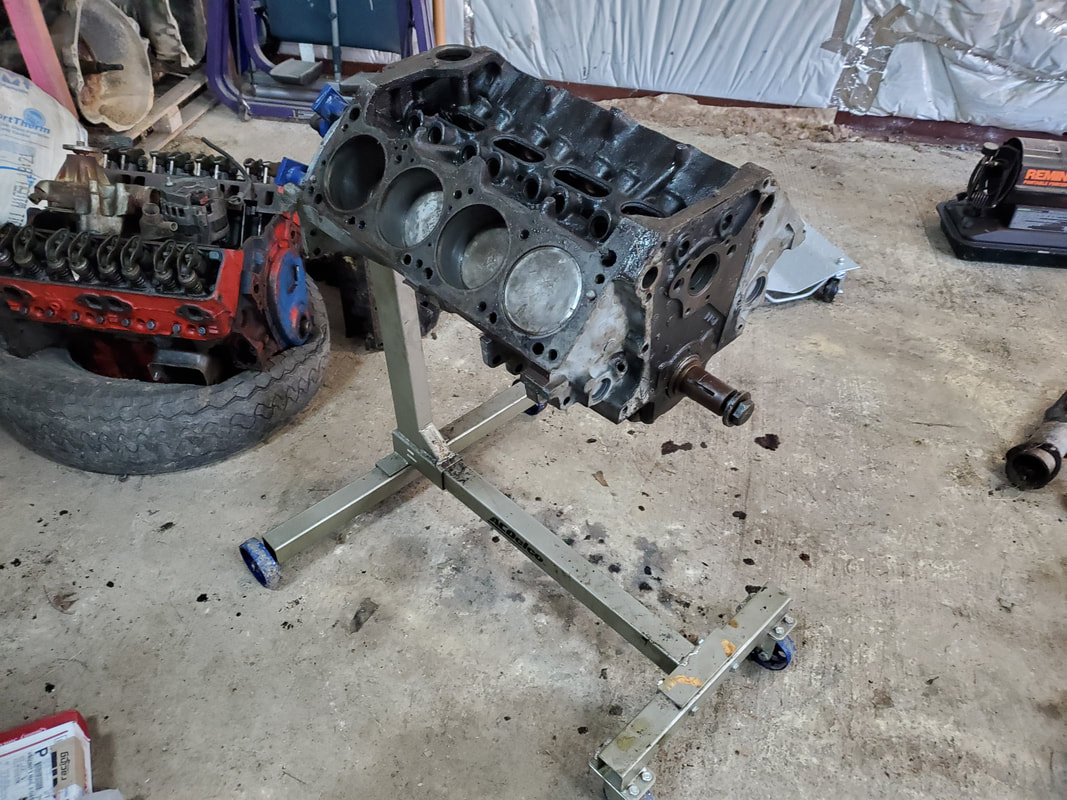 With the powertrain out of the car and a couple of side tasks done in the garage, it was time to move the body back down to the house until I get things set up the way I would like it to be prior to working on the next phase of that project. Movement of the car body was done the same way as we did going up to the garage. Only thing that worked to our advantage was the fact that the front wheels were scraping on the ball joint so there really was no concern with a car getting away from us and rolling downhill towards the house. We were able to slowly drag the car out of the garage and get far enough down the driveway until we hit the downward grade. Once there we removed the chains and slowly pushed the car back down, using the downward grade to our advantage to get the car rolling before coming back to the original area its been parked. With a little finesse we were able to get the car rolling right into its old spot, albeit with the car pointing in the opposite direction. 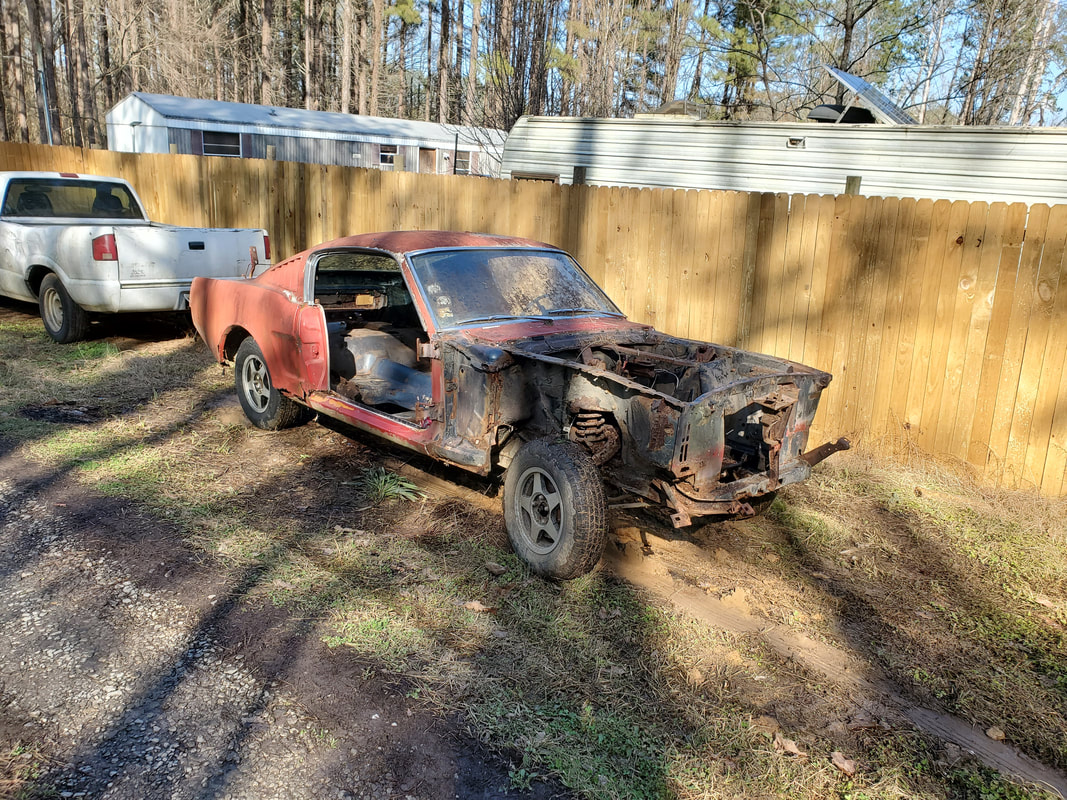 Mustang body parked in its original spot, pointing in the wrong direction and stripped completely out. With the Mustang back home in its original parking spot, sans powertrain, I can confidently say I can stop working on that project until I get things set up so I can lift the body up and roll the Ranger frame underneath it. That's a whole other animal I have to take on so until then the car body will be a stripped down reminder that I have a big project to get to more sooner than later. That stripped down car will also encourage me to get back into the project more sooner than later so it don't rust out any faster or any more than it already has.
After a few attempts I've finally managed to get the general car park area on the west side of the house, between the house and the main driveway. Even though there are some areas that didn't get covered due to equipment being staged in these spots, the main spots that I wanted to cover are finally covered. I have our smaller trailer staged right next to the house but because I plan on digging this area up to eventually install some drums to use as an impromptu cistern/graywater system, I didn't take time to move the trailer to cover the area up. I dumped gravel around the trailer up to the edge of the trailer. On the other end of the general car park area I have the car trailer staged, right in front of the chicken yard gate. This area also has crushed asphalt on the ground so it isn't imperative to get gravel over this. I'll probably put some down just to have an even covering for aesthetics.

Gravel spread on ground over general car park area.
I was also able to get gravel on the ground over the intermediate area surrounding the solar light tower and the beginning of the concrete sidewalk. A small walkway between the rock garden and the solar light tower also got covered, helping eliminate more muddy area that we normally travel over. One less muddy area to get our shoes and feet wet is always a good thing.
General car park area and intermediate area to far right covered with gravel.
Another little project that I decided was long overdue for me to take care of was mounting a manual tire changer. This was a little POS I got from Harbor Freight 15 years ago for the sake of being able to change tires myself. I did use this thing in a half assed manner by bracing the unit against a support post in the basement of the house I used to live in but for this time I decided to properly mount the thing to the floor. This would involve having to drill holes in the concrete floor and setting anchors with studs that I would set the tire changer on and secure with nuts and washers. 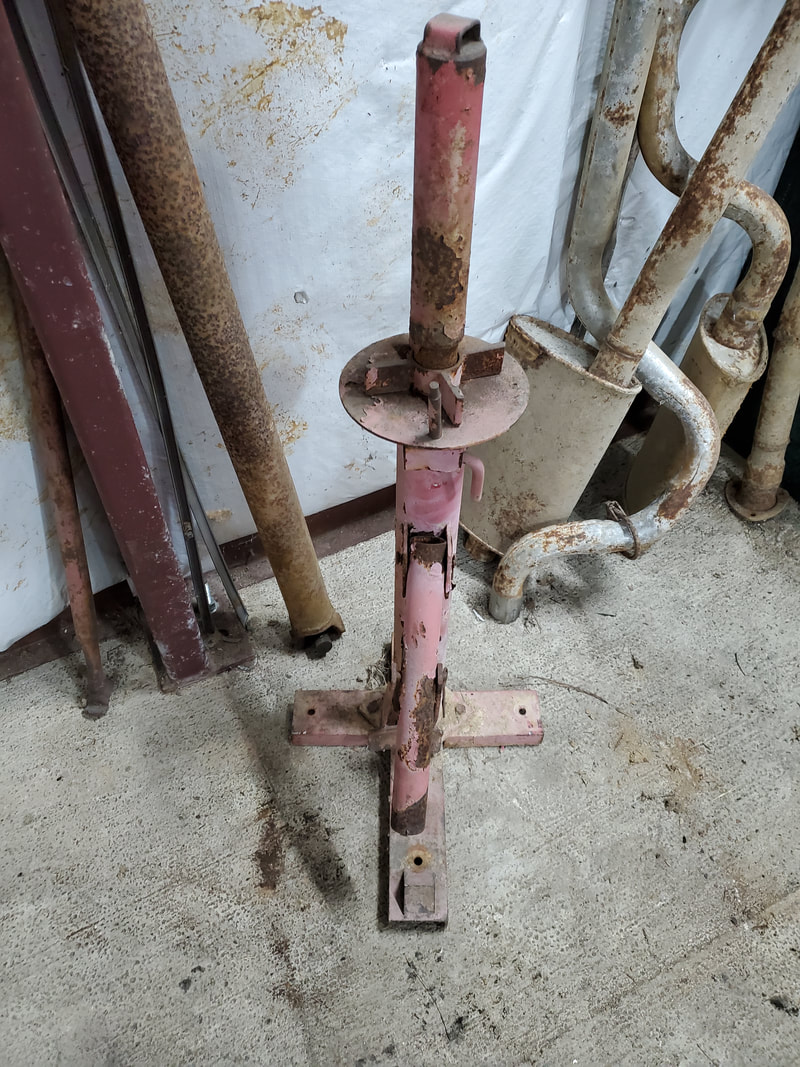
Manual tire changer, showing its age after having sat outside for some time.
This otherwise simple saga actually went shitty to some degree. Thinking that drilling through concrete with simple masonry bits and a 1/2" chuck drill was all it would take, I got started trying to bore the holes. This ended as fast as it started as the hard ass concrete was resisting the masonry bit at every turn. I decided to invest in a hammer drill from HFT. I brought this new tool home and got started on drilling the holes. Using water as a lubricant I started drilling one hole. That took a little effort but eventually it got done. I started drilling the 2nd hole and by this time the drill was getting rather warm. I did get the 2nd hole done but the drill started acting funny, like the brushes had shit in them. I was able to get the thing spinning at high speed again so I started the 3rd hole. By this time the thing was acting rather bad. By the time I was halfway down into the hole the drill finally gave up the ghost. It petered out and seized up, never to work again. At this point I was pissed off so I did go back to the regular 1/2" drive drill I was using. Surprisingly I was able to get the rest of the hole drilled with minimal effort. Perhaps the concrete an inch or so down was softer than what was on the surface. Whatever, I'll take a win where I can. With that I did go ahead and sink three of the four anchors needed to hole the tire changer down. The next day I took the dead hammer drill back to HFT and got a refund and got the next model up. With that I was able to drill the last hole so I can get the tire changer fully mounted and solid. 
Tire changer mounted to concrete floor with anchor studs in the drilled holes.
With that the tire changer is secured in the garage, ready for use. I purposely mounted it a few feet from the wall so I can have 360 degree coverage around the unit when I do remove tires with the long tool that comes with the unit. Now of course this isn't going to be the end all tool for this duty as nothing beats a powered tire changer in the ease and quickness of removing and installing tires. For now I can at least use this thing to remove bad tires from rims and for the most part, install older high walled tires like those you'd find on an older car with 14" and 15" rims. I'm not too confident about being able to pull or install low profile tires like those on the Scion TC since there isn't enough wall rubber on low profile tires to allow me to stretch the tire onto the rim easily. But like everything else in life, we have to do things in baby steps.
|
