|
After breaking off several small branches from the big old persimmon tree I pulled out the chainsaw to get ready to start cutting into the tree to bring it down. A couple of super low branches that I cut off to get things started ended up having a bunch of buds on them. After really focusing on the higher up branches, I noticed more buds on them, letting me know this literal late bloomer was still alive after all. Best case now was the removal of a couple of low lying branches that would've otherwise gotten in the way as they grew more during the summer. So now I can turn my attention from having to remove a giant fruit tree to getting the 84 F150 tuned up.
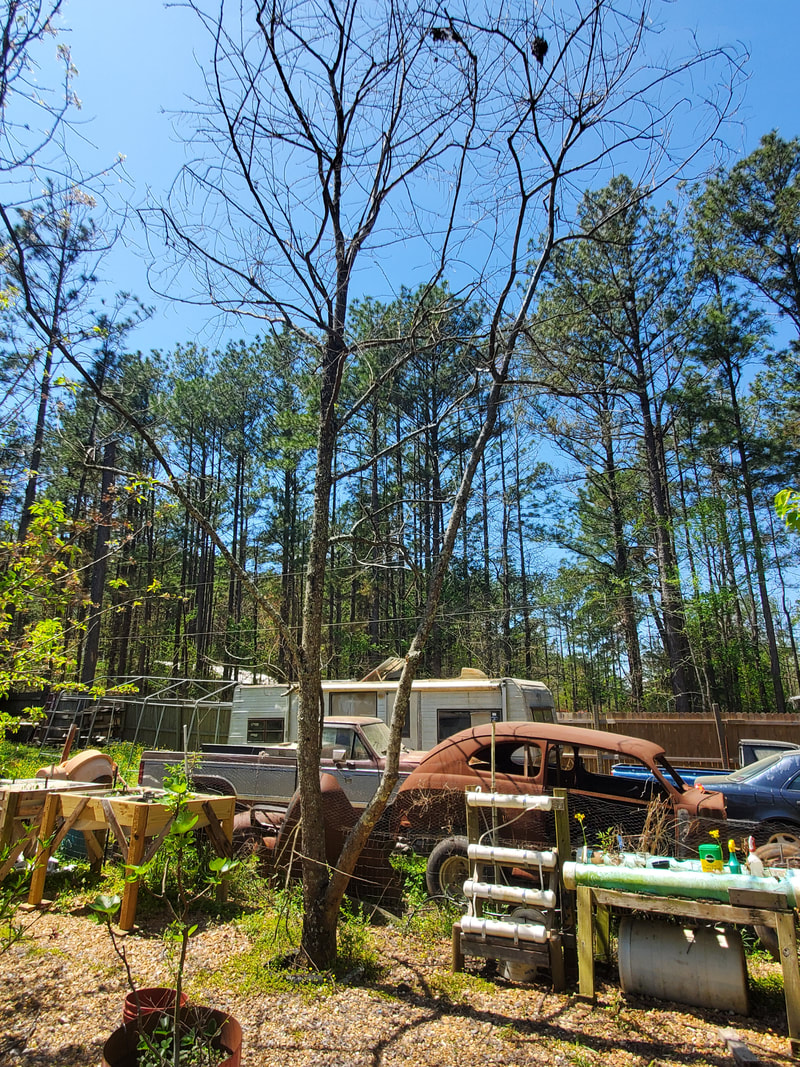
This deceptively slow blooming tree was almost turned into firewood.
As for the 84 F150, I wanted to put the timing light and vacuum gauge on the engine in order to fine tune the thing. This would involve checking to see what the timing is on the engine to confirm it's where it's supposed to be as well as checking to see where the tune on the carburetor stands so I can get this engine that much closer to being tuned enough to be trusted to immediately run the Rustang after the transplant. After starting the engine up to get a rough reading of the timing with the timing light, I found I couldn't see any numbers indicating the timing. After shutting the engine down and sliding under the truck to see where the numbers were at, I found that the numbers were barely legible, especially with the timing light from a distance. I ended up using a permanent marker to mark the lines for 0, 10, 20, and 30 degrees BTDC. 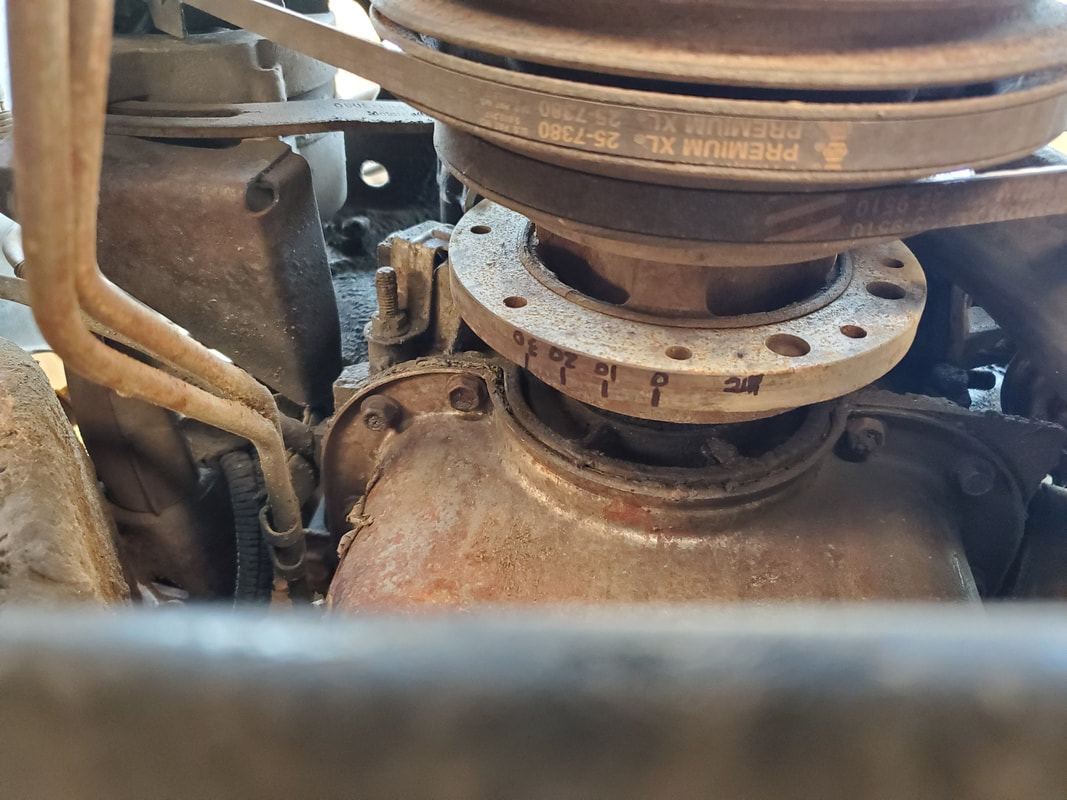
Timing marks on harmonic balancer, highlighted with permanent marker to make it more readable from a distance under the strobe light.
With the timing light in place and the markings highlighted, I went ahead to fire up the truck again. With the engine being nice and hot, I ended up having the hardest time getting the thing to crank. I ended up loosening the bolt for the distributor to try and move it to see if the slow cranking was because of the engine timing being too retarded. After some episodes of moving the dizzy back and forth, I got the thing to a point where it was apparently advanced enough that the thing was willing to crank at normal speed again. Once I got the engine started I went ahead and checked the timing, able to see the marks in the eye loop bracket on the front of the engine. I set the timing to 10 degrees BTDC. 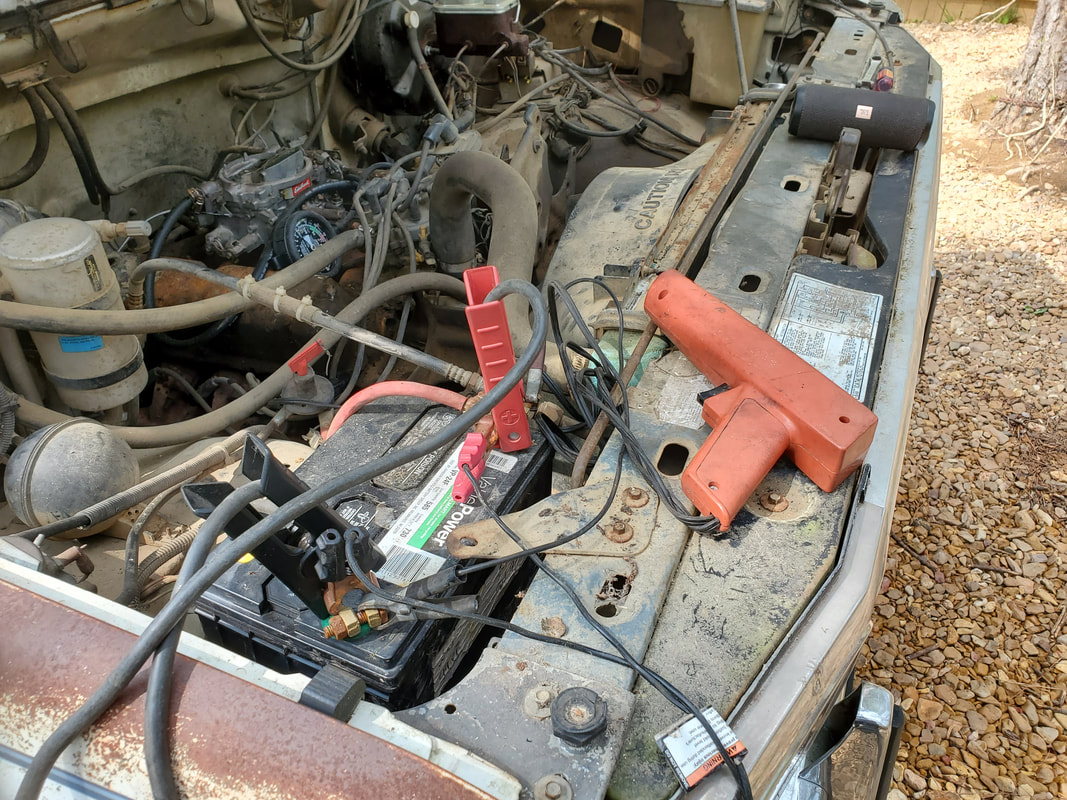
Inductive timing light used for checking the timing on the engine. Inductive head clamps to #1 cylinder's plug wire and power is supplied from the battery.
With the timing set I put the vacuum gauge on the vacuum port of the carb that feeds the vacuum advance on the distributor. After having upped the idle to keep the engine running before setting the timing. I had to lower the idle down to a reasonable level. With the timing set I was also able to open the choke all the way so I could have the engine in a state of normal operation while tweaking things. I was able to actually get the idle down to a reasonable point with the open choke and the timing set to a normal number. Unfortunately adjusting the fuel air screws on the carb had no effect on the vacuum reading. The timing and idle adjustments that were made had the vacuum reading within the green zone on the gauge for what constitutes normal engine operation. Tweaking the screws had no effect on the vacuum in the sense of making the vacuum reading go up or down, even when I closed the screws all the way, no effect. All this means is there may be another vacuum leak somewhere due to normal wear, whether in the carb or elsewhere like in the intake gaskets. Now, in the worst case as long as the timing is set right and everything else is straight, the minor roadblock of not being able to tweak the air/fuel screws may not be that big a deal since this only affects the efficiency of the idling engine. 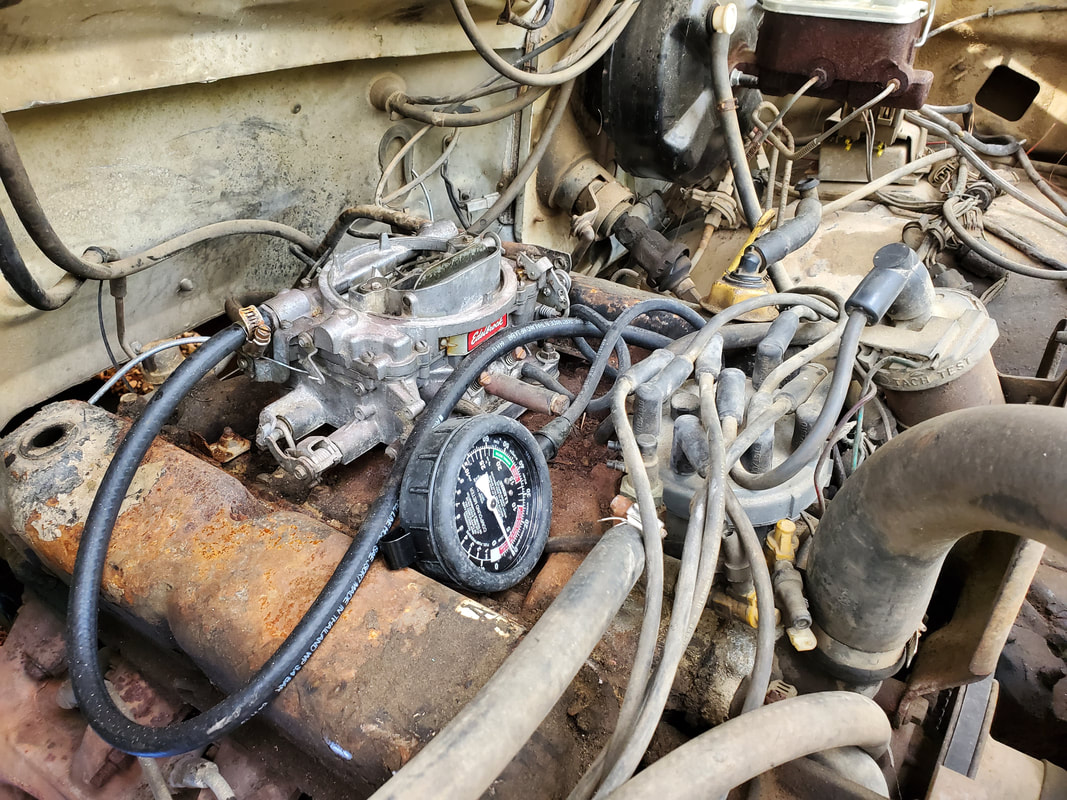
Vacuum gauge hooked up to carburetor.
When the engine was slow cranking I was about to remove the starter, thinking it was a hot starter and would need replacing, like the starter on the 94 F250. But after making the timing adjustments, it appears things are fine with the starter. I'll try to see if I can remedy the vacuum issue on the carburetor and gauge then I can get the tune on the carb taken care of. At least I can write off the timing though. I will still have to keep running fuel through the rear fuel tank, which its running on currently, so I can purge the old fuel completely in order to confirm that the tune is fine since its running on fresh gas. I may also go ahead and replace the plugs, wires and cap/rotor just to eliminate those components from the list of culprits contributing to a poor running engine.
0 Comments
Cleaning Out The 84 F150, Finally Getting A Tire For The Elco And A Long Time Garden Resident Dies4/18/2022 Heading back into the homestead, we got back to work with the myriad projects going on, especially now that the weather is staying at reasonable temperatures in the daytime. One of the things that I wanted to do, mainly as a feel good sort of task, was cleaning out the bed of the 84 F150. It's not like it will help anything regarding the drivability of the truck, I just couldn't stand to see the bed full of shit that will make working on the truck less fun. So with that, I took to cleaning out the bed, starting with the larger crap that could either be thrown on the burn pile or stacked by the outgoing trash for later disposal. 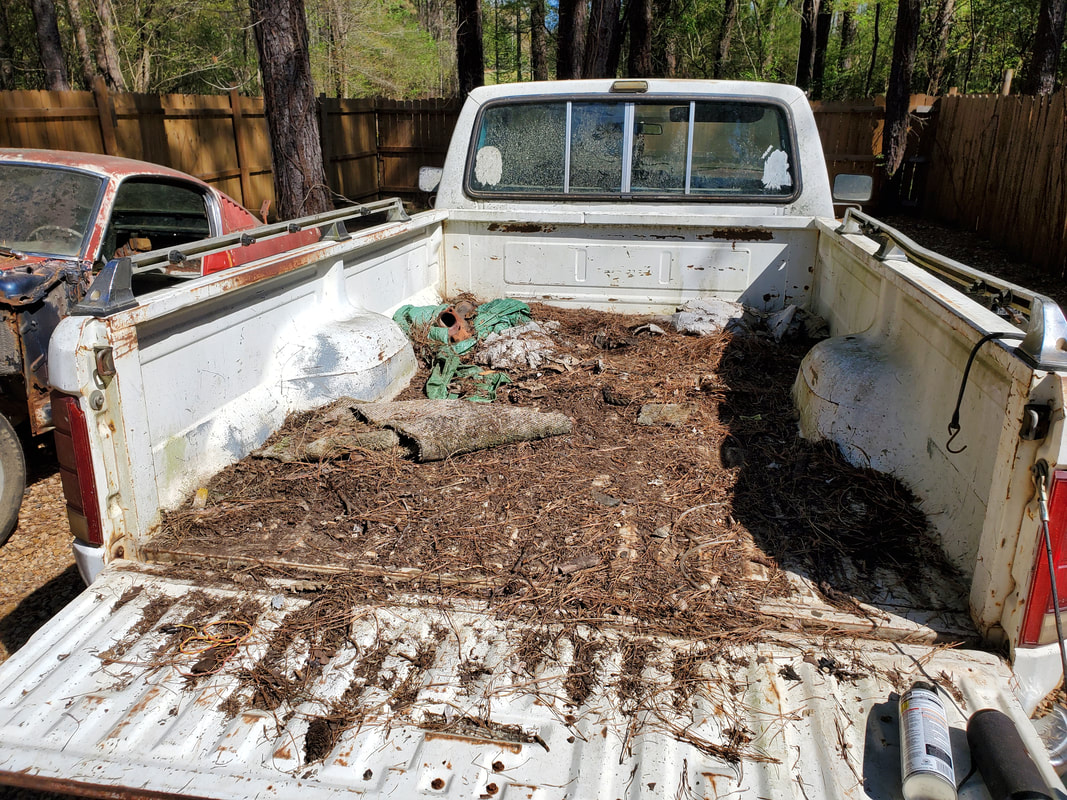 Different trash like old tarps and rotted cardboard, a broken yard statue a couple small bird houses and a glass panel that was broken into multiple pieces made up the larger trash that was disposed of first in the bed. The cardboard and tarps went on the burn pile and the statue went to the trash while the two little bird houses appeared to still be intact enough that I could probably give them away to someone who likes that sort of stuff, versus adding them to the landfills. The broken glass had to be carefully recovered from the pine mulch in the bed and the larger pieces carefully broken into smaller pieces while in the garbage sack so they wouldn't be as much a danger to me or anyone who may be handling the bag or can. With the larger stuff out, I brought the wheelbarrow over and raked out the pine mulch so I could transport it over to the burn pile where it was deposited for later disposal. With that, I hosed out the bed really good, having to use a broom to sweep out some of the more stubborn material and standing water in the bed. In the end I got the bed cleaned out to a degree that it was probably never cleaned at before. 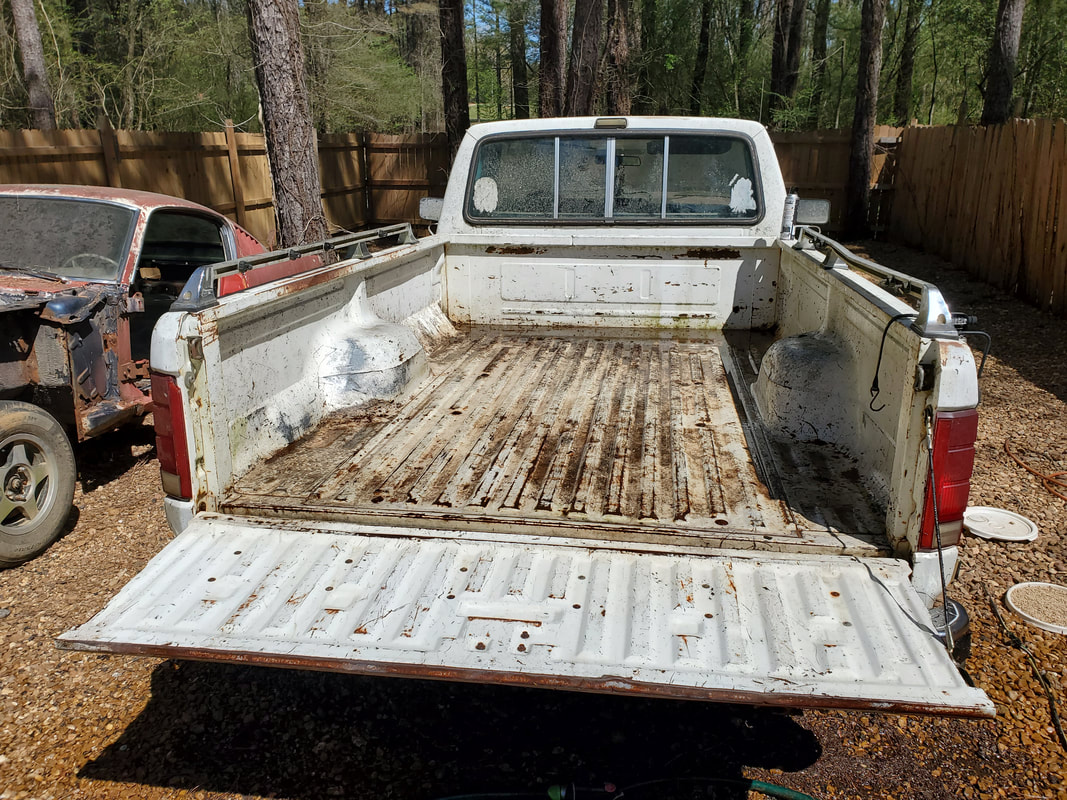 The truck's bed after hosing and sweeping everything out. Why go through all this effort for a truck that I plan on gutting the powertrain? Well if I hope to get top dollar for the body, the least I can do is make the truck presentable so when someone looks at it they'll see a decently clean beater truck versus something that looked like it sat in a field or junkyard for many years. In the right circumstances, it might prompt me to try and find a replacement powertrain that I can throw in the truck to resurrect it, maybe a 300 I-6 or even an old 302. In the meantime the 351 is still coming out. Later on in the day I took a little ride to the junkyard to find a couple things for some friends and family, and while there managed to scope out a used tire from their tire rack that was of a size that would make it a suitable replacement for the flat rear tire on the Elco. I had to grab this tire as it would put the Elco in a different light, having it on four inflated tires is symbolic as well as utilitarian due to the ability to more easily move the car when need be without worrying about inflating the tire and of course when the time does come to put this thing in gear for the first time, at least it will be able to roll freely. So now, with my new used tire in hand, I have to use our manual tire changer to remove the old bad tire from the rim, replace the valve stem and install the new tire so I can reinstall the rim on the Elco and have the car ride high on four tires for the first time since I had the car. 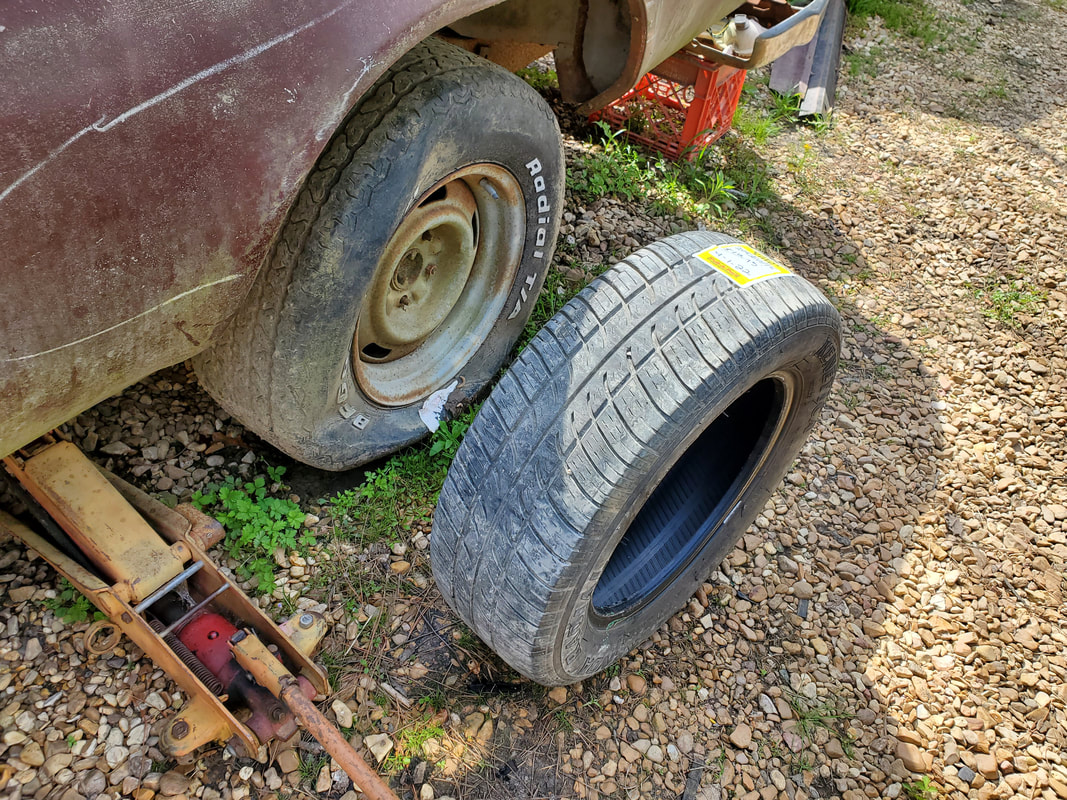 The new used junkyard tire next to the Elco's tire, its slightly smaller than the old tire but will work fine as we don't want too big a tire on the car anyway, especially for right now before we can get the suspension ironed out. On a side note, I have to announce a passing. One of our garden's long time residents, our persimmon tree, has died. Even though this tree never produced any fruit due to the fact we didn't have a pollinator, or maybe it was the pollinator and we didn't have a female tree, this tree did not come back this spring and from top to bottom, is nothing but dead firewood. Now we will have to cut this huge tree down, little by little, in order to safely bring it down without damaging anything within the garden, tree or otherwise. The smaller branches will of course end up on the burn pile while the trunk will most likely be cut into smaller chunks and staged with the other firewood on the pallets in the firewood staging area for later use. The old dead persimmon tree, towering over all the other trees and structures in the garden. This tree was around for over 10 years. I will still have to cut the stump down to the ground or lower and remove the tire that was used as a bed to contain the dirt the tree grew in. Rather than try to extract the whole root base, I will probably locate a large planter that I will use to grow another fruit tree in and place it here, this way that will be one less tree that's in the ground. This will allow me to move the tree at will versus having it as a permanent fixture in the garden. Just like the raised beds, if ever a time comes where we may decide to relocate, we can at least take these planters and beds with us to our new location. Even the dog kennel greenhouse can be partially disassembled and relocated if need be. But until then, we have some more landscaping to do now. For the ole lady's birthday today we visited a local spot only a short distance from our place, the McClain Resort. It's not a resort in the traditional sense, it's more like an animal preserve/zoo and includes a restaurant, mercantile store and plenty of exotic animals to see, up close and personal. They have a petting zoo where you can feed the smaller animals and a drive through safari that involves driving through a large acreage where many different animals reside. You can either use your own vehicle or rent a jeep from them for an hour to ride through the preserve. Also you get animal feed to feed to the animals, which will walk up to your vehicle to eat, with blatant disregard I might add, lol. 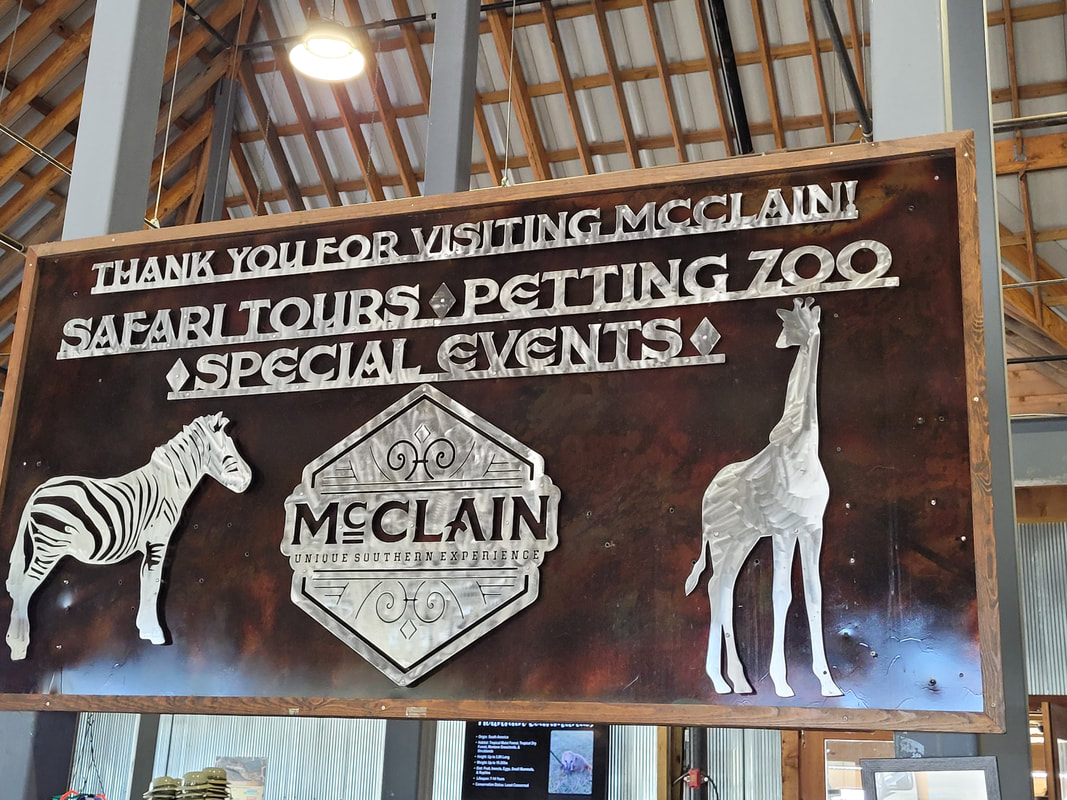 The placard over the check in counter. Upon checking in, we got to see a number of animals that were kept in pens in the climate controlled environment of the welcome center. There were caimans and turtles in aquariums, a baby kangaroo, lemurs and an animal called a coatimundi, which the exotic cousin to the raccoon. One of the workers had a smaller coatimundi that he was handling and allowing to crawl onto one's shoulders for photo ops, if they so desired. 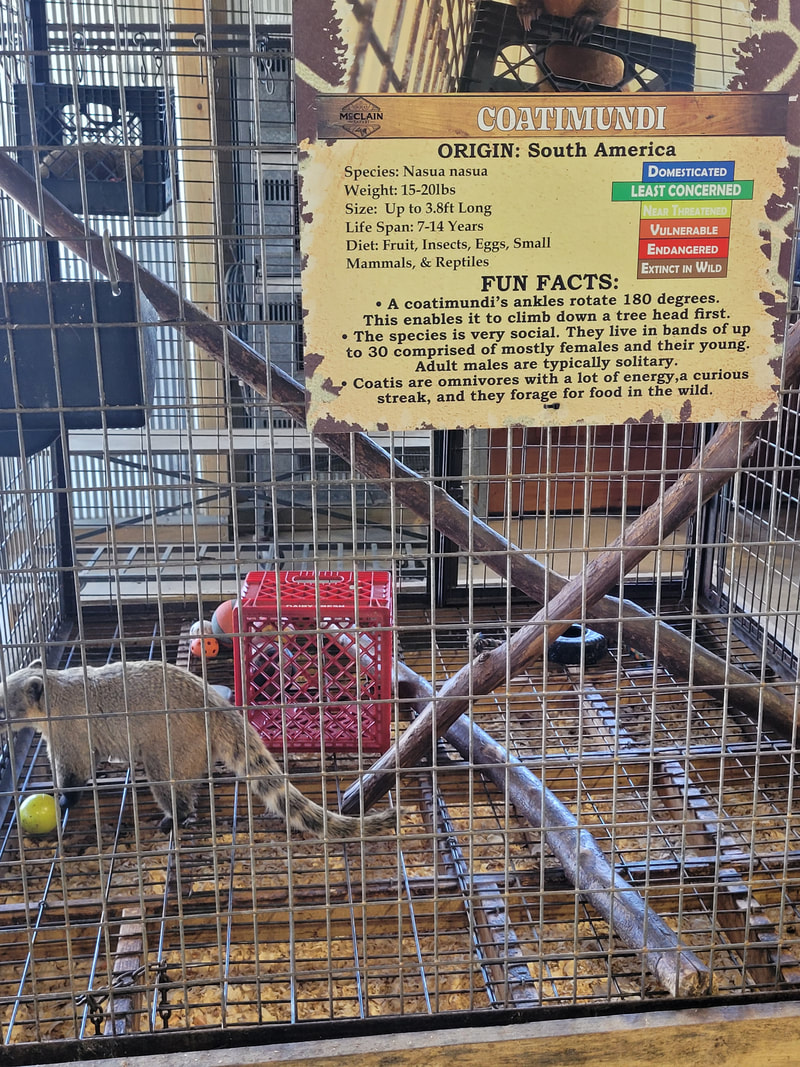 The coatimundi, the exotic cousin to the raccoon.  The baby roo kept inside. 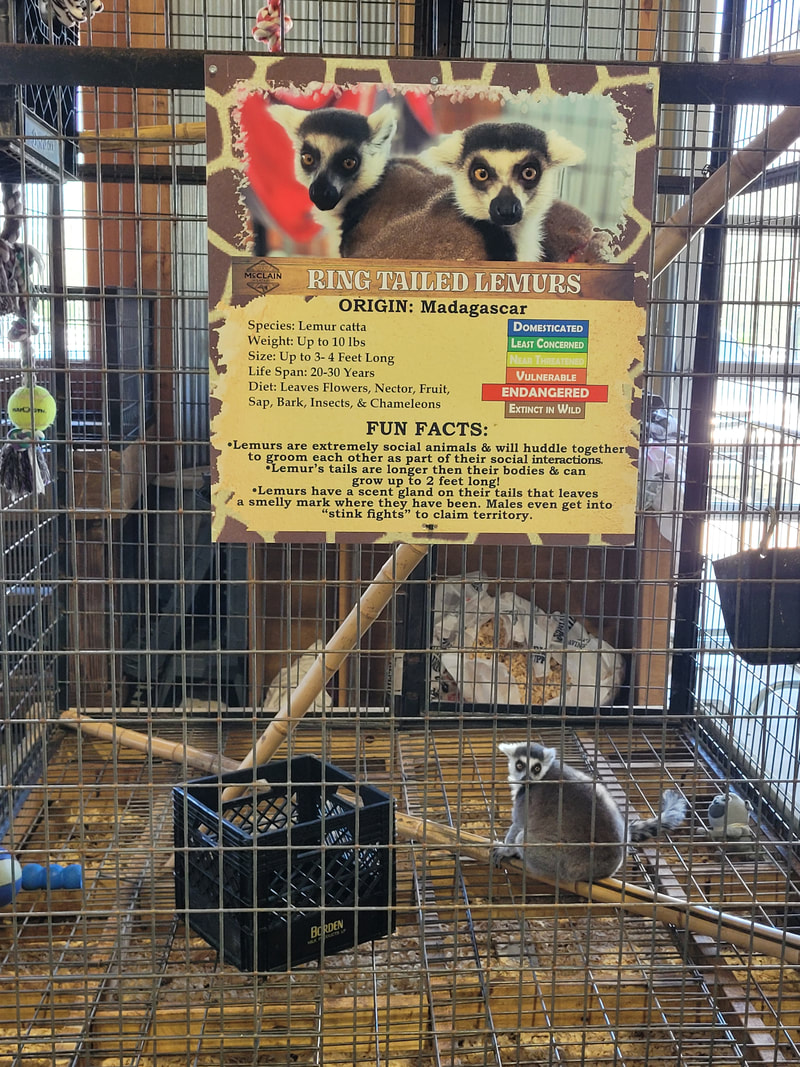 Ring Tailed Lemurs, interesting little fellows. 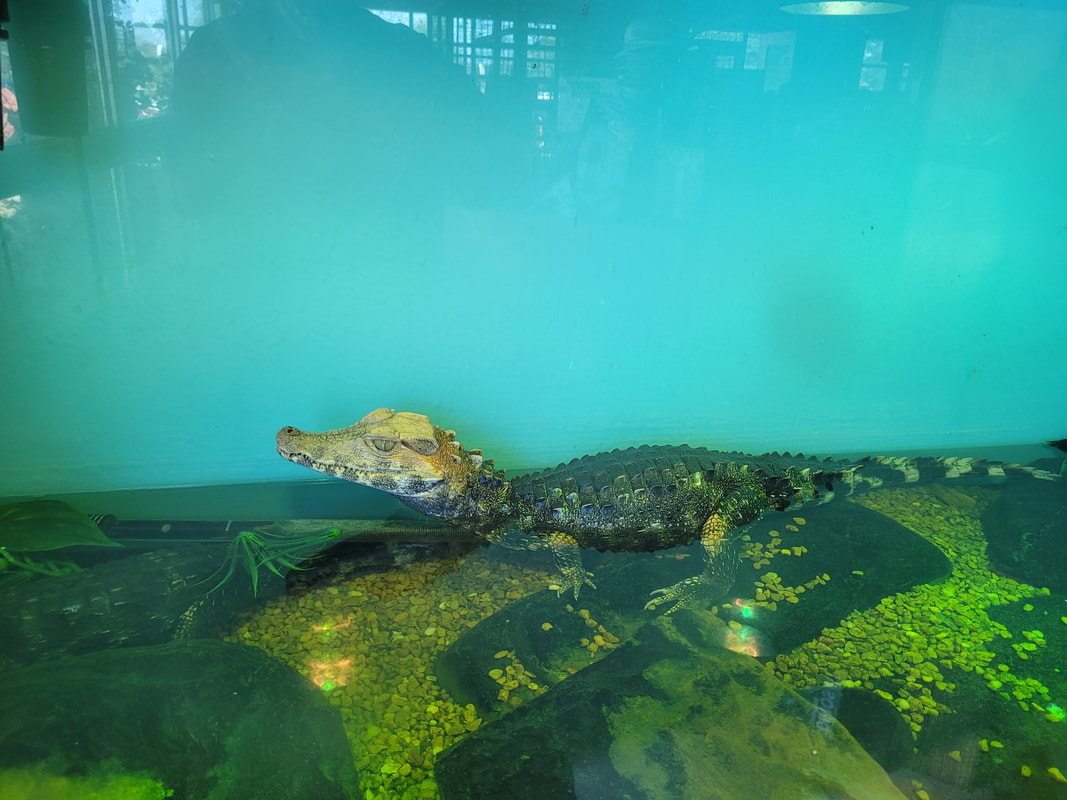 One of the caimans chilling in its aquarium, not a care in the world. 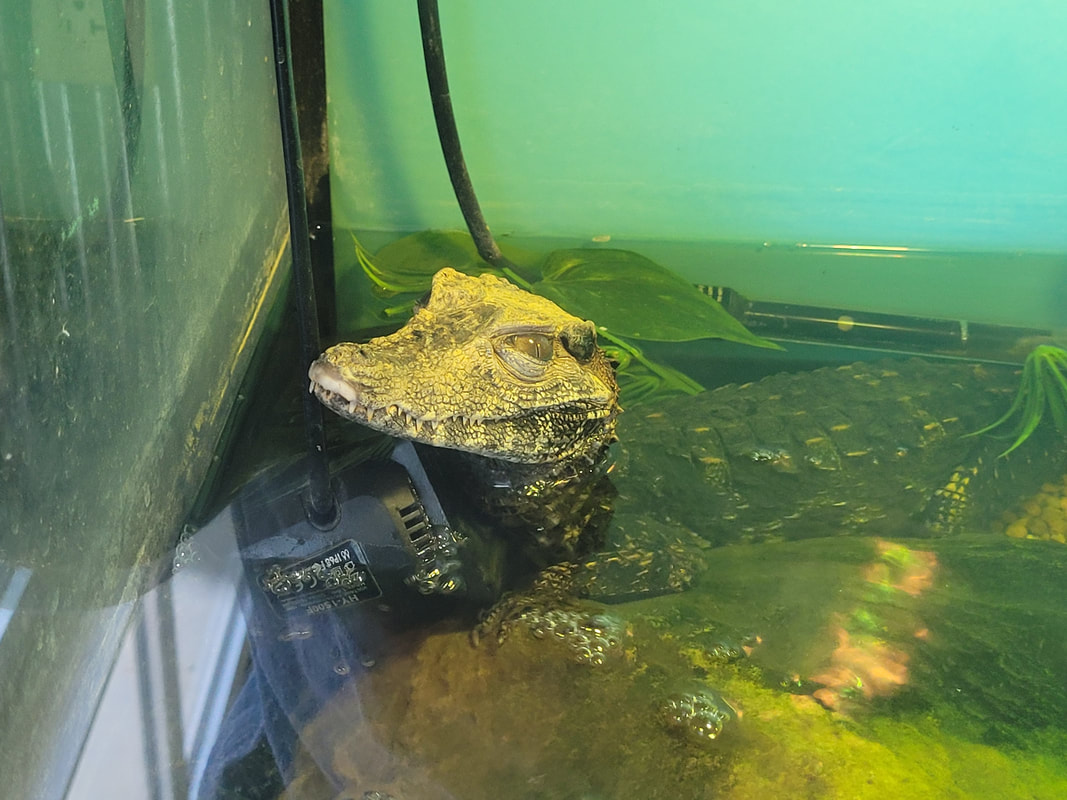 This caiman probably likes the vibration of the filter pump. 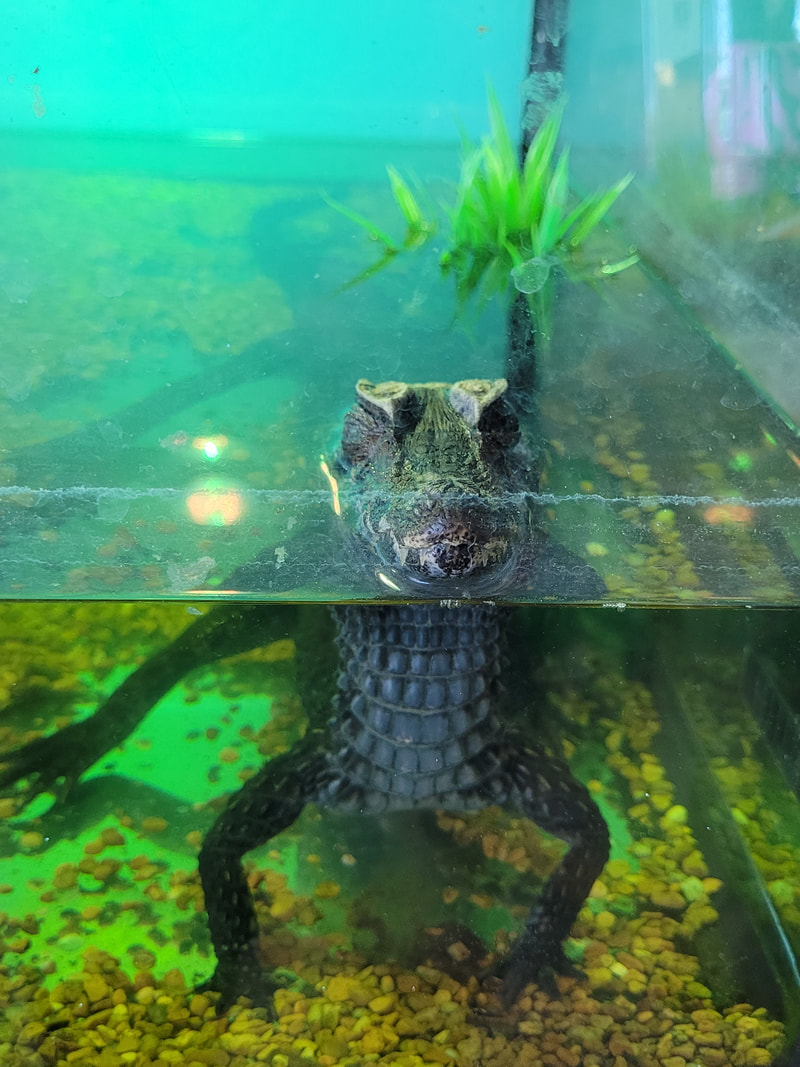 Another chillin caiman in a pose. The first thing we did was visit the petting zoo, which started off with walking by a large array of cages full of different rabbits. Most of these rabbits appeared to have been well fed, by everybody who came to look at them and toss in a carrot from the bags they bought when they checked in, including yours truly. Most of these rabbits were so well fed they didn't even eat all the carrots that were tossed to them. 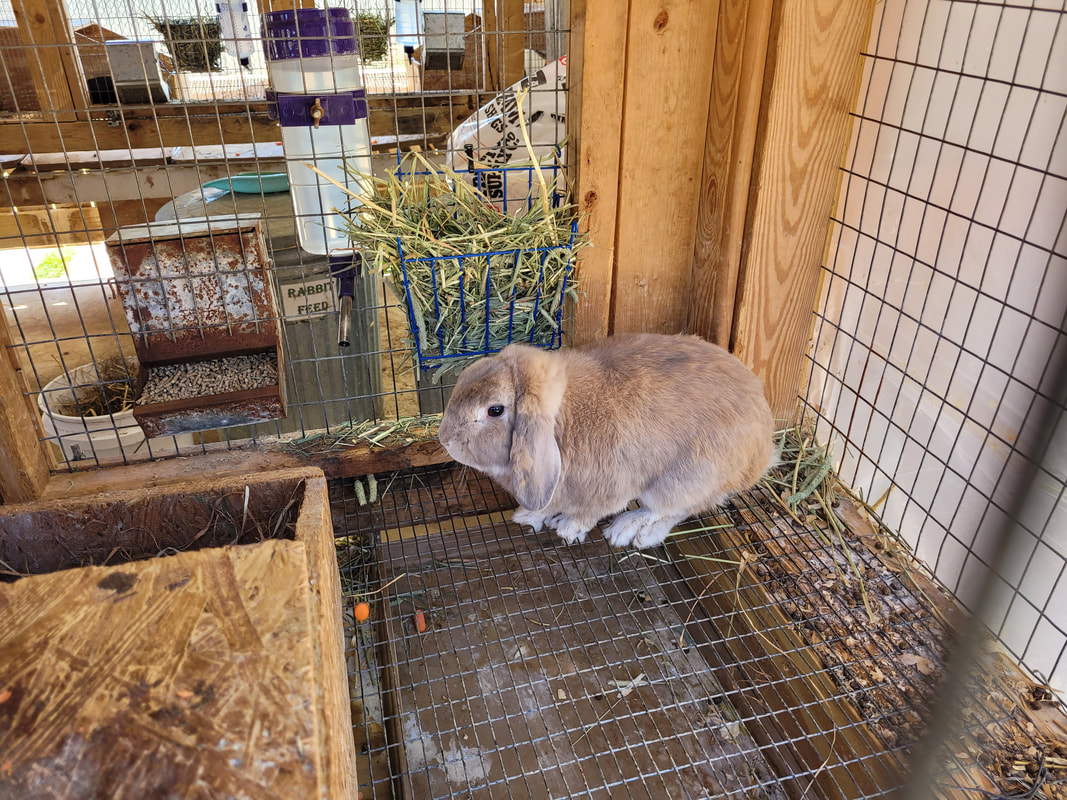 This plump bunny was chillin in the corner of its cage. 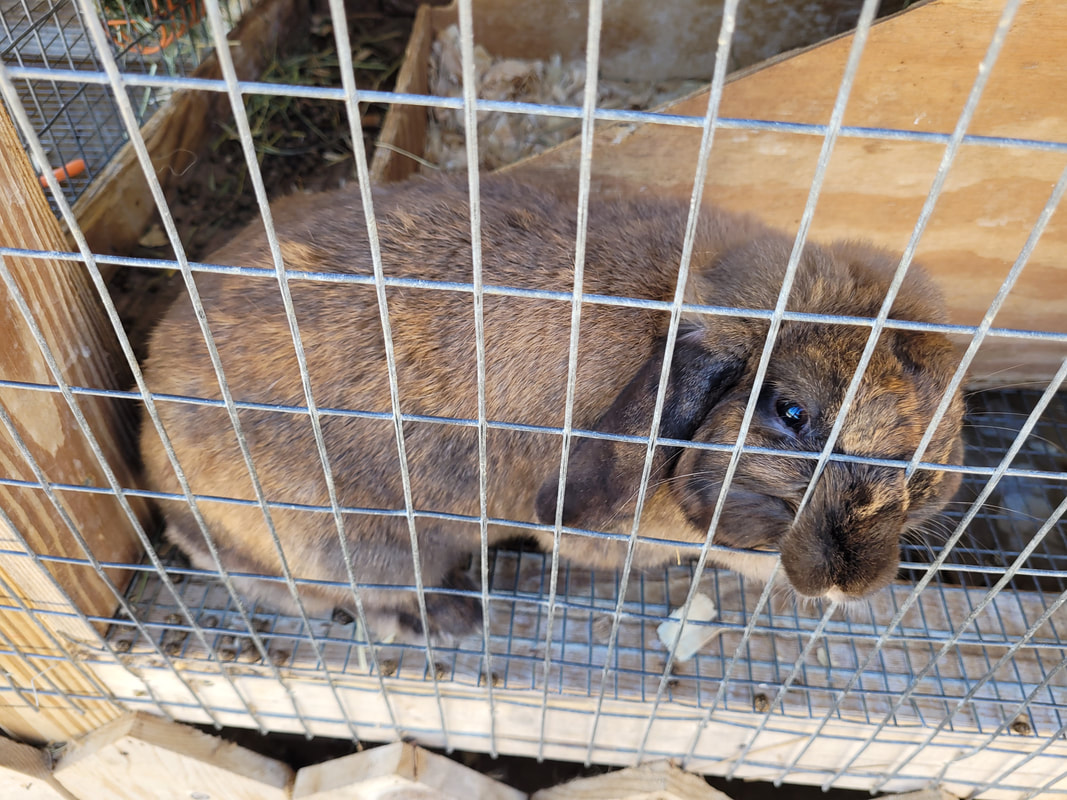 This bunny was sticking its nose out in search of some food. 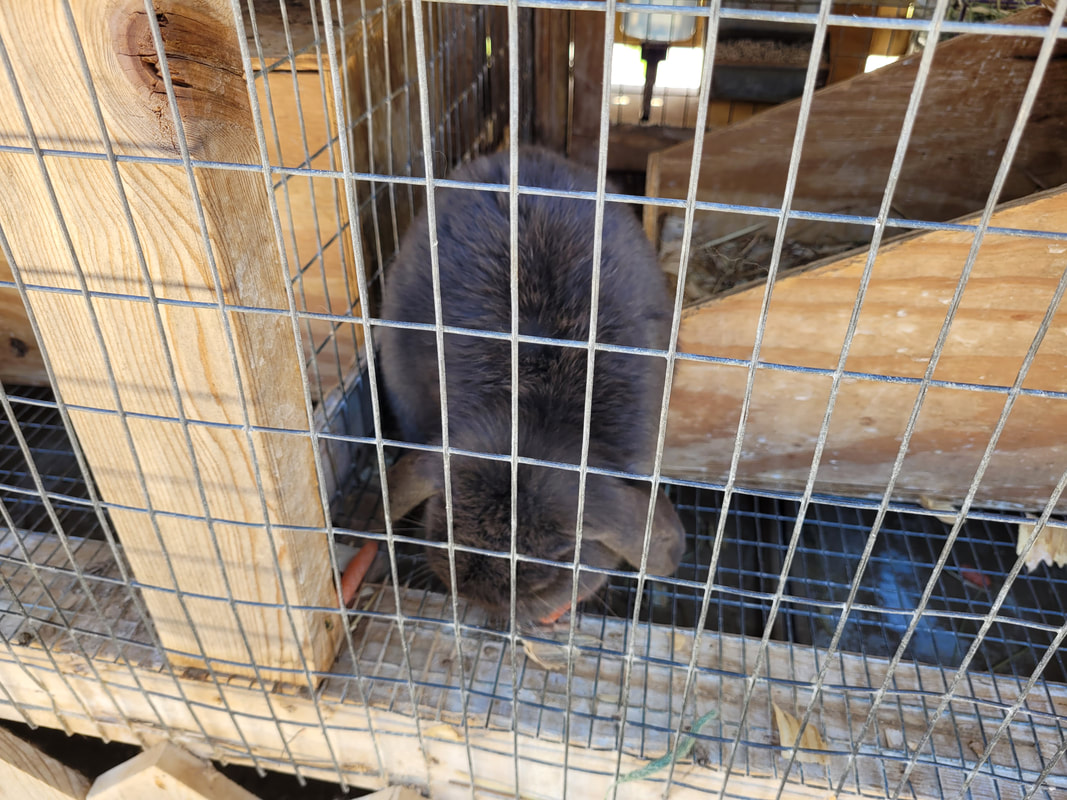 This rabbit was busy chewing on one of the carrots laying in its cage that had already been tossed in. 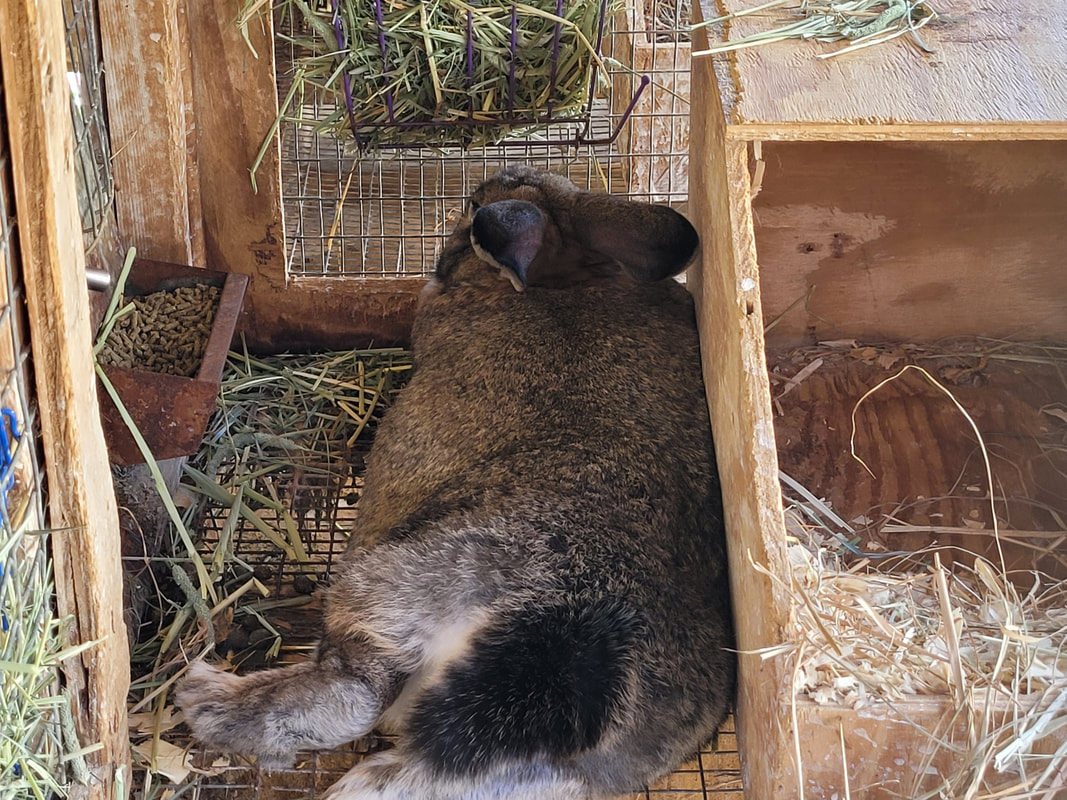 Looks like this rabbit is suffering from a food coma... 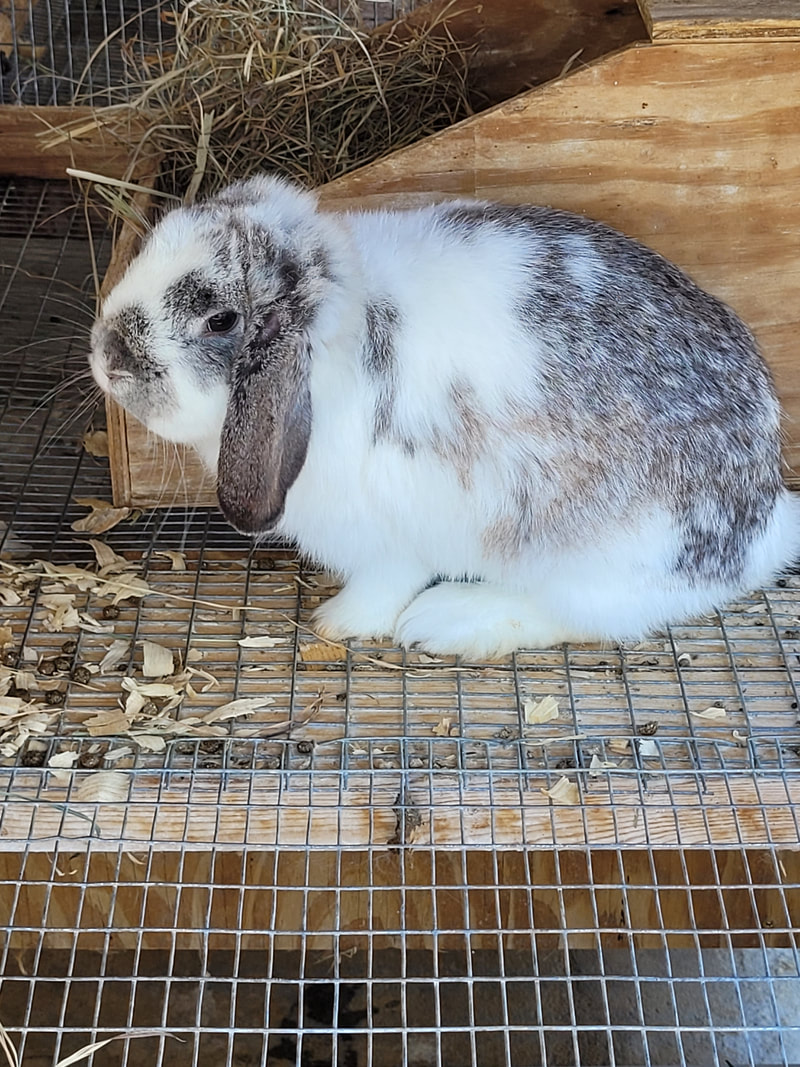 This bunny sat still long enough for this pose. Moving along through the outdoor area, we saw some otters sitting on top of a rock arrangement that had water coming out as an artificial waterfall setup, along with random ducks and other birds that were free ranging around the pond that served as an overflow for the otter tanks. Moving along we got to the regular animals who decimated our carrots and cups of feed. These animals consisted of goats, donkeys a zebra, and some sheep. All of these guys were eager to come up to us, knowing they would be well fed. 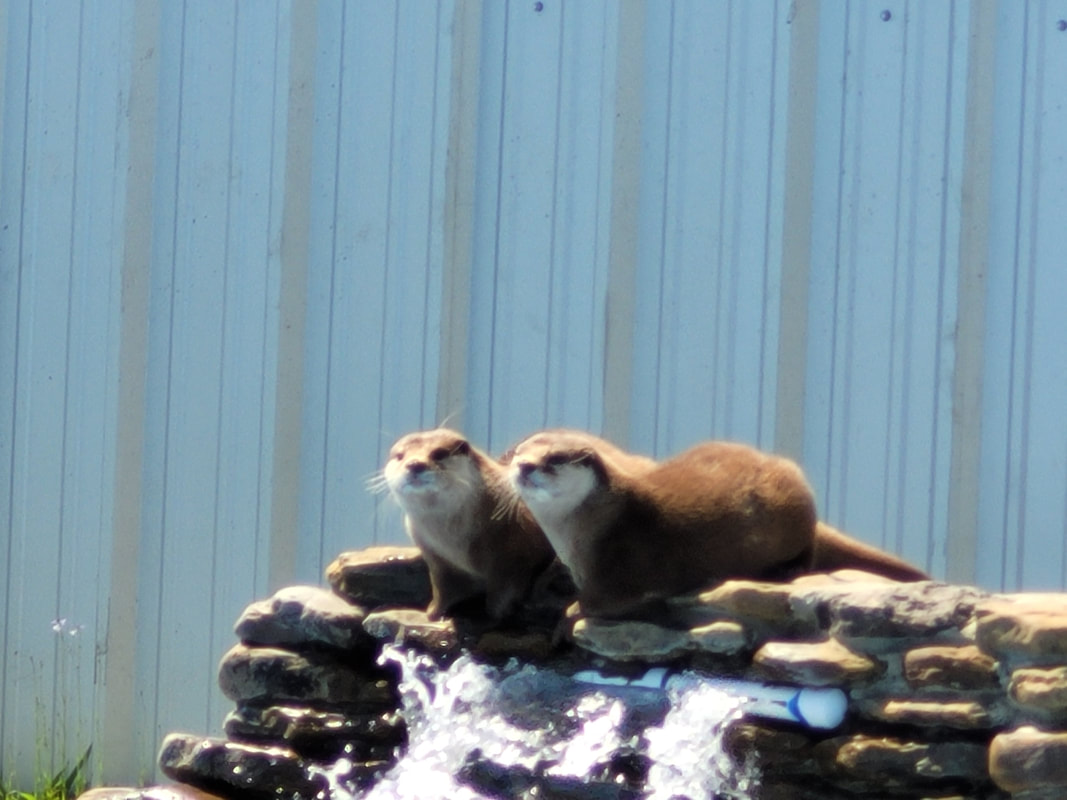 Pair of otters relaxing on a rock structure that has a PVC pipe within to simulate a waterfall. 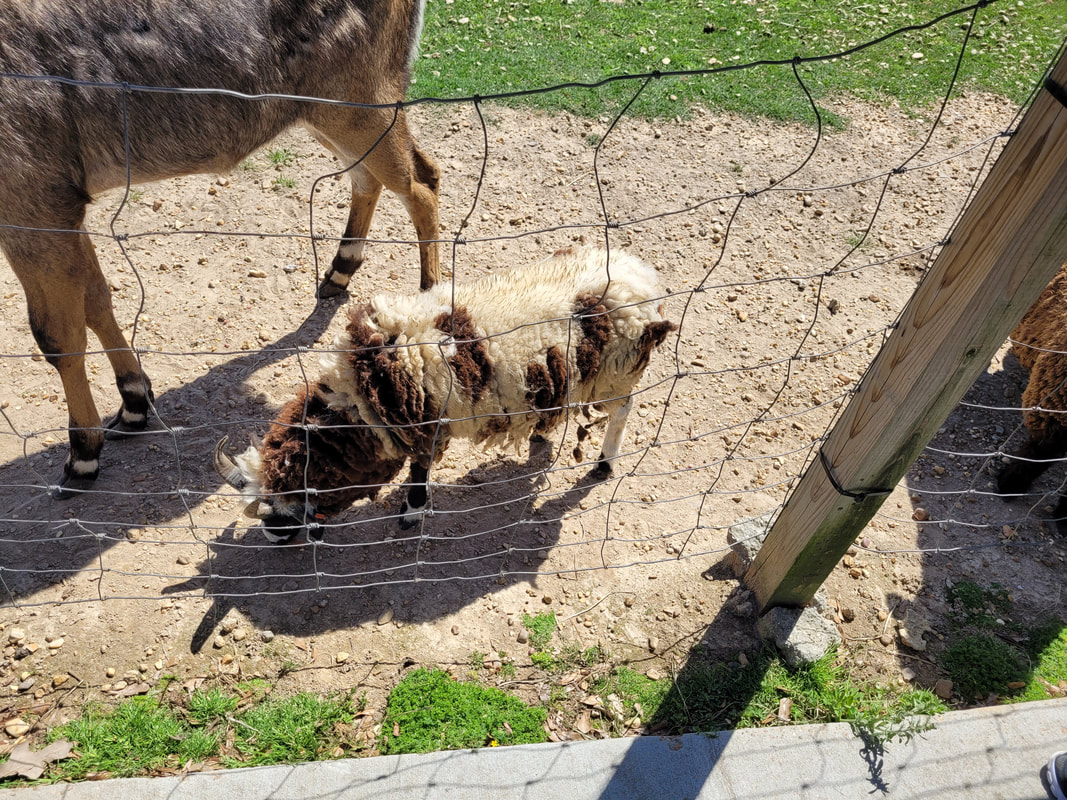 This wooly goat enjoying a carrot tossed to them.  An expectant sheep waiting for me to throw some food down. 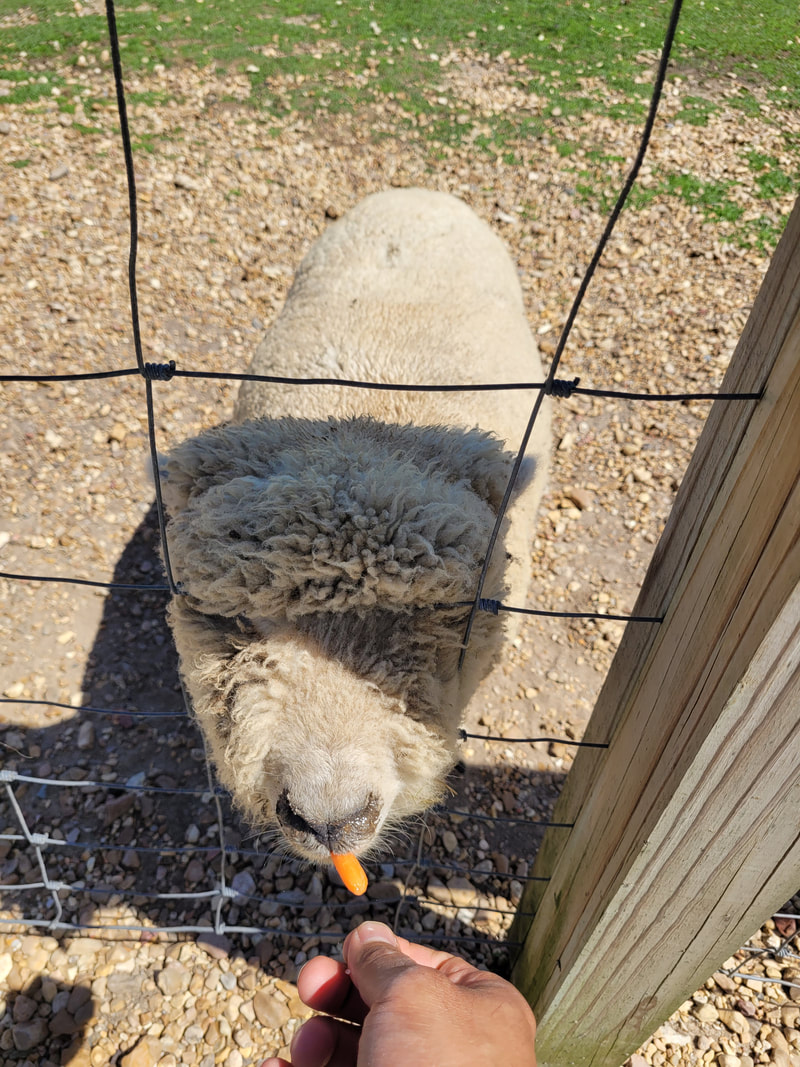 This eager sheep took a carrot from my hand. 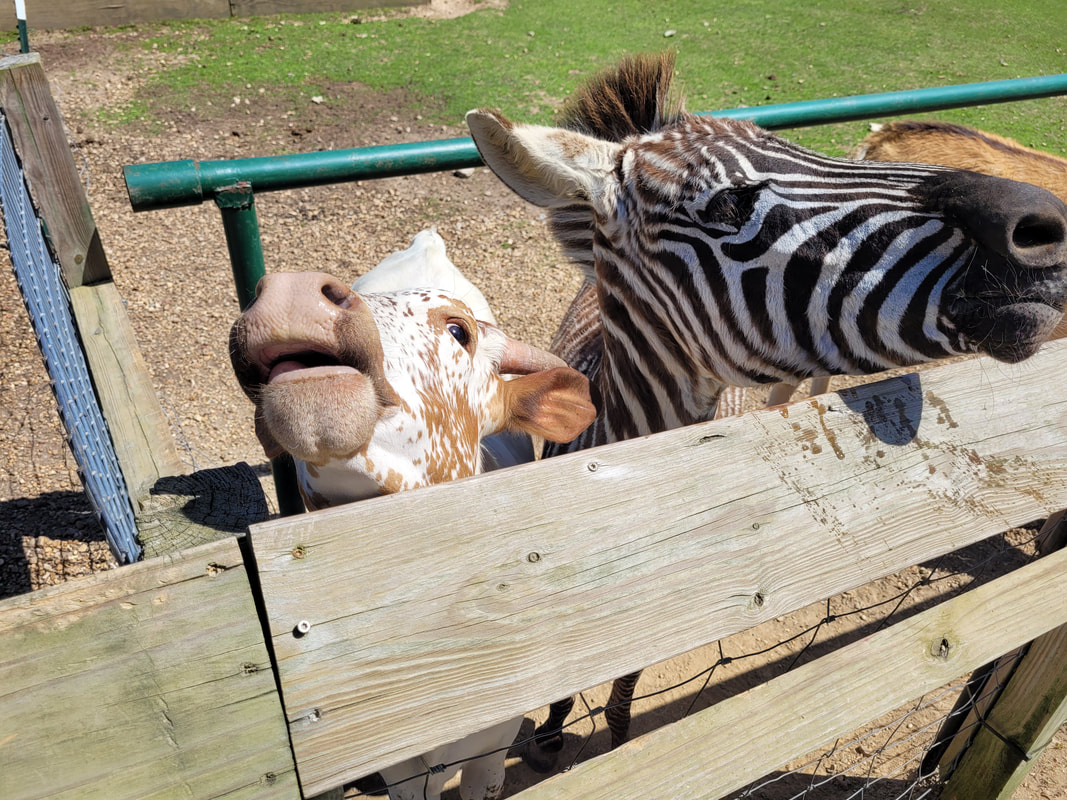 This enthusiastic little cow pushing past the zebra for his share of spoils. 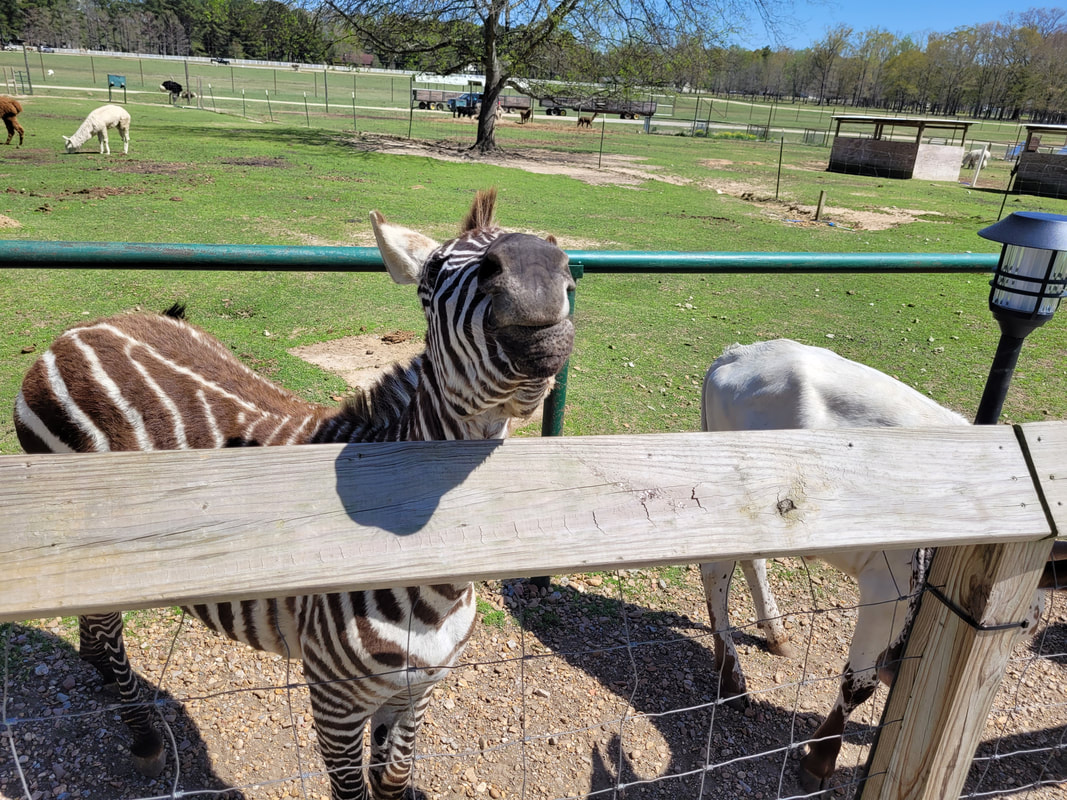 This zebra was rather comical, appearing to be trailed to hold its mouth open long enough to allow you to place a carrot within before closing its mouth so as to not pose a threat to your fingers. This guy was pretty cool. 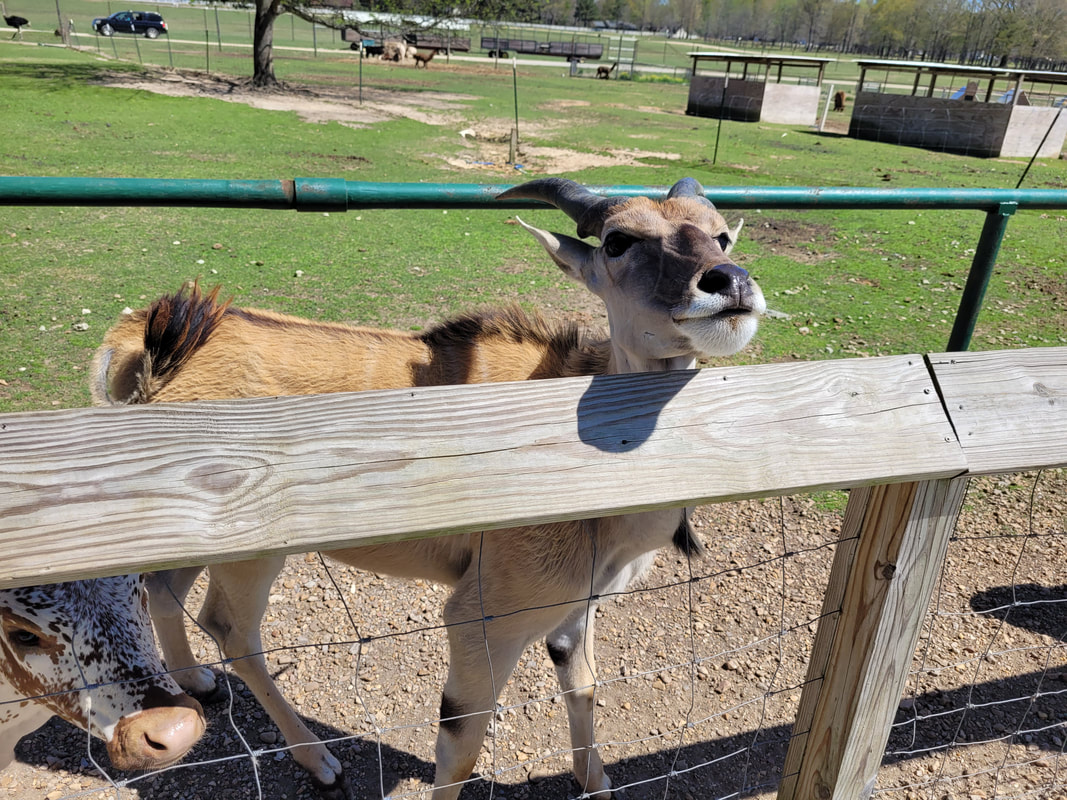 This goat posing for a picture, expecting something in return. 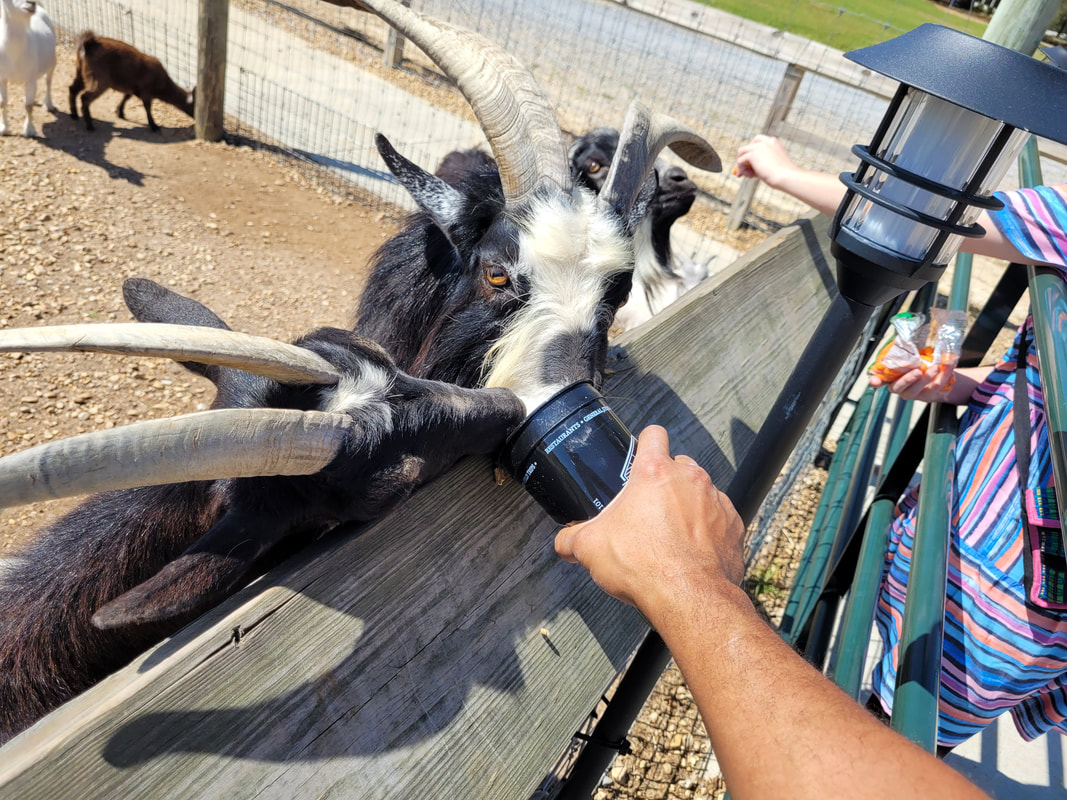 These hungry, hungry goats slurping down animal feed from my cup. 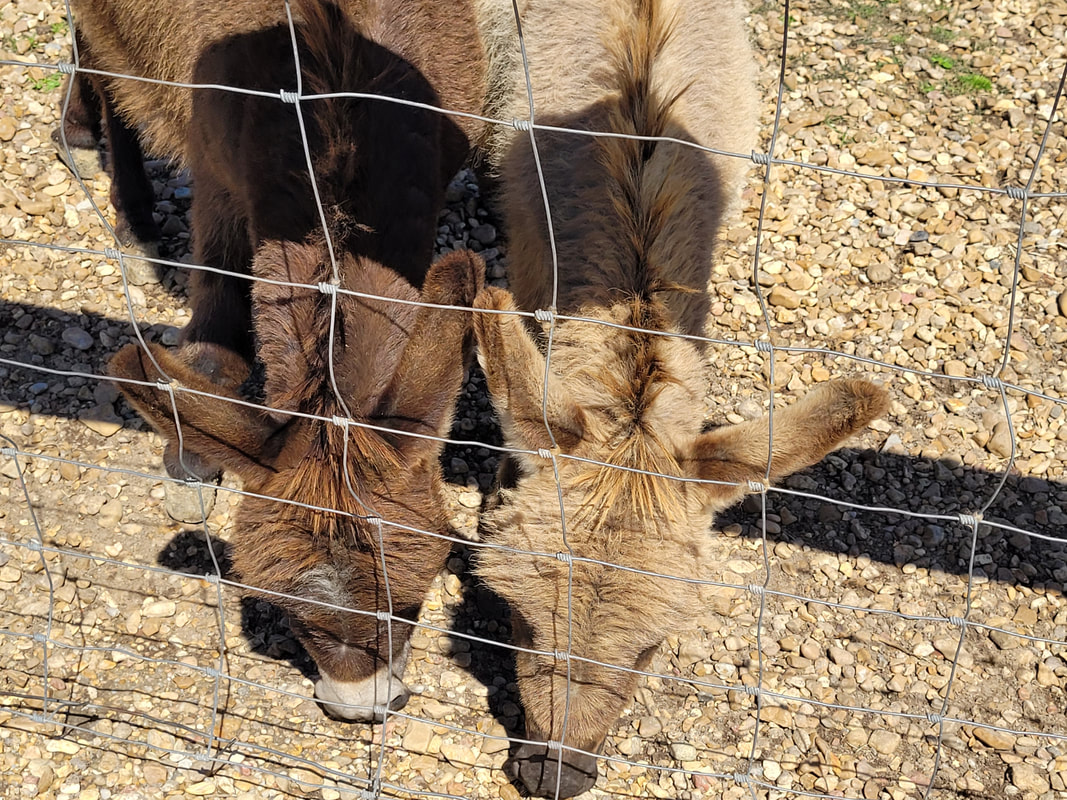 These two little donkeys enjoying more of our animal feed. 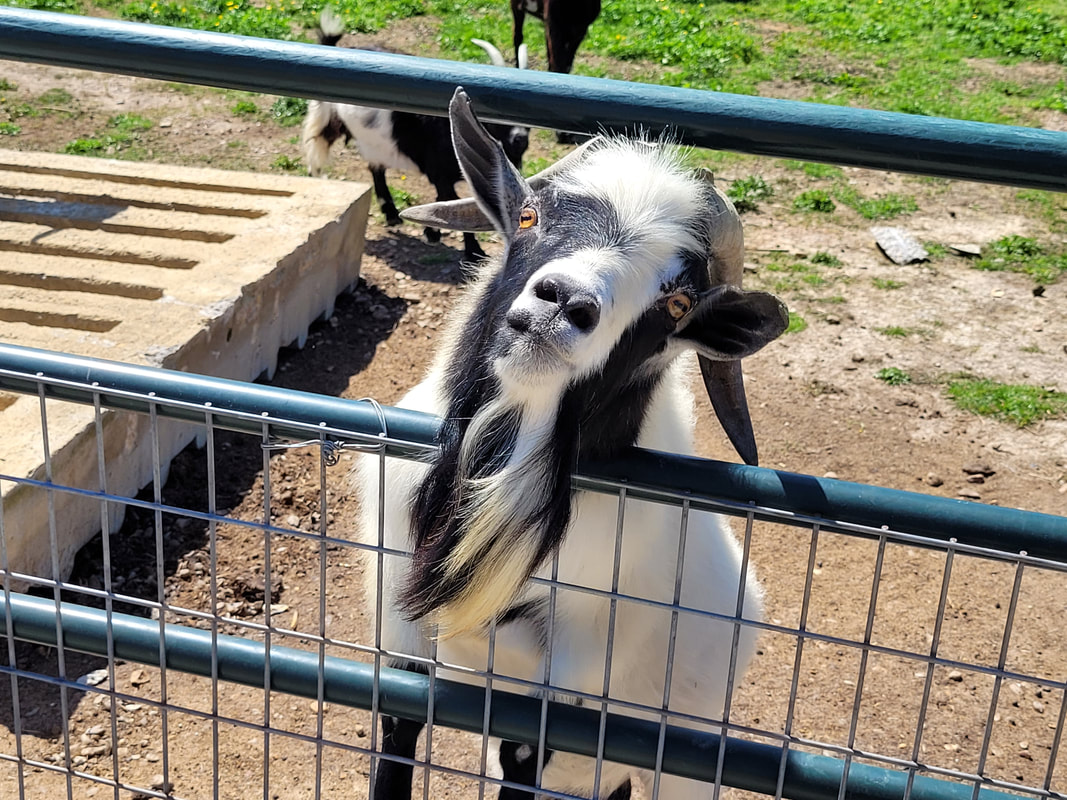 Another photogenic food driven goat. 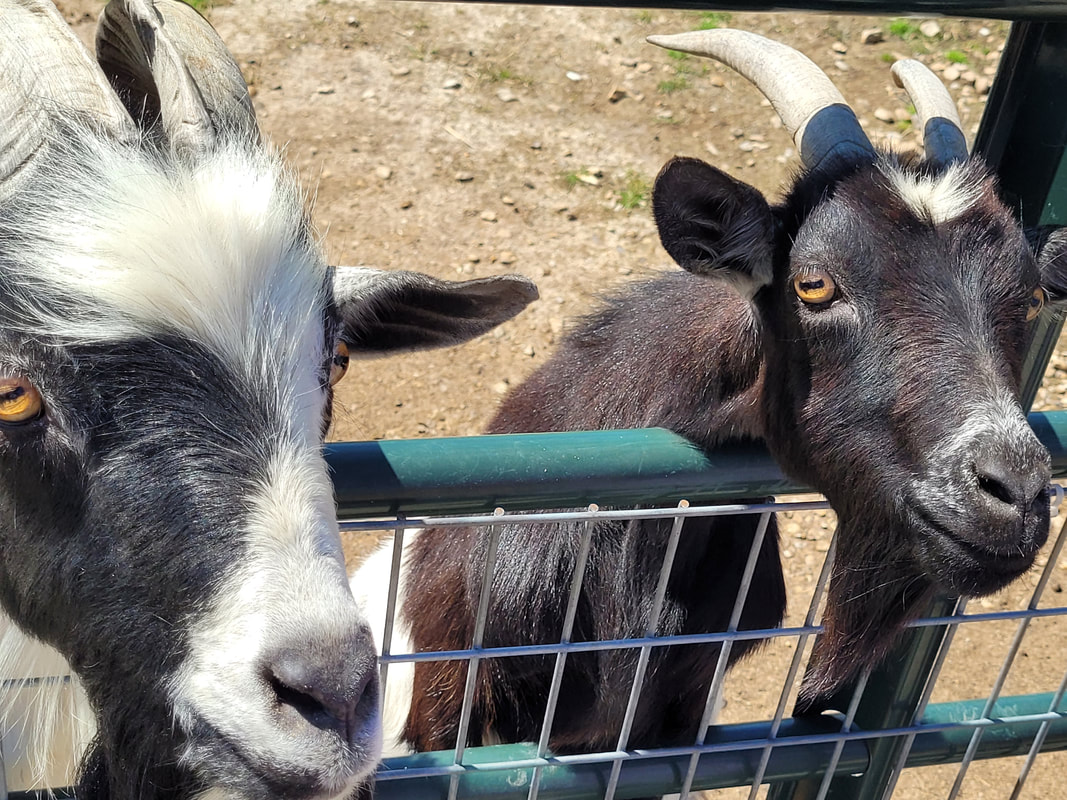 Brother goat and his partner posing for a picture. 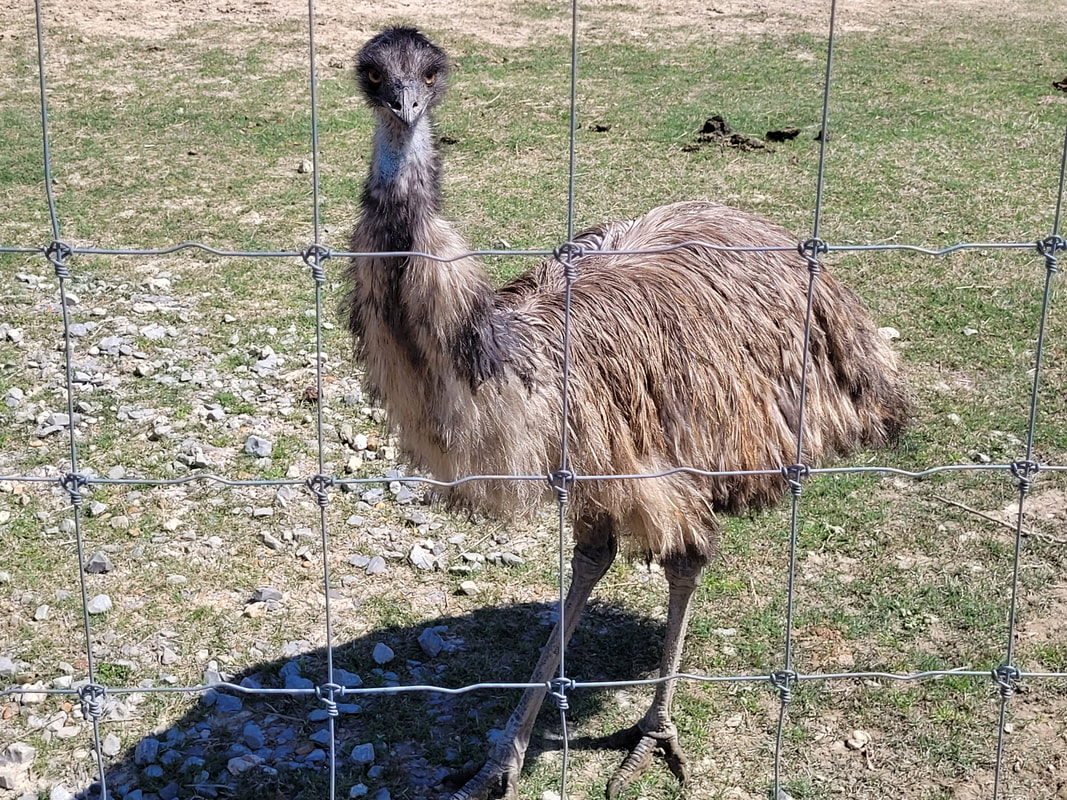 This emu stopped long enough to get this good shot of them. We saved the best for last, the drive through safari. We didn't want to wait for the next available rental jeep so we took our chances using our own vehicle. Of course the facility has you sign a waiver so if your vehicle gets damaged by an overzealous animal they won't be held responsible. We took our chances. With our large cups of animal feed in hand we made our way in. Of course other cars were ahead of us and the occupants would be feeding animals as well so progress through the field would be somewhat slow. This would prove to be sorta unnerving as some of the residents were of the size and type that appear to be somewhat dangerous for the integrity of a modern plastic clad vehicle. 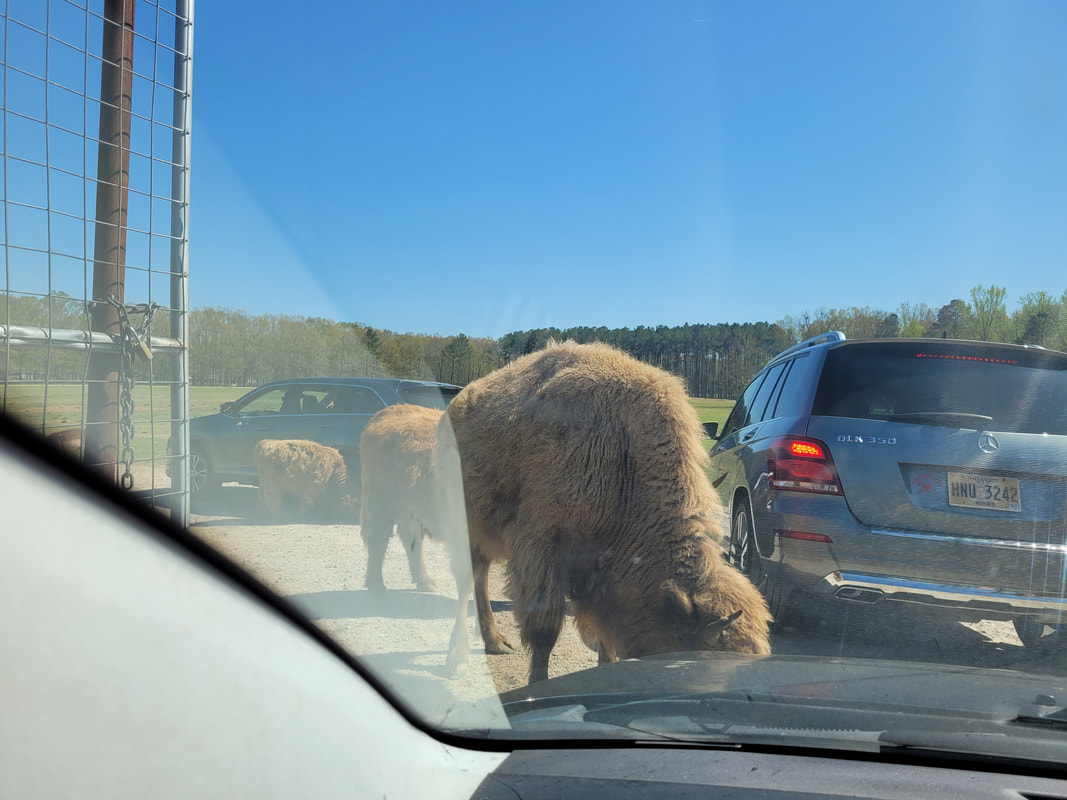 Slowly making our way into the field behind other vehicles, with these large fellows guarding the gate, waiting for the guests to pay the toll. 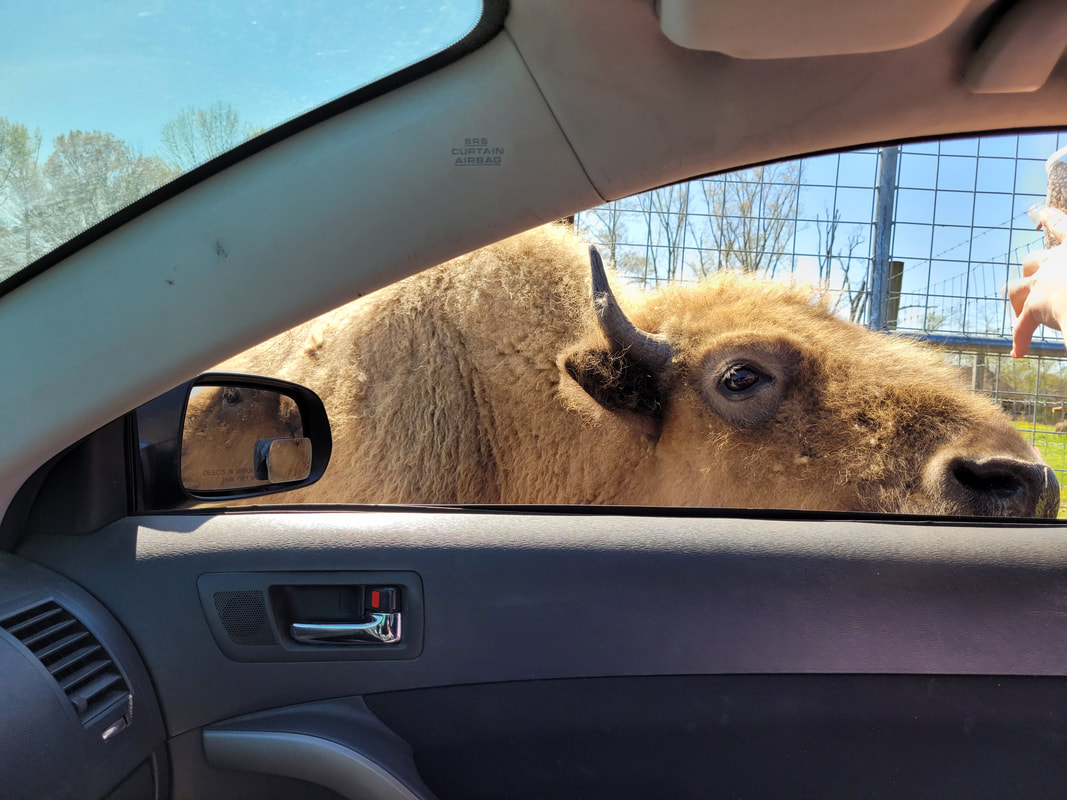 And so it begins, pay up! 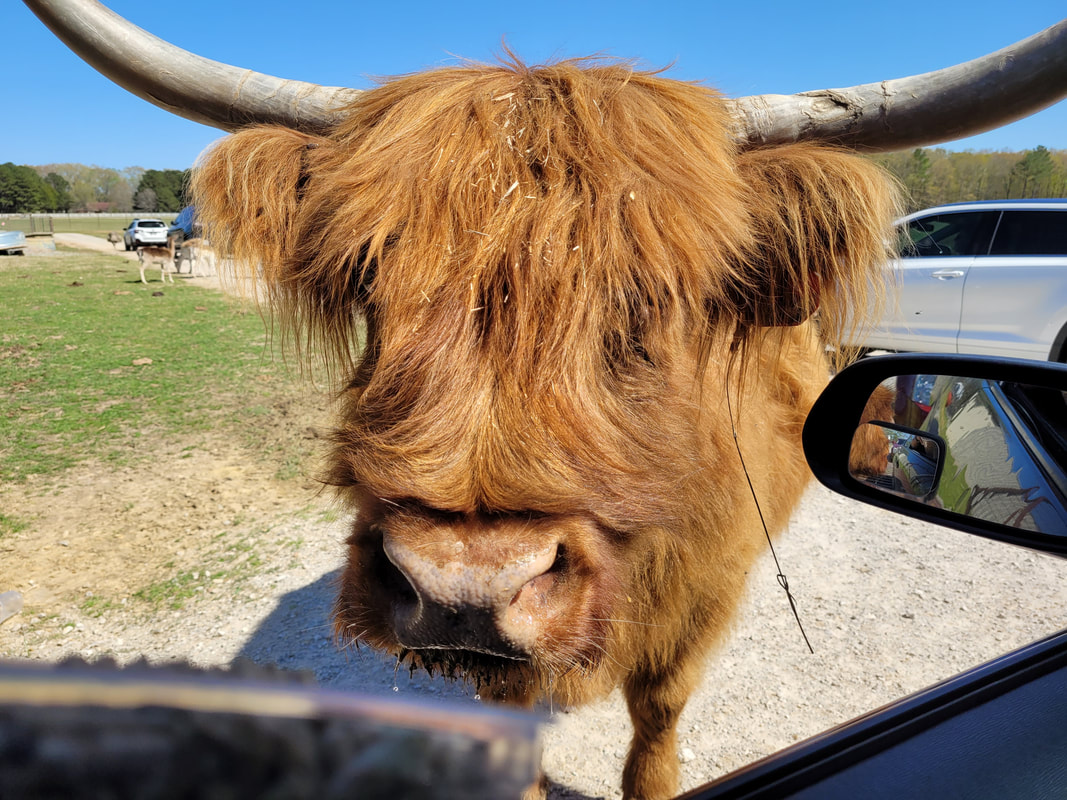 This shaggy fellow with those menacing horns looks like he wants to say "fuck yo' car!" 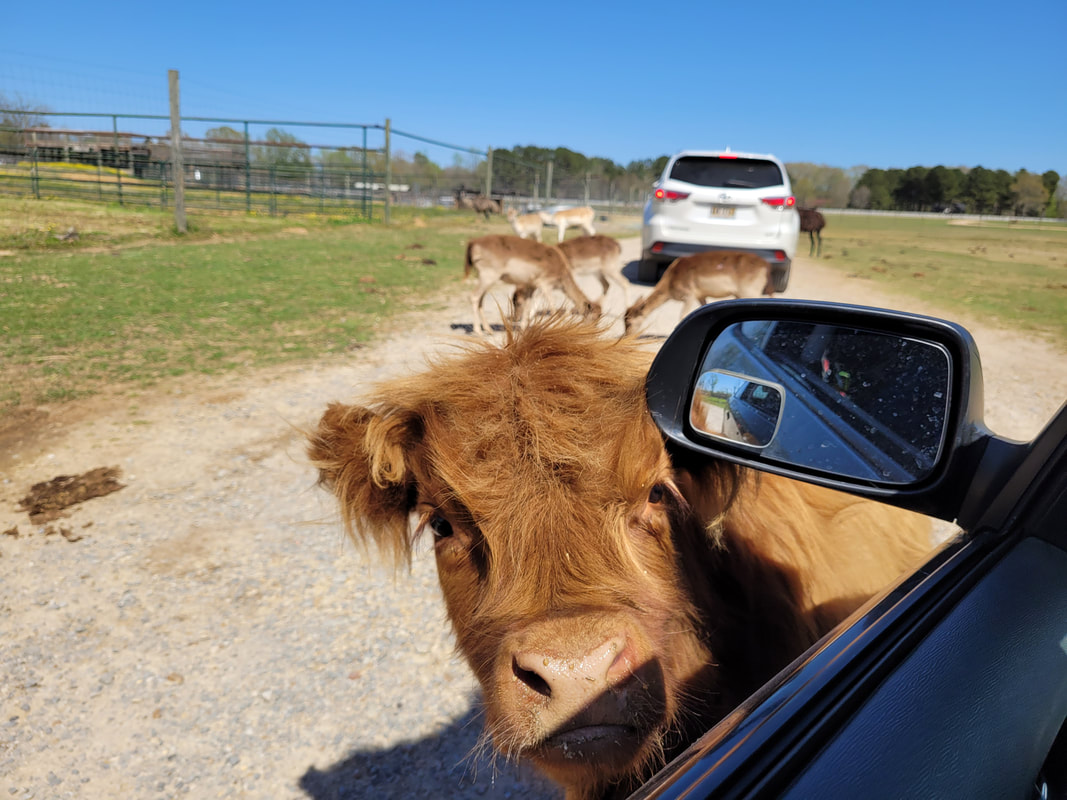 This little guy came up looking for his handout as well. Some of the bovine occupants were rather large and their horns rather menacing, making us nervous for the car as their movements would have us cringe due to how dangerously close they came to the mirrors or the glass. But so far it appeared that they knew what they were doing, not moving around with sudden movements that could result in damage. When we did let them eat from the feed cups, they were rather messy, drooling and tonguing the cups, making a horrendous mess. Where they were not a threat to car damage because of their horns, they were a threat to the cleanliness of our vehicle's interior because of their "animalistic" eating habits. Now the ostriches, these guys appeared to have a definite "I don't give a shit" attitude... 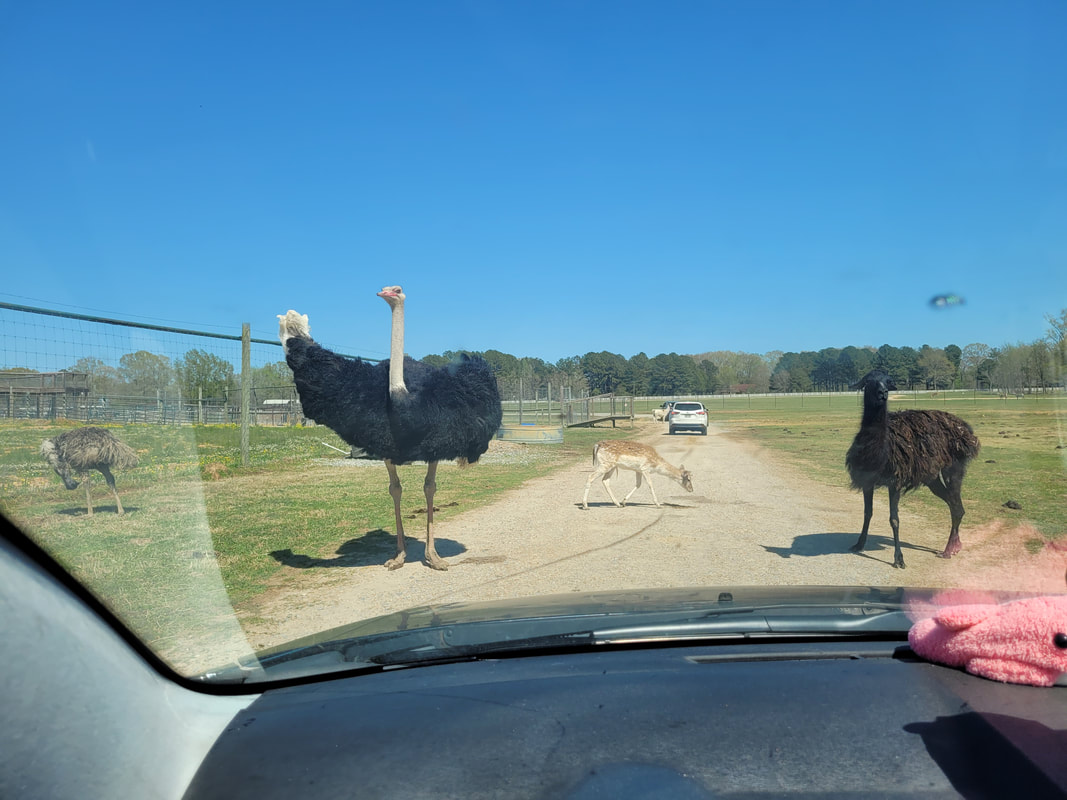 These guys stage themselves in a way where they're like checkpoint guards, telling you to stop here. 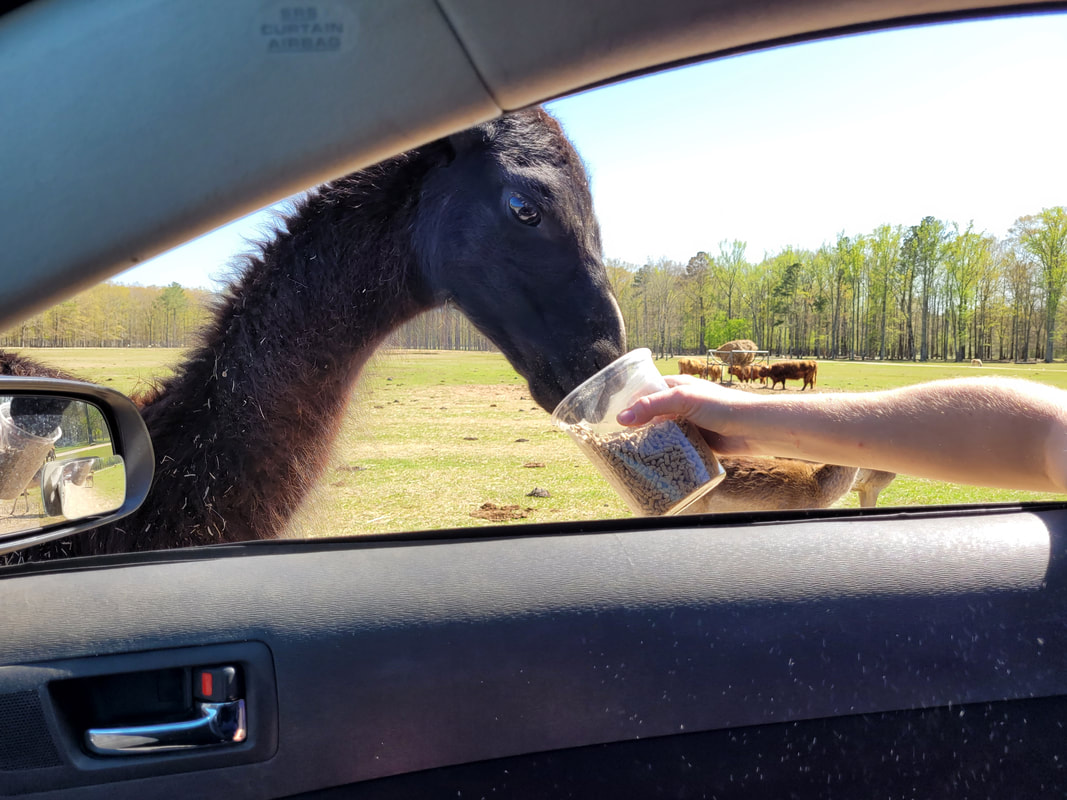 This fellow was at least a little cultured in its eating style. 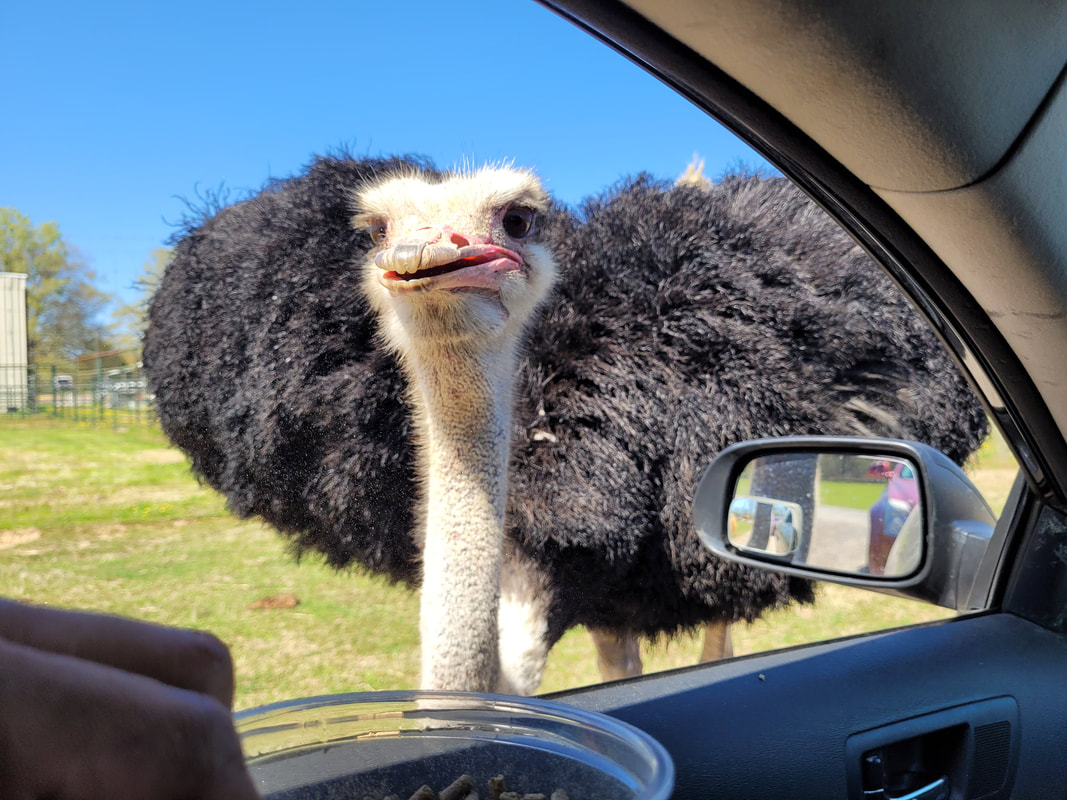 But not these assholes, one of them took the ole lady's feed cup, getting enough of a grip on it to be able to wrest it from her hand. The ostriches, like most birds had no qualms against just sticking their heads deep into the car to find whatever food they can sniff out, eagerly doing so until we gave in and held our hand out the window so they can feed at their leisure. They also have no problem trying to steal the food, as was the case when one snatched the whole feed cup from the ole lady's hand and stood there tipping the cup enough to get the feed in its mouth before dropping the cup on the ground and finishing off the spilled contents. The attendant at the gate did say if we do lose a cup don't worry about it, as they clean those up at the end of the day. There were plenty of cups on the ground, so this is not an isolated occurrence. Asshole ostriches... As we made our way through we encountered more bovines, water buffalos who had no problem with trying to stick their huge heads into your vehicle to get a taste of whatever feed we had. Of course the ole lady took my cup after loosing hers so I had to resort to holding a hand full of feed out the window, only to have these slobbering cows make a mess, ugh!  This big guy was the reason I had to wash up before we ate, slobbering all over the place. It wasn't a total loss, the ole lady had to clean animal feed and drool all off her door, LMAO! After our little safari adventure we pulled back around to the main parking lot so we could go inside and wash up before going to the buffet restaurant to end the day. We did go to the mercantile store to get some snacks and some meats they sold, that were actually nice cuts of pork and chicken and burger patties. They had a decent selection of butcher shop fare along with things like jams, jellies, preserves, honey and the like. You can almost go grocery shopping in this place. We actually plan on coming back here to get our meats, as other people state they do since the prices were pretty good for the meat that we got.  We couldn't end an animal adventure without at least pointing out one automotive item spotted on the premises, as was the case with this rover vehicle of unknown make/origin....  It appears to be some kind of mil-surp vehicle that probably saw duty in the jungles or deserts with its high ride height and open bays for ventilation. I want one now... As is always the case with buffets, we ended up overeating, wanting to be able to have a sampling of all the different foods on the counter. It was a good thing that we did do the safari with our own vehicle versus waiting to rent the jeep, due to the fact that by the time we were done, a couple large parties of people were coming in, with probably 30+ people total, both of them birthday parties as well, which would've made traversing the buffet a little difficult. But all in all, we had a good day, got to enjoy some animals from a perspective never done before and walked, or waddled away, with full bellies. A long nap was the result upon returning home...
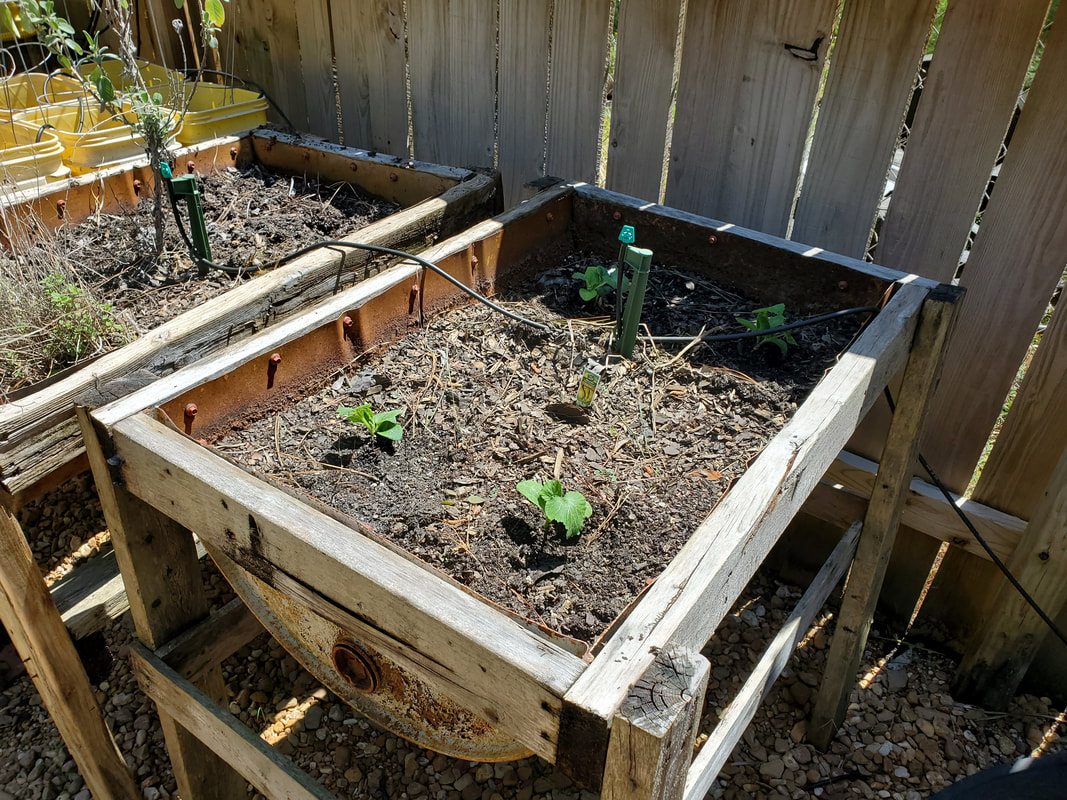
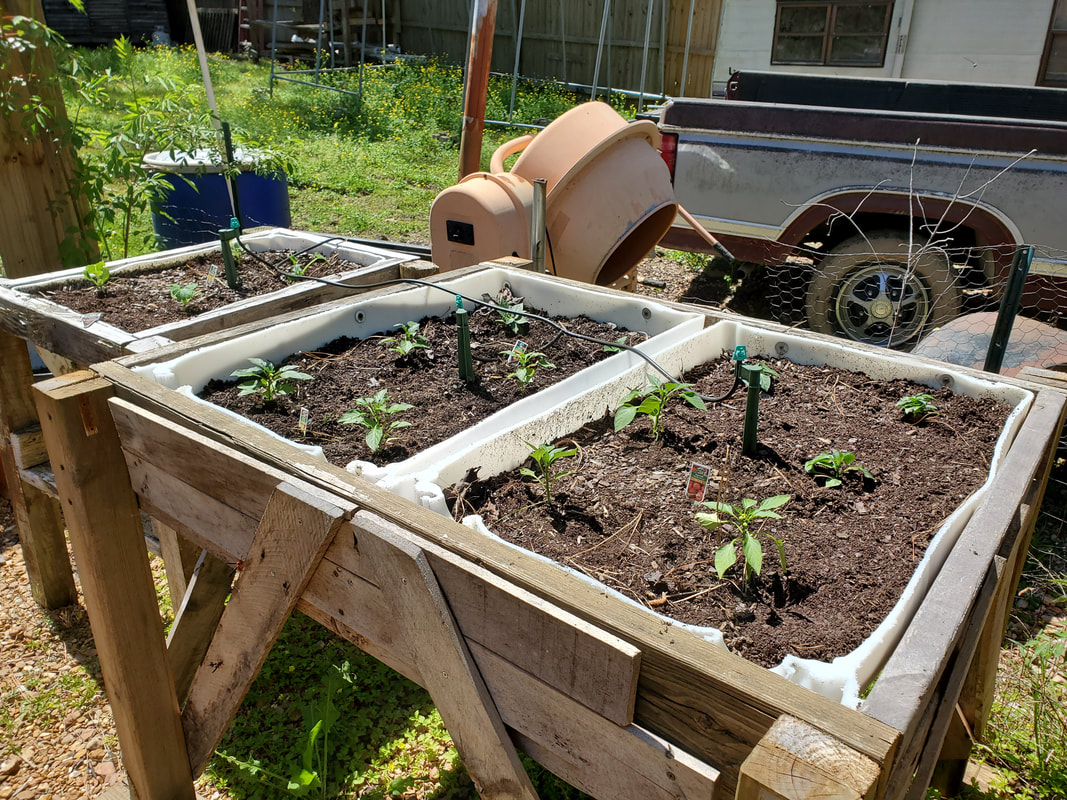
As is the case every year, we get to plant a bunch of stuff in the garden in order to take another stab at growing a bunch of veggies for the year, trying new methods and testing out new apparatus to see if these ideas and processes can give us the biggest yield. As was the case later in the last planting season, we've been incorporating a large number of raised beds, all made from scrap wood and plastic drums we had laying around the compound. Of course, there's still plenty of room for more raised beds, along with the hydroponic garden apparatus that we still have to complete in the greenhouse and elsewhere in the garden. Even our old double barrel hydroponic garden setup needs some reworking as the pallet that was used to build the setup is rotting away to the point that I'll have to rebuild the whole table that's holding the tubes.
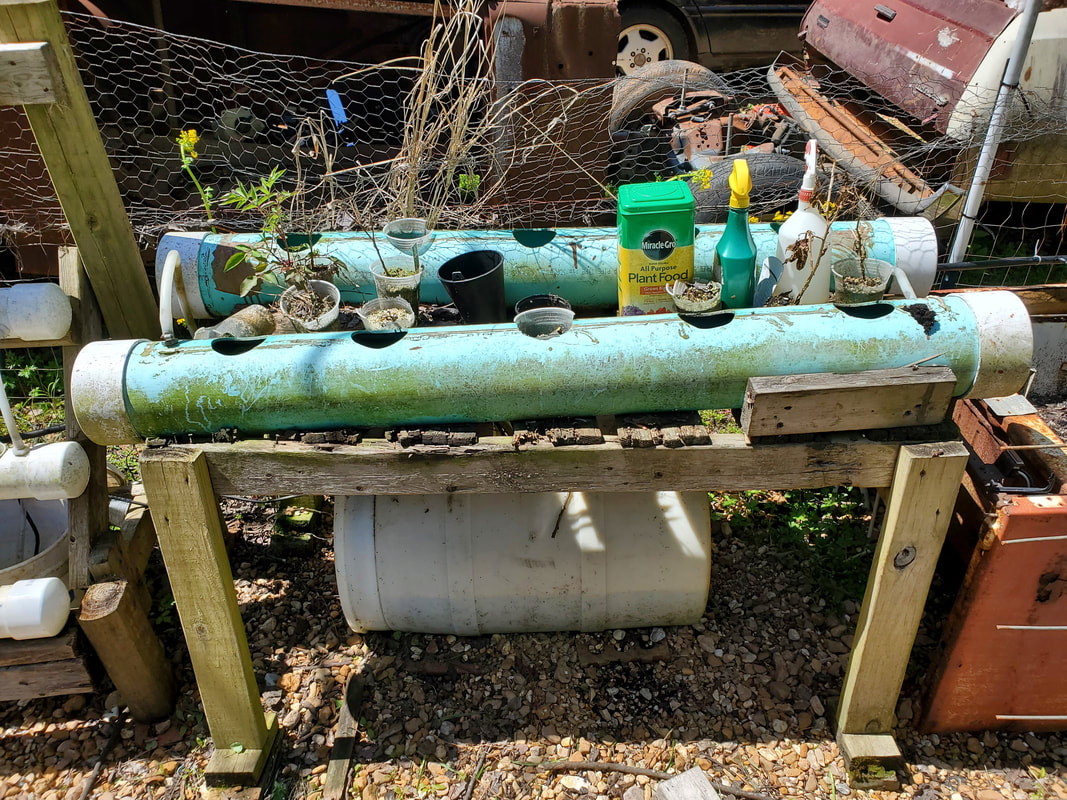
The old double barrel hydroponic garden setup, in a decrepit state.
In the meantime, I did pick up our first batch of plants from one of the local one off hardware stores that tends to have the seedlings at a pretty good price. I got a large number of peppers and tomatoes, along with some cucumbers and squash and a few strawberries. As far as strawberries, I ideally need a lot more than the six plants I got, but you have to start off somewhere right? The strawberries are being planted in the drum gardens around the fruit trees that are the center of the drums and I need a lot more to fill these vessels. In the future I plan on finishing a couple food forest setups right at the gate by bordering the plantings with railroad ties, filling with more dirt then planting around the trees and berry bushes with more strawberries. 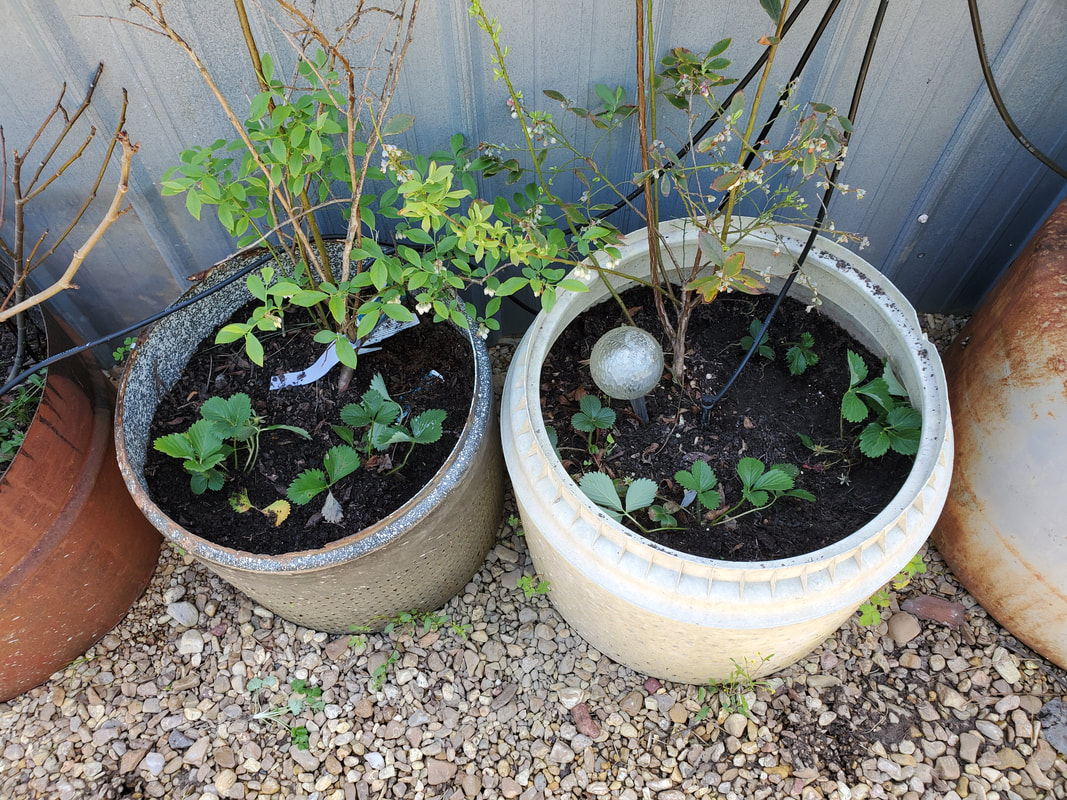
Two drum planters with blueberries planted within and the six strawberries also planted within.
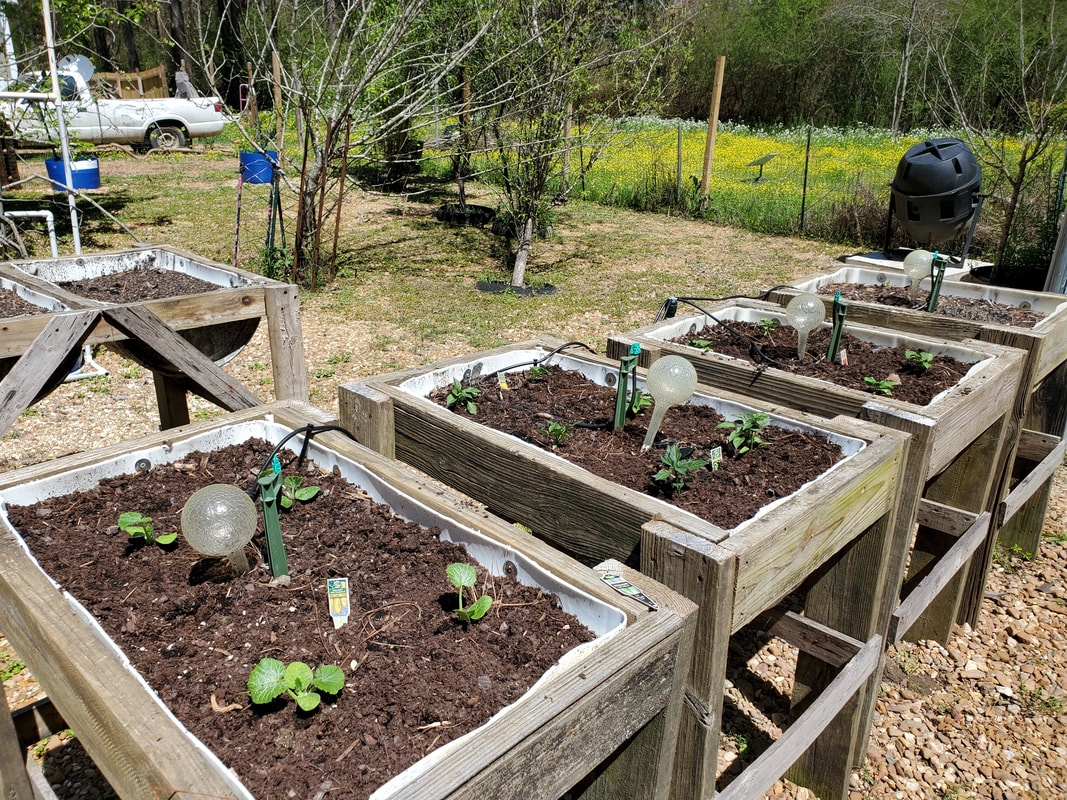
As for the other plants, I'll start off with the squash and cucumbers. Since the squash plants are typically smaller than cucumbers, I planted them in a few drum raised beds, four plants to each drum so they can grow and not crowd each other. I didn't really have any set plans for the raised beds as far as what would go in them, so this was no big deal. 
One set of squash plants planted in a drum raised bed.
This old metal drum raised bed which was used as an overflow for potato plants last year is now holding another quartet of squash plants.
As for the cucumbers, I ended up planting the four packs of plants in a couple of the larger washer drum beds that I used for potatoes last year. I hadn't gotten any potatoes and am not really sure if I will since I will need more space to plant the spuds. If I do get seed potatoes, I'll end up needing a lot of dirt and some more large beds to handle the amount of seed potatoes we typically get in a bag. Because of this, I'm not 100% sure if potatoes will be in our future this year. Now sweet potatoes, maybe, because the plants are typically in a six count flats so I could easily get a couple flats and only fill a couple drum raised beds, versus trying to fill up a million large drum beds. 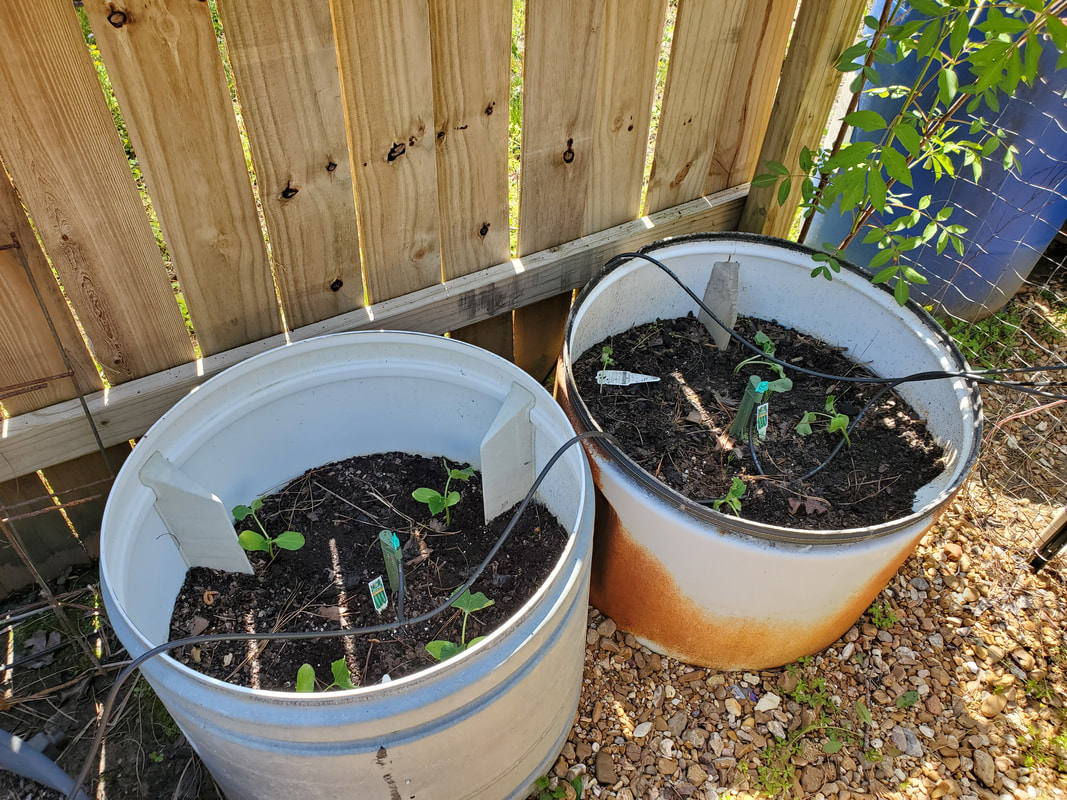
Cucumber plants in washer drum beds.
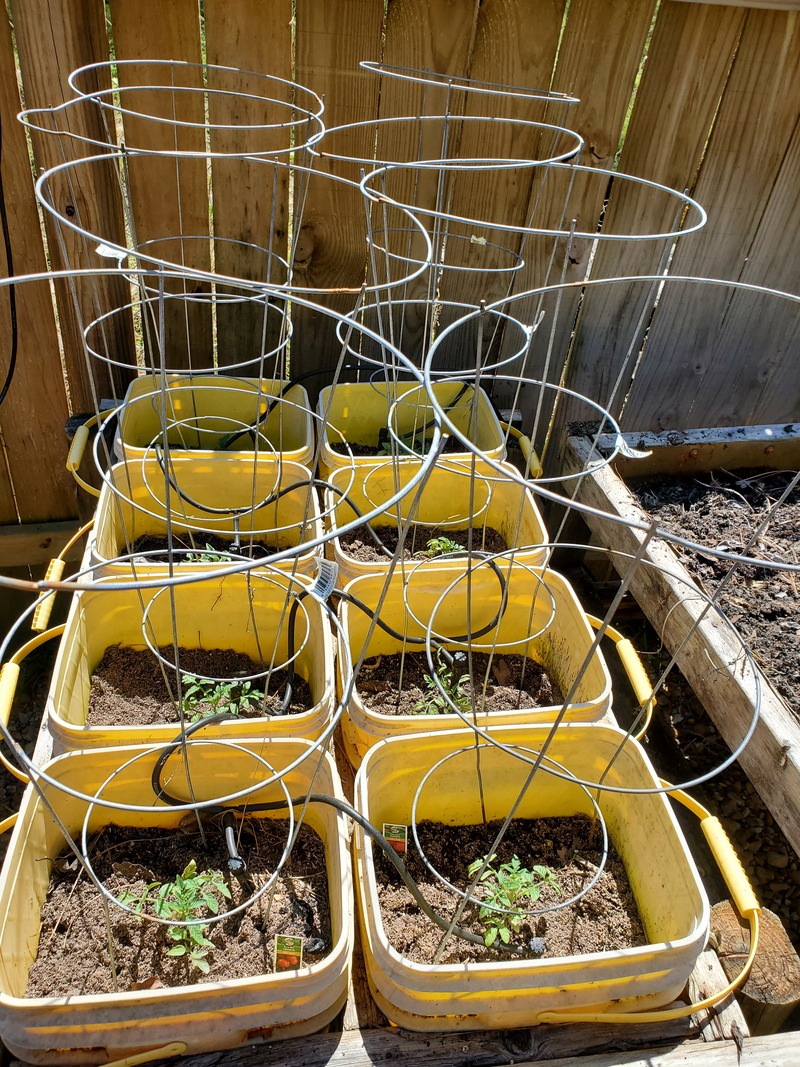
One set of cat litter bucket raised beds filled with tomatoes...
And the other raised bed full of buckets with tomatoes.
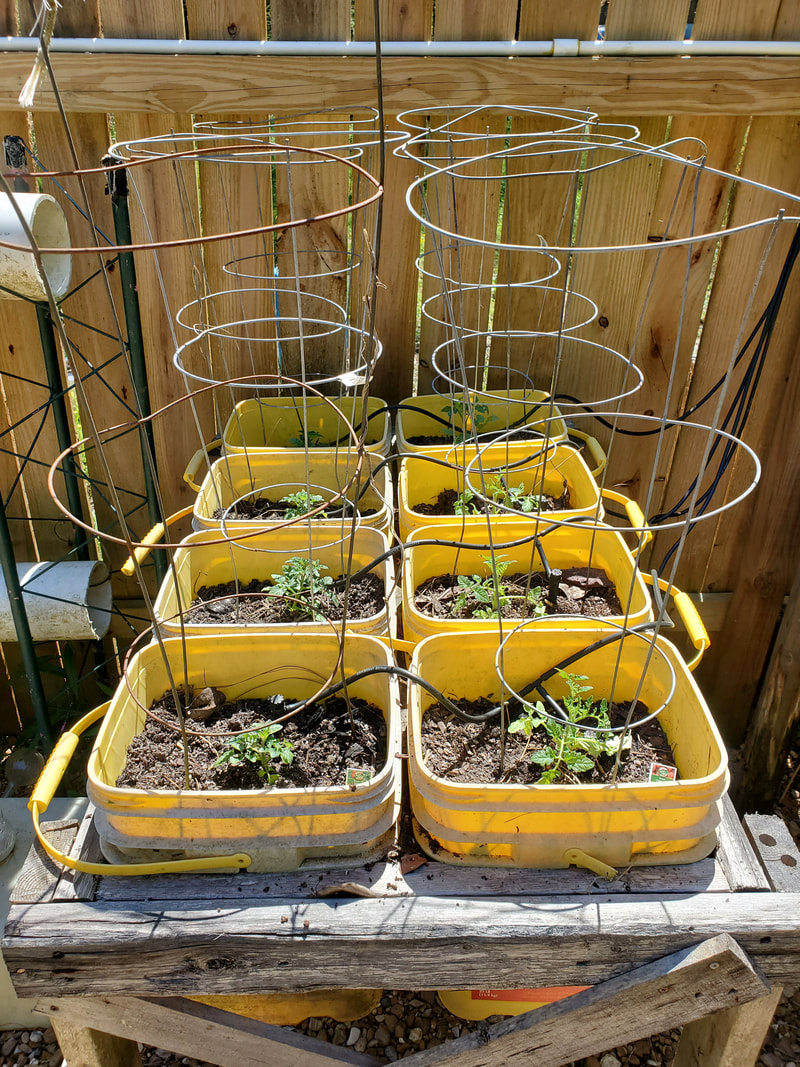
Last on the list are the peppers. I picked up several different varieties of peppers, including ghosts and jalapenos along with milder varieties. These will of course make for a nice addition to any salad, as well as be used in any sandwich topping. The peppers ended up going in several drum raised beds with six plants to a drum since these plants, unlike the tomatoes, don't take up a lot of real estate. Just like with the other plants, some compost and fertilizer will go a long way towards helping these plants be the best producers they can be this year. 
Some of the pepper plants planted in the drum raised beds, six to a drum.
And more peppers, the drum to the far left is the drum holding the squash plants.
The most recently made drum raised beds with the third set of squash plants and the rest to the right holding all the remaining pepper plants in the first batch I got.
When I do rebuild the double barrel hydroponic garden, I will most likely put pepper plants in the setup but will probably use different cup style planters since the plastic drink cups did not hold up well at all to the summer sun. I also still have a large number of drum raised beds still unoccupied and ready to accept more plants, as well as a couple that need more dirt to make them ready for planting. I still have the larger drum and refrigerator raised beds which I used for potatoes last year. As stated before, I may end up using these for sweet potato plants, so I don't end up with an influx of seed potatoes with nowhere to plant them. The store that I got this batch of plants doesn't have the variety that the chain stores like Lowe's does so I will end up having to pay a little more to access plants like sweet potatoes, beans, corn, herbs and other veggies that we made use of last year. And again, if I make more drum raised beds, there will be a lot more room to plant even more plants. Of course, all that means is there will be a large number of the same plants so we'll end up with a lot of tomatoes, peppers, squash, cukes and the like. Of course with a large number of raised beds I may even be tempted to use the raised beds to grow plants like watermelons and other melon plants, letting the vines run the ground from the drum beds or training them along trellises for the lighter veggies. The possibilities are endless for what we can do in the garden with the apparatus we can build and the space available.
Getting back into the swing of things, I got another load of gravel, using the F250 with its new bed for the second time around. After covering the area of the northwest yard where I plan on putting the Minivan Doghouse, I wanted to finish out the area before moving on to another area, most likely the chicken yard. After the chicken yard went for over a year since I first spread the gravel down, a lot of the rock has mashed into the mud and other areas have gotten to the point that it's just messier as the chickens do their thing of scratching around in the rocks. There was an area that I originally wanted to lay sod, but with the destructive nature of chickens, sod wouldn't even last long enough to take root in the chicken yard, so I'll just go ahead and spread gravel over the rest of the area and get things covered up. Anyway, with covering the rest of the northwest area, I wanted to cover up some chicken dust bath holes that were forming around the base of one of the pine trees in the area. I want to put a stop to that action before the chickens wear away enough soil around the tree that it can collect water and pose a threat to the tree's root base. The last thing I need is for a 100ft tall tree falling on the house and/or vehicles because of some fucking dust bathing chickens. So yep, this area was the first to be covered with the gravel.

Moving along from the gravel, I turned my attention back to the 84 F150. I left off with loosely installing a spare tire on the left rear axle. I still needed to see if it would hold air and if so, lock it down and get the jack from under the truck. I also needed to bleed the brakes on the truck so when I did get the engine tuned enough, I can actually put the truck in gear without it rolling through the fence or into another vehicle. Since I didn't have any help today to bleed the brakes under normal circumstances, I had to utilize one of the one-man methods of bleeding brakes. Starting with the rear brakes, what I did was fill the master cylinder with brake oil then open up the bleeder valves on both wheel cylinders and wait. Gravity will slowly pull the brake oil from the master cylinder down through the brake lines and into the wheel cylinders, causing any air pockets to move up to the master cylinder or even into the wheel cylinders and out. Eventually there will be more oil than air in that portion of the brake system, rendering the brakes bled. I did the same thing with the front brakes as well, which was easier as the front brake calipers were right below the master cylinder. With the brakes addressed, I was able to get a fairly decent pedal, even without power brakes. When the engine is running, I'll probably have a little bit more of a squishy pedal but hopefully will still have enough braking ability to stop the truck from any speed. With the brakes done I turned my attention to the last thing before I can try to do the next stage of tuning and testing on the truck, and that is installing the manual choke cable. On the carburetor there is a bracket for attaching a choke cable so that side of the install would actually be easy. 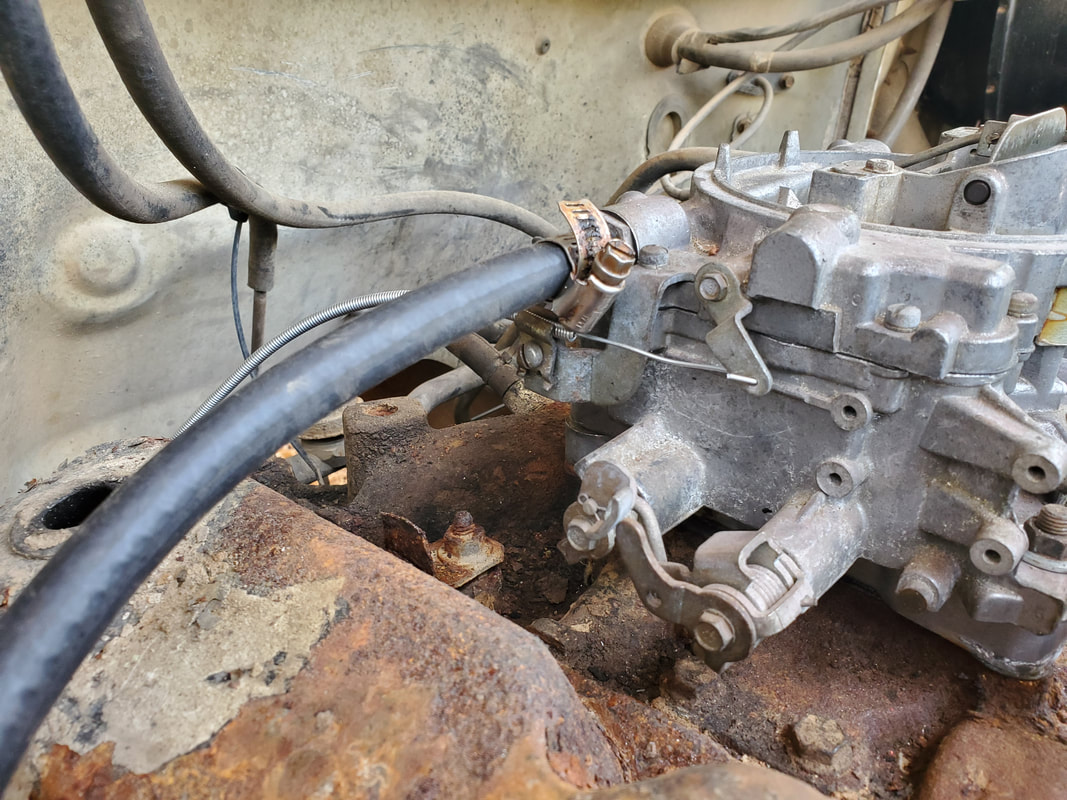
Choke cable hooked up to bracket on carburetor and to choke linkage.
The cable was routed through a hole that was plugged by a rubber cap in the firewall. I just pulled the rubber cap out enough to route the cable through without actually removing the cable. I routed the cable behind the engine and hooked it up to the carburetor, hooking it up to the linkage on the choke flap. Back inside the cab I attached the angle bracket holding the knob end of the cable to one of the existing screws under the dash, securing the knob end nicely. 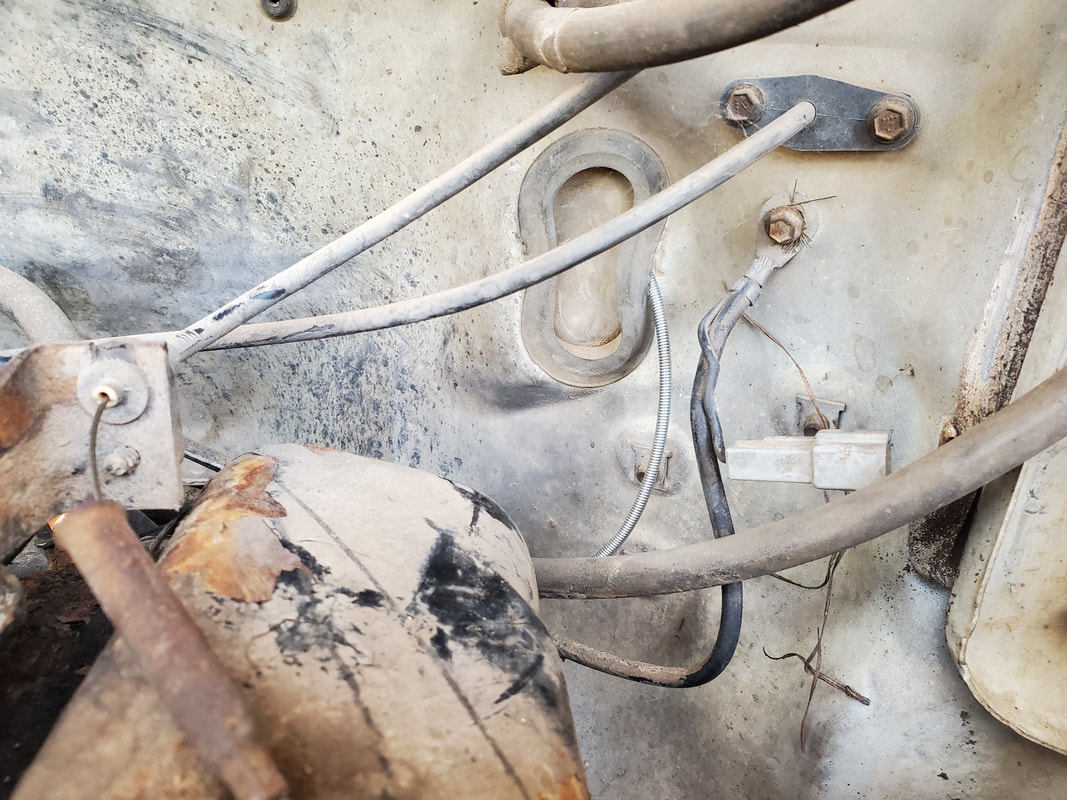
Choke cable routed through the rubber cap in the firewall and behind the engine.
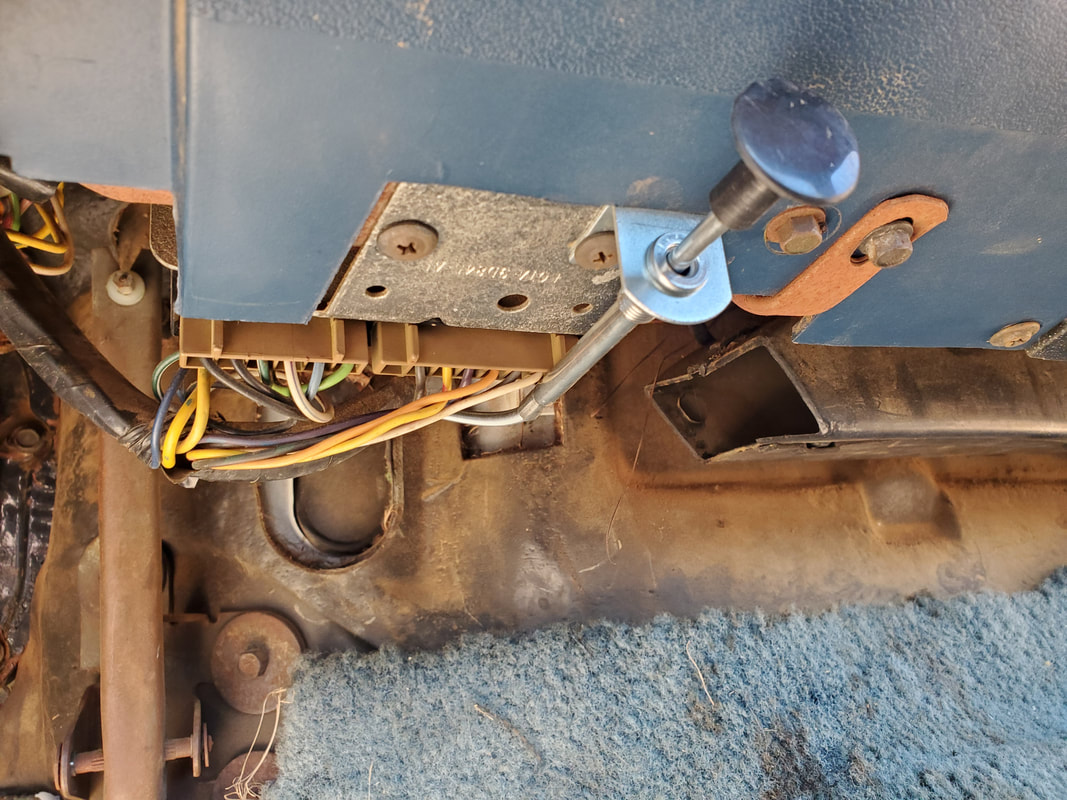
Knob of choke cable hooked up under the dash to existing screw.
With the choke cable hooked up and tested, I was able to go ahead and crank the truck up again. I still couldn't open the choke all the way, I'll still have to tweak things but in the meantime, I did put the transmission in gear again. After a couple stalls, I tweaked the idle up some and tried again, being able to put the transmission in gear and keep the engine running. The brakes were spongy as figured but they held just fine, even with my accelerating just to see if the truck would break free, which it didn't. Of course the truck did move forward and backward with no effort. If I can get the engine tuned well enough this thing should be more than able to run off. I'll probably put a timing light on the engine and vacuum gauge to fine tune the engine. At one point the starter did bind some so I'm not fully sure if the alternator is charging or if the timing is off some that it had the engine binding when attempting a hot startup, or if the starter is just worn out and dragging when cranking a hot engine. I'll visit all these areas further as the work continues on this truck and hopefully I'll have this truck running up and down the road for a spell before I yank its heart out.
When I got the engine running enough to idle, even with the choke only partly closed, I attempted to put the truck in gear to see if it would move. Even though the brakes aren't bled where they would grab, I just wanted to see what the thing would do, being ready to drop it into neutral at a moment's notice. Unfortunately, while in gear, the thing acted like the brakes were engaged. Despite confirming the parking brake wasn't set, I tried to accelerate only to have the engine stall when it couldn't pull against whatever was holding the brakes in the locked position. At this point the next thing I figured I'd have to do is jack the rear of the truck up and remove the wheels to survey the rear brakes to see what's up. Reason I focused on the rear brakes was because even when we were moving the truck into its current parking spot, the rear wheels dragged like the parking brake was set. So up the rear goes and off the tires came. 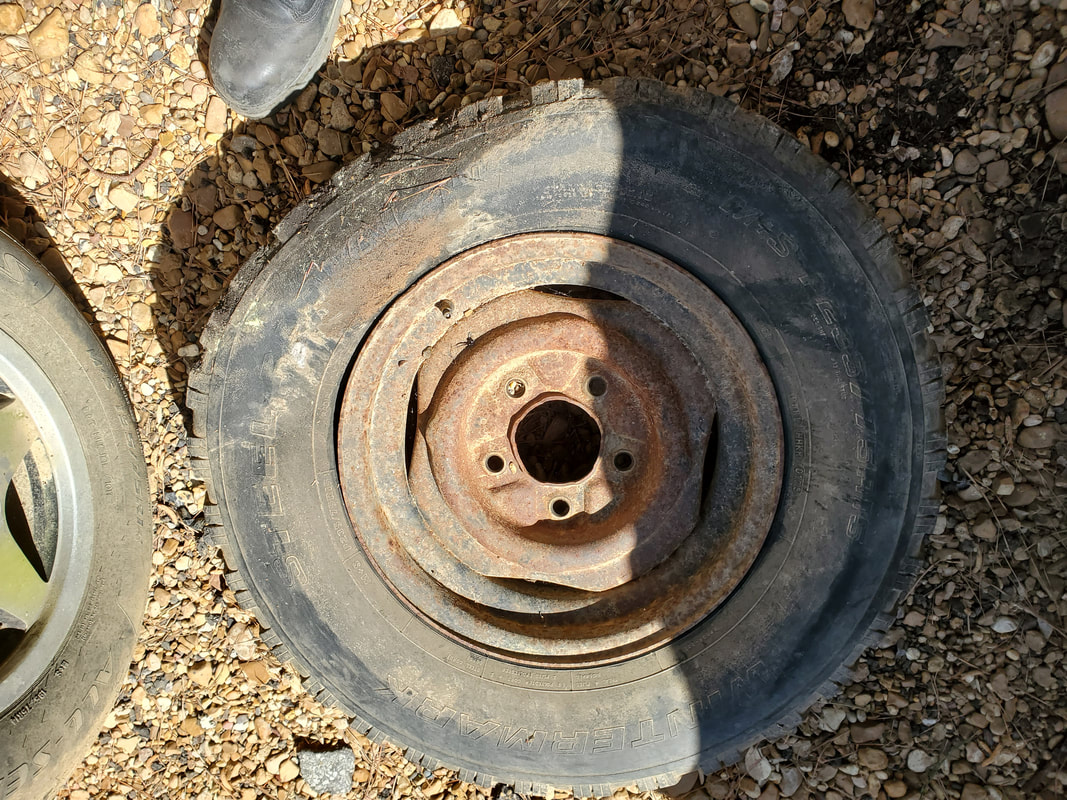 Left rear tire pulled free, tire is flat and will need to be replaced. At least the rim is in good shape. The left rear tire was flat and wouldn't hold air anyway so it would have to come off in order to be replaced. Luckily I have a spare with a full size tire in the back of the truck that I'll still have to see if it holds air just as well. Hopefully I'll be able to get away with not having to buy even a used tire, much less a new one. Anyway, I attempted to turn the brake drum to no avail. Checking everything on the parking brake and confirming nothing on the outside was stuck, I opened the bleeder valve on the wheel cylinder, just in case it was in the locked position under pressure for some odd reason. It wasn't. From there the baby sledgehammer came out. This drum came off surprisingly quick, all things considered. With some beating and working the drum I was able to get it off pretty fast, allowing me to move on to the right side. 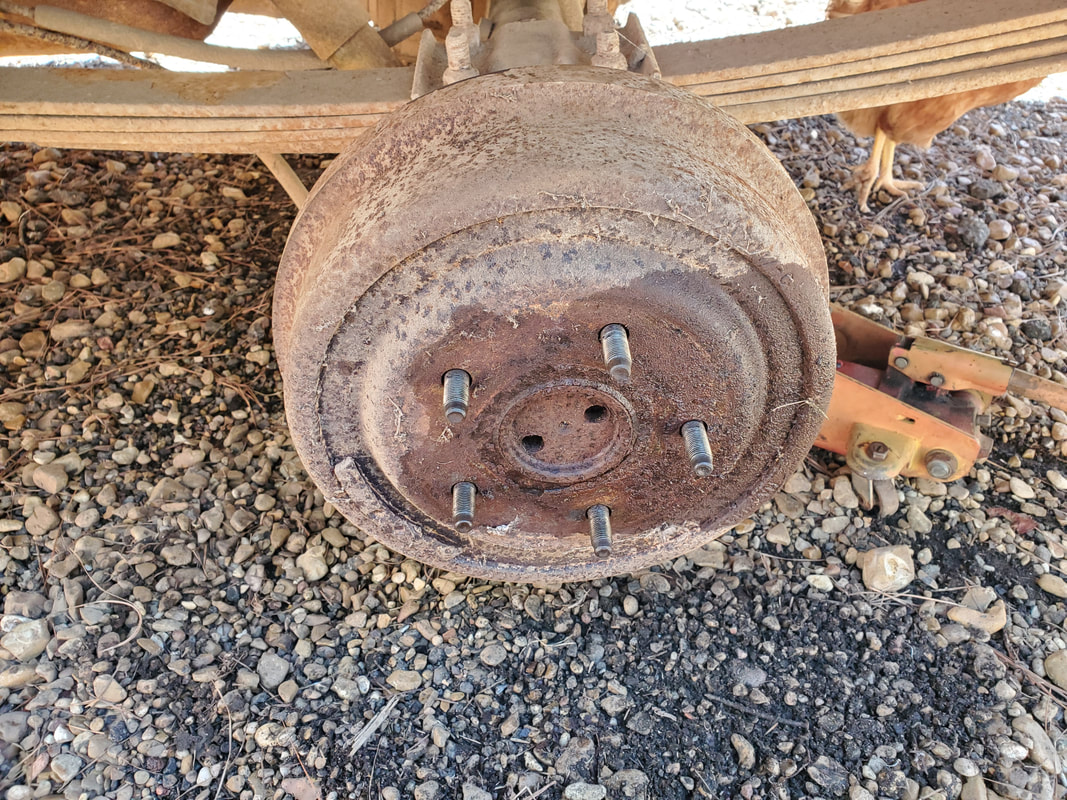 The left brake drum came off rather fast, given its being stuck. After looking at the brake hardware, I put the drum back on, the left side checking out as good, other than the wheel cylinder needing bleeding. When I looked at the rim on the right side, I was a little nervous. The center cap portion of the rim was rusted away to the point it looked like it would just break off. After pulling the rim off I looked around the hub and at least it appeared like there was still plenty of metal there around the lug holes. Hopefully the metal is still thick enough that it will sustain the weight of the truck while the truck is under motion. The last thing I need is to have the rim separate while rolling and having the whole wheel get flung off. Anyway, this brake was problematic. Beating it didn't free it. WD40 didn't help. I beat the shit out of the drum trying to work it off the axle, eventually breaking the outer lip from the drum. With no surface to hit on to work the drum off, I just said fuck it and hit the center of the drum, hoping the whole damn thing would shatter off. When I hit the center a couple times, would you believe the damned drum just popped right off like nothing was wrong? This POS really gave me the middle finger on this extraction, but luckily the drum as a whole stayed intact, minus the outer lip, which isn't essential to the drum performing its drum duties.  The right rear rim with the rusty center cap section that made me question whether this rim should even be used. 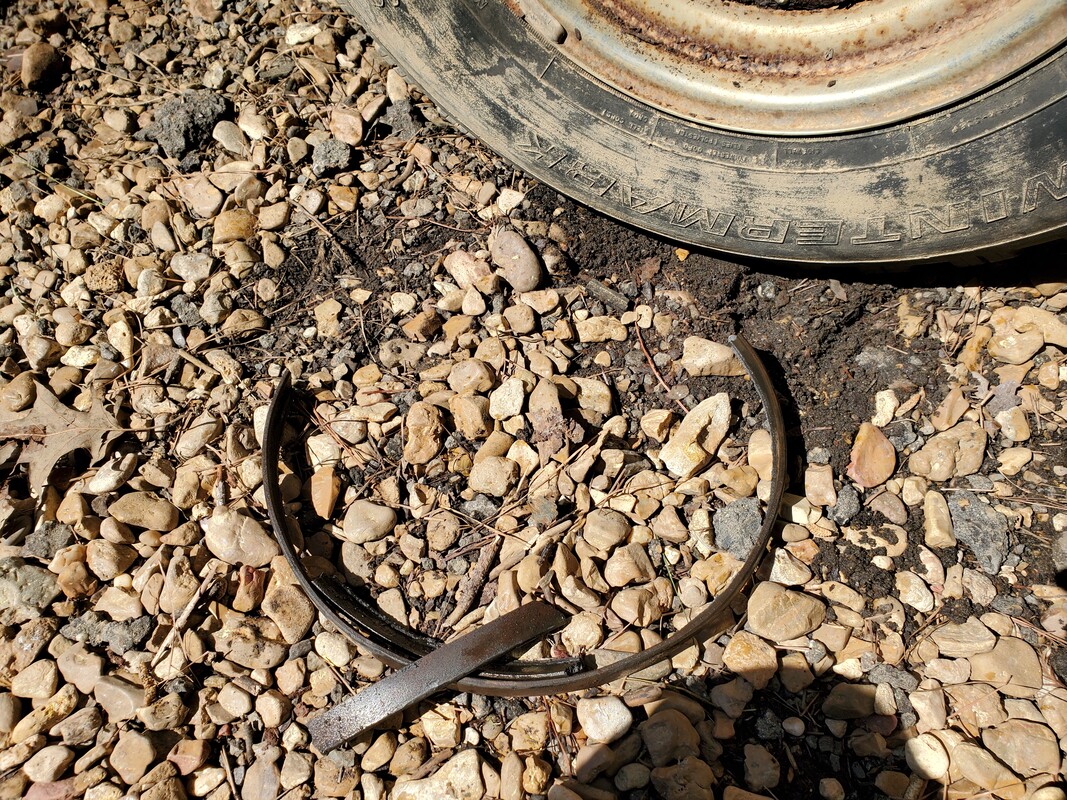 The sections of the drum lip that were knocked off with the baby sledgehammer after trying to extract the drum. Looking at these brakes, they too appeared to be in good shape, with the pads still showing life and the internals not damaged by rust. Even the wheel cylinder wasn't wet from leaking brake oil through bad seals. This side was pretty much ready to be bled and put back in service as well, with the bleeder valve opening up easily. With that, I put the lip-less brake drum back on and after checking the rusty rim once more to just tell myself that it should be ok, I put it back on as well, tightening everything down.  The brake pads and other drum brake internals, looking rather good for a truck that was sitting for a couple years in a moist environment. Looking at the spare tire, it appeared like it already had some air in it so it will probably hold air at normal pressure. As far as longevity, that I couldn't tell you, for any of the tires. I just need things to hold out long enough to test drive this truck some and still be able to roll around after I pull the engine and transmission. But in the meantime, I will still need to bleed the brakes all around to get those working and while I'm at it, install a manual choke kit on the carb so I can at least control that in the process of my tuning the engine. Another thing I need to look at is how the hell the two tank system works on this truck since I could not spot any kind of switch that would be used for switching between the tanks. I don't know how such a system would work, but I do have my head wrapped around the idea that I might have to bypass the rear tank, if necessary, and hook the front tank directly to the outgoing fuel line, just to keep things simple for the sake of testing the truck out on a limited amount of gas. If in some change of plans I do decide to hang on to this truck for any reason, then I can further work out the whole two tank system by adding an electric valve and switch inside the cab to activate the valve so I can use both tanks. The same would go for me installing a carb with an electric choke so I can remove the manual choke cable set and store it for future use on another car that may not have provisions for an electric choke hookup. At least on this truck it looks like I may have this thing on the road way faster than any of the vehicles I've worked on of this class. After pulling the old burnt carburetor off the engine, I just had to get things cleaned up and prepped up for one of the spare Edelbrock carbs I had in stock. I had to scrap off some old gasket material from the base and add a spacer since the carb would need some elevation to allow the throttle to free move. Luckily the carb I chose already had a spacer glued to it. This carb was one I used on the Dodge a long time ago to convert the spread bore intake to the square bore for the carb. With that done I had to address a couple other little things, one of which was some little vacuum actuated valve of some sort on the intake. This piece I ended up removing from the intake and chopping the part of the bracket holding the diaphragm as well as the shaft of the valve itself. Afterward I reinstalled the plate from the valve assembly onto the intake to block the hole. 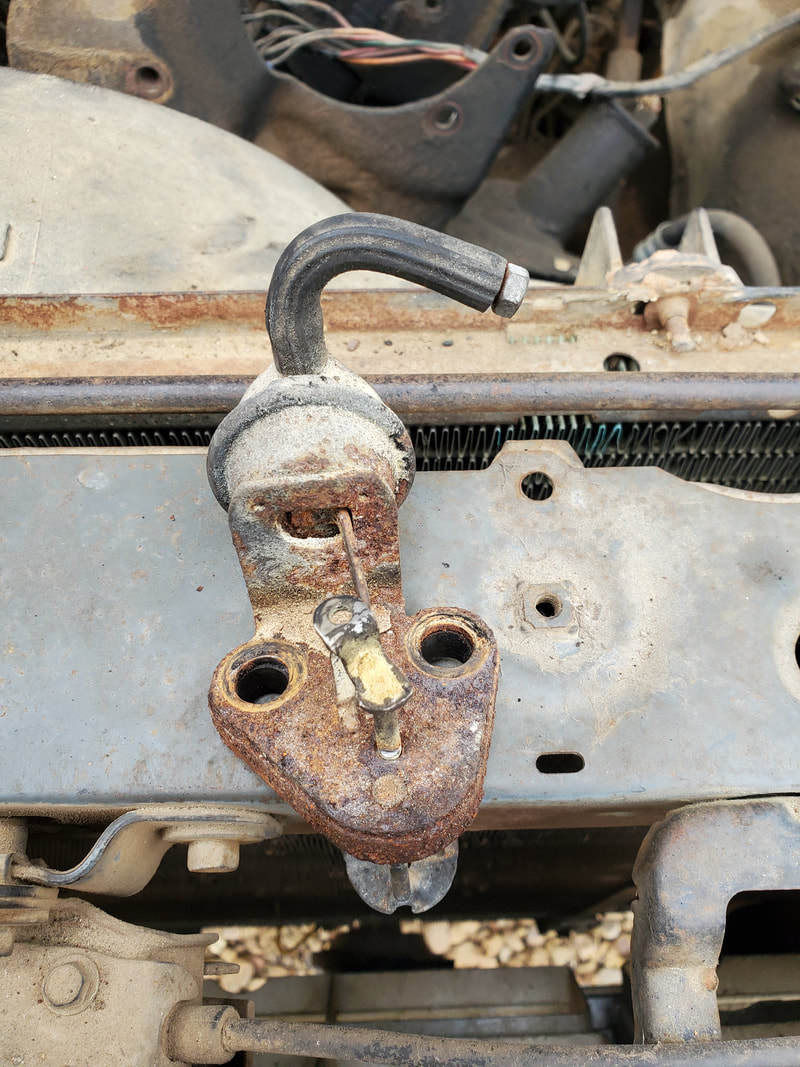 The weird vacuum actuated valve removed from the intake.  Opening on intake after removing the valve assembly.  The trimmed valve cover reinstalled on intake, along with a fresh gasket on the carb base. 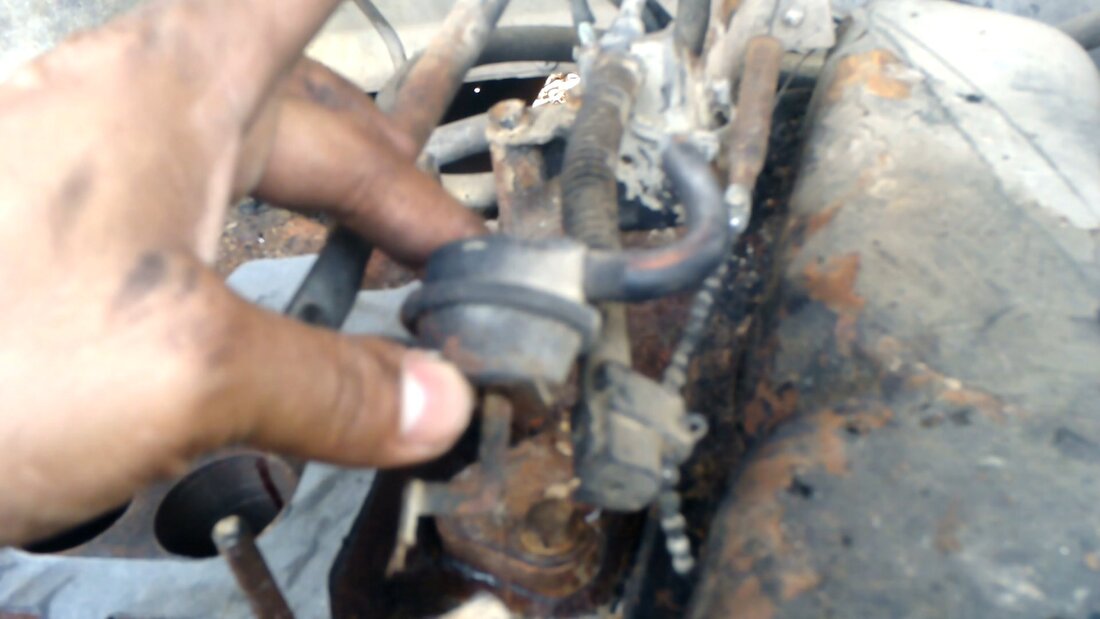 The cut of diaphragm from the valve assembly. With the valve assembly addressed, I bolted the carb down on the base. With the new gasket and some gasket maker down, I would have no problem with sealing issues on the base. I had to install a long bolt on the throttle and drill a hole through the cable base to secure the base to the bolt. I didn't secure the kickdown linkage for the transmission as the throttle on the carb wasn't equipped to handle this linkage. Besides, I really wouldn't need the kickdown to test the truck, at least for the short time that the powertrain would be in the truck. I got a new piece of hose to plug up to the nipple on the carb and after trimming the twisted end of the fuel line, I was able to put the hose on that end as well. 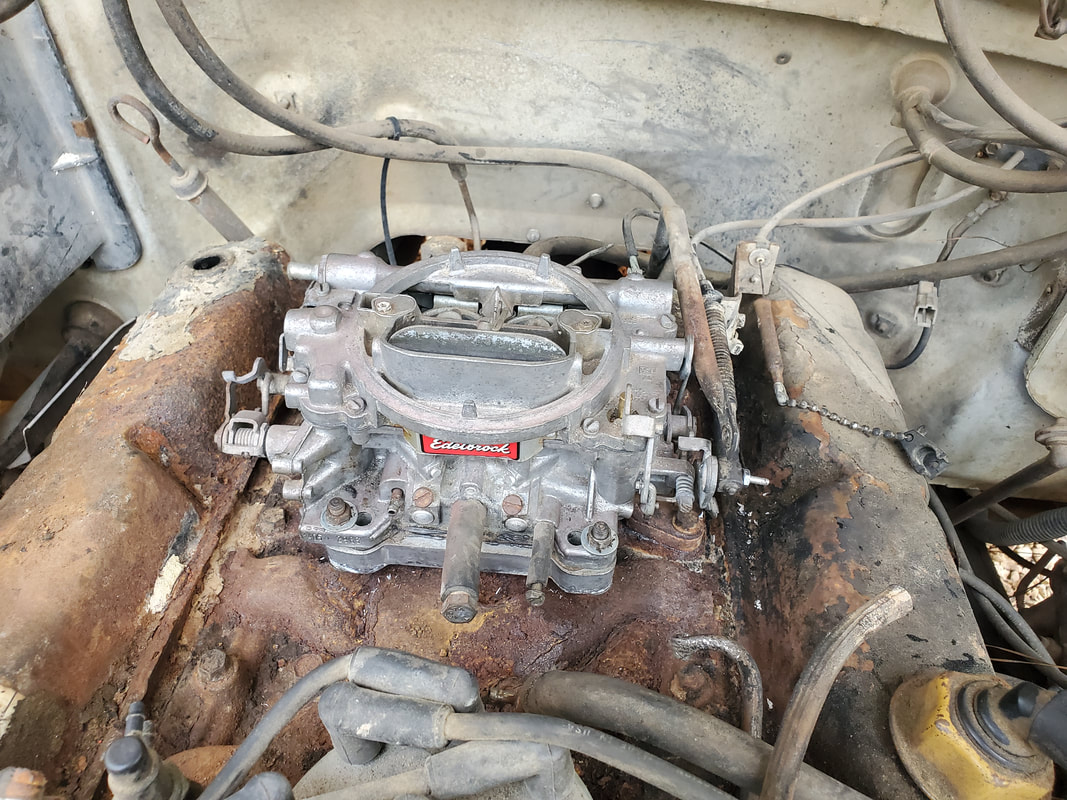 Carburetor installed on intake with spacer. Note linkage hooked up with screw to throttle on carb. 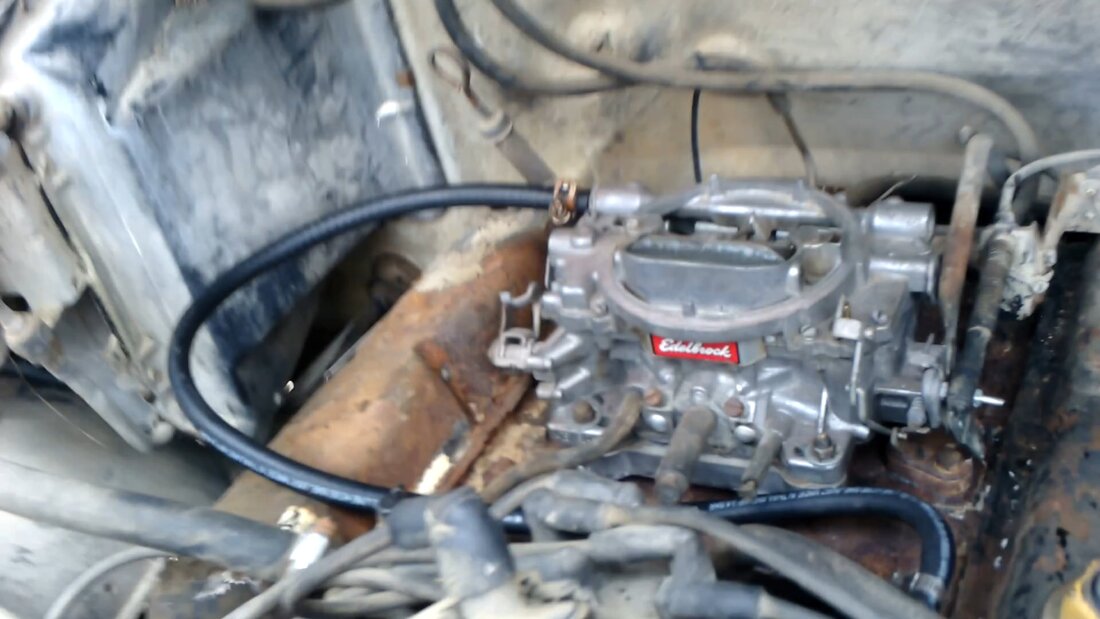 Rubber hose hooked up between nipple on carb and metal tube end coming up from fuel pump. Before permanently locking the hose down on the metal tube coming up from the fuel pump, I had to hook the metal tube to the portable fuel system fuel pump to see if there was any fuel still in the tank of the truck. Removing the hose from the input side of the fuel pump, I hooked the hose up to the pump from the metal tube and hooked another piece of hose from the output side of the fuel pump and ran it back into the fuel can. After hooking up the power clamps, the pump came on and drew through the fuel pump and metal tube, spitting the old fuel into the can. It was old fuel but still volatile enough that it should run. With that, I ran the hose back to the carb and locked everything down. I added some caps to a couple metal lines I removed some old vacuum lines from. I also cut a couple short pieces of hose to bridge between two close nipples on a manifold that has two pairs of nipples on it. After sealing the potential vacuum leaks, I added the battery from the DOB and got ready to attempt a startup. 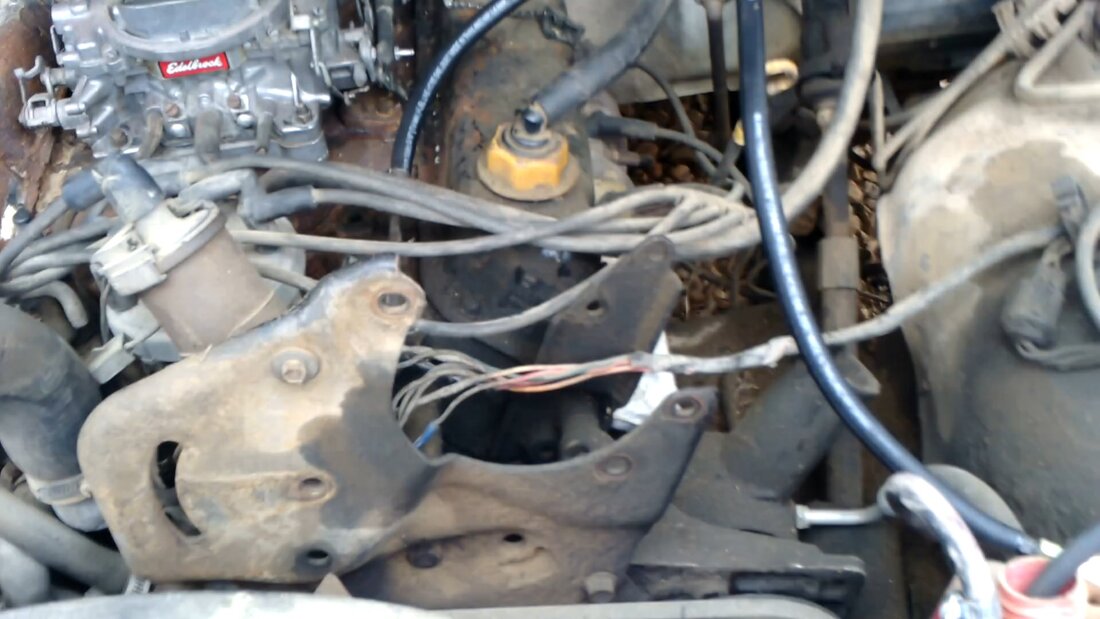 Rubber fuel line routed over to the fuel pump on the Portable Fuel System in order to draw fuel from fuel tank.  Holding fuel hose coming from fuel pump in the fuel can to catch fuel that was spit out. 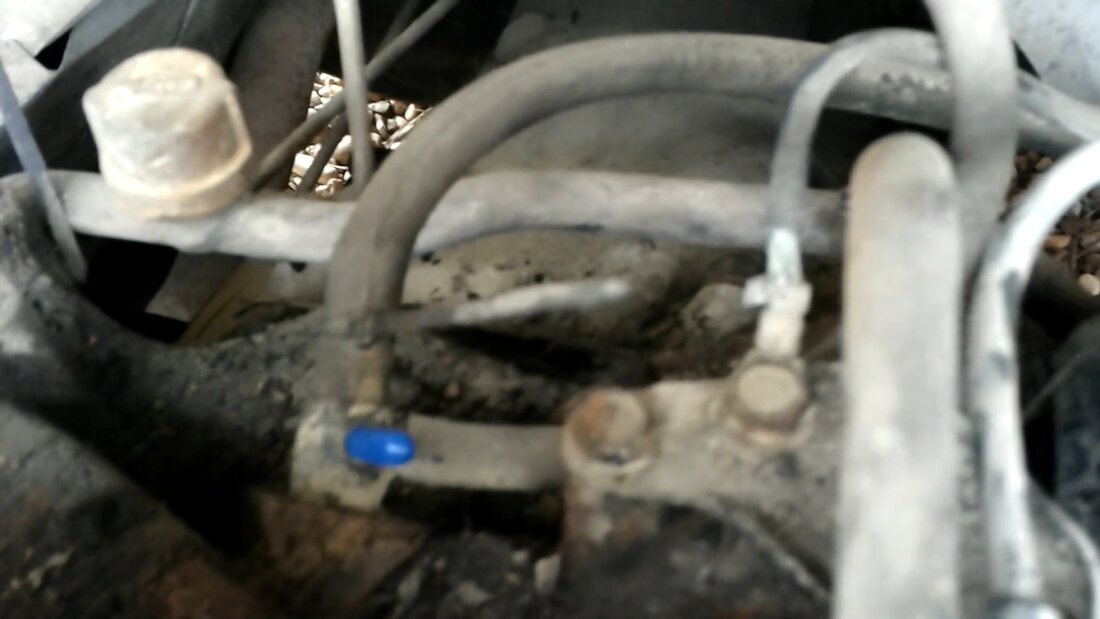 Blue vacuum cap placed on open metal tube coming from vacuum manifold on intake. 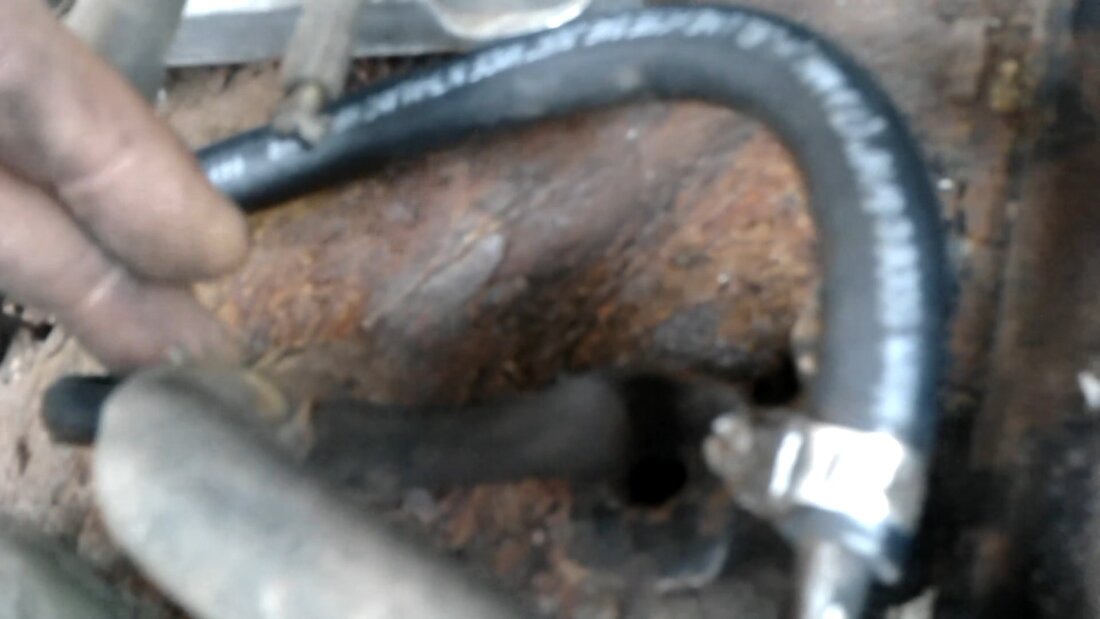 Another vacuum manifold with two short rubber hoses bridging pairs of nipples to close them up. After spraying some starting fluid in the carb and attempting a startup, I immediately got sputtering, which was obviously a good sign that the engine will start up. I put some gas in the carb to try and fill the fuel chambers and try again with very limited success. Afterward I removed the rubber hose and hooked it up to the Portable Fuel System, which was filled up, and turned it on to fill the carb all the way. Afterward I replaced the rubber hose and propped the choke closed and tried again. This time I got better results with the engine starting up. I then played around with the idle screw as well as with opening the choke to try and see if I could get the engine to run at an idle. It didn't really like running at wide open choke so I propped the choke only partially open and tweaked the idle down to an estimated 800 rpm. I got the engine running pretty good with only limited smoke from the old gas it was feeding off of. I even tried to put the transmission in gear but the brakes appeared to be a little frozen, not letting the truck move. The transmission did jump into gear no problem though. 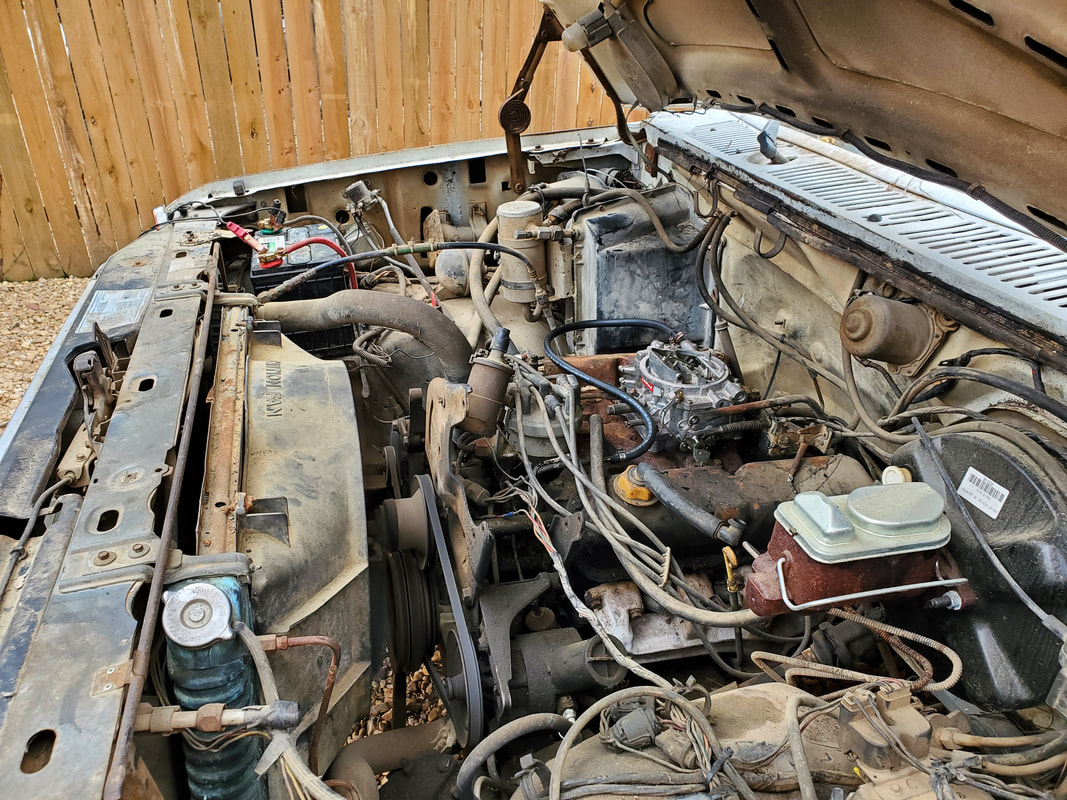 Everything hooked up, battery, carb, ready and running. With the engine running I tried to tweak things a little more but I couldn't get the thing to run on wide open choke. I'll probably have to run the old gas out before I can do any fine tuning on the carb plus I may need to hook up a manual choke, even on a temporary basis, to allow me to be able to make that adjustment for testing purposes. After getting the engine to run properly under normal circumstances, I'll still have to check the brakes to break them free as well as bleed the brakes to finish what the previous owners had started. Add one replacement tire and I should be able to test drive this truck.
As intended, I started work on the 84 F150 after getting done with the gravel and the landscaping just recently. The first part to this was the simple act of cleaning up the engine bay, which was nothing more than vacuuming the cobwebs and other trash from the engine bay. Once this was done I started off with the removal of the nuts holding the carb on. But this wasn't all that was required to remove the carburetor. There was the matter of removing all the vacuum lines that were attached to the carb as well as the manifold fittings routing other vac lines across the engine bay. There was also the matter of the compression fitting fuel line attached to the unit. Of course this didn't go well, with me eventually twisting the line to the point of breaking to get it separated. In the end I did get the carb off the mount.
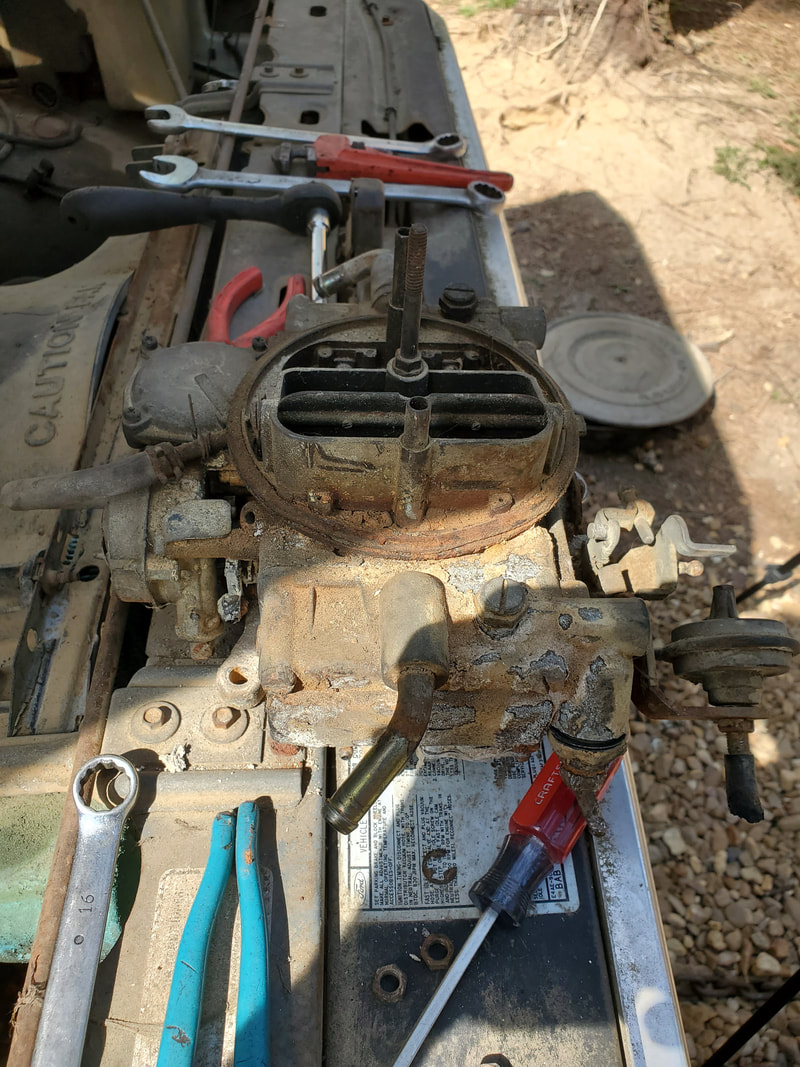
The toasty Holley carburetor after removing from the intake.
With the carb off the base, the next thing was the next round of vacuuming of crap from around the intake manifold. Once I cleaned more crap up, I started to really remove all the vacuum lines and little manifolds and other shit. I did take time to isolate the line going to the distributor. The lines going to the brake booster and transmission are actually routed to fittings on the intake so there's no need to even touch these. Other than the distributor, everything else is straight. I will probably end up having to cap off some nipples on the manifolds to kill any potential vacuum leaks but that's a minor inconvenience. 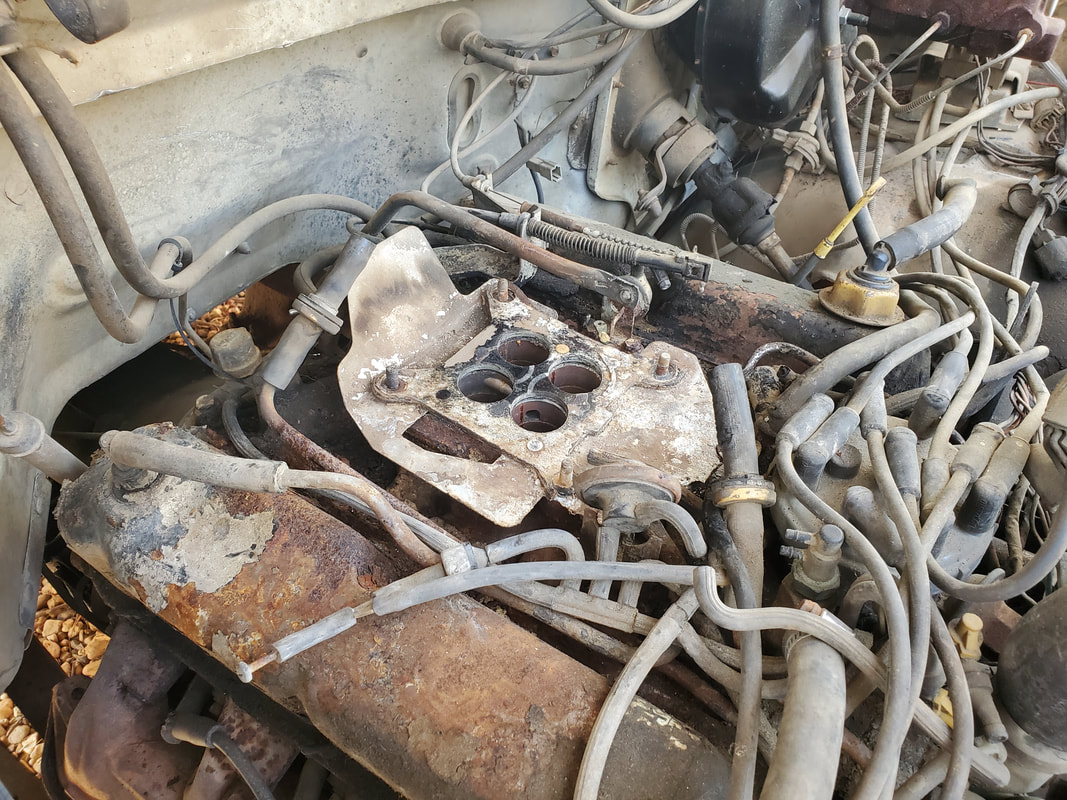
The base of the intake after removing the carburetor. There's still the spacer and this sheet metal plate that goes between the carb and spacer.
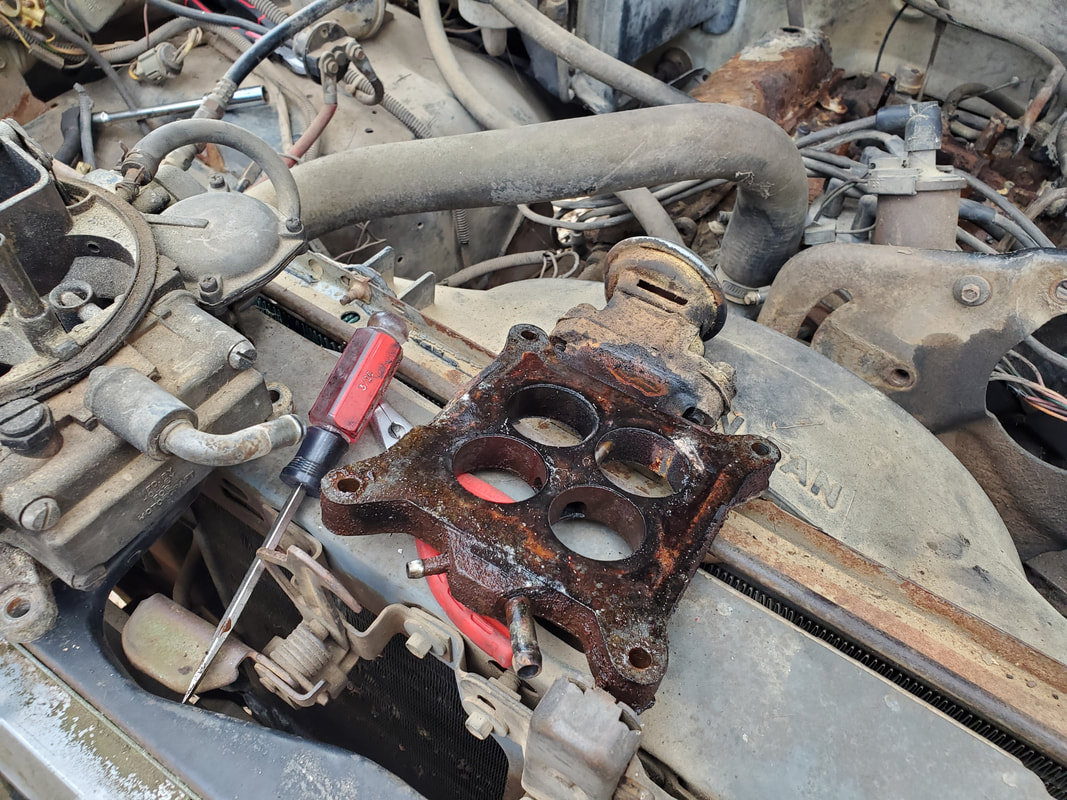
The stock spacer removed from the intake. Note how this is a square bore with individual barrels for the butterflies of the Holley carb. This is not going to work for the Edelbrock.
I was able to remove a good chunk of vacuum line crap, most of which was hooked up to the charcoal canisters for the evaporative fuel tank system. It's funny how the engineers added so much crap just for the simple action of venting gasoline vapors into the intake. With all this stuff out of the way, it did clean up the top of the engine quite a bit. Now, I did have to fight the spacer to get it off as it was probably never removed in the life of this truck. With a little WD40 and some wiggling, I finally managed to get the spacer and sheet metal plate off. With all this off, there's just a matter of a little bit more vacuuming to get the remaining dust and crust from the top of the intake, then I can clean up the surfaces in order to put the gaskets down since I will need to add an aftermarket spacer to this intake. 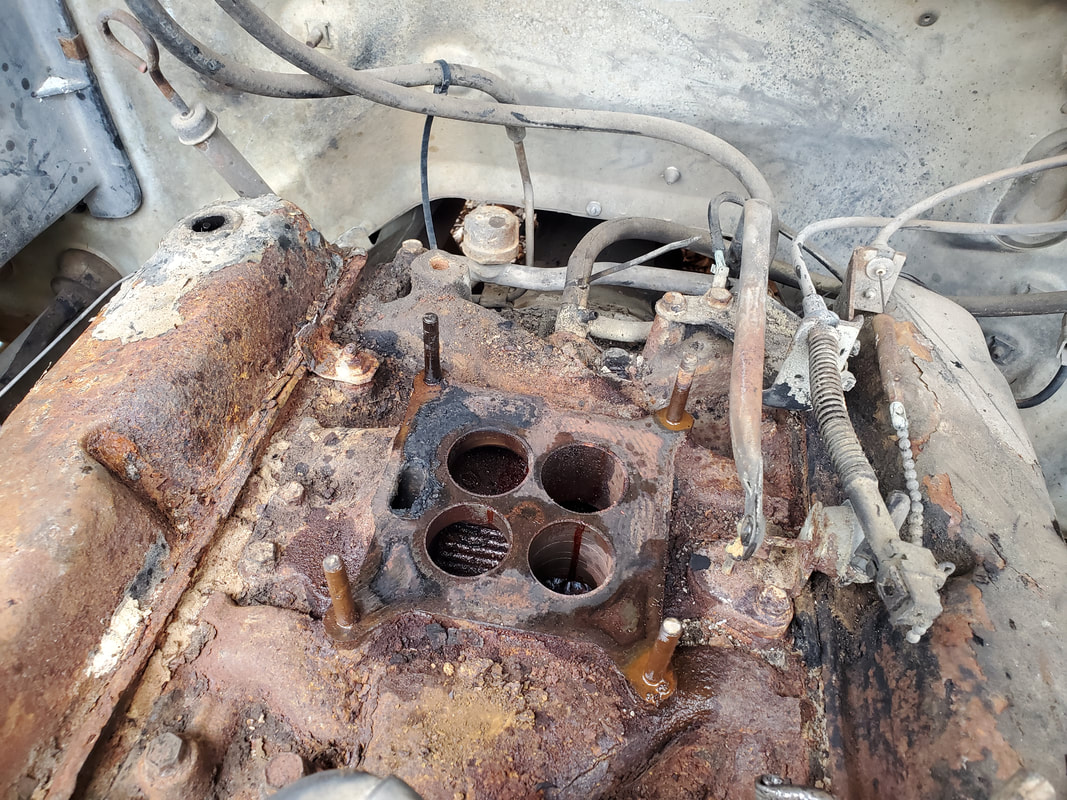
I will need to add an aftermarket spacer that is completely open as the Edelbrock's butterflies are not the same as those of the Holley and will be impeded by the barrels of the stock spacer. Luckily I have a few of these spacers as I had to use them to convert from a spread bore intake to the square bore of the Edelbrock. I'll probably need a spacer anyway since the carburetor's throttle will probably hit the top of the intake if it was mounted directly on the top of the intake. That's no big deal, as far as being able to get the engine running. I will more than likely end up getting an aftermarket intake that does not have all the EGR and other fittings and trash on top, as well as the small square bore barrels like the stock intake. Plus the stock intake is probably robbing me of power especially with the use of the Edelbrock carb. So once this engine is rested in the Rustang, a new intake will be on the menu to help make this powerplant become a better unit. 
As for the truck, even after removing the engine and all the vacuum trash, I wanted to try and retain as much as possible of the essential hardware that will allow the engine to run. This is because, the original plan is to sell the body to someone who may want this body for a hot rod or daily driver truck project and by keeping things intact like the wiring for the Duraspark ignition and the alternator, it will make it easy to resurrect this truck by simply dropping another V8/C6 powertrain in the engine bay and plugging up to the existing wiring. Hell if things go another route I may even be inclined to resurrect this truck for my own use or for resale as a partially restored truck. As for the task at hand, the next move is mounting the Edelbrock with the spacer and gaskets. I will have to cut the twisted end off the fuel line so I can place a length of rubber hose on the end of said fuel line to connect to the carburetor, no big deal. From there see if there's fuel in the tank, and if not, add some, then add a battery, and see if this pile starts up. Hopefully the fuel pump is straight, and if not, I'll have to replace it. It'll literally be the DOB revival all over again for all intents.
After being on vacation for the time there have been some things that have been put on hold. Even after returning, it took a few moments to get back into the swing of things as we had to get acclimated to the whole get up in the morning, work on shit, go to regular work, come home, and repeat. Only the weekends are open for long term working on projects. Obviously one of the things that was put on hold was the spreading of gravel. After three weeks of not laying gravel I finally got to the point where I could make a gravel run. But it wasn't quite that simple. We ended up taking on another project for the spring that would benefit us throughout the summer.
This little project was the cutting of the tree line along the driveway from the gravel road all the way up to the garage. This tree line has a bunch of weed trees and vines and other floral trash grown up out past the trees. The buffer of weeds and crap extends out from the trees in some spots, making for an ugly tree line that also lends itself to being a problem when it comes to cutting the grass along this tree line. With the weeds and other trash extending out, there are spots that won't be cut properly as the blackberry vines and other trash are reaching out, making it hazardous to even come close to the tree line. 
Starting at the main gate to the compound fence, I started cutting the brush from the tree line, clearing everything up to the actual trees so as to open up the area and make it neater than it was.
We all had a turn in working on this project, using everything from our chainsaws to hedge trimmers and manual shears to even renting an industrial sized brush cutter. At first I started off cutting into the trash solo, working my way from the house down to the main road. A lot of the trash was hauled up to the burn pile but as I made my way farther down the road, a lot of this trash was cut up into small enough sections to be tossed into the woods further. Now with this shit stacked in the woods just inside the tree line, I could leave this stuff here, or come back later on and remove some of this stuff to the burn pile site or even stack this stuff away from the tree line along the driveway to burn up in small piles. This could go in any number of ways but the main thing is I managed to get a good start on the tree line, chopping up quite a bit of trash using just the small chainsaw, the hedge trimmer and shears. 
Down past the compound fence, moving north, more of the tree line is cut up, extending down to the main driveway. To the right in the picture, along the driveway are smaller piles of brush stacked up to dry out prior to burning.
I ended up burning out the hedge trimmers but with all of us working on the project, we ended up being able to still hack away the brush from the tree line. The brush cutter was able to cut into the brush at the ground, chopping up everything and leaving the larger weed trees and vines to be chopped by the saws. As we made our way further down, instead of stacking the brush inside the woods, we started stacking the trees alongside the driveway in order to allow the stuff to dry out so it can be burned up on the spot versus trying to drag all this detritus a long distance to the original burn pile area or stacking more crap in the woods. After clearing the one side of the driveway opening, we chopped along the tree line running along the main road that runs along the north side of the property, clearing a patch of ground along that tree line. After that quick detour, we moved along the other side of the driveway, making our way back up the driveway. As before, the saws and brush cutter made fast work of the viney crap as well as the weed trees, adding to the stacks of brush along the driveway along with some extra being tossed in the woods. It didn't take long before we made it back up to the compound fence line. 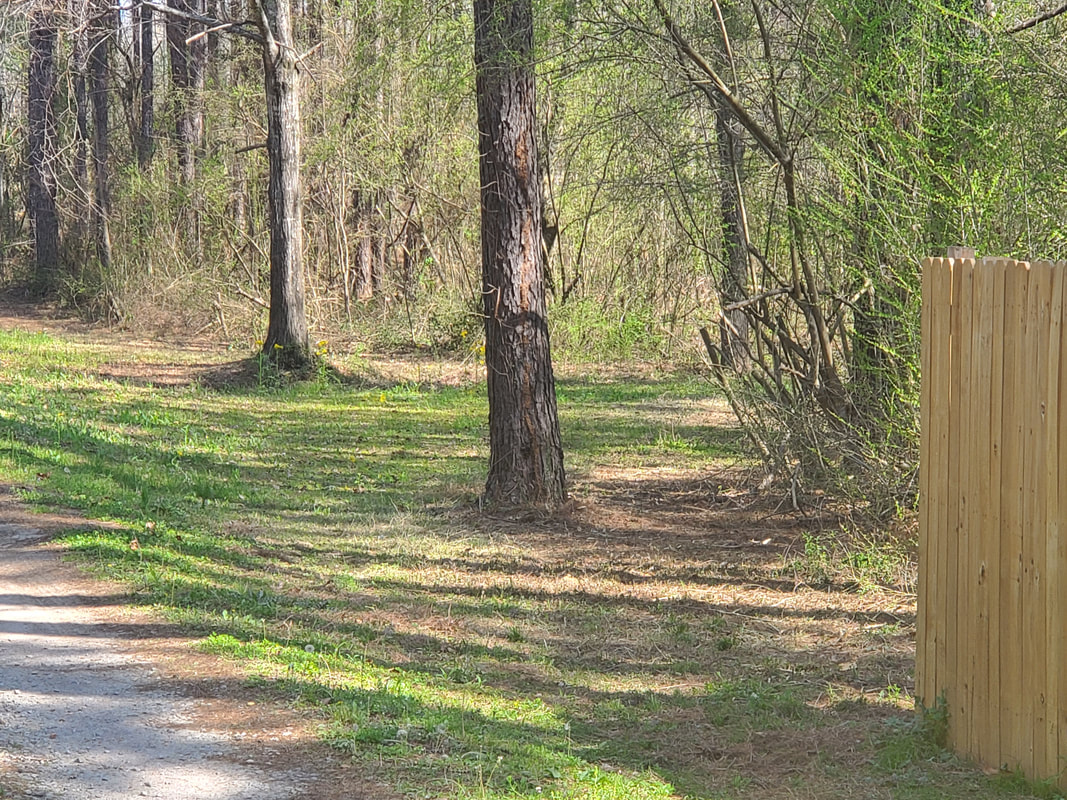
The other side of the driveway cleared of the brush and other trash that wasn't desired along the tree line.
Up above the compound, the patch of tree line on either side of the driveway didn't take long to clear, with the larger material being tossed in the woods. We did manage to clear some trunks, adding to the future firewood pile. We took another detour to trim along the tree line up by our mom's house, concluding the whole tree trimming/landscaping project. After returning the rented brush cutter machine, the next order of business was the spreading of gravel. 
The area of the yard next to the chicken yard fence that is now covered with gravel to provide a parking area for the minivan soon to be doghouse.
I already backed up the truck to the area that I planned on covering with gravel prior to us starting the landscaping project. The area next to the chicken yard fence is the current area to be covered with gravel since this is where I plan on setting up the minivan for the doghouse project. Currently I also have the 84 F150 parked between the area where I'm laying gravel and the rest of the driveway. It's not that big a deal as the distance between the two is small, the wheelbarrow will help out on this little job. The load of gravel did actually cover the ground all the way up to the north side of the fence with a wide enough patch to allow the minivan to be parked there now. I do still plan on covering the remainder of the area but my biggest thing was covering the area to park the minivan on. Opening that door now gives me reason to try and hurry up with the revival of the 84 F150 so I can do the engine swap with the Rustang, which would then allow me to move it so I can get the minivan moved there, which would be another little task knocked out. The more shit I get done, however small, the closer I can get to that imaginary point where I say I've caught up with the big projects.
A few years ago the DSL service that was at one time the savior of us rural folks started going downhill in quality to the point that it was almost no better than the dial up we've all grown up with in the late 90's/early 2000's. Because of this, we had no choice but to convert over to satellite internet. This, as it sounds, involves the use of a satellite dish, just like with the TV version, to bring in internet service. Download speeds are typically fair, but uploads were slow, due to the limitations of the transmitter in the dish head. Because in our area, no one had any prospects for bringing any other kind of high speed internet, we were stuck with the limited satellite internet service. Now if we were living in some super remote area like the Alaskan wilderness or in the middle of the Badlands, then sat internet would've been our saving grace as it granted us the ability to have phone service where we would've otherwise not been able to. But where we're at, we can literally go a few miles down the road and be able to tap into the new fiberoptic lines bringing that type of internet to some folks, or be able to tap into the cable lines bring that type of high speed internet to others. With the things that we typically do online, the run of the mill sat internet, even with the high bandwidth packages, still sucked. That is, until we were introduced to Starlink. Thanks to Elon Musk and his company, Starlink came into being and was introduced to us as the new saving grace for those of us who were stuck with regular sat internet. This service promised to provide way faster speeds and have unlimited bandwidth so there would be no interruptions once that monthly cap was reached. Even with the "unlimited" package, they still limited us to a certain amount, to which the speeds would be cut down until the monthly bandwidth amount reset. It wasn't truly unlimited in that context. At first we were with Hughesnet, then "upgraded" to Viasat, which really is a subsidiary to Hughesnet from what I've learned. 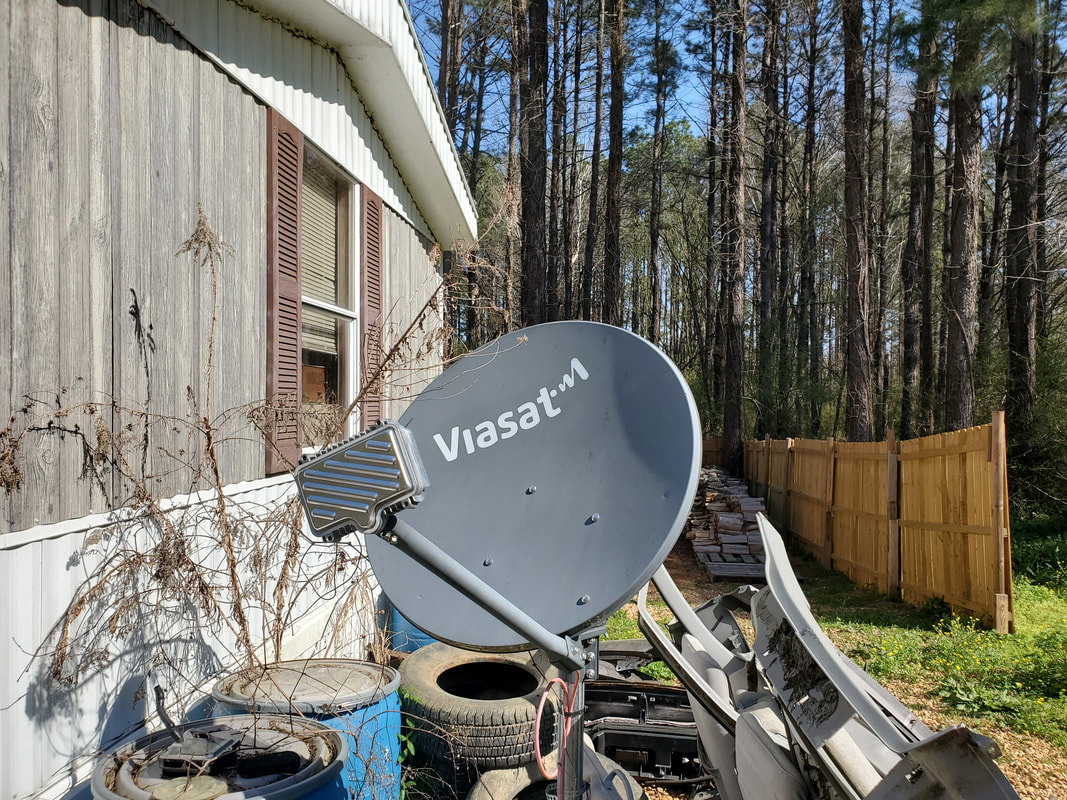 The Viasat dish attached to a pole in the yard next to the house, this has to be set up by a technician, we are unable to perform this job by ourselves. The nature of the Starlink system is that of simplicity. The system is able to be set up by just about anybody, with simple instructions and an app that walks you through the set up process, allowing you to have the system set up in five minutes. That's a rough analysis of what the set up process is as there are obviously other things to take into account. The system comes as follows: A transceiver array, which takes the place of the typical satellite dish, a stand to attach the array on, a length of cable attached to the array which is routed into the house or wherever the router will be situated, and the router, with a power cable. That's it. The array can be mounted on a pole attached to the roof of your house or other structure or to the included stand. The stand allows for quick setup as the array just has to be set up in an open area that gives a clear line of sight to the overhead sky. 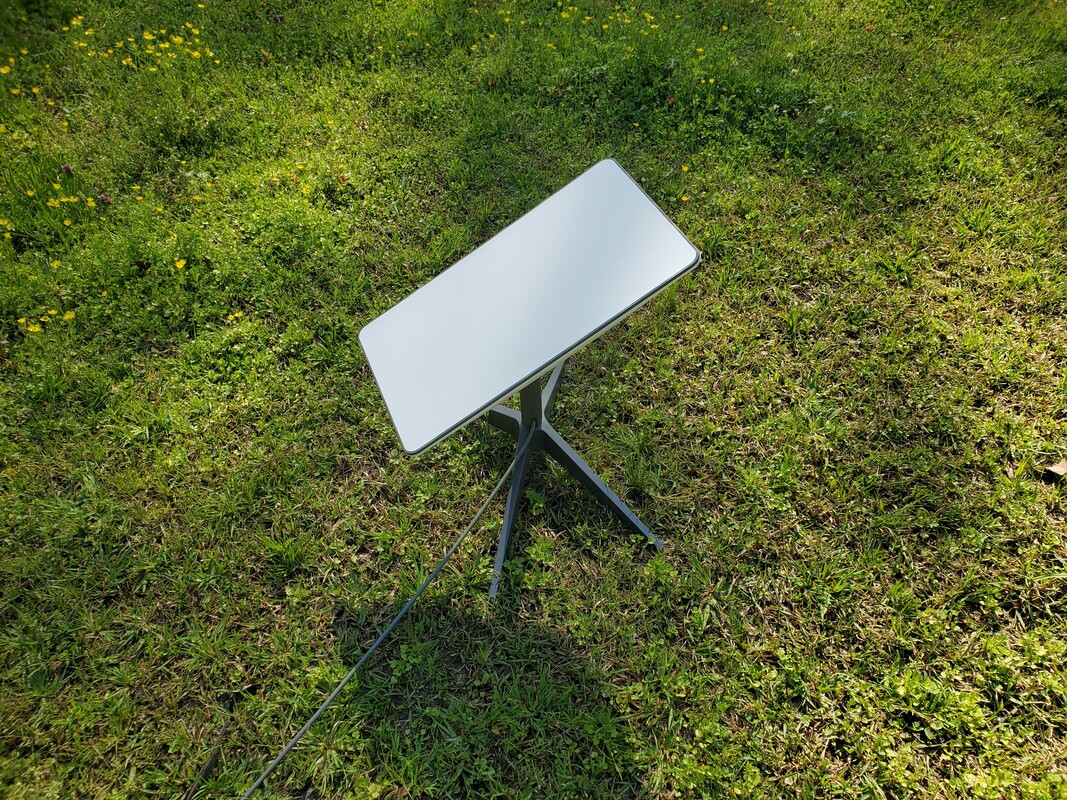 Because this kit is pretty much going to be a semi permanent internet set up for us, I wanted to do more to make it permanent than just routing cables through the window to get things set up as quickly as possible. I ended up going under the house, and utilizing an old hole in the floor under the spot where our entertainment center is situated to route the sat array cable through. After routing the cable through the hole I was able to set up the router on the floor temporarily until we get our old Viasat router out of the way. The router is plugged up to a spare spot on the power strip under the entertainment center so its ready to go. As for the sat array head, I just strung out the cable across the Midway and out to a spot outside the compound fence in the open yard to stand up the array. Yes while this is a temporary setup, at some point I will dig a shallow trench to bury the cable and may very well add a taller post to the eastern fence when I do set up that fence to prop up the sat array. But for now, the array is on the ground on its included stand with the cable strung across the yard. The next thing I did was download the app and go through the set up process. The first thing that the app has you do is a check to verify that the array has a clear line of sight 360 degrees around it. The array will seek the satellite on its own, I didn't have to do anything other than stand the array up. Once it does it scan of the sky, it will show you if there's any obstructions within the circle of sight in the sky. Now even if there are some obstructions, like some tree tops, this does not disqualify the system from being an active participant in delivering internet. It will just perform at a slightly less than optimum level as the obstruction will make the system have some pauses in data transmission/reception that may last only a slight moment, nothing too critical. Once the sky scan is done, the system is named, password set and that's it. At that point I logged in the phone and other devices to the new network as I would've any wifi network. The speeds were a night and day difference compared to the old sat system, with videos loading up way faster and playing with no interruptions. Even one of our games that is an online only game, logged on way faster than it typically does on the older system. 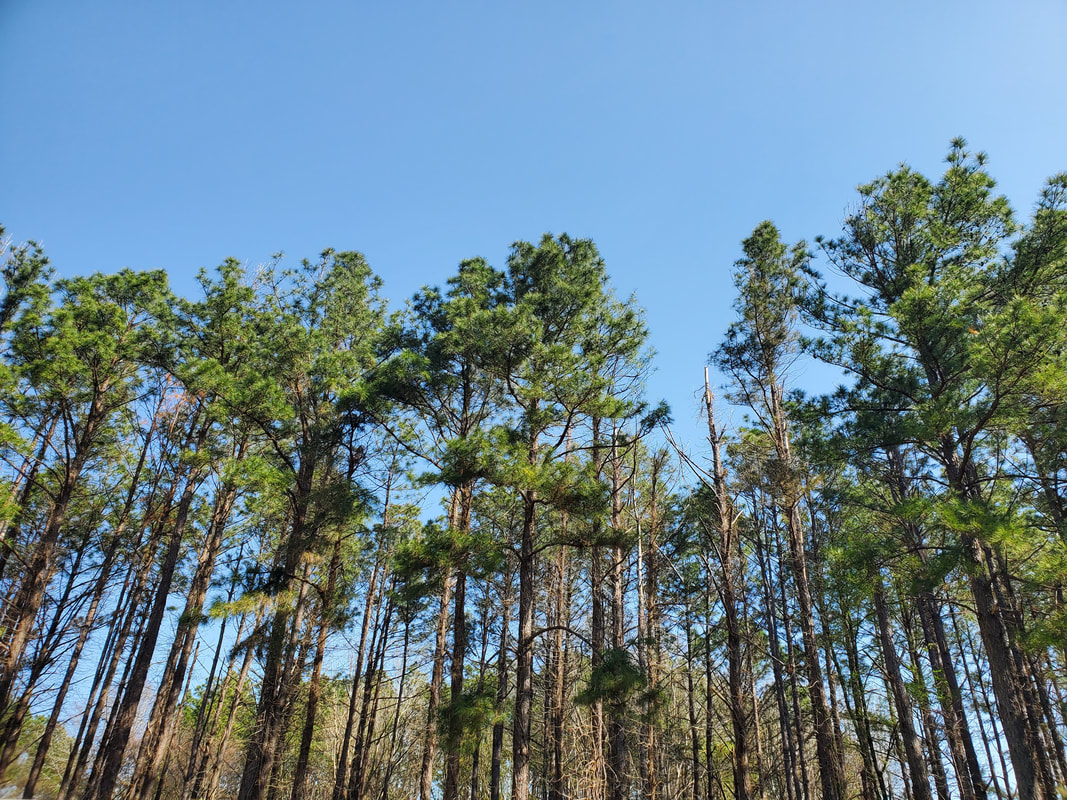 Now I would not have mentioned about obstructions for the hell of it. Because of the layout of our area, it would be obvious to figure that the tall pine trees would end up being a problem as far as allowing the sat array to have a clear 360 degree line of sight to the overhead sky. No matter where I staged the array, with the allotted amount of cable, the scan produced a small area of obstruction due to the tree tops. This obstruction was not too serious, but it was enough that every once in a while there will be a hiccup in the service that may be noticeable, mainly when playing an online game as the game will stall for a couple seconds and either come right back, or drop out. This doesn't happen much at all but its occurrence is enough to remind us that the tree tops are a clear problem to the optimum performance of this otherwise awesome system. Now of course this means that the thought about dropping more trees along this side of the yard are crossing my mind as there are other benefits to removing more of these trees. Doing so would also clear more threats to the compound in the form of falling trees. But that is another topic for another time. All in all the Starlink system has been working nicely, delivering speeds that put Viasat to shame. Even with multiple devices online, there are no interruptions in streaming and the speeds are fast enough that buffering is almost nonexistent. Now for the costs. As of this writing, there is a startup cost of $500 for the equipment and afterward the monthly cost is $110 a month. There is no cap on the bandwidth so I can stream to my hearts content day and night. Compared to the $250 a month for the Viasat service with the highest bandwidth, the initial $500 will be recovered in a short span of time with the $150 a month savings. Because of the unlimited bandwidth, this allows for starting up a VOIP phone service or even using the wifi calling feature on our cell phones through the sat network. Another good plus about this system is because of the ease of setup, it can be taken with and set up again anytime anywhere with minimum effort. Moving to the end of the world would be no big deal as we can set this system up and be online. Hell, if we really wanted to, it would be nothing to undo the cables and pack this system up to take with on an expedition somewhere where we may need internet due to the lack of cell service. This is definitely a system I would recommend if you live somewhere that regular landline broadband, fiber or cell hotspot is not available. |
