|
It's been quite some time since I really done anything on the perimeter fence, with the only exceptions being when I set up the gate frames for the eastern fence gate that would grant us access to the greater yard on that side of the fence. I did sink a couple more posts since I had some leftover concrete from the Whole House Generator slab. Leaving concrete sitting too long in anything but a completely dry environment pretty much seals its fate as the concrete will absorb moisture from the air and eventually harden. After sinking a couple of posts and using some more concrete for the Tumbling Composter slab, I still ended up having one extra bag of concrete left over. I had this bag stored in the S10 for the time being since that vehicle wasn't being used and it was the only real dry environment I had close by short of the house itself. I ended up getting a couple more posts so I could go ahead and use that bag of concrete up so it doesn't go to waste, while at the same time making a small yet necessary advancement on the perimeter fence. I had already sunk posts along the eastern fence line as it runs along the east side of the garden so I figured I'd continue on with this line and just work my way around to the southeast corner of the compound, where the Fallen Trees still lay. Once I make it around there and around the remainder of the southern fence line, I can then sink posts around the north and west sides of the garden, finally concluding the sinking of posts and the next phase which will be hauling in fence panels to get the fence completely erected once and for all. I of course pressed the gas auger into service once again to drill a couple of post holes in the ground along the old garden fence line. Before doing this I did have to use the weed trimmer to cut the high grass and weeds along the fence so it won't get in the way of either drilling the post holes or sinking the posts themselves. After getting the grass cut, I drilled my post holes.  Post hole augered out with post sitting in the hole. Note the chicken wire from the old garden fence. I set my measurement points using the posts themselves, getting an 8ft center spacing from the last post in the ground. Barring any mismeasurement of the posts themselves, the next post should be 8ft from the last post with an inch give or take or error. I will sometimes have to tack an extra 2x4 to the side of the post if I need extra surface to hang a fence panel that is off by an inch or so to ensure that the panel will be secured nicely. I set the post in the hole and brought the bag of concrete over, pouring dry concrete powder into the hole around the post. I had to keep the post upright as I poured the powder in the hole so it doesn't settle enough with the post off kilter where I won't be able to straighten the post out due to the heavy concrete powder not moving easily.  Post resting in hole while concrete was brought to the site to start the pouring This is the same technique I've been using for sinking fence posts for some time now. Rather than premix the concrete then pour it in the hole, which tended to be a messy endeavor, I poured the dry concrete in the hole around the post then I slowly poured water around the dry concrete, letting it soak into the powder. I sometimes had to add a little more powder as the concrete further settled to ensure that the top of the concrete around the post did not have any depressions that could hold water. It is these water holding depressions that can contribute to the base of the post rotting prematurely. After I had enough water soaked into the concrete around the post I moved on to the second and last post for this session. 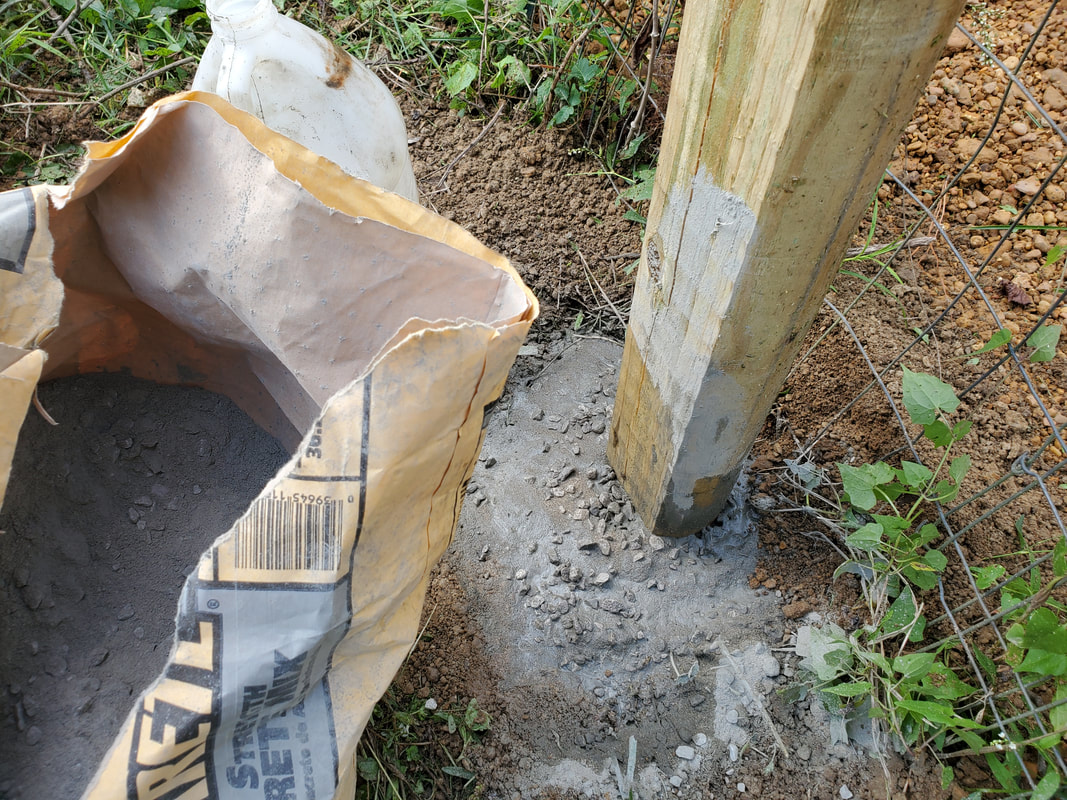 Concrete poured in hole around post and soaked with water. It took half of an 80 lb bag to fill one hole. Of course this post was just a repeat of the first one, measuring where the hole needed to be using the post itself as a ruler, then augering the hole out. I set the post in the hole and poured the other half of the bag of concrete into the hole and soaked it with water, topping off the concrete with the little bit of concrete powder that still remained. After I had the post secured in the hole with plenty of concrete, I had a smidge of concrete powder left over that I went and dusted on the ground in the garden around in front of the Dog Kennel Greenhouse where there was still some spots that when wet would end up being a little mushy. This concrete dusting will at least help keep that ground from eventually wearing away more under our feet when we find ourselves walking over it when its wet. 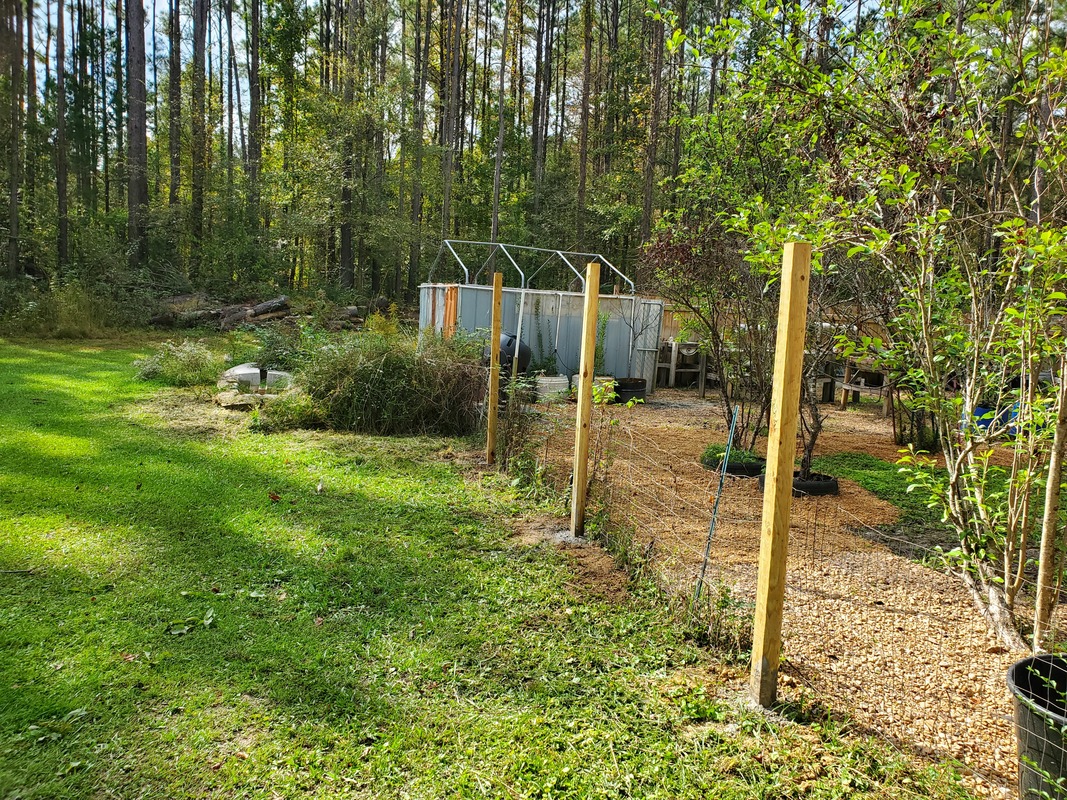 Two posts in the ground in the background. Note the close proximity to the Dog Kennel Greenhouse. With the posts in the ground I stood back and took a look. I determined that it will take two more posts before I reach the Dog Kennel Greenhouse east wall and another two posts before I'm past the Greenhouse and at the open back yard area where I will set up another pair of gates for reentry into the compound at the back yard area. It won't be that many more posts before I have the whole perimeter fence line established, I'll just need panels. I will also have to finish removing the Fallen Trees from the area to open the way for the fence line as there's still a few trees that are dead in the way of progress. Slowly but surely we'll get this fence done and be able to finally close in the compound.
0 Comments
Earlier this year during our trip to TX, we managed to pick up, among other car related things, a Mopar 413 big block V8 powertrain that was removed from an RV. The rig only had like 44k miles on it and ran pretty good. The guy had the thing rigged up to be able to start on the ground for a few seconds to show that it ran fine, which it did, even with a shitty carburetor. The transmission on it is a 727 Torqueflite but a version that has a shorter tail and an integrated parking brake drum assembly on the end of the tail. For $600 I was instantly sold since anything Mopar is expensive and anything big block Mopar is ridiculous. Fast forward to today and this rig, sitting on the floor in the garage needs a home. If you remember, we recently rebuilt a 318 small block V8 for the Charger with the intent of this being temporary while we work on getting the 440 big block powertrain worked over and ready to go back in the car. Now a little about that. For whatever reason or another, we appear to be having some issues with the rebuild of the 318 that is not looking too promising as far as having the powertrain ready for use. The engine sounds like it has rod knocks when running despite its starting up pretty good and actually running pretty good with no smoke. I even took the time to swap out the rod bearings to some of a slightly larger size just in case the crank was actually turned just a little. With everything appearing to be tight, after starting up the engine, the damned thing still had rod knocks. I was told that maybe one or more of the connecting rods might be drifting on the wrist pin of their pistons, not sure. Either way it goes it means more than likely having to pull the engine out and tearing it down on the bottom end to get a better examination since trying to pull it apart again on the bottom end was a PITA. I'll probably pull the pan again with it still in the car but if its something more than say, a loose connecting rod nut, then I'll have to pull the engine out. What does this have to do with the 413? Well since our prospects of having a small block powertrain in the Dodge and having it ready to hit the road are looking bleak, I figured I may as well try to ready this big block power train to go in the car and at that rate, whatever I figure out with the 318, it won't factor in with the Charger's resurrection. Either I'll fix the 318 and have a ready to use engine and transmission for another Mopar, or I'll cut my losses and sell the rig. If I work on the engine I did tell myself I need to build an engine testing stand that will allow me to bolt the engine up where I can start and run/tune the engine outside of any car so it can be confirmed ready to go when its dropped into its host body. In the meantime, I want the Charger ready to go. Now the 413 is for all intents the same block as the 440, with a few differences. The heads are different on the two so I will have to use the same exhaust manifolds that came with the 413, the 440's pieces won't work. I still have to see if the 440 accessory brackets will bolt up to the 413 heads. If not, then I will more than likely have to pull the 440 heads off and swap them out with the 413's heads. This may not really be that big of a deal since the 440's heads were rebuilt by a machine shop and should be more than ready to go, I'll just need head gaskets and will need to swap out the pushrods if they don't match up between one another. At that rate everything that was on the 440 would be able to be used on the 413. I can then send the 440 block out to be redone by a regular machine shop since this is the kind of engine that deserves high quality work done to it to make it something that will kick ass for a long time. The 413 would be a stepping stone to bringing the Charger back to its former glory. Hell I would even consider installing replacement heads on the 440 and leaving everything on the 413 so I would have two BB engines straight. As for the transmission, since the tail on the 413 tranny is shorter and has that parking brake assembly on there, it won't fit under the driveshaft hump on the Charger. The 727 that I had on the 440 needs to be rebuilt. Now I will need to do a little research to see if it may be possible to remove the tail section and output shaft of both transmissions and swap them out, putting the longer car tail on the 413 tranny so after I do the other swapping around I will have a complete rig ready to rock and roll. Only other thing I would have to do at that point is get the driveshaft shortened since I had to have a longer shaft made to accommodate the shorter 998 tranny that was with the 318. In the meantime I needed to strip down the 413 so I can get a better look at everything on this engine and formulate a battle plan that will have me not spending too much time or money in this swap out, as I've spent enough time and money messing with the damn 318's. 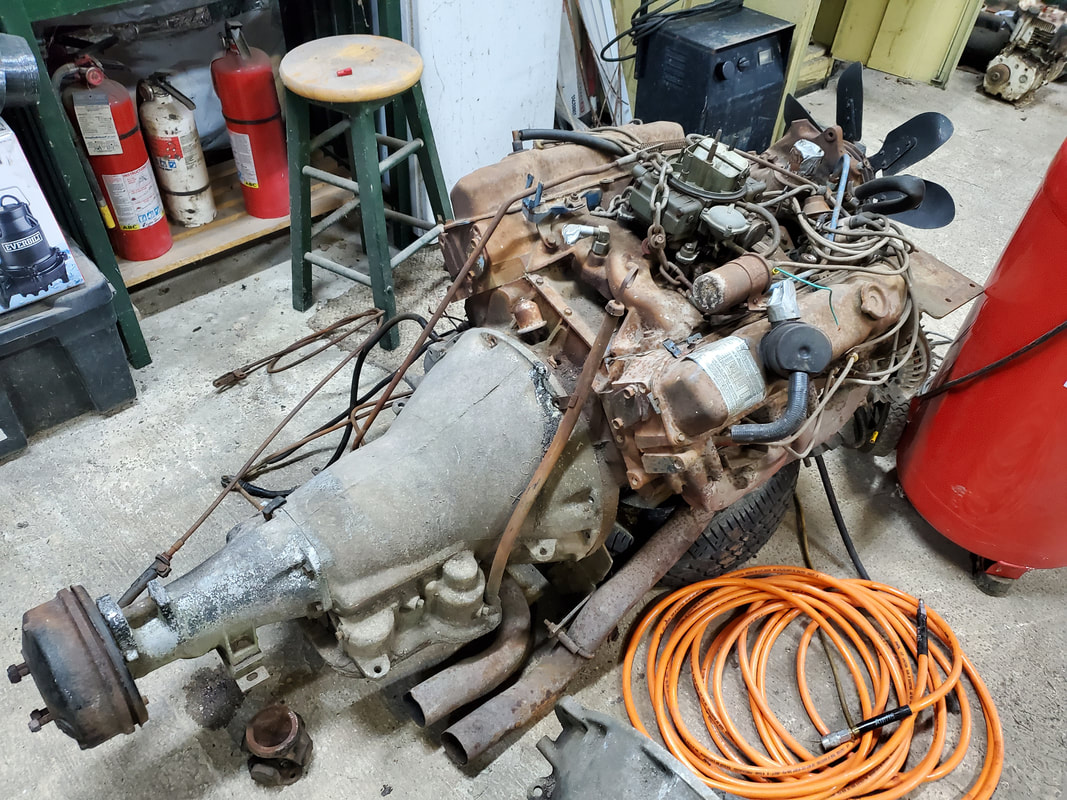 Engine at stage after removing electronics panel and other hardware from back of engine. Panel was bolted to top bell housing bolts to hold it upright and out of the way. 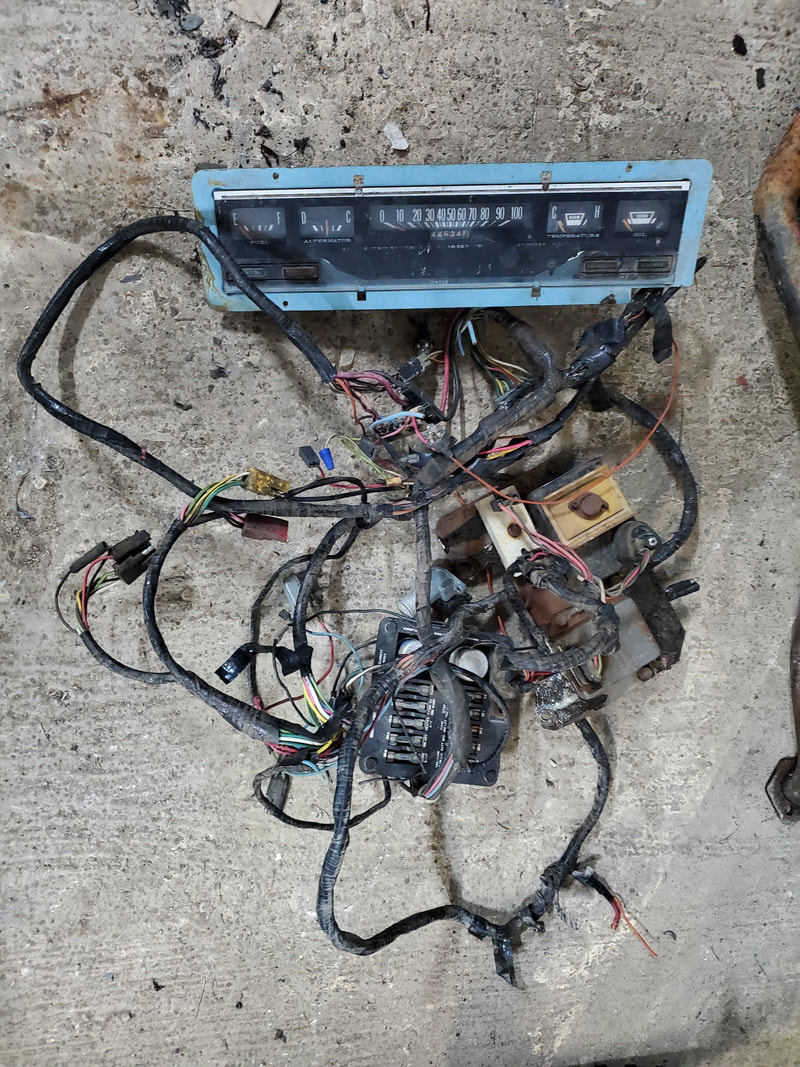 Electronics panel and gauge cluster/fuse box and other wiring that came with the engine. For all intents and purposes this wiring would allow one to damn near rewire a car to run with this or a similar power train. After pulling off the panel that held the voltage regulator and ignition module along with the associated cables and wiring that were hooked up to the engine to allow the engine to run, I got ready to pull the transmission from the back of the engine. In the meantime I moved the 440's transmission over to where the 413 is at so when I pulled the tranny free, I can have the two transmissions together so I can see what I need to do, if anything. I pulled the starter free, along with the dust cover from the bottom of the bellhousing before pulling the bellhousing bolts free. 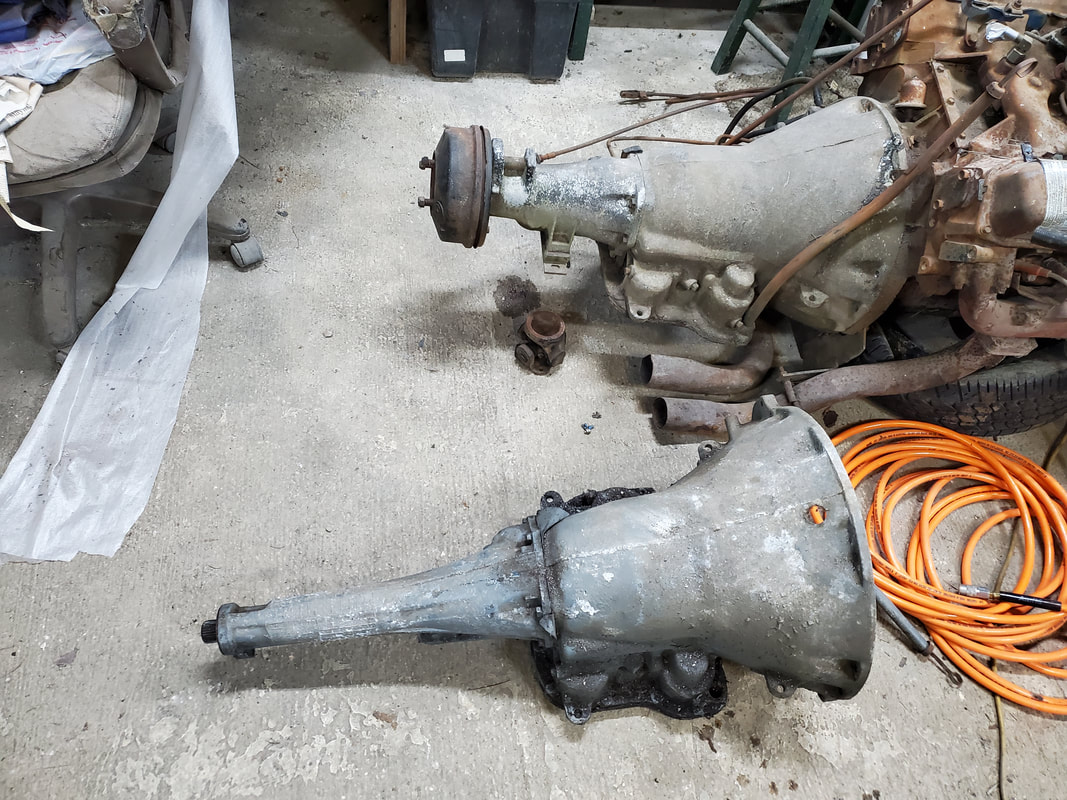 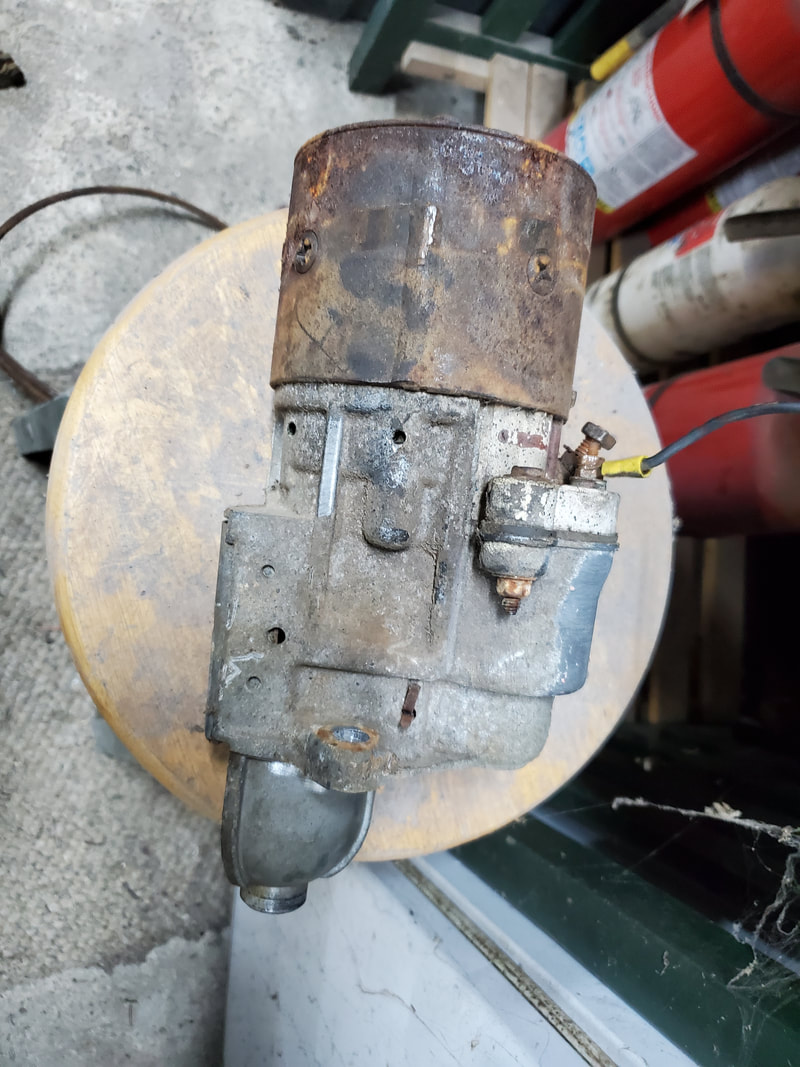 The gigantic starter removed from the transmission, used to crank the mighty 413 big block over. 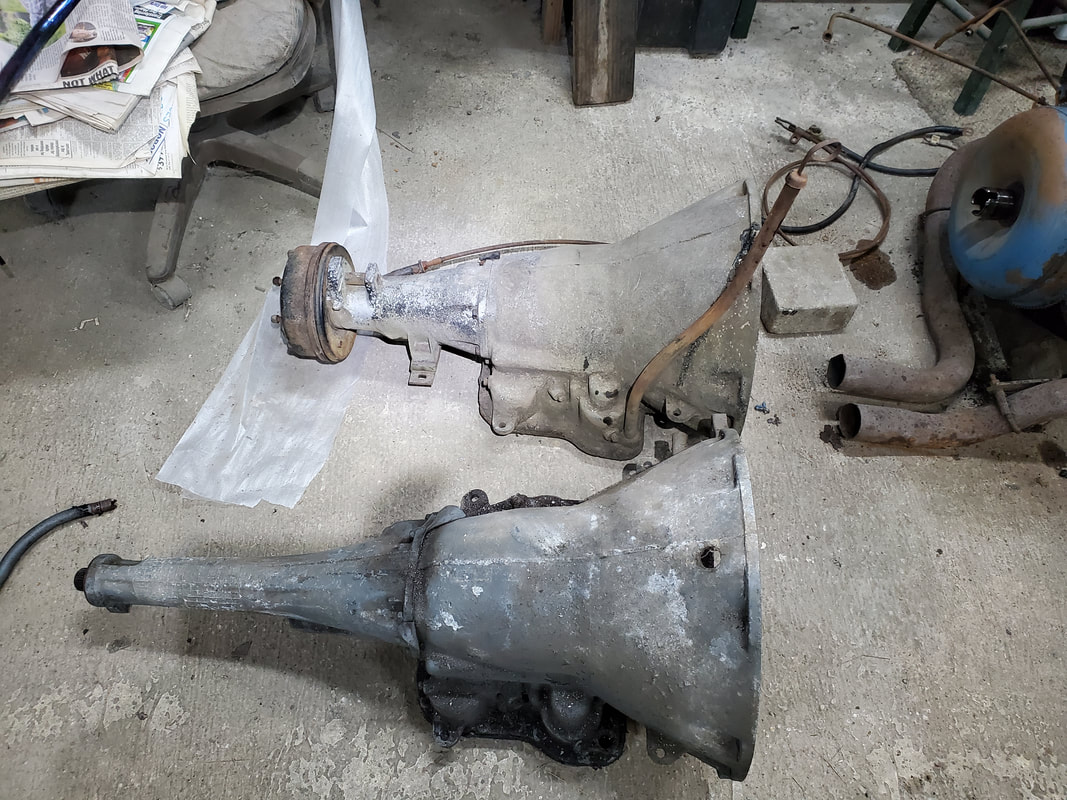 413's 727 Torqueflite transmission removed from back of engine and staged next to 440's 727 Torquefliute, note the difference in tails. With the transmission off, it was time to pull off the accessories and other hardware. Everything had to go, water pump, alternator, associated brackets, belts, carburetor, TV linkage, exhaust manifolds, everything. I started off with the water pump. This thing was huge, having ports that connected to the block, as well as to the fronts of each cylinder head. Along with the water pump I pulled the carb and TV linkage along with the coil. 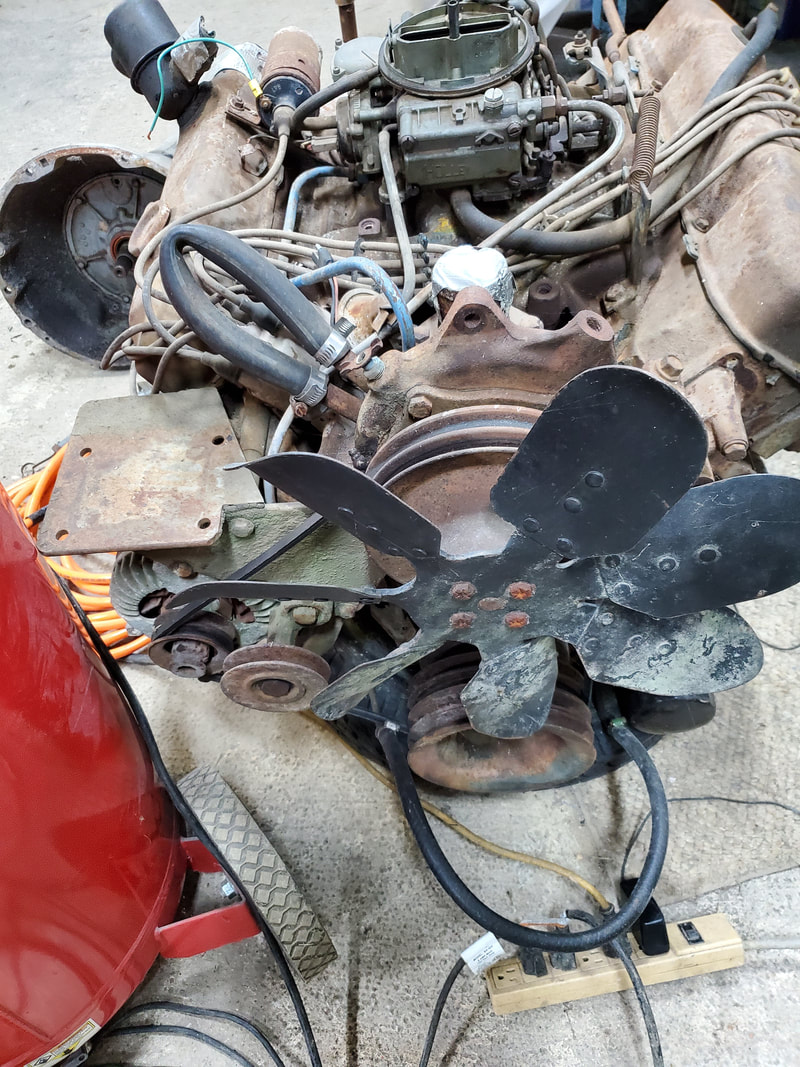 Engine with hardware still on, everything has to go. 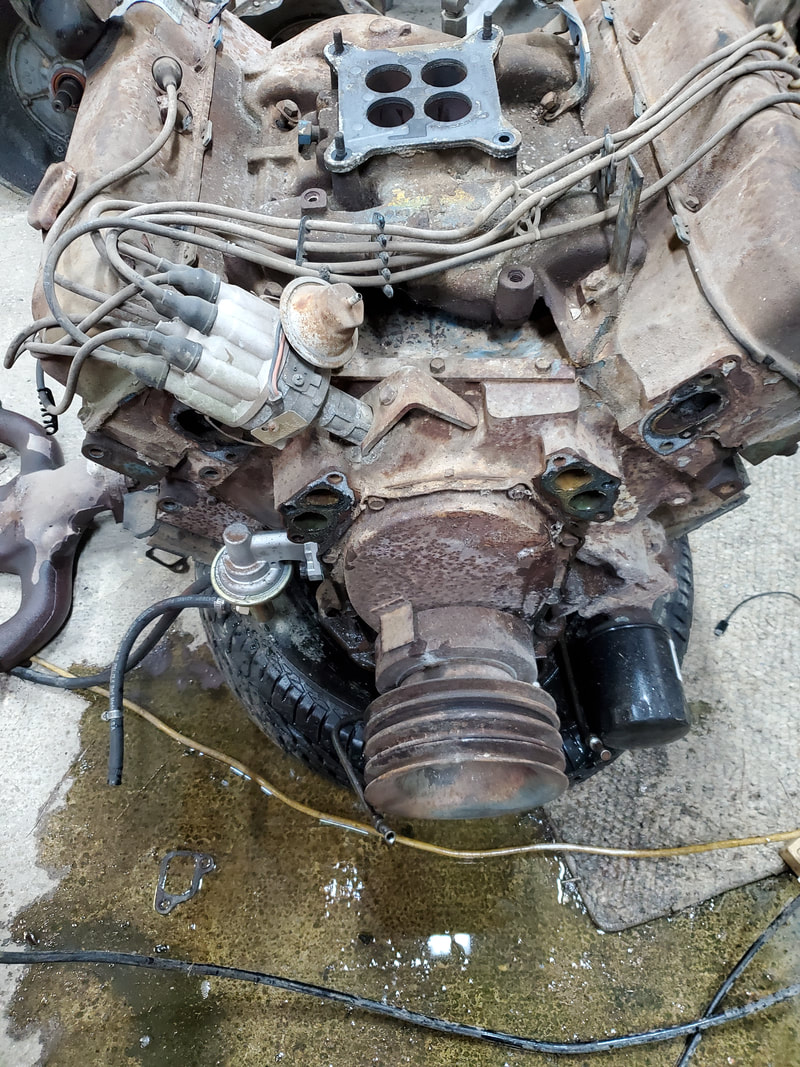 Engine after pulling water pump, alternator and coil off. The next thing to go on the engine was both exhaust manifolds. Now this was a little nerve wracking due to the fact that the bolts holding the manifolds to the heads were rusty. I was seriously afraid of snapping one or more off in the head. I did soak everything in penetrating oil from the beginning so I can give the oil some time to work before I got to the bolts. Luckily I managed to get every bolt pulled without incident. It wasn't a total win though. The bolts holding the flanges to the manifolds were so frozen on that they weren't coming off. Of course that ended up being a "fuck it" moment and the heads came off with the flange pipes and the length of pipe that was still attached. All of this went to the side. With that I pretty much pulled everything that I would've needed to pull off short of the distributor. 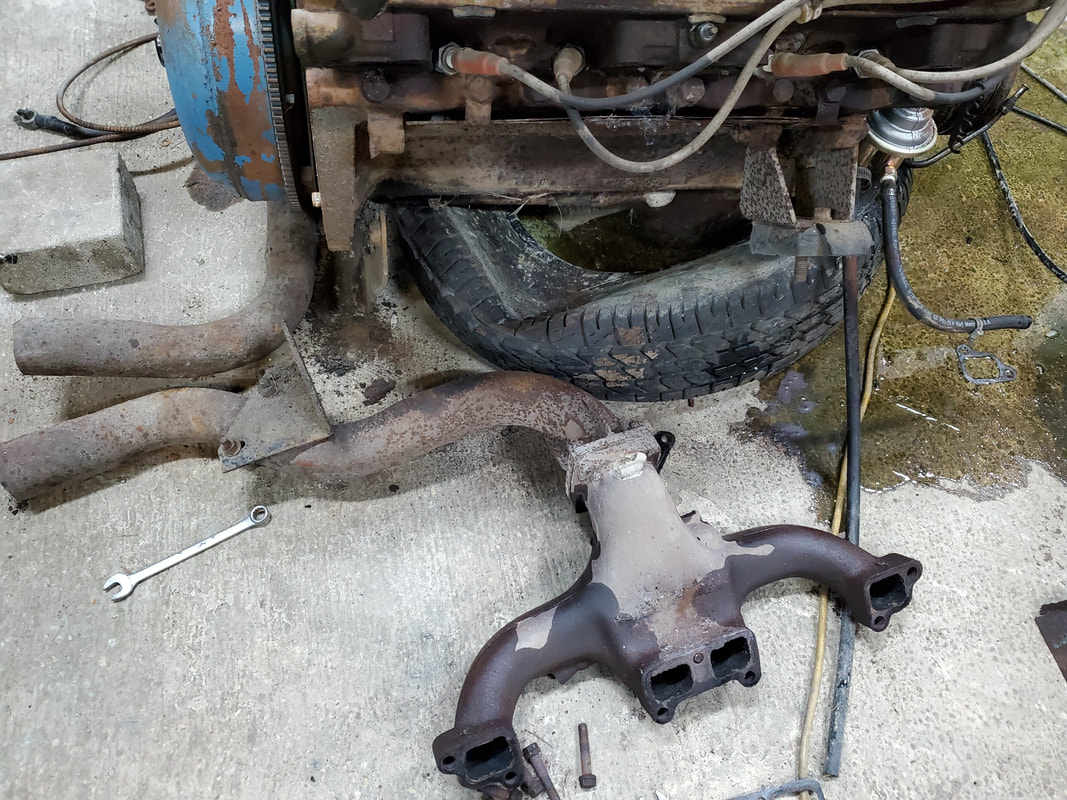 Getting the right exhaust manifold off the engine, note the length of the pipe from the flange on down. 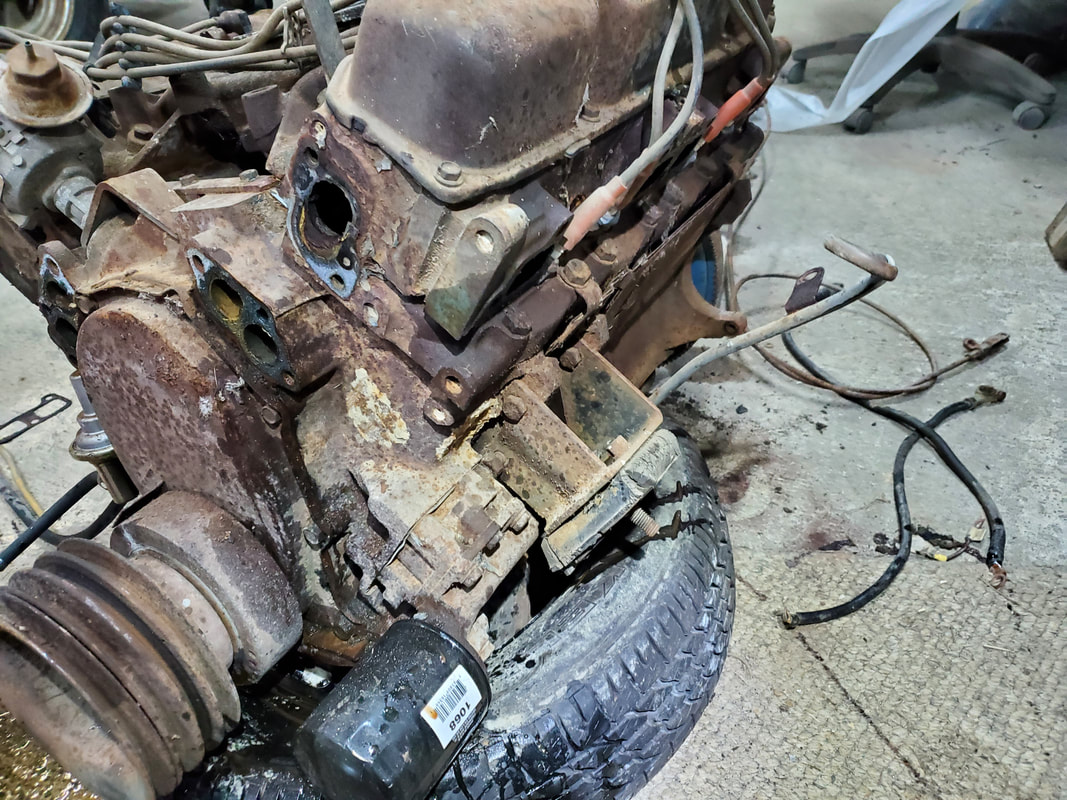 Left exhaust manifold is now gone. 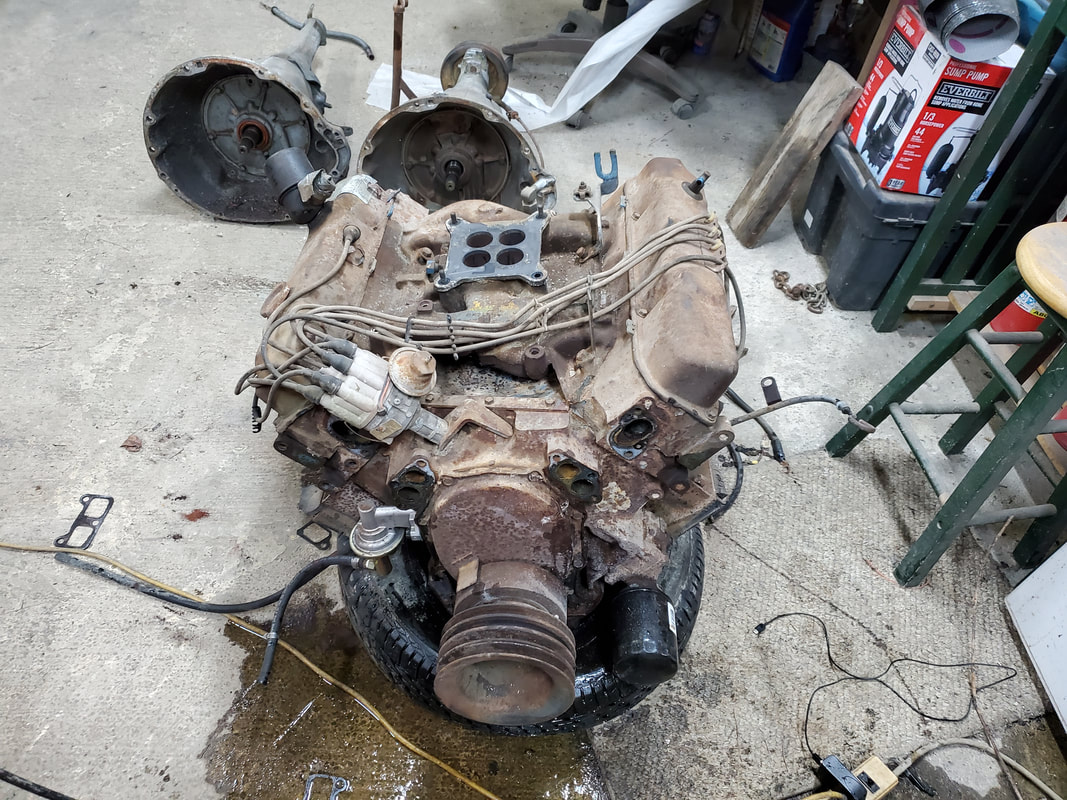 Engine stripped of everything in question that would need to go. 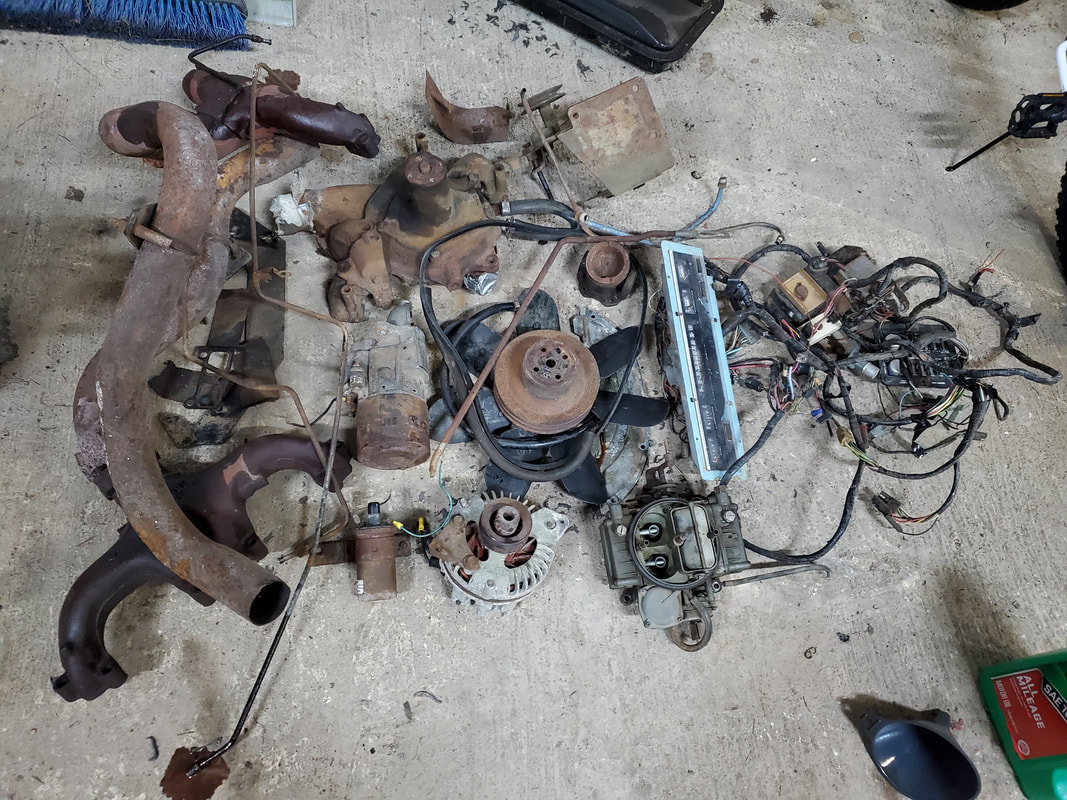 All the stuff pulled from engine, the exhaust, water pump, alternator, wiring, etc. Now in all actuality if I wanted to, I could try to see what it would take to still use the 413 hardware, as far as the water pump and exhaust manifolds. The engine didn't have a power steering pump on it so unless the brackets on the 440 are able to be bolted to the front of the 413 on its heads, I would have to forego a power steering pump and just bypass it with a jumper hose so the gearbox isn't just moving around dry. Also as far as the water pump is concerned, I would have to omit the fan that was on the pump as the pump being mounted higher than the normal 440's pump, would most likely hit the hood. This is no big deal as I already have electric fans on the radiator anyway. As for the exhaust, I would have to literally test fit the engine in the engine bay and see if the 413 manifolds with their respective flange pipes would be able to fit into the Charger's engine bay without hitting anything. Now if all those boxes can be checked off, then maybe just maybe I could drop the 413 right in as is and reuse everything. Even the intake is set up for a 4bbl carb, so other than a spacer, there would really be nothing else left to modify. We'll just have to see how things work out.
Recently we picked up an old charcoal grill from the trash that was a little rough but not too horrifying. Originally, I planned on adding this thing to the pile of outgoing scrap I hauled but after looking at it I figured, why not try to restore this thing? I figured that I could scrape off the rust on the inside and outside of the thing, shoot some paint on the body and add some better wheels to the thing.
Well I started looking at the grill. The wheels that were on the thing were cheap plastic wheels, one of which was half melted. I figured I could remove these and add a couple of bolts and use these old lawn mower wheels I still had that have 1/2" hubs on them. I also started using a wire brush to scrub the grill body and came across the air damper. That piece was rusted badly and pretty much had to be broken off in pieces. Upon removing that I started grinding the area with the grinding wheel on the die grinder since I had to remove the remnants of the air damper. Doing this opened up more rust holes and the like, which had to be plugged some kind of way. I have no problem with this as I would just take a piece of scrap sheet metal and after cutting and trimming a patch, weld the piece in place. 
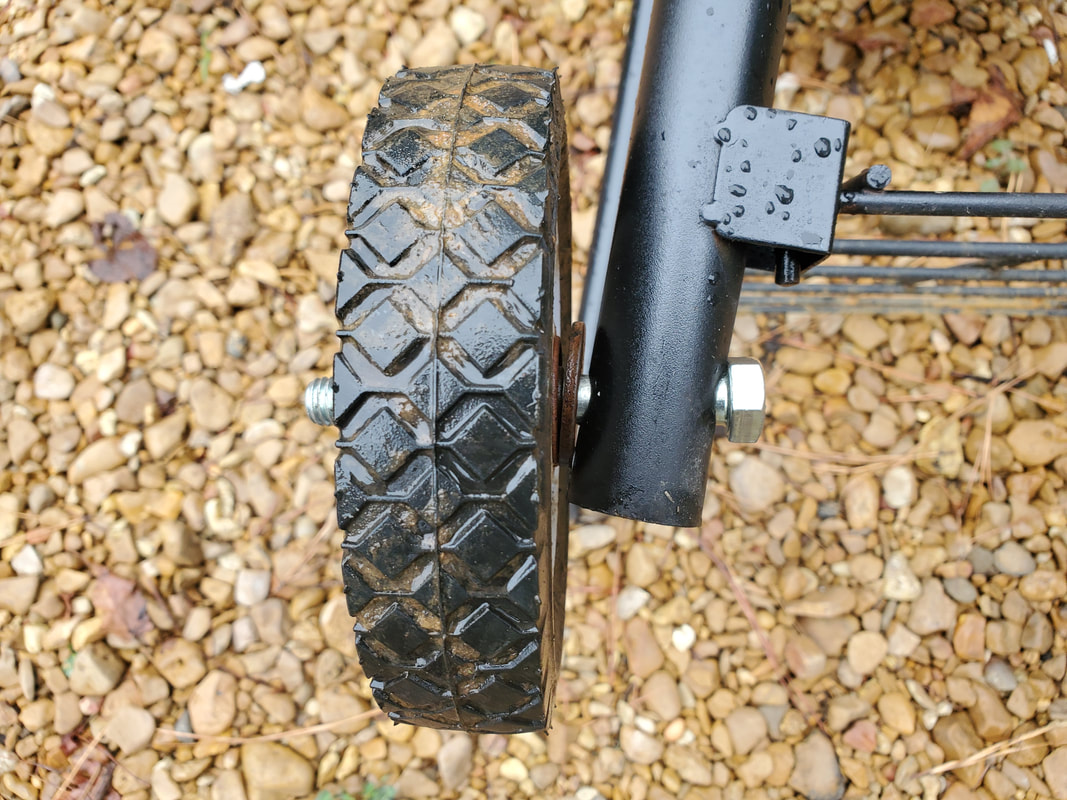
After removing the shaft that held the old plastic wheels I found that the hole at the bottom of the legs was big enough to accommodate 1/2" bolts, which are seen inserted to both legs. I'll be able to slide washers and the wheels in place and secure with nuts.

Air damper that is rusted to shit, prior to grinding off the grill body.

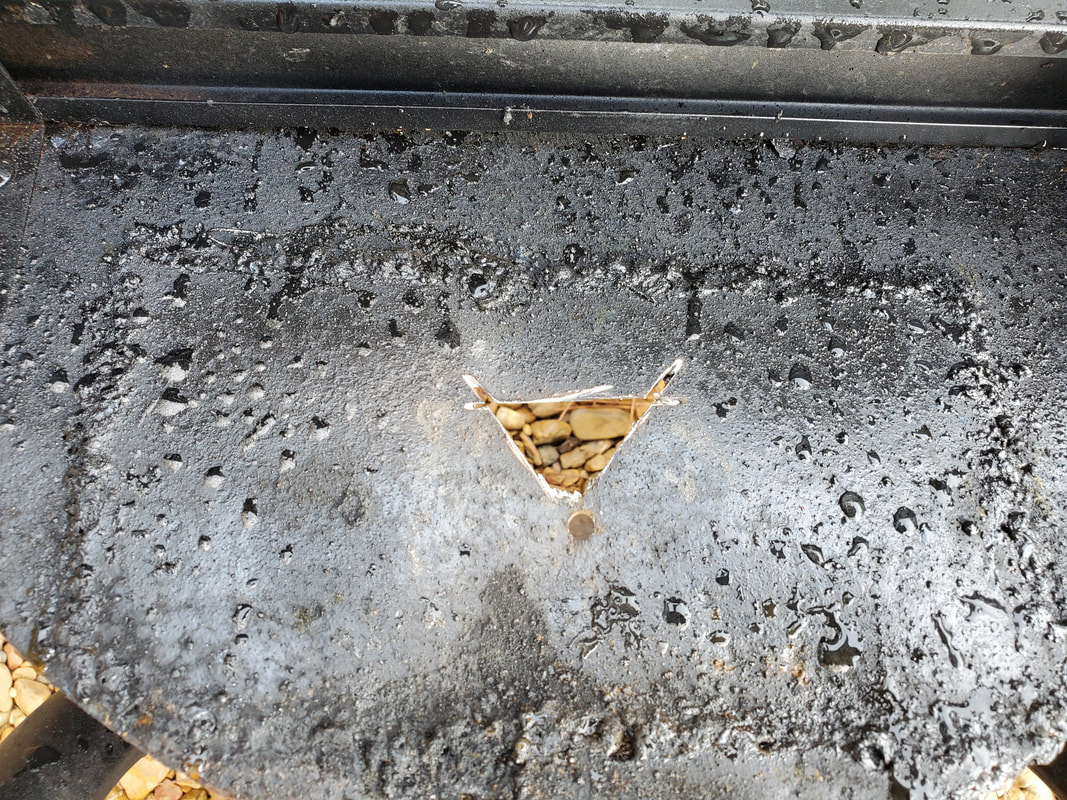
Air damper area after grinding rust away from old damper area. This will need a patch.
Since I still have a pretty good sized pile of scrap metal I was able to find a small piece of thin sheet metal that would make a good donor piece for my patch. Of course since both the grill body and even the patch were of thin metal, I would have to be very careful in my welding as the welder, even on the low setting, will vaporize the metal quickly. After cutting the patch as needed to thoroughly cover the area, I started the welding, having to fan the welding gun back and forth as I tracked around the edges of the patch so the arc didn't stay in one place too long. Even with this technique I still ended up burning holes that I needed to do the same in order to fill in with slag from the welding wire. It was a PITA but eventually I did make my way around except for the very bottom of the patch, where I needed to add a small piece of sheet metal to cover excessively large holes being burned into the side under the main patch. 
Metal patch cut and fitted over hole in side of grill.

Patch welded in place. You can tell from the shitty weld bead that I had to work my way around, taking into account the holes that were being produced and being filled in with wire slag. I had to weld an extra piece of metal at the bottom due to excessively large holes being burned through the grill body that were too big to be filled in with slag.
With the patch done, the next thing I did was scrub the metal with a wire brush so I can spray paint the outside body with some high temperature paint. This is the paint typically used on grills or other surfaces subject to high temps that would otherwise melt regular paints. It cures to a dull finish and ideally cures better when subjected to some heat. I had a couple of cans on the shelf, one that was probably half full and one that was about 1/4 full. I used both of these up putting a covering over the whole of the grill body. I used regular black paint for the legs and the shelf on the side of the grill since these areas would not be subject to intense heat like the main body. I also installed the wheels on their bolts at the bottoms of the legs, using washers and nuts to hold the wheels on. As for the inside of the grill, since this area is where the real fire is at, I didn't spray any paint here since food will also be in this area and even though the paint may be heat resistant, I don't need any level of paint cookoff going into food being prepared within. I just scrubbed the hell out of the inside with the wire brush to get the surface rust and other loose debris off the metal. The last thing I did was add a homemade damper. To do this I took a jar lid, drilled a hole in the middle then used a rotary tool with a cutting disk to cut out a triangular pie cut from the disk. I drilled a hole in the side, on the patch I just put in and after mounting the jar lid to the side, marked the same pie cut on the side of the grill. I removed the jar lid then used the die grinder to cut out the triangular hole so it would match up with the jar lid. From there I reinstalled the jar lid. The lip on the lid allows me to turn the lid without actually touching the body of the grill in order to adjust the inlet opening of air to the grill. Quick, simple, free. 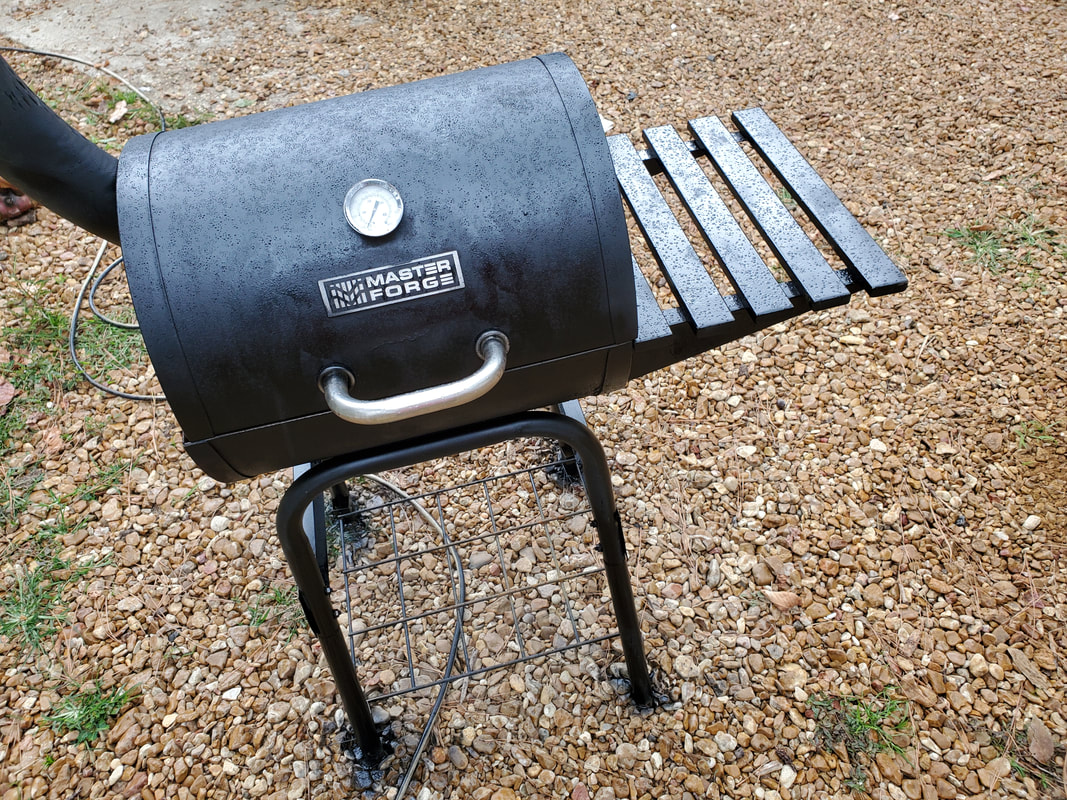
Grill after spraying high temperature paint on the body and regular gloss black on the legs and shelf. I was able to carefully spray around the handle and logo and thermometer without much of any over spray.
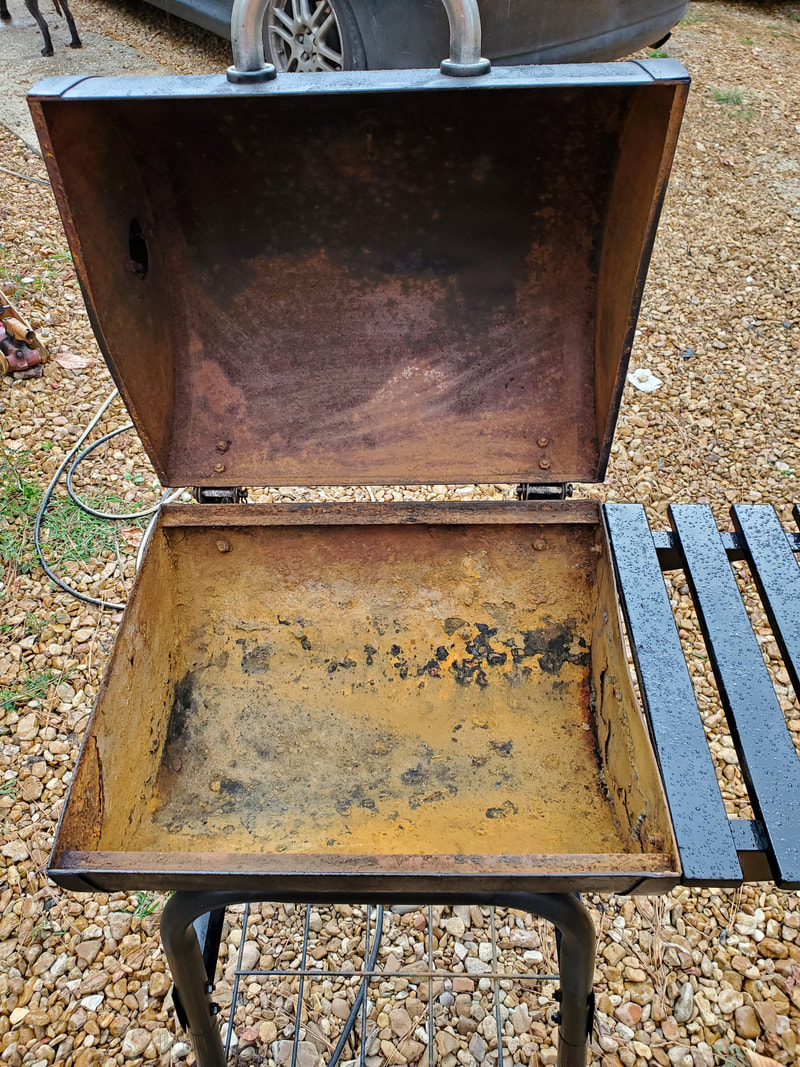
Inside of grill after scrubbing the crap from the inner surface.
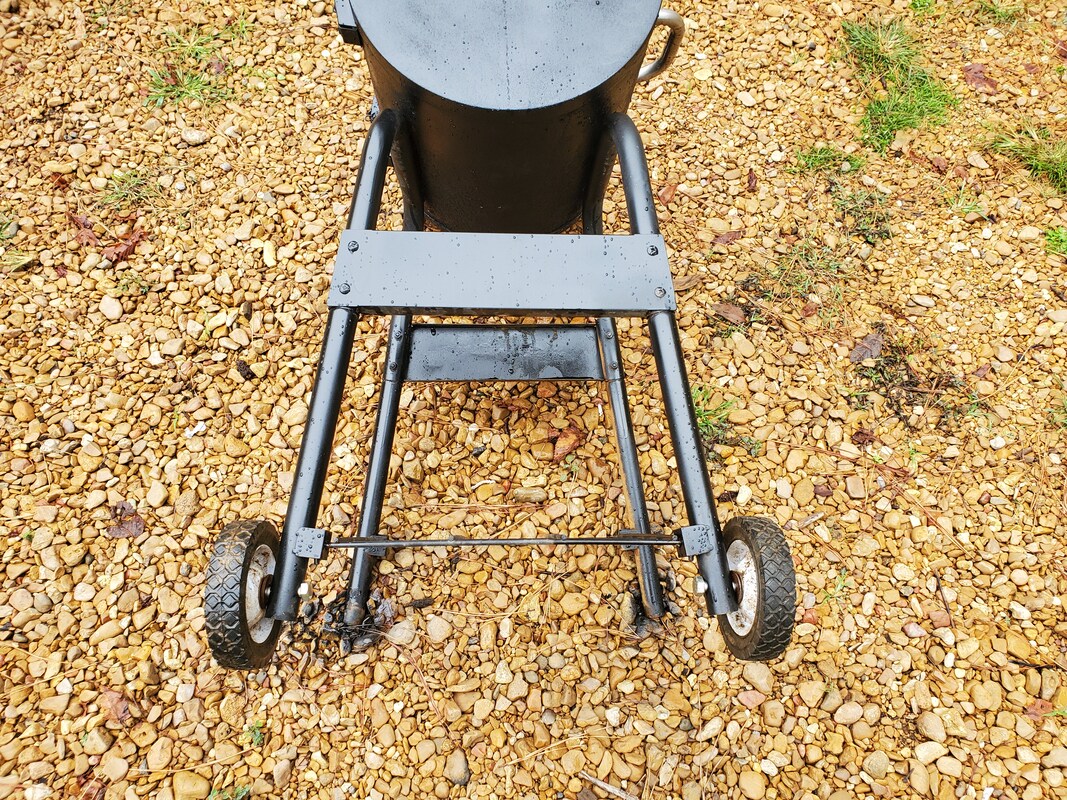
Wheels installed on bottoms of legs of grill.
Closeup of the wheel with the bolt, washers and nut. Nut is on the left side of the wheel, not visible due to being blocked by wheel itself.
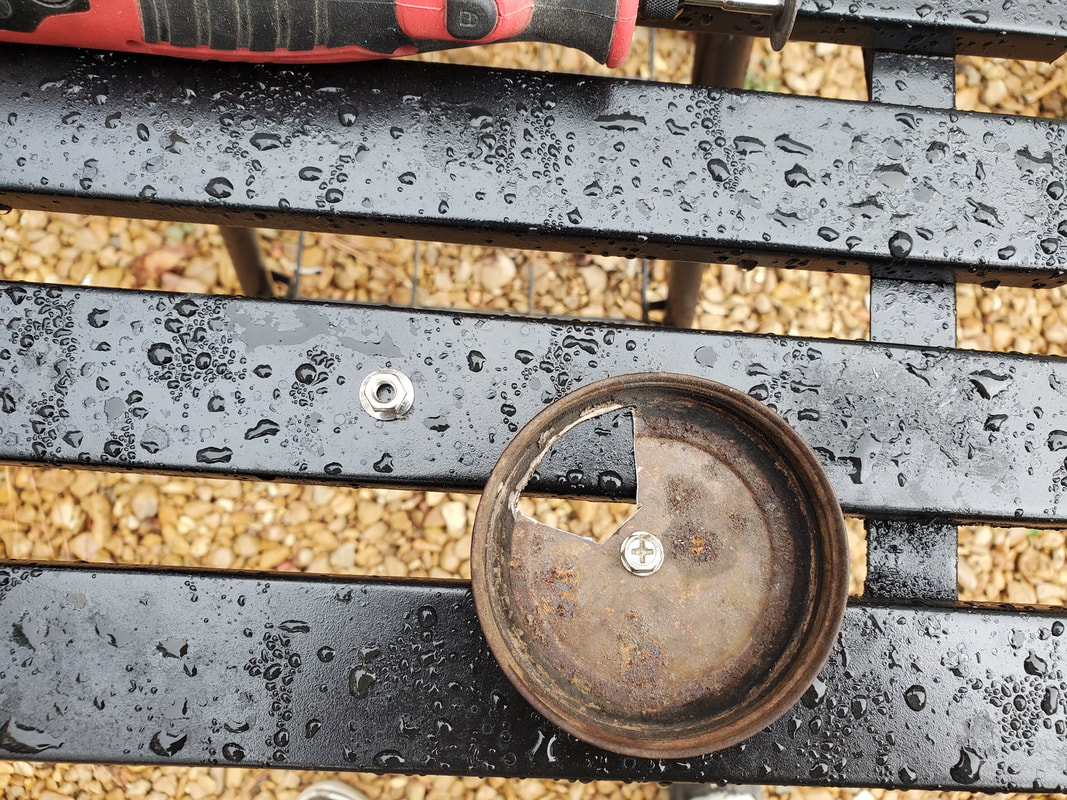
Jar lid with pie cut hole and drilled out hole for bolt.
Same pie cut hole in side of grill on patch, along with hole drilled to secure jar lid with bolt.

Jar lid damper bolted in place on side of grill.

Jar lid damper turned to expose pie cut opening on grill to show how air would be able to enter grill.
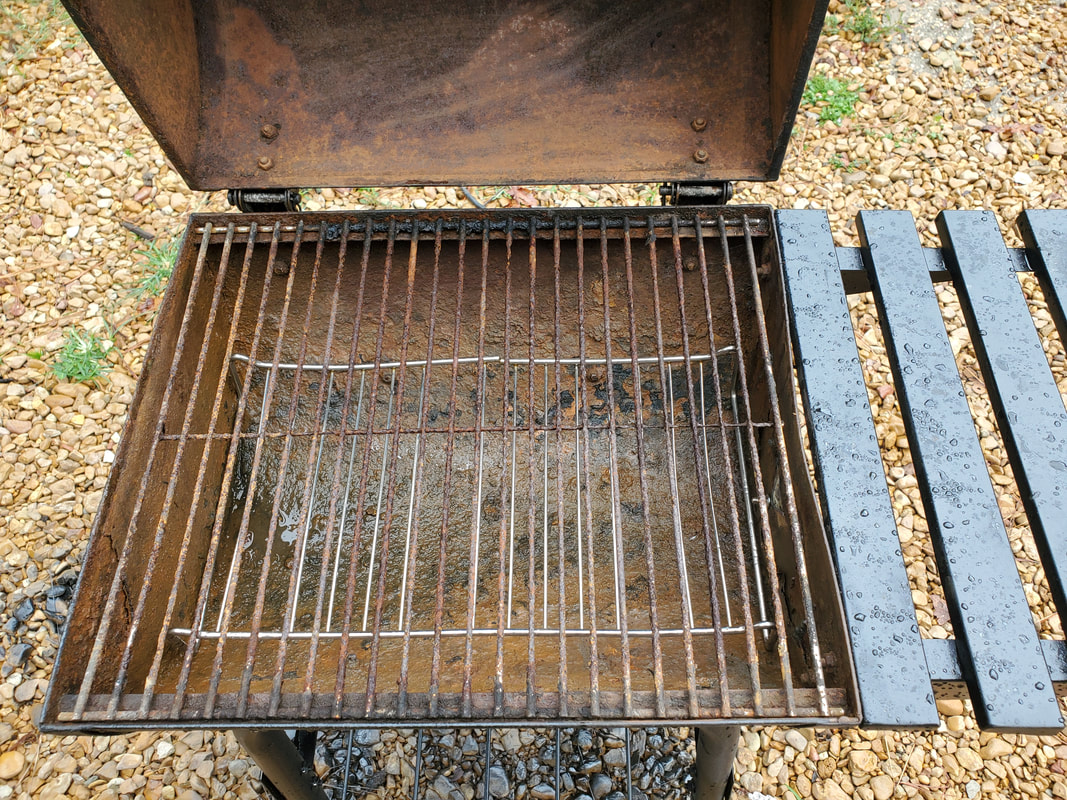
Grill grates installed. Bottom grate for charcoal was actually salvaged from some other source but happened to fit in the bottom of the grill body nicely enough to serve as a charcoal base. Top grate will more than likely be replaced before use, but will need to be kept to serve as a template to match up to a replacement grate.
With that, the grill is completed and ready for use. At some point in the near future, we'll pull out some charcoal and meat and get us a grilling going. Since its fall, the weather tends to be mild to somewhat cool, making it perfect for grilling without the worry of being cooked ourselves from being in close proximity to the grill. Plus if its slightly cool, the heat from the grill will be a welcome reprieve from the cooler temps around us. Hopefully this grill will give us some good life before rusting away to the point of no return. Of course it will probably last longer if we cover it up or otherwise keep it out of the elements where rainwater won't be able to attack it. We'll see, the grill was free, and for all intents, the stuff used on it was free since it was already here on site, I didn't have to buy anything for this grill.
Recently we picked up an old gas pressure washer from our neighbor since the pump unit was bad and to replace it would cost a large portion of the cost of a new unit. The engine was still salvageable, but like most small engines that sit, it would need a new carburetor. We got the unit on the strength that the engine is still useable for whatever, but me, I want to see if I could just replace the pump assembly with an aftermarket unit and restore this machine to regular operation and have a pressure washer added to the mix of powered equipment. We can definitely use a good high powered pressure washer for doing things like blasting grease and crud from engine bays on cars or cleaning engines of grease.
Anyway, the first thing I did was of course remove the pump assembly. The pump is held on with four bolts, which needed a wrench to get to the bolts. After removing the bolts the pump slid right off the engine's shaft, no problem. I set that aside then turned my attention to the carb. 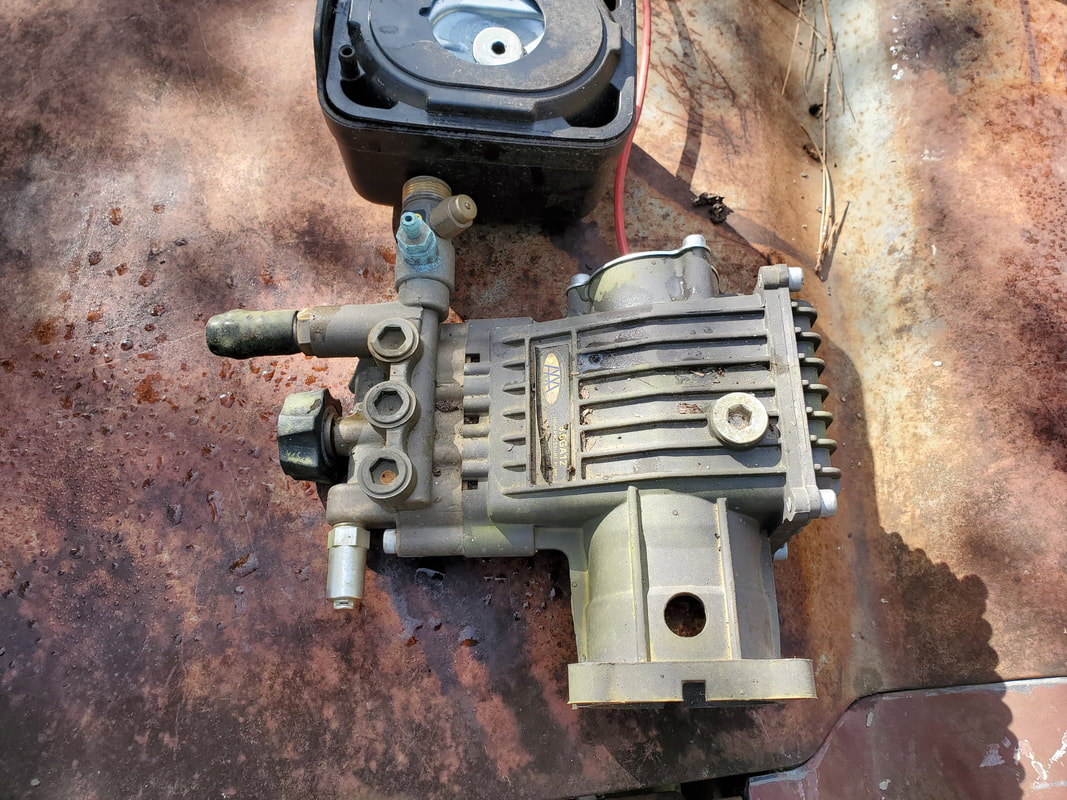
Pump assembly removed from machine and set aside.
As for the carb I pulled the air cleaner assembly from the top, setting it aside next to the pump. The carb also has a plastic base that wraps around the carb and serves as a base for the air cleaner assembly. After removing two nuts, the plastic base came off, and also freed up the carburetor to slide off the long studs. 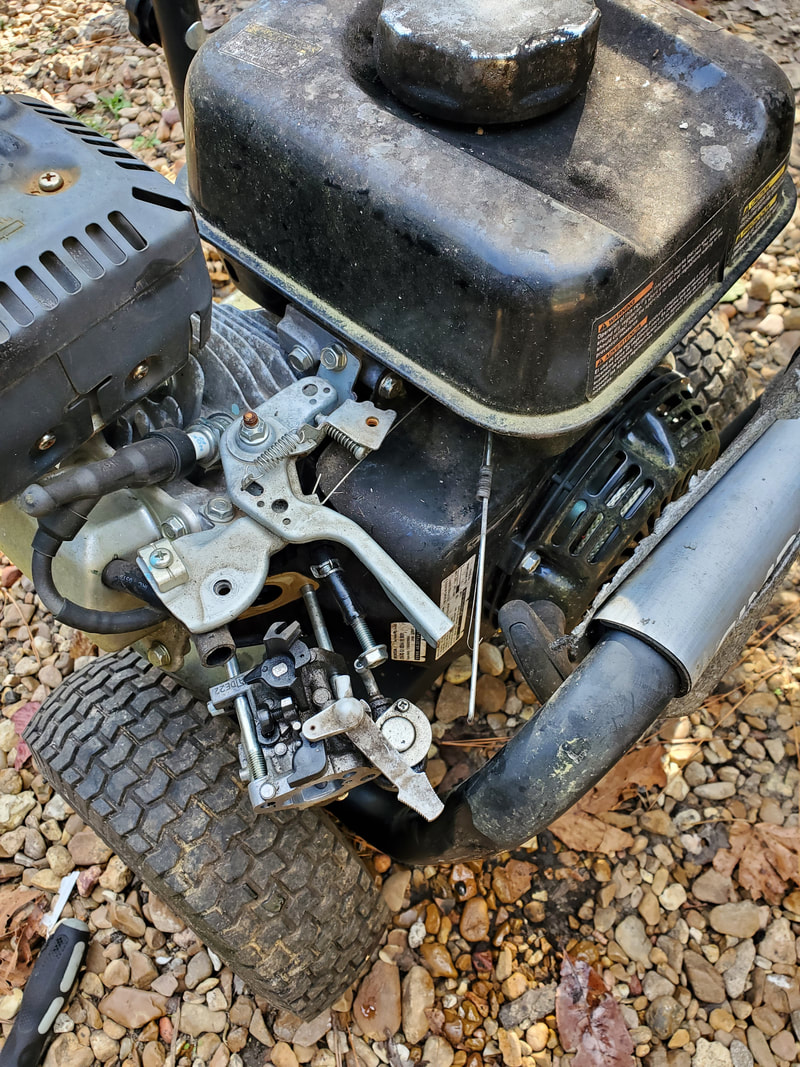
Sliding carb off the studs holding it to the engine, note how the washers tube body partially blocks free movement of the carb from the studs.
Funny thing about how the carb was situated on the engine was the fact that the mounting of the engine on the body of the pressure washer had the tubing of the machine actually blocking the movement of the carb from the studs on the engine. In order to facilitate this I had to loosen the four bolts holding the engine to the washer's body. Doing this allowed me to move the engine enough to pull the carb from the studs. Two linkages had to come free from the carb along with the fuel line and air line from the PCV port on the engine before fully removing the carb. With that, the carb was set aside with the rest of the junk. I had to use a bolt to plug the fuel line so all the gas doesn't leak out from the tank as well. 
Carb, air cleaner assembly and spacer base set aside after removal from engine.
Since I was pulling everything off the machine I figured I may as well finish pulling the engine from the base and set it aside. I could drain the oil and clean it up some with it off the body so I don't make a mess and have a greasy oily body that looks unsightly. Since the four bolts were already loose, it didn't take any effort to finish the job and have the engine off the base and set aside with the rest of the hardware previously removed. 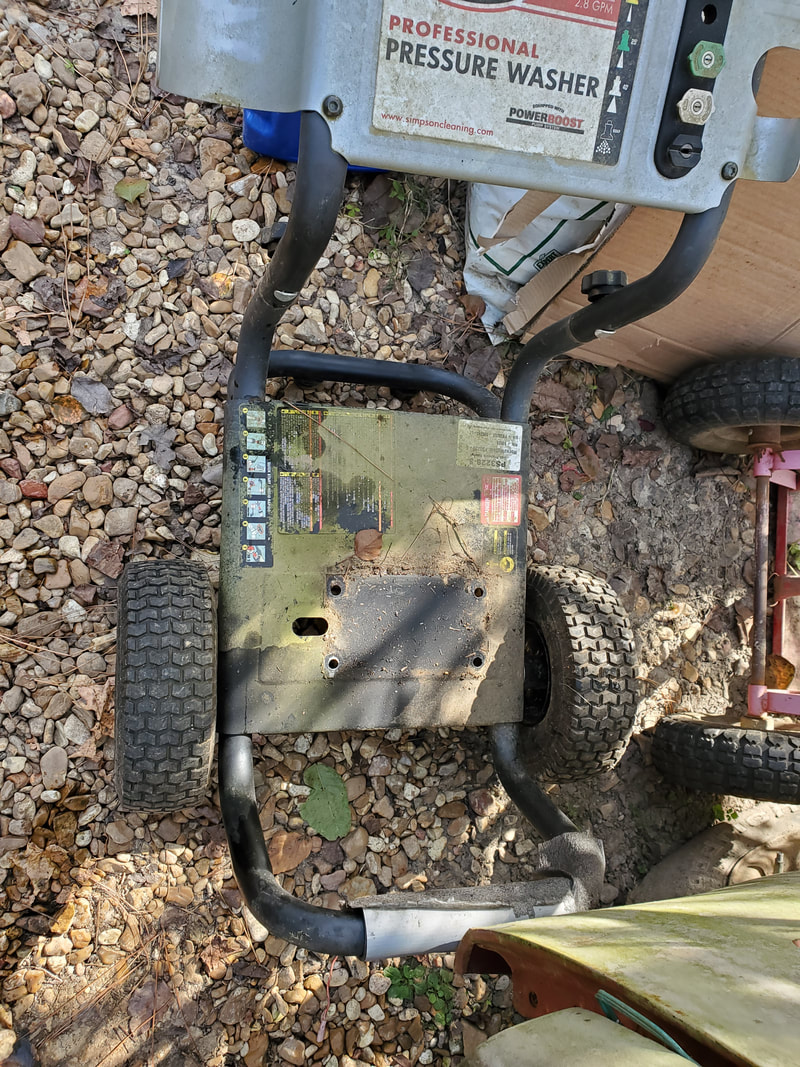
Bare base of pressure washer, stripped of all the hardware.
With that I can now start looking for the replacement parts for this machine. The carb appears to be the same as the one that we had to get for the Coleman Go Kart, since the engine used on that machine is a knockoff of the Honda engine on this pressure washer. I can probably just order the same exact carb and be done with that. I have to cross reference the available pumps I previously seen available for this brand of pressure washer to verify the one I need before ordering. Maybe the physical appearance may be different slightly, but I do need to make sure of the placement on the engine to make sure it will be compatible, we can't have any costly mistakes here when it comes to ordering crap online. Once I get that hardware I can get this machine restored and back in service, ready to go to work.
After having done all the work I had to do with the FMT's interior, getting the gauge cluster figured out so I could route the appropriate wires to the engine bay for hookup to the engine vitals once the engine is put in, I was left with installing a new dash panel. The old dash panel was unusable from the start, having been broken into two main pieces and a few smaller pieces. This was bad enough that it wasn't really able to be salvaged by gluing back together, it would've just been too tacky. I ended up having to order a replacement piece online, which surprisingly was pretty cheap. I guess we have China to thank again for reproducing replacement parts at a low cost for vehicles.
Anyway, I wasn't planning on even doing this work until Fed Ex showed up out of the blue with the package that turned out to be the replacement dash panel. I wasn't expecting the thing today so I chose to work on other low level crap around the yard. Once I pulled it out that stuff was put on hold so I could go ahead and throw this thing in the truck real quick before quitting for the day. After checking out how the thing went in, I found that there were three clips that look like they were probably melted onto stumps on the back of the dash panel to mushroom the plastic around the metal base of the clips to hold them in place. When the old panel was broken, the previous owners probably forcefully pried the panel off, breaking the mushroomed plastic from the clips, leaving the clips in the dash frame. On our new panel, since I didn't have the apparatus nor the desire to attempt to melt plastic on this new piece (I could've used a soldering iron but decided against it), I just decided to pull some small sheet metal screws out that had heads that were a little bigger than the holes on the bases of the clips. I would install the short screw through the top of the clip at an angle until the screw rested flush inside the clip with the thread poking out from the bottom of the clip. From here I would insert a small screwdriver at a slight angle, working the thread into the base on the back of the dash panel, having to angle the clip to get better connection between the screwdriver and the screw until the screw was down into the base enough that I had to straighten the clip out. I would then carefully screw the screw the rest of the way at an angle to seat the clip as close as possible before the clip would no longer allow me to get the proper connection between the screwdriver and the screw. 
Closeup of the clip screwed in place on the base on the back of the replacement dash panel.
Doing things this way I was able to get one of the clips to be almost tight against the base of the dash panel with the other two clips only having some play in them, not enough to give the dash panel a loose fit against the dash frame. The three clips are situated along the top of the panel, with the two end ones closer to the corners but still on the top and the middle clip in well, the middle. 
Back of dash panel with clips installed to their respective bases, ready to install.
Of course installing the panel would have to be done carefully as I didn't want to risk damaging the bases where the clips were screwed into. Upon observation I found there was one extra screw near the bottom left side of the panel, situated under a piece of molding that snaps into the front of the panel. This one screw helps hold the panel against the frame further. Since this screw was a star bit/torx bit, I removed and discarded this screw, replacing it with a regular Philips screw. Afterward I lined everything up carefully, snapping the three clips in place along the top of the panel then lining up the screw hole so I could insert the screw, further securing everything. Pushing in the rubber membrane around the steering column finished up everything, having the panel seated properly against the dash frame and gauge cluster. 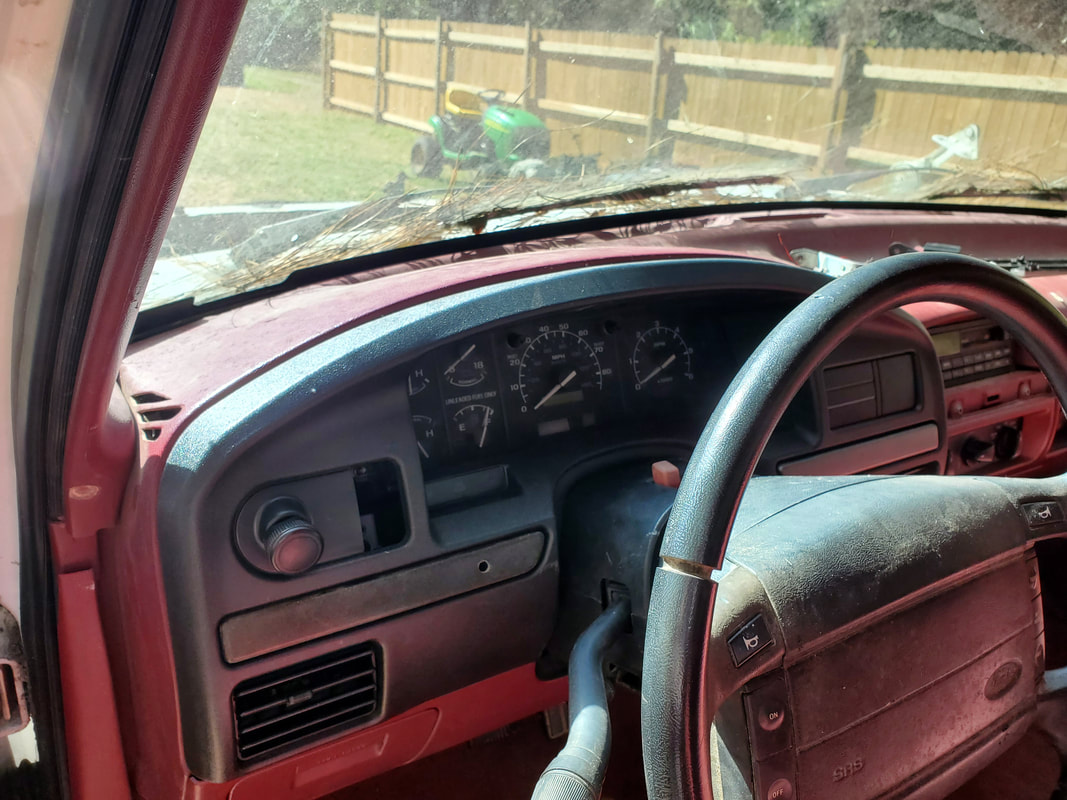
Shot of new dash panel installed on dash frame at an angle from door.
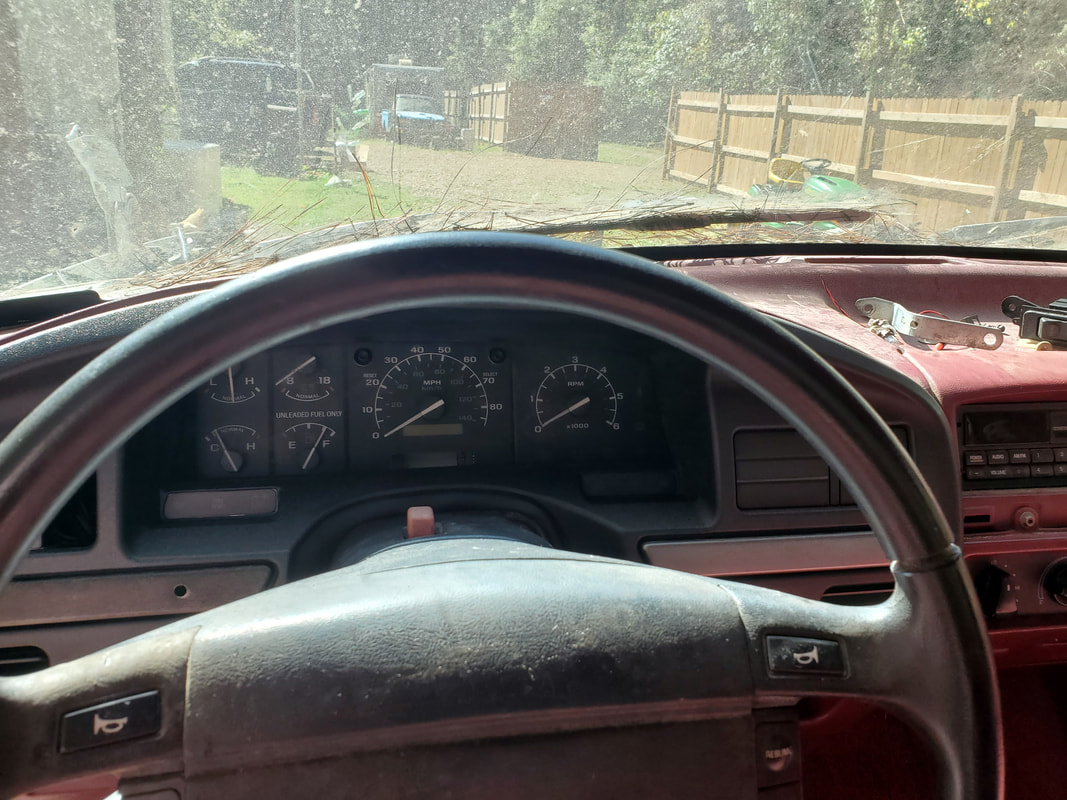
Driver's seat view of dash panel and gauge cluster. Note molding pieces on either side o steering column .
With the dash panel installed I was able to snap the knob back in for the headlight switch as well, along with the molding pieces that would cover the one screw holding the panel in place as well as accent the overall dash panel. With all of this put back together, I can comfortably say I'm done with the interior, now I really can concentrate on getting the power train installed. I already have the components in house to allow me to assemble the accessories on the front of the 302 engine so I can get that part done. I plan on "borrowing" the 4 bbl intake from the 289 V8 pulled from the 65 Mustang to install on the 302 so I can make the engine further ready. Since the 65 Mustang isn't anywhere close to being ready to go, using its intake is not going to put me at any kind of disadvantage. All that'll be left at that rate is getting the clutch hardware so I can assemble that and get the transmission installed on the engine so I cam move on to installing the whole works in the truck.
The last place I left off had me pouring a slab for the tumble composter we've had sitting in the garden for some years now, laying on the ground, not being used to its maximum potential. We finally took the time to set a frame and pour a slab with which to mount the composter on. To make things a little easier, I took the time to make a template for the mounts of the composter's legs where I could sink bolts in the wet concrete so when the stuff did finally dry all the way, the upside down bolts sticking up out of the concrete would provide the anchor points to set the composter's legs on. I wanted to let the concrete cure for two days to ensure that the concrete was cured to the core. After that two days passed, we went ahead and mounted the composter on the bolts. Now since the bolts are of the type where its a partial thread, I had to add some washers on top of the flat spots of the composter's legs to cover the bare shafts of the bolts so I could put nuts on the threads and lock everything down. With all that in place, the nuts locked the composter down solidly, allowing the composter to be able to be tumbled as intended. We can now start putting garbage in the drum and actually tumble the thing periodically to mix the stuff up to ensure its prompt breaking down. 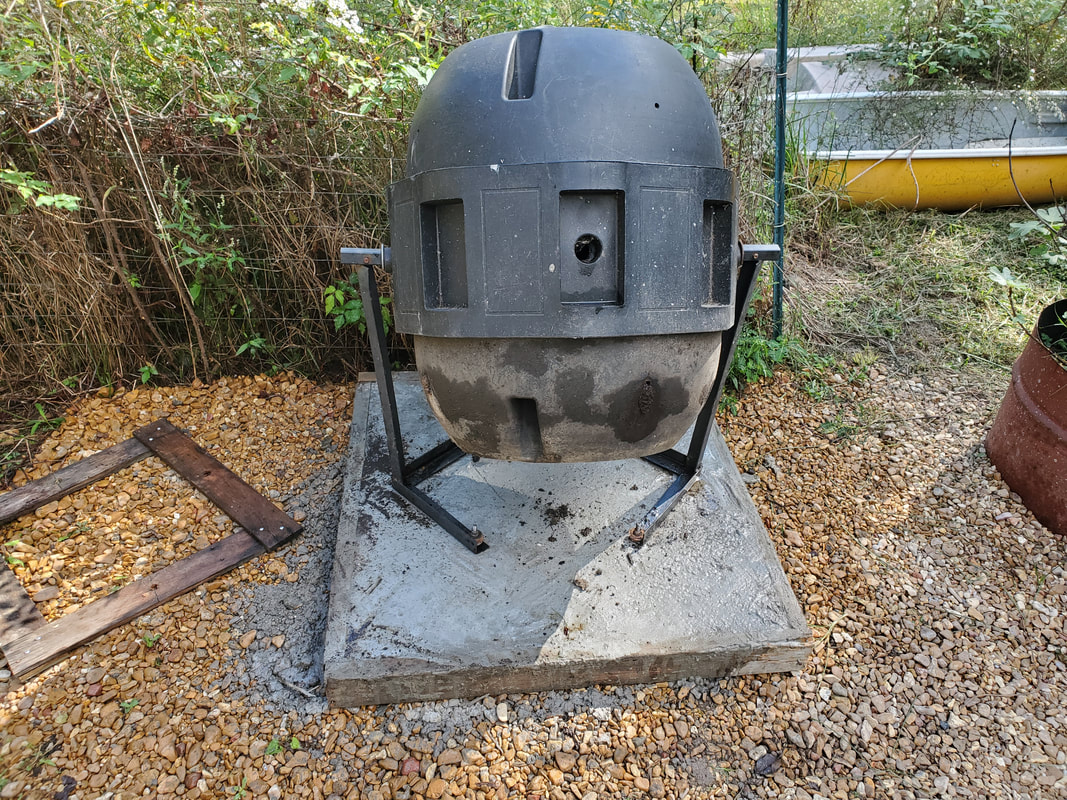 The composter mounted on the slab with the template still on the ground to the left. 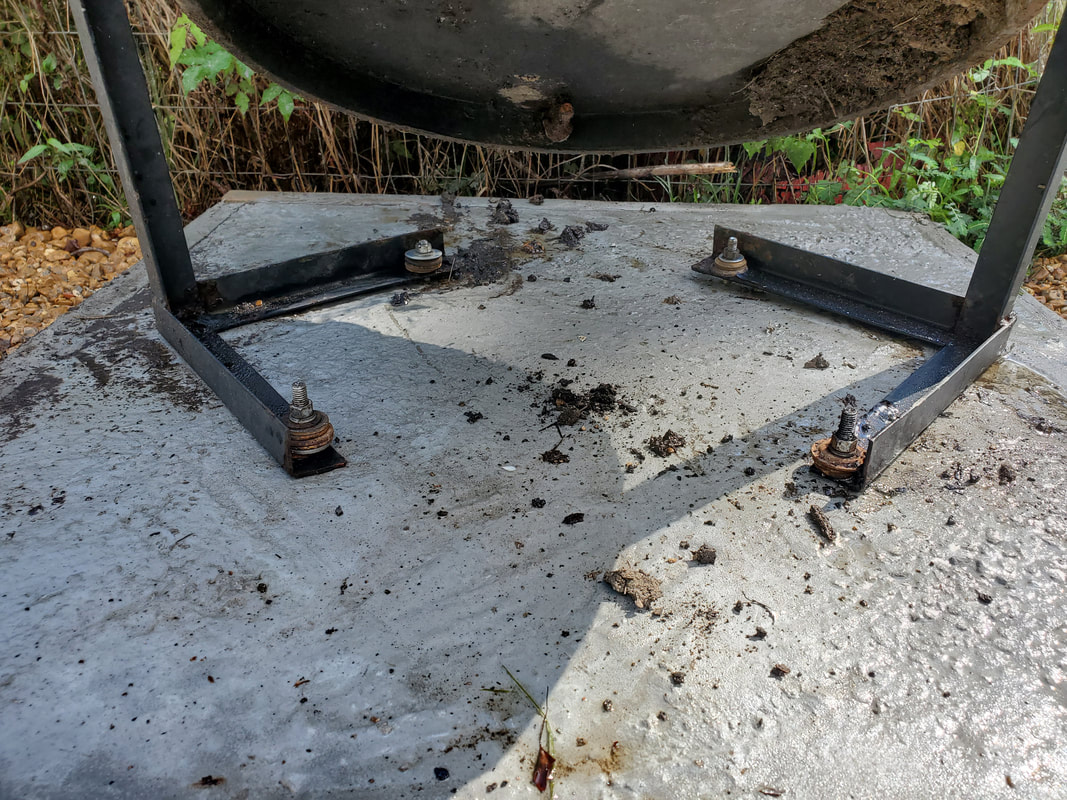 Closeup of the composter's legs secured to the bolts in the slab with washers serving as spacers for the extra long bolts. Next, after erecting the base frame of the portable garage with the vertical legs and roof frame pieces, I started adding supports to the unit. Starting with either end, I added two horizontal tubes near the bottom and near the top just below the roof frame pieces, linking the two end vertical pipes together. These pipes will help support the frame by keeping it from being able to rock side to side. I also added horizontal pipes near the bottom along what will end up being the front and back walls of the garage, linking the rest of the vertical pipes together to help lessen the ability of the frame to sway or move excessively.  Garage frame with horizontal support pipes in place along lower portion of frame. Note missing pipe in middle section. This is where the doorway will be. 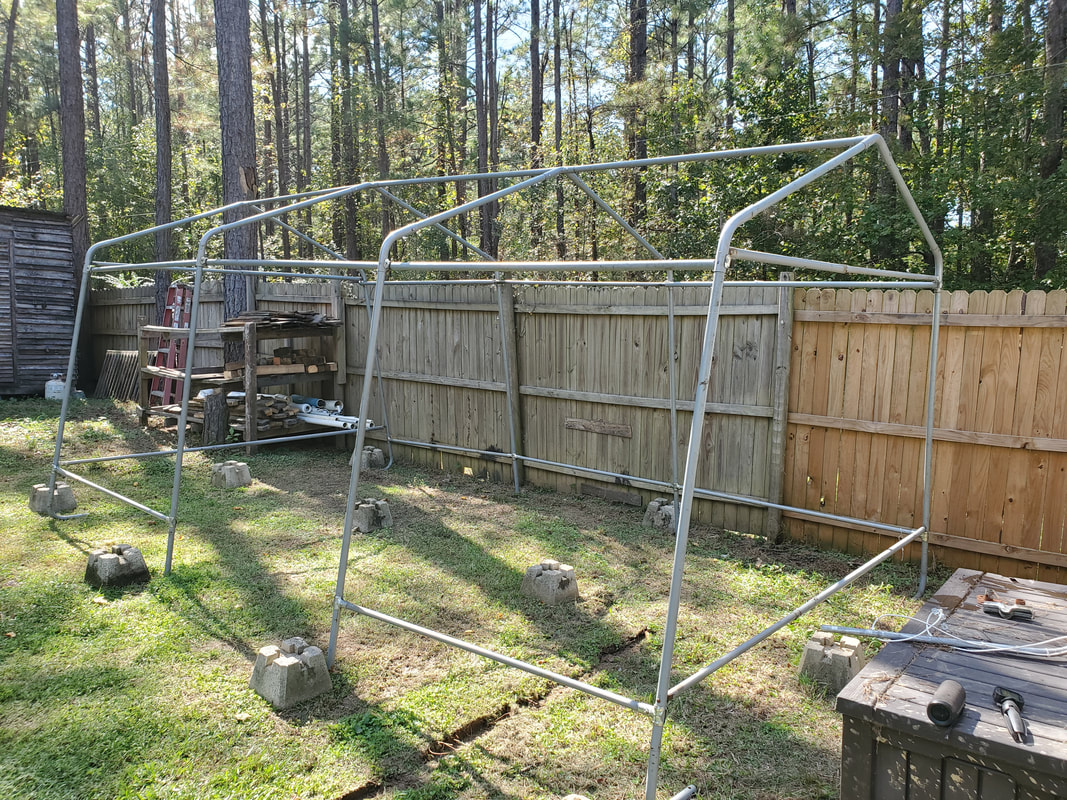 Another angle to the garage frame showing the ends with their pipes in place. As can be seen in the pics, the middle section of wall is missing the horizontal pipe. I decided to make this the doorway since the placement of the garage has it where either end is pretty much blocked or just in an inconvenient spot. Especially when it comes to being able to drive powered equipment in or out, putting the doorway on the end would make it more difficult to go in or out. As for the way the pipes were attached to the vertical pipe pieces, I was able to reuse the brackets that came with the old portable garage frame. These brackets had the holes already present along with the pipes. Only on a couple of occasions did I have to drill holes on the ends of a pipe. The brackets also have the curved portions that facilitate grabbing the tubing to ensure a good grip to hold the pipe in place. Once I ran out of the brackets, in order for me to continue hanging pipes up, I had to improvise. I ended up taking conduit straps and bending them into a straight U, then drilling a hole in the middle of the U as well as drill a hole into the garage frame. A carriage bolt went through the conduit strap and into the garage frame tube. From there I lined the pipe up with the conduit strap's holes and drilled a hole through the end of the pipe to secure it to the conduit strap with another carriage bolt. I did have some conduit hangers that were used for hanging conduit from metal ceilings and pressed these into service to hold the pipes in place. These brackets/straps already had all the holes where I needed them, making them almost perfect for this duty. 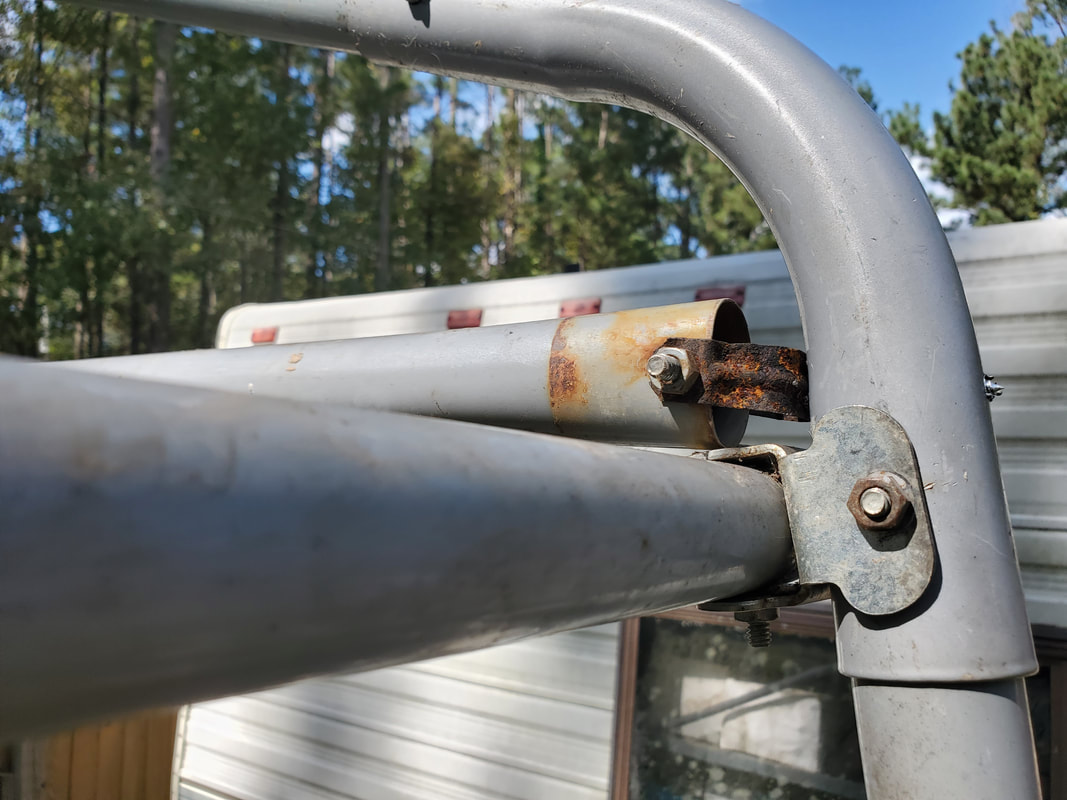 Old conduit strap pressed into service to hold pipe in place between vertical frame sections of garage. On the ends since the span between the two corner vertical pipes is approximately 9ft wide, I had to place two pipes, one inside the other, to cover the distance. Once the ends were secured with the conduit straps, I was then able to drill a hole through the two pipes in the middle in order to secure them with a carriage bolt so they wouldn't move in and out against one another. The bolt locked the pipes in place, ensuring the strength of the support on the wall. 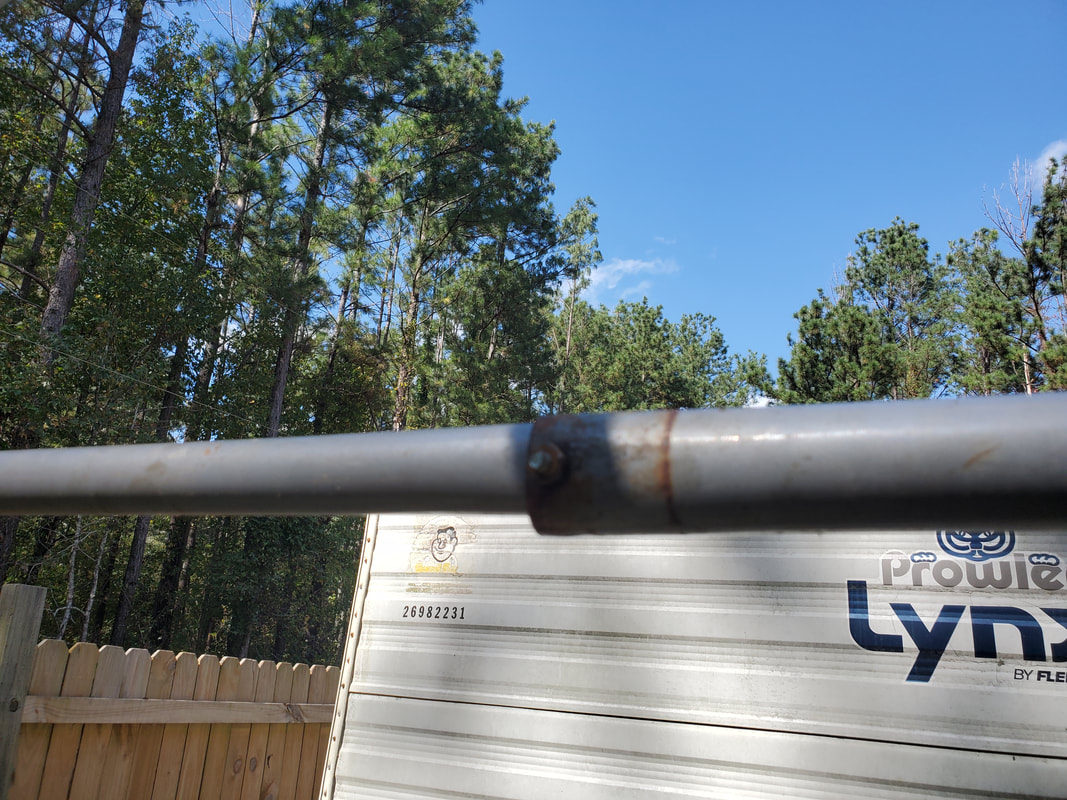 Closeup of the carriage bolt holding the two sections of horizontal pipe together on the end wall. This phase of the construction of the garage is complete, but I still want to go a step further. Even with the support pipes in place, I feel I can add more. Main reason is because I still had a number of miscellaneous pipes left, I felt that adding more supports between main pipes will help in making the overall structure super strong, and use up the materials I had available. This will be done by going to each section on the front and back walls and adding a pipe in the middle, dividing the three sections on the back wall into six and the two on the front into four. The ends will get two vertical pipes spaced apart equidistant, dividing the sections on the ends into threes. This amount of tubing in place will ensure the overall strength of the structure as well as provide a good solid anchor point for the corrugated sheet metal that we'll add later on. Once all this metal tubing is used up I then want to move the batch of cement blocks into place around the garage. These blocks have grooves molded into them for placing dimensional lumber on top of them to help make a more square wood frame. I'll use these blocks to hold the wood frame I'll have to build in order to support this garage and the hardware that'll be kept within.
As is always the case, once a week I make my gravel run, bringing back a truck load of gravel to be spread out over a designated area, in this case, the garden. Since I've been working on covering the grounds in the garden and getting things built up, the gravel for the new few episodes will be going to the garden. I managed to get gravel laid along the north and east fence lines to some length, as well as spread around a couple of the larger fruit trees that have been in tire beds. Doing this helps in slowing down the growth of grass and weeds around those trees so I can continue on the quest to beautify the garden with the laying of gravel. As it is, the bare area is being closed in more and more with every session of laying gravel. Before we know it, we'll have the garden graveled up good, allowing us to fully focus on the other improvements such as running water lines for the raised beds and electrical lines for the greenhouse as well as any hydroponics that get set up on the site. There are other plans for the garden as well but we obviously have to do one thing at a time.
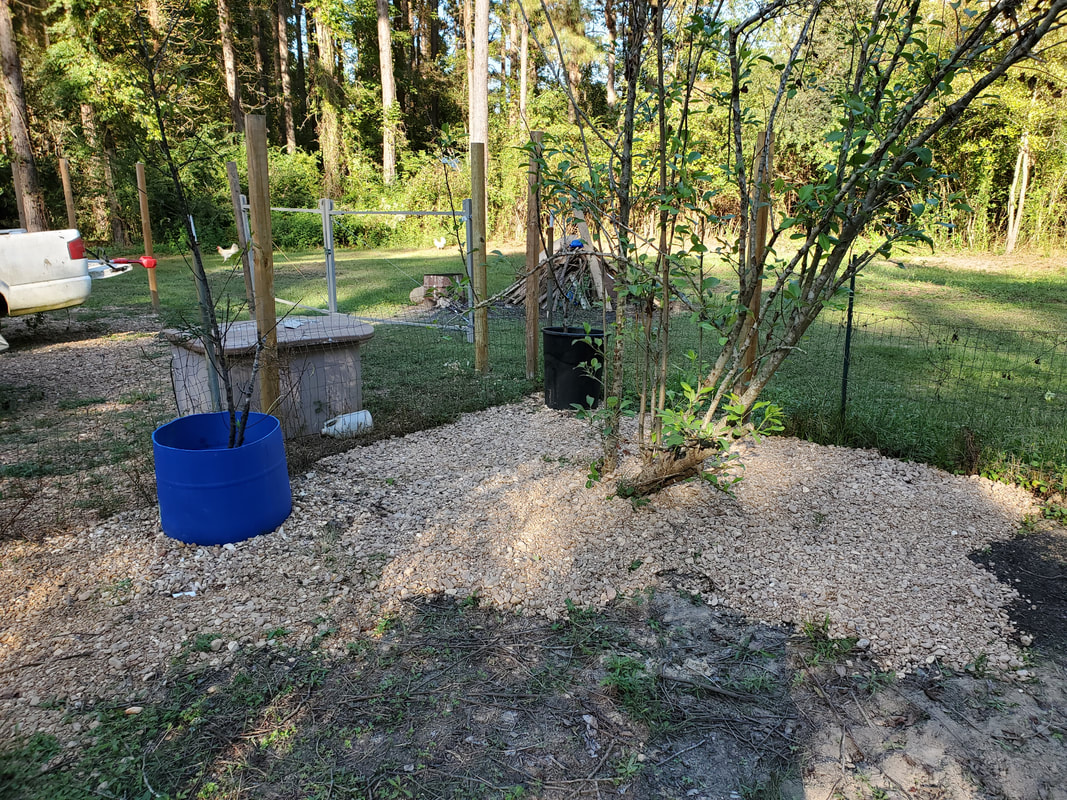
Gravel spread around the NE corner of the garden fence line, surrounding one of the fruit trees in a tire garden.
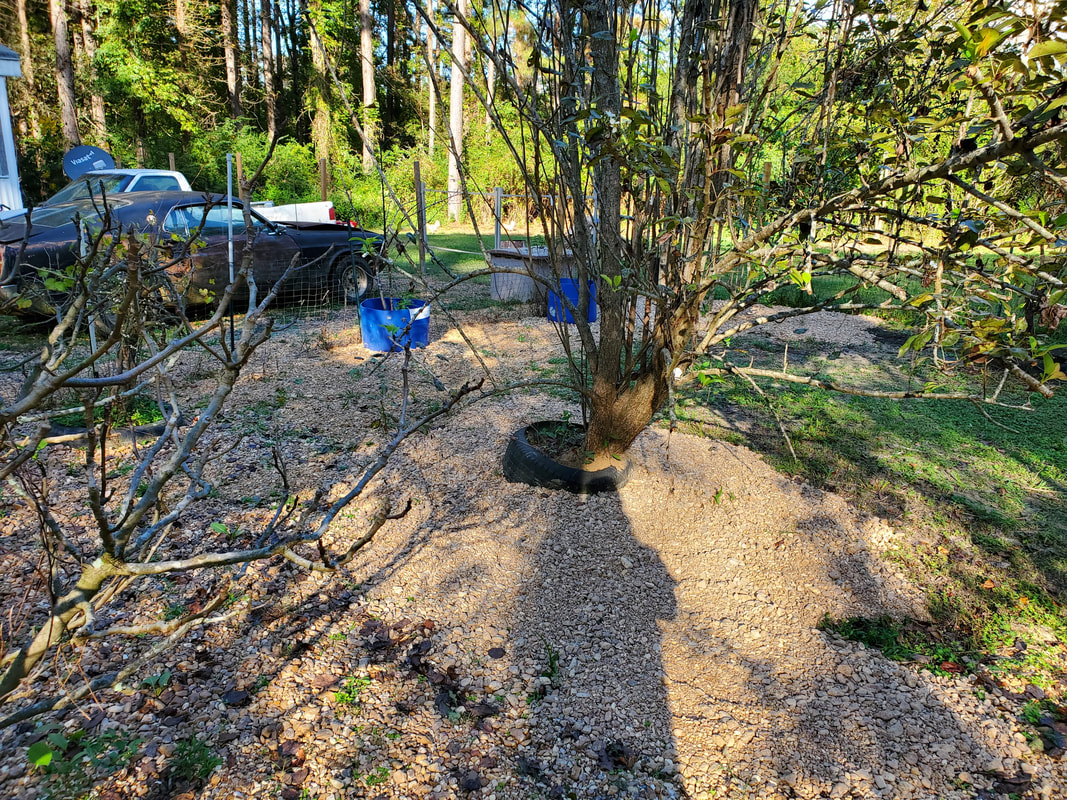
Another tire garden fruit tree in the middle of the garden with gravel surrounding it, adding to the growing gravel patch that is expanding out from the north fence line.
The next thing on the menu was the finishing up of adding the reinforcement pipes to the frame for the utility garage. If you remember, this frame was being built from the pieces of the cheap portable garage that we still had laying around. Also since there were still extra pipes left over from the second portable garage, I decided to add reinforcement pipes between the sections of main ribs or support pipes, adding to the stiffness of the overall structure. Also the extra pipes will provide an extra anchor point for the corrugated sheet metal that we'll end up adding at the end of the project. We'll of course have to use self tapping screws to do this but just like with attaching the sheet metal to the frame of the Dog Kennel Greenhouse, the same will go for the Utility/Equipment Garage. 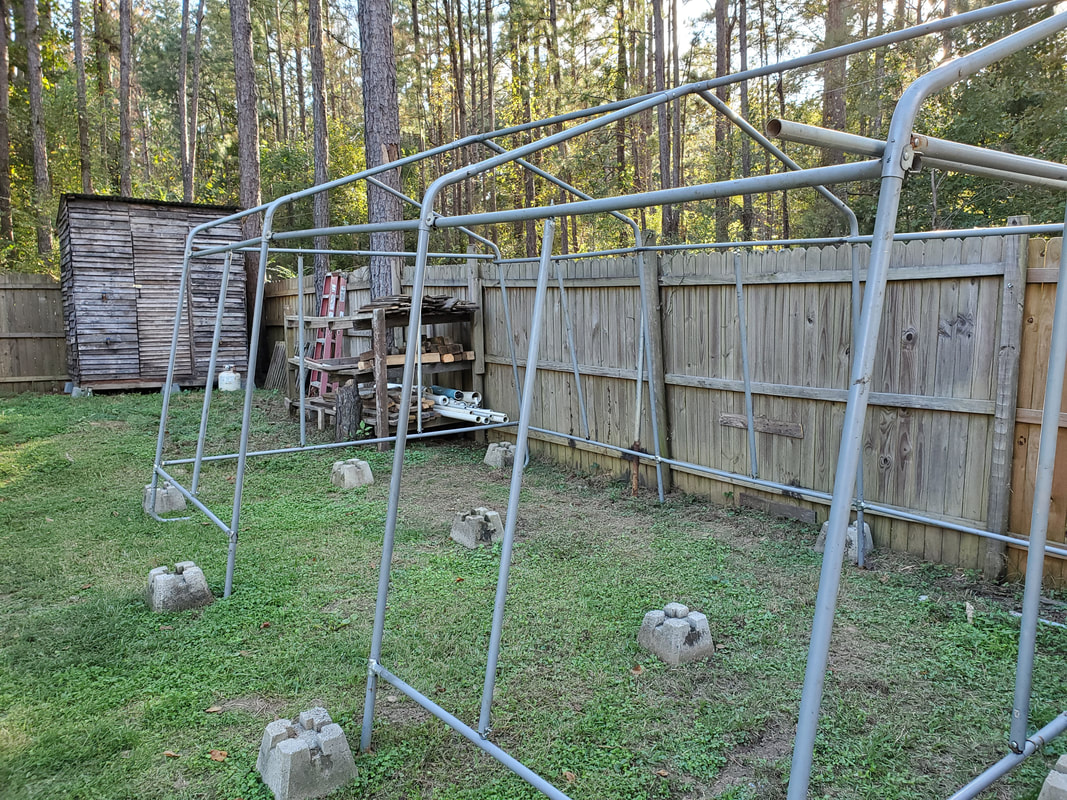
Equipment garage frame with extra vertical pipes added between the sections of main framing.
Lastly on the list is a small project involving some junk we picked up. This was literally picked up from the trash due to its being more or less, trash. This is an old charcoal grill that's shaped like a small drum, on a wheeled frame. It's not in the worst shape but it's definitely not in the best shape. One of the wheels are melted so the thing won't roll, it'll need two new wheels. 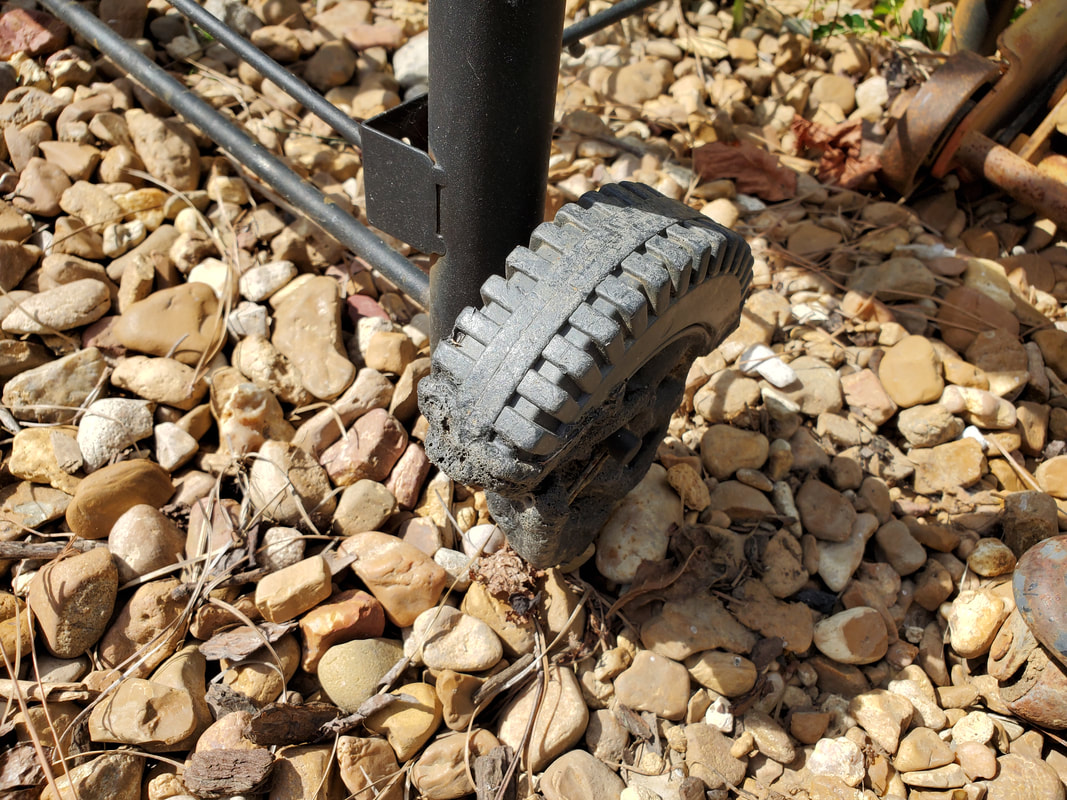
Melted wheel on bottom of grill frame. I'll add a couple of replacement wheels that were intended for use on a lawnmower and use 1/2" hubs so I'll probably end up welding a couple of long 1/2" bolts to the frame to accommodate the new wheels.
The grates in the grill are also in rough shape, with the grate that holds the charcoal in the worst shape. The metal was so degraded I just chucked it in the scrap can but luckily we actually had a grate that came from something like a stove or oven that despite its oddball shape and size, ended up being perfect for the charcoal grate in the grill. After swapping out that, it'll be a matter of scrubbing the drum clean so it can be painted. 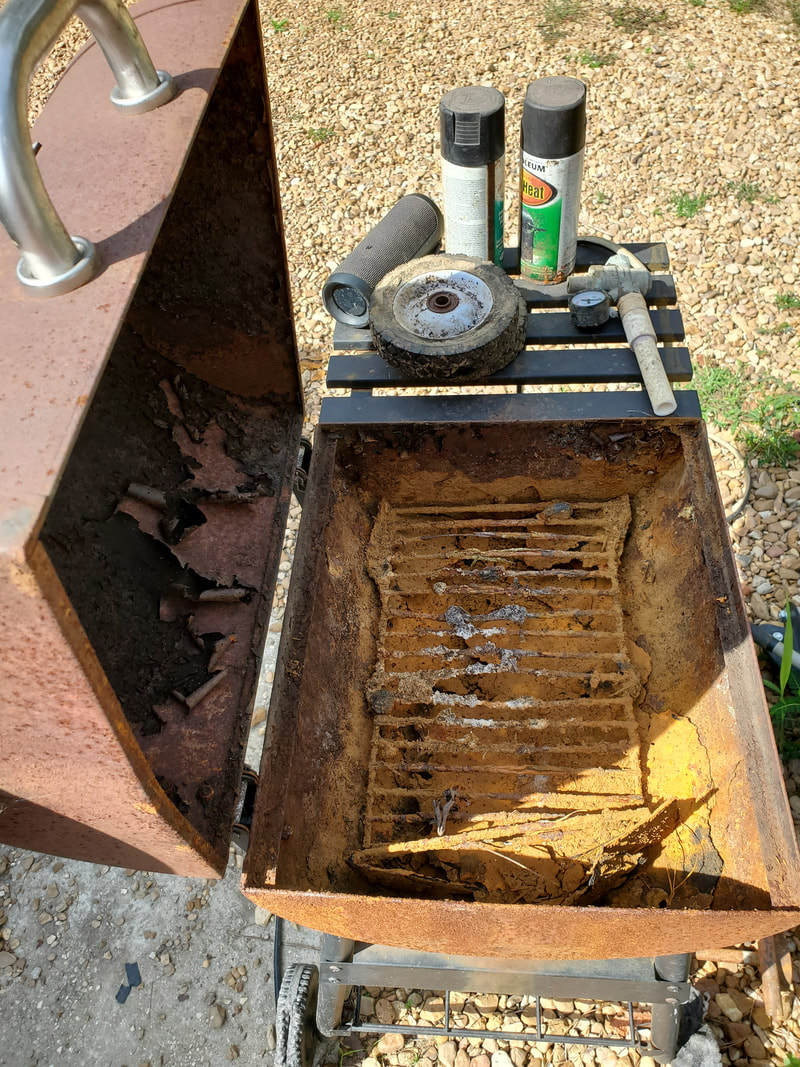
Inside of grill showing rusted charcoal grate among the inside of the rusty surface of the grill drum.
I have a couple of cans of high temperature/grill/oven spray paint that I plan on using to paint the outside of the grille due to the rust on the body. It's not rusted through to the point that it can be hazardous but I will want to scrape the metal to break up any loose clumps of rust prior to painting. I did manage to remove a large chunk of rust/metal when I removed the charcoal grate from inside the grille. I'll probably use a wire wheel to scrub the surface down before applying the paint as well. Between the new wheels, new paint and cleaning up, we'll end up with a better grade of charcoal grille. 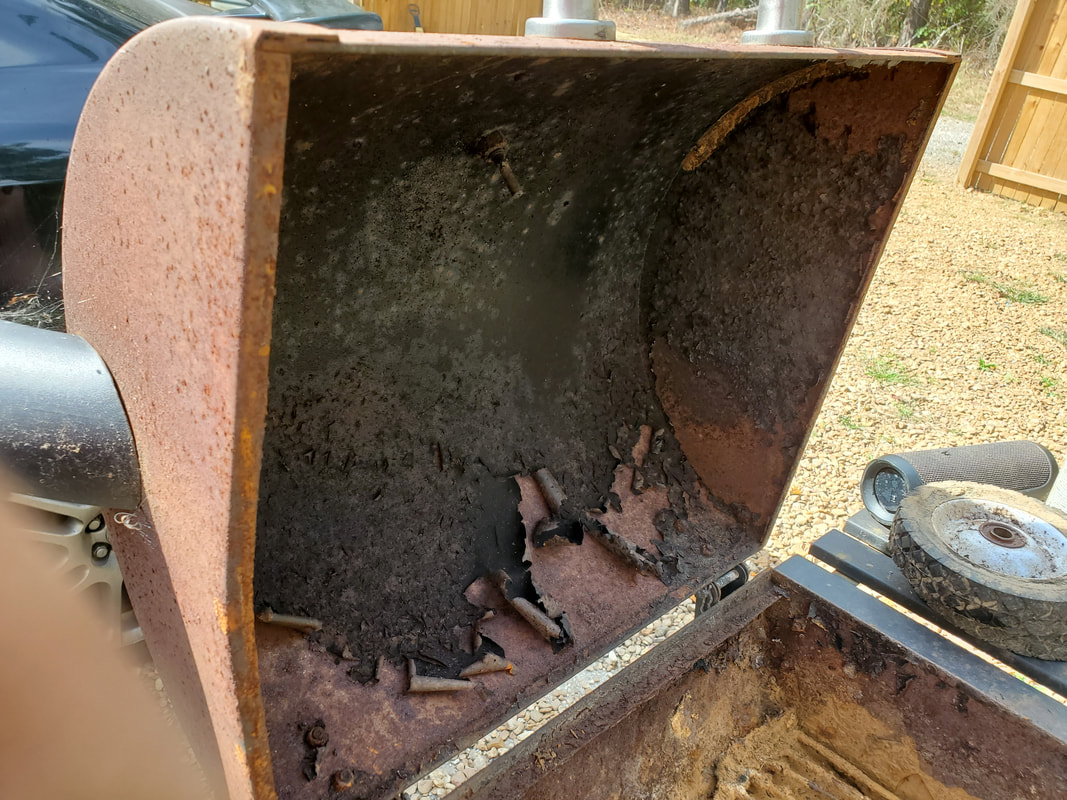
Closeup of the stuff that has to be scraped out from the inside of the grill to get the surface cleaned up prior to painting.
I could've scrapped this grill but not get hardly nothing for it and in the shape it's in, no one would buy it either. Best bet was to fix it, use it and if by chance we get bored with it we can resell it, especially after fixing it back up and getting some use out of it. It also has a limited preparedness application due to the idea that it's an extra form of cooking and in a pinch, wood could be used in the thing to cook food. So for now, this charcoal grill will be a new addition to the landscape after its done.
During one of my longer work days around the compound, I managed to get multiple things done. I always started off with the laying of more gravel over a particular target area before moving on to the main events of the day. The area of interest this time was an area along the midway where it meets the garden fence. I had a bunch of scrape I've been staging over this area for some time. Once I built up enough scrape to over fill the F250, I hauled that scrap to the scrapyard prior to getting my load of gravel. I killed two birds with one stone dumping the gravel then going right down the street to the cement plant to get the gravel that way I'm not burning 2x the gas going back to town again for the gravel. Since the scrap was gone I was able to lay gravel down over this bare area. Once that area was covered I continued laying gravel over the bare ground in the garden on the other side of the fence, surrounding the three fruit tree planters I recently established along the fence line. The gravel patch stretches into the garden for a couple of feet along the fence line, effectively shrinking in the amount of bare ground left to cover in the garden. 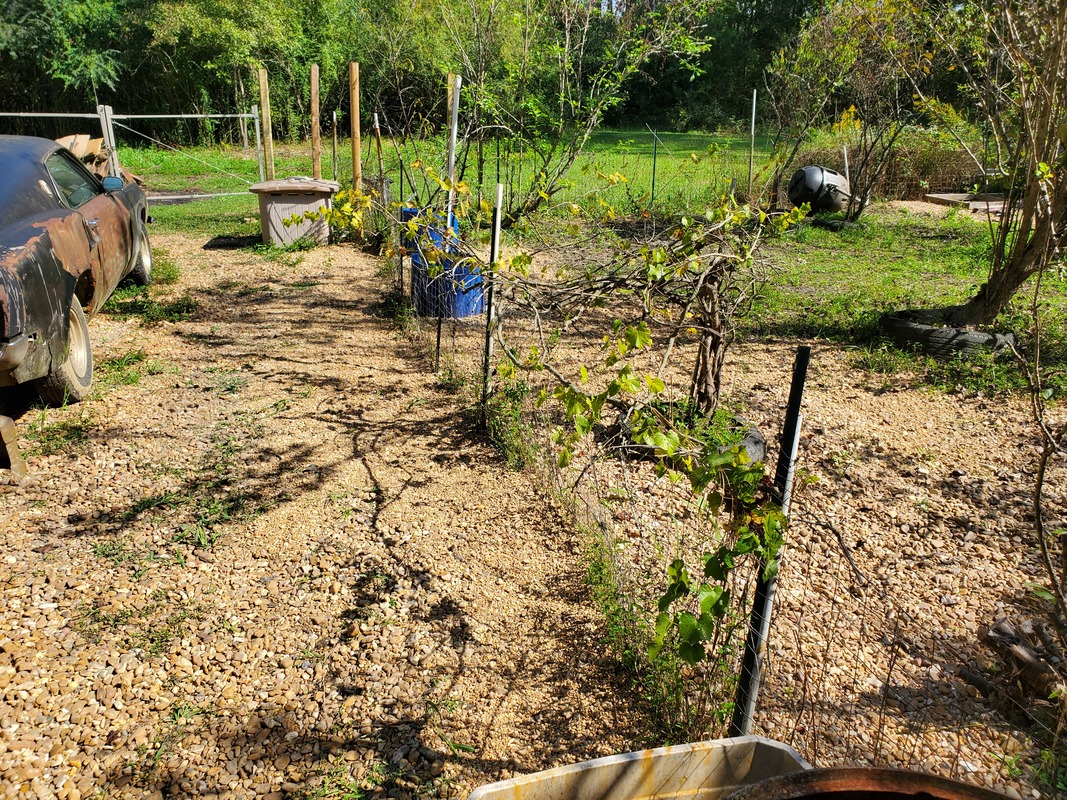 Gravel laid along garden fence line on both the midway driveway and inside the garden. The next thing that I had on the agenda for the day was planting some fall plants in the most recent drum raised beds that I made, along with one of the older ones next to where I set up the newer beds. We picked up three different types of lettuce, with each flat containing six plants. I planted all six plants in one drum half, so I was able to fill the one single drum planter and one of the newer ones which have two drum halves. I had to pour some dirt into the second drum half in the new raised bed. We'll be getting more plants in the near future so we can fill the other vacant beds since we pulled up the dead tomatoes and other plants that pretty much petered out at the end of the summer. Hopefully we'll be well set in greens going into the winter so we won't have to worry about buying much for salad for a minute. 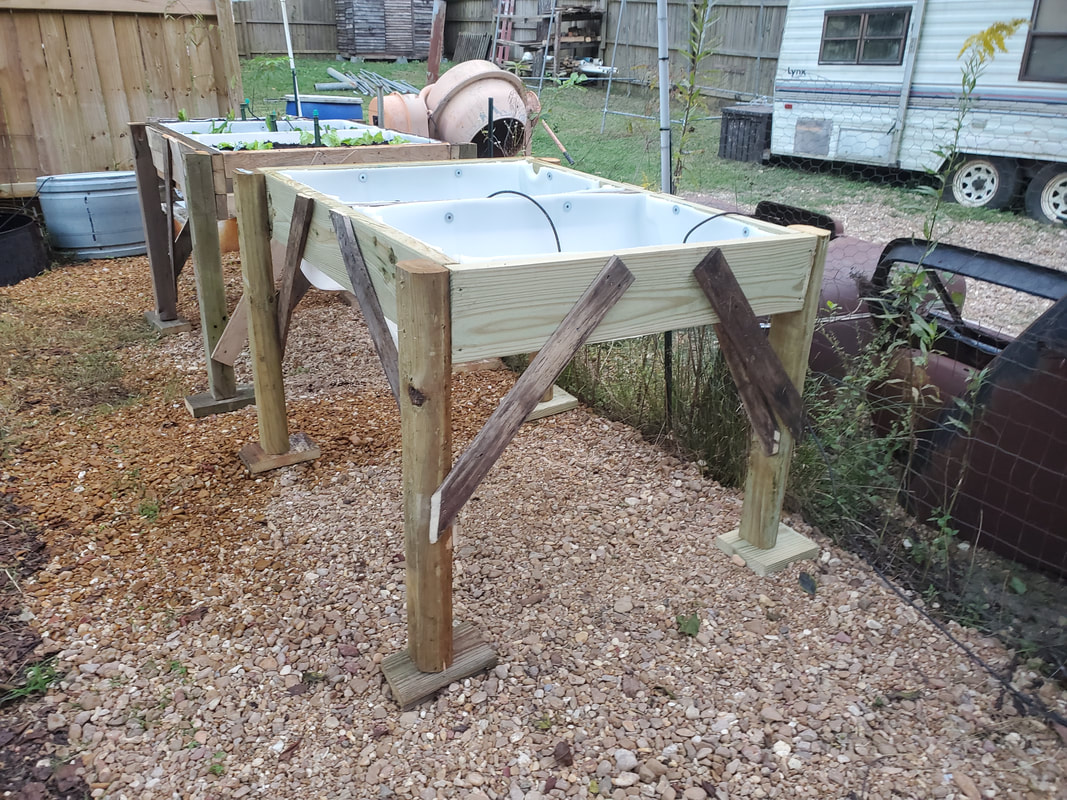 New drum raised beds recently built and set up where the last ground raised bed once sat, after I dug up the old raised bed. 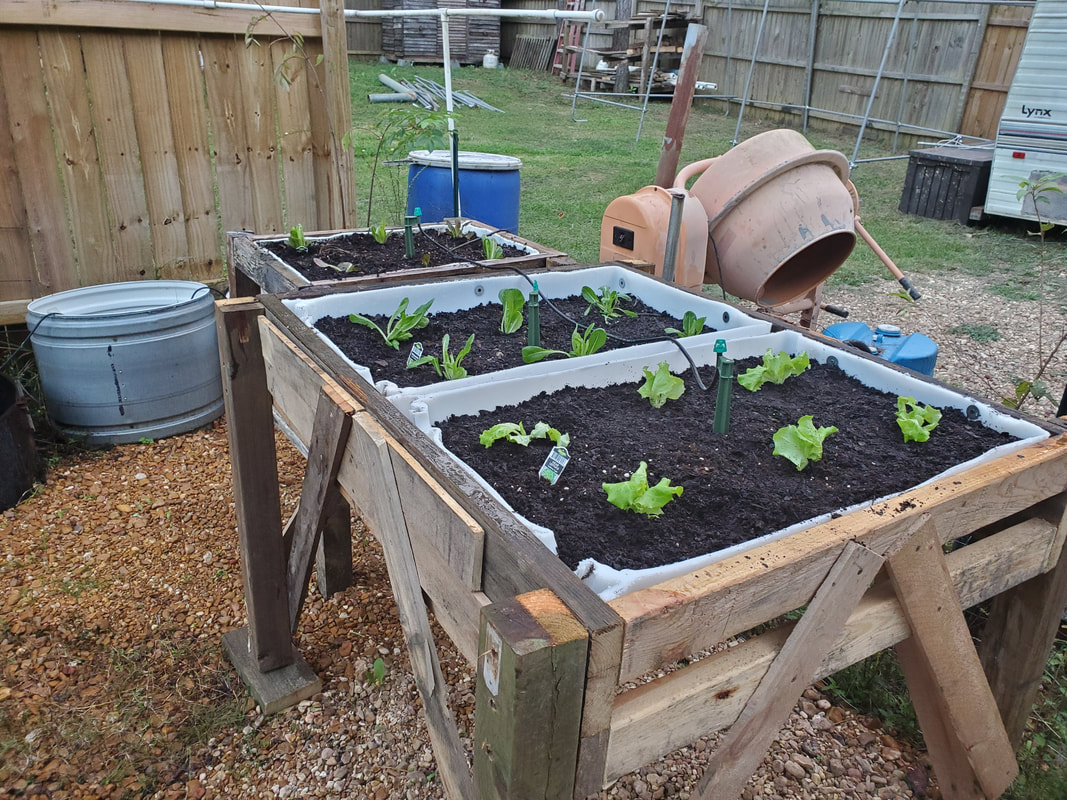 Lettuce plants established in drum raised beds. The main event for the day was a new construction project that I decided to start. Since I had reorganized the wood storage rack, I had the tubing from one portable garage that was removed from the rack, along with the tubes from the second portable garage that were left over after making the roof for the Kennel Greenhouse. I planned on building an equipment storage garage out of the portable garage frame. This garage will be mounted on a wood frame established behind the storage trailer along the west fence line. 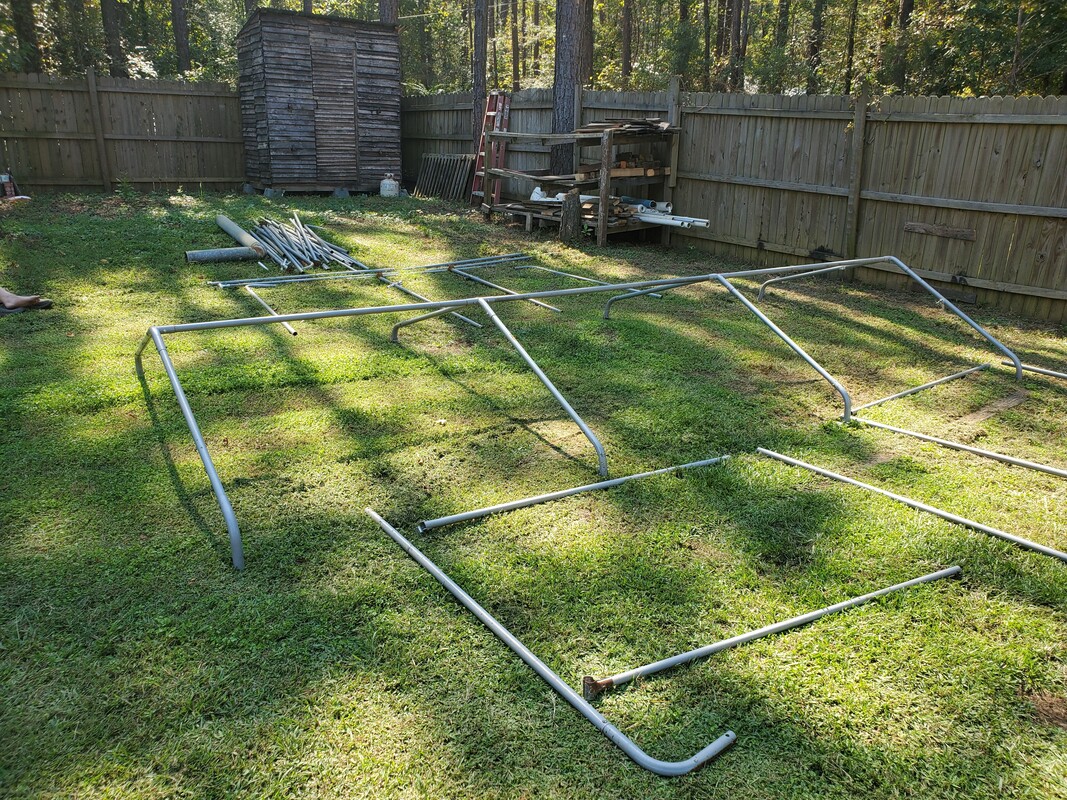 After piecing together the frame with all the pieces I managed to get the basic frame erected. I will need to add more tubes at the ends to reinforce the frame and will probably add more tubing at different points on the frame until I use up the available tubing. Since I don't have any more brackets to hold the tubing together, I'll end up using conduit straps wrapped around the tubes to hold the extra tubes in place. With the length of the garage's frame, I decided on making the entry door be on the side wall of the garage instead of on the end since the ends of the garage frame come real close to both the back of the storage trailer and the old wood rack. While I do plan on pulling down the old wood rack after using up the materials, I still want the entry door on the side where it'll be easier to come and go with our powered equipment such as the John Deere utility tractor or the go kart. 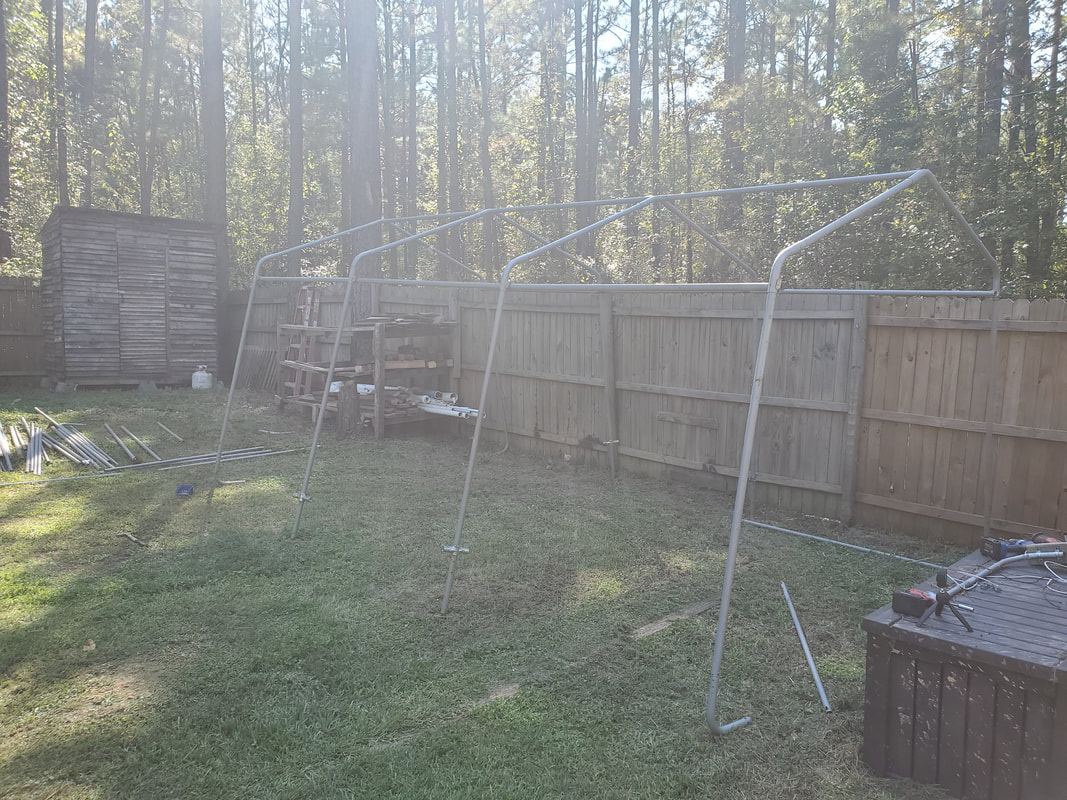 Portable garage frame built on the site where it will be permanently established. I'll have to gather up a lot of 2x6 boards to make the frame that this garage will be attached to. I'll also be using the masonry blocks that hold dimensional lumber for porches that we have left over from the dismantling of the old porch. We'll build the frame on top of these blocks to the dimensions of the garage frame then attach the legs of the frame to the wood foundation. 3/4" pressure treated plywood will make up the floor of the garage. After mounting the frame to the wood foundation, we'll clad the frame with corrugated sheet metal. I'll make a door frame with tubing as well as a door. Just like with the Kennel Greenhouse, I'll use self tapping screws to secure the sheet metal to the frame. This project will take a minute due to the scope of size of it but it will get done as time and materials come available.
After finally taking time to move things around in the garden, which includes the tumbling composter we've had for some time, we finally got around to setting up things for a slab to mount this composter on. After pouring the slab for the whole house generator, we reused the wood frame to set up a slab for the composter as well. Unlike the genny slab, we don't need as large of a slab for the composter so I cut down the boards to make a smaller sized frame. I had some concrete left over from the genny slab so by shrinking the composter slab frame I shrunk down the number of bags I'll need to supplement this slab as well.
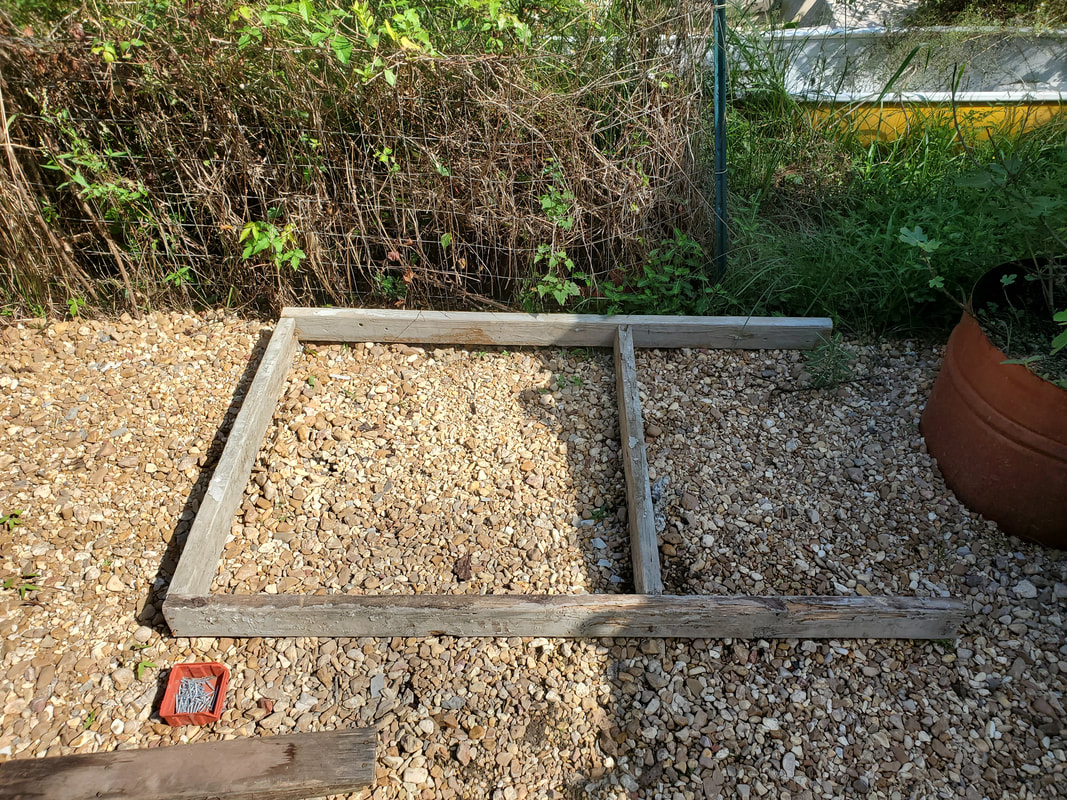
Slab frame laid out with board moved in for the new size needed, the extra boards were cut off later.
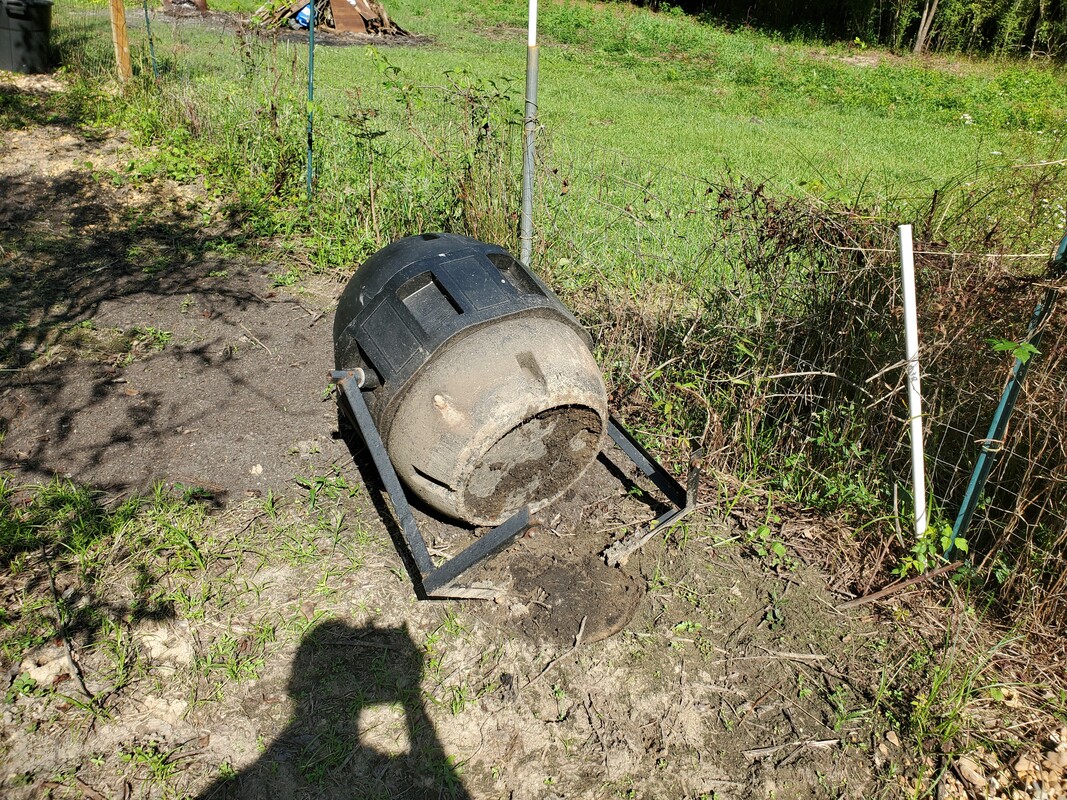
Composter laid on ground near where slab will be built. Note how the legs are made, which will determine how I make the template for the mounting studs in the slab.
Since the slab is going on gravel, we didn't have to worry about laying a patch of paver gravel in the slab frame. After cutting the boards down to size I brought in the cement mixer, extension cord and garden hose along with the bags of concrete to the work site. Another thing I did just before pouring the slab was make a template for the composter legs. These legs are simple angle iron legs with two mounting points on each leg. I took a couple of pallet boards and screwed them at about a 90 degree angle. I lined them up with the bottoms of each leg and drilled holes to coincide with the holes on the bottoms of the legs. I them got the spacing lined up with those of the composter's legs then screwed the two sections together making a diamond, or square, depending on how you look at it, that will be used for lining up where I would sink long bolts into the concrete to serve as anchors for the composter's legs. 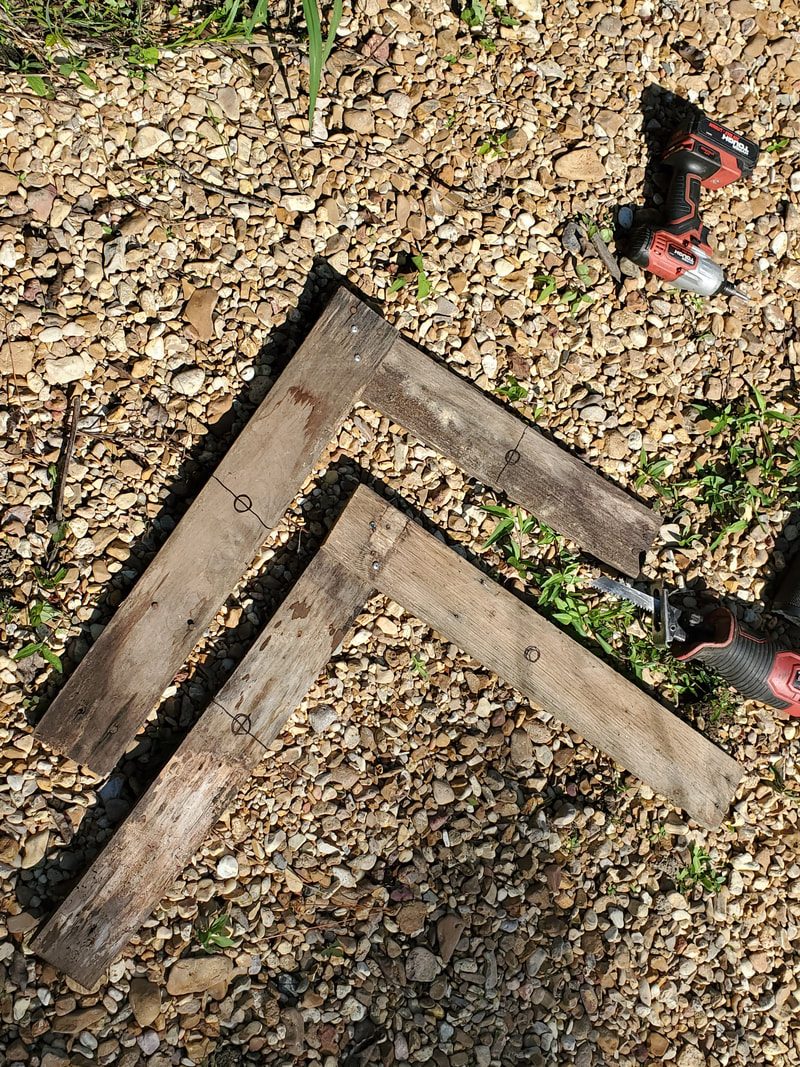
Two templates made from pallet boards screwed together to make 90 degree angles. These templates coincide with the bottoms of the composter's legs.
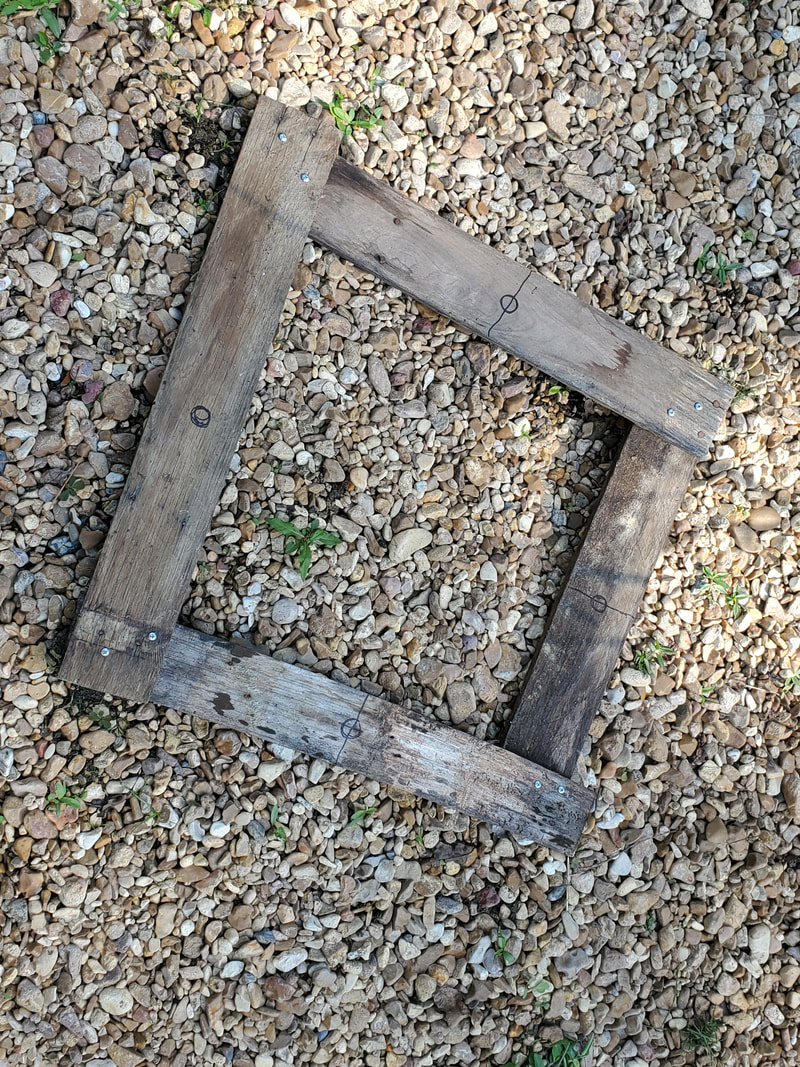
Both sets of templates screwed together to coincide with how the legs of the composter will sit on the slab, despite the wonky shape, this is how the legs will end up sitting.
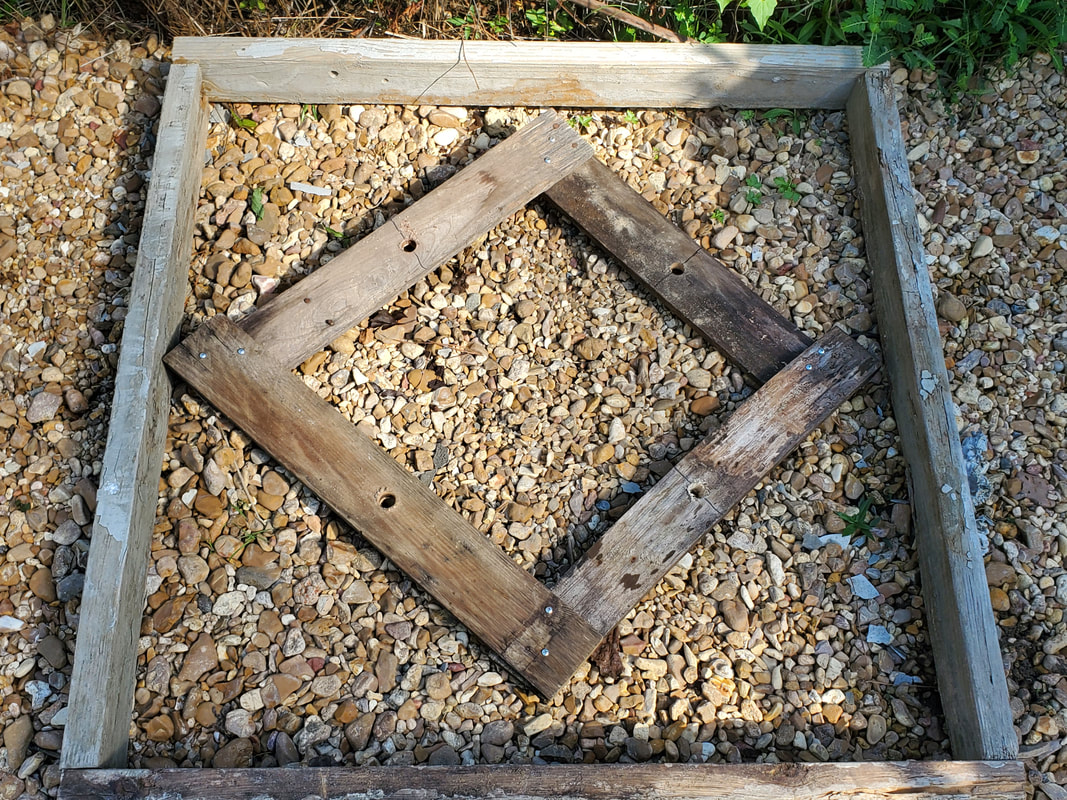
Finished template laid in slab frame for sizing up prior to pouring concrete.
I started mixing concrete one bag at a time so I can slowly and more cleanly pour the stuff into the frame. Mixing more than one bag will have the mixer straining under the weight of the concrete and make things more messy. Even with one bag I still end up using a shovel to help guide the pouring concrete into the frame to minimize the amount that ends up outside the frame. The amount that doesn't make it is small enough to scoop up with my hand. After pouring five bags, I had enough concrete in the frame that I was able to smooth the top off pretty good. I then used the template as a guide to push four long 5/16" bolts, head first, into the concrete. Once the bolts were in place I pulled up the template and straightened the bolts out to ensure they were vertical. With that I'll let the slab cure for a couple days before I mount the composter, to ensure that the slab is cured to the core. I don't want to prematurely mount the composter then end up having the bolts pull out because the core of the slab is still soft. 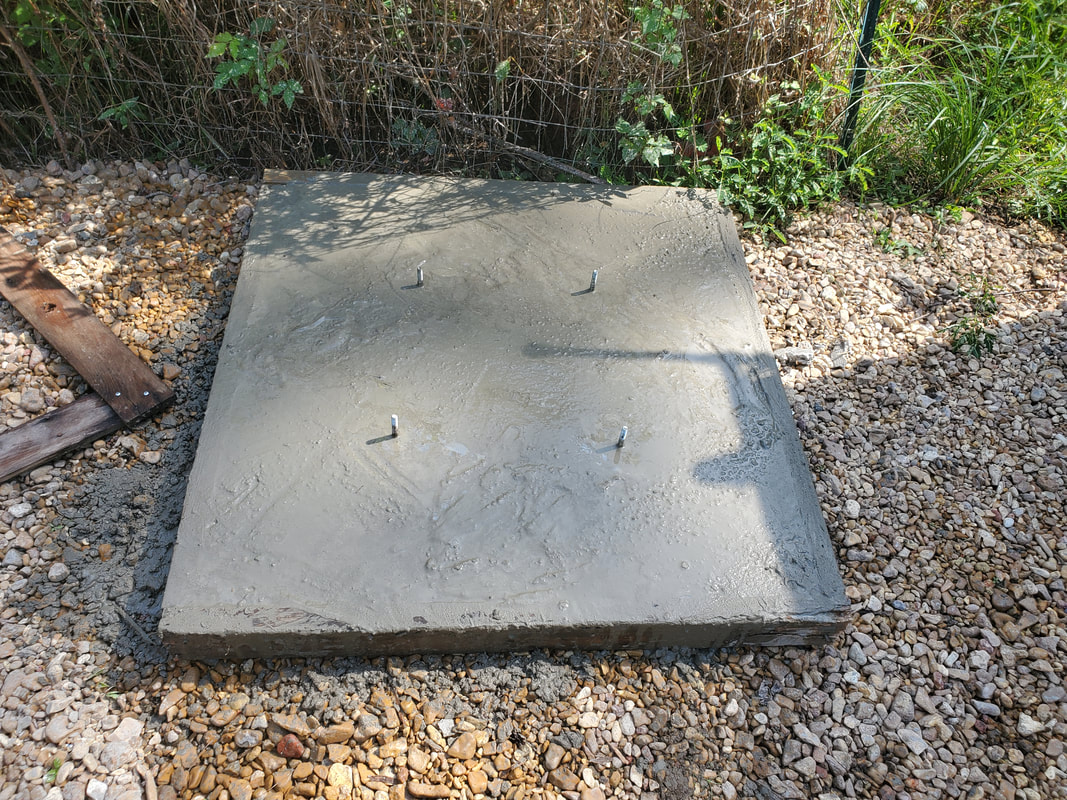
After a couple days I'll get the composter mounted, using washers and nuts to secure the unit to the top of the slab. Once its secured I can start putting garbage in the drum and be able to tumble it as intended to ensure that it mixes good enough to break down properly and create the rich material that will help feed our plants in the future.
As part of my quest to clean up the grounds, I've been working on reorganizing things outside in the yard and other areas, such as the garden. Landscaping has been done, generating lots of green waste to be disposed of. In other areas I took time to use raw materials to build things I've been meaning to build to continue my development of the compound so I can clean up things by repurposing from scrap piles to finished products. In this case, I've been using scrap wood from the wood rack to build drum raised beds for the garden. I've finally come to a point where I've just about exhausted all the good usable wood that would allow me to build a suitable raised bed. There really isn't too much decent dimensional lumber left, mostly pallet pickets along with some cuts of 2x4's and other small cuts of 2x6's and 2x10's. There's also some short cuts of landscape timbers and 4x4s. All wood that can't be used for a raised bed but may come in use elsewhere. I'll probably use some of this wood to build other additions to the garden like things in the greenhouse or even to reinforce existing raised beds. Our double barrel hydroponic garden will need repairs as the pallet table that the pipes are sitting on is falling apart. Anyway, I decided to reorganize the wood rack, sorting the wood out better so I can be better able to determine what wood I have available. I also wanted to sort and organize the PVC pipes on the rack and isolate the metal tubing from the portable garage. The plan behind that is I'll reassemble the portable garage frame and start the construction of a motorized equipment garage that will incorporate the portable garage frame. By building the frame it will get this material off the wood rack and more into play. 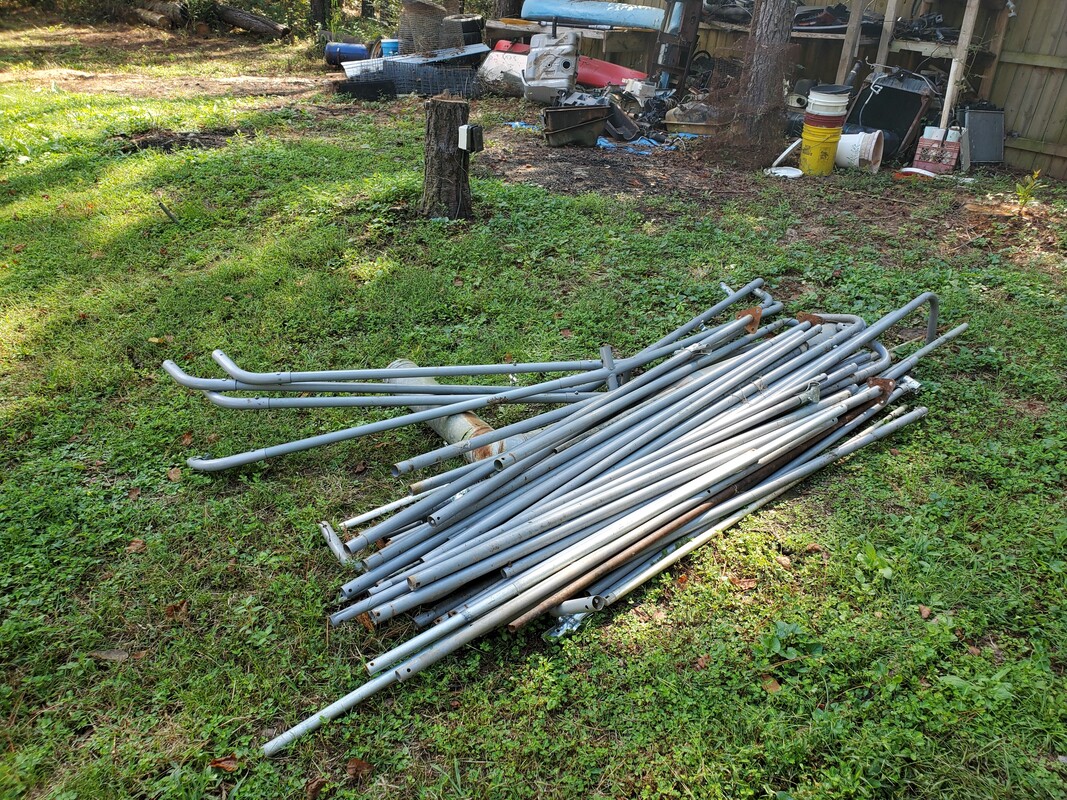 Pipes from portable garage stacked off to the side pending reassembly into a frame. Even the PVC pipe will eventually be planned for use, probably in more development of the garden where water needs to be routed to different hydroponic gardens or other similar applications. Hell, if I decide to get back into using PVC pipe for building certain things around the compound, this pipe will help fill the bill, allowing me to get this material off the rack and into play just as well. Another thing that I'm also trying to reverse is the hanging on to too many small pieces of material. You know the deal, you cut a board or pipe and end up with a foot long piece left after chopping a 10ft piece down. After a while you end up with foot long pieces, 6" pieces, 1.5' long pieces and before you know it you have a pile of miscellaneous short cuts that for all intents have no real use. Its this situation I'm trying to reverse, so a lot of small pieces of wood, especially some of the older more "weak" or rotted wood ended up in the outgoing pile going to the burn pile. 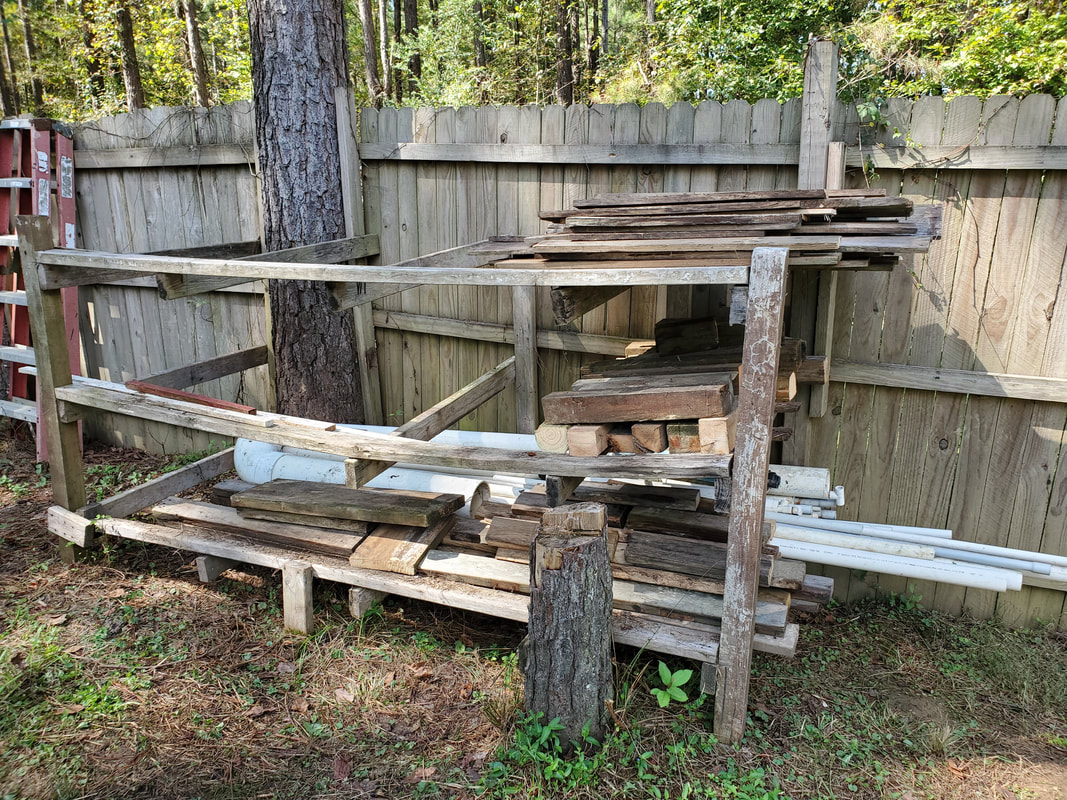 After the purge I ended up with a fairly decent pile of garbage wood that needed to go. All of this went on the burn pile, which was already growing from miscellaneous fallen branches and other trash that had been piled up as I cleared stuff from different areas of the yard. I won't fire the pile yet as I want to build it up more with some more brush and branches from other areas of the yard. As for the rack, everything has been streamlined down to what is shown in the pic, which is really limited to larger PVC pipe and smaller wood pieces. I'll be trying to use this remaining wood on some existing finished projects but more than likely this wood will end up supplementing any new wood I end up getting to build new projects around here, with the remainder ending up in the stove or other fire since I'll be trying not to save more of these smaller pieces as previously mentioned. 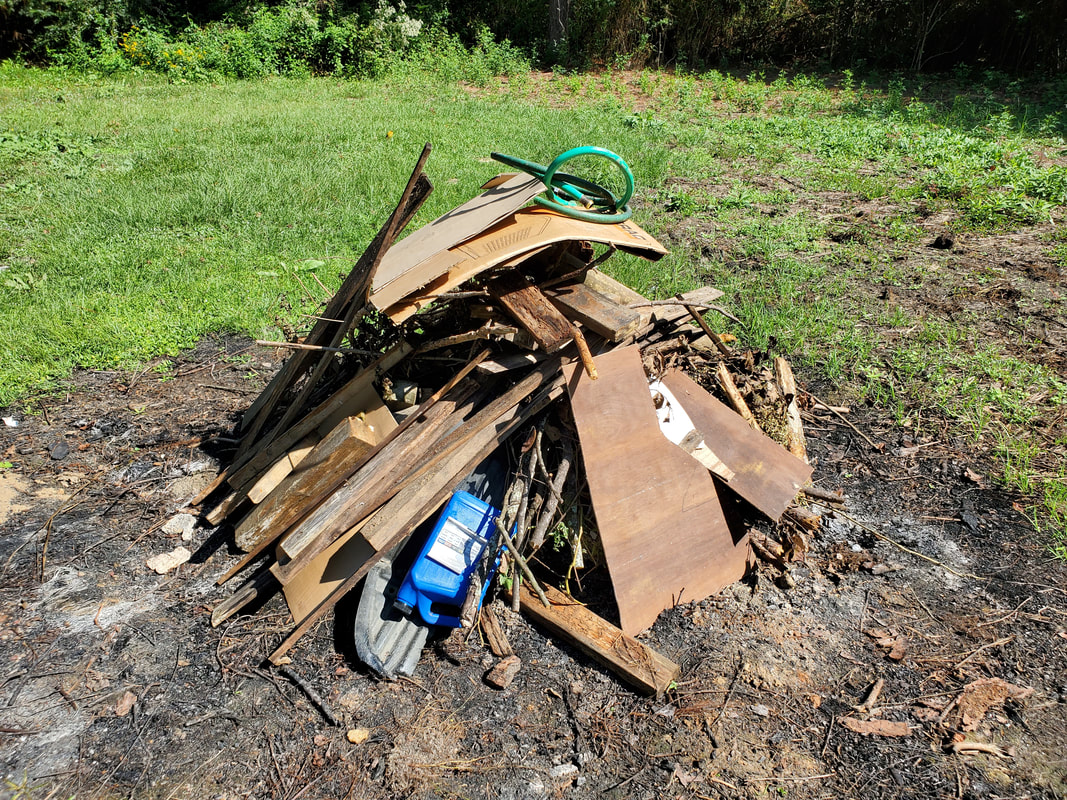 Pile of stacked wood and other miscellaneous trash awaiting more brush before disposing of. My end goal really is to eventually build a shed building with shelves that would be used for storing wood, which would also be relegated to more uniform pieces, and not a bunch of mix matched crap. I may have a small section for that type of wood but the real goal is to have a little of different sizes - 2x4's, 2x6's, landscape timbers, etc. Doing this would eliminate the flimsy rack that I currently have, which had to be reinforced due to the wood coming loose from the nails I used previously. Plus having the wood in a shed will obviously protect it from the elements for the long term. These outbuilding projects are all part of cleaning up the grounds and better organizing the materials and equipment around here so we can have a better homestead compound that will be more comfortable to work in due to the organization. The work continues at a steady pace... |
