|
After a long wait I finally received the rear wheel cylinders for the Monte Carlo. It's kind of wild that such a common component was not in stock in any of the Auto Zone stores in our area. One thing about GM cars, especially old ones, is the commonality between multiple models and years. The same wheel cylinder that I'm using on this 84 Monte was most likely used on cars going back into the 70's, as well as all of the G bodies in the 80's, along with the F and B bodies in the 80's as well. I also know for certain that the S10 trucks shared the same wheel cylinder. You'd think these damned things would've been in stock, but alas, they were not and even after ordering them I was at the mercy of Fed Ex, who if you live in a rural area, will not deliver your shit unless they have multiple deliveries going to the same area. Fuck your excessive wait time, you're running on their economics. Well to make a long story short, I will just order the parts from the store so I can be sure that the shit will be there in a day or two from another facility versus trying to order online to have it shipped to the house. Anyway. I already disassembled one side in preparation to replace the wheel cylinder. The brake shoes were still in excellent shape so there was no need to replace these. All of the other hardware, being drum brakes, consists of nothing but springs and some brackets, none of which goes bad unless you submerged your car underwater for 20 years and all the shit rusts into dust. One thing I will say about these wheel cylinders is I hate the way GM used this locking ring clip to secure the unit in place. Instead of using a couple of bolts like other makers, they used this godforsaken ring clip that you have to somehow knock in place around the locking lips on the wheel cylinder. Never mind trying to pop the damned things loose to begin with. Another thing that I would say too as one who's worked with drum brakes since I began messing with cars 20+ years ago, you MUST take a picture of the assembled wheel or have a printout of how all this shit goes together otherwise you will be in for a world of hurt trying to figure out how to put all these springs and brackets and other crap back together. Between the wheel cylinder fiasco and just the normal reassembly of the complete drum brake unit on one side, this took up a good hour+ of time. With that, the other side will have to be done the next day, but at least with the way things go together still fresh in my mind, hopefully my muscle memory will help me in making everything go a little faster. A couple of other things I wanna look at while the Monte is still in the "down" status is re-seating the distributor due to the idea that it almost seems like the thing is still retarded more than it should be. The engine appears to bind some when cranking, especially when warm and it seemed to only do this when the timing was retarded. I already had advanced the dizzy up to the point where it wouldn't go anymore due to the vacuum diaphragm hitting the intake manifold, yet the engine still bogs on cranking at times. I'll just make sure I mark where shit is currently at before removing the dizzy to set it back down again so we don't have any, um, issues. Another thing I want to also look at is installing a twin electric fan assembly behind the radiator on the car. I pulled the fan from the newer Grand Prix car I was working on with the intent of using it to replace the meat grinder fan that's on the Monte currently. The electric fan will at least be lower profile and open things up around the front of the engine and be one less load on the engine itself. It'll be a little safer since there won't be this implement of dismemberment spinning inches from me whenever I'm working around the engine while its running. There are some cons to having an electric fan but there are plenty of pros as well. For right now the pros outweigh the cons so I'll be looking at switching over to the electric fan. I also plan on doing this with the upgrading to a 3-core aluminum radiator as well for optimum cooling. These modifications, unlike the typical performance mods, will work towards ensuring the longevity of the car versus the short term performance gains one gets when they beef up a car's power plant. At this stage in my life I'd rather have a more or less stock car that I know I can drive to the east coast and back with no issues with aftermarket performance mods causing my powerplant to go into meltdown on the highway 200 miles past the ass end of nowhere. Now why did I pull the fan from the Grand Prix you ask? Well that's for a whole other post later on, stay tuned. 
Shot of left rear brake assembly on Monte Carlo

Closeup of bottom part of brake assembly, this emphasizes the importance of documenting how this goes together.
0 Comments
After taking time to assemble the base batteries for the kid's science fair project, we went ahead and started getting things set up so we can do the actual experiment. Since the project involves mixing salt water to use as electrolyte with two dissimilar metals, I didn't want to mix and assemble things then have the stuff sit for an undetermined amount of time. The metals would react with the salt water and eventually corrode, completely rendering the experiment moot. I wouldn't be able to get any kind of meaningful readings with all of the shit corroded. So I didn't finish assembly until we were ready to actually do the experiments.
The experiments involve taking an initial reading of the output voltage of each battery then turning on the LED bulb, which I decided to use in place of the COB LED cards I originally was going to use. The COB's require 3v while the simple old school red LED bulbs require 1.2v to operate. After turning the LED's on, three meter readings are taken at 5, 10, and 15 minutes to check for voltage output while the LED is on as well as to make note of the brightness of the LED. We made three different batteries, one with copper and zinc for the electrodes, in the form of copper pipe couplings and zinc plated angle braces. The second was copper/lead, again with copper pipe couplings and strips of pure lead for the electrodes. The third was lead/zinc, withe lead strips and zinc plated angle braces for the electrodes. We used four chamber popsicle molds for the battery bodies. Strips of old T shirt filled the bottoms of the chambers so the copper couplings can rest on the material more steadily, plus it served as filler so we didn't have to use so much salt water in the chambers. The lead/zinc battery had its electrodes hot glued in place to hold the metals straight while the ones using the copper couplings were able to hold straight with the copper couplings resting on top of the T shirt plugs in each chamber. We mixed plain table salt with water until the salt no longer dissolved, forming a saturated solution. The initial numbers showed that the copper/zinc battery put out the most voltage (1.86v)right away, lighting the LED the brightest from the start while the lead/zinc battery started off slow (1.67v), lighting the LED dimly. The copper lead battery didn't put out enough power (0.65v)to light the LED. After 15 minutes passed the voltage dropped in the copper/zinc battery and leveled off around 1.73v right alongside the lead/zinc battery. The copper/lead battery still didn't light the LED but only dropped a couple tenths of a volt, not as much of a drop compared to the others but still not enough output to light the LED. The brightness of the LED in the copper/zinc battery dropped the most but leveled off to just a tad brighter than the lead/zinc battery. The brightness of the lead/zinc battery dropped a little bit but held steady. After four hours the copper/zinc battery voltage dropped to around 1.43v but no longer powered the LED. The lead/zinc battery held strong around 1.73v after four hours, still dimly lighting the LED. The copper/lead battery was out of the race a long time ago. Even after 14 hours the lead/zinc battery was still putting out voltage, dimly lighting the LED, albeit very very dimly. Deposits were starting to form on the zinc surface, showing that the salt in the water was reacting with the metals to create another molecule as electrons moved through from one electrode to the other. Ironically, our first prediction was that the copper/zinc battery would come out on top, but as the tests showed, it was literally a tortoise vs hare race. The copper/zinc battery started fast then died fast, the lead/zinc battery started off slow but held strong for the long haul. This experiment was important in the R&D that I like to do when it comes to improvisation due to the fact that a project like this can pave the way to developing alternative power sources for off grid power plants or for preparedness oriented power plants that can be produced easily with readily available materials and chemicals that aren't dangerous. Now with the experiments done, the real "fun" part starts, and that is the putting together of the data and other information into the overall project for presentation later on. Ironically this did rekindle a little fire that I had a long time ago when I used to build all sorts of electronic gadgets using the components that i had amassed from 25 years of practicing the electronics hobby. Of course with the technological advancements, my components will be changing from the simple resistors and transistors and LED bulbs that made up the majority of the components to things like COB LED's, raw circuit boards of power supplies or bluetooth modules and mounted bases for relays and other fixtures or wireless modules and interfaces for smart phones to allow for automation and remote control. The biggest issue though, is making devices that will actually be put to use. In the past I built devices using my components because some of the circuits were simple, some looked interesting, and some did some rudimentary work, but nothing really practical from an everyday sense. Everything was really a novelty. I wanna build stuff that #1 is practical and will be put to use more often than just for demonstrative purposes and #2, cannot be bought cheaper in a finished form. Let me elaborate on this though. Some devices when you see a commercially made version it will be cheaper, but it will have some shortcomings or not have certain features you may be looking for. When I can take something that is already commercially available and produce a version that nobody else has duplicated, that's where the value comes in to play. Even if my finished product costs 2x what a commercially produced version costs, just because my version is one of a kind, it can't be compared with the commercially made version. The work continues.... 
Copper/zinc battery lighting LED bulb.

Lead/zinc battery lighting its LED bulb, the long standing contender in the race.

Set of test batteries, note the copper/lead battery on the bottom right, dead as a door nail as far as producing any real power.
Even though its been several months since the initial work I did on the trailer, there were still some things I had to do to really finish things up. Previously I did finish hooking up the lights in the trailer all the way up to installing permanent switches and outlet boxes so there won't be any extension cords or other temporary shit on the inside. One of the bigger things I had to finish up was drying in the trailer.
This involved sealing up spots on the roof and on the sides where appliances were removed among other things. While I thought I had the roof sealed up, there were still a couple of spots I missed apparently, so the roof still had a couple of leaks. These were addressed after I pinpointed their location. Another couple of spots were some openings where a couple of the appliances were pulled. These spots required more than just caulk. These required makeshift panels to be cut from some scrap sheet metal and bolted to the openings along with caulk to seal them up. I had plenty of scrap sheet metal available so this wasn't a problem. Another couple of spots were a little too small to justify cutting sheet metal to make patches so I thought of the next best thing, electrical box covers. These were just the right size to cover the holes and with the self tapping screws I've been using for the other covers, made for perfect makeshift patches with their bolt grooves. Again some caulk was used to serve as a seal around the covers. After doing all of the patches I used more caulk to seal around some past patches and around some vent hatches where a couple more old appliances were. Even though it took a lot of caulk, I just went ahead and used it to seal up all the vent grooves as I don't even want insects to be infiltrating the trailer and causing me problems later on down the line. In the end I managed to seal up the trailer completely near as I could see. I didn't see any more spots where there could be leaks or other small openings where water could get in. We will soon see though. At this point the next phase in finishing up the trailer is installing the power inverter and battery hookup for the lights in the trailer. Even though the lights will still use mains power, I still wanna do a small solar setup just to have that backup piece of mind when it comes to one of my "outbuildings" in the compound. I still need to install my larger panel for the ventilation fan as well. Things will get done slowly but surely. 
Large sheet metal patch over old appliance opening, note caulk around edges.

Smaller sheet metal patch, again note caulk around edges and self tapping screws in corners and sides.

Electrical box covers used as patches. Note caulk and self tapping screws in place.
Even though the storage trailer has been in place for a good half a year there have been a few things that still weren't completed yet, and really should've been. First and foremost was lighting the trailer up. This is a simple deal that really should've been done soon as I got the thing gutted out but alas, I bounced around to different things as opportunities presented themselves or tasks that needed to be done presented themselves. Well now at this point I decided to go ahead and knock this little job out since I was kind of in between other tasks at this brief moment.
I had already hung a single LED shop light on one end of the trailer a few months back. These are the fixtures that resemble the single bulb fluorescent bulb shop lights that were commonplace back then. These were on sale so I got one and hung the thing up to test it out and see how bright the thing was. Surprisingly it was pretty bright, but not quite enough to really cover the whole of the trailer, so I got another one. Only thing is, since these were 110vac, I needed to have a way to link the two of them up so they can both be activated at the same time. The only way to do this was to plug or otherwise wire them into the same circuit. Fast forward to now, I figured the easiest way to do this without having to spend any money was to install an outlet box on the ceiling with a twin outlet and plug the two light fixtures to that outlet. From here I would run a pair of wires over to a point where they can be energized by an outside 110vac power source. The goal was to supply this 110vac power via a power inverter powered off of a battery charged by a solar panel. Since that involves spending money I needed an immediate solution. That immediate solution is to just wire up the outlet box to a plug which will go to a power strip mounted on the wall next to the door. The power strip will then be plugged into an extension cord that will be installed through the wall to the outside where it will be plugged up to an external extension cord for the time being until a solar power system can be installed on the trailer. The only other option is to do a power run from the main house over to the trailer to supply mains power to the trailer without having above ground lines. The installation overall was as neat as possible. The two light fixtures were hung using the small chains that came with each light, securing them to the ceiling joists with wood screws. The cables were stapled in place using my staple gun, routing the cables over to a central point where I installed the outlet box. The outlet box was installed on the side of the ceiling joist so as to not be hanging down. A simple twin outlet unit and metal outlet cover completed the ensemble. This allowed for the plugs from the lights to be plugged up with no wires hanging down or any other really unsightly shit in the way. The cable coming from the outlet box was hooked up the same way. Stapled in place along the ceiling over to the outer wall, then turned at a 90 degree angle to run along side the inner wall over to the door. I installed another outlet box near the top of the wall next to the door. I hooked up a coupling from the outlet box down to another outlet box. The first box has an actual outlet in it and the other one has a switch in it. I then drilled a small hole in the trailer's metal siding near where the outlet boxes are so as to be able to string a cable with a plug on one end through said hole. I took the bare end of the cable and ran it through the cable coupling in one of the outlet boxes. I connected one of the wires in the cable to the outlet along with the ground wire. The other wire in the cable went aside. I cut two short lengths of wire, connecting one to the other side of the outlet and routing it through the coupling to the other outlet box and hooking it up to one side of the switch. The other short piece of wire went to the other side of the switch and back up through the coupling and was connected via wire nut to the other wire in the cable that came through the wall. The cable will be able to be plugged to an extension cord outside, routing power to the outlet boxes, through the switch and outlet over to the other outlet box where the lights are plugged up at. Plugging up the cord and flicking the switch gave me instant light in the trailer. I did remove the extension cord from the trailer as it was routed through an opening on the other side where the furnace once sat. I still have to make a panel to cover that hole up. The extension cord is now able to be situated outside and plugged up to the trailer as needed without it getting in the way inside the trailer. Future plans involve taking a 100 ft extension cord and hooking it up to an outdoor box and trenching said cable so as to conceal it all the way across the driveway and yard over to the trailer and then continue on behind the trailer over to the work area between the garden and dog area. The trailer and the work area will have outdoor outlet boxes set up in those two spots so as to allow me to plug up any time without having to string extension cords all over the place. 
First outlet box used for direct plugging of the two lights.

Shot of overhead cables routed along ceiling and one light already activated.

Outlet and switch boxes on wall, note coupling between two boxes along with cable going into boxes.

Power cable strung through hole in side of trailer

Back half of trailer lit up by new light.
Things on the home front are always happening. I'm always busy with something. Since the Monte Carlo really can't safely be driven due to the brakes I had to get the 69 Mustang ready for the road. Also I felt like trying to see if I can resurrect the old radiator from the Chevy Tracker since I had some of the aluminum "welding" rods that I kept seeing on those facebook advertisements. The last thing that I've been working on was helping to put together our kid's science fair project, at least the parts that involve adult intervention.
First of all the Mustang. As usual this car's always been pretty reliable, all things considered. Even when it sits, with a little jump start the thing starts up every time. The last time the car was driven was sometime around early May, before the weather started getting too warm to comfortably drive without A/C. I did start the thing a couple of times throughout the summer just to loosen things up and make sure all stays straight. I even moved the thing around just to make sure the rest of the drive line was loose as well. Anyway, I went ahead and cranked the thing up since I had recently ran the thing a few weeks before so the battery still had plenty of juice. As usual, after a few cranks to get fuel pumped up to the carburetor the thing fired back up fast. I let the thing run while I did some small odds and ends. I had to re-secure the dash cam and inductive phone cradle. I had to secure the back seat and get the spare tire (which was originally the regular tire but was changed since its dry rotted and needs replacement) put back in the trunk along with the toolbox. Other than putting some antifreeze in the radiator and some brake oil in the master cylinder, the tank was already full from me putting gas in the tank every time I got some gas for another car and adding some in a gas can. Driving the car was pretty routine. It was loud, creaky and old but the thing is, the car's always been this way. It's funny how when you stop driving a car for a while and start driving it again, all the little quirks that went ignored (consciously or unconsciously) come back loud and proud. The car pulls to the right, most likely due to the right rear leaf spring torque box being pushed up a little bit, putting it out of line with the left side so the right side of the car has a slight lean to the right. I'm sure the front suspension is probably on the tail end of its life as well. Shocks may be worn, hell even the leaf springs are probably weak. When the car hits slight dips in the road the rear subframe creaks loudly from excessive flexing. The exhaust leaks badly enough that you can smell the odor inside the cab and the noise is intense, even for a 6 cyl. Even the steering since its manual steering, is much harder to work, compared to even a shitty power steering system. Basically the car needs all kinds of work to make it comparable to even the Monte Carlo. In time the mustang will have its rebirth in another form as a car that's better than ever before. The next thing is the Tracker's old radiator. Because of a bolt turning up missing, allowing the mounting brackets to spread apart, causing the condenser to move around enough to wear a hole in a corner of the front of the radiator. I figured those aluminum welding rods should be more than able to fill the hole worn into the core passage on the radiator. I went ahead and used a standard propane blow torch, like the ones you use for sweating copper pipe, to heat the area up. I did use some plumbers acid flux to clean the area first. I went ahead and heated the shit out of the area, vaporizing the flux and creating the environment to melt the aluminum welding rod. Of course the way the thing melted in the 2500 degree flame was substandard by my eye. Weird thing is when all was said and done, there was this weird solid shit that filled the area enough to completely cover the hole. It didn't look like anything I could identify, I'm not really sure what's in those aluminum welding rods but it did hold. I did do a weak test where I plugged the hole on the bottom port and filled the radiator with water to see if I seen any seepage, which I did not. So far so good. Of course the only other test will be to cap off the whole radiator and pressurize the unit up to the normal operating pressure that the radiator cap is rated for. 
Tracker radiator before, note the hole in the bottom right side of the core, near the seam.

Same area after aluminum welding rod patch, note solid area covering hole amid the blackness from firing the area with the blowtorch.
Last but not least is the science fair project. The project that we chose was which two metals make the best battery when salt water is used as the electrolyte. The metals in question are copper, zinc and lead. There will be three different batteries made, one that's copper/zinc, one that's copper/lead, and one that's lead/zinc. We will be using four chamber popsicle molds for the battery chambers. Zinc plated angle braces will be the zinc electrodes, copper pipe couplings will serve as the copper electrodes and lead strip, supplied in rolls, will be for the lead electrodes. We will be hooking up a simple LED light to the battery to demonstrate ability to perform work as well as hooking up a meter to show power output. The first battery that we worked on was the carbon/zinc battery. We did everything according to the procedure we assembled so as to weed out any bugs in the the written instruction since the procedure is intended to help the layman conduct the experiment step by step. After getting everything assembled I put the meter to the battery and tested each electrode, getting around 0.55 volts, a tad lower than the 0.75 volts I got when I made a single power cell once. When I tried to measure full output power I only got 1.25 volts, not even enough to make our LED card light up. After troubleshooting I found out that the solder joint hooking up one of the wires to the zinc angle brace was shitty and not conducting good so I had to re-do the solder joint. Afterward I hooked up the LED and got enough power to dimly light the board. The voltage measurement was 2.1 volts. We are going in the right direction. Later on after I drained the salt water from the chambers and rechecked the solder joints and added some extra solder to ensure connectivity between the wire and the angle brace. I even verified continuity with a meter for each angle brace connection. When I reassembled each cell, which uses a strip of old T shirt wrapped around the angle brace to insulate it from the inner walls of each copper coupling, just for shits and giggles I hooked up the LED board, the thing lit up, a little brighter than before. The T shirt strips were still soaked with salt water solution and allowing the chemical reaction to occur in each cell. The meter showed a voltage of 3.05 volts as well. Definitely a step in the right direction. Most likely though we will probably end up going to old school LED bulbs, like the ones we used to get from Radio Shack for use in electronics hobby projects. I have a shit load of this old hardware from my old electronics hobby days going back to elementary school days, most of that shit is 25 years old. There will be more to come on the science fair project as this project is a learning experience for me just as well as the kid since I never really delved into the hobby of making batteries from scratch and the simplicity behind this opens the door to some preparedness ideas, namely making batteries for off grid power. Especially when salt water can be used for the electrolyte, one can scale up such a setup and get a hold of some ocean water and have quick power. Hell it could be the basis of a pseudo-free energy power source for a boat, unlimited electrolyte for a battery. 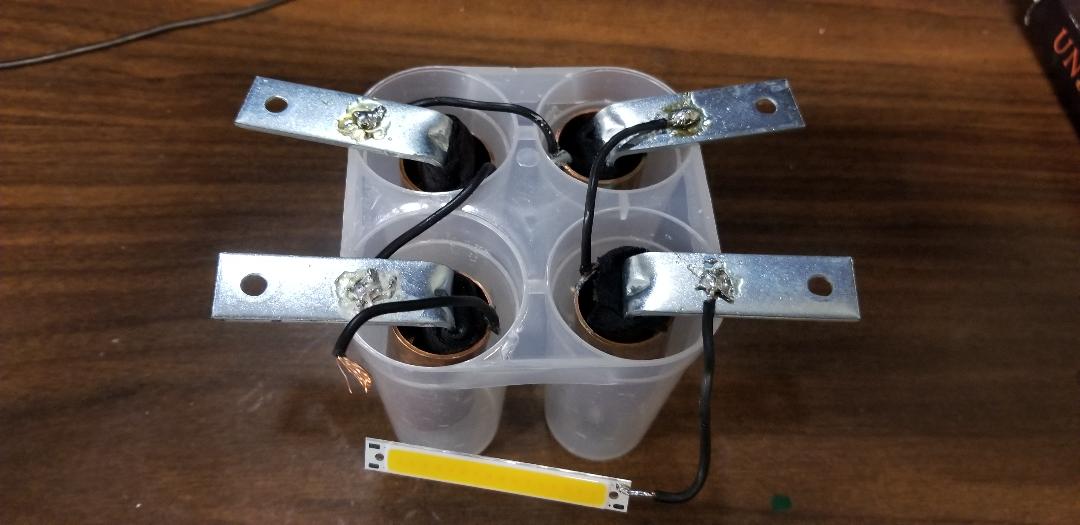
Homemade copper/zinc battery, note all components in use.
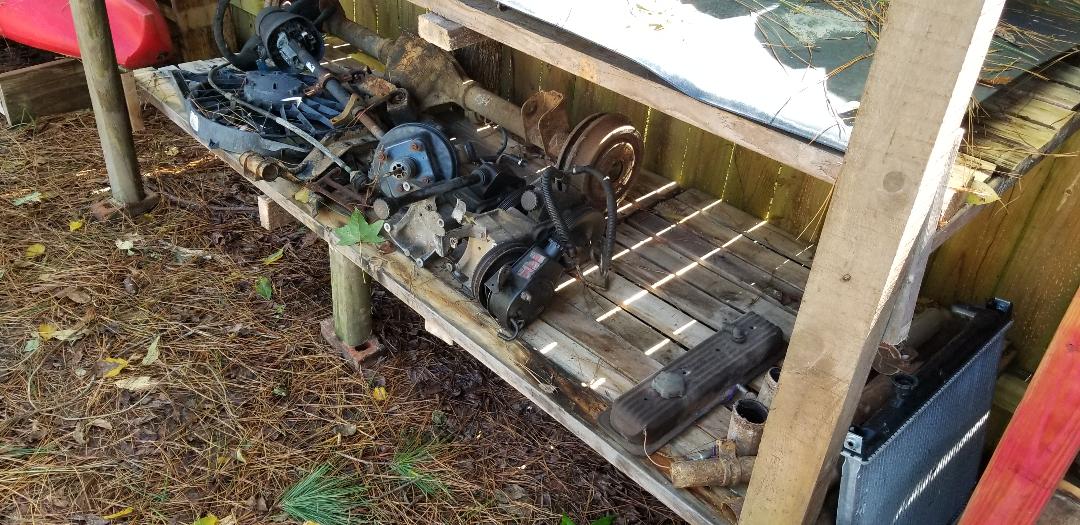
After loading up the S10 with a bunch of auto parts from the garage and moving on to the next day, I was able to unload said parts and distribute them on the old pantry shelf turned auto parts shelf. I arranged things according to weight and category, with things like hoses and pieces of exhaust pipe going on the top shelf and heavier stuff like pulleys and brackets going on the lower shelves. Some of the other heavier stuff like the power steering pumps which were still mounted to their brackets were put on the other auto parts shelf. Some of the other parts also went on the other auto parts shelf on top of or next to some of the other crap that was already stocked. When all was said and done the new shelf was stocked up with a little room to spare. There's also room on the other auto parts shelf for more crap but most likely on top of some other shit.
1st auto parts shelf stocked with more auto parts.

Old pantry shelf turned auto parts shelf stocked with parts.
I had to get a little fire started as it was a little chilly outside and I had some car shit to do that would warrant a fire since I'd be working in one spot. I had already taken a drum and chopped it in half to create two halves, both with the bottoms cut out. The drum used to be one of the oil drum chicken coops we had set up in the chicken yard a couple years ago so the ends had openings cut out for entry and for removing eggs from the nesting bed in the back of the drum. This works to my favor as it makes cleaning easy and when stacked on bricks allows for proper air flow even though the drums are low enough to not really need extra ventilation. I had some wood I had already tried to use before but it was still a little too wet from past rains. I also had some pine mulch in the bottom of the can that I was going to try to burn up but it too was wet. This time however I went ahead and used some of my oil wood along with one of my tube/lint/wax firestarters and some cardboard and paper to help get the wet wood going. With this help it didn't really take long to get a fire going. The next thing I had to do was troubleshoot the Monte Carlo to see what was up with the brakes. The day before I went to check the fluids and found the brake master cylinder pretty far down. After filling it up and getting ready to ride out, the pedal was really spongy. I pumped it a few times and didn't get too much pressure but still enough to stop the car. Upon checking it out at the time I didn't see anything around the wheels that would imply bad wheel cylinders or calipers. However today when I checked things out I did see wetness around the rear wheels which would make sense - the front brakes still worked fine to stop the car but the wheel cylinders in the rear were shot and pissing oil out with every pump of the pedal. I decided that if I'm going to replace the wheel cylinders I might as well replace the shoes as well since I'm going in there. I'd rather go in there once and not have to worry about that shit again for a minute. After seeing what was up with the brakes on the Monte I went ahead and put a plug in the Tracker's spare tire, which was originally on the truck but had to be swapped out after the tire picked up a piece of a razor blade. Luckily the blade piece was a triangular piece that merely pierced a hole versus actually cutting a gash in the tire. I was able to use a standard plug to repair this. The problem came when I went to put air in the tire. The air compressor that we use outside to fill tires has a bad habit of not starting when its cold. Whether its because of the oil used in the compressor or its just finicky, this time the damn thing was really being a bitch. I even moved the compressor by the fire to try to warm it up in addition to the sun shining on it. It would bounce a little like it wanted to start but no dice. I emptied the thing of air into the spare tire so when I tried to start it the compressor would not be fighting against the air pressure already in the tank. The thing did finally start then. This made me wonder if the capacitor was going bad in the motor, making it way harder to start up under heavy load. I did drain the oil from the compressor pump though as it was pretty thick. I'm planning on trying some lighter weight oil, maybe straight weight for the winter, see how that does. 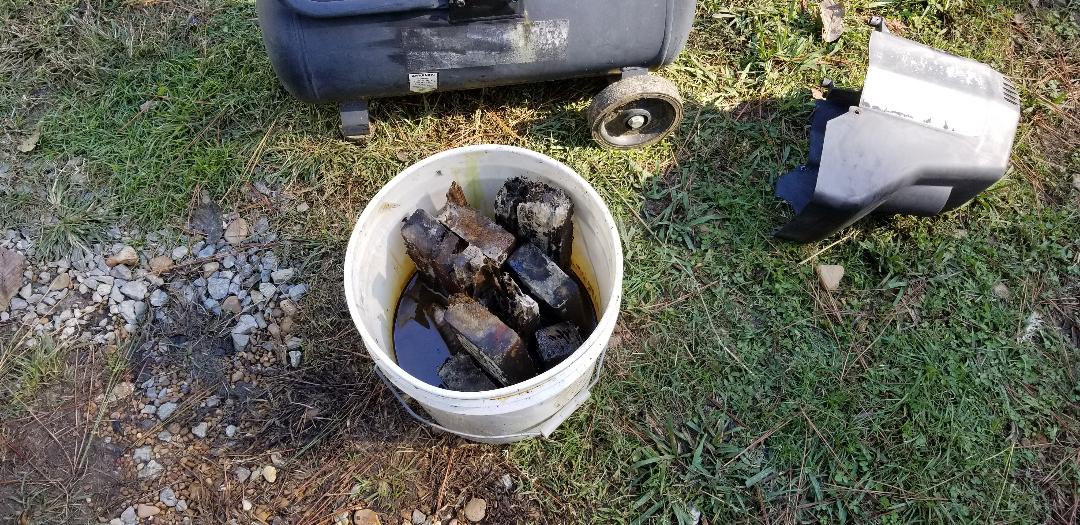
Oil wood bucket, only partially full of oil as it had soaked into the wood. Will continue to add oil to the bucket along with more wood to keep a steady supply of this simple fire starter on hand.
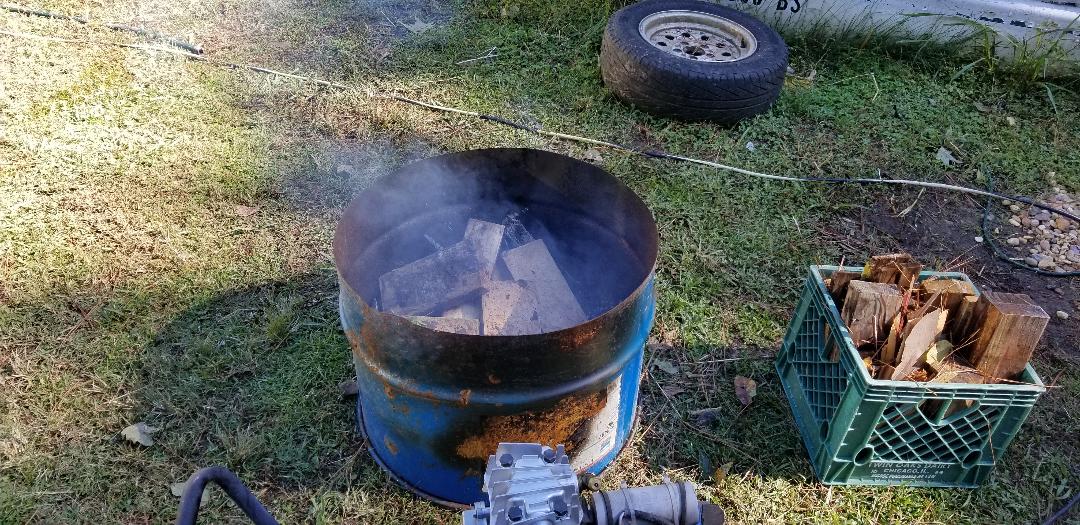
Burning half drum with spare wood in crate next to it.
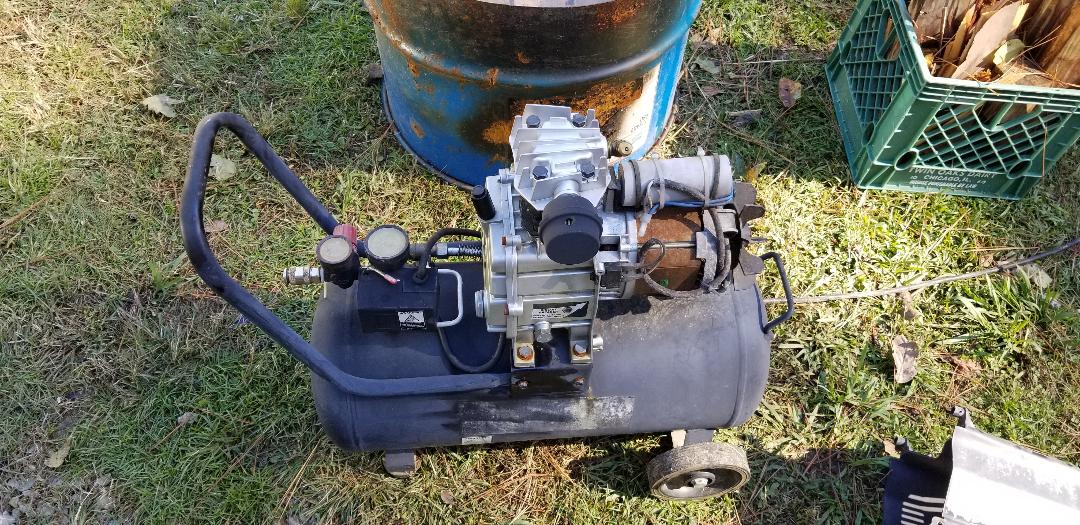
The troublesome air compressor that did get a lot of work done for us through its life here.
Another development that occurred after we left the house was when the Tracker started running hot after someone pointed out the thing was pissing water from under the front of the truck. After stopping to check it out I found the radiator spurting water out slowly. At this point my first thought was getting water into the thing and making our way back to the house. I emptied the whole gallon bottle of spare water/antifreeze we had and quickly hit the road. We hit the highway and made it about a third of the way before I decided to stop and check the radiator again and top it off. After getting some more water from the gas station I got the rad topped off and we were back on the road again, this time making it about another third of the way before stopping at another and final gas station along our route back to the house. After topping off the rad we hauled ass back to the house, just making it as the temp gauge was already creeping back up before we made it back to the house, but we did make it. At this point we got to work pulling shit apart quickly so I can swap in the spare radiator I had on deck for just this case. I then found one of the mounting screws at the top of the radiator was missing, causing the mounting bracket which also holds the AC condenser, to spread apart some, pulling the condenser free from its rubber insulated mounts on the opposite side so the whole unit was able to bounce around. From the way it looks, the condenser or its tubing or the mounts might've hit the radiator just right or rubbed it just right to make the hole that caused us the headache it did. After reseating the condenser I went ahead and mounted the radiator as well and got everything secured along with a fresh bolt at the spot where it was missing. Another thing I had to fix was the shitty welds that I did to hold the body sub frame in the front together as part of the repairs from a deer strike several months earlier. From all the driving that the ole lady does in the truck the bumping and jarring caused the welds to break and those pieces of the body sub frame. I had to pull the grille to open the area up in order to weld things back up so nothing pierces the condenser. After playing with this shit for about 90 minutes we got things back up and was able to hit the road again, a little late but running nice and cool with a fresh radiator and everything patched back up. In the meantime I did find that no one had the brake parts for the Monte in house so I ended up ordering the stuff through their website so it can be sent to the house in a few days with free shipping. I did manage to get the crank sensor for the Explorer and a fuel filter for one of the generators which we had to use the night before as the power went out and stayed out all night. So as it stands there is much more to be done when it comes to automotive work and the way it looks I'm going to be buying stuff and making repairs as I complete work on the cars. This stuff has been put off long enough.
|
