|
With all of the things going on around the homestead, spreading gravel has sorta been put on the back burner. For a couple of weeks I had gotten only one load instead of the typical two loads. On a couple of occasions I didn't get any since we either weren't around on the day I would typically get the stuff or I had other crap going on or the weather didn't permit going to get gravel let alone spreading any. Well with this load of gravel, one of the things I had to divert to was patching up some of the spots on the already covered gravel areas. As I had to do this before, it was nothing new to have to go back over these areas. Luckily since I had moved the vehicles around after clearing up a lot of stuff, I had the midway cleared where I was able to pull the truck all the way into the midway where I could shovel the gravel right from the truck and onto the spots to be recovered. Some of the spots were tire grooves from the constant traffic from us parking and pulling out every day. Once I took care of the spots on the midway I turned my attention back to the side park going towards the storage trailer. 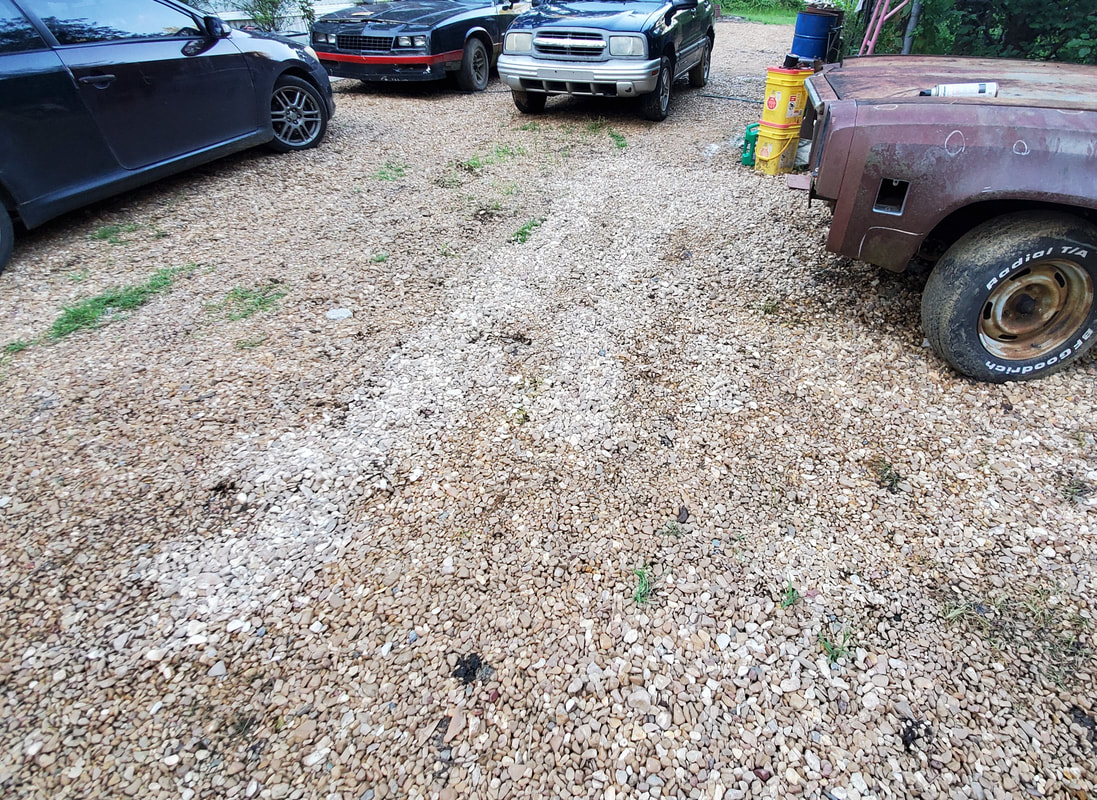 Even in the side path I had to do some covering up since with the areas cleared up there has been more vehicular traffic in the form of the F250 being pulled over the area as I spread gravel over the ground that makes up the side path. Even with the multiple rains that have passed through, the ground settled more, creating some depressions in the gravel that would collect water after a good rain. I wanted to cover all this up enough that we don't have standing water after a rain. I staged the truck over the area and spread some gravel over the areas to be patched, getting a thick layer of coverage over the small areas before moving back to the edge of the gravel layer near the back of the storage trailer. I still need to get as much ground covered as possible here. 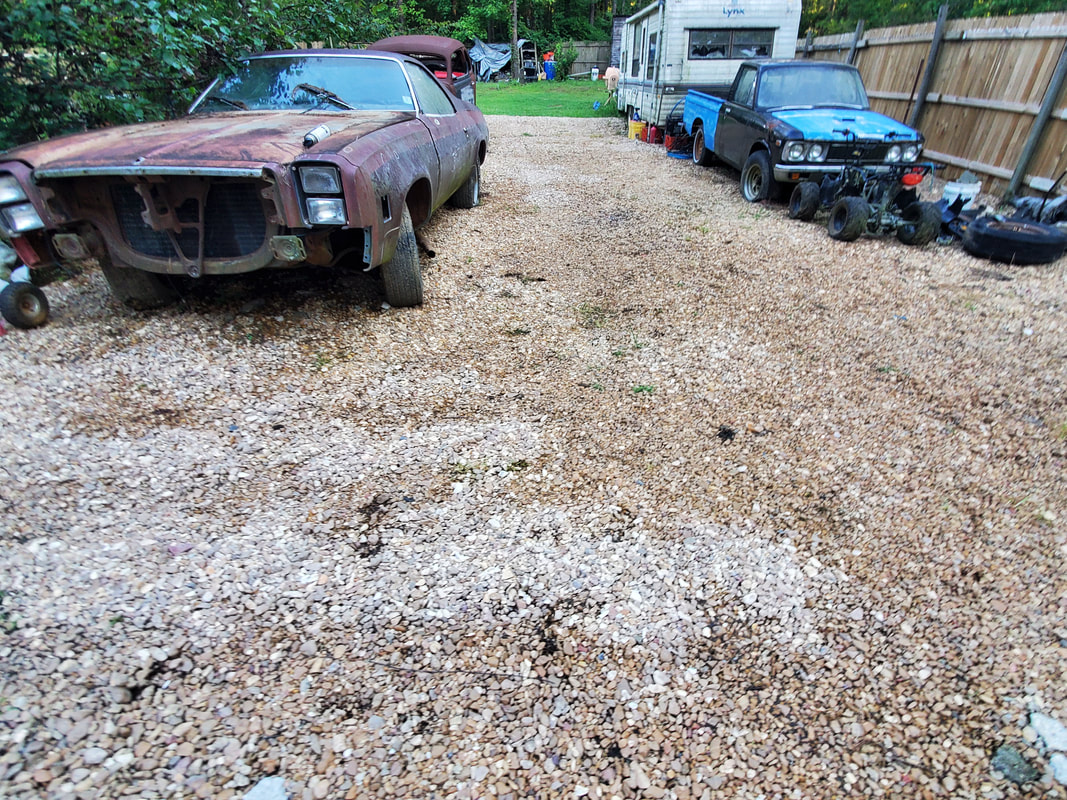 Spots in the side path covered with fresh gravel. Fresh spots are more white compared to the old gravel. After patching up the other areas of the midway and the side path, I moved the truck all the way to the edge of the gravel layer near the back of the storage trailer. I spread the gravel to cover the whole span between the storage trailer and the garden fence , working my way out to cover more ground. I wanted to get a good enough layer covered so when any vehicle drives over this layer of gravel it'll settle the rock into the ground without sinking in. I will have to come back over this area in the future as more traffic on the gravel will push more of the rock into the soil, exposing spots or creating depressions that will need to be addressed.  With the load of gravel exhausted, I managed to get the side path covered up all the way to the end of the garden fence and almost to the end of the storage trailer. This is good as I can start covering up some other areas of the compound, one in particular is the garden. I had already started laying a gravel layer over what would be the walkways in the garden where you would walk by the raised beds along the back fence. Now even though these gravel layers have since sprouted up lots of grass that will need addressing, there are areas of high traffic in the garden that will definitely need a lot of gravel as the ground is soupy and will swallow a boot in a heartbeat. The very middle of the garden is the worst as the ground is slightly lower than the surrounding ground so it collects water way easier and hence becomes super muddy. I'll be concentrating my efforts in this area with the next load of gravel. Also another area that I will spread some gravel is in the area where the dog kennel greenhouse is located. I decided to start work on that long since delayed project as I had a new idea to use components from the old portable garages I have stored with the other scrap to make the roof frame, plus use up the batch of corrugated sheet metal to clad the walls of the kennel. As part of that project I will lay down a tarp over the inside area with which to spread a bunch of gravel over in order to create a floor within the soon to be greenhouse so no grass pops up in there. It shouldn't take much but it will be an area that will get first dibs on the gravel when the next load gets brought in.
0 Comments
After finally getting the parts I ordered for the Tracker, I was able to get to work on doing the suspension work that needed to be done. I was planning on replacing the control arms and tie rod ends on the front end. I had already checked the shocks and they were fine so there was no need to mess with those. Now since I did this work before on the other Tracker we used to have, this would be pretty easy, it would just be a matter of taking things apart and putting them back together in reverse, obviously so I got to work on an off day where I would have plenty of time to do the work without rushing.
After jacking the truck up and supporting it and removing the tire the first thing I did was put another jack under the control arm to hold it up some since I would have to remove the bolt to the ball joint and jack the control arm up out of the spindle knuckle. I also pulled the tie rod end out as well, after removing the nut I hit the knuckle with a baby sledgehammer to jar the tie rod shaft free. The same went for the ball joint. 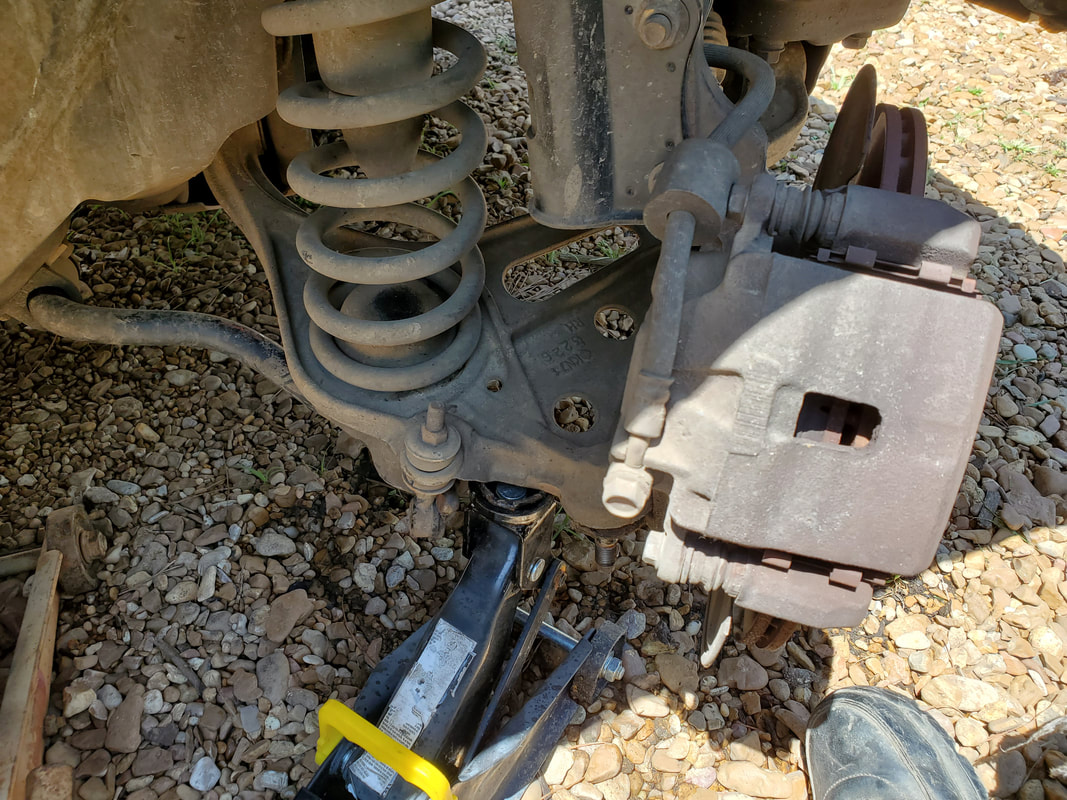
Jack supported under control arm to get things supported prior to pulling things loose.
With the ball joint and tie rod free I would've removed the sway bar link but it was already broken, which explained the wobbly nature of the truck so of course I will have to get those parts in the near future to make that repair after this. Without having to worry about the sway bar link I was able to remove the jack from under the control arm to tip it down and pull the coil spring free, a convenient design on this vehicle for removing the dangerous coil spring. From there I was able to pull the two nuts and bolts that hold the control arm to the frame.
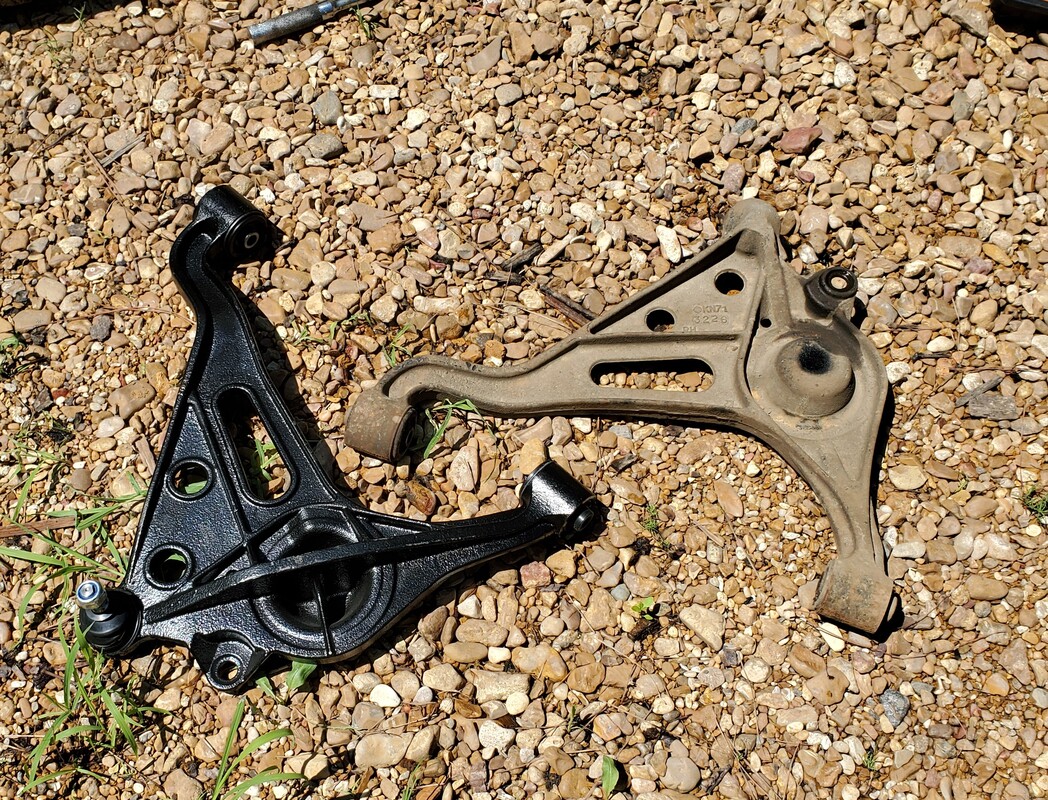
New and old control arms next to one another.
With the old control arm out I was able to put the new control arm back in pretty fast, with only two bolts needed to put the unit in. I put the spring back in place and put the jack back under the new control arm so I can jack the unit up to get the ball joint shat high enough to be able to clear the knuckle on the spindle. With the control arm jacked up, I got the ball joint seated in the spindle and torqued down. 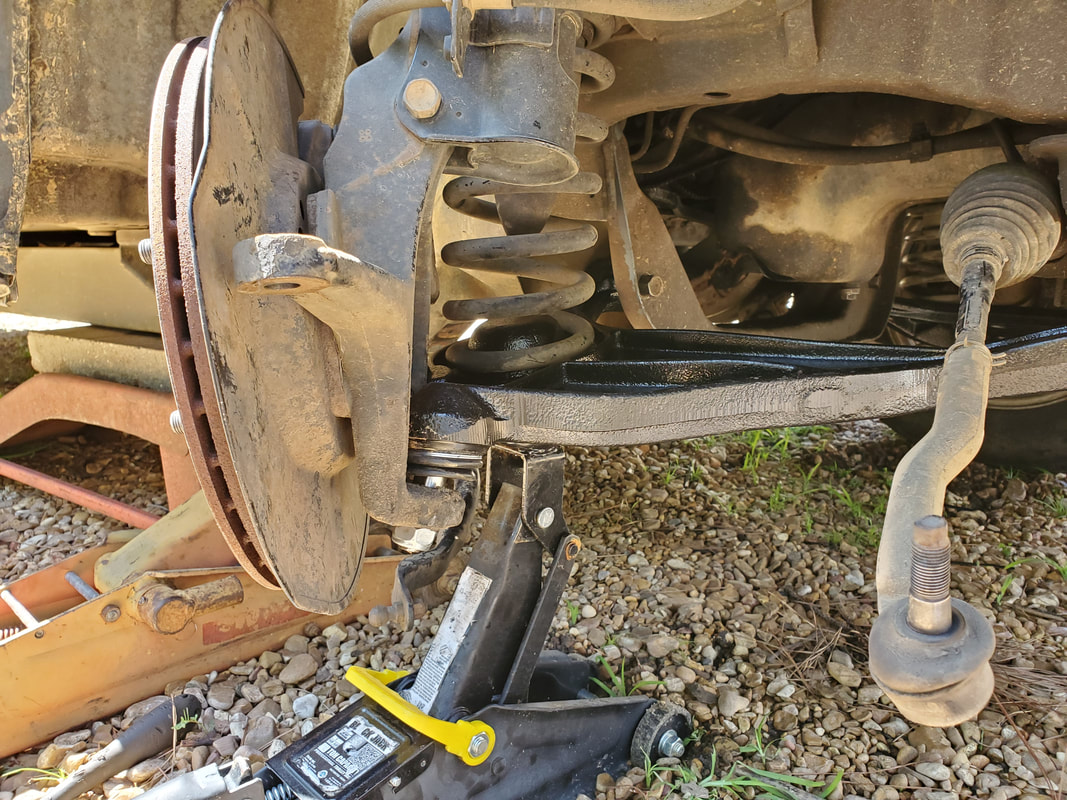
New control arm installed with ball joint seated in spindle knuckle.
Next was the tie rod end set. Since the new tie rod ends also came with the boot and the nut, I didn't have to take the old assembly apart to recycle any parts. I removed the assembly by applying the inner tie rod end wrench to the piece and turning the whole works off. With that I was able to assemble the new tie rod assembly then match the new assembly next to the old assembly to get the adjustment as close to the old one as possible before reassembly on the truck. Since I had parked the truck with the wheels amidships from the start, as long as I get the tie rod end assemblies as close to the adjustments of the old ones as possible I should be able to maintain the alignment of the truck. 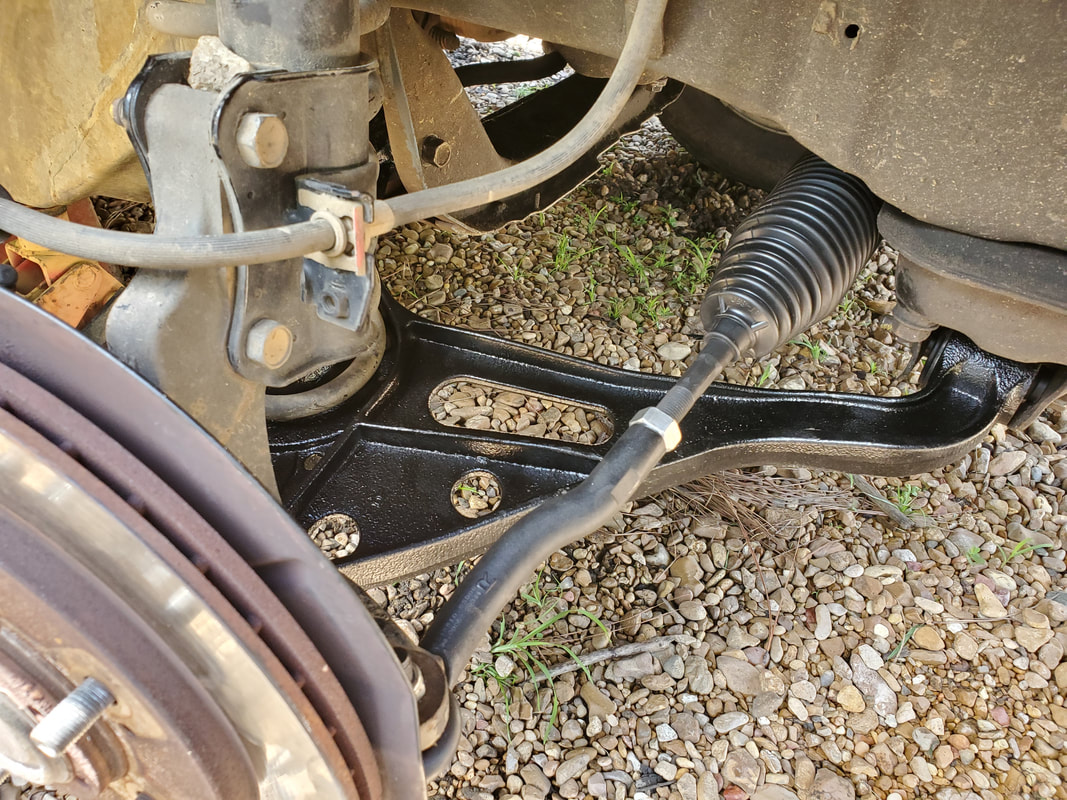
New tie rod assembly secured to knuckle on spindle.
With the new tie rod assembly adjusted and bolted back up to the rack and pinion and the spindle, there was a matter of the boot. Since I had to essentially destroy the special clamp to remove the boot from the rack and pinion side of the boot, I had to use something to secure the new boot to the rack and pinion. Since I don't have the special clamps, I used the next best thing-zip ties! I took a long zip tie and wrapped it around the grooved lip of the boot then pulled it super tight with pliers to secure it. I did the same with a smaller zip tie to the tie rod shaft end of the boot to get that end secured as well. 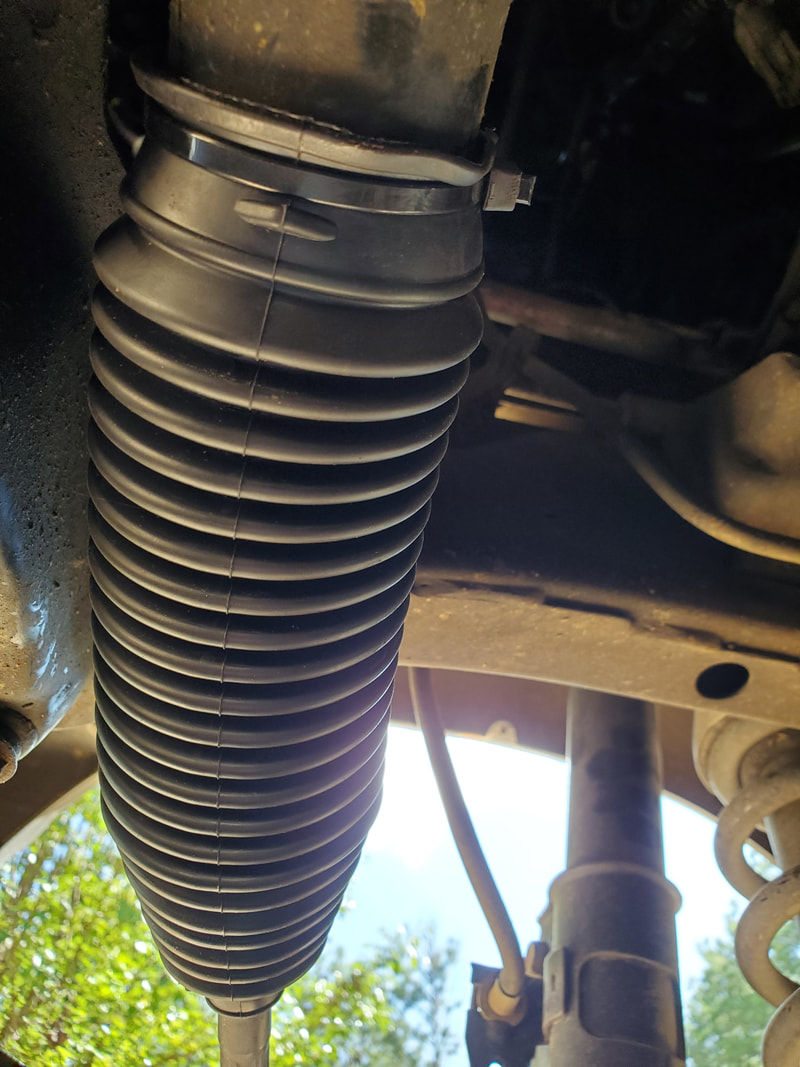
With that I put the tire back on and got ready to do the other side. As would be figured, everything on the other side was the exact same as this side, along with the use of zip ties for the tie rod boot. I also go the tie rod adjustments as close to original as possible here too so the alignment is damn near exact. Now there's still a matter of the sway bar links that will have to be replaced since only one is holding on and this will definitely miff up the stability of the truck especially at highway speeds. I will be getting those parts as soon as possible to get them on the truck to complete the work on the front end.
Today was just taking a little time to do some things in the garden. Of course part of this involved just simple watering of planters and raised beds that I haven't yet run micro irrigation lines to. I also took some time to put some hydroponic fertilizer into the drum for the one main HP garden and top it back off so it'll be good for a while. I also dug out some fish emulsion and put some water into it to thin it back out so I could pour a little bit into multiple planters. I did this since I could've poured a certain amount into a water bucket to make a batch of fish water to pour. This way the little glob of fish crap will last a bit longer when the planters get their daily dose of water.
Speaking of micro irrigation, I did take some time to run a spur line to the fourth drum bed that I set up in the middle of the garden. I set this drum up when I uprooted a fig tree last year but never got any irrigation set up in it. Well today that finally happened. Of course in the end there was nothing to it, it was just a matter of poking a hole in the 1/2" hose that was feeding the high volume water to the other three drums then putting the press in fitting into the hose so I could hook up the couple of feet of 1/4" hose that feeds the micro sprayer, which is all attached to a stake in the planter. 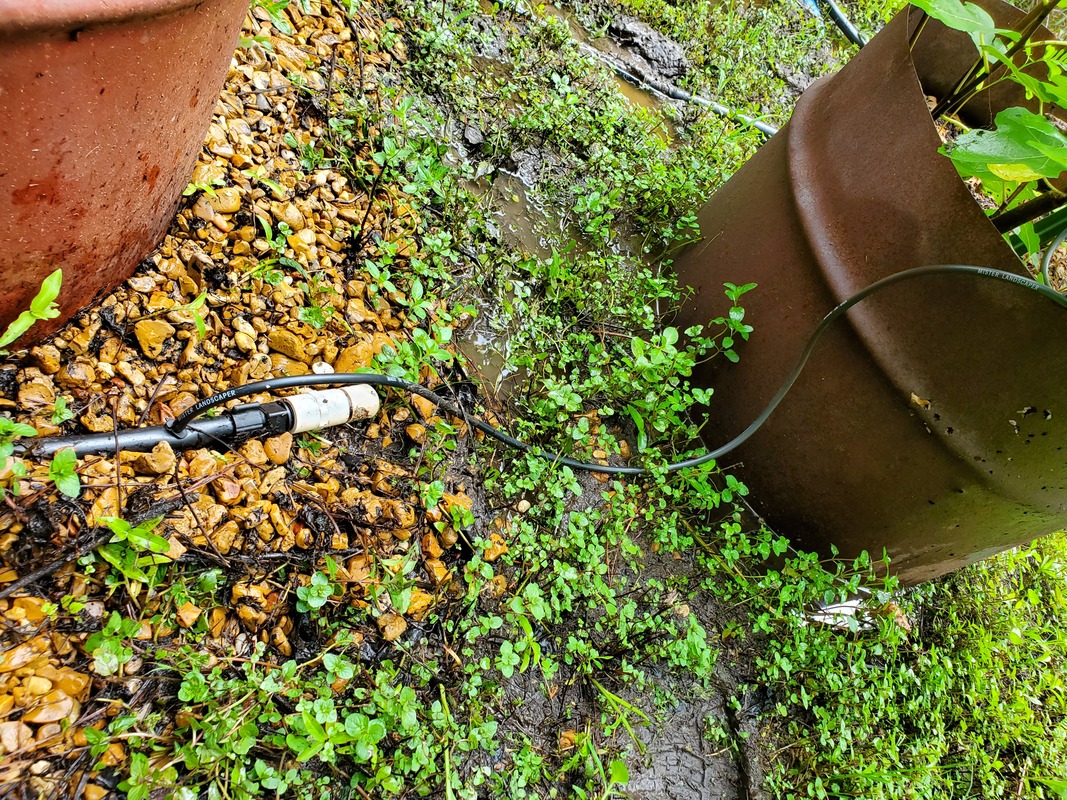
Tap in micro irrigation line for smaller hose feeding sprinkler to drum bed.
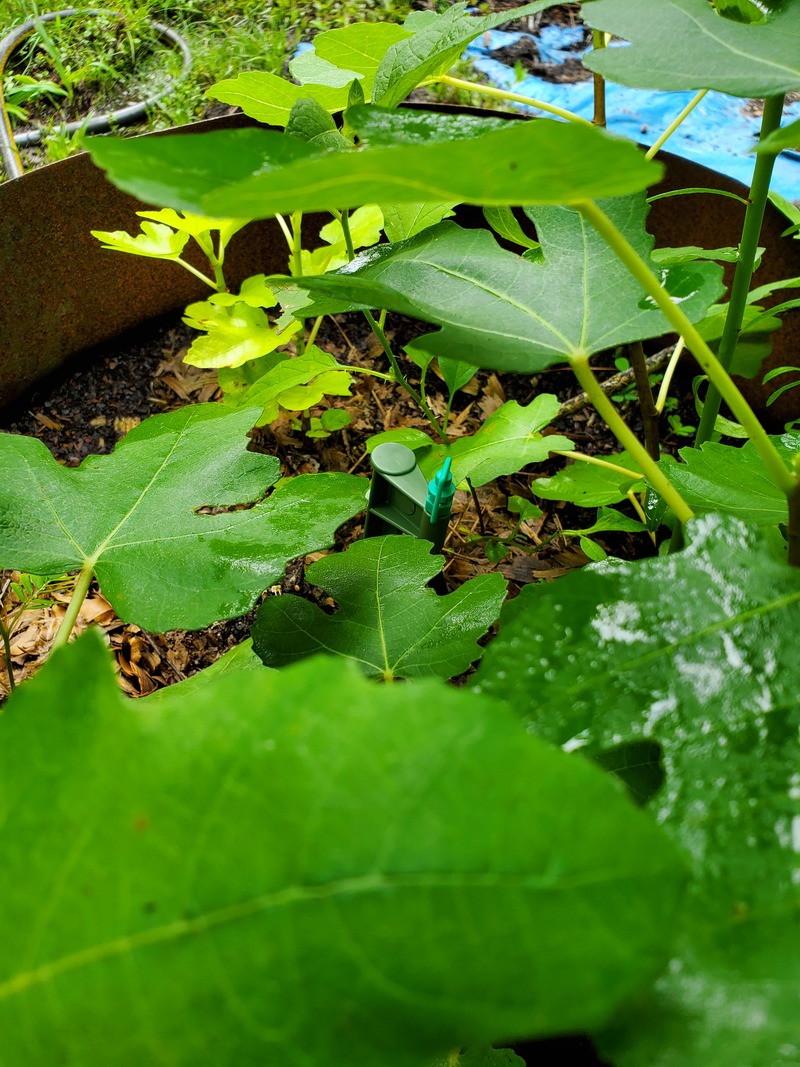
New sprinkler head on stake in fourth drum bed.
Another thing that I found in the middle along these drum beds was that some of the strawberries sent out runners that had started taking root in the ground surrounding the drums. The thing I love about strawberries is that they are a definite self replicating plant in that I was able to uproot these multiple plants, all tied together on the runner vine, clip them to separate them then replant them in the drums where there was space for more strawberries. 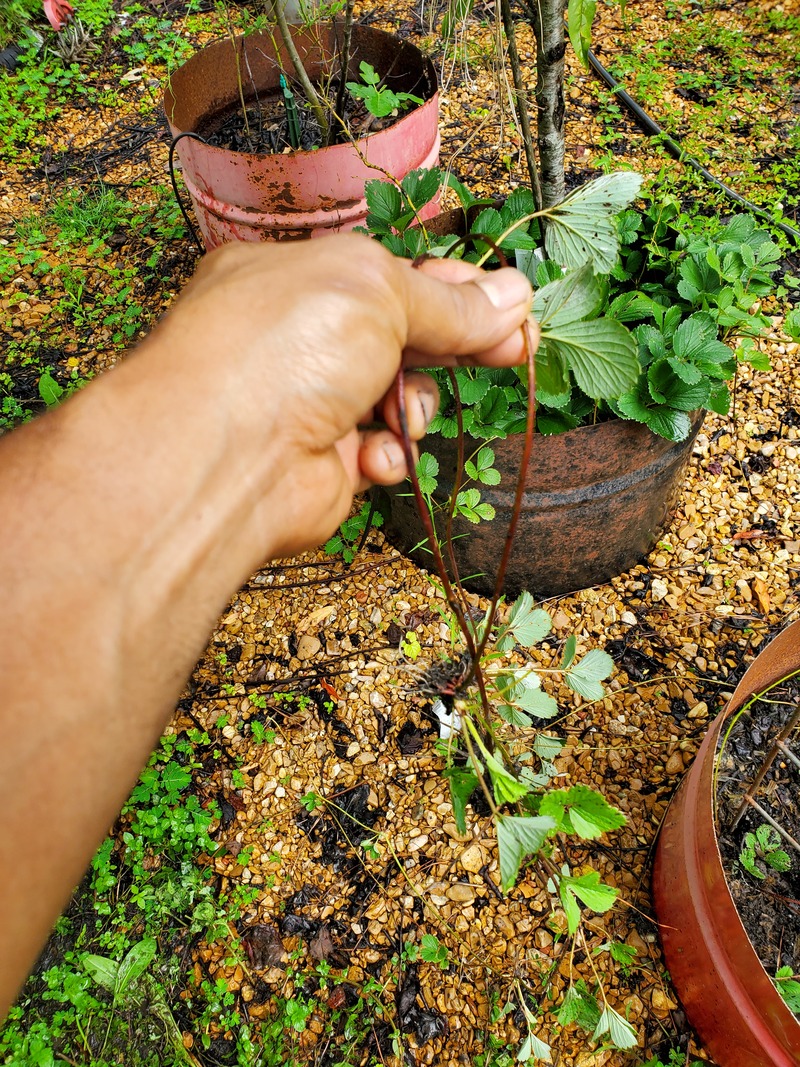
Strawberry runner vines pulled up from ground.
After clipping the multiple plant sets from the runner and replanting them I was actually able to fill two beds up with plants that next year should grow larger and fully cover the dirt in the beds and hopefully be large enough to produce fruits as a result. Of course they'll get a little boost from some fish emulsion. 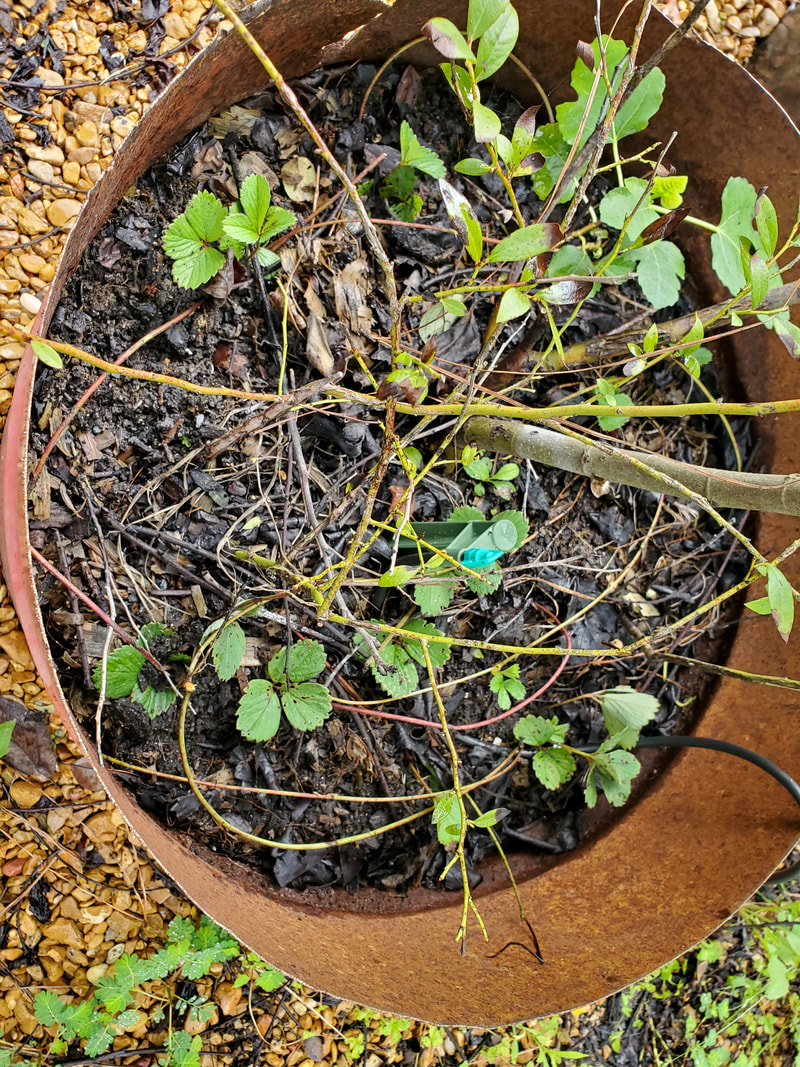
Another little thing that I decided to start work on was the building of the dog kennel greenhouse. If you remember, I moved an old chain link dog kennel to the corner of the garden where it currently sits with the intent on turning it into a greenhouse. The way I plan on doing this is to first cover the sides up then make a roof frame that will have a clear covering. At first I planned on getting some corrugated translucent plastic panels for the roof but then I thought that I could actually just pick up some thick Mil UV resistant plastic sheeting that I could place over the roof in the winter to make the actual greenhouse then remove in the summer when its not needed since it'll be hot. As far as the sides, they'll be covered by corrugated metal panels all around. The plan is to have the sides covered so just the roof is exposed to the sun to help control the amount of intense sunlight hitting plants within, especially during the summer since too much hot sun will cook plants. Besides, when I get the wood fence panels up, two sides of the dog kennel will be blocked anyway. 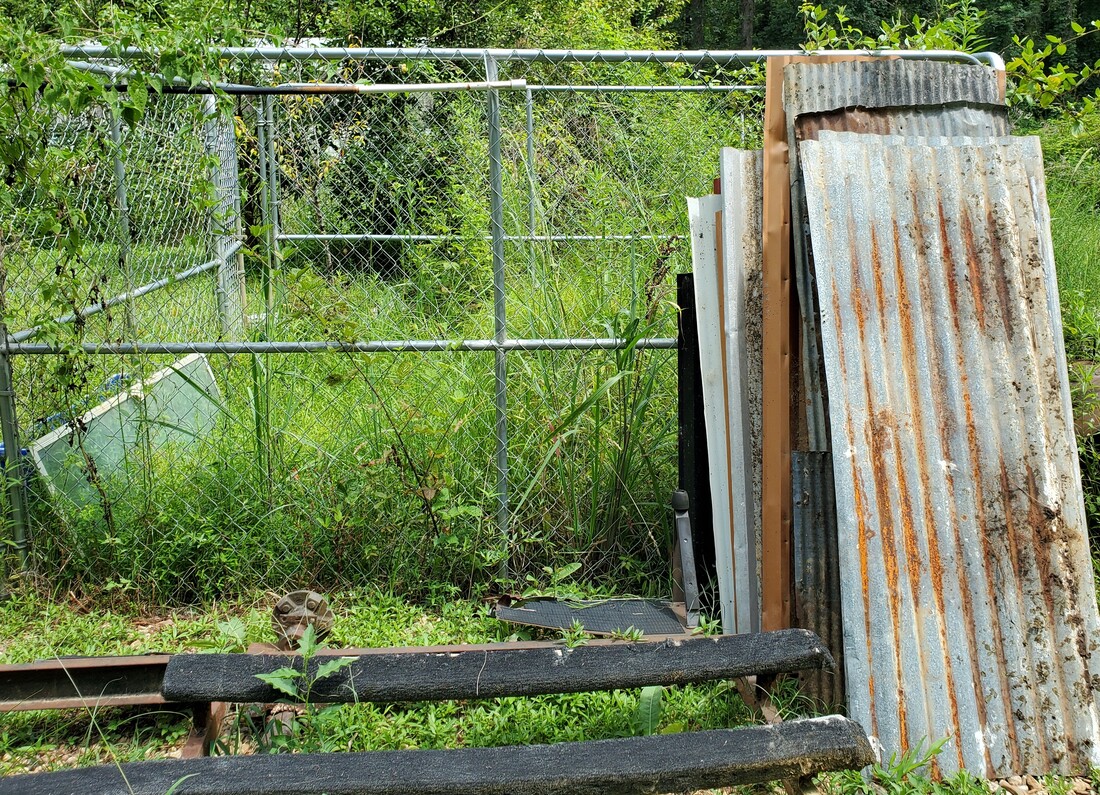
In the meantime I started moving scrap corrugated sheet metal panels over to the kennel greenhouse to have them staged so when I actually start hanging panels I will have them already on site. I'll be using self tapping screws to hang the panels on the kennel's frame as well as to each other to make the walls. I also plan on using the roof framework from the old portable garages we disassembled in the past to make the roof frame for the greenhouse. Of course the benefit to all this is that I'm using up all these scrap materials that are sitting in a pile along the main fence. As these projects get done, more of these scrap materials will be taken out of circulation and no longer cluttering up the place, a win/win benefit. Also getting this greenhouse project done will allow me to get more use out of the garden especially for next year.
After having installed a new carburetor on the larger Briggs generator we have there was still a matter of fixing the slightly smaller Champion generator that had also started acting up. The Briggs genny at one point had to be run on a makeshift propane hookup since the Champion started messing up right when we needed it the most, during a rain storm (of course!) The Champion had gradually started running worse and worse until the thing would barely run under no load conditions.
So with the Champion out of commission, we focused on the Briggs, getting another carb for it and getting it restored back to normal operating order. Since other obligations came about, getting a carb for the Champion was put on the back burner. Finally we managed to get a chance to get a new carb for the Champion so we can get that unit restored just as well. Part of the problem here is the simple fact that storing these gennies outside, ages the machines way faster due to moisture causing problems with the carburetors mainly. So to help remedy this, we took the Champion up to the garage to store it under cover to keep it safe from the elements since it won't be used as long as the Briggs is still operational. Not to mention we are planning on getting a whole house propane genny soon so we won't even need the Briggs, meaning that it too needs to go under cover to keep it protected from the weather. So with the new carb in hand we hauled the Champion up to the garage to install the new carb, and of course keep the machine up there after testing the machine out. This should be a pretty quick in and out job since the carb is only held on by two nuts on the studs that hold the carb in place. The air cleaner assembly had been disassembled before when the genny was starting to act stupid and was needing constant shots of starting fluid to get it going. 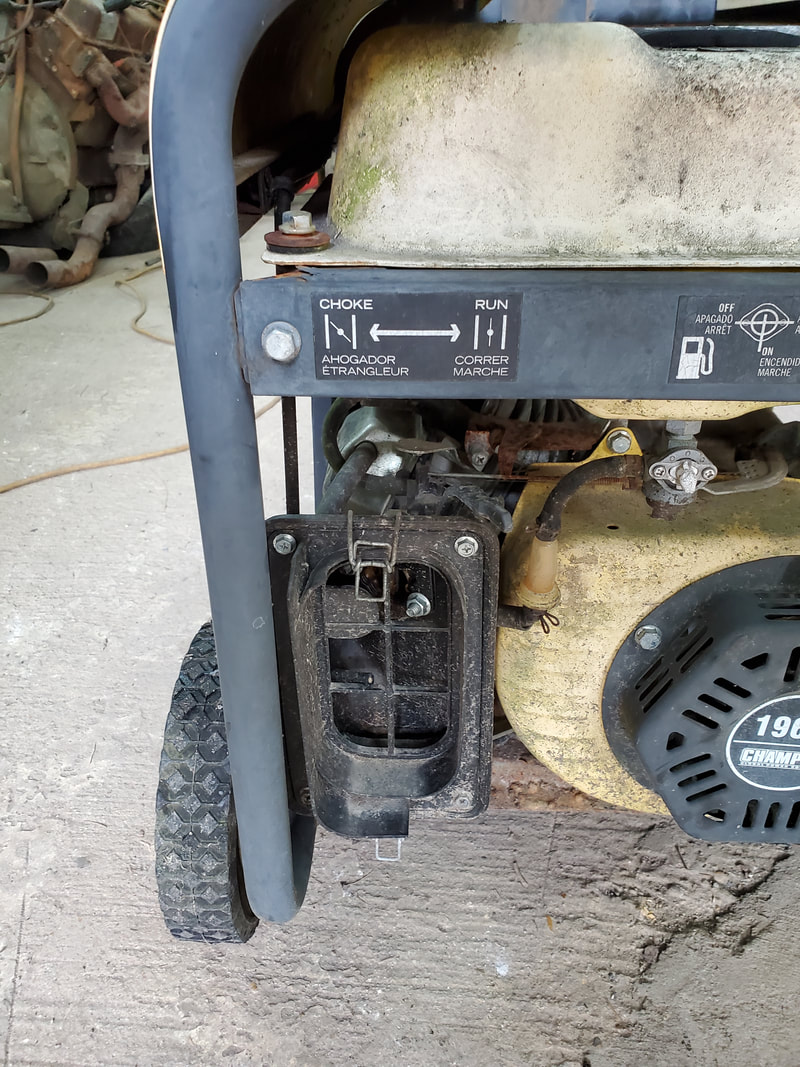
Partial air cleaner assembly on carb which needs to be removed to access the two nuts that hold the carburetor in place.
Pulling the inner portion of the air cleaner assembly loose to gain access to the two nuts then removing the two nuts and a single bolt behind the air cleaner assembly had the unit removed from the carburetor. With the assembly freed, all I had to do was pull the linkages from the top of the carb and slide the unit free from the engine. 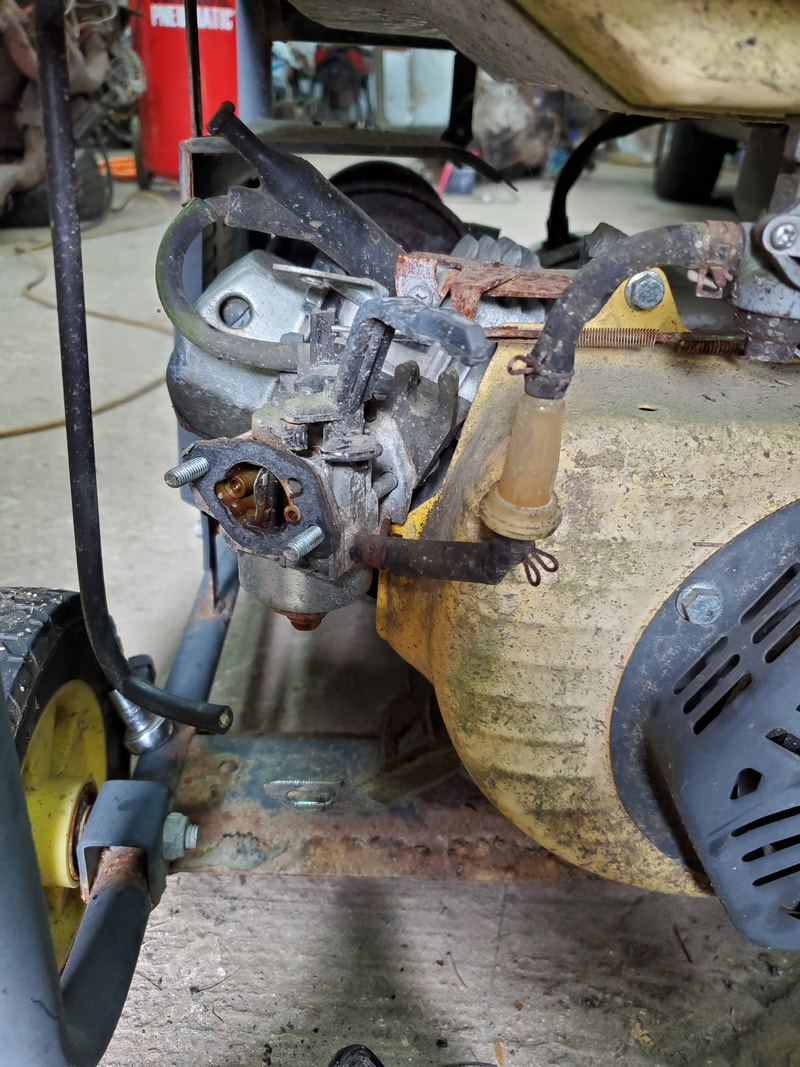
Old carburetor prior to removal
As stated, with the hardware pulled free, the carb was quickly removed and the new unit installed. Before installing, I had to smear a thin layer of gasket maker, taking time to make sure excess goop didn't make it into any cavities around the passages where air and/or fuel vapor need to move through. With the gasket maker in place I pressed the carb against the intake on the engine and we quickly put the air cleaner housing back on along with the choke lever so I could get the two nuts installed in order to get the carb mated nice and tight against the intake with the gasket maker in place while it was still evenly spread. 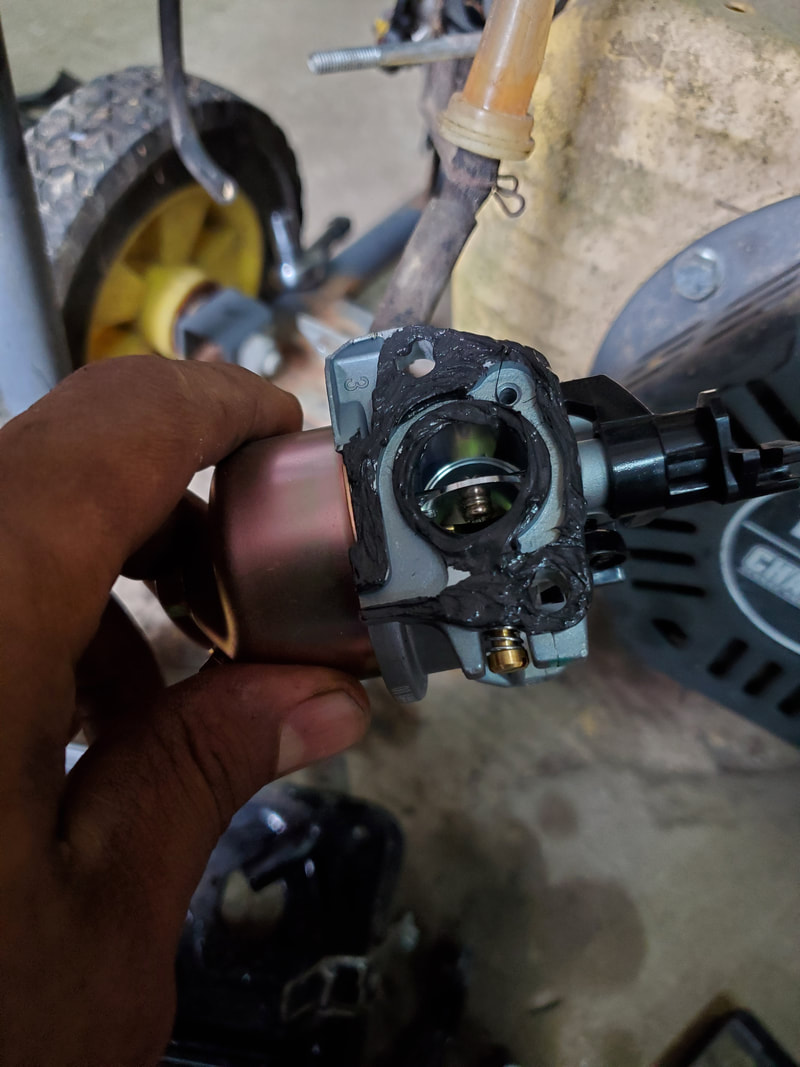
Gasket maker applied to surface of carburetor prior to installing.
With the air cleaner assembly bolted back up, including the inner housing, I plugged up the fuel hose and got ready to start the unit up. We sprayed some starting fluid into the carb and pulled the cord, getting the engine to start, then it died. Tried it again, it started, then it died. I pulled the fuel line off to verify that there was fuel moving from the tank into the carb, there was liquid flowing. Note that I said there was liquid flowing. This is where we get to the crux of the situation. Because the genny was sitting outside for so long, somehow moisture was able to infiltrate the fuel tank and collect. If you know your chemistry, you'll know that water is heavier than oil, in this case gasoline so it will settle to the bottom of whatever container the two sit in, in this case, a fuel tank. Because of this simple little fact, there was water collected at the bottom of the fuel tank, where it was the first thing to flow down into the carburetor. I ended up pulling the fuel line loose and letting it drain out all the water until I put my hand under the liquid to confirm that the liquid was gasoline, not water/gas mixed up. From there I had to remove the float bowl from the carburetor to remove the collected water there, then after reconnecting the fuel line, let pure gasoline flow down through the carb before putting the float bowl back on. After confirming that we had nothing but gasoline moving through all of the fuel system, including the carburetor, I reassembled everything and tried again. This time the machine fired up like it was supposed to and kept running, like it was supposed to. 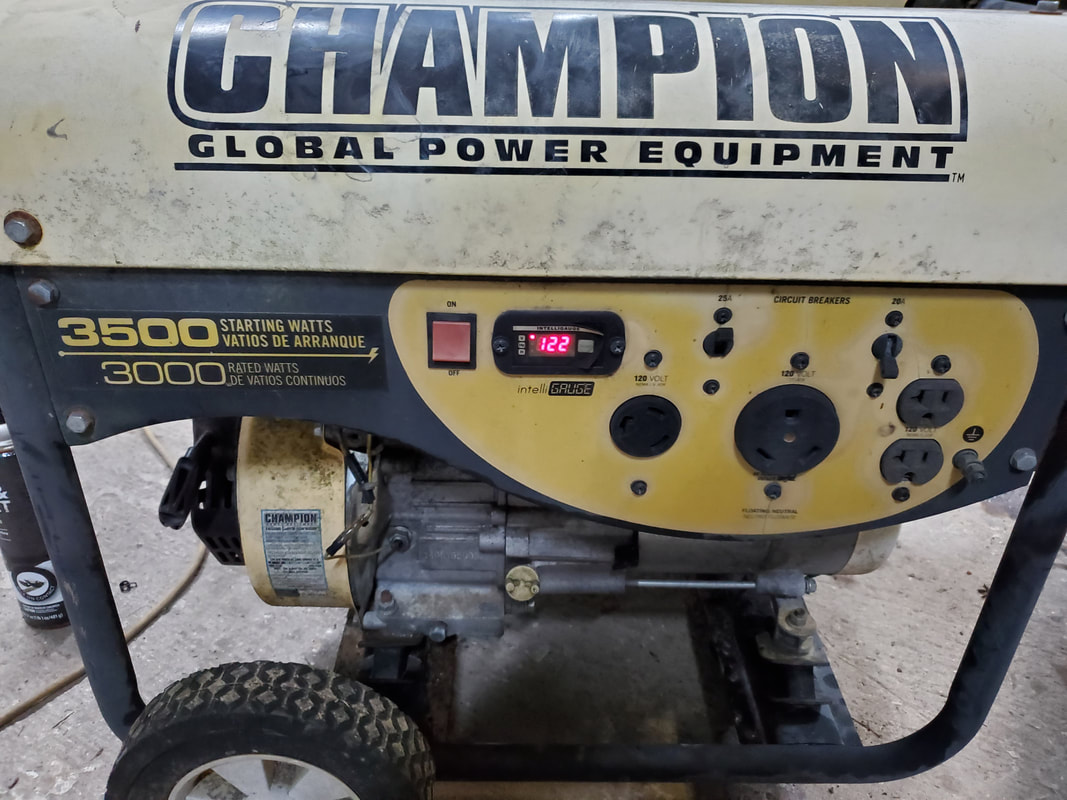
Generator running, showing output voltage on digital display.
We let the genny run for a few minutes at open choke to confirm that everything was good, the digital meter confirming we were getting full output voltage from the machine. There was no leakage of fuel from anywhere and the engine ran like a sewing machine. With that I shut the unit down, satisfied that the genny is now ready for use when the need arises. And with the unit stored under the roof of the garage, there should not be a problem with the thing collecting moisture from being outside getting rained on. All we have to do now is get a replacement air cleaner element so I can put the air cleaner back together completely that way the engine can at least run w/o the risk of sucking up dirt and dust from the environment. With that, we managed to get one more item removed from the outside grounds of the homestead and put up like it should've been and that item is operational and ready for use.
In the process of putting together the new 318 for the Dodge, we ran into a bit of a roadblock due to the fact that we were missing a couple of Woodruff keys for the crankshaft and camshaft. While we were still able to install the camshaft, oil pump driveshaft and oil pump, we really couldn't go any further until we get a hold of replacement keys for the two shafts. Without those pieces we won't be able to finish assembling the timing set and hence everything on the front of the engine. In the process we also need to get the set of cylinder head bolts that will allow us to install the cylinder heads after getting everything on the lower end assembled.
While this little setback would've deflated some people's drive to continue with anything related to their project, I decided since I had the ole lady up in the garage to go ahead and remove the old 318 V8 from the car, especially since the weather outside was rainy and crappy, enough so that neither of us wanted to try to walk back down to the house only to be soaked to the bone afterward. We went ahead and got started with that little job since we technically had plenty of time and nothing else to do. To get things started the first thing was to remove the hood from the car, which again, requires an extra set of hands due to the weight of the heavy metal. 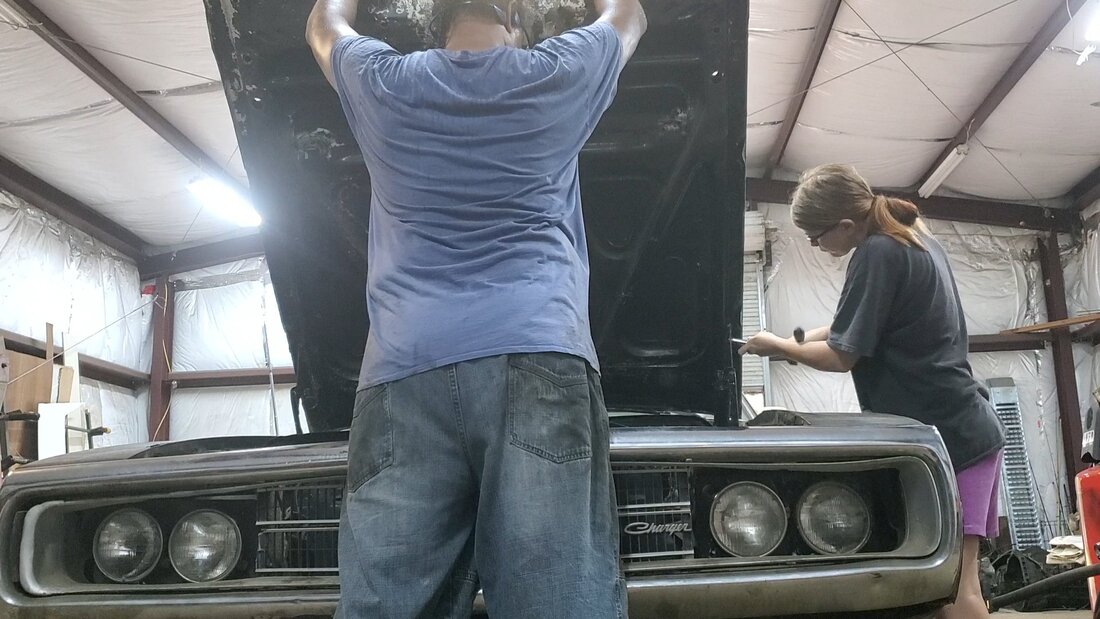
The both of us in the process of removing the heavy hood from the Dodge.
Since I already had a couple of rounds with removing and installing engines in this car, I already had it mapped out in my head just what had to be done to pull the engine from the car. After pulling the hood from the car, there was a matter of disconnecting the hoses, wires, radiator, exhaust pipes, transmission lines, power steering lines, motor mount bolts, torque converter bolts and bellhousing bolts. Having the ole lady's extra set of hands helped out in getting the miscellaneous hoses and wires removed from the engine, handing off bolts and handing over tools when needed to help speed things up. As we pulled things loose, all around, I had to slide under the car a few times in order to pull the motor mount bolts and exhaust manifold flange bolts. Back on top the carburetor was removed and replaced with a crane hook plate that bolts to the top of the carb base so the cables/hooks can be hooked to said plate so the crane can be hooked to the thing to hoist the engine from the car. Some people might be leery about trusting 600lbs of metal to four 5/16" bolts. Surprisingly those little bolts, especially when they're grade 8 bolts, have a tensile strength that far exceeds the weight of the engine. With four of them, the whole assembly is more than capable of holding the engine up. I managed to get the torque converter bolts freed up to separate the torque converter from the flywheel and then get the five bellhousing bolts pulled free. These bolts on this powertrain are surprisingly easy to get to and remove unlike other powertrains I've removed as I was able to reach all the bolts without the use of long extensions or universal joints. With the engine fully separated from the transmission and the transmission propped up on a large brick underneath, we moved the crane into position and hooked it to the hook/cable combo I had hooked to the carb plate. With a little rocking we were able to get the engine to pop free from the transmission. From there we hoisted the engine up high enough to allow us to slide the crane out from under the car and out of the way off to the side where we laid the old engine down on the floor, using another brick under the front of the oil pan to keep the engine standing upright properly. At a later date we will have to remove the intake manifold to use on the new engine since I never bought a second intake. Only way I'll do that is if we end up finding another car in the future to use the 2nd 318 engine in where we would need another intake for the rig. We will also have to remove all the brackets and the alternator and power steering pump from the front of the old engine for use on the new engine. As with the intake, a second set of components will be ordered for use on the other engine if the need arises. Until then, we'll pull these components from the old engine and use them on our new engine and leave the old engine on the floor until I can get an engine stand to hold the engine to allow us to move the unit over to the corner where we'll be staging old engines pending rebuilding. 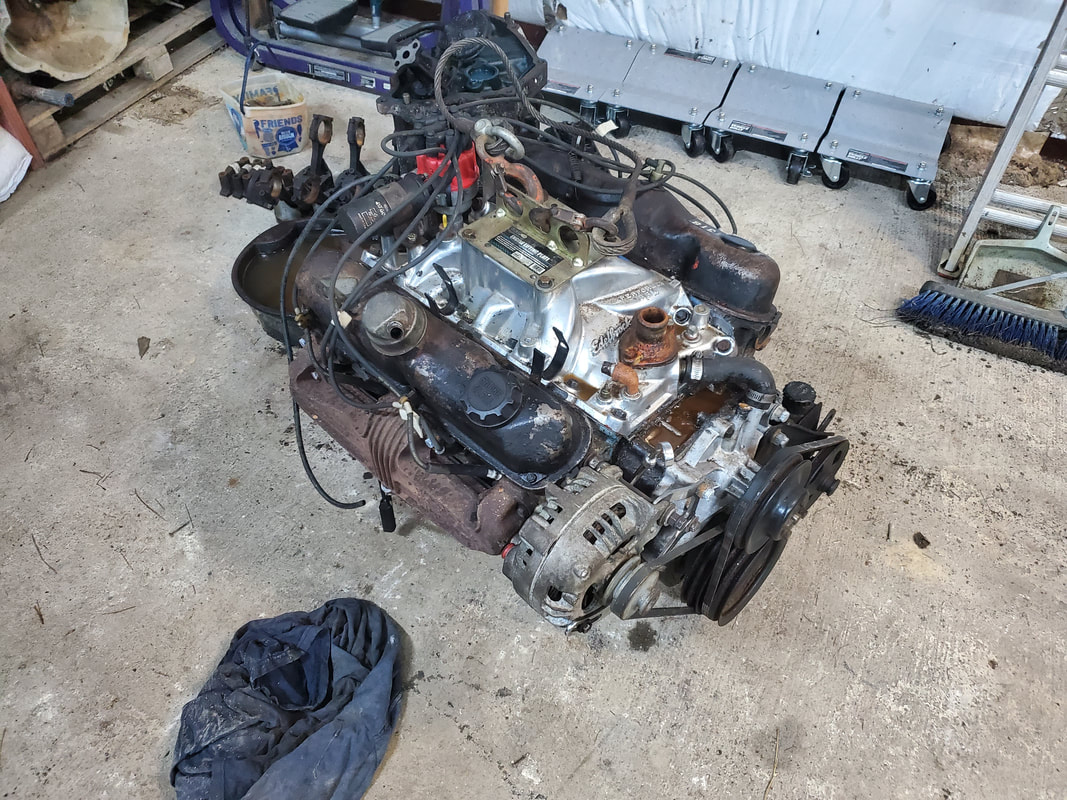
Now with the engine out from the car, there was a little thing I may need to check out. On the transmission when the unit was full of fluid it would leak the oil out even when sitting not running. The transmission would still run but would leak out a large amount of oil in a few days. Now I wasn't sure if it was from a leak from the dipstick tube, or from the front seal. Prior inspections ruled out the oil pan as there was no residue around the base of the oil pan. With the engine removed from the car, I may just go ahead and replace the front seal since the component is so cheap and could very well spare me the headache of dealing with leaks if that part is indeed bad. 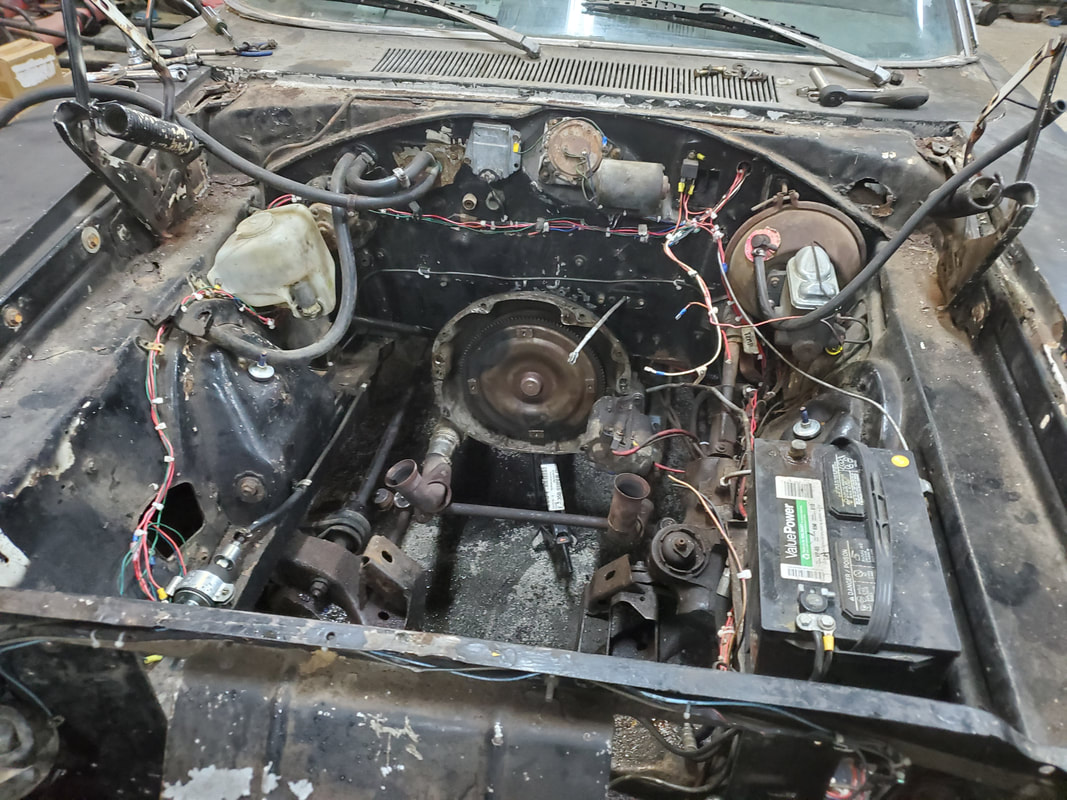
Now because I took the time to do a lot of finishing work in the engine bay prior to installing the old 318, there really isn't much else for me to do under the engine bay of the car while we finish things up with the new 318 engine. I took the time to neaten up all wires and hoses from the beginning so other than the front seal on the transmission, there really is nothing else to do in this area of the car. I do need to get a replacement alternator since the old one is defunct, plus the radio turned out to be shit as well. I won't remove the brackets and accessories from the front of the old engine though until the new engine is completed so I won't confuse myself with the arrangement of the brackets at a later date. There was a cool aftermarket media player radio that had a style that is reminiscent of an old style radio you may have found in a car from the 60's so I'll end up getting this retro style unit for the car at a later date. Until then we will move on to some other projects around the compound so we can get some other things done.
After having taken a little bit of a break from the engine rebuild to do things like go on trips to pick up cars and vacation and build/fix other things around the homestead I finally got the desire to get back into the garage and continue work on the 318 engine that we had been slowly building for the Dodge.
Where we had left off was with getting the pistons ready for installing into the block, which also involves installing connecting rod bearings and piston rings and of course using a ring compressor tool to squeeze the rings in flush so the piston can be tapped into the cylinder smoothly. 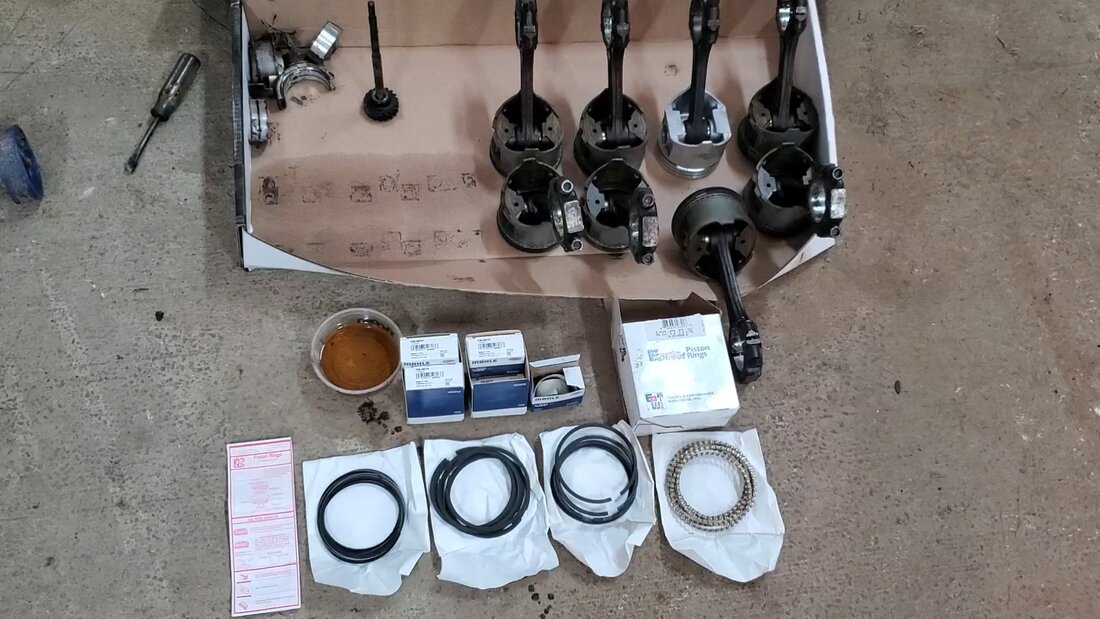
Pistons laid out on cardboard along with piston rings and rod bearings.
I started off with installing the piston rings on each piston. There's a three piece oil ring on the bottom slot on each piston and two solid metal rings for the top two sots on each piston. The top piston ring has a mark on it to identify where the top is at so it can be oriented the right way since there is a taper on the bottom of the ring. The middle ring is the same on the top and bottom so orientation doesn't matter. Now one thing that I did want to check before proceeding was checking the gap spacing to verify that we wouldn't have to file down the ends of the ring to open up the gap. This is done to maintain a certain gapping which takes into account expansion when hot so each cylinder can maintain proper compression during operation. Gapping is expanded when building a hotter engine since the excess pressure that would be generated when you cram extra fuel and air into the engine can damage the engine. 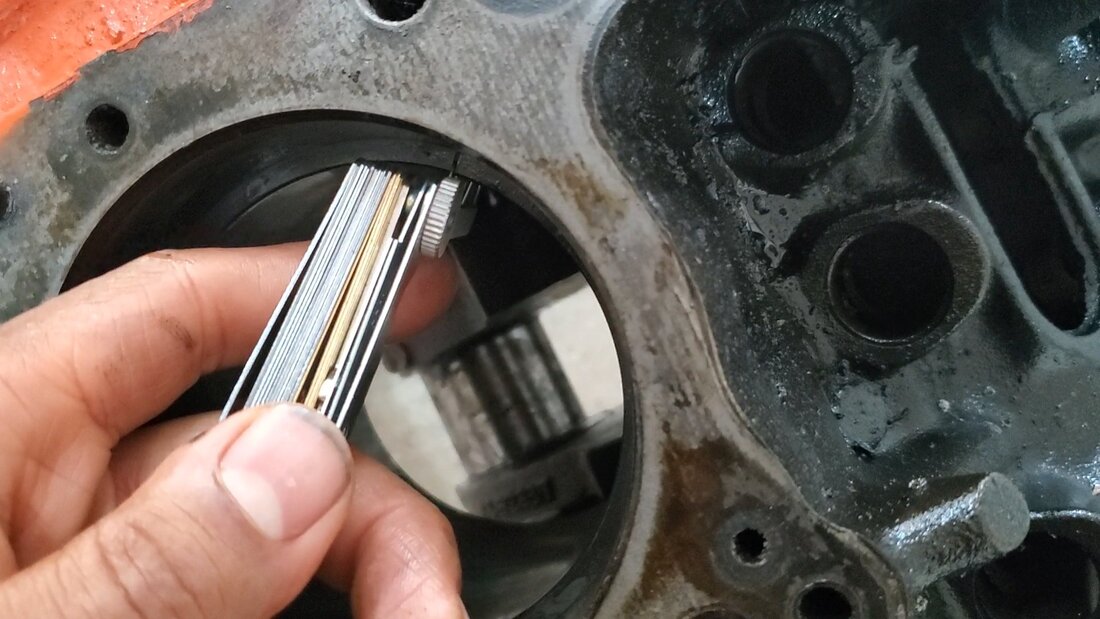
Checking ring gap by installing ring into cylinder and using a feeler gauge to check gap spacing.
Ring gap spacing is checked by taking a piston ring and pressing it into a cylinder on the engine then taking a piston, preferably a flat top piston, and pressing the piston into the cylinder on top of the ring to press the ring down into the cylinder nice and straight, since the piston will go in straight. Then a feeler gauge is used to check the gap spacing, as per the engine's specs. The 318V8 gap specs are 0.010-0.020". When I checked the ring on our engine we had a gap of 0.025", which is slightly above tolerance and will probably bleed off just a wee bit of compression but with the possible aftermarket mods like headers, 4bbl intake and carb, and larger than stock 4bbl carb, the extra gapping won't really matter and may be of a slight benefit. Another thing I had to do was clean the slots on the pistons. Since carbon buildup would cause the rings to not seat themselves properly in the slots, the crud needed to be cleaned from each piston. This was done with a piece of a broken piston ring, scraping the junk from the slots of the pistons to ensure they're clean enough to not cause problems with the new piston rings. 
Installing rings on piston.
With our pistons clean, I started installing all of the rings on each piston first. Once the rings were all done, I then did a quick install of one piston to ensure no problems with anything. Using the ring compressor, which is a corrugated strip of metal with a lever and adjuster stud, the tool presses the rings in tight and flush with the walls of the piston so the piston can be tapped into the cylinder without damaging the rings. After getting the first piston in I went ahead and installed the connecting rod bearings and cap to get that assembly secured before moving on. 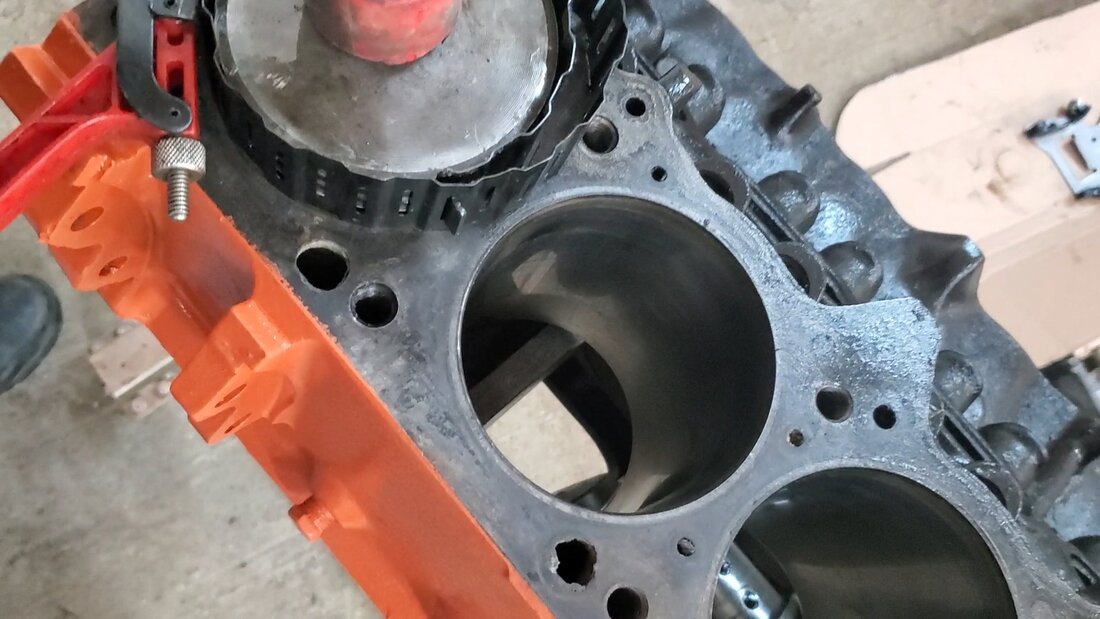
Installing piston with ring compressor tool in place on piston.
Since it was a pain in the ass to install the rod bearings with the piston in, I went ahead and installed the rest of the bearings on the other pistons before installing said pistons. Once the pistons were in I did have to check orientation of the bearings to make sure they didn't shift any from their grooves on the rod and the bearing block. Once I verified the bearings were straight I capped everything up and snugged the nuts in place. From there we had to torque down the nuts on the connecting rod caps. Of course during all of this process we continued to apply oil on everything to ensure that all components remained well lubricated all through the assembly process. As we torqued the nuts down I would manually turn the crank to verify everything is still straight and nothing is bound up, indicating a problem. After getting the last rod torqued down, I turned the crankshaft multiple times, also applying oil to the cylinder walls as the piston was on the downward stroke to keep the walls well lubricated. After I was satisfied that the pistons and crank were straight I moved on to the camshaft. 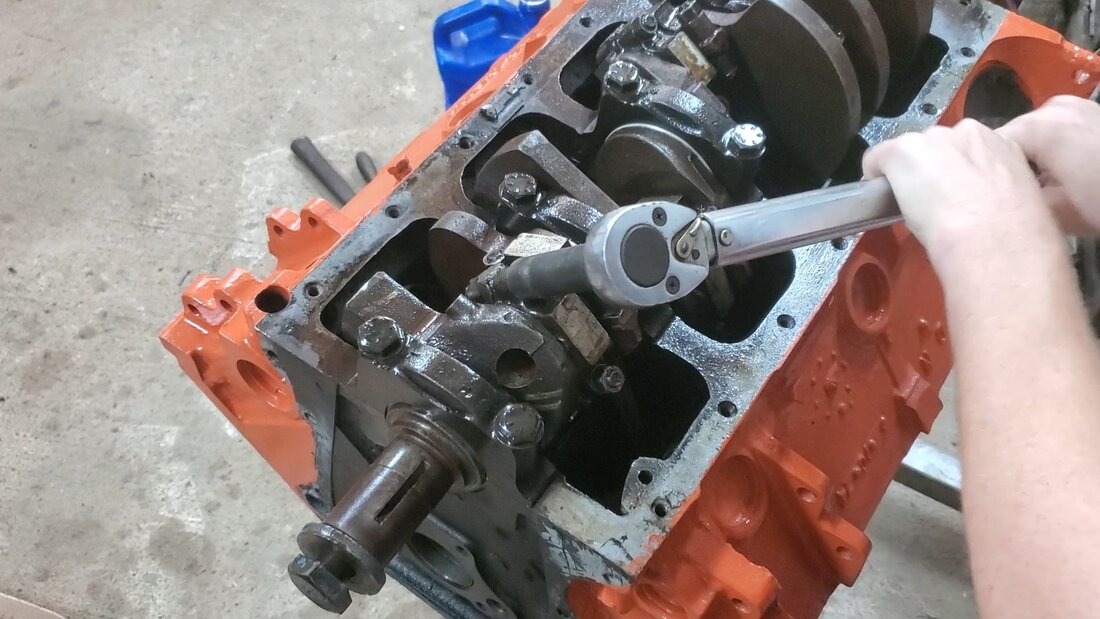
Torquing down the connecting rod nuts.
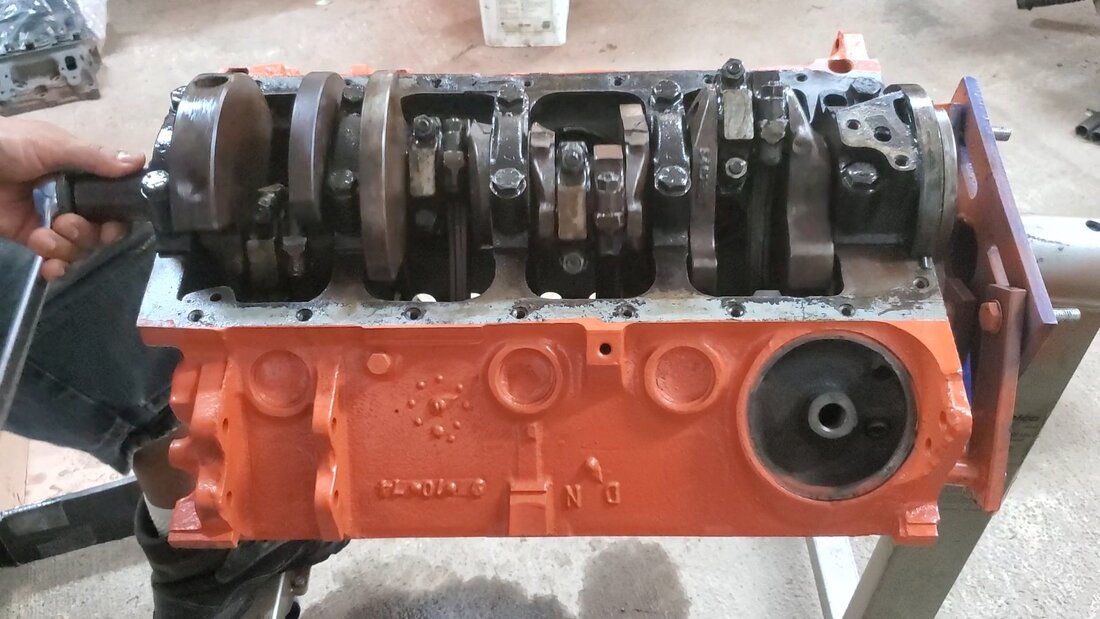
Turning crankshaft with wrench to spin bottom end to verify all is well.
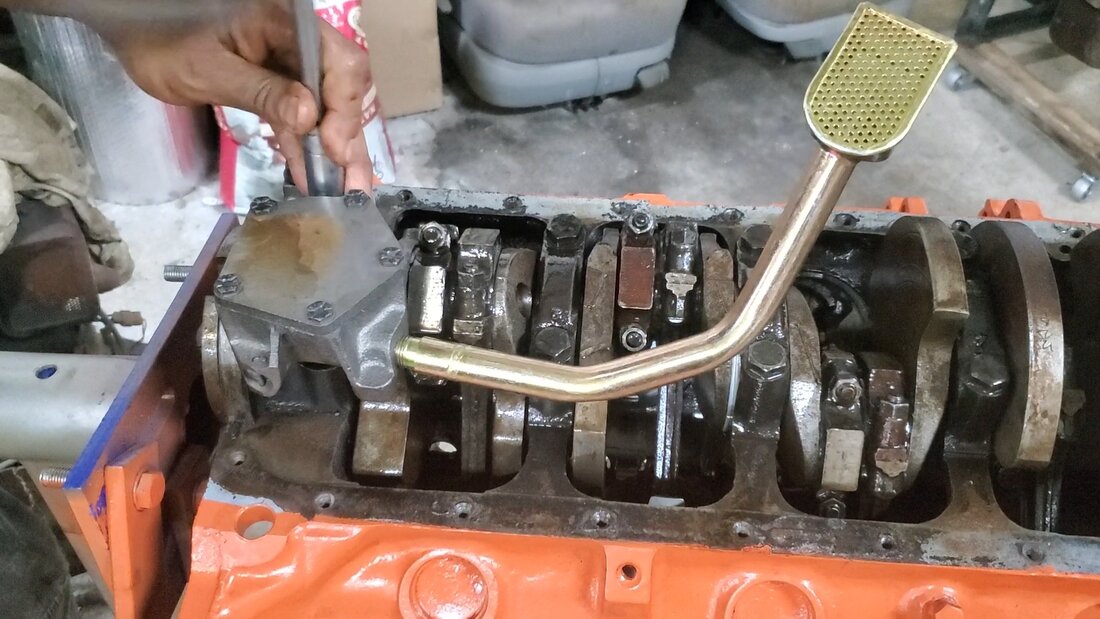
I had all of the camshaft/oil system/timing hardware laid out on cardboard ready for installation. The first thing I installed was obviously the camshaft. Just like with the pistons I oiled up the whole unit and took time to slap some oil on the camshaft bearings in the block. Once everything was lubed up I was able to carefully slide the camshaft in place and have it seated all the way. 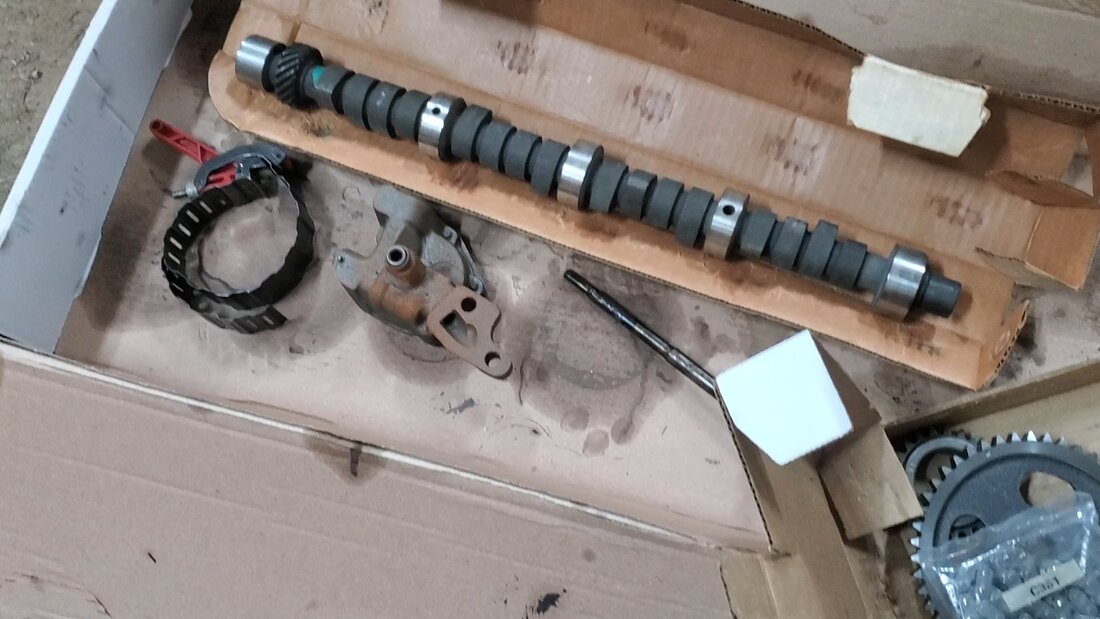
Camshaft and other associated hardware laid out on cardboard ready for install.
Camshaft retaining cover and chain tensioner, a modification to this older engine.
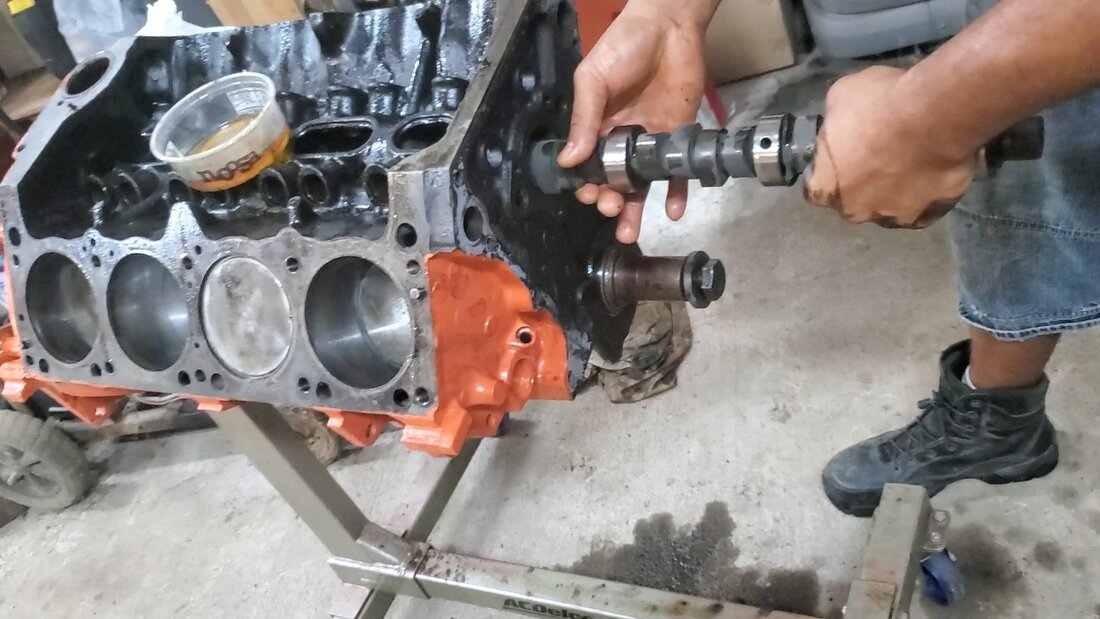
Installing the camshaft into the engine block.
After installing the camshaft I had to divert a slight bit. The reason being is I was missing the Woodruff keys that are needed for both the crank and cam to hold the timing gears in place. Without these the gears would just free spin. Now because I was unable to continue with the install of the timing set, I moved on to the oil pump and the oil pump/distributor driveshaft. The driveshaft was easy to install and as with everything else, received a liberal lubing of oil prior to installation. Afterward I applied a thin layer of gasket maker to the surface where the oil pump would set and while that was getting slightly tacky, took the oil pump pickup and screwed it into the oil pump body, From there I bolted the whole assembly down onto the gasket maker on the engine block. I made sure that the driveshaft meshed into both the camshaft via the worm gear and the hex shaft in the oil pump. 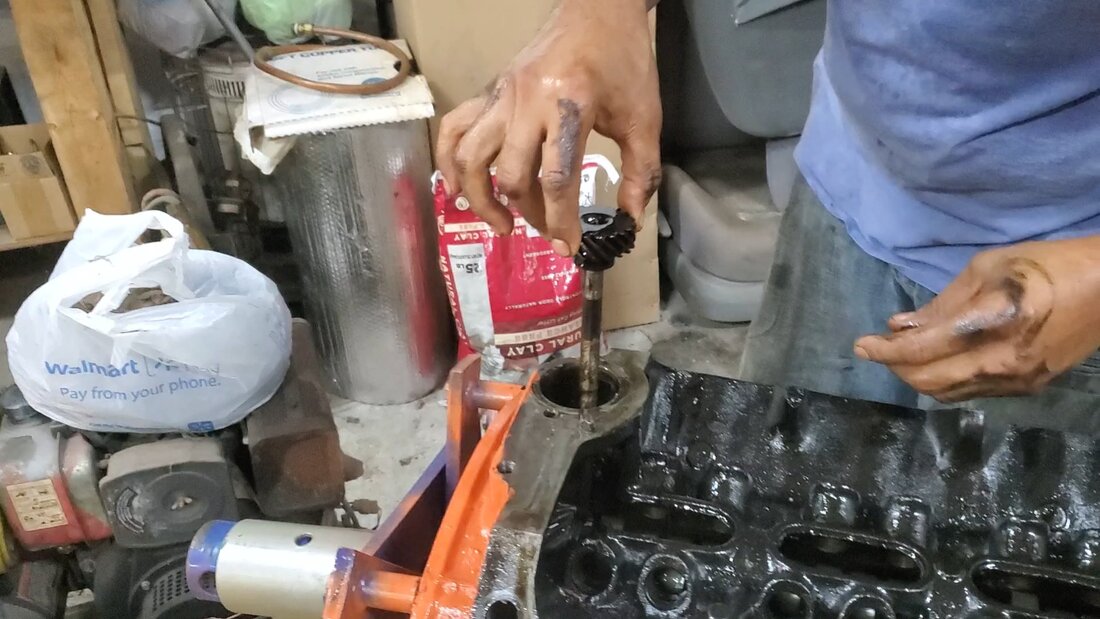
Installing the oil pump/distributor driveshaft.
Oil pump in place with oil pickup installed as well.
With that I have to wait until I get those Woodruff keys before I could continue with the rest of the timing set install. After I do get those components I can get the timing set in, along with the timing cover and the harmonic balancer. From there I can torque down the oil pump and install the oil pan. Once that's done then I'll have to install the cylinder heads before proceeding any further. Of course I have to get a hold of a set of cylinder head bolts before I can perform that task.
|
