|
After driving the Scion for so long the time finally came that one of the CV axles decided to start going through its death pains. The outer boot was pretty much disintegrated and the unit would growl when the car is turned hard to the right. We ordered a replacement CV axle from online and there was also a matter of replacing the spindle assembly with the new wheel bearing that I installed in it a while back. The ball joint hub in the old assembly was wallowed out, prompting me to get a new assembly and at the same time change out the wheel bearing since it was a pressed in unit. With everything in hand I got to work in the morning.
Things started going pretty good. I was able to break down all of the "outer" components - brake caliper/pads/mount, popped out ball joint and tie rod end, removed bolts from strut, pulled speed sensor, even the CV retaining nut came off easily with the impact wrench and a large socket. 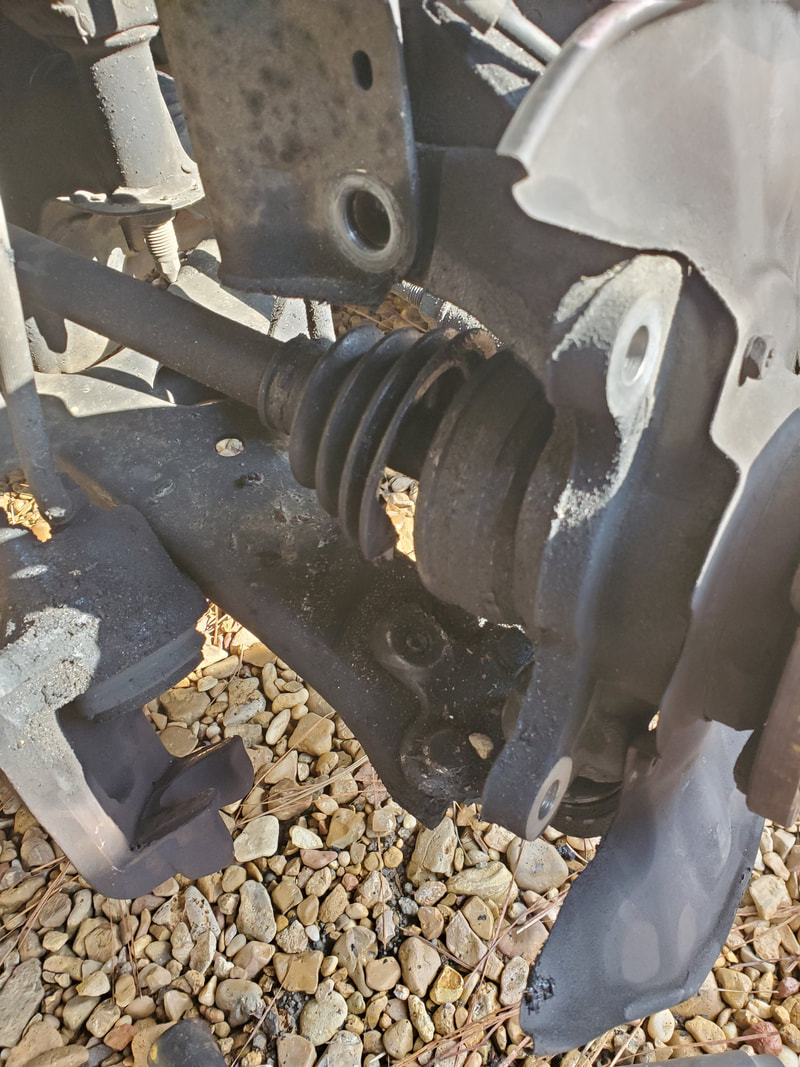
Old CV axle boot, broken apart, note brake caliper removed from spindle.
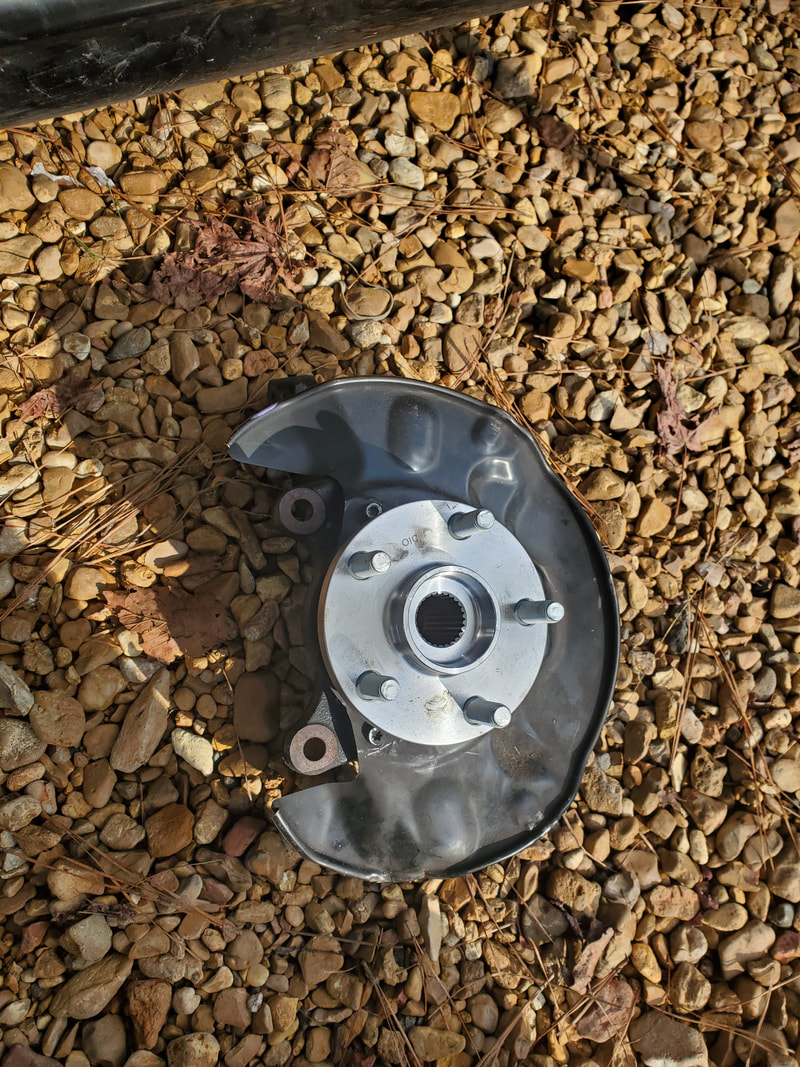
New spindle assembly with wheel bearing and hub pressed in.
When the CV axle was free from the spindle I attempted to pry the inner bearing shell from the transmission. This is where the fuck shit began. That part did not want to budge. I tapped on it with a hammer, pried on it with a crowbar in multiple ways from different angles, no luck. I ended up removing the first 2/3 of the axle, leaving just the inner bearing shell stuck in the transmission. 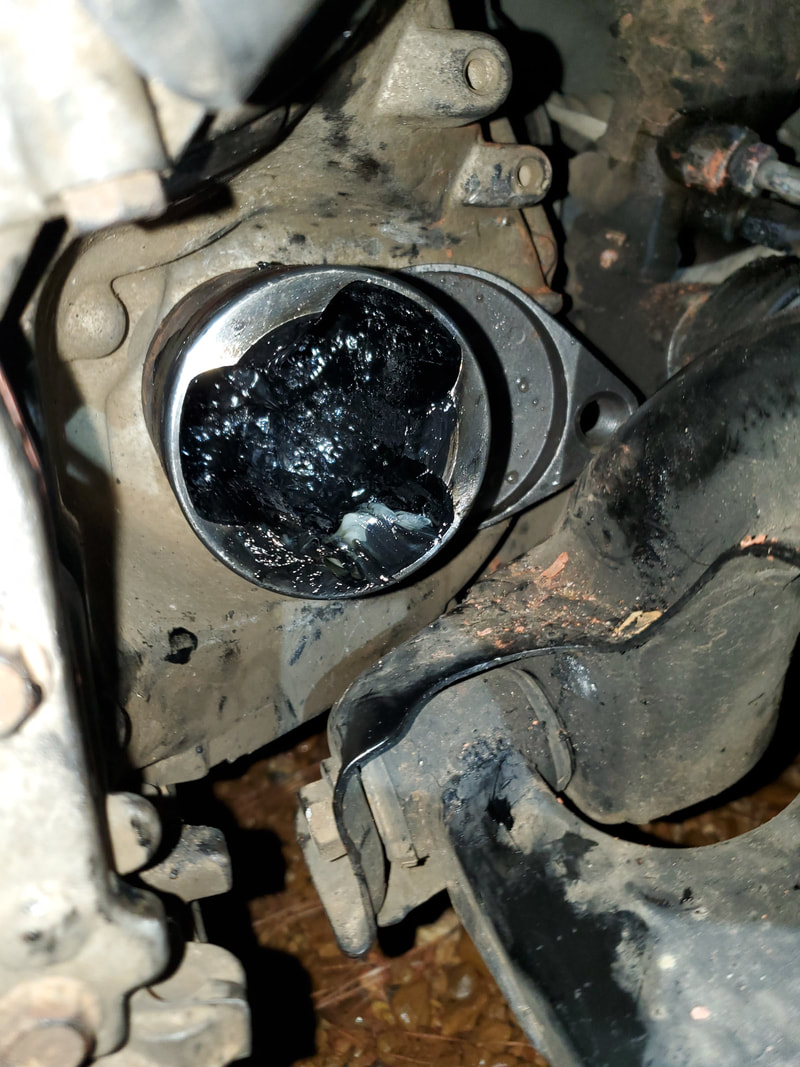
Inner bearing cap stuck in transmission. Note CV axle removing tool in place.
The next course of action was to rent a CV axle removal tool from Auto Zone to try and get this stubborn shit out. At the same time I had to get another CV axle to try. Reason for this was because I thought of a plan to try and remove the inner bearing housing from the online CV axle and just install the outer 2/3 of the new axle into the bearing housing that's stuck in the transmission. Problem here was the idea that the axle we got online was built differently from the stock axle. The shaft was thicker and the inner bearings were fatter, like this was some kind of performance CV axle or maybe it was for the standard transmission variant of this car. Even the inner shaft where the inner bearings slid onto was thicker than the shaft on the old CV axle. Don't know, but when I tried to slide the inner bearings from the new axle into the old bearing housing, the bearings obviously wouldn't fit. I picked up another CV axle from Auto Zone in case that one was of the same build as the old one so just in case the removal tool didn't work I can try the swap out idea with the Auto Zone axle. Well needless to say the damn removal tool didn't work. It didn't work because the body of the bearing housing was so close against the transmission body that the tool couldn't wedge itself between the two enough to do any good. There was no room underneath to get a hammer in there to try and pound the tool in place, same problem I had with trying to pound crowbars and other tools in place. So with the tool plan being a failure, it was back to the plan to just swap out the outer 2/3 of the new CV axle with the old bearing housing. I removed the clamps to the inner boot on the new housing. I pulled the new bearing housing free and attempted to install the unit into the old bearing housing. Everything actually went together but when I tried to slide the new boot over the old housing I found out another problem. The new bearing housing was made in an odd shape that had three indentations, instead of the perfectly round body of the old housing. The inner boot was made with thicker rubber sections to fit around these indentations to help keep the axle grease contained. This was surely a problem. I had thought of a spur of the moment plan though. I still had the replacement CV boot that we got from Auto Zone a while back when the boot was falling apart initially on the old CV axle. We couldn't put this on as it required a tool that stretches the boot around the large knuckle on the outer portion of the CV axle. But in this case, this boot was a life saver. It turned out to be the same size as the inner boot on the new CV axle, meaning, all I had to do at this point was just swap out the boots and through everything together. 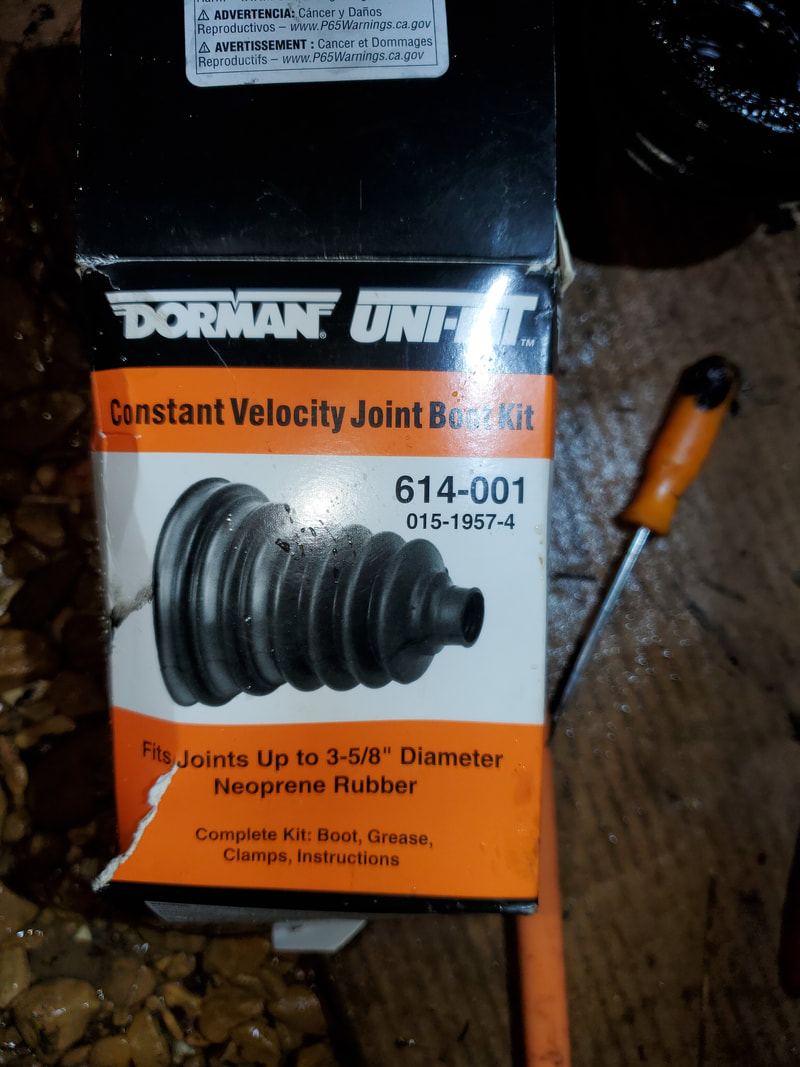
Replacement CV boot we had on the shelf that ended up being our life saver in this clusterfuck of a project.
I had to remove the snap ring and remove the triple bearing cluster that made up the inner portion of the CV axle. With that I was able to remove the boot from the shaft and slide the new boot on. The new boot came with these boot clamps that even though they require a tool for correct installation, I had to make due with just brute force and regular tools to put enough tension on the strap and be able to fold it down over the clamp and lock in the tabs that helps hold the strap down. 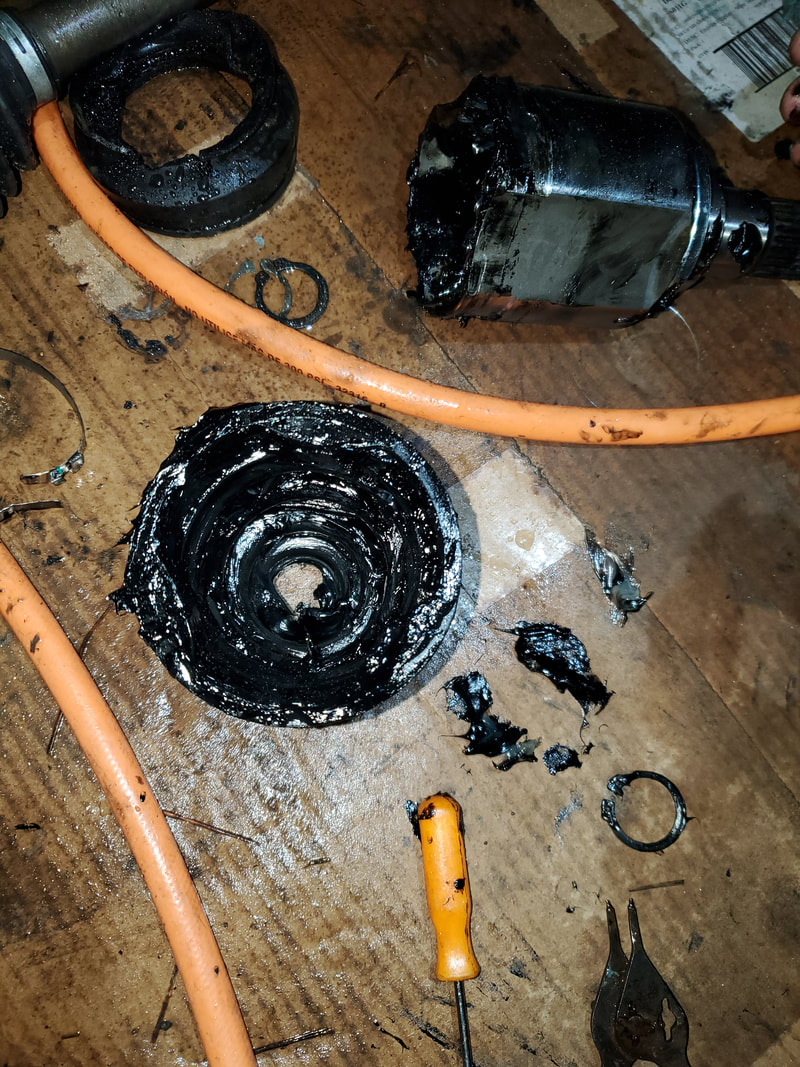
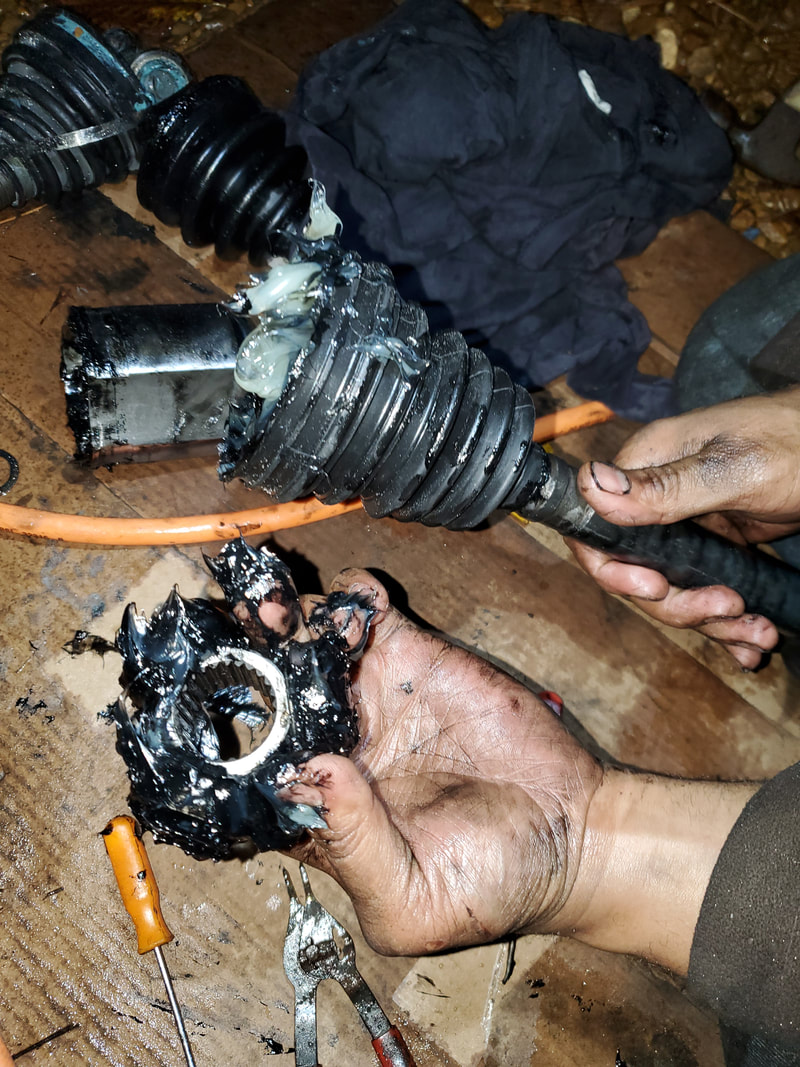
Axle boot and bearing housing from new CV axle, note odd shape of housing and inner ridges inside rim of boot that disallowed me from using this boot on the old housing.
New boot on axle and triple bearing assembly being packed with grease. Note new bearing housing in background and the odd shape of the unit barring me from using it's associated boot.
With the bearing and boot packed full of grease I secured one of the clamps as best as I could with the unit on the outside of the car. From there I slid the outer portion of the axle into the old housing and worked the boot around the indentation of the housing where the strap goes. I used a pair of needle nose pliers to put tension on the strap as I folded it around to secure the thing. I had to try this a couple of times as it was too loose and allowed me to slide the boot off the housing. After a couple of tries I was able to get the strap tight enough that it would most likely take some effort to fully work the boot free, hopefully not but maybe. With that I bent the excess strap enough to break the unneeded material free. 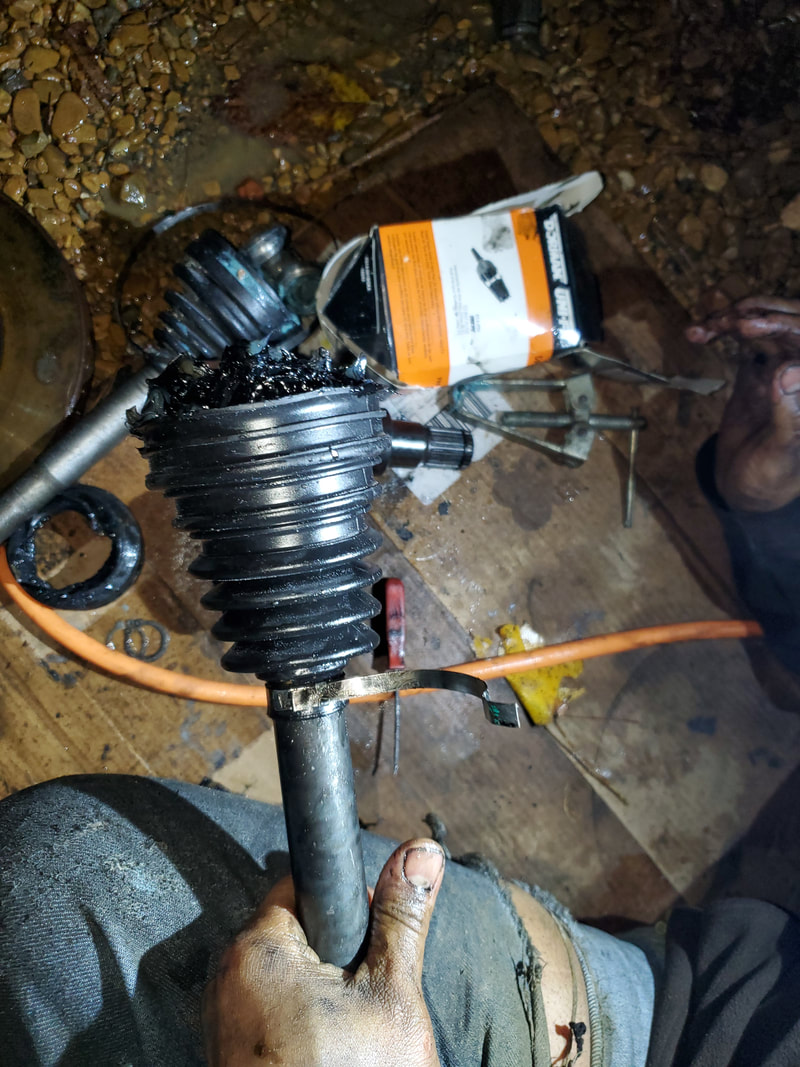
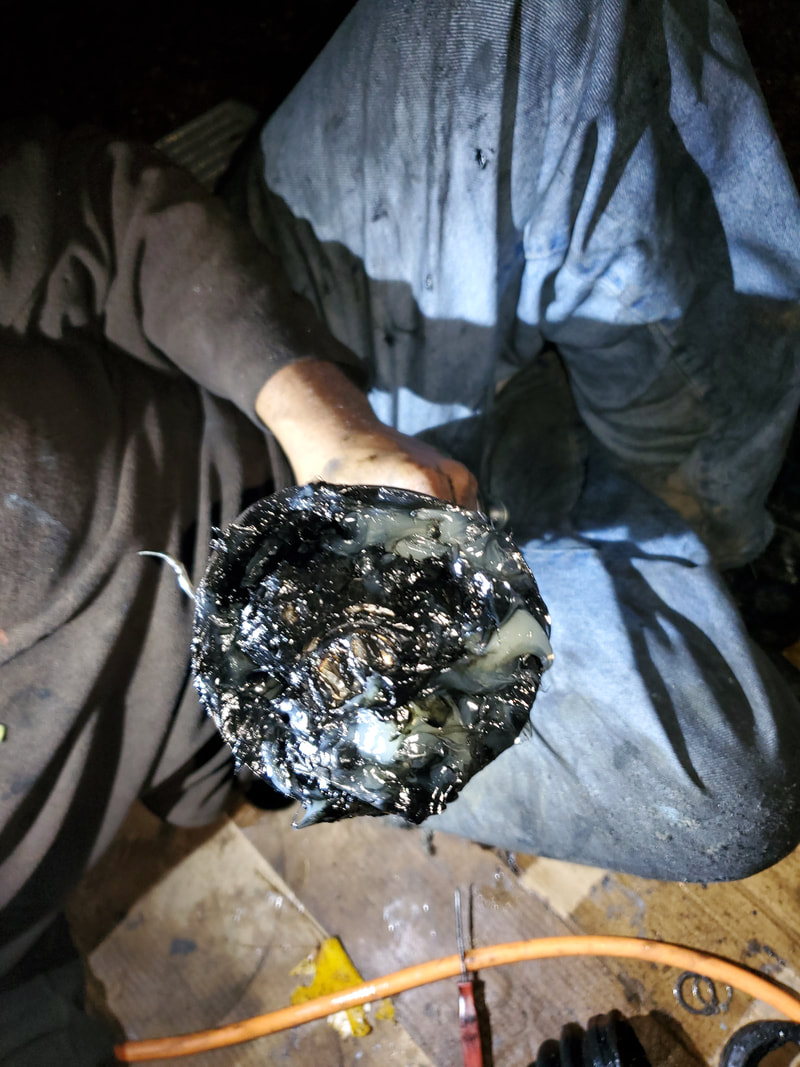
Boot and triple bearing assembly packed with grease ready for installation.
With the CV axle in place and everything appearing to be holding together pretty good (I moved the axle to different extremes to to test if the boot would stay on through the normal motions), I was able to reassemble everything. At the same time I also took the time to replace the brake pads since they too were worn once again. I did the brakes on the other side as well to complete the work I set out to do on the front end. One thing I will have to do is purchase a CV boot clamp/strap installation tool and a few straps along with a couple of boots as this stuff appears to be something I will most likely be putting to use in the future. I will use it to properly install straps on this CV boot first and foremost. Along with the CV axle removing tool and slide hammer, I feel these tools will be very necessary as they will allow me to conduct jobs for people involving CV axles, as well as allow me to be able to do more repairs to cars I may pick up for resale in the future. There's nothing like having the proper tools in your toolbox to make these jobs a lot easier. Now on another note, after doing a little research, it appears that the costs for "professional mechanics" to do this job would amount into the $500+ range. From what I gathered, to properly do this job (which includes using the axle remover tool), the engine/transmission would have to be detached from its mounts, jacked up high enough to expose enough room around the axle to allow for the mechanic to get the remover tool in place and be able to hit it with a hammer to get it in place to be able to get the slide hammer in. Short of dropping the whole K member, this is about the only easy way to get the room needed to get any tools in there around that axle to remove it. This job was definitely a learning experience.
1 Comment
With the Ranger stripped down and the cab staged by the site for the new car based coop there was still a matter of removing the frame from the chicken yard and moving the S10 bed into the chicken yard, also to be staged by the coop build site. To move the frame I enlisted the use of the Tracker since its the narrowest vehicle in the fleet, able to fit through the gates into the chicken yard. With the other half helping to manually steer the frame's wheels as we pulled the frame from the chicken yard, we made our way into the main driveway. From there we worked our way across the yard and the car park area and along side the storage trailer.
Once the Tracker made its way into the back storage area the truck started getting bogged down on the soft ground. By this time we were able to move the frame by hand into its new staging spot behind the garden fence. With the weight removed from the Tracker I was able to move the truck back off the soft ground and back onto the regular driveway. The next move was to get the S10 bed moved into the chicken yard. 
Ranger frame moved behind garden fence for the time being to get it out of the way.
As for the S10 bed I used the two wheel dolly to get the thing moved from its resting spot at the north end of the lot next to the chicken yard fence. It was pretty easy to move the bed once I got things situated on the dolly the way I needed to. Once in the chicken yard I had to remove the bed from the dolly and slide it sideways between a couple of trees before being able to put it back on the dolly to move it the final few feet to its staging spot near the NE corner of the chicken yard. With that little bit of work the S10 bed was staged along with the Ranger cab. All I have to do is get the railroad ties. 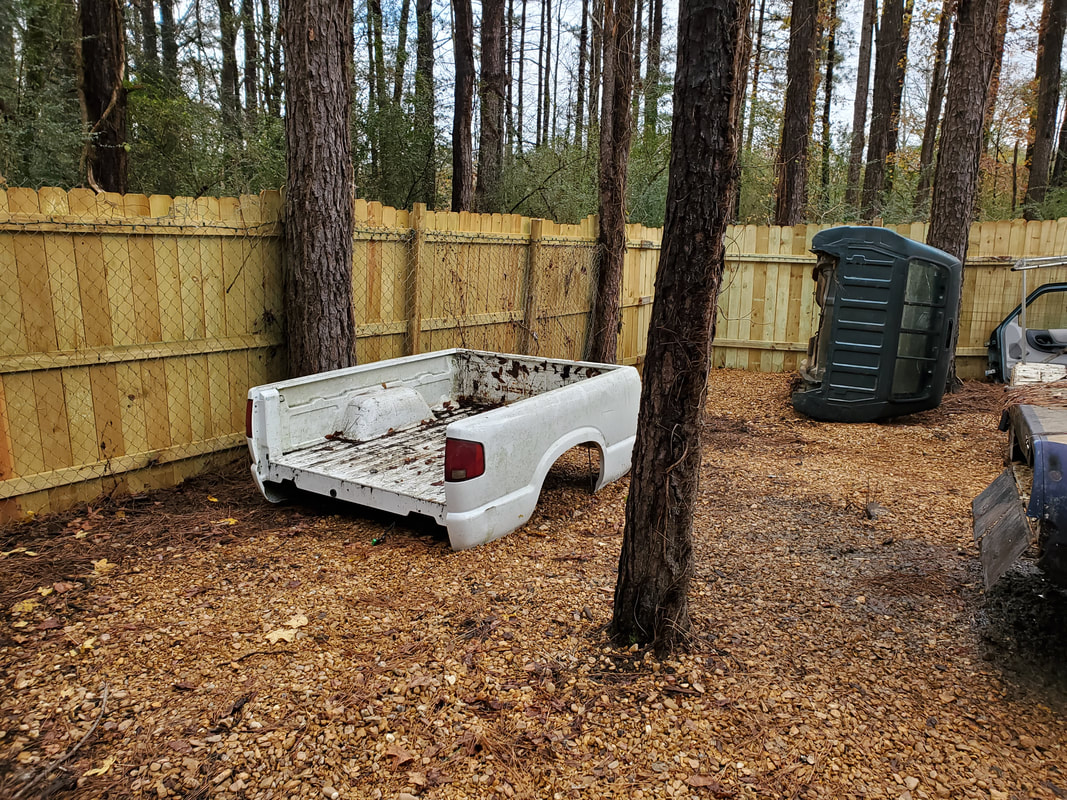
S10 bed staged near NE corner of chicken yard with Ranger cab in background to right.
With the frame gone it opened up a bunch of room in the chicken yard. I do still have to lay down a lot more gravel over all the dirt areas, especially in the NE corner of the yard prior to laying the railroad ties. With the clutter removed it makes things easier to maintain, such as cutting any high grass, even in the little area I plan on keeping grassy after laying down the gravel. 
On a side note I had to make a minor repair to the F250's tailgate. The handle had broken inside the tailgate where it makes contact with one of the levers pulling on rods that work the latches on either side of the tailgate. The old handle would only pull one latch. I had to remove an access panel on the tailgate in order to open the tailgate. I ordered a replacement handle online a while back so once I finally got the new unit I could get to work getting the handles swapped out. 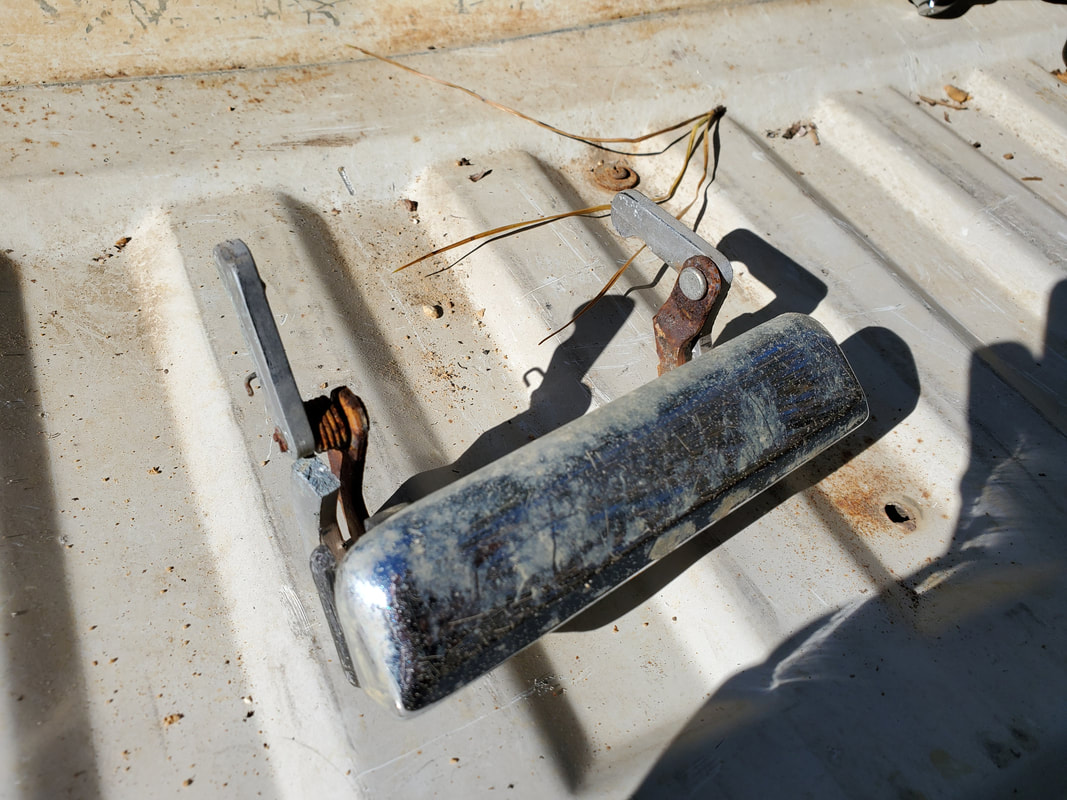
Old tailgate latch, note brake on left side lever near spring.
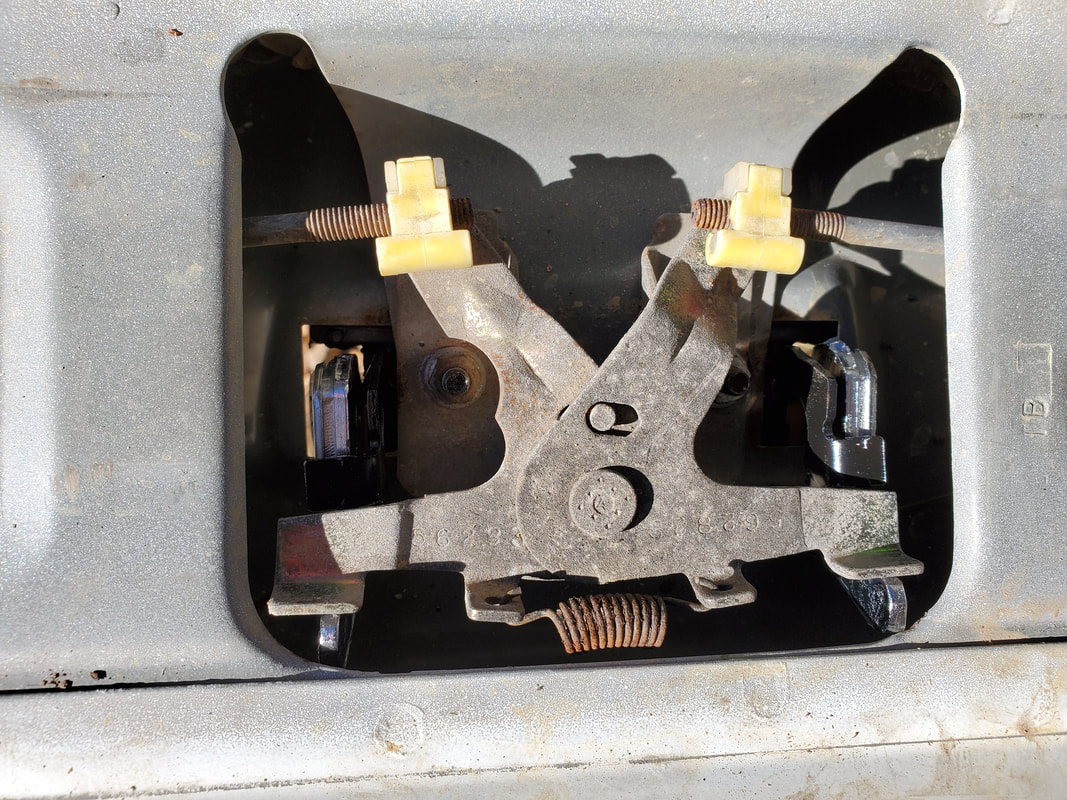
Lever mechanism connected to rods that extend out to latches on either side of tailgate. Levers from new handle can be noted to left and right of this mechanism.
My next set of exploits will be having to do some work on the Scion. It needs a new CV axle on the driver's side and some front brakes. At the same time I also plan on replacing the old spindle with a new one that has a new wheel bearing I installed in it a while back. The old spindle also has a wallowed out hole where the ball joint shaft goes into it so this old spindle is pretty much compromised either way. I didn't want to change anything until I had to change the CV axle since I had to pull all this stuff apart anyway. It just happened to be perfect timing that the brakes also need replacing since that stuff too will need to be pulled apart in this job.
The time had come to remove the cab from the frame. Again there were four bolts holding the frame in place. The bolts are held with nuts so I had to use a socket and ratchet on one side and a breaker bar with a socket on the other side. I tried to turn the bolts but after a short time of struggling I determined that this was a hopeless endeavor and it was time to go to the saw.
I had to start cutting through the rubber bushing first in order to get to the bolt but what I did have to do was use the handle from one of my jacks to pry up on the bottom of the cab and wedge a brick between the cab and the frame to take the pressure off the rubber. As the saw cut through the rubber the surrounding rubber pressed against the saw blade. Wedging the brick under the cab allowed me to more easily cut the rubber before hitting the bolt. After the first bolt was cut it was on. I went straight to cutting through the rubber bushings instead of messing with the impact wrench With the bolts cut off I had to enlist the help of the ole lady to help push the cab off the frame and get it on the ground without risking breaking the windshield or back window. 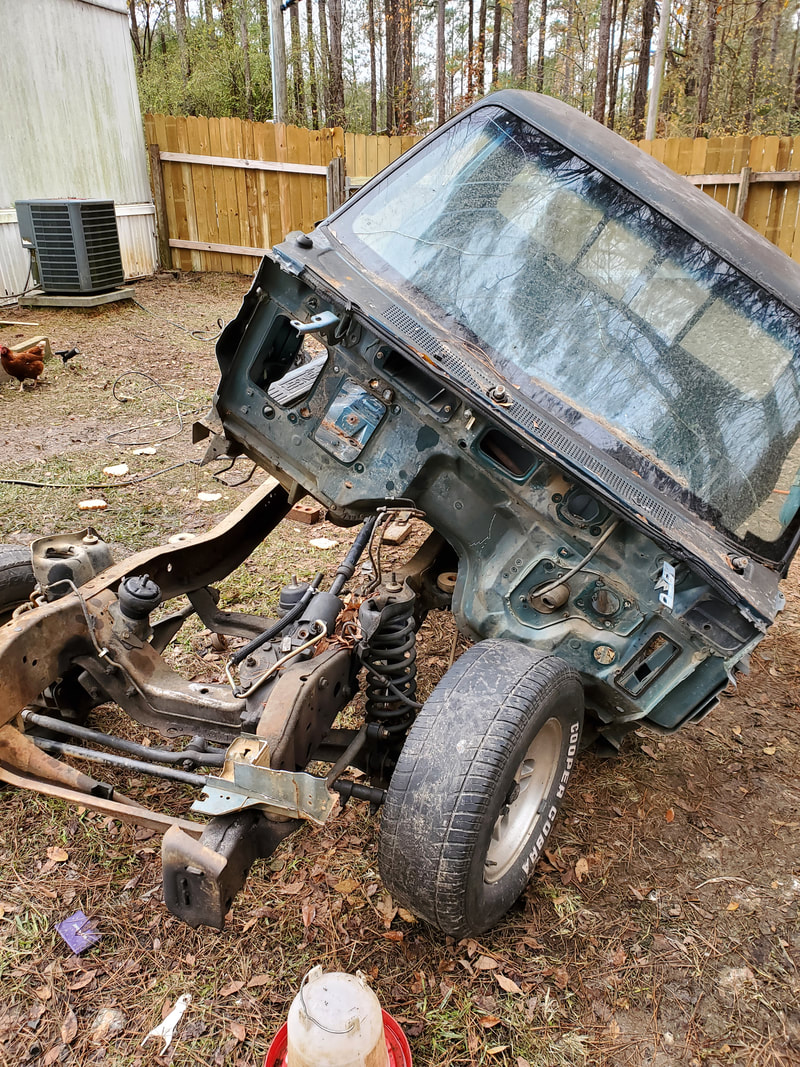
Cab finally freed from frame and leaning over onto ground.
With two people moving the thing, the cab turned out not to be too heavy that it couldn't be moved. We used the two wheel dolly to get the cab from the site of the frame across the yard and over to the other side of the Toyota Chicken Truck. From here we had to take the cab off the dolly and turn it on its side to get it between two trees. There was a tree directly to the left of the Toyota and another right at the fence line on the east side of the chicken yard. The gap was probably 6 inches too narrow for the cab to pass through in its upright position. It was fine, we were able to get the cab worked on to its side and we gradually slid the cab across the graveled ground over to the northeast corner of the chicken yard. 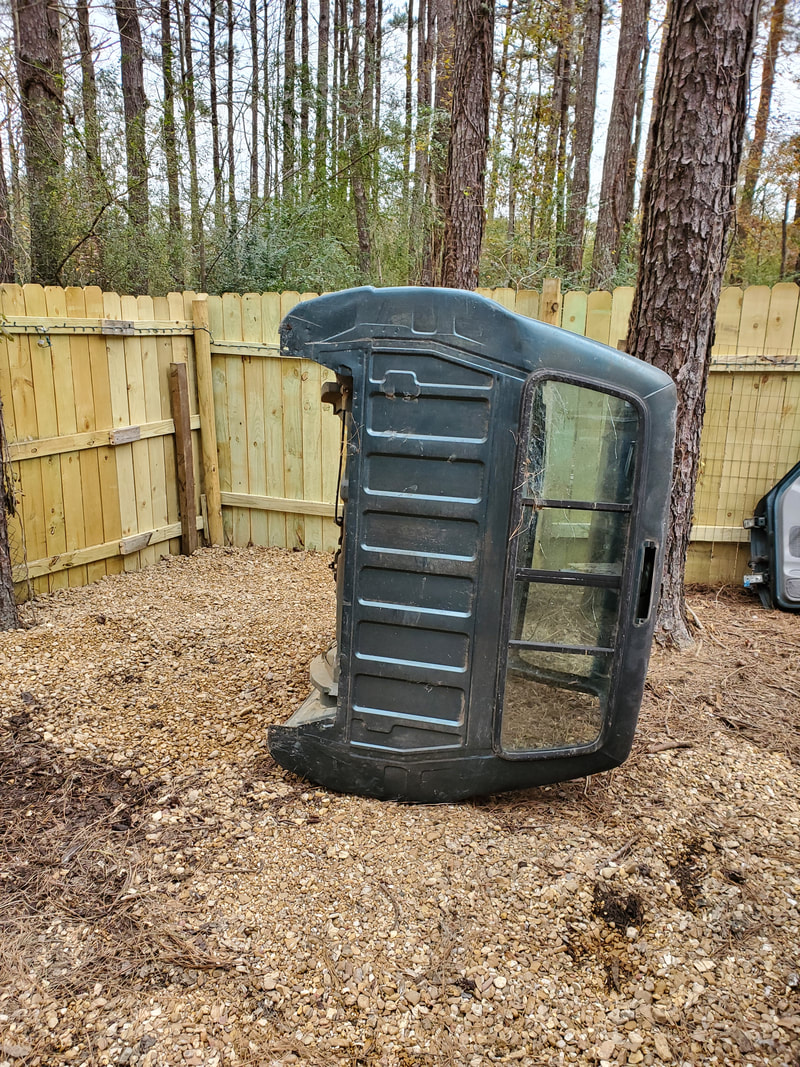
Ranger cab staged in NE corner of chicken yard.
On a side note, I did get a load of gravel and spread it out over a large spot of the NE corner of the chicken yard prior to us moving the cab over here as I want to get a head start in getting the area ready for the coop build. When I do get enough of the area covered in gravel I can then lay down a couple of railroad ties over the gravel that will serve as the foundation for the coop. This will at least make the area less hospitable to varmint infestation as there won't be a mulch rich environment present for them to hide, just gravel. 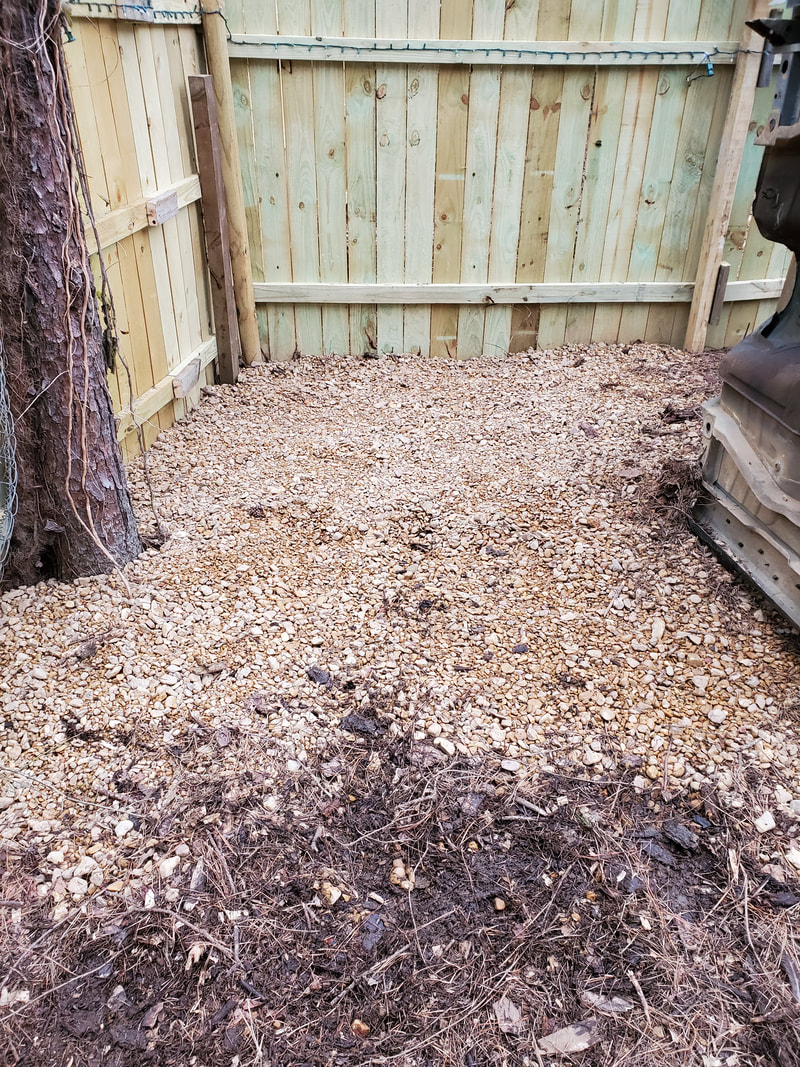
Graveled up area in northeast corner of chicken yard where the Ranger S10 coop will go, note Ranger cab on its side to far right.
With the cab out of the way I had a little mopping up to do on the frame. I removed the fuel lines from the frame rail all in one piece, which will allow me to sell this hardware since its not damaged. I also had some more wiring I had to pull free after cutting the harness to get the wiring separated from the cab. I did leave the brake lines as these will allow me to not have to do a full brake rebuild when I do start the truck frame/Mustang body morph project. Other than using some adapter fittings to attach the brake lines to the Mustang rear end when I do swap the car's rear end onto the frame in place of the Ranger's rear end and quite possibly doing some morphing of the ranger's master cylinder to the Mustang's body, I won't have to do anything to the brake lines on the frame. 
Ranger frame free of any unneeded components.
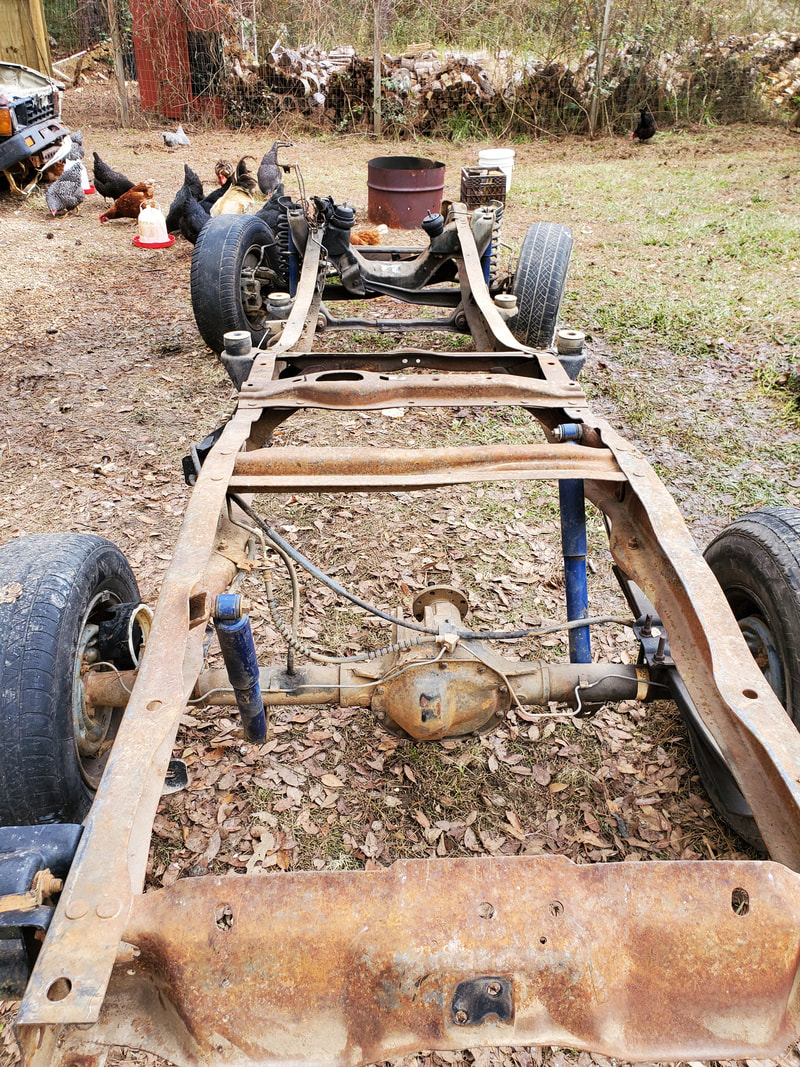
Shot of frame showing inside of frame rails and the lack of the fuel lines.
After removing the heavy stuff from the engine bay there was a matter of the cab. There was still the dash, carpet, headliner, seatbelt buckles, wiring, and some other crap. This part of the strip down went pretty easy, as the dash was held on by only a few bolts and everything else was pretty much a matter of yanking things out. A lot of these components are going to be sold which will help recoup the costs of the truck body/frame as well as help fund the rest of the coop project. As for the wiring, some parts of the truck's wiring are salvageable while other parts of the wiring really won't be salvageable as I would have to chop the wiring at spots to facilitate removal. 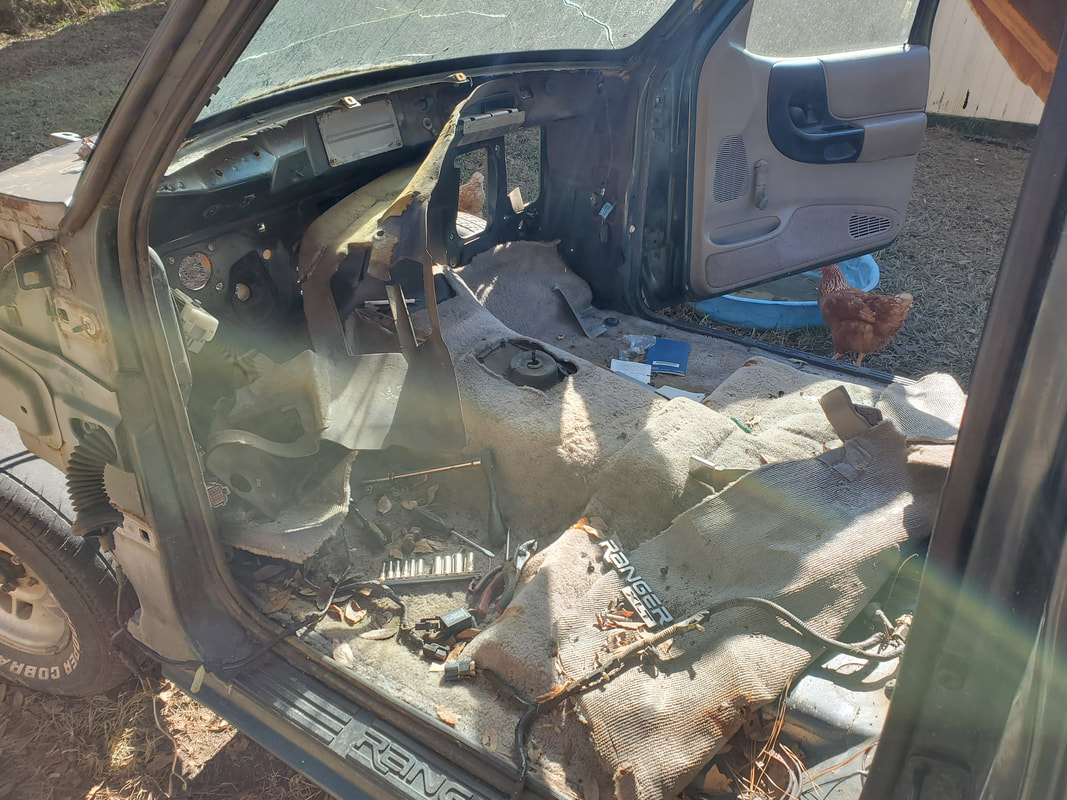 Inside of cab after removing dash, note all the other crap still present. Another thing I wanted to get off was the door. Even though the door will be put back on, it definitely needed to come off before I can move the cab as the door is a good chunk of weight. I did have to pull some of the carpet and molding to access one bolt that was put in from the inside to hold the bottom hinge, stupid design but whatever, the door came off. 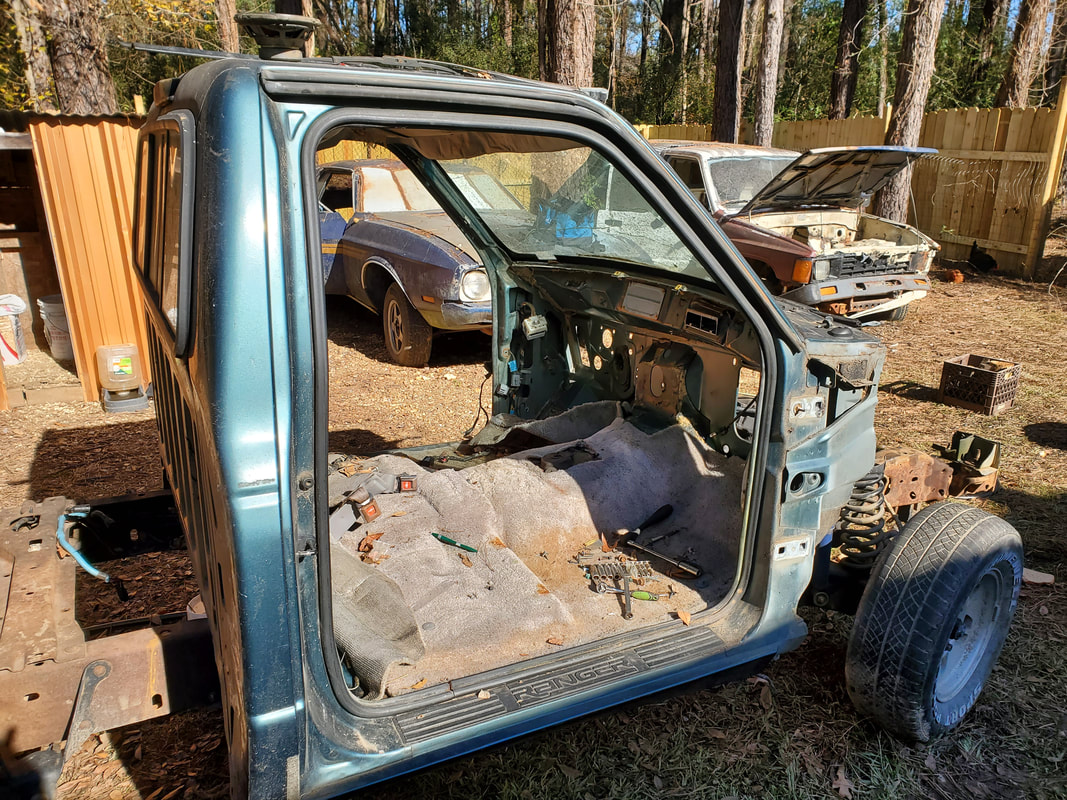 Ranger cab after removing door.  Ranger door staged against tree near corner of chicken yard where the coop will be set up. With that I continued pulling things from the cab. The carpet came out along with some of the wiring. The back panel came out. Seat belts, wiring that had to be cut as it went outside the cab to the back, and parking brake cable was pulled free. With everything pulled out, I moved on to the last thing on the truck, the fuel tank. 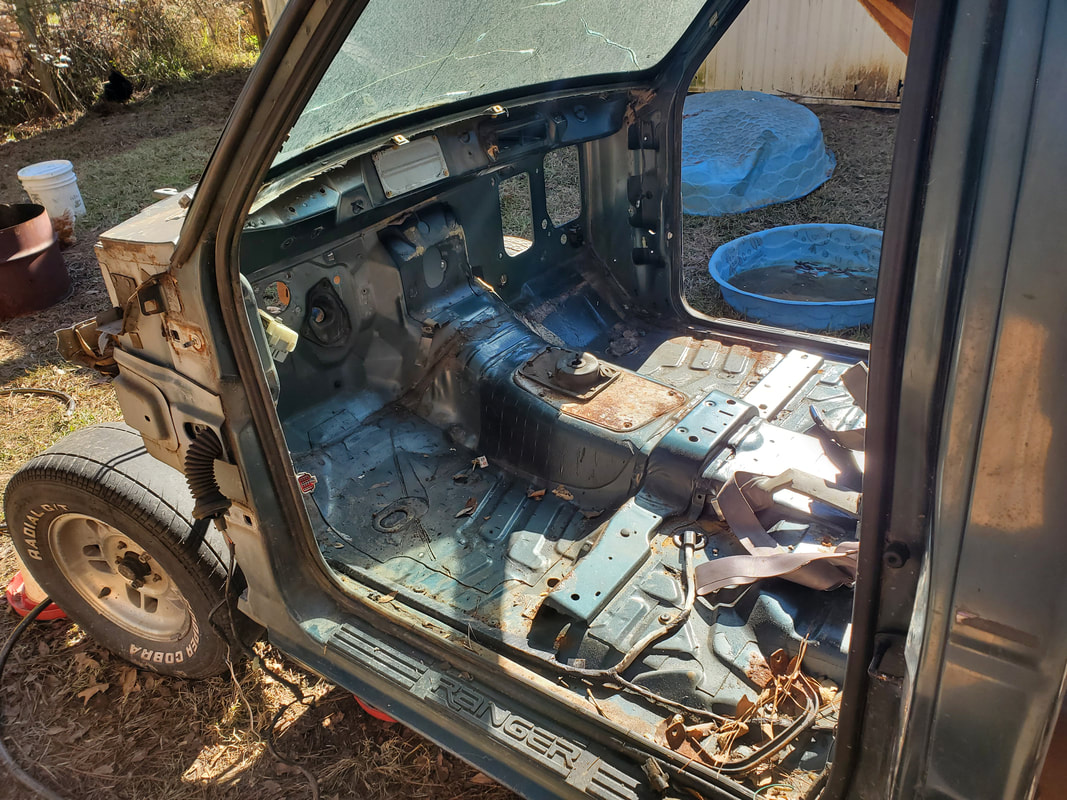 Carpet removed from cab. 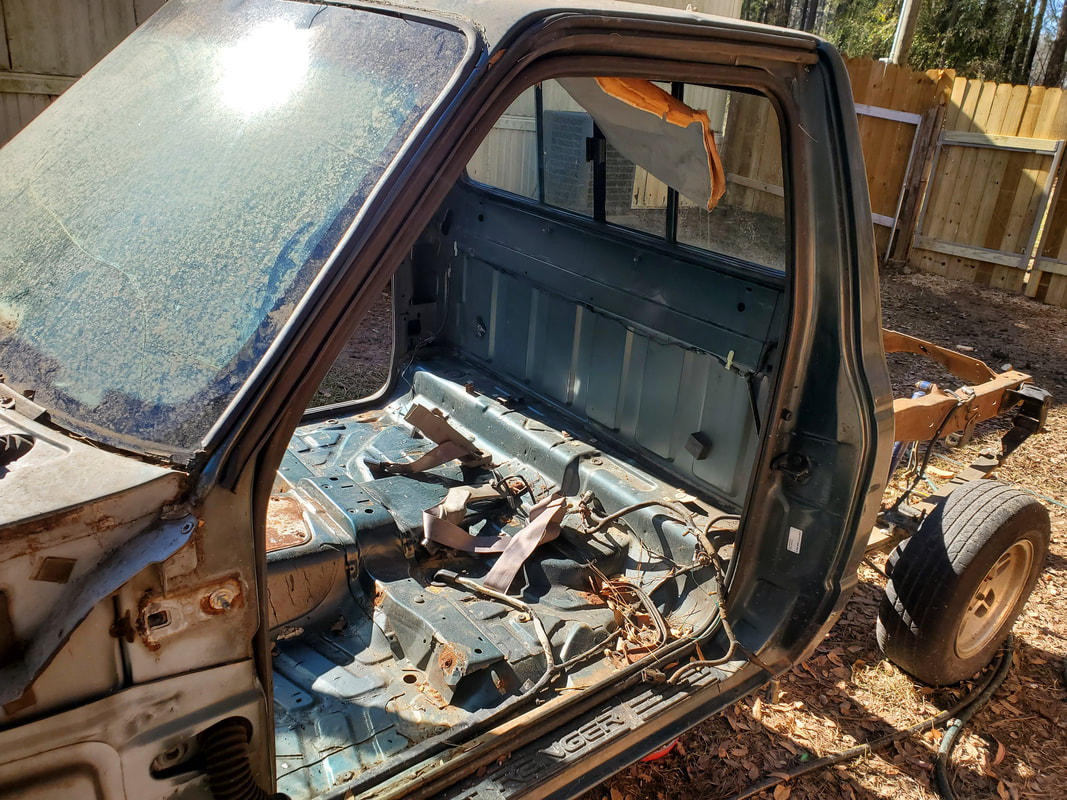 Back panel removed from cab. The fuel tank was still in place and surprisingly still about 1/4 full of fuel. The sending unit was already removed but otherwise the tank was intact and ready for use. At least whoever buys this thing only has to just put another sending unit/fuel pump in place (I would replace that part if I had to drop the fuel tank in my truck). Only two straps held the tank on so this thing came out pretty fast. With the fuel tank out, the next phase of the project will be removing the four bolts that hold the cab to the frame. 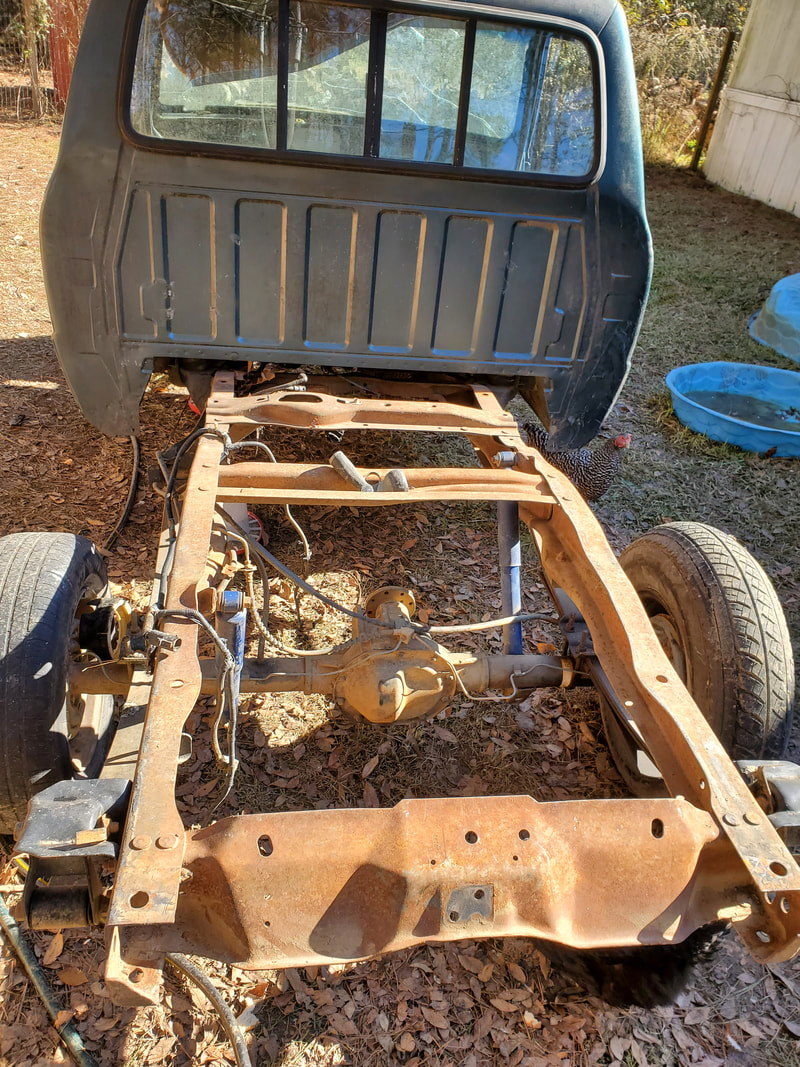 Fuel tank removed from Ranger. Things are moving along pretty fast with this project. Hopefully the retaining bolts will be easy to remove and I don't have to hack at the damned things to sever them as there are some thick rubber bushings around these bolts. Hopefully the cab won't be too heavy to move as there is a gap between the truck and the spot in the chicken yard where the coop will be constructed. I've finally gotten a chance to start work on the Ranger body. This is the truck frame with the cab still on that I picked up with the intention of using the frame for a swap out on one of the Mustangs in the yard. But since the cab is still present along with many parts, I had to remove these items before I can utilize the frame. Since the cab was still a usable component, along with a bed for an S10 that I have laying around, I figured I can piece these two large components together to build another chicken coop. Since it will be more likely we can get the cab off once we lessen the overall weight of said cab, I had to get to work on removing everything conceivable that would not be needed on the body. I wanted to start in the engine bay, since there's a whole wire harness along with many remaining components that hadn't been removed yet. My plan was to cut the inner fender panels and radiator support panel from the cab and totally remove this metal from the picture. Since the engine bay is pretty open once the fender splash guards are removed, there was no need for me to keep this metal present to use as an extension of the chicken coop like I did with the last two car coop projects. I would need way too much scrap metal to close in the engine bay. 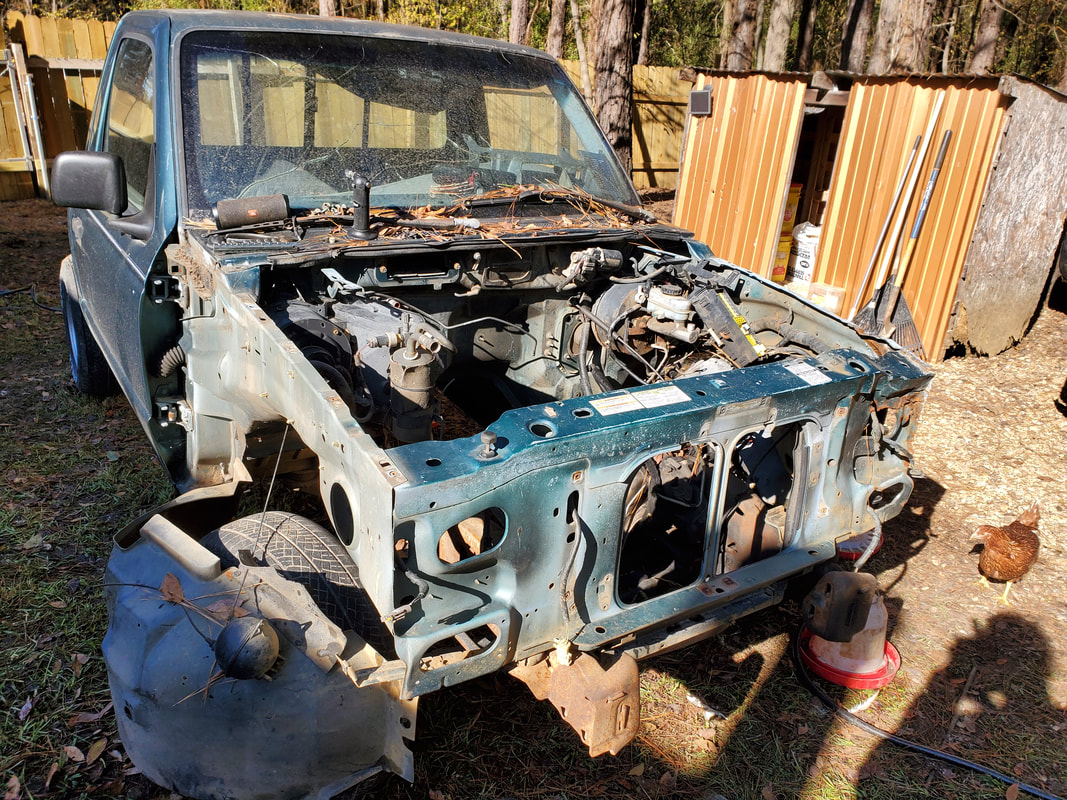 Ranger body with everything still present. I started off with the easiest stuff. The fender splash guards came off along with the hood latch, HVAC box, brake booster/master cylinder, throttle cable, air intake tube, wiper motor, wire harness and a few other smaller components not worth mentioning. With all these components gone it left the engine bay pretty empty within. Now it was time to put the engine bay metal to the knife, or more accurately, the saw. 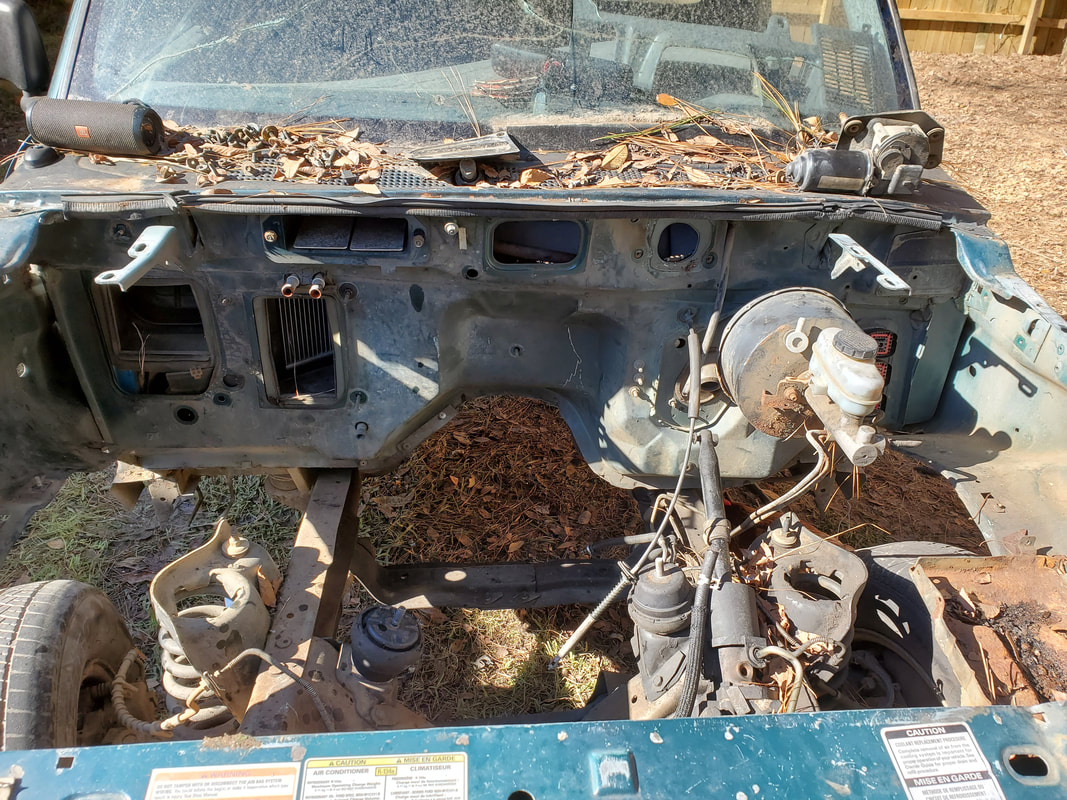 Engine bay cleared of components, note open nature of engine bay that makes it not practical to try to enclose this area. With the reciprocating saw and a couple of metal cutting blades I wanted to try to cut through the bolts that are used to secure the body to the frame. The rubber bushings were still pretty intact and heavy enough that cutting through this material proved to be a hindrance to the saw's ability to efficiently cut into the bolts. Afterwards I decided to just cut the metal around the mounts so as to be able to remove the engine bay structure and leave the little bit of metal around the mounting points from the body. With some headache and a little help from the die grinder, I managed to finally get the engine bay structure separated from the frame and the cab, removed once and for all. 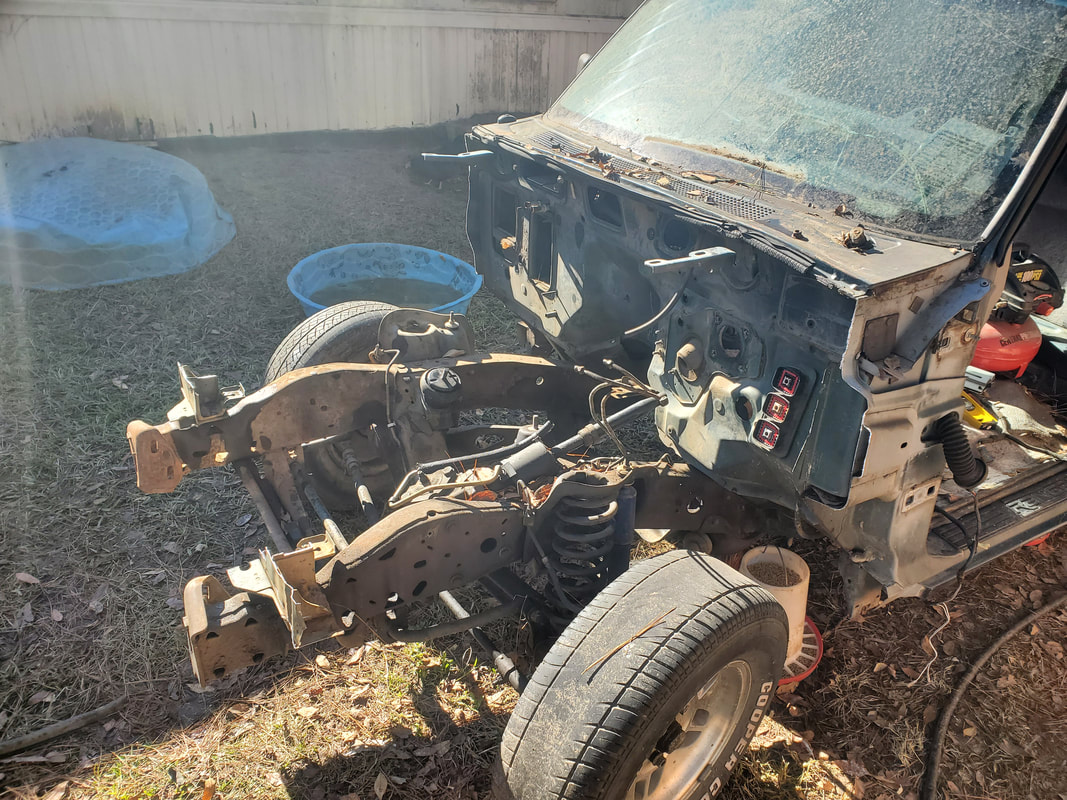 Cab and frame with engine bay structure removed, note leftover metal around front of frame rails after cutting structure away from these points. 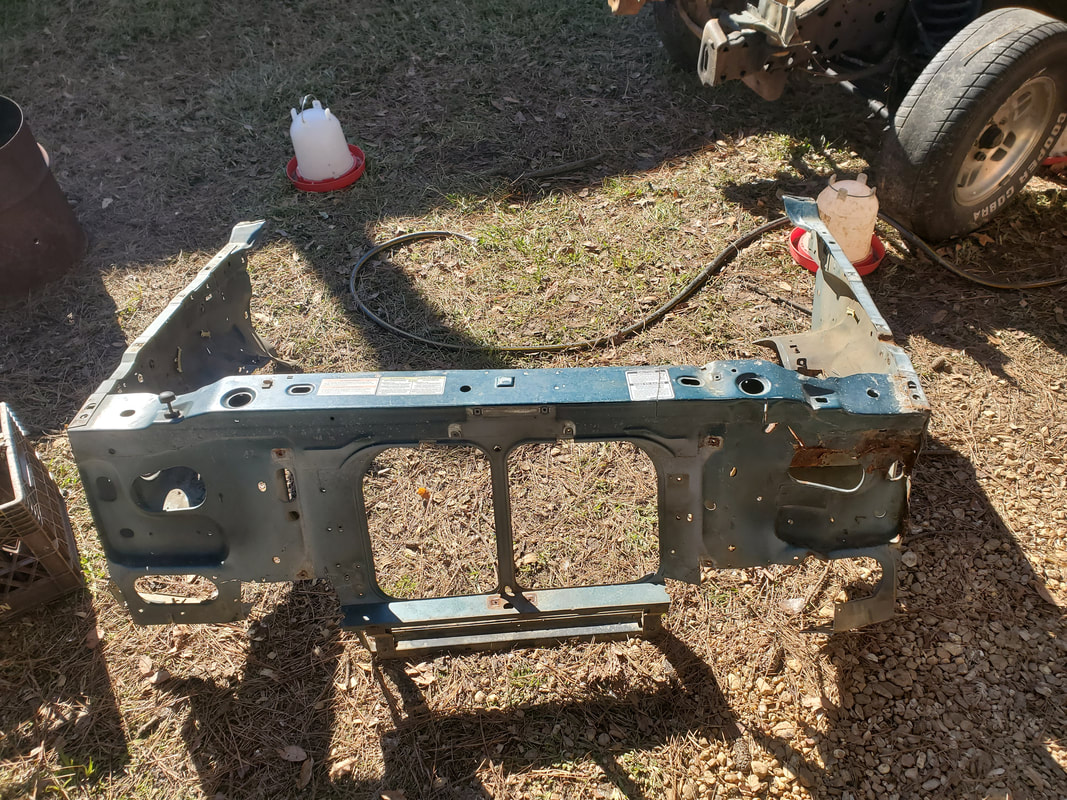 With the metal gone from around the cab and the frame I then turned my attention over to the interior. Since the interior was already gutted pretty good, there were only a few components that I needed to remove. I of course started with the easiest. Since the driver's seat was already out and in order to put the seats up for sale it would be better to have both together, I went ahead and pulled the passenger side seat out first. I was then able to photograph and list these seats for sale, hopefully to move them more sooner than later. I did remove my fence building tools as well since I will be gutting the interior on the next go around. 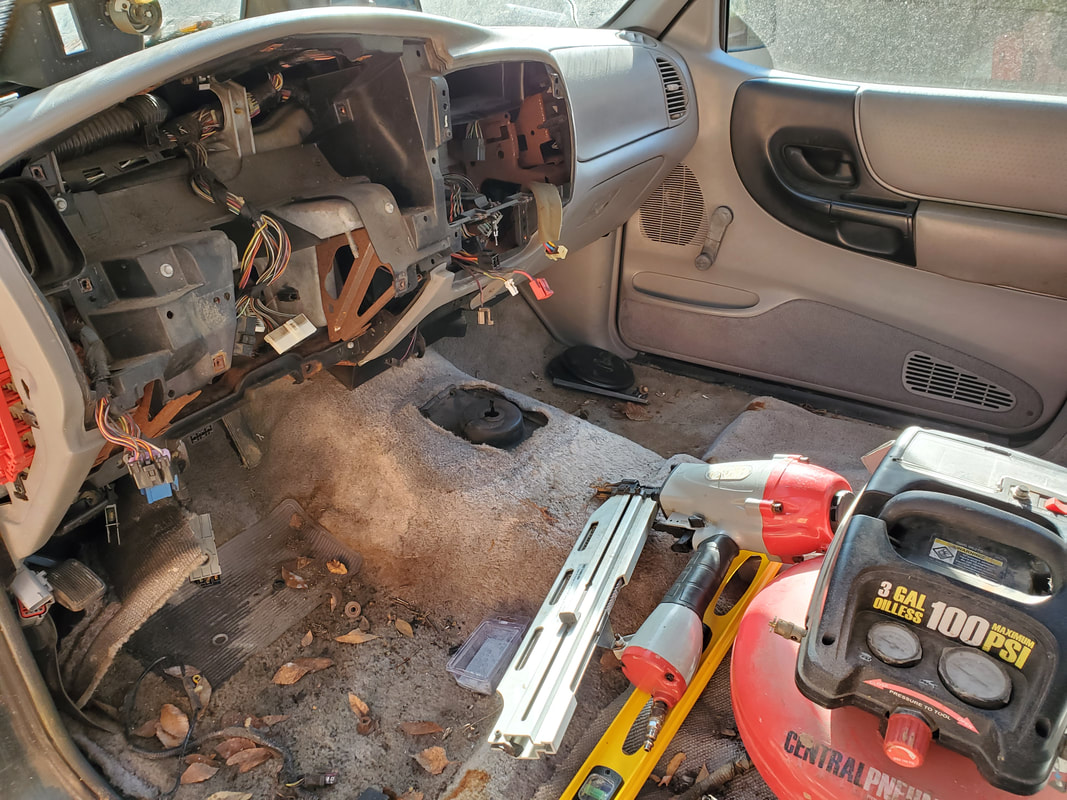 Ranger interior, note missing components all around, leaving very little to scavenge. Since the gauge cluster is out, there isn't a whole lot remaining for me to remove that I care to salvage. The wiring harness in here may or may not be salvageable but if not, then there will be no issue with me cutting where needed to get all the wiring out and staged with the other bulk wiring I have from the Toyota truck. The carpet and insulation from the floor will be the next thing to come out as it doesn't matter how much I butcher this, its getting tossed out anyway. Without the gauge cluster I don't really have to be super careful pulling the dash out as I can just scrap it if push came to shove. The inner HVAC box may have some value but who knows. Other little things like the speakers, relays, etc, will be removed and saved if I deem any of these components worth saving. The driver's door was removed before we got the truck so that leaves the passenger side door. This will be removed prior to moving the cab as the door is a good amount of weight by itself. Once I get the cab separated from the frame then I can really say I'm getting somewhere with the overall project.
One night while sitting around, the ole lady shows me a picture of a bulk chicken feeder that made use of some large PVC pipe elbows secured in a bucket and angled downwards into the bucket so even with the feed filling the bucket and being over the fittings inside the bucket, the chickens can poke their heads inside the fittings to peck at the food without making a mess and as they eat the food from the bottom of the bucket the rest will flow on down. No mess no fuss no muss.
After looking at the picture I said I could make that in a short amount of time, I should even have the fittings needed for this project along with plenty of buckets all over. Well after looking at my scrap piles, the only things I came up with was a regular bucket that was left over from a past attempt at making a bulk water bucket for one of the old chicken watering apparatus, and some 2 1/2" PVC pipe. I figured with the hot glue gun and my power tools, I can still make one of these bulk feeders, just adding my own twist to the design to make it work. Starting off I did some eyeballing with the pipes and the bucket and came to the conclusion, I would have to angle the pipes downward into the bucket, securing them in place where the birds can still poke their heads inside to eat and the bucket will allow feed to flow down below the pipes to be consumed afterward. With the design figured out the first thing I had to do was trace lines on the bucket so I can cut the holes in the sides for the pipes to go through. From there I used the die grinder to cut starting slits in the traced circles on the bucket then used the fine tooth blade on the reciprocating saw to cut out the oval shaped openings in the bucket. 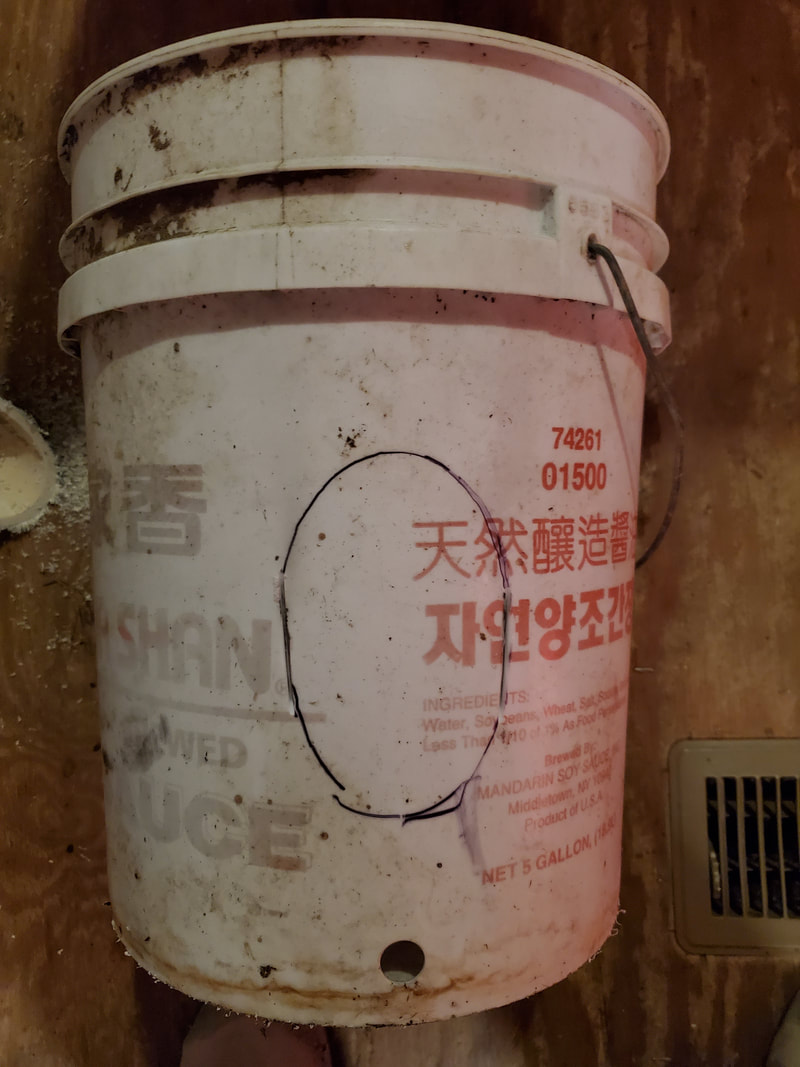
Tracing a hole in the side of the bucket for the large PVC pipe to go through later on.
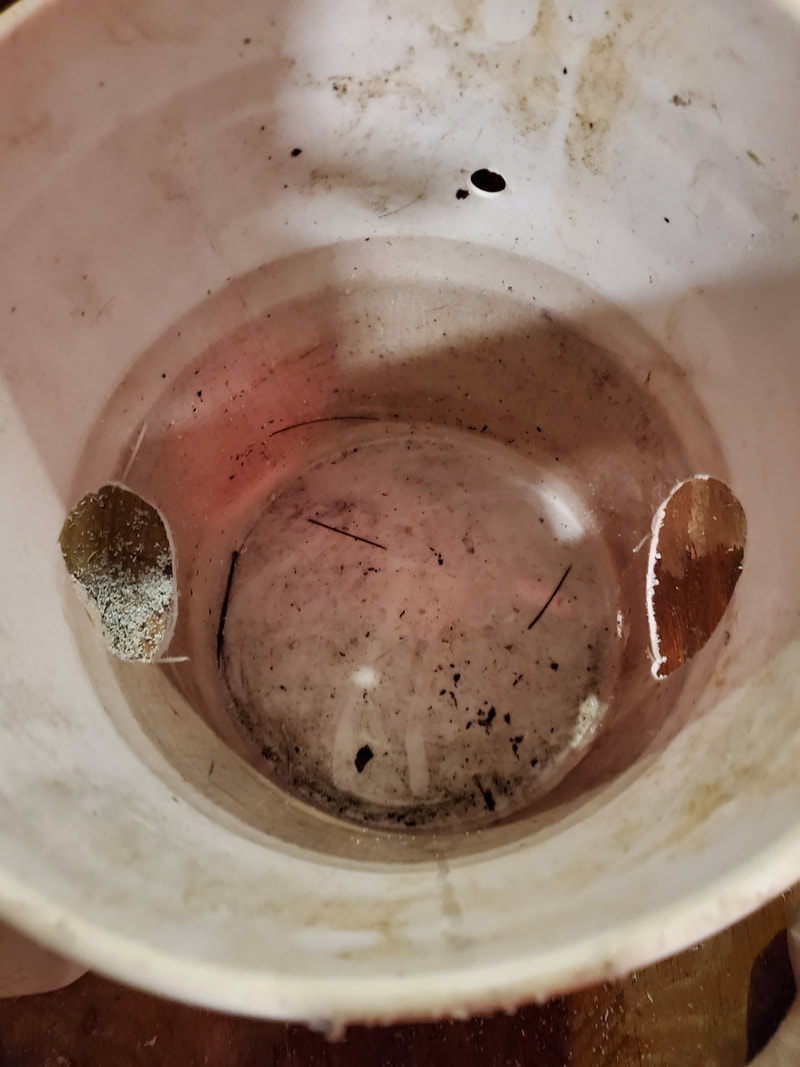
Holes cut in sides of bucket to accommodate PVC pipe.
The next move was to cut the PVC pipe. Since the pipe was going in at an angle and the pipe needed to mimic what the elbows did in the pic, I had to cut the end of the pipe at a 45 degree angle. I cut a little less than a foot of pipe from the angle cut. Since the other end of the pipe was also at an angle, I just took the first cut, lined it up with the end of the larger pipe, marked and cut the 2nd piece so I can have the two pieces that pretty much make the project. 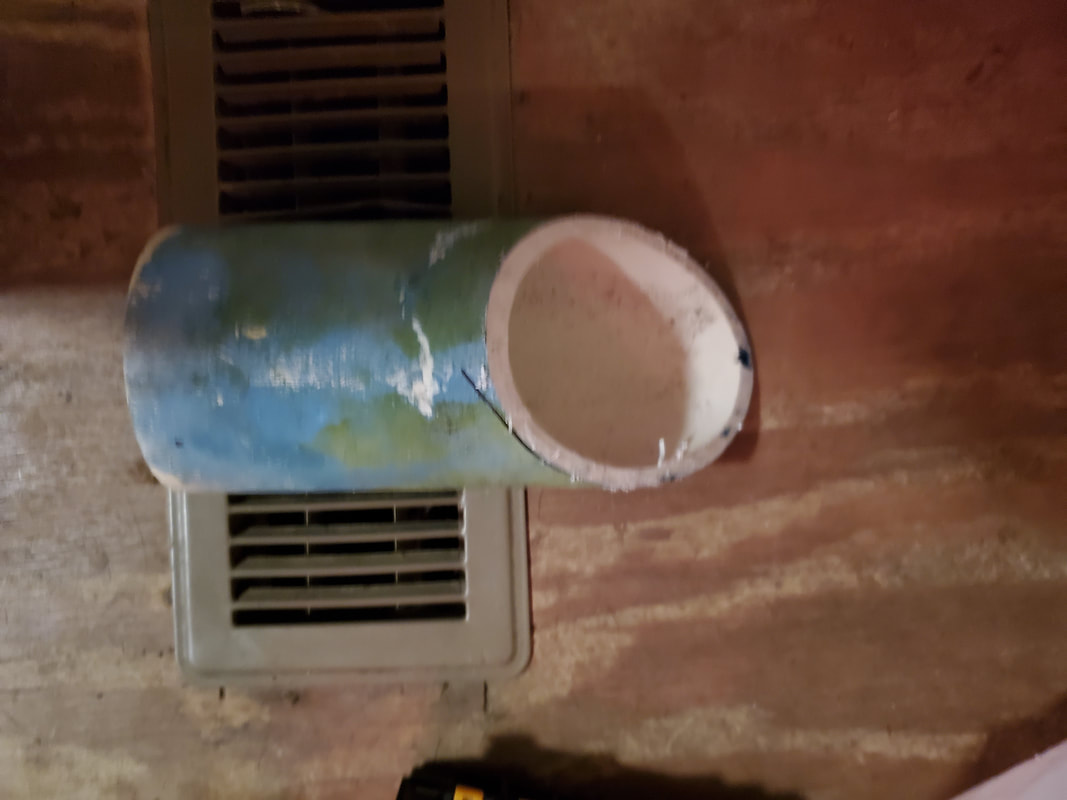
First angle cut piece of PVC pipe.
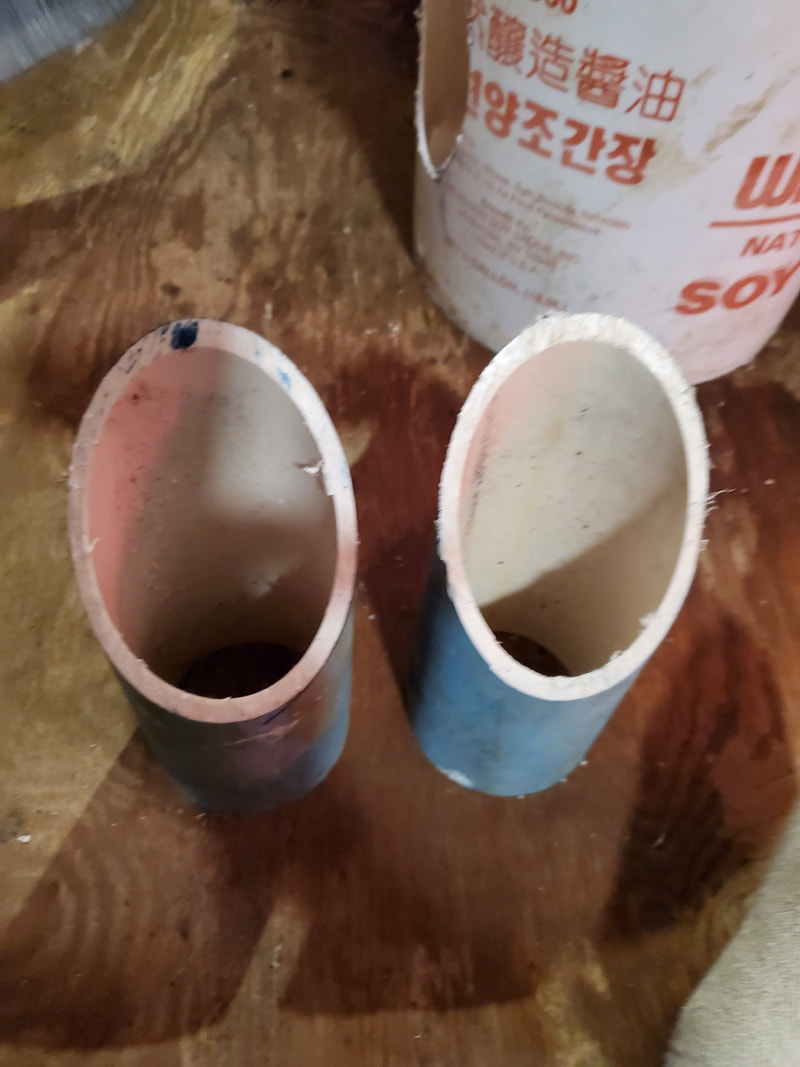
Both angle cut pieces of PVC pipe, ready to go.
With the pipes cut and the holes cut I was ready to put the pipes in place. I had already plugged up the hot glue gun to get it warmed up so it would be ready by the time I got to this step. With that I test fitted the pipes, putting the straight ends in first, and having the angle cut ends be the ends sticking partially out of the holes in the sides of the bucket. The pipe would be secured in the bucket almost flush with the sides of the bucket so as to appear neat with clean lines, nothing sticking out. I held the pipe in place while I applied the glue all around the outside of the pipe, leaving a small lip to accept the glue on the outside. I applied more glue on the inside about 2/3 of the way around. I couldn't reach under the pipes to glue them since the pipes were low in the bucket and the bucket bottom pretty much blocked getting a glue gun in there to do that job. 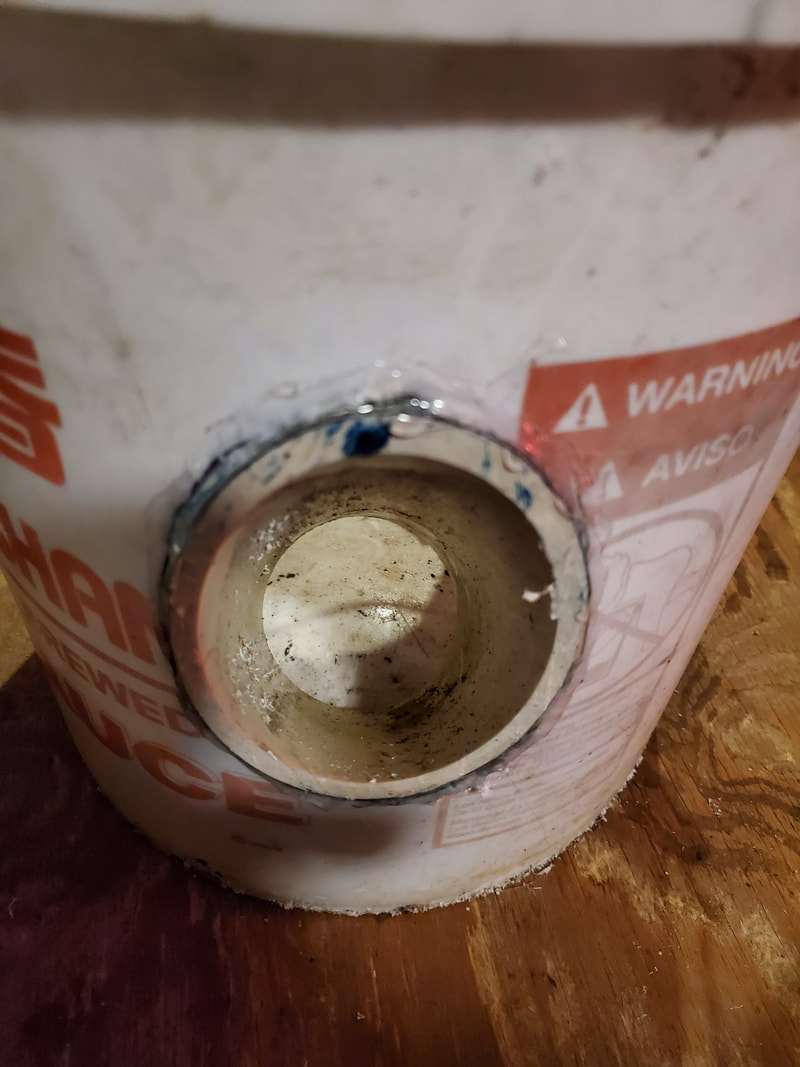
PVC pipe glued in place in bucket, note small lip around edge of pipe sticking out enough to accept glue.

Both PVC pipes glued in place inside bucket showing angle of pipes.
After finishing this last step and letting the glue cure for a little while, chicken food was poured inside. The feed settled around the openings of the pipe but because the openings were not at a level where food could back flow out of the downward angled pipes, I was able to fill the bucket to the top. The food was settled at the bottoms of the pipes, ready for chickens to stick their heads into either pipe and start eating. We ended up putting the bulk feeder into the old firewood shed turned feeder/chicken yard storage shed. This old pallet/sheet metal structure holds the buckets of feed as well as extra loose feeders and waterers. After turning the birds loose, some have actually been using the structure as a shelter, laying eggs inside and climbing over everything I'm sure. With the bulk feeder in place, that 5 gallon bucket holds enough food to damn near feed these birds for a couple of weeks. The two pipes allow birds to be able to feed without crowding each other out like it would be if only one opening existed on the feeder. A normal 50lb sack of feed will take two 5 gallon buckets to contain it all so this feeder is essentially holding 25lbs of chicken feed. After doing some quick training to show the chickens how to use this thing, they picked up and have been using it ever since. I do have plans to build another bulk feeder and situating it somewhere that's covered since we don't need rain ruining a bunch of food. Lids on the buckets will help keep rain out or at least keep chickens from getting inside the buckets and "soiling" the feed. With that, this quick little late night project went from a "hey check this out" to "here it is, all done!".
With the rear access gate done I turned my attention to the northeast corner of the chicken yard as well as the main fence since there was a small gap at this point of the chicken yard. With the way the 2x4's terminated, it left a gap that needed to be filled in for the chicken yard. Since I already sunk a post for the east side of the chicken yard fence and the NE end of the main fence, I would've needed a 12+ft fence to cover this gap. It would be easier to just do a regular 8ft section of the main fence and just secure some short 2x4's from the inside to the end of the fence at the chicken yard. I started with the 8ft 2x4's. I tacked these up for the main fence then measured the gap for the chicken yard portion. After cutting these boards I found that I was going to have to remove the chain link fencing from this gap to be able to attach the boards the way I wanted to. At first I thought this would be a problem but the die grinder made fast work of the chain link fencing. I cut it at the corner of the chicken yard fence then cut at the tree where the fence is secured to, removing approximately 4ft of fencing. With that I was able to secure the short pieces of 2x4's, using "tie boards" to secure the ends to the ends of the main fence boards. 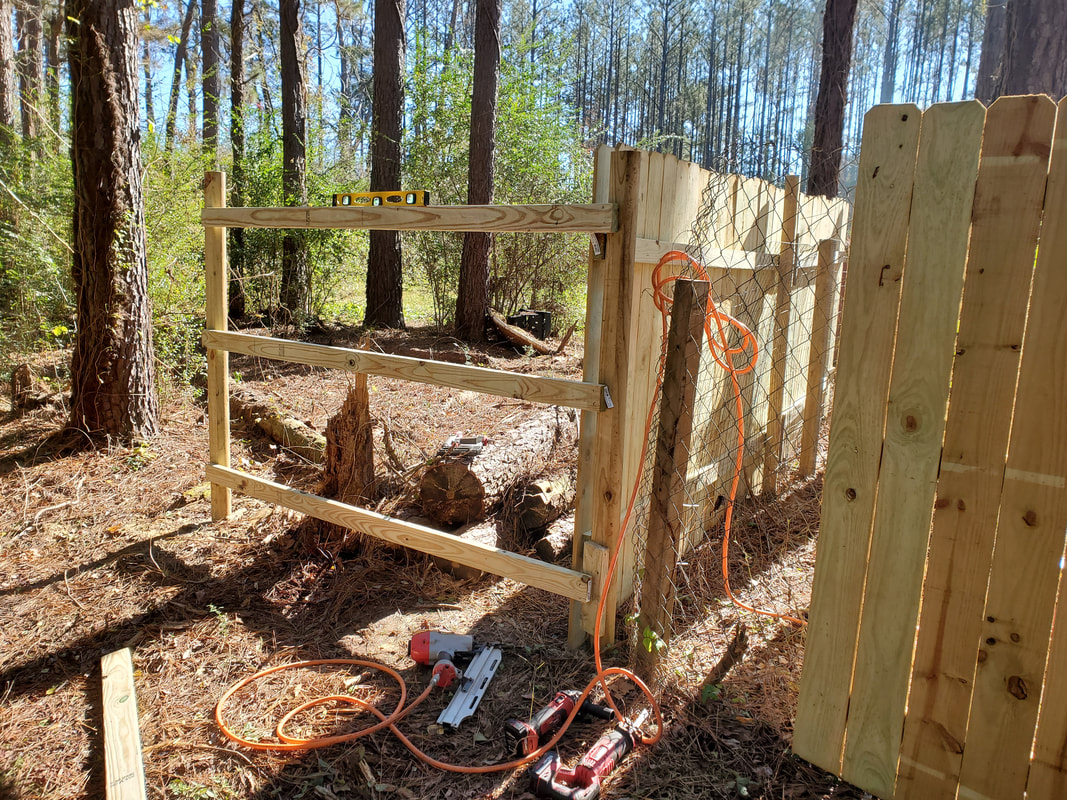 Main fence 2x4's secured to posts outside of chicken yard, note chain link in place at corner of chicken yard fence. 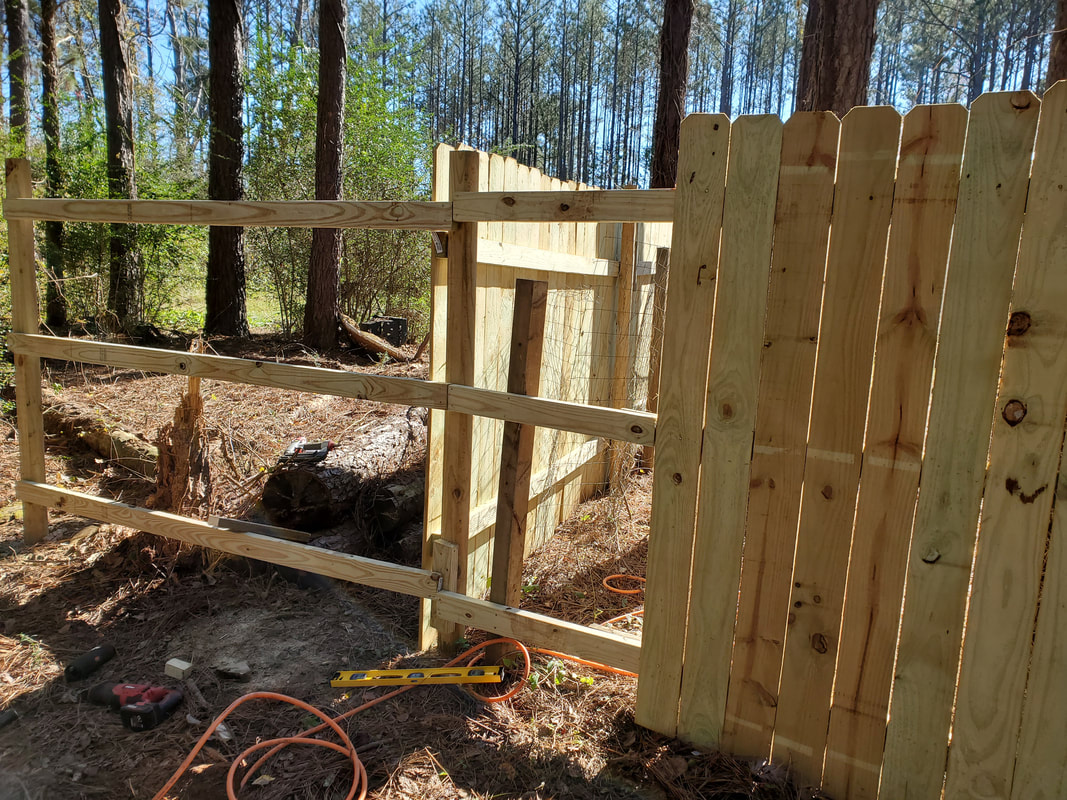 Short 2x4's secured in place in corner of chicken yard fence. 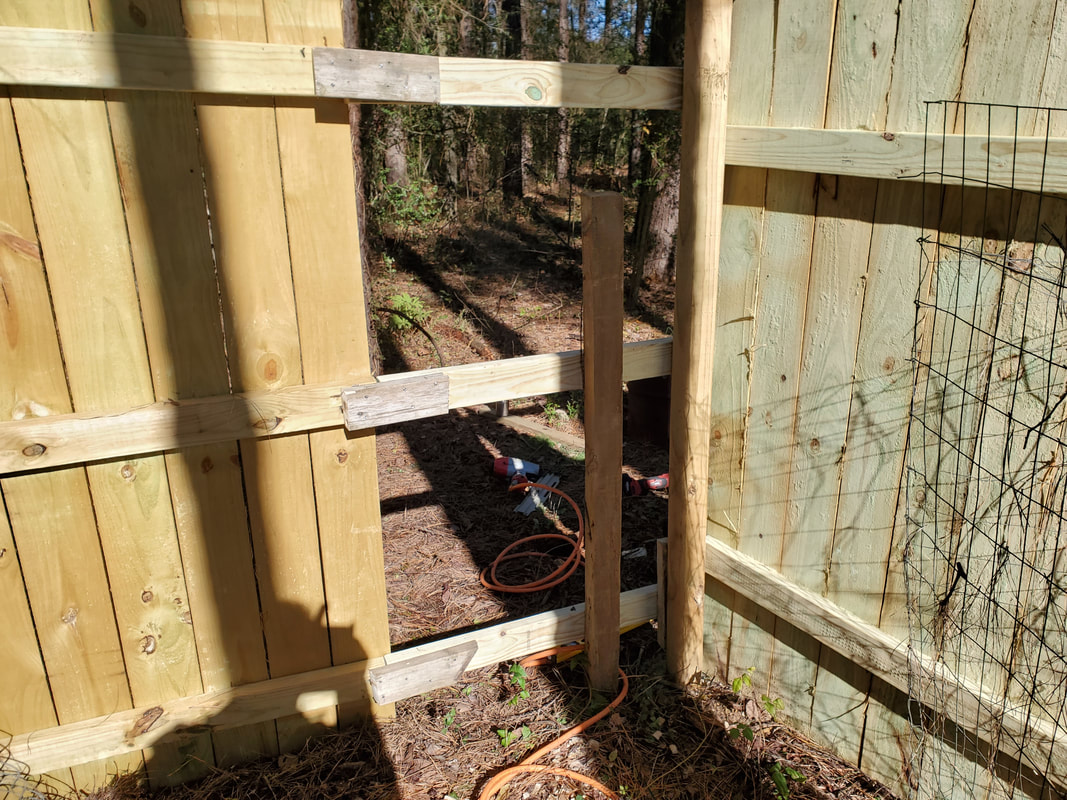 Tie boards holding ends of short 2x4's to ends of main fence boards in chicken yard. Note absence of chain link fence. With that I started tacking up pickets. I had plenty of pickets to cover the gap and the section of fence. After covering the whole area I was able to rest even easier knowing that another sensitive area of the chicken yard fence was covered. I still had another section of the main fence remaining to cover. A tree at this spot would serve as the NE corner of the main fence. It's approximately a 6ft gap. 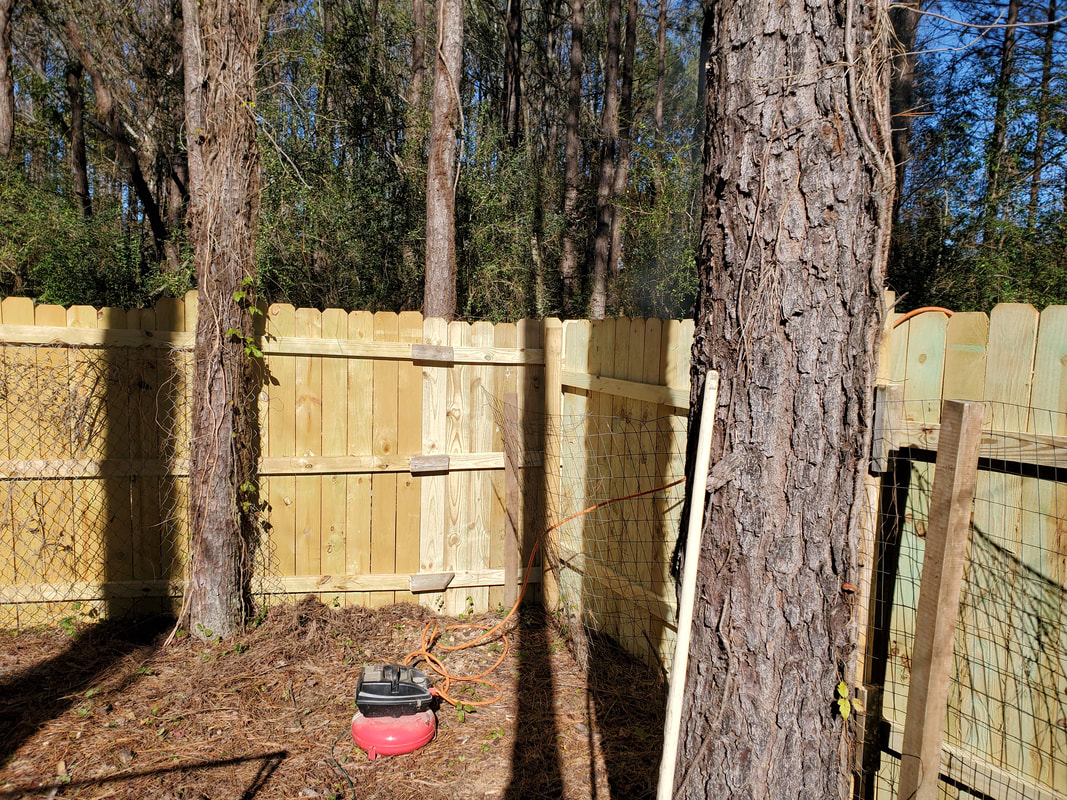 Gap in chicken yard fence closed in with old chain link fencing gone. 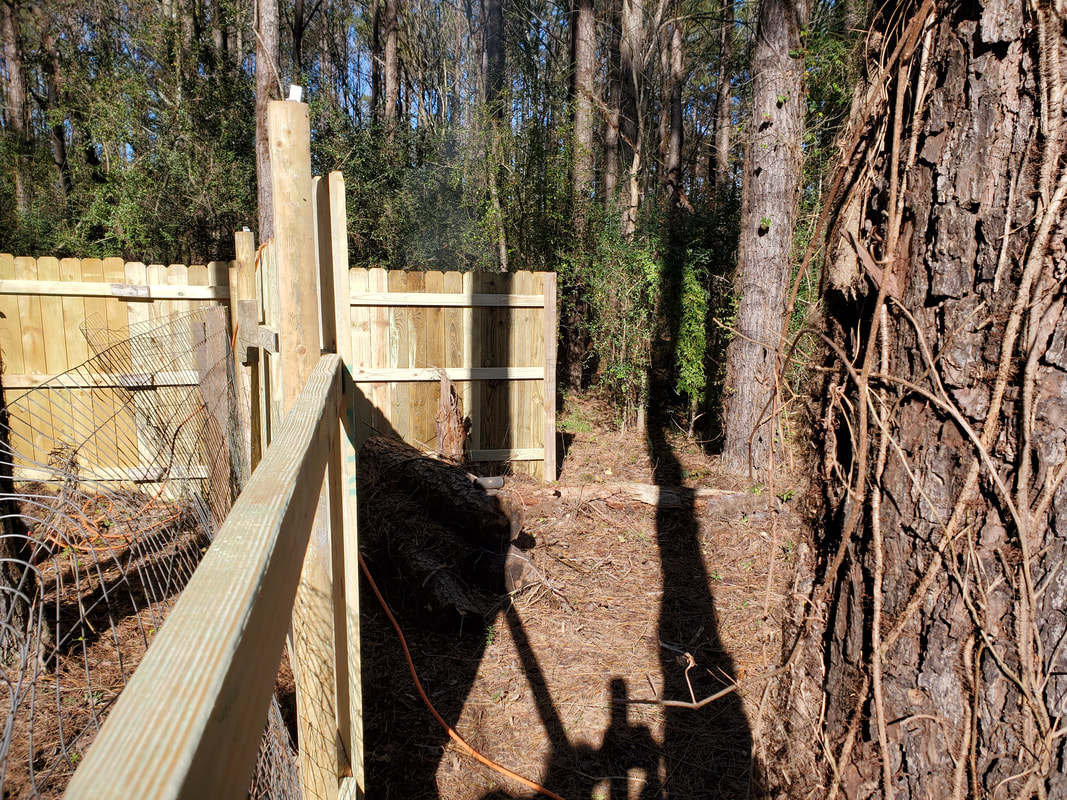 Shot of north fence at east side of chicken yard. Lastly, I cut some 2x4's to fill in the final section of north fence. I had to use some long deck screws to secure the ends of the boards that went into the tree since the nail gun nails wouldn't be long enough to pass through the gap in the bark and into the actual wood. With the boards in place I moved on to the pickets. 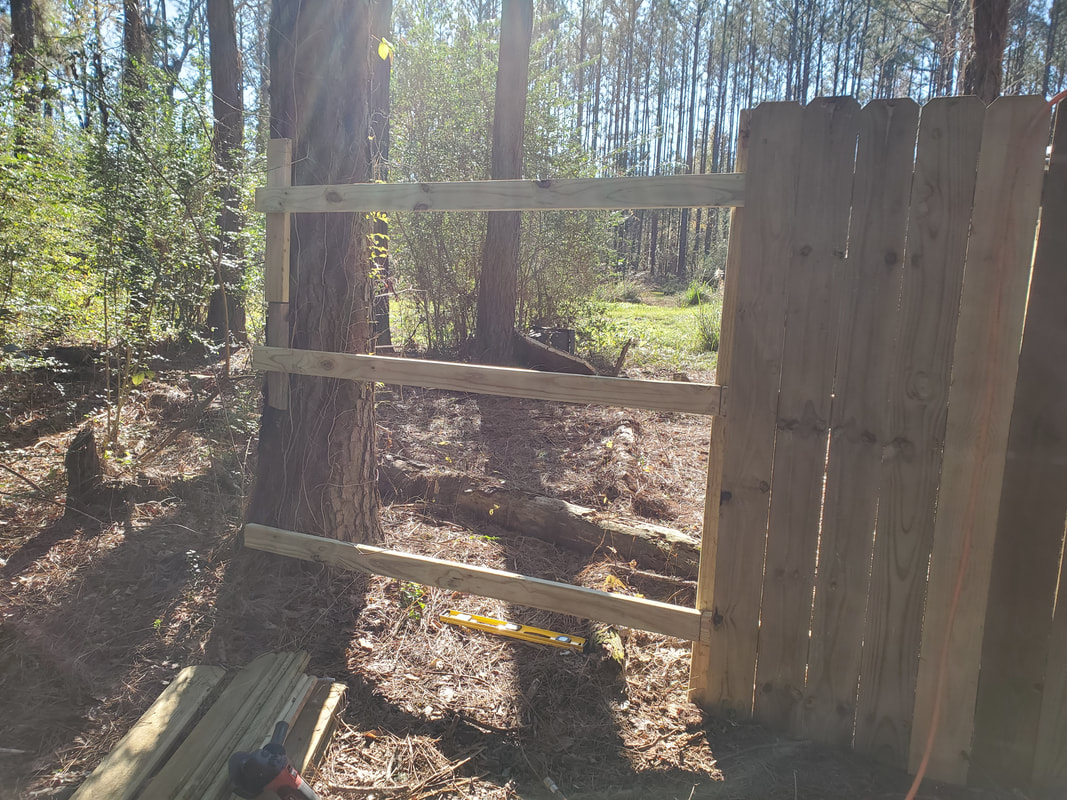 Last section of main fence boards on north side of clearing secured to tree and last post. Surprisingly I actually had enough pickets left to fully cover this section of fencing all the way across the tree. After getting the pickets in place I can say that the north side of the main fence is done save the section from the west side of the chicken yard to the driveway. 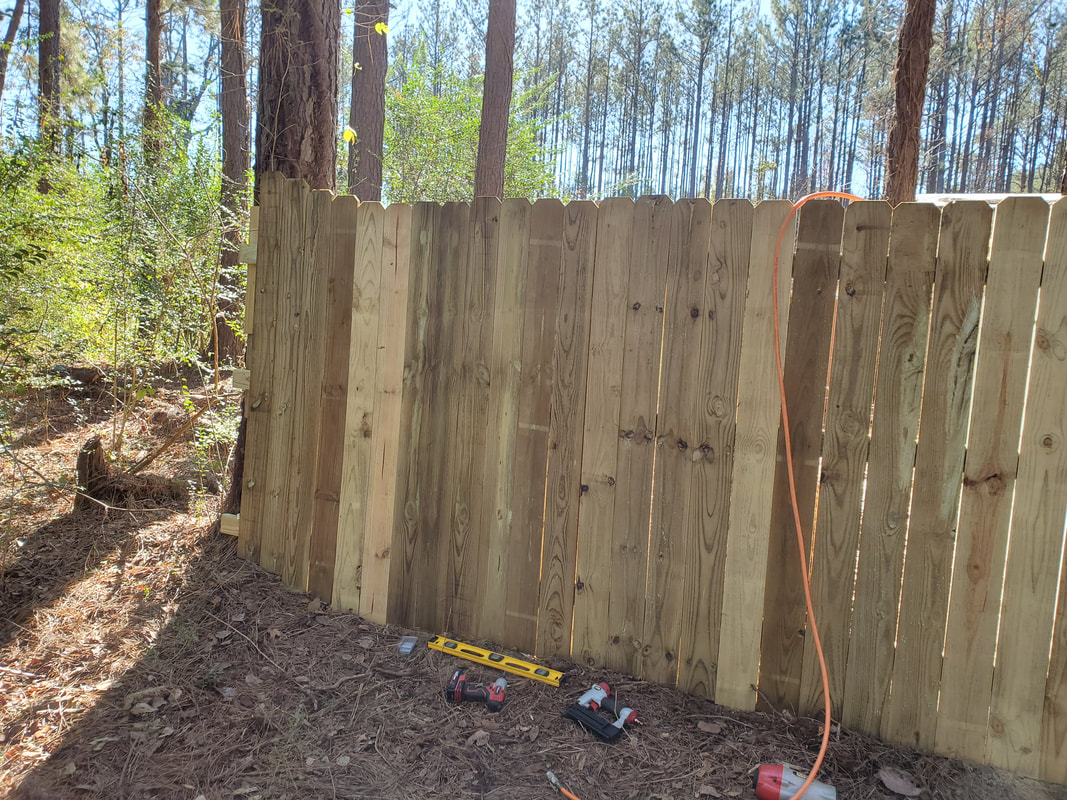 Northeast corner of north fence done with pickets in place over boards all the way across tree. At this point I can now start building the east section of main fence, going from the tree and out towards the east side of the garden fence. This section will take me across the septic field and the area where I normally stage any burn/brush piles. I can also start sinking posts between the trees on the west end in order to get the rest of the north fence done at that end as well. As time progresses I will continue to get materials and put them in place to get more sections of fence done. Soon enough I'll get the whole grounds enclosed as I wanted from the beginning.
After finally getting another gate kit from Lowe's I was able to get to work on the rear gate for the chicken yard. To recap, this gate will allow anyone who we use to "chicken-sit" be able to access the chicken yard without having to go through the main yard area, especially after everything is enclosed within the main perimeter fencing, where we will have the yard dogs roaming free.
Well, just like with the 2nd gate that was part of the main gate, I decided to hang the frame before putting pickets on. Of course this meant building the frame. Unlike the other gates, I was actually able to get away with only one of the cross bars that links both halves of the frame together. The kit comes with four cross bars, two pairs that are able to be slid inside of one another as part of the ability to expand the gate width from one size to another. I only needed the larger bars as the gate's narrow enough to only need these pieces. I used self tapping screws from my stock to assemble the frame. Putting the turnbuckle and hinge brackets in place had the frame ready. Lastly was the pair of hinge bolts and the frame was able to be hung. 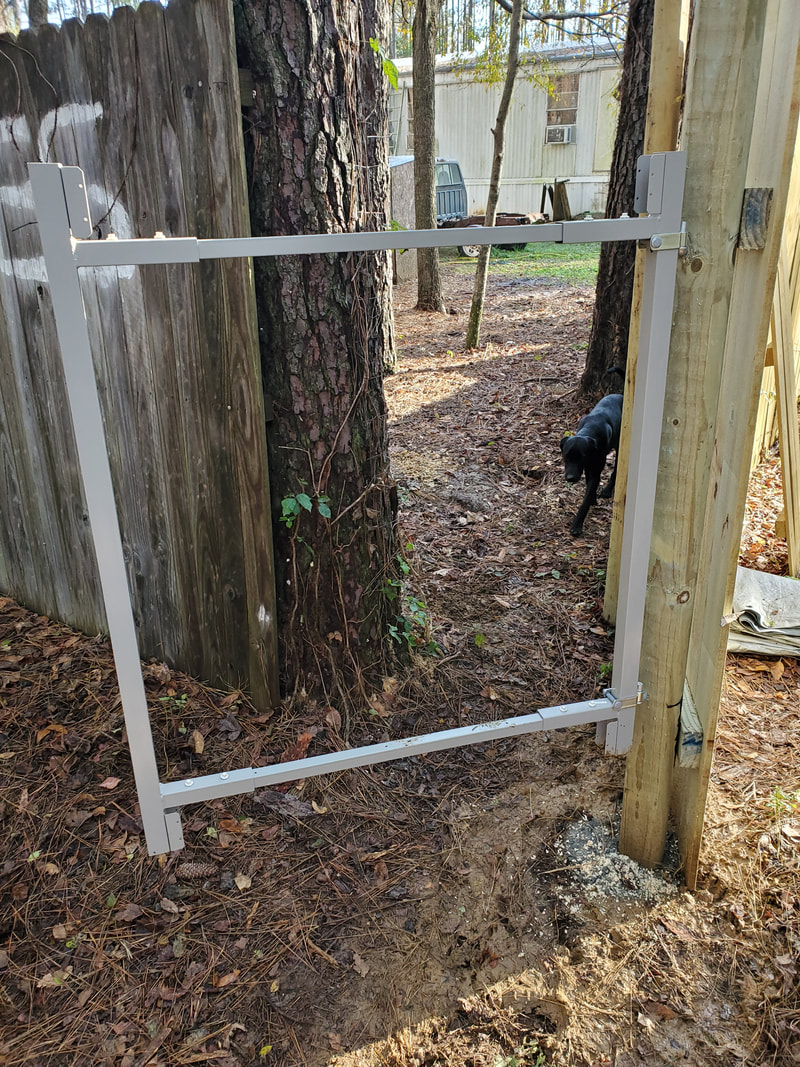
Gate frame hung on post at rear of chicken yard.
Just like before the picket hanging went routine. After cutting and hanging the 2x4's I tacked on picket after picket until the gate was fully covered. Of course I didn't need many pickets unlike the wider gates. The end pickets were reinforced with self tapping screws into the corners of the frame to further hold them in place since the brads used to hold them to the 2x4's were off center. At least this spot was nice and level enough that I didn't have to modify the ground or the bottom of the gate to allow for a good arc of swinging. The latch set was secured as well in their respective spots with the gate latching nicely. 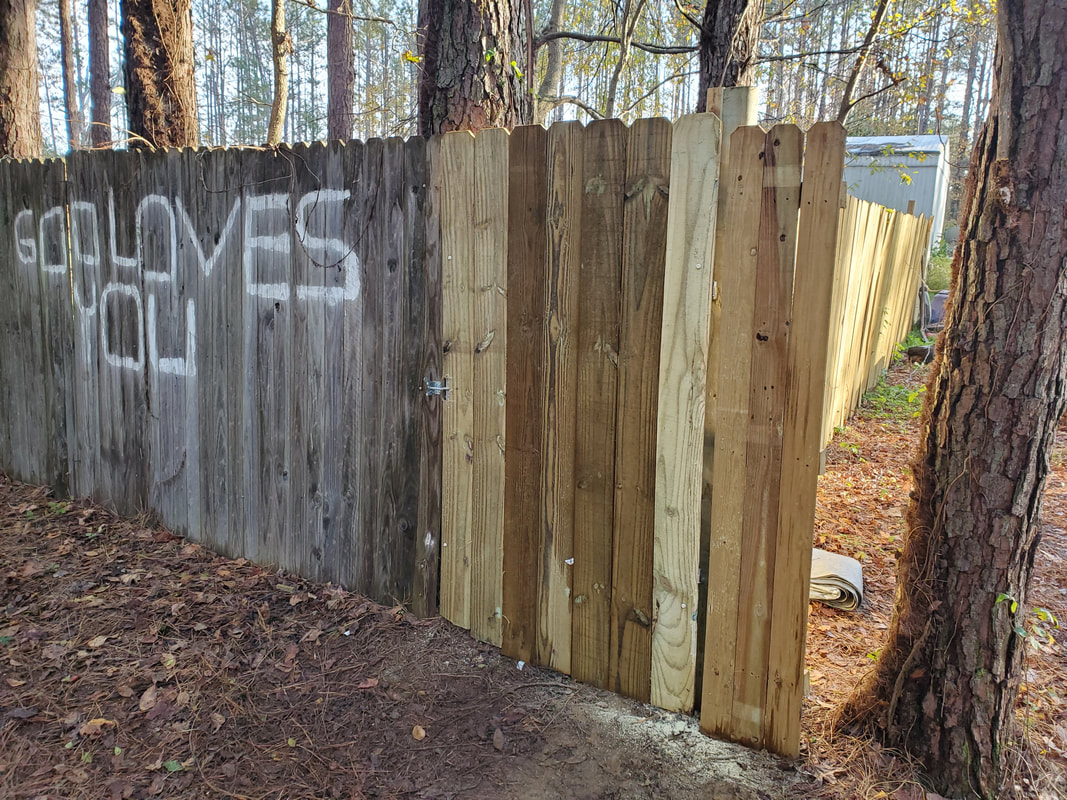
Gate with pickets installed and extension piece to cover gap where fence ended at post.
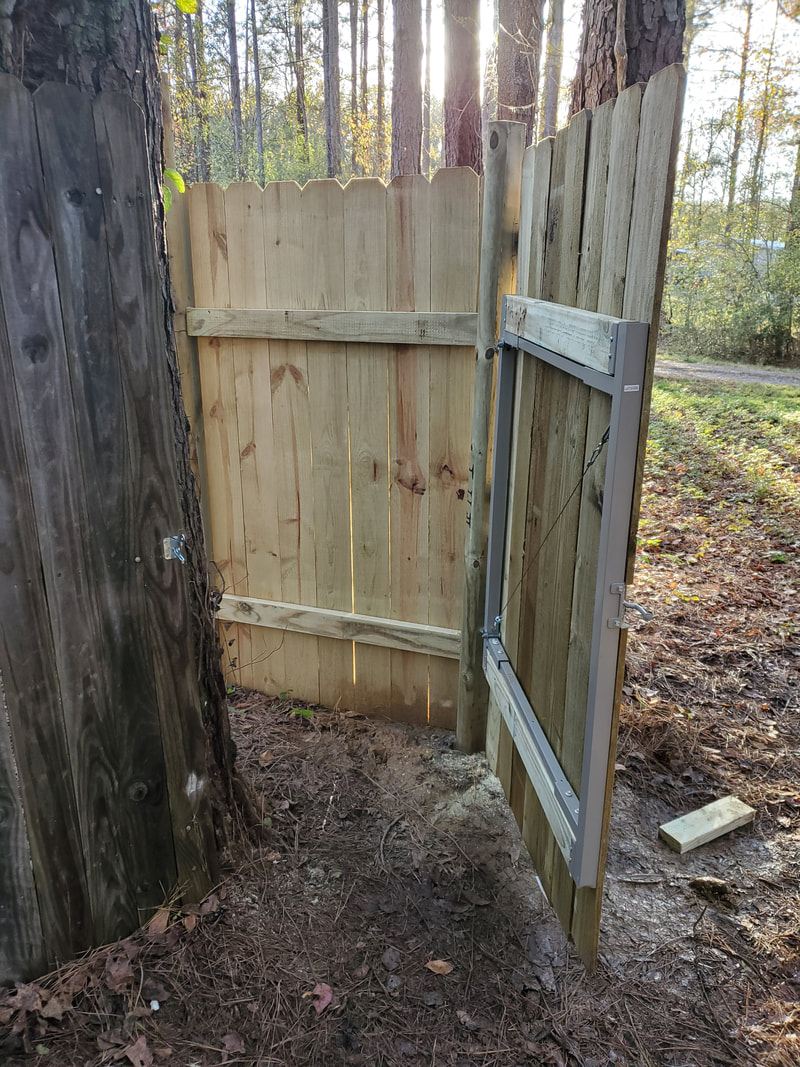
Inside of gate partially opened, note latches.
Because there was a gap between the post holding the gate and the end of the fence where the angled extension is I had to address this if I was to turn the chickens loose in the yard. I didn't want any birds to be able to squeeze through the gap nor anything be able to squeeze in. Thinking of something I still had a small piece from a commercially made fence panel that I cut off from another section of fencing. Along with that I had some short cuts of 2x4s that I figured I could tack in place between the posts from the fence to fill those gaps then finish it with the short extension piece which will be a continuation of the main fence as it extends toward the driveway. The gaps are filled in enough that no birds should be able to get out nor anything large able to get in. 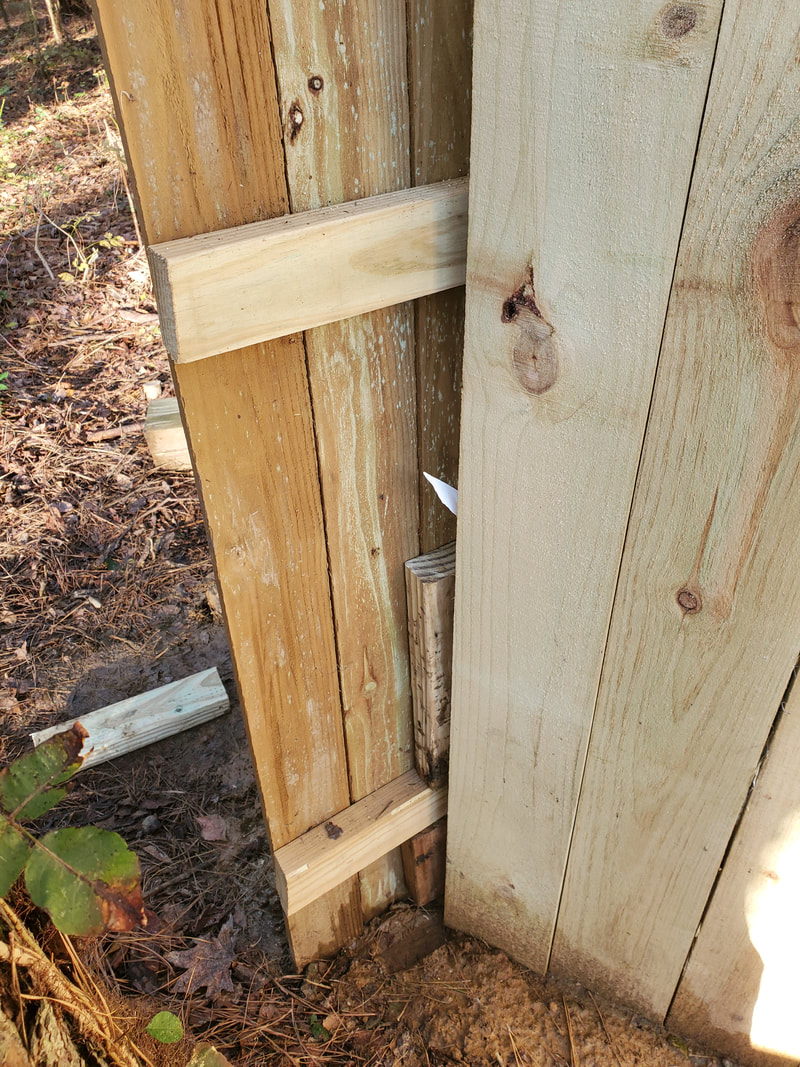
Extension panel in place with short pieces of 2x4 secured in between boards to fill gaps.
With the gate in place we were able to turn the chickens loose in the yard. Even though there's still missing fence, the old chain link and wire fencing is enough to keep the yard contained. As time progresses I'll get more of this filled in too, until I finally get the whole fence around the chicken yard done.
The next move is the building of the east side of the chicken yard fence. Since posts were already sunk in the ground, it was a matter of tacking up the 2x4's for holding the pickets. Even though there was still old wire fencing hung up, I wanted to just install the fence over this. I may remove some or all of this over time if its deemed necessary but until then the main goal is getting the wood fence up to enclose the yard. 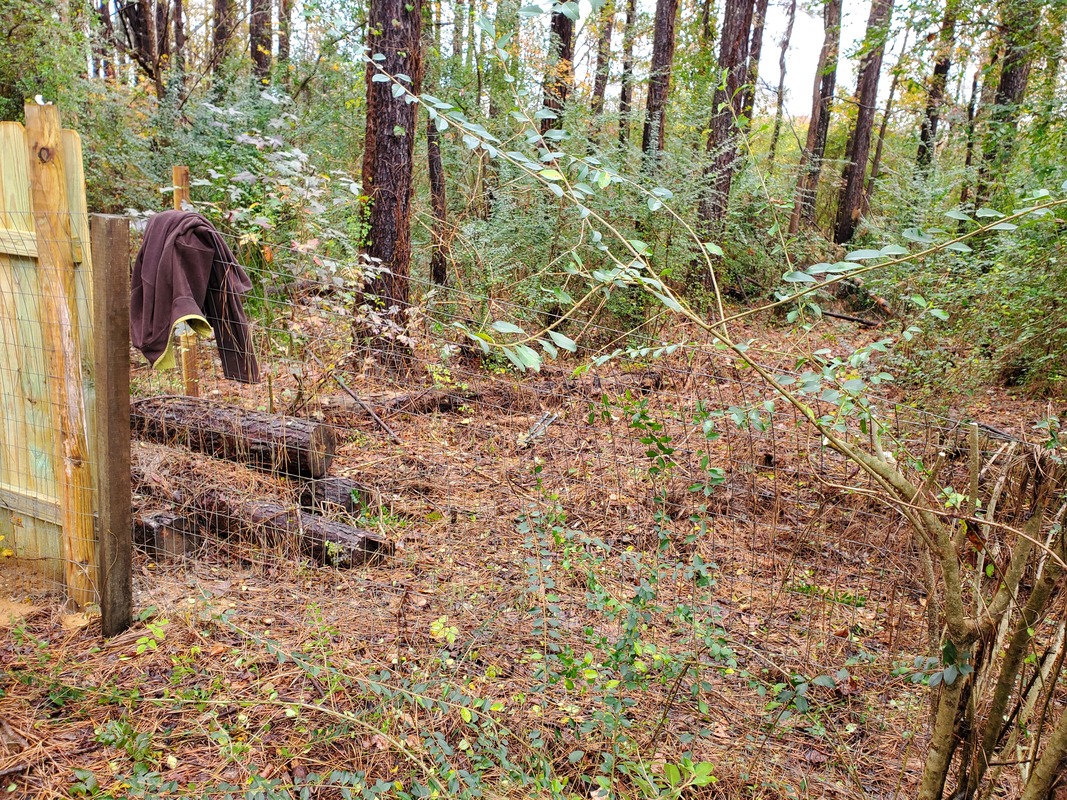 Open area where east side of chicken yard fence was started. As usual the post holes are quickly done with the digger, sinking posts and sealing in place with powdered concrete soaked in water to set. Using the level I tacked up the 2x4's between the posts, a couple of times having to tack up extra 2x4's on the sides to provide a wider surface with which to hang the boards from, due of course to mis-measurement when I initially sunk the posts. No big deal, with the extra boards in place and the picket support boards up, I can move on to the pickets. 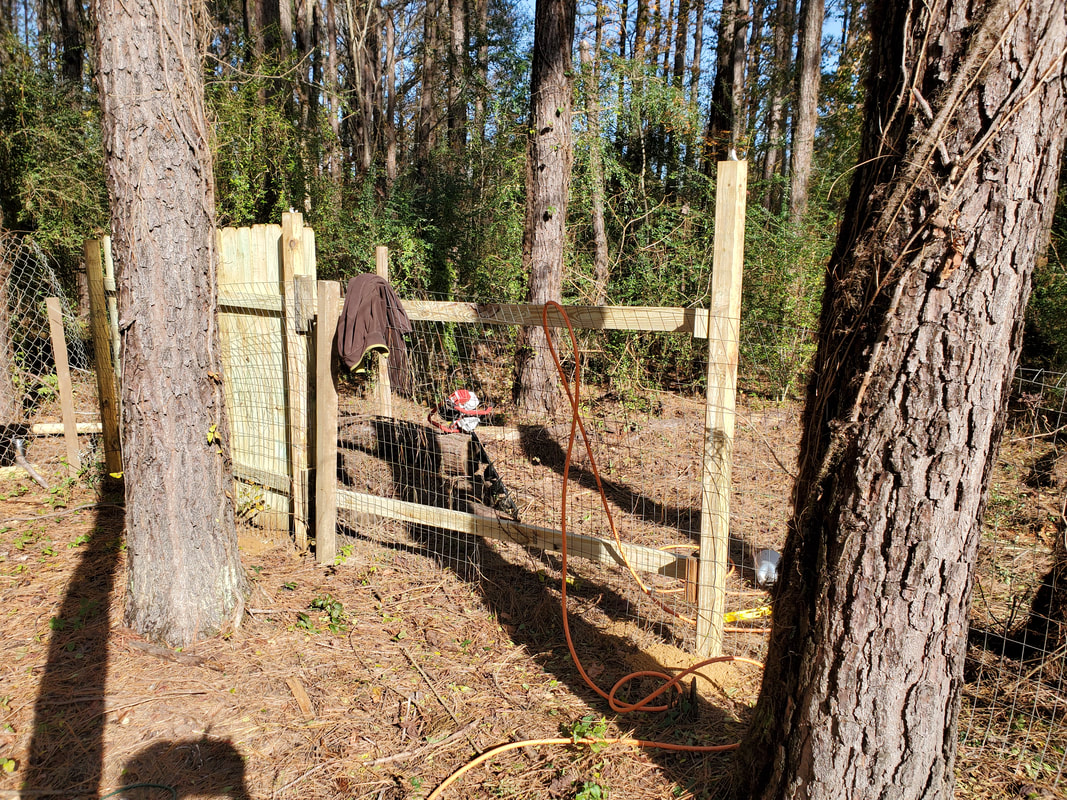 2x4's hung between posts as east side fence comes together. Just like with the rest of the fence, installing the pickets goes by pretty fast with the brad nail gun. Tacking up the pickets becomes an almost hypnotic action as the same motions are carried out in rapid succession. After a short time, I find a whole section of fence panel is done. 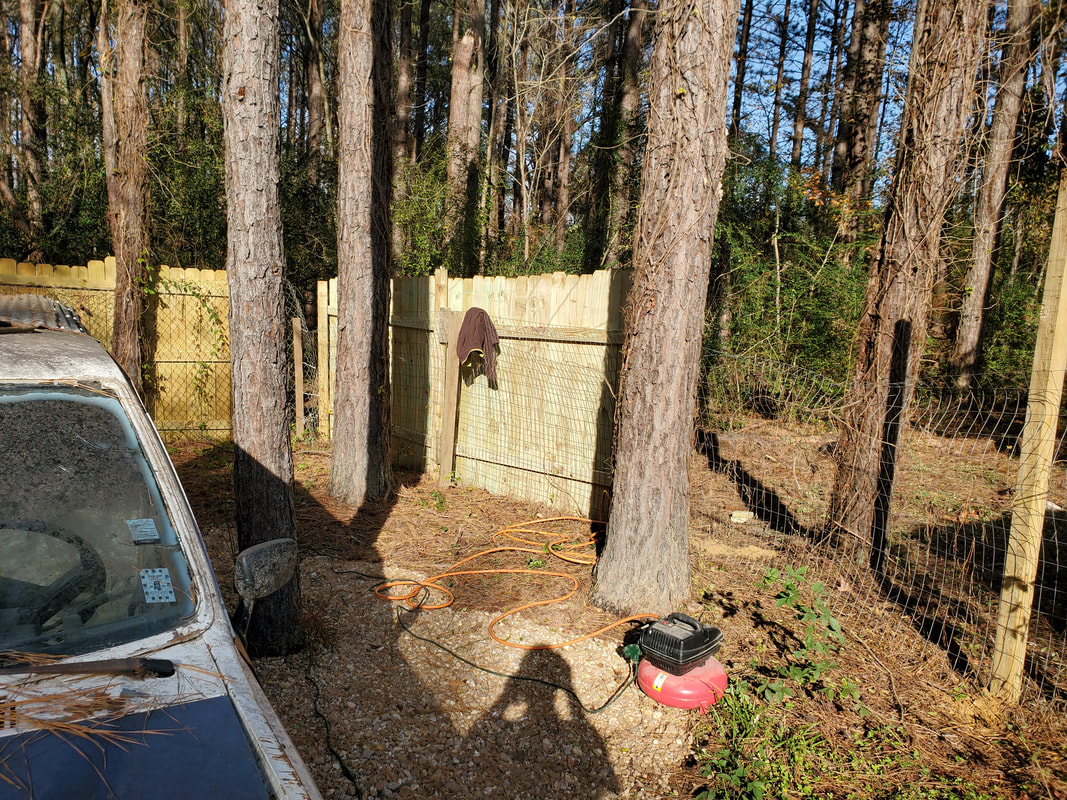 Another section of east side chicken yard fence completed. Based on the supply of materials, whether pickets, 2x4's or posts, I try to get one section done at a time. Unless I know I have enough of everything to keep going in one session, its one section at a time. I was able to tack up a couple more 2x4's to get another section started. As mentioned before, we already had a large supply of pickets from a previous supply run, so its time to run through this supply. As stated before, the goal is to get up to the firewood shed before stopping as I have to clear some firewood away from the fence line to open the area up to allow me to be able to drill more post holes and actually build more sections. 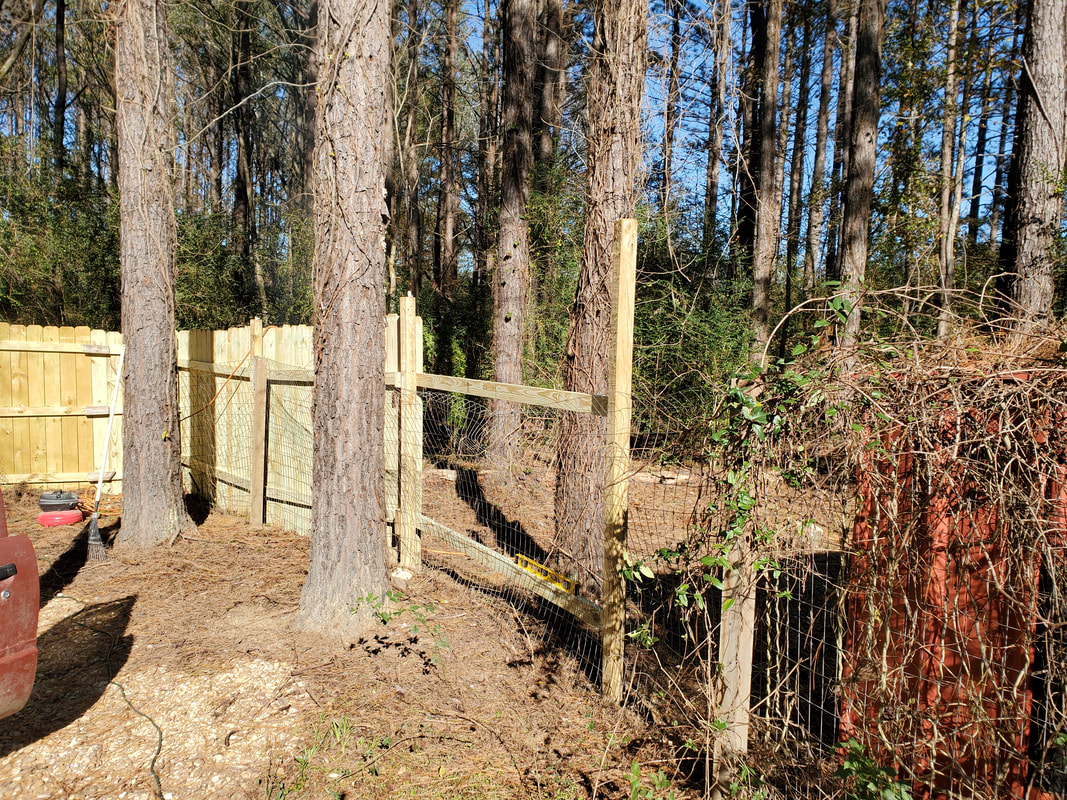 Another section of fence being started. As usual the hypnotic routine of tacking up pickets continues, completing another section. As can be seen in the picture, the firewood shed is in the foreground to the right. As can also be seen among the firewood shed is a lot of foliage and shit that will need to be removed. Of course there will be some blackberry vines mixed in this too so that will just complicate things too. At this point the building of the east side of the chicken yard fence will cease. 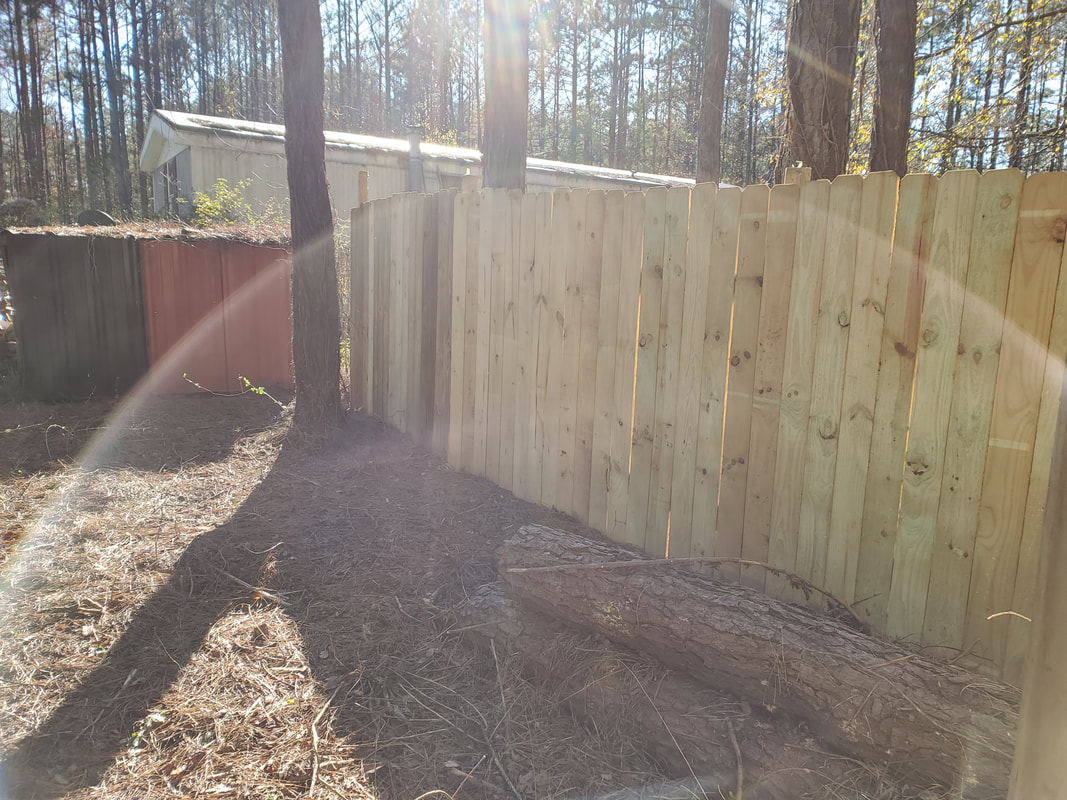 Pickets tacked up to 2x4s on east side of fence up to firewood shed. Work on the fence is pretty much concluded until the surrounding area up ahead is cleared. Other areas that needed attention are the small gap that was left in the NE corner of the chicken yard fence along with the remaining couple of sections of the NE side of the north/back fence. Pickets still remain to allow me to complete the task of covering these areas, I just need to get some more 2x4's and the work will continue over these areas. With the gates and pretty much all of the rear section of the chicken yard fence done the next move is the east end of the yard and that section. This section still has wire fencing put up across old cedar fence posts from the last version of the chicken yard fence. This section is also butted up against the large pile of stacked firewood and the firewood shed. Since the old posts from this fence were posts sunk to leave 5 ft out, I would need to either put the top support board close to the top of the posts for supporting the pickets, or sink new posts. It also depends on the spacing, since this was rolled wire fencing used, the spacing might not be of the 8ft intervals needed for doing what amounts to the standard spacing for wood fencing. Also at this area is the imaginary point where I wanted to turn the main fence back south to continue the enclosing of the overall yard. This would make up the east section of fence. The area where the fire wood is at would be a narrow section of yard caught between the chicken yard fence and main perimeter fence. The thing is in order to do this I had to do a little grounds clearing as there was a lot of weed trees and other flora in the area along with deadfall. All of this needed to go to make way for the fence line as well as just clean the area up. After having cleared the area up I drilled a couple of holes with the post hole digger for the posts that were needed since I still had a couple of posts on hand. After sinking those posts I found that I only needed to do two sections of fencing to get that end of the fence done. There's a tree where the corner is going to be that will more or less be the corner post for the fence. With the posts in the ground I turned my attention to the chicken yard fence. 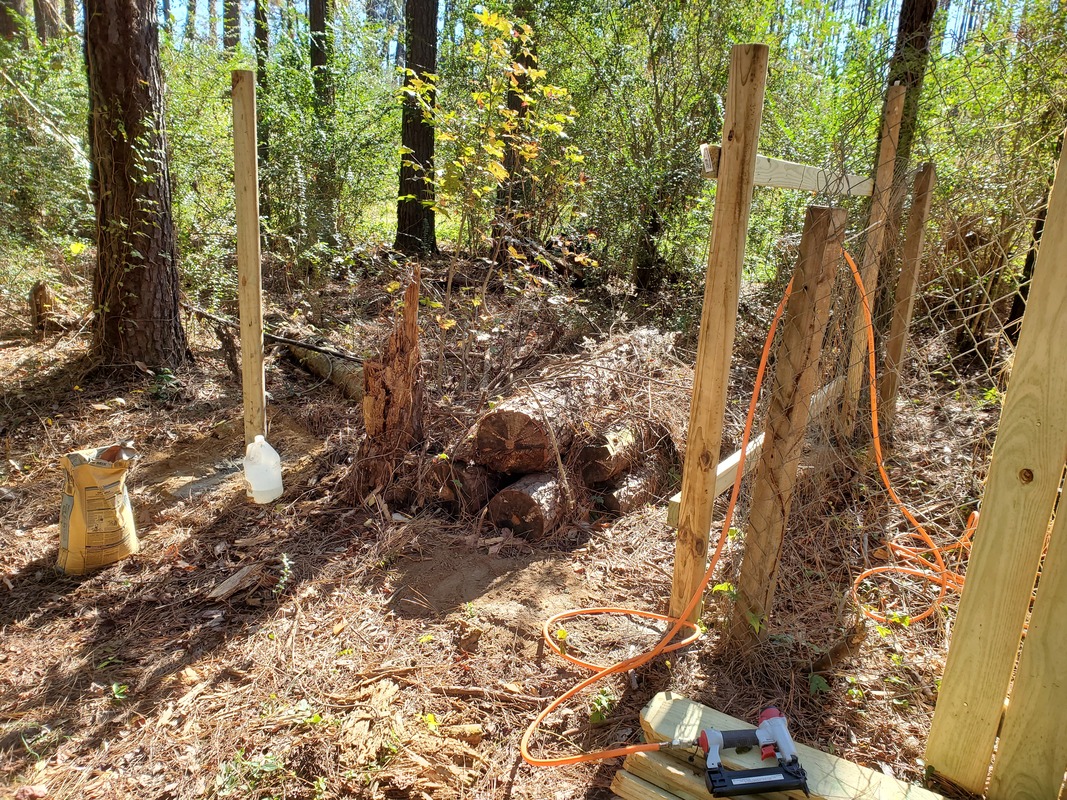 Last couple of sections of North fence with the two posts in the ground, one post serves as the corner for the chicken yard fence in the right foreground. The number of posts I had available allowed me to sink a few posts up to the point along the old chicken yard fence line to where I got to the firewood shed and the stacks of firewood. Some of the firewood outside of the firewood shed will need to be cleared from along the fence line before I can continue sinking posts so the extra post went to the spot at the northeast corner of the north fence. From here I nailed up a couple of 2x4's as is the routine with the interior fencing, no need to waste 3 boards for a "non security" fence. I had enough 2x4's to take care of a couple of sections on the chicken yard fence as well and along with the large number of pickets, I was able to start making fast work of these sections. 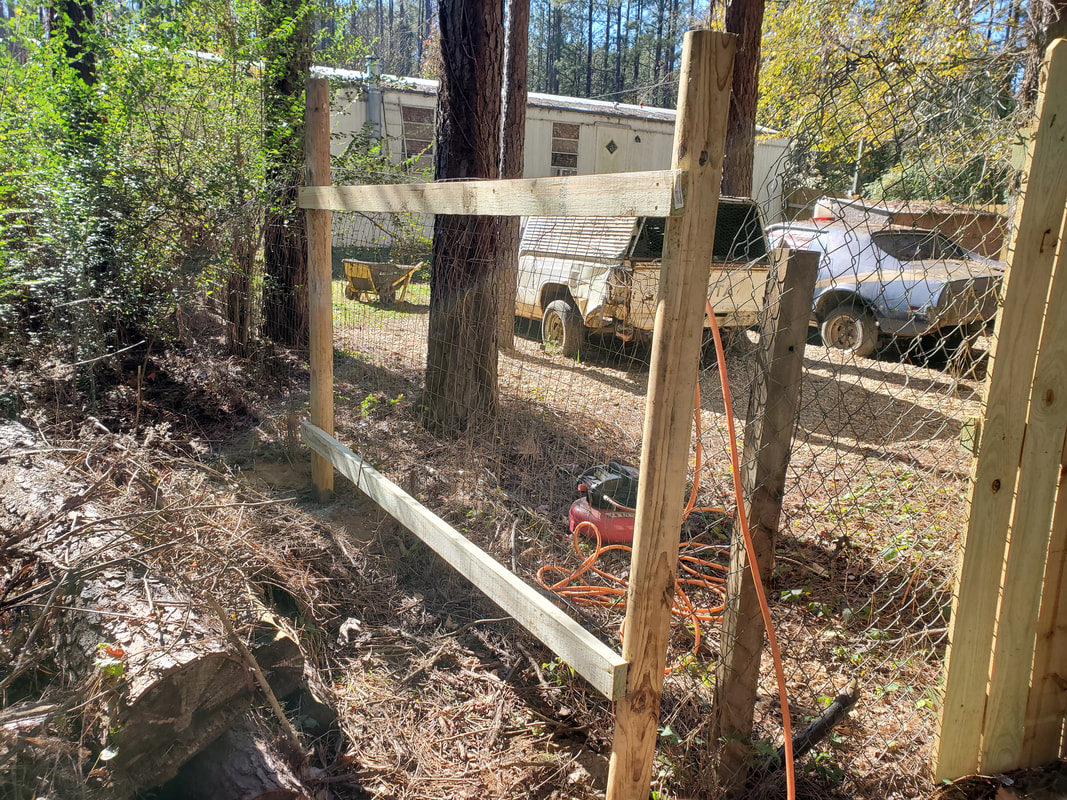 Getting the 2x4's up for hanging the pickets from. This point is the NE corner of the chicken yard fence. One of the things that may be noticed in the last couple of pics is the stack of logs still in place on the ground. These were leftovers from the leaning tree that was cut down several months before. Before all this area was "developed", the tree guys stacked these logs out of the way in what was the "back" of the woods, behind the chicken yard where it would've been considered out of the way, since I wasn't paying them to haul the scrap wood away. I figured at some point in the future I would cut up the remainder of this wood for firewood anyway. Well that time has come but first I wanted to get the fencing up. I will at some point start putting the chainsaw to this wood, a little at a time to get it cut up then hauled over to the main driveway where I typically do my log splitting. From there I can cart it over to the wood pile for stacking and drying. Now that winter is almost upon us (the temps are already here), I will be using up some of the old wood that I cut and stacked earlier this year so I can get a head start in replenishing the supply when I do get to this wood. Anyway, back to the fence. I cleared enough trash from the surrounding area and along the fence line that I was able to get the pickets up without any interference on the ground or otherwise.  First section of fence picketed up, with more to come. As can also be noticed in the NE corner of the chicken yard/perimeter fence there is a small gap in the fence left unfilled. The old post and chain link is also still present. Problem here was the 8ft 2x4's used terminated a couple feet shy of where the new fence post needed to be so this gap remained. What I will have to do is cut some shorter 2x4's and nail them in place on the new fence post and mate them end to end with the 2x4's from the established fence then "tie" them together with some short cuts of 2x4 from the inside so as to connect the sections together. I had to do this on a couple of occasions with whole sections of commercial fence panel as my measurements were off as to where the posts needed to go and the ends of the panels didn't meet up dead center with the posts. This is ok from the aesthetics side as these "patches" aren't visible from the outside world. They're just visible from inside the yard where we would be at and of course we're not concerned about these little "inconsistencies". I will also have to remove the chain link fencing from this spot as it will interfere with the placement of the 2x4's and making things even. Of course this is a job for another day but it will get done much sooner than later as I still have a good number of pickets remaining. Plus with us using up firewood I will manage to clear out some of that stacked wood that's right alongside the old fence line so I will be able to get posts in the ground much sooner. Hopefully by the end of the year I will have the rest of the chicken yard fence done in its entirety. |
