|
With the parts gathered for the interior of the Truckstang, the time begins to start the assembly. There's a few things I was able to install immediately without doing any extra work. There will be other things that I have to do on the interior, such as cover the floor with paint, or maybe even rubber undercoating to protect the sheet metal inside from rusting out, especially during regular use. Of course I'll undercoat the outside under the car as well but the inside needs covering, if for no other reason to make it look better. The first thing I took time to do was install the glove box door, despite there is no actual glove box. I'll have to source one of those in the future, unless I make something that can serve as a glove box. Until then the glove box door goes on with three simple bolts. 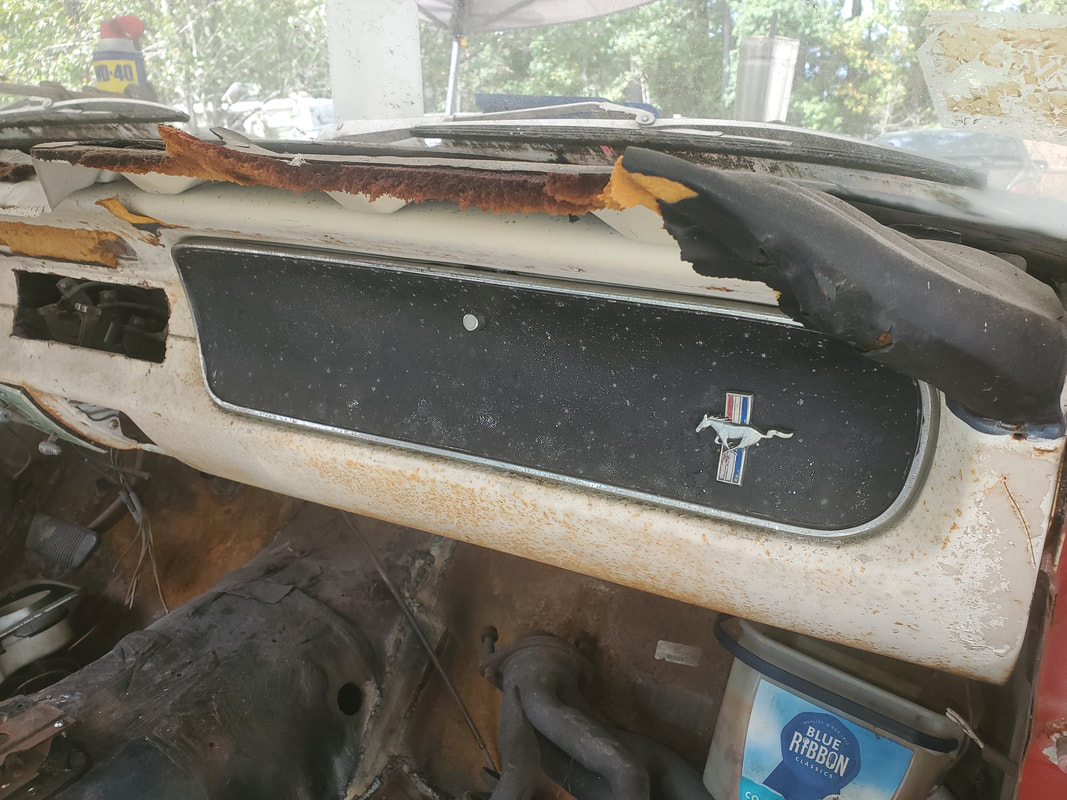 The glovebox door installed on the dash panel. Note how the dash panel is faded and rusty, these areas will be spray painted to make everything look a lot better. I might have to remove the glove box door later to spray paint the dash body, unless I mask the door then spray around it to save time. The other thing I installed were the sun visors, which also may need to be removed or masked off in order to spray paint the interior areas that used to be white. The main reason for installing these parts so far is to really get them out of the way as part of the completion of the interior. Call it putting the cart before the horse but with these items out of the way, it makes it easier to sort through the other interior parts, even at a simple level. 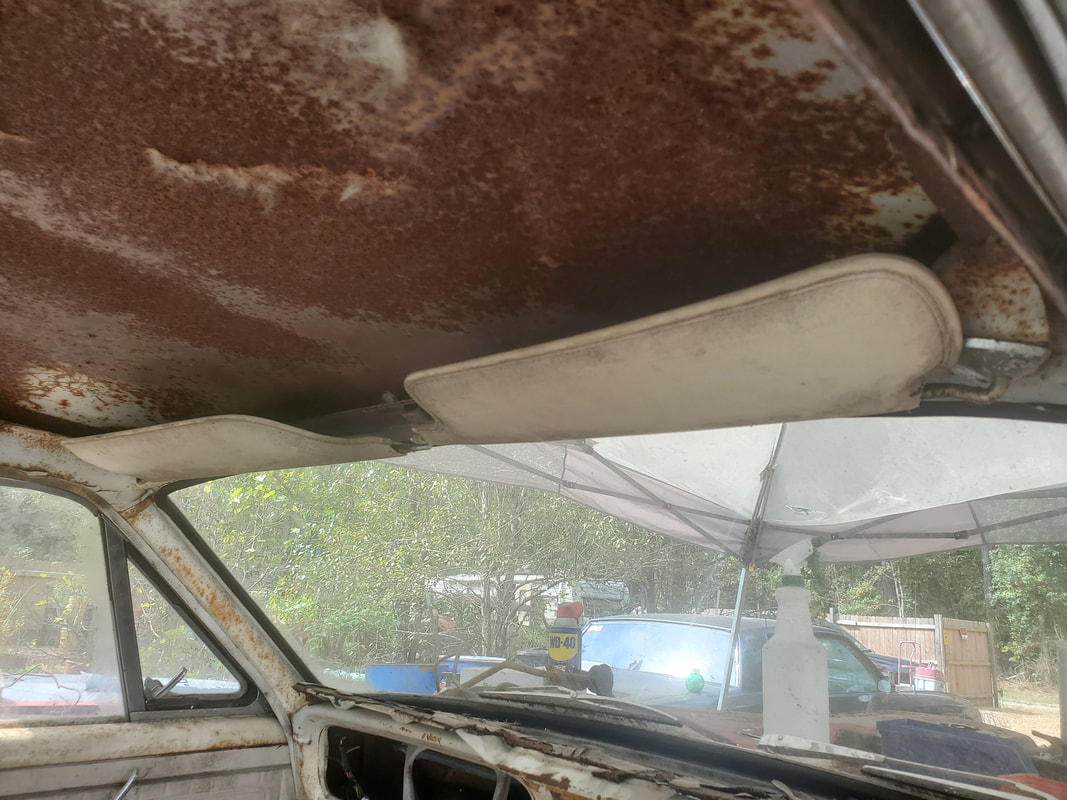 The sun visors installed on the ceiling of the car, note all the rusty faded aeras that I plan on spray painting over in order to make the interior more complete. The last thing I installed in this installment was install the taillights. These complete housings just needed to be bolted in place. Both housings are supposed to have four studs to hold the actual housings to the taillight panel while the lenses and chrome plated covers were held to the housings with sheet metal screws. On one of the housings two of the studs are broken off. The chrome plated outer covers on the taillights had sheet metal screws that were long enough to reach through the taillight housing and the taillight panel. Because of this, it didn't matter about the broken studs as I was able to use those sheet metal screws to hold the entire assembly in place for either taillight panel, not just the one with the broken studs. 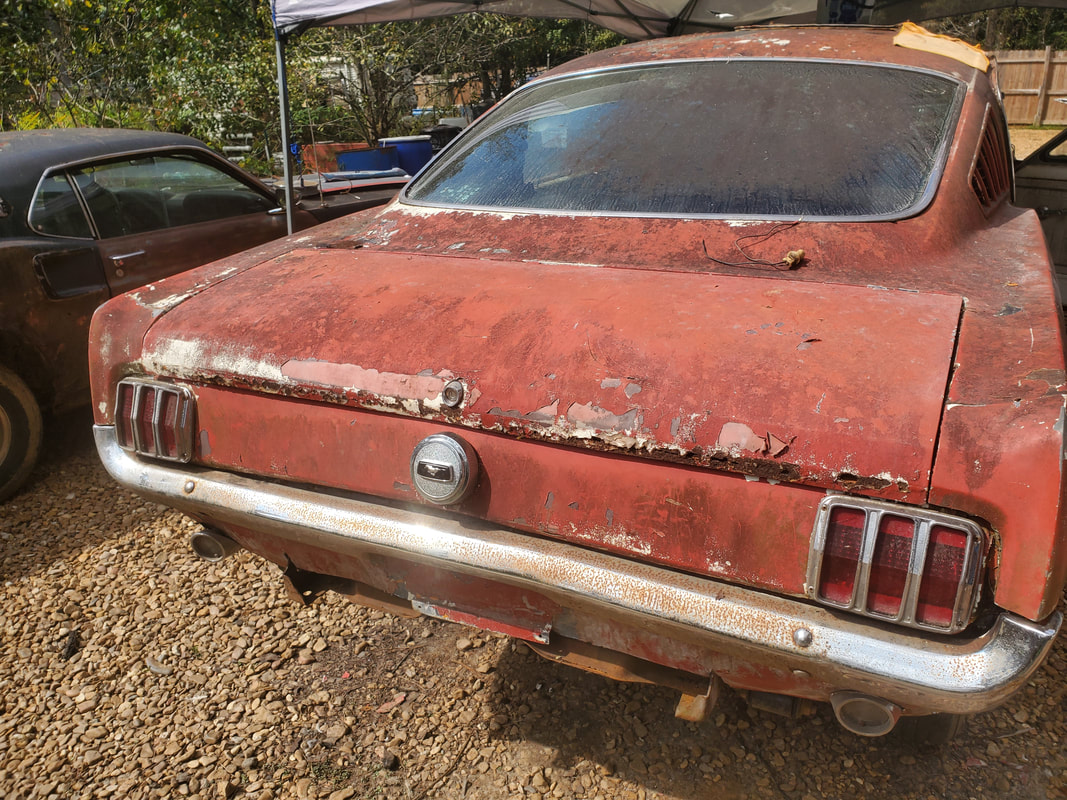 The taillight housing installations installed on the back of the body. The next thing I wanted to do was get some spray paint in the color of the interior panels, which was something like an eggshell or ivory white. My plan was to use this spray paint to spray all the interior molding pieces and panels before installing everything. Doing this will help make the interior look a lot better versus just installing the panels with their surface rust and faded paint. As well as painting the interior pieces, I'll use the spray paint to hit the areas of the interior that need to be painted over. Once I spray paint the inside of the car, I'll be able to get all the interior hardware installed, setting me up for the real meat and potatoes of the project, the rewiring.
0 Comments
Getting Some Landscaping Done And Getting Ready For The Final Leg Of The Truckstang Project10/12/2022
With the third part of the Truckstang project done, which involved the reassembly and patching of the body, I took a little time to get some other things done around the homestead. Things like cleaning up overgrown areas and pulling weeds along with trimming some thick brush areas were all part of the agenda. One of the bigger things I wanted to do was clear a path behind the southern fence line in preparation for future work erecting more fence along that fence line. The southern fence line is only 2/3 complete but since then the area had become overgrown heavily. I took some time to chop up the brush and other green trash that was covering the area. Just like with the northern fence line, having the southern fence line clear will allow movement around the fenced in compound from the outside a lot easier than if movement has to be done exclusively through the front gate.
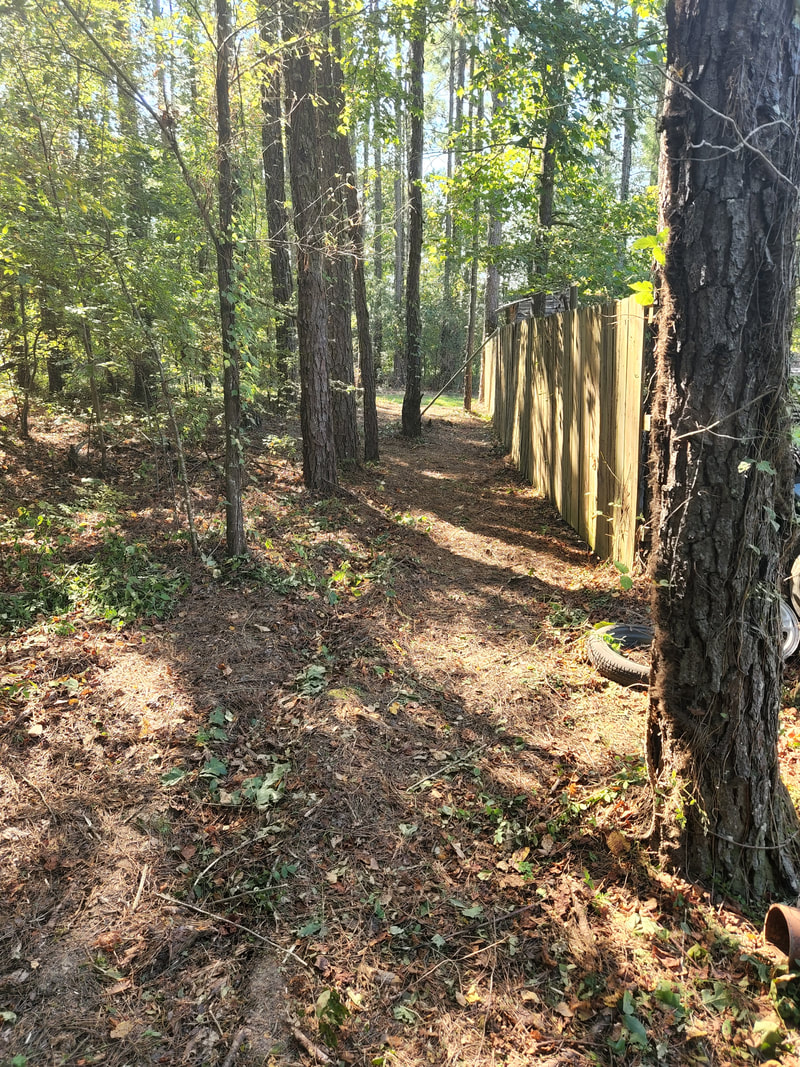
The path cut through the woods along the southern fence line.
Part of clearing this area involved piling up material on the burn pile so I could have enough material to justify firing the pile since there was plenty of trash in place. I wanted to have a nice pile of brush in this pile so I could kill two birds with one stone by getting rid of trash and green rubbish. Of course with all the brush on the garbage pile, it would need a little help in the form of some old gasoline/motor oil mixture I've accumulated from past automotive work. 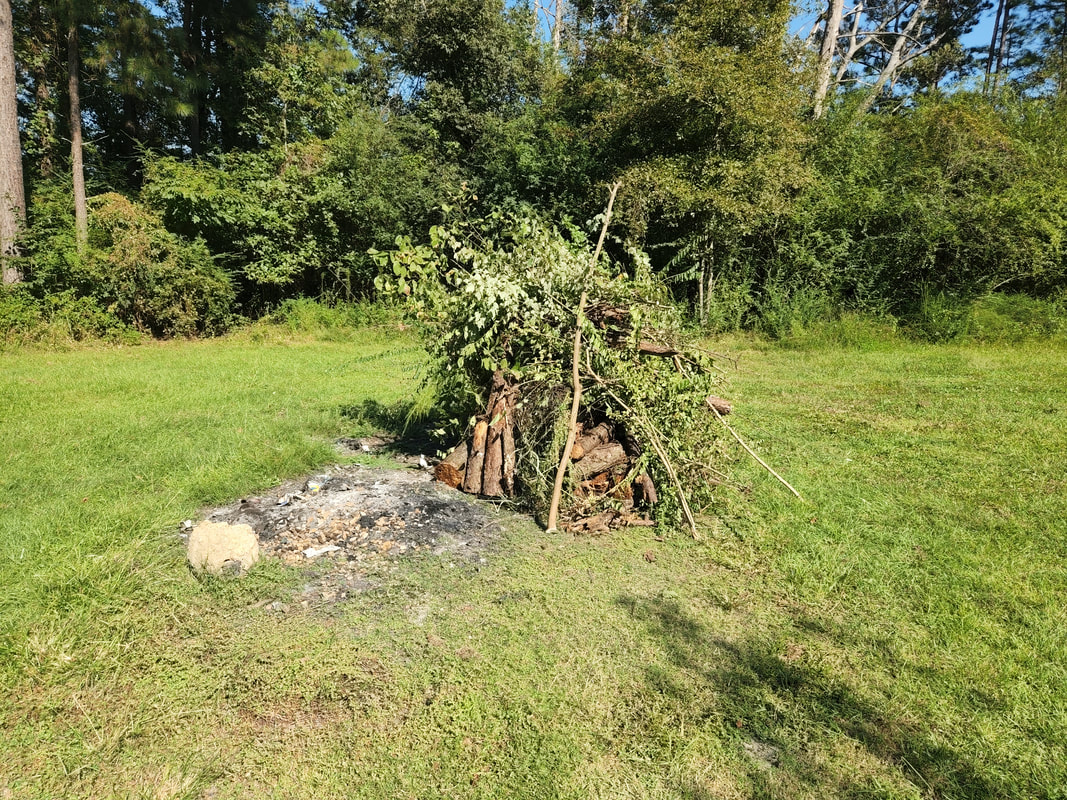
The burn pile after building it up with a lot of trash cut from the southern fence line.
Since I was using a mixture of power tools to clean up the area, I also decided to go off on a tangent and also chop up some of the logs at the old Fallen Trees area. If you can recall, this area consists of a stack of old trees we had brought down a couple years ago due to beetle infestation. I had to use the large chainsaw to chop up some of the stumps and other large fallen half rotted logs. All this trash ended up on the burn pile. After the smaller trees in the path were cut up, I cut up the stumps and fallen tree logs that blocked the area. All this ended up on the burn pile since the logs were too rotted to even try to use them for future firewood. Since I still had plenty of charge in the chainsaw, I turned my pent up energy on the Fallen Trees. Along with the new chain, I managed to chop up a bunch of logs, making some progress on future work in this area. This area will need to be cleared of most of the Fallen Trees in order to make way for fence posts and the fence line that will be run through this area. 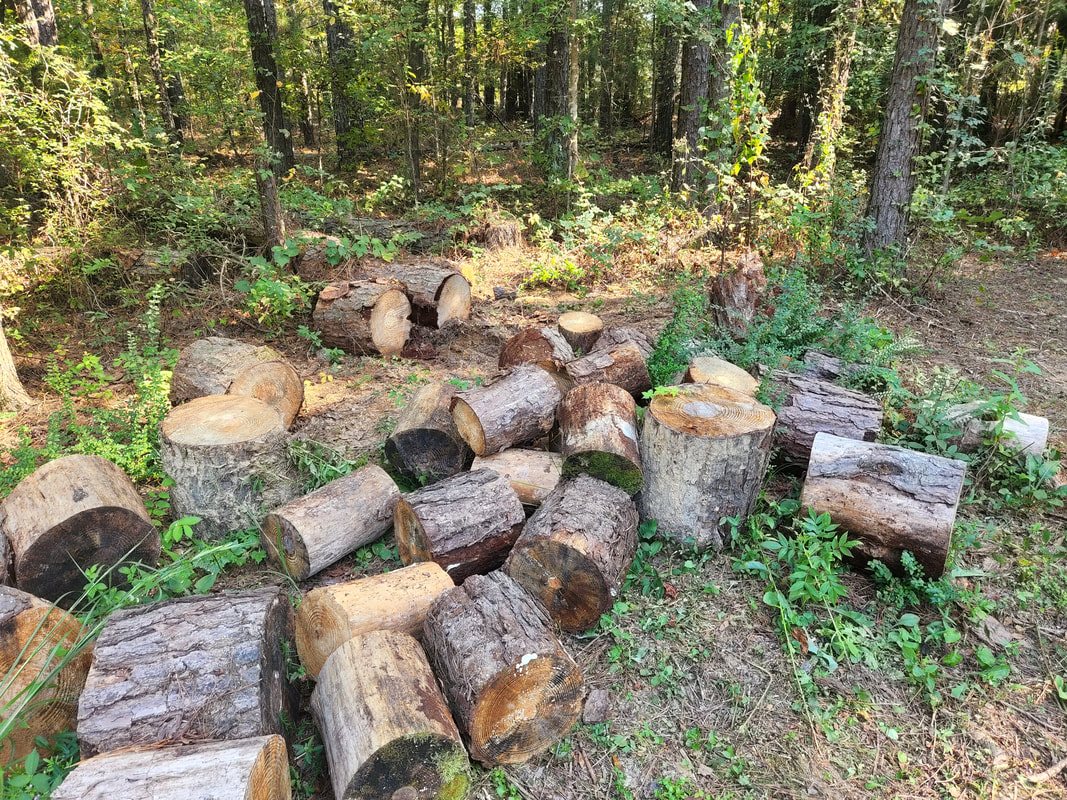
The cut up logs after using up the chainsaw's battery. Along with the rest of the logs, all this will need to be split later to pad up the firewood pile and obviously clean the area before we can build the rest of the fence line extending to the southeast corner.
Once I exhausted the chainsaw's battery, I went ahead and fired the brush pile, which by now was rather large. With the gas/oil mix, the whole pile went up rather nicely, being almost 90% consumed inside an hour. During this time I managed to clean up some more things in the general area, just to make good use of my time while being able to keep an eye on the blazing burn pile. I never want to leave such a large bonfire unattended as it doesn't take much for shit to spontaneously ignite and get out of control. 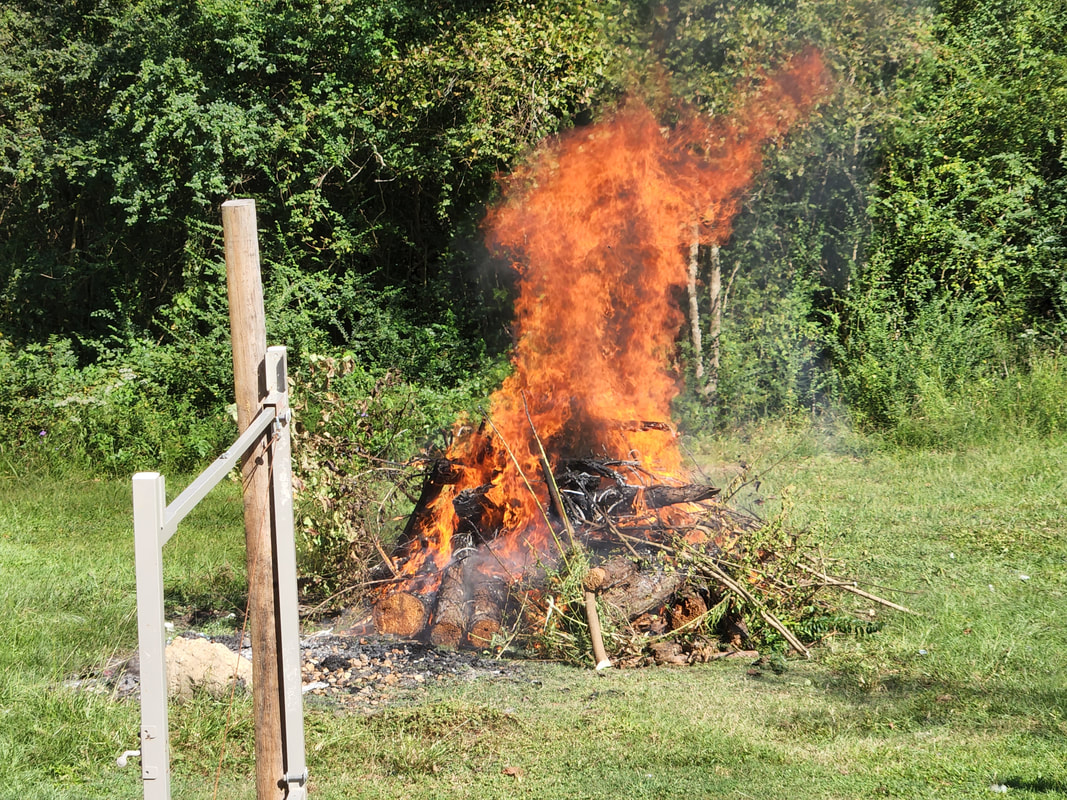
The blazing burn pile after finishing the stacking and yard work.
Once the burn pile was down pretty good that I was able to safely walk away from it for a prolonged amount of time, I decided to go up to the garage to grab all the interior parts and most of the engine related parts for the Truckstang. I staged just about everything needed to get the interior reassembled, minus the rear seat. The fourth installment of the Truckstang project will involve getting the interior assembled before moving on to installing the seats, then the engine shit, like the exhaust system, radiator, etc. I also have to do the electrical system, which I decided I would get a generic wiring harness that includes the fuse box and a good length of wiring to ensure being able to reach all loads in the car that the stuff would go in. 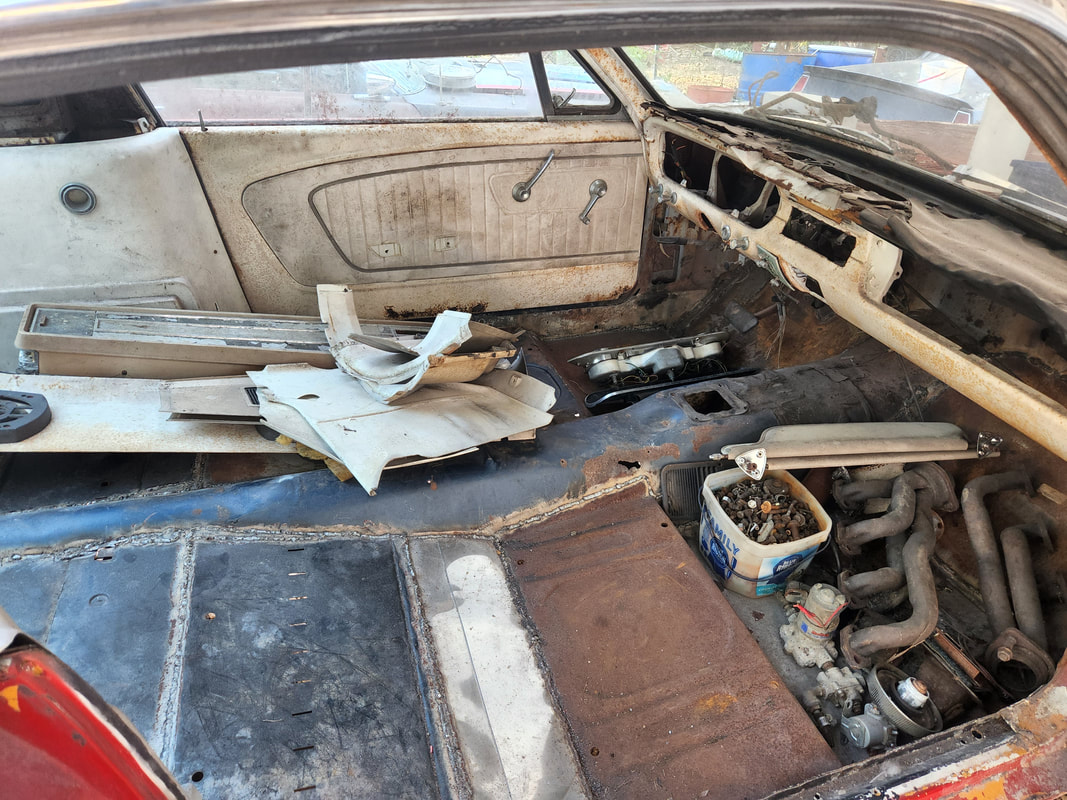
All the interior parts brought down from the garage and staged in the cab prior to installation.
Back to the seats on the Truckstang. The reason I separated the seats from the rest of the interior is because I have to repair the mounting studs on the seat bases, or more accurately, replace most of them. During the initial disassembly, many of the studs snapped, leaving nubs on the seat bases. I'll have to grind down these nubs then try to knock out or drill out the flat nubs so I can install bolts that I would later tack weld to serve as new studs to mount the seats. Along with the studs, the seats need to be heavily cleaned, and due to them being white, probably need to be cleaned with bleach to restore the whiteness of the seat material. 
Both seats, showing the broken studs on both units. Even the studs that still exist need to be cleaned up before mounting the seats.
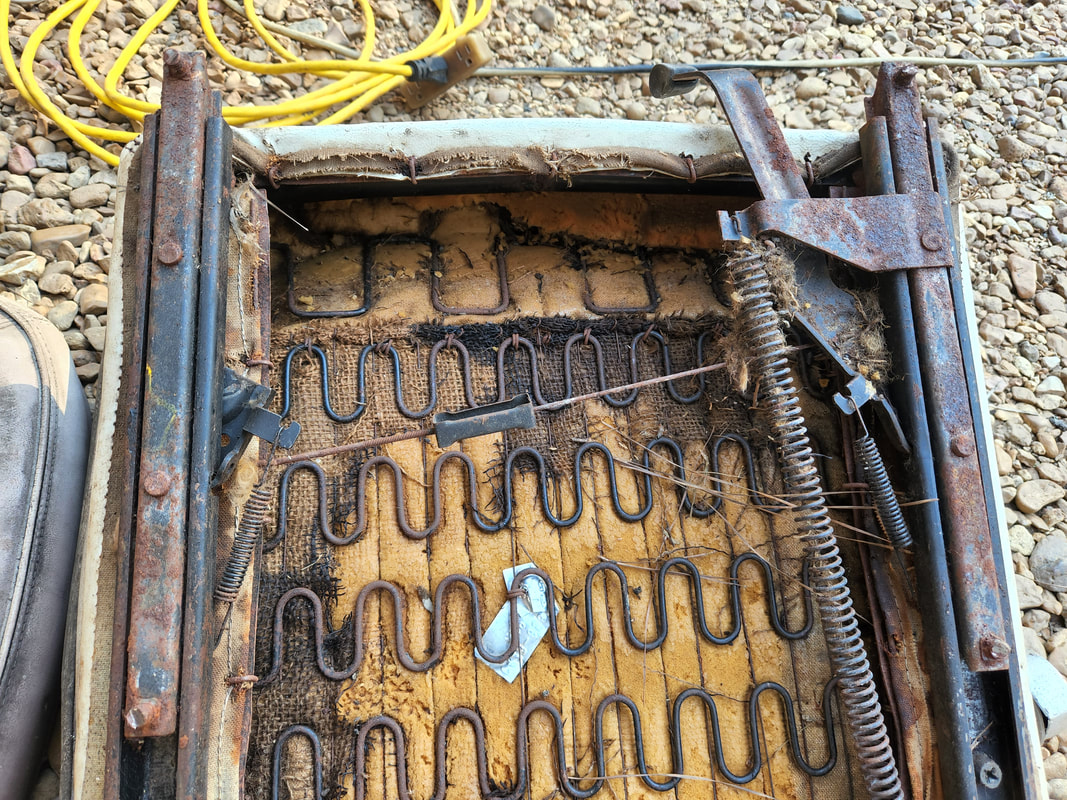
Closeup of the broken studs on one of the seats, all of which needs to be repaired before the seats can be mounted.
This here is the main reason I wanted to get other work done around the yard, because once I get started on this fourth part of the Truckstang project, I'll probably not find myself working on anything else until most of the project is done. Just like on the other phases of the project, when I was in the middle of the work, other things were put on the back burner. Of course those phases did move along pretty fast, all things considered, so hopefully that trend will continue. Of course, when I reach a point where I need to wait for a part to come in the mail that I need to order (and I'll need many), I can take a break to do other work around here. We'll see.
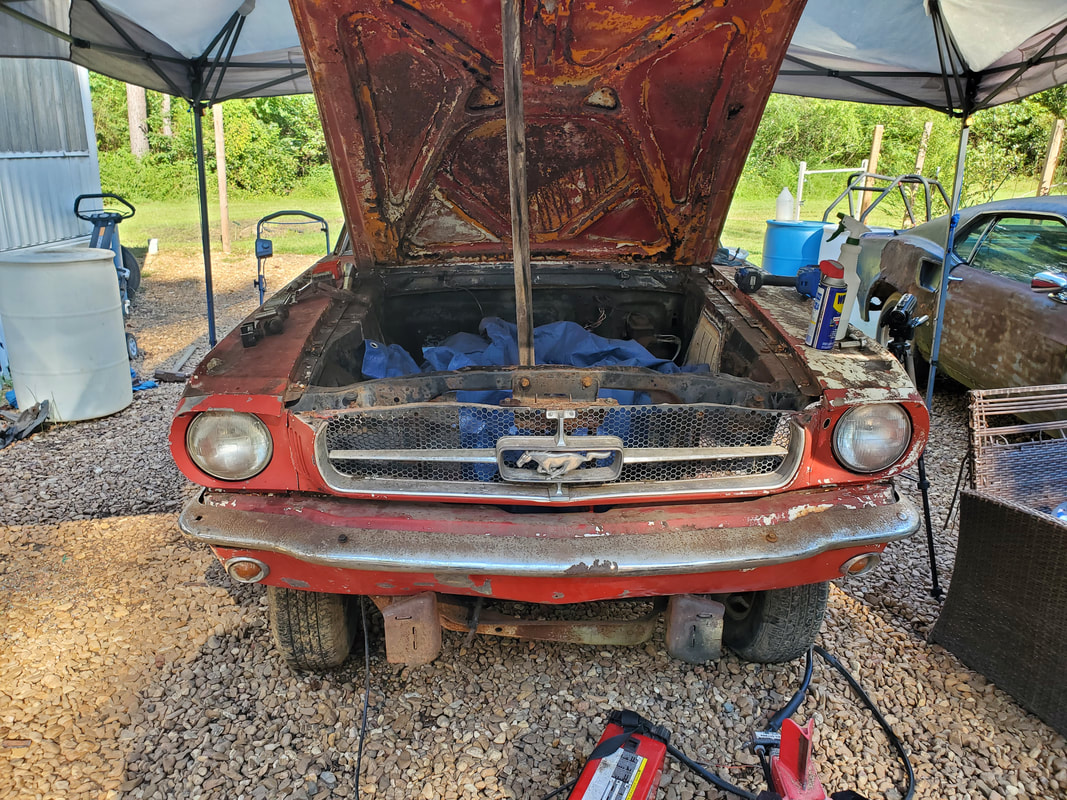
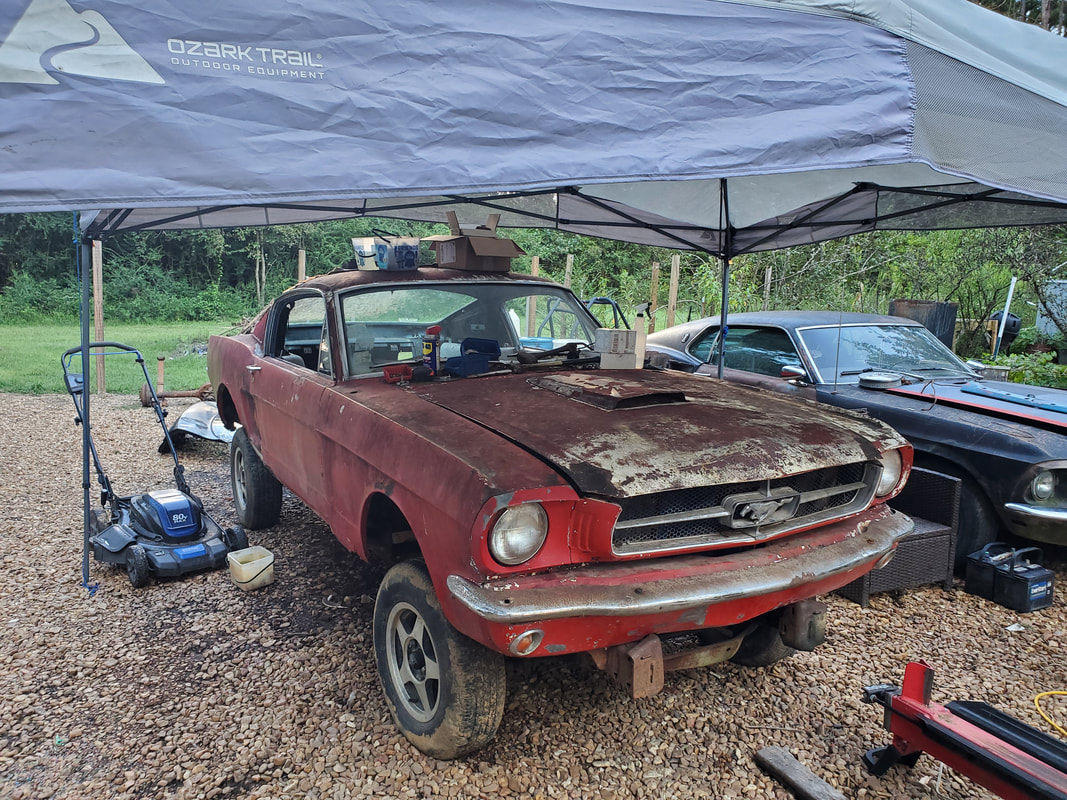
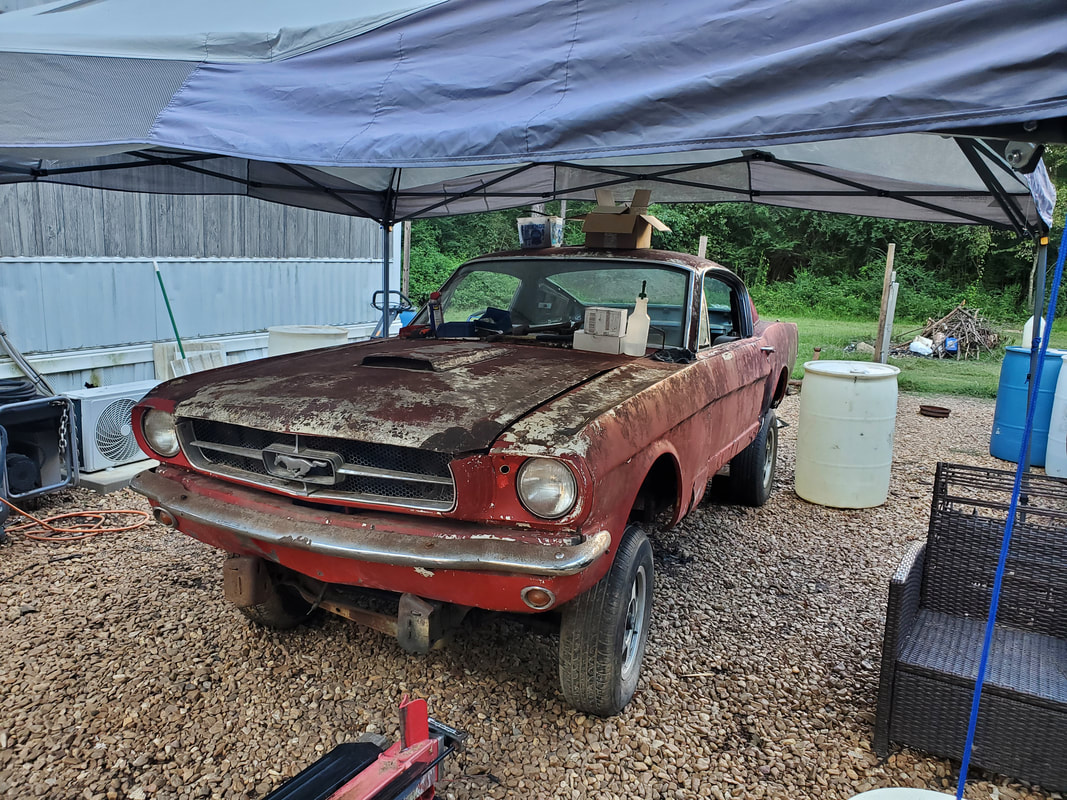
With all the body panels installed and patches made where rust holes were present, the only thing left to do at this point on the 65 Mustang was to somehow fix the doors' latches so they would properly latch up when in the closed position. I had some linkage parts and other miscellaneous parts to use in repairing the doors if necessary, but the first thing I wanted to do was actually look at the existing mechanisms to see if I would even need to fix or replace anything. Maybe I'll get lucky and just find something that's frozen and can be freed up to permit proper operation. 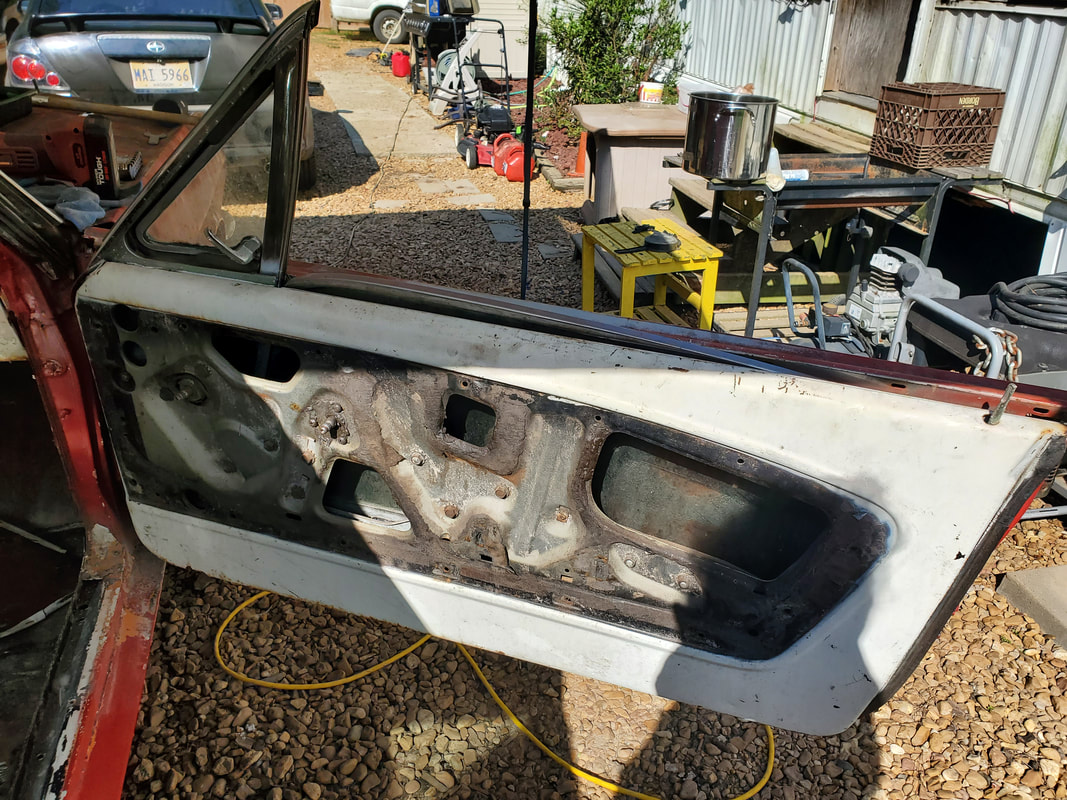 The passenger side door sans interior panel, allowing me to get inside the door to examine and ultimately fix the latching problem. For starters I had to remove the interior door panel in order to access the inside of the door. The latch mechanism is only partially on the outside, with the rest, including the linkages to the door release handles and lock/key cylinders on the inside. I had to carefully remove the panel given the fact that it's 60 year old particle board held with snap clips. Of course the area around each snap clip was either damaged some or completely compromised. It just means that in the future, these interior panels will be added to the set of parts that would need to be replaced. Once the panel was off, which included removing the door release lever and window crank, I was able to get my eyes and hands on the internals of the door. 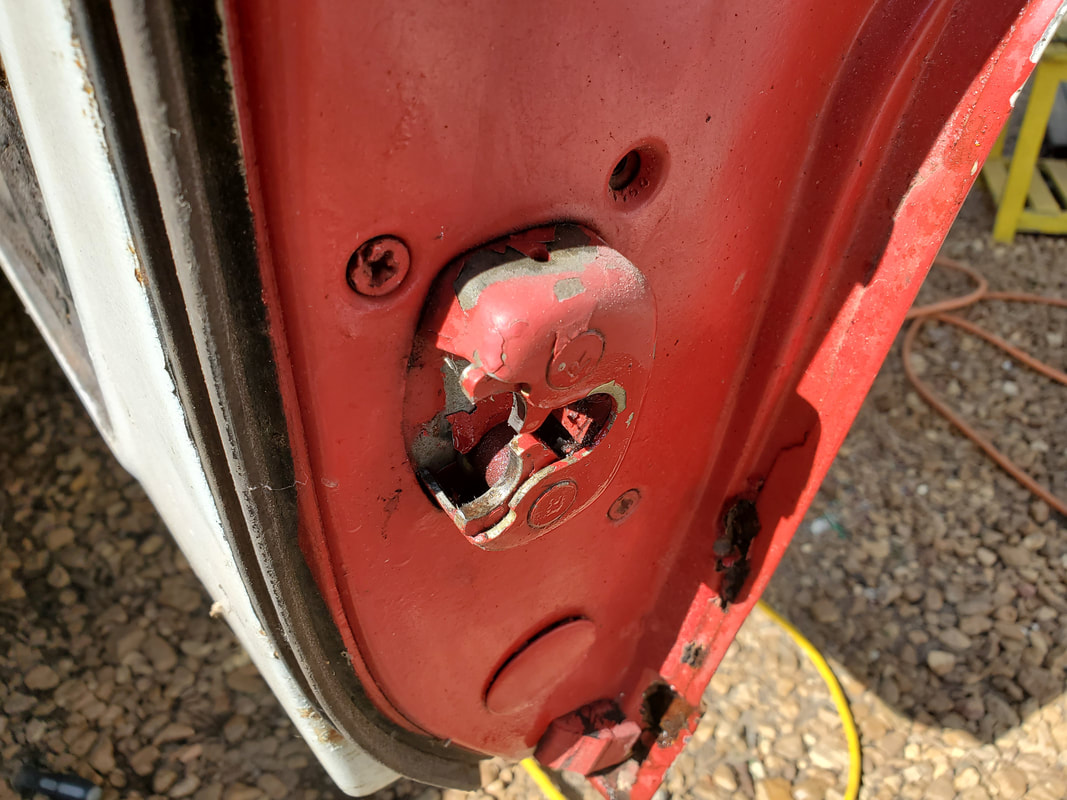 The outside portion of the latch/lock mechanism as its positioned to grab the knob on the door jamb in order to latch shut. 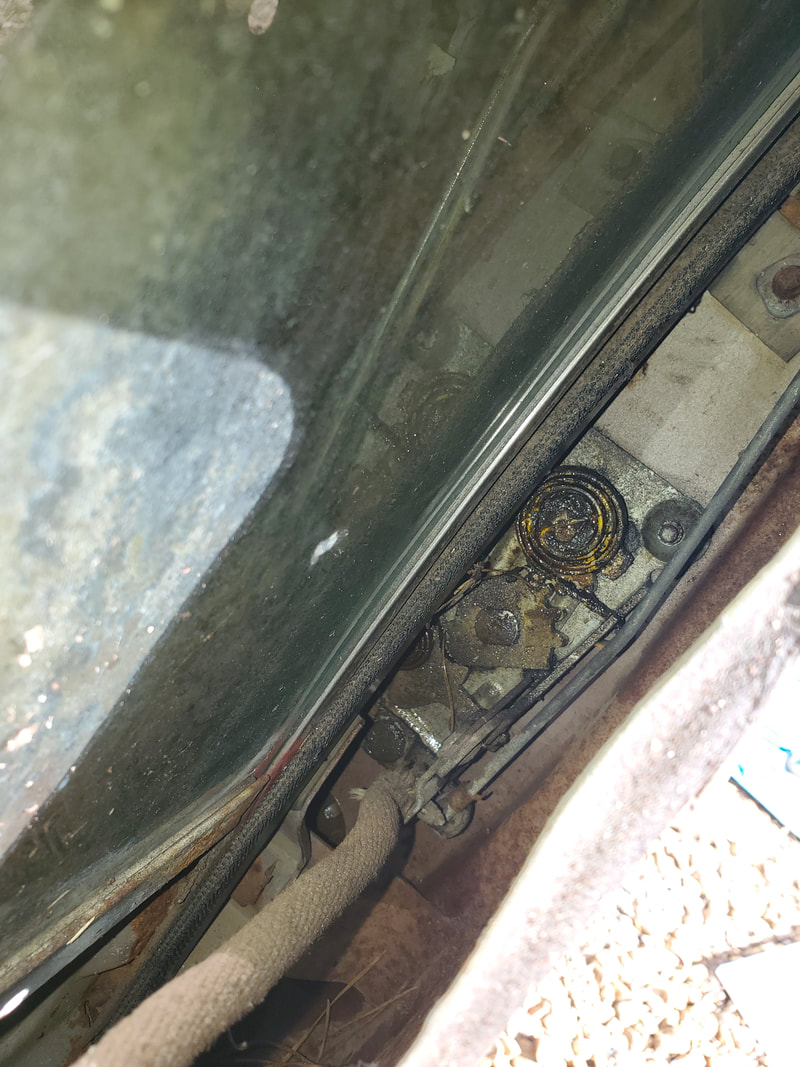 The latch mechanism and associated linkages attached to the mechanism, all inside the door to the rear of said door. What ended up happening here was a combination of slowly working the linkage mechanisms going to the door release handle and button, on the inside and outside respectively, as well as the lock knob, and spraying everything down with WD40 to help loosen everything up. After a little while of doing this, I was able to get all the mechanisms to work properly, finally allowing the door to latch closed as its supposed to, and open from the lever or button as its supposed to. Even the lock knob did its job of holding the door locked. Funny thing with these old Fords, if you lock the knob then shut the door, the lock knob will pop back into the unlocked position. It's almost like a safety feature where you can't lock your keys in the car. The 69 Mustang is the same way. Along with this, I sprayed down the window crank mechanism and worked that up and down to loosen everything up so that too would work properly. 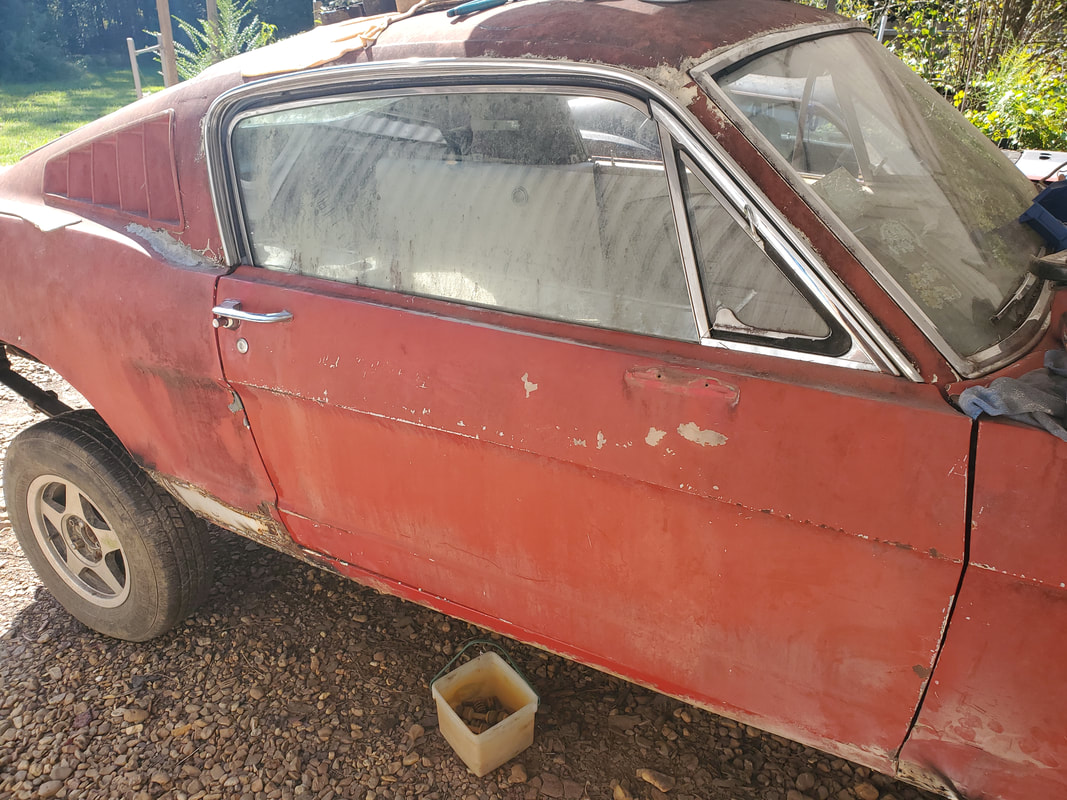 The passenger side door in the latched closed position with the window shut. I pulled the clips from the door and replaced them on the door panel, allowing me to snap the panel back in place. A corner of the panel was already broken, hanging on by only the vinyl skin. I ended up drilling a small hole to use a sheet metal screw to hold the corner of the panel to the door. Since the panel has to be replaced anyway, along with the door, it's nothing to fix this minor problem in such a way. Moving on, I went to the driver's side, carefully removing the panel for all the same reasons, along with the door release lever and window crank. As with the passenger side, I wet everything up with WD40 then slowly started working the linkages and mechanisms. 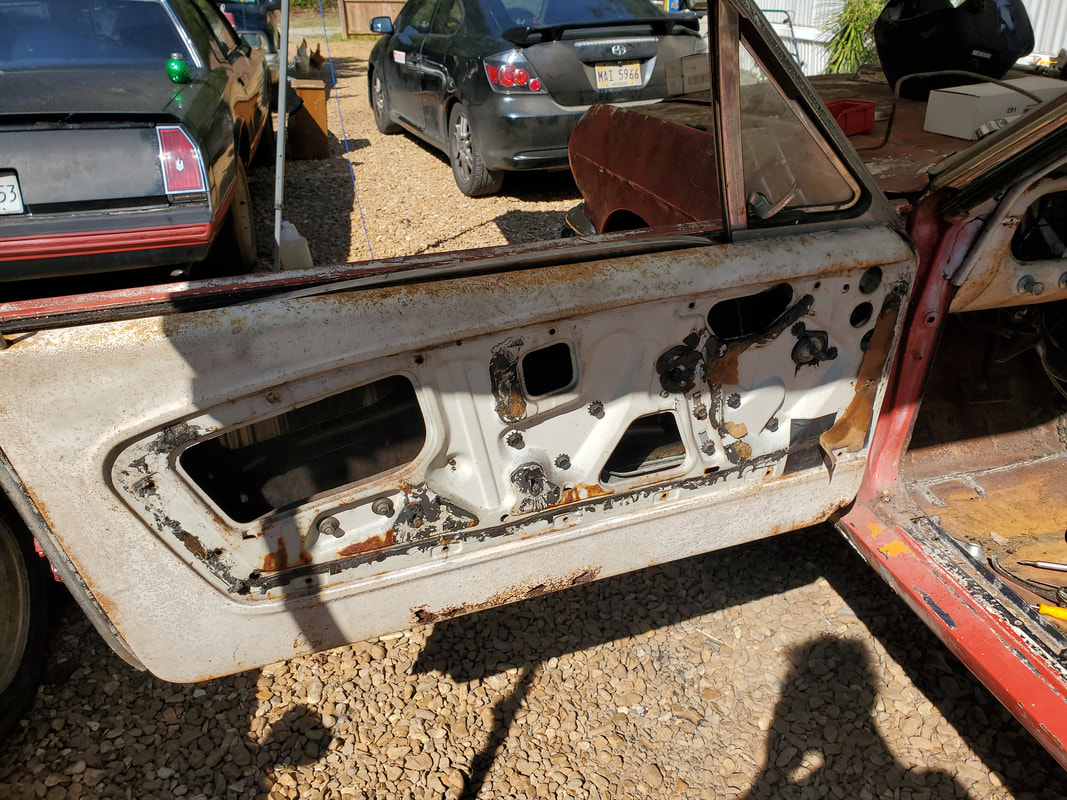 The driver's side door after removing the panel in order to access the door's internals. 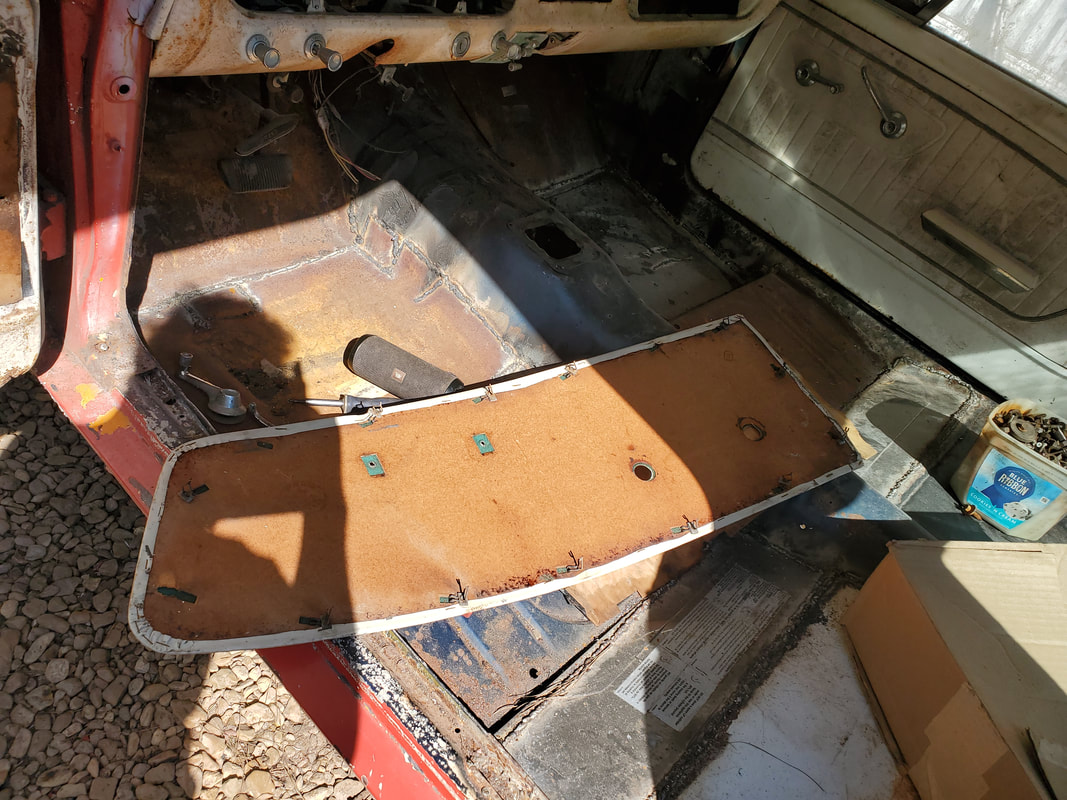 The interior panel removed from the driver's side door with care in order to not damage the particle board that the panel is made from. As before, after working the mechanisms and linkages long enough, I got everything freed up enough so that the door finally latched as its supposed to. The door release button and lever both worked properly as did the lock knob. The window required some WD40 in the track and mechanism, and some careful cycling up and down since the whole assembly appeared to be resistive. I did manage to get the whole thing working enough to let the window completely up and down but it would require a little assistance to work the mechanism to let the window up safely. It appears that something is slightly binding on the window crank mechanism enough so to be visibly distorting the door as the assembly is worked. This would mean that I'd have to remove this assembly then try to see what all could be causing the binding, or full out replace all this hardware whenever I do get new door shells to replace the old rusted out pieces. Either way, in the end, everything is working as designed. 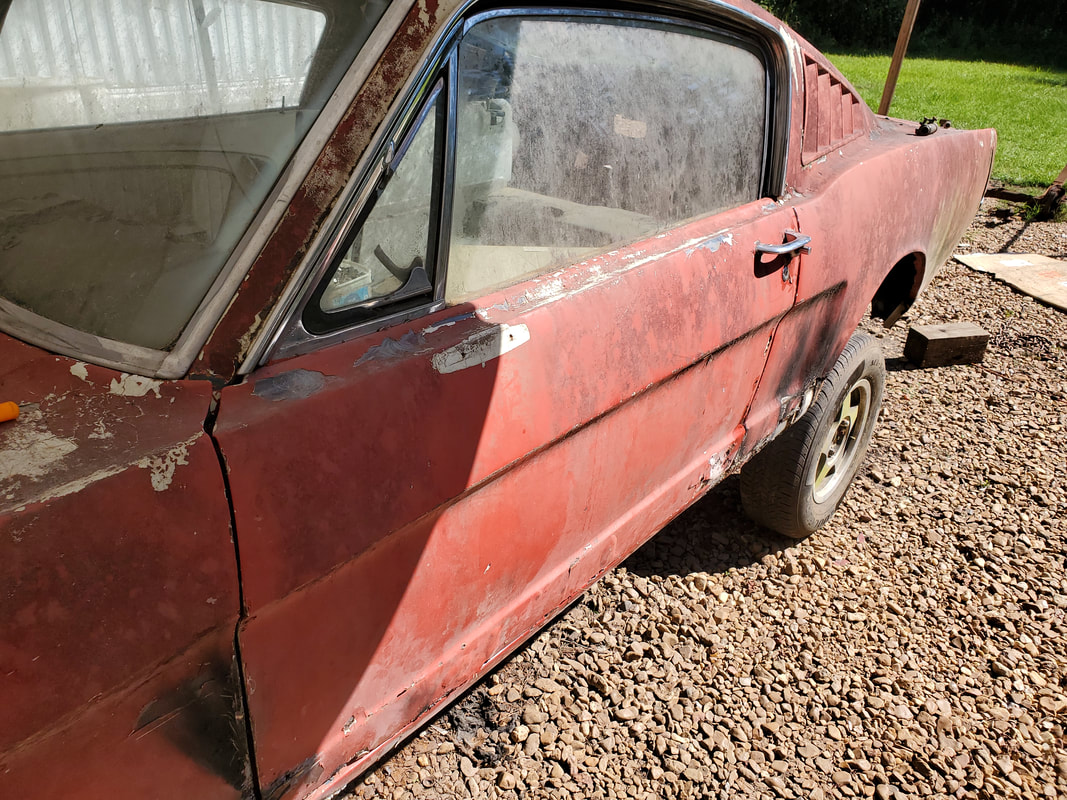 The driver's side door after freeing up the linkages and latch mechanism. The interior panel was straightened out and snapped back in place with little fanfare. With the doors now able to latch closed and the windows rolled up, we can now consider the car more or less dried in, so even if it rains, the interior won't get drenched, especially whenever I do put the seats and interior panels in place, or apply paint on the sheet metal floors. I would have to replace the weatherstripping on the doors, but we come back to the idea that the doors are so rusted out that there might not be anywhere to properly hang weatherstripping where it'll even be effective. But aside from that, we're technically done with the body repair/assembly phase of the 65 Mustang project. The next time we visit this car will be when we start fitting out the interior with all the components I removed from the car initially, as well as the extra hardware to bring the powerplant online and electrify the vehicle. There's plenty to do on that part of the project and we will get to that soon enough. Whether because of the rear end collision or a coincidental circumstance of timing, the sunroof on the Scion decided to start acting up. Upon trying to cycle the sunroof to the open position, the glass went up partway, then shifted off center some before binding up. After a couple attempts to try to close the glass to no avail, the drive motor made it to the point where there was no more movement on the glass. Whether open or close, the glass was stuck in the partially up/open position, much like a moonroof. Unfortunately, there's nothing I could do to remedy this situation since the way the sunroof mechanism is designed doesn't allow for full manual operation to open or close the unit. I would have to resort to replacing the whole sunroof, if I could find one to replace it with...  Old sunroof stuck in the partially open position. 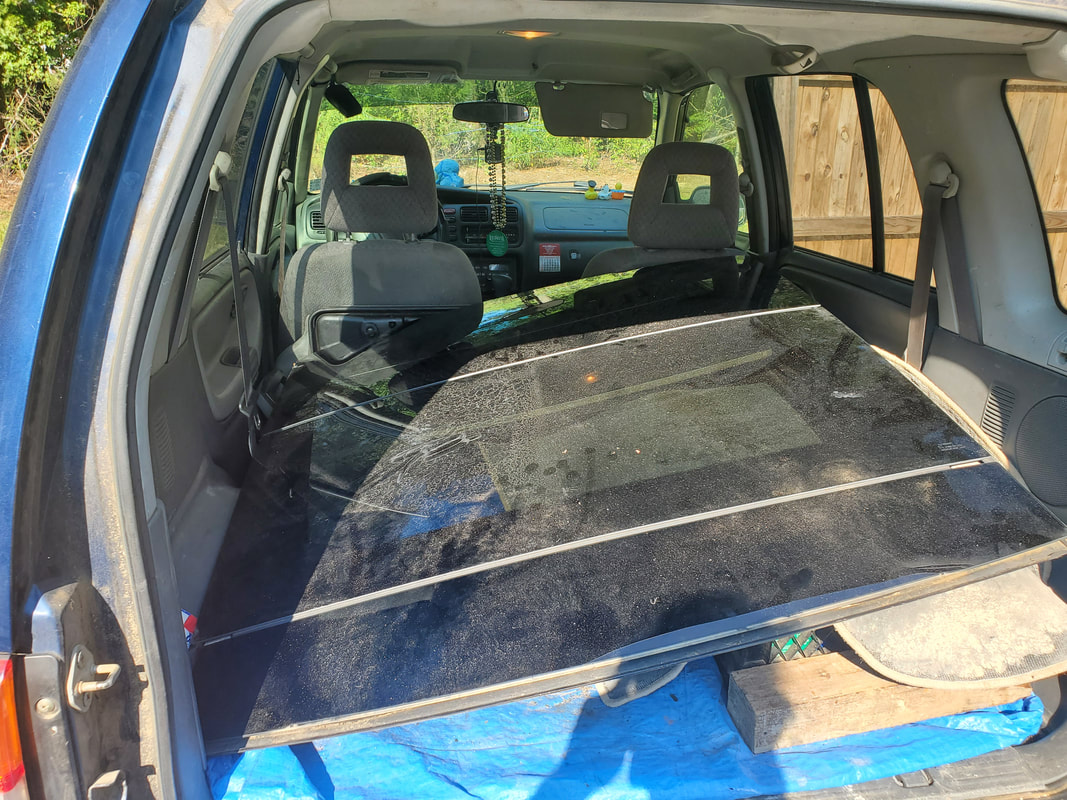 Replacement junkyard sunroof assembly in the back of the Tracker. Fortunately, the same Scion car that donated its parts to repair the rear end damage earlier on our vehicle was still at the junkyard, with a sunroof. Since I wasn't familiar with removing a sunroof on any car, much less this one, this whole thing would be another learning experience. I had to start off with removing the headliner to expose the entire assembly. There were the sun visors, a couple handles above the doors, the clips for the sun visors, and the light/switch fixtures on the front and back of the ceiling, all which had to be removed in order to allow me to pull down the headliner. 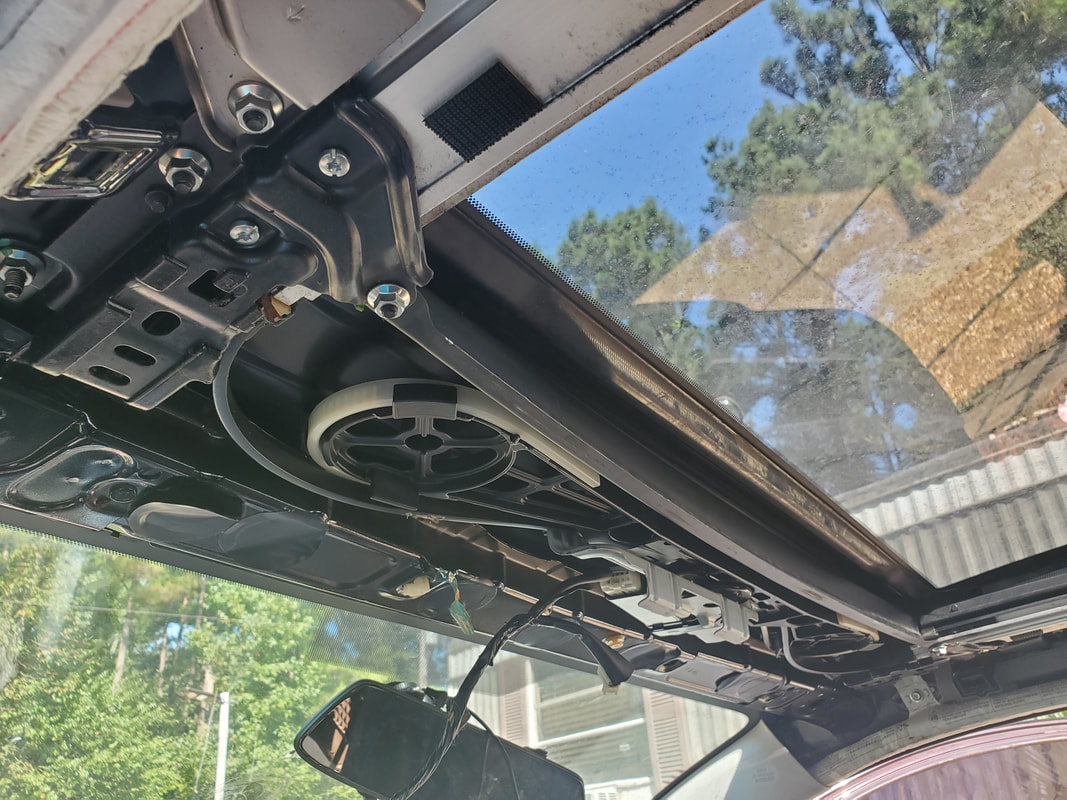 Shot of the sunroof mechanism after removing the headliner to expose the entire assembly pending full removal. 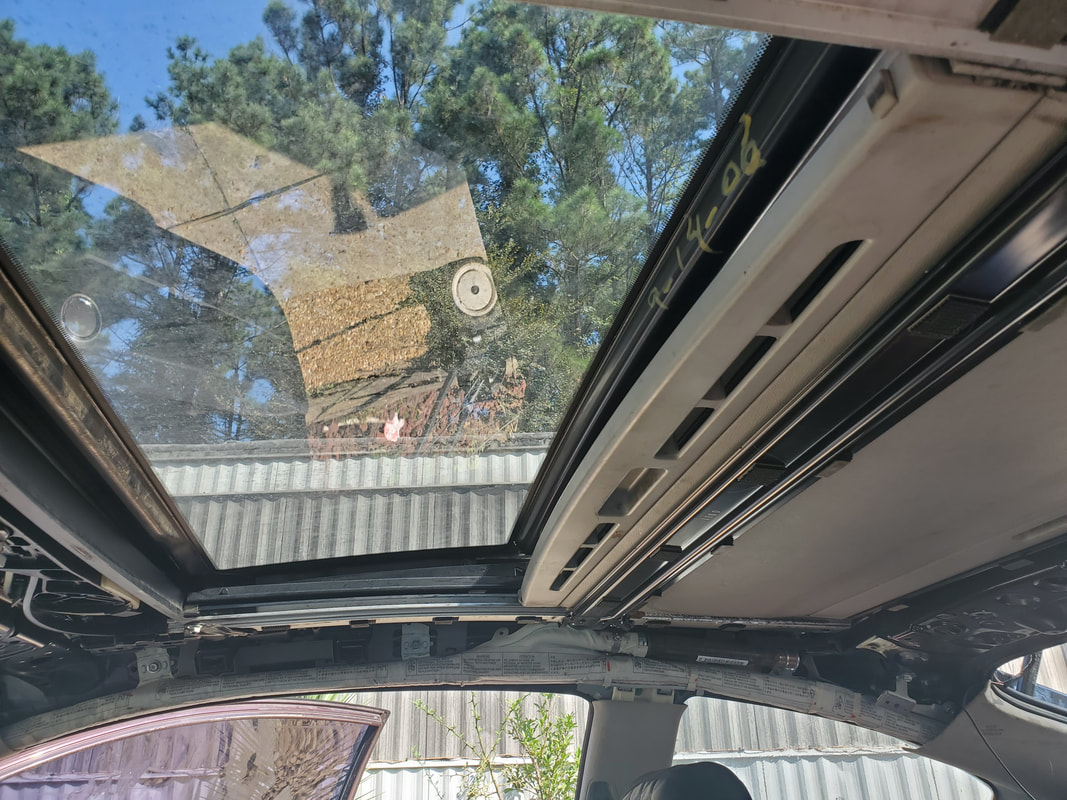 Another angle of the exposed sunroof assembly after pulling the headliner free from the interior. With the entire assembly opened up, just like at the junkyard, I exposed all the retaining nuts that held the sunroof in place via studs along the perimeter of the assembly. The studs along the side were easily accessible save for two on each side near the back that were blocked by the side airbags. I had to remove some nuts and some bolts along the airbag assemblies to pull them away enough to reach those couple nuts. Along the front and back of the assembly were some recessed nuts that had to come out. Once these were all pulled away, and all wiring unplugged from the unit, I was able to push the sunroof up from the car's body.  Sunroof on the ground after removal. 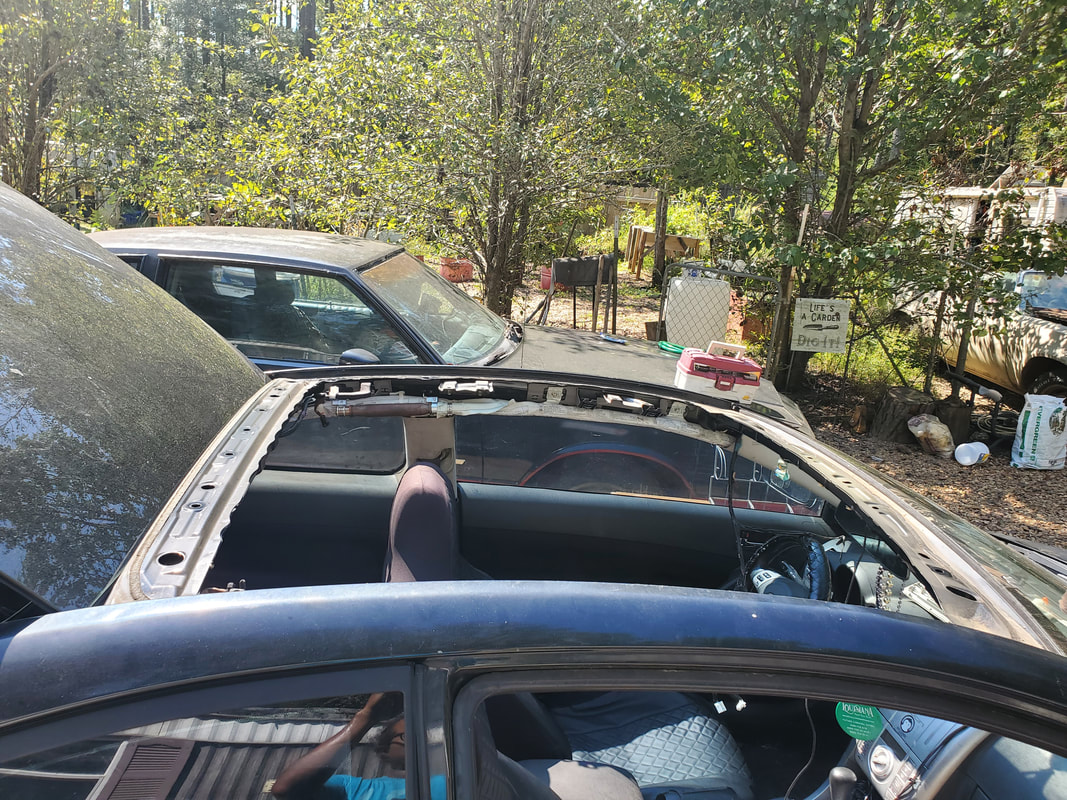 Open roof on car after removing the old sunroof assembly. The entire car's roof is a sunroof assembly. With the old sunroof free from the car, everything went in reverse. The junkyard sunroof assembly was carefully transported over to the car and set down over the hole that is the roof of the car. With the new sunroof seated in place, I was able to replace all the nuts around the unit to secure the thing to the body. The airbags went back into their spots as well as the headliner. All wiring was plugged back up, other wiring tucked away neatly so nothing was exposed or otherwise in a spot where damage can occur to any wiring. Once the headliner was replaced and everything confirmed snapped in place and buttoned down, I turned the key on to test the sunroof.  New sunroof installed on the roof of the car. 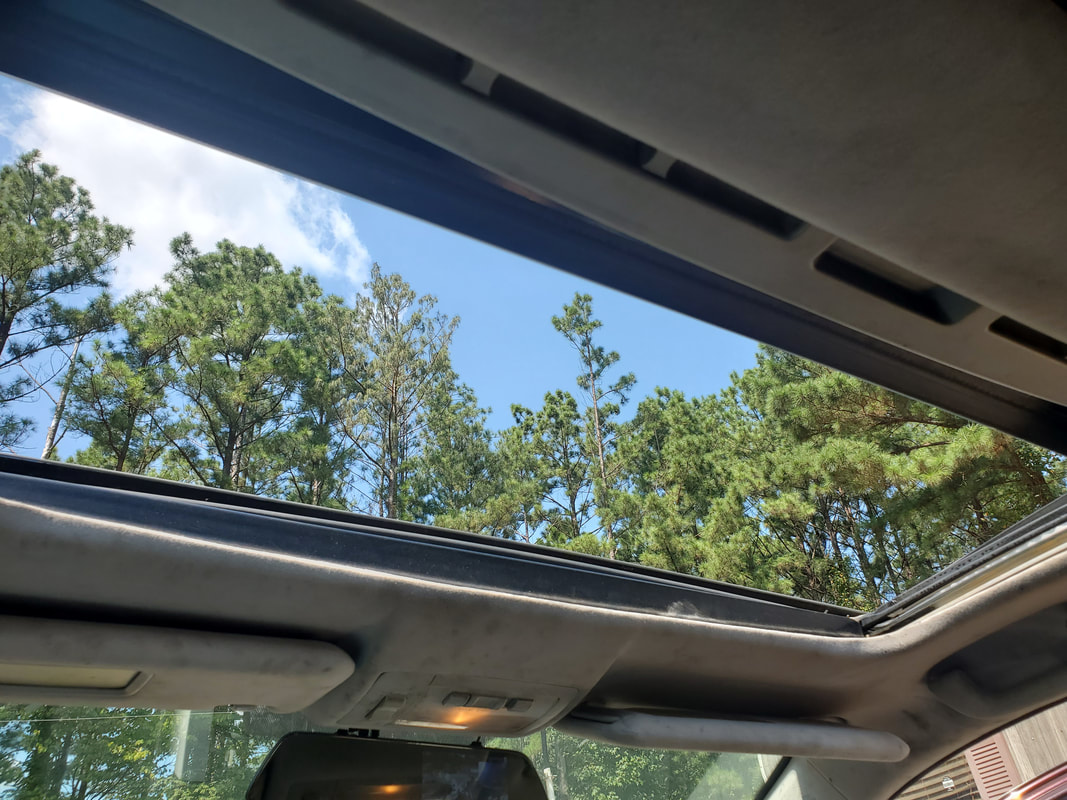 Shot from the inside showing the sunroof in the open position. Yep in a rush I put the sun visors on backwards, that was later corrected... 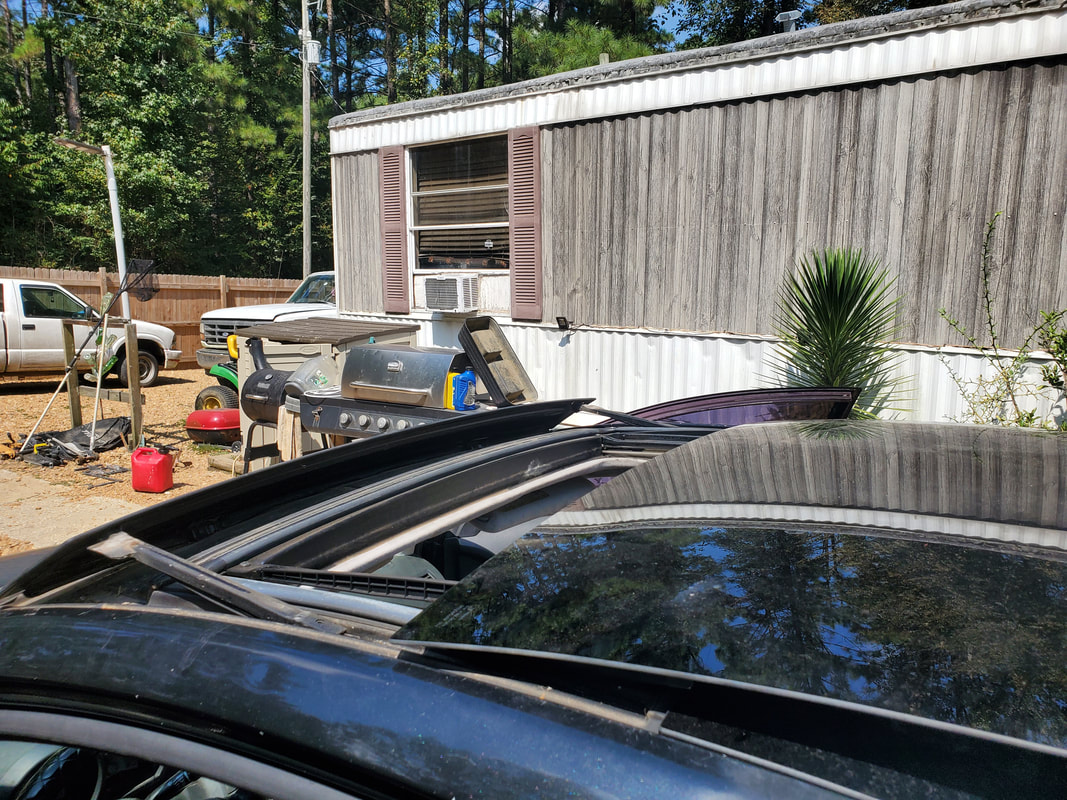 Outside shot showing the sunroof in the open position during the initial test. The sunroof opened up smoothly with minimal effort, opening and closing as intended. All glasses moved as they were supposed to, closing flush. I did take a moment to smear some grease on the tracks for the glass to lubricate everything so we can at least give this unit a chance at longevity. With the sunroof done and working, I just have to poke around in the old sunroof just to see if there is any chance of salvaging the assembly. If the damage in the drive system is a gear or replaceable part, I can repair the assembly and keep it aside as a spare. Otherwise, I'll just have to try to recover the glasses, one of which was the replacement glass I installed a while back after the original glass was broken. The glasses on the sunroof are extremely valuable due to their ease of breakage and the fact that the older this car gets the more likely one will not be able to find a replacement glass. Either way, I still come out ahead in the deal here, but the main thing is, our sunroof is working as designed once again. Even though I welded some large patches in the rear quarters earlier in the project, there were still some areas that needed attention, mainly on the other side of the fender well, going to the rear of the panels. These areas, just like the others had large rust areas that would be best filled in by welding in sheet metal patches from the inside, where applicable, and in the case of the tire well, just welding large patches in place to cover the holes. There was also the matter of welding some patches on the intermediate section that connects the inside of the rear quarter with the trunk floor. These areas were rusted out bad just as well and would need covering since the wheels would just throw water inside these areas and into the trunk when driving on wet roads, contributing to further rust. Starting on the left side, I did my prep work of grinding as much bare metal as possible then cutting a piece of sheet metal to fit in place. 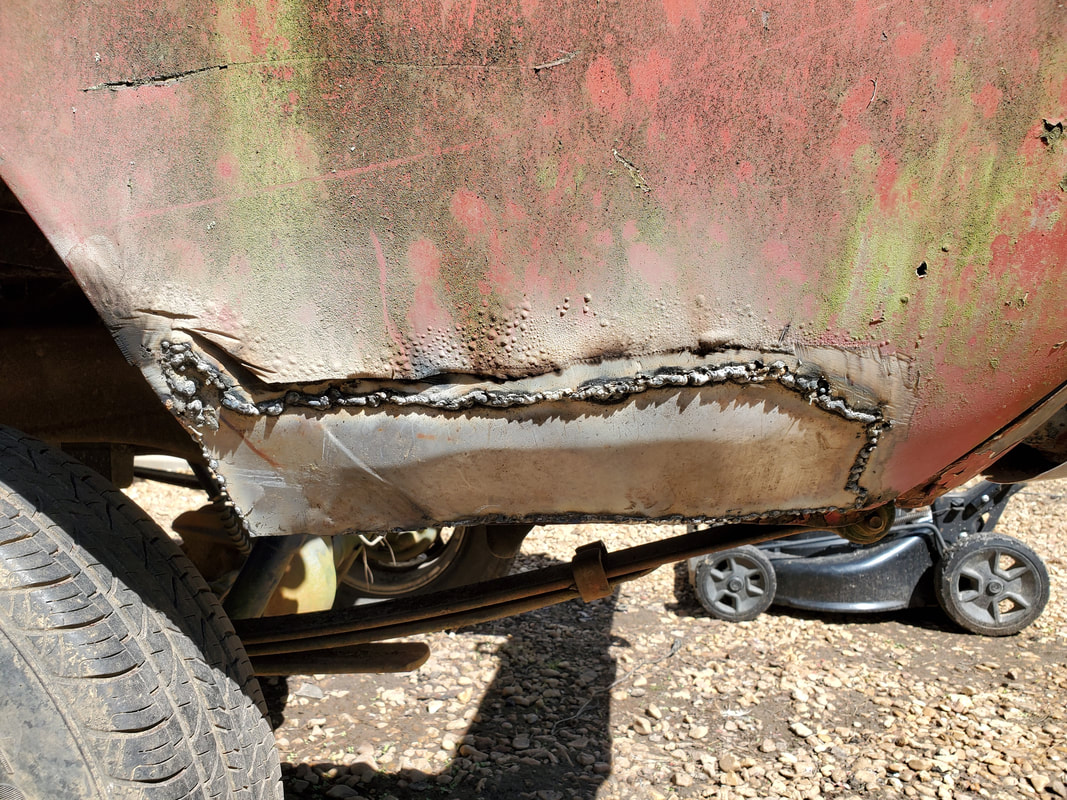 Left side rear quarter patch welded in place. On the right side, things were a little worse off with the intermediate area needing serious attention in the form of larger patch to cover the larger opening on that section of sheet metal. I was able to weld some points where the old metal separated, then fill in the openings with patch metal, taking time to fill in some of the odd openings with weld slag since it would've been more trouble trying to cut a little bitty piece of sheet metal just to fill a larger opening. With the intermediate patch done, I also added a couple pieces of patch metal in the tire well as this area was well rotted out just the same. 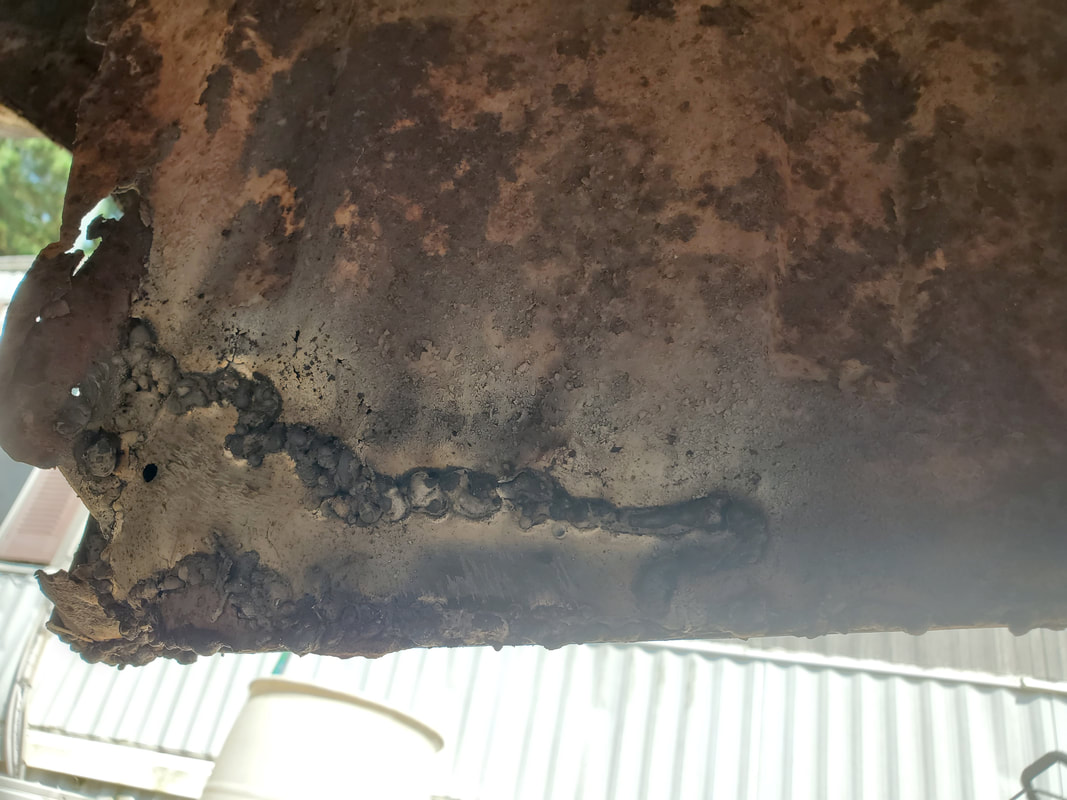 Intermediate panel with patch welded in place to fill in the openings present from rust. Undercoating will most likely be used to cover this rusty surface to slow down further degradation. 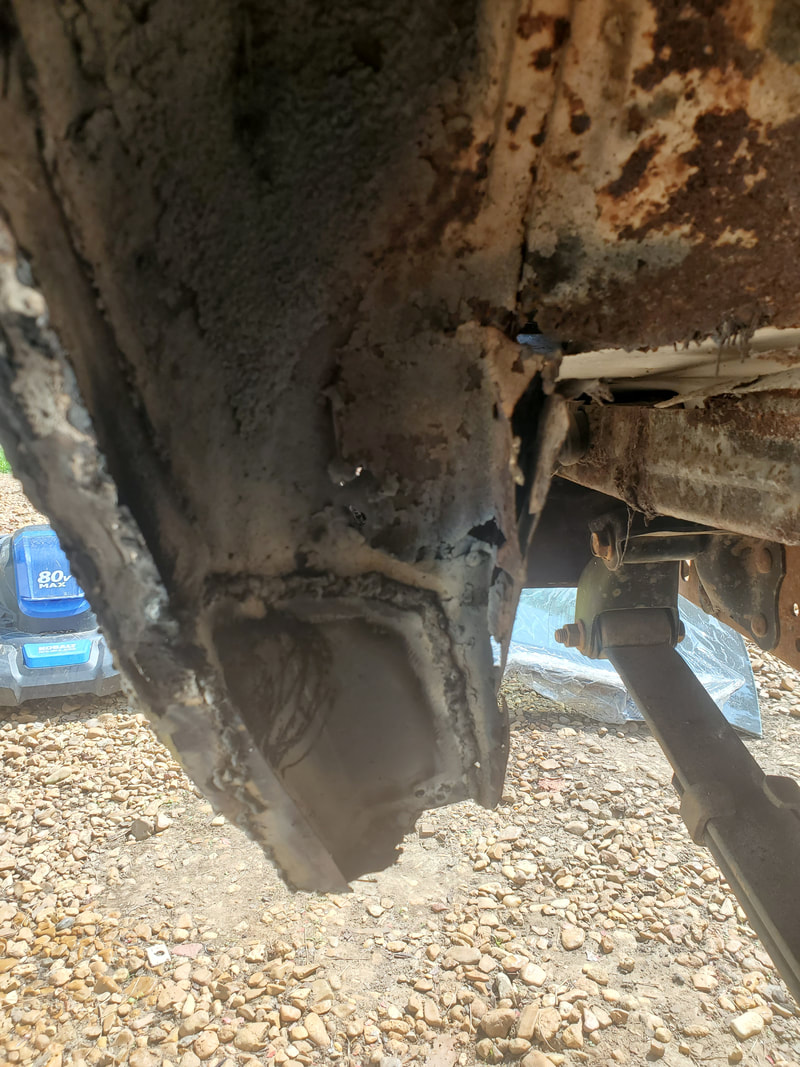 Tire well patch consisting of a couple smaller pieces of patch metal welded to fill in the openings in the old metal. These areas would most likely get covered up with spray on undercoating. On the quarter panel patch, I took a moment to cut a small piece of cardboard that I trimmed up to fit in the opening and used this piece of cardboard as a template. I cut out a similar piece of sheet metal, made to fit exactly as intended in the opening, so I wouldn't have to trim a piece while fitting it in the hole. With the sheet metal patch cut and the area prepped, I welded in the piece of sheet metal, connecting with the fender lip and tire well patches to get enough connection to all the metals so when I apply bondo, these areas will be covered pretty good. 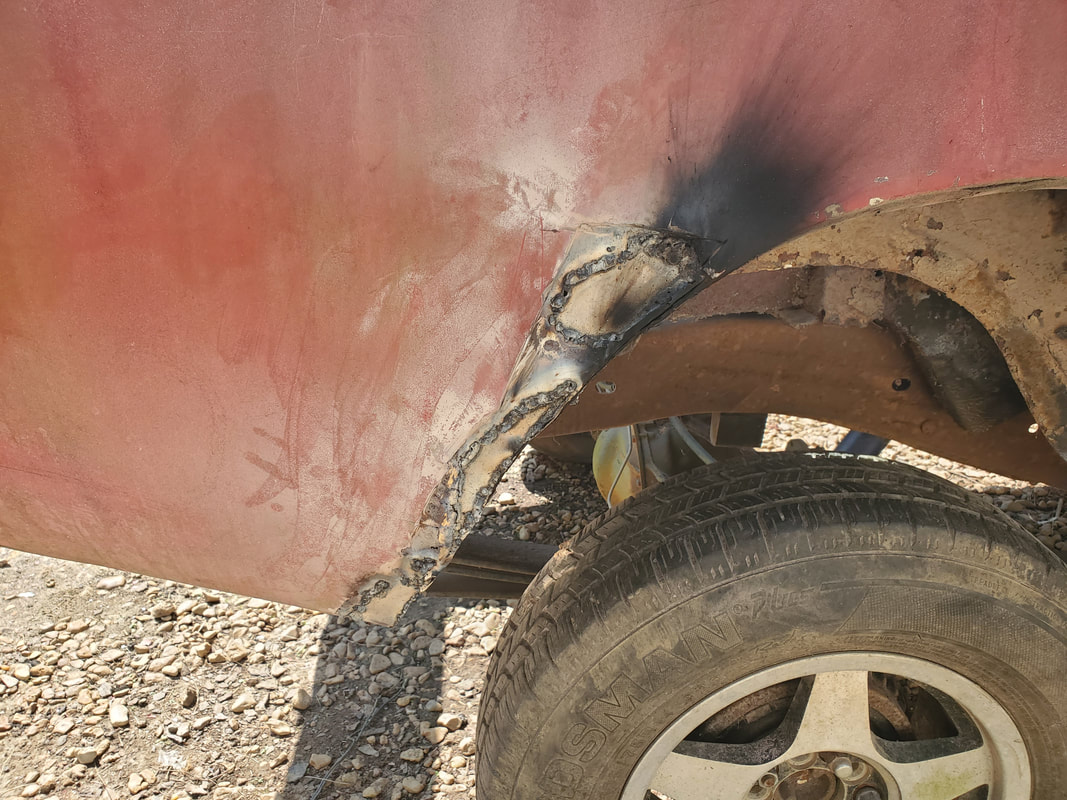 Right rear quarter patch panel welded in place. With all the body areas patched up with our crude sheet metal patches, I can turn my attention to getting the doors to latch up properly. I'll have to pull the door panels to go in the doors and remove the latch mechanisms to inspect and see if there's any mechanical issues with the mechanisms that may warrant replacing the units. If not, I can see what can be done to make the mechanisms latch properly so when everything is reassembled, the doors should be able to latch as intended. At the same time I can also take the time to make sure all the other linkages to the door handles and lock knobs all work properly and make the necessary repairs so the doors can be written off as good. Once that's done, we can write off the body portion of the project, and move on to fitting out the interior of the car. As with the right side, the left fender bottom needed to be patched up to cover the large rust hole as well as provide a surface with which to secure the bottom of the fender to the inner body. The area needed to be prepped up with a bunch of grinding to remove the old bondo as well as rust along the edges that would be welded on when I put the patch on from the inside of the fender. I also had to add a patch on the front of the rocker panel since that area also had a large hole. Then there's a matter of the door. All along the bottom of the door it's rusted out horribly to the point that it really isn't worth trying to patch any of the area due to how bad off the area is. All I could really do there is just add a few small welds to hold the bottom of the skin to the rest of the door shell so the metal doesn't flap around. I will need to replace this door though. 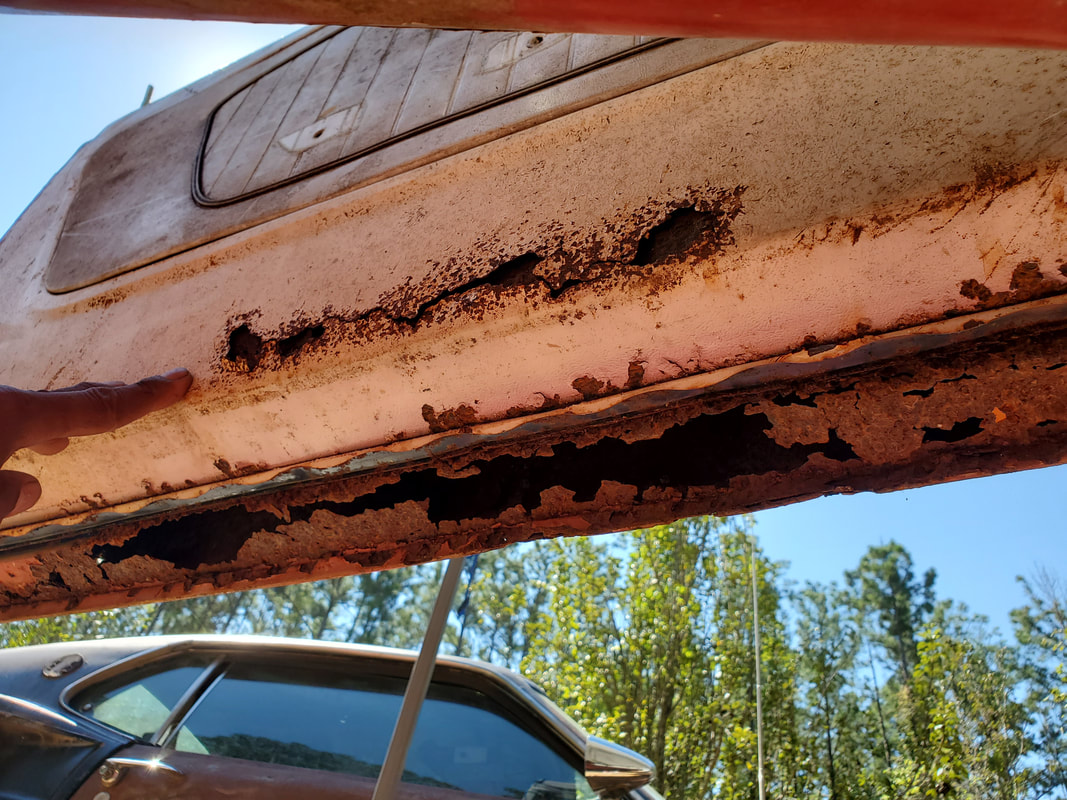 Bottom of the driver's side door showing the excessive rust along the surface. This door will need to be replaced. 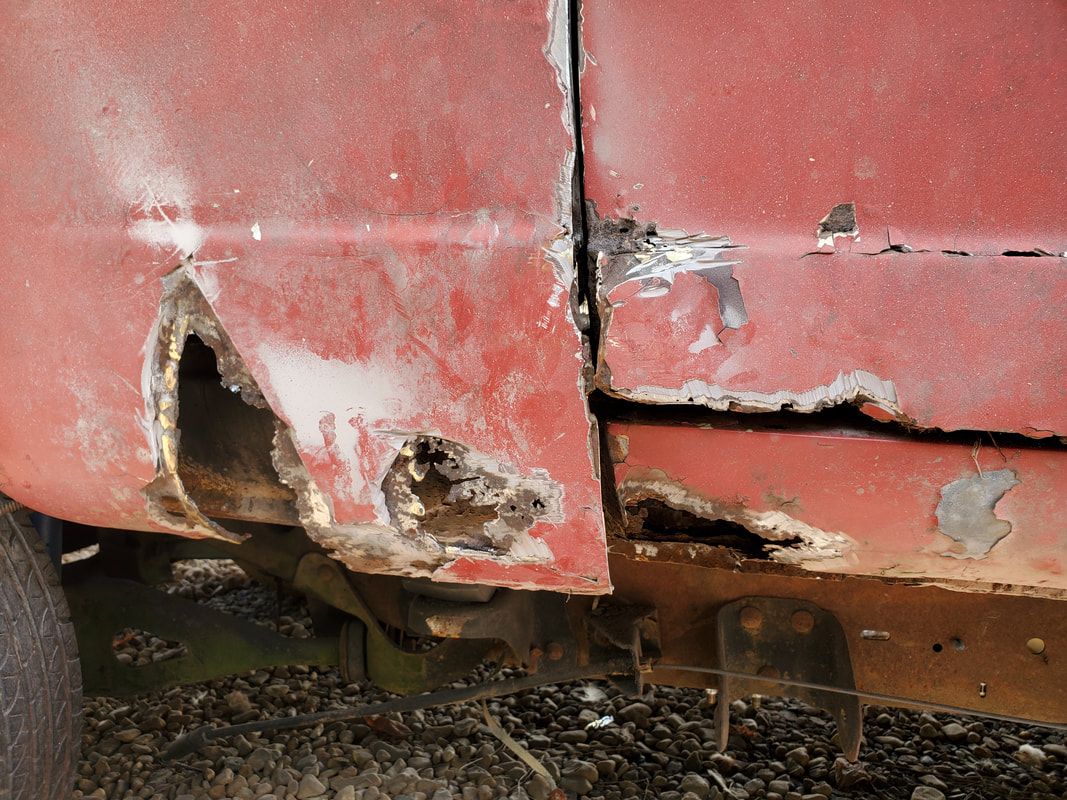 Driver's side fender bottom showing the large rust holes present, along with the rocker panel hole. As before, I cut a piece of sheet metal and bent it slightly to match the curvature of the bottom of the fender. I welded it along the edges of the fender where I ground the rust away, needing to use vice grip pliers to hold the surfaces close together as I welded the metal. I also had to weld along the edge where the inner fender body and the skin met due to having to grind away a lot of this rusty metal due to the fender scrubbing on the door when it would be opened. Once all the areas were welded up, I cut away some of the excess metal I left along the bottom of the sheet metal piece for use as an anchor tab. 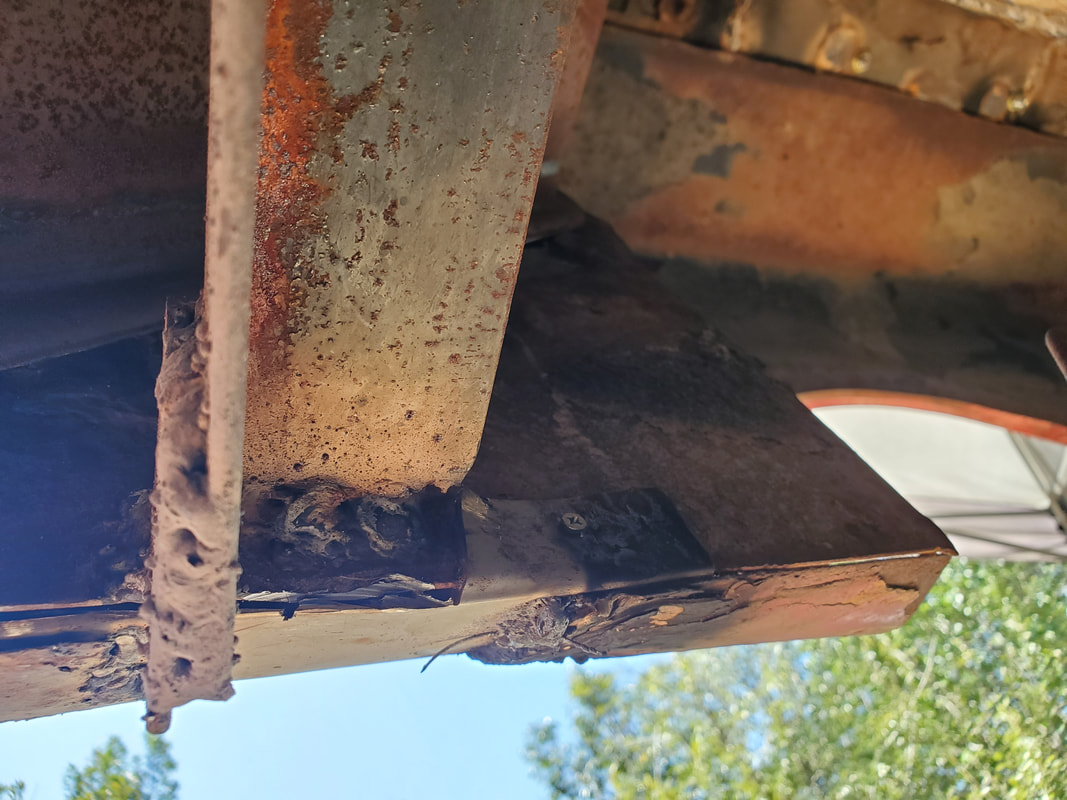 Front tab on sheet metal patch folded around body member and secured with sheet metal screw. Note the angle iron body mount in the picture. 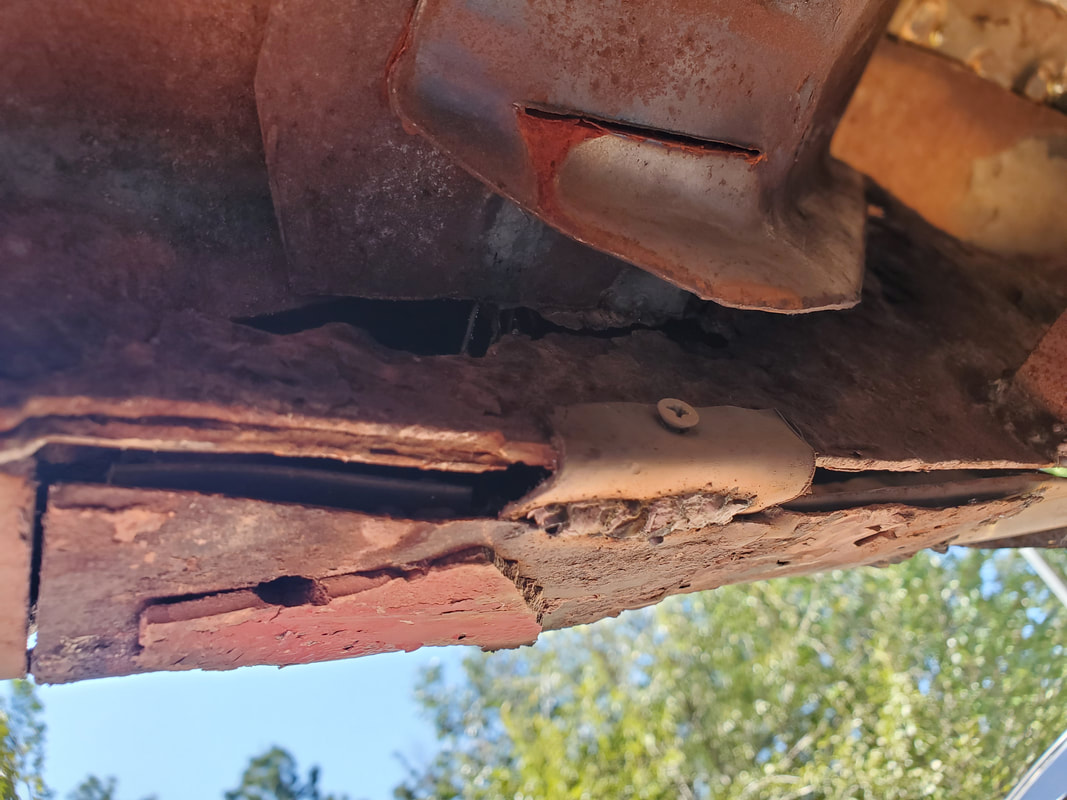 Rear tab folded around inner body member and secured with sheet metal screw. When I cut the sheet metal, I cut off of an edge of a piece of appliance sheet metal that had a lip on it. I cut two tabs from the lip then pushed the bottom of the fender close to the inner body where the lip tabs can fold over the edge of that body section. I then drilled a hole in each lip and through the body member to attach a single sheet metal screw through to hold the tab in place to the inner body. This allowed me to get the bottom of the fender attached without having to add any extra metal nor have a visible screw showing on the fender surface as was the case with the right fender. Could've done this with the right side but you work with what you have. 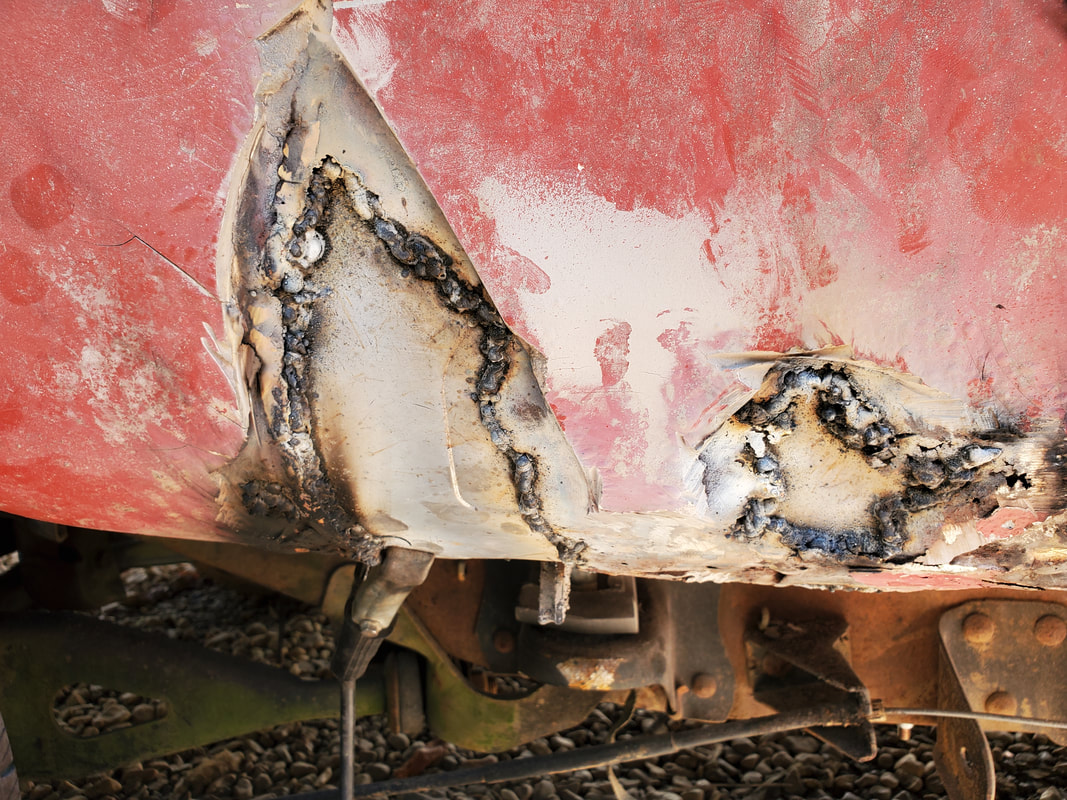 The sheet metal patch added to the inside of the bottom of the fender. All this area will need to be covered in bondo to even try to make the area look somewhat decent, but in the end any repair of this nature will be short lived. On the rocker panel I had to cut away the metal from around the hole then cut the sheet metal patch in a way where I would almost have the piece sit even with the original surface of the rocker. Because of how the rocker panel is situated, I couldn't insert the large piece of curved sheet metal from the inside. There was also the matter of the fender not being perfectly lined up with the rocker panel front edge and the apparent use of bondo on the front of the rocker panel had the surfaces meeting in a way where even after I weld on the new sheet metal, I'd have to use bondo to build the surfaces back up to even things out when the filler is sanded down. Again, with the bootleg way we're doing this body patching, anything pretty much goes since no matter what we do, it's probably going to come out kind of ratty and even if I do manage to get it to look pretty decent, its probably not going to last too long before things start to degrade. 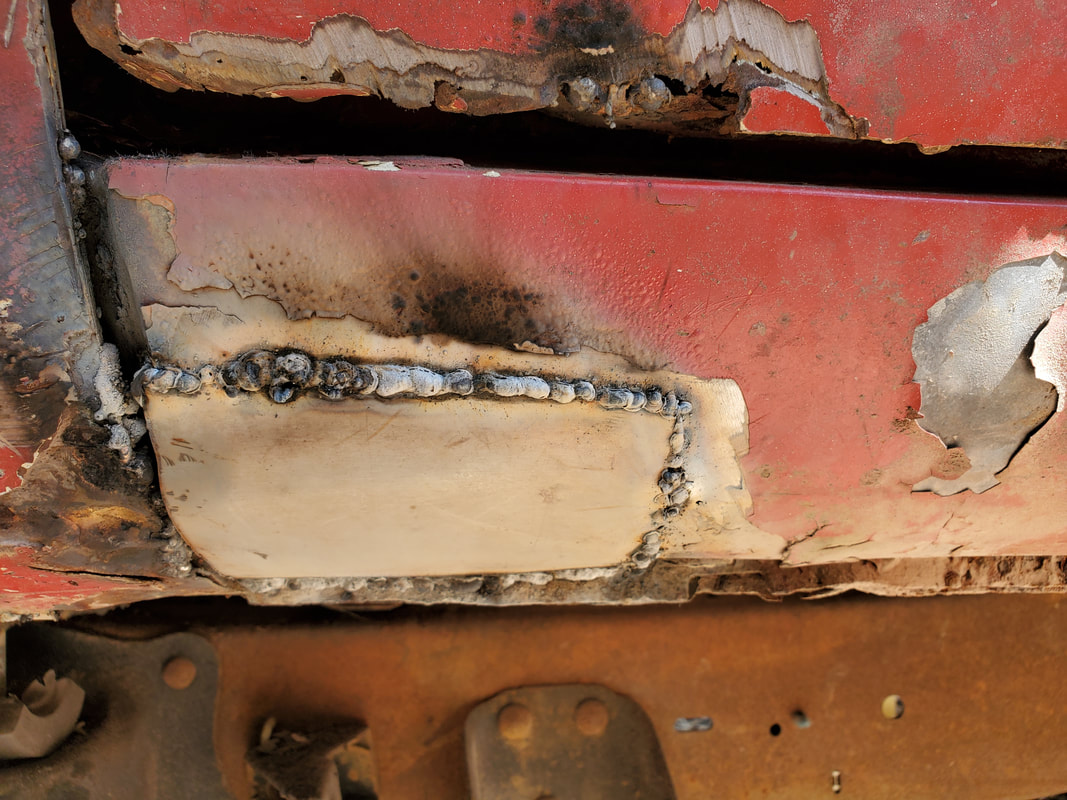 Rocker panel patch added to the surface of the old panel. Bondo will have to be used to help cover up the weld seams even after grinding down the slag to try and smooth things out best as I can. On a lighter note, regarding the door, there was a spot at the front bottom corner where the metal skin was rusty and was bondo patched up. That area due to degradation, was bulging out and pulling away. Luckily, I was able to trim some of the edges down and provide a surface with which to add a few small welds to hold that little area of door skin back against the door shell so when body filler is used, it can cover up the edges and other imperfections in the door surface. Again, this door is so far gone that it almost doesn't matter what I do to it, it's going to be ratty. 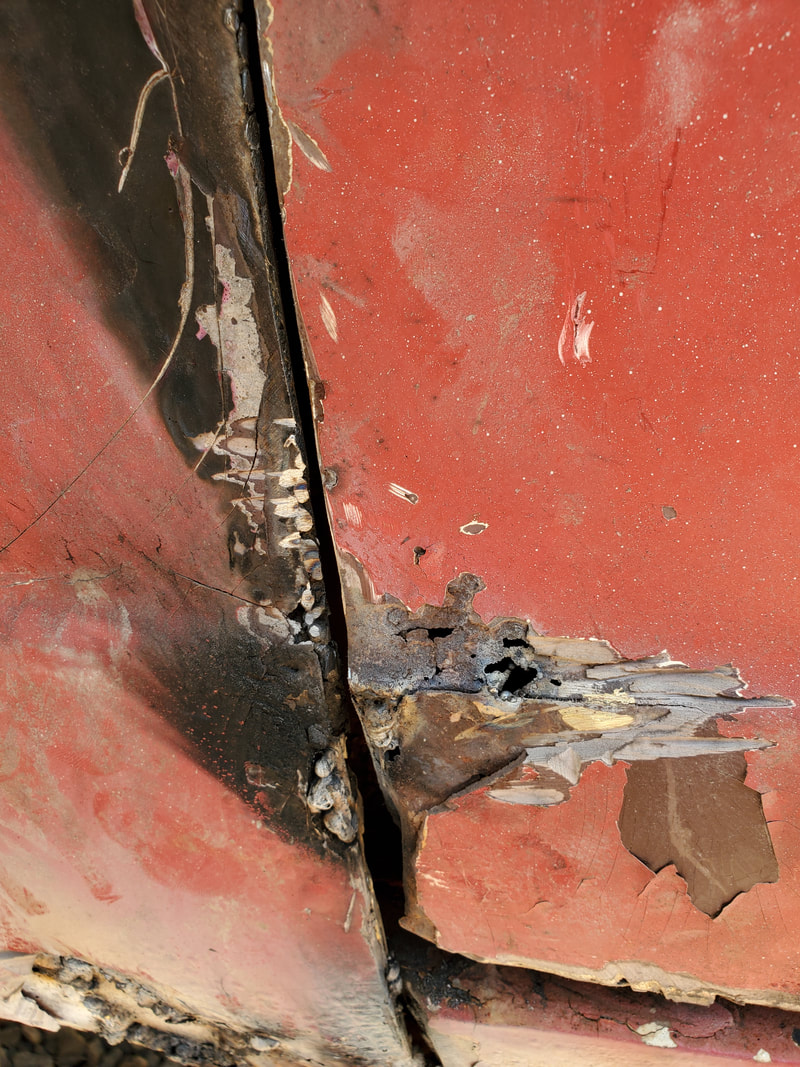 Bottom front corner of door secured by welding small bare area where door skin was pulling away from door shell. Again, bondo will have to be used to cover up these imperfections and the longevity of this repair is going to be minimal. The door will have to be replaced. At this point all that's left are a couple spots along the rear most areas of the rear quarter panels around the edges. The areas were already prepped by grinding away old bondo and rust in preparation for the sheet metal that'll be used to make the repair patches. Once this is all done all that's left is to get the door latches working again somehow so the doors can close and latch properly. Once that's done we can consider the body building/repair portion of the project completed and can then start making plans to start fitting the car out with all the other hardware to complete the build. With the body panels and parts all assembled on the Truckstang, in order to wrap up the body part of the build I have to patch spots along the rear quarter panels, front fenders and on one of the rocker panels. The areas I want to start on are the front fenders. Since the bottoms of both fenders aren't secured, this would be the obvious area to start. The thing is, in order to secure the bottoms, I have to weld some scrap sheet metal to the bottoms as a lot of the old metal is rusted away. I have to grind away old bondo and rust from the edges of the rust holes so I can have some bare metal to weld to where I would place the sheet metal patches. The sheet metal patches would be placed on the inside and lightly welded along the edges of the rust hole to hold the patch metal in place. 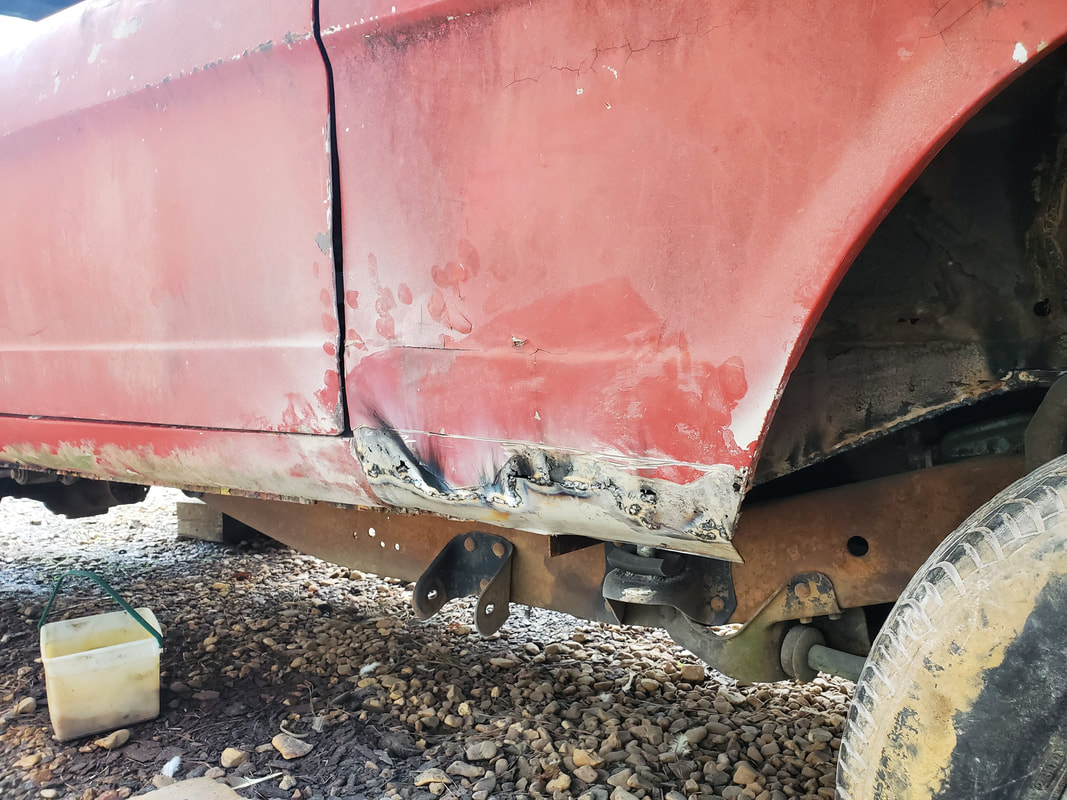 Sheet metal patch welded in place on the right fender along with the attachment of the bottom of the fender to the inner body structure. After grinding the area and prepping the sheet metal, I welded the metal lightly. I had to bend the sheet metal to match the contours of the rocker panel and try to be straight enough to run the same plane as the rocker. From there I took a small strip of scrap metal and used it as a bracket to hold the bottom of the fender to the inside of the car's body. I drilled a hole on the inside body where the makeshift bracket was attached with a single sheet metal screw, then drilled another hole along the bottom of the fender patch where it was attached to the bracket. Another small hole was drilled near the back of the fender bottom where the angle was right enough to go straight through the fender and into the inner body structure, allowing me to insert a long sheet metal screw all the way through, further holding the bottom of the fender in place. 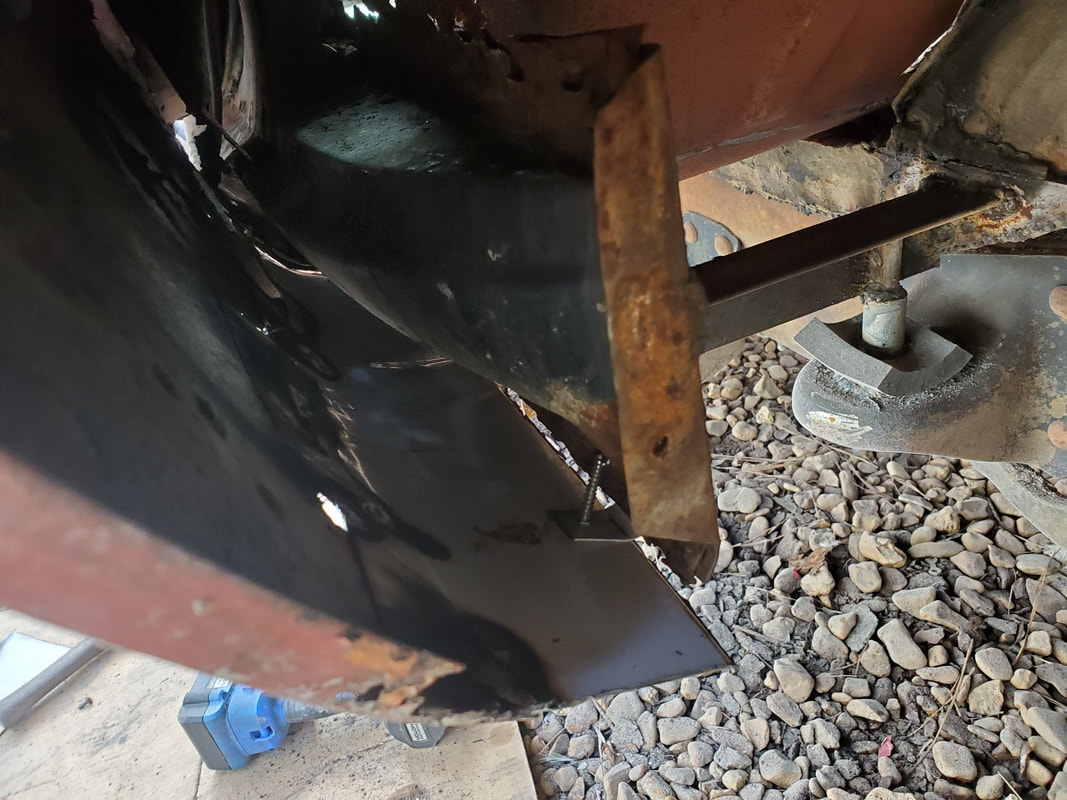 Makeshift bracket made from scrap piece of sheet metal, attached to the inner body structure and to the inside of the fender patch, so the only thing visible on the outside of the fender is a screw. The left side ended up requiring a little more than the right side. Besides the giant hole at the bottom of the fender, there was the matter of the front bottom corner on the door being pretty ratty, and the front of the rocker panel also holed out. I'll have to weld in patches over all this. I had to cut out the edge of the fender where misalignment of the fender relative to the body had the back of the fender overlapping the front of the door. This area was rusty and distorted anyway, but the thing is, I'll have to do some light welding to reattach the inner part of the fender to the front skin of the fender. Some of the inner fender material would be cut out since it was rusty metal but I will still have to weld a sheet metal patch to the inside of the bottom of the fender anyway. The door will require a little more careful fuckery to get it right, if possible, while the rocker will require a patch done in a way where there the raised weld slag will be at a minimum, to prevent having to use too much bondo to build up the surface to level things off. Left side fender, rocker panel and door, after grinding down the surfaces to clear the areas of old bondo and rust in preparation to weld in patches. As with the right side, sheet metal patches will have to be welded in from the inside and any excess slag ground off before we can apply any bondo to cover the patches. The left side is pretty bad, about the same by comparison with its own unique challenges. We have the added bonus of the rocker panel and door having some areas that need attention just as well so I'll get to that in the next session.
At this point, I am just about done with the assembly on the Truckstang, with me picking up where I left off with the front valance panel and intermediate panel that connects to said panel. After looking at these two panels, I thought about how I could actually weld the two panels together at points where edges of the panels make contact with one another. Even though the panels are bolted together, welding the two will help hold them together in a way that will keep them straight where once manipulated into a straighter position and welded up, they won't just work their way out of whack through normal body movements I did have to make sure that welding these two panels together wouldn't have me unable to reach the other bolts that hold the valance panel to the fronts of the fenders. All was well there so it was a green light to weld everything together.
Valance panel and intermediate panel with welds at contact points and corners, holding everything together nicely.
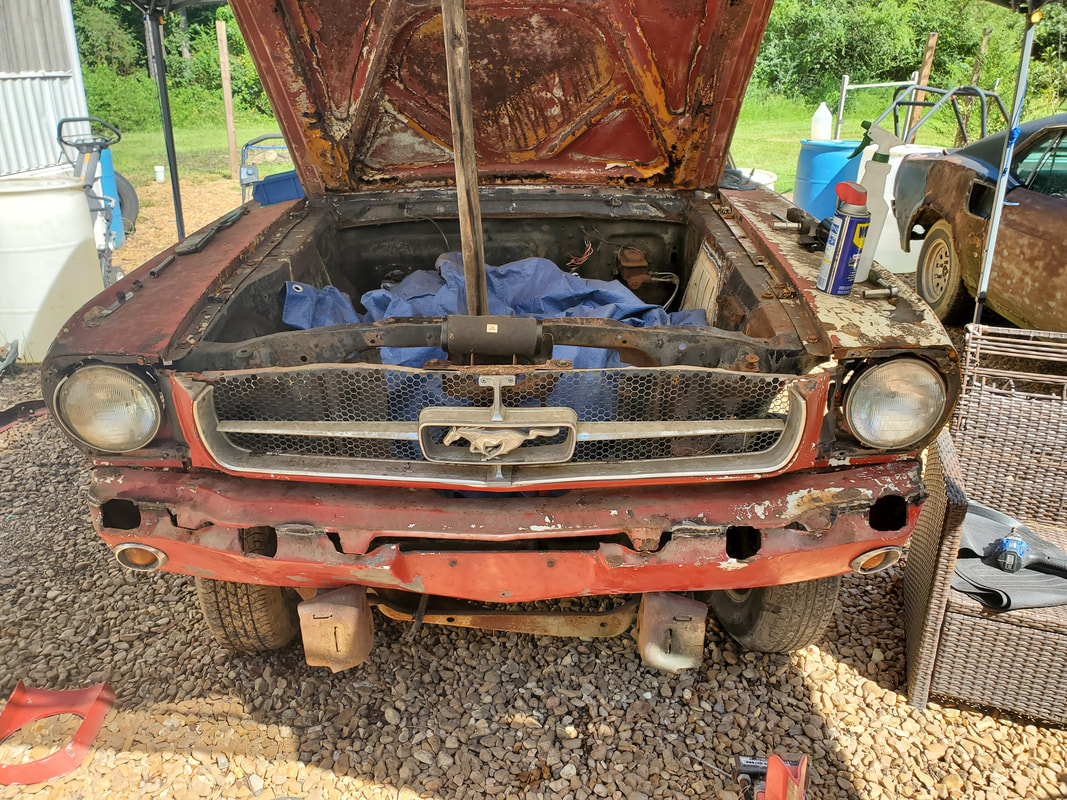
As can also be seen, I took a moment to put the grille/headlight assembly on after getting the panels welded together. I had to add nuts and bolts in a couple spots where the bolt retainers had snapped bolts and had to be ground out. I also had to install the hood latch assembly since a couple mounting points on the middle of the grille connected to the top of the assembly. With all these components together, I was able to install the headlight trim pieces. I would've liked to be able to make all this be on piece, but the way this whole front clip goes together, I would be unable to reach the bolts that hold the grille assembly to the body if the headlight trim panels were in place so I resigned myself to just reassembling everything in reverse of how I pulled everything apart. 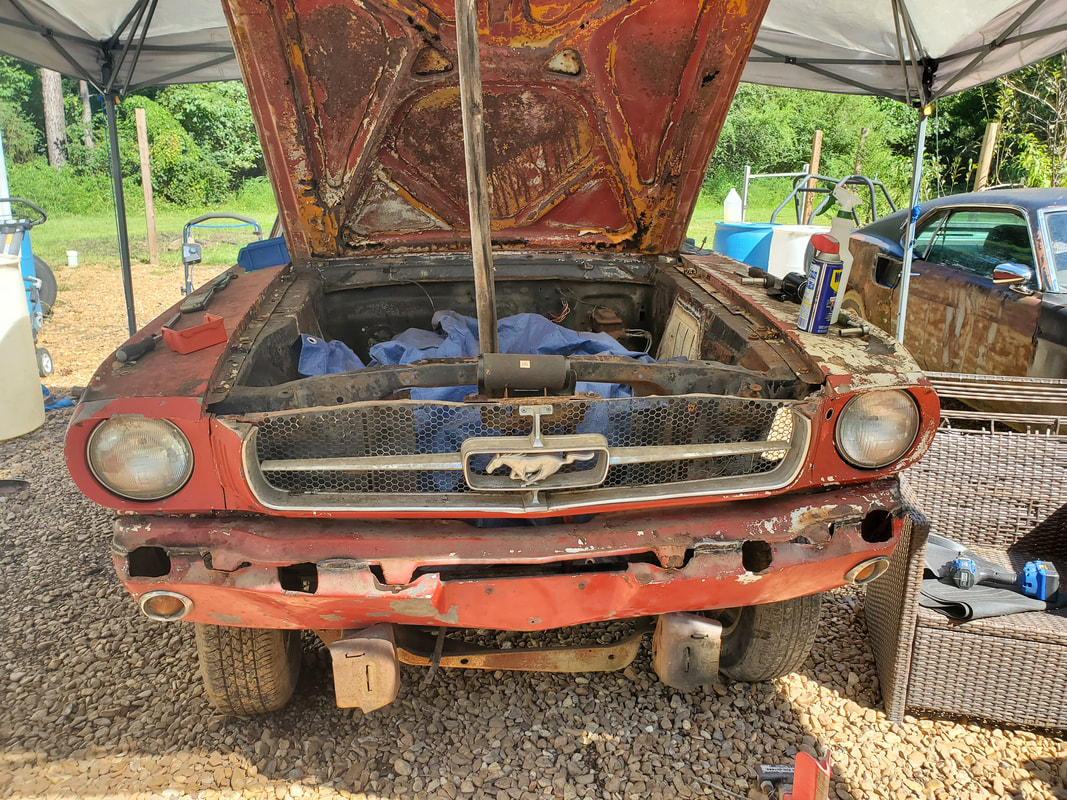
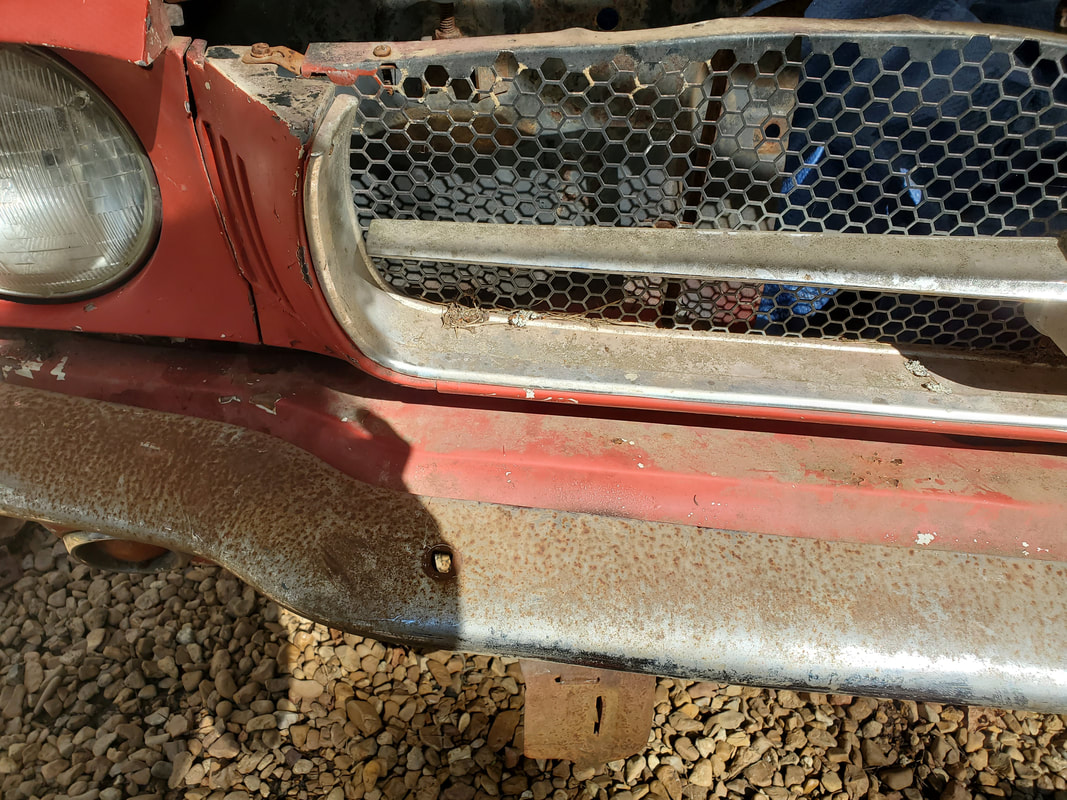
Grille/headlight assembly with headlight trim panels in place.
With the front end pretty much assembled, the next order of business was to figure out how to install the bumper. I still had the bumper bars that hold the bumper, but they normally bolted to the front of the old subframes, which no longer exist, after having to cut that out during the mounting of the body to the truck frame. I had to figure out a plan. That plan ended up being the cutting/trimming of the ends of the bumper mounts where they bolted to the subframes, in order to fit them around the points at the front of the remaining sections of subframes, where the front body mounts are. I would then weld the ends of the bumper mounts to the subframe sections, allowing me to bolt the bumpers to the mounts. 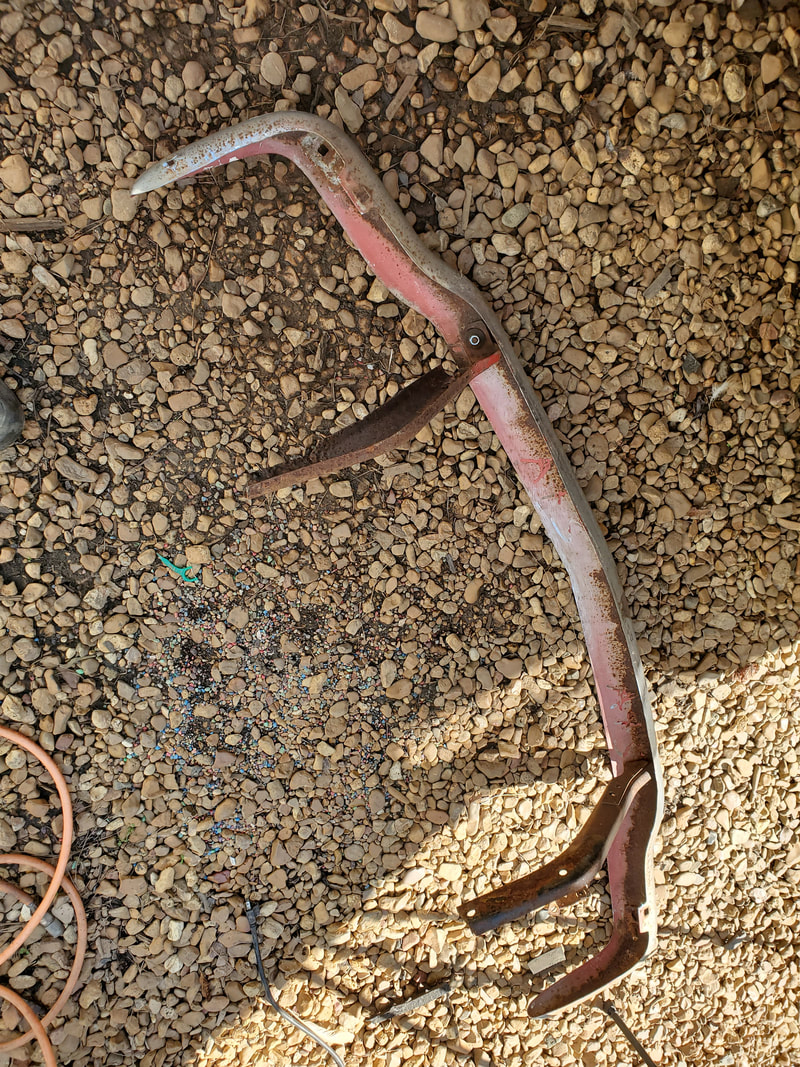
The front bumper with the bumper mounts bolted in place, these would later have to come off in order to position the mounts.
I put the bumper mounts in place just about where they would need to be in their final position and temporarily bolted them to the bumper. I situated the bumper just about where it would be in its final position as well and marked the spots on the inside end of both bumper mounts that would need to be cut out to make them fit around the front body mounts as flush as possible. Afterward, I went ahead and removed the bumper mounts and cut out the marked areas then reinstalled them again. Satisfied that the mounts would sit flush against the subframe area among the front body mounts and allow the bumper to sit in a position with a fair spacing around the rest of the body, I welded everything in place. 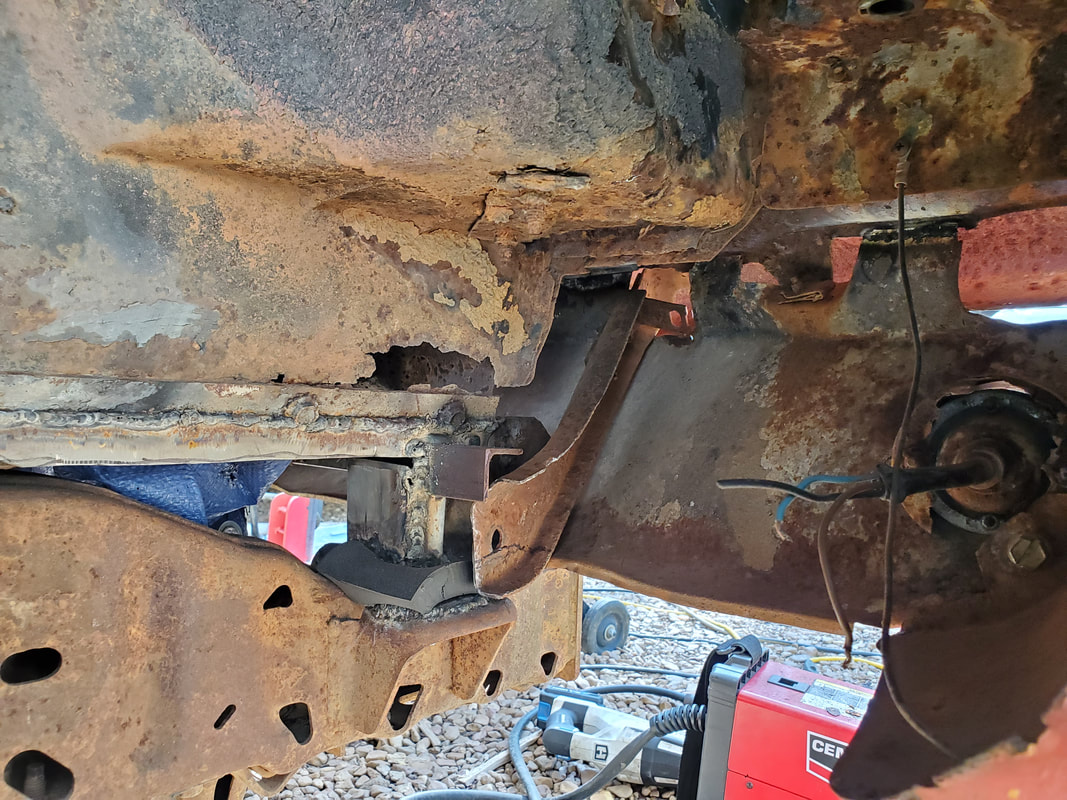
Staging the bumper mount to mark what metal would need to be cut out in order to fit the mount flush against the subframe section prior to welding in place.
Staging the bumper mount and the bumper in place, the mount and bolt holes line up good enough to allow me to move forward in getting everything put together.
The bumper in place after welding the bumper mounts to the subframes.

The front end with the hood lowered back down. Even with the stripped paint, the front of this car is looking a lot better now.
Right side shot of the car after completing the assembly of the front end.
Left side shot of the car with the completed front end. There's still the matter of getting the front fenders addressed.
With the front end completely assembled, there's the wrap up of the car's body. This will involve getting the bottoms of the front fenders secured, which will include having to weld some sheet metal along the bottoms of both fenders in order to attach the bottoms to the body. Just like with the rear quarters, this will involve grinding away the old bondo and rust along the edges of the holes in the panels then welding some scrap sheet metal on the insides of these holes. This will later allow me to reapply a layer of bondo over the area to smooth out the surface so once finished, the fenders will hopefully look close to a "factory" finish, compared to how they look now. Along with the front fenders, there's some patching that will need to be done on the front of one of the rocker panels and the doors, along with some more areas on the rear quarters, which will conclude the body building portion of this project.
As we start moving into the advanced stages of the body reassembly on the Truckstang, other challenges pop up. One of those challenges is the idea that the panels are rusty, some more than others, and some are distorted in a way where it makes fitment a little troublesome. There is also the issue where some of the mounting points for the body panels are nonexistent, either because the metal tabs where a bolt or bolt retainer clip would go are rusted or broken off or have broken bolts in them. This problem was made apparent with the rear valance when I had to manipulate the panel to fit in place. With the welding that I had to do in the rear to reinforce the body in order to mount the body to the frame, I had to go through a little extra effort to get the valance to mount to the body, and even then the panel isn't perfectly straight. I'm afraid this problem will be apparent on the front just as well. In the meantime in the rear I went ahead and got the trunk lid mounted. 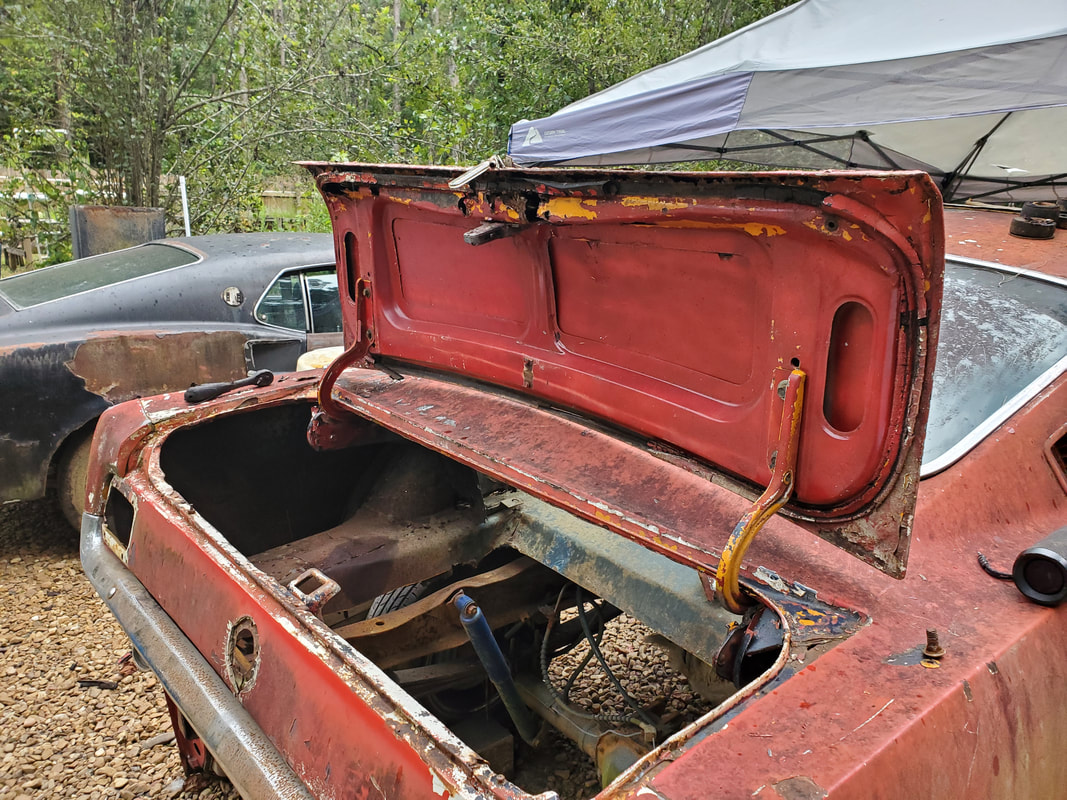 Trunk lid mounted on the hinges while welding the latch bracket to the rear of the trunk area. The torsion rod had to be removed as the tab on the right hinge was weak and wouldn't allow for the proper operation of the spring bar. 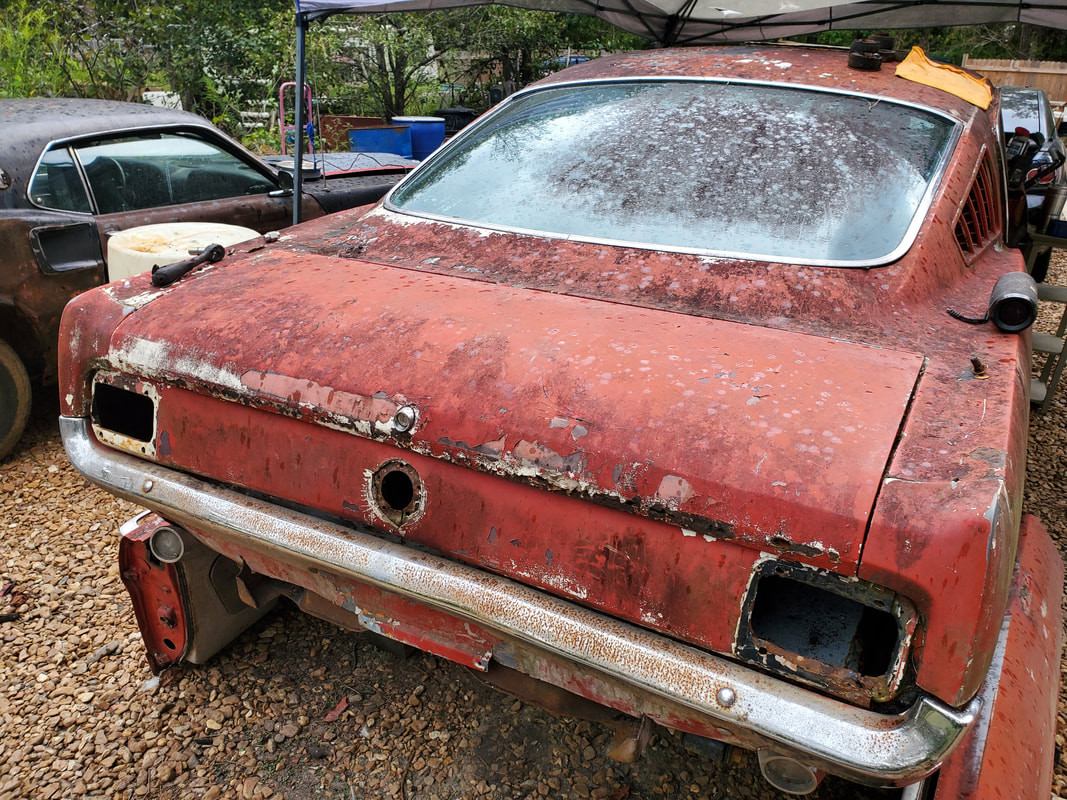 The trunk lid in the closed position testing the latch after welding the bracket back in place. Trunk fits flush against the body. The trunk lid is one of the panels that is extremely rusted out. The outside skin isn't that bad surprisingly, but the inside around the latch mechanism is rusted out horribly, but still intact enough to allow the trunk's use where it can be latched. I had to weld the bottom of the latch bracket to the back of the trunk after having had to move the piece during the welding/reinforcement of the rear of the body during the mounting process. After welding the bracket back in place, I mounted the trunk lid and closed it, managing to get the alignment right on the first try. I had to remove the torsion rod that is used as a spring to pop the trunk lid up when the latch is released since the tab that the rod links to was weak enough that it would bend when the trunk lid is closed down some. This is fine since it doesn't stop the operation of the trunk lid. From the rear we moved on to the doors next. 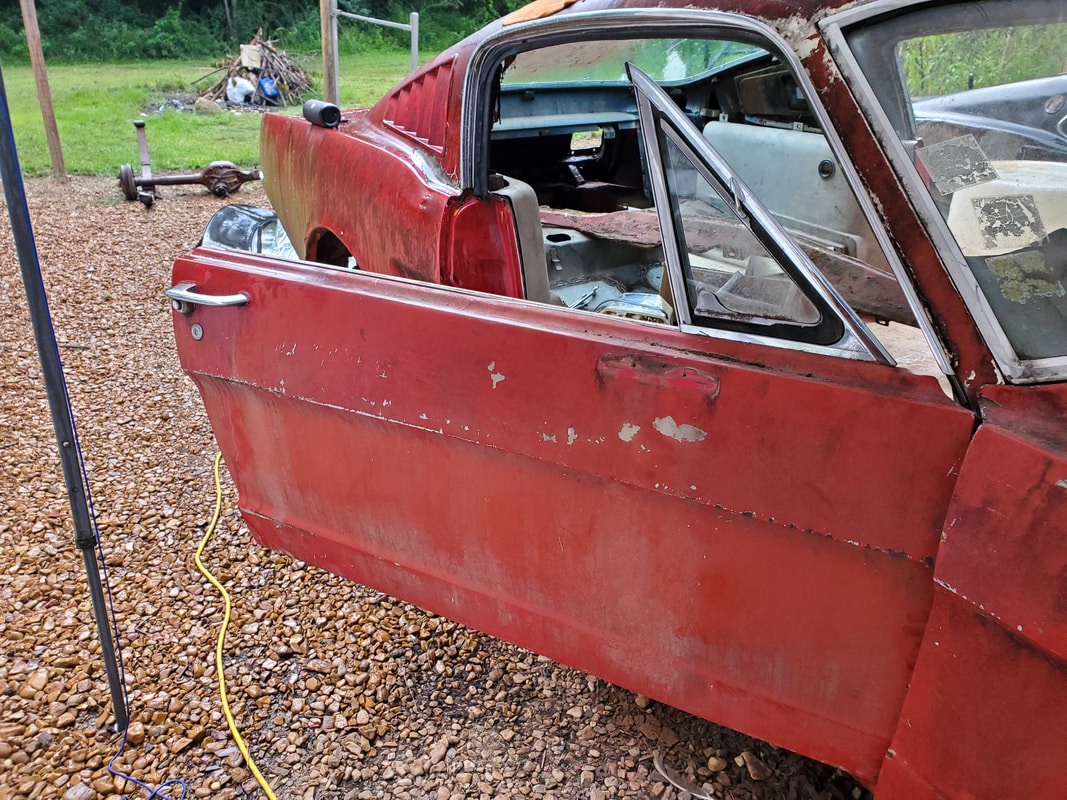 The door after getting the bolts secured in the hinges. 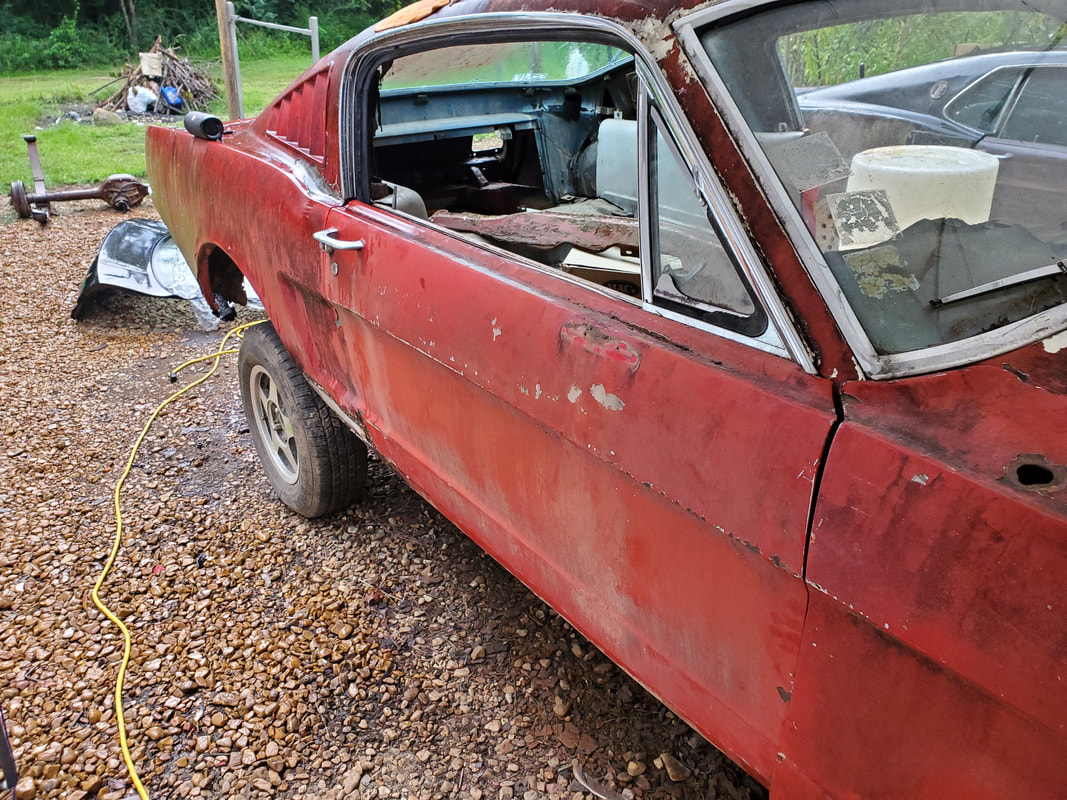 The door in the closed position, despite the latch not operating properly. The gaps are acceptable on the front and back. With some help I was able to get the door lined up enough to get the bolts in place on the hinges. I did have to loosen the body side of the hinges to slide the door back a small amount in order to line the latch up at the rear of the door. Despite the latches being lined up, the latch is not operating properly to allow for its grabbing the knob on the body so the door can fully close properly. I figured I'd have to go in the door to mess with the latch mechanism since this problem has been present since before I even stripped the car. I may very well have to replace the latch worse comes to worst. This problem was also apparent on the driver's side door. Only good thing on the driver's side is I didn't have to realign the door for it to close flush. 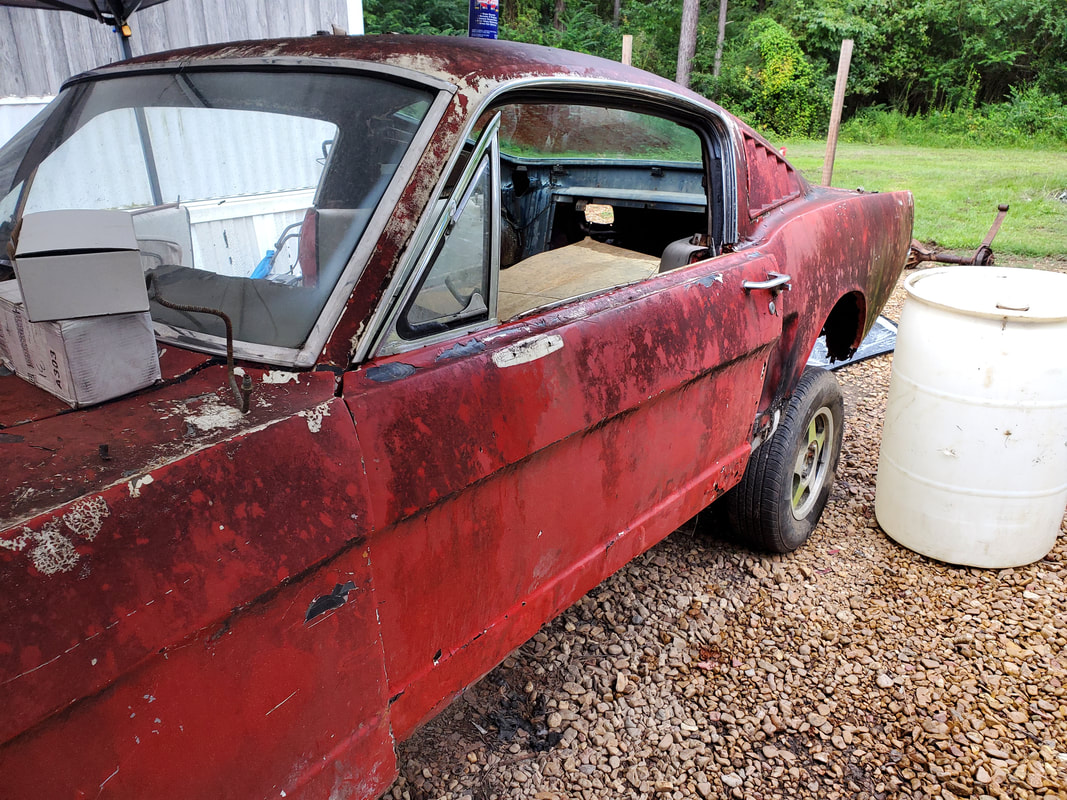 The driver's door installed and unable to fully close due to the latch being bad. The door wouldn't even sit in a semi closed position. 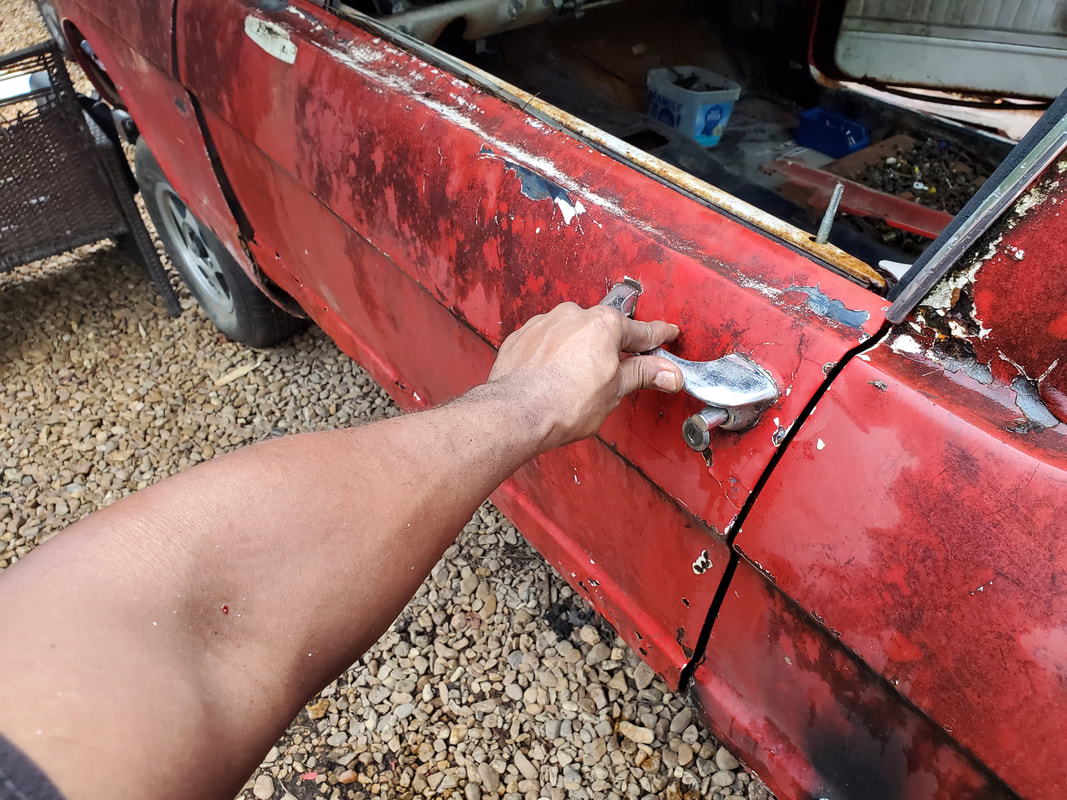 Holding the driver's door in the closed position for this photo op. The gaps front and back are at acceptable distances. Even the A-pillar window fits nicely. With the doors pretty much addressed and the need to work on the latches already established, I moved to the front where I would have to assemble the multiple components that make up the front clip. At first I wanted to try and see if it would be possible to assemble these pieces as one unit but the way everything is made makes that very difficult. The front valance had the same problem as the rear where I had to cut notches out to accommodate the Ranger frame rails at the front. Also there were a couple mounting points that were missing/broken. It's also funny that the left fender had a thick layer of bondo where the front of the fender meets the valance panel, in a crude attempt to make the seam flush between the two panels. This bondo was broken some during the disassembly, and in order to make things somewhat "right", I'll have to replicate this fuckery if I'm to reuse these panels. Otherwise I'd have to just replace all the panels, which will get expensive. Because these panels are very ratty, I'm open to do anything I need to in order to give the illusion o a nice body. 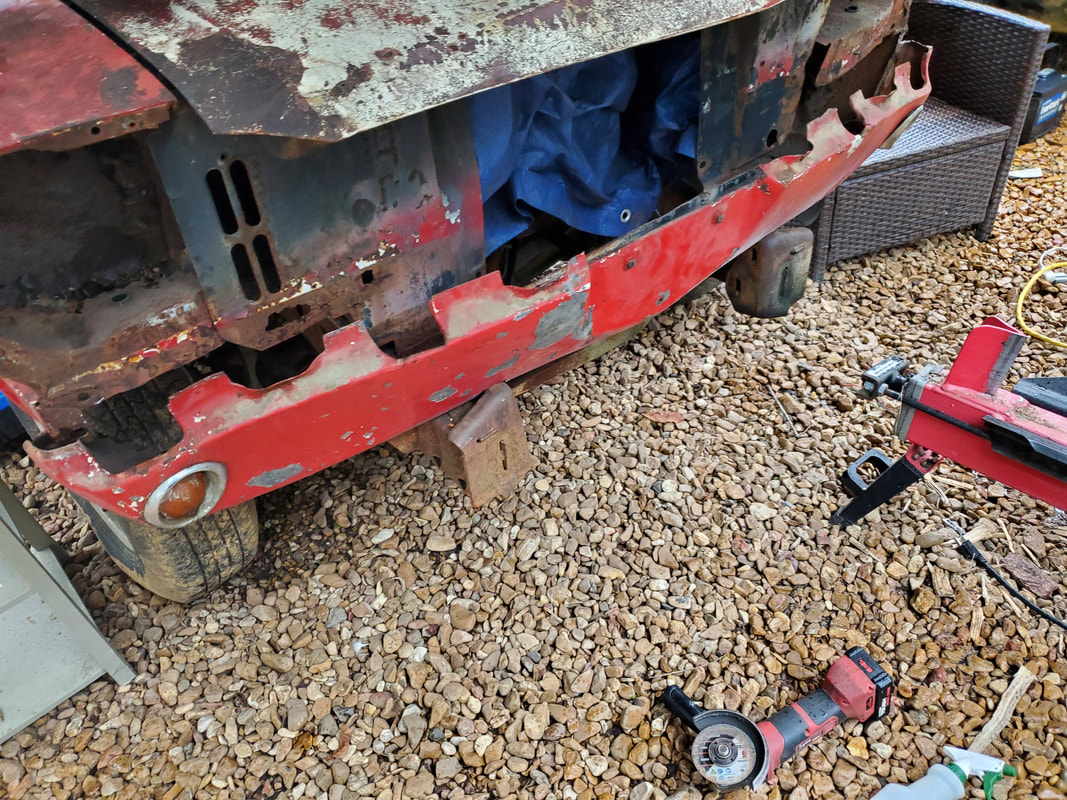 Fitting the front valance panel in place, taking into account the Ranger frame rails and the distortion of the panel. 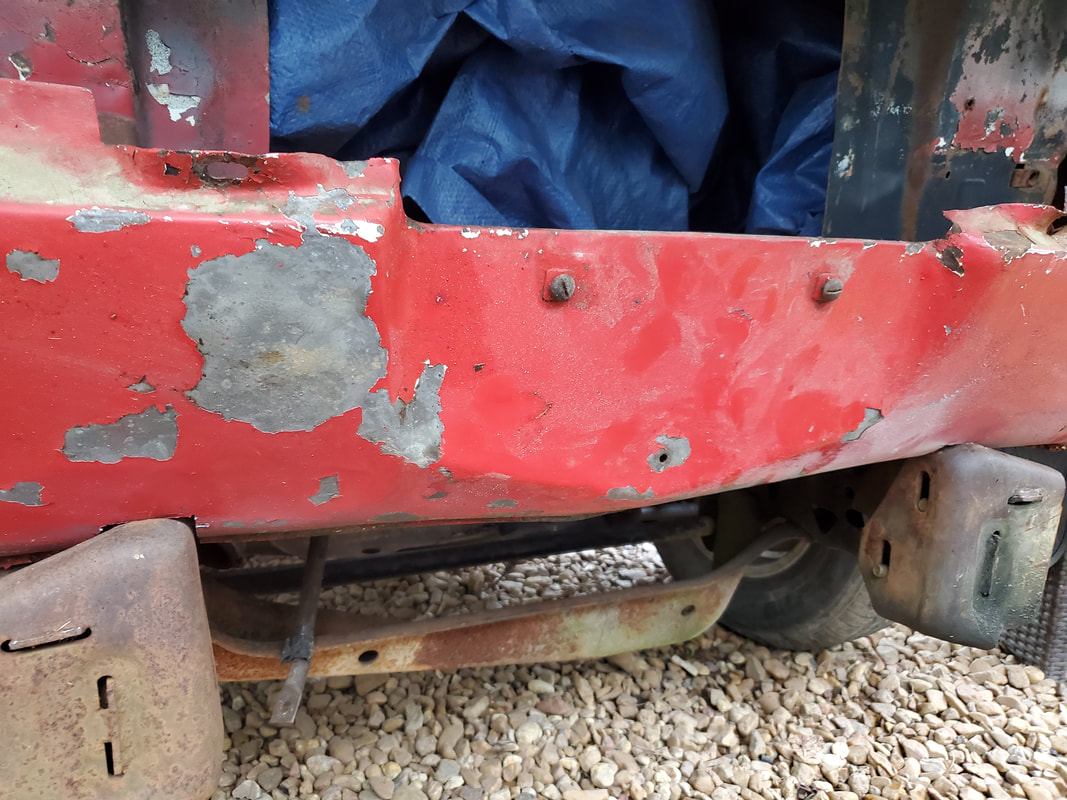 Closeup of the notches cut on the bottom of the valance panel to accommodate the Ranger frame rails. With the front valance panel in place, there was an intermediate panel that had to be mounted on top of the valance panel. This panel fills the gap that would be present between the top of the valance and the grille/headlight assembly that will also have to be mounted. Large notches in the top of the valance also accommodate the bumper's mounting apparatus so this panel is necessary to fill in the open space that would be present if it were not for this piece of sheet metal. 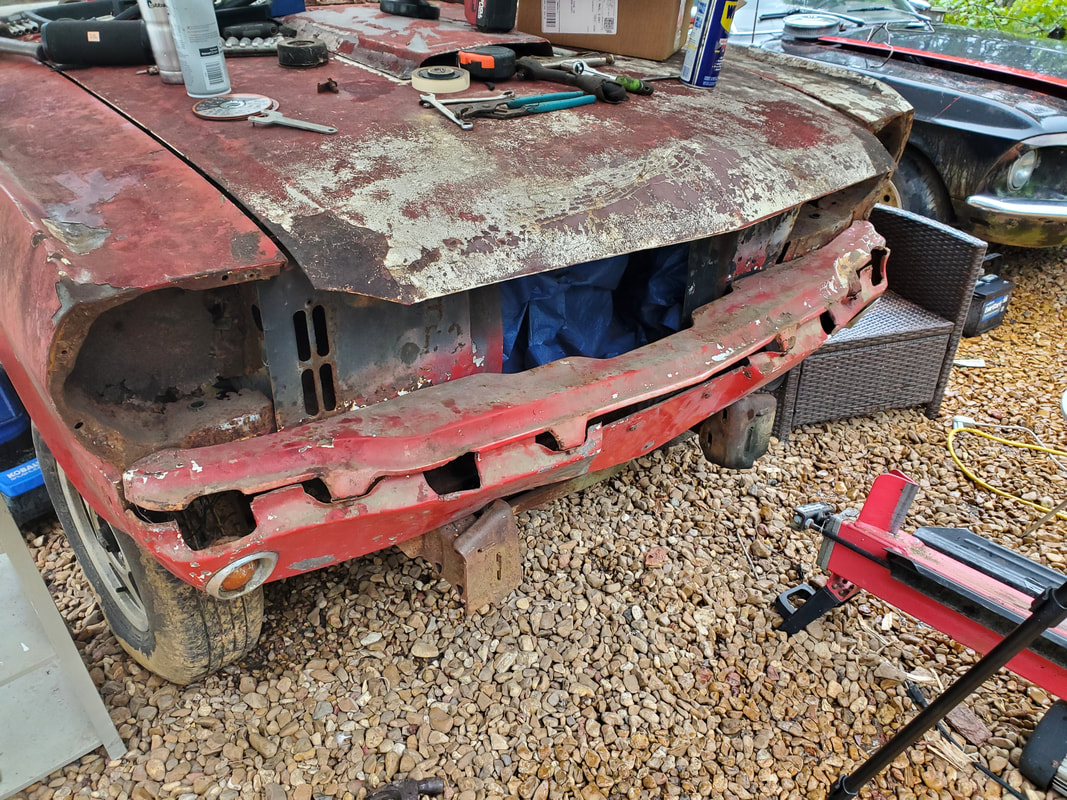 Right side shot of the intermediate panel as its mounted on top of the valance panel.  Left side shot showing the intermediate panel as its mounted on top of the valance panel. With the way the intermediate panel was distorted along with the two end tabs being non existent due to rust, the panel would not sit nice and flush on the top of the valance panel. To remedy this, I had the idea of trying to weld the two panels together where they meet, creating a single piece from the two separate pieces. I have to check to make sure I'll still be able to reach the mounting bolts for the valance panel afterward. If so, I can weld these two panels together and at least somewhat achieve the goal of combining these front body pieces together, which will also help in making the two panels sit evenly enough relative to the other, which will at least help in getting the remaining body parts lined up and mounted. Speaking of the bumper, the original mounting bars that held the bumper are no longer present on the body, due to the idea that the subframes that held those bars are no longer present. Not to mention one of the bars was rusted all to hell. What this means is I'm going to have to fabricate some form of mounting bracket for each side to hold the bumper via its original mounting points so the bumper can sit at a proper spacing from the valance and the body in its new configuration. This will be a little bit of an undertaking just like mounting the body to the truck frame. After finishing up the grueling work of closing in the interior of the Truckstang, which involved welding up a lot of sheet metal, I decided to take a short break. I spent somewhere around a month give or take working on the car from the start when I initially started breaking down the car prior to getting it on the drums and boards all the way to the point I finished welding up the last bead on the last section of flooring sheet metal. I had to tend to other duties, one of which was an impromptu body repair on the Scion after a rear end collision. I also took the time to take care of some other cleanup work and some other automotive troubleshooting and problem solving work on the Tracker and F250. I also managed to get a bunch of landscaping done as well. With that all said and done, I felt comfortable getting back to the Truckstang once again. This time we're going into the advanced stages of the body repair/assembly. With the floors done, the next order of business is putting the body panels back on. We took a moment to bring down the doors, front and rear valance panels, front and rear bumpers, the pieces for the grille/headlight assembly, and trunk lid. I started with the easiest of the panels/areas and that's the rear. I started with the rear valance panel, which even though it normally would just be secured in place with several sheet metal screws, will require a little more to get it installed in our application. 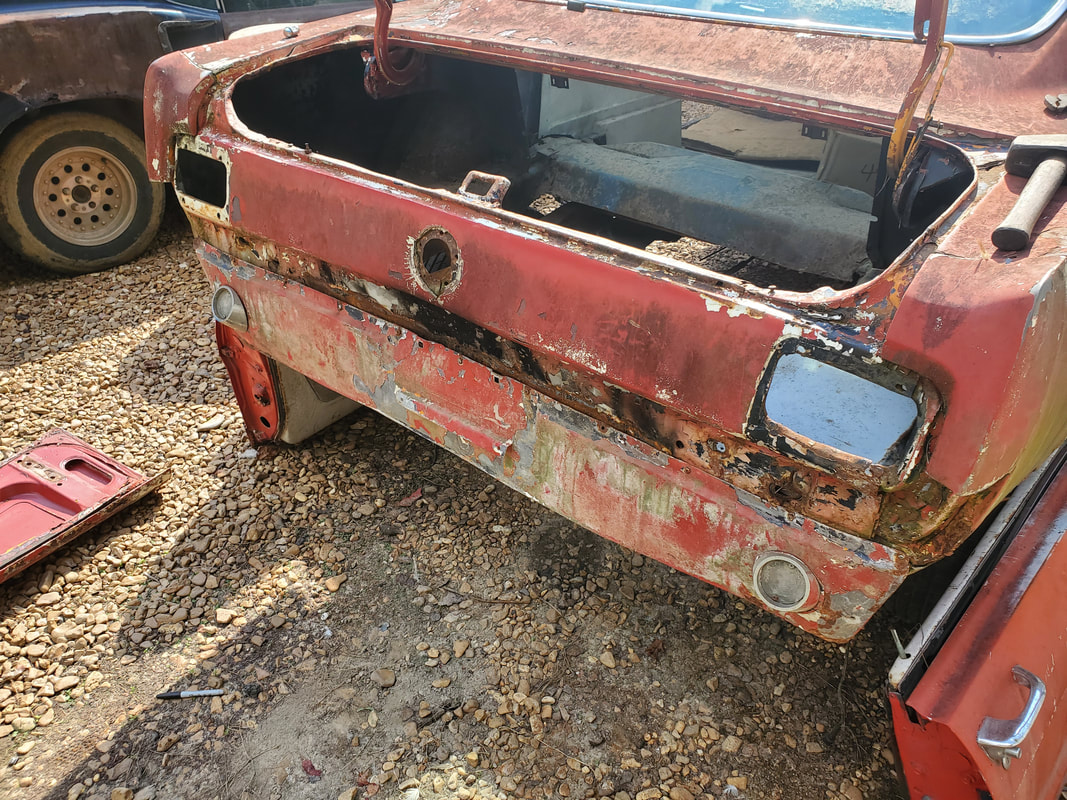 Valance panel secured with sheet metal screws along the top of the panel during the test fitting, just prior to cutting into the sheet metal. Because of the rear of the Ranger frame extending out from the rear of the Mustang body, the rear valance panel will not go on in its original form. I ended up having to hack into the panel around the points where the Ranger frame made contact with the inside of the valance panel so the panel could be manipulated to fit in and around the frame rails and crossmember. This took a few tries to get the metal cut out that needed to be cut out to ensure the panel would fit all the way against the corners of the rear quarter panels. I cut just enough metal away to achieve this goal while still retaining the license plate mounting point. One may cringe at the thought of hacking up an all original valance panel but this piece was not in the best shape anyway so hacking into it really wouldn't matter. Besides, if I'm going to restore the body of this car. I'd have to be willing to do whatever I have to in order to get the panels back together, in much the same way I had to hack the floors up to make things work with the arrangement of the body on the frame. 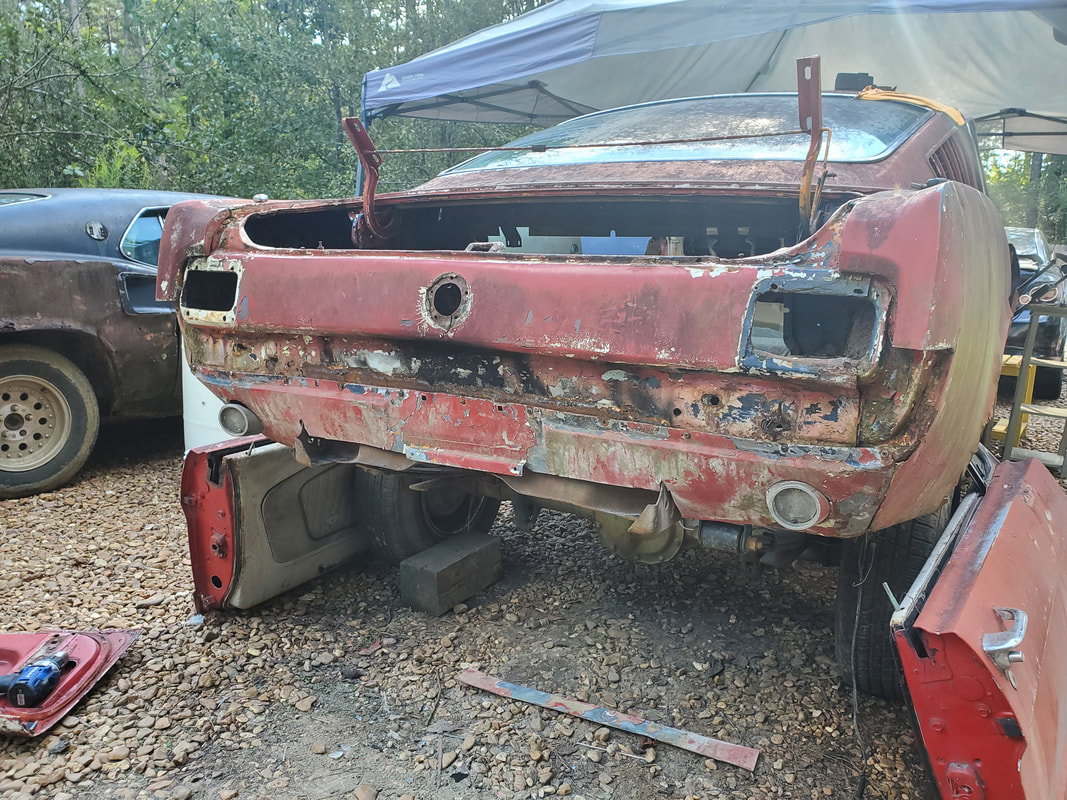 Rear valance panel fully secured with sheet metal screws along the top and on the bottom corners after making the necessary cuts to allow the panel to fit around the Ranger frame rails. With the rear valance panel secured fully on the body, even at the corners, I took a moment to scrape away the burnt paint on the bumper panel to clean the metal off after the paint was burnt from the welding in the trunk area. I also had to source some nuts/bolts/washers in order to secure the bumper to the panel. I also had to grind out a broken stud/thread piece on one of the bumper brackets to leave the hole in order to allow the bolts to hold the bracket in place. Once that little order of business was taken care of, I was able to bolt the bumper in place.  Rear bumper mounted in place. I did have to beat on the right side of the bumper to get the side to come closer to the body as we had some excessive gappage at that corner. Because of the condition of the body and the apparent distortions of the body, the bumper didn't sit perfectly flush on the right side. After a little sledgehammering, I was able to get the bumper sitting even on both sides, even with some gaps between the bumper and the body. At least it was even either way. With the valance panel and bumper in place, the last move in the rear will be mounting the trunk lid. |
