|
As part of my weekly routine I hit the gravel place to get a load of gravel to spread somewhere in the compound, in this case, in the garden. I've been trying to cover more of the muddy areas that have been exposed after the cleanup work I did a while back. Of course I'm trying to extend the already established gravel grounds that I've already laid versus just having random patches everywhere. I focused mostly on the area near the entrance where the composter used to sit, since this area is pretty bad as far as mud is concerned. 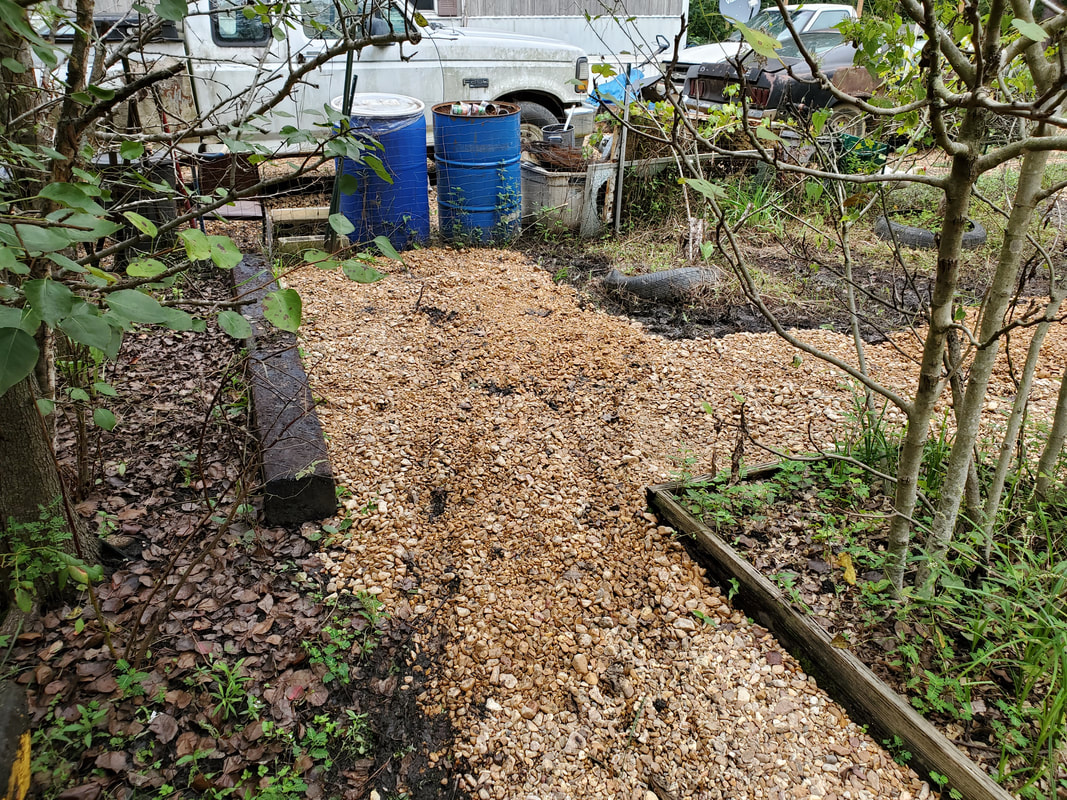 Walkway between railroad tie raised bed and fig tree raised bed covered in gravel leading up to old composter spot. I continued the walkway that went along and in between the railroad tie food forest raised bed and the fig tree raised bed that have been set up a while back. This walkway connects to the open area where the composter used to sit and getting this area graveled up will go a ways to taking care of the sloppy areas of the garden that we will traverse when within the fences. Also by getting this gravel laid down, it will allow me to be able to finish up the railroad tie bed and have that portion of the garden finalized as far as aesthetics is concerned. Also in this area it meets up to the garden fence line, which at this moment is still just a simple T-post and chicken wire fence from a long time ago, which will eventually be pulled up and replaced with a regular wood fence like the rest of the compound and the rear part of the garden. 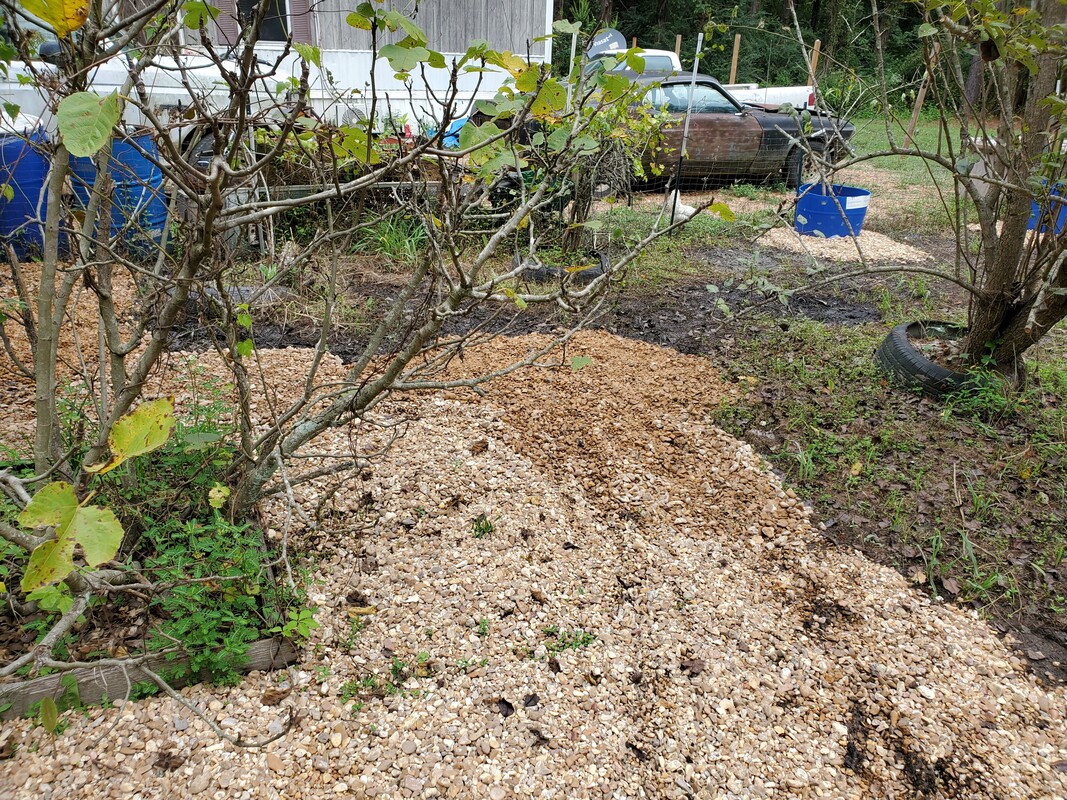 Area around fig tree raised bed covered in gravel extending out towards north fence. After getting a good covering of gravel over the old composter area, I did want to cover a spot where the composter is currently sitting since I plan on making a slab to put the composter on. I did have to move the composter further away from the area where I plan on making the slab and dump a bunch of gravel over this area so I can get the whole ground settled good enough that when I do pour the slab it won't be as likely to crack due to ground settling since most of this area is muddy. 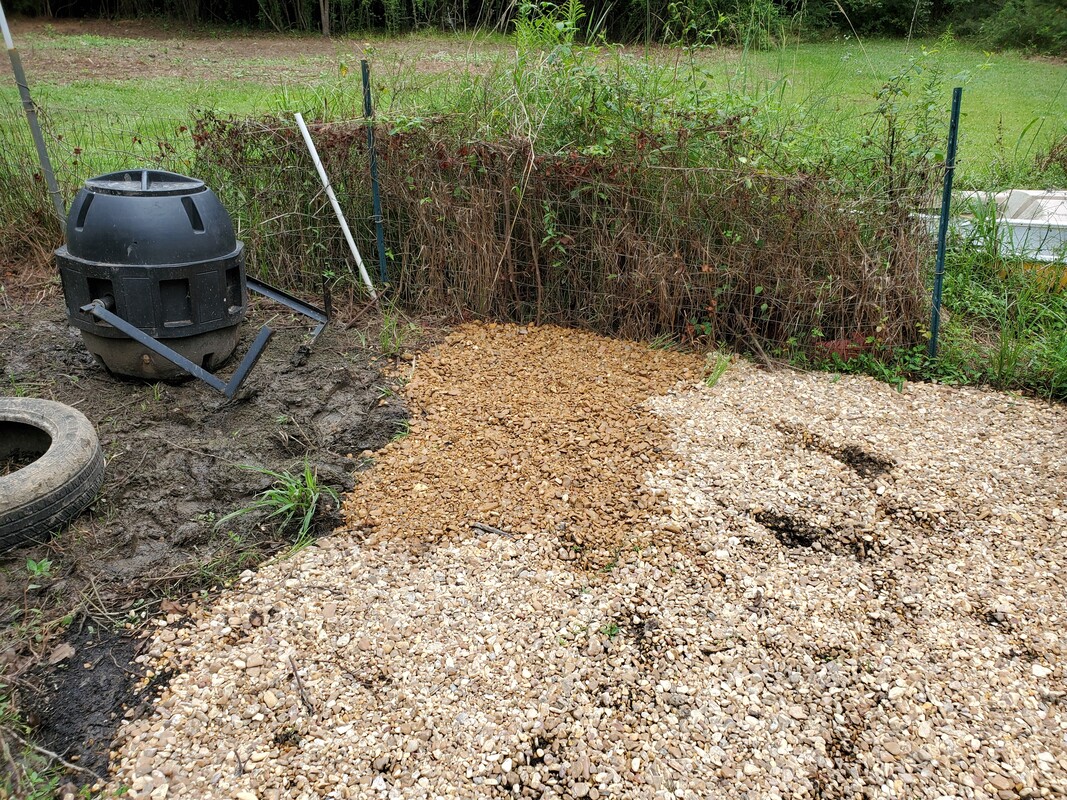 Patch of gravel laid in the spot where I plan to pour the slab to set the composter on, close to the eastern fence line and just across from the Kennel Greenhouse. With my gravel laying session completed I turned my attention back to the Fallen Trees. Even though the 18" chainsaw is out of commission due to the chain drive sprocket being stripped, I was able to use the 12" chainsaw to cut into a lot of the trunks even up to 12". I did have to work a little bit to cut all the way through the larger trunks but I did cut enough short logs to make me a sizeable batch for splitting. Of course I already accommodated these future firewood stackings by laying gravel and pallets down in the firewood staging area in the recent past since I planned on getting back to processing the Fallen Trees into useable firewood. 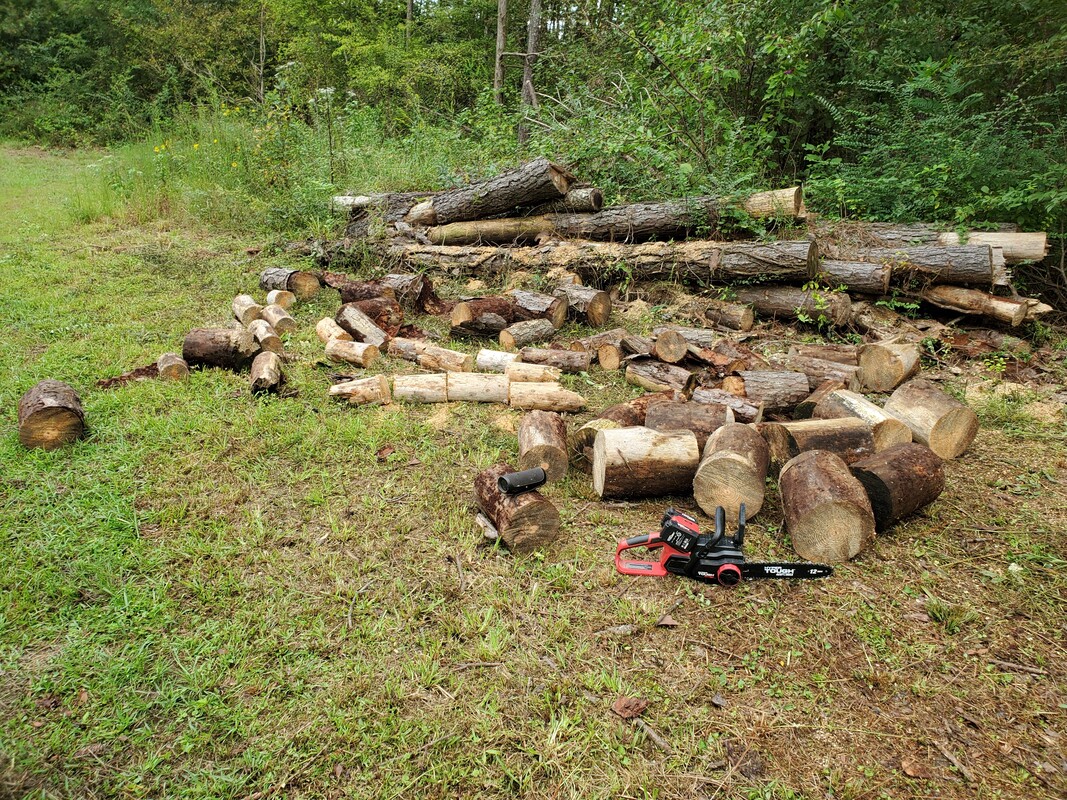 Large stack of cut logs, courtesy of the chainsaws, note the 12" chainsaw in the foreground among the cut logs. Even though I was focusing on the main stack of tree trunks that is kind of in the middle of the whole area, there was a couple of individual trunks I took time out to chop up, since they were just sticking out in the middle of the area. These were of course, larger trunks that I had to really work on to get cut into the smaller logs I need them to be. I had to go into a second set of batteries before I managed to get everything cut up. Some of the stuff went to the burn pile, mostly weed tree crap, but the main tree trunk was cut up and added to the batch of logs that need to be moved over to the splitter for splitting. After getting the trunk cut up a quick pass with the mower helped neaten things up on the ground. 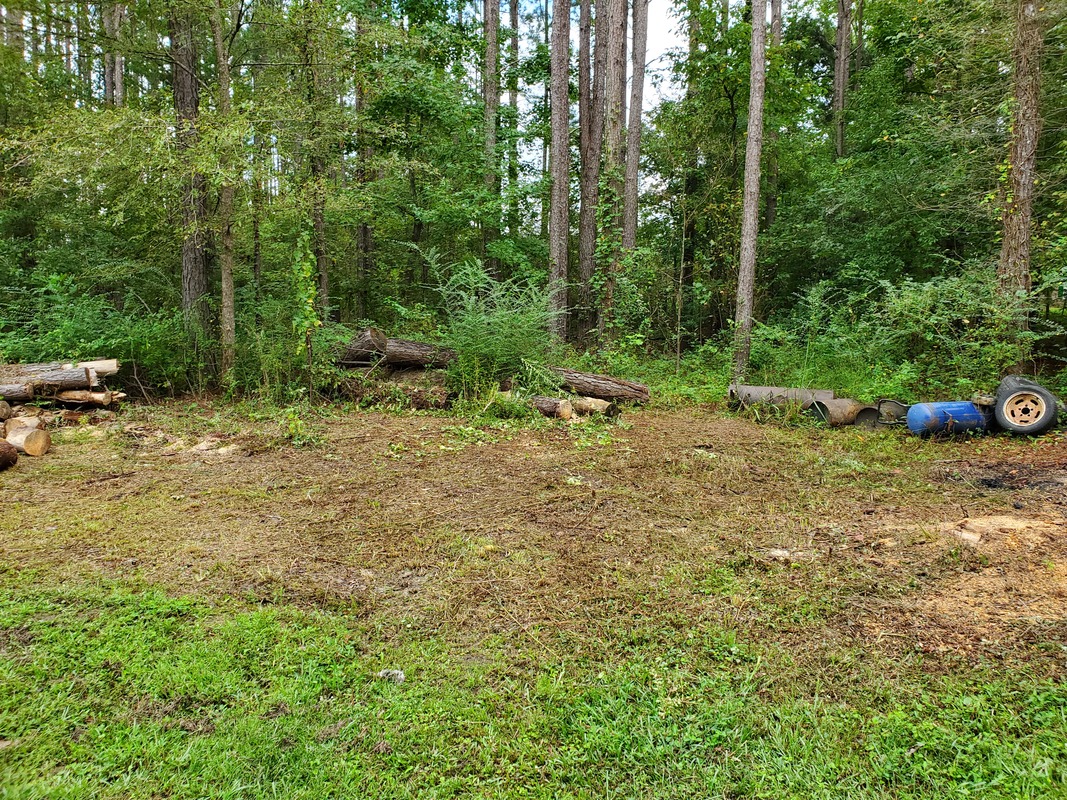 Middle area where lone tree trunk once laid, after cutting said trunk up the area is now open, allowing for further cleanup. Scrap pile is to the far right and the main stack of Fallen Trees is to the far left. For the time being I'm going to be making it a daily job to use a pair of batteries with the 12" chainsaw to cut as many trunks up as I can before the batteries are exhausted. I'll then be moving those cuts to the splitter and taking care of them then ending the job with them being stacked on the pallets in the firewood staging area. I'll keep going back and forth with this until I manage to get these trunks all cut up. Once the sprocket comes for the 18" chainsaw I can get that saw back in the game and take the load off the 12" but as far as landscaping is concerned, this is where I'll be focusing on for some time. I want to get all these trees cut up and the area cleared for the future fence line, even though it'll probably just be a row of posts being sunk in the ground along the planned fence line. Eventually I'll start making it a habit to get a fence panel once a week, maybe 2x a week based on available money, until I get the rest of this area covered, leaving just the gates. That will be a whole other animal to tame.
0 Comments
After removing the double stump the other day I started chopping away a little at a time at the elevated stump to try and get it down to ground level so it won't be as imposing. Today I chopped a little more into the stump, making vertical cuts at a point where it would allow me to remove 1/4 of the stump after making the horizontal cut. I managed to get a couple of fair chunks removed from the stump before exhausting one battery and part of a second battery. The main disqualifier was the chain drive sprocket on the saw. After so much heavy use the sprocket finally gave way, with the chain being chewed up to the point that the chain started slipping bad on the stripped gear. That will need to be replaced before I can continue with any more heavy cutting.
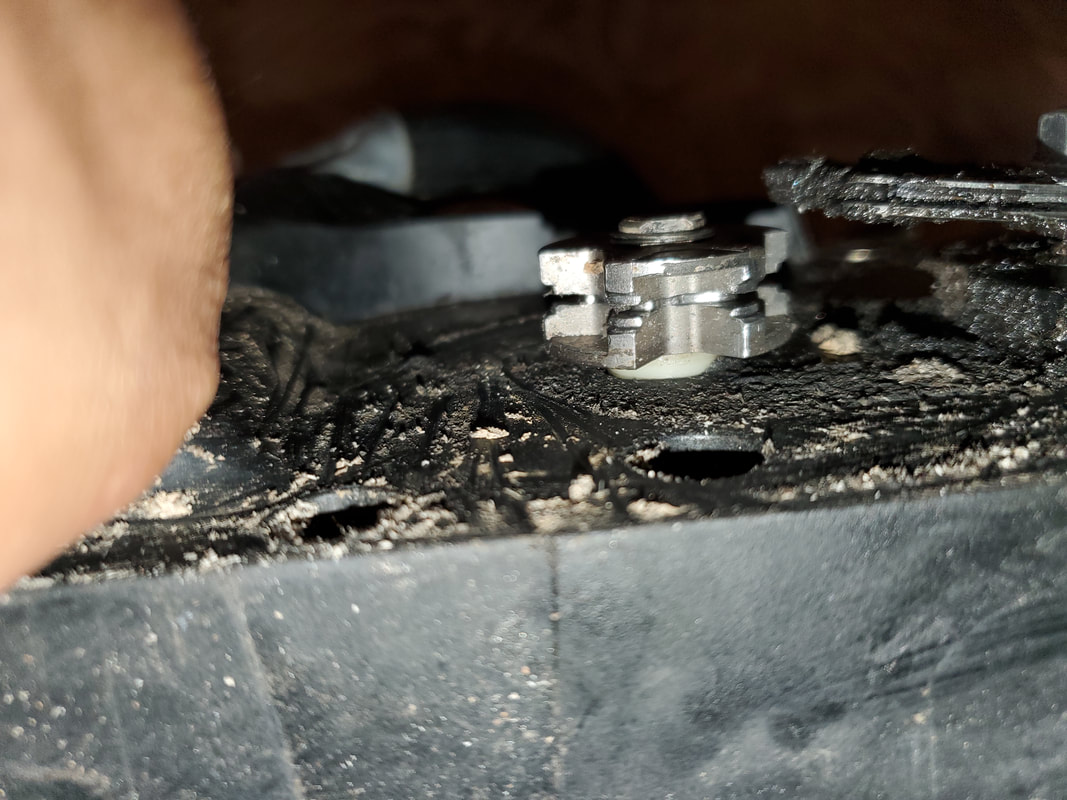
Chain drive sprocket showing how bad the chains have stripped the large teeth in the piece. This is pretty much garbage.
After removing everything it didn't make any sense to reassemble the saw as I really can't use it any until I replace the gear. Really I'll be removing the gear so I can at least have things ready to install the new gear when I do get it. At the same time its good that I managed to get some new chains for the little 12" battery saw that we've had sitting for quite some time due to our laziness in looking for replacement chains. After replacing the chain, I put this one back on the field and off the bench so I'll be able to use it to cut some of the smaller diameter logs in the stack of Fallen Trees. As for the stump, that will have to wait until I replace the sprocket on the big saw. 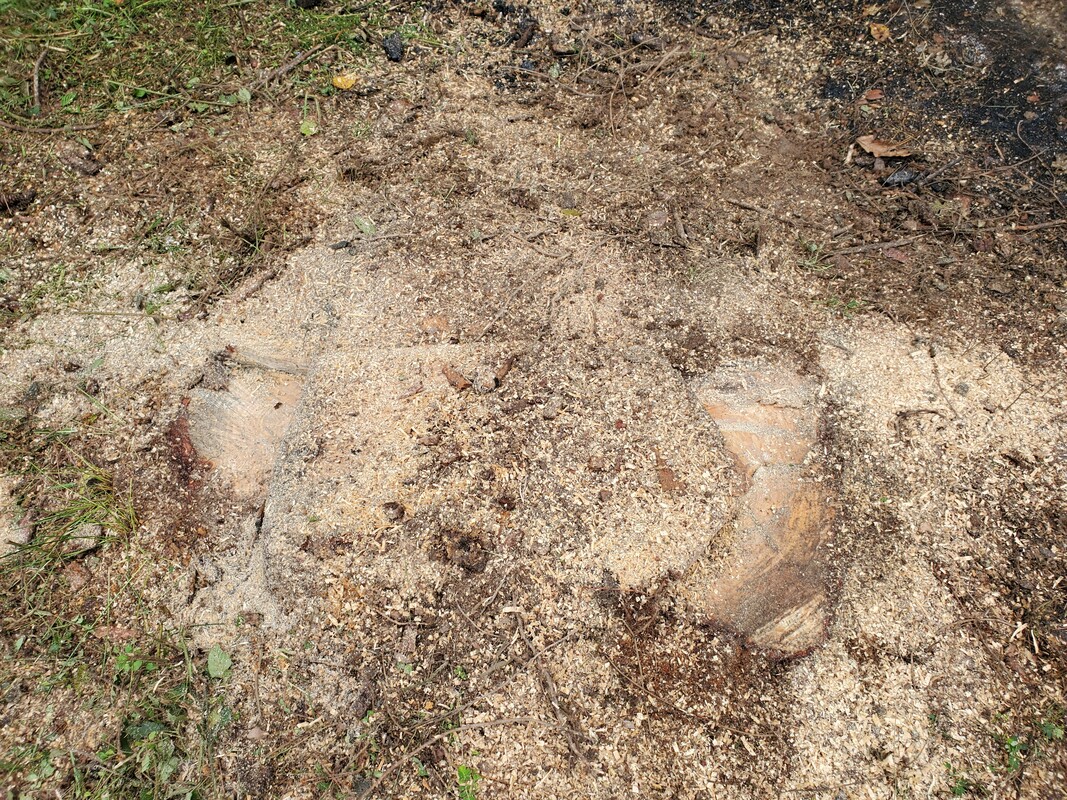
The double stump with more chunks cut out from the left and right sides of the stump as they sit in the picture.
Since I couldn't use the big chainsaw anymore I turned my attention to the Fallen Trees. As stated before, I targeted the smaller diameter trunks that were at the front of the stack, chopping into them with the fresh chain on the 12" saw, chopping out chunks that will then be transported over to the log splitter for later splitting. I split more than enough logs to keep me busy for a bit before the batteries eventually exhausted themselves. At the same time I even managed to chop up some other brush around the stack of trees. I used the Electric Bush Hog to further chop weeds and other brush that were still thick around the stack of trees. I used the saw to cut some thicker branches that were in the middle of the stacks of trees, moving all that trash to the burn pile for later disposal. 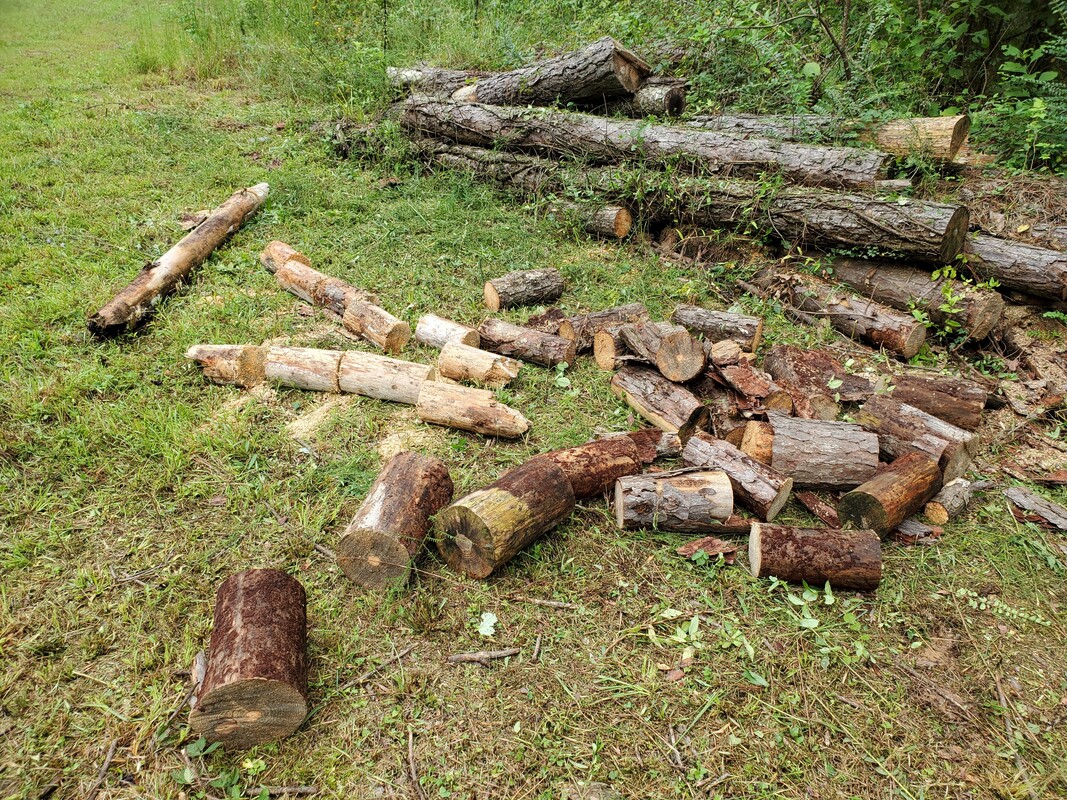
The fresh cut stack of small logs cut from the smaller trunks of trees, courtesy of the 12" chainsaw.
Cutting into the bare areas of the yard among the spread out stack of trees will get me off to a head start in cleaning up the greater yard in this area so when I do manage to cut and remove the tree trunks, I'll be able to have the area fully cleared for future development. Of course some of these tree trunks are rather large in diameter and will require the 18" chainsaw to be in tip top shape to handle this load. Luckily I still have plenty of chain to handle the work load because I'm gonna need it to make the number of cuts necessary to turn all these trunks into short enough logs for splitting into future firewood. 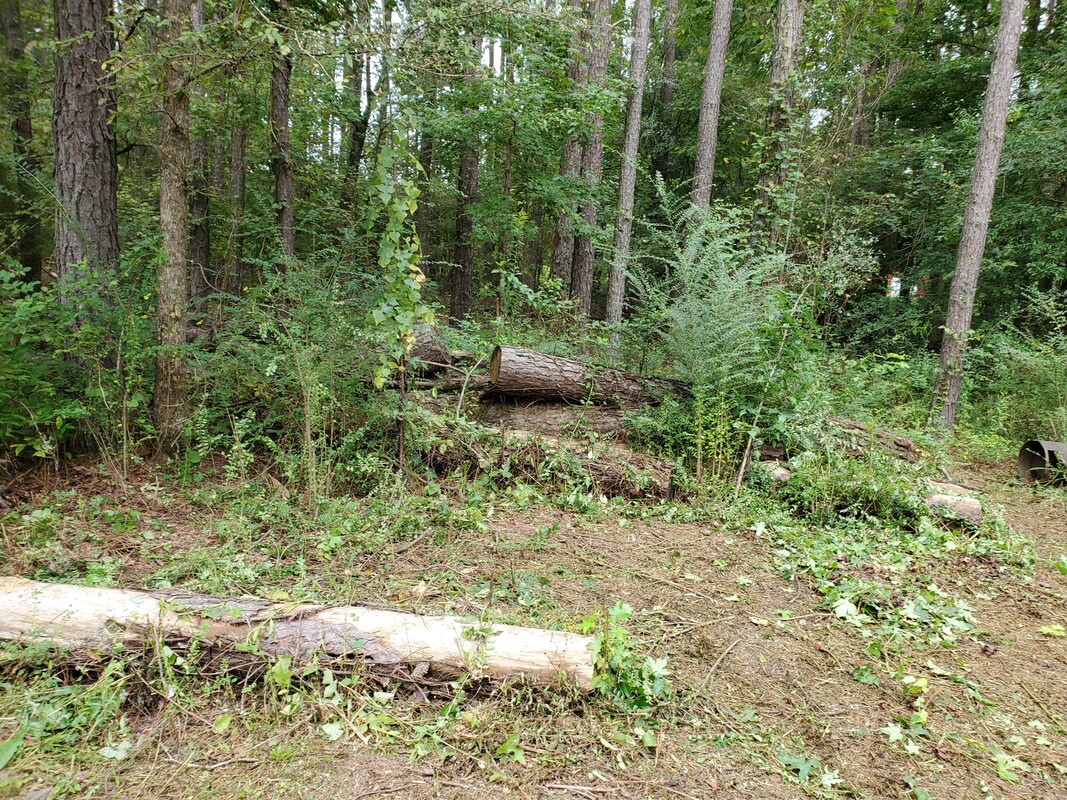
Even though my main focus is in this area where I've been cutting some of the brush between the different tree trunks laying on the ground, the only trees in this area are the larger trees. This is the area that will be within the compound's fence when I do manage to erect the fence. Until then I'll have to just keep chipping away at the greater stack to lessen the clutter so even while working on the larger trunks I'll not have to worry about as much in the greater yard. Instead of stopping because of a damaged or broken tool, I instead turn my attention to another part of the greater project where I can use other tools to continue the work. Capitalize on the time in any way possible.
Working our way around to the south end of the compound, in the "backyard" area, I've managed to chop down a lot of brush and stumps, down to one remaining stump. All the stumps have been chopped down to ground level so as to make it easier to ride over with the mowers, or at least be able to get close enough to the flat stump area with mowers and/or trimmers that we can get grass trimmed without risking damage to the machines.
Last stump cut down in backyard area, also last stump that was burnt in an attempt to destroy said stump.
The last stump that has to be disposed of is actually a double stump that is quite huge compared to the other stumps that were chopped down. I'm not sure how I may approach this one, but I will probably cut the stump in the middle at the low point to separate the two stumps then work on one at a time to get them chopped. Each stump is probably near 18" in diameter, the same as the length of the saw bar, which means I'll have to work my way as deep as I can on one end then do the other end as well until I finally sever the stump log from the base. I'll probably end up cooking a chain in the cutting of this stump, which is why I made sure to get a 6 pack so I won't be short of chains. This will still apply when I do start cutting up the Fallen Trees into smaller logs for splitting. 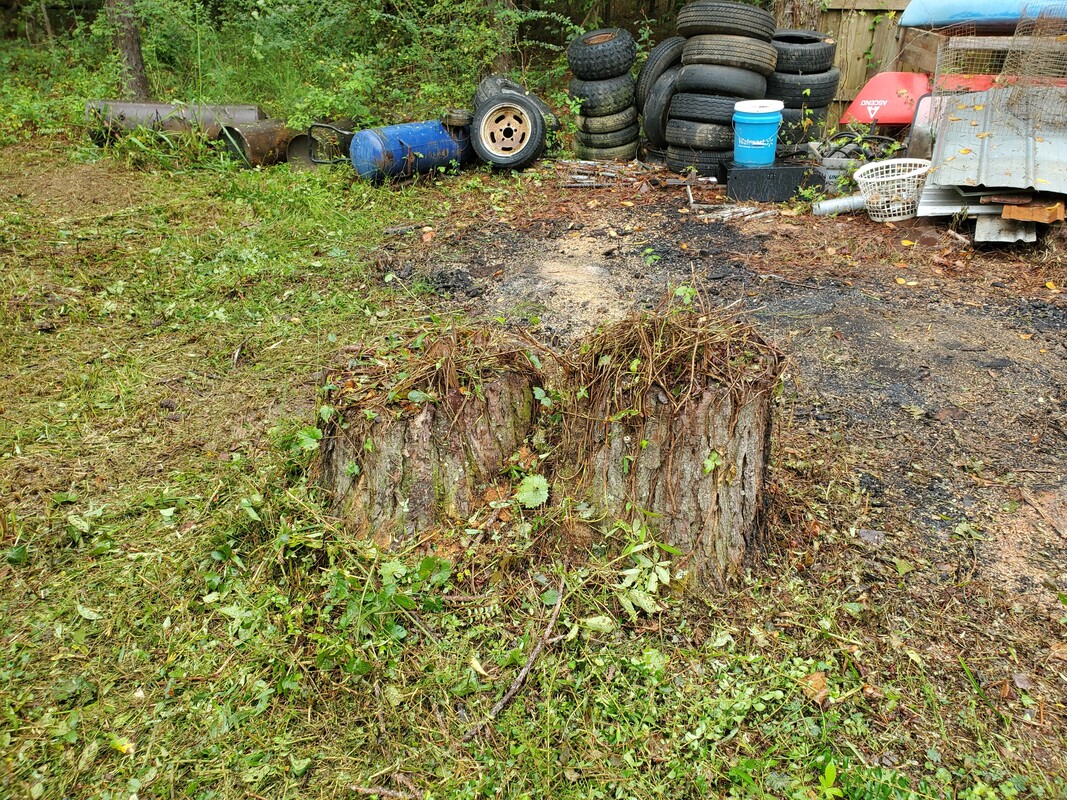
The imposing double stump sitting in the middle of the backyard area, hopefully soon to be gone.
The brush that covered the ground past this double stump wasn't just regular heavy grass but a mixture of heavy grass, miscellaneous weeds and some small sapling weed trees. I started chopping into this with the hedge trimmer at first but then said fuck it and brought out the Electric Bush Hog to really chop into everything to get it on the ground before coming back over the cut down foliage with the regular push mower to chop it all up into mulch. Of course I had to raise the mower as high as it can go since the uneven ground made it hard to push the mower over everything. It didn't take long before I started exposing the first of the Fallen Trees, some lone trunks that stuck out from the main stack of trunks. I further cut around these to get them more exposed so when I come in there with the chainsaw I won't have to brush against any of this since most of this is a mixture of blackberries and other weeds that can harbor ticks and fleas. I want everything clear from around these logs. 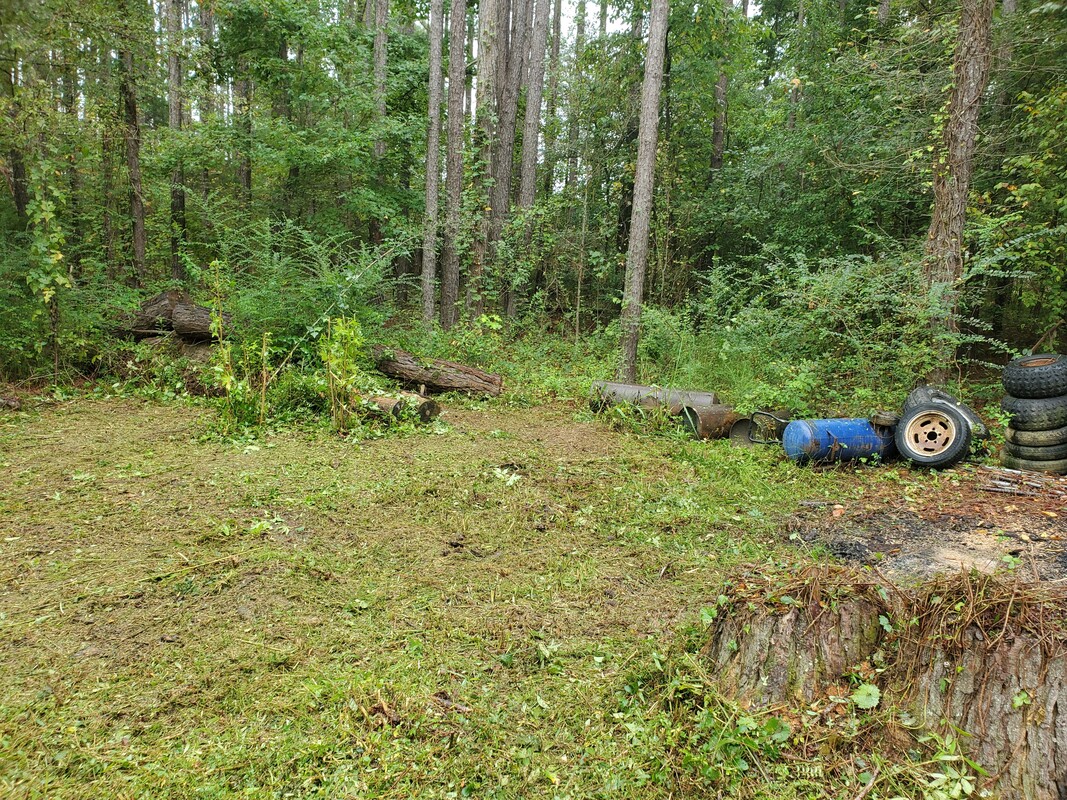
Area just beyond double stump cut and mowed down, ridding the area of grass and weeds to expose the first of the Fallen Trees, seen in the upper left of the picture.
After exposing the first of the tree trunks I continued working my way around the main stack of Fallen Trees, along the outskirts of the main yard. Again, I wanted to get all the grass cut around the stack of trees so that won't be a concern as I work around the area cutting up tree trunks. Especially since I have to pick these things up from the ground, the last thing I need to be concerned with is being surrounded by high brush and crap. Besides, it just looks a lot neater when the stuff is all cut down. Of course since these trees are sitting right in the path of where the compound's fence line, my main focus will be to clear the trees from the area where I will have to sink posts first. Once that area is cleared then I can slowly continue working my way through the rest of the trees to get them processed. I will need to clear everything all the way up to the tree line where the south fence will continue so I can have the area opened up enough to work without being in the middle of brush. 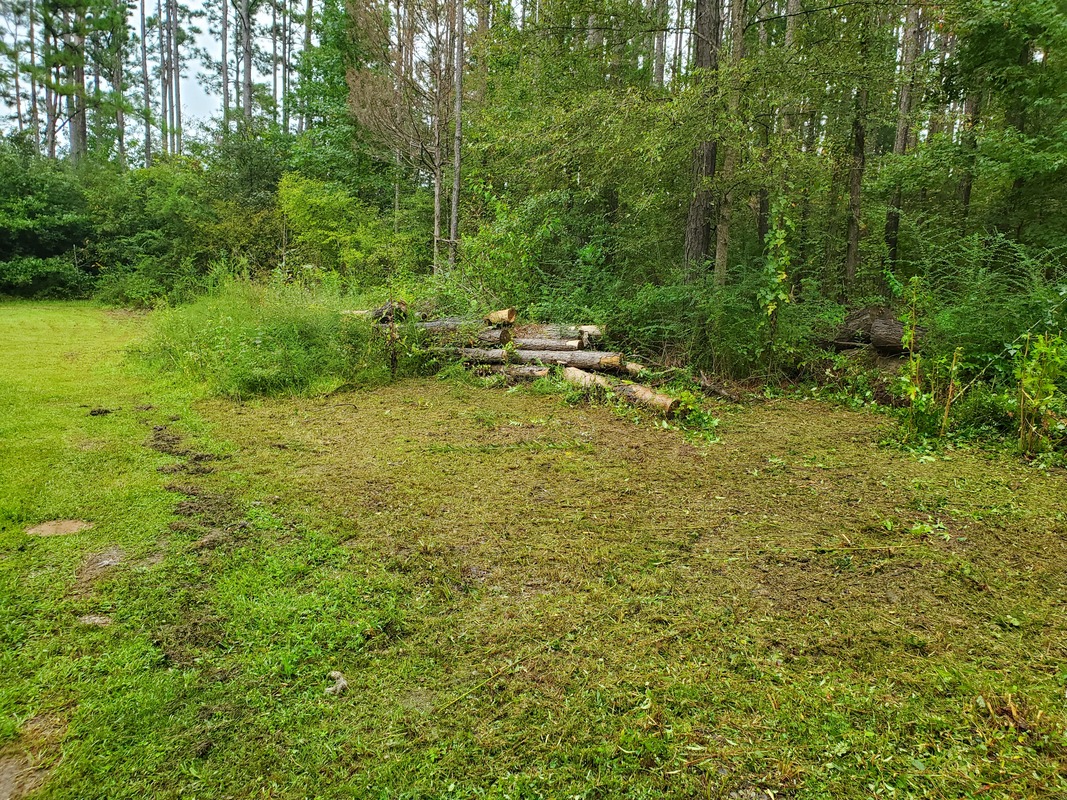
Greater area cleared into the main area of Fallen Trees, exposing everything for future work.
I have plans to eventually get several posts and concrete so I can get the fence line established along this area in order to start trying to get the fence line completed, especially in the rear area here. This area will also have a double gate set up for access, same as at the other end of the east fence line by the Midway. These two gates will allow us to keep the compound closed down but still able to move vehicles and equipment around easily. Getting these areas closed up will also make it easier for us to let the dogs out to roam and burn off energy without worrying about them running off. There will be plenty of room for them to roam around and be completely contained. Sinking of posts will also include putting them along the east fence line of the garden, now that we have the garden cleared up, it'll be nice to get the fence set up along this route so I can remove the old chicken wire and T post fence. The biggest thing right now is to get the Fallen Trees cleared out from the greater yard so we can more easily mow the area with the zero turn and not have to worry about going around things with weed trimmers or other equipment. While I don't want any grass within the fenced in compound, it'll be nice to have a grassy area on the outside of the compound, in this greater yard, where we can conduct different practices in a more "natural" setting. But to have that setting it'll be nice to not have to go through extra effort maintaining it. Being able to just mow around the area real quick with an occasional trim of any protruding branches along the tree lines will make this greater yard more welcoming compared to how things used to be when the foliage was able to just grow wild.
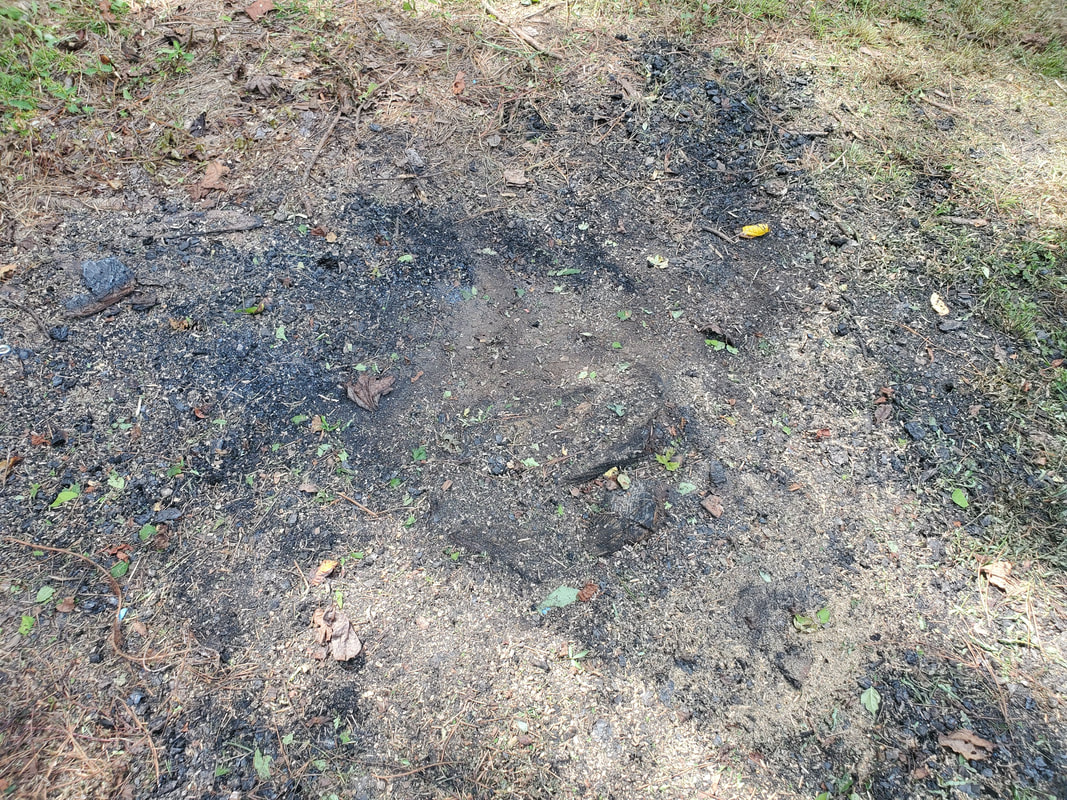
Over the last couple of days, my landscaping endeavors have taken me into the area where I needed to clear several large stumps from the Fallen Trees that were brought down last year. I made several attempts at burning these stumps with no real progress despite the prior preparations to help them along in burning better. After getting a pack of new chainsaw chains, I decided not to waste any more time with these stumps, it was time to start chopping them off at the ground.
I had already cut several of the smaller stumps down that were near the fuel shed, especially since I wasn't going to fire these, not next to a FUEL shed. After cutting those down I cut a couple of stumps that had already been fired a couple of times, getting them out of the way. After firing the remaining stumps, once all the stuff burnt away, I came back the next day, cleaning up everything from around the stump then chopping it away at the ground so our mowers will be better able to go over them without making contact. 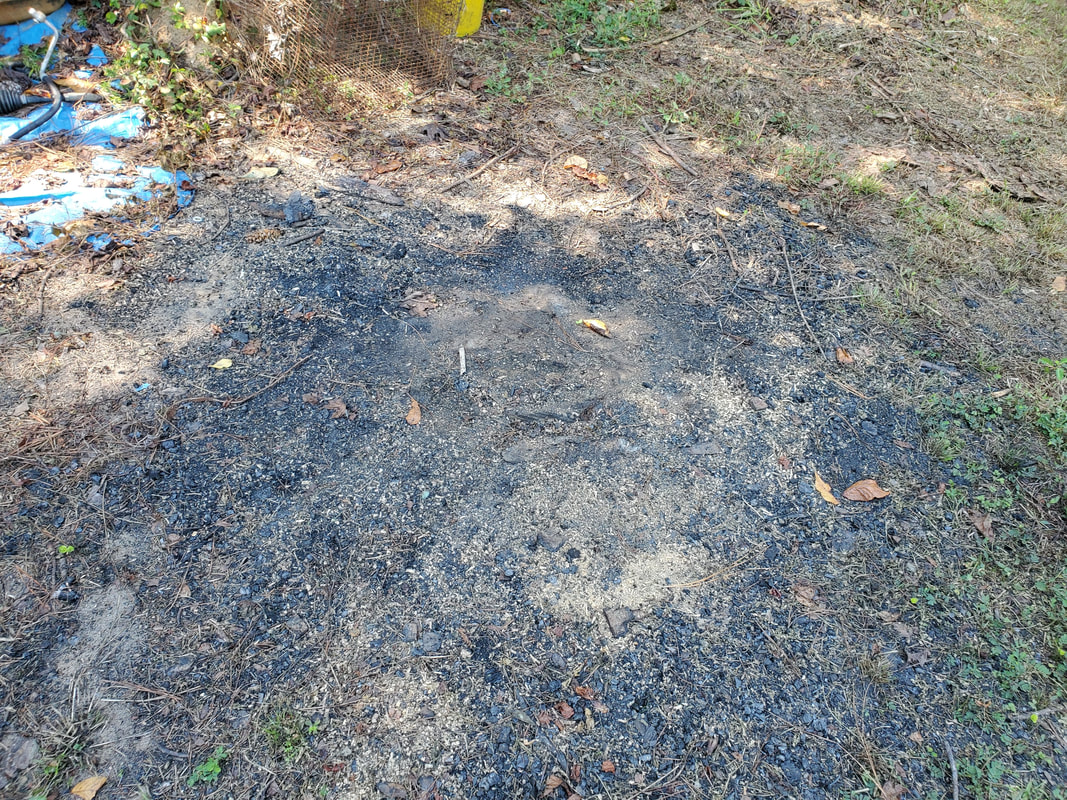
One of the older burnt stumps, chopped down at the ground, flush.
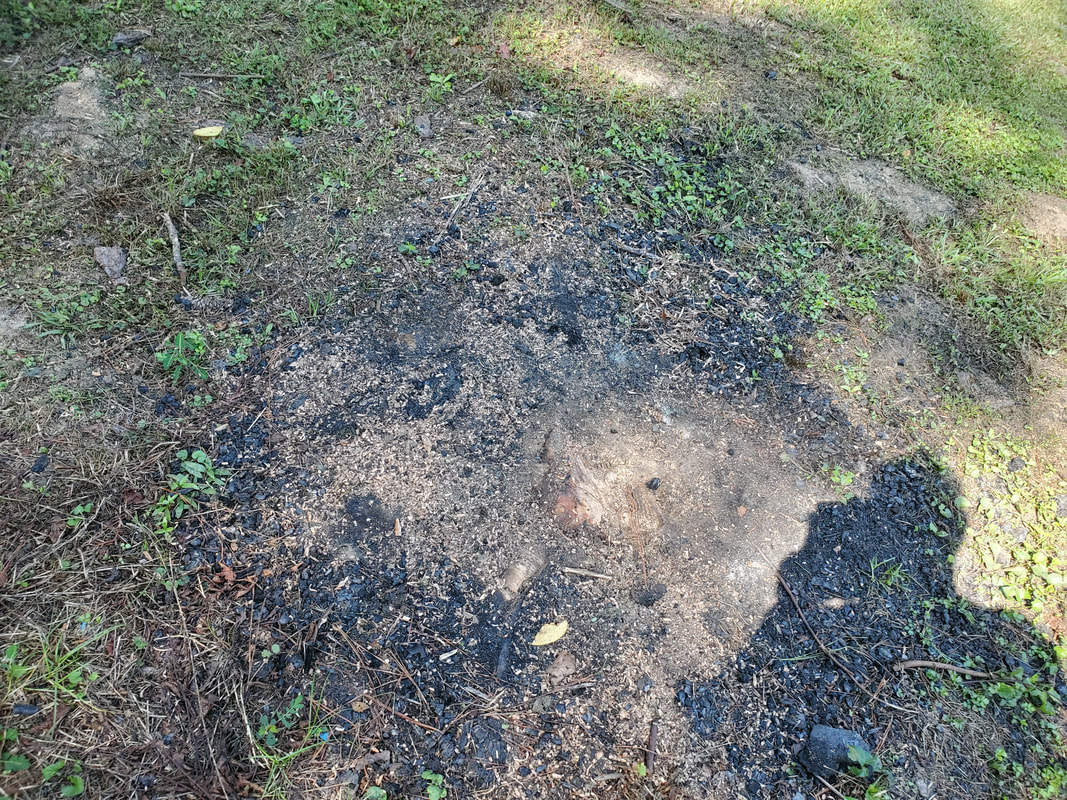
Another burnt up stump, chopped away at the ground.
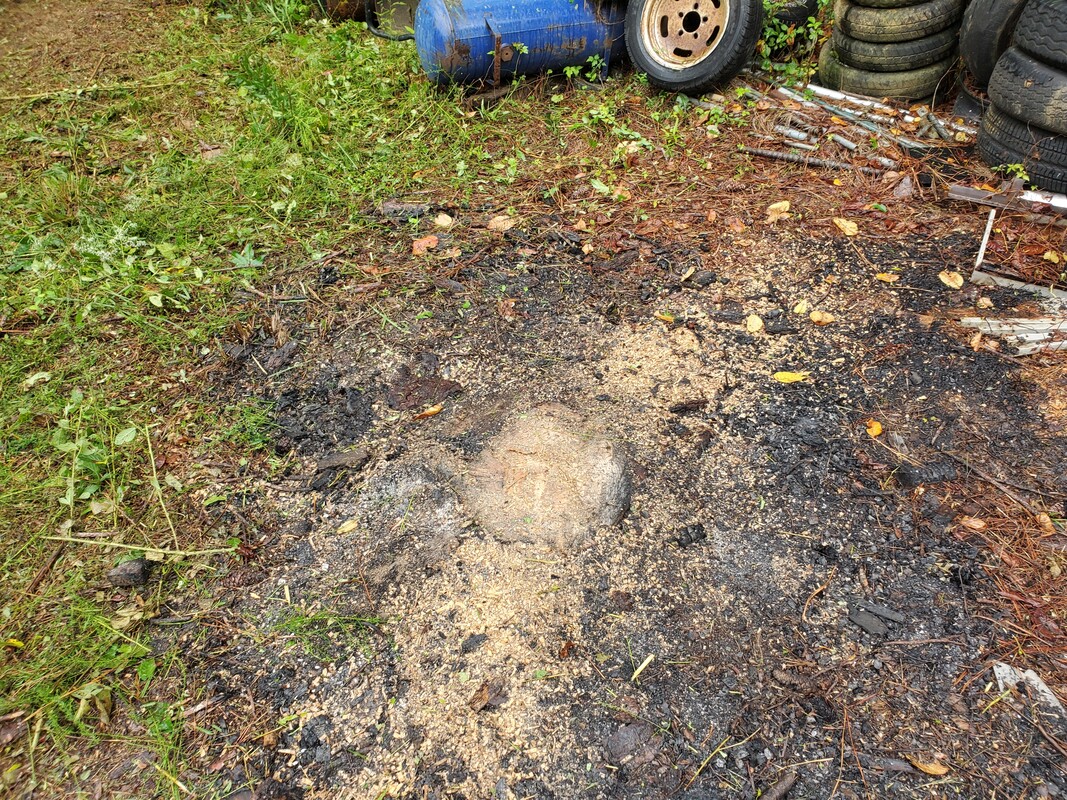
Another burnt stump, closer to the storage racks near the fence line, chopped down at the base.
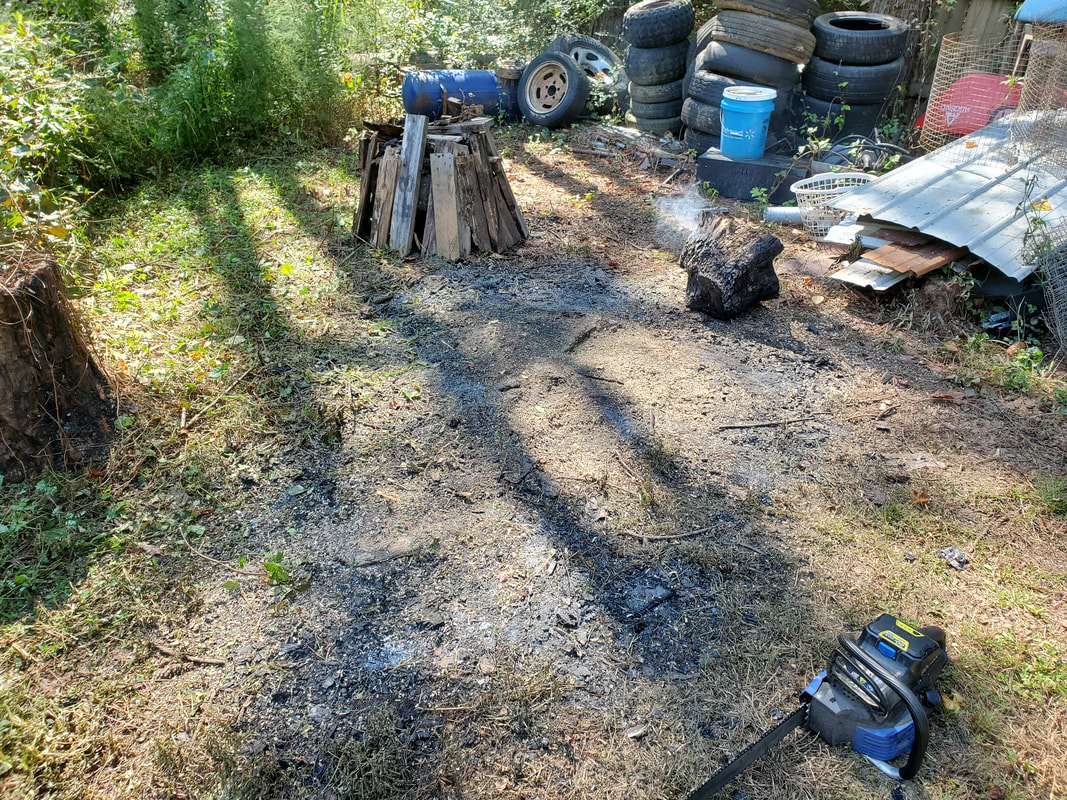
Most recently burnt stump, very close to scrap piles, chopped away, note remaining pyre in background.
At the time of this article I had one more stump remaining that was piled with wood for firing so just to save the trouble of having to put scrap pallet wood somewhere I just fired the pile to burn it all up some more. Of course the stump won't be burnt enough to even make any difference but afterward it'll be the same thing, clean the area up then chop the stump down. Afterward, I'll have to chop the weeds down from around the other stumps that are hiding within, including a large double stump that I'm sure will give me some real resistance to fully chop up. That's why I got several new chains, since I know I'll probably wear out a couple of chains, even with a sharpening job on them. The main goal is to chop away all the stumps and clear the ground up to the stack of Fallen Trees so I can get to work cutting them up for splitting and stacking so I can finalize the cleanup of this whole area. 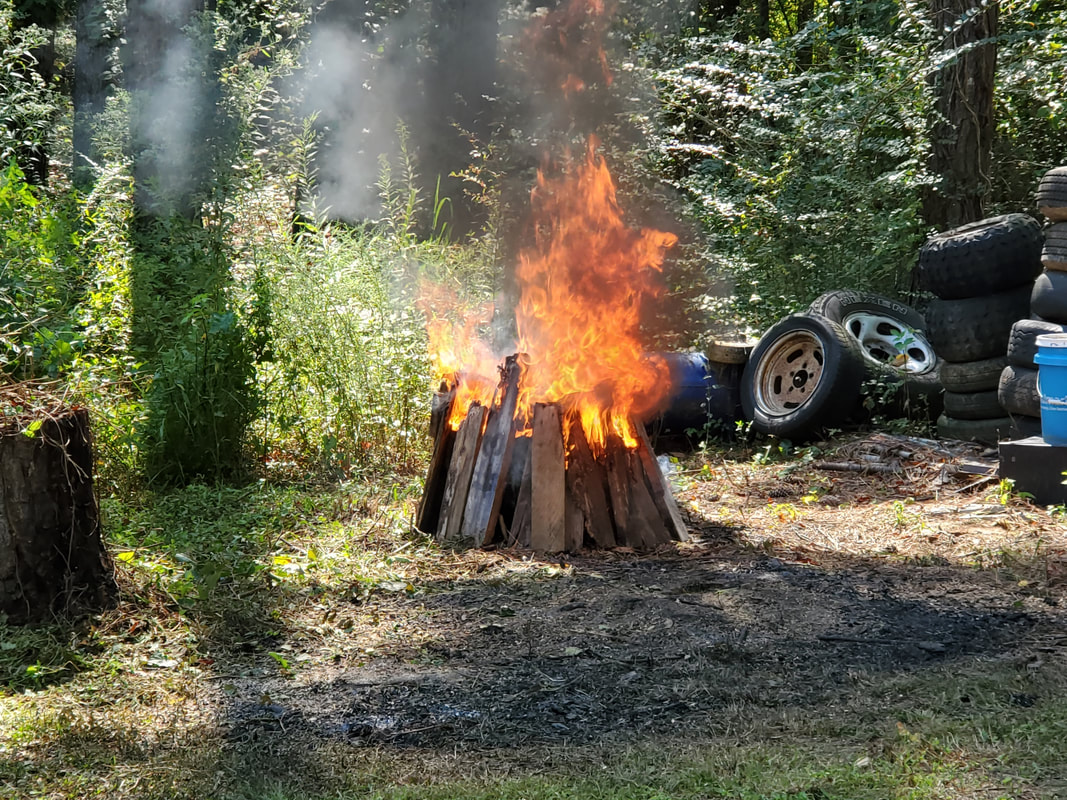
And note the now blazing pyre around stump.
Another thing I thought about was the idea of the micro irrigation system in the garden. The larger volume sprayers that I have in several raised beds and drum planters are contributing to the oversaturation of the surrounding grounds since the small beds are quickly saturated, draining the water into the surrounding grounds. The timer that I currently have on the system has a minimum on cycle of 30 minutes, more than is necessary to ensure proper soaking of all the beds. Besides having to change the timer, I need to downgrade to the lower volume sprayers that I've been using for the most recent drum raised beds. Now rather than go and buy new low volume sprayers to replace the high volume units, I decided to move the different sprayers around. A couple of larger raised beds have two and three large volume sprayers in them, which is overkill. I downgraded these to a single large volume sprayer, which will more than soak the ground properly, even in a lesser run time. 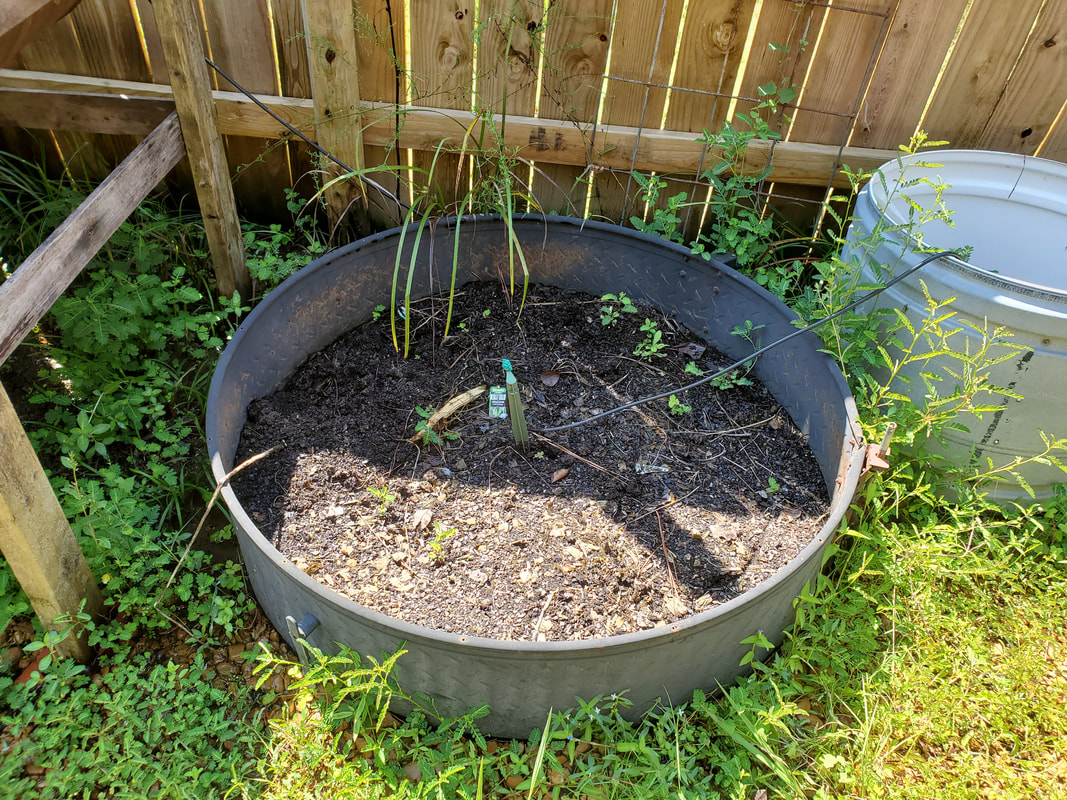
Raised bed that had three high volume sprayers, downgraded to one high volume sprayer.
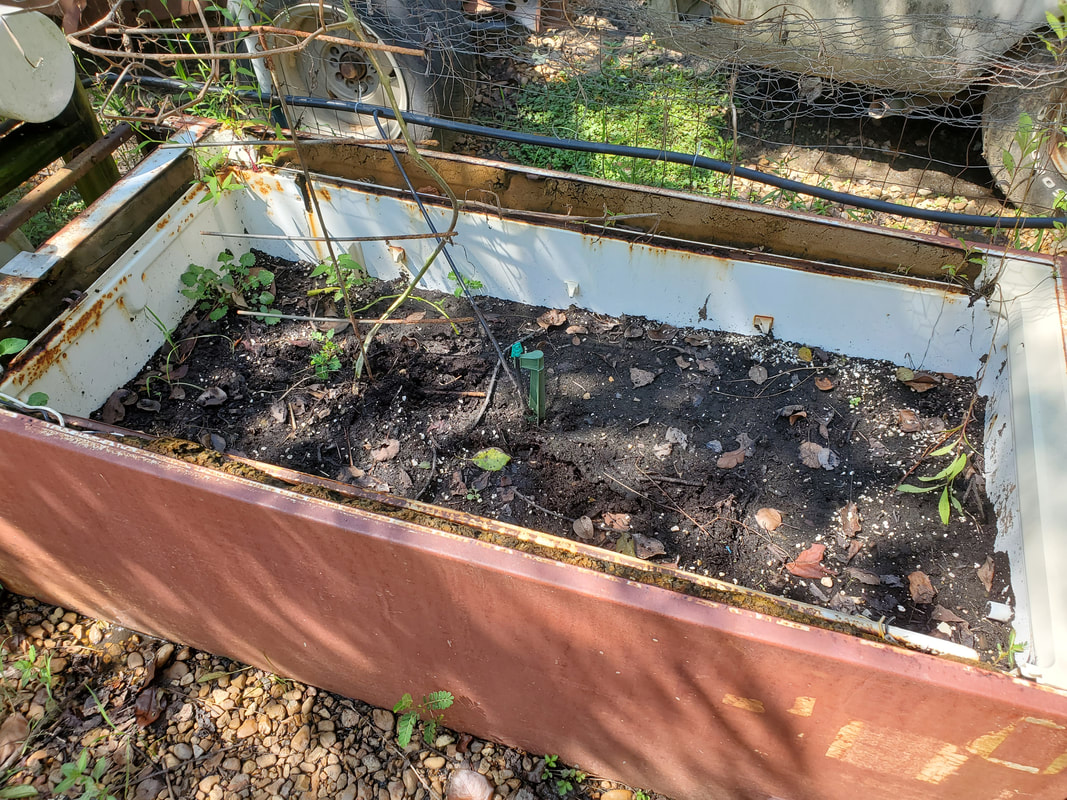
Raised bed made from old refrigerator that had two high volume sprayers, now downgraded to one.
With the extra large volume sprayers in hand, I went to the four pack of drum raised beds that I set up with twin low volume sprayers and replaced those two with a single large volume sprayer. From there I took the freed up low volume sprayers and used a single low volume sprayer to replace the single high volume sprayer in the row of drum planters in the middle of the garden. I replaced all the twin low volume sprayers in all the drum raised beds with single high volume units, which will give the same volume of water but with less equipment. Doubled with the lower time cycle in a new timer, we should be able to lessen the amount of wasted water draining out from these gardens during watering cycles. 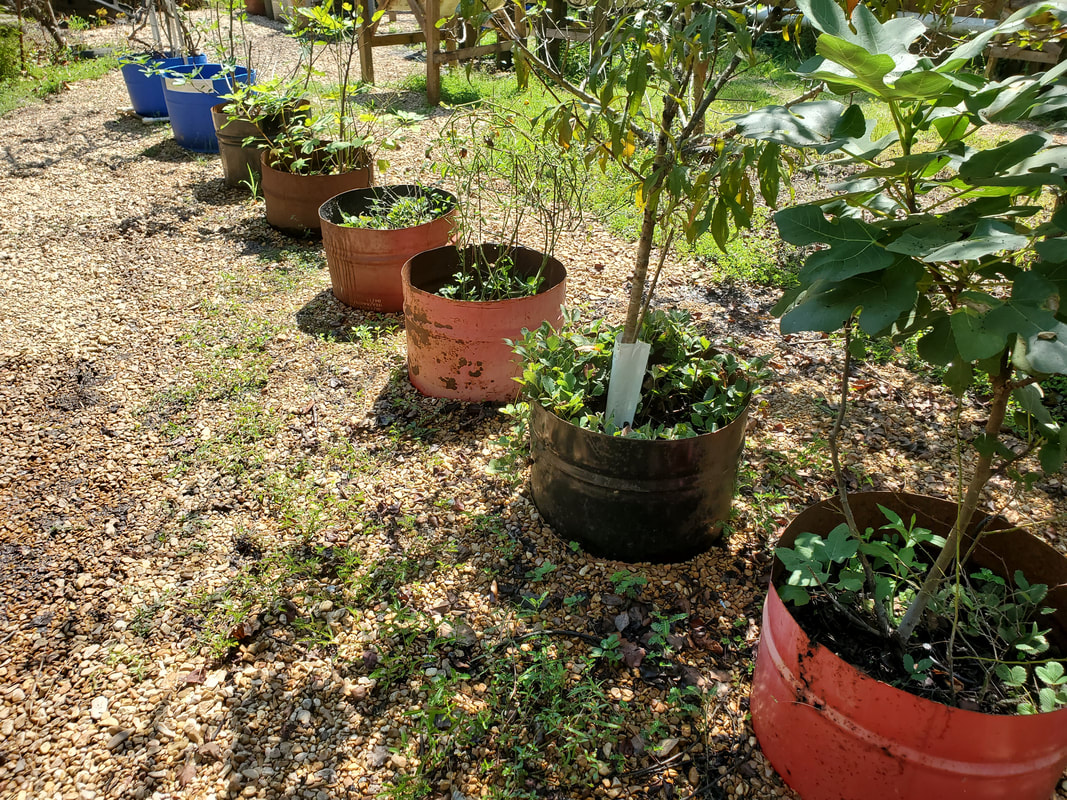
Row of centrally located drum planters with 2/3 equipped with low volume sprayers. The other planters were new additions that need plumbing run to them to equip them with more low volume sprayers.
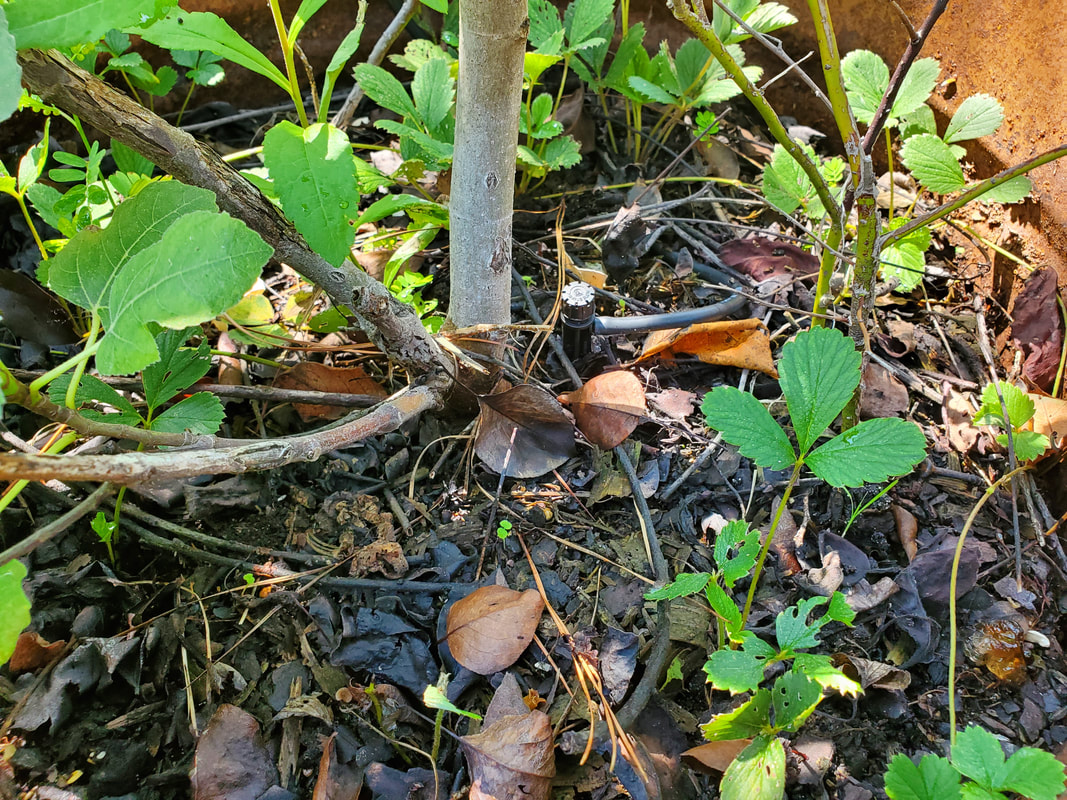
Single low volume sprayer in place of the high volume unit that was oversaturating these drum planters.
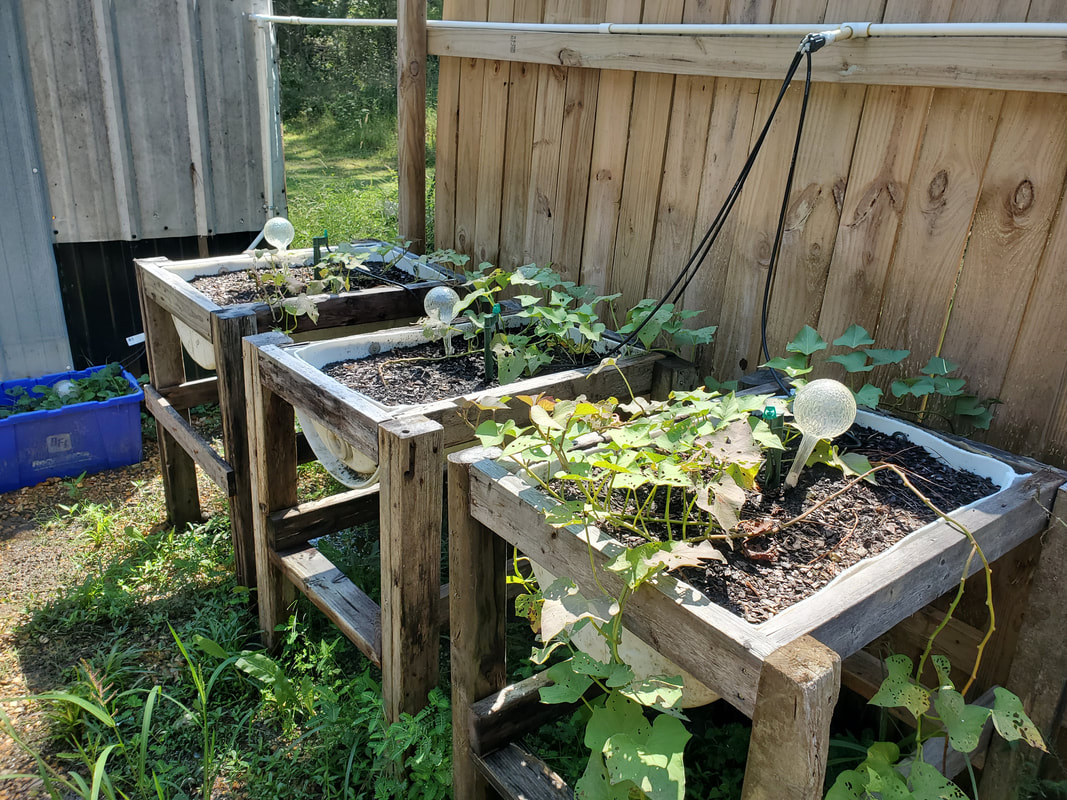
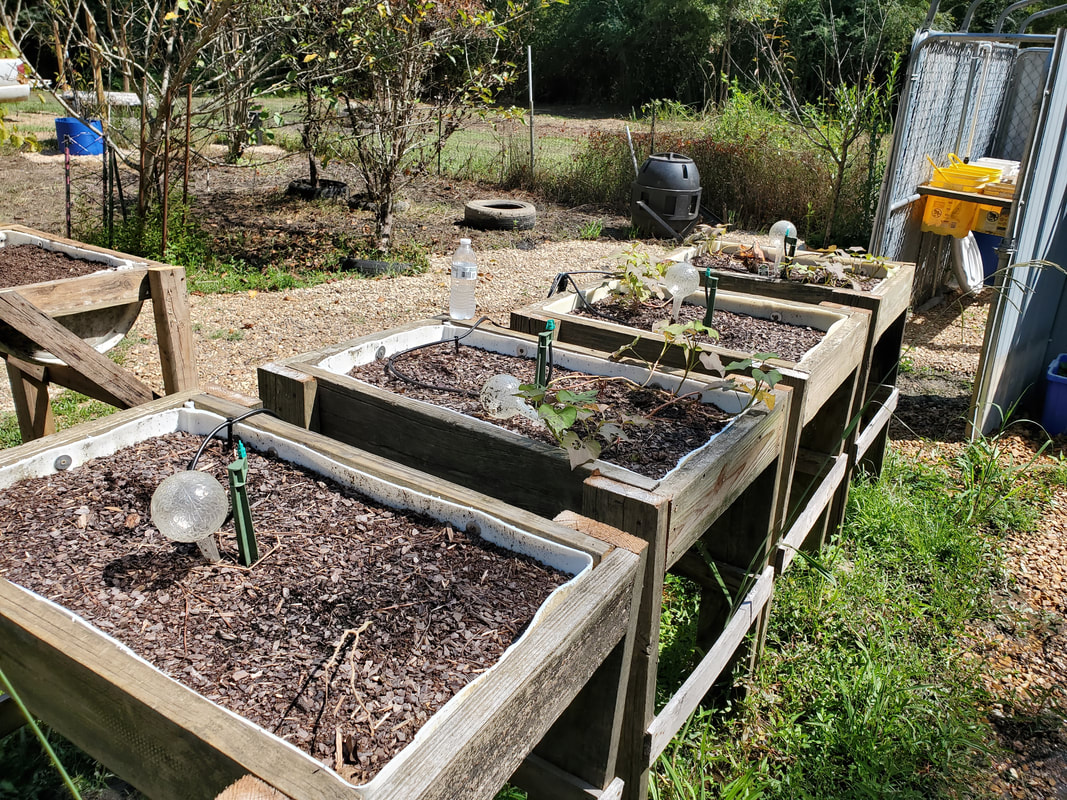
Three pack of raised beds with single large volume sprayers in place of the two low volume sprayers.
Four pack of drum raised beds with single large volume sprayers in place.
We just got our hands on a new pet project. This was courtesy of our neighbor who was cleaning out his garage, the item in question being an old pressure washer. The problem with the machine is the pump module is shot and he was told that to replace the unit would cost almost as much as it would be to buy a new unit so he decided to get rid of it. The engine is just fine and being a Honda engine, probably worth its weight in gold anyway. My plan of course will be to make an attempt to repair the machine by replacing it with a new pump module that I will have to source from some mystery place online. I'll either find a drop in unit that is cheap whether used or new, generic or OEM or I won't. Worst case I'll have a good engine to remove from the machine and a few parts I could sell from the unit, and of course the engine will end up on a future project you'll see here. 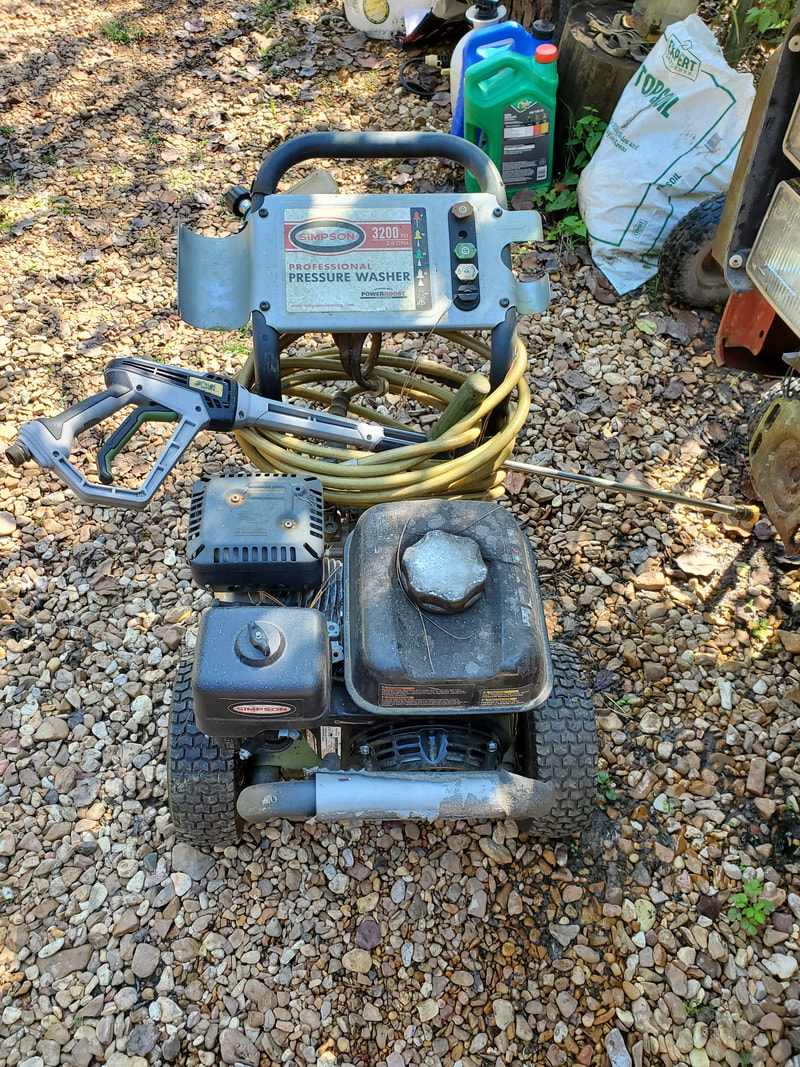
The new used pressure washer.
Of course this will be one of those projects I would like to get completed more sooner than later not just because I don't want to end up with more junk laying around doing nothing but because resurrecting this machine means equipping us with a vital piece of equipment that can clean all manner of things around the homestead. We'll see how things pan out.
Some time ago we had ordered a whole house generator from Lowe's after coming to the conclusion that pulling cords on portable generators sucked. Not to mention having to run cords all over the place to power the devices that we wanted to power. Only problem is, apparently other people had the same idea since the generator in question was on backorder. Seems like a lot of stuff is on backorder but that's neither here nor there. When the first date came for the arrival of the genny, the store said the item was delayed, it should be like a month later. Well as we got closer to when that time should be, we checked with the store and found out the thing was gonna be there the next day. This meant getting a slab started. I already had some old 2x4's laying on the scrap wood pile that would work just fine for the slab frame. We went and got a few bags of paving gravel to lay inside the frame for the base. The first thing I did was cut the grass over the whole area where the slab would go. After measuring out the boards, which would make the slab be 5' x 3', I cut the boards then nailed them together with the nail gun. 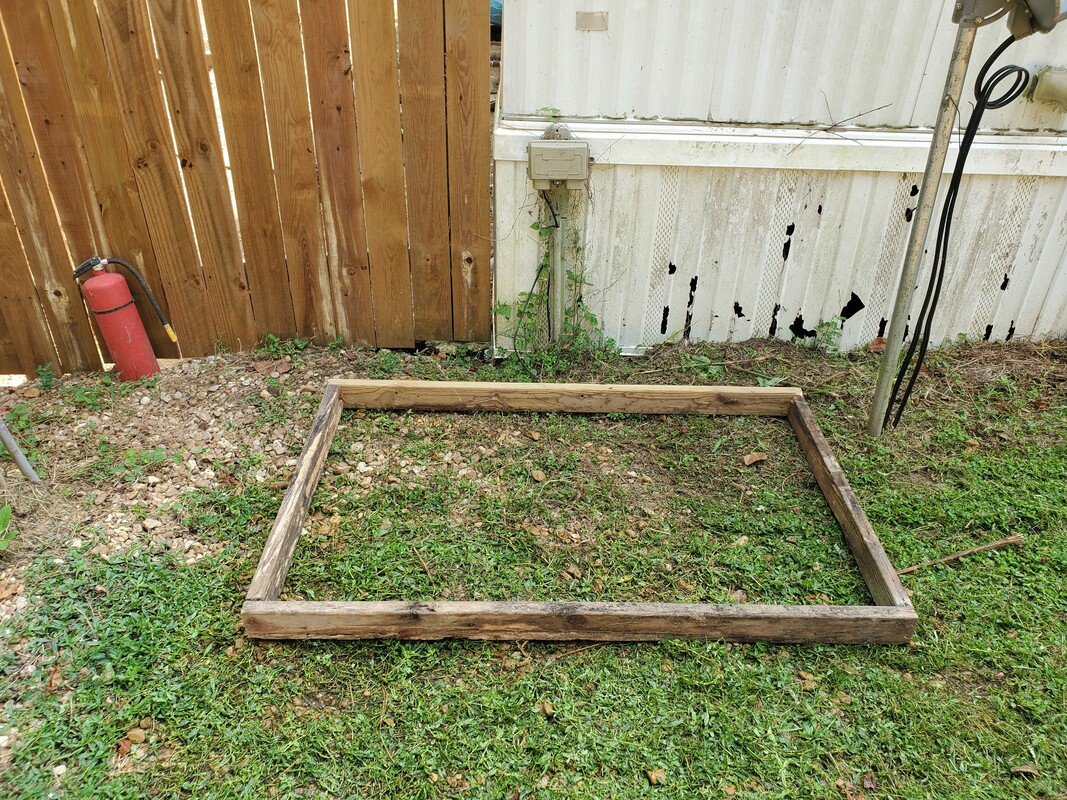 Slab frame assembled and sitting on the future spot for the generator, note grass cut down low around the area. The dimensions of the generator base are 4'x2' so making the slab frame a foot longer and wider was to give plenty of room for the unit to sit and better support the base versus having the edges of the genny base touch the edges of the slab base. I also put the slab frame close to the power pole next to the house since the generator would be hooked up into the main box before it goes into the house, which is a lot easier than trying to do a transfer switch that is hooked up to specific circuit breakers. This hook up will supply power to the whole house with one single hookup, so long as we don't turn everything on simultaneously, the 7500 w unit should more than handle the loads we would typically have on during an outage. 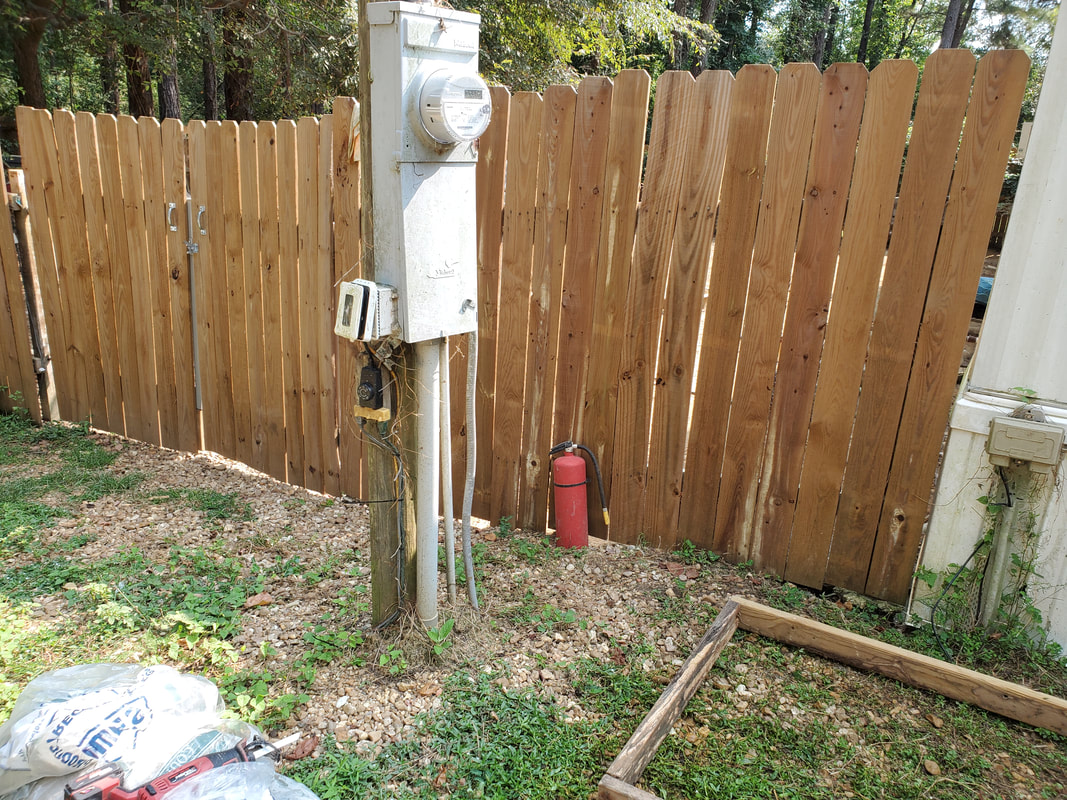 Note close proximity to the power pole and the main breaker box where the genny would be hooked into. With the frame in place I took the few bags of paving gravel and spread them out. I took the time to lay a nice even layer in the slab. I ended up having extra gravel left over but didn't want to just pile it in as this would make an uneven layer. From there I picked the frame up to let the edges fall down before putting the frame down on top of the gravel. Doing this made things where the concrete will be touching just the gravel after pouring due to the edge of the gravel being underneath the frame and the thickness of the slab will be the full width of the 2x4's versus having a half inch or so of gravel taking up space that could otherwise be filled with concrete. 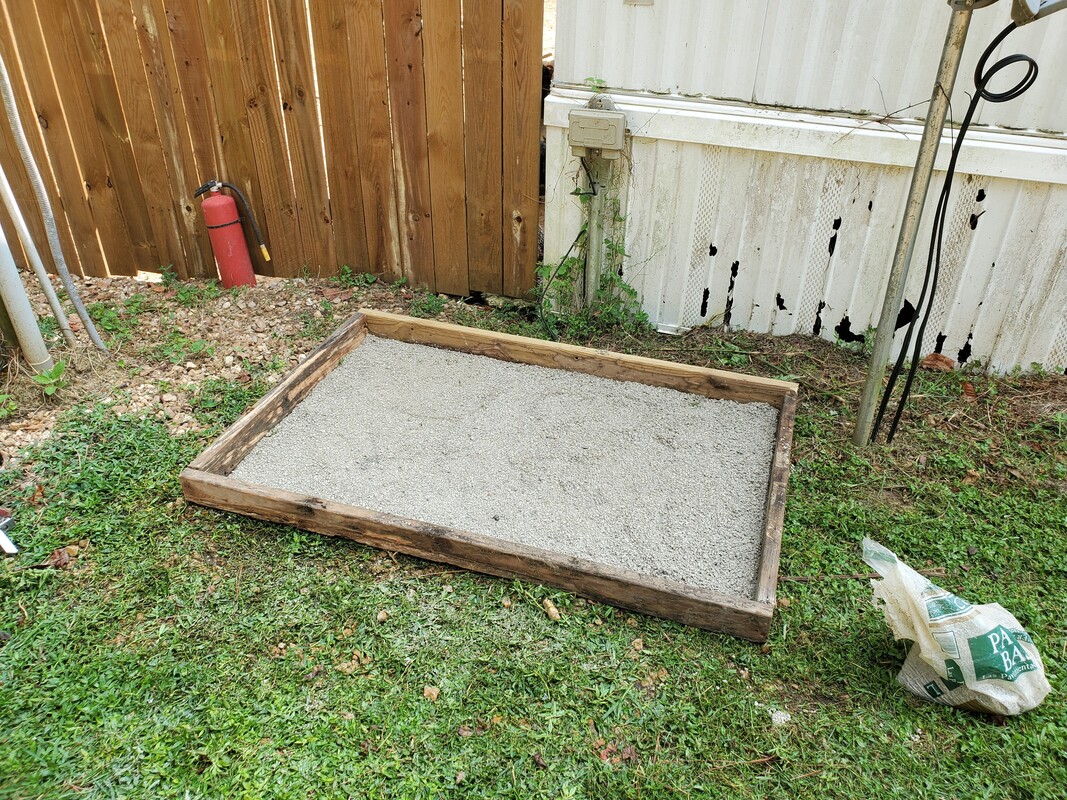 Slab frame with paving gravel inside, ready for concrete. With the frame set up it was getting late so we hooked up the trailer and made a run to Lowe's to pick up the new genny. Of course this thing is heavy and came on a pallet that we and a couple other people had to muscle on to the trailer. Once we got the genny home it was just the two of us that had to muscle the thing off the trailer. I did manage to get the trailer backed up along side the frame so when we did get the unit off the trailer it would be sitting next to the frame so hopefully all we would have to do is just work the thing off the pallet and over and onto the slab. 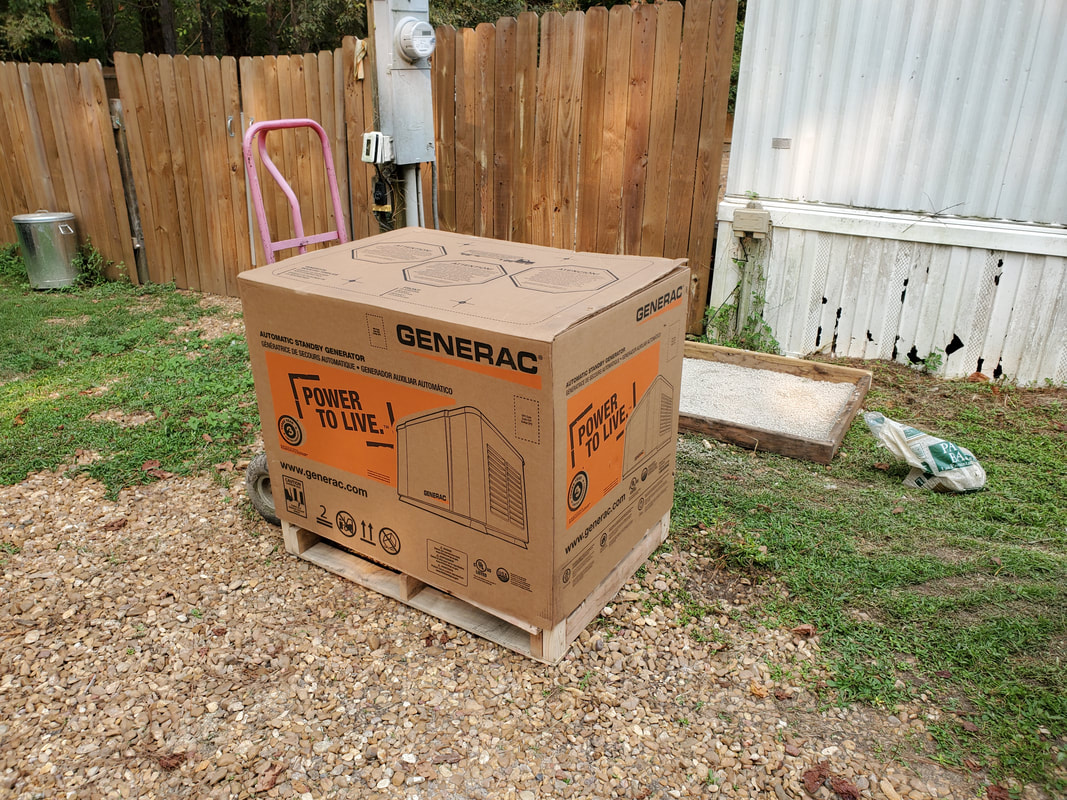 Generator on pallet sitting on the ground next to the slab frame. At this point I will have to calculate how much concrete I'll need so I can get just enough to make the slab as I don't want to have much left over. Any left over concrete will end up just being spread out over some area of the yard that doesn't have gravel on it yet, like in the garden. I'll also have to break everything open so I can check out what all I have to work with so I can start looking at how I'll set everything up on the pole and eventually start getting things hooked up. We will also have to get a local propane company to come out and run a gas line and set up a propane tank to supply fuel to the genny, as well as hook the gas line up to the unit, which means getting the genny fully installed beforehand. Once the gas is set up and hooked up, we will no longer have to worry about working with the portable gennies, they'll fall back to a true backup role in the event the main genny craps out for some reason. This would also put us closer to energy independence sort of, since this genny, besides being hooked up to power the whole house, also has the ability built in, to be hooked up to other gas sources, whether natural gas or even a methane generator, even a wood gas set up. I'm sure with light modifications this machine can be adapted to run off of other fuel sources. Once we managed to clear everything there was to clear from the garden, we were left with a bunch of open ground, much of it mushy from the water of the irrigation system soaking the ground. Some of these spots aren't bad but some are ridiculous. As usual, this is where the gravel comes in. When I went to get a load of rock, I managed to get lucky and get a heavy load. Sometimes I'll get a little less than what I probably should've gotten but at times I'll get what appears to be probably 2x what I should've gotten so I don't say anything when I get less since it'll be made up for on one of the runs where I get a lot, like this time. And this time was a good time to get a good load as I would need a lot of gravel to make a serious dent. I started off in the middle of the garden, expanding out from the central walkway I've been laying where the row of drum planters are. Some of the soupy area is in this spot so I laid a couple of wheelbarrows full to cover this soupy area enough that the ground doesn't turn into a quicksand when I step on it. 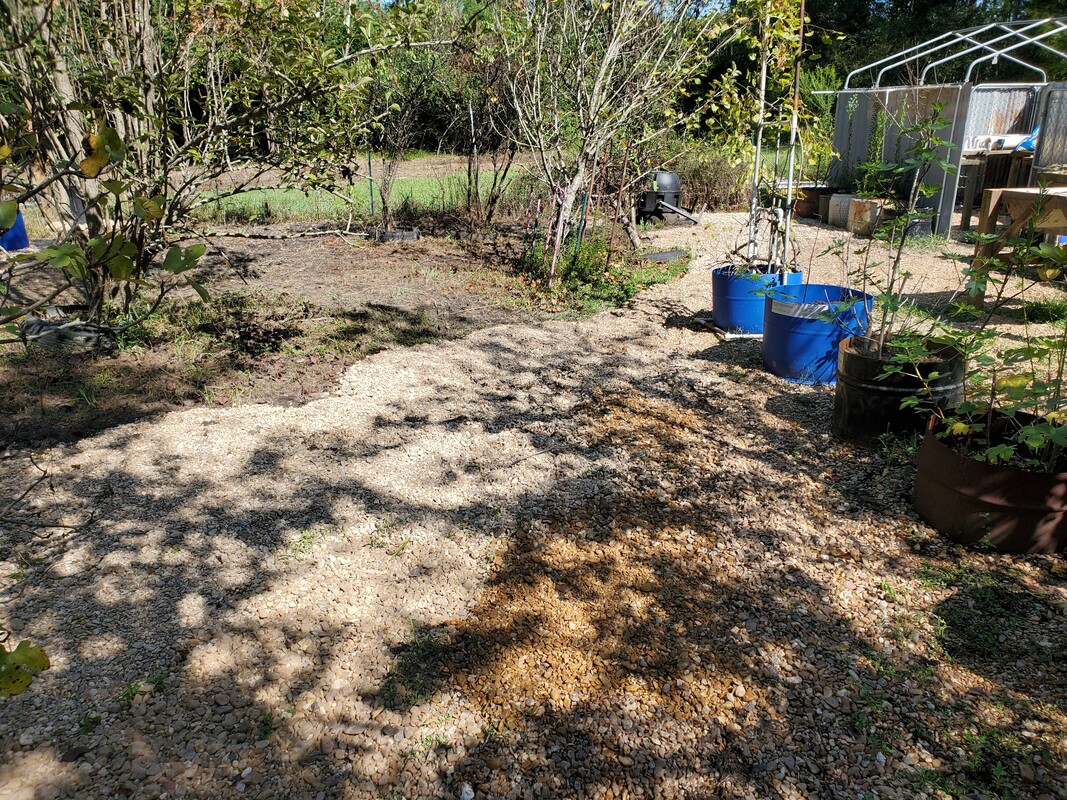 Central walkway area with fresh patch of gravel added to widen the area. I diverted my attention to the three drum planters that I set up along the north garden fence line as well. If you recall, I put down some plastic before placing the drum planters on the ground to create a barrier that would then be covered with gravel and hopefully keep weeds from popping up around the drum, making life a little easier when it comes to landscaping. It's easier to weed trim over open ground than up against a surface that will eat away trimmer string as the trimmer slaps the hard surface. 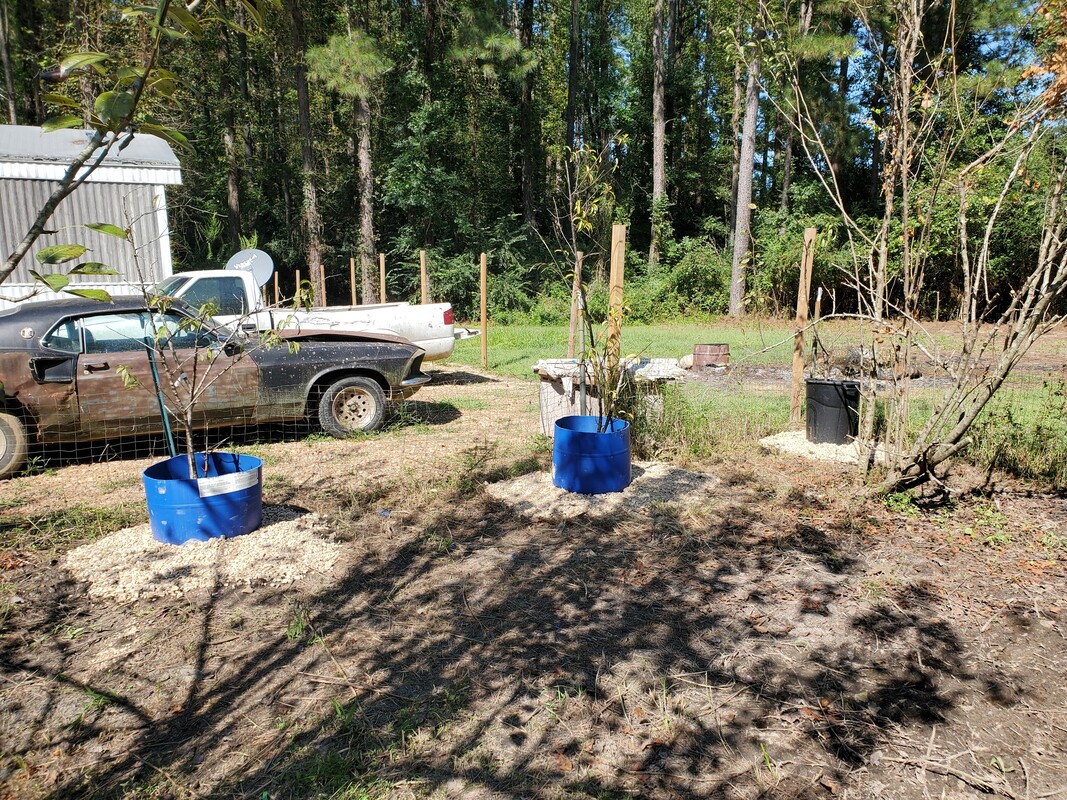 Three newly added drum planters along north garden fence with patches of gravel added around the drums. After I got the three drum planters done I then turned my attention to the eastern area of the garden, running along the Kennel Greenhouse. This area, which is an extension of the central walkway if you keep walking straight east, runs along side a row of drum planters with micro irrigation sprayers added. As a result, the ground in front of these got mushy and by extension the greater ground that was once covered by tire gardens which also became a slop pit. I spread a fair amount of gravel over all this area to cover up the walkway in front of the drum planters and extend out from there to cover more ground since this mess is hell on feet since every footstep goes to the ankle.  Extended walkway over to greenhouse with fresh patch of gravel all the way to the eastern fence line along side the drum planters. Sadly but expected enough, even a heavy dose of gravel wasn't enough to get a good base established. As I step over the gravel, mushing it into the mud over and over in order to get it well mixed, I laid more over the spots and continued to do the same. Even after laying what would look like a decent covering of rock, the "floor" is still pretty moveable and will probably need more time to allow the rock to further settle into the mud to the point that everything takes the effect of concrete with gravel mixed and starts to establish itself. Anyway, I finalized my spreading by going back to the central walkway, this time reaching over to the first encountered fig tree that's in an older raised bed. I did lay some gravel before and come in contact with the raised bed but not fully. After clearing the garden and moving the composter to its new spot, that entire area ended up being another soup bowl of mud that came up to the central walkway. This is where I made my next patch. I laid more gravel in the small path that went between the fig tree raised bed and the food forest raised bed that I started rebuilding with railroad ties. This path connects to the central walkway and leads over to where the composter was at. I spread more gravel around the fig tree raised bed as well, hitting some of the soupier areas here, getting a base layer established that will need to be mushed in so I can come back over this later with more gravel to get it more solid. 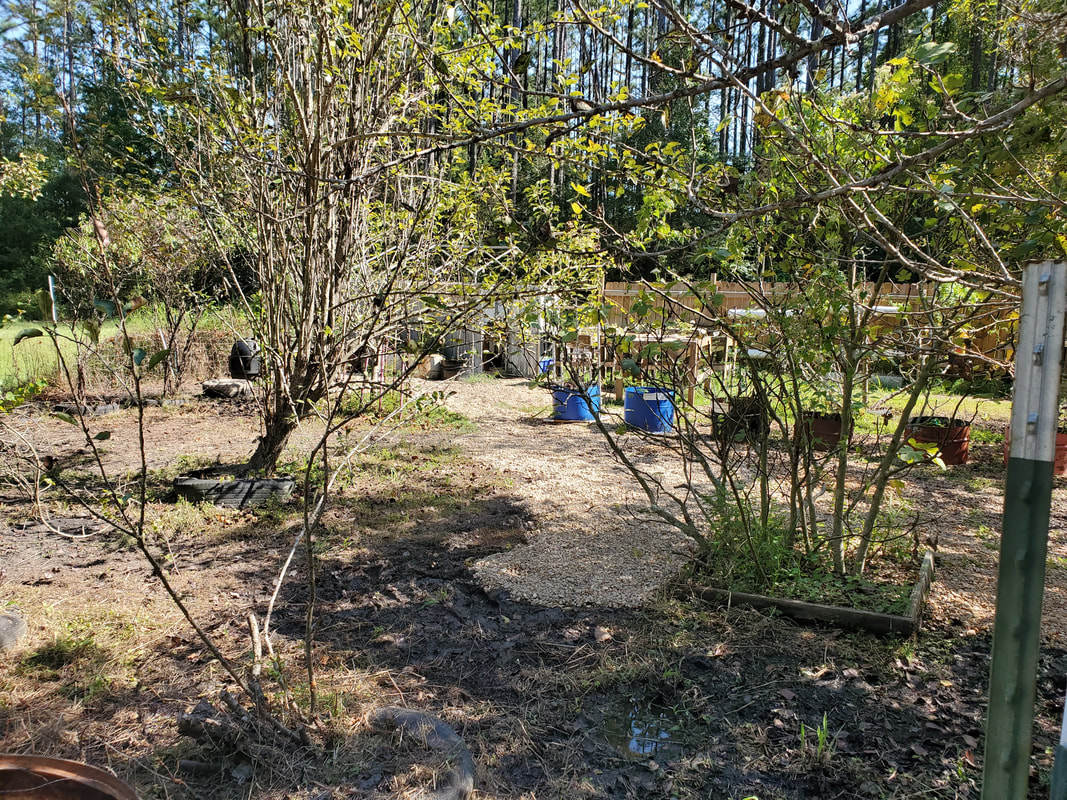 Area where composter used to sit with gravel laid in paths connecting to the central path. Note fig tree raised bed right of center with gravel on all but one side. Really the bigger problem is addressing the amount of water that is ending up on and in the ground when the irrigation system is on. Some of the raised beds and other gardens use the high volume sprayers that cover a large area. The more recent additions were the lower flow sprayers, that are more suited to the smaller bucket beds and even the drum planters and drum raised beds. Also the timer that is used is a mechanical type, a cheapo from Walmart that has these little inserts that you place at the specific times and when the rotary clock turns, the inserts make contact and activate a rotary switch to turn on the load. The inserts come in pairs, one to turn the switch on and one to turn it off. Because of the simplicity of this device, the minimum time that is on this timer with these inserts is approximately 30 minutes. With the high volume sprayers, hell even with the low flow sprayers, in 30 minutes the smaller bucket beds get over saturated, pissing a lot of water into the ground. The drum planters also get saturated in no time and drain into the ground. Of course this high clay ground is not a good sponge of water, instead allowing it to pool near the surface, causing the conditions we have currently. I'm going to have to "upgrade" to the smaller low flow sprayers, maybe even the smaller trickle irrigation fittings to slow down the amount of water going into the planters and beds. Really my biggest modification will need to be an upgrade of the timer to a digital unit that can be programmed with a lesser time of maybe 5 to 10 minutes to allow the beds to get a light soaking then stop before any large amount of water drains out and soaks the ground. Maybe with these upgrades I'll be able to lessen or even stop the over saturation of the greater garden grounds, enough so to be able to get my gravel laying taken care of and get some of the grounds covered the way I've been wanting to in the first place. After our previous episode with the foliage of this area, I managed to locate and neutralize the yellow jacket nest that was in one of the pieces of PVC pipe on the wood/pipe rack. With this little issue resolved, we were able to start on the remainder of this area, which of course incorporated the use of the Electric Bush Hog, weed trimmer and reciprocating saw. The bigger problem here was the idea that there was a lot of pipe from one of the portable garages, along with some chicken wire and other metal crap on the ground. Slowly working into the thick grass with both the Bush Hog and the weed trimmer, the more pipe was exposed we were able to remove the material and stage them outside of the work area to continue the cutting of the grass and weeds. 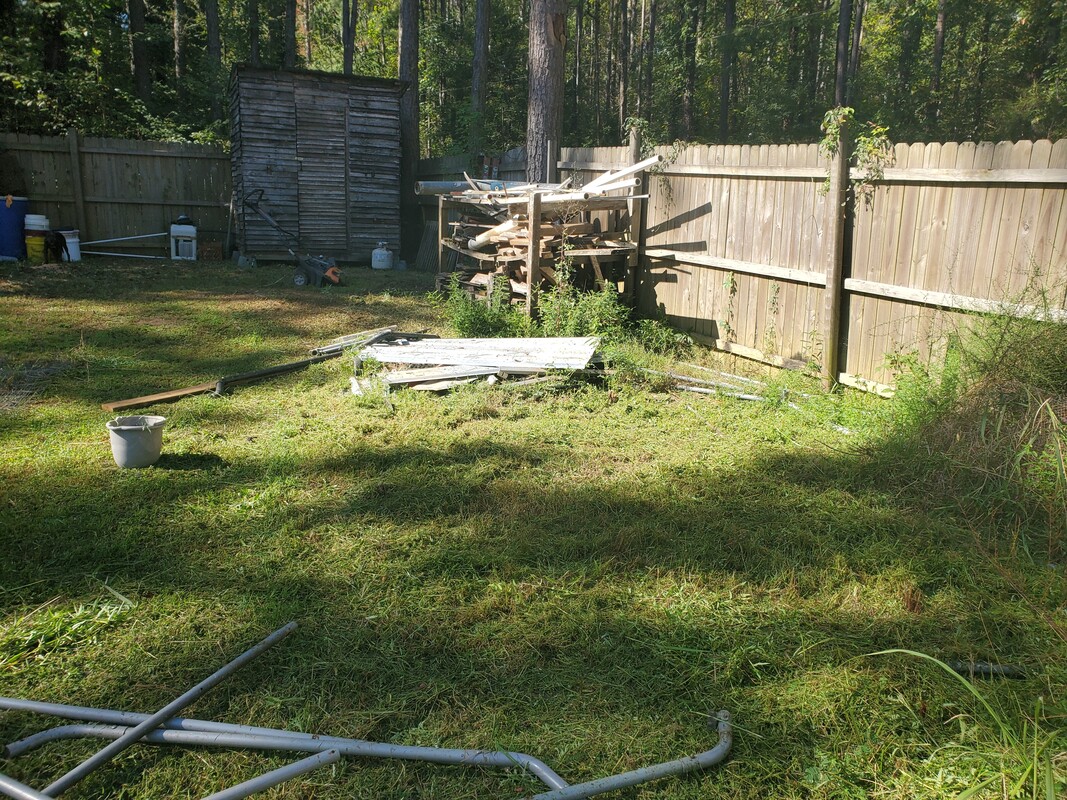 Cutting the high grass and weeds gradually to expose the metal material to be cleared from the area.  As we moved more material away and even took time to organize the materials in the places where the stuff really should've been, we were further able to cut the grass up to the fence and even to the other side of the storage trailer, between the trailer and the fence, clearing some grass in that area and even discovering and spraying another wasp nest that was causing problems with the bastards getting into the trailer. We cut the grass around the wood/pipe rack and further stacked the loose wood that was on the ground back onto the rack where it should've been in the first place. Some other stuff that we had to clear from behind the storage trailer was six spare tires for our car trailer that we had stacked back there in the past. We moved these tires to the auto parts area where we have several other tires and rims stacked, seemed like a more appropriate spot for these items. 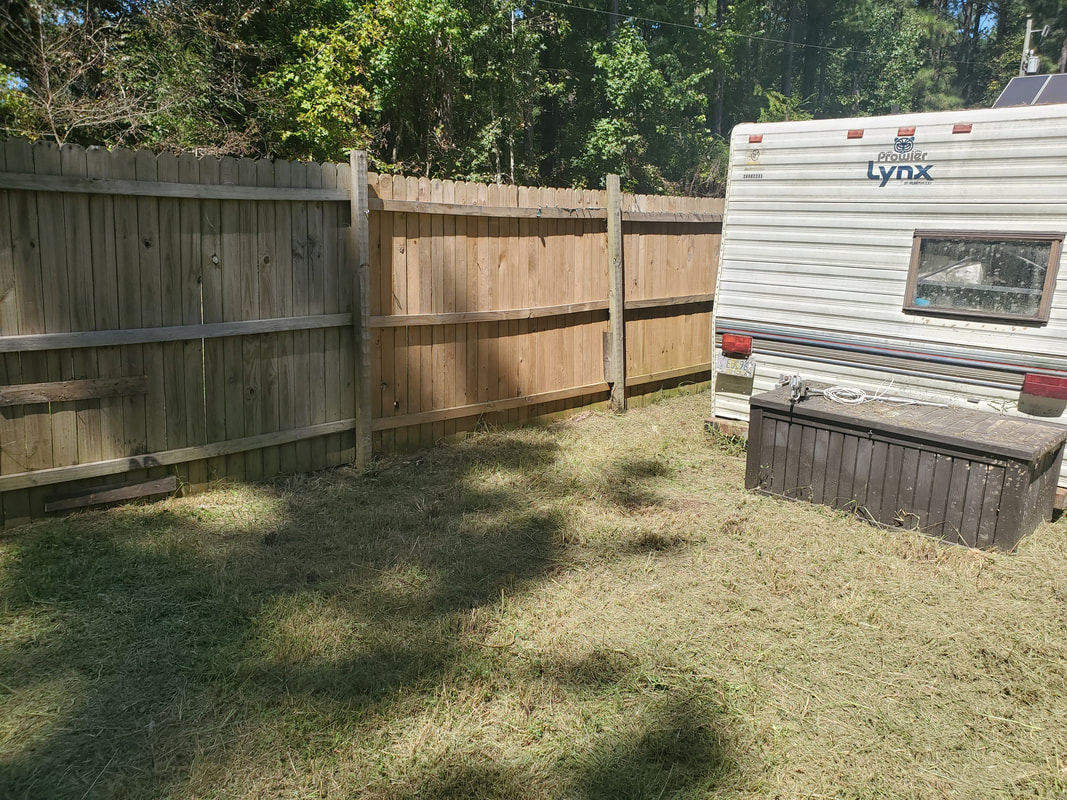 Area behind storage trailer cleared of metal items and spare tires, and of course grass and weeds. 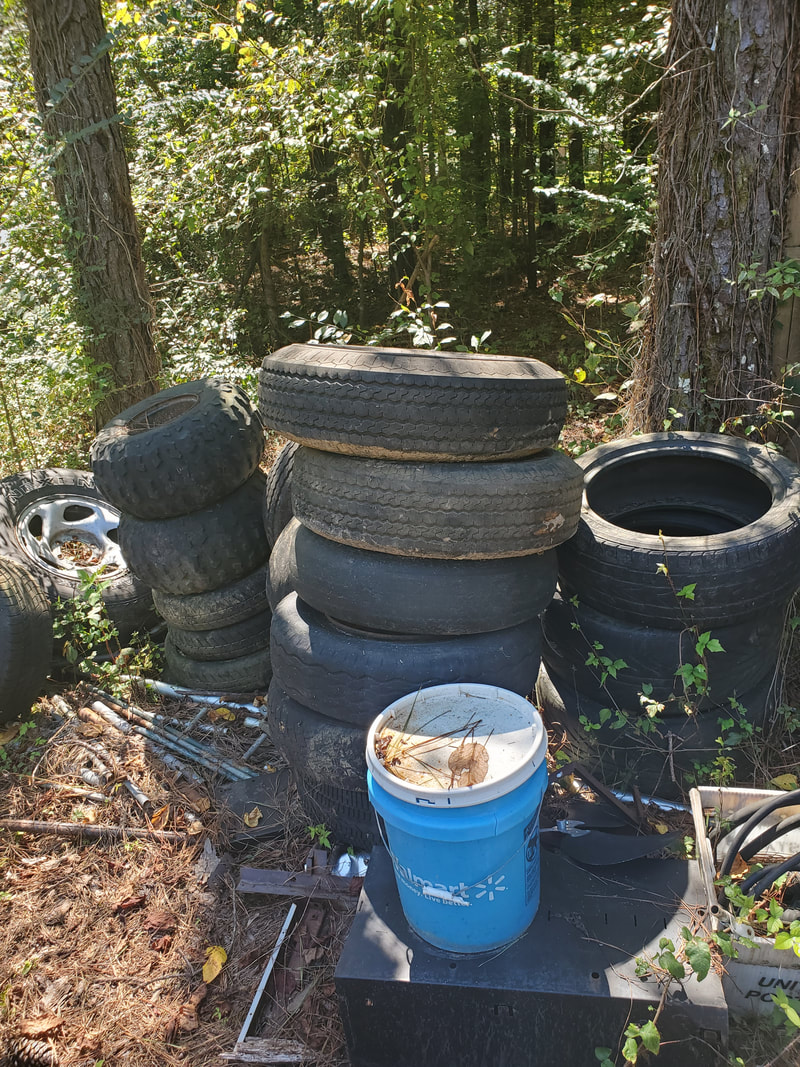 Center stack is the spare trailer tires, relocated to this spot. With all the wood stacked, we even took the time to stack the metal tubing from the portable garage on the top of the wood/pipe rack, moving the smaller pieces to the general scrap area, along with all the miscellaneous sheet metal that was on the ground. All that happened was that we took the time to put things in their respective locations where they should've been in the first place. 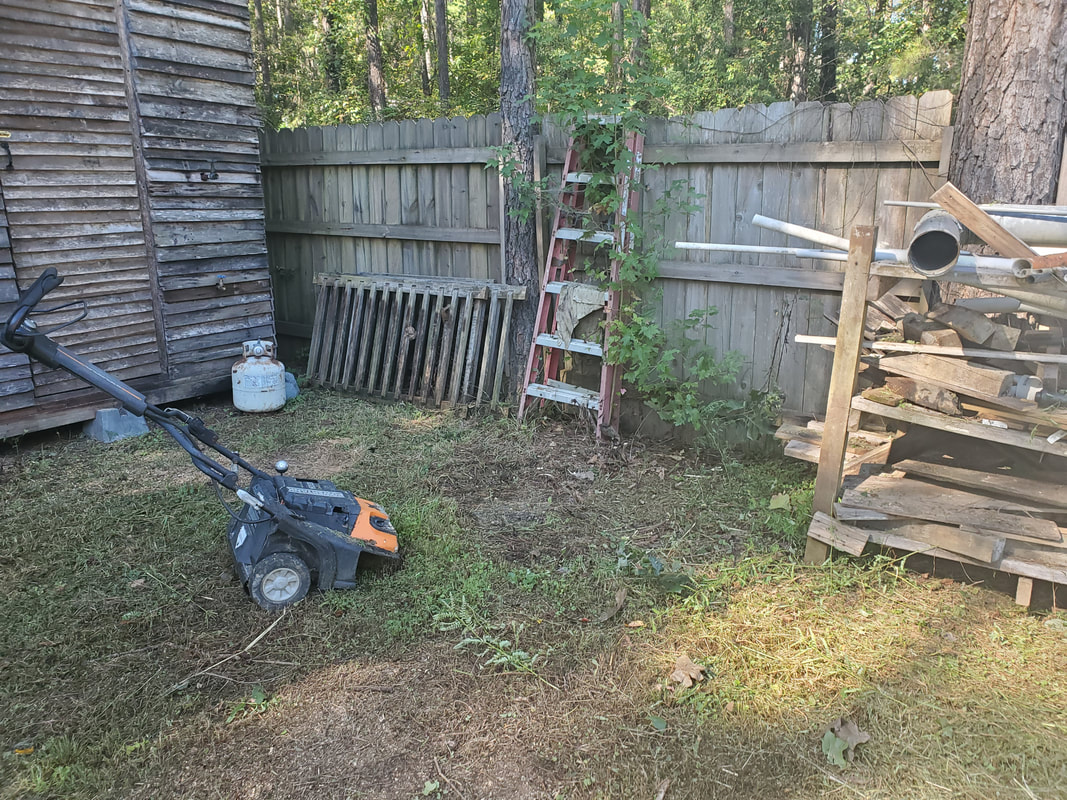 Area between fuel shed and wood rack cleared of grass and loose wood on the ground. Note porch railings stacked against fence near fuel shed, not laying on the ground. 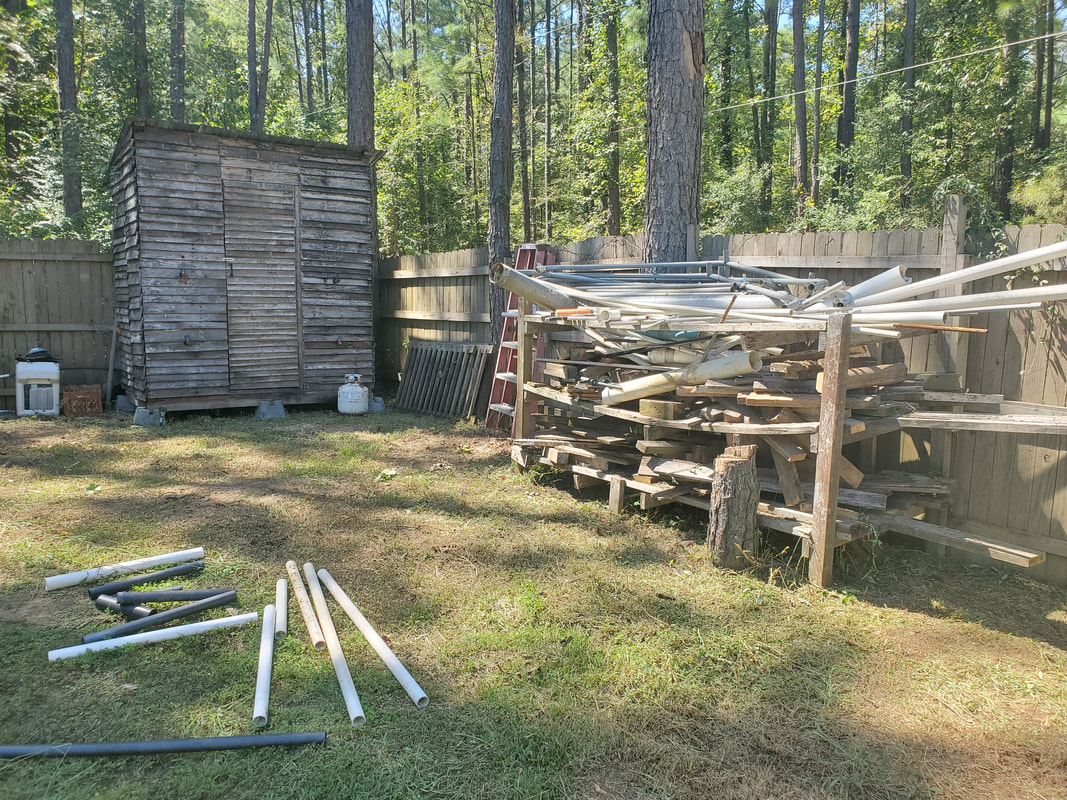 Wood rack with portable garage pipe stacked on top level. PVC pipe on the ground is for an upcoming project, soon to be moved to where that project is at. 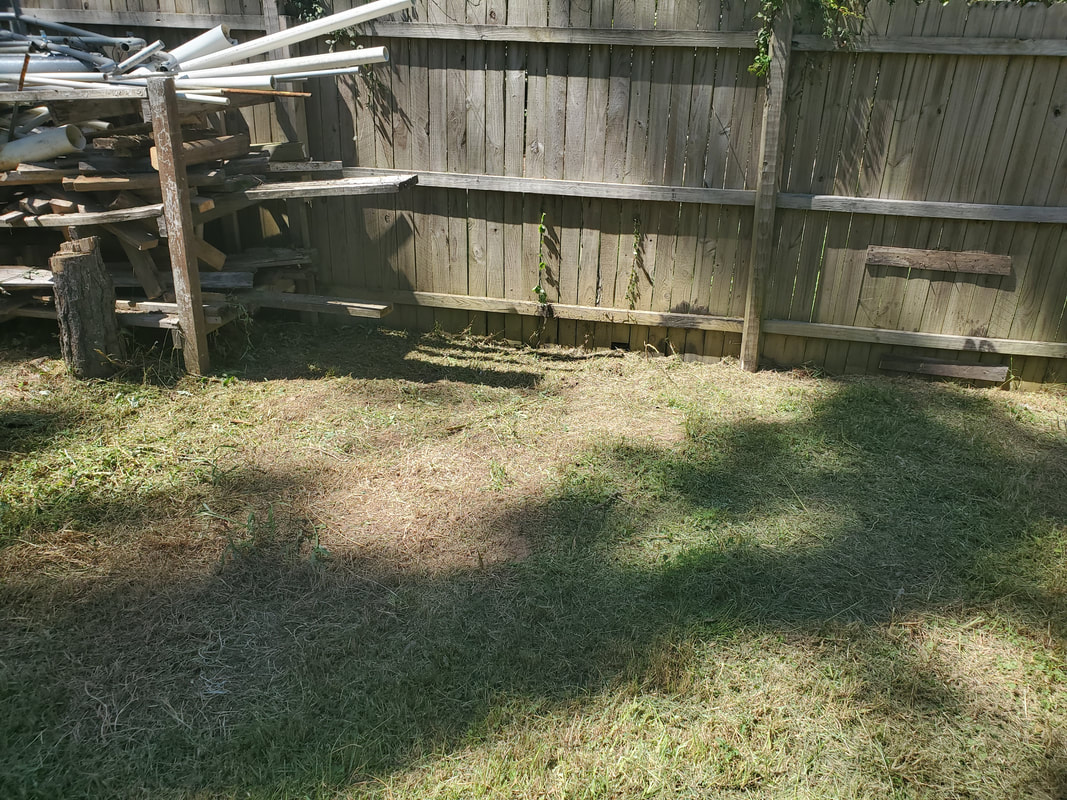 Center area between storage trailer and wood/pipe rack, cleared of all sheet metal and other miscellaneous metal crap. The pipe from the portable garage will be used to eventually set up another portable garage frame that will incorporate corrugated sheet metal for the skin. This was the main reason for clearing the stumps so these areas can be prepared for the building of the garage, which will be used for storing things like the Utility Tractor and the electric mowers and other equipment that is normally kept outside. Also the PVC pipe I pulled from the rack is going to be used for a future project, where I decided to try and make a frame to mount on top of the catamaran boat we have to make the body for holding a mast and seat and other apparatus pertinent to making a complete sailboat. I tried this before with wood and that didn't pan out as the wood rotted away in short order so I decided to use this 1 1/2" PVC pipe for this duty, at least it won't rot like wood or rust like the metal pipe. That project will be showcased soon enough here as well as on TIC and the YouTube channel so stay tuned. Turning My Attention To The "Backyard" Area Of The Compound For The Next Landscaping Episode10/14/2021
Moving from the garden after an extensive operation across the whole garden, I turned my attention to what I like to call the backyard area. This is the area in the southwest corner of the compound where the fuel shed is at, along with the auto parts racks/shelves and the wood/pipe storage racks. This whole area is behind the storage trailer as well. Because of the scrap metal and miscellaneous wood that has been scattered on the ground when I was gathering materials for past projects, grass has been able to grow up around this area and all this stuff, making it more difficult to landscape since we can't just come through here with the zero turn or even the push mower. Another thing that I had to address is the multiple stumps that still remained in the area from past trees that were brought down.
We did try to burn up some of the stumps but stumps are made of uranium or some kind of super hard metal because these damn things don't burn up no matter how many times you put fire to them. At this rate, I just decided to put the chainsaw to the stumps. Of course this means cutting at the ground, as low as possible so we will be able to go over the areas with the mowers without incident. 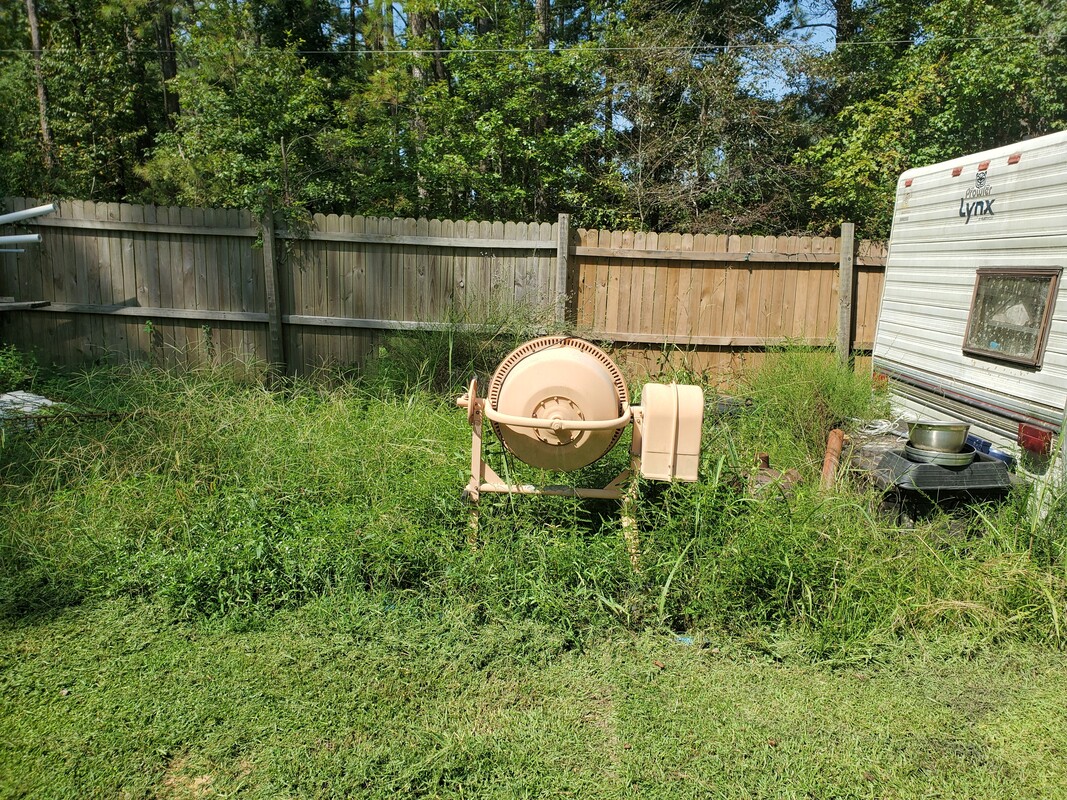
Area directly behind storage trailer with random items sitting back there surrounded by high grass.
Area along west fence up to fuel shed with wood/pipe rack, also surrounded by high grass with random items on the ground.
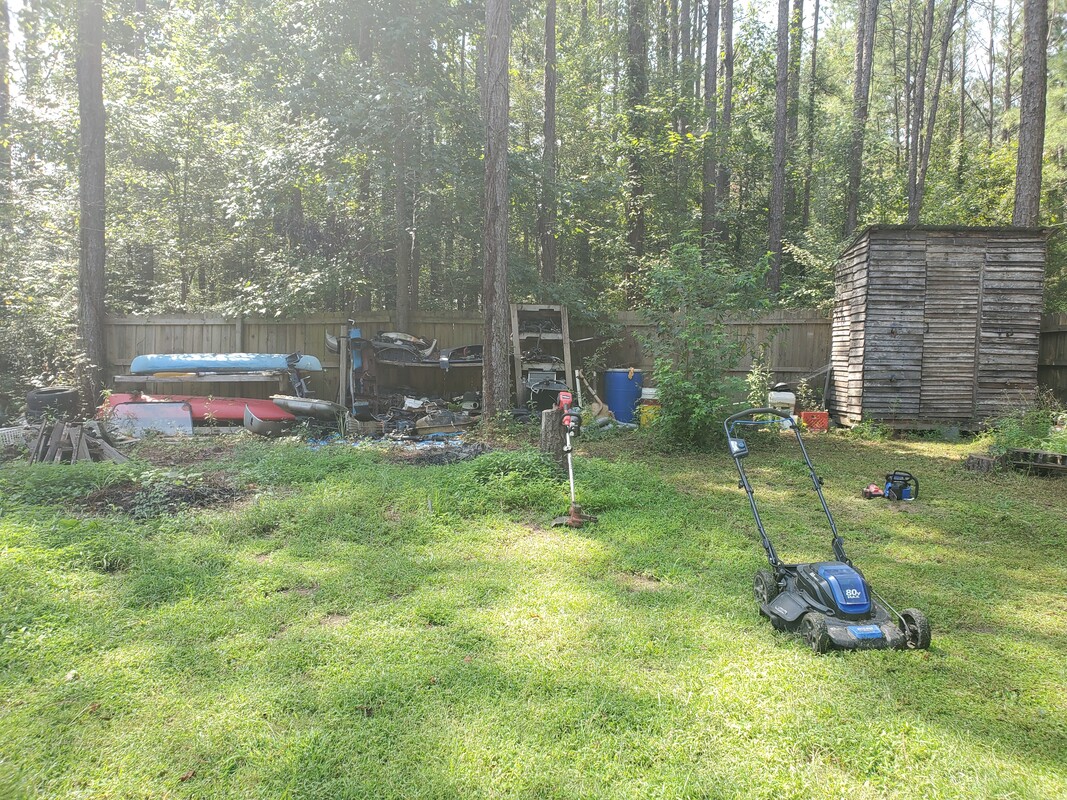
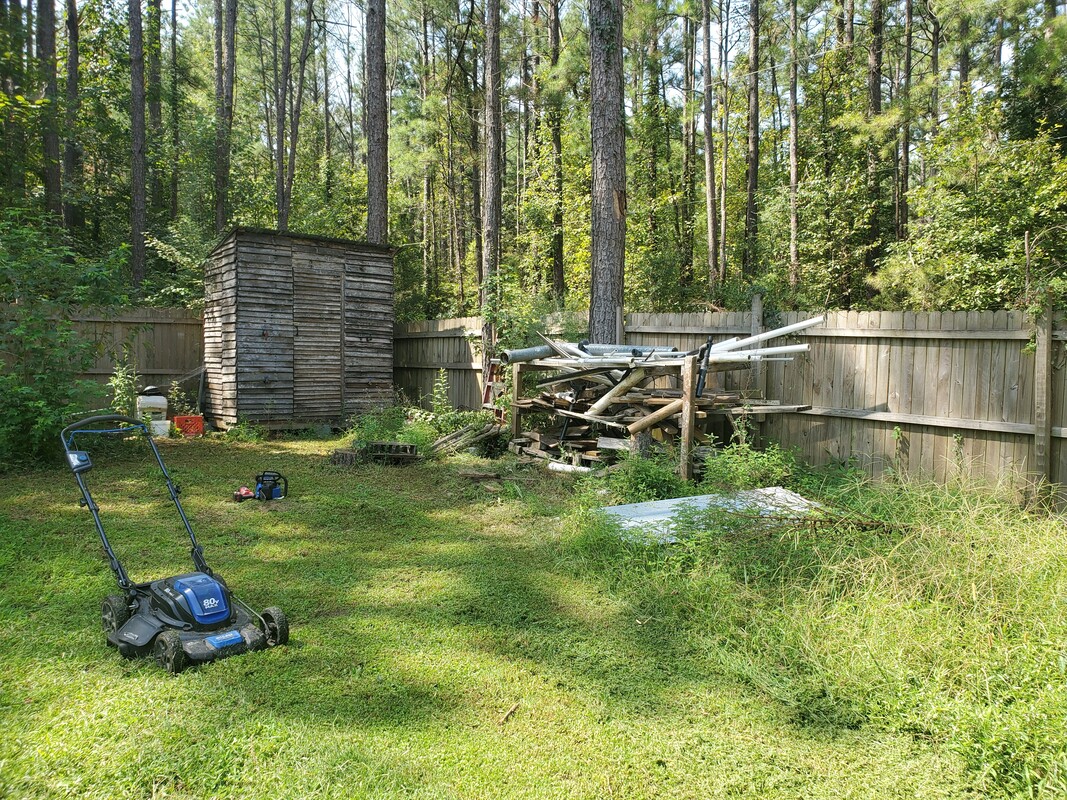
Area in central back yard, leading up to auto parts racks and kayak rack, note stumps and pile ups of burn material around them in the left background.
This project just like the other landscaping projects, had multiple parts to it. First I went over the general area with the push mower to get the larger grassy areas cut down to expose the areas around the stumps. From there I used the weed trimmer to cut the grass and trash from around the stumps. Once the stumps were fully exposed, I took the chainsaw and went to work on the stump. I cut halfway through one side, then did a vertical cut down the middle of the stump to separate the two halves of the stump then finished off the second half of the stump, leaving a flush surface where the greater stump used to be. I had to change batteries several times obviously since I was cutting through stumps that ranged from smaller ones up to those greater than a foot in diameter. A couple of these stumps were from larger weed trees that had sprouting branches coming right back up from the stumps. Once the stumps were cut, the sprout branches and the stump went right onto the burn pile. I was even able to cut up one of the stumps I recently burnt, or tried to burn unsuccessfully. All of the stumps that were in front of the fuel shed were cut away to nothing. 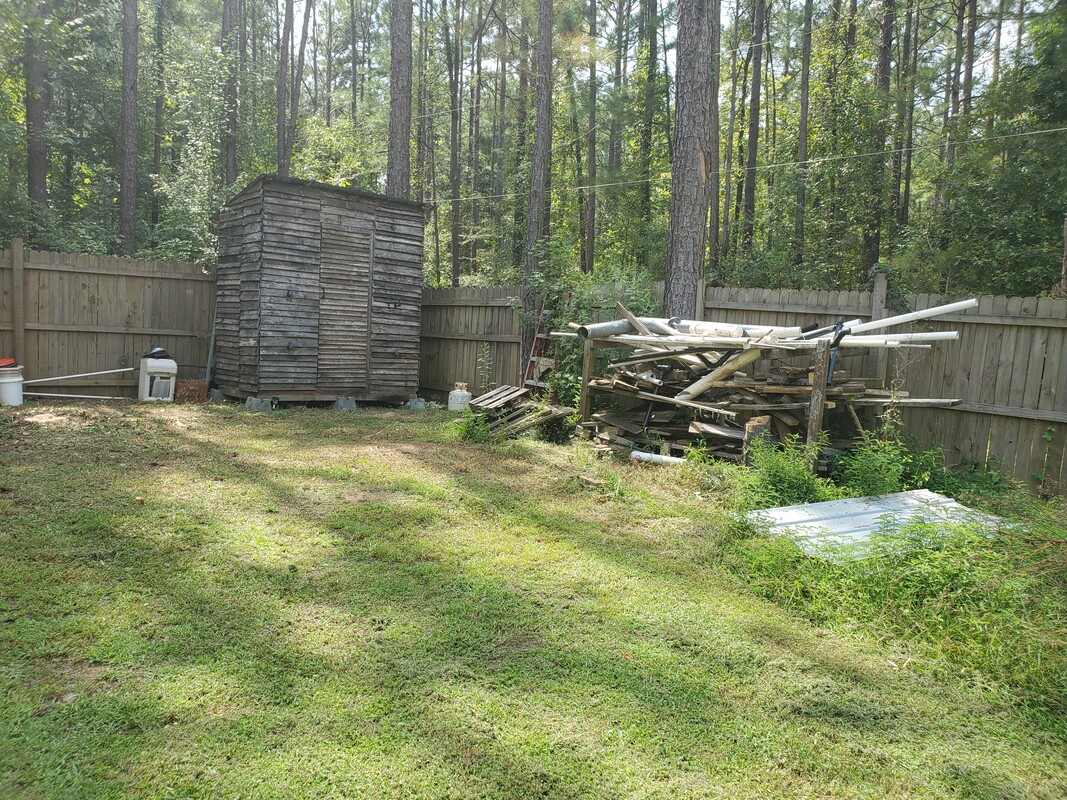
Area cut down smooth sans stumps.
Area in front of fuel shed void of stumps that once impeded our movement around here.
Area extending from fuel shed in front of wood/pipe rack with missing stump at bare spot.

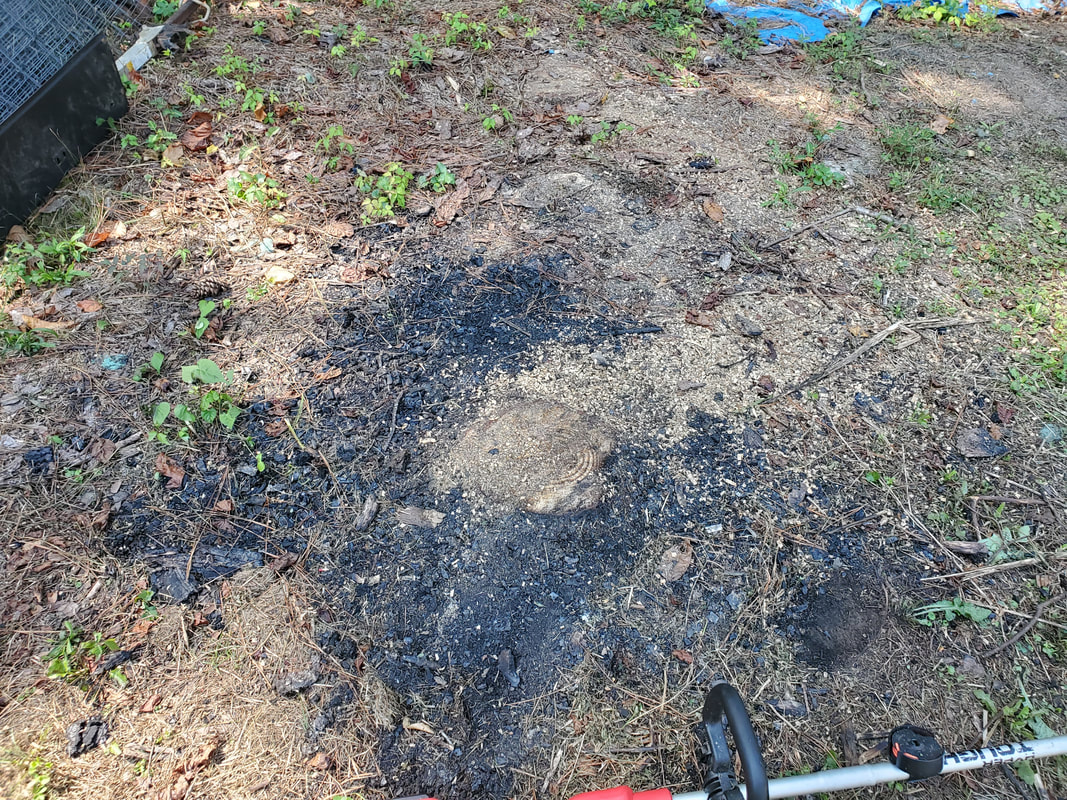
Area in front of auto parts racks with a few missing stumps including a once burnt stump, note the bare burn spot where the stump sat.
Area where burnt stump once stood, cut smooth.
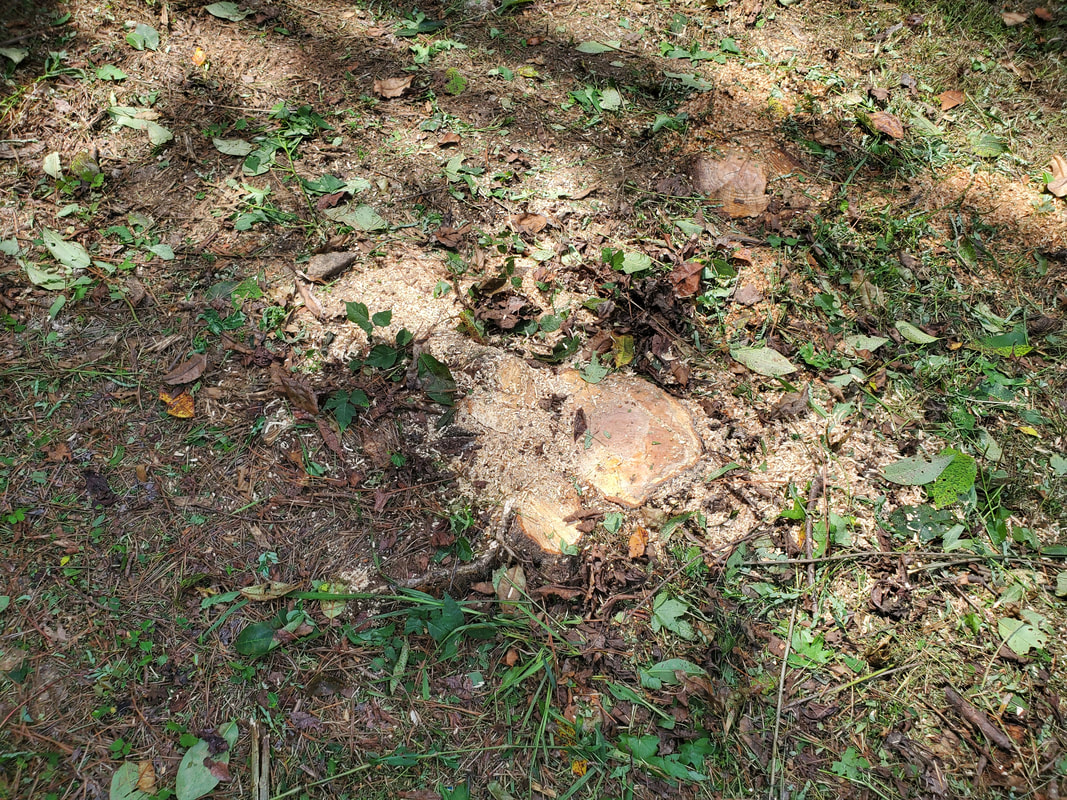
Double stump where weed tree tried a vain attempt at resprouting another set of branches to regrow itself, nature did not win this fight.
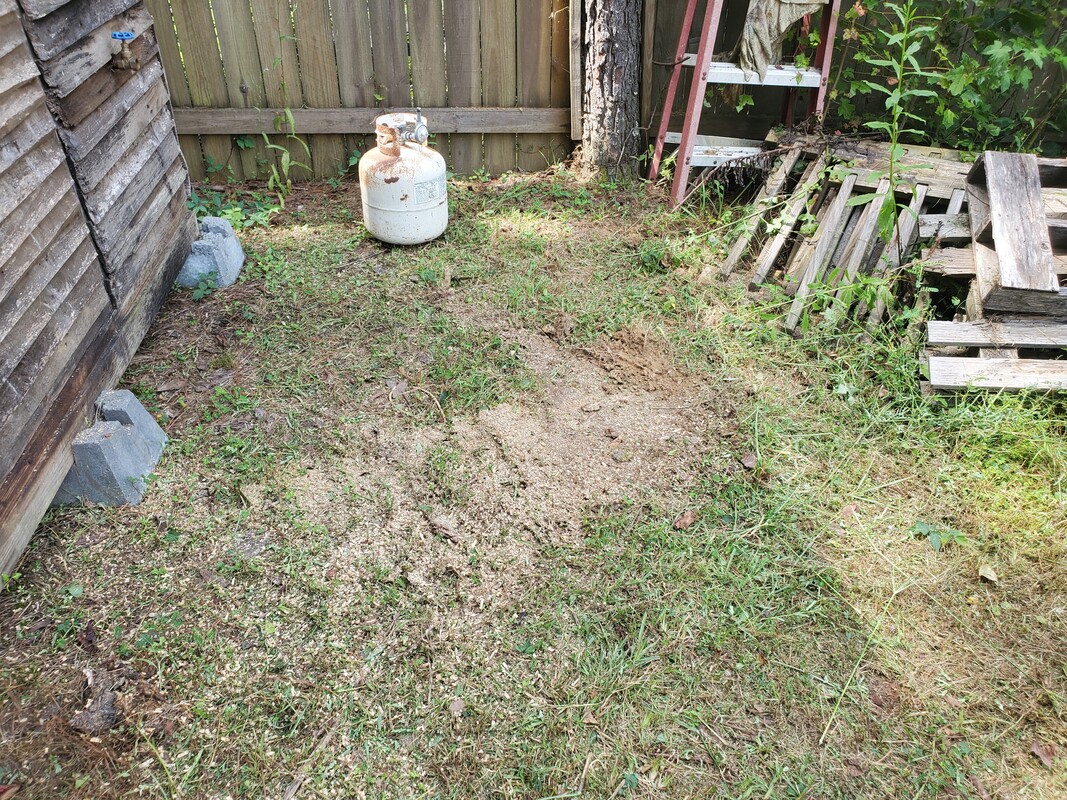
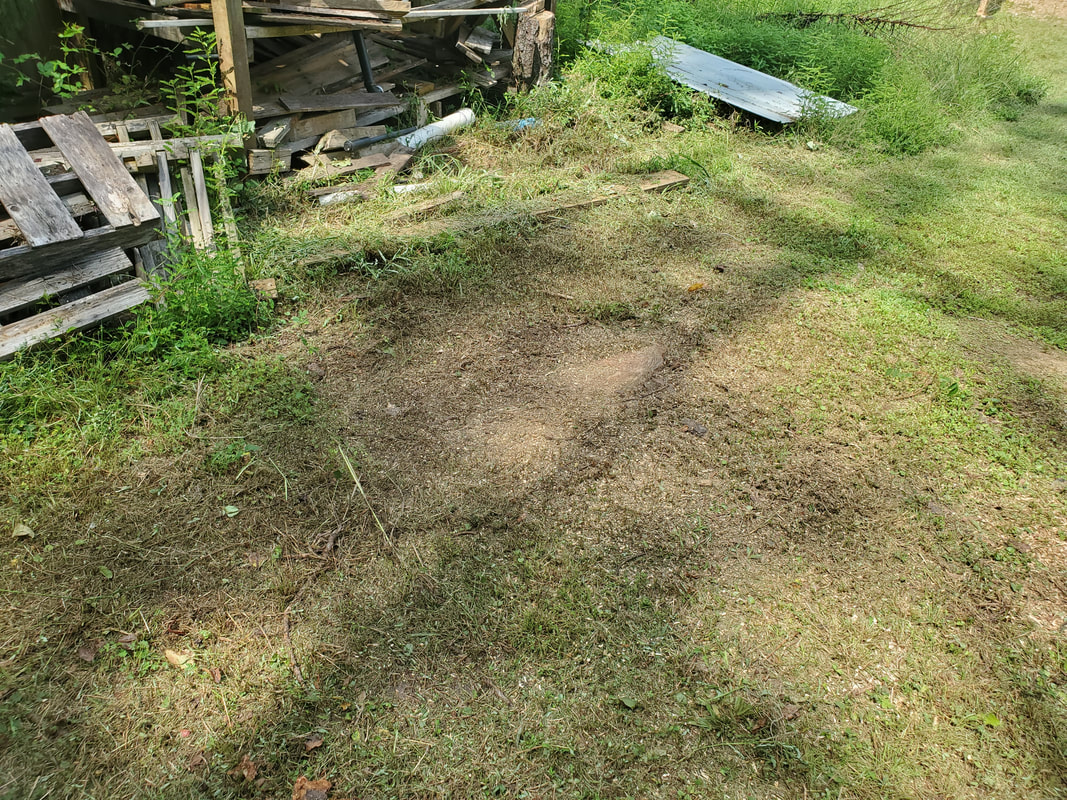
After cutting up the stumps I went to try and stack up some of the wood and pipes that were on the ground in front of the wood rack. That went well until a crew of yellow jackets had other plans and started swarming, coming from a nest that was inside of one of the already situated pipes. Even with my slow moving back, one of the little demonic bastards tagged me in the thumb, making that shit swell up and throb for a while. After that episode I was done with the wood rack. I ended this session with trimming the grass that was extending from the back of the storage trailer back towards the fuel shed, doing my best to stay away from the wood rack until I can catch these fuckers in their sleep at night and blast them. 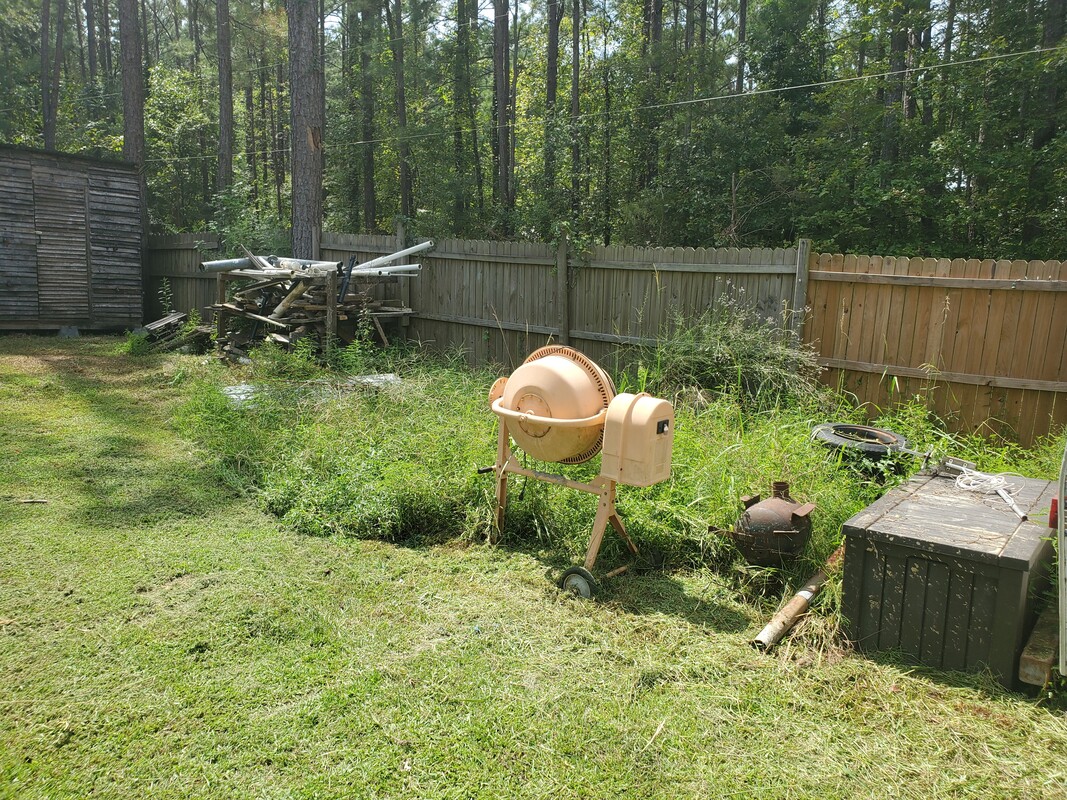
Area around cement mixer and storage box partially exposed from cutting grass from around the area, note distance from wood rack, no we're not doing that again!
After I do get a chance to blast the yellow jackets at the wood rack, hopefully there will be no more surprises when I go back to this area the next time since I need to stack and reorganize the materials for the rack to clean up the grounds around this rack. Once the grounds are clear I can then cut and trim everything, which includes another stump, around the wood rack, leading back to the rear of the storage trailer. There will be more to come in this landscaping project.
After all the work that we've been doing in the garden, we've made it to the advanced stages. After cutting down a lot of overgrown areas and trimming multiple fruit trees and muscadine vines, I turned my attention to taking care of the remaining fruit trees that were still planted in tire beds. I had three small fruit trees still in tire beds but after finding another plastic drum I decided to go ahead and take care of two of the trees. I also found the most unlikely container to use for the third tree, an old plastic garbage can that we were using as a feed container for chicken feed. A varmint chewed a small hole at the bottom of the can, rendering it useless for holding feed so it was the perfect container for planting a tree, it's even got a drainage hole already in it! As with the muscadines, I dug up the root ball of the tree and pulled it up from the tire bed, then placed them in their respective containers. The drum I did like the last plastic drum, where I cut it half the short way making two tubs. Since the drum has a removable lid, the top half ended up having the lid as the bottom of the planter. With the filler cap removed, the planter has instant drainage. The bottom half I needed to drill some holes in it before using the container. 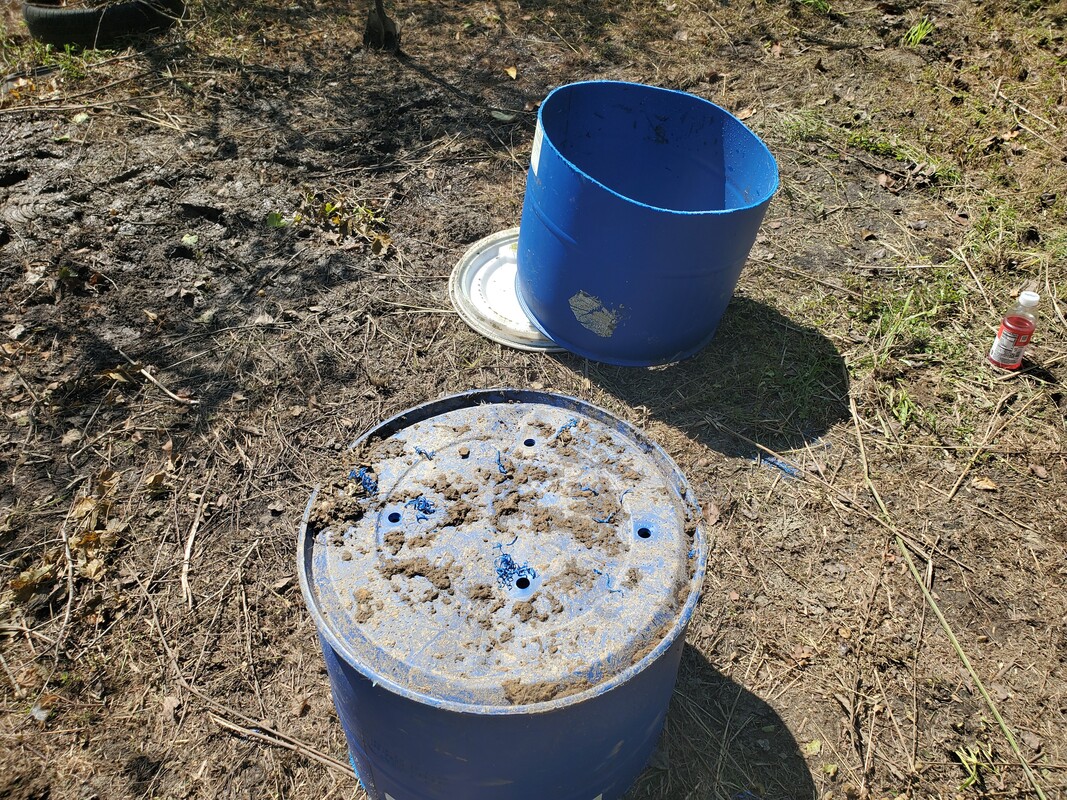 Bottom drum half with drainage holes drilled. Note top half with removable lid. 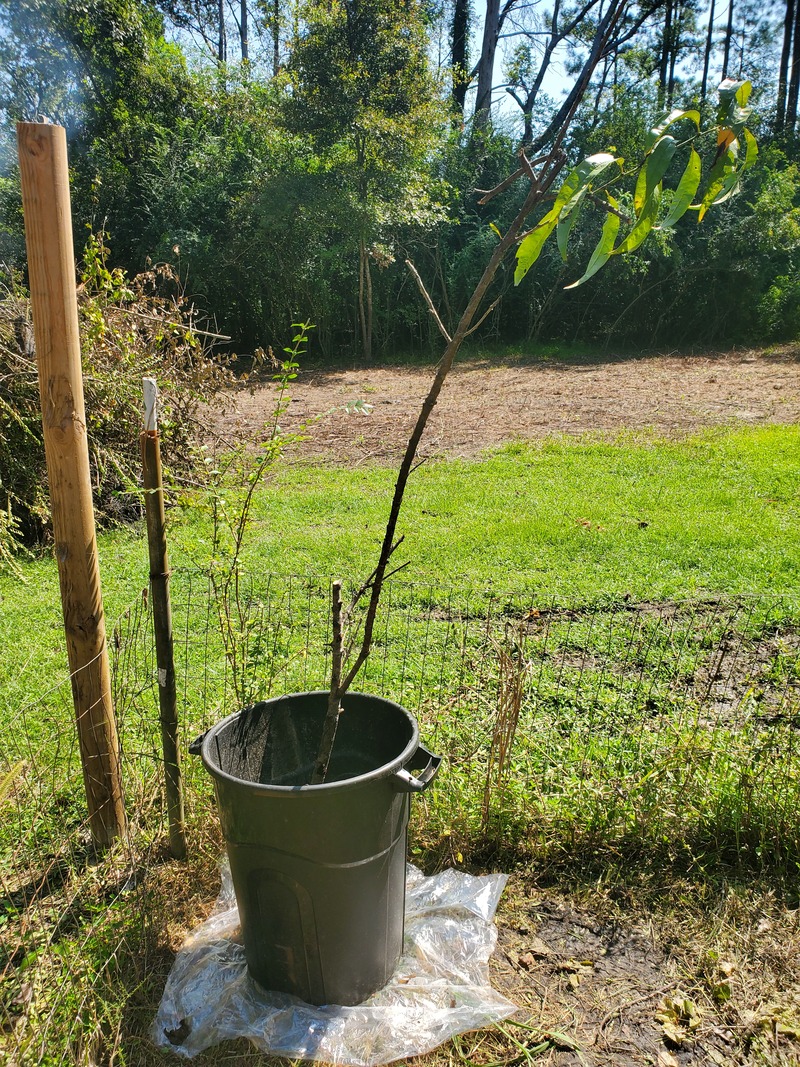 Plastic trash can with fruit tree planted within. Before laying the drum planters down I took some bags and laid them down on the ground to serve as a barrier to put the drums on top of. When I lay gravel down over all this, it'll help keep weeds from sprouting up around the drums, keeping me from having to use the weed trimmer to cut around the drum planters. I also killed two birds with one stone by using up more of the compost from the composter to put in the drum planters over the root balls of each fruit tree. Now I just need dirt to fill the containers up. 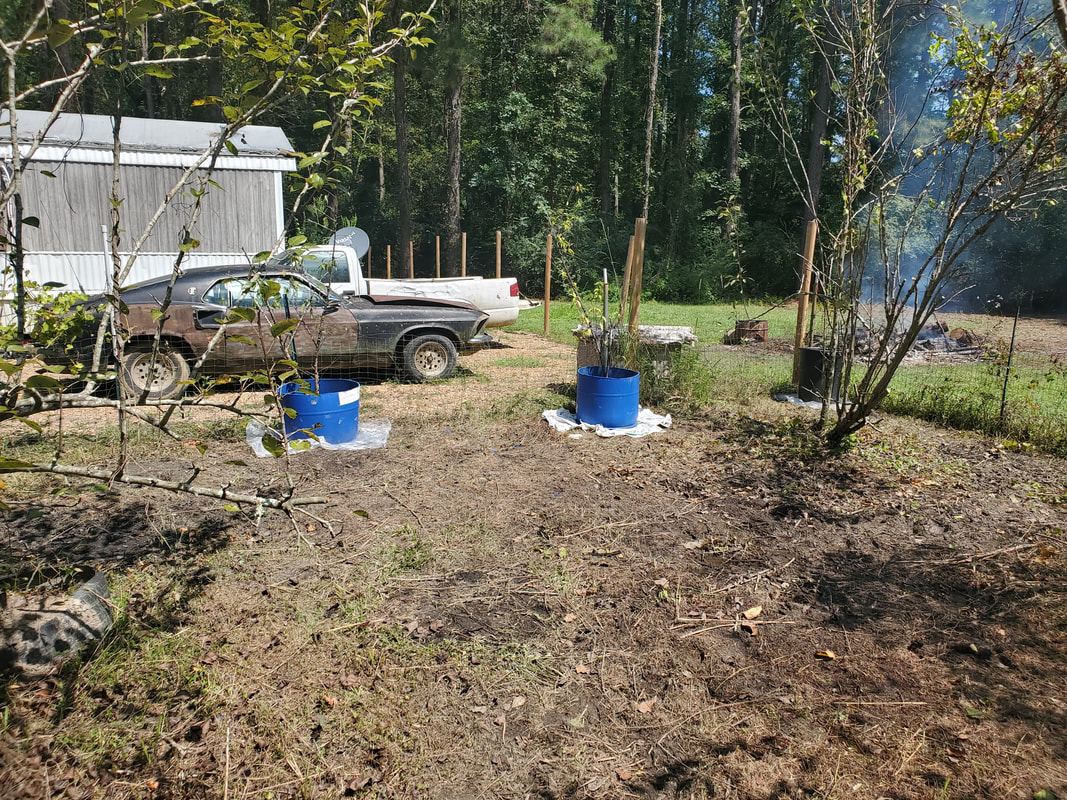 Drum planters situated along north fence on their beds of plastic with fruit trees in place. 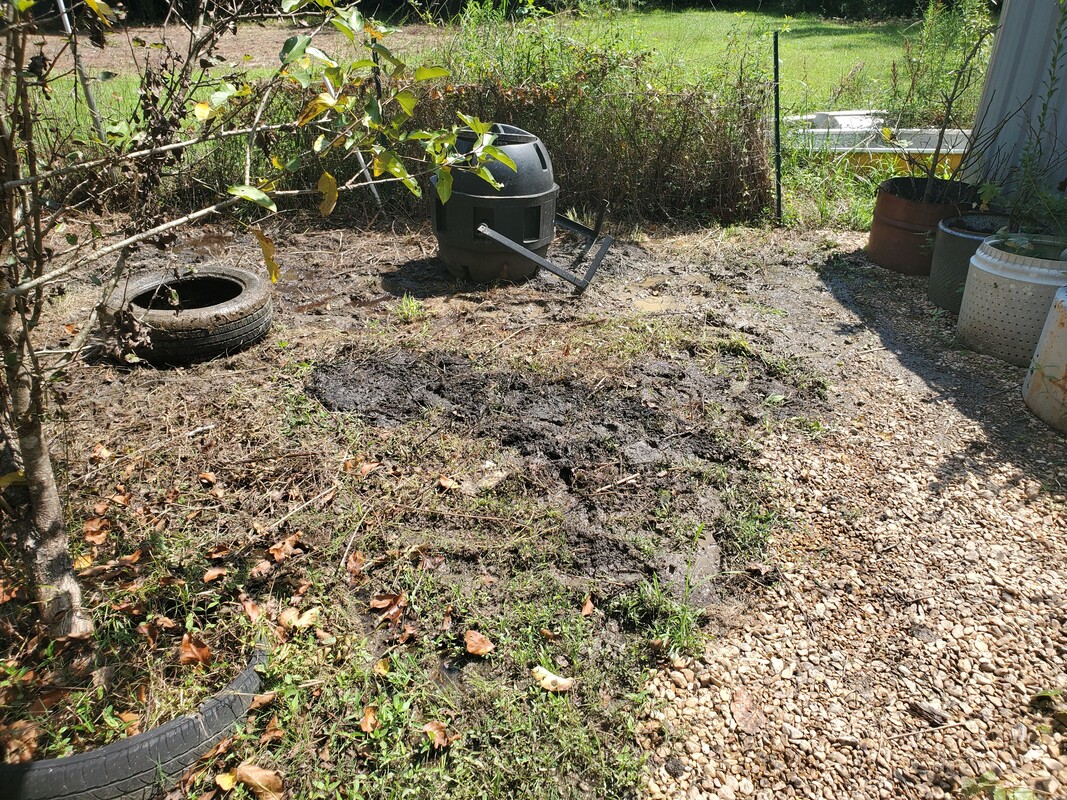 Bare area left behind after removing tire beds with fruit trees planed within. I ended up putting the drum planters along the north fence, evenly spacing them out with the muscadine tire bed that still remains in place close to the fence line. The plastic garbage can planter is on the northeast corner of the fence line. After pulling up the two fruit trees that were in drum planters near the Kennel Greenhouse, I had to smooth out the ground to get the dirt mashed into the ground to help level off the area prior to laying gravel later on. The third fruit tree/tire bed was near the NE fence line but still needed leveling off as well. Now the ground is all cleared of tire planters that I want to remove. Also regarding compost, to empty the rest of the composter I shoveled the remaining contents into the most recent raised drum bed garden assembly as well as all the bucket beds and one drum half bed in the Kennel Greenhouse. Getting some nice ripe compost in all these planters will get them ready to accept new plants and hopefully cause them to thrive with the extra nutrients. I also had some bags of dirt from the store that we picked up to fill the last drum bed that has the two muscadine plants within plus the one next to it that has blackberries. The remaining dirt I used to fill up the new drum raised bed. 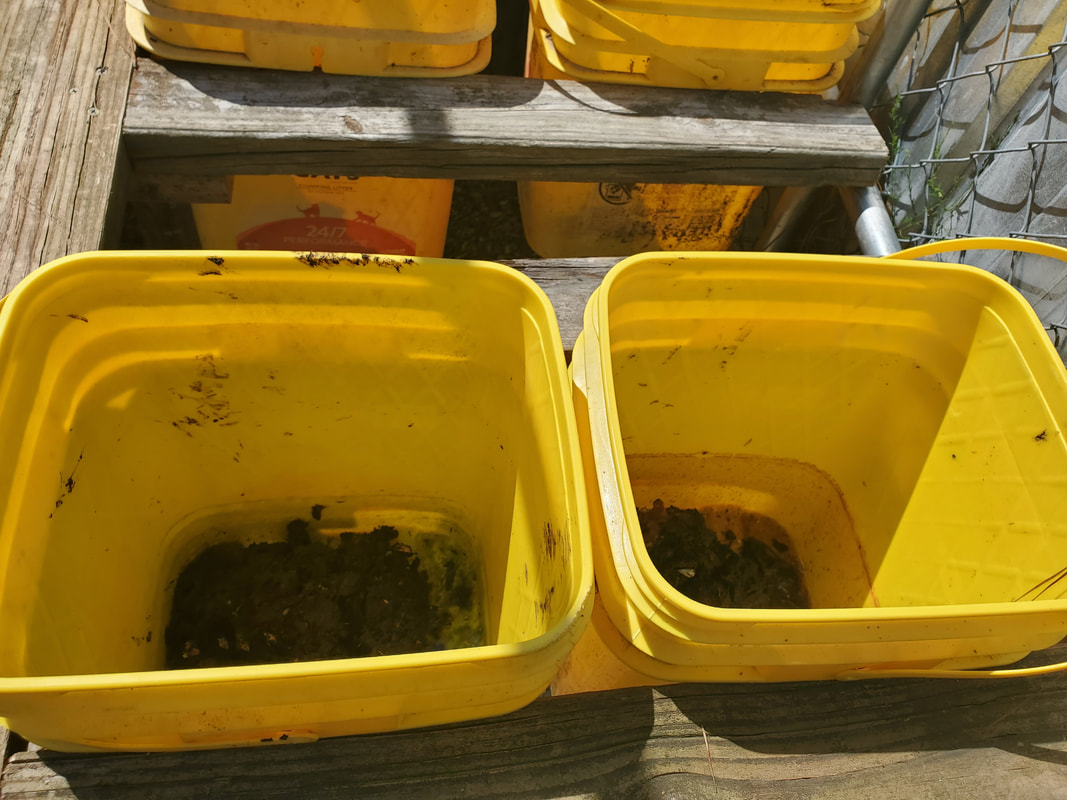 Bucket beds in Kennel Greenhouse with a little compost in each. 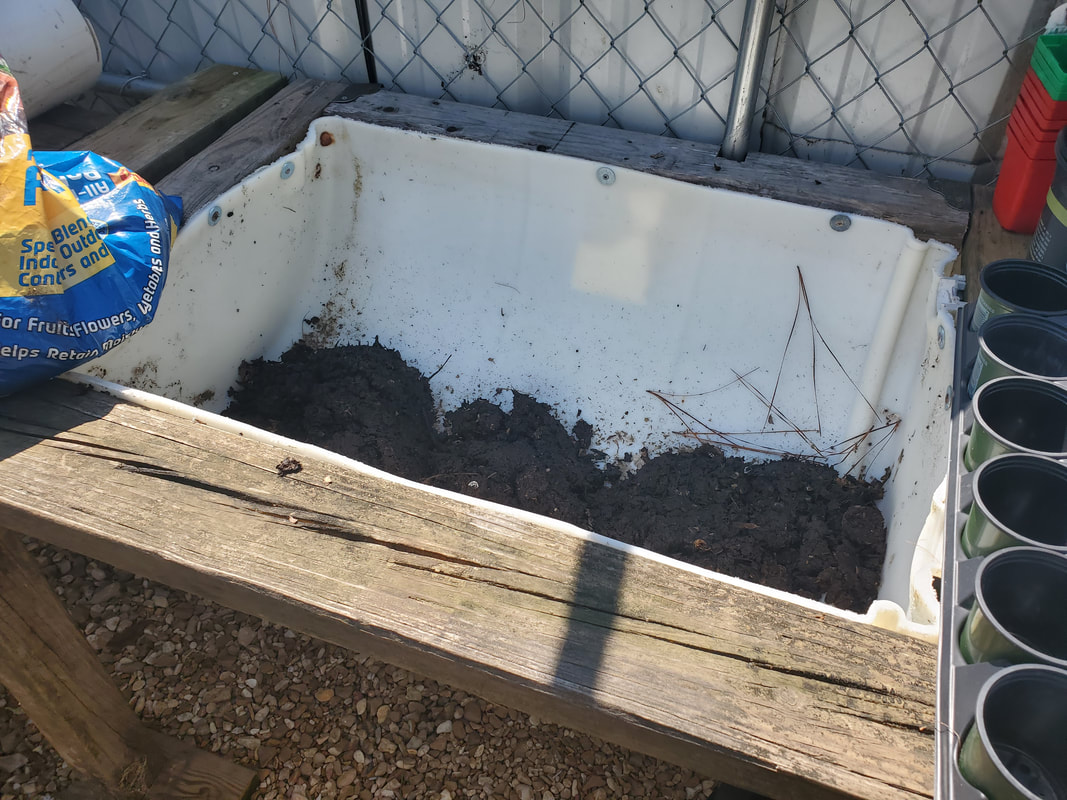 Half drum bed with some compost placed within. 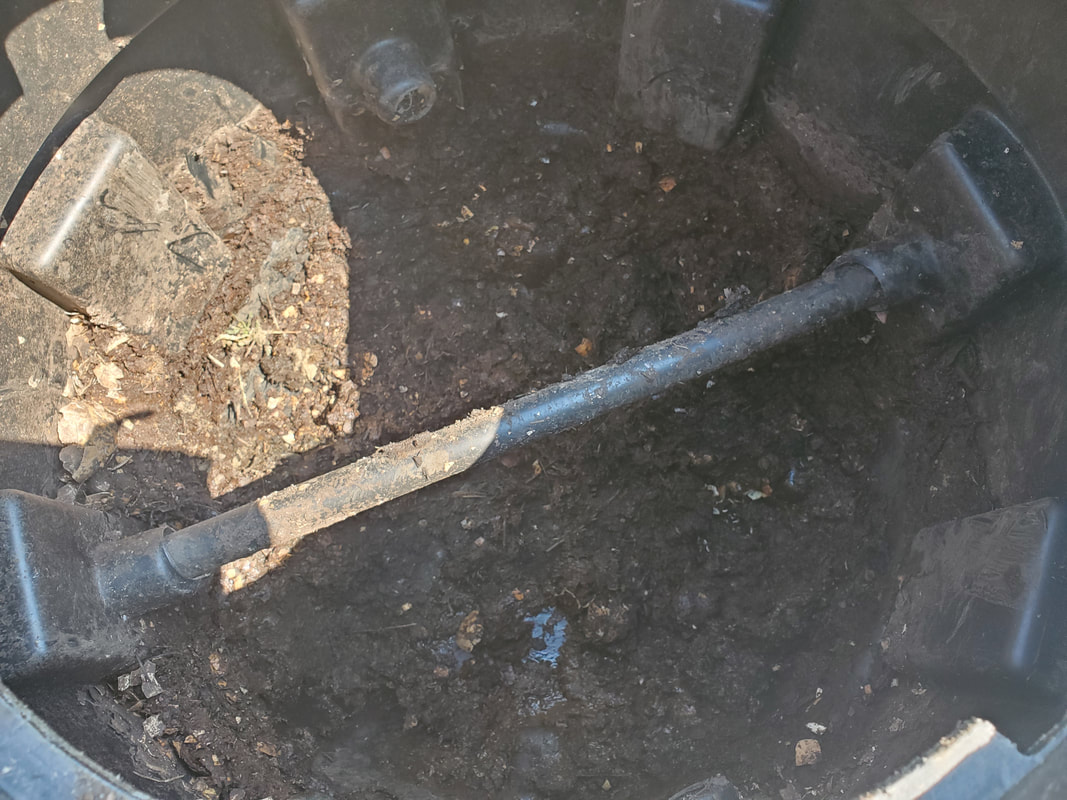 Emptied out composter with just some remnants remaining. Now the thing will be light enough to lift up and move around to place on slab when we do get that done. 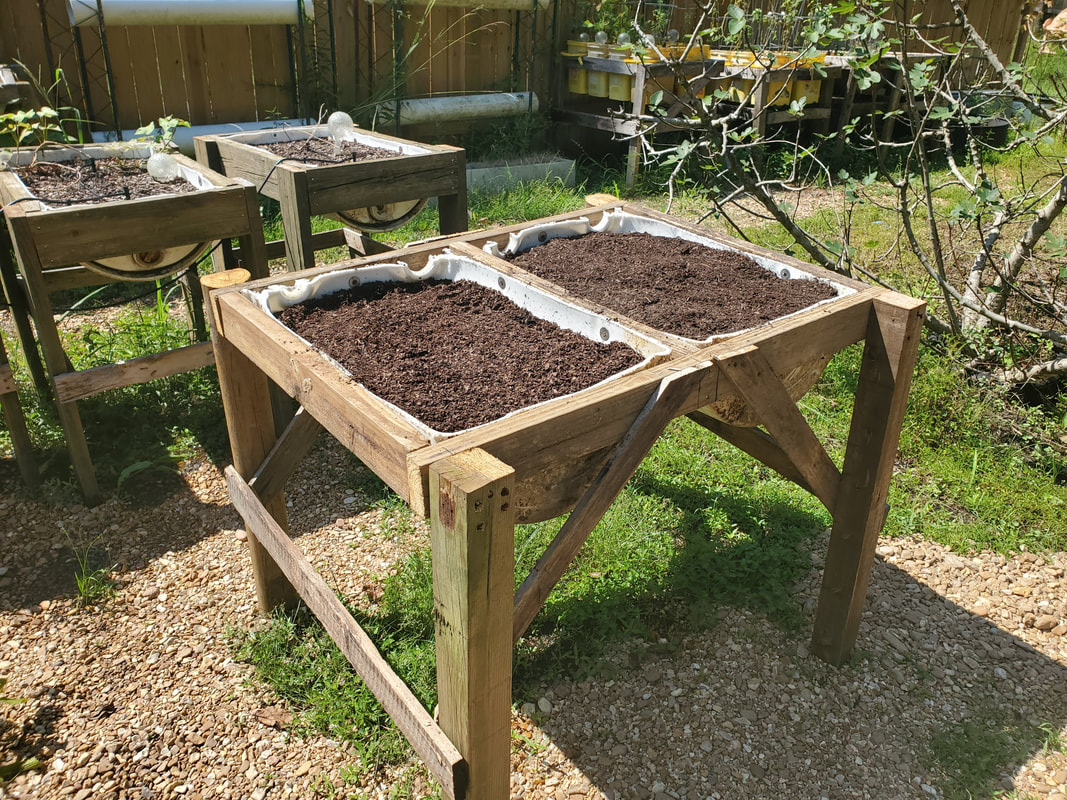 Newest drum raised bed with fresh dirt placed within. 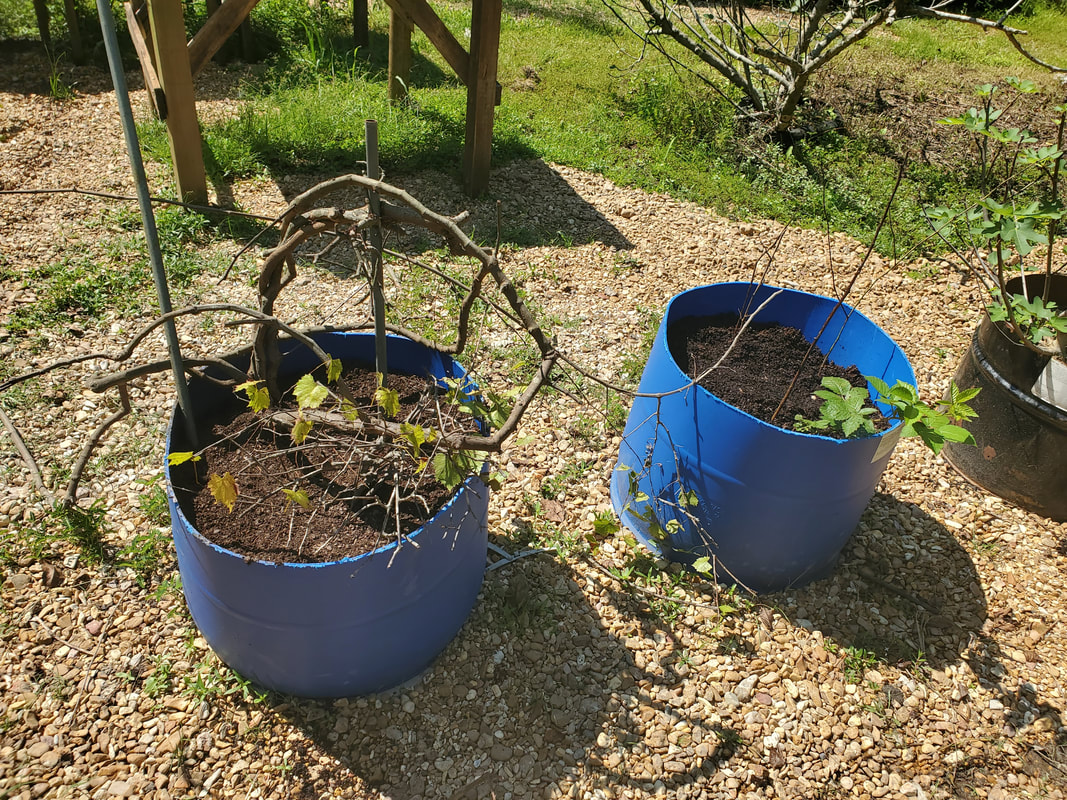 Muscadine and blackberry drum beds with fresh dirt placed within to cover everything up. The last thing that needed to get done was addressing the super long vines of the muscadines that are in the garden. I figured I could use some of the scrap PVC pipe and fittings we have laying around to make a makeshift trellis to train the long vines around, creating what would amount to a muscadine tree. I dug out a bunch of 3/4" pipe and tees and a few elbows and started throwing together a base frame that would fit around the drum while providing the support to hold a couple of pipes in the soil then just start building up. The supporting base along with the rest of the trellis, is not glued together. The obvious reason being I may want to try something else or modify things and being able to take the structure apart will go a long ways as far as being able to salvage things for personal use. 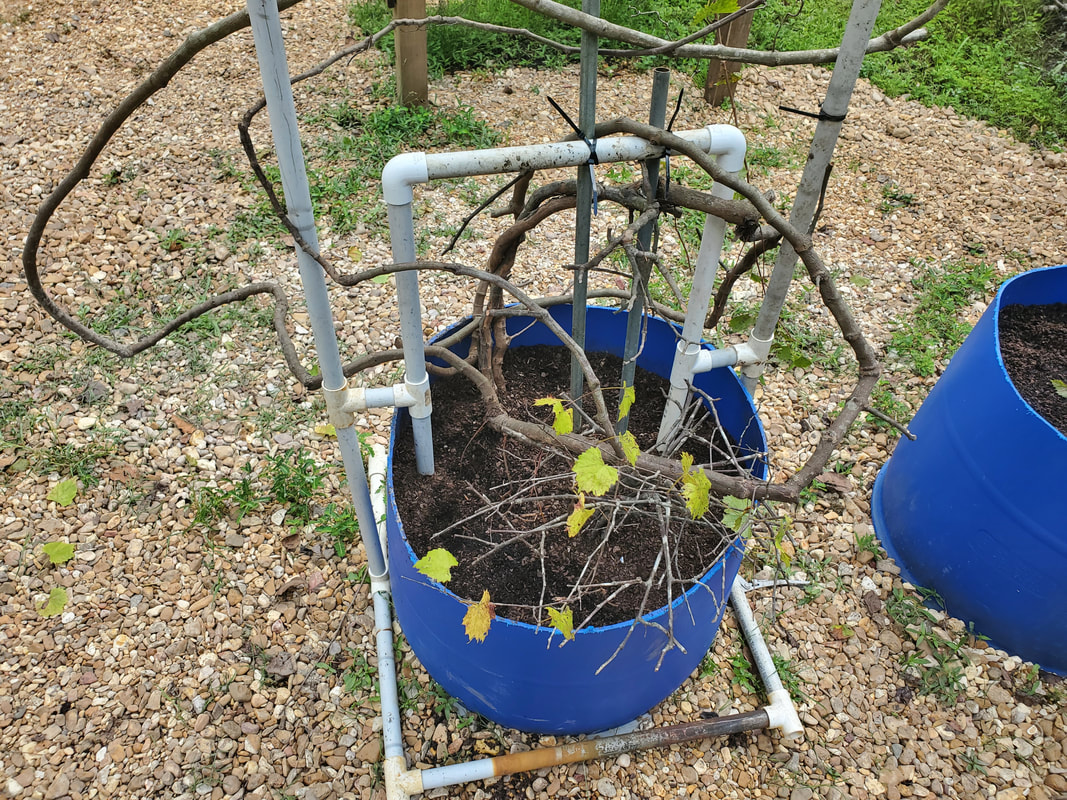 Closeup of lower PVC pipe frame and supporting base built around the drum planter to hold up the greater PVC frame that rises over 6' tall. I didn't incorporate a lot of pipe or fittings into the overall structure as I was really just shooting from the hip when it came to the design and really implementing the whole thing. A couple of metal conduits that I placed in the drum aided in the support as I was able to use zip ties to hold the conduits to the lower parts of the PVC frame. Once the overall structure was completed I routed the long vines around and through the PVC structure, using zip ties to tie the vines to various points around the frame. Once the thing was all secured, looking back at it, it almost puts you in the mind of a tree with ivy covering it, sorta. 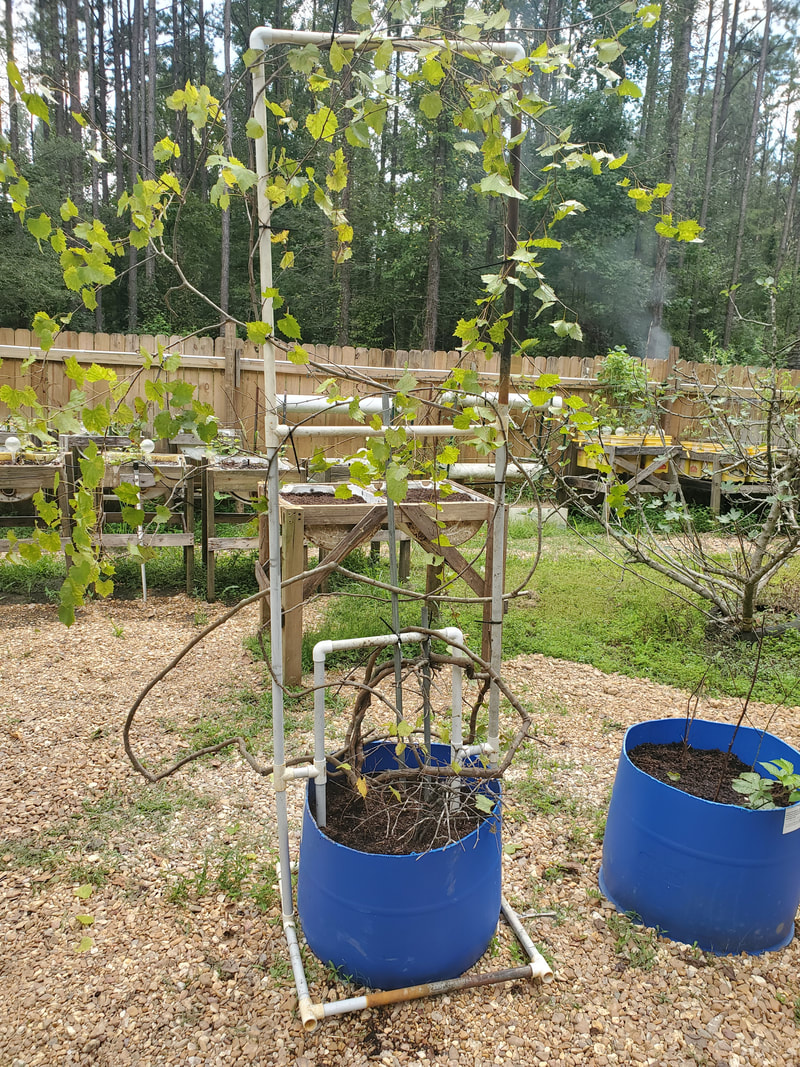 The muscadine tree, completed PVC pipe trellis with vines secured in place. Note zip ties all over and two conduits helping hold things up better. With all of these things done, all that remains is filling the three drum planters with the fruit trees that I mentioned in the beginning with fresh dirt. Once this is taken care of, it'll be back to the gravel spreading. I will have to run some water lines to the new drum planters and drum raised bed and start planting some cool weather plants within, such as lettuce and spinach. I still need to put dirt in all the greenhouse beds as well so I can get those planted, even before making the cover for the structure. All in all the newly revamped garden is coming along rather well.
We've recently started up a new quest to really get back into the sport/hobby of airgunning due to the fact that ammo has gotten ridiculously expensive to the point that sport shooting is starting to not be economically viable for a homestead that has funds already stretched pretty thin. Being able to spend $20 for some CO2 cartridges and some tins of pellets and BB's to hone in shooting skills is a lot better than spending $200 to do the same. Because of this, I've been eyeballing many new airguns that have hit the markets. Most of these guns from their specs show promise for serving in a limited self defense capacity, leaning more towards less lethal due to the idea of not being able to kill a human, with the possible exception of some of the larger caliber air rifles that have performance specs that are comparable to real firearms. That's neither here nor there, we're mainly focusing on the more affordable lower caliber airguns and paintball airguns that as of lately, accommodate a myriad of less lethal ammo choices to give one the ability to defend themselves without the trauma of taking a life. That brings me to an old acquisition we have.
That acquisition is a Chaser .43 caliber paintball pistol. This funny looking air pistol works much like a regular pistol, being magazine fed, while being powered off a regular 12g CO2 cartridge like most air pistols you can get at your local chain store. While I don't have the performance specs of this paintball gun, what I do know is that there are many ammo types for this caliber, allowing this paintball gun to serve as a nice less lethal defense tool. Between pepper balls to different plastic and light metal alloy balls, this gun can put a hurtin' on someone without killing them. Thing is, this gun needed to be cleaned up and serviced due to not having this work done and having it just sitting in storage for many many years. 
The Chaser .43 cal paintball pistol.
Just like with any gun, disassembly comes with a bunch of little screws and several small parts. Ironically even a paintball pistol has internal workings very similar to a regular pistol as far as trigger groups, magazine, magazine catches, slide, springs, etc. I made a mental note of the gun as I pulled it apart so I could get it back together without incident as one missing part will completely FUBAR the project. 
Gun taken apart and laid out on work table prior to cleaning.
With everything apart I was able to get to work with the real intention of this disassembly, which was to thoroughly clean this gun inside and out to get all paintball residues and dirt from the internal workings so this gun will run smoother and hopefully have most of its potential power retained. 
Hammer and breech block/charging block removed from rear of gun. Both components are linked together by a peg.
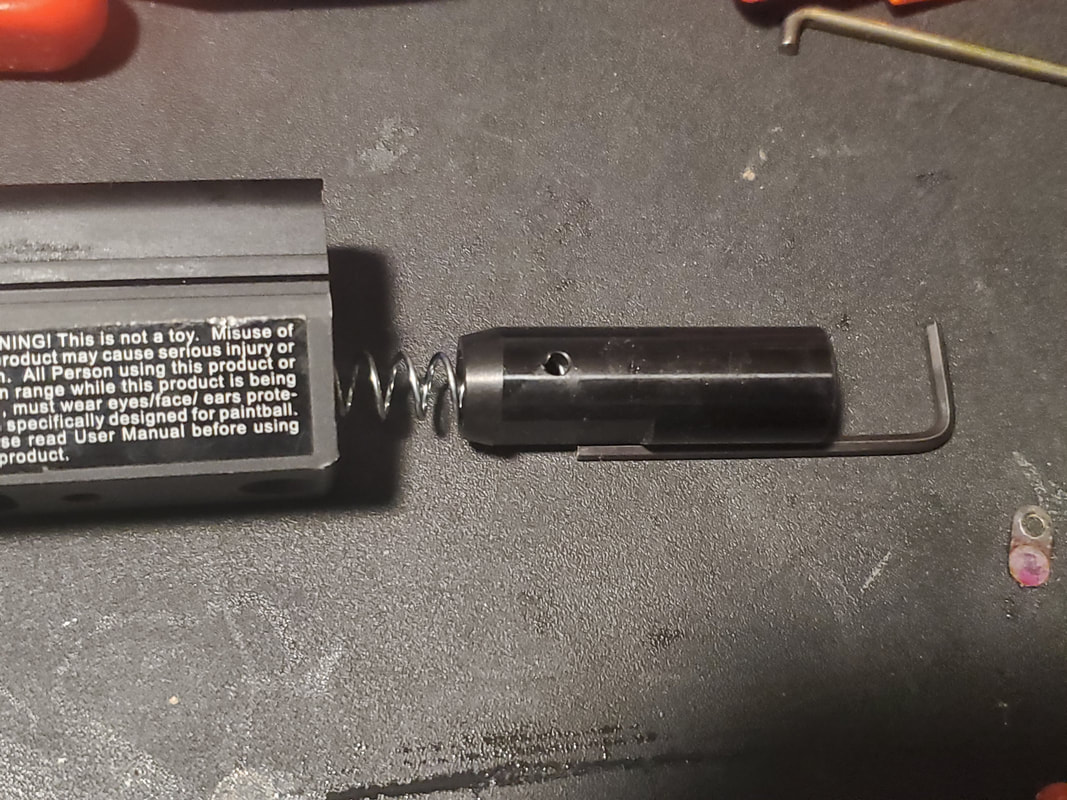
Forward spring block removed. This piece is held under pressure by the main spring at the front of the gun and is linked by a rod to the hammer in the rear of the gun. No spring is present behind the hammer.
After cleaning all residues from the surfaces of the gun parts I then greased everything up with gun oil. All surfaces where parts slide or turn/pivot, got oil. Now for the reassembly. Since I made note of how the gun came apart it went back together rather fast, giving me a quick breakdown of how this gun was engineered. 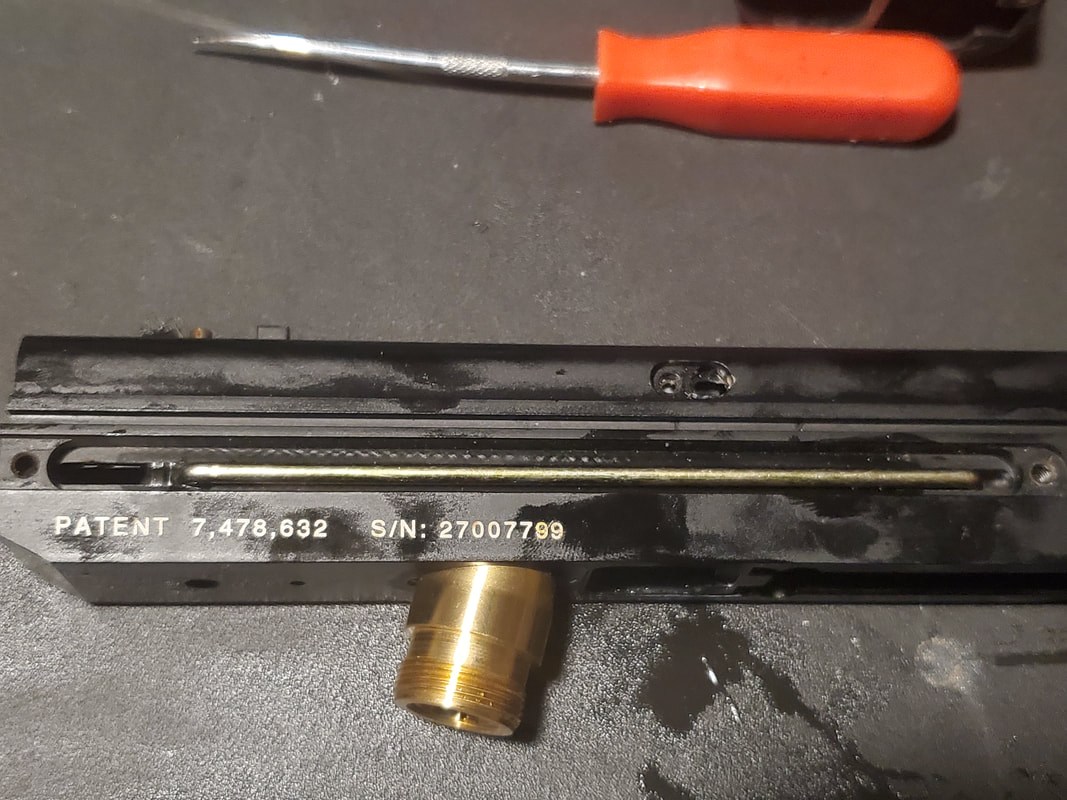
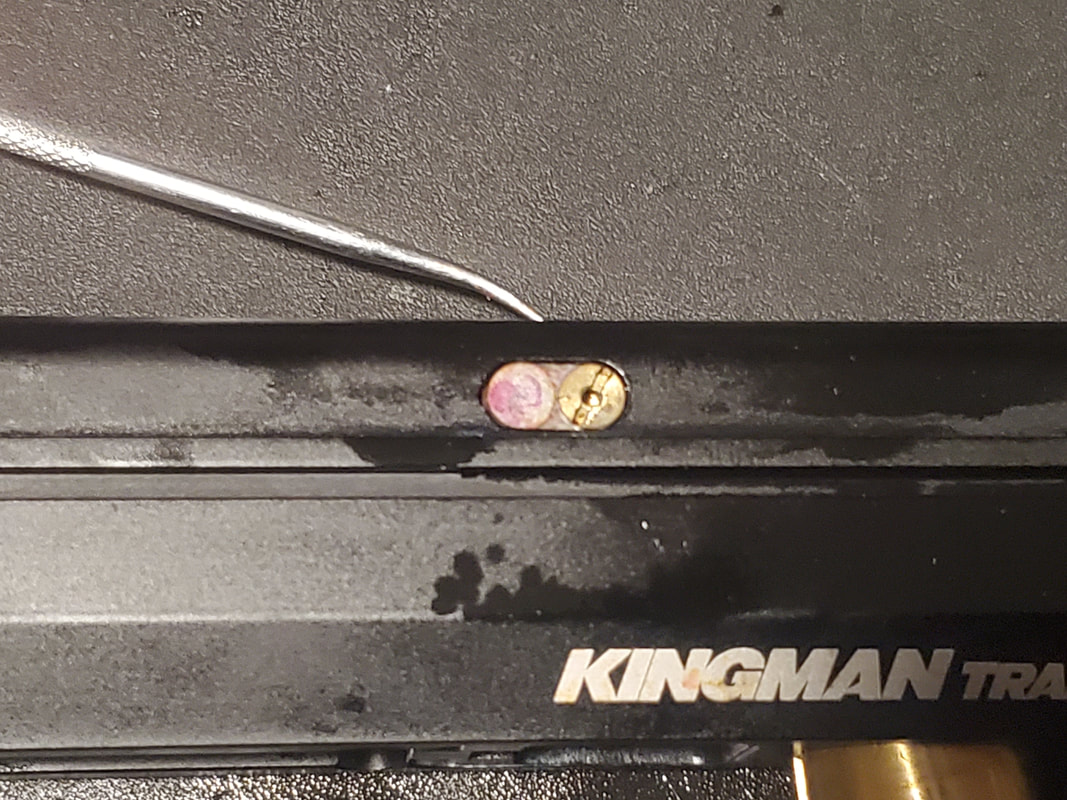
Linking rod between hammer at rear of gun and main spring block at front of gun, note the oil residue on receiver. The bronze part is the CO2 valve as it protrudes from under receiver.
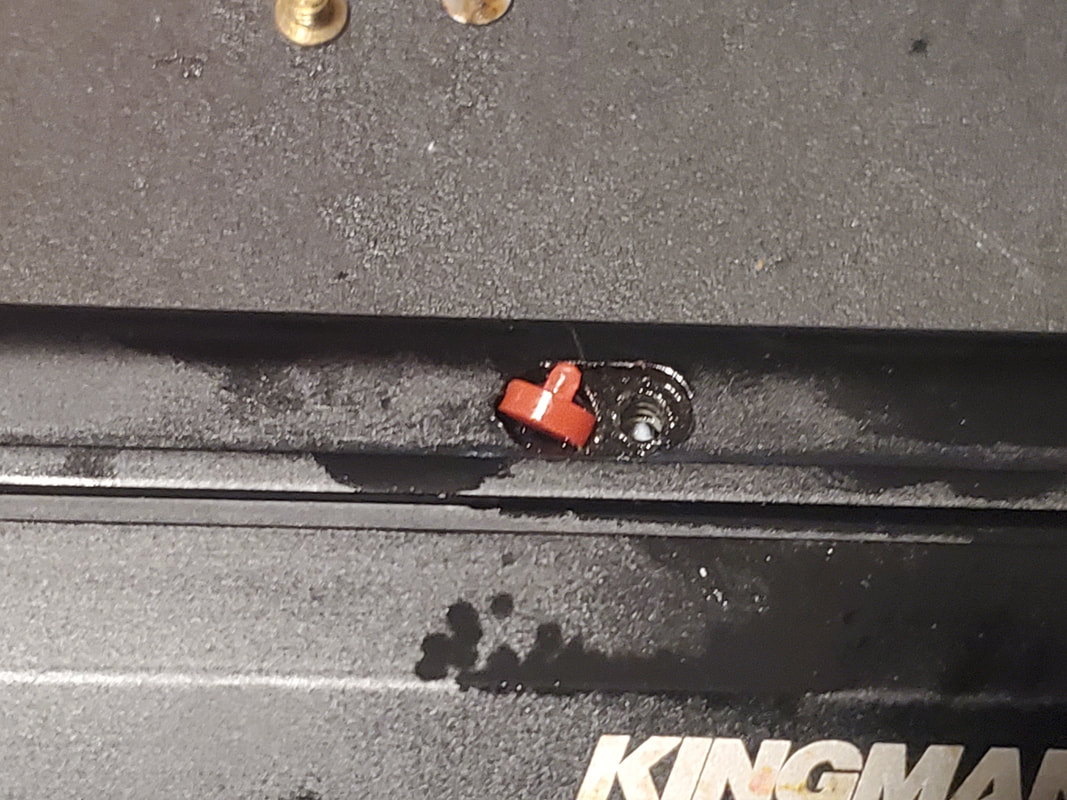
Rubber paintball retainer plug prior to reinsertion. These plugs hold the paintball in the breech so it doesn't slide down the barrel when the gun is tipped muzzle down. Note the gun oil.
Paintball retainer plug inserted on one side of the receiver.
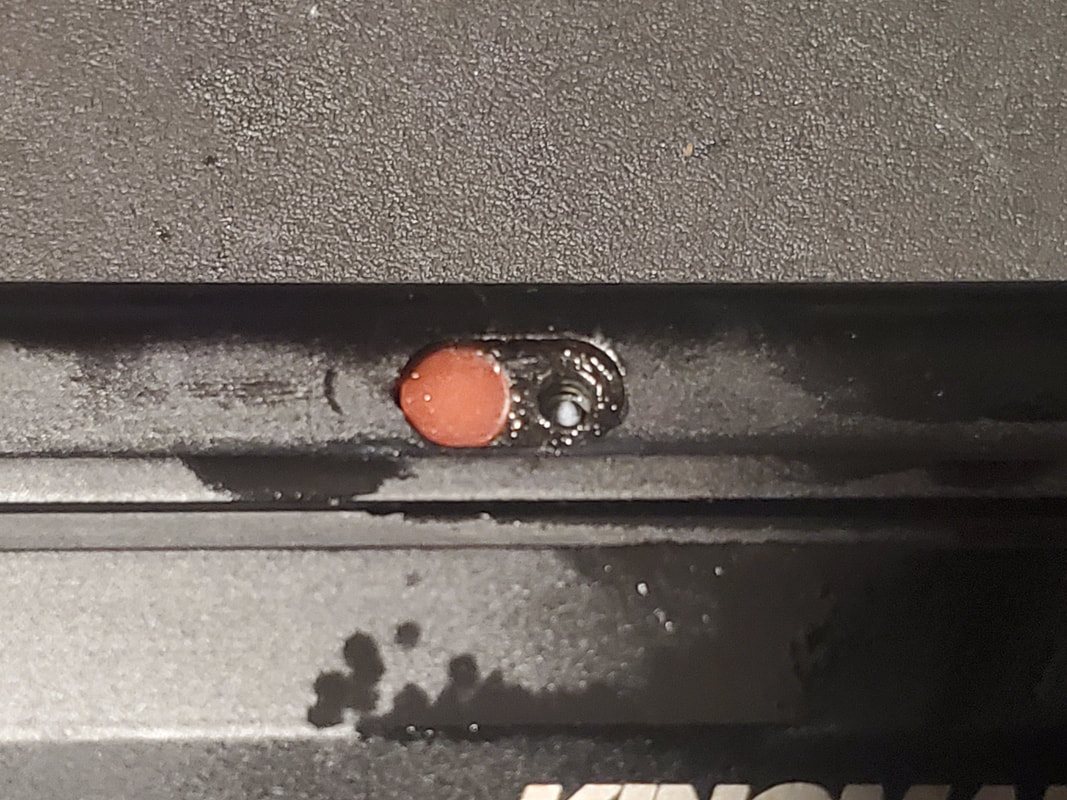
There's two paintball retainer plugs, as this one is on the other side of the receiver.
As the gun went back together I added more gun oil to the surfaces that had the newly fitted parts mating together once again. All springs and spring loaded components went back together again. The slide went back on, secured with its fasteners. Once the slide was back on the gun was pretty much done. I tested everything out to see how the gun worked, finding that everything moved pretty smoothly. With the gun cleaned up and greased up, all that's left now is to test the thing. 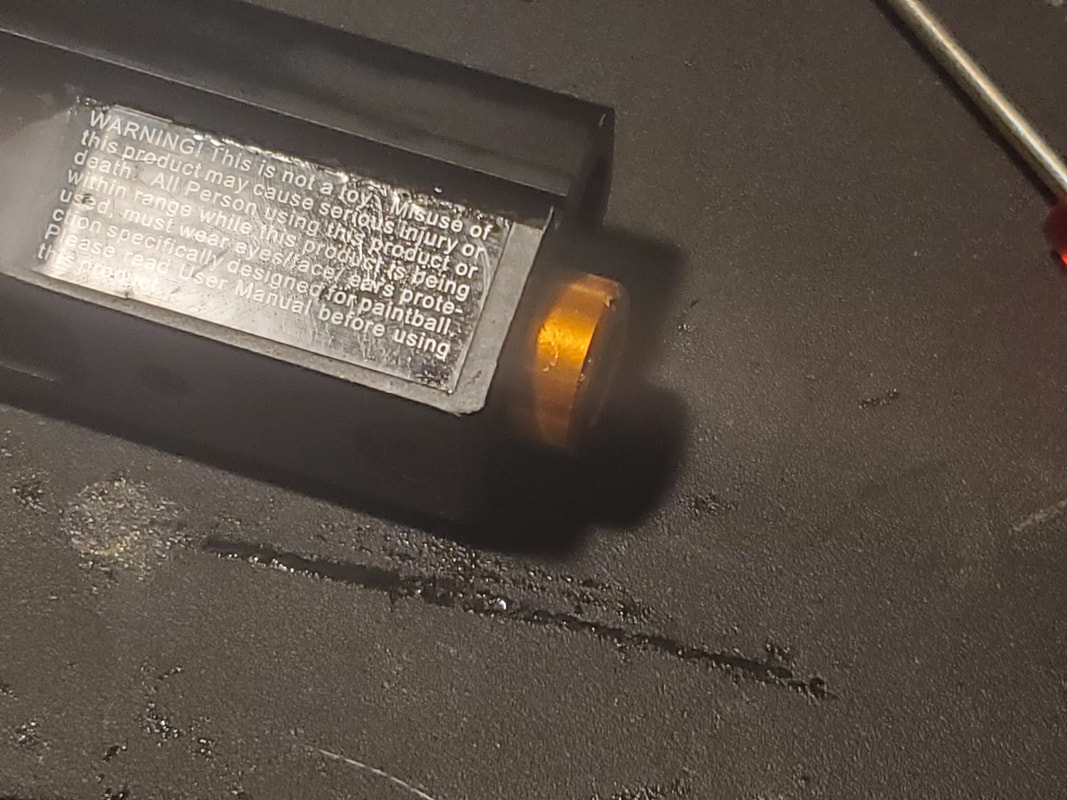
Main spring block plug reinserted after putting the spring and plug in place.

Excessively greased up gun awaiting installation of the slide.
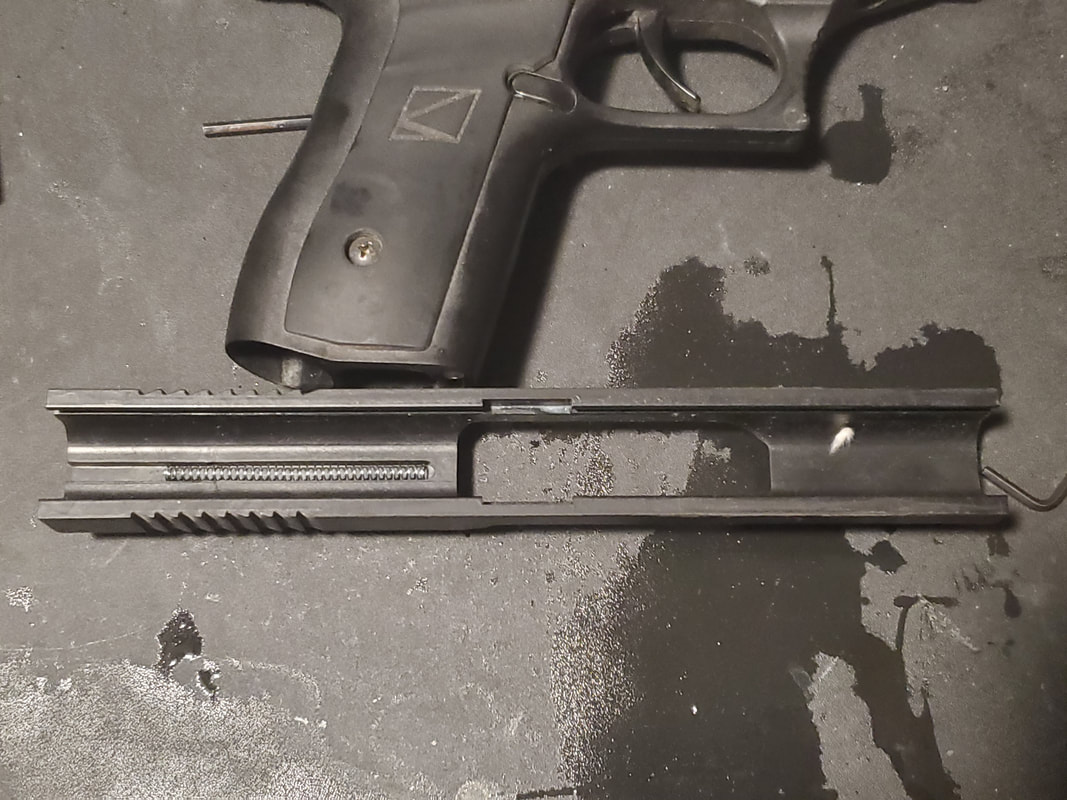
Slide with recoil spring inserted.

Pistol reassembled and wiped down to get excess grease off of outer surfaces.
I did have a small amount of .43 cal paintballs but these things apparently have a shelf life to them and some of them are soft and a little sticky, making them potentially dirty to use on a freshly cleaned gun. I may try a few of the better specimens just to test the functionality of the gun but overall I'm not trying to run shitty ammo through this thing. In fact, I will be planning on buying some less lethal ammo for this gun and more than likely not even bother with paintballs as the purpose of this gun and future ones like it is to be a means of less lethal defense. Ammo like rubber balls and plastic/metal balls will be the commonplace with this gun and for all intents, I'll probably end up building up some special range setup that would allow me to recover most of this ammo. I recall seeing some glow in the dark practice ammo for this caliber as well, which would make recovery that much easier, just wait til night and go pick up the loose ammo on the ground.
|
