|
After removing the solar panel array that recharged the battery that went to the old area light, I had to come up with a replacement for the old solar area light setup. I had seen these all in one solar lights that look like some kind of street light setup that has a solar panel, a large set of LED's and are lithium battery powered. Online they were about $60 for one that's supposed to be of a pretty good intensity. I thought about getting one eventually until one day we seen the same type of unit at walmart.
The walmart units came in two sizes; one was a 1000 lumen unit and the other a 5000 lumen unit. The 1k lumen unit was around $30 and the other $60. I figured I'd give the cheaper one a try and if it didn't meet my expectations then I'd try the other one. 
Walmart solar street light.
With the light in hand, the first thing I had to do was remove the old LED light assembly that I put together. This was mounted on a PVC pole standing approximately 10ft after it was anchored down. I had to safely and carefully use a ladder to get up to remove the fixture. Once it was down I could move on to the next phase. 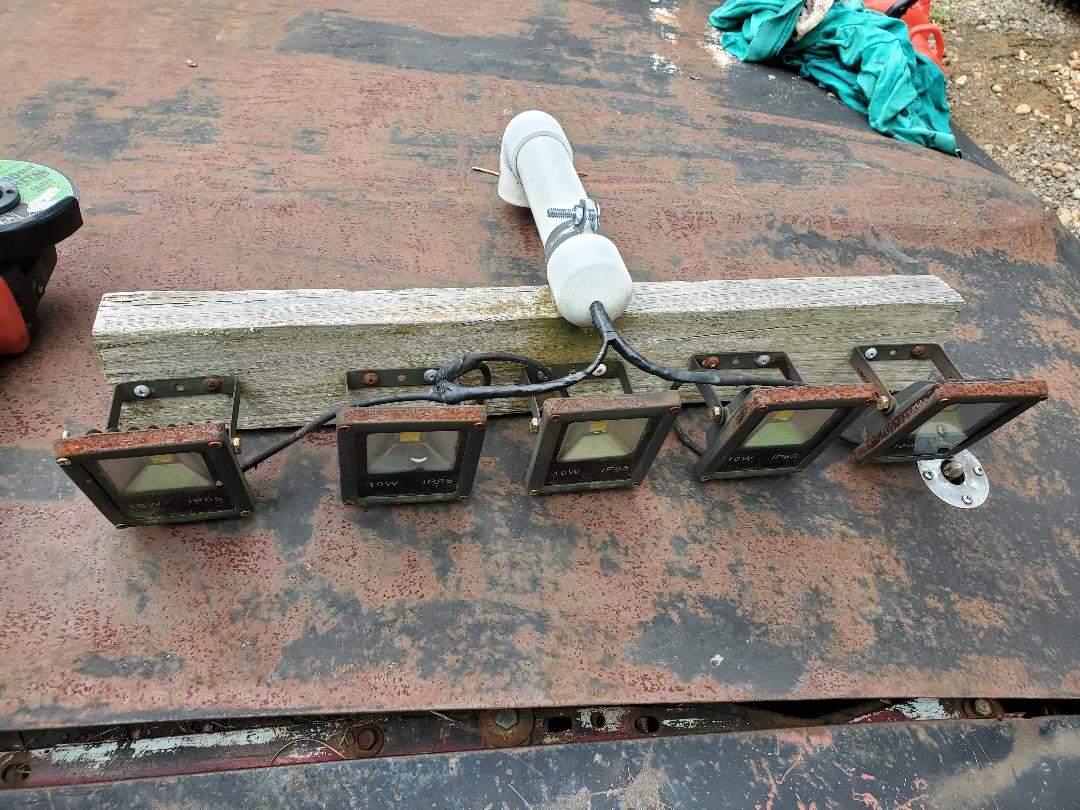
Old LED light array after removing from post.
Taking the light out of the box I found that the light was missing an important bracket that helps hold the unit to any post. I ended up having to take a piece of sheet metal and cut a strip of metal and drill a couple of holes for the retaining bolts so I can mount the light to the post. I wasn't about to wait to return the light to the store as I wanted this thing mounted so I can see how it works. 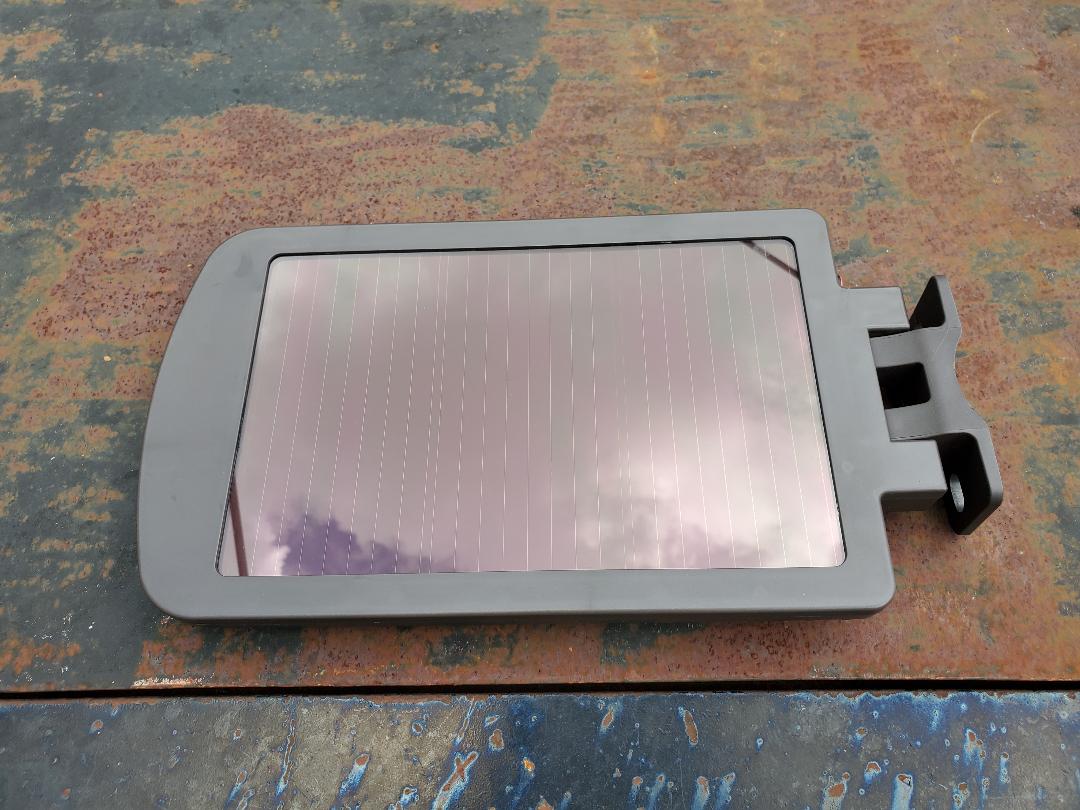
Solar panel on top of solar light.
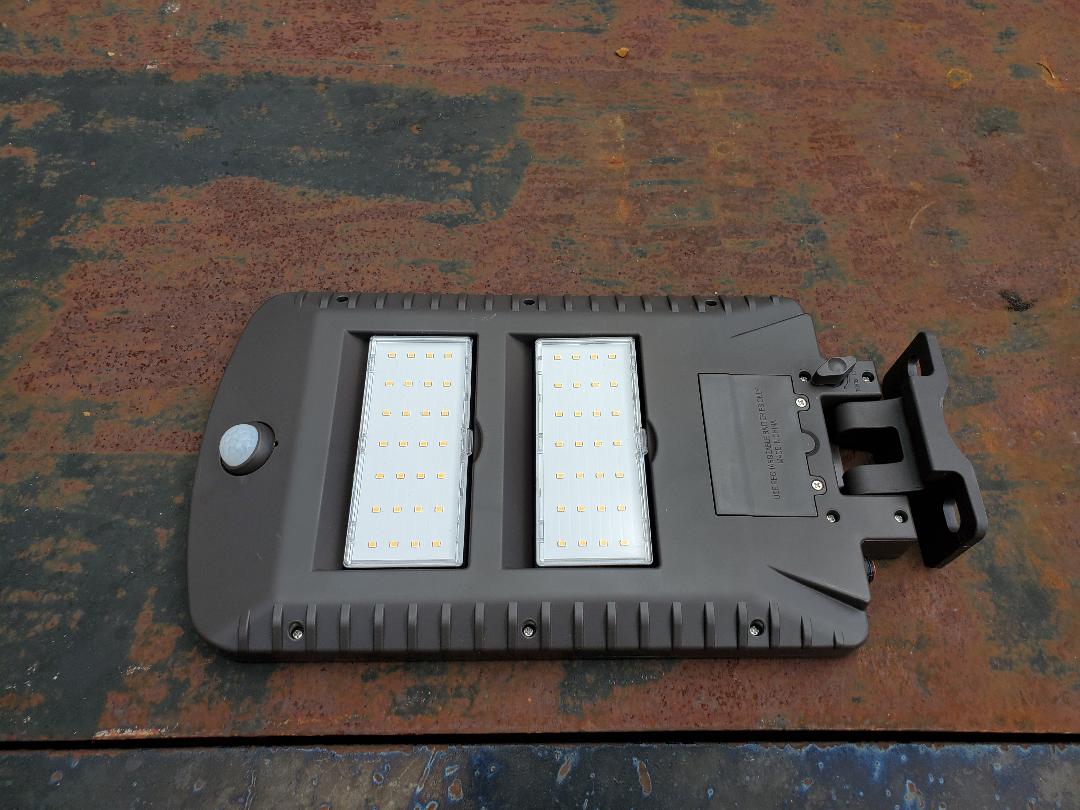
Twin LED arrays in solar light fixture.
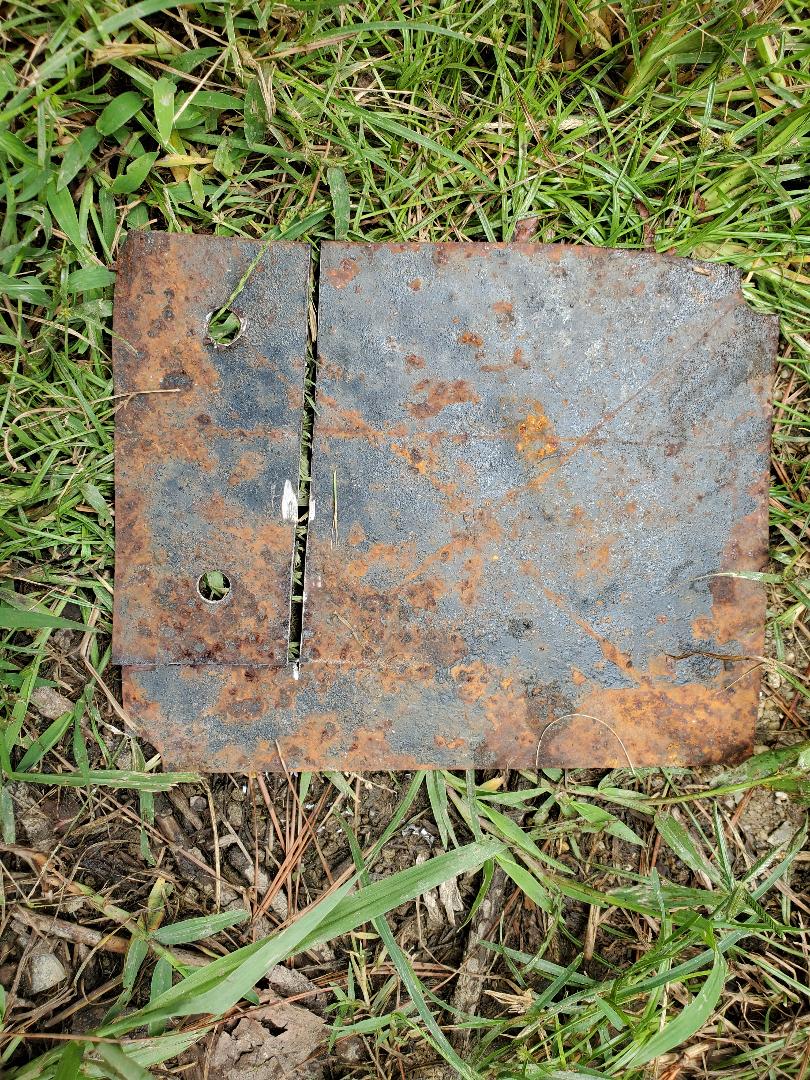
Sheet metal bracket cut from piece of stock to use in mounting the solar light to the post.
With the bracket made I was able to get back up on the ladder and get the light mounted. And that was it, there was no wiring, no switches, no external batteries, nothing. I tightened the two bolts and just got down. The solar panel immediately started charging the lights batteries. 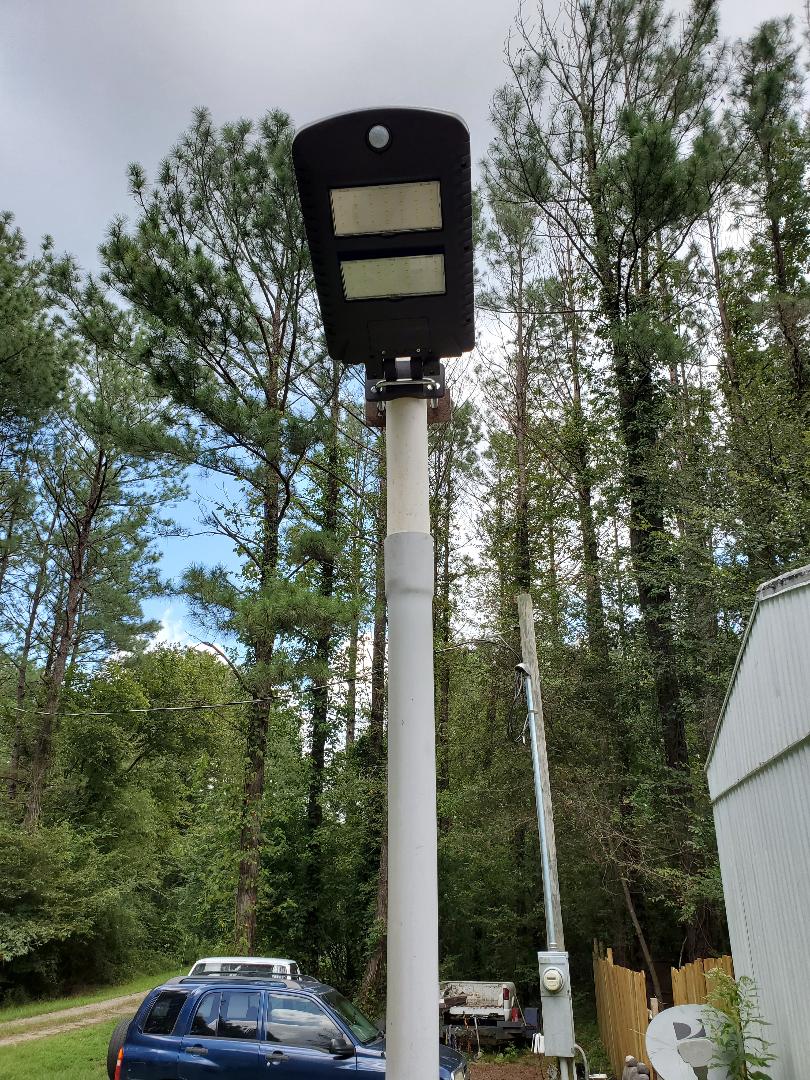
Solar street light mounted on post.
After night came and we returned home to be pleasantly surprised at the performance of the light. The light works as any typical dusk/dawn light does, coming on when darkness falls, but it comes on at a low intensity. The motion sensor on the fixture senses movement be it a car, person, or dog, and turns the light on to full intensity. Even at low intensity it lit up the driveway fairly well that one could use that light to guide themselves through the driveway. The higher intensity was plenty bright for the area it was covering. I can only imagine that if the fixture was higher it would probably cover even more. 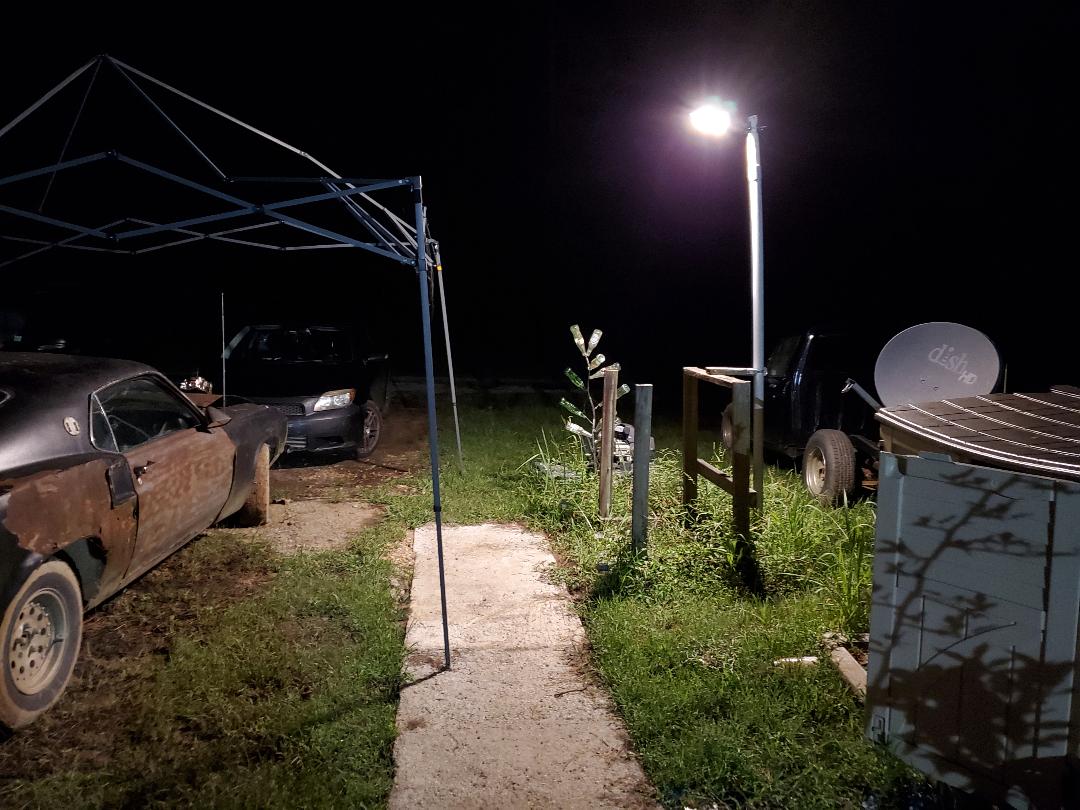
Solar street light illuminating driveway area at night.
One thing that I also like about this light is the idea that even though it came on when it was dark, probably around 7-8pm sometime, the light stayed on all the way until around 130-2am, with minimum illumination at high intensity. The real test will of course be in the winter when it gets dark around 430-5 pm. Since I don't make it back home until around 1045pm, I will need the light to be able to still be powered all the way until past this time. Worst case I will have to search out some super high powered lithium ion batteries to replace the stock batteries in the light. Either way, I will be installing more of these lights around the property as there are other areas that I want to cover with light at night so as to make it more convenient to maneuver around the grounds in the dark of night. I will definitely want to try the 5k lumen unit to see how it works as well.
0 Comments
Setting up raised bed planters in the garden isn't the only thing that I'm trying to do to make the garden a better place for growing food. There is also the rearranging of things within the garden to change the overall floor plan of the grounds. In this case the rearranging involves deleting a couple of fixtures from a past plan. There were two small raised beds that I set up using some wood posts and corrugated sheet metal for the sides and support. These beds were to serve as food forests, having multiple fruit bearing plants within the beds. Fruit trees would be in the middle with berry bushes partway out and strawberries along the outer perimeter of the beds. These beds were fine and dandy in concept but their location wasn't conducive to what I wanted out of the garden. They had to go. The first bed had a single fruit tree in it as the other one that was in there died. There was a couple of berry plants among the fruit trees and while I did have a lot of strawberries in the bed in the previous year, for some reason they died out and never came back. At this current time the bed was overrun with weeds and other unwanted flora. First thing I had to do was remove said weeds and unwanted flora. 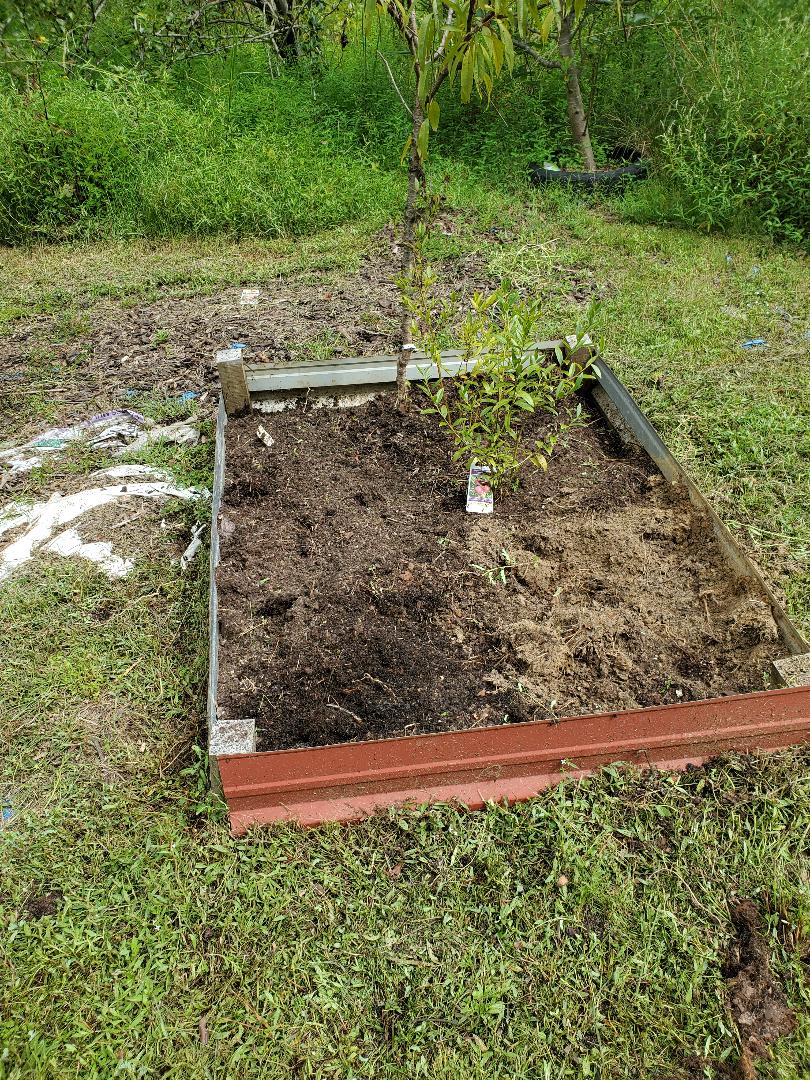 Raised bed after weeding and removing one of the berry plants. With the weeds gone I then took the berry plants out and planted them in the washer drum I set up along the side of the dog kennel along with the other drum planters I had in place. With the berry plants in place, I could move on to the next phase, which was the actual dismantling of the raised bed itself. 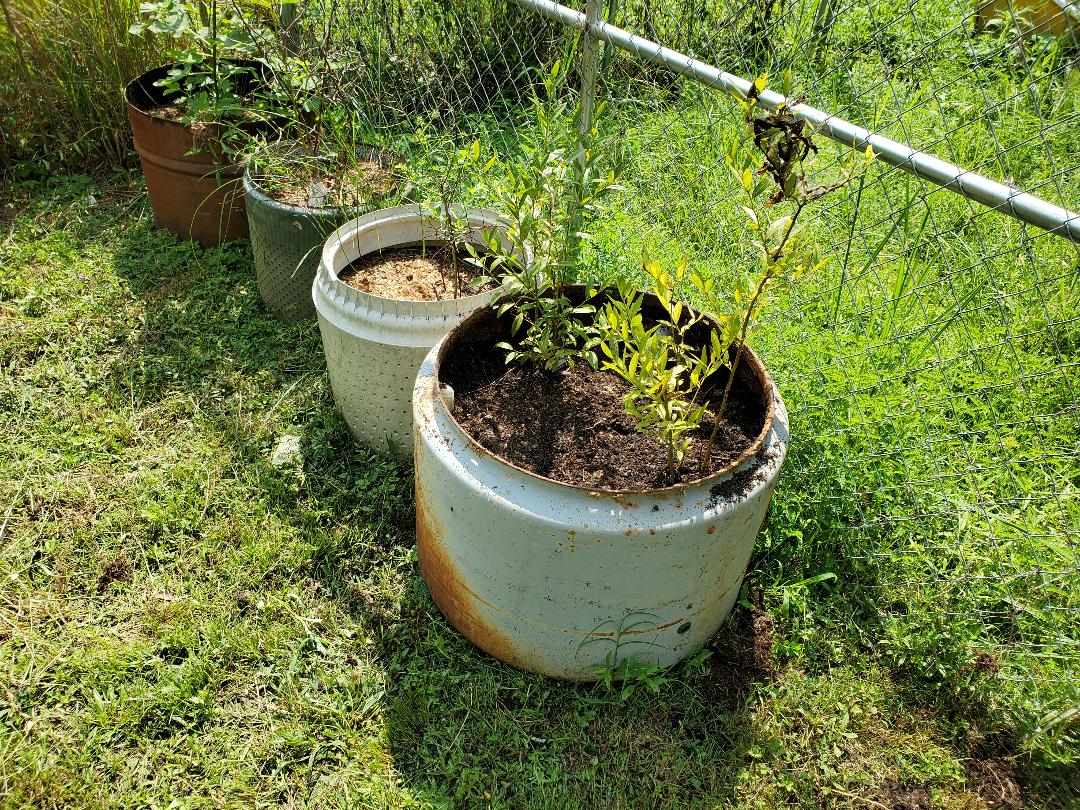 Washer drum filled with dirt and the two berry plants removed from the old raised bed. Dismantling the raised bed was pretty easy. Since I fastened everything using wood screws, the impact driver made fast work of said screws, allowing me to separate the sheet metal from the wood posts that were sunk in the ground to form the corners of the raised bed. The wood posts came up next and everything was stashed on their respective resource/salvage piles for future use. The next thing was to start digging out the dirt from the old raised bed area in order to help clear the grounds. I had another recycling bin laying around that I was able to put along side the other big that currently houses strawberries. I filled this container with a bunch of the dirt from the old raised bed. In the future I will most likely fill this planter with more strawberries.  Recycling bin filled with dirt to be used as a planter in the future, note strawberries in bin next to it. After filling the recycling bin with the dirt from the raised bed, I still had a lot of dirt left over. I used some of this dirt to further fill the other drum planters alongside the dog kennel since I never filled them to the top in the first place. I did have to carefully pull as much weed root material from each shovel full of dirt I dug up so I don't end up transferring weeds to the other planters. When it got to the point that the dirt I was digging up was too "contaminated", I used that remaining dirt to fill some depressions in the garden where the grounds were muddy. I threw the rooty dirt on the ground and walked it into the muddy soil to "mix" it up. It really didn't do much but it was a useful way of getting rid of dirt that I didn't want to try and recycle into other planters. After getting most of the dirt out from the old raised bed site, there is still a matter of the lone fruit tree. This tree is still very much alive and its roots are surrounded by the remaining dirt that I couldn't dig up. I'm kind of reluctant to just dig this tree up to transplant it because the last fruit tree I did this to while it was still green had pretty much shriveled and browned out and may very well be dead for all I know. I won't know until next spring if the tree comes back.  Remains of old raised bed, leaving fruit tree with root base covered in dirt. Note outline of bed where dirt had been covering the ground. I pretty much am planning on waiting until late fall when the leaves have all fallen off most of these trees and they've pretty much gone dormant. This way I will most likely be able to uproot and transfer the tree to another planter elsewhere without running the risk of shocking the tree to the point where it will die out. This same goes for the fig tree that's in the adjacent raised bed that I will have to dismantle later on. I will leave these plants until fall and in the meantime continue working on other improvements in the garden.
With the rear garden fence coming together almost to the point of completion I figured its time to throw together another raised bed. Another good reason for wanting to do this little side task is the idea that it'll allow me to use up some more materials that I have stacked up on racks, buckets and 2x4's. Besides, as we come into the fall, now is the perfect time to plant some greens so I can get some harvest of the cooler weather veggies before any super cold weather sets in.
As with the other garden bed assemblies I had to gather up the wood that I figured I'd need to build the setup, along with eight cat litter buckets. I also took some measurements of the other bucket raised bed just so I can duplicate those dimensions for the legs and try to have this garden assembly match the existing unit. After cutting the boards needed to make the cradle that will hold the buckets, I was able to nail those together to get that part started, test fitting the buckets to make sure that the middle board is positioned properly before nailing it in. With the cradle made, I was then able to measure and cut the four legs and nail them up so I can get the basic table assembled. 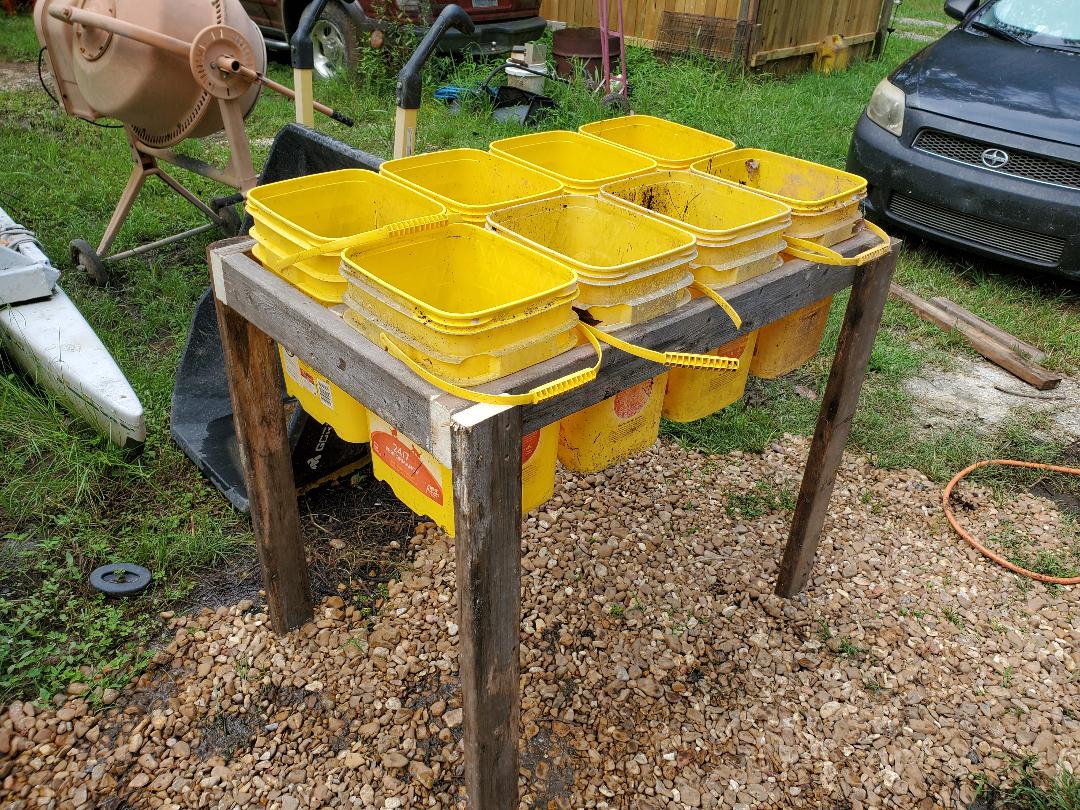
The basic raised bed table assembled with the buckets fitted in place.
One would think this is where it ends but nope. After putting a bunch of dirt in these buckets and setting the assembly up, it wouldn't take long before this whole thing starts getting weak and distorted enough that it might fall over. I still have to put reinforcement boards in strategic spots around the table so it will be nice and sturdy in order to last a long time. I had to put a couple of 2x4's against the legs about halfway up, linking the long sides together to hold the legs stationary along that plane. I took a couple of pallet boards to do the same along the short sides of the table, linking the legs midways up to hold the legs stationary along that plane as well. With these boards in place the legs won't be able to move around where they can give out under the weight of the eight buckets full of dirt. Lastly I cut some short pieces of 2x4's to nail in place around the cradle boards to help further strengthen that part of the table. With those little boards in place, the cradle will stay together under the weight of the buckets just as the legs will stay together. 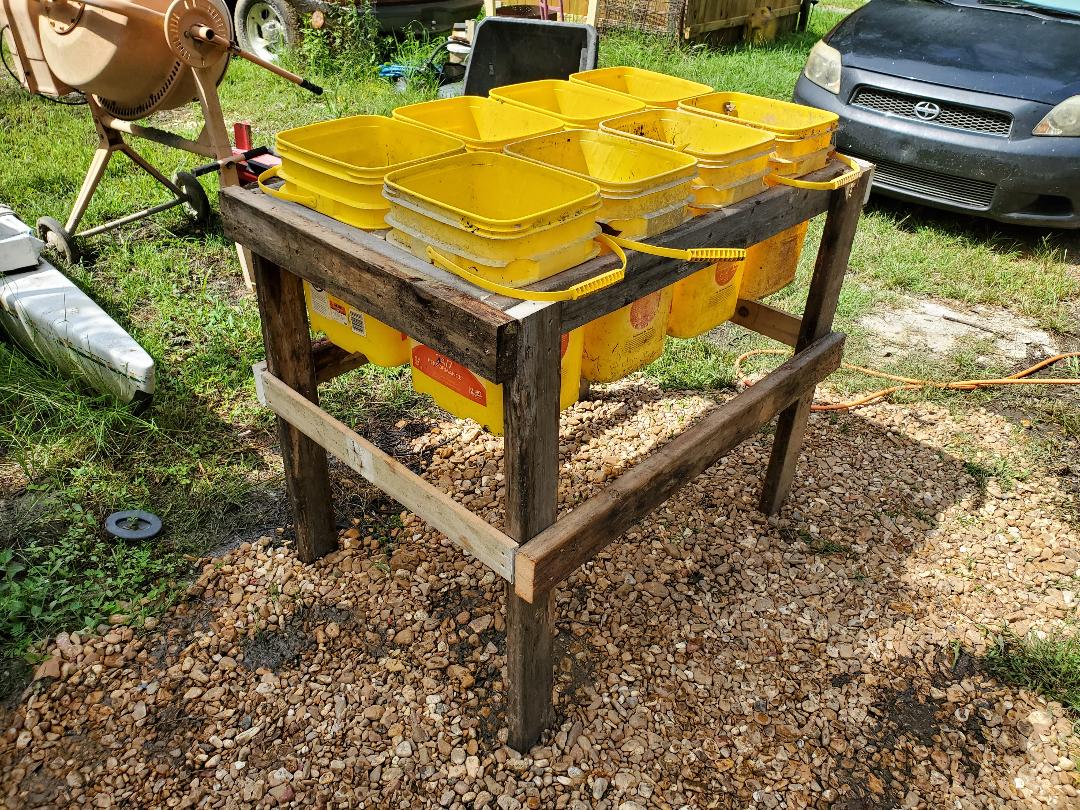
Raised bed assembly with reinforcement boards in place, all ready to set up.
With that, the raised bucket bed assembly was ready to set up. I had to get some bricks to set on the ground so the legs aren't just sitting in the dirt/mud. After setting the bricks up, having to mash one of them into the soft dirt to get the base even enough on the sloped ground, we went ahead and moved the bed assembly into the garden. After setting the assembly on the bricks, tweaking them to make sure the whole thing was level, I cleared the crap from the ground where the bed was sitting. The crap was some old stuff I used for some past garden setups and was currently not being used. I needed to move everything out of the way so I can get any errant weeds from the ground under the bed. This would be in preparation for eventually laying gravel underneath the bed, along with the rest of them to make things nice and neat. I'll probably end up spraying the ground some to keep any more weeds from popping up around the raised beds. 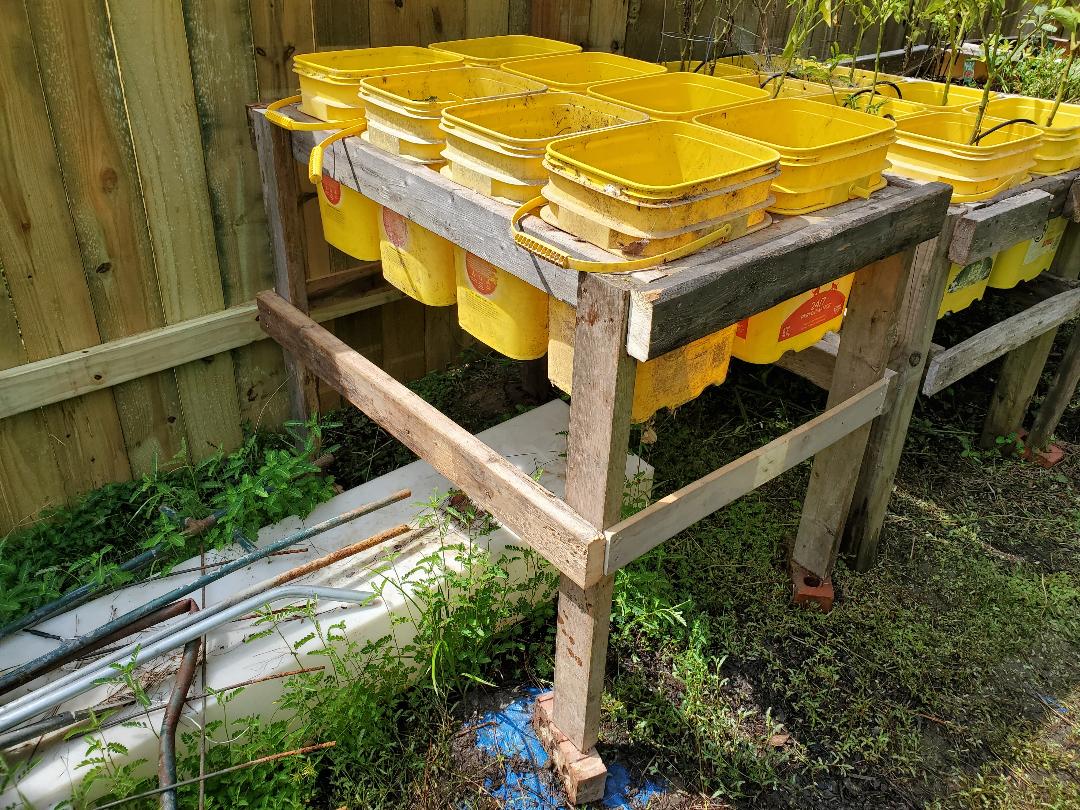
Raised bucket bed set up alongside other raised bucket bed against fence. Note crap on ground under assembly prior to moving it all away.
Again, all of these things I'm doing are to make the garden life a little easier as I don't want to be breaking my back bending over to pick weeds from the ground let alone having to work the soil to plant veggies directly in the soil. Even a moderate garden takes a lot of legwork to be able to keep it tidy and weed free and even then it is never completely clean. This way, with gravel on the ground and raised beds and hydroponic garden assemblies set up, I won't have to bend down to weed anymore or work plants into the soil. With gravel all over the grounds within the garden I won't have to worry about coming through the garden with trimmers or mowers periodically to clean the excess weeds and grasses. As for the crap on the ground where I placed the raised bed, I did have an idea for some of that stuff. The lattices that were among this stuff can be used to hold the sewer pipe that I plan on using for another hydroponic garden assembly. The white tank that is seen in the previous picture will obviously be used for the reservoir for the garden. With that, the biggest goal is to use these materials to build usable products for the garden and the homestead as a whole versus just throwing the stuff out.
After the success of the first load of gravel in covering what I wanted to cover around the Mustang Chicken Coupe, I immediately planned another run for some more gravel. After getting another truck load from the cement plant, I came back and spent the greater part of the midday shoveling gravel into the wheelbarrow and carting it over to the spots where I wanted to set the rock. I backed the truck into the driveway to have it be closer to the spots where I wanted to plant the rock. The work was obviously strenuous as it was hot out and shoveling rock isn't some light weight work, much less trying to move wheelbarrows full of the stuff. 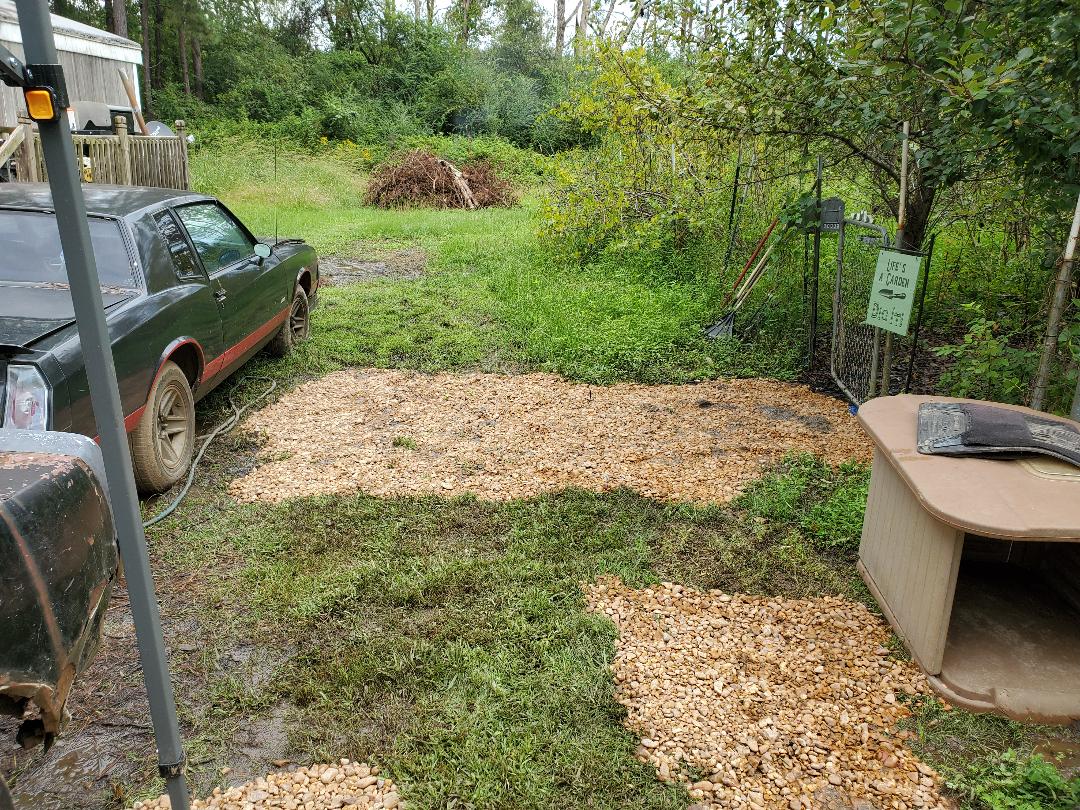 The first place I hit was the area in front of the garden fence, the area where I put the last few bags of recovery gravel from Lowe's. This all of course was covered up but it was ok. After spreading some and walking over it to mash it into the mud, I was able to get a nice area covered. The next area I started doing was another area that had some mush, in the area that is in front of the side path going to the storage trailer. I started covering this area with the intent that once I get these initial areas covered, it won't take much to link these areas together with successive loads of gravel in the future. 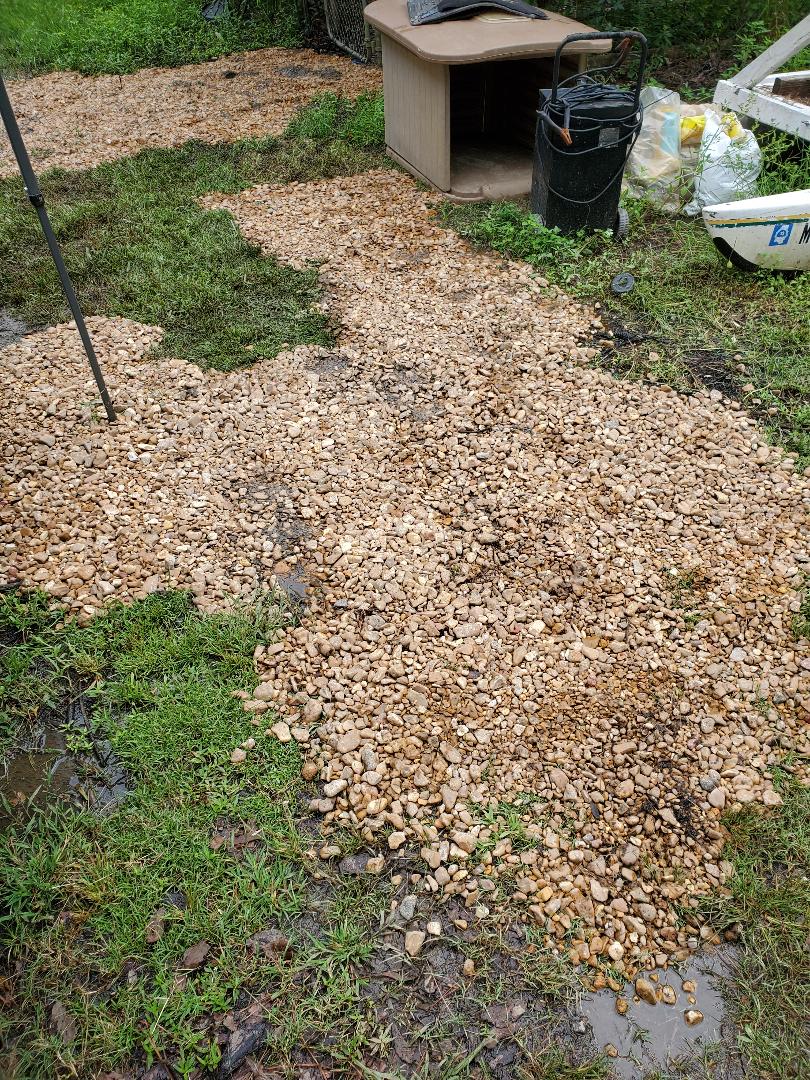 Area next to side path covered in gravel to cover the mud. Note close proximity to first area I covered. Another area that needed covering due to mud was a small area next to the walkway, right by the stairs to the porch and next to where the Monte Carlo is currently parked. Because of where the car's parked, the area to the east is narrow and with my foot traffic over the muddy area it just got worse and worse. This area received a large amount of gravel to cover the mud as well as cover the ground along side the walkway for aesthetics. More gravel later on will help cover the narrow area between the walkway and the car. This will make it easier to take care of errant grass that pops up next to the walkway as I can just spray the few blades of grass that do pop up through the gravel versus having to run the trimmer over the area. 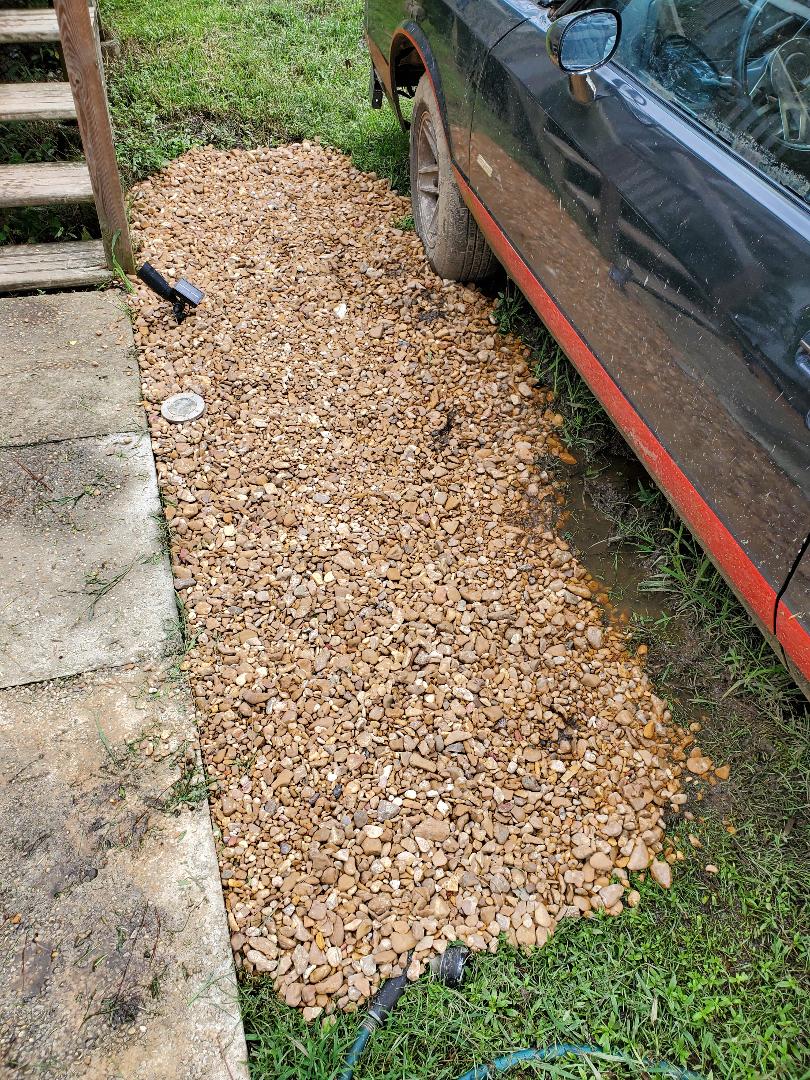 Muddy area between walkway and parked car covered in gravel, also note few blades of grass that I missed after a preliminary trimming. Lastly I used a few bits of gravel to fill some crevices next to the walkway that were still present after removing the mold boards when I was pouring the concrete. These areas are potentially hazardous as someone can trip on them, plus, it looks better covering them in gravel in order to achieve the goal of having neat grounds throughout the yard. 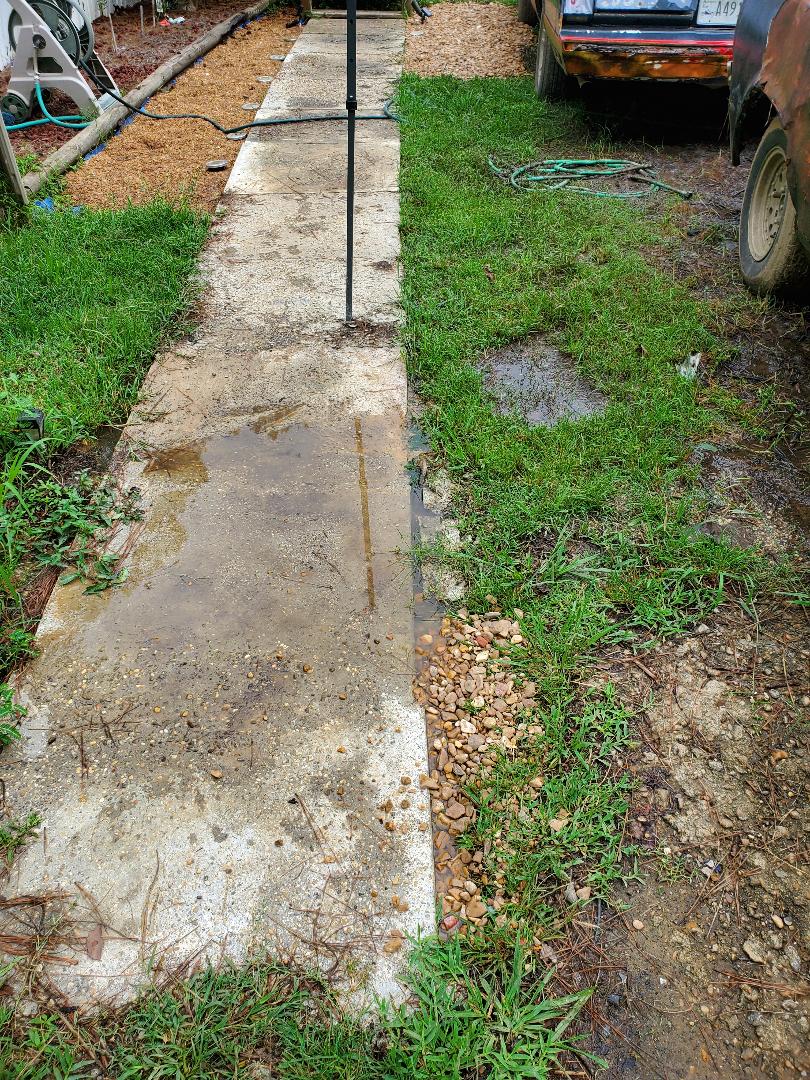 Bits of gravel used to fill crevices next to walkway. As I continue to get more loads of gravel, these areas next to the walkway, along with other areas that are high traffic, will get covered by gravel, allowing me to achieve the goal of having the neat and orderly grounds that I seek. Grounds that do not have patches of grass or muddy areas or areas that are just uneven are what I'm after. This will make routine maintenance much much easier as I won't have to use any lawn equipment to trim large amounts of grass, if any at all. Other than spraying the gravel to kill any grass that does pop up, the new grounds will be virtually maintenance free. |
