|
After having pulled the rear fuel tank from the FMT, I was still tasked with the removal of the front fuel tank. Unlike the rear tank, I'll be keeping the front tank as part of the modified fuel system, which as stated before will consist of just having a regular single fuel line going from the output of the sending unit over to the left side of the engine bay where it will link up to the mechanical fuel pump on the left side of the engine. The sending unit itself will be modified by deleting the pump motor and capping off the return port then capping off the port on the top of the tank for the evaporative fuel return system. As before, removing the front tank started with removing the two straps holding the tank in place. Also as before, due to the caked on dirt and rust, I had to use the impact wrench to break the nuts to remove the bolts. After removing the straps I was able to lower the tank enough to be able to remove the filler tube and evaporative fuel tube from the top of the tank. Lastly I unplugged the sending unit pigtail and popped the accursed lock ring fittings for the two fuel lines on the sending unit. With that the tank was down and out. 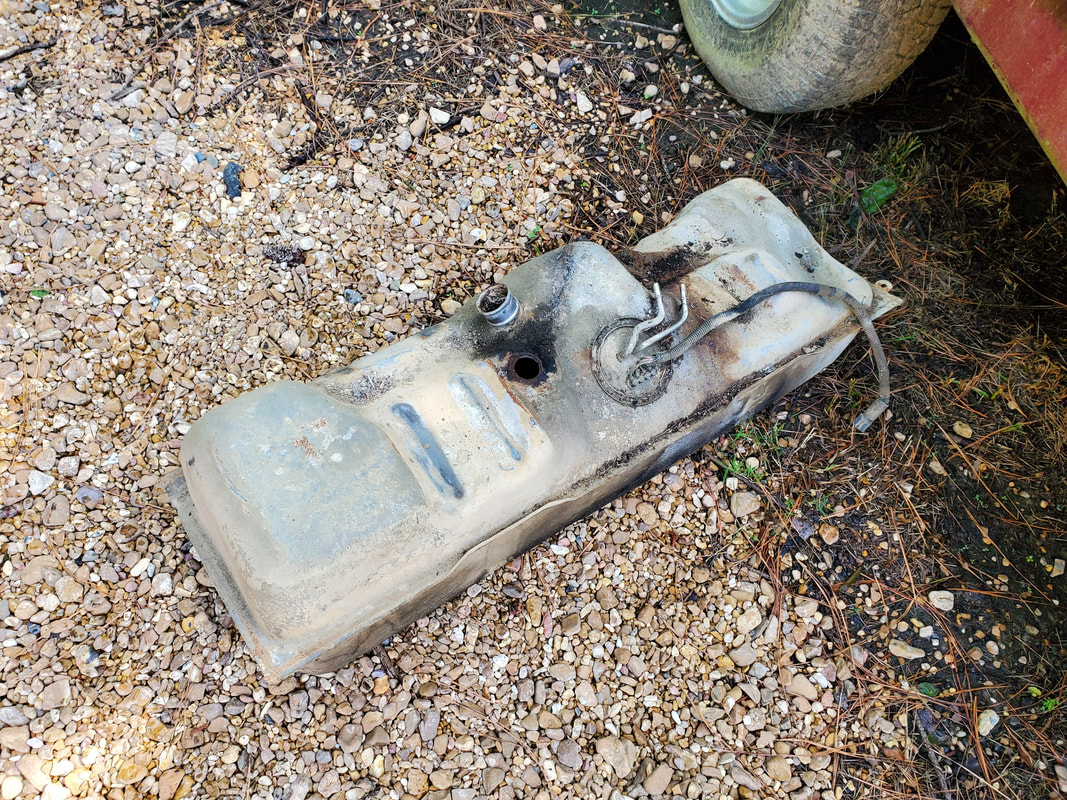 Fuel tank after removing from under the truck. With the tank on the ground I popped the locking ring to remove the sending unit. Unlike the rear tank's sending unit I was disappointed when I removed the unit to find it looked horrible. Between the rust and grime on it, the float for the sending unit was gone and the strainer was broken up bad. This sending unit even after removing the pump would probably not work. I'll have to replace it....because the rear sending unit will not fit....because...they're made different.... 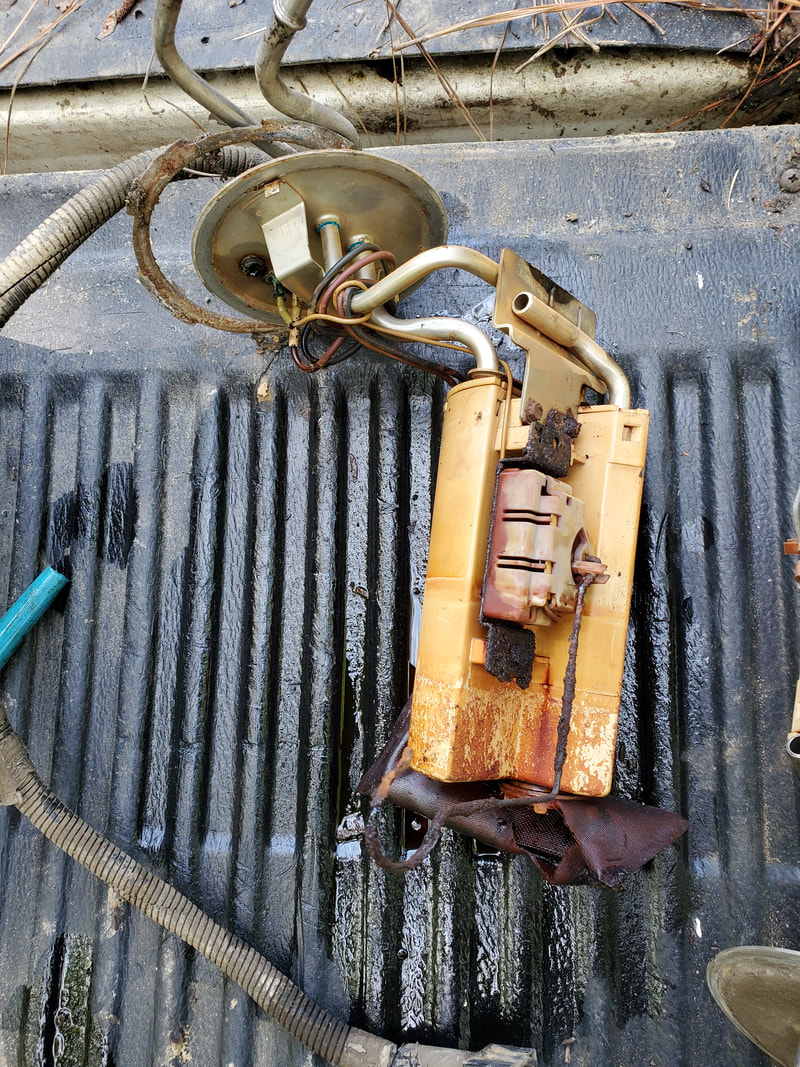 Bad sending unit removed from fuel tank, useless to me. After removing the shitty sending unit, I still had to remove the varnish called gasoline that was still in the tank. Luckily there was only about 5 gallons so moving the tank wasn't that bad. Because there was this much gas in the tank instead of trying to use a funnel to put the gas in a can I just used an old bucket and dumped it in, then dumped it from the bucket into a dirty old diesel fuel can using the funnel. I'll end up mixing this old fuel with old oil to use for brush pile fuel or for starting a fire pit. 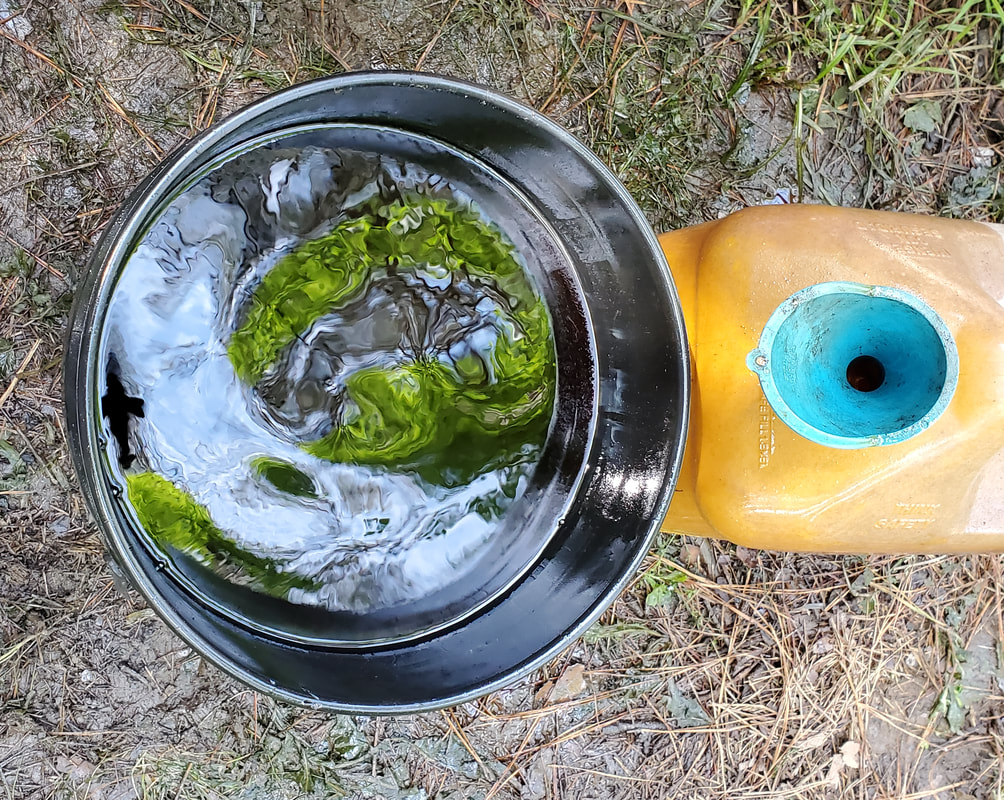 Five gallons of old gas removed from tank, prior to pouring into old diesel can. After taking care of the fuel the last thing was removing the old fuel lines from under the truck. I was at least pleasantly surprised to find that the lines were held up by simple clamps versus straps held in with bolts. Also the previous owners in the process of replacing the fuel filter because they didn't understand how lock rings work or how EFI fuel systems work and their requirements, they just cut the lock ring fittings that would normally go to the fuel line and used worm clamps to clamp the hose on both sides to the nipples of the fuel filter. That this thing even held is beyond amazing to me since the pressures on this EFI system can reach 40 psi. Anyway, there was one other lock ring fitting I had to break to separate the fuel line at the midway point. After removing that I and the worm clamps I was able to remove the fuel lines in sections from the front going back. I cut the rubber hoses for the evap fuel lines since they aren't that important enough to try and save. I had to do a little manipulating of the tubing and lines to get them pulled free but it didn't really take that much effort to get the lines out. Even the evap fuel tubing didn't take much effort to remove as it too was just held up by snap hangers in the frame rail. Everything came out quick and dirty. 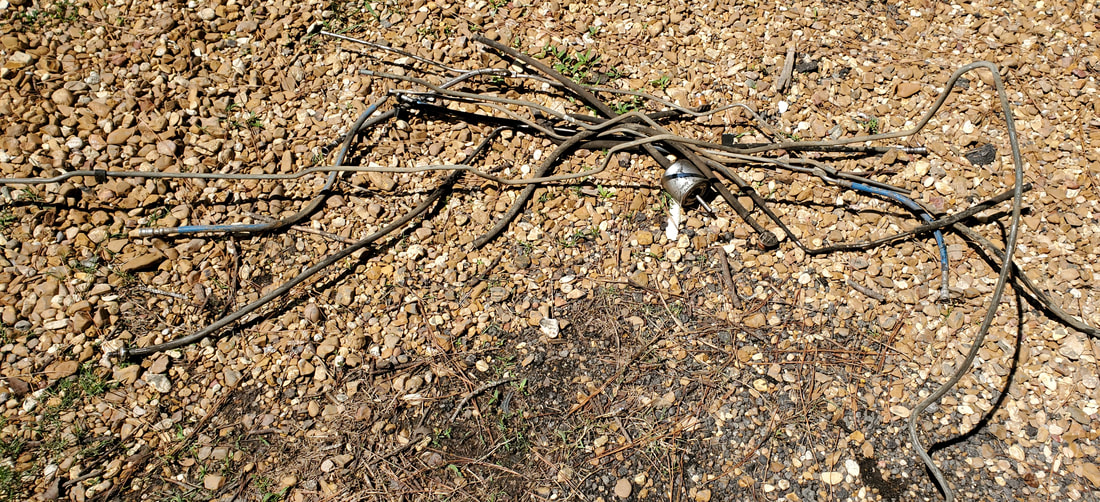 Old EFI fuel lines removed from under truck. One other twist I found was that the evap fuel line I removed, being 3/8" tubing was very long, reaching from the middle of the fuel tank across the underside to the right side and along the right frame rail over to the right side of the engine bay where it hooked up to the charcoal canister. Being this long had me thinking. I started straightening the line as best as I can, sometimes using a baby sledge to try and straighten the sharper bends. After getting the line straightened as much as I can, I found that it was plenty long enough to reach from the fuel tank to the left side to hook up to the engine's fuel pump. This is perfect as I don't have to waste any money buying fuel line to install later for the new fuel system, perfect. 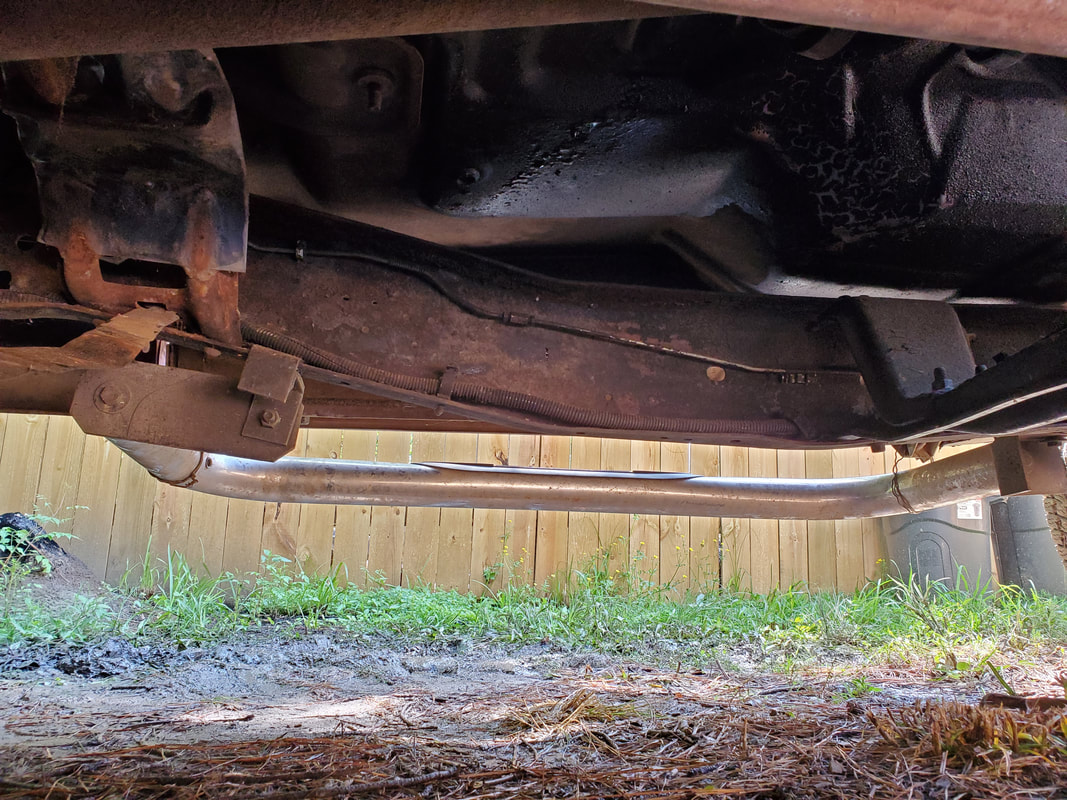 Underside of bed cleared of front fuel tank and fuel lines along frame rail. With that the underside is all ready to start building the new fuel system. I will obviously be starting with the install of the recycled evap fuel return line but I will need to acquire a new sending unit for the tank. If I buy a new one, even generic, I will still have to modify it by removing the pump motor since it won't be used. Otherwise the only other option is hoping to find a truck at the junkyard with an intact front gas tank and sending unit within. The chances of that are pretty slim. I'll probably just end up just getting a generic sending unit and modifying it accordingly, it'll save me the time I'd otherwise spend trying to find a used unit at the junkyard. Generic units should be pretty cheap compared to the replacements at the big box stores.
0 Comments
As part of the build of the FMT I will have to make some serious changes to the truck's fuel system. Since the truck was originally an EFI system that uses high pressure fuel pumps to feed the EFI system, I have to deal with a double fuel line system consisting of a heavy duty fuel line and a return line, going to a fuel pump/sending unit assembly that consists of the high pressure fuel pump and sending unit. The sending unit has a pigtail for the two sets of wires and uses the lock ring system for securing the fuel lines to the nipples on the unit. Also the truck has two fuel tanks, each with its own sending unit assembly. To switch tanks, the truck will just turn off one fuel pump and activate the other pump to feed the system. All of this stuff has to change. My plan was to delete the rear fuel tank completely, and replace it with a spare tire winch mechanism that you would typically find in SUV's and some trucks. This again, will allow me to stow away the spare tire under the bed versus laying it loose in the bed. Leaving the front fuel tank, I will still have to make changes since we're not going back to the EFI system but instead will be using a standard mechanical fuel pump on the engine block drawing from the fuel tank at lower pressures. All of this only requires one simple metal fuel line coming from the sending unit going to a fuel filter and into the fuel pump then into another fuel filter before going to the carburetor. Most installs don't have a fuel filter before the fuel pump, but I would actually like to install a higher performance pump so I can have the ability to feed a bigger carburetor whenever I upgrade the engine in the future. To start the job I have to target the rear fuel tank. The tank is held in with two straps across the bottom of the tank. The bolts holding the straps in were pretty well rusted and required the impact wrench to break them free. The straps each had a bolt on either end that had to come down to allow the tank to drop. One strap came loose easily but the other one had one bolt that was blocked by the aftermarket dual exhaust system. After trying to take the bolt and nut lose with a pair of wrenches, in vain, I just said screw it and grabbed the reciprocating saw and cut the strap in two to get it loose. After getting the strap loose I was able to maneuver the tank down to the ground. With the tank on the ground there was still a matter of removing the sending unit since I would have to work the lock ring tool into the hose to separate the hose from the nipple on the sending unit. This would be much easier to do if it wasn't stuck in the fuel tank while it was at an angle. I undid the lock ring holding the sending unit in the tank and pulled the unit free from the tank, allowing me to remove the tank all together from under the truck. 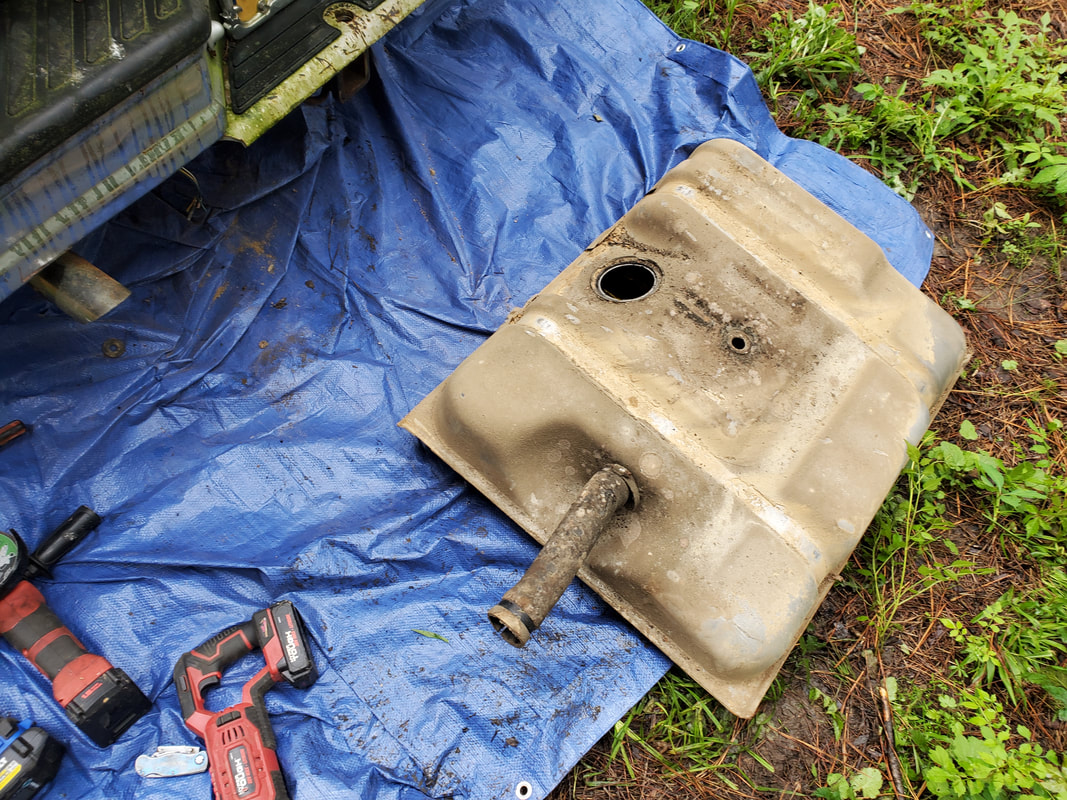 Fuel tank removed from under truck. Note rubber hose that connects tank to filler tube. With the tank out of the way I went back under the truck and used the tool to separate the hoses from the sending unit. Despite the bolts holding the straps being almost rusted together and dirt being present everywhere, the lock rings came loose with a minimum of effort compared to past episodes with these things. After removing the hoses from the sending unit the plug was pulled from the pigtail on the sending unit so I could get that out of the way just as well. I then removed the top halves of the straps for the fuel tank since they would not be needed and would actually be in the way when I install the spare tire winch under the bed. 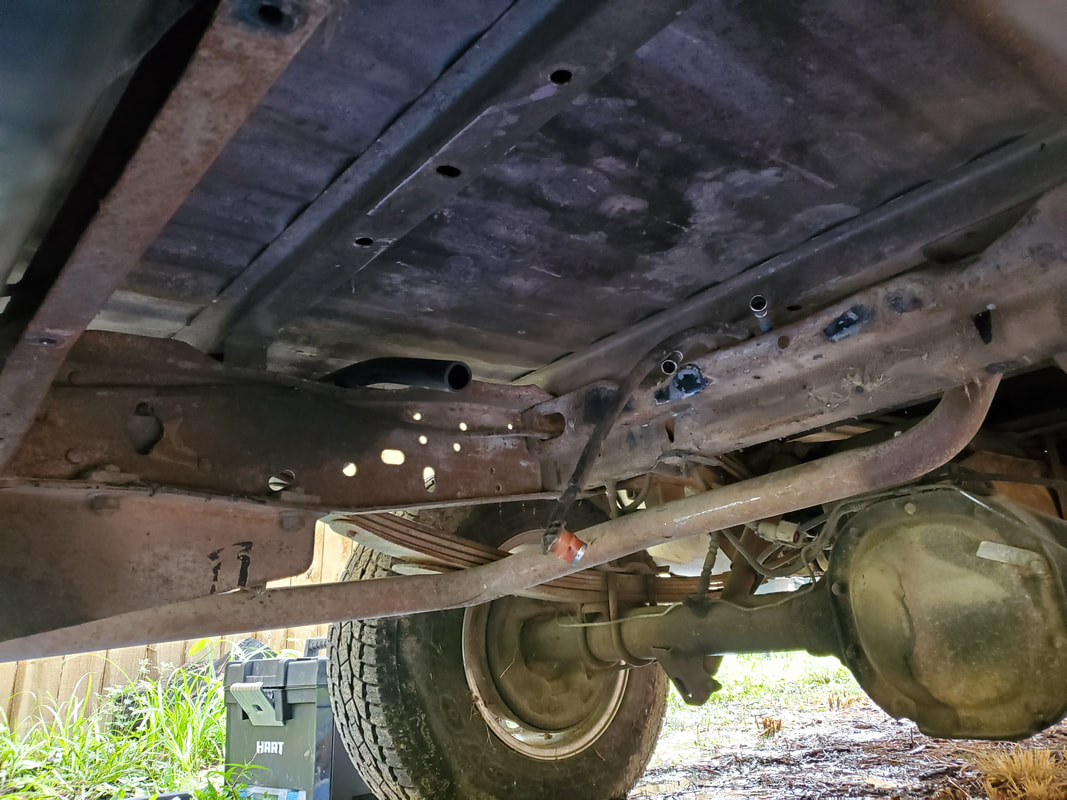 Underside of bed after removing tank and sending unit. Note end of filler tube protruding from upper center above frame rail. With the tank, sending unit and retaining straps removed from under the bed, I turned my attention to the fuel filler hose. I already had to cut a slit at the end of the rubber tube attached to the fuel tank to allow it to pull free easily from the filler tube so I didn't have to worry about that. But the filler tube is held in by three 7mm bolts, and a hook under the bed that is clamped by a worm clamp around the filler tube. After pulling all of this free I had the filler tube completely removed from the quarter. I removed the gas cap just as well and put it with the filler tube for when I put these items up for sale later. 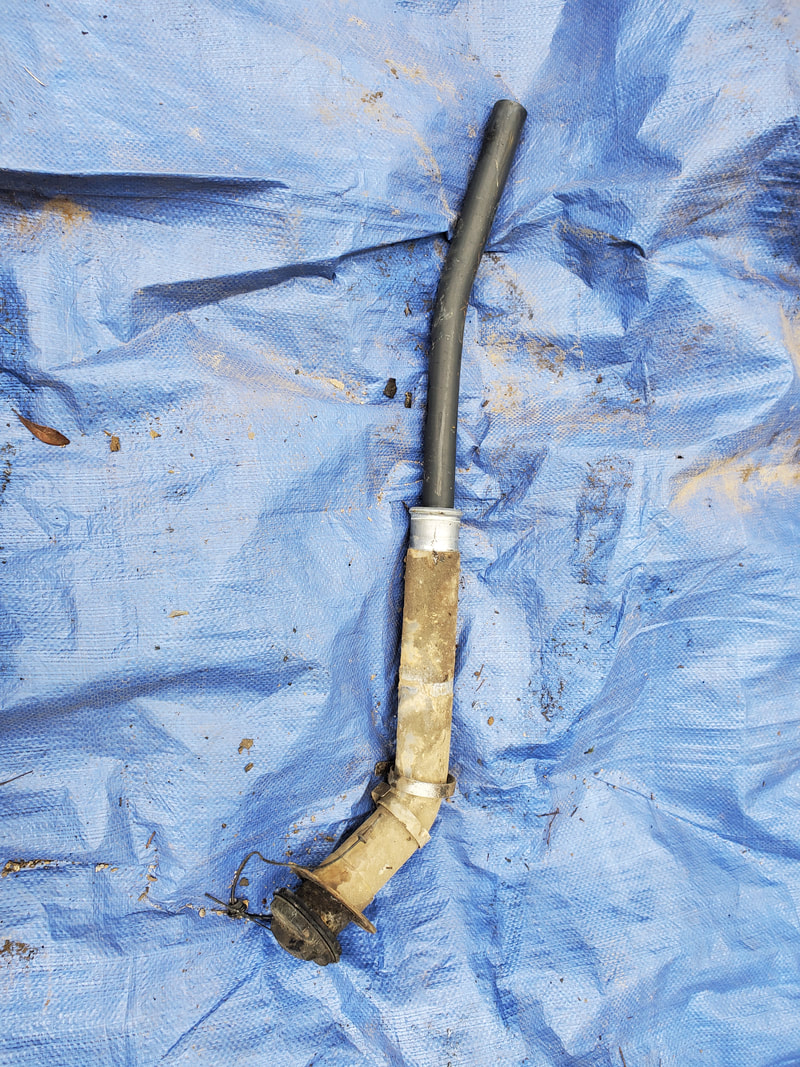 Fuel filler tube removed from quarter panel with gas cap. One might ask, "What are you going to do with the opening behind the rear gas door?" I had an idea that stems from a thing I did with the LUV a long time ago to extend the truck's utility beyond just hauling stuff. I had installed a power inverter behind the seat in the LUV along with a quad outlet box which would allow me to plug up extension cords for running things outside the truck, or plugging things up inside if I was doing something inside the truck. Well fast forward to today, and that idea still held some weight, but with a twist. I thought about fabricating an outlet box that would hold a single outlet within but would bolt up to the opening where the old filler tube was sitting at. I would of course have to install an outlet wiht a waterproof cap to keep it protected from moisture but it would otherwise be behind the gas door. I would then run a power cable from the outlet along the bed over to the cab and inside the cab, terminating at a power inverter installed within. I'd have a power switch operating a relay to cycle high amperage power from a pair of cables running from the battery to supply power for the inverter, since I would probably have at least a 500w inverter in there that would allow me to run most power tools and other small devices that might be used in the field. This would allow the FMT to pull extra duty as a worksite power source or emergency power source, or a campsite power source while still being a hauler and an overall fun riding truck.  Fuel tank and miscellaneous parts removed from under the truck. Another benefit I managed to get (which some may see as superficial) was the idea that I was able to pull about 5 gallons of fuel from the rear tank after its removal. There's still about a half gallon remaining that I really can't get out easily without some kind of small hose attached to a pump to draw it out completely but that's fine, the fuel is relatively old anyway. Even though it's old, I mixed it with the bulk fuel in one of the drums of the fuel shed, which will negate the old-ness of this fuel, allowing me to add to the fuel supply just a little bit more. I will be able to do the same thing with the front tank when I remove it as well since I'm sure there's still some fuel in it. This fuel is still plenty volatile as it evaporated pretty fast after spilling some while transferring it to the gas can to take it to the fuel shed. But there you have it, the start to the rebuilding of the FMT's fuel system. The next order of business will be dropping the front fuel tank to remove the sending unit to remove the pump motor and redo the plumbing to allow me to just have a single fuel line hooked to the output and just the circuit for the sending unit itself being retained. Also the double fuel lines will also be removed since they will be replaced by a single metal tubed line running from the bed under the cab over to the engine bay where it will link to the block mounted fuel pump via a short piece of rubber hose. More to come...
Living out in the country has its benefits in many ways but it also has some drawbacks, not many, not serious, but drawbacks nonetheless. One of those main drawbacks is the risk of power outages when the skies so much as dribble or the wind so much as farts for a second. An errant tree will come down over a power line and have power out for hours or more while power crews try to locate the damaged line and repair it. Because of this you have to have a means of backup power out here otherwise you will have to be ready to spend many a night in the dark when the weather wants to go bipolar.
In our case we have a couple of portable generators that are each big enough to handle a heavy load in the house (fridge, freezer, TV, internet, couple of lights, AC). Because these generators aren't always running, it is sometimes necessary to run them just to keep things loosened up and to purge old fuel from their systems. Sometimes we may forget to do this routine maintenance and the gennies will sit longer than usual before it gets started. It is during these conditions when I find out that the carburetor is gummed up or otherwise messed up and not allowing the genny to run right. We had a situation just like this during a storm situation where the power was out and wasn't going to be back on for a good while, like the next day. One generator, the bigger of the two, would not start at all except on starting fluid then die once that vapor was exhausted. Undeterred we moved to the other genny and got it started. It however had always required a shot of starting fluid to get it started but once started it would stay running. We were good for a while but then near the end of the night the thing had crapped out. After wrestling with it I was able to get it started again. After a couple more episodes of the genny crapping out I come to find out that the fridge cycling on was drawing down on what was a compromised genny, causing it to die. Normally the unit would handle the load but not now, the carburetor was crappy. The following morning I had decided to try a little test. Knowing that these same engines would run on propane, I did some quick research on running small engines on propane and decided to get to work. I had an old regulator I salvaged from a broken grill. I took the regulator and hooked up a couple of pipe adapters that allowed me to terminate the end of the regulator line with a 1/8" NPT nipple. 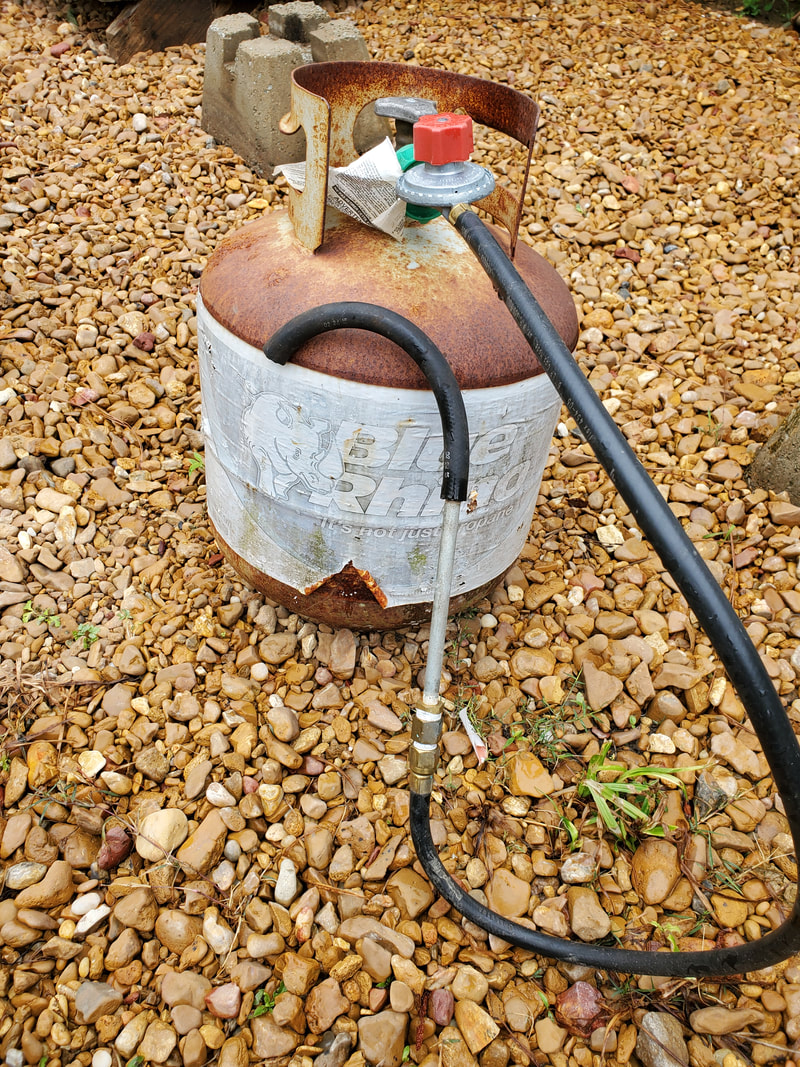
Propane regulator with pipe adapters and nipple attached to the end of the hose.
The next thing I did was disconnect the fuel line on the carburetor of the genny. Since we're not going to be running on gasoline, it wouldn't be needed. I did a test where I suspended the pipe nipple in the throat of the carburetor and cranked the genny over. I was able to get the unit to sputter to life and eventually balance out with some adjusting of the regulator and tank valves. After a while running the unit I decided to try something else. 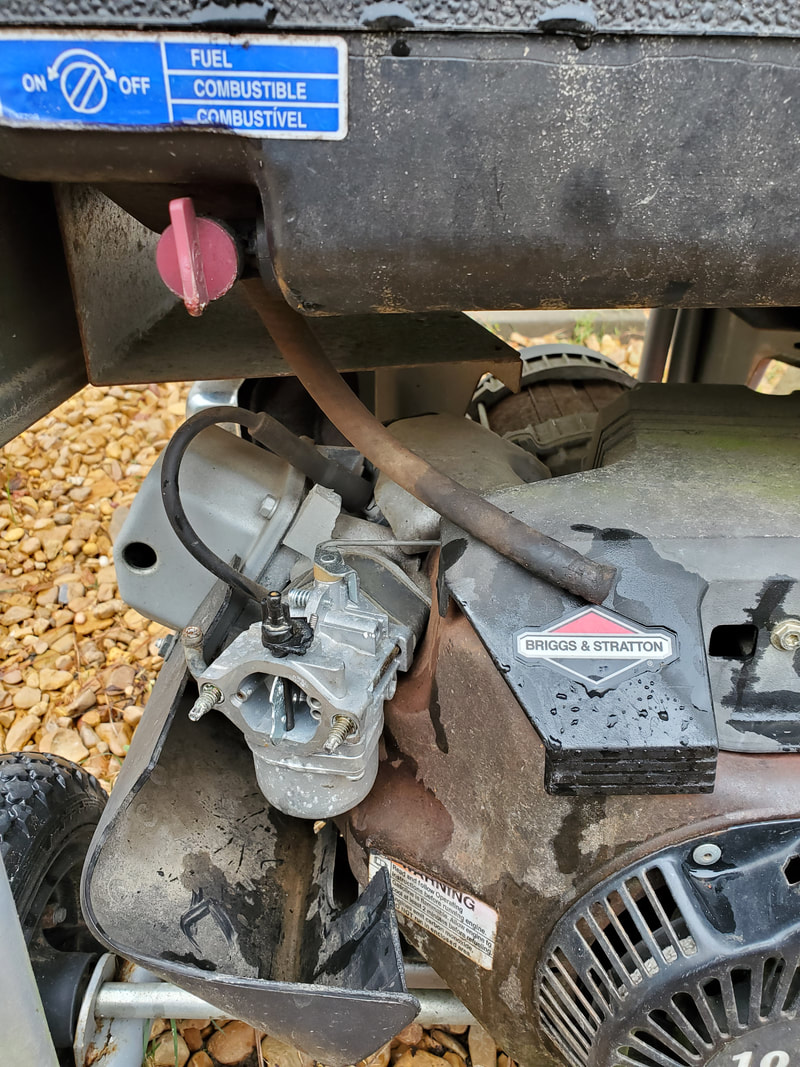
Gas tank fuel line disconnected from carburetor.
Since the fuel line was disconnected from the carb on the genny, I took a short piece of rubber fuel line and plugged it to the 1/8" nipple then took the other end of the hose and plugged it up to the input port of the carb, setting things up the same way it would've been with the gas line. I repeated the same procedure, turning the gas on just a little bit so I don't "flood" out the engine with pure propane. Even though propane is just a vapor, you can flood the engine where there isn't enough O2 molecules mixing in with the propane to allow for combustion. 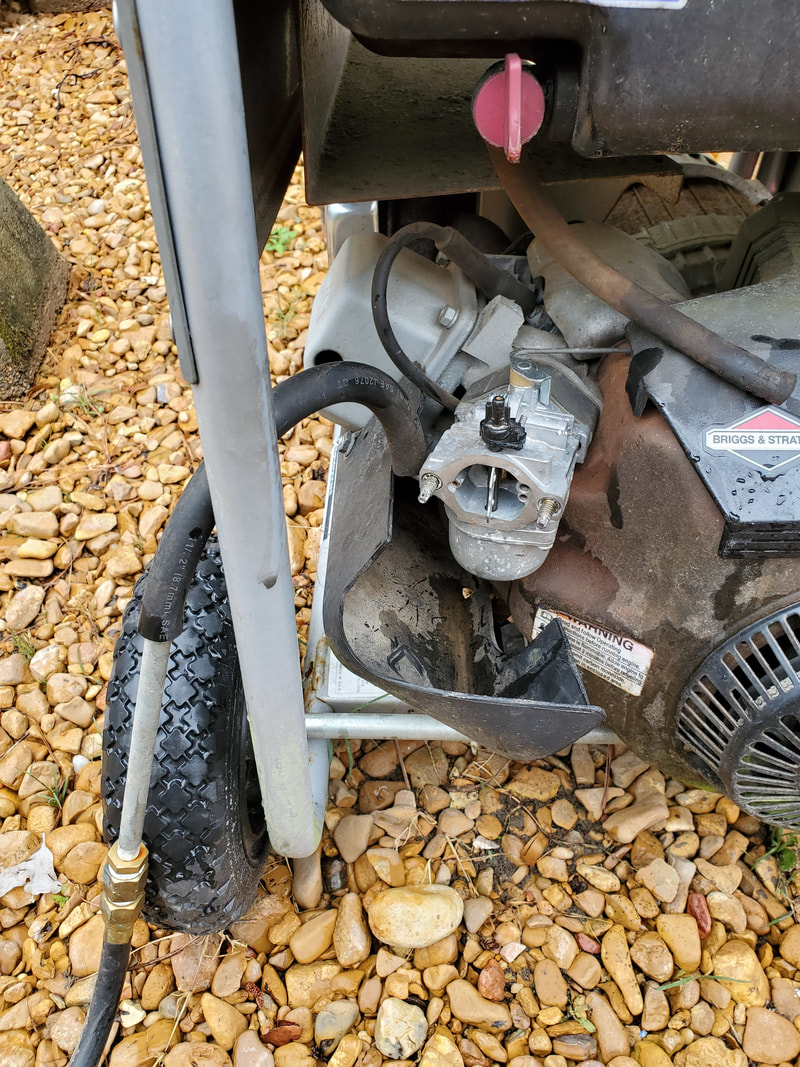
Fuel line from propane regulator hooked up to carb fuel input line.
After turning the gas on a little bit I pulled the cord and after a couple pulls got the engine to pop right off easily. It held an idle so I slowly worked the regulator, opening it up until the engine ramped up to normal running RPM. One thing I did notice is when I kept trying to open the regulator, past a certain point the engine RPM's would drop off like the regulator did something weird where it would not allow gas to flow any more after that point. Not that the pressure remained constant, it just disappeared. So with that I had to keep the regulator valve opened within that "sweet spot". When I got the engine running at what sounded like normal running RPM I plugged everything up and lo and behold the genny ran all of that stuff, cranking out power with only a slight drop in RPM as the machine was put under the heavier load of all the devices. We ran the genny for the whole time we needed, only shutting down when we left. Since there was no way to further regulate things in our absence, we didn't want to leave things running since anything can happen that'll have propane just leaking on out and one good backfire could cause this gas to ignite from the carburetor making for a bad day. Well the power did come back on and things got back to normal, but not before I ordered another carburetor for the big genny while getting the propane bottles refilled. A little while later the new carb came in. The unit is only held in by two long bolts that required a 5mm socket to take them off as the heads were smaller than the actual thread. It literally took me one minute to replace the carb on the genny, hooking the fuel line back up in no time. 
Both carburetors side by side. Old carb is on the right.
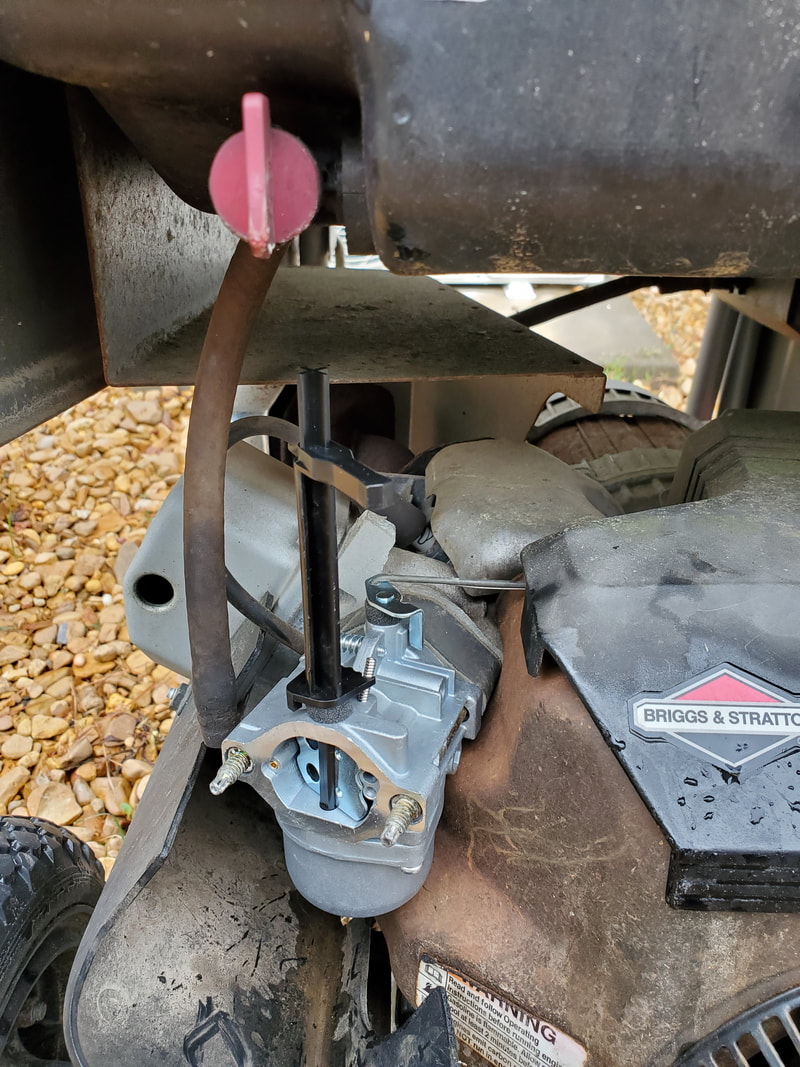
New carburetor hooked up and ready to rock and roll.
With the new carb hooked up I set the choke and pulled the cord a couple of times and once fuel started flowing the genny popped off to life, running just like normal. With that, the big genny was back to life. After running the machine for a few minutes I shut the fuel line off and let the genny keep running to exhaust the fuel in the float bowl. I wanted the carb to run dry so there won't be any gas inside to go stale and damage any seals, which tends to be the problem with these small engines. Hopefully we'll actually take time to periodically start this thing up to keep it loosened up. I need to order another carb to put on the shelf for this genny plus order a couple of replacement carbs for the other smaller genny that had started acting up as well so I can be sure to be more than prepared so even if the "new" carb decides to peter out again, I can quickly replace the thing and be back in the race with no hiccups.
After having cleaned up the storm damaged fallen tree from the back area of the yard and moving it over to the staging area with the other wood I had moved, I had the issue of having wood all over the place, blocking the back area along the eastern fence line. It would be very difficult to say the least, for me to move things like the wheelbarrow from the front through this area for moving gravel or even for us to move the two wheel dolly with new fence panels through here for the building of the eastern fence line. This wood would need to be processed so it can be removed from the grounds here. Besides, I hate clutter. Might not seem like it but I hate clutter! 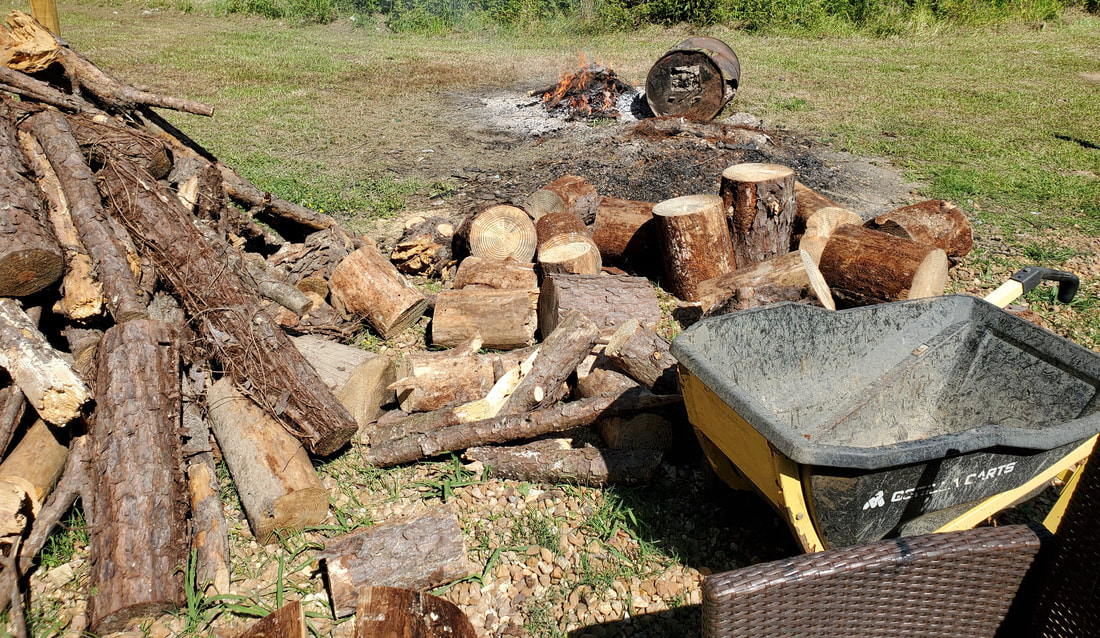 Extra wood added to the already spread out stack of pre-cut wood in need of processing. I started splitting the wood, much of this the very large logs from the larger portion of the tree trunk, which generated a lot of splits of wood of various sizes. Since most of the logs were cut to a longer length, I chose to split the wood as much as I could while still keeping each piece of a diameter that would make it be a viable piece of firewood and not kindling. The longer pieces of around a couple inches diameter or in width would still burn for a while and still fit in the stove good, unlike if the pieces were long and 6 inches wide. As stated before, my concern was with the idea that with the adding of all this extra wood, I would be using up the already limited space that remained on the pallets. After splitting 90% of the newly added wood, I did work my way about a third of the way onto the last pallet. While this may look like there's still plenty of room, you have to remember that the end of the stack will have to be at an angle so the top most stacks of wood won't fall over onto the lower stacks of wood. I will have to lay more gravel and pallets to make more room for the remaining big logs I recently added, much more so for all of the other wood that's on the ground. 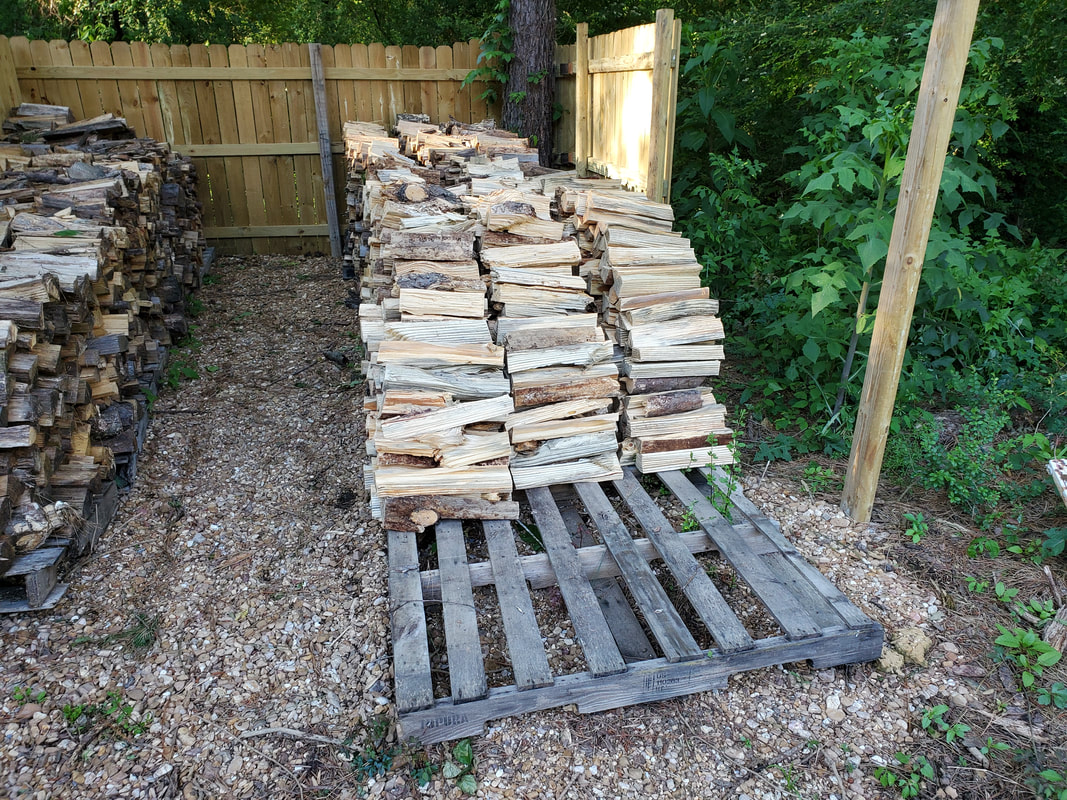 At least with the amount of wood that I did process, most of the newly added wood being gone, I did clear up a fair amount of space around the eastern fence line. I won't have to go through much effort to move anything if I do have to move something large through the area. I will keep cutting and splitting the wood even after I do exhaust my storage space as I want to get that part of the job done. It wouldn't make sense to put off finishing the wood up just because I don't have anywhere to put it. I can have the wood done so when I do get gravel on the ground and lay extra pallets down, I can immediately stack up the already split wood so the task will be done that much faster. 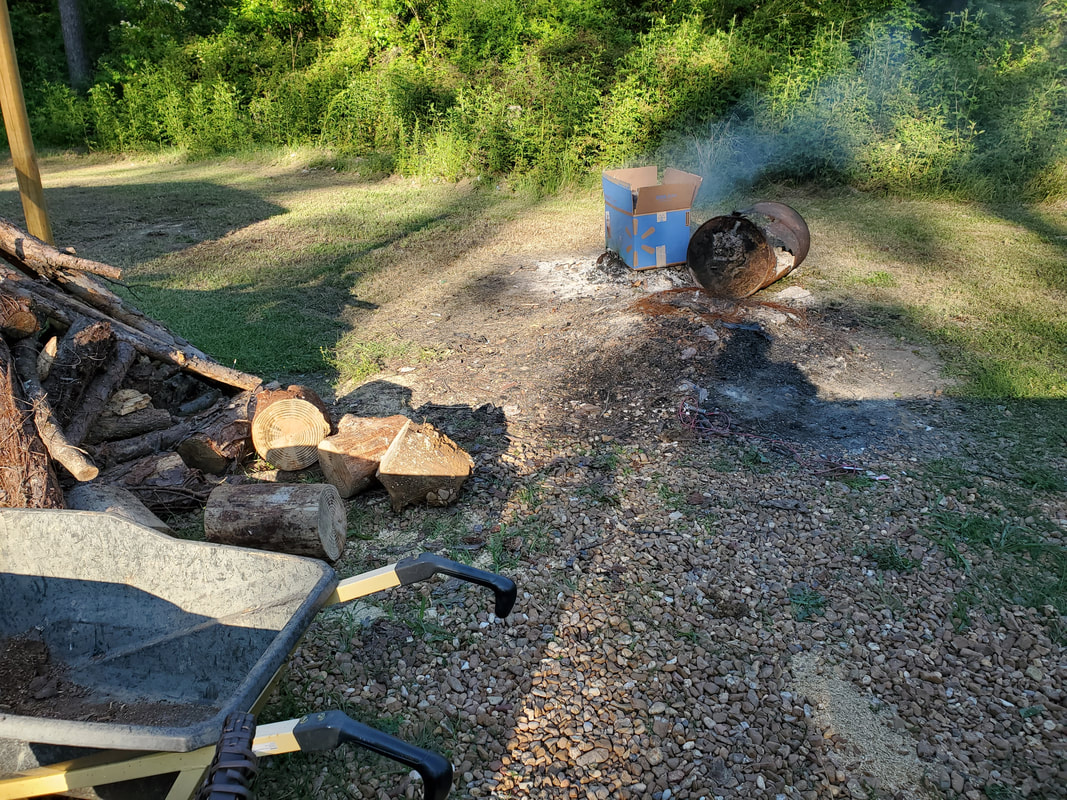 Area cleared up pretty good after processing newly added wood. All of this falls into the category of cleaning things up, getting rid of clutter. Whether the wood was stacked at the back of the yard behind the garden or on the ground at the eastern fence line, clutter is clutter. The wood was moved to clear the clutter at the back of the yard to make way for when I move the boat trailer and catamaran boat over this area to their soon to be resting spots, just like the wood needs to be processed and cleared from the current staging area so I can be able to continue working on the eastern fence line along with moving things around through here. Eventually we will start building the new porch and being able to move things out of the way like the generators and the new tow dolly. Hell, getting the wood cleared will allow me to possibly store the tow dolly on the east side of the house, if not in another spot. Point is, the clutter has to go!
After having to deal with the fallen apple tree and removing of a couple of dead fruit trees I went on ahead and did some other work in the garden. We had recently picked up some more plants and had plenty that had to go in the ground (or raised beds or whatever). Some of the plants were some strawberries, which I try to get a few whenever I get the chance since I had plenty of drum beds with fruit trees or berry bushes that had plenty of empty space for strawberry plants. The three plants I had went into one of the drum beds that had a dead fruit tree I had to pull out. The same drum did have two berry bushes in it as well so at least there was a couple of other plants within. The two berry bushes and the three strawberries would fill the drum pretty good.
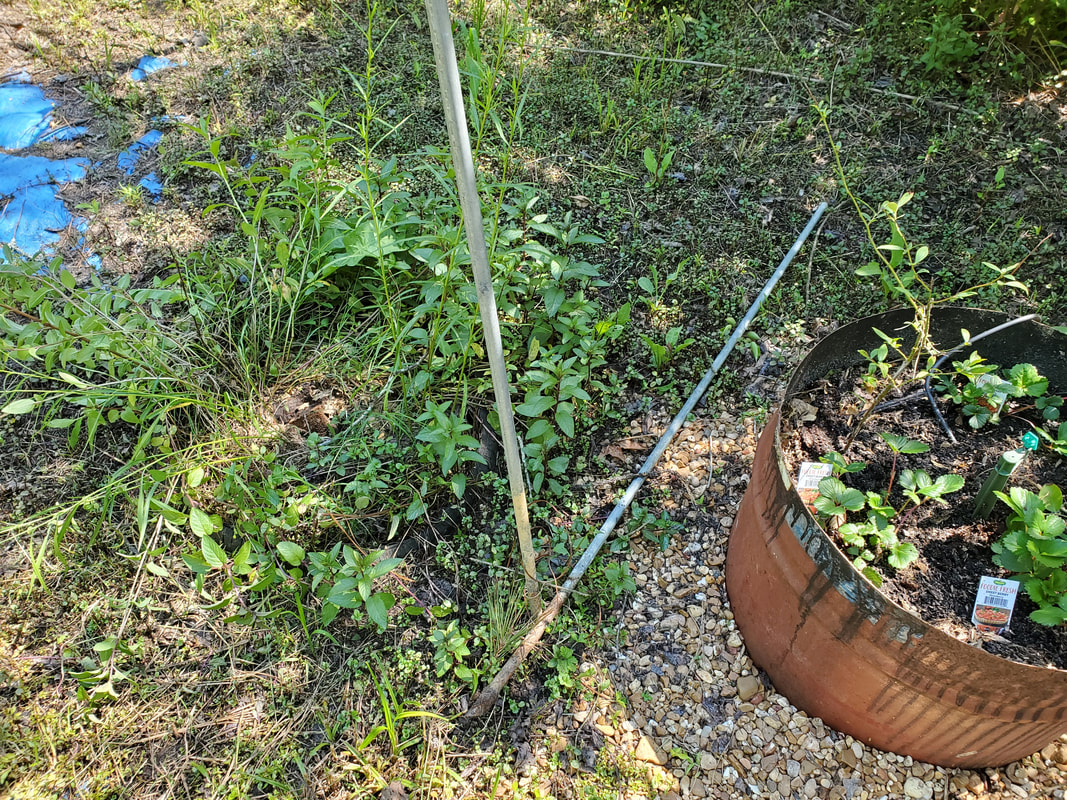
Area where old apple tree was pulled up, conduit in the ground was for holding up the tree. The other conduit was in the drum to the right for the other fruit tree that died.
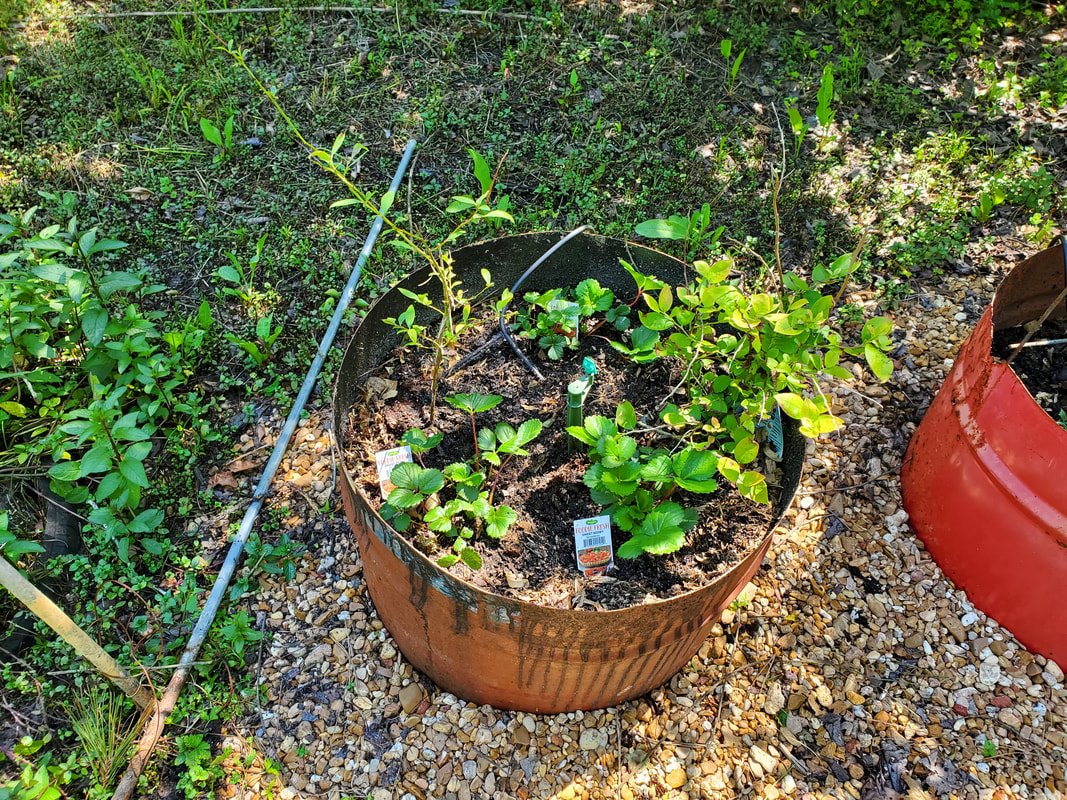
Drum bed with new strawberry plants and two berry bushes.
Another thing I had to plant was a bunch of pepper plants. I didn't have any of the wild peppers that I got the last time, the hottest I have at this time are some jalapenos that are in the hydroponic garden assembly. These other peppers are just mild bells and similar peppers. I didn't have anything new to plant these in so I ended up giving in and reusing the old raised bed that I was planning on removing this year but never got around to it. I would've replaced it with some more bucket or drum raised beds had I had the materials and time to make these things but since other things took precedence, the old bed remained. I ended up breaking the soil and pulling up the weeds to prep the garden and went ahead and planted the peppers in three rows along the length of the garden. At the end of the garden remained space for two more plants. Since I ran out of peppers, I took some of my extra tomatoes and planted them in these spots. 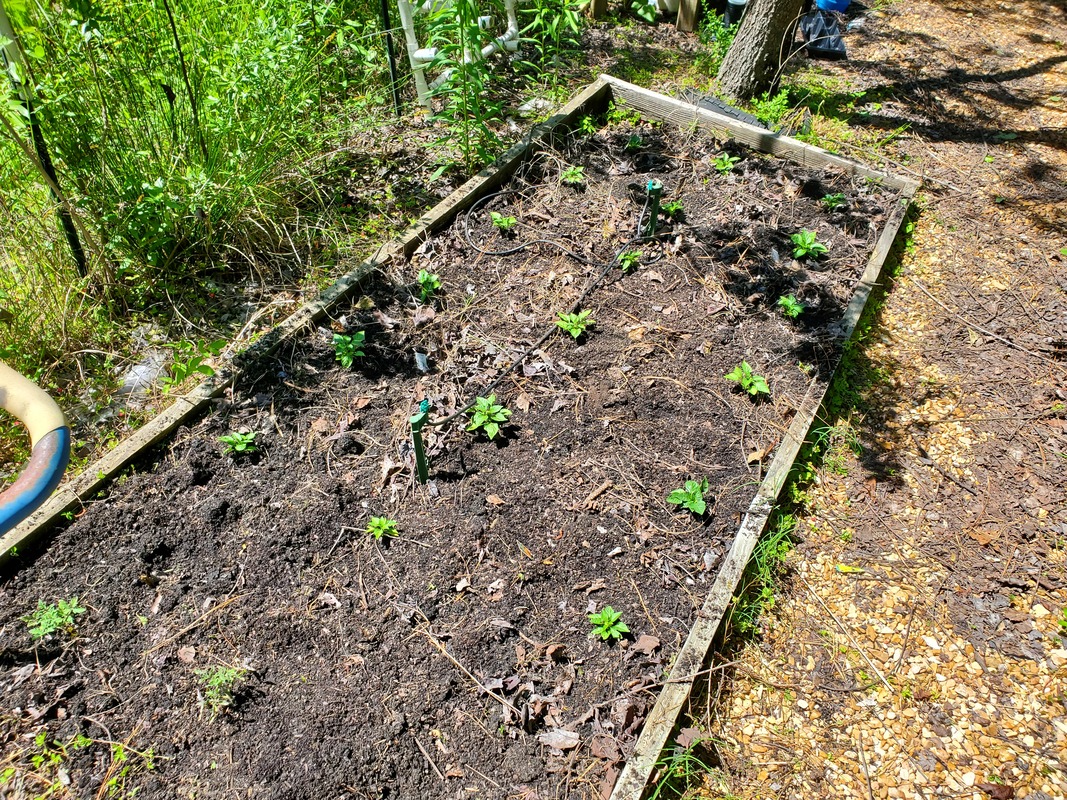
Pepper plants and a couple of tomatoes planted in old raised bed to make use of space for excess plants.
As for this bed, if I were to keep this bed, I would have to more than likely spend some money bringing in something like railroad ties and a boatload of dirt to make a bed that is stacked up high enough to not have to bend over too much to work the garden while still maintaining the space to plant the same amount of plants I can plant now. Otherwise I'll have to make sure I have all the resources to build some replacement beds immediately after removing the rotting boards and the dirt within the bed. Back to the tomatoes. I ended up taking a couple more tomatoes and planting them in another drum garden, the one right next to the drum that I planted the strawberries. This drum used to have a grape plant in it but that plant never came back so the drum was empty. Since I had all these tomatoes, I had to put them somewhere so this empty drum was pressed into service. 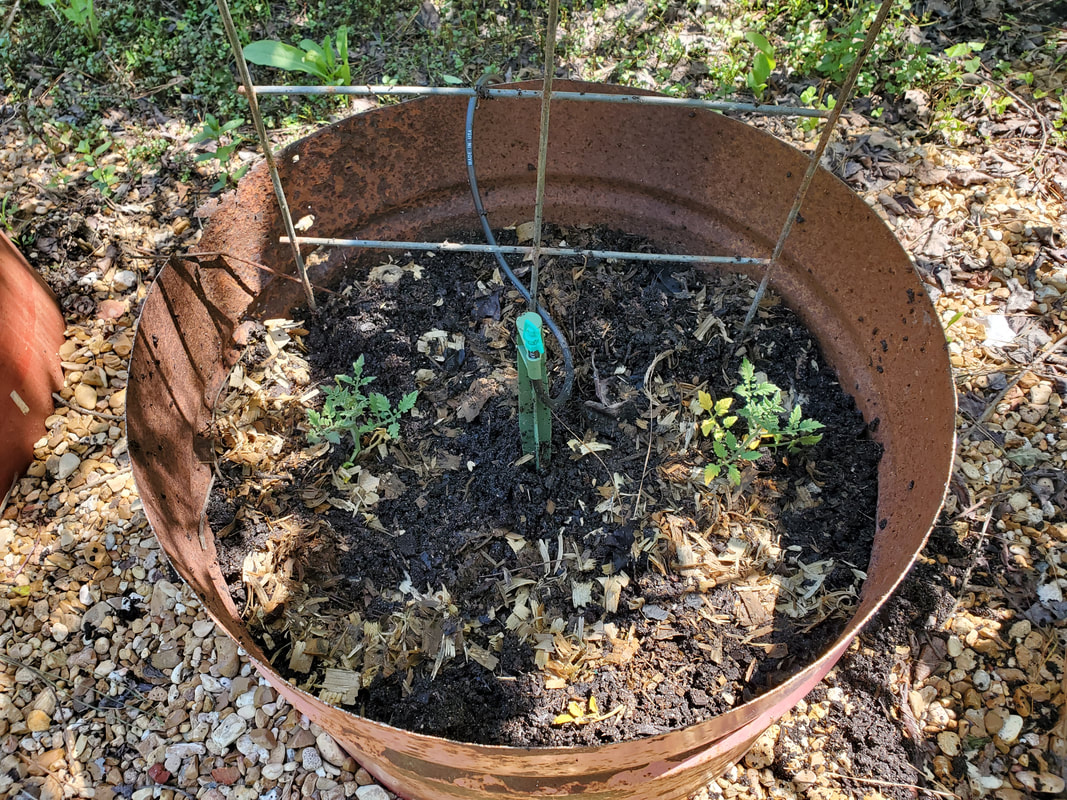
Two tomato plants planted in old drum with trellis from grape plant.
The last thing that I had to do was place several tomato cages in some of the bucket beds that already had tomatoes planted within as well as one of the old generation drum beds. I had eight cages that allowed me to take care of all but two tomatoes in the bucket beds. I will obviously need to get more cages for the remainder of the tomatoes in the garden. It'll be a while before the plants grow enough to require cages so of course I'll have time to get them, but at least I managed to get more done in the garden. 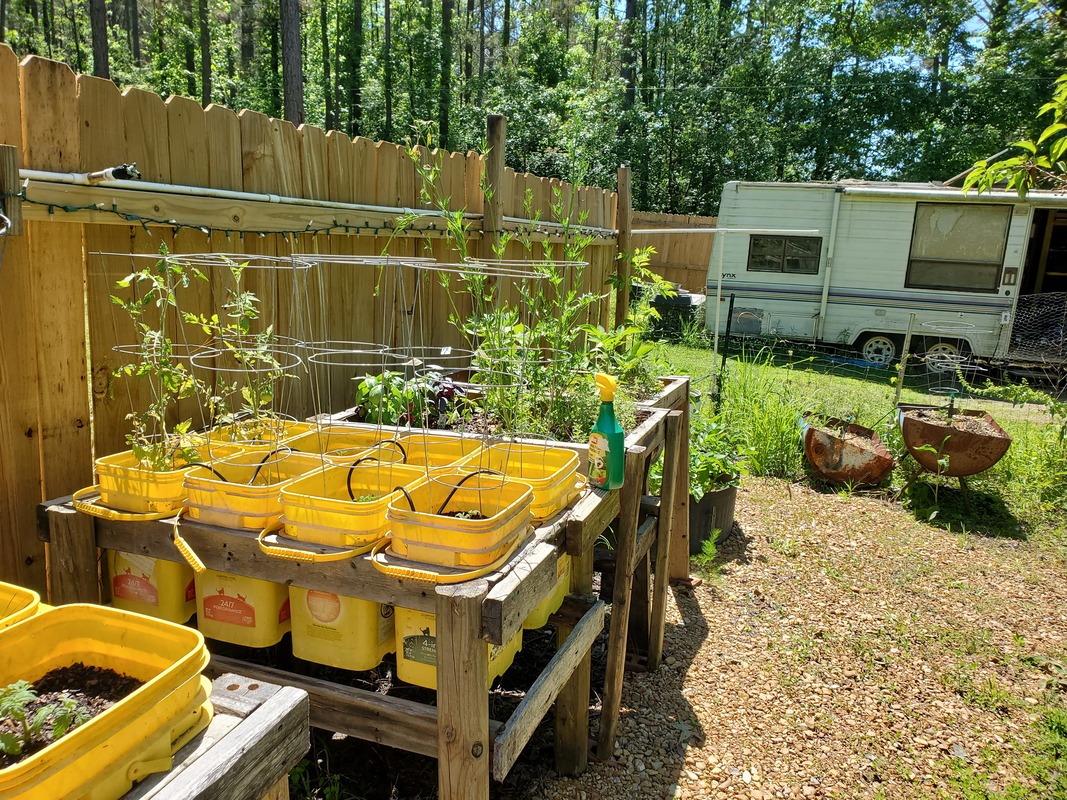
All that I have left is six tomato plants in their flats. I'll either end up waiting for the potato plants to reach maturity where I can pull everything up and prep the spots again or I'll have to take time and resources to build another garden assembly to plant the remaining plants. As with everything else around here, I'll have to continue to juggle the time between this garden, cars, building projects, grounds development, etc, trying my best not to ignore any one thing for too long. At least I can say the garden is off to a really good start and will continue to grow as I do the maintenance and new construction within.
|
