|
There wasn't much left to really finish up the rest of the floor in the engine bay of the Mustang Chicken Coupe. I just had to cut one good piece of metal to fill the opening for the 4th section of floor. Of course when I do these rough measurements, no matter how close I get the measurements, if I don't make some kind of template using cardboard, I will end up being off a little bit with the cuts on the piece of metal needed. This was the case, again. I ended up getting everything right all the way up to the last inch of metal, and with a slight angle to the edge of the piece of sheet metal. I went ahead and welded in the sheet metal as neatly as I could to the rest of the edges and the pipe. I ended up cutting a piece of sheet metal in a triangle shape, just a little bigger than the size of the opening so I can fill that remaining gap neatly. Welding it in was no big deal. 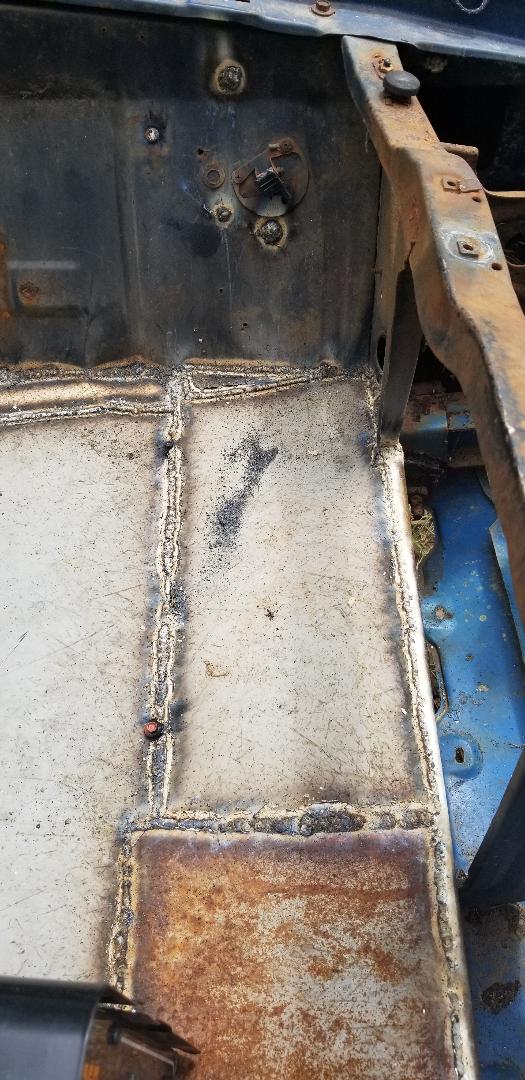 Piece of sheet metal welded in place along with extra patch at edge where mis-measurement was made. With the floor all done I moved on to plugging a bunch of openings in the radiator support panel since this area is going to be for baby chickens that can easily get through some of the openings in the panel. There were also other small bolt holes and other similar openings that I wanted to plug up, mainly because I want to seal up any means for birds to escape and ultimately, any means for pests to come in. I want to keep mice, rats, snakes, and even wasps from being able to get in and wreak havoc within the metal confines of the engine bay. I cut some small pieces of metal for the larger openings in the radiator support panel and the smaller holes I just filled them in with weld slag. After filling in all of the little holes I moved on to welding in the patches over the larger holes. 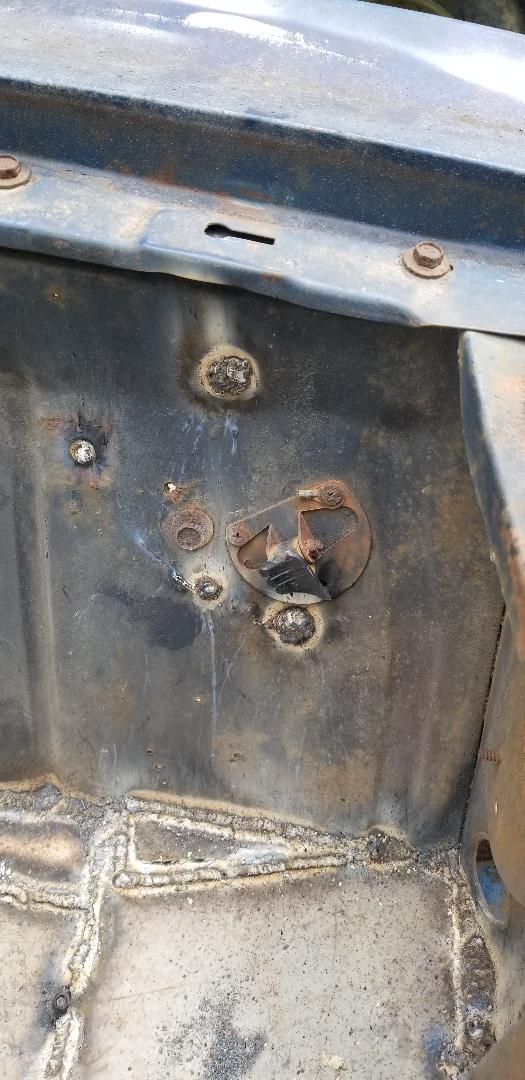 Small holes filled in with weld slag.  Left radiator support panel patches welded in place. Welding the patches went pretty quick as this was just a simple act of burning exposed metal all around the pieces to secure them, no load bearing metal, nothing to be watertight, just some simple crude patches. With the patches done, the waste removal chute will be the next thing on the agenda. 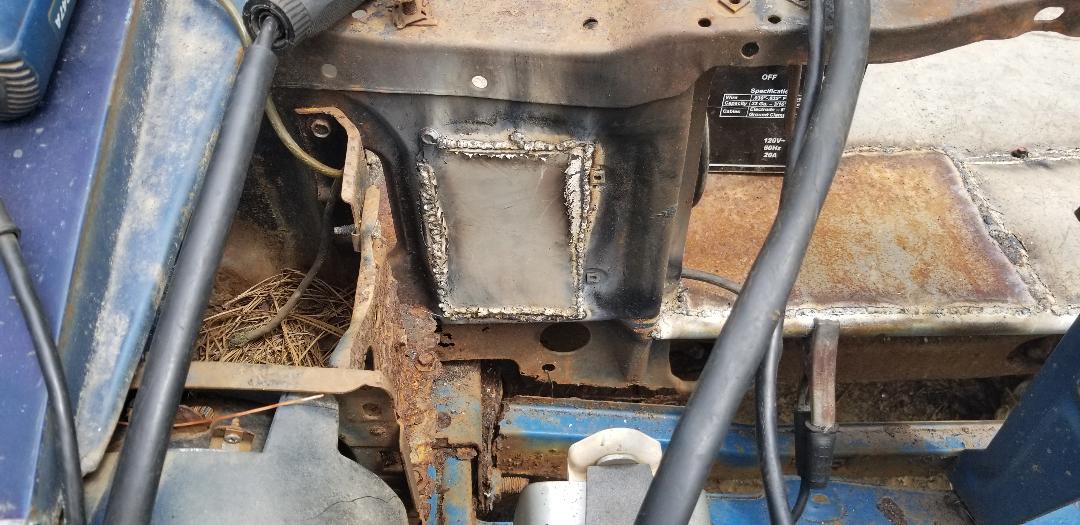 Outside shot of right radiator support panel patch.  Inside shot of right side radiator support panel patches. Some other areas of the engine bay where there's gaps will be filled in with some expandable foam or something similar that can be wedged in the gaps and not be degradable by water or heat or pecking birds. Some of these areas are rust holes that because of the rusted weak metal, welding is not an option. Other areas because of how the area is formed, it would take a lot of welding to secure even small pieces of metal to help fill the gaps. Main goal is getting all of the easy areas welded up first with the alternative patching being the last thing to do to finish up the brooder section of the car body. I do look forward to getting this done as there are some more baby birds en route and I wanna be able to put this thing to use with those birds versus having them in a brooder box in the house.
0 Comments
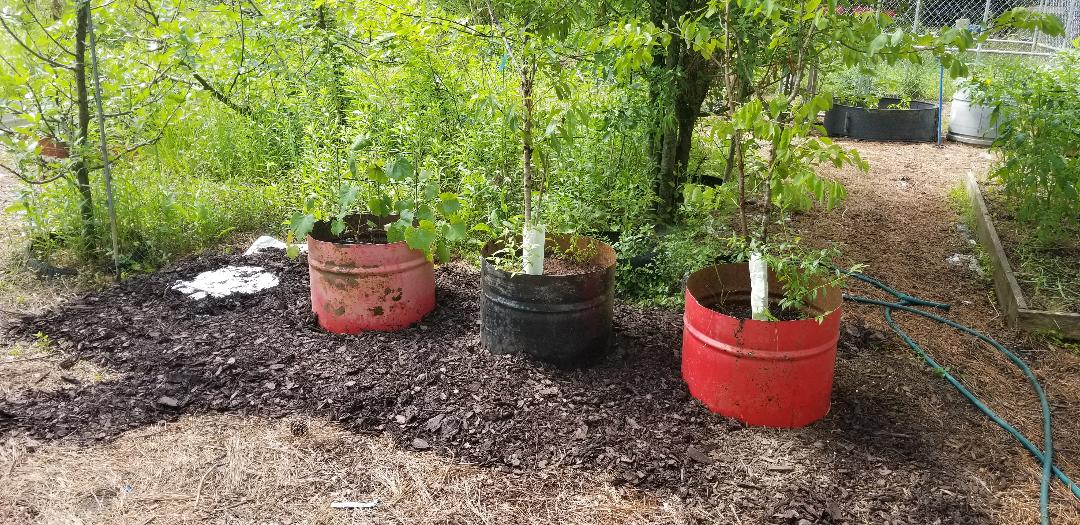
Finishing up the job with the drum planters was the first thing on the agenda for the day. After getting some more mulch I was able to spread a good layer of mulch around the drum planters, covering the plastic I laid on the ground prior to setting up the drum planters. I ended up finding that there was enough room to actually set up a 4th planter, when I cut another drum up that is. I spread mulch around that area, leaving a circular spot bare to accommodate another drum. Better to do it this way than to have to move the mulch out of the way later on when I do set another drum down. I wanted to get that out of the way before moving on to the Mustang Chicken Coupe floor to try and get closer to finishing off the brooder section in the engine bay.
Evenly mulched drum planter area, note bare area for 4th drum to be added later on.
Just like with the 2nd section, I had to finish the 3rd section with a small piece of metal on the end. Of course this was pretty easy, just a little bit of welding to get the metal in and set. With the 3rd section done, it was time for the 4th and final section of floor in the engine bay. This was the section going up against the inside of the radiator support panel. 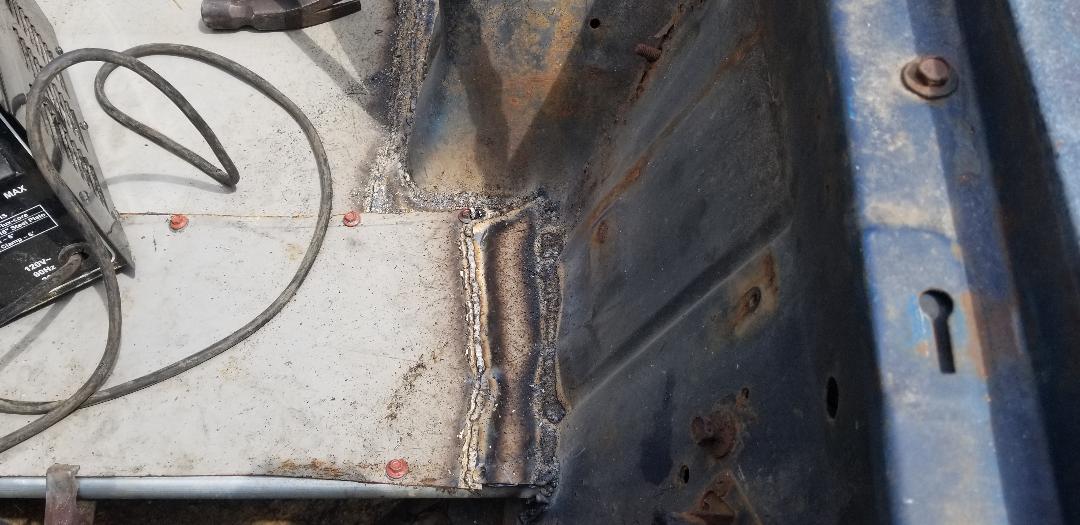
Small piece of metal added to finish up the 3rd section of floor,
I cut a piece of pipe to fit in the center of the radiator support panel from the outside. There was a cavity that would hold the pipe nicely so when I weld in the sheet metal, it would be relatively straight, all the way across from right to left. I welded it in and moved on to the sheet metal. Time to find a suitable piece to go in.
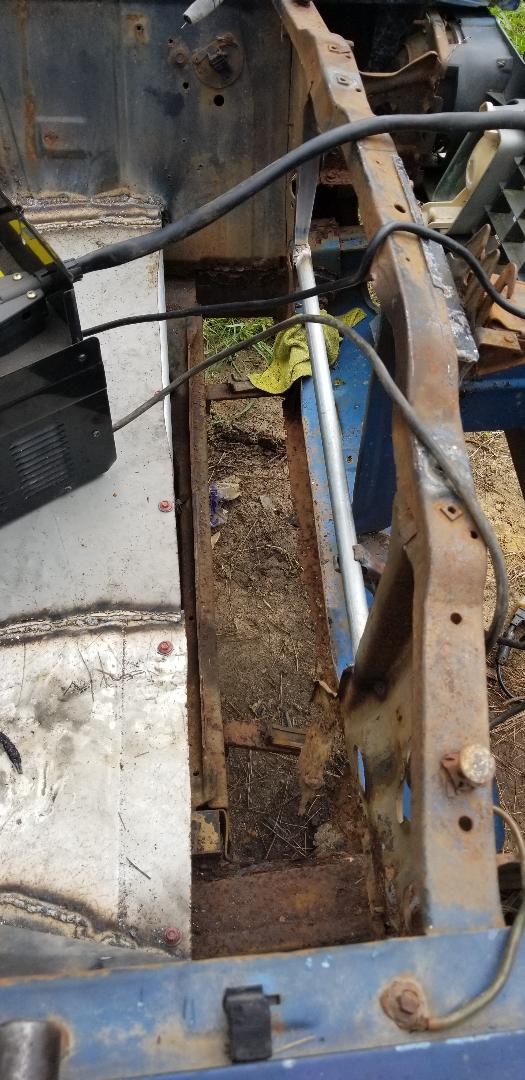
Pipe welded in place in radiator support wall/panel, note how its in place from the outside of the panel.
I measured the width of the opening and found a piece of metal that would allow me to cut a nice clean piece that would fit the width needed. I was able to cut a piece of metal that was long enough to almost cover half the distance from right to left in this section. I had to cut a small tab in the middle of the piece to go around one small spot in the radiator support panel so the sheet metal would sit nice and close to the panel so I can weld the sheet metal in place with a minimum of slag to fill any gaps. Since I already had the self tapping sheet metal screws going through a piece of sheet metal and the conduit, I decided to just weld the sheet metal all the way through. 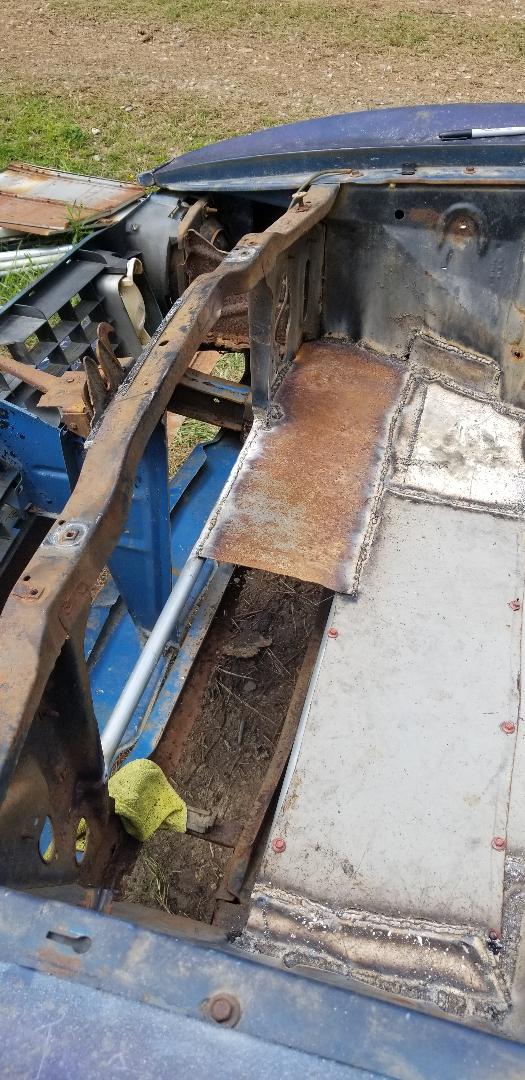
1st section of sheet metal welded in place over pipes and against radiator support panel. Note how sheet metal almost covered half the distance across.
I will try to find a piece of sheet metal that is long enough to cover the remaining gap of the 4th section and still be wide enough to accomplish the same. With that final piece of metal welded in I can start working on the chute that will allow us to easily clean the mulch from the floor by sweeping the material down the chute and into an awaiting receptacle under the front valance panel. I will also have to add a removable sliding door with guides on either side of the opening on the radiator support panel so the sliding door can be easily removed when necessary. With that done I can move on to adding the electrical conduits and outlet boxes for the heater and light for the brooder.
After having taken a break from working on the Mustang Chicken Coupe for several days I decided it was time to get back to work on the project. I had to finish up a small area in the 2nd section of floor before moving on to the 3rd section. I had to weld in a very narrow piece of metal to fill this gap. I attempted to try and cut a single piece of metal to fit in the gap but when I tried to fit the piece in I ended up finding out the shit didn't fit. I ended up welding in a section of the metal, cutting it, then situating it in a way where it would fill most of the gap. I ended up filling in the remaining gaps with slag to finish things up with the remaining gap in the 2nd section of floor. 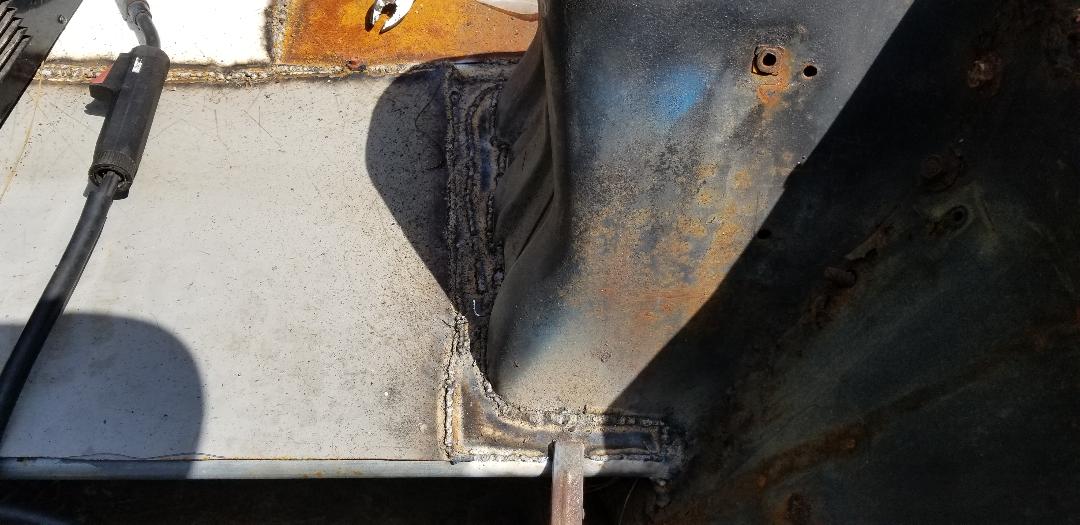 Second section of floor done after welding in remaining piece of metal to fill in the gap. With the 2nd section of floor done I measured and cut another section of conduit to weld in place for the 3rd section of floor. Now because the passenger side of the inner fender was rusted out, I would have to come up with an idea to secure the pipe on that side. I went ahead and supported the right side of the pipe with a soup can while I welded the left side in. With the left side welded in I did some light shitty tack welds in the rusty metal to be able to hold the pipe in place while I started on the actual floor panels. I welded and screwed in a small section of sheet metal at the end to secure it in place on the pipe. With the metal in,,, I cut a piece of the donor metal panel I used where the metal bent 90 degrees. I wanted to basically make a piece of angle iron that I would weld to the end of the sheet metal panel and to the inner fender where there was still some decent metal. 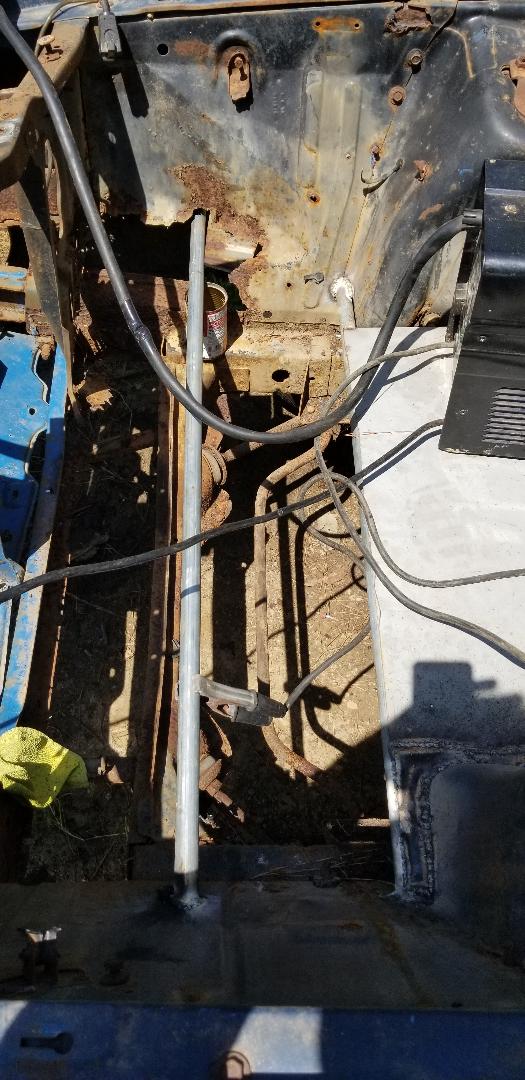 Conduit welded in place at bottom of pic and supported by soup can at upper end of pic. 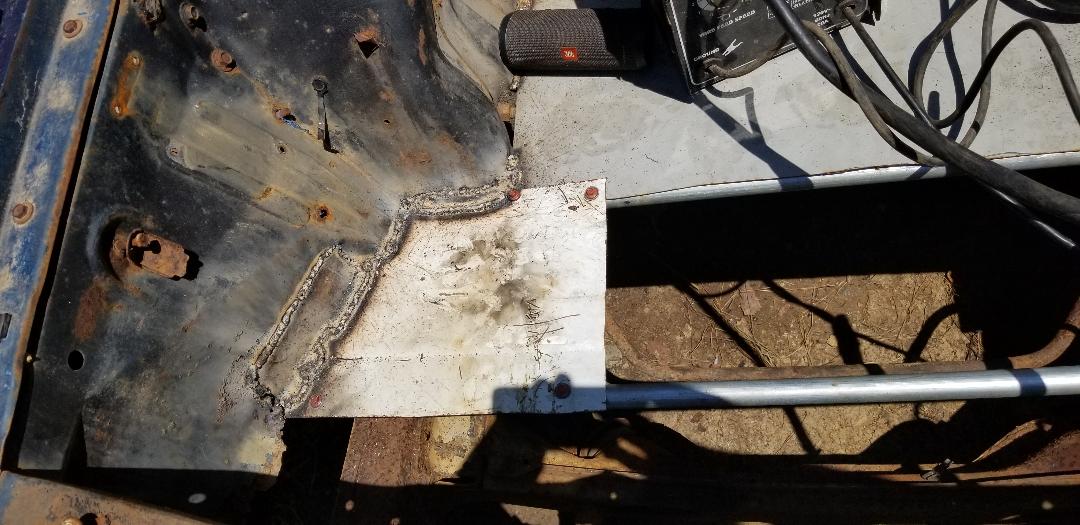 First piece of sheet metal welded in place in third section of floor with angle iron piece of metal welded in to hold both the floor and conduit in place. With the first piece of sheet metal in place along with the alternative support for the pipe taken care of I found a piece of sheet metal that was already cut in a way where it needed very little to make it ready to fit right in the gap between the conduit and the end of the 2nd floor. I just had to cut the ends of some "interior" braces since this piece of sheet metal came from a filing cabinet. After cutting out the ends of the braces to allow the sheet metal to sit nicely in its home between the conduit and the end of the 2nd floor, I went ahead and used sheet metal self tapping screws in multiple spots to help secure the sheet metal panel to the conduit and to the end of the 2nd floor. There were still some spots that could use some light welding so I did go ahead and burn some metal in those spots but the main support of this piece of sheet metal was the screws.  Third section of floor almost done with piece of sheet metal that is secured with sheet metal screws. As can be seen in the pic, the third section of floor is almost done, with the exception of a small section/gap that needs to be filled in with a final piece of sheet metal, just like the 2nd section of floor. With the 3rd section done I will move on to the final section, which will put me against the radiator support panel. This will be the last section of floor in the engine bay. With the floor done I will then add a section of sheet metal on the front of the radiator support panel that will be angled downwards to meet up with the front valance panel, with the intent of making a ramp that will allow us to sweep wood shavings/mulch from the brooder down the ramp and outside of the car on the ground. A container of some type will be placed under the valance to catch the mulch that is swept out. Things are moving along pretty good. After getting two of the drum planters set up with the fruit trees and blueberry plants, I ran out of dirt and time so had to pause. I picked up some more dirt, as well as a bag of mulch for when I clear the remainder of the old raised bed. I planned on using the bags from the dirt, which I saved to lay on the ground prior to covering with mulch and the drum planters. First thing I had to do was shovel up the old dirt form the old raised bed. I used the wheelbarrow to contain the dirt as I dug it up. Another little thing I had to do was uproot the hosta plant and replant the thing in a bucket. To do this, rather than use the good dirt I recycled some of the dirt from the ground that was going to be dug up anyway.  Hosta plant replanted in bucket using old dirt from raised bed. With the hosta out of the way I went ahead and shoveled out as much dirt as I could to get the ground leveled off. I took this old dirt and spread it out over a section of the chain link fencing I laid on the ground in the midway between the house and the garden. I also had to take care of one more plant that was in the garden, a grape plant. Since I had more dirt I was able to get the last drum set up with the grape plant, all by itself, for the time being. I might plant strawberries around the grape in the future but grapes will grow to a good size to more or less take over the area that its growing in, or in this case the container that its growing in. With the dirt out of the way I then laid out several dirt bags on the ground to cover the raw ground in preparation for the mulch and the drum planters. 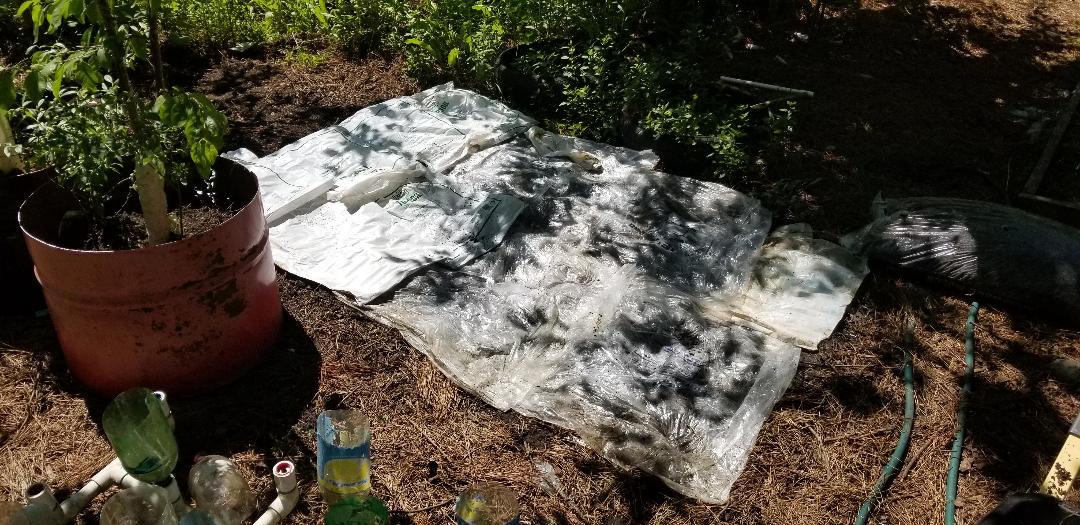 Dirt bags laid out over bare ground where raised bed used to be. As I started spreading the mulch it became clear that I would not have enough from that one bag to cover the entire area that I laid plastic down on. Even if I keep the plastic bare where the drums will sit and just spread mulch around them, there still wouldn't be enough. I went ahead and situated the three drums evenly on the plastic as planned then lightly spread the mulch all over the plastic to ensure that all the plastic is covered so wind won't pick up any individual bag and blow it away. With the plastic area lightly peppered with mulch and the three drums situated I then moved on to another little thing to make one of the planters better. I still had a piece of cattle fencing that I had used for a trellis in the past. I had cut a piece from this to make a small trellis for the two cucumbers I planted in a washer drum. I cut another large piece from the remaining piece of fence, leaving a narrow section that was just a trunk with legs coming out of each side, maybe good for supporting a tomato or something. Anyway, I took the section I cut and staked it in the drum next to the grape plant, weaving the vines up the rungs of the "trellis". With the grape supported, the plant will be able to grow more and thicker within the drum. 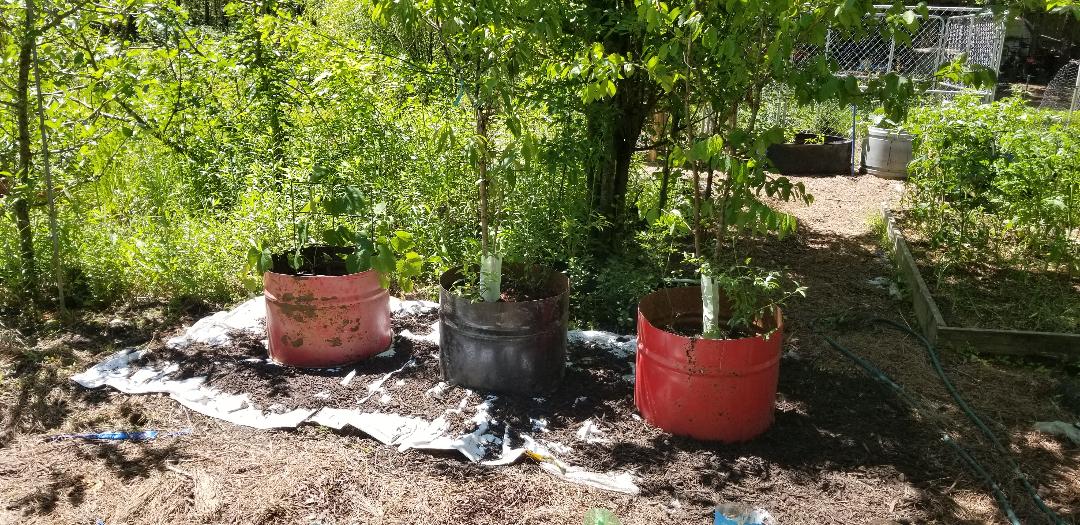 Three drum planters set up on site. Note plastic lightly covered with mulch. 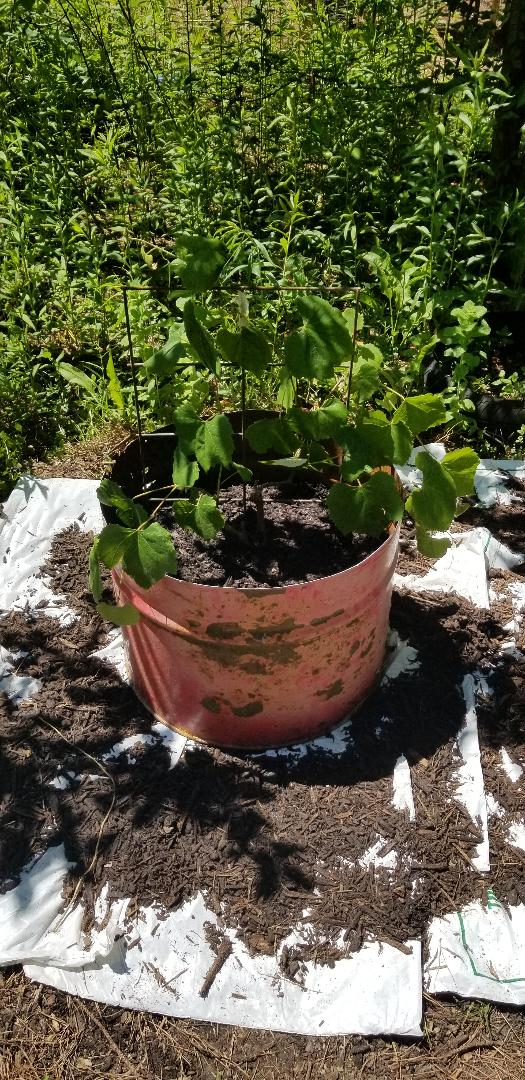 Grape plant in its drum with cattle fence trellis set up to support plant. Note light mulching around plastic. With the drums set up and plastic over the old raised bed site, the only thing left now is to get enough mulch to fully cover the plastic so it won't be visible. Along with trying to make the garden more efficient with the ways the plants are set up, there is also the aesthetics. Making the garden look nicer by setting up things like standardized raised beds or planters for trees or even hydroponics helps make things nicer. By covering the ground with a bed of mulch (which needs plastic to serve as a weed barrier), we provide a clean walkway around the planters and beds and other apparatus. The goal is to eliminate errant weeds popping up all over the place all around planters and beds. I want the garden to be something that is pleasant to look at as well as productive. We will reach this goal. Another plan to help organize the garden and make things more convenient for rearranging and even possible moving out if needed was to delete what was left of a raised bed I was in the process of trying to redo at one point. The original idea was to set up another food forest by planting a couple of smaller fruit trees along with some blueberry plants among the trees. Strawberries would finish off the remainder of the ground within the raised bed. The raised bed was really going to need to be rebuilt anyway since the boards were rotting away with every passing day. With my new plan to redo the garden, I aborted the rebuild of the raised bed. I still had the plants to contend with but what to do? Since I was already using drums build raised beds, I figured I would use drums to set up what amounts to large pots, for the use of fruit trees. I had three drums that were once chicken coops with squares cut out of either end to act as openings for the birds. Since I dismantled that setup, I still had these drums. After using other drums for things like half burn drums, I had just these three left. Problem is, they were rotted to some degree. In the end all I can muster was three planters from these drums instead of the six I was hoping to get. 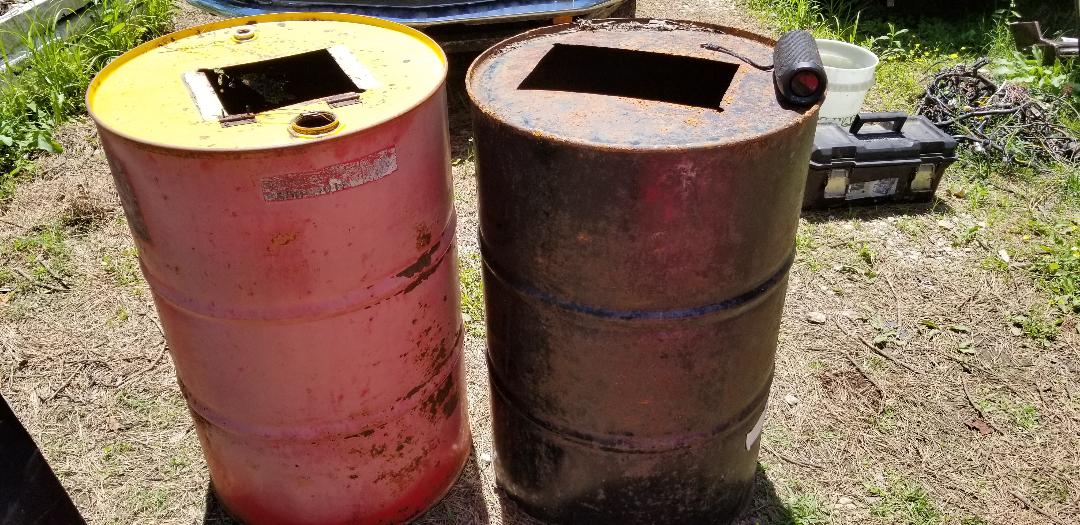 Chicken coop drums to be used for planters for fruit trees. I went ahead and marked the three drums, drawing lines around the center of each one so I can cut them in half with the saw. After cutting the drums in half I tossed the rusty portions into the outgoing scrap pile and kept the others. I had to put something in the bottom of the drums to cover the large square openings so dirt won't come out and the whole planter can be moved with ease with a two wheel dolly. I ended up using a couple of drum tops I cut off of some past burn drums and had set aside as sheet metal donor pieces. Using the saw I cut a circle from the tops, tossing the rings into the scrap pile and putting the discs into the bottoms of the drum halves. 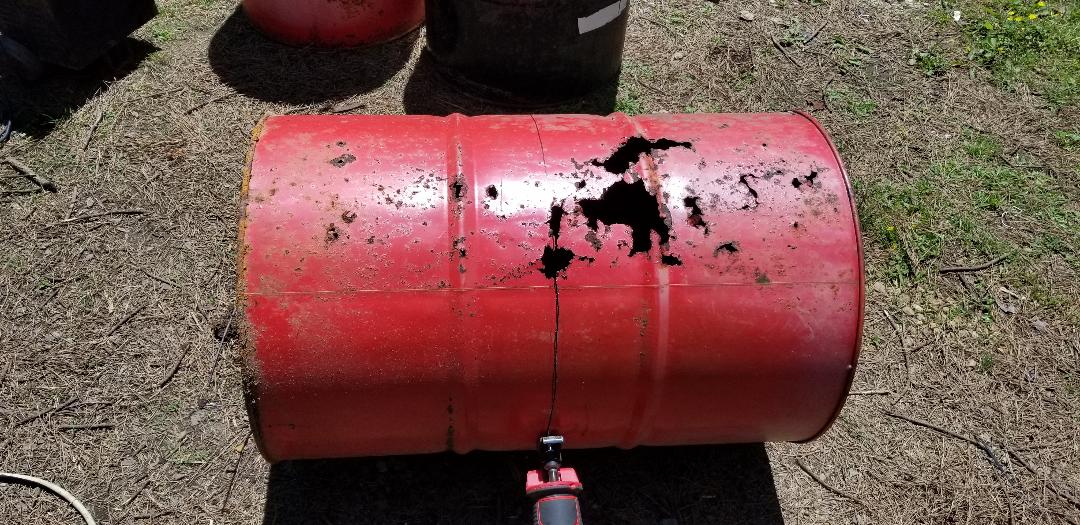 Cutting drum in half with saw after marking center line. 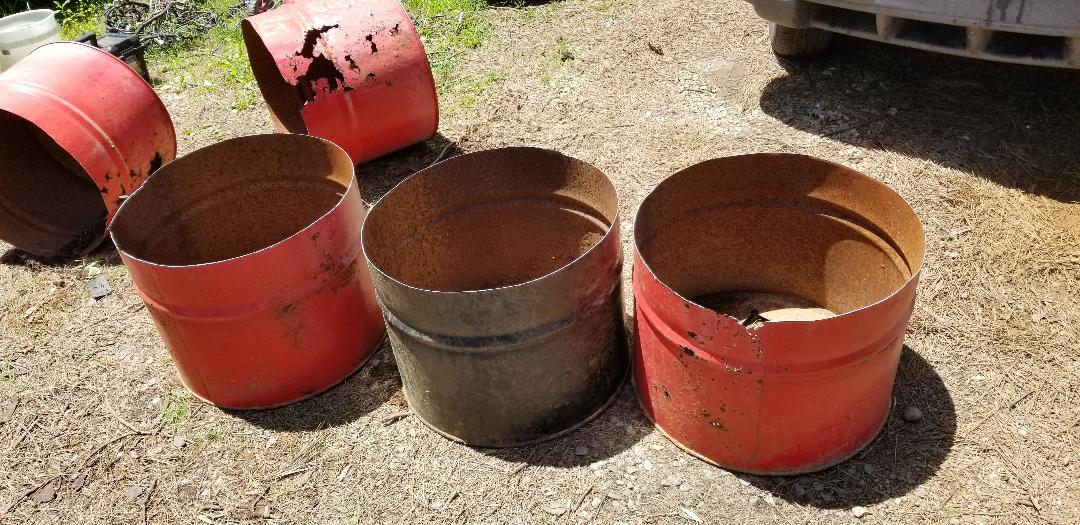 Drum halves to be used for planter pots. Waste halves are in background. 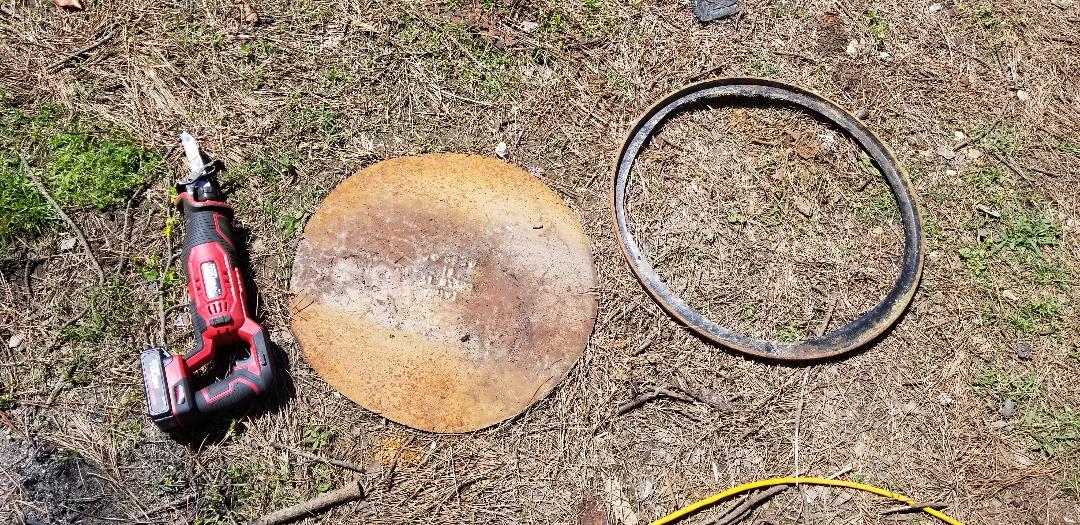 Cutting disc from drum top for bottom of planter drum. With the drums prepped it was time to start work on the raised bed, or what's left of it. First thing I did was pull up the plants, starting with the trees. I went ahead and actually planted them into the drum planters and set them aside while I continued with the rest of the work. We then pulled up the remnants of the wood from the old raised bed, tossing it aside for trash to be burnt up later with the plant waste to be pulled up from the dirt in the garden. I ended up pulling a lot of waste plant material from the dirt, random weed plants, excess mint plants that grew through the dirt. I saved some of the mints to be replanted later on in another drum pot. 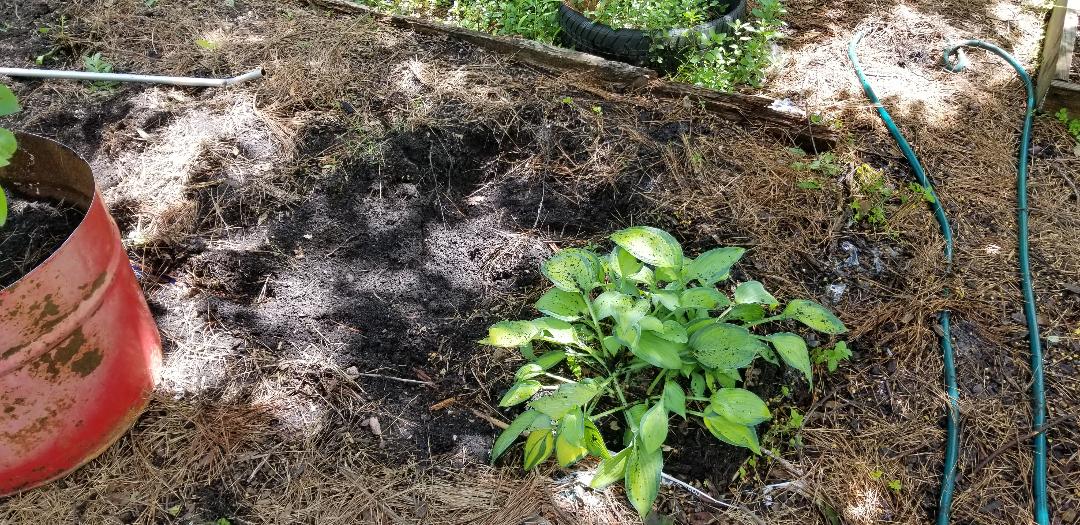 Remnants of raised bed with most of the plants pulled up except for a hosta plant. 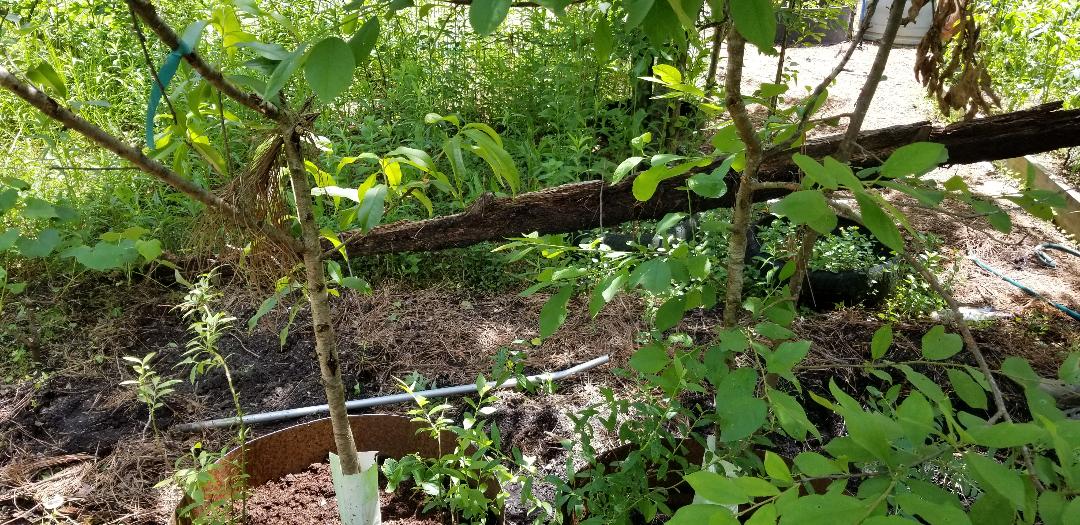 Pulling up rotted board from old raised bed, note drum planters with trees in foreground. 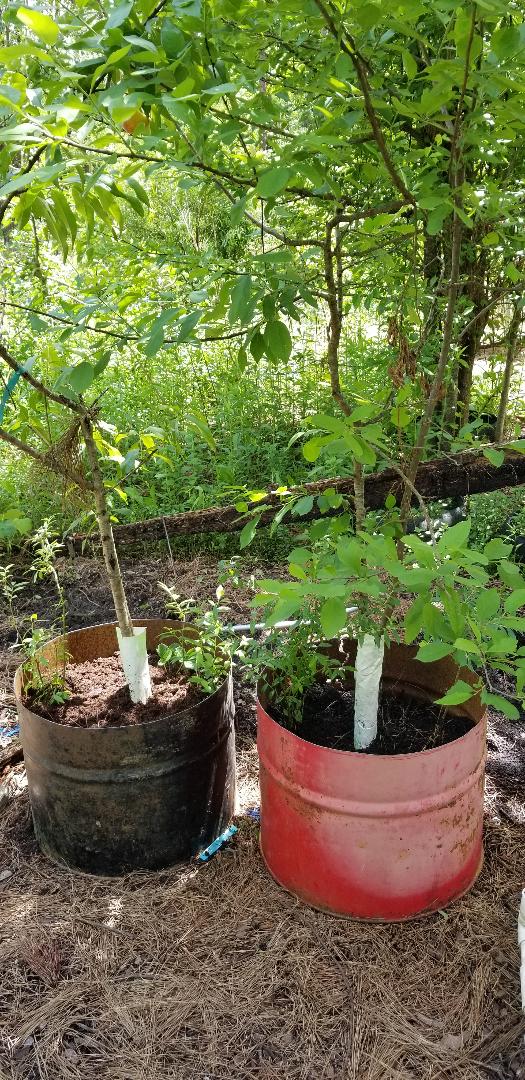 Fruit trees and blueberries planted in drum planters awaiting placement in new space of old raised bed. With the progress made, I had to conclude this session as time ran out and I also needed more dirt. The rest of the project will get taken care of so I can continue with other improvements in the garden. One thing I will have to do with these drum planters is plant more strawberry plants around the blueberries and the fruit trees so I can accomplish the whole food forest ideal but with the drum planters instead of the permanent raised beds that I was originally riding on. During a cool rainy day I decided to go up to the garage to replace the fuel tank on the Dodge. This was supposed to be a simple procedure but like many things around here, its never a simple procedure. First I had to remove the fuel filler tube. This involved removing the fuel filler cap and base on the outside of the quarter panel, which then allowed me to twist and remove the filler tube, which is held in the tank with a large rubber bushing. Next, I had to remove the false floor in the trunk to access the fuel tank. I had six bolts holding the panel on, three on either side. I went ahead and unscrewed these bolts. The bolts were secured with nuts that I tacked some welds in place to hold them up underneath so I don't have to have a second set of hands holding a wrench on the nuts. I was able to get the bolts off to get the panel removed. With the panel off the next move was to remove the fuel. This was done by me pulling the fuel line from the output side of the electric fuel pump and hooking up a hose to the pump and routing it to a fuel can. Turning on the ignition so the pump would come on, I was able to get the fuel pumped out from the tank so I can then remove the hose and sending unit wire and remove the tank. 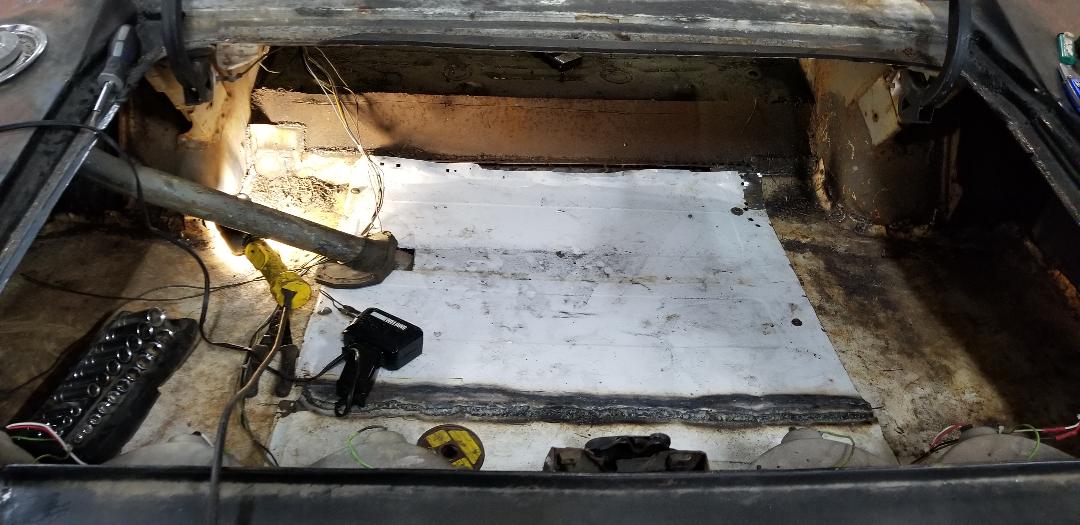 Dodge trunk false floor covering the fuel tank I pulled the tank out and removed the sending unit to swap into the new tank. I then noticed that the sending unit had a port for a return line on it, probably for those who might use an aftermarket EFI system that has a return line. Either way, this needed to be plugged up before I start putting large amounts of fuel in the tank. I found a short piece of hose, a bolt, and a couple of hose clamps to put on the port to seal it. After putting the gasket and sending unit in place I put the fuel tank in the trunk cradle and hooked the fuel line up and the sending unit wire to it. Prior to putting the fuel filler tube in I had to swap out the rubber bushing as well. This thing ended up separating around a third of the bushing. I'm hoping that the thing would seal when I fill the fuel tank up. The false floor for the trunk went on last. When I went to put the bolts in, I couldn't get four out of six bolts to tighten up. Turned out the damned nuts broke free from the weak tack welds and fell to the floor when I pulled the bolts beforehand. I ended up needing to get that help I mentioned I was trying to prevent to hold the wrench on the bolt while I tightened the nuts up on the bolts. 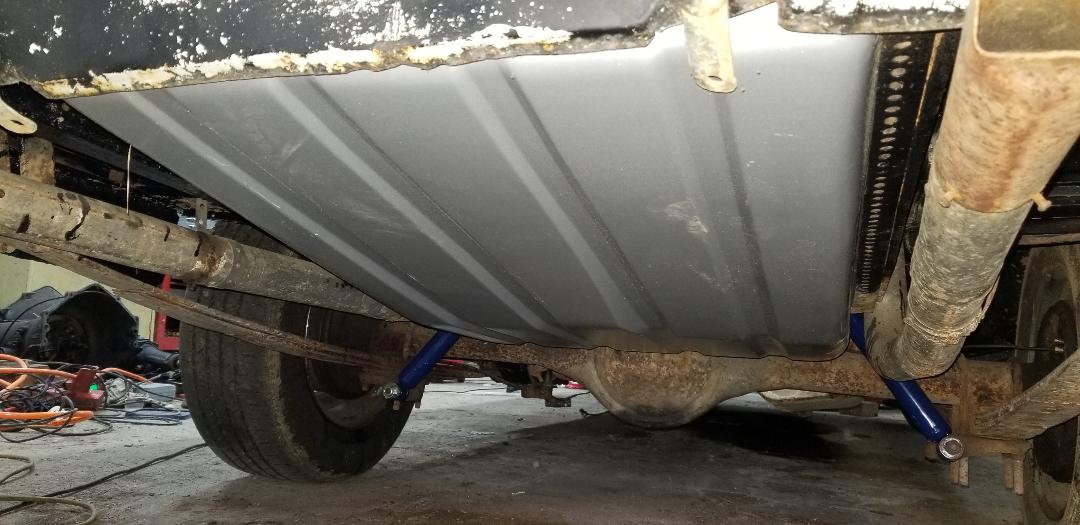 New fuel tank resting in trunk cradle In the ruckus of trying to find the holes for the bolts, the wire for the sending unit, old as it is, broke apart about a foot from the plug going on the sending unit. After getting the false floor bolted down, I had to repair that wire, using my normal technique of putting a piece of heat shrink tubing on one wire then twisting the stripped ends of both wires together, soldering then covering with the heat shrink tubing. Afterwards I got the fuel for the moment of truth. 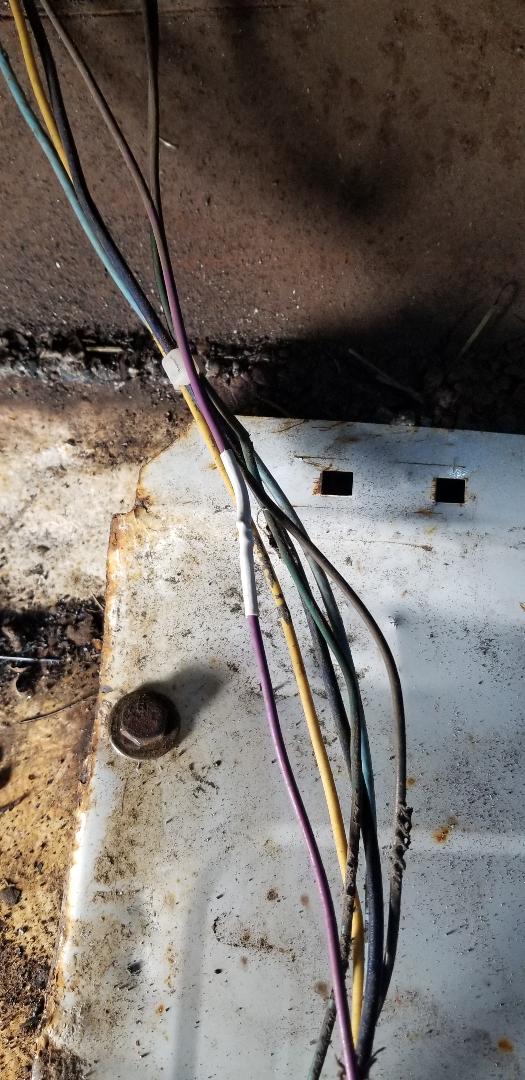 Repaired sending unit wire (purple wire with white heat shrink tubing over solder joint)
I pretty much figured out what to plant in the other drum half after building the first raised bed after the ole lady picked up a bunch of herbs. With the plants on a clock since the temps are getting a little warmer, I had to get the 2nd raised bed built pretty fast. After doing this I already knew how to approach this. I went ahead and cut out the measured boards in the quantities needed to make the base and legs.
I started with the base. I fastened the boards together around the drum half using the nailgun, pounding the corners of the drum as needed to ensure the base had a proper fit from the start. As I built the base around the drum I even secured the drum using the self tapping screws I used on the other raised bed. With the base secured to the drum half, I moved on to the legs. 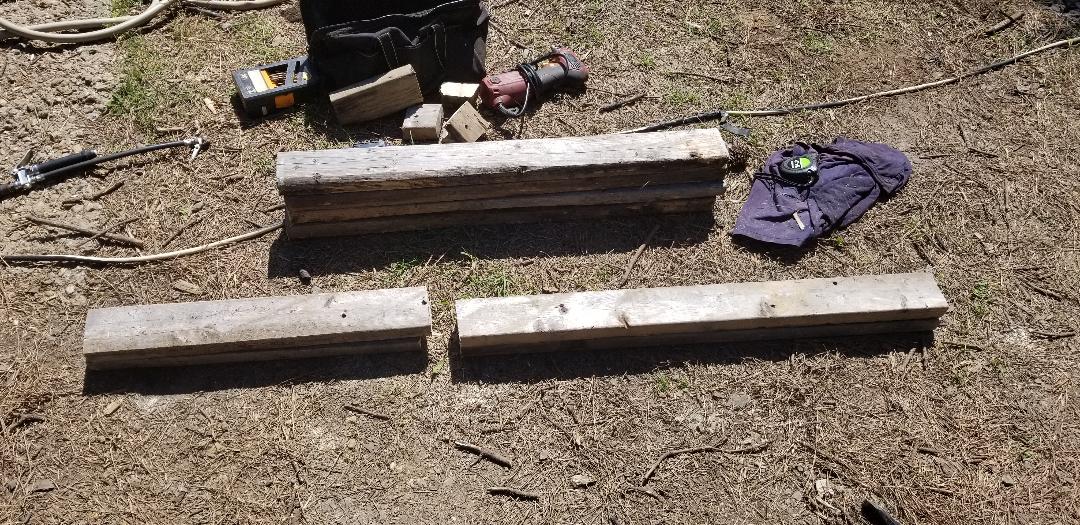
Boards cut for raised bed, ready for building.
After securing the legs to the base, I thought about the idea of adding more material to the underside for extra support. I cut some more boards and put two brace boards, one each, spanning the short sides of the legs. Next I cut and took two more boards to span the long sides between the legs, giving the extra support needed to ensure the whole bed and base stays sturdy. Lastly I drilled three 1/2" drainage holes along the bottom of the drum using the step bit. 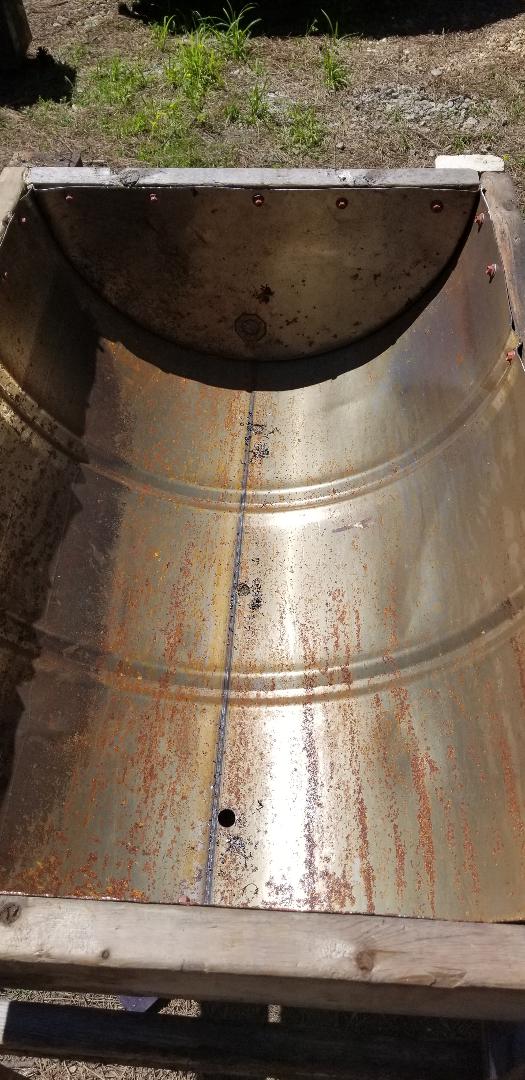
Drainage holes drilled into bottom of drum.
Second raised bed built ready for placement.
With the bed done we went ahead and moved the unit to the garden, placing it next to the first raised bed. Four bricks under the legs helped support the assembly. As with the first raised bed I started off with a layer of soiled chicken mulch then mixed a bag of composted manure and two bags of topsoil. With the medium in place we went ahead and planted the herbs. Two basils, two oreganos, two parsleys, two thymes, and one sage are planted in the bed. So now with our other new setups for the garden, we can add herbs to the mix. I'm covering a small footprint and already have quite a bit of produce in production. The more raised beds and hydroponics I set up along the perimeter of the garden and my new idea of drum pots for fruit tree and brambles will have the garden pumping out more produce than we know what to do with. 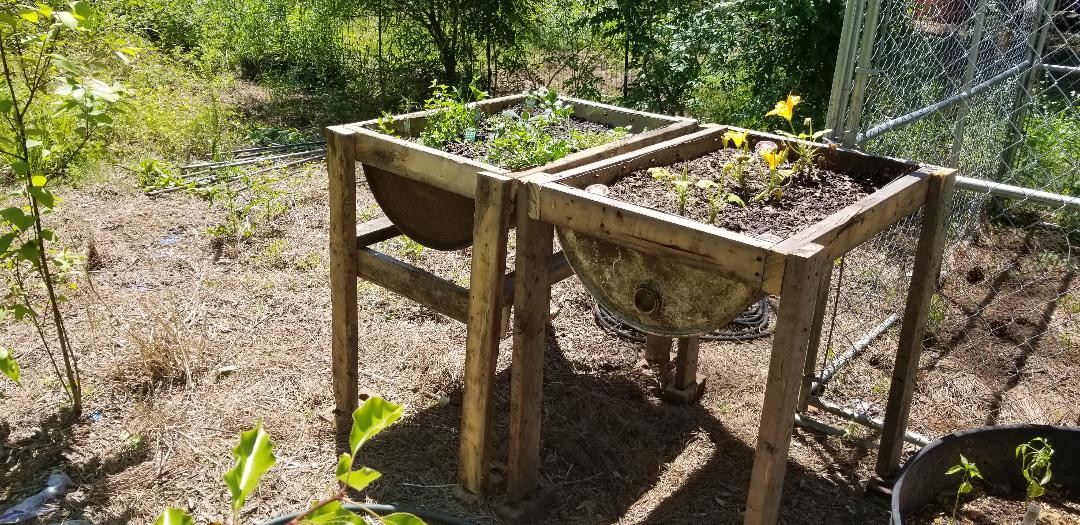
New raised bed set up next to first raised bed.
One more thing I did while in the garden with the extra dirt was to add more dirt to the potato drum. I put a half load of dirt in the washer drum and planted potatoes in that, waiting for the plants to grow up above the top of the drum. I added two bags of dirt around the stalks of the plants so they can send out more roots for more potatoes, hopefully adding to the production of the batch of plants in the drum. There will surely be more to come with regard to the garden. 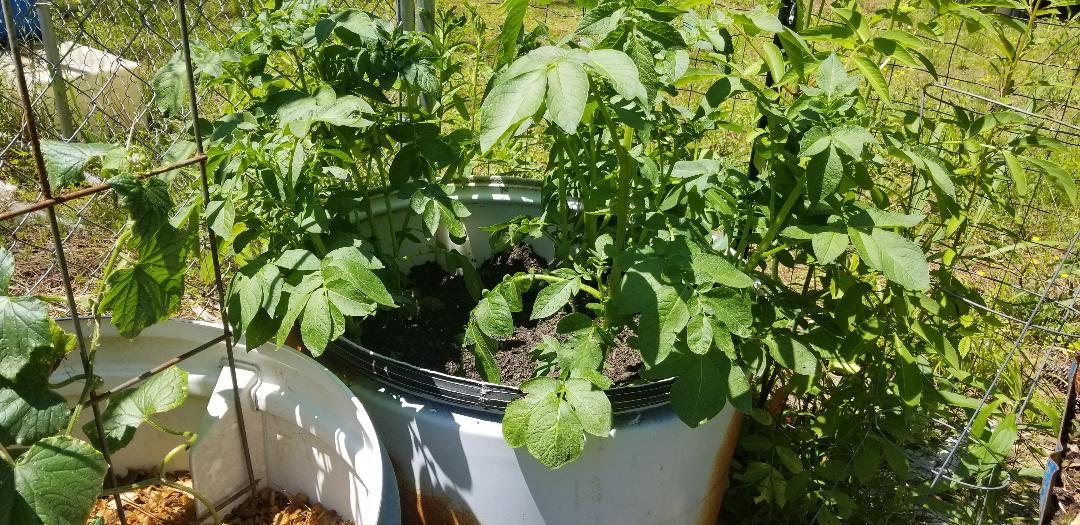
Washer drum with potato plants and added dirt.
After going through two compressors and trying a third and brand new compressor only to find out that the compressor wasn't the problem on the Tracker's AC system, I ordered a new expansion valve and a condenser/dryer, since there was a clog somewhere in the system. I did get the expansion valve so that was the first thing to go in. First thing I had to do was bleed out the refrigerant in the system so I can pull the lines from the old expansion valve. Once this was done a 10mm bolt was removed to pull the lines from the EV. The next move was going to have to be done carefully. There were two hex head bolts that are recessed in the EV body so there was no room for error, no stripping bolts, otherwise this otherwise simple repair turns into a clusterfuck. I sprayed down the bolts with WD40 just to let the shit soak some prior to putting an allen wrench on the first bolt. I made sure the wrench was straight on the bolt, well seated and took my time to work the bolt free enough that I could gradually turn the bolt a quarter turn at a time. I managed to get one bolt free, happy I took my time on the 2nd bolt, managing to get it free with no incident. Looking at the bolts, I seen there was material on the threads from the body of the HVAC box. I had to clean those threads before putting them back in with the new EV so there is no chance of either stripping the bolt threads/heads or breaking them completely. I took my time with a pick to clean the threads before putting the new EV in and securing it with the newly cleaned bolts, which went in nicely. Expansion valve with one bolt pulled from unit.  Expansion valve bolt note metal stuck in threads. One thing I did do prior to installing the new EV was compare the two. I attempted to blow air through the new EV and as its supposed to do, it only let a small amount of air pass through. Upon doing the same for the old EV, nothing came through, it was clearly clogged. Even after replacing the EV, I still didn't bother to recharge the system since something had to clog the old EV. Maybe the dessicant from the dryer broke up some and passed through the system into the expansion valve, or the old compressor shaved some metal in its operation which passed through to the EV to clog it. Since there's a new compressor the only thing left is the dryer, which since its attached to the condenser, the whole unit has to be replaced. So I wait for that unit to come so I can replace it then attempt to recharge the system. Another thing that went on was that the tree guys I mentioned came to remove the leaning tree that was in path of the house. They didn't use any cherry pickers to get high into the tree, the one guy just climbed the tree while his assistant worked the tracked loader that they used to pull the lines they tied to the tree. The guy climbed an adjacent tree to get lines around the leaning tree then swung over to the tree to chop the top most 20 ft of tree. He cut it enough to where it fell but hung on the last little bit of material, hanging straight down. When he moved free of the tree he finished the cut letting the section fall to the ground. The other guy pulled the lines as needed to manipulate the rest of the tree to get it into a position where he could chop it from the top down in sections until they got it all down. With each section the helper used the loader to remove the sections and drop them off to the side with the rest of the cut logs I still have to cut and split. In less than a couple of hours they had the tree down, removed, along with a couple of other smaller trees that were in the way and even the rest of a tree trunk that I didn't finish cutting into smaller sections. The guys did plenty of shit to get things right. The chicken yard is all cleared and other than the extra wood that I have to chop up and split, the chicken yard is plenty cleaned up and ready for further development.  Tree guy in orange in the middle of the pic high up in the tree chopping away.
I went off on a real tangent here but this was one of those little things that allowed me to get one of the vehicles back to a better state of readiness. The 69 Mustang had an old air cleaner that was meant to be used on the 2 5/8" base of the 1 bbl carburetor that's on the 6 cyl engine. This little air cleaner is about 4" wide, really intended to be used on custom engine setups that have multiple carburetors. I couldn't use the old air cleaner that I had for this engine since the original carburetor didn't have an electric choke. For a while I used this little air cleaner but had to replace it once. Problem is no one makes the replacement element for it available for a good price. The only ones I found were online and were a couple dollars less than the whole unit, so when it was time to replace the thing I ended up just getting a whole assembly. This time I didn't want to do the same thing so I decided to look into an adapter that would adapt the 2 5/8" base to the standard 5" base of a normal 4 bbl carb air cleaner.
As usual I found units on ebay that went from just a base adapter all the way to a base adapter with spacers for where the air cleaner might have to clear things like chokes on carbs or maybe HEI distributor caps or whatever. I ended up getting the all inclusive kit that has everything, who knows when this shit might come in handy. Another thing I ended up getting was a 10" air cleaner to put on the adapter. I can find a 10" air cleaner element way easier than a little dinky 4" unit. Hell if I wanted to I could go for a reusable K&N cleaner element and just reuse that thing after giving it a good cleaning. 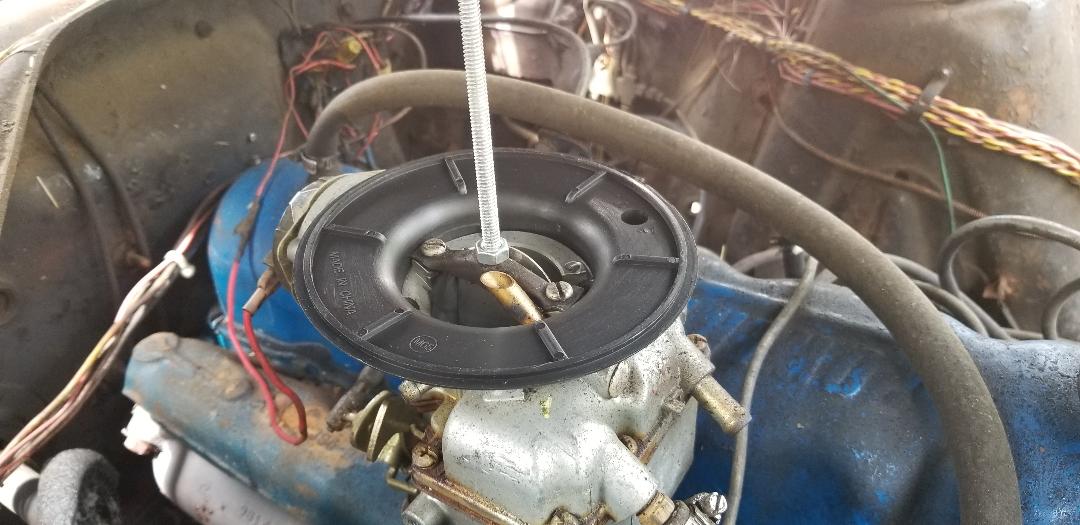
Air cleaner adapter mounted on top of 1 bbl carb. Note stud screwed in place to accept air cleaner unit.
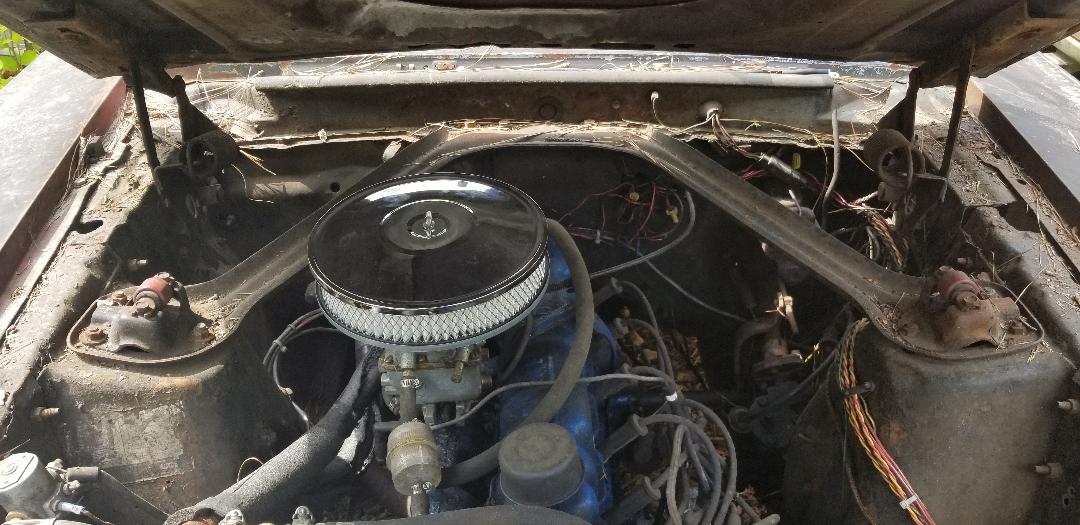
10" air cleaner mounted and secured on top of carburetor.
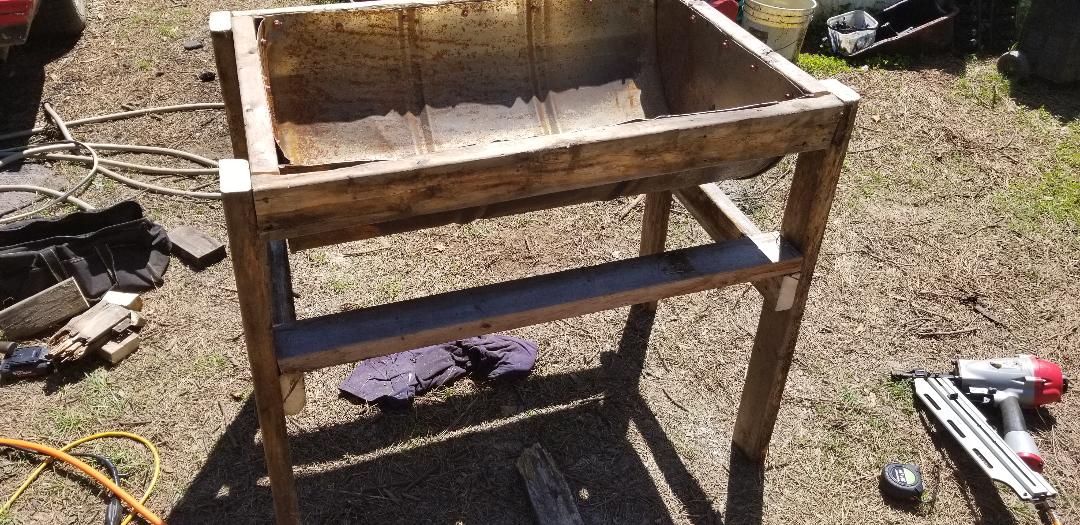
I ended up not needing the spacers as the adapter base was enough to raise the air cleaner body above the electric choke on the 1bbl carb. I installed the stud that came with the air cleaner, using a nut to secure the stud to the top of the carb so it doesn't screw itself out. After putting the air cleaner on and securing it with the included wing nut I ended up having to trim the stud down with a die grinder so I will be able to close the hood without the tip of the stud poking on the sheet metal. With the air cleaner task taken care of I then moved on to dismantling the old brooder box that was in the chicken yard. This thing was in such a state of decay there was no need to continue to try and patch on it and we haven't used the thing in over a year either. Also with the incorporation of the brooder box section in the Mustang Chicken Coupe, this old unit would no longer be needed even if it wasn't falling apart. Also because we have a pine tree that was leaning in the direction of the house and was destined to be cut down after we found a tree service to do the job, I had to remove this thing from the yard and ultimately out of the way. Since there was really no need to try and salvage any of the wood, I didn't bother trying to undo the screws and other fasteners to take the thing apart. I just used the sledgehammer to just bust the thing apart, taking time to carefully knock the sheet metal free so I can salvage that. I also got another fire going in the half drum so as I broke wood away, I was able to throw it in the can to get it "disposed" of. In a short amount of time I had the brooder completely broken down, sheet metal stacked on the pile with the other sheet metal and was even able to salvage a couple of sections of 2x4's that I was able to knock free in one whole piece. I even got all the scrap wood burnt up so I didn't even have to worry about cutting the shit up to stack for more fire wood. We have so much firewood at the moment that there was really no need to try and cut up this garbage wood to use as firewood. 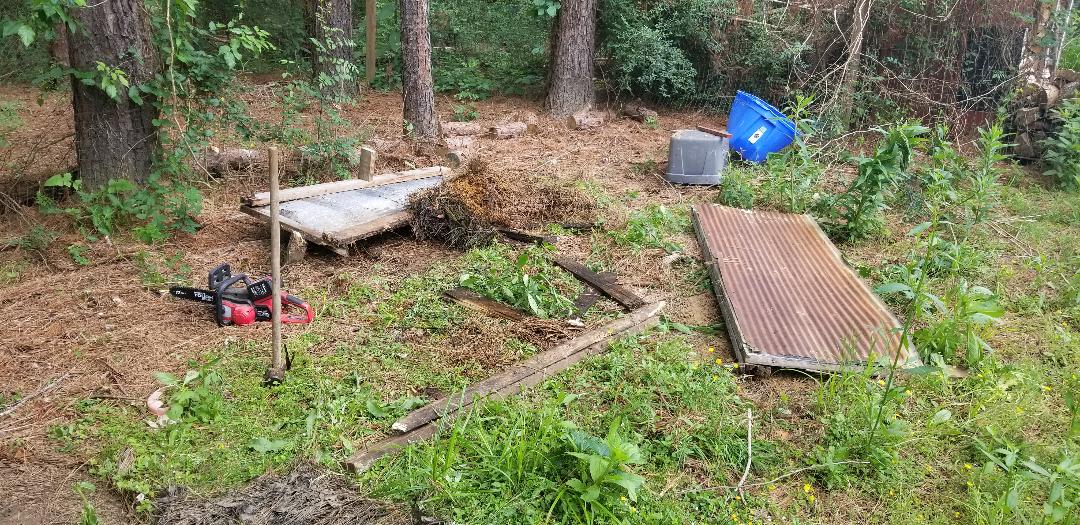
Remnants of brooder box as its being broken down.
With the brooder box gone and all refuse disposed of, I took time to remove the cut up logs from another tree that fell in the chicken yard. That wood went onto the pile that still needs to be split for more firewood (another reason I said fuck that scrap wood from the brooder). We had the yard all ready for the tree guys to come out and bring the menacing pine tree to the ground.
With the windshield done on the Mustang the next stop is the engine bay. Since I have adolescent chickens that are needing to go into some secured coops, this made sense to be the first place to start working, especially since I can move the birds into this section while working on the other parts of the overall chicken coupe. The first thing I did was weld in a piece of pipe just behind the shock tower and just above the steering gearbox. I didn't want to put the pipe lower where I would have to weld in some type of cover to go around the gearbox so it made sense to just put the pipe high enough that the sheet metal that will go on the pipe will cover the gearbox. The first sheet metal that I choose to use was some drum tops that were cut out from some old burn drums. I had to cut rectangles from these circular pieces of metal and after measuring the space between the pipe and the firewall. It ended up taking three pieces of sheet metal, cut from three drum lids to cover the first section of the floor in the engine bay. I didn't fully weld the metal along the firewall since the firewall has an irregular pattern, not straight. I welded the spots where sheet metal made contact with the firewall. The gaps that are present I plan on sealing with some tar or maybe some of that expanding foam. 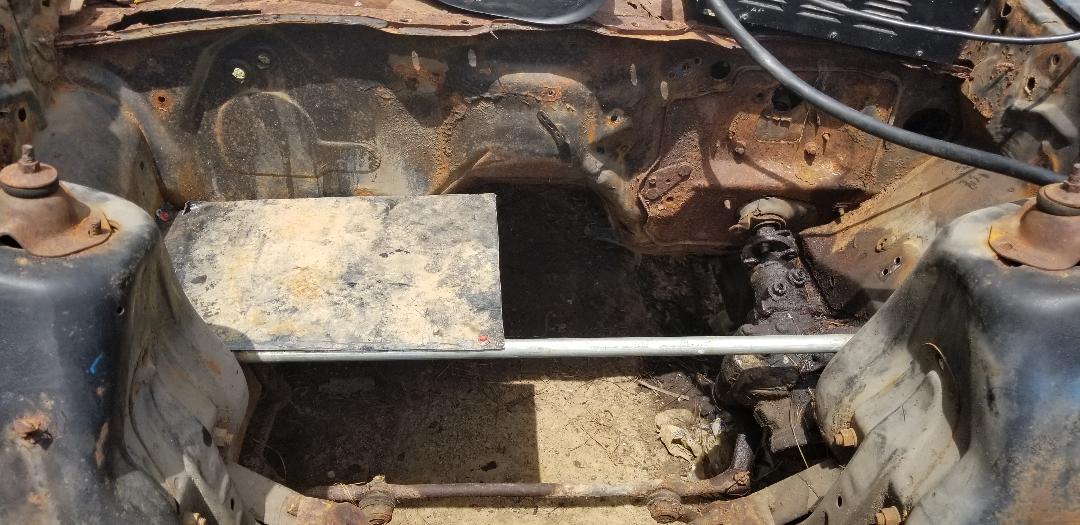 First piece of sheet metal welded in place to pipe 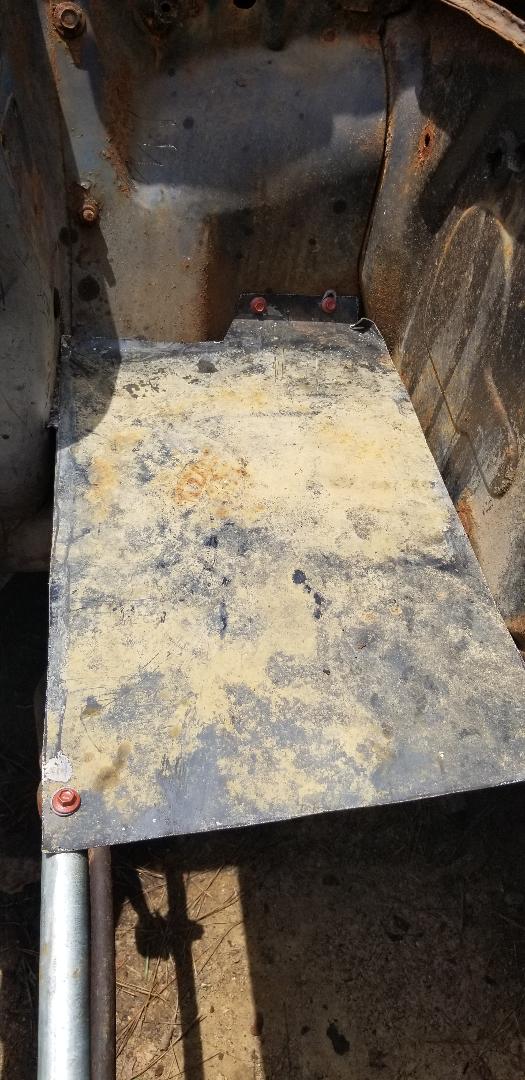 Closeup of sheet metal attached to pipe and firewall. Note self tapping screws used to help hold the metal in place prior to welding. 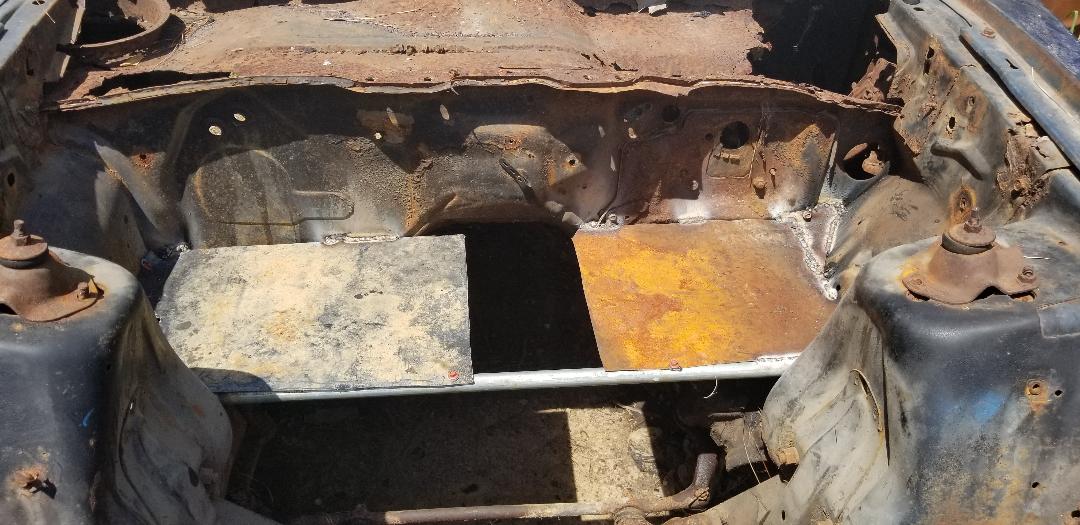 Second piece of sheet metal welded in place for first section of floor. 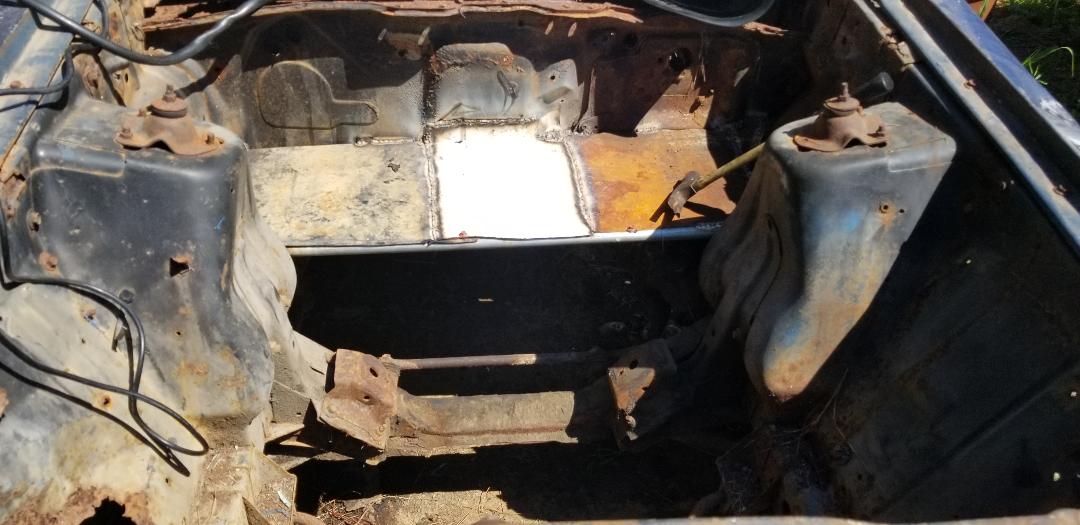 First section of floor finished in engine bay. With the first section of floor taken care of I moved on to the next section. This of course started with another piece of pipe, welded just in front of the shock tower. I had to make sure that the level where the pipe was to be attached would have the floor be as level as possible and not uneven where water may pool in a low spot. With the pipe welded in I moved on to the floor panel.  Second pipe welded in place in front of the shock towers. Instead of using another drum top or two or three for the floor I chose a piece of sheet metal that was actually the side of a filing cabinet. The metal actually had a couple of braces underneath that would end up being a problem. After measuring and cutting the section of metal I had to trim out some of the braces under the sheet metal at either end so the piece of sheet metal will overlap onto the pipe nicely. The seams that were welded were nice and clean with no elevated sections or anything uneven. The metal covered about 4/5 of the area to be covered. I'll just need to cut a small piece of metal from some final scrap to finish this section of the floor. The engine bay brooder section will get done pretty fast. 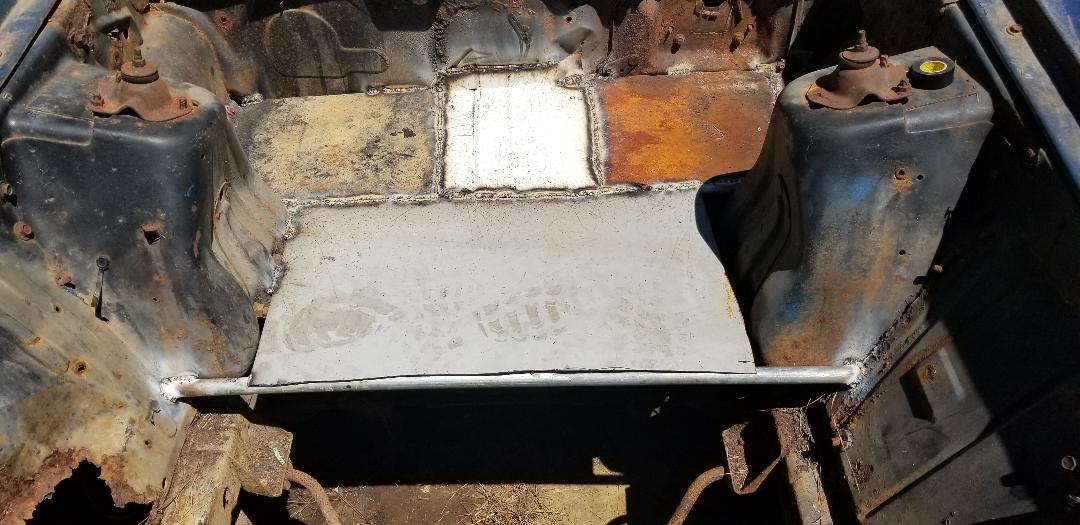 Large section of sheet metal welded in place over second pipe, note small area that still needs filling in. |
