|
After having started setting up the new firewood storage area and dismantling the old firewood shed, I started moving even more firewood out from the old area in order to clear the grounds along side the chicken yard. By transferring the wood to the farthest rear portion of the area, it'll clear the whole stretch of ground along side the eastern fence line for me to lay gravel and just neaten things up all in all. Even after dismantling the old firewood shed to get more pallets to lay on the ground for the stacking of the firewood, I was still in need of more pallets to make enough spots with which to stack the future firewood that's to be cut from the fallen trees on the opposite side of the compound. I had to transplant the firewood that's in the middle by the chicken yard fence so I can free up those pallets in order to move those over to the new firewood storage area, which also has gravel laid down in order to keep the pallets from rotting due to direct contact with the moist ground. 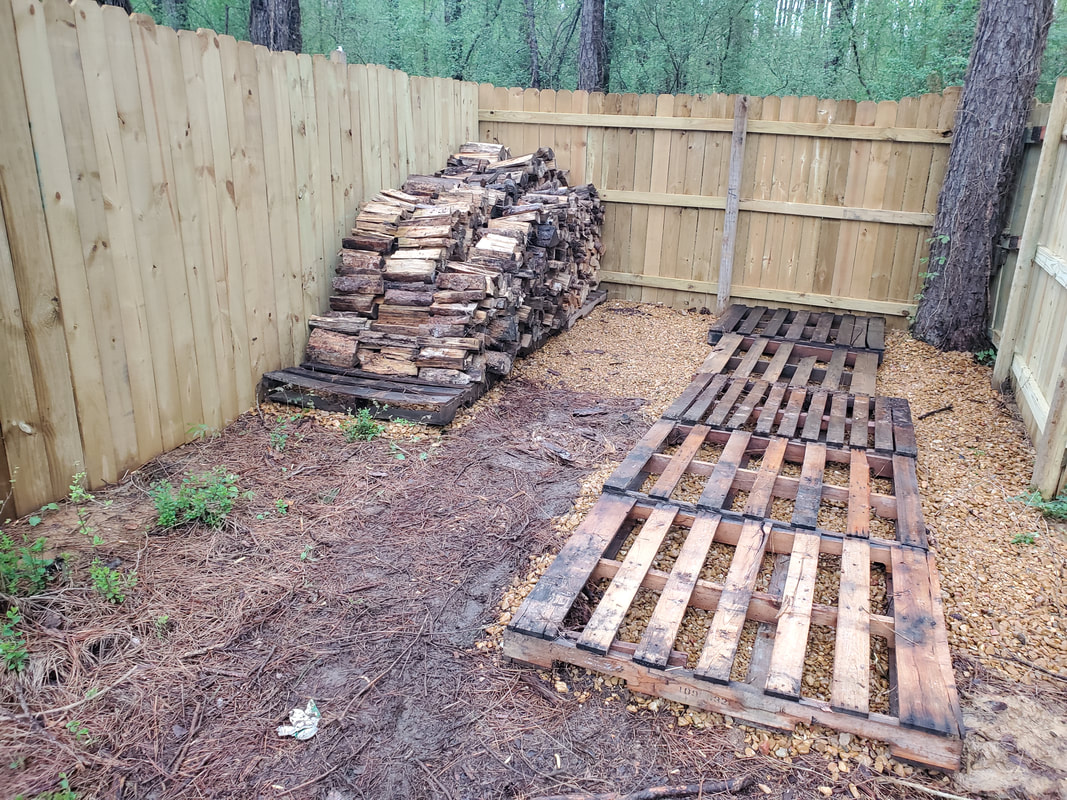 Stack of firewood started after clearing the firewood shed and laying pallets down. 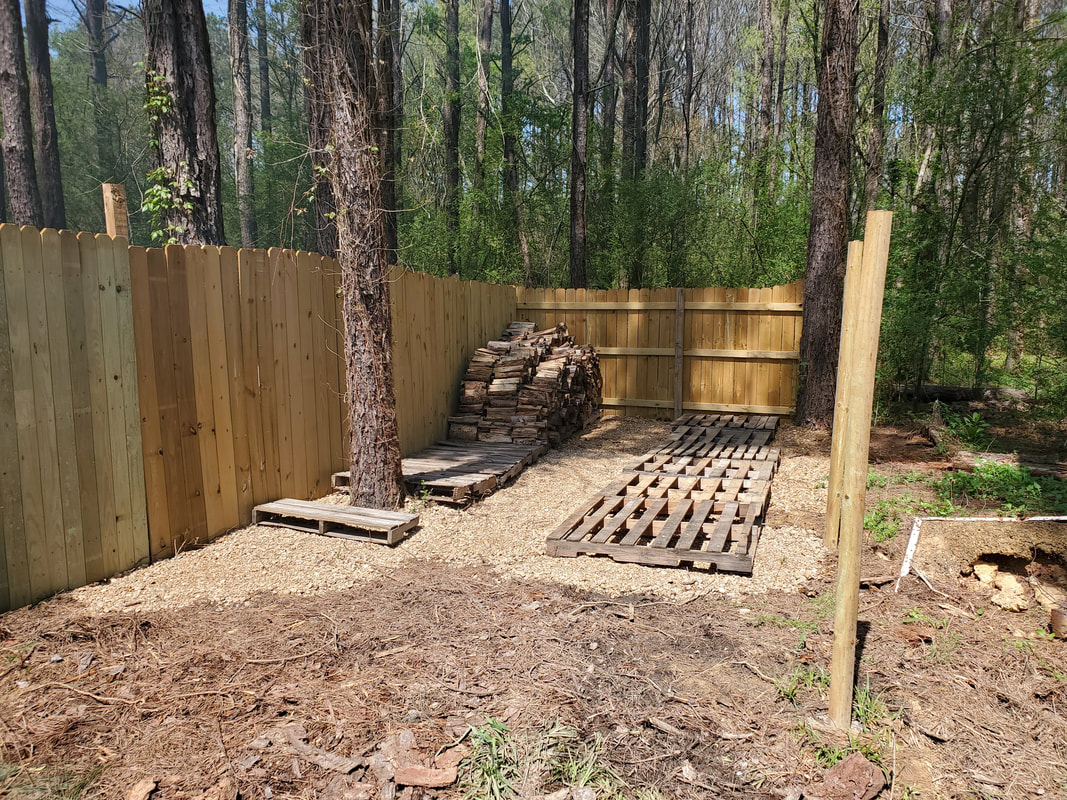 Laying more pallets down on top of fresh gravel for more firewood stacking. With the help of the trusty wheelbarrow, I was able to get a good amount of wood moved and stacked, enough to cover up the row of pallets to the left in the pic, against the chicken yard fence. The stack extends all the way to the tree in the pic and is approximately 4ft high, much higher than the stacks that were initially stacked along the chicken yard fence in the middle. The footprint covered now by the amount of wood I managed to stack is probably half of what was being covered initially, maybe even less. 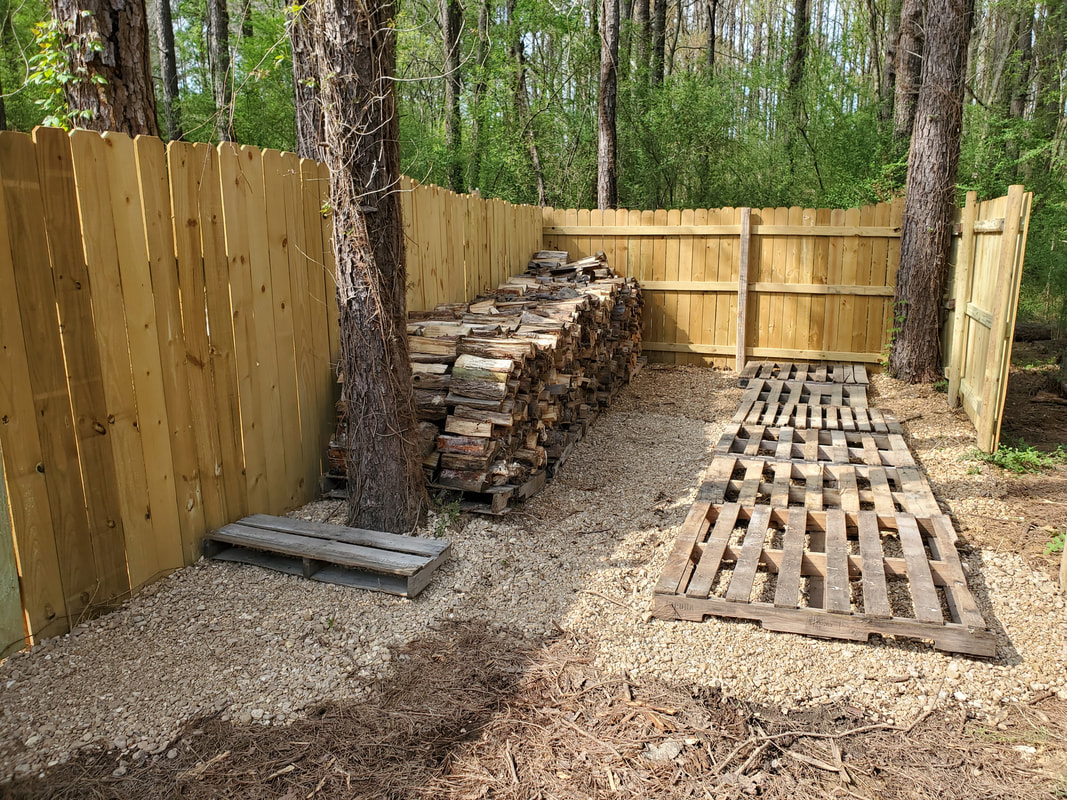 Huge stack of firewood against fence. 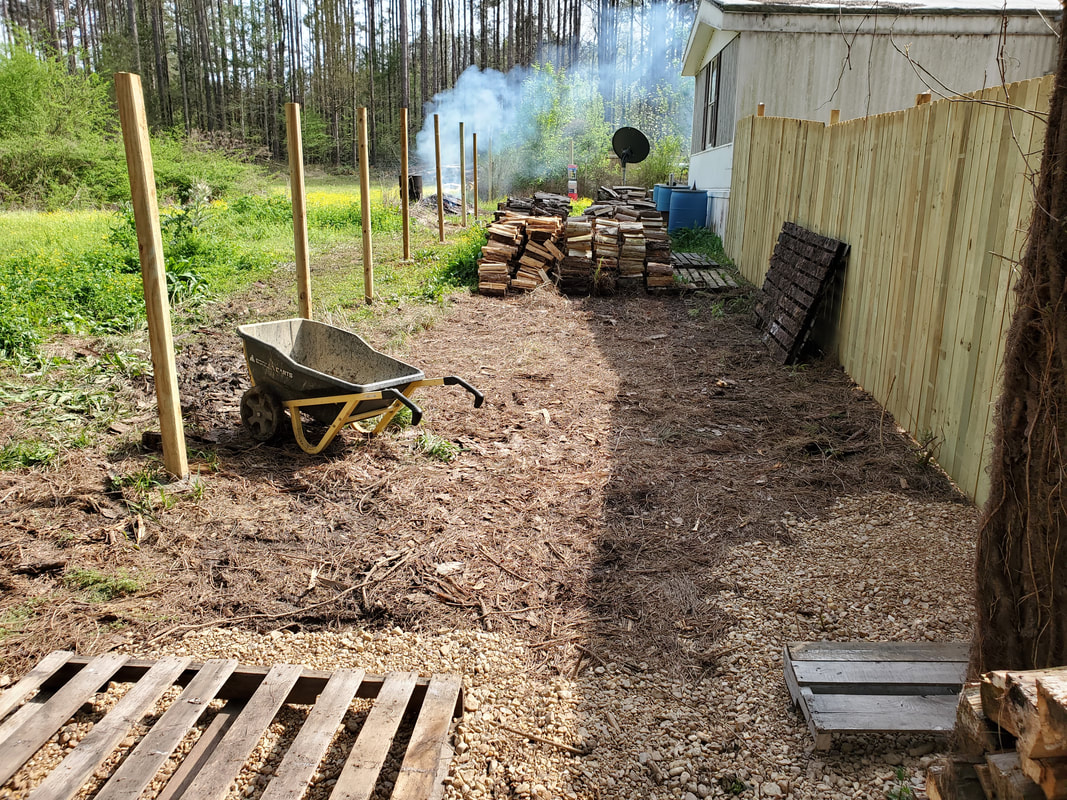 Area cleared by moving firewood and pallets from grounds. With a good batch of wood stacked and covering one good section of pallets I turned my attention to another area that was bugging me, well really two areas. One was the growing garbage pile that we had stacked right in the line of the eastern fence. The other was a large patch of weed tree/brush that was on the outside of the eastern fence line and would ideally need to be removed to clear the path along the outside of said fence line. Killing two birds with one stone, I cut up the patch of weed brush and stacked the sections on the garbage pile, getting a good little spread all around the trash pile. For good measure I threw some other plastic garbage and other stuff that needed to be disposed of into the pile so when I did fire the garbage underneath, everything would catch pretty good and consume the brush pile covering it. 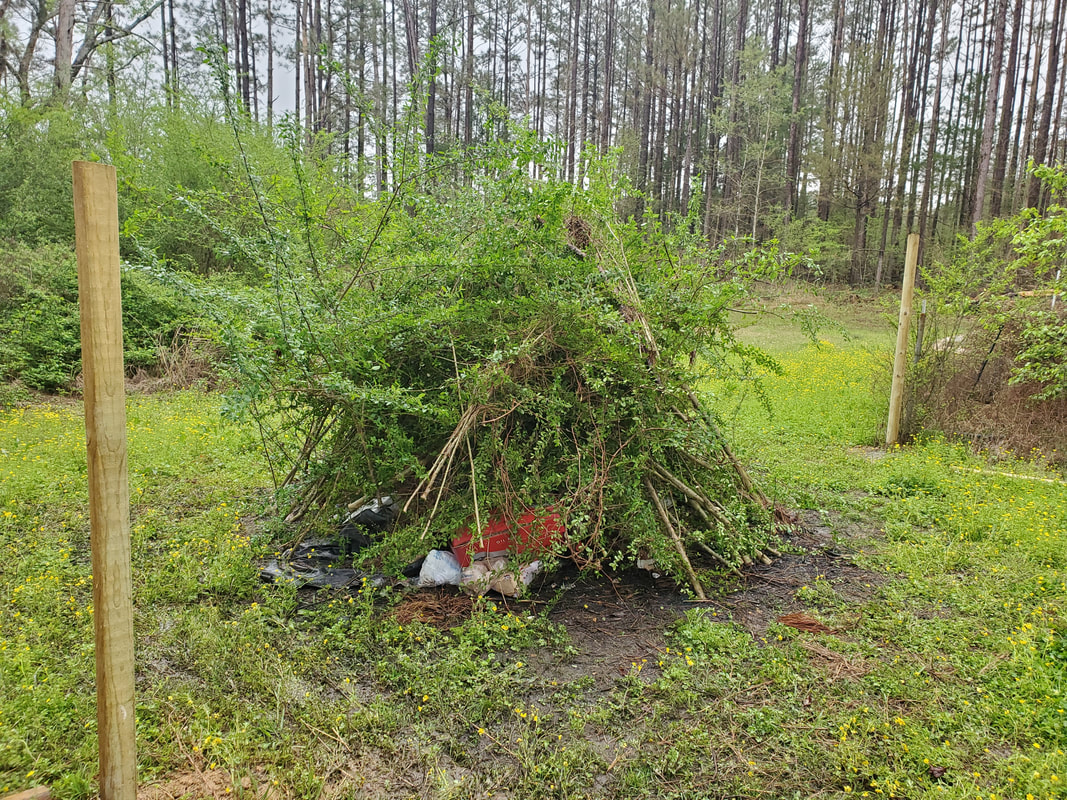 Garbage pile covered with brush cut from weed tree pile. 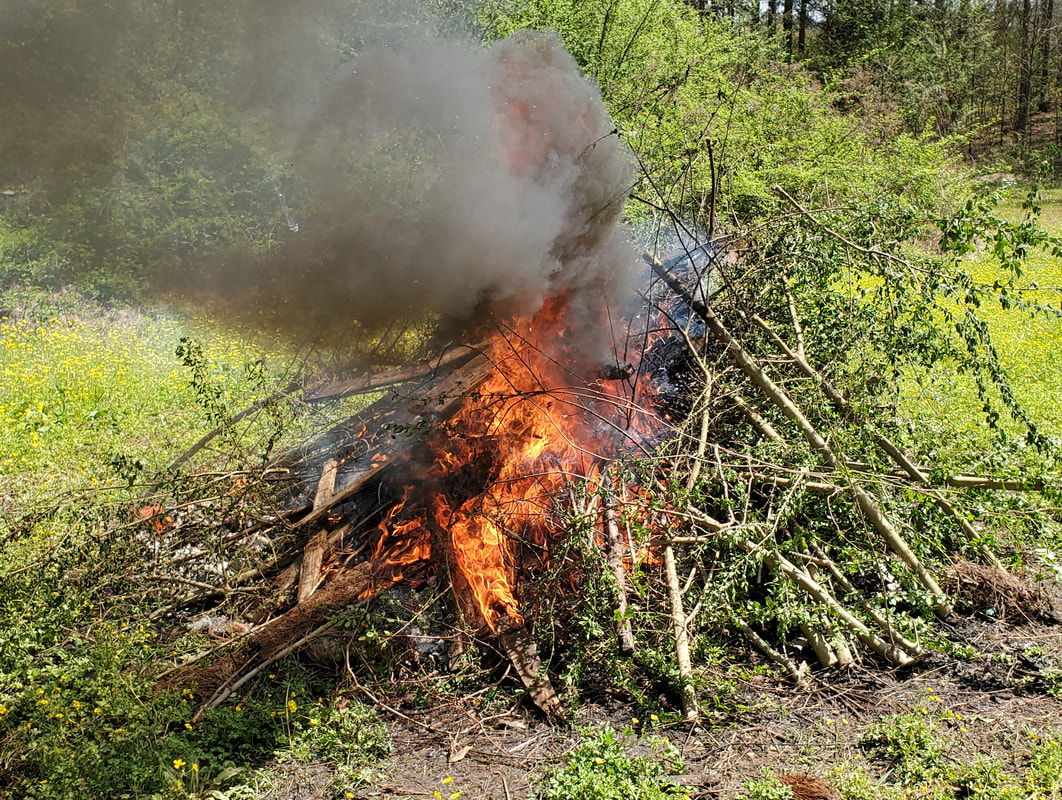 Burning brush/garbage pile 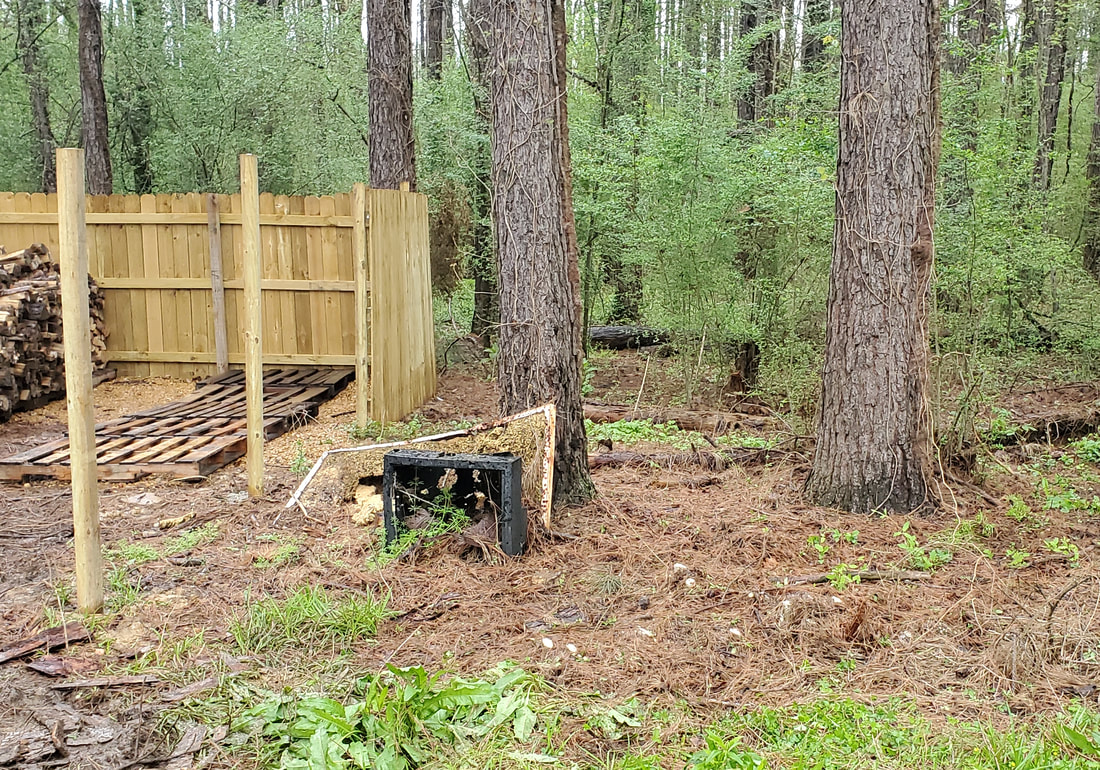 Area next to TV target is where weed tree was growing, which is now completely cleared from said weed tree. Now its a matter of getting that old target trash removed as well.... After getting rid of the garbage/brush pile and moving this large batch of wood I put myself in a position where I can slowly finish up with the remaining firewood stacks at the middle of the stretch next to the chicken yard fence. As my attention span and time allows, I can move a couple of wheelbarrows full of firewood over to the pallets at the back of the storage area and fill the pallets up. There should be plenty of pallet space to move all of the remaining wood and then some as the stacks will be high on the other row just like the first row. This will give me plenty of opportunity to lay more gravel down as well. I still have to lay gravel down from the back of the storage area towards the midway and from the midway towards the back of the storage area, closing in on the firewood stacks. Eventually I'll get all wood moved to its new home and completely cover the grounds with gravel, finishing up that part of the project. Other than hanging fence panels to fully enclose the eastern fence line, there's really nothing left to do in this area. I did have an idea of hanging some Christmas lights along the sides of the firewood area on the inside of the eastern perimeter fence and on the outside of the chicken yard fence to light up the whole firewood storage area, in much the same way as the chicken yard. Only difference is instead of the lights being on from dusk til dawn they'd be on a motion sensor to light them up only when one of us comes through, such as when we come through to gather some wood then go back inside. By not having the lights on all through the night they'll last a lot longer and not use as much power. It'll definitely be nice to write off another large part of the compound as complete, allowing me to fully move on to another area without having to worry about coming back to the area in any big way later on.
0 Comments
When I left off, I had the ductless AC system installed but still had to pull vacuum since there was air in the lines that were hooked up to the outdoor unit and the indoor unit, which also had air in the lines as a result. The outdoor unit came precharged with refrigerant, held in by two valves, one of which has a nipple on it to connect the AC manifold hose to hook up to the vacuum pump. The problem I ran into was the fact that the nipple on that fitting was of a larger size compared to the fittings/threads of the hoses on the AC manifold gauge. I had to get an adapter fitting to allow me to connect the hose to the nipple on the AC system in order to get the vacuum pull down completed.
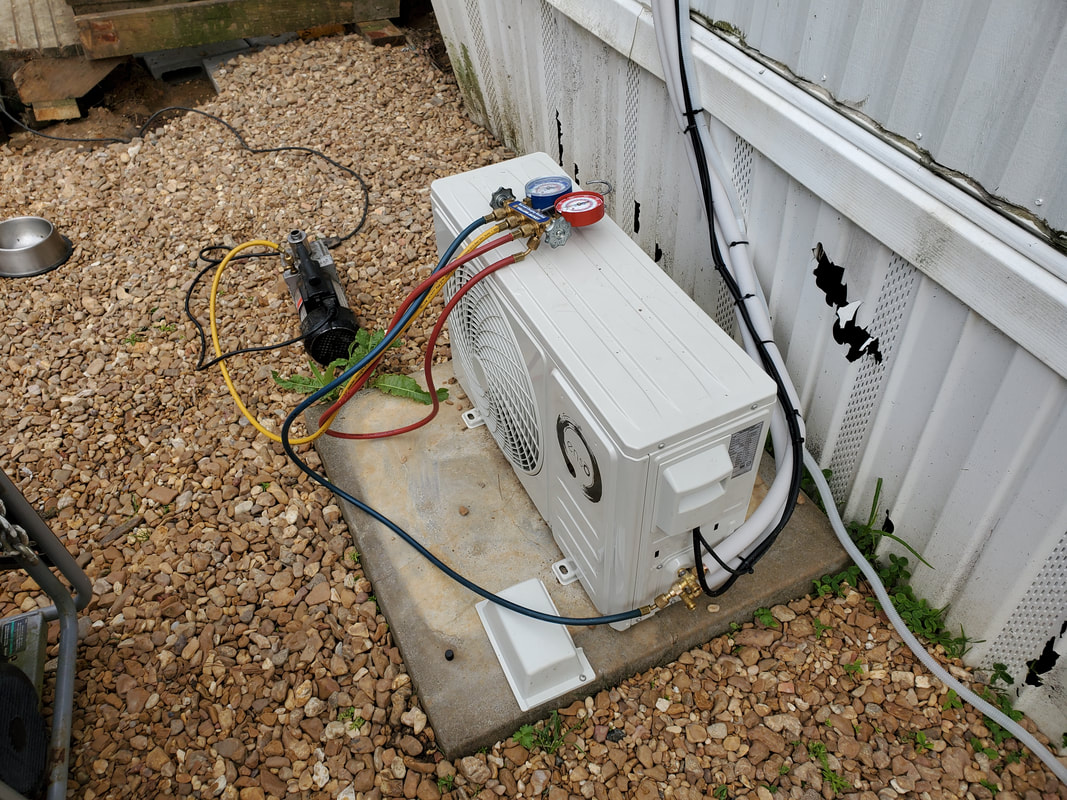
AC manifold gauge and vacuum pump hooked up to AC system pulling vacuum.
After getting said fitting I was able to hook things up and initiate the vacuuming down of the rest of the system. While that was going on I took time to go inside and wire up the power plug to the cable coming from the indoor unit. I had salvaged a power plug from an old AC unit that came with a built in circuit breaker for redundancy, seemed fitting to use this plug on the power hookup for this AC system. I soldered the three wires together and covered everything with heat shrink tubing. I wrapped the trio of wires together with electrical tape then capped that off with more heat shrink tubing to ensure that these wire connections will be well protected. The only thing I'll have to do from there is use some cable straps to secure the power cable to the wall in a neat and concise manner so even with it plugged up to an external outlet, the routing of the cable won't appear too.....bootleg.... 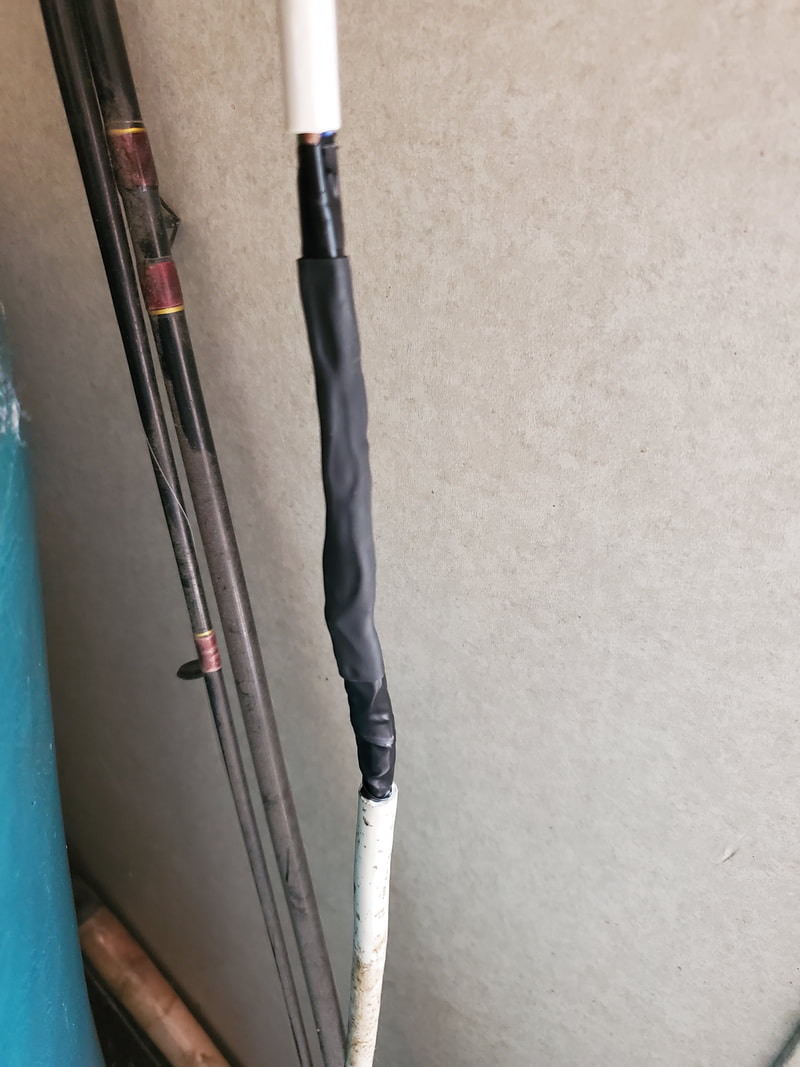
Power cable spliced together and covered with electrical tape and heat shrink tubing.
With the power cord ready to rock and roll the vacuum process was pretty much done. For the most part, a system like this only needs maybe 15-30 minutes to ensure complete evacuation of any air and moisture from the system. This thing was hooked up for around the higher end of that time window so I pulled everything off per the instructions. The first thing the instructions said to do was release some refrigerant into the system for 10 seconds. This was to ensure that the lines going into the manifold and the rest of the system were full of refrigerant prior to removing the hoses. Obviously when you remove the hoses, the vacuum seal will be broken and a small amount of air will be allowed to re-enter the system. By releasing some refrigerant into the lines, when you remove the lines, instead of the vacuum allowing a small amount of air to re-enter, the positive pressure will allow the low pressure refrigerant to escape upon removing the hose. You want just refrigerant molecules in the system, not air and water molecules. Anyway, with that I was able to open up the valve and release all of the refrigerant into the system. I plugged up the indoor unit and after reading the instructions to see how to work the remote to see what modes do what, I turned the system on. After a brief run the unit started pumping out nice cold air, quietly and smoothly. The remote has a vane control that allows you to set the unit to oscillate like a table fan so you can spread air around the room as well as set the vanes to open up to allow the maximum flow of air from the system. I also did a test with the heat pump setting to see how that worked. The temps outside were in the middle 60's which was a reasonable number to test either AC or heat. With the heat pump setting enabled, the unit started pumping out heat pretty fast, doing a good job with the unit's method of air flow to ensure nice coverage of treated air throughout the room. 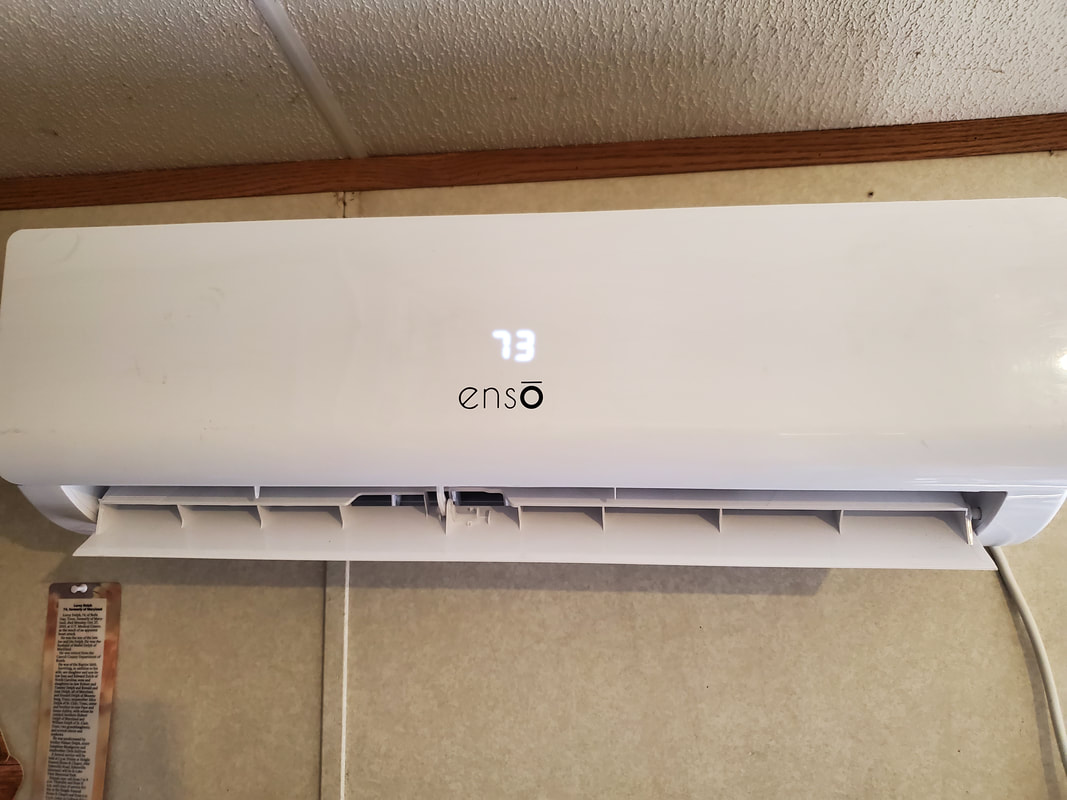
With that, the Ductless AC system install was a complete success. After seeing how well this unit operated, we took time to remove the large window AC unit from the window opposite of the spot where this system is at, since we've been plagued with water sealing problems in the last year because of this system being in the window. With it out of the picture, we can now start the repair process of the area, including the floor, so we can curtail any possible mold problems that arise due to moisture in places where moisture don't belong. Another thing that will be in the works as well is the install of another one of these units in the bedroom so we can do the same thing there and remove that window AC unit and clean things up. By freeing up the windows like this it makes things more streamlined and neat along the walls of the house. These ductless systems are low profile and because they're mounted on the wall near the ceiling, they're completely out of the way and use just as much power as a regular window AC unit so there's no extra concern about power requirements if you do have multiple systems installed, just as we have with window units. On a final note, this type of HVAC system is excellent for use in applications where the installation of a traditional HVAC system may not be feasible, such as in a trailer house or workshop or other location where installing duct work or other hardware to accommodate whole house units is either not possible or too expensive. Especially with the heat pump equipped units, you can have a complete HVAC system that is of a lower profile than anything available on the market and can also control the use of HVAC by only operating the systems that cover the areas you expect to be in versus heating or cooling an entire house. So next time you're faced with the dilemma of what to do about HVAC in your home or shop, check out one of these systems and try it out.
After having been running window AC units for the last 10 years, we decided to upgrade to what's called a ductless AC system. We first seen these things when we were on a trip and stayed in a B&B and the room we used had one of these units inside of it. We were impressed with how quiet and smooth the unit operated and how seemingly simple it was to install so we did a little research and made note of some available units that we might put our hands on for a future install.
The first thing I did notice was that there were units that were 110vac powered versus the typical 220vac that larger AC units use. This was rather inviting on the premise that I don't want to have to install a whole new outlet and circuit to deliver 220vac to a remote spot in the house just to power one of these units. Secondly, I also found that there are units available that double as a heat pump. This means that the system will heat up just as well when switched to that mode to heat a living space. I figured that the AC system technically works in reverse in its movement of refrigerant to get the heat affect going. When an AC system is in normal operation the condenser gets hot as it dissipates heat to help the vaporized refrigerant cool down to liquify again to continue the thermodynamic cycle. In heat pump mode this process is reversed, making the evaporator be the condenser and vice versa. Anyway, enough with the science lesson. I ordered a kit online that met the requirements stated. We have a 12k BTU unit that runs off of 110vac and is a heat pump as well. This unit comes in two parts, an outdoor unit that contains the compressor, condenser, fan and some electronics and an indoor unit that contains the evaporator coil, blower and some more electronics. The outdoor unit comes precharged with refrigerant and has two valves on the system that are opened to allow the refrigerant to move throughout the system when the copper hoses are hooked up. The system comes with two copper hoses about 10ft long as well as a plastic tube for draining condensate from the indoor unit. A couple of cables are included for linking the two systems together. One cable is a 2 conductor cable, the other a 3 conductor cable. The first thing I had to do was determine where I wanted to set the system. This system would be used for heating the living room/kitchen space so at first I was going to put the system in the chicken yard near the window where we had the current window unit sitting. Only problem here is the idea that the chickens will sit on top of this thing in short order and have it covered in shit and all scuzzed up. The next option is to move it to the opposite side of the living room near the window that is overlooking the porch area and mount it on that wall. There's a working outlet right there and a good sized space on the wall to accommodate the indoor unit. I took the slab that the old house AC unit sat on and moved it to the front of the house. This slab is actually a foam block covered in a thin concrete skin probably an inch thick so it was easy to move with a 2 wheel dolly. 
Slab moved to new location on front side of house.
The next move was to start with the indoor unit. I had to get the cables connected to the circuit panel and get the hanging bracket mounted on the wall. The schematic on the cover for the circuit panel showed me where to put the wires so that was no big deal. The big deal was me trying to get the bracket up. The stud spacing on a trailer house isn't the same as a regular house so even after finding where the studs were, I had to cut a patch out of the drywall where the unit will go and add a small piece of 2x4 that would serve as a backing to take the wood screws to hold the bracket up. After attaching the 2x4 I put a piece of the drywall back in to provide that even spacing so it would match up to the other side where the bracket screws will go through drywall and wood. 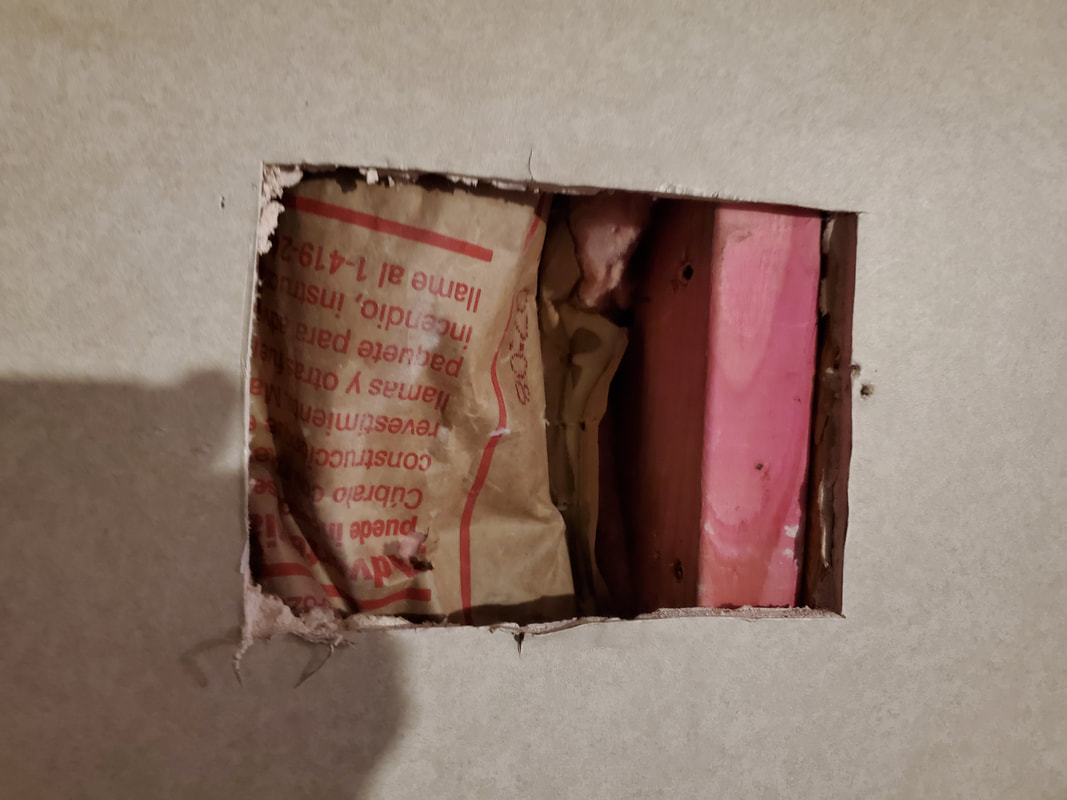
Extra piece of 2x4 screwed to stud to provide anchor point for bracket.
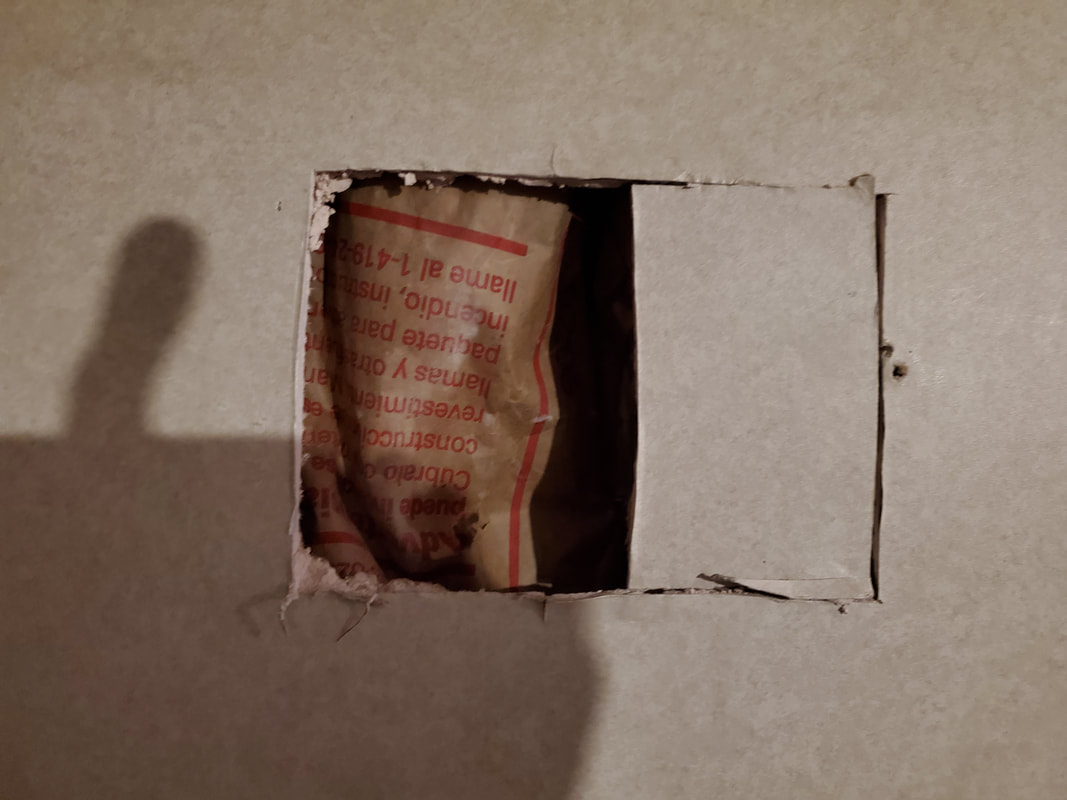
Extra piece of drywall attached to the 2x4 to match up the surface with the opposite stud before hanging the bracket.
With the stud situation taken care of I went ahead and secured the bracket to the wall with wood screws. From here I had to poke another hole in the wall to accommodate the refrigerant lines, drainage line and power cables that will run through the wall to the outside. The kit came with a plastic tube and flange that is used for a conduit to route these things through the wall and close up the opening on the outside so as to make things nice and neat. I manipulated the copper tubes from the indoor unit to fit flush against the back of the unit and have the stubs poke through the hole in the wall. I had to cut the hole in the drywall on the other side of the same stud that I attached the extra 2x4 onto. From there I drilled a hole on the sheet metal outside then drew out the full hole the size of the conduit so I could cut it out with the saw. 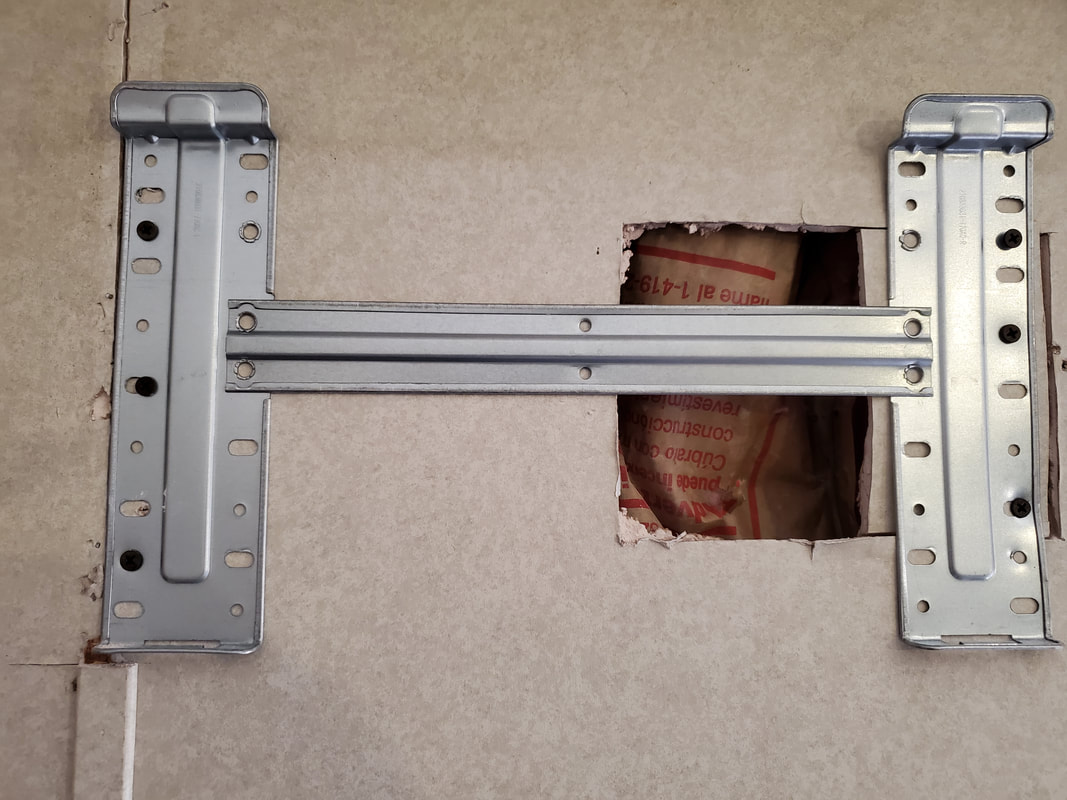
Bracket attached to studs on wall, note how extra piece of drywall and extra board line up with screws on right side of bracket.
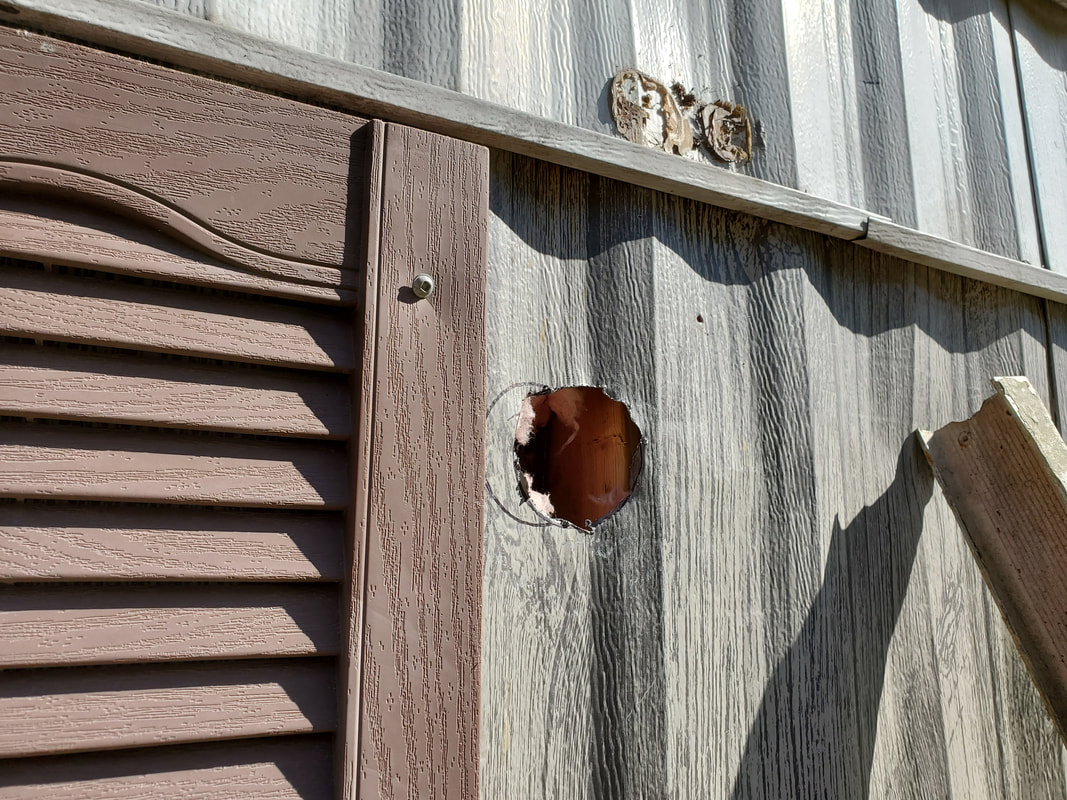
Hole cut through sheet metal on outside, note stud to direct right of hole.
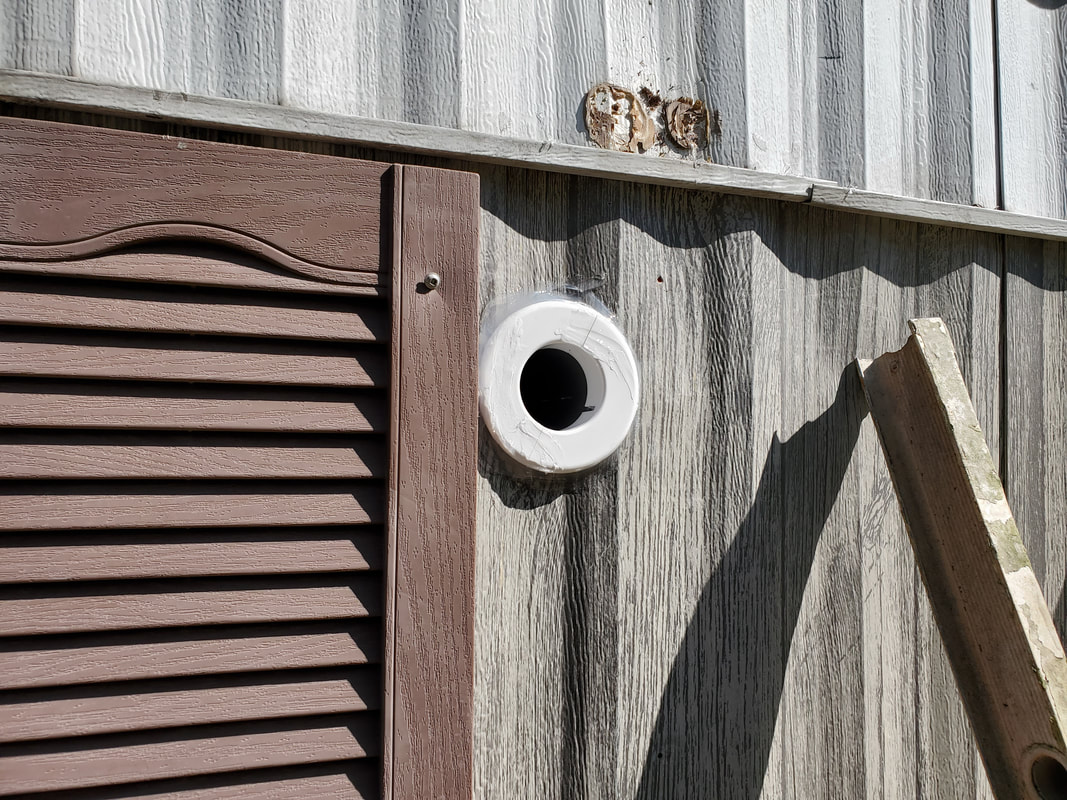
Flange over conduit with caulk to seal things up.
From here I hung the indoor unit on the bracket and routed the cables and stubs from the refrigerant lines out through the tube. I did have to reset the tube as the hoses pushed the conduit and flange from the wall. That was no big deal, just a bit of a waste of caulk as I had to re-caulk everything. With that though I was able to go ahead and start hooking up the refrigerant lines that'll go down to the outdoor unit. 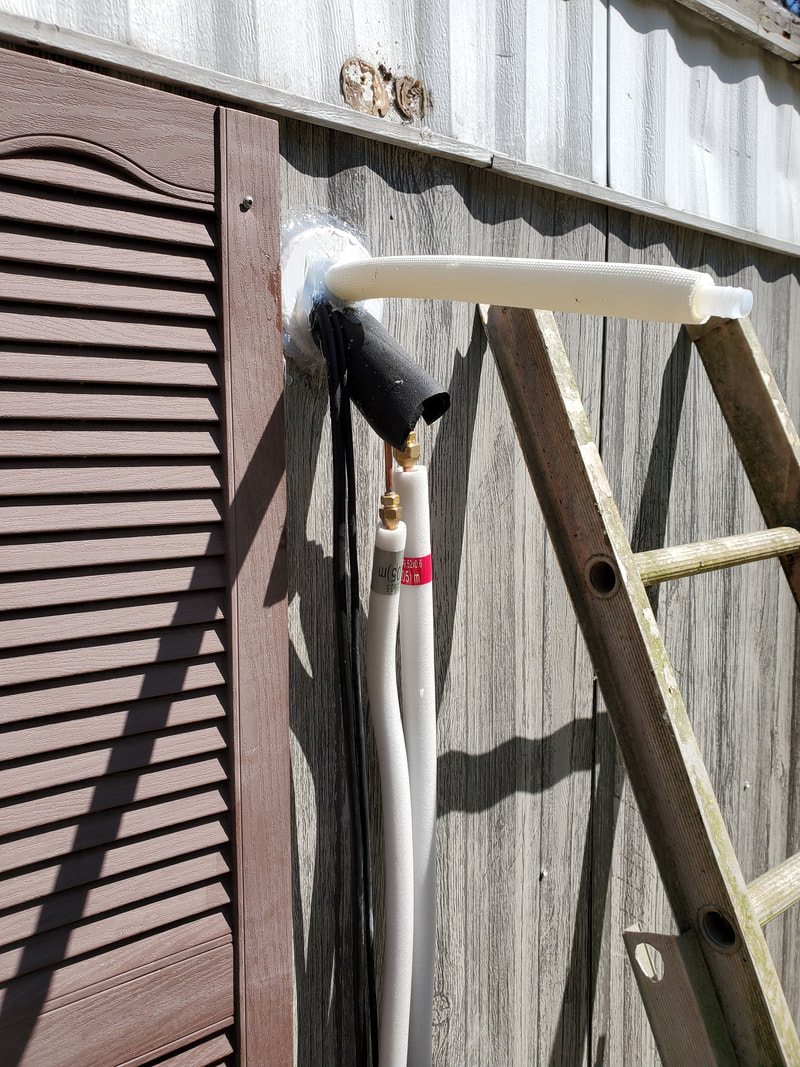
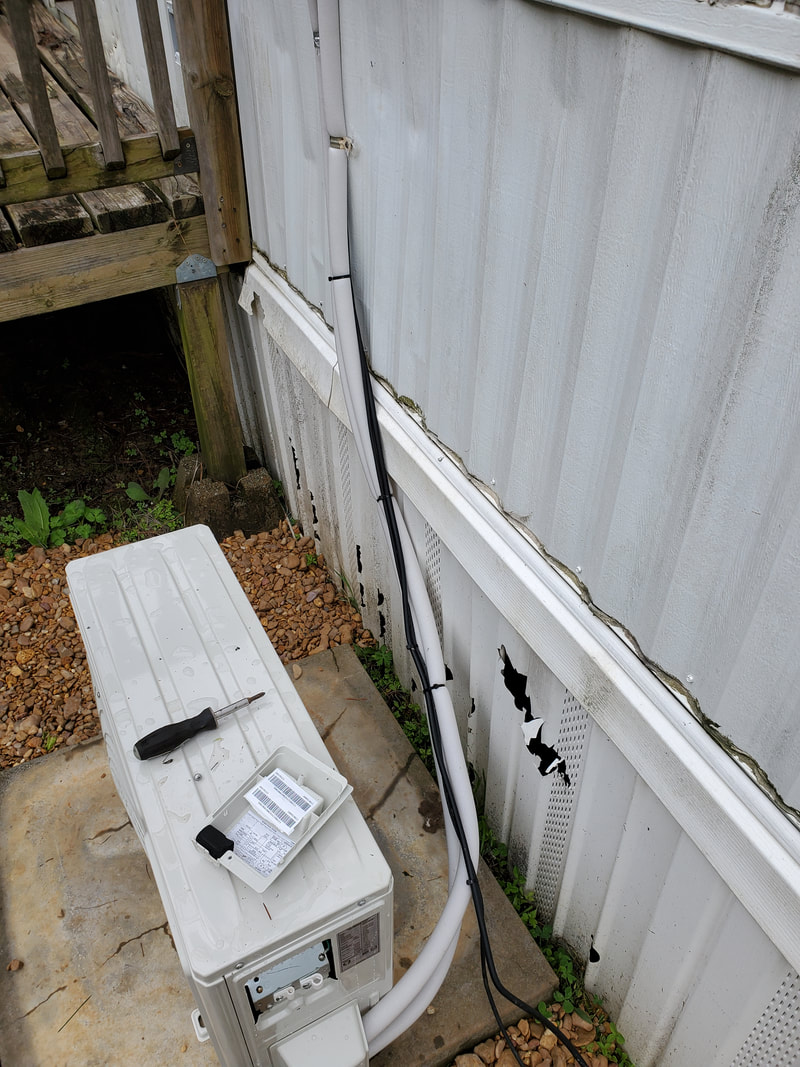
Refrigerant lines and cables routed down from connections inside house. Note caulk around lines coming from flange.
After attaching the two refrigerant lines and routing them down the side of the house I zip tied the two lines together along with the two cables, all going down to the outdoor unit. I then used some conduit straps to secure the whole works to the side of the house, making note of where the stud was so I could get the wood screws through the sheet metal into the wood stud for proper attachment. 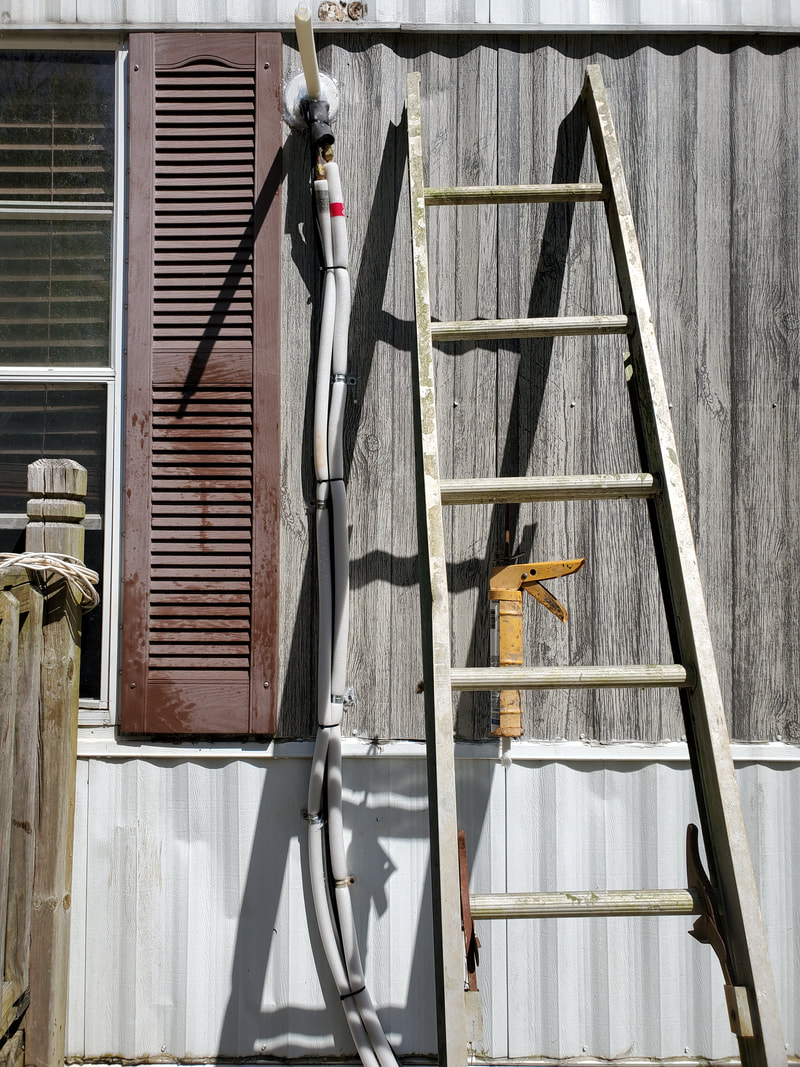
Refrigerant lines and cables running down side of house, note conduit straps and zip ties holding everything together.
Refrigerant lines hooked up to outdoor unit with cables laying off to side awaiting hook up to exposed circuit panel. Note schematic cover on top of outdoor unit.
Hooking up the copper lines was no big deal, using the proper wrenches to get things secured. Of course you have to be careful not to put too much stress on the copper and brass tubing and fittings otherwise they will bend and break way easier than any iron fittings will. With the refrigerant lines done I moved on to wiring the cables up to the circuit panel in the outdoor unit. Just like the indoor unit, the schematic shows where all the wires are to go so as to not make a mistake. With the cables hooked up the last thing to go up was the drainage hose, which was zip tied to the bundle of hoses and cables already established against the wall. After routing the drainage tube off to the side, It was time to hook up the vacuum pump to pull vacuum. Why? Because contrary to the thought that these units are completely plug and play, you do have to pull vacuum to remove the air in the lines that are hooked up along with the evaporator/indoor unit, all of which are full of air and moisture. After evacuating this half of the system, only then can you administer the refrigerant through the rest of the system. Only problem is the vacuum pump and manifold use a different sized thread than what's on the valves on the outdoor unit. The manifold hoses use 1/4" female thread connectors while the 3 way valve on the outdoor unit uses a 5/16" male thread. Unfortunately I had to order one of those and sit back and wait for that to come so I could finish this project.
After clearing everything from the area in the Northeast corner of the perimeter fence I had to move to the next phase which was laying down gravel so I can get the area set up in order to ensure that it doesn't get overgrown with weeds. Laying gravel down and setting the pallets on top of the gravel will also ensure that the pallets won't rot fast from direct contact with the moist muddy ground. And as mentioned, keeping weeds and grass from overgrowing the area will keep me from having to spray weed killer just to keep the wood piles from being covered in foliage, which can also attract varmints and bugs. A load of gravel ensured I had a good sized area covered in order for me to lay down several pallets. 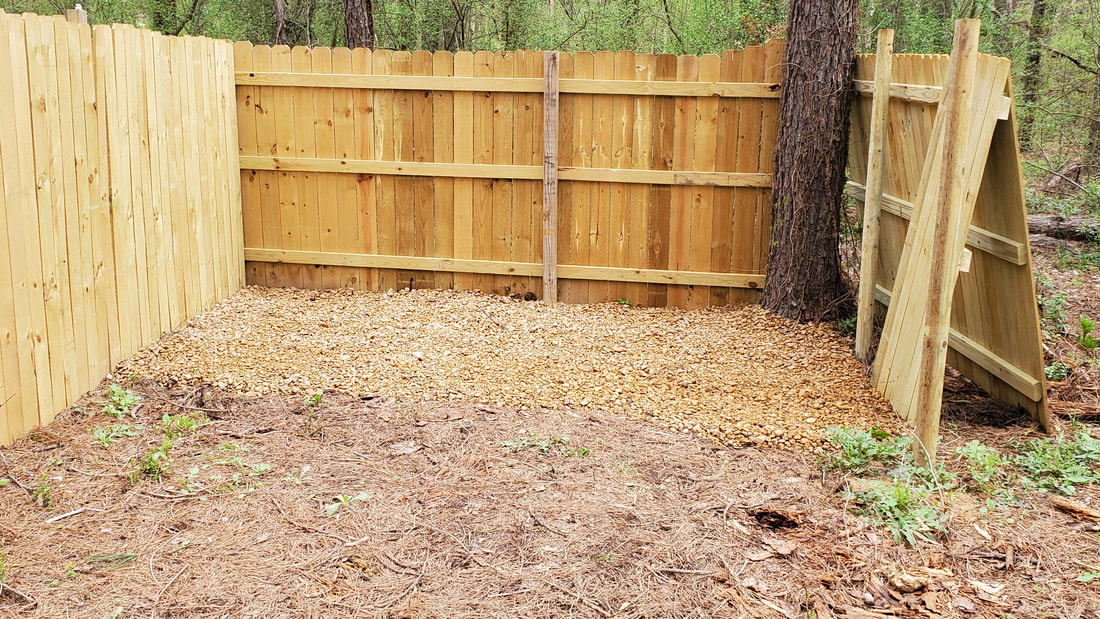 Northeast corner of yard with gravel laid out to accept first set of pallets. I already had three pallets that were freshly acquired that I had set aside for use in this area. I laid these out and set them apart from each other, creating a central walkway between the two rows. This way I can move about along the length of the area, collecting firewood and placing fresh firewood wherever I need to along either side. This will also make it easier to keep any critters from taking residence within the wood piles due to inactivity at one end or another. 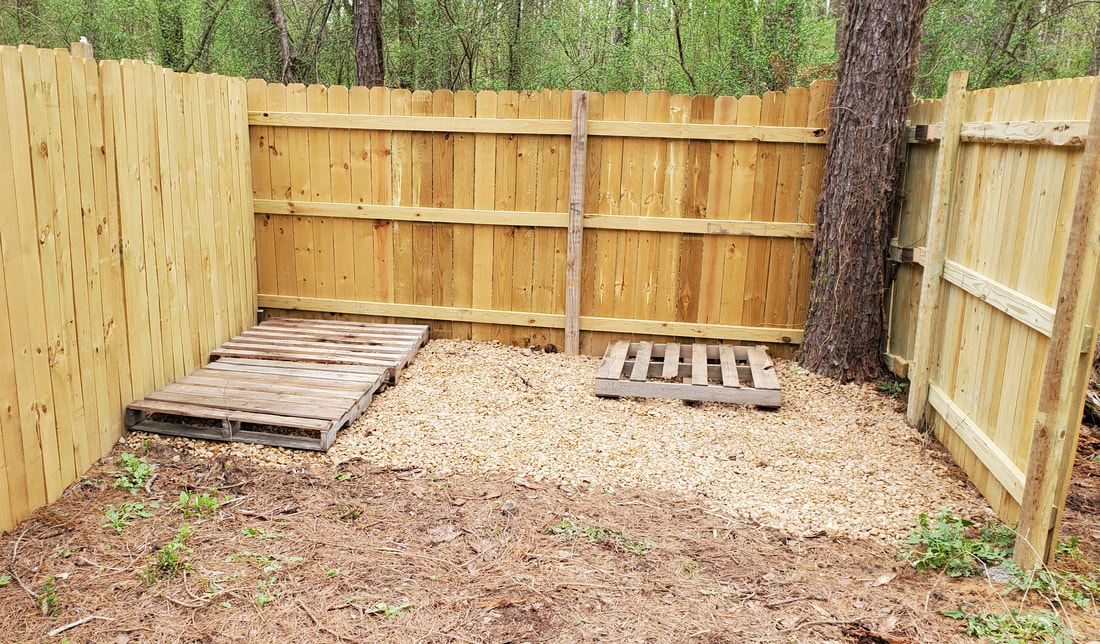 Firewood area with pallets laid out, note spacing creating central walkway between rows. Now on a side note, since I already had a fence panel staged at the corner of the area, I decided to take care of that real quick. I had already sunk another post next to the tree to serve as a better anchor for the panel. What I did have to do is an interesting mix of fuckery to get the small area against the tree closed in after anchoring the panel to the posts. This incorporated the use of a cut off section of one of the fence panels that was used to close in the chicken yard. Along with some 2x4 pieces, I had everything I needed to get the whole works closed in. 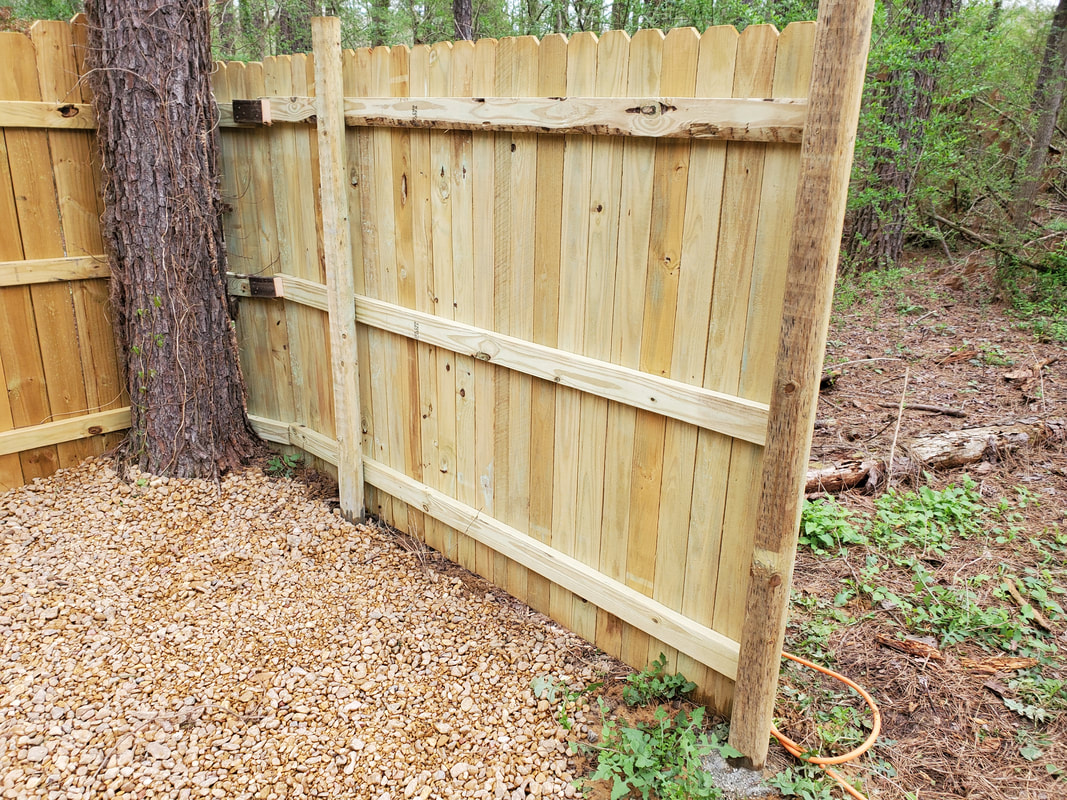 Closeup of fence panel secured to posts with extra section connecting panel to tree. I had to trim the panel cut off to mate to the contours of the tree. The pieces of 2x4's being attached to the tree also helped in making the attachment of the panels more solid. Of course when you loo at it from the outside it does look shitty, that I will admit. But since this is in a corner that is not visible to normal traffic, it doesn't really matter that it's shitty looking. I just needed it to be closed in enough that animals can't wiggle through. As the picture shows, the connection of the main panel with the cut off panel to the tree is janky as hell, but still functional. 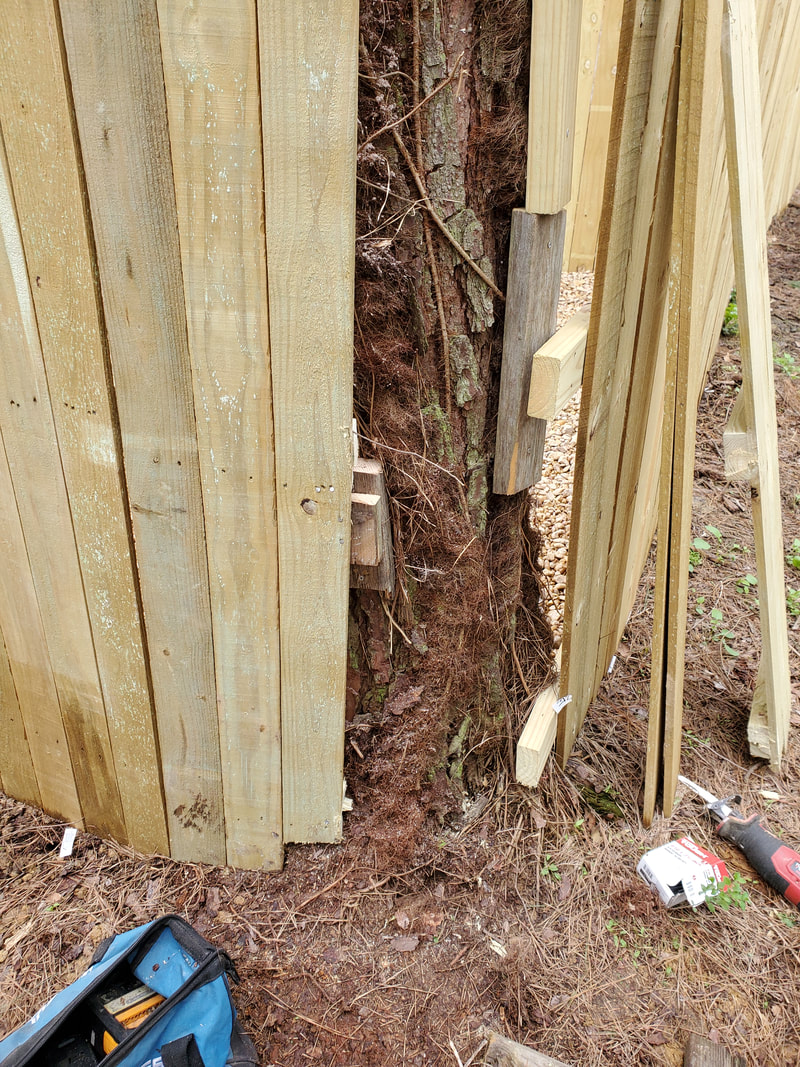 Putting 2x4's up on the tree to aid in securing the panel cut off sections up around the tree to close everything in. With the fence done I turned my attention to the firewood shed. One of my biggest goals was to get the firewood moved from this structure to the pallets at the back of the yard so I could dismantle the old firewood shed. I started moving the wood from the structure and stacking it up in the corner that mated to the chicken yard fence, getting the wood stacked from the back. 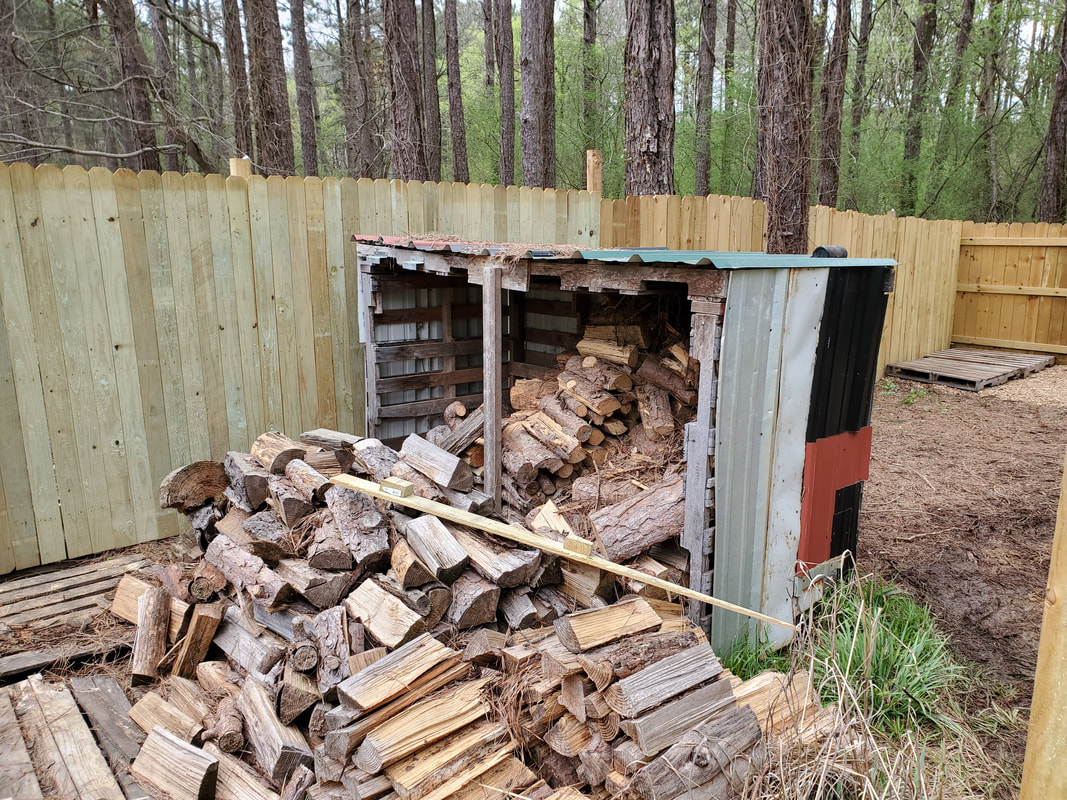 The firewood shed that needs to be cleared before demolition.  Firewood stacked on pallets from old firewood shed. After clearing the firewood shed I started the demo. Using the impact driver I pulled every screw I could get a grip on. I pulled the sheet metal free first, getting the skin of the structure cleared then stacking that metal out of the way prior to moving the metal over to the sheet metal scrap pile. From there I was able to start pulling wood screws from the pallets as they were held together with wood screws and some 2x4's. 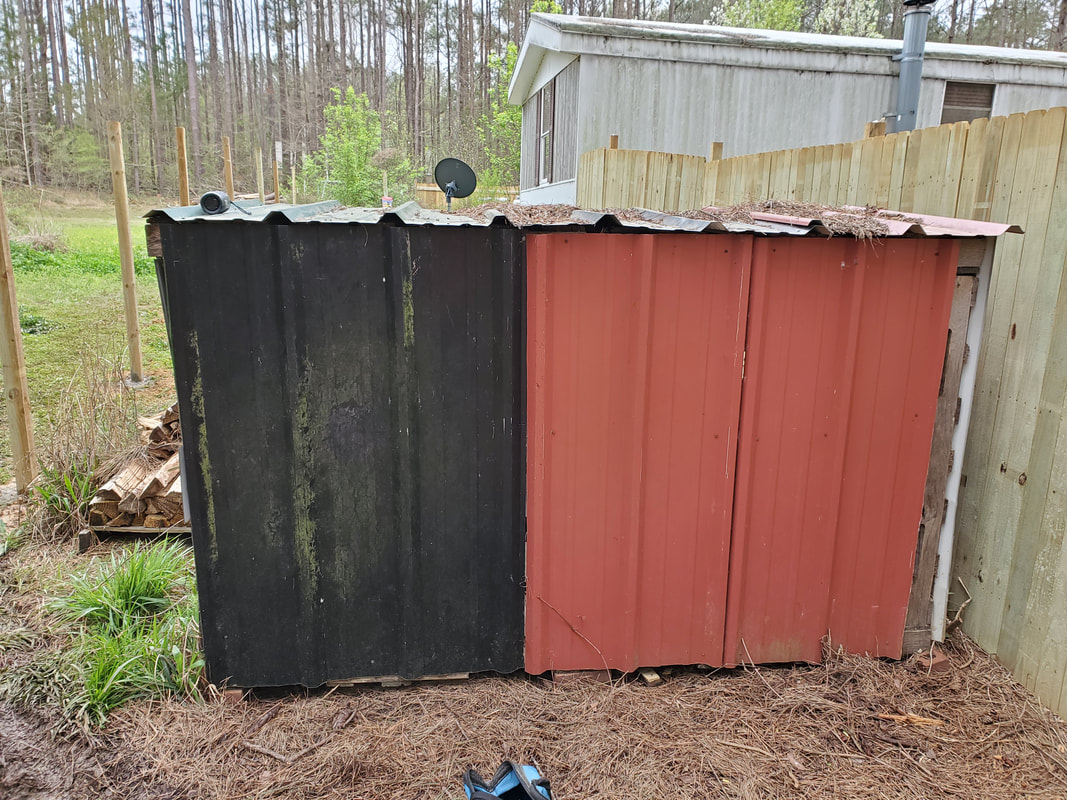 Back of firewood shed showing sheet metal skin of the structure. 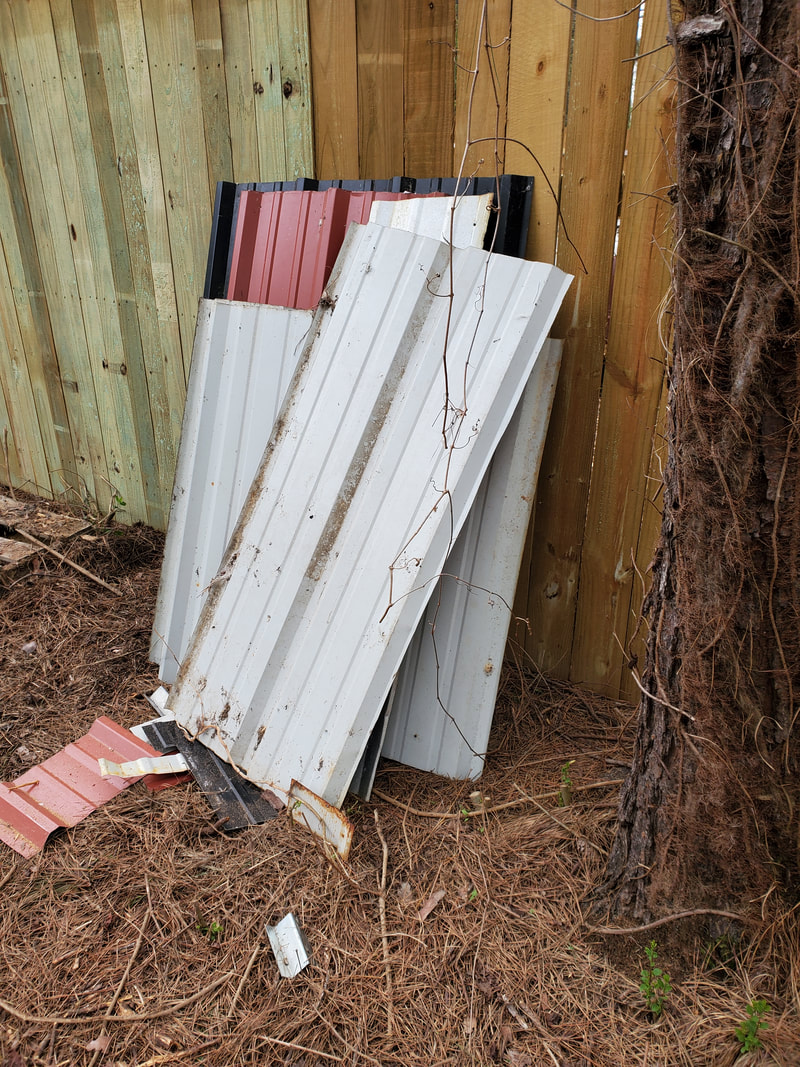 Salvaged sheet metal from old firewood shed. As I started pulling screws free and getting the pallets separated, I managed to find out that most of the pallets were still in good shape and as a result, able to be used as pallets for laying down more firewood. With the way I was stacking the wood up higher than I did when everything was free standing on the ground before, I could get most of this wood stacked on a smaller footprint where for one thing I can get all the existing firewood stacked on the few pallets I do have laid down, and second thing, I can get the soon to be cut and split firewood stacked on the soon to be laid down pallets from the old firewood shed. If I had to stack the firewood from the fallen trees at the other end of the yard like I've been doing with the current stacks of firewood, I'd have a super huge area covered in firewood that would be ridiculous in the amount of area covered. 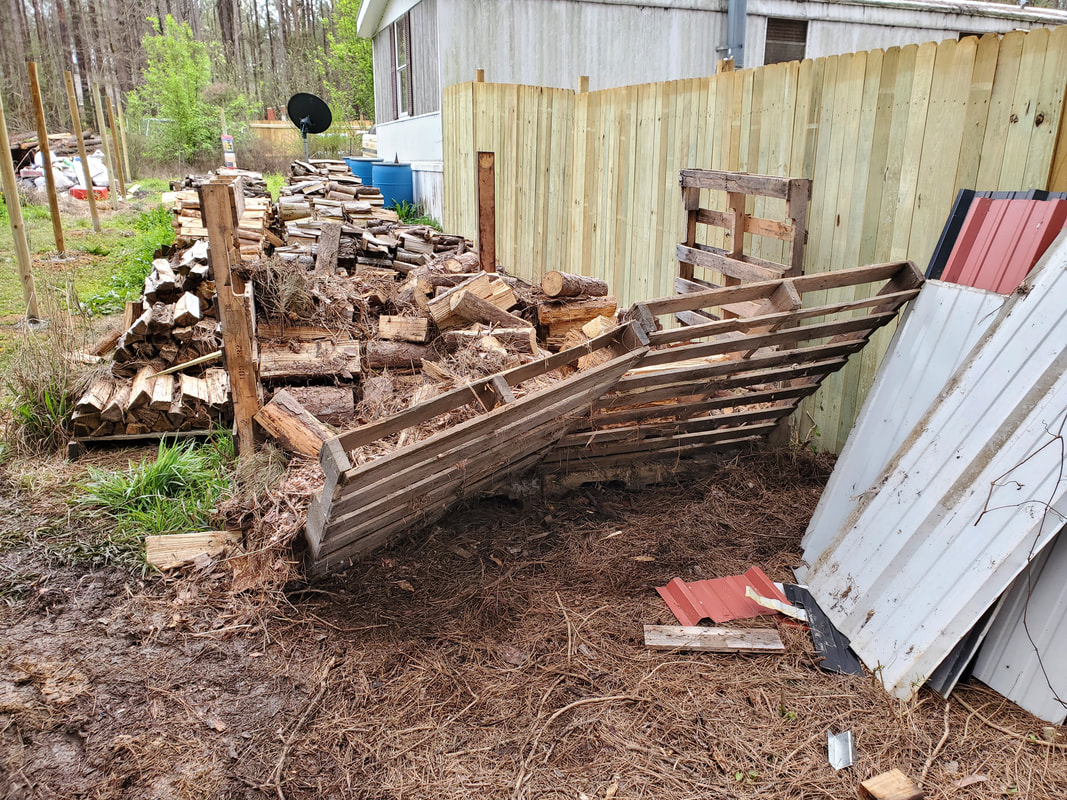 Pulling pallets apart from old firewood shed. 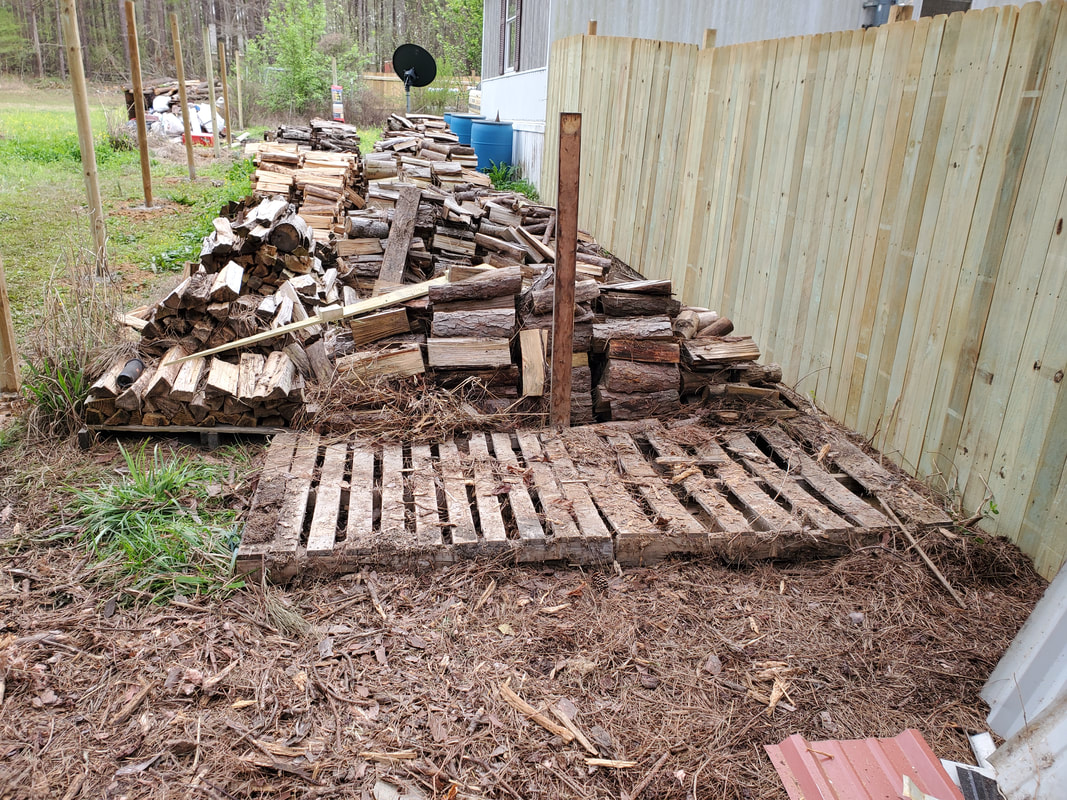 Not much left of the old firewood shed... With the extra pallets, I should have plenty of platforms for laying all our firewood down, only thing is I'll need another batch of gravel to spread over the area to extend the new area out more. I also need to lay the gravel just up to the fence line and not go over, so I'm not wasting gravel and also I don't have any interference when I do put up more fence panels in the future. 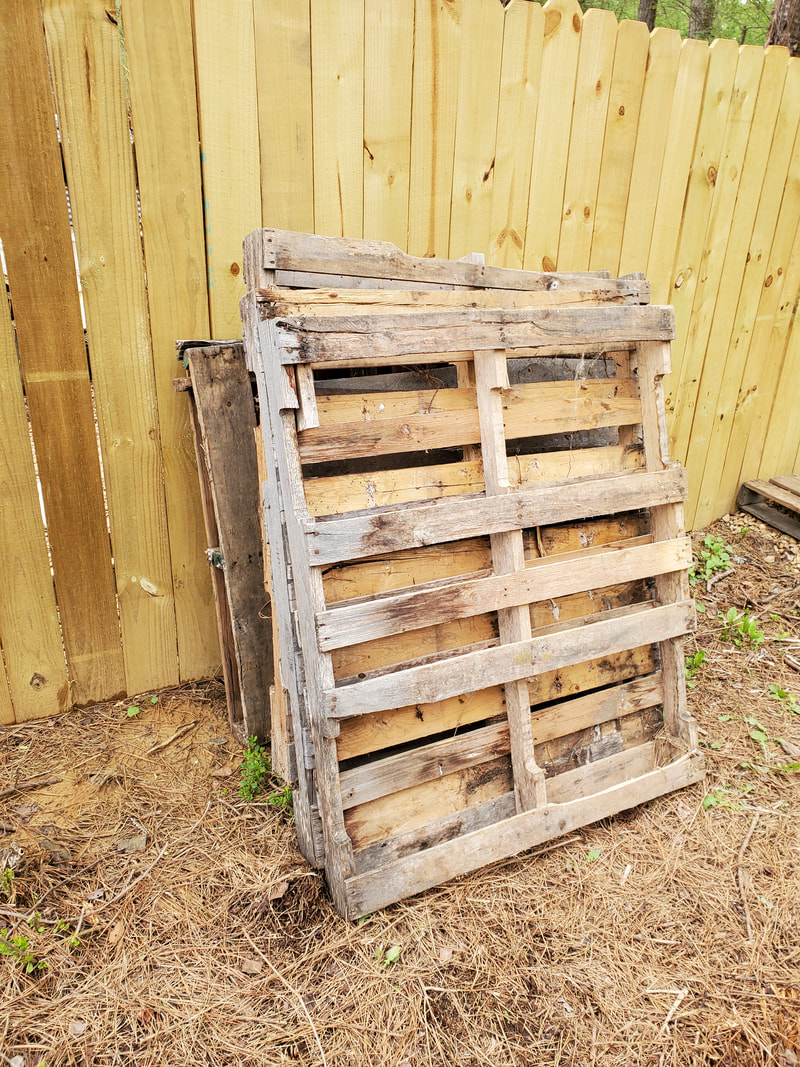 Salvaged pallets from dismantling old firewood shed. Another reason I don't want to just start putting up fence panels in this area is because as I do put the panels up, I'll be enclosing the area enough so that if I don't get the current stacks of firewood moved out of the way, or at least clearing the row of firewood that's along the fence line, I'll end up blocking myself out from being able to go to the back to even move the firewood around. So in the end I really need to just focus on getting all the current stacks of firewood relocated and get the ground cleared completely so when I do set up the panels I won't have to worry about any issues with movement through the area. |
