|
After an initial installment of cutting wood after the storms passed, I prepared myself for another round of cutting wood. In this case I wanted to start cutting some of the larger chunks of wood into smaller pieces to be staged in the firewood shed and staged for future splitting with the wood splitter. I had to continue to cut some of the sections of trees that were still across the 73 Mustang and the Chevy LUV, as well as the large sections we cut from the S10 and from across the road. Most of the trunks from these trees are around 14" in diameter so they will definitely need spitting to even help the wood dry let alone make it small enough to get into the stove. This is just fine though as it'll allow the wood to burn better even as dry wood.
I started making piles in the areas where I started cutting wood. I started with the tree sections from the S10. Letting the ole lady use a new battery electric chainsaw we picked up, she was able to handle the branches coming from the trunk as well as the smaller branch sections that were like an inch or two in diameter. These will make good kindling branches for getting a good fire bed going for the larger logs. I used the plug up 14" electric chainsaw for the trunk. After getting that section of tree cut up and stacked I moved on to the tree across the Mustang and LUV. At first this took quite a bit of time using the electric saws to cut the branches off of the main trunk so I can clear it for the larger saw. There were a lot of branches and since I am trying to make firewood all of these branches had to go. After exhausting the batteries on the smaller saw I went to the plug up saw and bounced between cutting branches and cutting the 1-2" sections in the branches as well as taking off some of the trunk as I cleared smaller branches. When our other neighbor came home he showed us his chainsaw, which was a Stihl Farm Boss saw, looks like an 18" bar, more than enough to hack through the shit we're working with. Once I got the thing going, I ended up hacking through the trunk section that was on the mustang and LUV in no time. I ended up cutting the trunk into nice 12" long sections while the ole lady stacked the logs. My faith in gas saws was renewed once again, well faith in good chain saws that is. 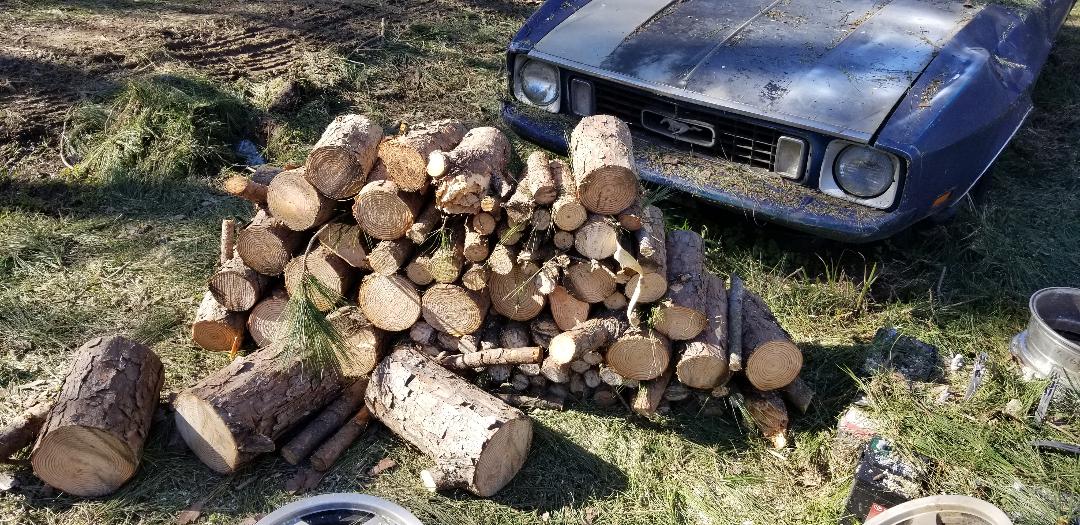
Cut up trunks and branch pieces in nice stack in front of Mustang.
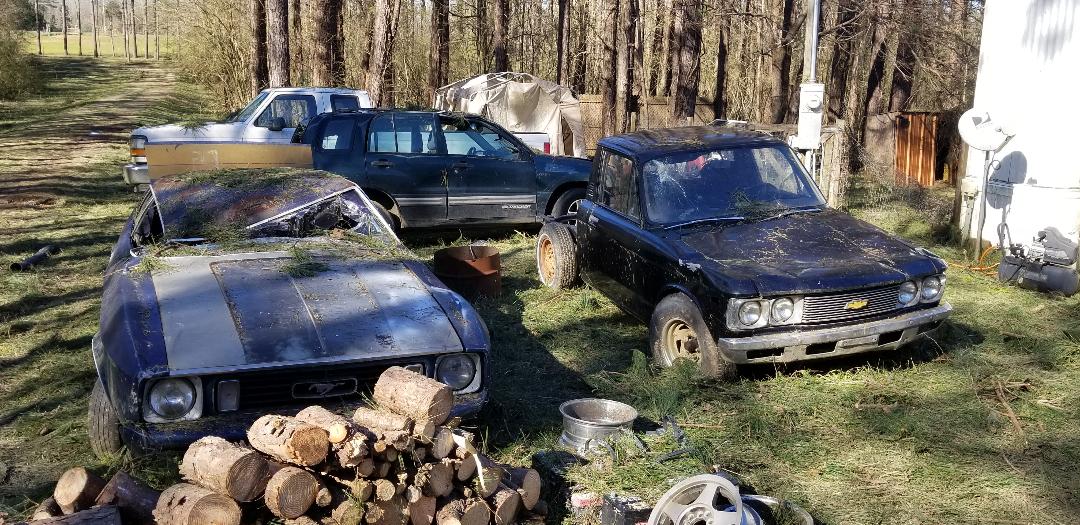
Cleared Mustang and LUV, note damage from trees.
After clearing the trees from around the vehicles, I moved to the stacks of shit on the other side of the driveway. Now that I had the Stihl chainsaw, I just cut loose and started hacking wood up like crazy. I had the ole lady bring the wheelbarrow so we can stack the cut sections of trunk and dump them into a staging area with the other stacked logs. It didn't take long before she got tired and ended up breaking formation, leaving me to my own devices.
After a couple of wheelbarrows full of logs that I cut, loaded and moved to a staging area, I said fuck the wheelbarrow and just went to randomly cutting trunks into footlong sections and leaving them where they sat. I kept hacking wood until I ran out of fuel and by that time the insurance guy came by the house to check out the damage to one of the cars. With that it was pretty much getting later in the day so it was time to clean up and get ready to continue on with the day. I will be continuing the cutting up of the wood as well as stacking into staging areas, or really a staging area, as I wanna have the wood in one area so I'm not trying to move the log splitter any after getting it set up in one spot. Same goes for the chipper shredder too. I'll be working at this shit for a good while, all the other work I was doing, especially on the Dodge, will have to be postponed for a minute. UGH! 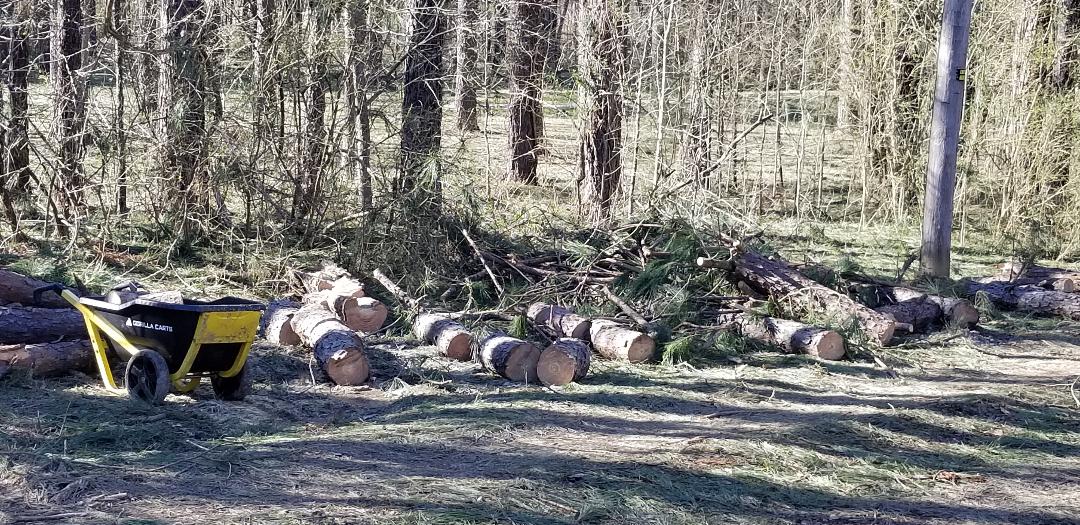
Bunch of cut up trunk logs with wheelbarrow staged for stacking of said logs. As you can see there are a LOT of logs to split.
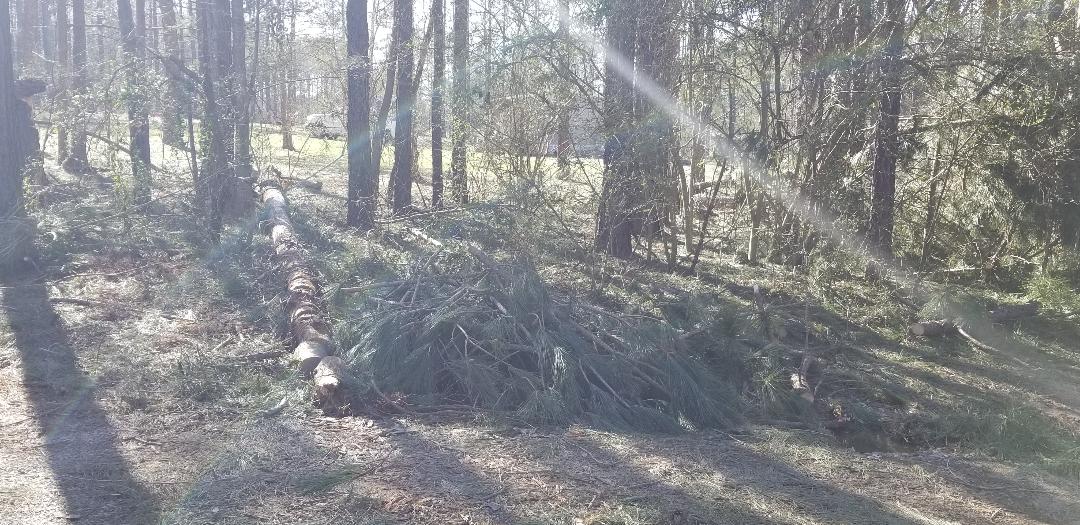
Stack of loose branches along with one cut up trunk.

Another stack of logs cut up by El Camino, along with a bunch of branches.
0 Comments
On the night/morning that I was working on installing the back window on the Dodge I decided to stay up in the garage to try and install the moldings. As stated before, I was able to snap the top molding in place due to the fact that the clips still exist in the top portion of the window frame. I gotten some 5 minute epoxy to use to try and glue the moldings around the sides and bottom and at the same time found another tube of the same epoxy in the storage trailer. I went ahead and attempted to glue the moldings down but had nothing but a hard time doing so as this epoxy SUCKS. If you have to do something as far as holding something under pressure, you can't use this shit. You would have to sit there for 10+ minutes holding pressure on the items being glued down for the shit to really work. Because of this one little detail, I fought this shit. I had to pull the moldings up multiple times to try and bend and manipulate the pieces so when I laid them back down they would sit in a way where no real pressure would need to be applied. I had to apply and re-apply epoxy trying to get these damn moldings down. At one point I even tried to see if there would be a possibility of drilling into the bottom ledge of the window frame to secure the moldings with small sheet metal screws. In the meantime I had to make a couple of trips up and down between the garage and the storage trailer fetching different shit in the process of trying to get these moldings down so I could come back down and go to bed. I had been paying attention to the winds as they were picking up in front of a severe thunderstorm that was reported to be en route over our area. I didn't give it much thought as storms come and go all the time. Only thing I was concerned with was trying to finish before any heavy rains came as I didn't want to have to hunker down while it rained or worse, have to traverse the 600 ft or so back down to the house in the rain. A little bit later the power flaked out. The backup generator kicked in, restoring power to the garage and the house. Figuring that a tree came down over a power line somewhere down the road since the wind was blowing, I kept working since I needed to get this shit done so I can get the genny down by our house started up. While fighting the moldings and epoxy I started hearing some light tapping on the roof of the garage. At first I thought it was heavy rain drops starting to fall. My thoughts went back to having to walk in the rain. Then the taps got louder. This didn't sound like no ordinary heavy rain drops. You mean to tell me its hailing? I go to look outside as the taps increased in frequency. My next thoughts were about the idea that I hope no car windows get damaged. I went to the doorway to look outside and see that there was indeed hail coming down, quarter sized pieces of ice in fact. The shit was coming down more, almost like rain. Dammit man, I really hope no glass gets cracked. Then as I stood out there watching the hail come down and the lightning flashing, almost hypnotized by it, the wind started blowing hard as a motherfucker, the hail taps increased in frequency to the point it sounded like a machine gun going off. I kept looking outside as hail was coming down heavy as hell, then it was like everything got opaque, couldn't even see a few feet out past the patio of the garage. Then the sounds got to the point where the machine gun sound turned into a constant roar, deafening in magnitude. The winds were trying to pull the door out of my hand and shit was flying through the air at high speed. Visibility was gone as winds were blowing shit everywhere. My first thought was a Goddamn tornado was right over us. My next thought was, "yep, I need to get way back inside." I shut the door and just kept paying attention to all the sounds, listening to the garage door flex and rattle and the roof get hammered by hail. I tried to continue with the work on the moldings but really couldn't focus on that other than just trying to push down on the moldings to help the drying epoxy to hopefully grab a little better. In probably another 5 min or so the loud roar subsided enough that I felt safe enough to open the door to look outside. It was still raining but not blowing shit everywhere. The smell of pine lingered in the air and a cloud of what seemed like dust or smoke, I don't know, was also in the air. The ole lady came up with her umbrella, hysterical because some trees came down. My mom also came out from the house to see how things were. There as a bed of fresh pine needles all over the place along with hail balls. When I walked back down to take a look at these fallen trees, I ended up seeing nothing but a bunch of destruction. One tree came down and landed right on top of the S10 having crushed the camper shell and the bed and landed between the Explorer, fucking the front bumper up and coming to rest just behind the 69 mustang and just in front of the storage trailer. Another tree came down right across the 73 Mustang crushing the roof and also landing on top of the LUV, leaving a large indentation across the fenders and hood. Another tree came down across the ass of the 73 Mustang crushing the trunk/rear quarters of the car. Another tree came down right across the back of the Tracker collapsing the rear of the roof all the way up to the front doors. A couple of other trees came down across the driveway and in the chicken yard as well. The Scion had its mirrors pounded where the plastic shells were broken off and the mirror glass was done. The Monte Carlo's mirror had a giant hole in it like someone nailed it with a 3/8" ball bearing from a sling shot. It's taillight lenses were also smashed up. The windows in the storage trailer that were facing the winds were all smashed out and the little solar walkway lights we had along our concrete walkway were in pieces all over the yard. My mom's house took damage, with some of the siding being pelted and stripped off on the sides facing the winds that hit plus some roof damage. One thing that I can be thankful for is the idea that the vehicles that were the most important weren't damaged. The scion wasn't damaged outside of the mirrors. That's the money car. The Monte Carlo, both the 65 and 69 Mustang and the El Camino were not damaged, outside of the MC's taillights and mirror. The F250 came out clean as well. The house also came out clear. The Dodge of course was in the garage. My mom's vehicles came out clear too. Unfortunately I will have to remove the smashed camper shell from the S10 and either try to pound the sides of the bed back up to some semblance of straight so it an at least be somewhat normal until I can find a replacement bed. As for the Tracker, the only real option there is to find another donor body and transplant the engine and other useable parts from the smashed Tracker to the donor. Luckily I've had an eye on an identical truck that had a dead engine for a while now. Perfect! I can swap my good engine and the replacement tranny I have in the garage to this body and use the good parts for other repairs or to at least have a stock of some replacement parts. Obviously the only real option for the old Tracker body is to scrap it. Unfortunately there was no insurance on the Tracker and S10 since they weren't being used and we were no longer able to get comprehensive coverage to cover damage while the car's sitting idle at home. 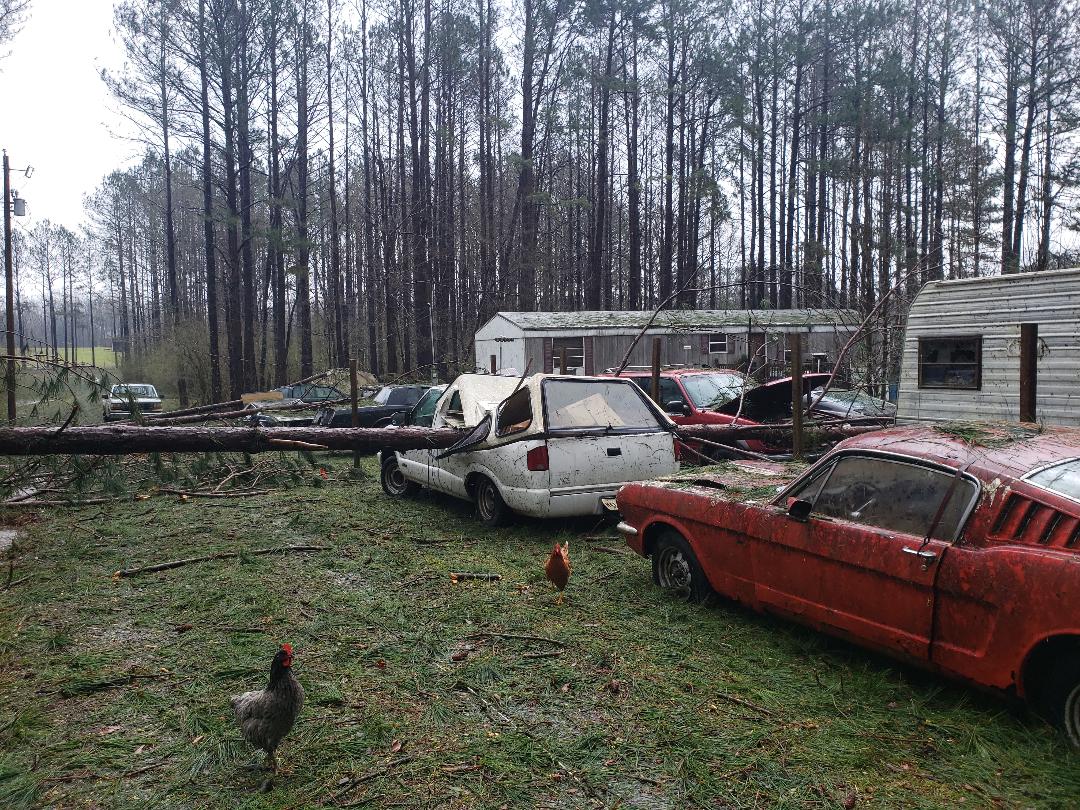 S10 damaged by tree. 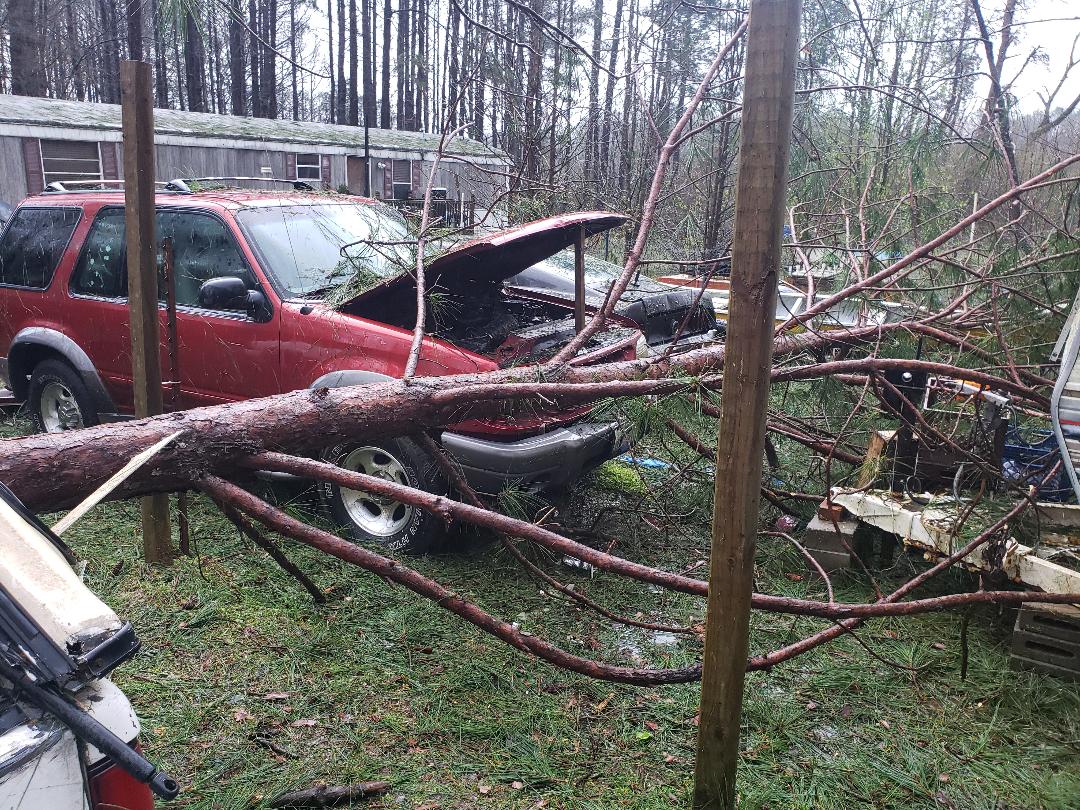 Tree across front of Explorer. 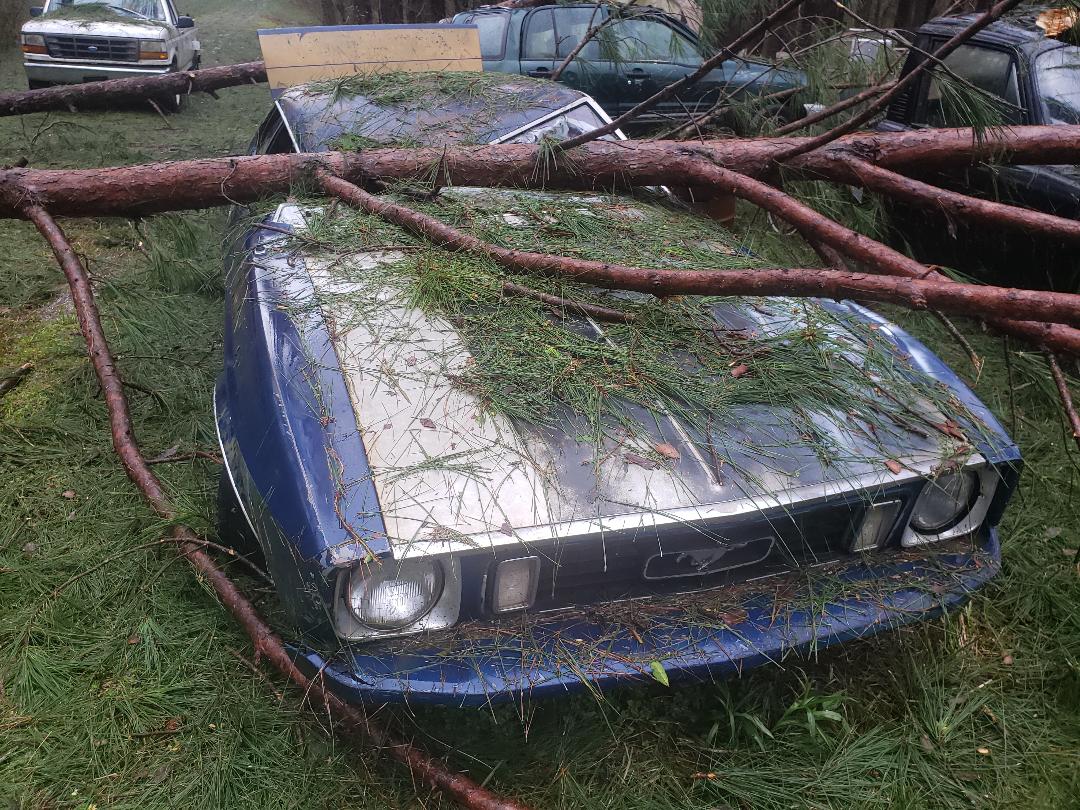 Mustang roof crushed by tree. 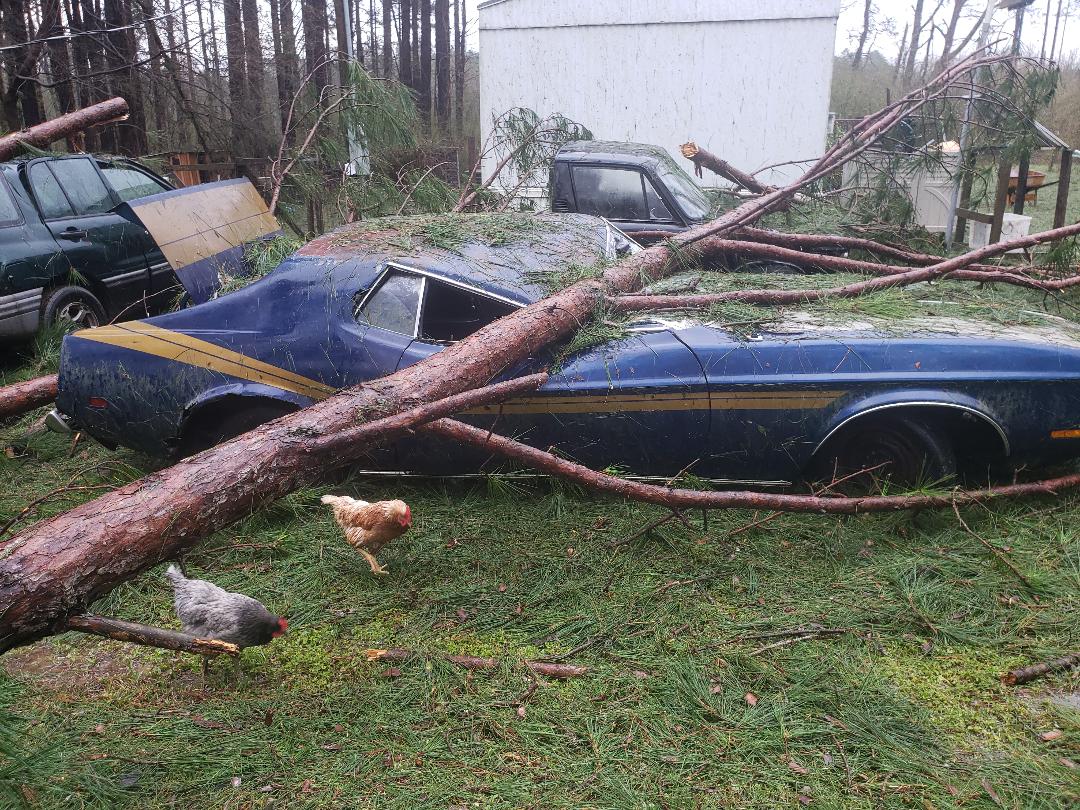 Side shot showing severity of damage to Mustang. 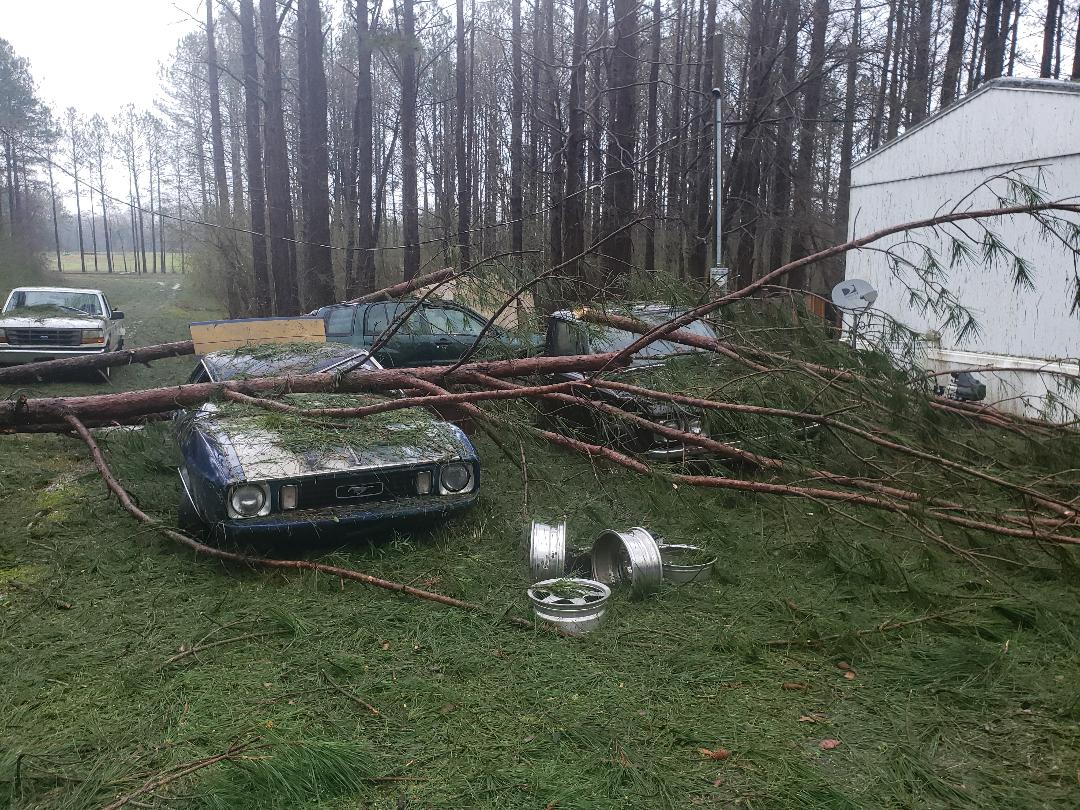 Shot of Mustang and LUV damaged by tree. 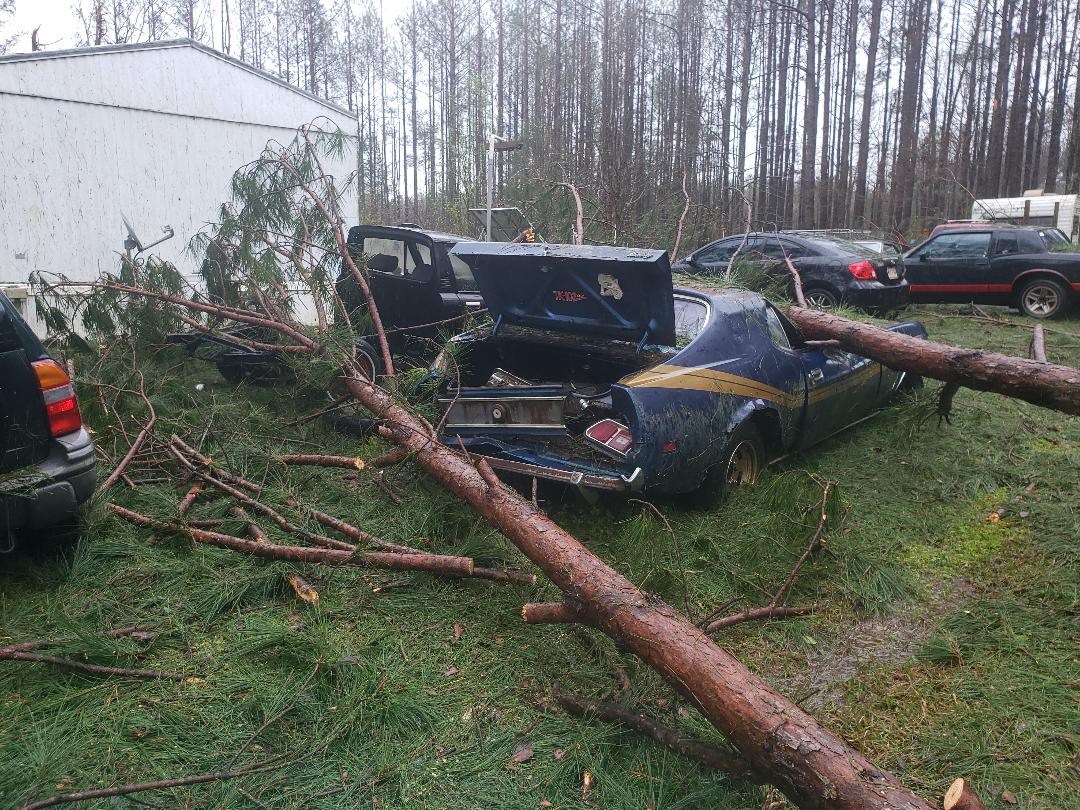 Rear of Mustang damaged by tree. 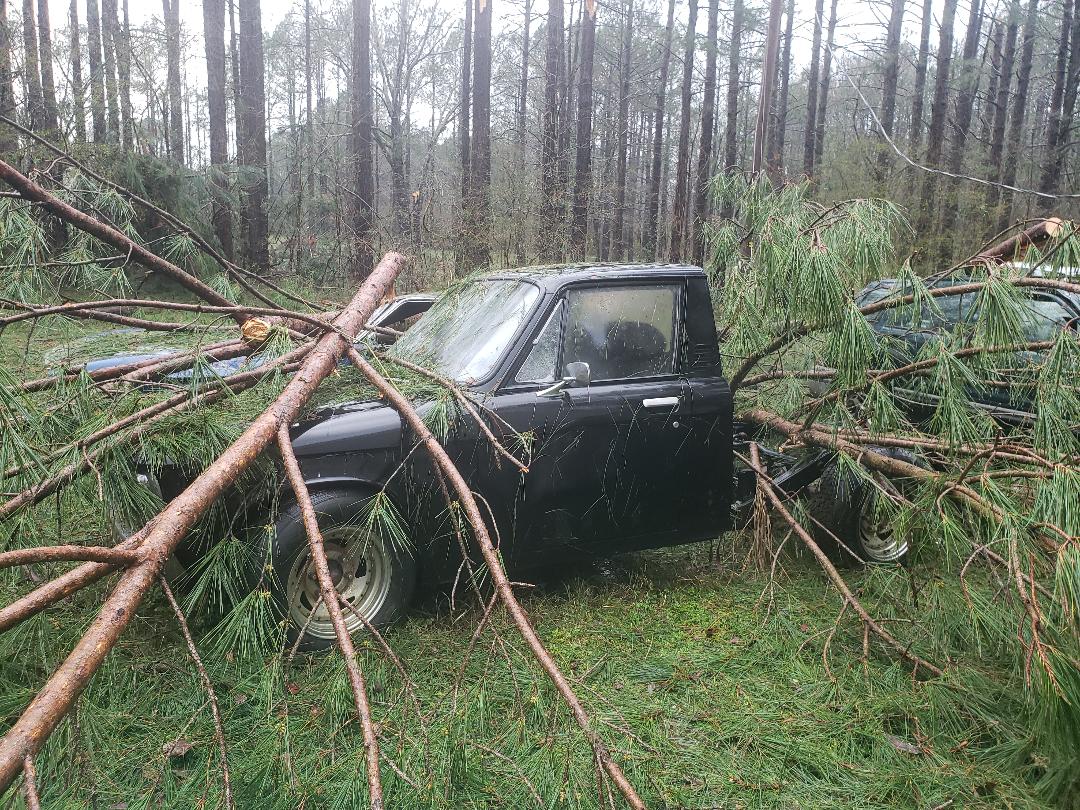 Tree across LUV. Tree across rear roof of Tracker. Front of Tracker damaged by tree. Note I've already started cutting. 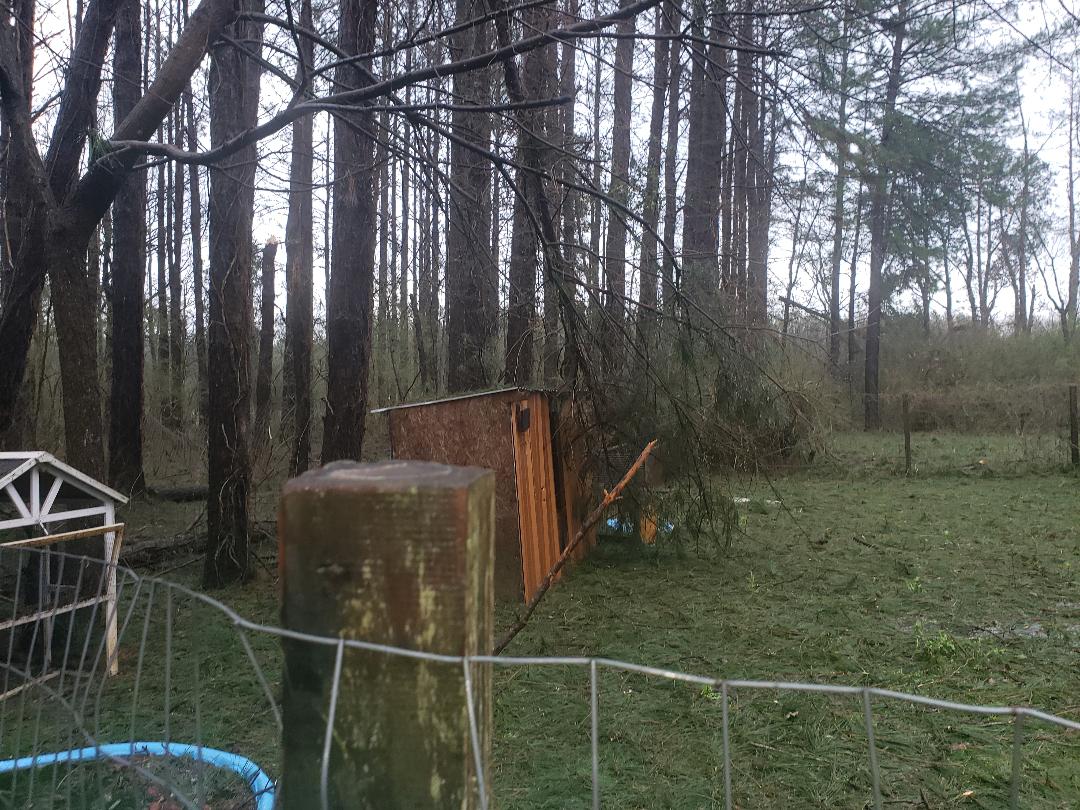 Tree down in chicken yard. Because of this damage, we will be busy cleaning up for a while, then afterward trying to address the damage on the vehicles. Even though the 73 Mustang is pretty much trashed, we planned on using the rusted out body to make a chicken coop, especially since the chickens had already been using the vehicle to nest in. I'll have to try and pound the collapsed roof and rear quarters out a little bit to at least try to straighten the thing out some prior to making the changes to it to utilize it as a coop. I already planned on pulling the powertrain and some salable parts as well as the wire harness, which can be processed later for scrap. As for the LUV I'll have to remove the fenders and gradually pound out the dented in tops of the panels. I just so happen to have another hood for the LUV, the old one that has a fake hood scoop on it. This one will need to be repainted to make it somewhat match up to the rest of the cab. Of course since the paint job and work I put into the cab forward portion of the LUV is pretty much for naught, I'll probably end up just reinstalling the unfinished bed and probably doing some light prepping of the bed's surface then just spraying any old paint on the bed to cover it up, not even worrying about clear coat or sanding or bondo work. As mentioned the S10 and Tracker are the ones that'll need the serious work. There will be updates as work gets done on these vehicles.
At this point I finally get to install the rear window. I had to do a few things prior to installing the window. First thing was to clean the window frame of dust and any rust particles that would keep the glue from sticking good. The next thing is cleaning the old glue residue and other crud from the edges of the glass. This required a bunch of scraping with a scraper razor to work the bulk glue and crud off then another pass to get the layer of residue from Since the glue is super thick I had to get a heavy duty caulk/adhesive gun. A regular cheapo caulk gun was not going to cut it. With a new heavy duty caulk gun I was definitely ready to rock and roll.
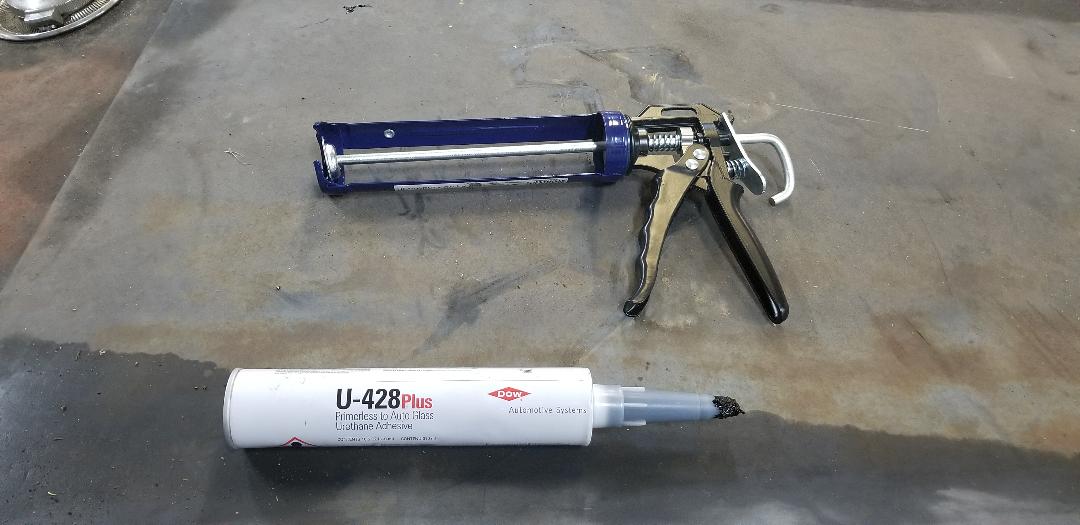
Heavy duty caulk gun and automotive adhesive.
With the glue in hand I applied a nice bead all the way around the edges of the frame. When I set the glass in place, I found that the bottom ledge of the window frame was a little off. When I situated the window where the sides and the top ledge of the frame were nicely covered by the glass pressing down on the glue bead, I applied more glue from the inside into the gap under the glass and on the bottom ledge, creating this super thick glue bead that filled the gap between the window and the frame. I checked along the rest of the window frame and applied more glue in spots where it appeared to have small gaps. I also applied some glue from the outside in spots where it could benefit from more glue squeezed in place. Main goal was to use up the glue since once the tube was opened that shit was on a clock. After using up all the glue I made sure the glass was pressed down nicely onto the glue bead so as to ensure proper adhesion.
With that I let the stuff cure so I can move on to installing the window molding. The top portion of molding is going to be able to be snapped in place due to the stock clips still being in place on the roof but the sides don't have the clips since I had to replace the rear quarter panels and of course the bottom ledge doesn't have the clips since the bottom ledge is a few pieces of angle iron. This means some improvisation. In this case its going to be the use of epoxy to basically glue the shit in place. One can't really sweat me utilizing practices like this, even on this car as most of the methods used to bring this car back from a rusty death incorporate all kinds of improvisation. Either way, the rear window is in, all that's left now is to do a little bondo work around the bottom of the window and a couple spots on the roof and some primer and we can officially be able to leave the car outside without the worry of water getting into the car. 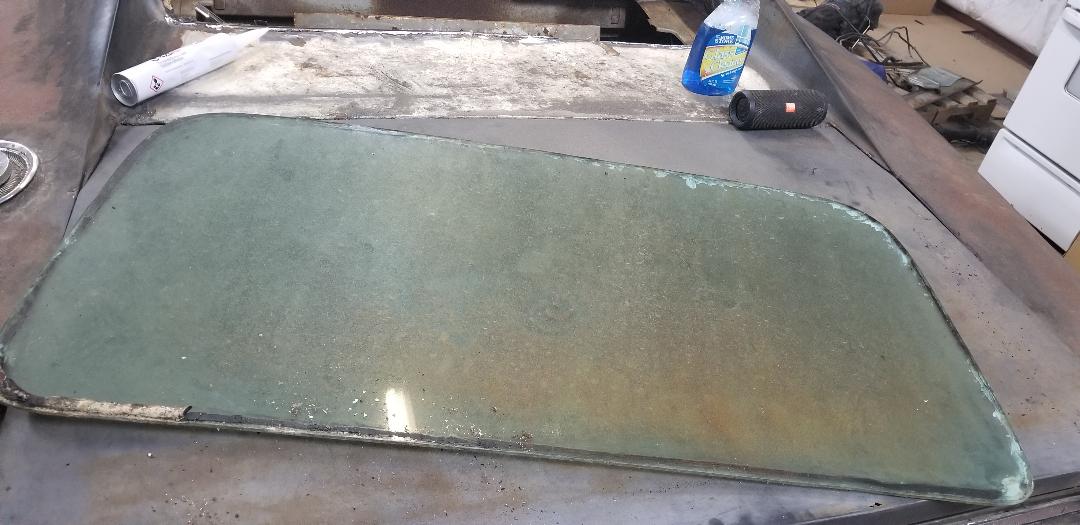
Rear glass before scraping old glue from edges.
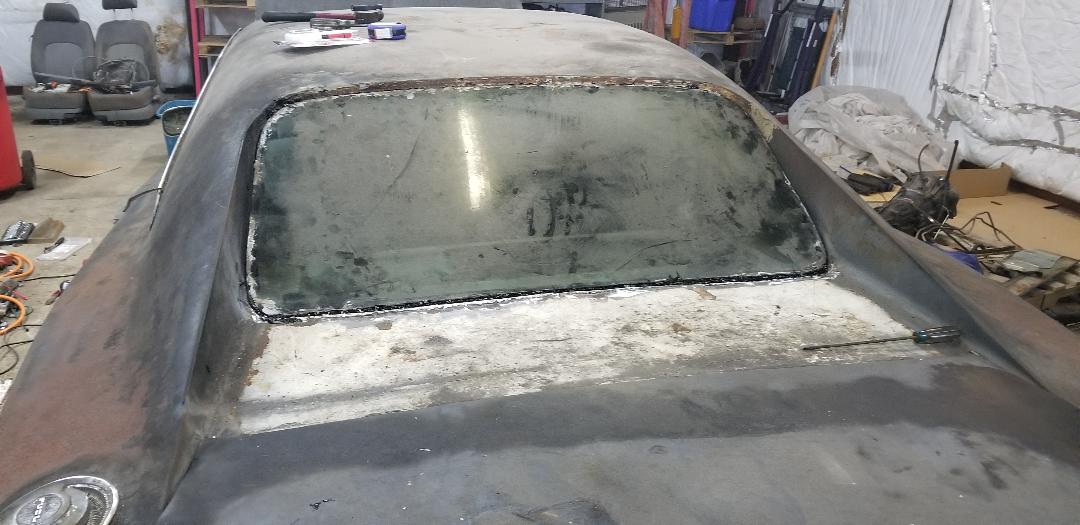
Rear glass glued in place.
After getting the welding wire and a new welding helmet, I went ahead and welded the rest of the angle iron that I missed when I ran out. I also did some more welding on the corners, putting pieces of metal in spots to act as filler. After welding everything along the bottom frame it was getting close to the end of my session outside so I finished up with the grinder, grinding the rough slaggy surfaces where the welding occurred.
Another area I addressed is the rusted metal that makes up the rear shelf framework. This is where the panel that holds the speakers goes. The supporting metal was rusted away in two spots, compromising the structural integrity of the rear portion of the framework. This had to be fixed. Since all of this will be covered by a panel anyway, I just cut and welded in two pieces of angle iron to bridge the gaps where the metal was rusted out at. Again, this unsightly metal will be covered by the panel that I'll make later on. I do still have to add a couple of small pieces of metal in the very corners on either side of the bottom portion of the window frame. These aren't true corners as they curve so it'll be a little more than just cutting a perfect 90 degree piece of metal. I'll have to cut a piece of thinner angle iron and more than likely have to cut slots on one of the sides so I an bend the angle iron to fit in the curvature of the opening prior to welding. After I do that I can finally do the final step of applying the glue to secure the window to the frame. It surely is coming along nicely.... 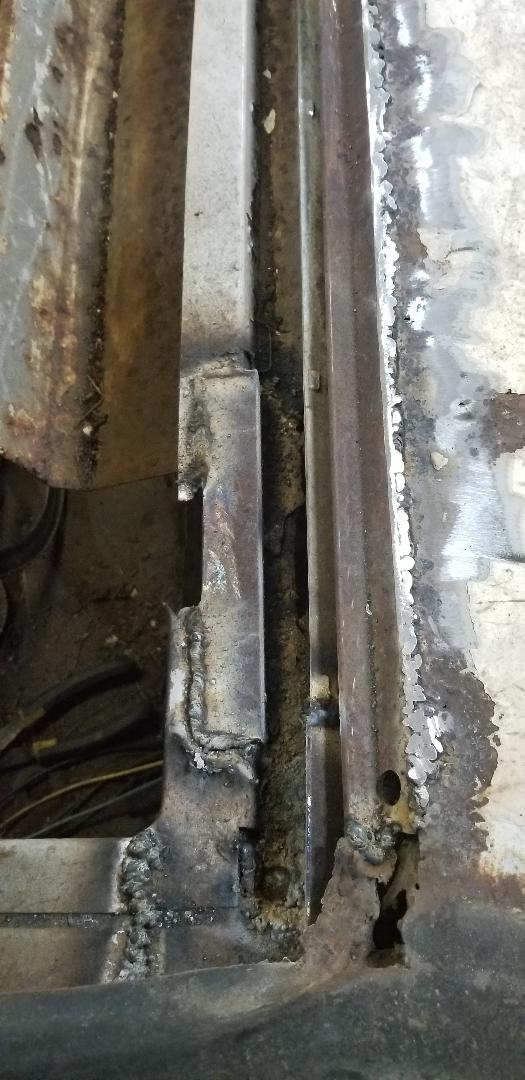
Left bottom corner of window frame, note gap in immediate corner that still needs to be filled in. Note the angle iron used to close in the rusted out gaps in the metal that makes up the rear shelf framework.

Middle portion of window frame, note seams where middle piece of angle iron had to be added.
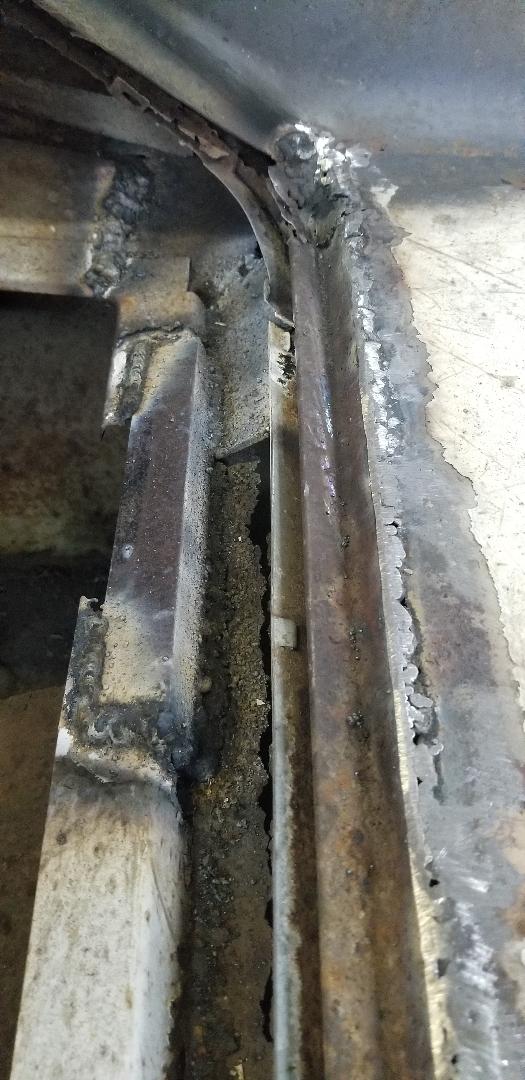
Right bottom corner of window frame, note gap in corner needing to be filled in. Note the piece of angle iron that is used to fill in the gap made by the rusted out metal that makes up the rear shelf framework.
As things progress I continue to get the interior put back together on the Dodge. The biggest thing was the center console. This thing was outside for a while and was in a state of disrepair. The rear metal piece that goes into the plastic console body was hanging out due to a broken bolt mount in the plastic itself. I had to drill a small hole through a tab on the inside of the metal piece and through the inside plastic base of the console in order to secure it to the console better with a sheet metal screw. With the back piece secured in place on the console I was able to stage the unit in the car on the center hump so I can secure that. There was already a strap near the front of the center hump that lined up with a couple of screw holes on the center console so I was able to immediately screw down the front section of the console. As for the back half I had to drill a couple of holes through the storage compartment bottom and through the center hump metal then secure with a couple of long sheet metal screws and washers to hold the rear section of the console. With the console down, I had to secure the storage compartment door. The studs that are on the door are not true threaded but use these nut caps that lightly twist onto them. This won't work so I ended up just force threading some nuts of a similar size onto the studs in order to secure the door in place. I also had to bend the latching tab so when I freed up the lock on the door it was able to latch in place. The next thing I wanted to do was hook up the two console lights that exist on the unit. This was rather easy as the plug already has the two lights hooked up together where I just needed a pair of wires to feed power and ground to the lights. I hooked up a 2 conductor able to the plug and ran the cable up front and under the dash and up to the circuit feeding the interior light in the dash. After splicing the two wires and securing the extra wire I was able to get the two lights back online. With the lights back online I was able to secure the front top panel in place which uses a flap at the front and two screw tabs at the back. One of the tabs are broken off so at the back I was stuck with just one screw tab, which will have to do. Until I can manage to find another console top that's intact, this will have to do. I also secured the shifter cover on the top as well. This is held in with four long screws through the top. I will have to find a rubber boot as the one on this one is broken up and shitty. Of course it'll have to do since its all I got. I don't wanna just leave the shifter mechanisms exposed, not sure what's more tacky.  Center console installed in place. 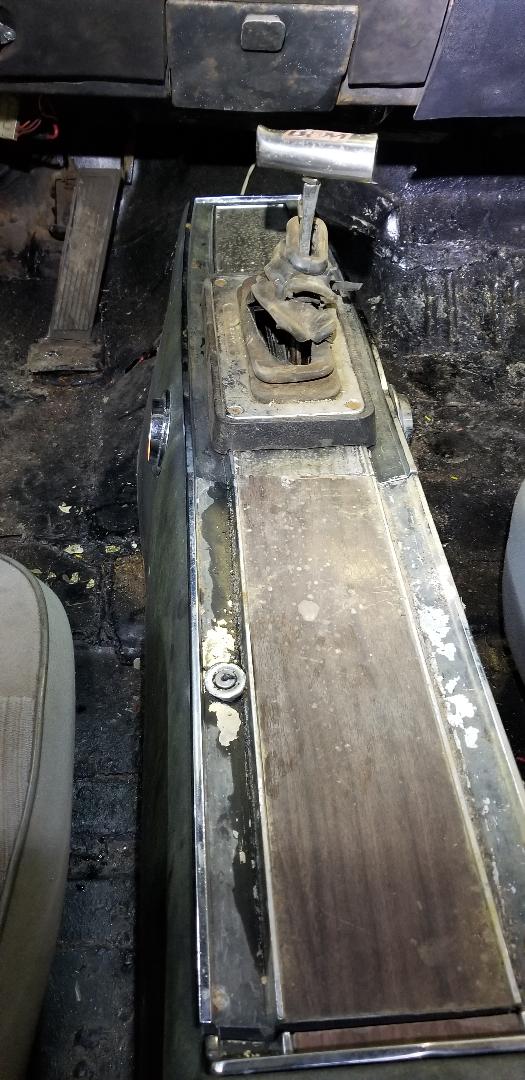 Closeup of shifter cover and boot. 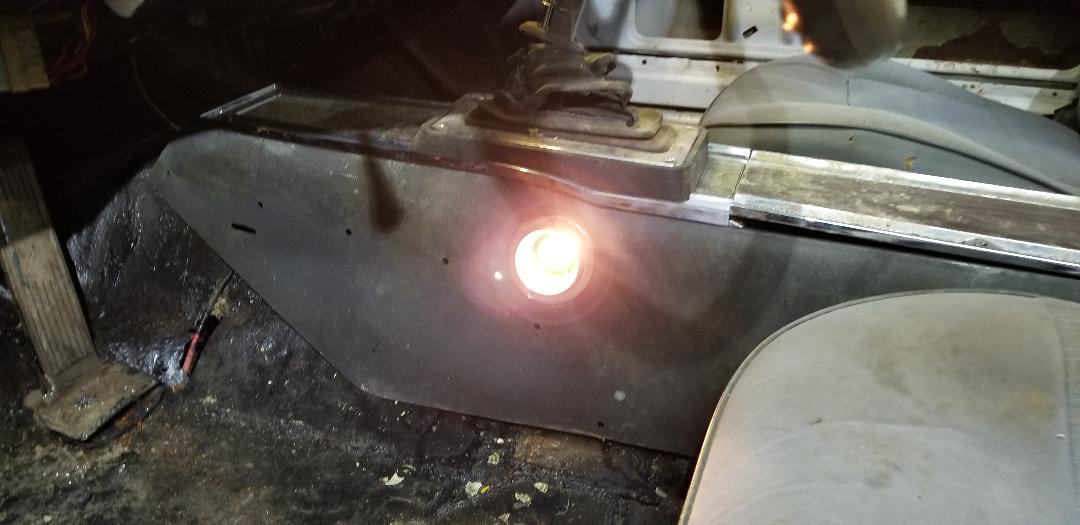 Center console light lit up. After putting the center console in place I moved on to the rocker panel moldings. These things are kind of beat up but overall are still whole. The screw holes are a little more wallowed out than they should be so they would require countersunk screws or screws with small washers that will fit into the countersunk openings. Also, since I had to repair the rocker panel sills beforehand, I had to drill new holes for the screws. I had to make sure the moldings were lined up prior to drilling the holes as I didn't want to have any more holes than necessary in the rocker sills. After getting things lined up and the holes drilled, I was able to secure the moldings nicely, enough so that the doors were able to close still. 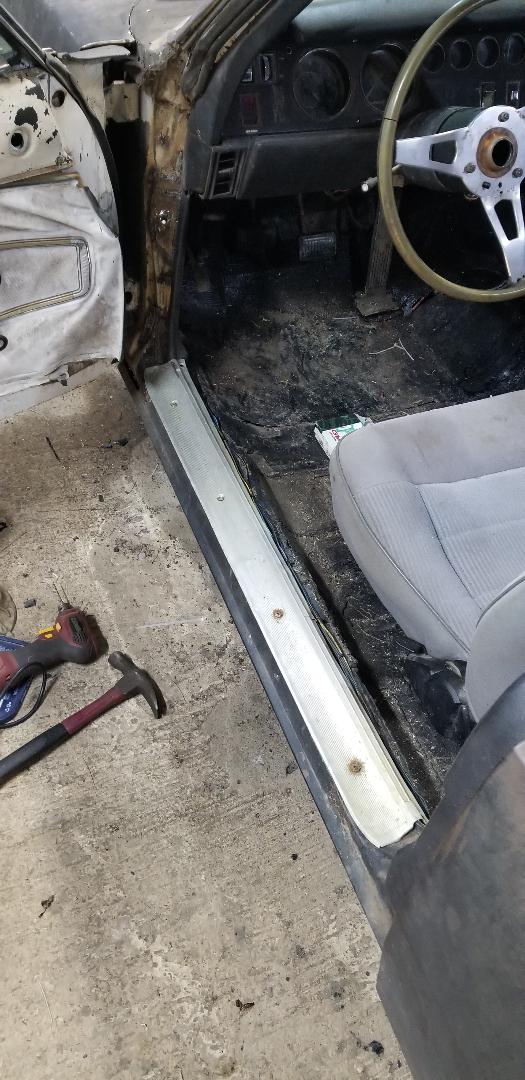 Rocker panel molding in place. With these interior components in place the next thing is to fix the rear window frame in order to glue in the window so I can be able to dry in the car prior to moving the car outside. I don't want any water getting inside the car so I'll have to take care of that window as well as probably do some minor bondo work in order to seal the small rust holes that may be present on the roof as well as around the trunk panel. With that the Dodge will move outside and pretty much stay outside for the remainder of the tasks that I have to do prior to moving on to road testing. |
