|
I finally got around to a moment where I can conduct a project that had been of interest to me for a little while, enough so that I made some preparations a while back to start the project with some ease. This project was to use a lawn mower carburetor to run a car engine. A couple other youtubers tried this idea with a nice level of success that inspired me to want to try the idea. One guy tried this idea with an old Ford 302 V8 and after adding some extra components, managed to get the V8 car to run over 40 mpg and still achieve 70 mph on the road. Another dude used a more modern Saturn 4 cyl car and managed a successful test on the once EFI fueled car. If these guys had this level of success, then there's no reason I couldn't do it. It's just a matter of what level of success. What car would I use? For the sake of argument, I chose to use the Rustang, the 69 Mustang that currently has a 200ci I-6/6 cyl engine with a 1 bbl carburetor. This seems like a decent compromise, not a huge V8 nor a little bitty 4 cyl. To start things off, I picked up a lawn mower, well more accurately a lawn tractor carburetor. This carb is normally for a 16 hp lawn tractor and should be of a size comparable to the carbs used by the other guys on their experiments. With the carb in hand, the next thing was to figure out how to mount this thing. The other guys utlized 3D printers and CAD programs to design and print mounts for their carbs. Unfortunately, my budget minded ass has to go through more or less "po' man's" methods.
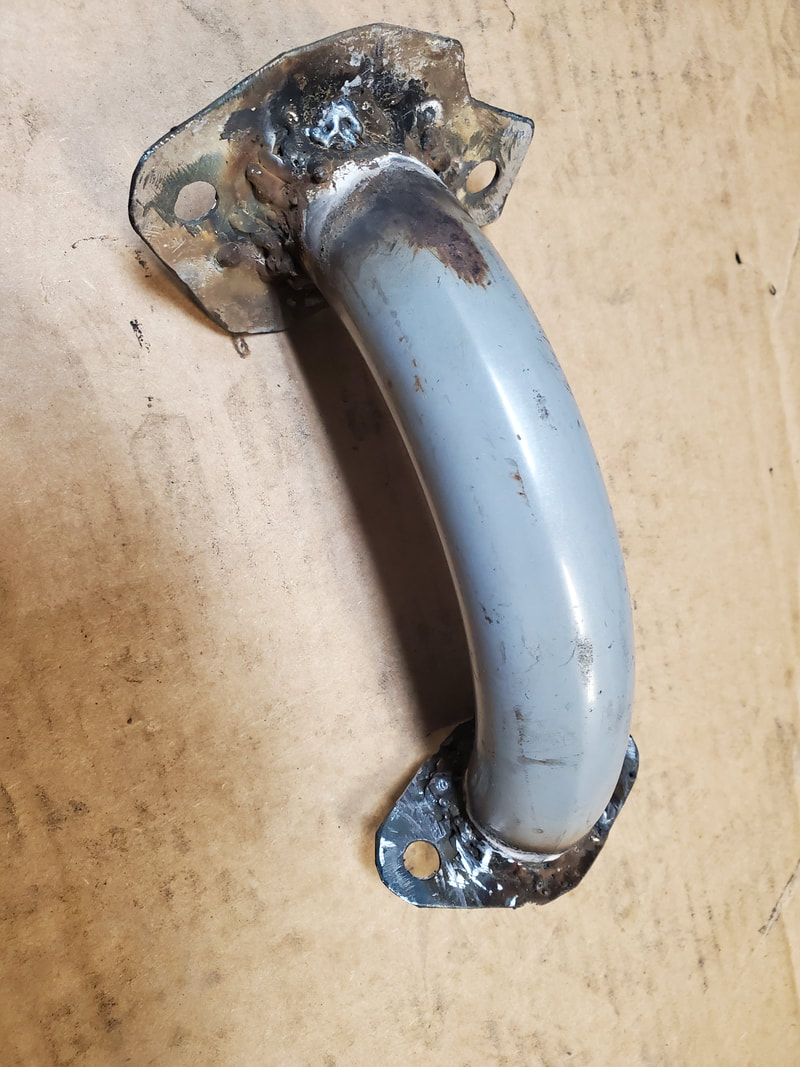
The completed intake plenum made from scrap metal tubing and bases cut from rigid sheet metal cut to match the bases of the intake and stock carburetor.
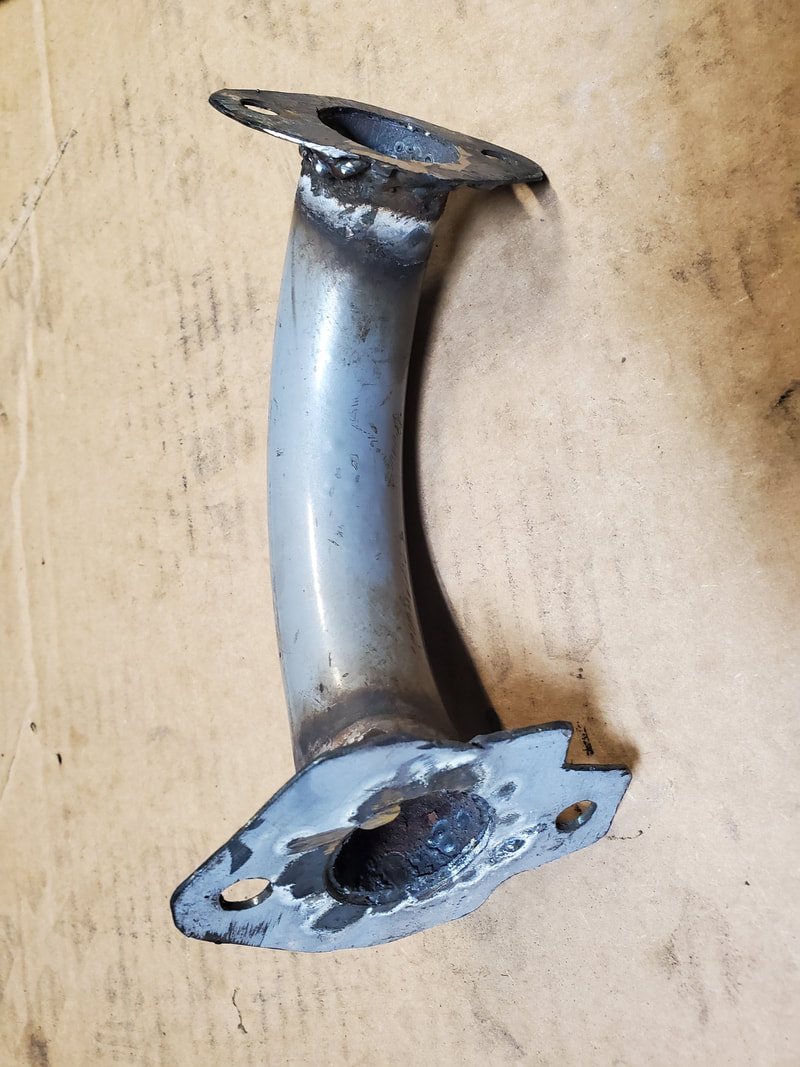
The inside of the plenum tube at one of the base mounts showing how crude yet effective this method was to fabricate an intake plenum for our carburetor.
The first thing I did was make templates of the 1bbl carb and the base so I can cut some rigid sheet metal bases that would fit in the same way gaskets would. Once the sheet metal plates were drawn out and cut out, I then took a 90 degree tube elbow and welded the two plates to either end of the tube. The popcorn welding was rather crude and ugly but decent enough to get the job done. With our upper manifold/plenum made out of scrap parts, the next move was to mount the carb to it. Here I did cut a gasket from some gasket paper and using a couple bolts, secured the carburetor to the side of the manifold that would accommodate the carb base. 
The lawn mower carb mounted to the base on our intake plenum. Gotta love those popcorn welds.
With our base carb/intake assembly made, there were a couple other things that had to be addressed. One is fuel delivery. While the nipple on the carburetor is 1/4", same as the line on the Rustang's fuel system, the mechanical pump would supply way too much pressure to the little carburetor, causing it to flood out and run super rich, negating the goals of this experiment. To resolve this issue, I sourced a fuel pressure regulator for low pressure applications. This regulator regulates from 5 psi down to 1 psi, sufficient to not burst the internals of the lawn mower carb. I'm not sure of the volume ratings of this regulator but I would like to think that it's not too high that our setup can't handle it. The next issue was an air cleaner. Since I didn't exactly have a factory air cleaner for this carb, I would have to make one from scratch. In true improvisation style, I used junk. In this case, I used a soup can. After cutting a large hole in the middle with a hole saw, I made a template to match the outside base of the carb where the stock air cleaner box would go, taking into account the location of the bolt holes. With that template I drilled the mounting holes in the soup can around the main hole, allowing me to mount the can in place on the carb. This can will accommodate rolled up HVAC filter material or something on the lines of that, which would allow for filtration without restrictions. 
The complete upper plenum manifold with the lawn mower carb and soup can air cleaner bolted up, along with the fuel pressure regulator, attached to the side with zip ties.
The next thing I did was assemble the regulator, plugging it up to the nipple on the carb. With the regulator in place I zip tied the unit to the soup can to make an all in one unit that would bolt down to the intake manifold on the 6 cyl engine. At this rate, I shouldn't have to do much to get this rig mounted in place of the 1bbl carb and have this car running, hopefully. I took the 1bbl off and razor scraped the old gasket from the manifold base to get things prepped up for the lawn mower carb installation. I just need to cut one more gasket for the manifold base and we're ready to rock and roll. 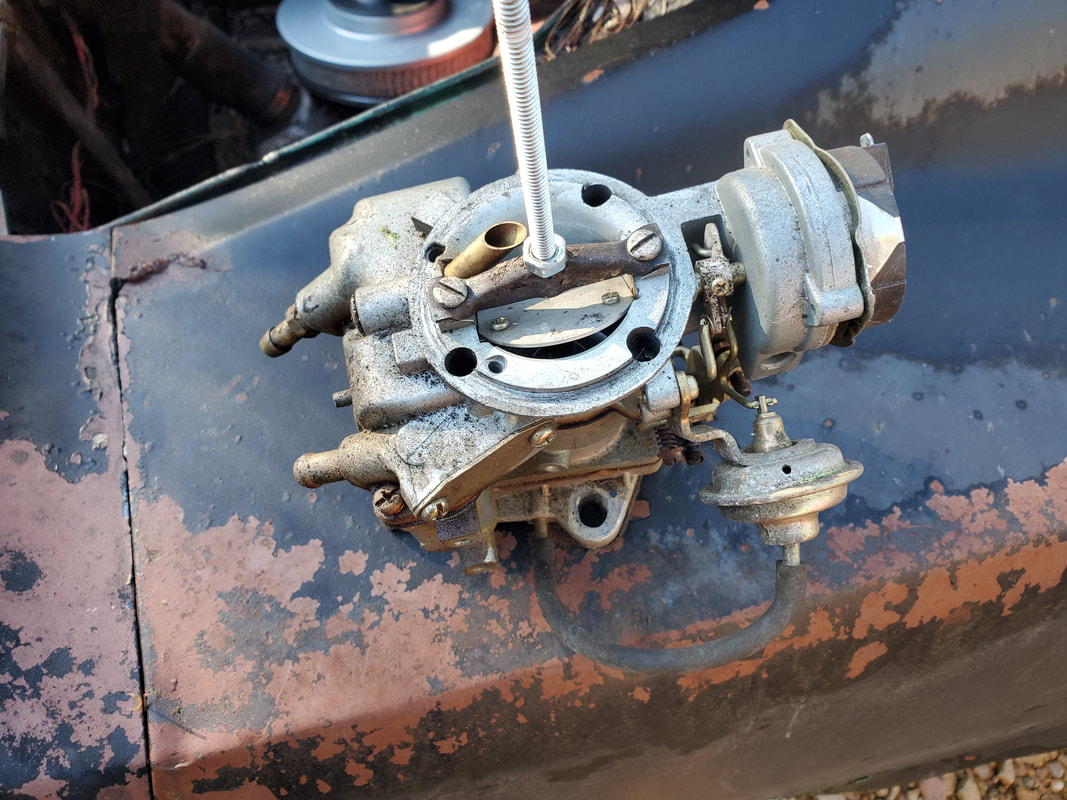
The stock 1bbl carb that is used on the 200ci 6cyl on the Rustang.
Everything is in place enough so that I shouldn't have to modify much of anything to make this rig work. In fact the whole goal is to do this project in a way where it will be nothing to revert back to the 1bbl with ease. No brackets or mounts will be cut or otherwise altered, the wire for the choke is easily replaced as the wiring is homemade anyway, and the fuel system will remain the same all the way past the fuel filter. Even the throttle cable will remain the same, save for possibly removing the cable from its bracket. Just like the other youtuber, Thunderhead289, his rig was reversible on the road for proof of concept and as a redundancy while doing the extended road tests. I plan to achieve the same goals with our little rig.
0 Comments
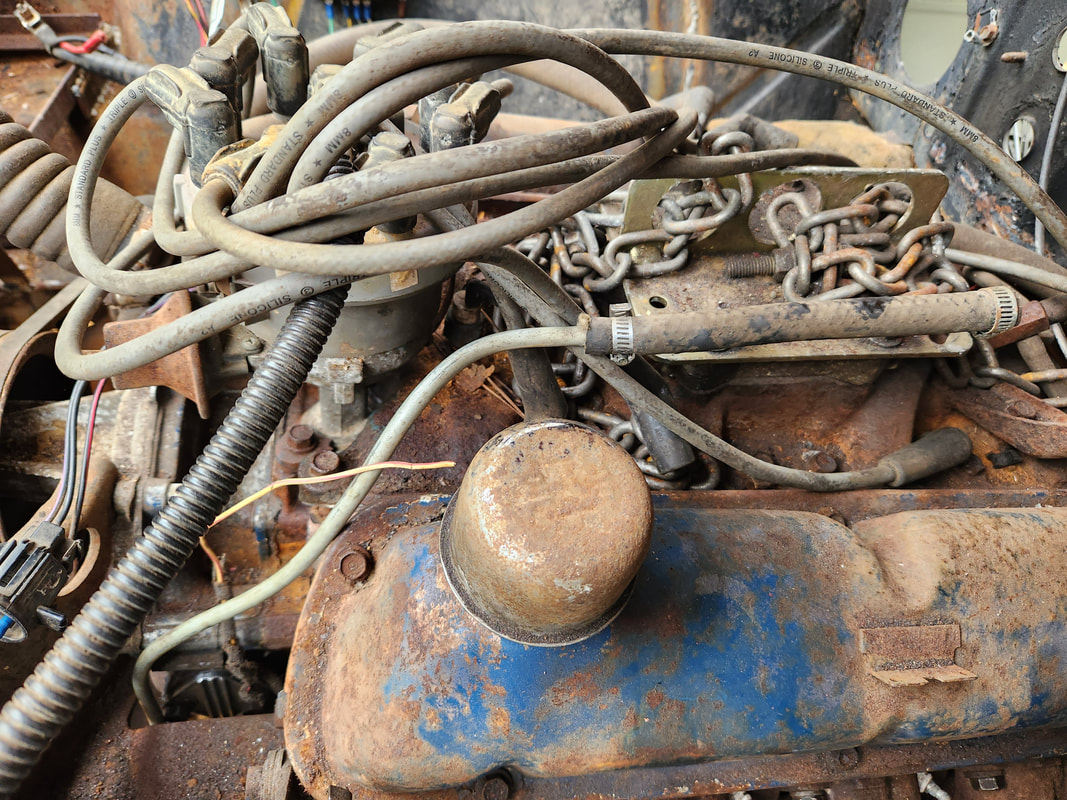
After a pause on the work with Truckstang, which really started right before we went on our overseas trip, I decided to get a few little things done since I managed to gather a few components. My biggest focus was getting the fuel system hooked up, but there were a couple other little things. One of the smaller things was installing the top radiator hose, which I happened to find in the garage, so that was money saved there, no need to buy a new one. The second thing was a set of exhaust manifold gaskets. Even though I already installed the exhaust system, there was still the matter of the gaskets. After getting a pair of gaskets, I dug out enough bolts to cover both manifolds so I could fully secure the units after putting the gaskets on.

Our set of exhaust gaskets, ready for installation.
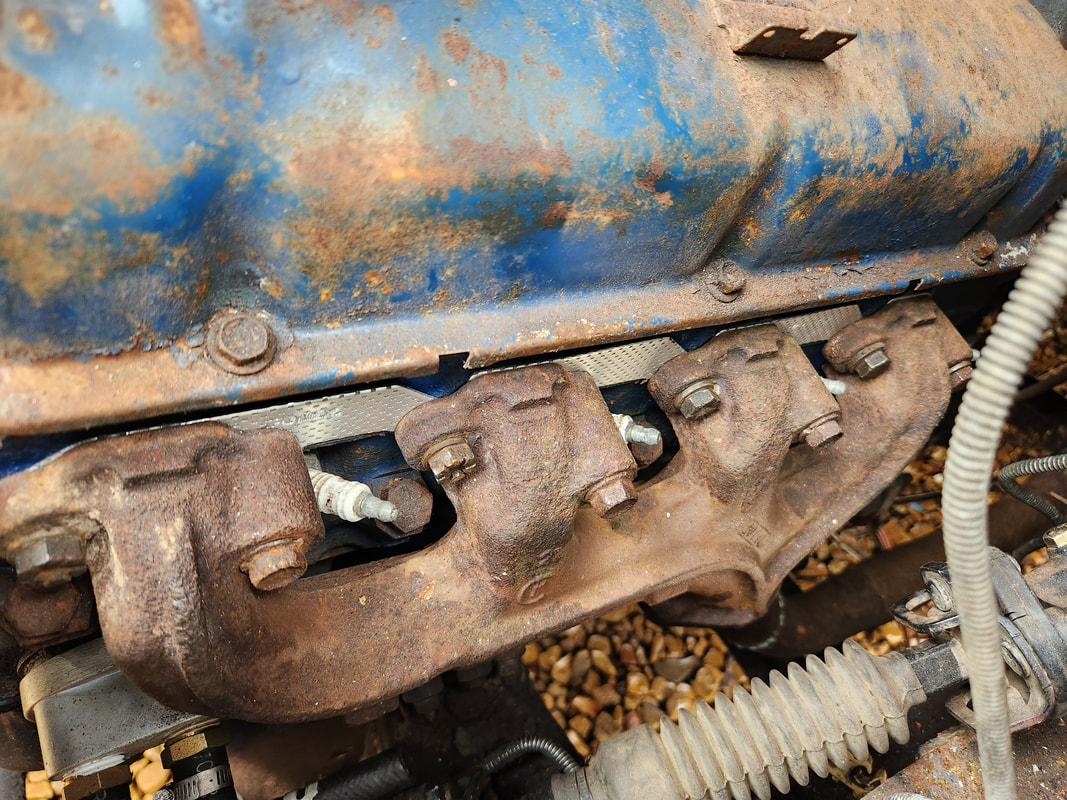
The exhaust gasket mounted in place with the manifold fully bolted up.
Now for the fuel system. At first I was going to install the stock fuel tank but it turned out to be far too wide to fit in the opening, especially since the truck frame is narrower than the opening in the trunk floor. What that means is other than a regular fuel cell, a 12 gallon boat fuel tank is the only other option I have for a fuel tank in this car. I can add an aftermarket fuel sending unit for a gauge, especially since the plastic tank's body will be easily cut into. As for the rest of the system, namely the fuel lines, that will be set up with the help of two 6ft lengths of 5/16" metal fuel line. 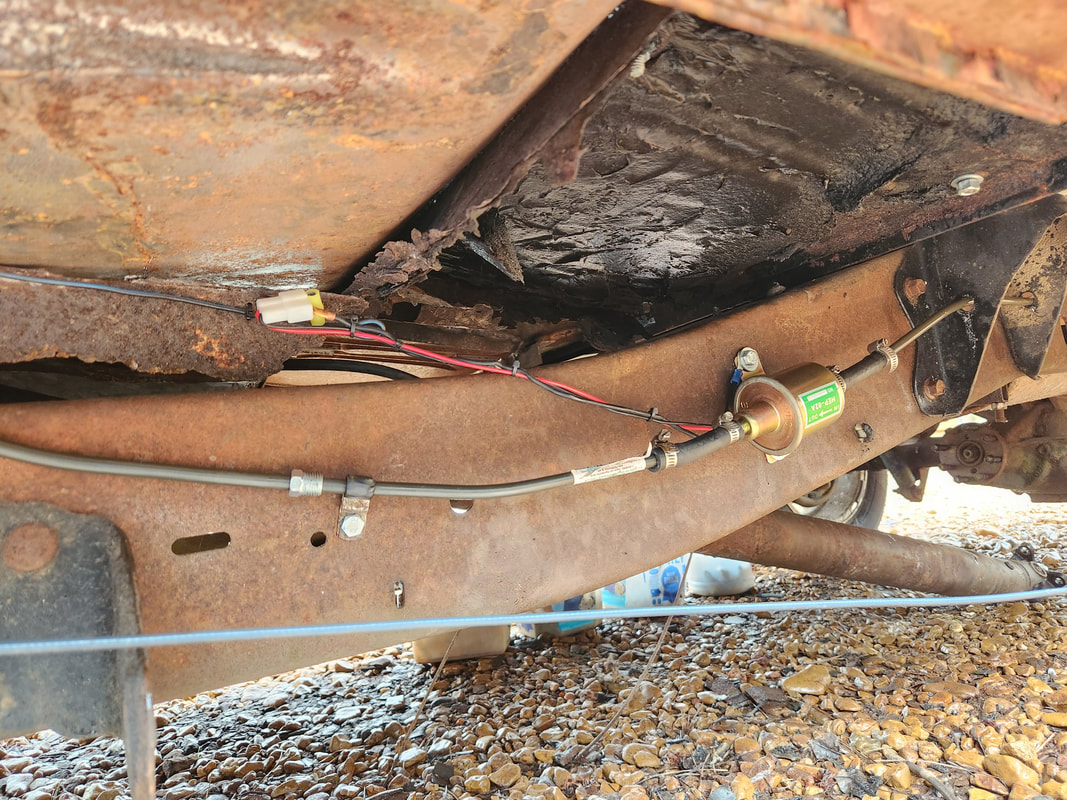
The front section of tubing is attached to the output side of the fuel pump via a short piece of rubber hose and a strap holds the tubing in place, anchored to a factory hole in the truck frame.
The fuel pump is centrally located, right under where the driver's seat is. I took one length of line and bent it to follow the frame up to the shock tower panel, then turn at an angle through a hole just behind the shock tower panel. From here the tube follows the inside of the panel to just under the power steering pump, making a 90 degree turn to go under said pump where it meets with a short length of bent tubing that works its way between the accessory brackets and up to the top of the engine to where the carb would sit. I used some retaining straps to help hold the tubing to the frame where one hole was present, and drilling a couple holes, one at the shock tower panel and one at the middle body mount. A nut and bolt hold each strap in place, securing the tubing. 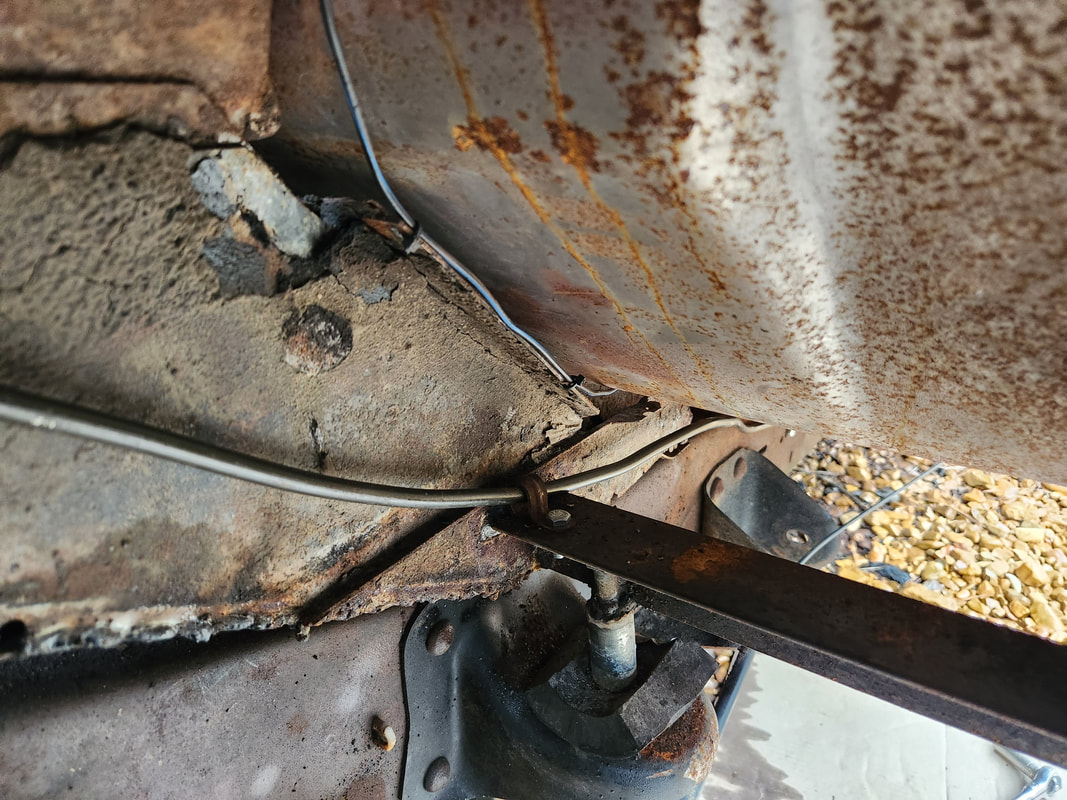
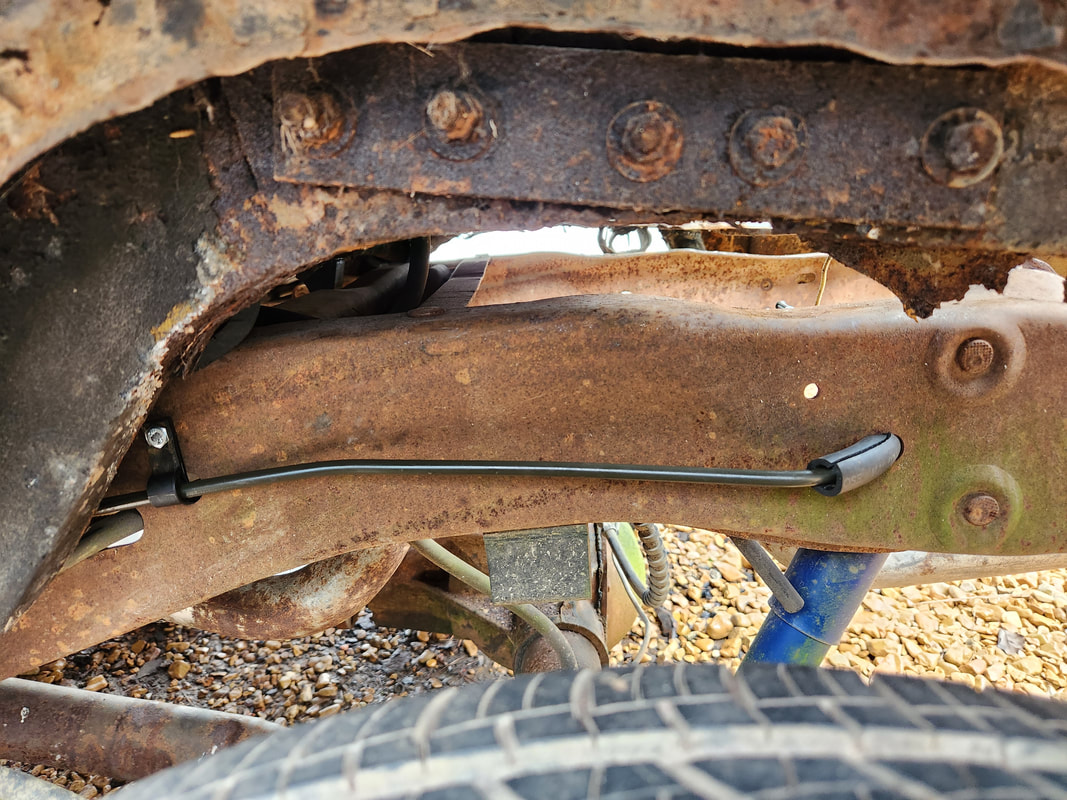
The metal line angles up, following the old subframe. A strap is anchored to the body mount that I welded to the frame earlier.
The tubing angles up and makes a slight bend to go through the large hole in the shock tower panel. A piece of rubber hose will be cut lengthwise and wrapped around the tubing to cushion the tubing so it won't be chafed by the metal edges of the hole.

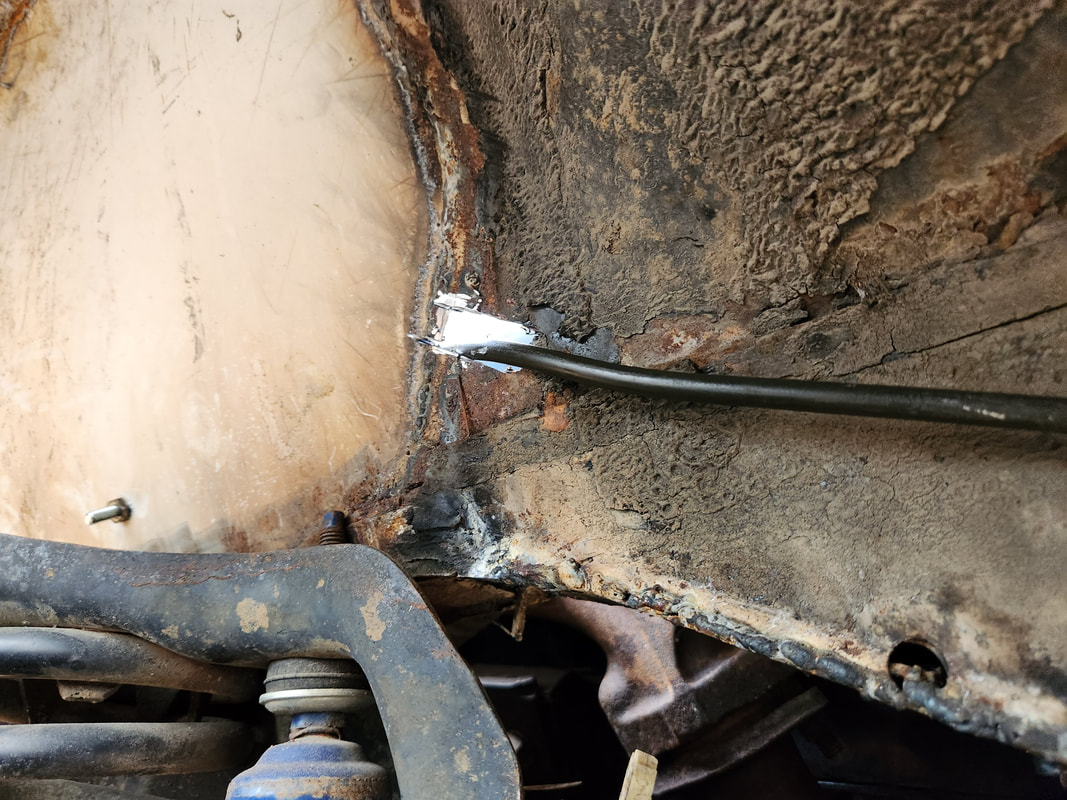
A strap attached to the inside of the shock tower plate holds the tubing in place as it gets ready to bend towards the engine.
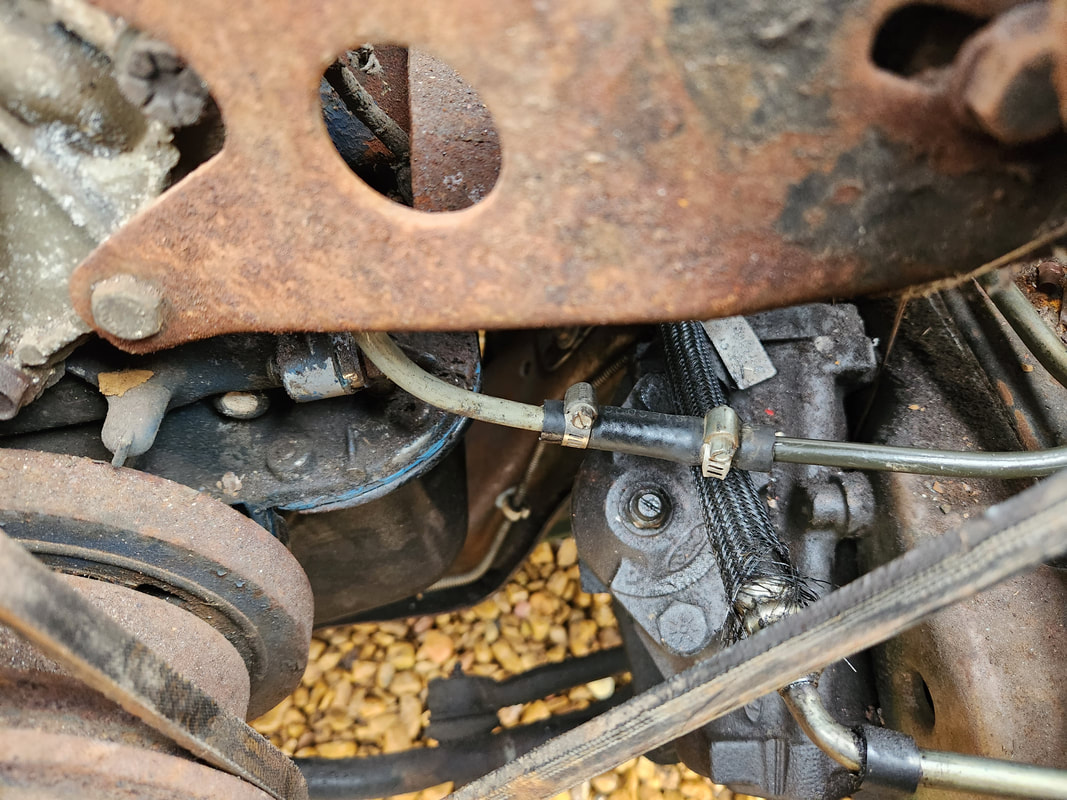
A short piece of rubber hose connects the end of the 6ft tube to the end of the short fuel line going up to the carburetor.
A shorter piece of fuel tubing that was used to connect the mechanical fuel pump to the carburetor is used here.
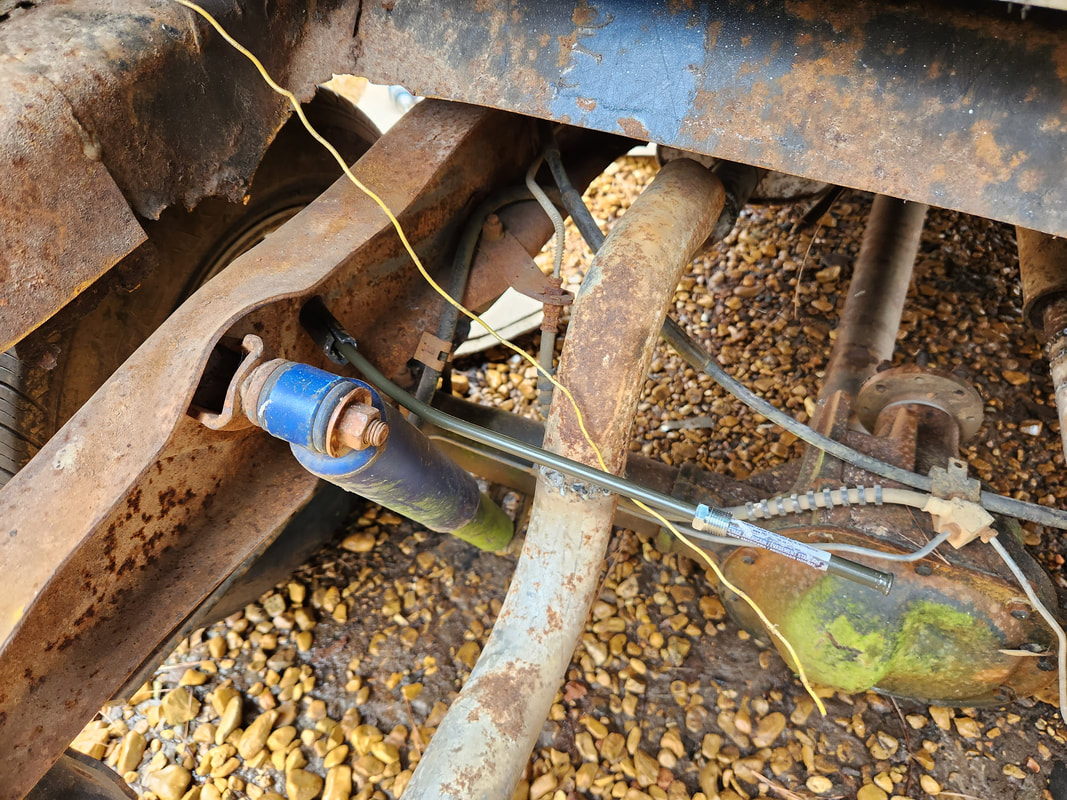
On the back side of the fuel pump, the input side, I just needed a single 6ft line. This time to accommodate the mounting of the line, I drilled two holes in the Ranger frame/body mount in order to route the tubing through, just behind the fuel pump. From here I bent and routed the tubing along the frame rail up to another factory hole in the frame, where the tubing is bent and routed through towards the trunk. A single strap holds the tubing in place. To help keep the tubing safe where it passes through the hole in the frame, same as the front, a piece of hose is cut lengthwise and wrapped around the metal tube, then the hose is slid through the larger hole, acting as a cushion between the tubing and the metal edges of the hole. This way vibrations will not chafe the metal tubing and cause a potential leak down the road. The rest of the tubing is pointing into the trunk where it will be connected to the boat tank with a short length of hose. 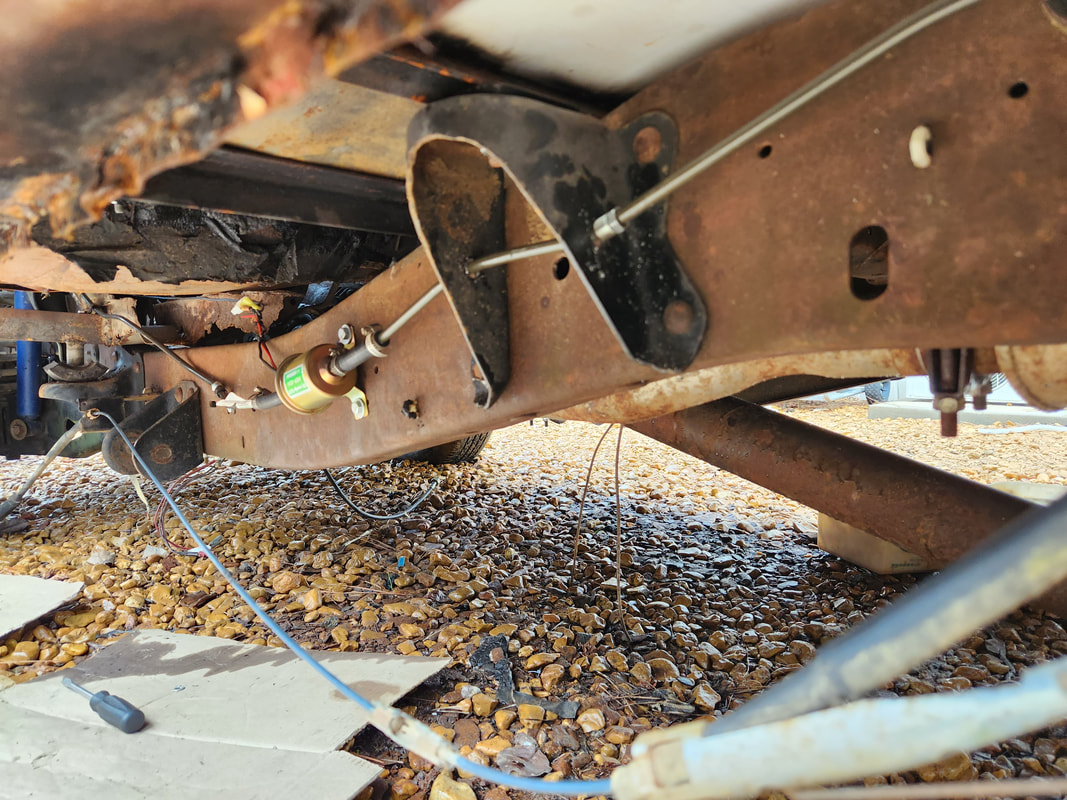
The tubing is connected to the fuel pump with a short piece of rubber hose then is routed through two holes drilled in the body mount on the truck frame.
A single strap holds the metal line in place and a piece of rubber hose cushions the tubing where it passes through the frame.
The last couple feet of fuel line are bent and routed through the frame and into the trunk where it will be able to be connected to the boat fuel tank with a short length of rubber hose.
At this point the fuel system is done, short of the boat tank and carburetor. The carb is already on order, straightout of China. The boat tank will be ordered first chance I can free up $100. I'll also have to get some angle iron and maybe some other metal to fabricate a frame to hold the boat tank. Once that's installed I can then fabricate the rest of the trunk floor to complete that part of the car. Only other things left on a side note are the H4 headlight housings, universal heater box, and a driveshaft. The headlights and heater box are just a couple things to make the car more complete and able to be used under normal circumstances, but the main thing that is needed after the fuel system is completed is the driveshaft.
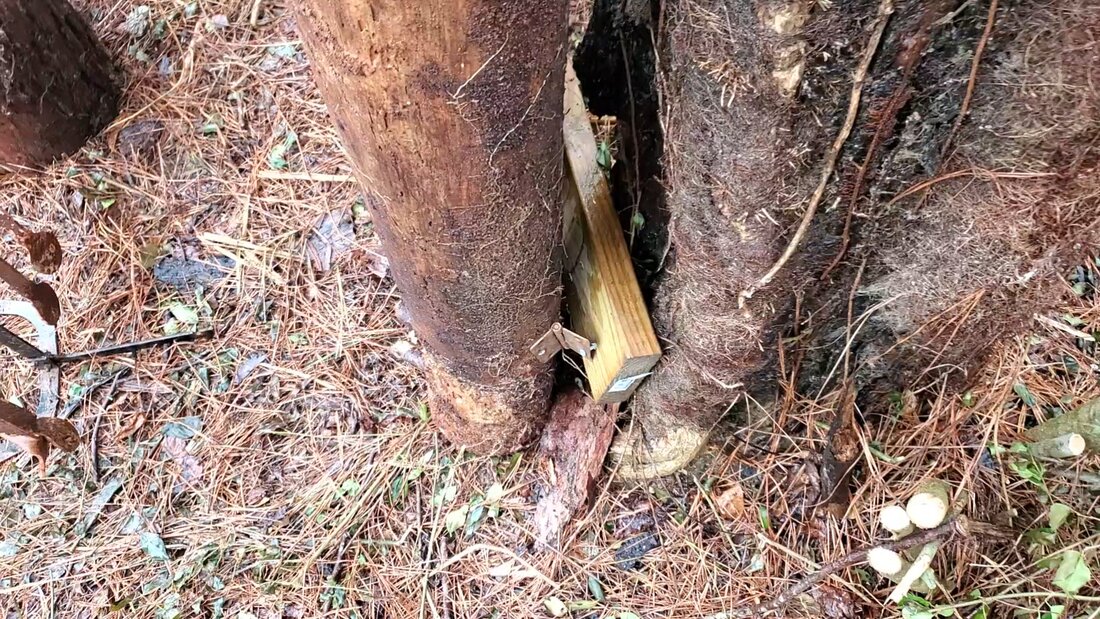
With the greater reconstruction on the Fuel Shed done, all that was left was to reinstall the pallet pickets that we had pulled off to allow us to cut the walls apart from each other at the corners. I had already installed the drums and other internals, even the loose fuel cans and propane tanks and the like. Many of the pickets were pulled off in batches of two through five pickets, making it somewhat easy to tack back up. At first I thought I'd probably have to pull the pickets apart and tack them up singly, but that wasn't the case. As I started tacking up the pickets, from the bottom to coincide with the overlapping, I had to take into account the holes for the faucets on the drums. The sections of pickets that had the holes in them were tacked up first, leaving the bottom loose to allow me to insert a picket under the bottom piece. The whole operation wasn't complicated, it was more time consuming, given the idea that some pickets had to be replaced due to degradation and the idea that I had to climb the ladder to reach the higher points of the structure to get the pickets in place. 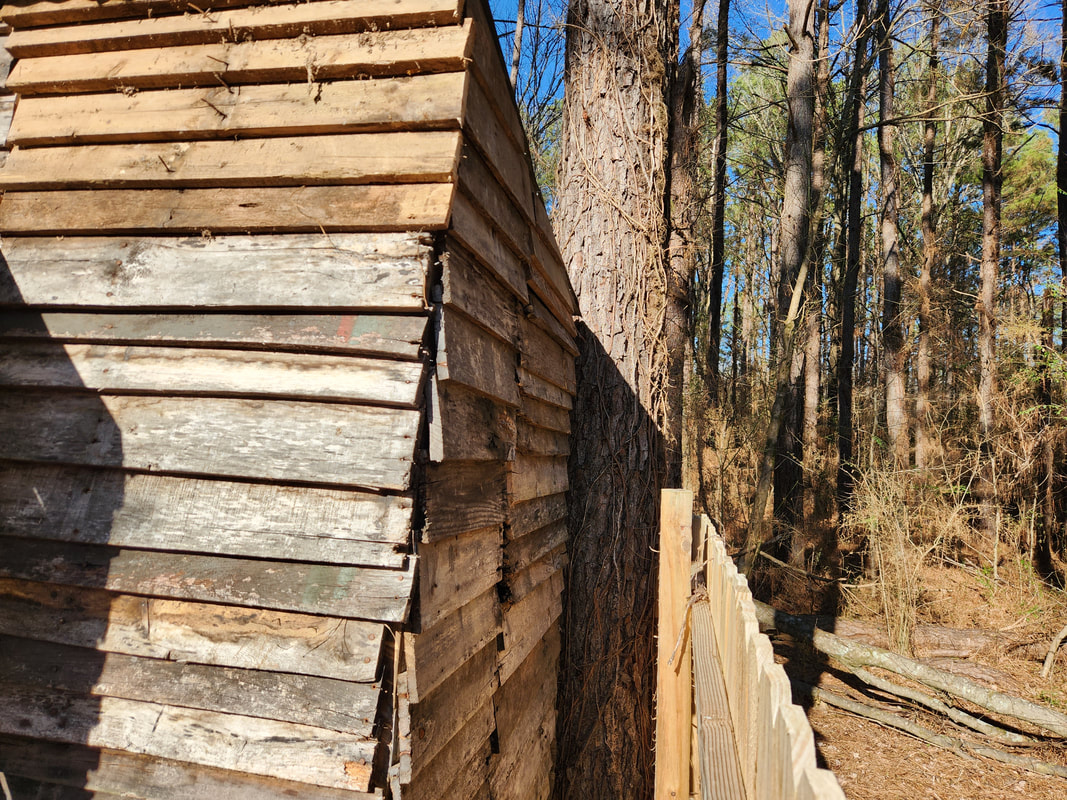 Right side of the shed with the back row of pickets tacked in place from bottom to top. 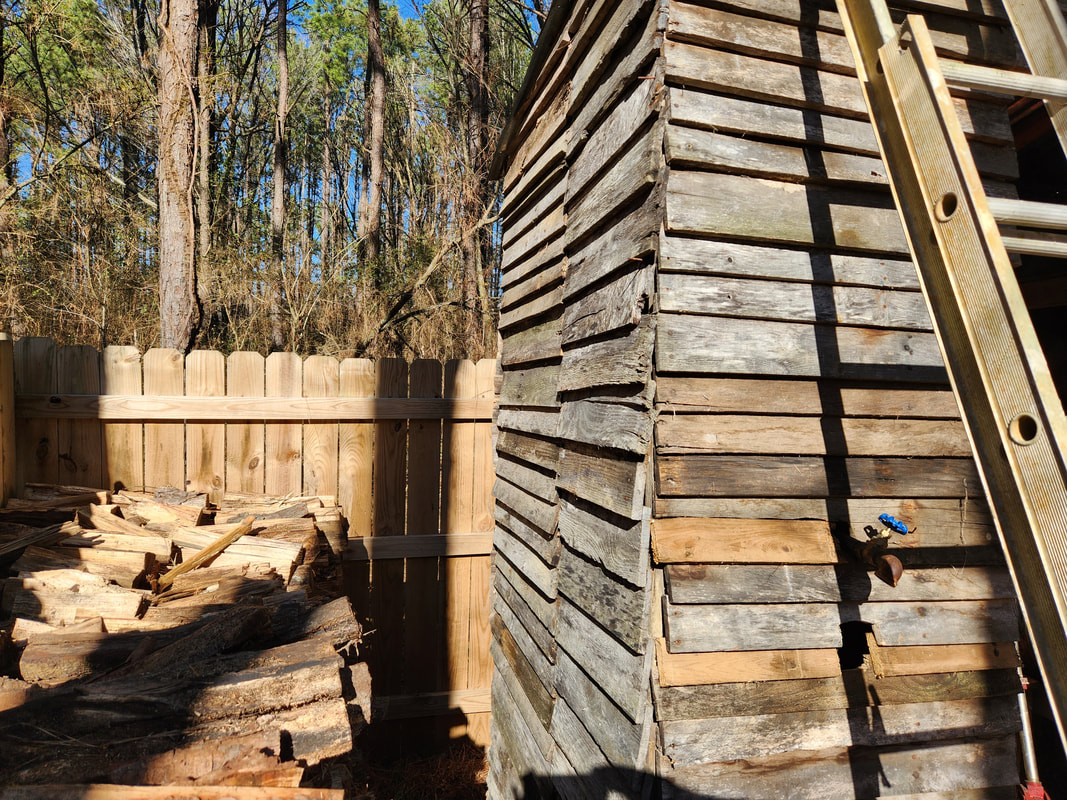 Left side of the shed with pickets tacked back in pace including the top few pickets that were cut at an angle to coincide with the angle of the roof. The pickets on the sides are uniform up to the last few pickets that had to be cut at an angle to coincide with the angle of the roof. I had to install these pickets first, with the bottom left loose to allow me to tuck the lower picket under it to complete the installation of the pickets. One of the other changes that I planned on making was the addition of another porthole in the front to allow me to install an extended filler tube from the outside into the drums. This would be an improvement over the filler tubes that were tucked through a small gap between the front of the drums and the back of the front wall. To do this I had to cut holes in a couple pickets just in front of the larger port on each drum. I was able to cut a couple holes in the pickets as I worked my way up to accommodate the lower two drums but the top two I just tacked up the pickets before cutting the holes, really on the mindset that I wanted to get the pickets done. 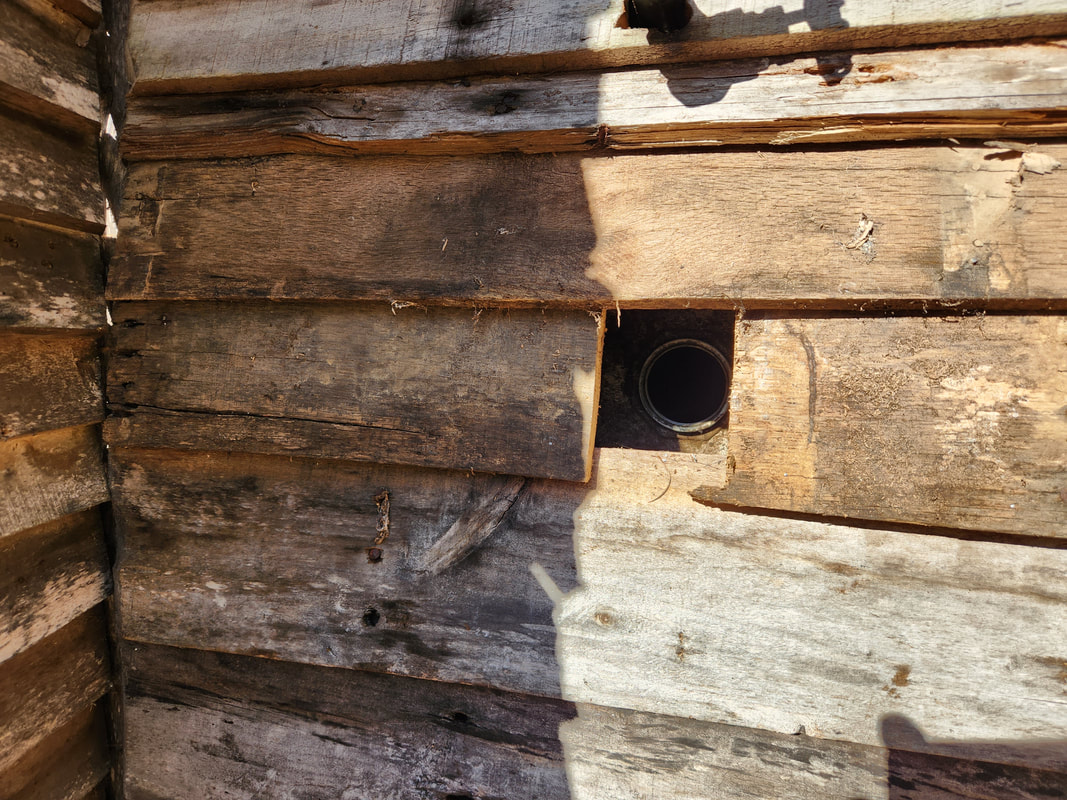 The lower drum's filler port hole, done by cutting a picket into two pieces that were short enough to create this hole that lined up with the port on the drum. After the pickets were installed, I inserted 2" male thread/female smooth bushings into the ports on the drums and put a length of PVC tubing in place, cut the tubing short then added the 2" street elbows to the tubes, adding the screw on caps. For the top holes I eyeballed where the ports were then drilled a large hole for each port with a step bit, then used the saw to cut away bits and pieces around the initial hole to make it large enough to accommodate the 2" PVC tubing. With the fittings in place for the top holes the modification for refilling the drums was completed, for the most part. But there's more. 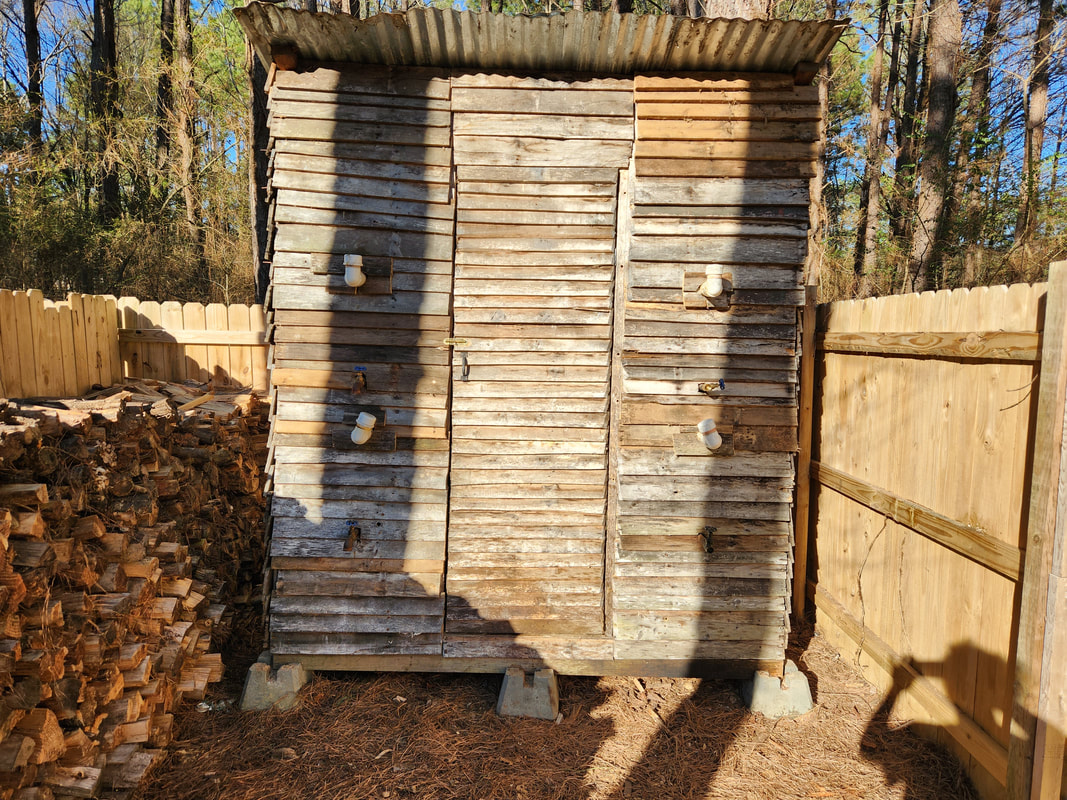 Filler tubes in place on all four drums, with added pieces of cut pickets used to cover up the large holes that were cut to accommodate the PVC tubes. 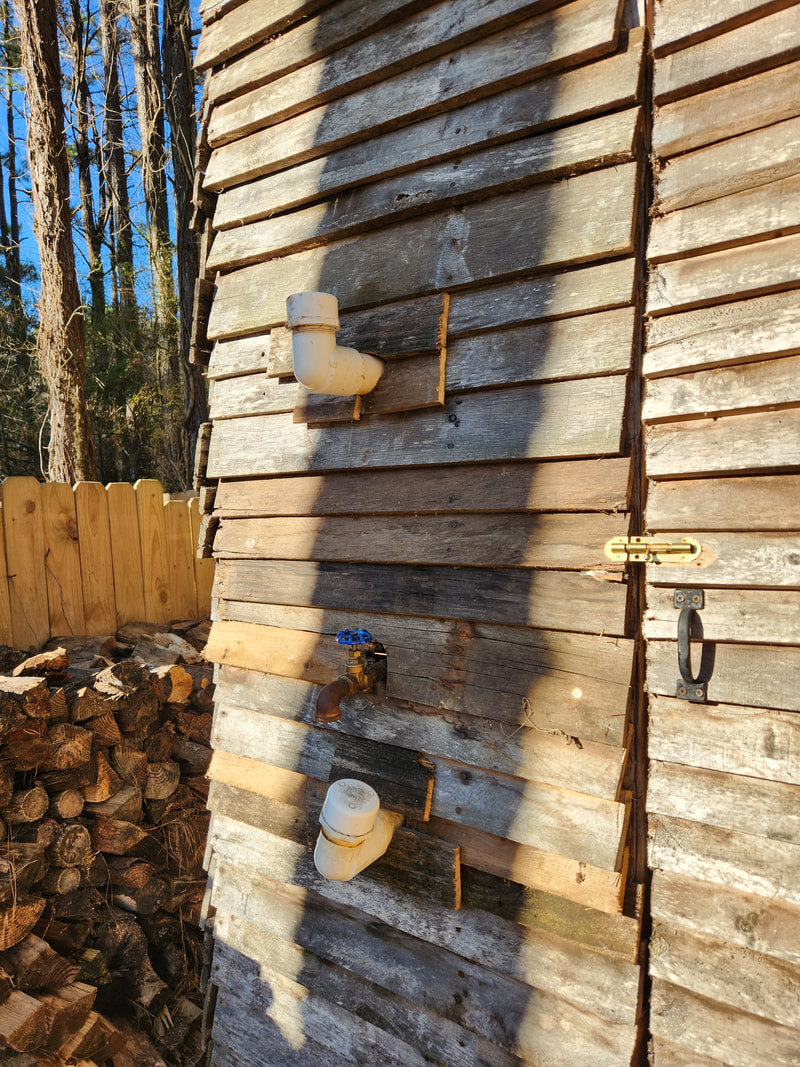 Closeup of the pieces of pallet boards tacked around the PVC tubes to close the gaps around the tubes. Another little thing I did was take leftover pieces of pallet pickets and chop them into curved sections to fit around the PVC tubes to help close in the gaps. With this all done, the next and pretty much last thing that had to be done was to add some extra pipe to the faucets for the top drums. This is because the filler ports for the bottom drums would be right under the faucets for the top drums, which would make getting fuel from these drums difficult, unless I add some pipe to bring the faucets out far enough to clear the filler tubes. 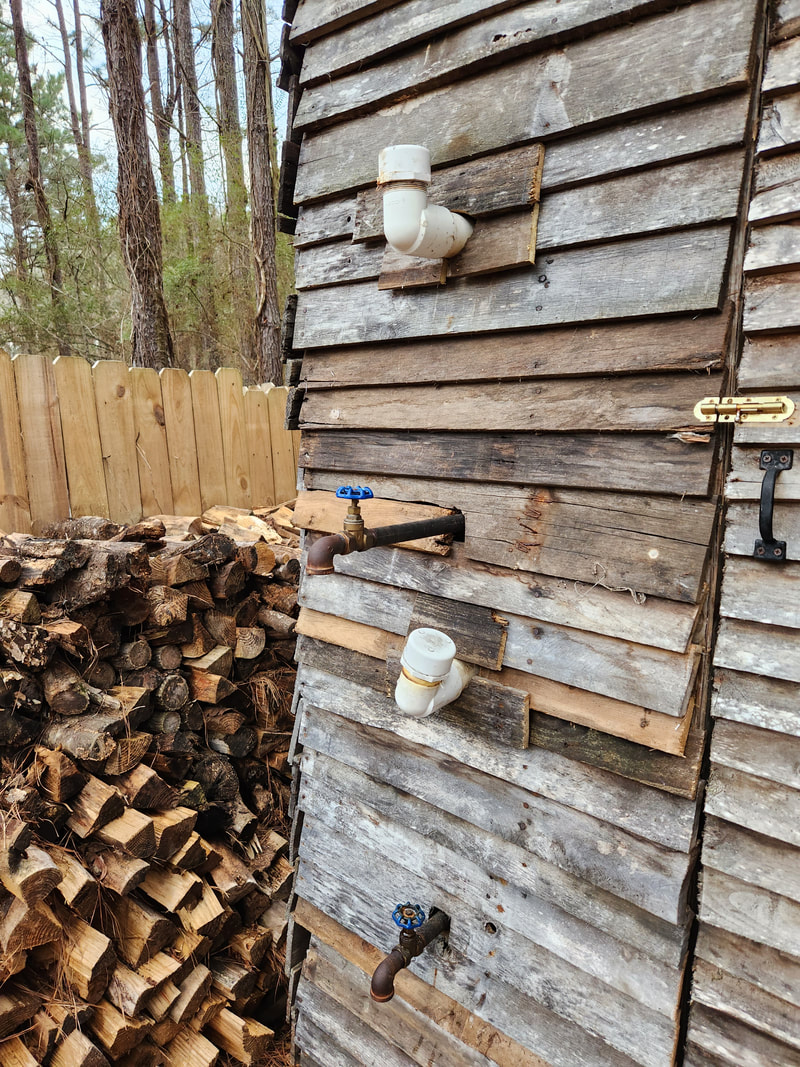 The faucet pipes for the top drums after installing an extra nipple and coupling to extend the pipes out to clear the bottom filler tubes. With the addition of a coupling and a 6" nipple to extend the faucet and pipe out, the top drums are now set and able to be used in the new configuration I worked out. With that, the Fuel Shed is ready to be back in business, with the final thing being to fill the drums up with fuel once again. I might be compelled later to use some expanding foam around the different points on the structure to close in the multiple gaps that are present around the PVC tubes, corners and other points since the walls are nothing, but pallet pickets used like shingles. This of course will be something that'll be done down the road. With the breaking down of the Fuel Shed, there also came the moving of all the components to the new build site. Some things are easier than others to build but some parts would be a real pain to move. After leaving the WVO drum to drain overnight, I was finally able to pull the remaining two drums and their supporting frame from the structure, allowing me to cut through the remaining nails that held the rear wall and front wall to the side wall. 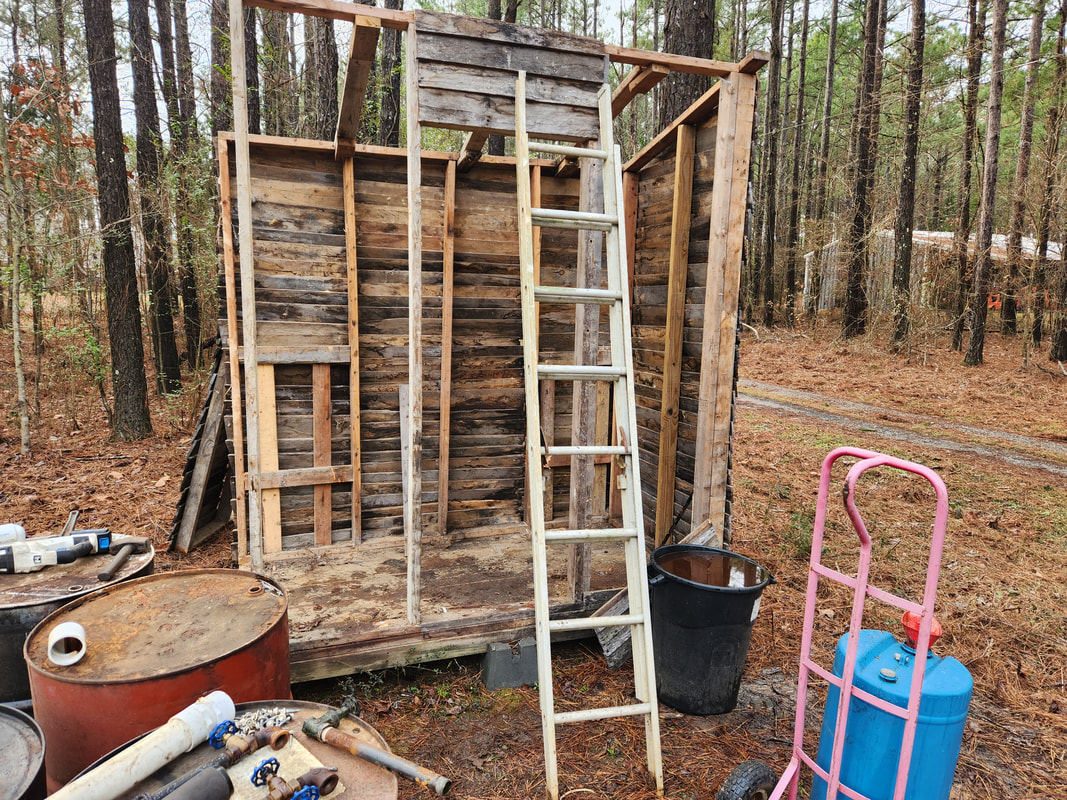 The structure after getting the last two drums and support frames removed from the structure. As for the pallet pickets that I had to remove in order to expose the corners, I laid everything down into four separate piles to coincide with the walls that they came from. When I removed the pickets, a lot of the pieces came off in sections of 3, 4, or 5 pickets. While this might make things look easy when it comes to disassembly, more than likely I will be breaking the pickets down and re-nailing the individual pickets back up, as things like this never go back up exactly as they came apart. 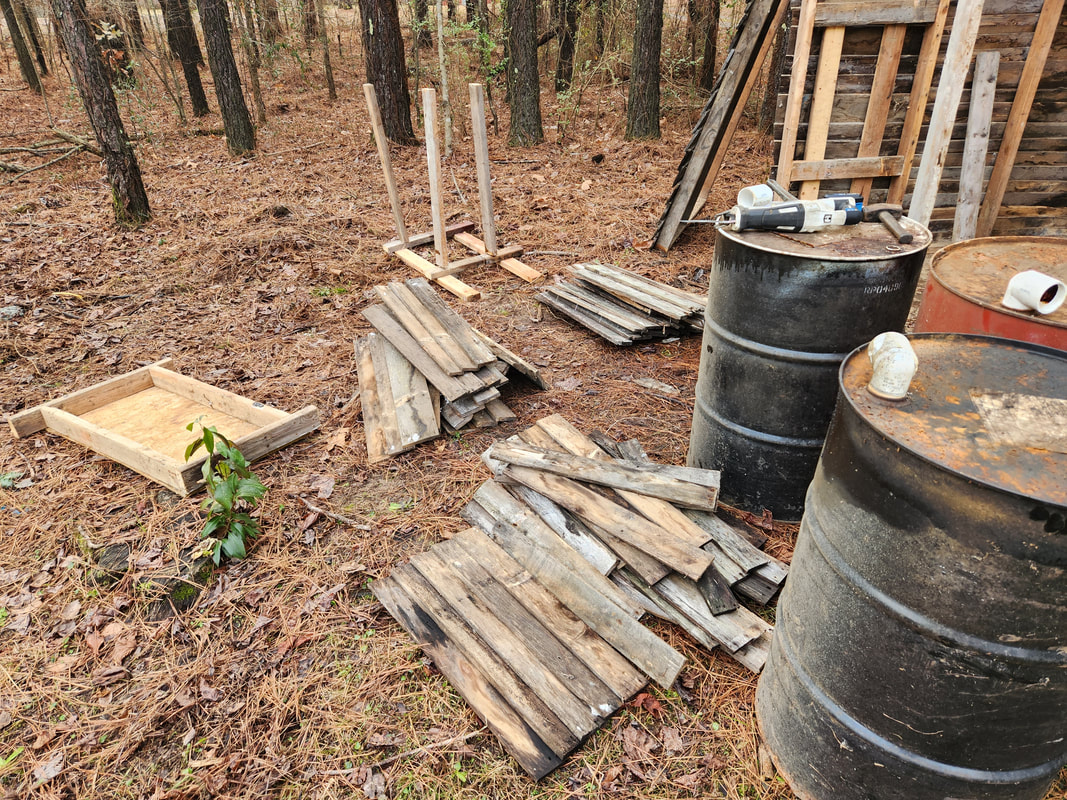 The piles of pickets pulled from the walls to clear the corners to allow me to cut the nails holding the walls together. The first wall that came down was the front wall. This wall had all the pickets, save the few above the doorway, removed. This section was light, so it was easy to move out of the way. The side wall was easy to move just as well, due to the idea that one row of pickets was removed, and the wall was smaller. When we got to the rear wall, the one that was still fully covered in pickets, that wall proved itself to be heavy as hell. Even when we laid the wall against a dead tree trunk, it didn't take long before the weight made the tree break at the base and fall over. 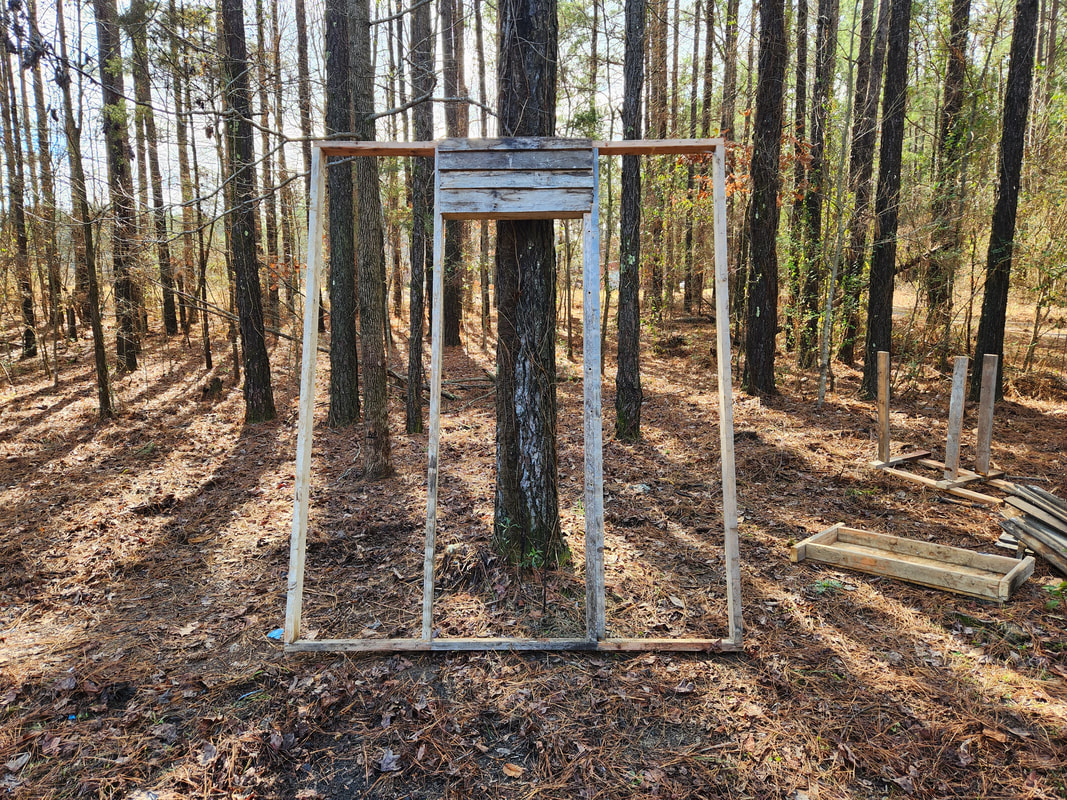 The front wall frame removed after cutting the nails holding it in place. 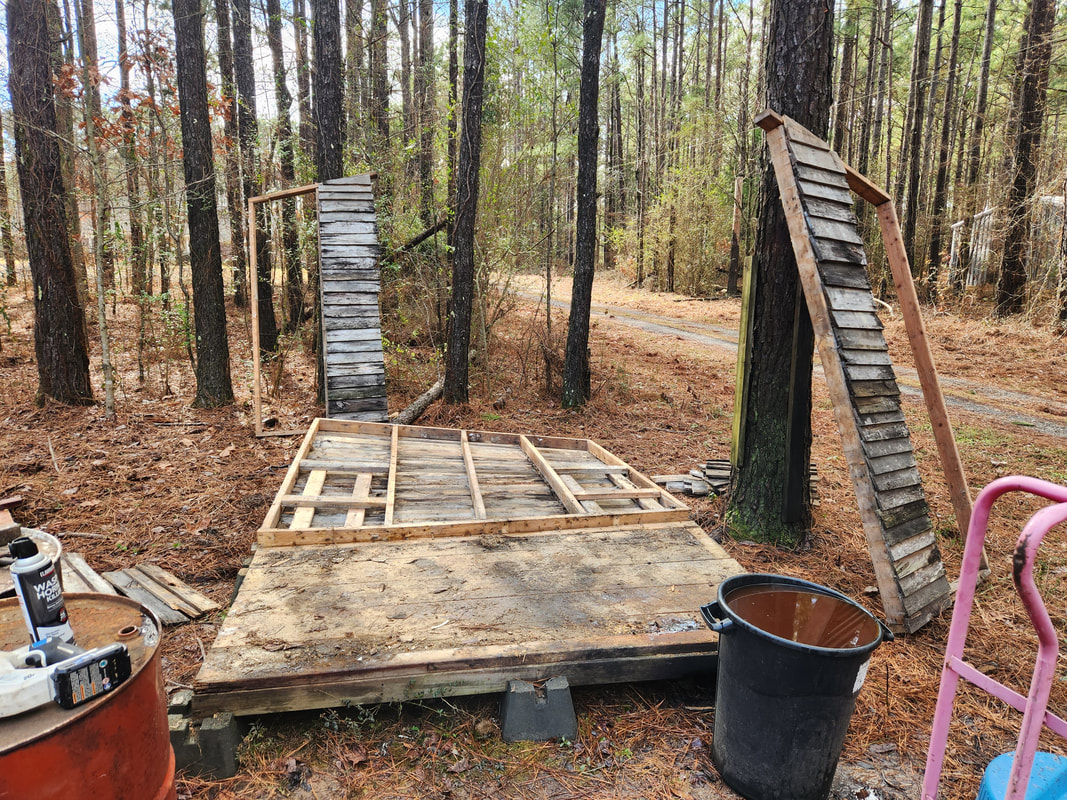 The rear wall of the shed laid down on the ground after separating from the foundation base. Note the other walls and piles of pickets around the worksite. With the walls down, the next move was to move the foundation to the new site. Along with that were the foundation blocks. Just like the rear wall, the foundation base was heavy as shit and took some real effort to move. We eventually got the piece moved and with the blocks, set down and ready to build on. 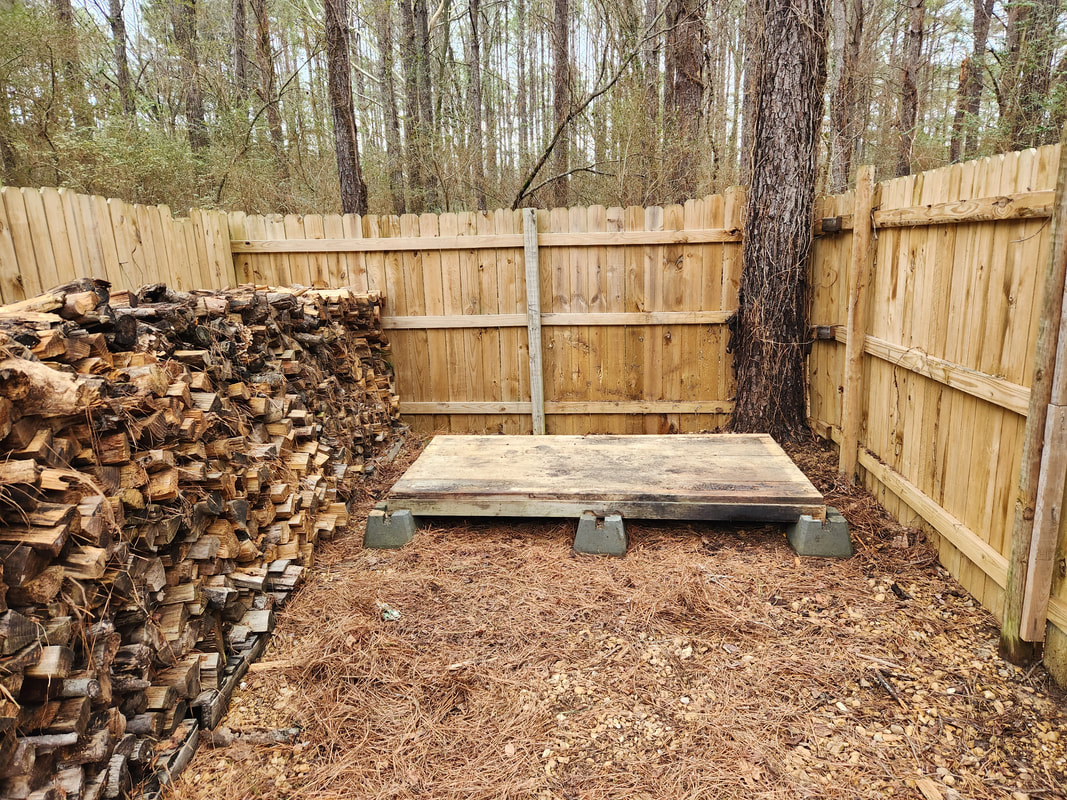 The foundation of the shed set up on the support blocks. Of course, with the foundation set down in place, the first wall to go up was the rear wall, the hardest one to move. After muscling the wall across the yard and sliding it the remaining 50ft to the build site, we got the wall up and staged in place. After screwing the wall down, I grabbed the side walls and got them in position and screwed them down while my partner held the rear wall up. Once the three walls were up, the front wall was child's play. With the walls up, I was able to go ahead and start assembling the internals of the shed. 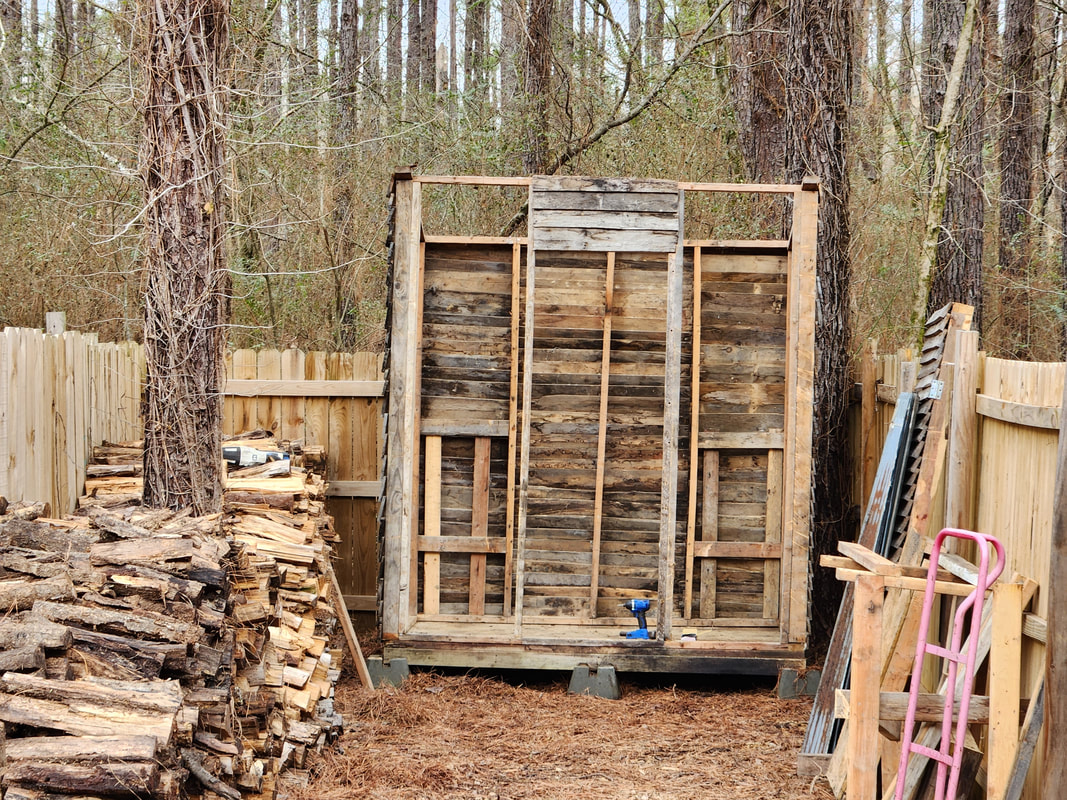 The structure with the drum support frames secured in place. To help in getting some of the boards secured, I used some old brackets that were salvaged from the disassembly of the old porch. All the internals of the shed were the next thing, I had to finesse the frame sections in place and line things up before securing the frames with wood screws. Once the frames were in, I moved the drums in place. I installed the top shelves and the middle bench, laid the roof sheet metal in place, and installed the door, getting everything in place and off the ground. I moved the picket piles in place, making sure to keep the piles separated and located where they would be going, as far as which side wall and which side of the front wall they would go on.  The structure with the fuel drums in place and sheet metal on the roof. 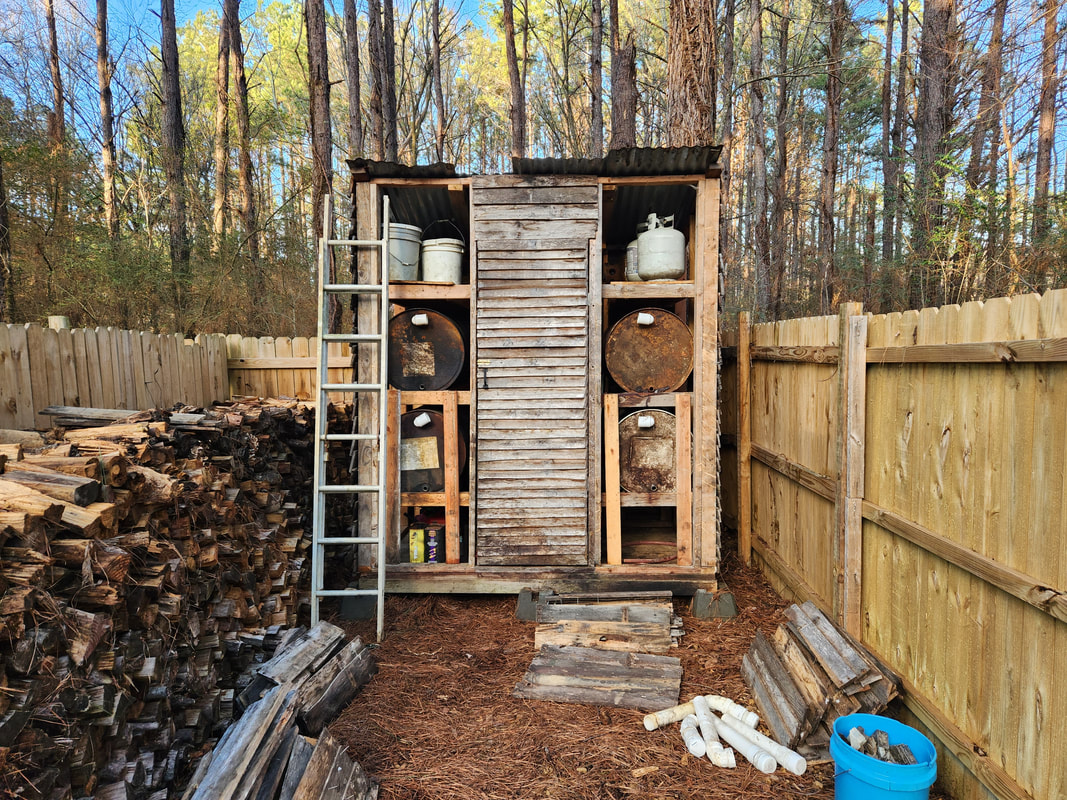 The Fuel Shed with the door in place, and the oil wood buckets, propane tanks and extra fuel cans all stored back in place where they were when the structure was in its old location. Note the piles of pickets staged in front of the shed. At this point, other than the garbage can and the 15 gallon barrel with the WVO, I pretty much cleared the area where the Fuel Shed used to be. I will have to transfer the oil in the garbage can to the drum to top it off and find some other vessels to use so I can get the oil out of the open can. I won't put this oil back in the WVO drum but will instead set it aside in the other vessels until I can utilize the oil in making a diesel alternative for later use. As for the drum, I'll just fill it with regular diesel to help dilute the remaining WVO in the drum. That fuel will more than likely be used in some future diesel heaters I want to try out, as well as some small single cylinder diesel engines I want to get back into playing with in future projects. In the end, the drum will be dedicated to holding straight diesel fuel. 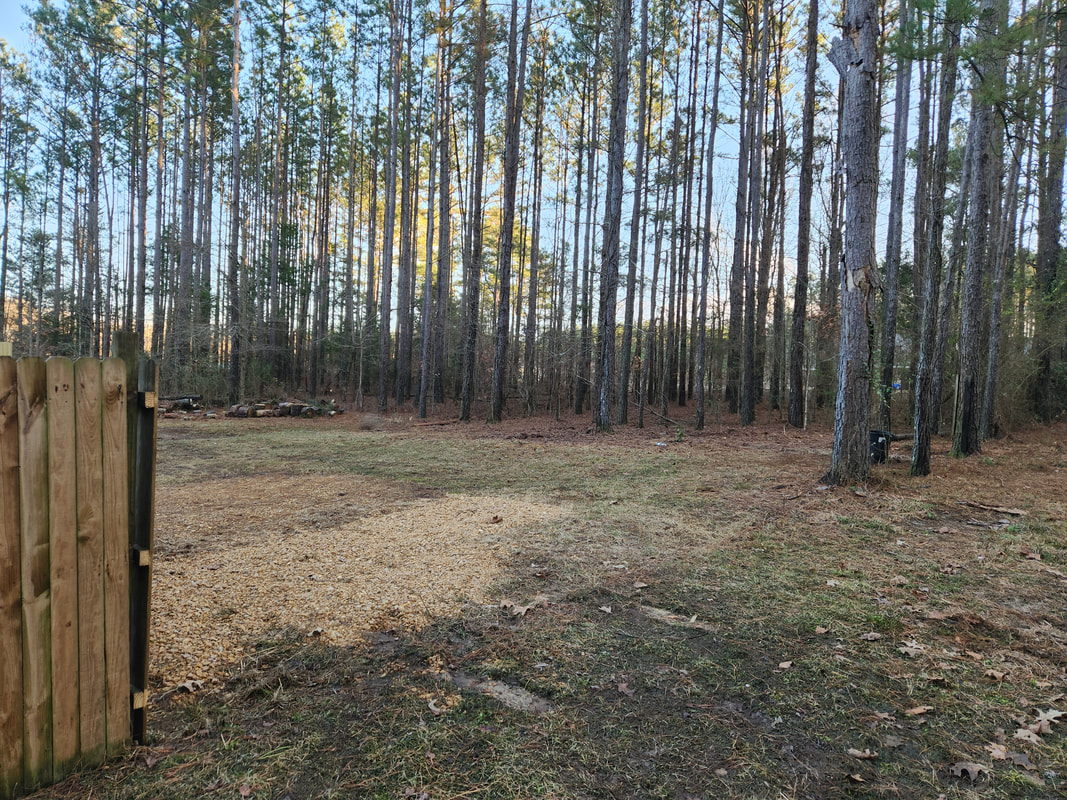 The old backyard area after clearing the Fuel Shed from the area. Only thing left are the vessels holding the WVO drained from one of the drums. The home stretch will be finishing up the pickets and making some small changes. One thing I want to do is move the filler ports for the drums to the outside so there will be no need to go inside the shed to refuel the drums. I'll do this in the same way as the faucets, by putting holes in the pickets where the filler tubes would go and add pieces to reach out from the drums through the wall and to the outside where the 90-degree sections and screw-on end cap will be outside. The faucet for the top drum will also get an extension of pipe to put the faucet out so it will not be directly over the filler port for the bottom drum. At some point I would probably add a motorized pump for use in fuel cans to help make it easier to pull fuel from the can at the ground and up into the higher filler ports for the top drums. Trying to hold 5-gallon fuel cans over one's head for several minutes to fill the drums will be very taxing. Besides using step ladders to get high enough to do the refueling of the drums, using motorized filler hoses is the most viable option. Soon the Fuel Shed will be completely moved and ready for business once again, but within the fenced in compound. With the firewood staging area prepped up as intended and the shooting range finished, the time has come to start breaking down the Fuel Shed. A part of me pretty much felt that this would not exactly go easy. Prior to the beginning of the breaking, I had emptied out the two drums of their gasoline, using the fuel in the vehicles and setting aside the money that would've been used for fuel, in order to be able to refuel the drums after rebuilding the structure. At this point, the next thing was the removal of all the loose stuff from the shed, which included extra fuel cans that were full of gasoline, some diesel cans full of old gasoline for use in mixing fire starting fuel, some other smaller cans, buckets with oil wood for fire starting, and some propane tanks. Once all this stuff was done, I started off with the removal of the "bench" that held the fuel cans. Since all of this structure was assembled using nails and brads with the different nail guns, I had to either pry the boards loose or flat out cut through them with a metal cutting blade on the saw. 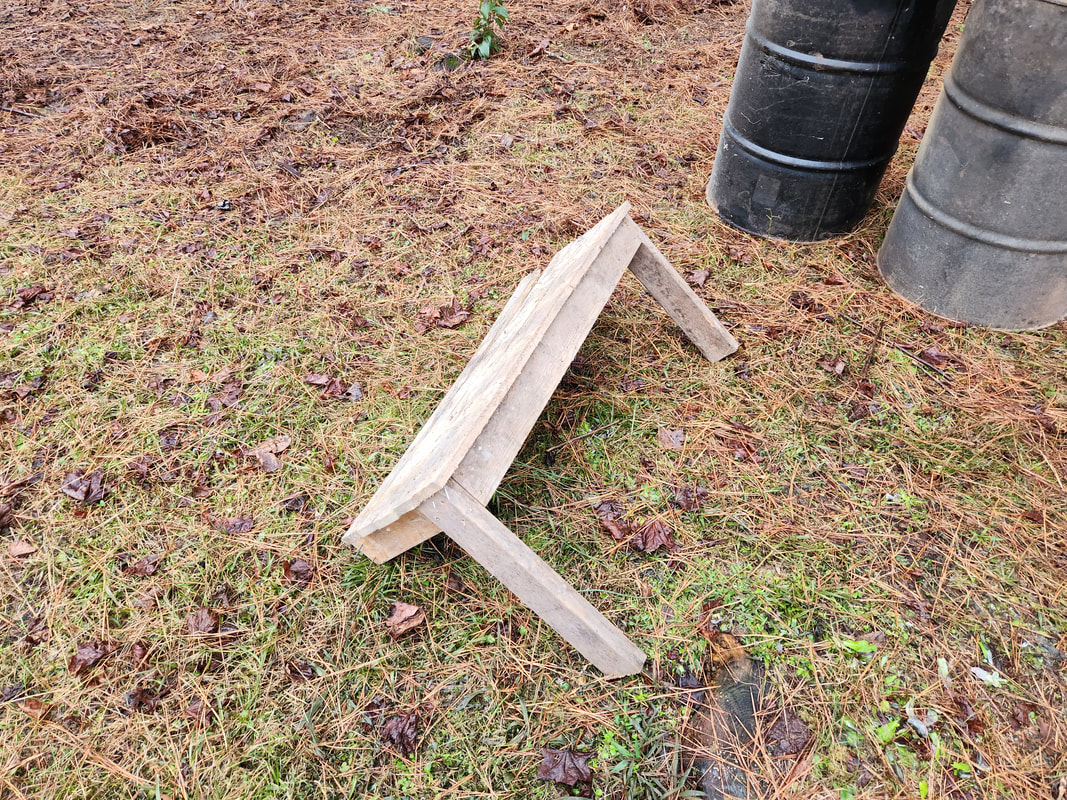 The middle shelf that held the extra fuel cans after removal. This bench/shelf only had two legs as the back end was propped up against the stud frame of the rear wall. The next thing that I removed was the two gasoline drums. To do this I pulled the faucets with their long pipe nipples from the drums, which then allowed me to pull the drums from their resting spots. I would've removed the one kerosene drum which was situated under another drum which was full of waste veggie oil, but the WVO drum was weighing down the 2x4's holding it up, which closed the gap enough to prevent me from pulling the bottom drum through and out. Due to the amount of WVO in the drum, I had to use a spare old 5 gallon gas can to catch some of the oil, along with a 15 gallon chemical drum and finally a spare trash can to allow us to let the drum to empty into the can in our absence. 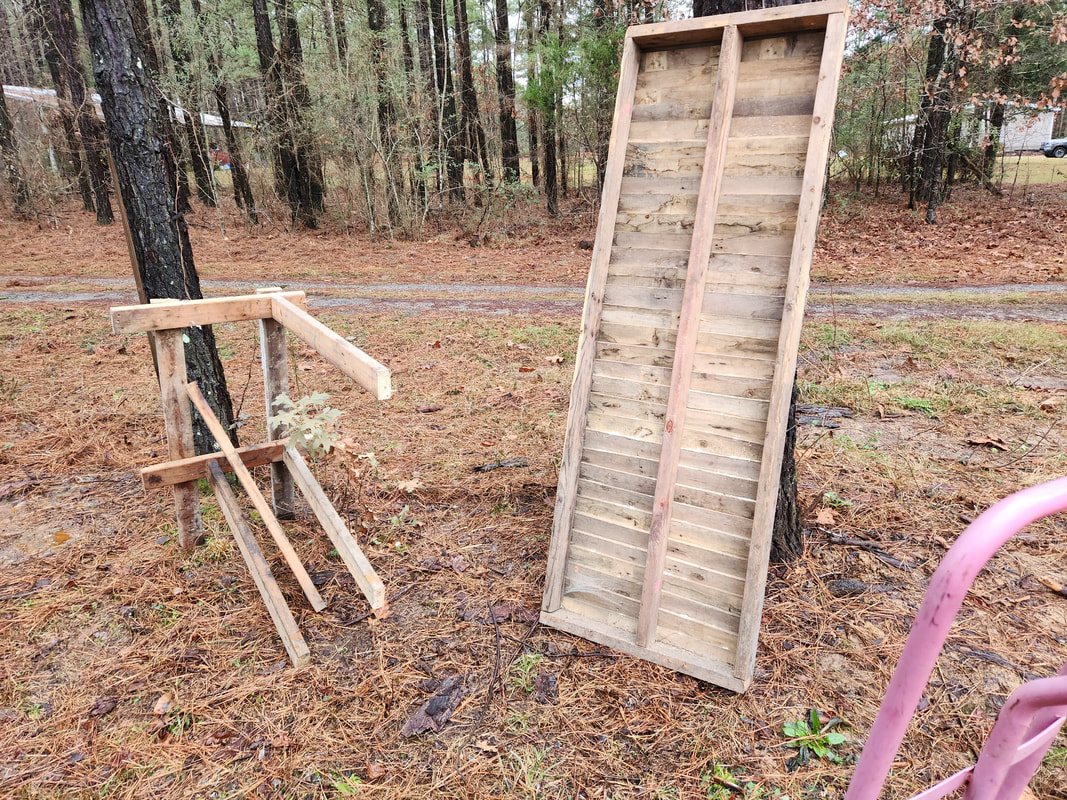 The door and the left drum frame removed from the shed. As can be seen, this frame will need to be reinforced and assembled with wood screws to support the weight of two full drums. With the drums out on one side, I commenced to cutting the nails to pull the wood frame that held those drums. This frame will have to be reassembled using wood screws where applicable since the structure will end up being weakened at the nail joints. There will definitely be some changes in the reassembly of the structure to accommodate possible new visions I may come up with on the fly. As things came loose, things were moved to the firewood staging area to get the items in place for the reassembly. 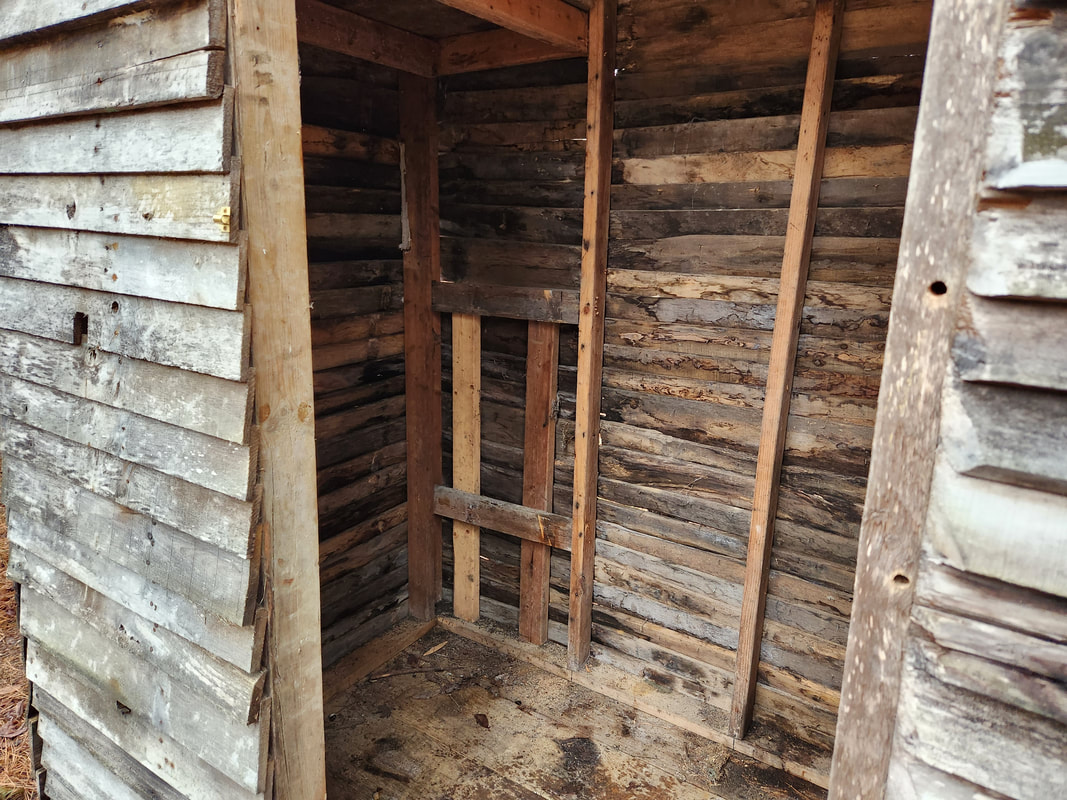 The left side of the shed after the removal of the drum support frame. At the rear of the shed is part of the framework that was still tacked up and unable to be easily removed. The next thing I wanted to do was pull the roof off. Part of this is to allow me to pull the boards free that were used as roof trusses. I will have to mark the location of these boards in order to put them back in the same spots so the mounting of the sheet metal will line up with the boards in order to hold them in place with the screws I used before. Once the roof sheet metal was off, I looked at the corners to see how I could cut through the nails holding the walls together. 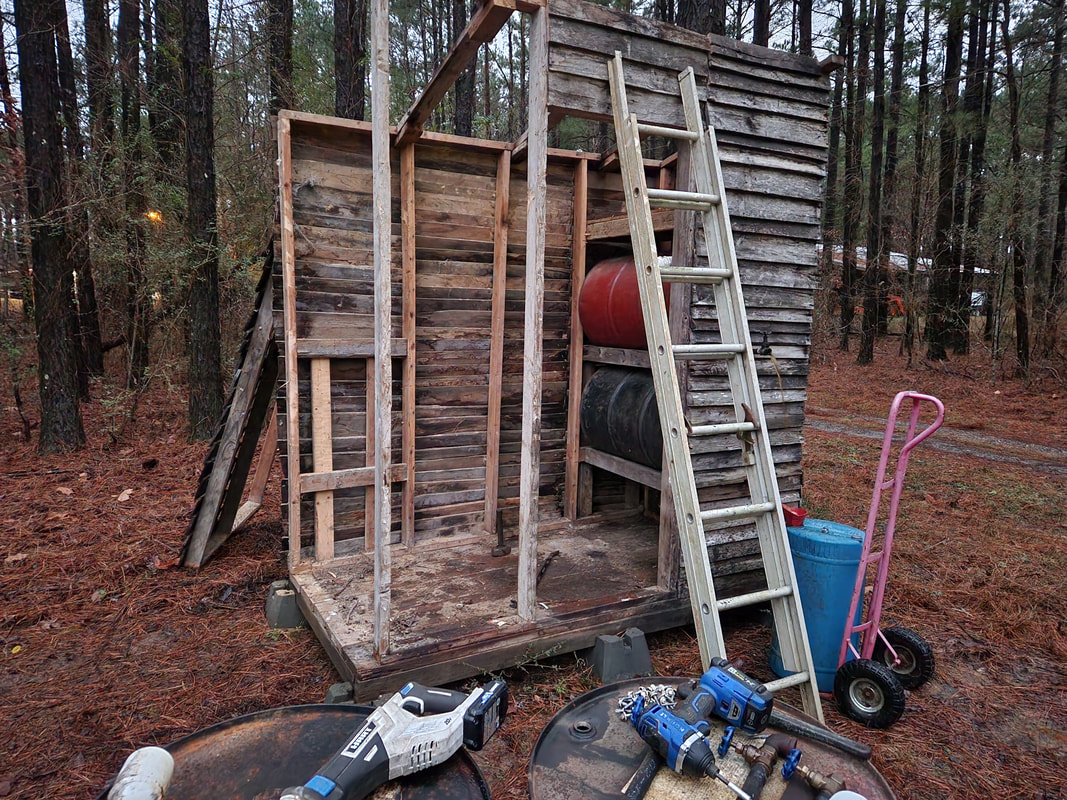 The roof metal and left side wall are removed, along with the left row of pallet pickets that made up the wall. Note the left side wall propped up at the back of the shed against a tree trunk. In the end I ended up just conceding and started pulling pickets off the walls where they mated up to two of the corners. On the side wall I pulled the row of pickets that mated the side wall to the back wall. This allowed me to cut through the nails holding that corner together. Then I pulled the pickets on the front wall where the front wall mated to the side wall, allowing me to cut through those nails. After using the crowbar to pry the bottom of the stud frame from the foundation floor, I was able to fully remove the wall from the floor. By this time, we'd lost daylight and in order for me to pull the front wall or even the back wall, much less the other side wall, I would have to get the WVO drum out. This is where the decision to use the trash can to catch the oil came in, we did not have any more time to sit out there waiting for the oil to drain out so by tomorrow it should be emptied out, allowing us to remove the WVO drum and the kerosene drum in turn. We can then get the rest of the breaking done.
With all other things addressed, I could finally move on to the final assembly of our shooting range. This was a rather simple affair, involving the hanging of two 2x6x8 boards across two trees. From there I hung the logs, starting with the largest ones. Apparently, I cut a few too many logs and because of this, I used the large ones first.
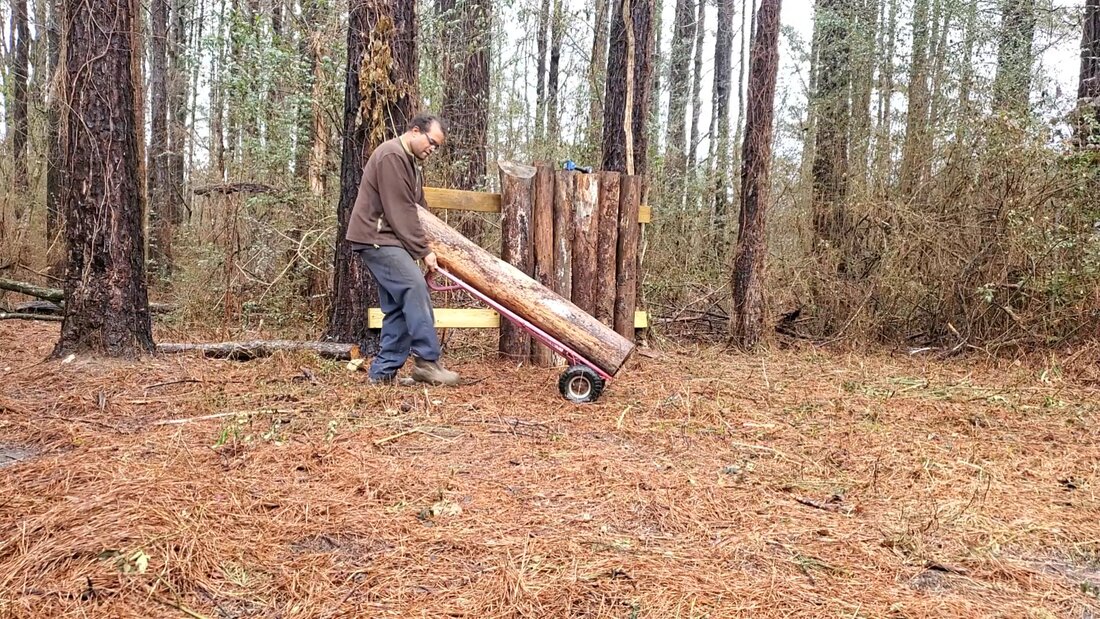
Moving the logs into position and hanging then against the 2x6's which are already mounted on the trees.
On the ends I had to do something different. Since the trees were blocking my ability to straight drive a deck screw through the boards and into the logs, I had to use something else to attach the logs. On one log I used two angle braces to hold the log in place. On the other log I was able to drive a deck screw in at an angle to attach the top end but used a rusty hinge as an anchor to hold the bottom end of the log to the board. 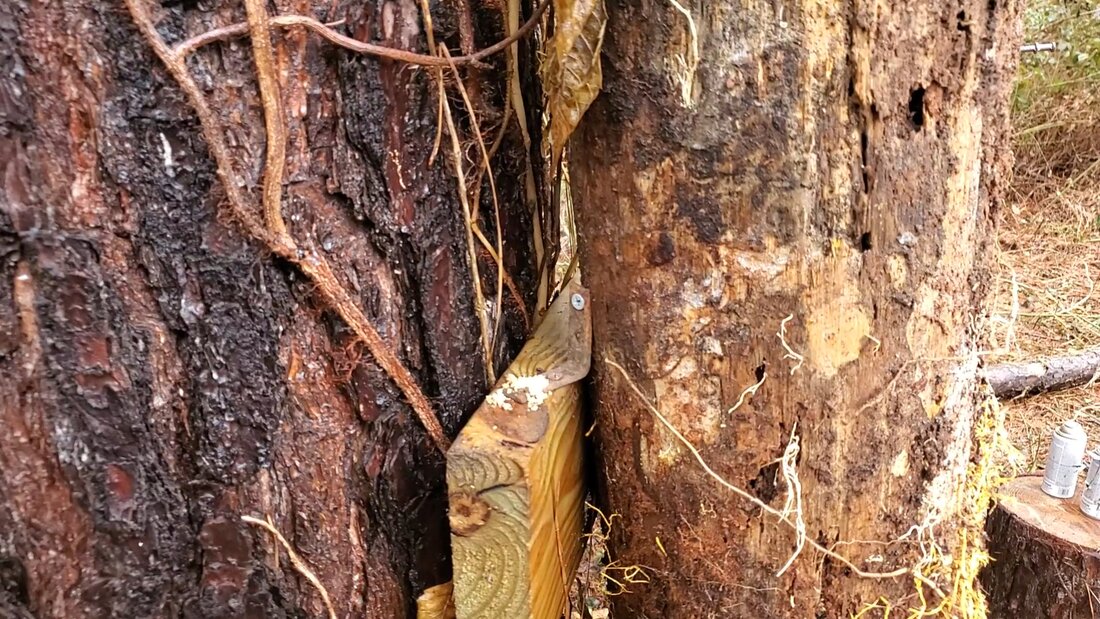
The angle braces used to hang the end log on the left side of the backstop wall, since the tree stopped me from driving the deck screws straight into the log.
The rusty hinge used to hang the bottom end of the right side end log. The top end has a deck screw driven in at a sharp angle.
With all the logs attached, I moved the apparatus from my old shooting range into position. The two metal swing targets were set up on the ground on either end of the log wall and the two log sections were posted between those two targets for use in holding things like cans or the like. As an added bonus I tacked up several nails on the logs for use in hanging old CDs or similar light targets, giving us the opportunity to use any number of things for targets. 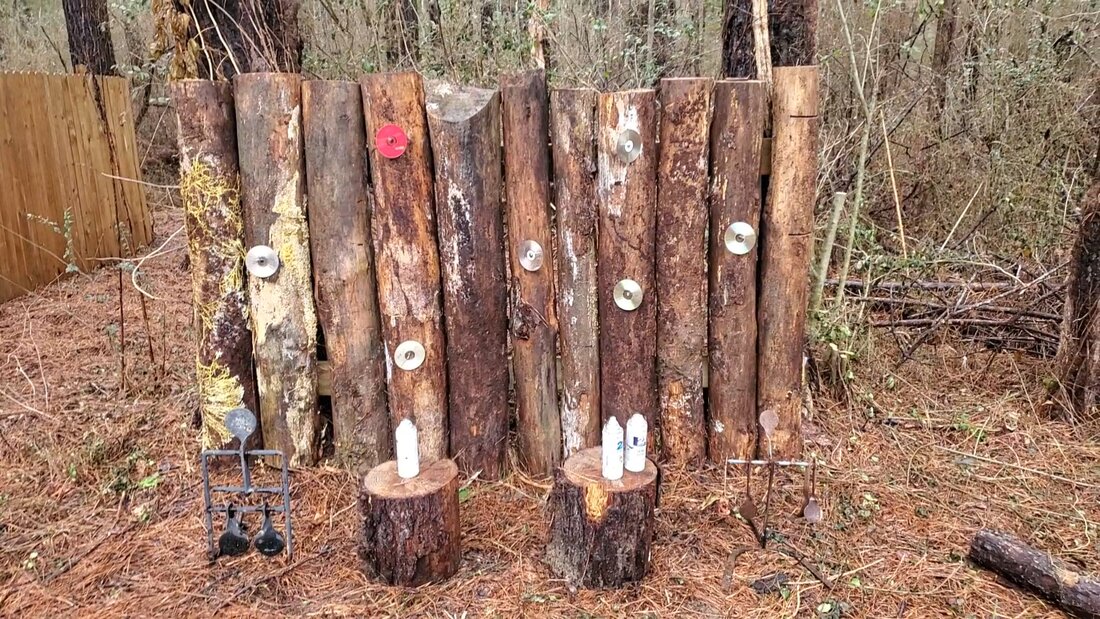
The finished shooting range/backstop wall with metal targets, target stand logs, and nails with hanging CDs in place. Let the shooting begin!
Even with the range set up as it is, I will probably come up with other things to use as a means to reinforce the logs to ensure they stay up in the elements. I want the only thing to cause this backstop to fall apart be the decay of the logs themselves. I will end up doing some more landscaping around the back of the trees and the backstop just to make it easier to work on the wall and the range as a whole. I will also bring out a folding table and chair to set up for use in setting up any weapons we use on the range. The table will allow us to use a chronograph or shooting stand for testing muzzle velocity and sighting in of optics respectively. While we will mostly be working with air guns, the range will allow us to work with regular firearms, as well as some homemade projectile throwing apparatus. There will be more to come on that note, as I have plans to work on some old pneumatic pieces I built in the past and have how-to manuals for, as well as some new ideas. Stay tuned for more in the world of projectile throwers right here.
To prepare for the moving of the fuel shed, I had to clear the outer row of firewood that was stacked up. This wood was moved to the inner row, building it up higher and fuller than before, while at the same time using a lot of the wood during the cold days and nights we've had. Many of the pallets were stacked up, their fate undetermined, despite the bottoms of the pallets being rotted to a degree. More than likely these pallets will end up on the next burn pile just to dispose of them since I have more than plenty of firewood. The inner row of firewood is just about full, and I still have a lot of logs that need to be split. So, for me to try and salvage wood from these pallets just to add to the already full would be pointless, I may as well just clear this mess from the area, add to the goal of cleaning up the area. 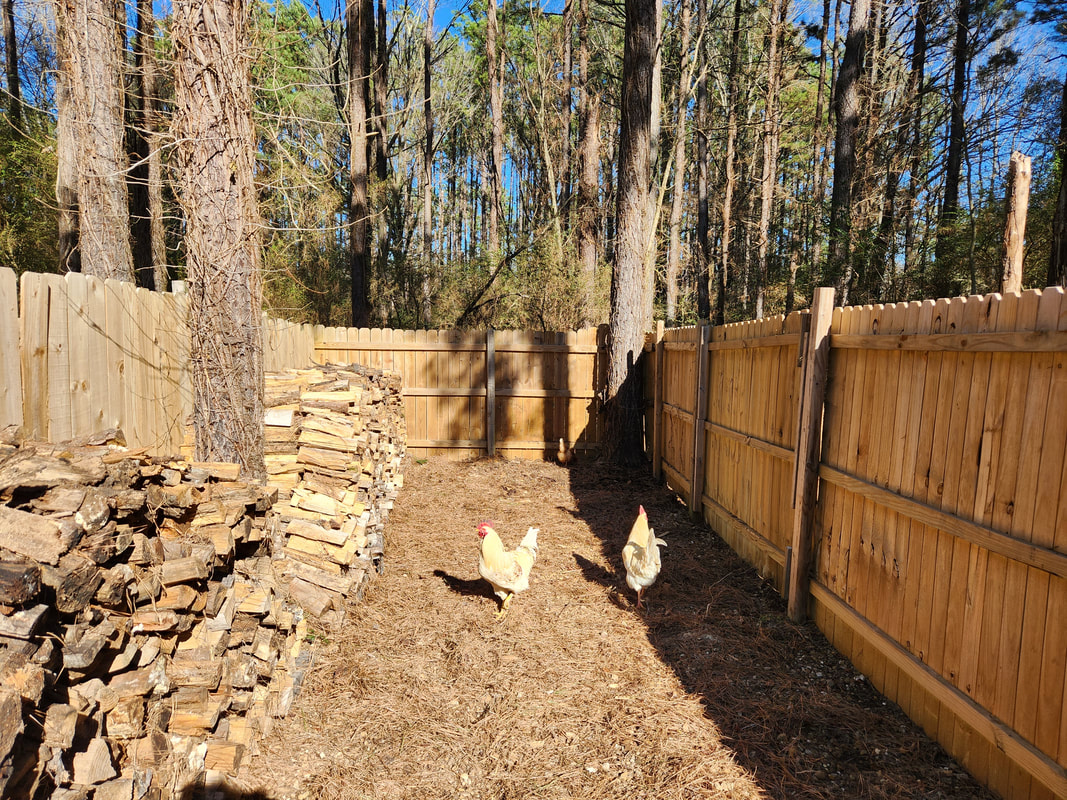 The outer firewood row completely cleared of wood and pallets, back area is open now to start setting up the foundation for the Fuel Shed. 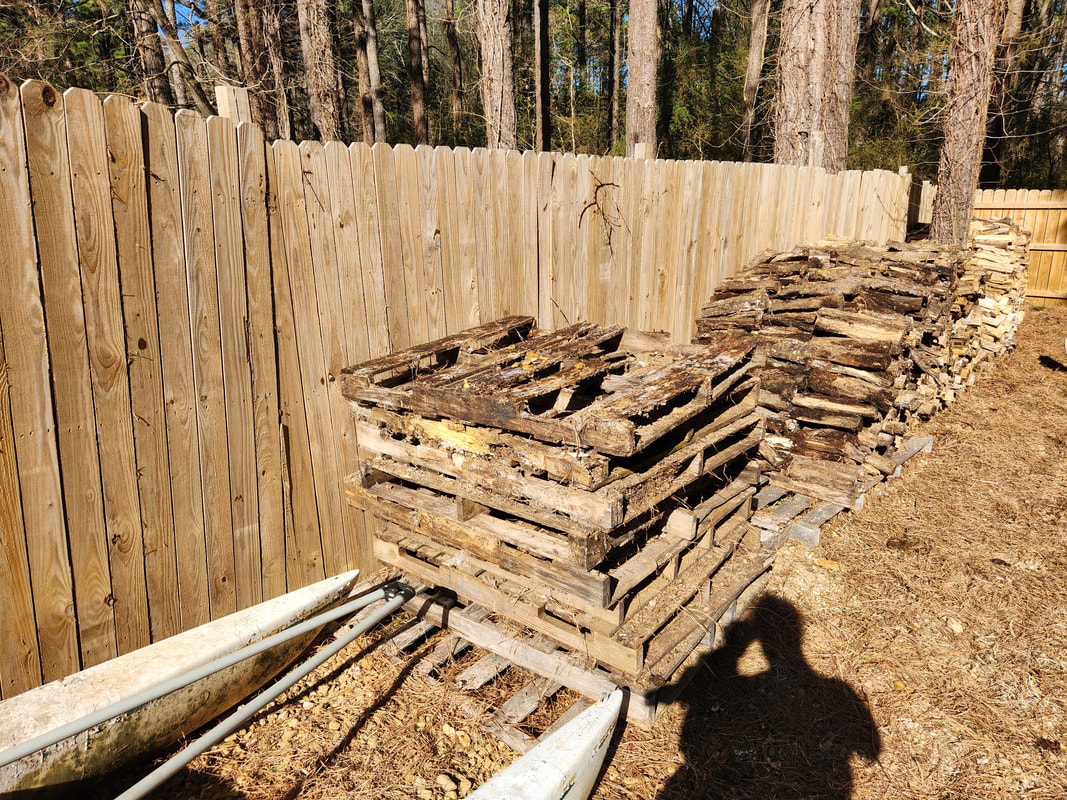 Old pallets stacked up after clearing the firewood from the outer row. These pallets will probably be on their way out in a blaze of glory. With the firewood area ready, I can eventually move forward with dismantling the fuel shed so it can be moved in sections over to the firewood area. Once reassembled, I can install the drums again and fill them up, restoring our fuel stockpile and continue building on it to reach the preparedness goals that were set when that structure was first built. Anyway, moving along, we come back to the east fence line. After hanging the last section of fence panel, I was left with a section approximately 4ft long that will mate with the end post. To accomplish this, I grabbed some pickets, and a 16ft 2x4, which I cut into the lengths I needed to span the small gap. This way, assembly would be rather quick. 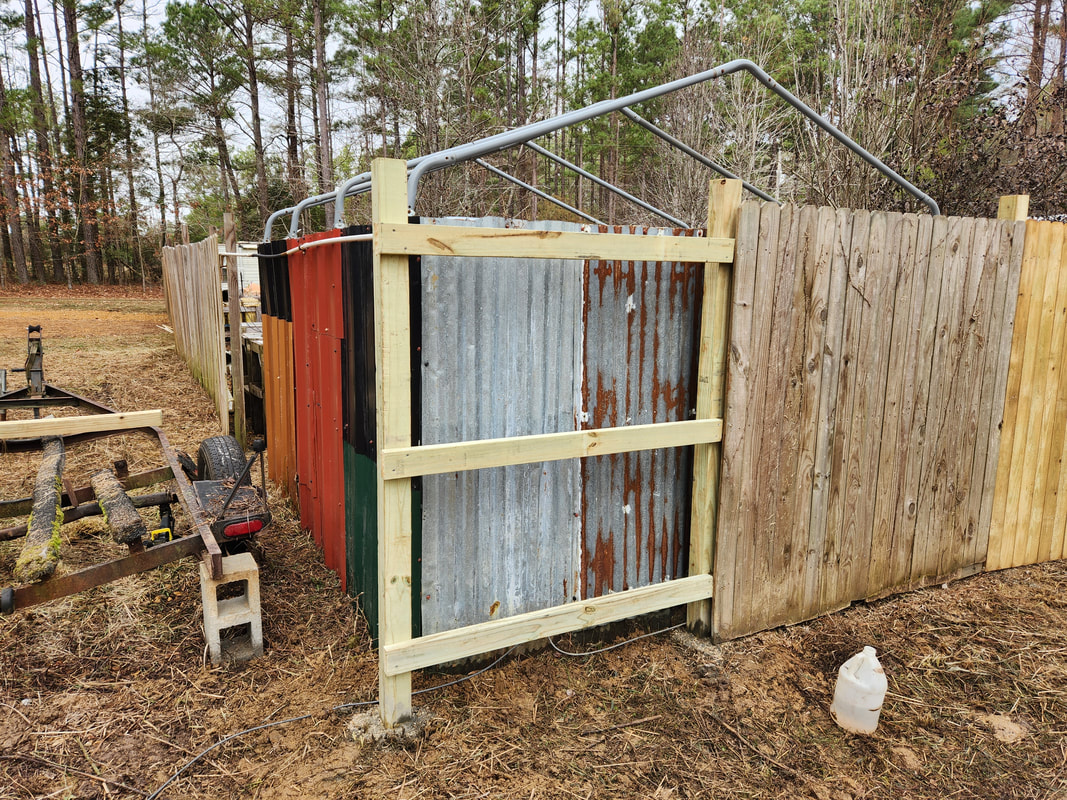 Pre-cut 2x4's secured in place between the fence posts in preparation to hang the pickets. I managed to guess the number of pickets I needed to cover this gap to ten pickets. The last picket overlapped by a couple inches from the end of the post, which is fine, given the idea that the panel for the south fence line will extend out from post by a couple inches as well. This overlapping fence picket will cover that gap that will be formed at the corner when the other panel is up. 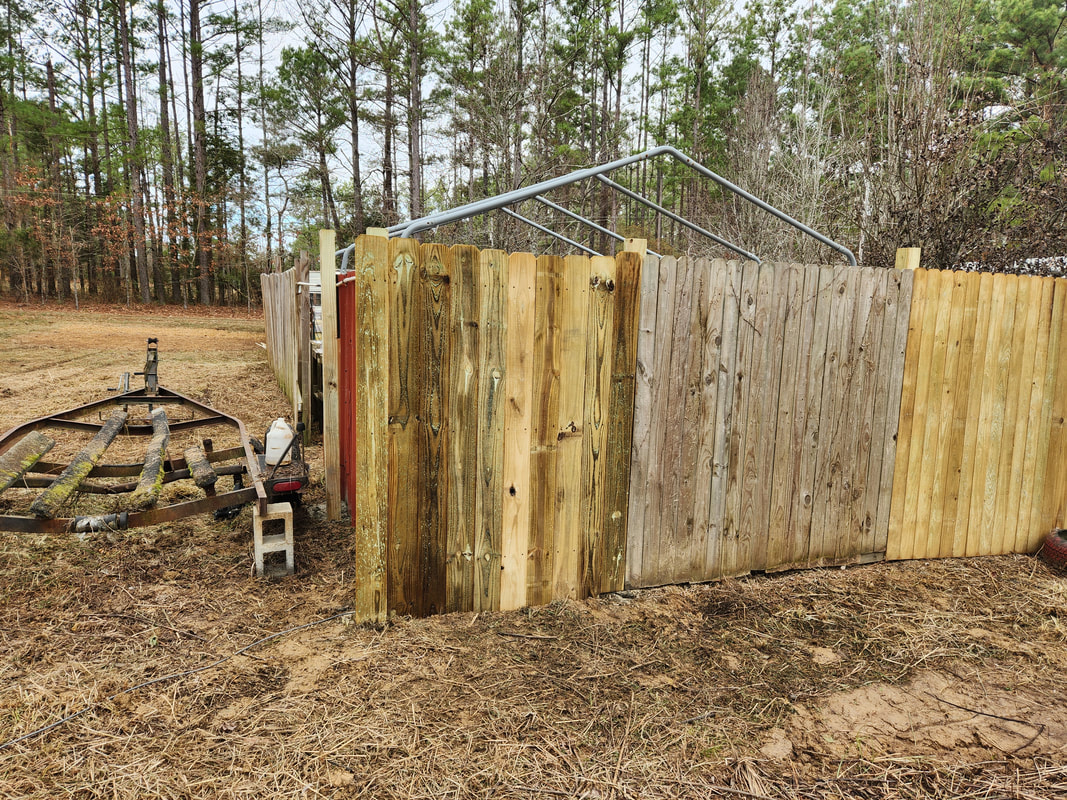 The last section of east fence line completed with the pickets in place. Along with the pickets and 2x4's, I also got one more post, as I only needed the one for the rest of the south fence line. This will have me only installing one 8ft panel and a 6ft homemade panel. I had to auger out the hole for the post, but with the boat trailer in the way and the Dog Kennel Greenhouse right at the fence line, the auger ended up going into the ground at an angle, making for an odd hole that had to be further dug by hand with my trench shovel. Even then I didn't get the hole down to the full 2ft. The hole is probably somewhere around 1.5ft give or take. I got the post in the hole and filled with the remaining concrete I had, which wasn't enough given the oversized hole I ended up drilling out. I only need a little bit to level off the hole, but the remaining concrete from that bag will be used for building up the driveway for the last stage of the project. 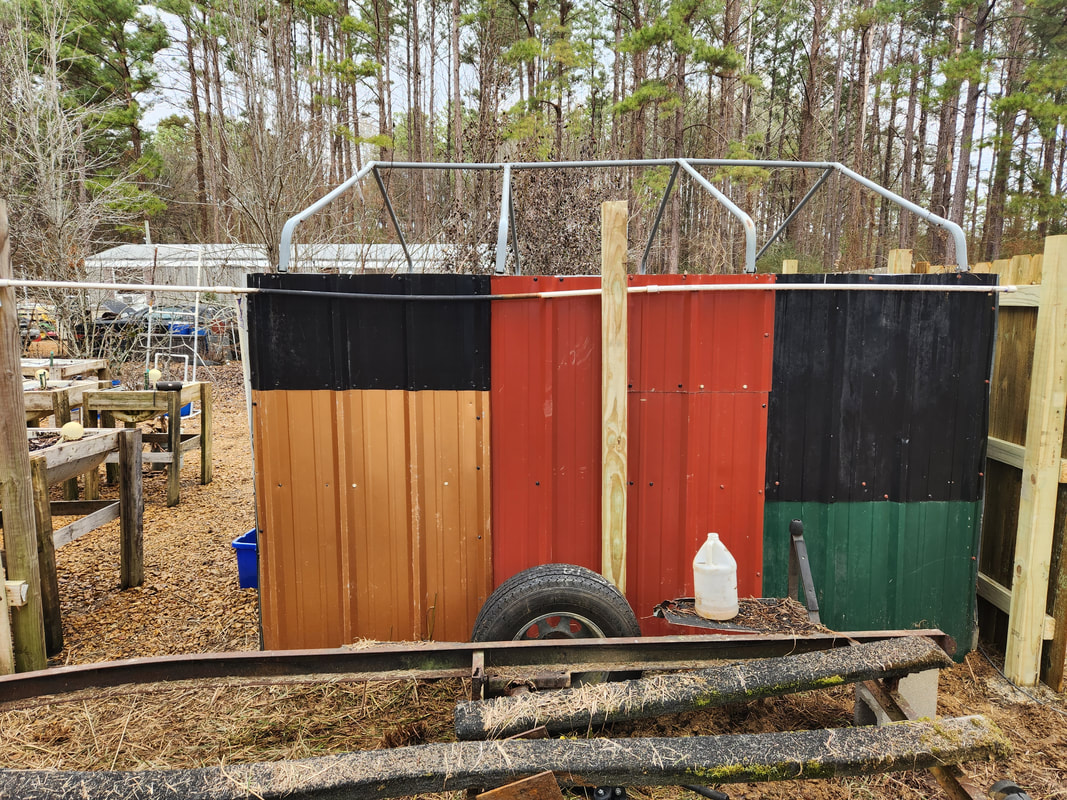 The last fence post that had to be sunk, with the boat trailer in the way. Once I get the remaining fence panels up, I will need to build up the driveway to make it wider at the gate. I will be adding another fence post which will narrow the opening to the gate, so widening the driveway will allow us to swing out the F250 or any other larger vehicle to be able to clear the gate and get back on the main driveway without going into the dirt. Even at this point, the compound will be completely locked down save the main gate.
When we left off, we were working on cutting some 5ft logs for use in the making of a backstop wall for use in a shooting range setup that was planned to be set up along the north tree line just across from the east fence line. After getting the logs cut and laid out, there was a matter of cutting the overgrown brush and briars that occupy the grounds in front of the tree line. Of course, this involved the use of all the garden power tools, including the reciprocating saw for cutting through the trunks of the weed trees that also litter the grounds.
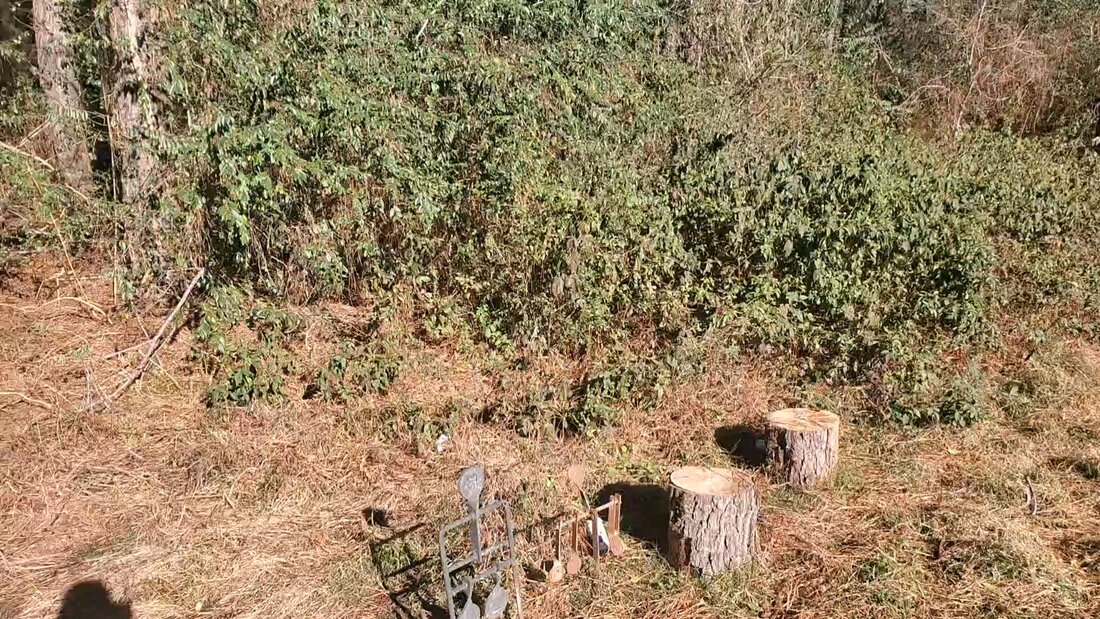
The overgrown area occupied by blackberry briars and other trash, all of this will be gone.
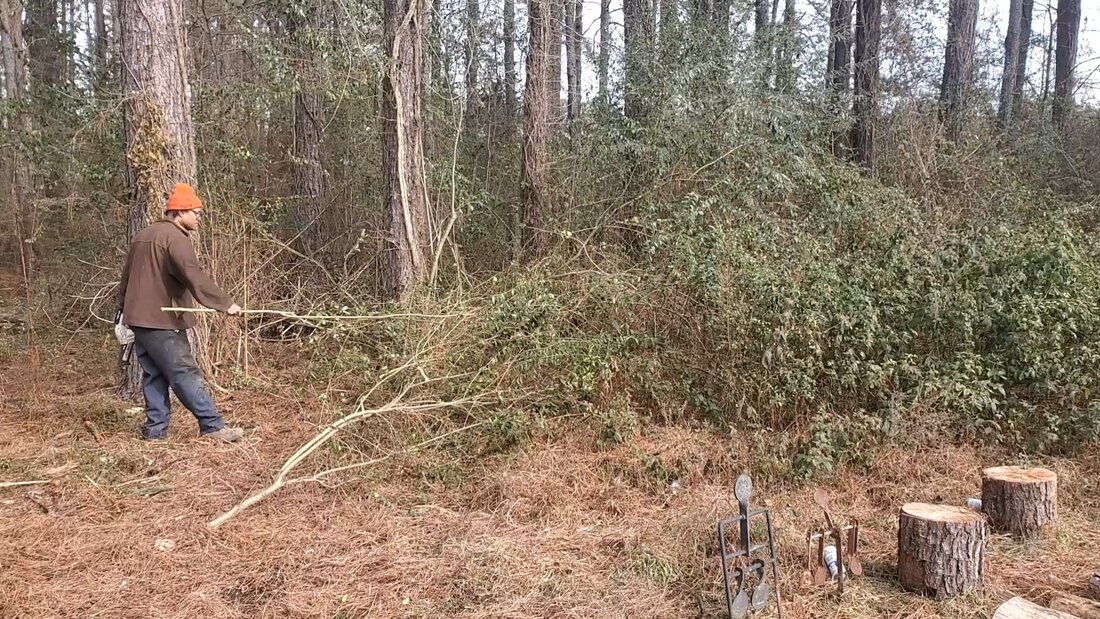
Cutting away the large weed trees that occupy the area along the tree line.
Over the course of 45 minutes, I bounced between using the hedge trimmer, weed trimmer and reciprocating saw to cut through the mixture of blackberry briars, weed trees and miscellaneous vines and other grass over the area. The larger weed trees were cut into small enough sections to be stacked on the growing burn pile, which is already full of other trash that came from the previous cleanup of the old backyard area. As time progressed, the grounds opened up more and more. 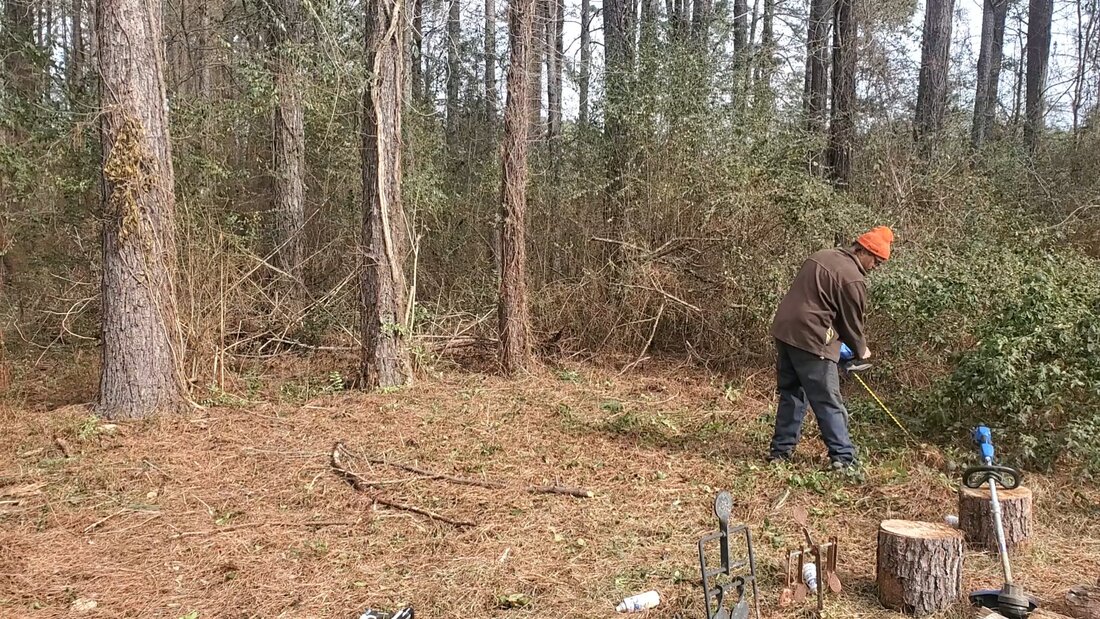
Going into the home stretch of cutting through the overgrown brush in the area.
I chopped away enough brush and trash to clear an area that exposed four trees along the tree line. This area probably reaches out some 20+ feet from the east fence line, giving me more than enough area to set up our backstop log wall. The 2x8x8 boards that I'll use to help hold the logs up will be anchored across two or three of the trees, depending on the spacing between the trees. I may have to anchor the boards across two of the trees with overhang on either end. If this is the case, then I may consider drilling out holes for fence posts to hold the ends of the boards on either end, away from the trees to further reinforce the log wall. 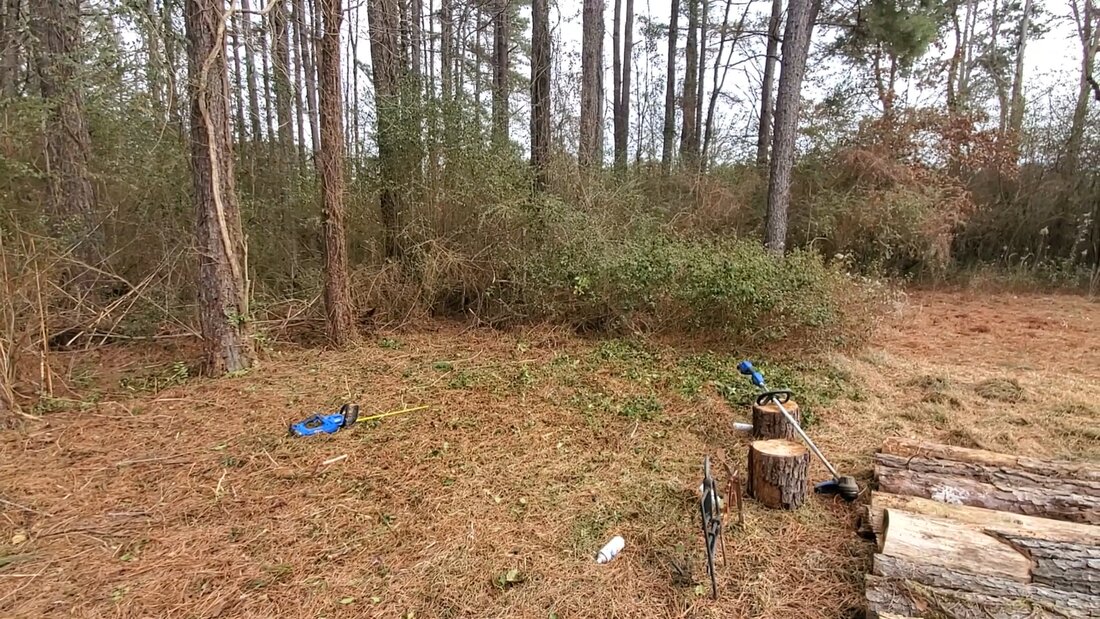
The north tree line after cutting away the brush and weed trees from the area. Note the shooting range apparatus in the right foreground
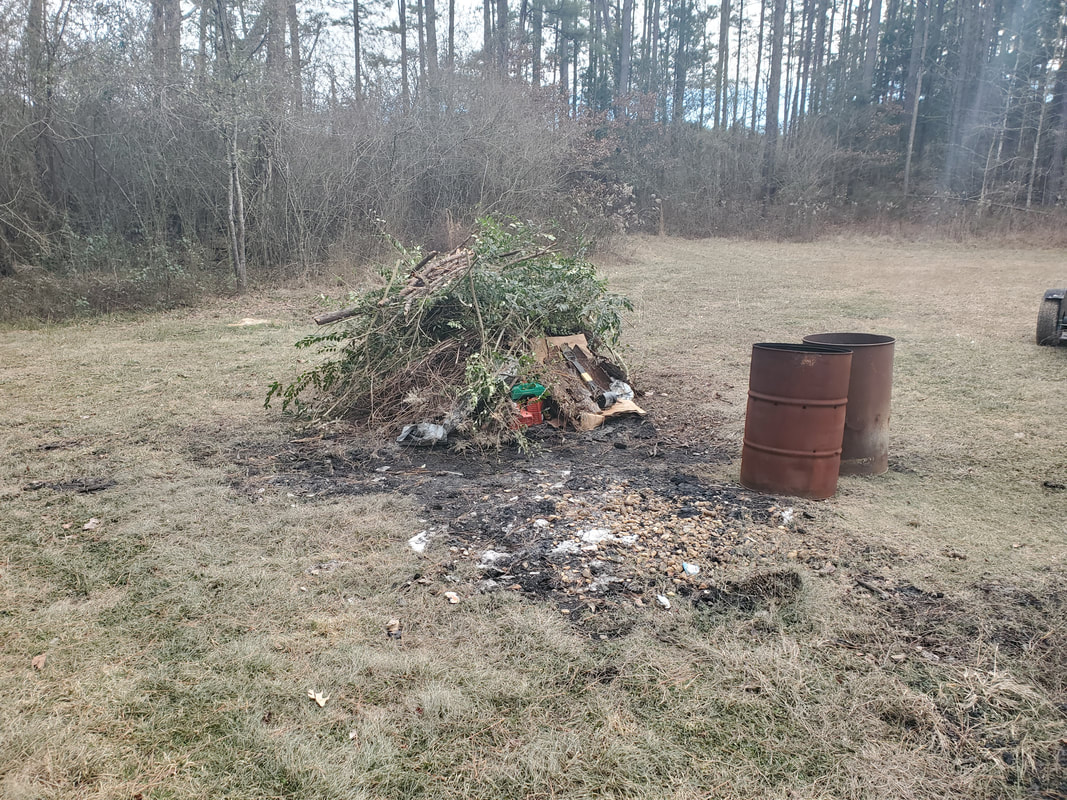
The growing burn pile, courtesy of the weed trees and other larger trash harvested from the cleanup of the tree line.
There's still some brush and trash that I left behind along the tree line that wasn't cut yet. Even though this brush doesn't interfere with my placement of the backstop walls, I will end up still cutting down all this trash for aesthetics, just to make the area nice. Since we would be out here enjoying the new shooting range, it would only make sense to try and make the rest of the surrounding area nice too by cutting away this overgrown trash. The same goes for cleaning up the burn area. At some point I would plan on either setting up a new burn area, or even working out a new plan to handle brush that is generated from landscaping, all the way up to and including using a chipper to grind a lot of stuff down. Of course, there is the matter of just cutting brush down to small enough pieces that a burn pile can be set up to cover a smaller space and taking time to periodically clean up the burn area. There're many ways we can address keeping this new backyard area clean and nice to look at so we will be happy to be out in this area enjoying the activities that warranted setting this area up.
We've now come to the point where there's only a few things left in the old backyard area. These things, rather large things, will need more than just some simple picking up and moving around. One of those things, the car trailer, would require me to hook up to the unit and drive it around to the new "back", the open area along the east fence line, where I plan on staging the rolling stock. The tow dolly is already in place, but to make things easier, I moved the tow dolly out of the way some to help open up the area. Before doing all this, I did take time to do something I hadn't gotten around to since making repairs, and that is testing the winch on the trailer. 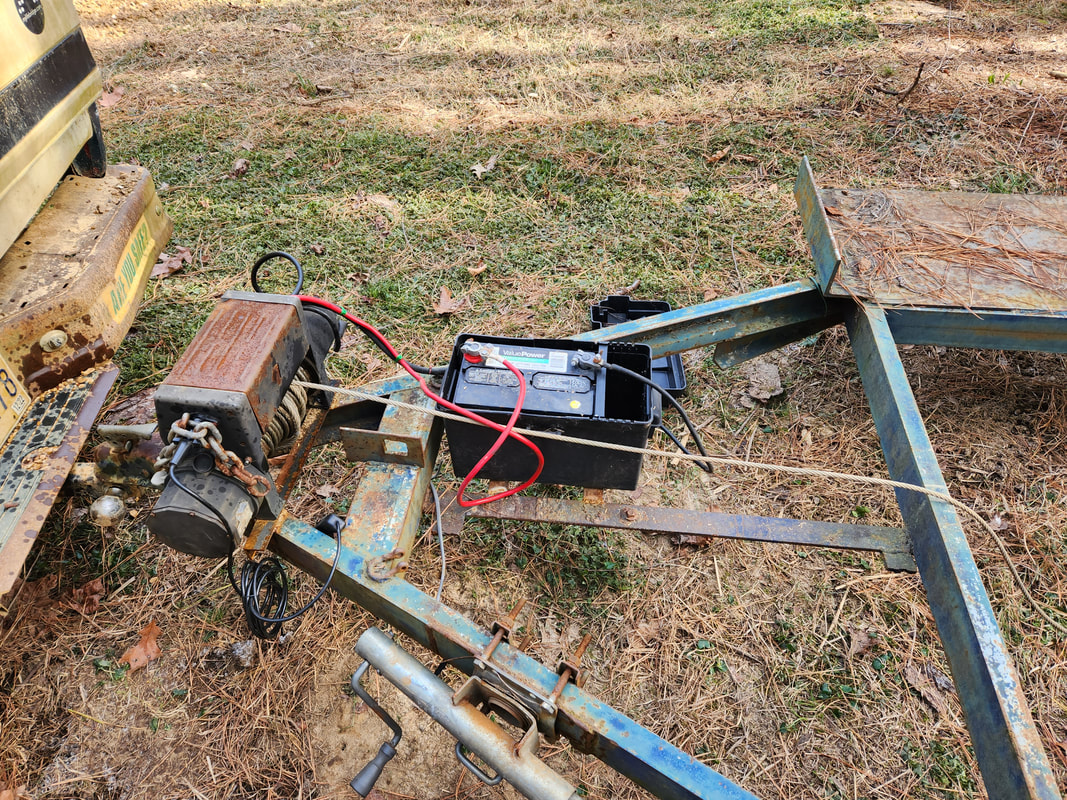 The winch assembly with the FMT's battery installed in the battery box and the cable reeled out to hook up to the Tracker. A while back I made some repairs to this winch by replacing one of the solenoids, as well as making a mount to secure the unit to the trailer. With all that said and done, I had to get a new remote-control cord as well. With those things taken care of, to test the thing out I had to install a battery. Courtesy of the FMT, a battery was sourced. To test the winch, I pulled the Tracker around and staged it behind the trailer. I hooked the trailer to the F250 to hold it in place, which I would have to do anyway since I'll be moving the trailer. I used the remote control to unspool the winch cable to reach the Tracker. I hooked the cable to the tow loop on the Tracker and grabbed a spare block to use as a wheel chock so the truck won't roll uncontrollably to the front of the trailer. 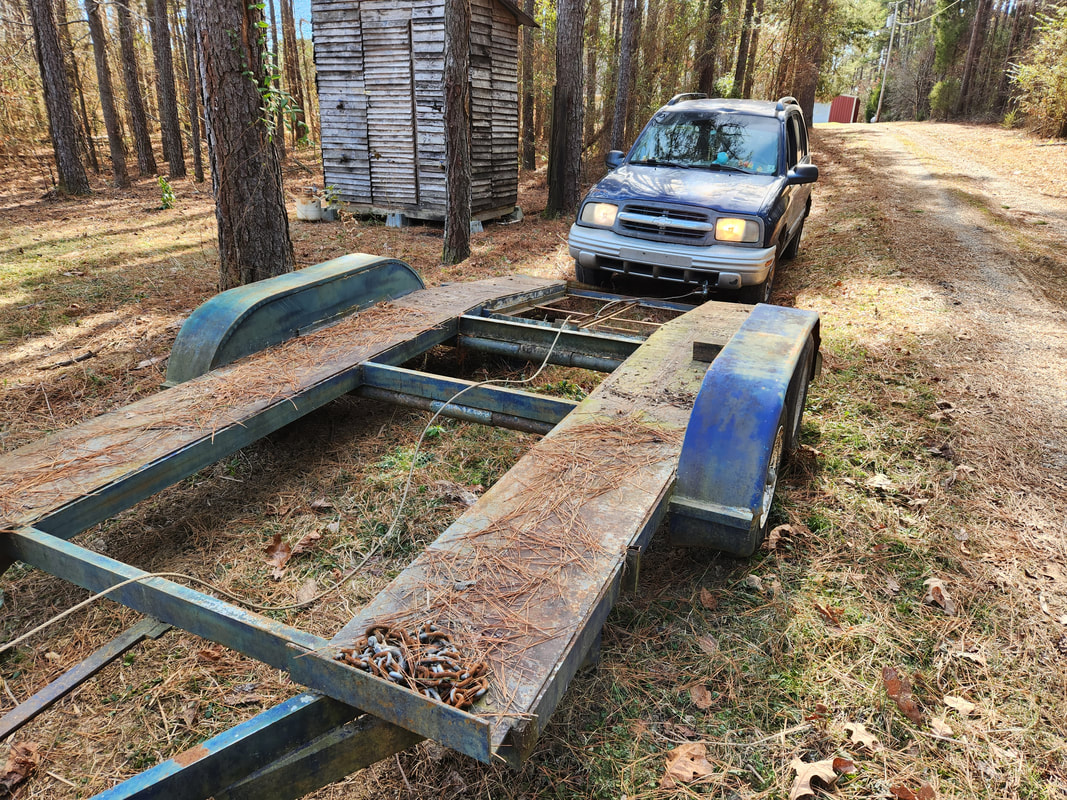 The Tracker staged behind the trailer, ramps down and winch cable reeled out and hooked up to the tow hook on the truck. With all conditions met, I started reeling in the winch cable. Even though things appeared slow, the winch started pulling the cable in, with the Tracker in tow. I did spray some WD40 on the cables since they were dirty and dusty to aid in lubricating the cable as it winds up, but I will probably be better off getting a marine battery to use with this winch as it will supply more juice for added longevity when reeling the cable in with two tons of car in tow. Using the wheel chock to help the truck stop as its being wheeled up, I was able to get the Tracker in place on the trailer, without incident.  The Tracker pulled up on the car trailer courtesy of the winch. The test didn't exactly go off without a hitch. I had some episodes where the solenoids stuck on occasion, requiring me to cycle the buttons to somehow make the solenoids release, then when I used the controls, just run the motor for a few seconds at a time versus a constant drag. It seemed like that constant running made the solenoids want to stick. Worst case is I'll have to grab some grease to use on the solenoids to lubricate the springs and the contact arms so they can move freely. Even when I unplugged the remote control the solenoid would stick on, telling me that the sticking is in the solenoids themselves and not our new remote control. Anyway, with the tests done, I pulled the Tracker off the trailer and parked it again and commenced to moving the trailer to its new resting spot along the east fence line. After backing the trailer into just about where I wanted the thing to go, the F250's right tire started spinning on the ground that was just starting to thaw some. In the end I dropped the trailer where it sat, which had it straight parallel to the fence, but not exactly where I wanted it to allow me to place the tow dolly back in front of it alongside the fence as well. I ended up parking the dolly next to the car trailer, then moving the general utility trailer just behind the tow dolly. The open spot alongside the fence and behind the car trailer is reserved for the boat trailer. 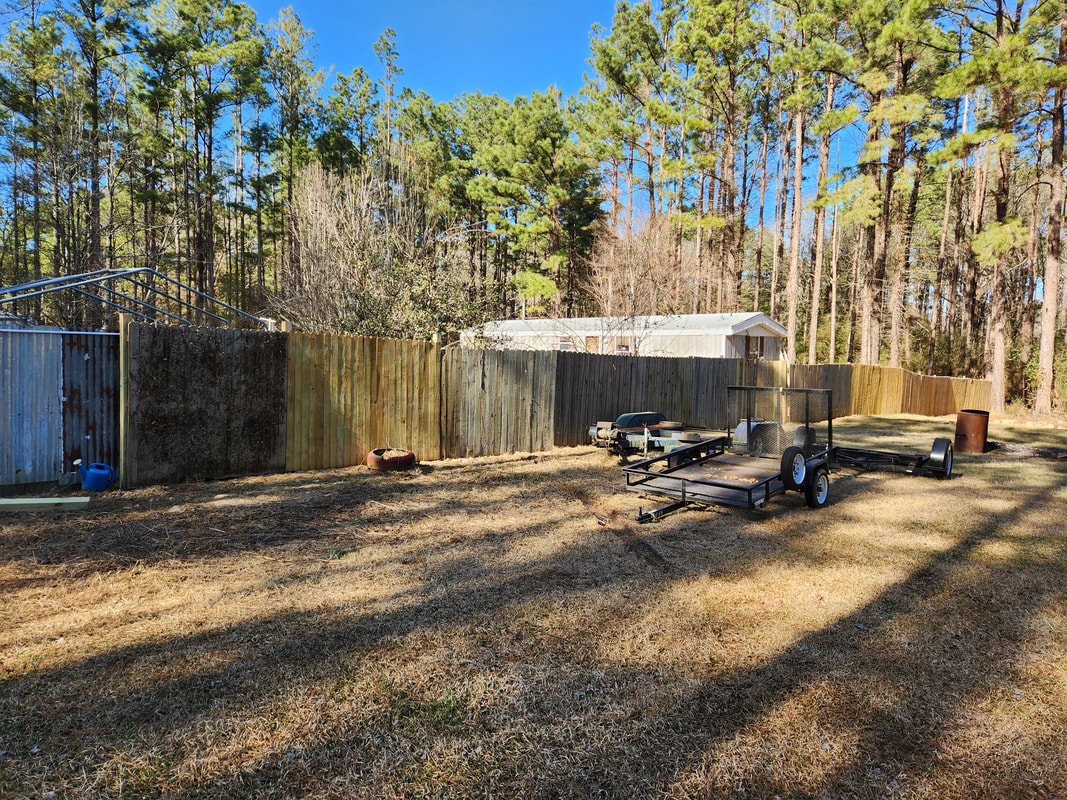 The car trailer, tow dolly and utility trailer staged alongside the east fence line. With the trailer moved to its new resting spot in the new "back", I turned my attention to another large thing that needed moving, even though this isn't in the old backyard area. In the firewood staging area, the outer row of firewood that's stacked on pallets needs to be completely moved out of the way along the outer fence to open up the area going all the way up to the northeast corner of the fence. This open area will be the new home for the Fuel Shed, once its dismantled and moved to this spot. The firewood that is in this outer row will be stacked on the inner row along the chicken yard fence, building up those pallets of firewood even more so than they already are. Of course, at the same time I'll be using this firewood first for our stove, since any of the wood that is on the bottom of this huge stack is older and holding more moisture than the wood at the top of the pile. 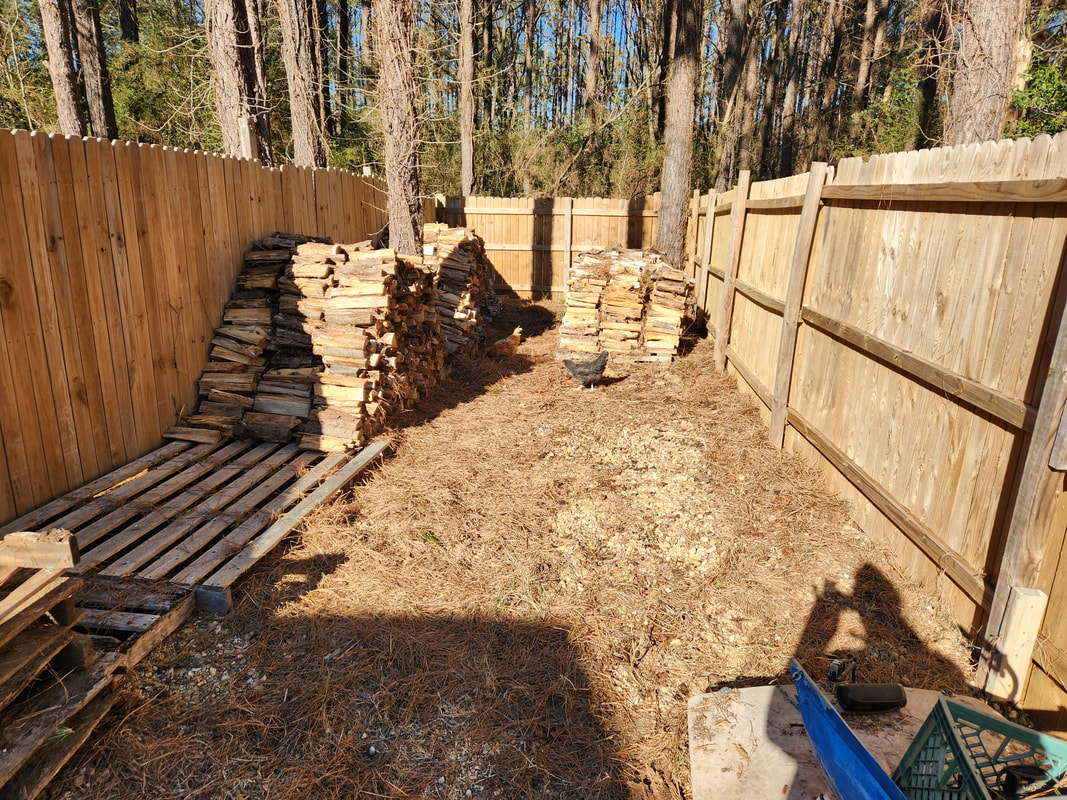 Outer row of firewood eliminated working back to the north fence. Several pallets have been cleared and stacked up as seen on the far left. The remaining wood will be stacked on the inner row from the pallet to the far left all the way to the innermost point of the row, against the north fence. I started from the outer end of the row, building up the pallet just across from this point, building it up higher than the rows originally were. There's a tree that's centered along the inner row that I continued laying a couple more pallets down after said tree. The first pallet after the tree was stacked high with wood from the outer row. There's another large pallet after the 1st pallet that is bare but won't be stacked with wood until I manage to cover the pallet at the innermost point of the inner row, connecting to the rest of the stack on the inner row. A lot of this area was started with wood from the innermost point of the outer row as well. In the end once the inner row is completely stacked about 5ft high from the north fence all the way to the outermost point of that row, including that empty pallet that's seen in the picture. Again, wood will continue to be used from this outer stack so even as I add wood to the inner row, some of the older stuff will be used in the stove first. I will get this little project taken care of more sooner than later. After taking a moment to run to Lowe's to grab another fence panel and a post and concrete, I took a moment to hang the panel up over the open area on the eastern fence line that mates up to the Dog Kennel Greenhouse. This area is close to the southeast corner of the fence line and will require the new 8ft panel we picked up, a 6ft panel I had left over from the dismantling of the old fence line, and a remaining section that covers 4ft, which will have to be made from scratch. Hanging the 8ft section wasn't a big deal, just some deck screws used, and the panel was up. I did have to add some extension boards on the outer post to allow me to hang the 6ft section since the 8ft panel covered both posts, not providing any surface for the 6ft panel to attach to on the inside. 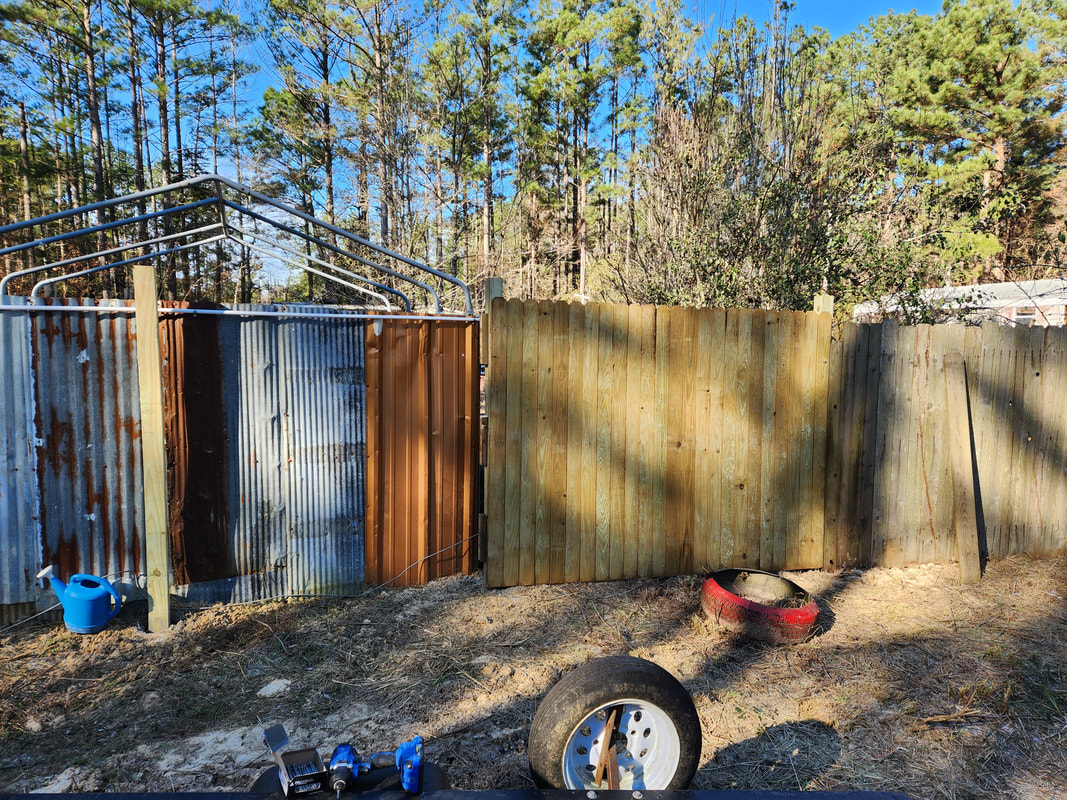 The new 8t panel hung in place across the fence line, closing the gap on the east fence line. After attaching the extension boards, I moved the 6ft panel in place. I ended up having to trim a little of the panel off, removing one of the pickets. It was just as well since the bottom of the pickets on this end were cut down, or up, some. I secured the panel in place with more wood screws, leaving a small opening at the bottom where there were a couple pickets that were trimmed short from the bottom up. At least on the outer end the panel left enough post for the next panel to attach to. 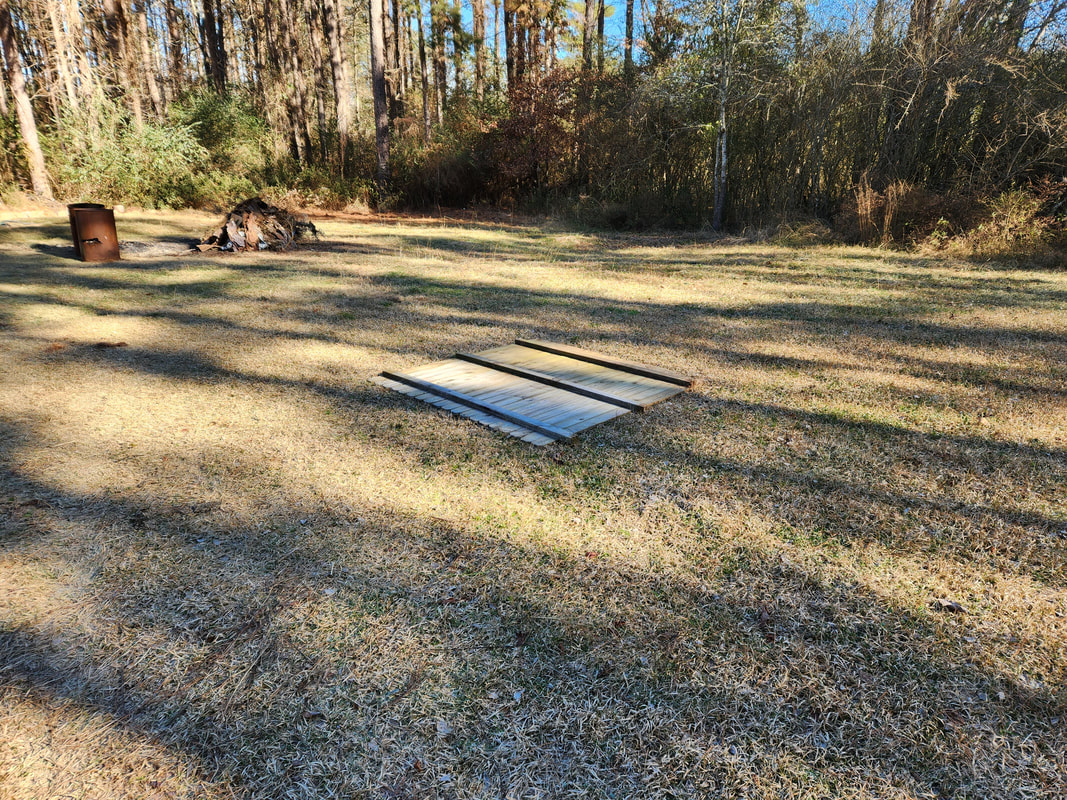 The leftover 6ft fence panel that will be hung now that the new 8ft panel was hung. This panel once hung did manage to cover up the opening on the eastern fence line that was present between the Dog Kennel Greenhouse and fence line. With this panel up, the eastern fence line is closed up, save for one more opening on the south fence line on the other side of the Greenhouse. There was still the matter of the small opening at the bottom of the panel where the two pickets were trimmed a little shorter. I had to figure out something quick to close this opening. 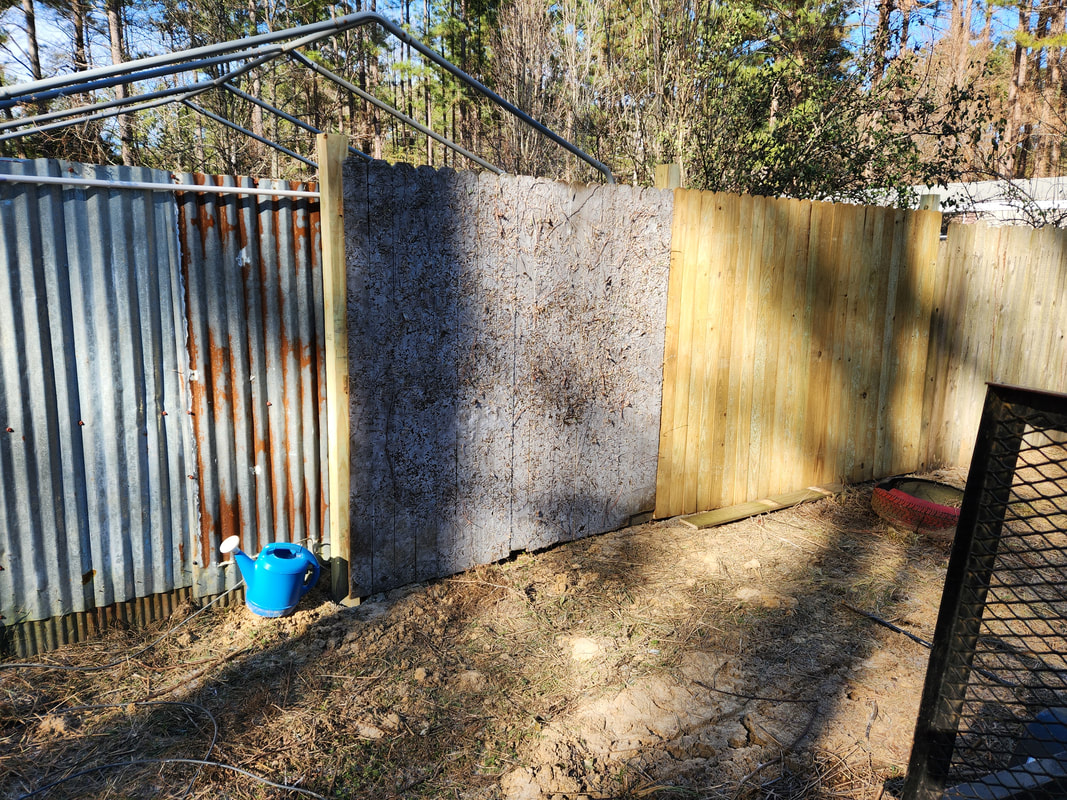 The 8ft and 6ft fence panels installed on the fence line, covering the opening between the Greenhouse and fence. The quick solution to this problem was to take a spare picket that was shorter than the rest and trim a piece of board that was around 8 inches long give or take. I set this piece of wood on its side and laid it across the opening on the fence panel from the inside, using wood screws to secure the panel to the bottom of the pickets, effectively closing the gap at the bottom of the panel. At least that will be one less spot for rabbits or other varmints infiltrating the garden. Also, doing the patch this way allows for the patch to be more discreet versus being obvious if the wood patch was installed on the outside of the panel.  The short piece of picket board used to cover up the small gap on the fence panel from the cut pickets. I would've sunk the post we got but the ground was too frozen to use the auger, much less a shovel to dig out. I'll have to wait on this until the ground thaws. Once this post is in the ground, I can get the 2x4 and a few pickets to finish this small section of fence panel, completing the eastern fence line. At the same time, I will probably get the extra post or two needed to provide the spacing for the last couple panels I'll need to add on the southern fence line where it meets at the corner. I will probably need two panels to close this gap on the south fence line, which will also close the remaining opening to the outside, aside from the main driveway. Once this is taken care of, all that's left is the entry gate. |
